
17 files
-
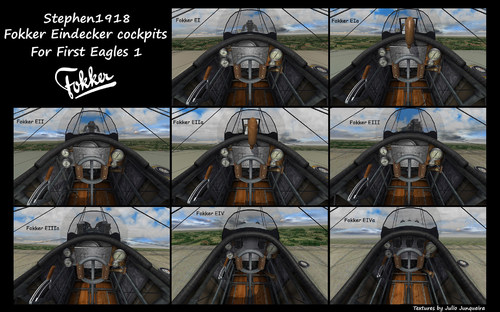
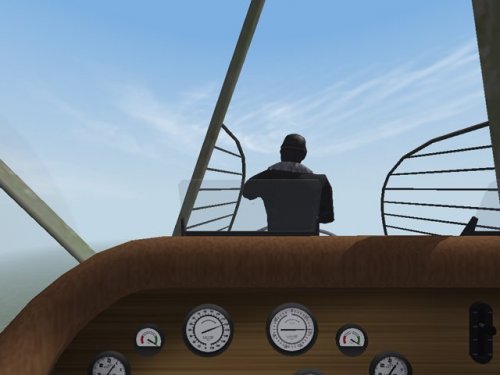
Stephen1918 Fokker Eindecker cockpits for FE 1
Stephen1918 Fokker E cockpits for First Eagles 1
Fokkers EI, EIa, EII, EIIa, EIII, EIIIa, EIV & EIVa cockpit pack for First Eagles 1.
I did new textures and new painting approach for Stephen1918's Fokker E cockpits.
You will find, a new Spandau machine gun, a new Parabellum machine gun, Vrt, compass.bmp figures & a new Glass.tga and a complet new set of textures for Stephen1918' cockpits.
The Spandau, Parabellum machine gun, Vrt, compass and all gauges, still with the same size of the original aircraft & cockpits bmp files.
Inside the pack you will find folders for optional cockpit leather colors (Black & brown) for all these fokkers above.
To use one of them just rename one of your choice as:
- BROWN LEATHER-FokECockpit.bmp rename it as FokECockpit.bmp
- BLACK LEATHER-FokECockpit.bmp rename it as FokECockpit.bmp
__________________________________________________________________________________________________________
Installation instructions for First Eagles 1 users: (cockpit & aircraft BMPs & TGA files)
First make a back-up or rename your original cockpit folder, the Spandau, Parabellum, Vrt, compass BMP figures and the Glass.tga figures. This is just in case you wish return with your former cockpit textures later. Then just drop or copy all the Fokker folders from mine Aircraft folder to your Aircraft folder.
That's all.
_________________________________________________________________________________________________________
*OPTIONAL*
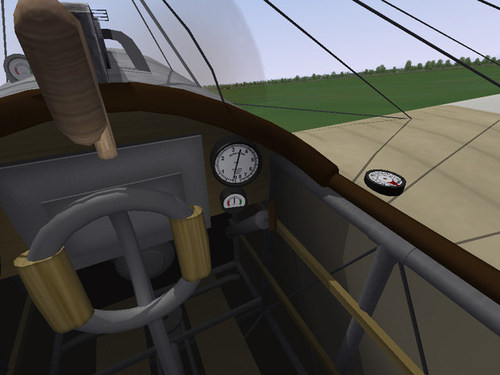
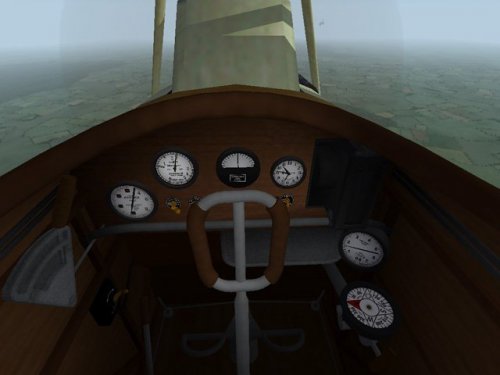
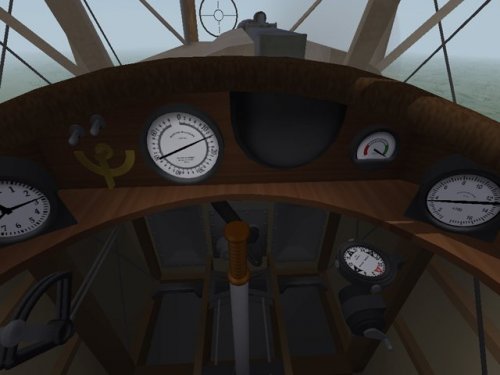
I slightly modded my MinPitchFront for a little wide cockpit views (see the screenshots).
If you wish to use my MinPitchFront edition ini, Open your COCKPIT.ini and make these following editions:
[CockpitSeat001]
MinPitchFront=-80 <----------------- you must to add this valor.
This is not mandatory. All cockpit files will work normally without this edition as well
That's all.
__________________________________________________________________________________________________________
Credits:
- Julio Junqueira skin textures (BMP & TGA files) for Stephen1918' Fokker E cockpits.
- Stephen1918 for the Cockpit ini files.
__________________________________________________________________________________________________________
- special thanks to Stephen1918 for the excellent Fokker E cockpit models.
- special thanks to CombatAce.com hosting the files.
__________________________________________________________________________________________________________
These textures are freeware; you are allowed to use it as you wish, but The names of all contributors listed here, must be added in any new released readmes. These textures may not in any way, be used in any payware additions.
21 downloads
(1 review)0 comments
Submitted
-

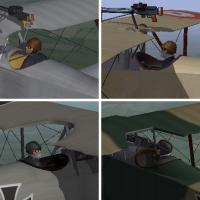
Stephen1918 Fokker Eindecker cockpits for FE 2
Stephen1918 Fokker Eindecker cockpits for FE 2
Fokkers EI, EIa, EII, EIIa, EIII, EIIIa, EIV & EIVa cockpit pack for First Eagles 2.
I did new textures and new painting approach for Stephen1918's Fokker E cockpits
The size of the instruments were slightly increased for a better view of them. The cockpit 3D LODs are setted to use jpg files.
You will find, a new Spandau machine gun, a new Parabellum machine gun, Vrt, compass.jpg figures & a new Glass.tga textures.
There is 4 optional (Vrt) at your choice. You will find them on the folder "OPTIONAL PROPELLERS" .
(2 "Garuda" propellers, one "Integrale" propeller and one "Germania" propeller) To use one of them just rename it as "Vrt".
__________________________________________________________________________________________________________
I'm including also, here at CombatAce.com in a separated download only for FE 2 users with the Andre (Laton) Simpson's Fokker E 3d LODs, setted to use jpg files. So you will be able to use my new Spandau, Parabellum, Vrt and compass in jpg format figures together with Stephen1918 cockpit using JPGs textures.
__________________________________________________________________________________________________________
Inside the pack you will find 3 folders for optional cockpit leather colors (Black & brown) for all these Fokkers above.
To use one of them just rename one of your choice as:
- BROWN LEATHER-FokECockpit.jpg rename it as FokECockpit.jpg
- BLACK LEATHER-FokECockpit.jpg rename it as FokECockpit.jpg
__________________________________________________________________________________________________________
Installation instructions for First Eagles 2: ONLY FOR FE 2 USERS. (Stephen1918's cockpit 3d LODs USING JPGs)
First make a back-up or rename your "original cockpit folder". This is just in case you wish return with your former cockpit Textures and 3d LODs later. Then just drop or copy all the Fokker folders from mine Aircraft folder to your Aircraft folder.
That's all.
_________________________________________________________________________________________________________
*OPTIONAL*
I slightly modded my MinPitchFront for a little wide cockpit views (see the screenshots).
If you wish to use my MinPitchFront edition ini, Open your COCKPIT.ini and make these following editions:
[CockpitSeat001]
MinPitchFront=-80 <----------------- you must to add this valor.
This is not mandatory. All cockpit files will work normally without this edition as well
That's all.
__________________________________________________________________________________________________________
Credits:
- Julio Junqueira skin textures (JPG & TGA files) for Stephen1918's Fokker Eindecker cockpits.
- Stephen1918 for the Fokker Eindecker Cockpit 3D LODs & ini files.
__________________________________________________________________________________________________________
- special thanks to Stephen1918 for the excellent Fokker E cockpit models.
- special thanks to CombatAce.com hosting the files.
__________________________________________________________________________________________________________
These textures are freeware; you are allowed to use it as you wish, but The names of all contributors listed here, must be added in any new released readmes. These textures may not in any way, be used in any payware additions.
38 downloads
(1 review)0 comments
Submitted
-
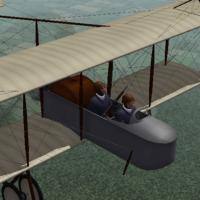
Cockpits for Laton's Fokker E-Types
By Stephen1918
I modified the cockpit from my Fokker D.II to make new cockpits for all eight of Laton's Fokker Eindeckers. Each cockpit has a fully functional stick, rudder control, throttle, and gauges, including the wing mounted compass. The cockpits are basically the same, but each has been tweaked to make it fit into Laton's fuselage and to reflect differences in the type (like the number of guns in the E.IV planes.)
I have sorted everything into the appropriate folders for easy installation.
My thanks to Laton for having made so many planes that we are still flying today.
Installation Instructions
For both FE1 and FE2- For each plane, delete Laton's original cockpit folder and cockpit.ini file and replace them with mine.
82 downloads
(2 reviews)0 comments
Submitted
-
Cockpit for the DFW C.V
By Stephen1918
This cockpit will replace Fokker D7 cockpit used until now to make the stock DFW C.V into a flyable plane. I can't find out who first converted the stock DFW into a flyable plane by using the cockpit from the Fokker D7. It seems to have been done several times over the years. I found a mod to convert the DFW C.V into a C.I uploaded by Christian59 in 2007 which used the Fokker cockpit, and it seems to have already been done before. The most recent version I could find was by JacksonM in 2017 and was included with his Hangar Screen pack.
I have used parts of the cockpits I made for other German planes to make a completely new cockpit for the DFW C.V which fits the fuselage better and has the correct placement for the gun. The new cockpit features fully functional gauges, throttle, rudder control, and stick. This cockpit should work with the DFW in both FE1 and FE2.
NOTE - There is a typo in the stock FM for DFW C.V which causes the Fuselage to disappear in the cockpit view. I have included instructions to correct the typo. If you are using one of the modded FMs, you may need to correct the typo there too, check to be sure. Instructions to fix the Data.ini are included in the download in a separate text file.
Installation Instructions for both FE1 and FE2
If you have already have a flyable DFW C.V using the FokkerD7 cockpit, delete the "cockpit" folder if it exists, and delete the DFWC5_cockpit.ini file. Then open my "DFWC5" folder and place all the files - 1 folder and 1 ini file - into your DFWC5 folder. You will also need to change one word in the DFWC5_data.ini. See the file named "ChangeForDFWC5DataIni"
If you still have the stock version, Open my "DFWC5" folder and place all the files - 1 folder and 1 ini file - into your DFWC5 folder.
You will also have to add the following line to the plane's ini file.
CockpitDataFile=DFWC5_cockpit.ini
You will also need to change one word in the DFWC5_data.ini. See the file named "ChangeForDFWC5DataIni"
NOTE - If the DFWC5_data.ini is not in the folder, you may need to extract it from the ObjectData.cat file using one of the utilities found here at CombatAce.
109 downloads
(2 reviews)0 comments
Submitted
-
Cockpit for the SPAD 7
By Stephen1918
This cockpit will repace the SPAD 13 cockpit used until now to make the stock SPAD 7 into a flyable plane. I can't find out who first converted the stock SPAD 7 into a flyable plane by using the cockpit from the SPAD 13. It seems to have been done several times over the years. The most recent version I could find was by Sinbad in 2012.
I have used parts of the cockpits I made for the SPAD 11, SPAD 16, and SPAD A.2 to make a completely new cockpit for the SPAD 7 which fits the fuselage better and has the correct number of guns. The new cockpit features fully functional gauges, throttles, rudder control, and stick. This cockpit should work with all the SPAD 7s (SPAD7_150, SPAD7_180,etc.)
NOTE - About 10 years ago, Gr.Viper made a SPAD 7 by converting the SPAD 13. MY cockpit will not work for that version since it uses the SPAD 13 plane with a revised FM. (If your SPAD 7 has two guns on the fuselage, then you are using GR.Viper's conversion and this cockpit won't fit.)
Installation Instructions for both FE1 and FE2
Do this for each SPAD 7 you want to convert:
If you have already have a flyable SPAD 7 using the SPAD 13 cockpit, delete the "cockpit" folder if it exists, and delete the SPAD7_COCKPIT.ini file. Then open my "SPAD_7" folder and place all the files - 1 folder and 1 ini file - into your folder.
If you still have the stock version, Open my "SPAD_7" folder and place all the files - 1 folder and 1 ini file - into your folder. You will also have to add the following line to the plane's ini file.
CockpitDataFile=SPAD7_cockpit.ini
138 downloads
-
New Cockpit for AEG G.IV
By Stephen1918
This cockpit will convert the stock First Eagles AEG G.IV from an AI plane into a flyable plane. The cockpit features fully functional gauges, throttles, rudder control, and stick.
Acknowledgement
About 10 years ago, ravenclaw_007 made the AEG G.IV flyable by making a cockpit using the cockpit from the SE5a. My thanks to him for leading the way.
Installation Instructions for both FE1 and FE2
If you have already installed ravenclaw's version, you should delete the two ini files ("AEG_G4.ini" and "AEG_G4_COCKPIT.ini") before installing this version.
If you still have the stock version, this install will replace the original AEG-G4.ini file. You should make a backup in case you want to revert to the original AI version.
Open my "AEG_G4" folder and place all the files - 1 folder and 2 ini files - into your "AEG_G4" folder.
154 downloads
-
Armed Observers for First Eagles
By Stephen1918
When World War I began, airplanes were designed strictly for reconnaissance. They were unarmed and built for stable flight rather than maneuverability. Within a very short time air crews began to carry weapons. Observers with pistols or rifles became common until armed aircraft were produced.
I have made a set of armed observers for First Eagles. The observer carries a rifle "at the ready." He moves his head, but does not shoot the gun. There is one for each stock pilot color, and one for each of the helmeted pilots I made before. A total of six observers.
You will need to install the observers into the game, then make a change to the data.ini for each plane to make them appear in the game. The center point matches the center point of the FE Gold and FE2 stock pilot, so they should swap into your plane without any adjustment. If the plane uses the old style FE1 pilot, some minor tweaking may be required.
Note that this only replaces the stock pilot and will not replace a gunner built into the 3D model.
My thanks to Whiteknight06604 for suggesting the idea and for beta-testing the observers.
Installing the observers into the game:
For FE1 - Open my folder named "FE1" and copy all twelve files into your "Aircraft" folder. Don't put them into any of the other folder. The LOD names are the names of the new "pilot." The numbers match the FE pilot numbers so uniform colors will match.
For FE2 - Open my folder named "FE2" and copy all six folders into your Objects/Pilots folder. The folder names are the names of the new "pilot." The numbers match the FE pilot numbers so uniform colors will match.
Putting the observers into a plane:
For both FE1 and FE2 - Open the plane's data.ini file. Find the section for crew (about 1/2 to 3/4 of the way down). The Observer should be in SeatID=2. Change the PilotModelName to the name of one of the new observer. Save the file and fly. (You might want to comment out the original name and type in a new line, like in my example, in case you want to change back.)
Example:
// Crew ---------------------------------------------------------
[Pilot]
SystemType=PILOT_COCKPIT
SeatID=1
PilotModelName=WWIpilotNew2
PilotHeadNodeName=head
Position=0.0,-0.2,0.70
MinExtentPosition=-0.32,-0.41,-0.26
MaxExtentPosition= 0.32,0.36, 0.82
[Observer]
SystemType=PILOT_COCKPIT
SeatID=2
//PilotModelName=WWIpilotNew2 <--old pilot name
PilotModelName=WWIObserver2 <--new pilot name
PilotHeadNodeName=head
Position=0.0,-1.0,0.70
MinExtentPosition=-0.32,-1.28,-0.26
MaxExtentPosition= 0.32,-0.50, 0.82
66 downloads
-
Pilots with Helmets for First Eagles
By Stephen1918
Some flyers wore simple crash helmets in WWI, especially recon and bomber crews where they would have to move around during the flight. These helmets were made of heavy leather with cork inserts. They didn't offer much protection by today's standards, but they were better than nothing.
I have made new pilots with French style and German style helmets. Each style includes a version with a scarf over the lower face, making four new pilots for First Eagles.
You will need to install the pilots into the game, then make a change to the data.ini for each plane to make them appear in the game. The center point matches the center point of the (new) FE2 stock pilot, so they should swap into your plane without any adjustment. If the plane uses the old style FE1 pilot, some minor tweaking may be required.
My thanks to Quack74 for suggesting the idea and for beta-testing.
Installing the pilots into the game:
For FE1 - Open my folder named "FE1" and copy all six files into your "Aircraft" folder. Don't put them into any of the other folder. The LOD names are the names of the new pilot.
For FE2 - Open my folder named "FE2" and copy all four folders into your Objects/Pilots folder. The folder names are the names of the new pilot.
Putting the pilots into a plane:
For both FE1 and FE2 - Open the plane's data.ini file. Find the section for crew (about 1/2 to 3/4 of the way down). Change the PilotModelName to the name of one of the new pilots. Save the file and fly. (You might want to comment out the original name and type in a new line, like in my example, in case you want to change back.)
Example:
// Crew ---------------------------------------------------------
[Pilot]
SystemType=PILOT_COCKPIT
//PilotModelName=wwiPilotNew2 <--old pilot name
PilotModelName=FrHelmetPilot <--new pilot name
PilotHeadNodeName=head
Position=0.0,-0.82,0.75
MinExtentPosition=-0.30,-0.93,-0.36
MaxExtentPosition= 0.30,-0.24,0.83
144 downloads
(4 reviews)0 comments
Updated
-
Bristol Scout Cockpit texture reworked
By Hansa
A new texture for the Bristol Scout cockpit. I tried to do a photorealistic texture.
Enjoy it!!!
152 downloads
-
 (0 reviews)
0 comments
Submitted
-

Gotha G.IV Cockpit and Bombsight
By sinbad
Gotha Revised Cockpit and Bomb sight
This cockpit is derived from a mod by Ravenclaw_007 10 May 2008 and from the FokkerDVII Cockpit by Third Wire. This mod is NOT intended to depict an authentic GIV cockpit, but to improve functionality (primarily adding back the compass) and the appearance. The bombsight is derived from one originally developed by Dfang in 2008 for the Staaken.
The Gotha bomb sight in this mod mimics a Goerz “telescope type” sight, one of several sights used by the Gothas.
There are no records I can find which depict the actual sight picture, so the cross hairs and reference marks are speculative. We do know the real sight was illuminated for night use; the mod attempts to depict that function. None of the sights used by the Gothas were especially effective (one was actually called a "non-precision" sight). Sights were only one reason bombing was less than accurate. The Gotha approach altitudes in England were usually at or above 3000 meters to avoid defending aircraft, balloon cables, and AAA. The real Gotha bombardier was the aircraft commander, operating in the forward observer station.
Installation- First back up everything. Then to install for and FE1 and FE2:
In The Objects/Aircraft/GothaGIV folder
GothaGIV_Cockpit.INI
GOTHA_sight.tga
GOTHA V24 HiRes_gunsight Full center 5 nums.tga
GOTHA V24 HiRes_gunsight Open center 5 nums.tga
DVII_DASH_AMMO.bmp
D_VII_FLOOR_FRONT_BACK_WALL.bmp
D_VII_LABLES.tga
In the FE or FE2/FLIGHT folder
VIEWLIST.INI
MISSIONCONTROL.INI
The Beta testers and I all used variations of the June 2009 FM by Peter01, who did some of the original FM work on this project back in 2008. The calibration of the sight relies on it, so it is strongly suggested. There are two versions of the sight. One has a open cross hair and the other has a full cross hair. The default (with the open cross hair) will install unless you substitute the other. To install the alternate, save GOTHA_sight.tga as GOTHA_sightBAK.tag, then copy the GOTHA V24 HiRes_gunsight Full center 5 nums.tga, and rename that copy GOTHA_sight.tga. That way you’ll still have a full set of the sights if you want to reverse the process. Keep all versions in the Objects/Aircraft/GothaGIV folder.
Operation- When the aircraft loads, the sight will appear at eye level. Hit the \ key [immediately below the BACKSPACE KEY] twice. The sight will drop to the floor. When approaching the target, engage the wing leveler or autopilot and hit the .DEL key, to go to invisible cockpit. Use the mouse and the NUM PAD + key to position the sight. In FE1, you can then use the \ key to select the bombs from the various choices in the loadout, if you have selected multiple weps in the load out screen. In FE2 the game will not display these choices, but the ordinance will be selected. Drop the weps in the usual manner with the ENTER key.
The default altitude for missions is set at 3000 meters, or approximately 10,000 feet, the most common approach altitude for attacks on London and the coastal areas. The sight is calibrated to operate at 110 kph for 3000 - 4000 meters, and 90 kph at 1000 meters. The calibration speeds are very important to accuracy. Targets should be attacked with a "stick" of several bombs some toggled a bit ahead, and some a bit behind the apparent aim point.
If you prefer a different approach altitude, you will find alternatives in the folder. Simply copy the one you want, delete the old file and then save the copy as missioncontrol.ini. Do not simply delete the MISSIONCONTROL.INI without using one of the enclosed files as other operational settings are also adjusted for the Gotha GIV in that file.
Known issues- the Gothas carried a very diverse load of stores. In configurations with heavy bombs loaded under the nose, the bomb sight may be temporarily blocked by the bomb on the forward port side. One way to deal with this is to manually toggle only that bomb at initial approach; another is to select a loadout that does not place a bomb in the forward port rack. The typical load for the attacks on England was 6 50kg bombs, so it is relatively easy to set up an authentic loadout which avoids the "bomb block" bug.
Thanks to Southside Bucky and OlPaint01 for exhaustive Beta testing. This was a challenging mod to develop and the comments and advice they provided was extremely helpful. Thanks also to the original developers whose work is incorporated here -- Dfang, Ravenclaw_007, Peter01 , and of course Capun and the team at the Skunk Works for the Gotha.
sinbad 20 April 2010
235 downloads
-

Albatross DII Cockpit and Screens
By sinbad
These files will modify the original Albatros DII by BortdaFarm by installing the stock Albatros D3 cockpit from the Third Wire Expansion Pack. This mod tested AOK with and without the April 08 patch. The files will not work unless you have installed both the Expansion pack and the BortdaFarm Albatros DII.
BortdaFarm invested a lot of time and effort into the creation of the Albatros DII, and I'm glad he did. There is only so much one person can do and the EP cockpit by TK and his team is more detailed and functional. Thanks to both BortdaFarm and Third Wire for making these models for us.
The files in this package include alternative loading and hangar screens. Back up your original files (in case you later decide you prefer the originals) and place all of the enclosed files in the AlbatrosDII folder.
In addition to the cockpit and the screens, there are two gunsight types included. The default is the classic Fokker crosshair. The alternative is a slightly larger Spad13 type with a small circle in the center of the crosshair. If you prefer the latter, simply open the file marked ALBATROSD3_COCKPIT.INI and change the following lines from this:
//GunsightMilSize=40
GunsightMilSize=30
GunsightName=Fokker_ironsight.tga
//GunsightName=Spad13_ironsight.tga
to this
GunsightMilSize=40
//GunsightMilSize=30
//GunsightName=Fokker_ironsight.tga
GunsightName=Spad13_ironsight.tga.
You may notice that the windscreen appears to be slightly forward of the gun breeches. Don't worry, it will still keep the wind off your face! There was no way I could find to avoid this and still place the new cockpit in the model in a way that functions properly. If anyone can resolve this dilemma, please do so. BTW notice the hole in the glass in the BTF model. These holes were in the original aircraft windscreens to allow sighting the weapons despite the smears of oil and dirt that often impaired the view.
I also want to acknowledge the dedication and continuing hard work by Peter01 on his outstanding flight models for the Albatros DII and so many other aircraft for First Eagles. These FMs are a tremendous enhancement of the sim.
August 22 2008
sinbad
460 downloads
(0 reviews)0 comments
Updated
-
gunsight
By p10ppy
Add on gunsight for FE
As mentioned in a recent post, I’m somewhat “uneasy” about using aimangles to adjust the gunsight/bullet path convergence
The issue (thanks B Bandy RFC) is that the AI becomes very inaccurate when using significant amounts of this parameter (empirical testing seems to confirm this)
The AI would seem to use the aircraft’s fore/aft axis for aiming fixed guns and aimangles shifts the bullet path away from this axis
This is fine for vertical adjustments because the AI can be “told” to compensate with the GunBoresightAngle in the [FlightControl] section of the FM (as with the Lewis gun in the stock SE5a)
SE5A_DATA.INI
[FlightControl]
GunBoresightAngle=5.0
[internalGun2]
AimAngles=0.0,5.0,0.0
However there seems to be no GunBoresightAngle equivalent for left/right adjustments
So heres a replacement gunsight that can be moved around instead of the bullet path
Its somewhat of a pain to use I’m afraid
The steps
You will have to extract the WEAPONDATA.INI and the WEAPONDATA.DAT from the ObjectData.CAT if you haven’t already and place them in a folder called “Weapons” in the “objects” folder (you may have to make the “Weapons” folder)
Place the GunSight.bmp and gunsight01.LOD in the “Weapons” folder has well
Add this to the bottom of your extracted weapondata.ini
----------------------------------------
[WeaponData027]
TypeName=Gunsight01
FullName=Gunsight01
ModelName=Gunsight01
Mass=0.010000
Diameter=0.100000
Length=0.010000
SubsonicDragCoeff=0.000100
SupersonicDragCoeff=0.000100
AttachmentType=
SpecificStationCode=
NationName=
StartYear=0
EndYear=0
Availability=0
BaseQuantity=0
Exported=FALSE
ExportStartYear=0
ExportEndYear=0
ExportAvailability=0
WeaponDataType=5
MaxFuelAmount=0.001000
Asymmetrical=FALSE
---------------------------------------------
Note [WeaponData0XX] should be sequential with any thing you already have there
After you have saved that, Open the extracted WEAPONDATA.INI in the NEW weapons editor and hit save
Now change your “victim” aircraft FM thusly (SPAD7_180 used here as an example)
Add TWO new systems to the component that the gunsight will sit on (often [Nose])
SPAD7_180_DATA.INI
------------------------------
[Nose]
ParentComponentName=Fuselage
---snip----------
SystemName[001]=Engine
SystemName[002]=Gunsight01/////New
SystemName[003]=Gunsight/////////New
---------------------------------------
Add two new weapon stations’ to match in the weapon station section of th FM
-----------------------------------------
[Gunsight01]
SystemType=WEAPON_STATION
StationID=11//note these are sequential with StationID’s above
StationGroupID=4//note these are sequential with StaionGroup’s above
StationType=EXTERNAL
AttachmentPosition=0.0,0.75,0.642 //where the gunsight will appear on the aircraft, you will have to test
AttachmentAngles=0.0,0.0,0.0
LoadLimit=5
AllowedWeaponClass=FT
AttachmentType=NATO
ModelNodeName=
PylonMass=0.0001
PylonDragArea=0.00
NoJettisionTank=TRUE
FuelTankName=Gunsight01//name of the weapon lod
--------------------------------------------
The next one’s parameters are largely irrelevant, its to hide the existing gunsight
The most important bit is the ModelNodeName=sight,
“sight” being the mesh name of the original gunsight
You will have to deduce that with an OUT file or use a hex editor on the main models LOD to find it (not as hard as it sounds) or ask the original modder to tell you
-------------------------------------------
[Gunsight]
SystemType=WEAPON_STATION
StationID=12//note these are sequential with StationID’s above
StationGroupID=5//note these are sequential with StaionGroup’s above
StationType=EXTERNAL
AttachmentPosition=0.000,0.5000,0.0000
AttachmentAngles=0.000,0.0000,0.0000
LoadLimit=1
AllowedWeaponClass=FT
AttachmentType=NATO,WP
NumWeapons=1
ModelNodeName=sight// name of the original gunsight mesh
PylonMass=0.0001
PylonDragArea=0
FuelTankName=
--------------------------------------------------------
Finally modify or create a loadout file for the aircraft so the gunsight01 is loaded in all configurations
SPAD7_180_LOADOUT.INI example
------------------------------------
[Default]
DefaultFor=SWEEP,CAP,INTERCEPT,BALLOON_DEFENSE,CAS,RECON,ARMED_RECON,ESCORT
Loadout[11].WeaponType=Gunsight01
Loadout[11].Quantity=1
[Le Prieur]
DefaultFor=BALLOON_BUSTING
Loadout[01].WeaponType=LePrieurTube
Loadout[01].Quantity=1
Loadout[02].WeaponType=LePrieurTube
Loadout[02].Quantity=1
Loadout[03].WeaponType=LePrieurRocket
Loadout[03].Quantity=1
Loadout[04].WeaponType=LePrieurRocket
Loadout[04].Quantity=1
Loadout[05].WeaponType=LePrieurRocket
Loadout[05].Quantity=1
Loadout[06].WeaponType=LePrieurRocket
Loadout[06].Quantity=1
Loadout[07].WeaponType=LePrieurRocket
Loadout[07].Quantity=1
Loadout[08].WeaponType=LePrieurRocket
Loadout[08].Quantity=1
Loadout[09].WeaponType=LePrieurRocket
Loadout[09].Quantity=1
Loadout[10].WeaponType=LePrieurRocket
Loadout[10].Quantity=1
Loadout[11].WeaponType=Gunsight01
Loadout[11].Quantity=1
------------------------------------------
Phew
I usually mod the main guns tracer size with the gun editor to make testing easier (bigger, temporarily)
AttachmentPosition=0.0,0.75,0.642 equals Left(-x.x) or Right(x.x), Down(-x.x) or Up(x.x), Backward(-x.x) or Forward(x.x) from the aircrafts CG (units are metres)
Keep adjusting it till you have it right, the above is good for MY spad7_180 with the cockpit setting that I use
I will include my SPAD7_180_LOADOUT.INI and my SPAD7_180_DATA.INI in the download (they go in your SPAD7_180 folder)
Please backup your old ini's first
My SPAD7_180 ini's are modded for LePrieur's as well as the cockpit settings here http://forum.combatace.com/index.php?autoc...p;showfile=5924
so YMMV
Enjoy and feel free to use it for other aircraft (and re-release it for the community if you wish)
224 downloads
(1 review)0 comments
Submitted
-

Gotha GIV Cockpit
this is just a mod of the cockpit.ini file to fit the Fokker D7 cockpit to the Gotha GIV
-unpack the GothaGIV_Cockpit.ini file and drop it in the GothaGIV folder it will overwrite the existing Cockpit.ini file
293 downloads
(2 reviews)0 comments
Updated
-

AEG G4 Cockpit
This is a modification of the SE-5A cockpit to have a placeholder until someone coms up with a real cockpit
just drop the ini.files in the AEG G4 folder and let the existing file override
thanks to Third Wire for this great aircraft
461 downloads
(2 reviews)0 comments
Submitted
-

update files for 3 aircraft
By gambit168
Hi all
Not sure which cat these should be in , so i thought as they r for my skins , then the skins section is best
ok in this zip is a cockpit texture for the EIII i guess same for EI & EII
also white decal letters for halb DIII jasta 22 ( they are black now , should be white)
and a new fuse bmp for the jasta 35b DXII, as i noticed today its wheel covers were out of line with the wheel hub :yes:
262 downloads
(5 reviews)0 comments
Submitted
-

First Eagles - Albatros DVa Cockpit
By Aladar
A quick disclaimer.
The cockpit isn't at it's best, there are limitations of the Albatros model that prevent a few things. For one, the cockpit padding cannot be hidden, so you'll be seeing the external models padding instead of my own high res padding. Secondly, the MG stocks can't be hidden, so I didn't see any reason to model much more than what you see sofar.
TK said he'd fix this in the next patch, and when he does, I'll do a revisit and fix these things, but for now you'll have to live with them.
Anywho, hope y'all enjoy the cockpit as much as I did making it. :)
2,207 downloads
(11 reviews)0 comments
Updated
-
Download Statistics
14,206
Files12,482
Comments26,857
Reviews