Jump to content
Sign in to follow this  
Eagle114th

Aircraft skin project - Problem (BLACK texture) - Need Advice

Recommended Posts

Hello everyone,

After spending several days learning and creating new texture for more aircraft.  It appears that if I add higher resolution of texture to any existing SF2 plane, the plane appears all black.  In order to fix it, I had to lower the resolution to the aircraft default, to make it appear in-game.

For example, I made new camo for MiG-15Bis, I saved the camo as 2048 while MiG-15Bis originally have texture at 512 x 512.  Unless I save it as 512 x 512, it will appear all black in-game.  I do not want to reduce the quality of texture, hence staying with 2048 x 2048.

I tried this solution by deleting texture sets in MiG-15Bis.ini, then run SPF2 again.  Still show MiG-15Bis being all black.

Does anyone know the solution to this problem? 

As always, thank you for the advice and supports.


UPDATE: I did some testing.  If I reduce texture from 2048 x 2048 to 1024 x 1024, texture will show up in-game.  However, if I want to go HD mode (2048 x 2048 or higher), it will show up as all black in-game.  I am still troubleshooting through this, so I can finally get HD texture show up in-game.

Edited by Eagle114th

Share this post


Link to post
Share on other sites

did you create a textureset.ini for new skin???? the game engine will not recognize it without them. also, what format did you save the skin as? bmp? jpg? All stock lods can use both, as the engine (tm) reads those formats. 

no matter what they say, size really does not matter. we have skins here in 4096x that work just fine. 

  • Thanks 1

Share this post


Link to post
Share on other sites
6 hours ago, Wrench said:

did you create a textureset.ini for new skin???? the game engine will not recognize it without them. also, what format did you save the skin as? bmp? jpg? All stock lods can use both, as the engine (tm) reads those formats. 

no matter what they say, size really does not matter. we have skins here in 4096x that work just fine. 

Thank you for the reply.  This is very strange because this is what I have in Paran Camo texture folder in MiG-15Bis folder:

1

I also have textureset.ini and decals.ini included.  What I did while creating a new camo is copying an existing MiG-15Bis texture folder, then replace all .bmp files with my new camo in 2048 x 2048 resolution.

Here are the codes from textureset:ini
NOTE: For now I set the Nation to Soviet for testing camo.

[TextureSet]
Name=Paran Desert
Nation=Soviet
StartDefaultDate=1
Specular=1.000000
Glossiness=0.500000
Reflection=0.800000
DecalNumberRandomize=TRUE

Then I ran SFP2, MiG-15Bis is all black.  I also deleted all TexturesetXXX codes in MiG-15Bis.ini file.  Still black texture problems in SPF2.

However, I reduced the quality of texture from 2048 x 2048 to 1024 x 1024, then it started showing the texture in-game.  This is confusing, why won't 2048 x 2048 or higher work in SPF2.   I am still tweaking around MiG-15Bis to see what else I am missing.


Edited by Eagle114th

Share this post


Link to post
Share on other sites
29 minutes ago, Eagle114th said:

However, I reduced the quality of texture from 2048 x 2048 to 1024 x 1024, then it started showing the texture in-game.  This is confusing, why won't 2048 x 2048 or higher work in SPF2.

Don't get crazy over this. 2K and 4K textures do work in SF2. The reason you see them not loaded is due to your video card; it runs out of memory, and so it cannot load all the skins. Just reduce graphics settings in the options, that may help. Nothing to do with your custom skin nor with the game engine.

When you have tons of third-party mods with high quality and high resolution textures, chances of this happening increase, especially on older GPUs. The game itself is incredibly stable, even when your video card runs out of memory, you expericence just missing textures, no crashes to desktop over some textures.

Edited by Menrva
  • Like 1
  • Thanks 1

Share this post


Link to post
Share on other sites
35 minutes ago, Menrva said:

Don't get crazy over this. 2K and 4K textures do work in SF2. The reason you see them not loaded is due to your video card; it runs out of memory, and so it cannot load all the skins. Just reduce graphics settings in the options, that may help. Nothing to do with your custom skin nor with the game engine.

When you have tons of third-party mods with high quality and high resolution textures, chances of this happening increase, especially on older GPUs. The game itself is incredibly stable, even when your video card runs out of memory, you expericence just missing textures, no crashes to desktop over some textures.

That is noted.  Just a quick question, my video card is NVIDIA GeForce GTX 1080 with 8 GB video memory.  Is that enough to run SF2 with 2048 x 2048 or higher resolution? 

Edited by Eagle114th

Share this post


Link to post
Share on other sites
19 minutes ago, Eagle114th said:

That is noted.  Just a quick question, my video card is NVIDIA GeForce GTX 1080 with 8 GB video memory.  Is that enough to run SF2 with 2048 x 2048 or higher resolution? 

Definitely yes. Are you sure you're not running the game with Intel's integrated GPU? By default SF2 uses the first GPU it finds, and so users think to be playing SF2 on the dedicated GPU, while it currently uses the Intel one. You can change it at the graphics options in the menu. Also, avoid running the game with all options to Unlimited, use the Customize setting and only put Texture settings to Unlimited, everything else to High.

Edited by Menrva
  • Thanks 1

Share this post


Link to post
Share on other sites
1 minute ago, Menrva said:

Definitely yes. Are you sure you're not running the game with Intel's integrated GPU? By default SF2 uses the first GPU it finds, and so users think to be playing SF2 on the dedicated GPU, while it currently uses the Intel one. You can change it at the graphics options in the menu. Also, avoid running the game with all options to Unlimited, use the Customize setting and only put Texture settings to Unlimited, everything else to High.


I changed the option as suggested in your post, I still face the same 'black texture' problems.  Here is screenshot of what I set in options:

NOTE: Just in case, anyone is wondering.  My recent added SF2 installation doesn't include my new SF2 screen overhaul.  My main SF2 installation does have it.  This is just a quick copy of SF2 for testing camo and other items quickly.

 
img00065

The result:

img00064

UPDATE: After doing some testing, this is what I found out:

By using bmp. file, SFP2 can run up to 1024 x 1024.  HOWEVER, if using .jpg file, can use 2048 x 2048 or 4096 x 4096.

Which do you consider to be the best quality?

1024 x 1024 by using .bmp OR 4096 x 4096 using .jpg

The reason why I ask is that from what I learned, by using .jpg, the quality of image is reduced.

Share this post


Link to post
Share on other sites
1 hour ago, Eagle114th said:

Which do you consider to be the best quality?

The reason why I ask is that from what I learned, by using .jpg, the quality of image is reduced.

Bitmap obviously would be best for quality, but with modern painting software you can save high quality JPGs with no noticeable loss in quality. Keep in mind that JPG textures do bring longer loading times especially on older hardware (despite the smaller size, the SF2 game engine has to decompress such textures), especially if all are saved at 100% quality, but they help save some serious disk space. All in all, always go with .JPG where possible, save with maximum quality. If things go awry, always keep a copy of templates at hand, so that you can re-export the same texture with different settings.

Edited by Menrva
  • Thanks 1

Share this post


Link to post
Share on other sites

Dumb question, but, is your skin folder named in exactly the same way as your skin's .ini? I typoed one once and got the black skin result because the sim couldn't "find" the skin. One letter was all it took.

  • Like 1

Share this post


Link to post
Share on other sites

doesnt have to be. im working a ANG project right now, skin folders are just named teh number of the squadron (110, 159, 199 etc), the textureset.ini (which always stays named just that) opens up to reveal "Name = 131 FW, 110th FS Missouri ANG" etc,

its the aircraft that the "whatever_aircraft" folder needs to match "whatever_aircraft.ini" and causes issue in game. the rest of the ini's just need to match whats in that first one and be present in the folder

never recall a misnamed folder disappearing a skin. much more common for me is to set up the first skin how i want, then duplicate with intent to open inis and edit. for whatever reason (forgetfulness, have to leave computer for more than 15 minutes whatever) i often go to work on something to discover i might have two "some_skin"s in the dropdown! nothing devastating, just annoying

  • Thanks 1

Share this post


Link to post
Share on other sites
14 hours ago, Menrva said:

Bitmap obviously would be best for quality, but with modern painting software you can save high quality JPGs with no noticeable loss in quality. Keep in mind that JPG textures do bring longer loading times especially on older hardware (despite the smaller size, the SF2 game engine has to decompress such textures), especially if all are saved at 100% quality, but they help save some serious disk space. All in all, always go with .JPG where possible, save with maximum quality. If things go awry, always keep a copy of templates at hand, so that you can re-export the same texture with different settings.

That is noted. From now on, I will go with .JPG format, unless for any reasons, some files needs .BMP.  

I am finally able to use any higher quality camo (2048 x 2048) for Dhimar and Paran projects. 

  • Like 1

Share this post


Link to post
Share on other sites

most of the stock aircraft are nicely and reasonably mapped on few bitmap sheets. So if templates are in good quality skin in 2048x2048 is good enough. Although I prefer stock aircraft and many CAddons in 3072x3072. And usually Templates made in 4096x4096 or higher..then scale down the finished bitmap. 

  • Like 4

Share this post


Link to post
Share on other sites

i remember having a heart attack at the file size on the first template you sent me to assist with yakarov :lol:. but draw big then scale down is an excellent way to go if youre really concerned about space. you lose way less detail shrinking  something huge but detailed than trying to upscale somthing small. and if you worry about losing detail, you can go mid way; i've been shrinking alot of files lately from 1024 to either 512 when its simple or 768 when more intricate.

but thats not the way, its just a way. you'll find theres many ways to skin a mod Eagle


  • Like 2

Share this post


Link to post
Share on other sites

This is the way


(we need a mando emoji)

  • Haha 3

Share this post


Link to post
Share on other sites

flash back to the infantry Sergeant doing lane trainng at Fort Dix, 2011

"we arent going to show you THE way, we're just going to show you A way. this is your show, we are just sharing our experience to help you all get more gooder."

Share this post


Link to post
Share on other sites

Everyone, thank you for all the supports and advice!  It has been humble experiences learning about painting many specific parts and make it detailed as possible.  

I also learned how to align the camo by using LODViewer.  That tool is definitely godsend!  We owe a huge thanks to the author of LODviewer!

(NOTE: I am working on imported version of IDF Mirage IIICJ for Dhimar.  I am working on a big mod project with a small team.  At once when I am done with the camo, I will change the decals.  For now, I am happy with the camouflage.  It took me a whole day to find the techniques to align the camouflage.  It is indeed, a tricky work at first.

unknown.png
unknown.png

Edited by Eagle114th
  • Like 2

Share this post


Link to post
Share on other sites

Hello everyone,


After getting used to the making camo on aircraft by using templates;  I decided to go for the aircraft that doesn't have the templates.  At first, it was very challenging.  It was very interesting experiences going through the intense research, trial and errors, finding out how to 'merge' the camo into already-painted aircraft in SPF2. I wanted to add F-86F-2 to Dhimar for the mod project.  

NOTE: I am adding all the people who made the mods to the credit part, including KAW campaign mod. I am going to request the permission for using it in the big project too.

After researching about 'merging' the camo into already painted camo by using PSP (I use GIMP 2), I decided to give it a try.  Using GIMP 2 works differently, compared to what was shown by using PSP in the tutorial video.  Took me several attempts to get it working.  What made it work is using different techniques for two types of shades:

1) White - Grey - Black only 
2) Any colors besides white - gray - black 


Just for your info, "Burn" method does not work in GIMP 2 well, so instead, use Multiply and Pin Light methods.  They work depending on the situations.


This is KAW F-86F-2, big respect goes to everyone who poured many hours making this aircraft and camo.  I flew her often in KAW and enjoy seeing this camo.

1
Here is Dhimar F-86F-2 with new strips (replaced it with dark navy blue of Dhimar):
 

5

6

7
Now here is the second (different) camo:

2

3

4

  • Like 1

Share this post


Link to post
Share on other sites

great progress

next tip: when working without a preset template, do your panel lines first. if you are starting from someone elses skin, it is easier to trace the panel lines first, then have it be the uppermost layer and adjust opacity as needed.

where it gets really fun is when you are making the very first skin and place the first panel lines

  • Like 1
  • Thanks 1

Share this post


Link to post
Share on other sites
29 minutes ago, daddyairplanes said:

great progress

next tip: when working without a preset template, do your panel lines first. if you are starting from someone elses skin, it is easier to trace the panel lines first, then have it be the uppermost layer and adjust opacity as needed.

where it gets really fun is when you are making the very first skin and place the first panel lines

Thank you for the advice. I will keep that in the mind.

Just to share what I have learned:  In order, for me to get the panel (line, rivets, etc), this is what I do:

1) Use saturation to turn shades of colors into white - grey - black colors
2) use "Color to alpha" to make all most color go invisible, except for lines , rivets, and panels.
3) Add the colors to any unique panels that needs coloring.

4) Do my best to make the 'dark' background go alpha as possible, so it won't darken the camo I create.  If not possible, then do this;  Use erase and soft circle shape with air spray, make it 20 percent or so transparent and lightly erase the 'darken' area to make it go fully transparent as possible.

And for the weathering part, I use small erase (air spray) to clean and have it 'merge' into the new texture / camo from top (as layer).

I would like to request for your advice too. What do you do, in order, to extract the panel, line, rivet, etc from the user's camo without the available templates? 


Edited by Eagle114th

Share this post


Link to post
Share on other sites
1 hour ago, Eagle114th said:

What do you do, in order, to extract the panel, line, rivet, etc from the user's camo without the available templates? 

I am making a brand new template. :biggrin:

Extracting panel lines and rivets from ready skin can be a pain in the arse. Been there done that. -> 'I am making a brand new template' is an absolutely serious statement. 

You can try to play with the contrast of existing skin to achieve as dark as possible (rivets/lines) then extract by making a selection by color (of darkened rivets/lines) from a layer.  (shift+o in gimp if I remember correctly) 

  • Like 1
  • Thanks 1

Share this post


Link to post
Share on other sites
19 minutes ago, yakarov79 said:

I am making a brand new template. :biggrin:

Extracting panel lines and rivets from ready skin can be a pain in the arse. Been there done that. -> 'I am making a brand new template' is an absolutely serious statement. 

You can try to play with the contrast of existing skin to achieve as dark as possible (rivets/lines) then extract by making a selection by color (of darkened rivets/lines) from a layer.  (shift+o in gimp if I remember correctly) 

Thank you for the advice too!  

This is the video that lead me into exploring the different methods of extracting or 'merging' the camo into an existing texture by using GMP 2.  As stated above, PSP and GIMP 2 works differently. 


  • Like 1

Share this post


Link to post
Share on other sites

like Yakarov said, make a new one. well in my case, ish

i trace over teh original panel lines myself with 1 pixel straight black brush or pencil. then when its complete, i duplicate and invert so there is a white offset  for a bit of depth. takes abit of time, but i figure they took the time to put the original panel lines on, might as well use the location unles its badly off

i then put them into a layer group, and adjust the opacity of that until i think it looks right. usually somewhere between 12% and 30% all depending.

usually, panel lines and exhaust stains are about the only thing i would reduce opacity for on a skin (jpg or bmp). unless your getting really fancy and having sand blasted areas of paint over an original metal skin (a thought given your subject matter). but in beginning basic practice most of the skin colors should be solid if working a basic camo


Yakarov, you now also now the pain in creating fresh skins for another modeller too :lol: but its good that you have been working with them, their game has picked up a bit this year since you started collaborating.


EDIT: back to Eagle; that video is another way, and working on the fighters rather than big birds youll have more details to pull out. again personally i  would have the details that show through the paint in layers above the paint job

but to paraphrase Bob Ross, this is your show, you create it how you want to

Edited by daddyairplanes

Share this post


Link to post
Share on other sites

The templates for the Sabres are readily availalbe -- just look for Ravenclaw's F-86 templates. There are no better

Why do extra work, when it's already been done for you??

  • Like 2
  • Thanks 1

Share this post


Link to post
Share on other sites
3 hours ago, Wrench said:

The templates for the Sabres are readily availalbe -- just look for Ravenclaw's F-86 templates. There are no better

Why do extra work, when it's already been done for you??

Agreed as doing templates is long enough...

Share this post


Link to post
Share on other sites

Create an account or sign in to comment

You need to be a member in order to leave a comment

Create an account

Sign up for a new account in our community. It's easy!

Register a new account

Sign in

Already have an account? Sign in here.

Sign In Now
Sign in to follow this  

  • Similar Content

    • By LaoHu
      I downloaded this mod for the F-5 and all of the skins for the aircraft are black, which means the textures aren't loading but I can't find out why it isn't loading. There is no exact installation instructions other than extract it into the mod folder which I did and there doesn't look like there are any issues with the file placement compared to the other aircraft files. Can anyone help me out?

      P.S. the drop tanks have the textures working and the cockpit, loading screen, menu, etc all work. Everything but the skin. 

       
    • By LaoHu
      Would it be possible to put a photograph in your cockpit? Often pilots are shown to have a photo of a loved one inside their cockpit attached to the dashboard to remind them of home, give them inspiration, etc. Would it be possible to stick one in a cockpit through some kind of texture edit or something? 
    • By Eugene2


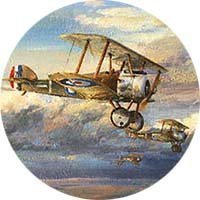
      View File Photorealistic default skin for Geezer's Martinsyde G100/G102s
      Photorealistic skin for excellent Martinsyde G100/102 (all modifications) by Geezer.
      I tried to add some "photorealistic" textures for more impressive image of this aircraft.
      Eugene
      Submitter Eugene2 Submitted 07/03/2022 Category Other Entente Aircraft Skins  
    • By Eugene2
      Photorealistic skin for excellent Martinsyde G100/102 (all modifications) by Geezer.
      I tried to add some "photorealistic" textures for more impressive image of this aircraft.
      Eugene
×

Important Information

By using this site, you agree to our Terms of Use, Privacy Policy, and We have placed cookies on your device to help make this website better. You can adjust your cookie settings, otherwise we'll assume you're okay to continue..