
Search the Community
Showing results for tags 'sabow'.
Found 28 results
-
From the album Steel armor - Blaze of War
-

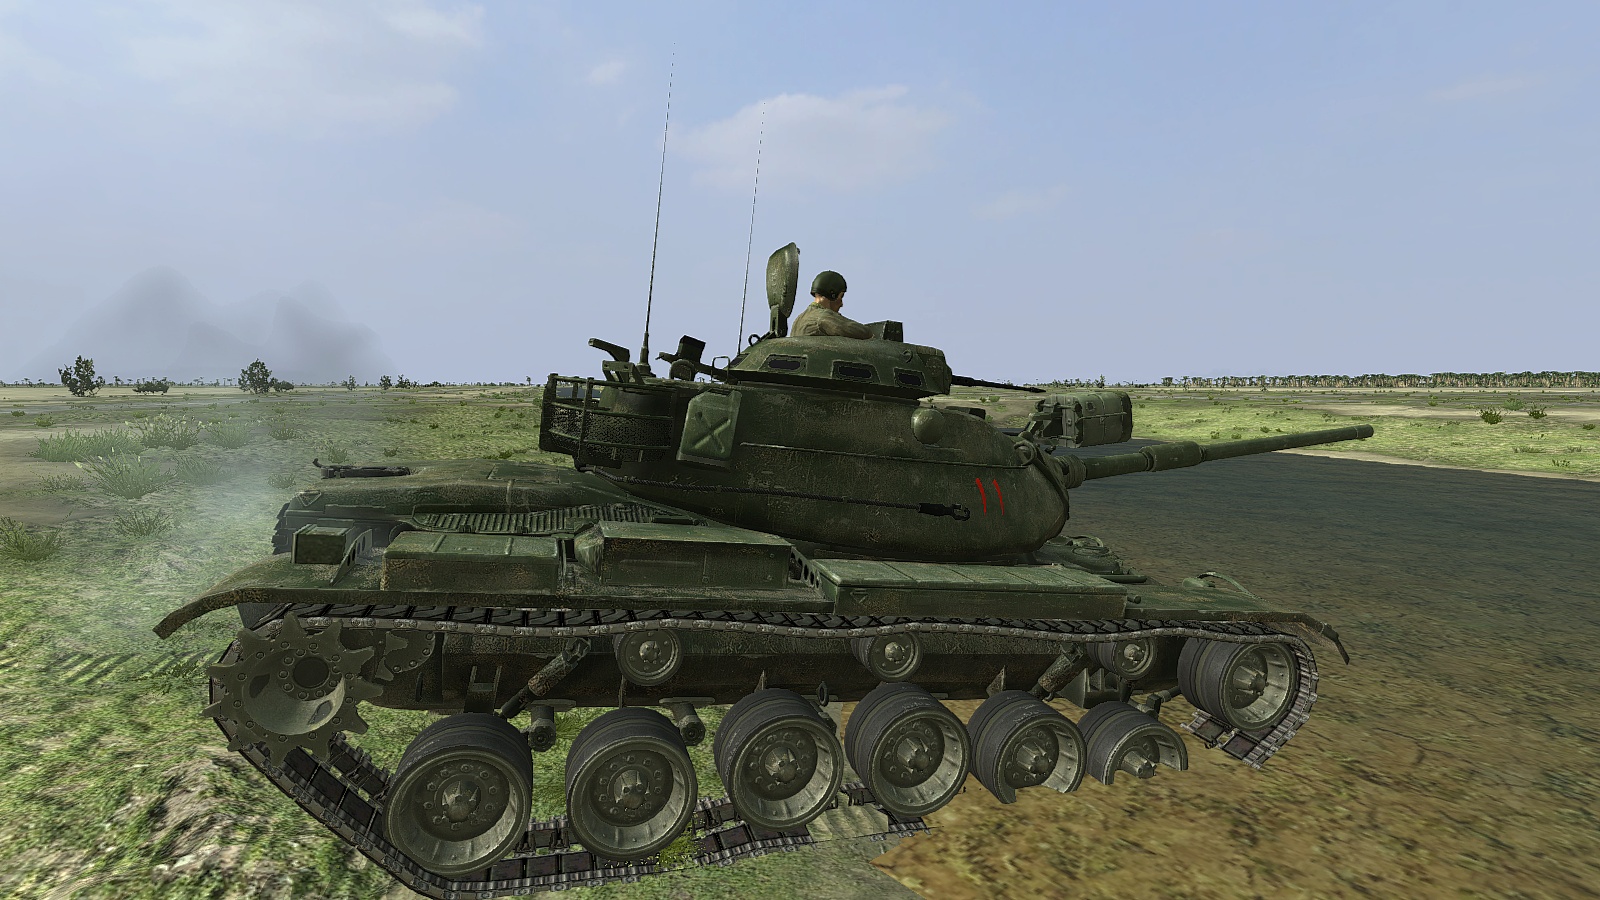
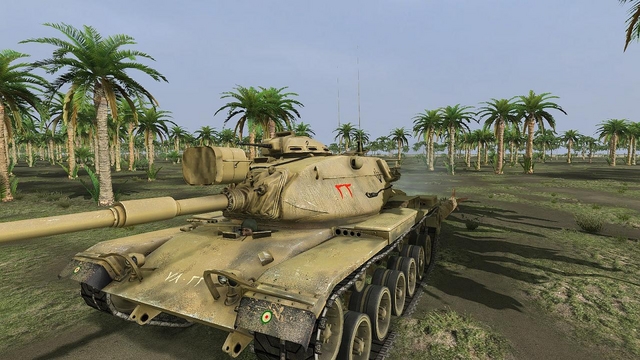
Steel Armor Blaze of War/SABOW - Iranian Chieftains through M60 TC's binos
33LIMA posted a gallery image in Member's Albums

From the album Steel armor - Blaze of War
-
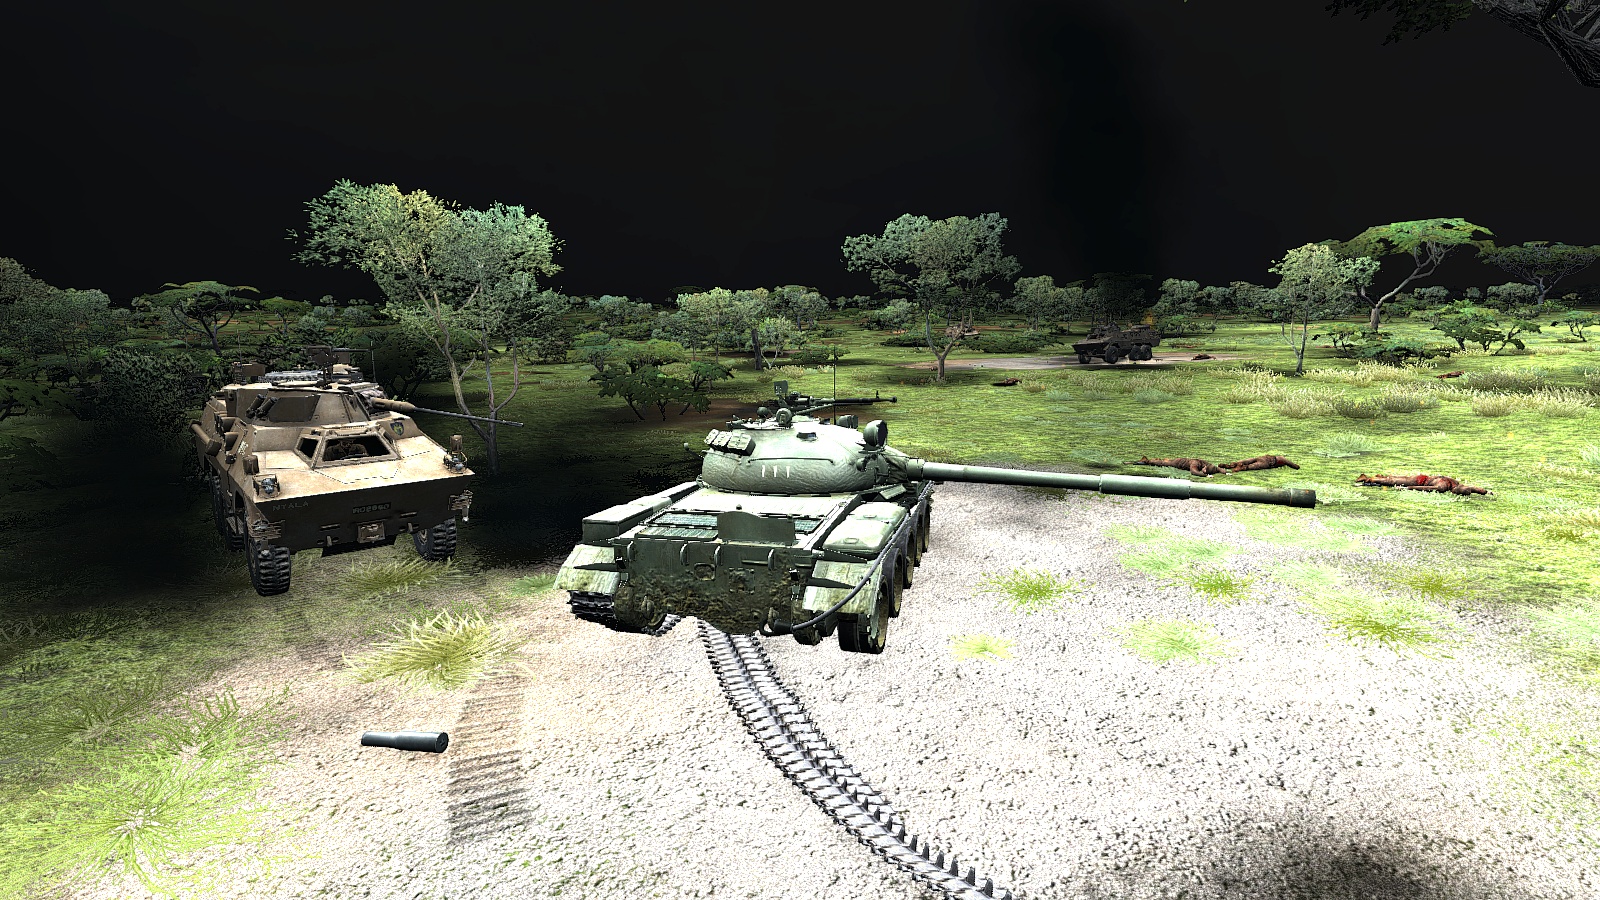
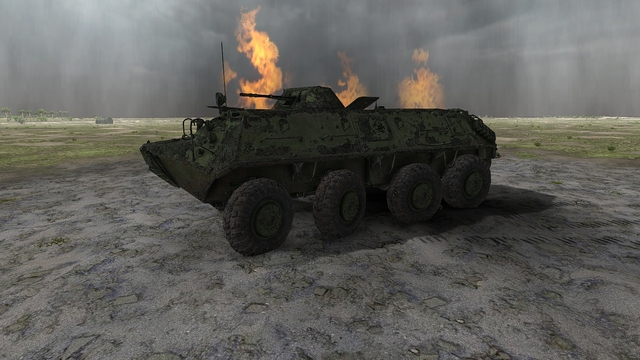
Ratel IFV & knocked-out Cuban T-62, Angola, Steel Armor Blaze of War
33LIMA posted a gallery image in Member's Albums
From the album Steel armor - Blaze of War
-
South African infantry, Angola, Steel Armor Blaze of War
33LIMA posted a gallery image in Member's Albums
From the album Steel armor - Blaze of War
-

From the album Steel armor - Blaze of War
-
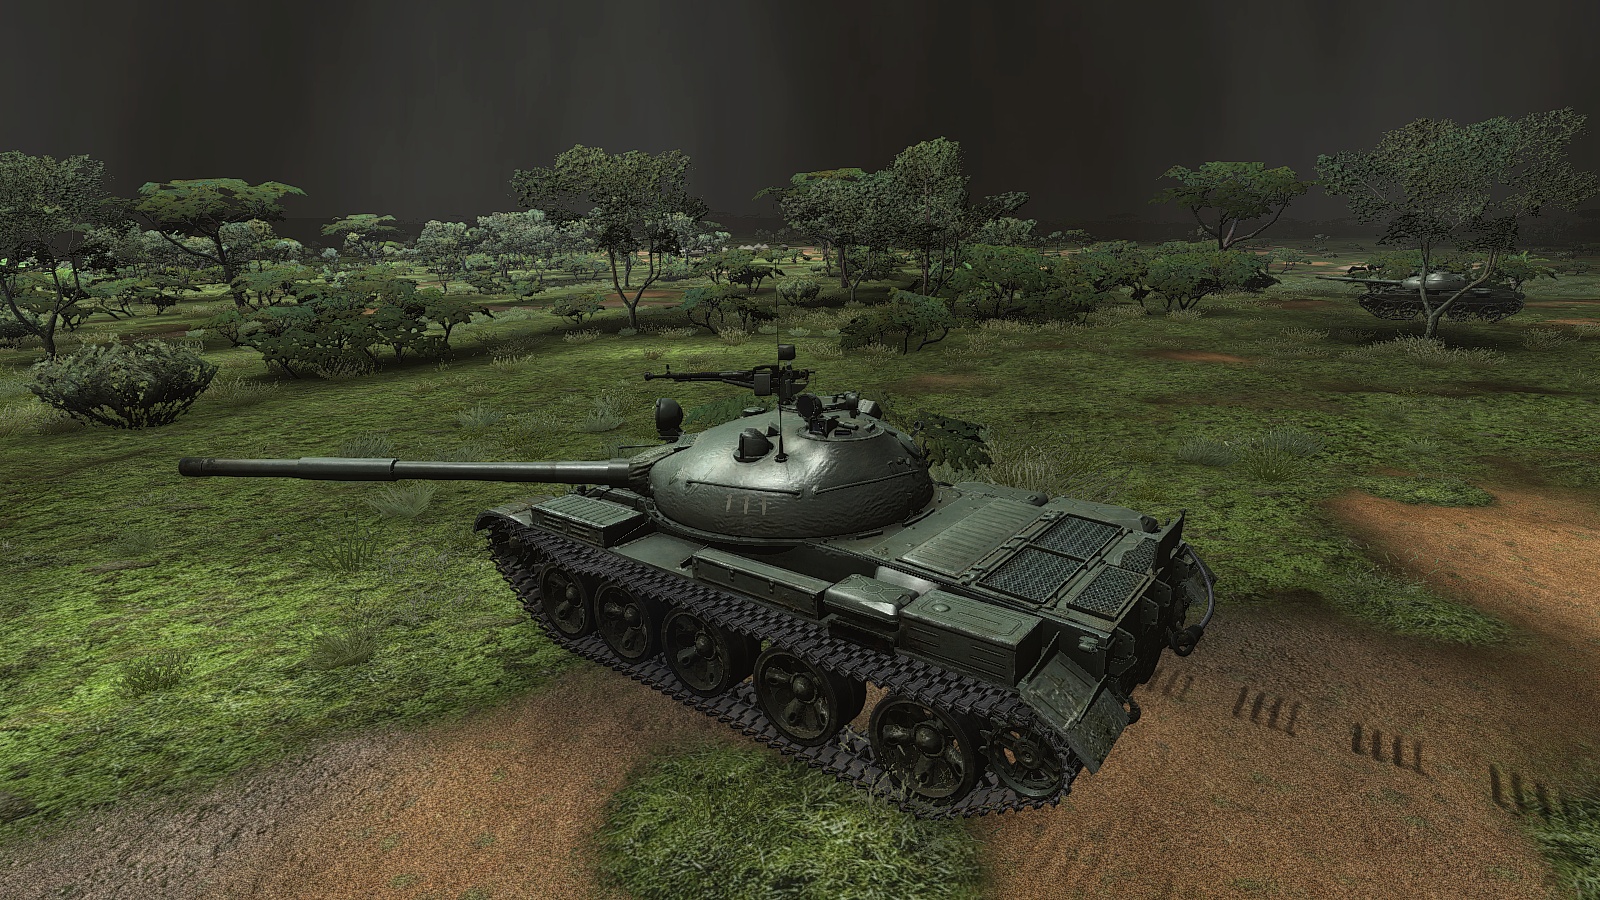
Cuban T-62s counterattack near Tumpo, Angola, Steel Armor Blaze of War
33LIMA posted a gallery image in Member's Albums
From the album Steel armor - Blaze of War
-
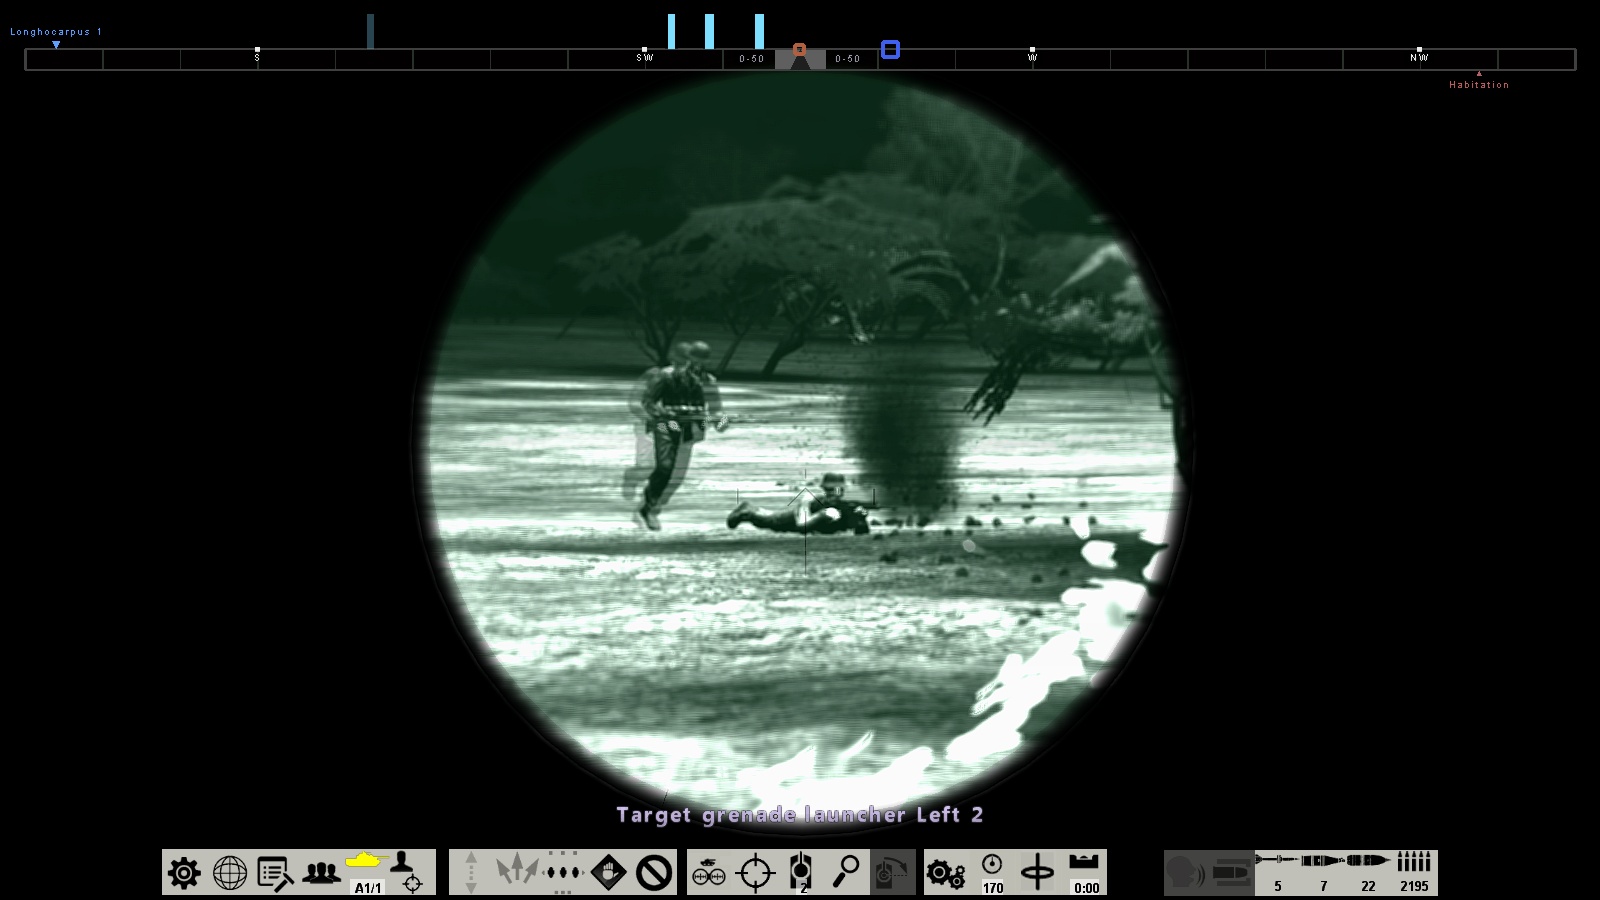
Recoilless rifle through T-62 gunner's night sight, Steel Armor Blaze of War
33LIMA posted a gallery image in Member's Albums

From the album Steel armor - Blaze of War
-
Cuban T-62s counterattack near Tumpo, Angola, 1988, Steel Armor Blaze of War
33LIMA posted a gallery image in Member's Albums
From the album Steel armor - Blaze of War
-
Cuban T-62s counterattack near Tumpo, Angola, 1988, Steel Armor Blaze of War
33LIMA posted a gallery image in Member's Albums
From the album Steel armor - Blaze of War
-
Driver's night vision view, T-62, Steel Armor Blaze of War
33LIMA posted a gallery image in Member's Albums
From the album Steel armor - Blaze of War
-
An uncertain turn of events in a later round in my Iran-Iraq War campaign! My first M60 campaign in SABOW is proving to be something of a roller-coaster ride. And an expensive one! Back in daylight after the opening mission during the hours of darkness, we seemed to be doing quite well in mission #2, playing our part in the Iranian counter-offensive against the invading Iraqis. The culmination of my plans in that mission was a combined tank-infantry attack on a Iranian defended locality. With no artillery support and therefore no chance of a smokescreen, the risky part was a final dash over a stretch of open ground, to reach the objective. We had got about half-way across, when a tracer round zipped in from our right. Next thing you know, our little force is being torn to bits by fire from an enemy T-55 platoon, which had decided to flank attack our flank attack. No matter how many times you have read accounts of battles like Operation Goodwood, it's still shocking just how fast a formation of tanks can be converted to scrap metal, But that's what happened. Most of the APCs survived the subsequent fire-fight, but most of our tanks didn't. Though the surviving Iraqi tanks withdrew and our objective was gained, it was at considerable cost. Despite all that, the next mission, also in daylight, started promisingly enough. Overall, it seemed that our Iranian counterattack was going well and my formation, the 3rd Armored Brigade, was playing its part. The next battle was a bit of a teaser, though. Intelligence apparently indicated that the enemy had decided to counterattack our counterattack, which of course they are perfectly entitled to do. This intention is shown by the large, triangular ,blue enemy arrow, pointing north-north-east. However, from the red, friendly arrow going the other way, it seemed we were also expected to attack, in the opposite direction, towards the enemy position marked 'Babylon1' - generating a meeting engagement. The smaller red and blue (more rectangular) arrows to the right apparently denote pre-battle moves, during the prior 'operational' phase, though why there are both enemy and friendly moves starting and ending in my territory, I do not know. Anyhow I decided to try to box clever, resulting in the dispositions you can see above. I would stand on the defensive first, and destroy by fire from covered positions the anticipated enemy attack as it crossed the relatively open ground to the north of the central irrigation channel. After that - or if the enemy didn't attack, after all - I would then go over onto the offensive. This plan seemed more sensible than driving forward to meet an advancing enemy somewhere in 'no-man's land'. I always like to start a battle with a plan, even if it may be a bad plan and even if it doesn't survive contact with the enemy. They say that a bad plan is better than no plan at all. I tend to agree. I had just three platoons, two of tanks and one of mech infantry. I put the latter in the woods to the west, to cover my right flank where the battle lines ran north-south. A tank platoon with three M60s I set up in the same woods, further east, placed so as to fire out over the open ground towards the expected enemy advance. Not very subtle but we had a key point, 'Xerxes 2' in that spot and I was determined not to lose that. The more subtle part of this plan was the placement of my other platoon - which had five M60s - in a strip of wood over to the east. Their position had an irrigation channel to its rear whose banks might provide them with cover to move north or south if need be; but above all else it had a good overlapping field of fire with the other tank platoon, covering the open ground in front of 'Xerxes 1'. An enemy force attempting to advance across that ground would be destroyed by concentric tank fire from 'Xerxes 1' and from its right flank. As usual I had no artillery or air support, so this battle would be won or lost by the marksmanship and battle drills of my eight tanks. I felt reasonably confident that the combined fires of eight 105mm guns would make life very difficult for any Iraqis who ventured into my chosen killing ground. I had made my plan and deployed my troops. Now, it was time to wait and see what the other guy had in mind. ...to be continued!
-
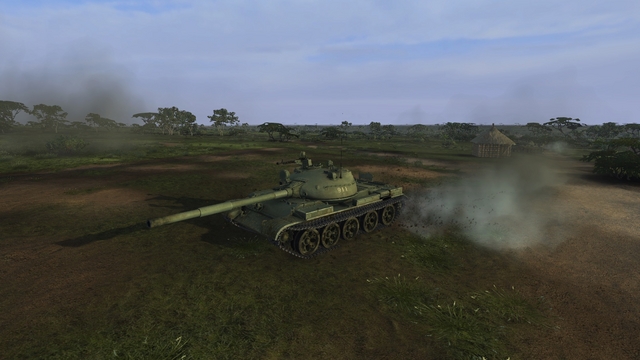
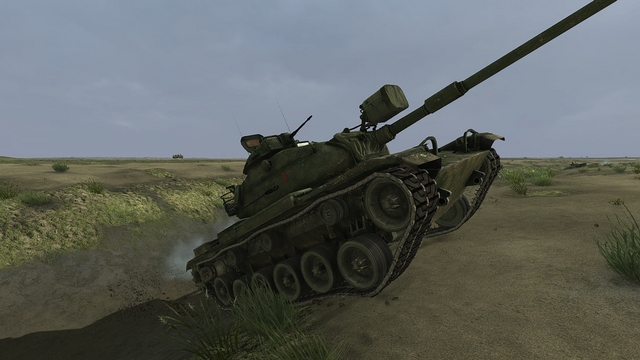
On campaign with the new release of Graviteam’s Cold War wargame/tanksim! These days, Ukrainian developers Graviteam are famous principally for their PC wargames. These started life on World War 2’s Eastern Front as Achtung Panzer - Kharkov 1943 and morphed into the Graviteam Tactics series, ranging into other theatres and periods in the process. However, as many of us will know, Graviteam have also developed tanksims, not least one of my current favourites, Steel Fury – Kharkov 1942. While the latter lacks some of the more sophisticated features of tanksim classic Panzer Elite, it has some nice touches of its own and with the support of a talented modding community, still provides a top-notch first or third person simulation of fighting WW2 tanks in an all-arms battle, at platoon-to-company level. Combining the wargame and tanksim genres is Steel Armour – Blaze of War (SABOW), dating from 2011 and now re-released with the game engine of the Graviteam Tactics wargame. I recently updated my GamersGate SABOW to the latest version - patches are available on the Graviteam SABOW forums as well as via GG and now Steam - and decided to give it a go. I have had SABOW for some time, but confess that I had previously been put off by its rather complex-seeming interface and somewhat difficult documentation, both of which received some attention in the upgrade. This being a combination of a wargame and a tanksim - more about how this mix works for me, later - there's a lot to learn. And I'm still somewhere along the early part of that big learning curve. So while nominally a mission report, this piece is more of a tanksimmer's first impressions of SABOW, after playing it on and off over the last few weeks. The setting SABOW is set in the later stages of the Cold War. The action itself centres on three single-player campaigns, following the Iran-Iraq War (1980-88), the Soviet intervention in Afghanistan (1979-89) and the middle years of the long Angolan Civil War (MPLA & Cuba vs UNITA & South Africa, 1975-2002). There is also an easy-to-use ‘quick mission builder’ with which you can in a couple of minutes plonk tanks and other units from each side onto a map and kick off the fighting, largely by-passing the ‘wargame’ element. To this, the new version has now added an ‘instant action’ option – click a main menu icon of either a T-62 or an M60A1 and you are pitched straight into a pre-set battle; no setting up involved. The tanks Two of the tanks featured in SABOW are playable, for the tanksim component of the game. First, there’s the Soviet T-62. This is used by the Iraqi Army in the (first) Gulf War campaign, by the Soviets in Afghanistan, and by the MPLA’s Cuban ‘advisors’ in the Angola campaign. Second, there’s the US M60A1, used by the Iranian Army in the Gulf War campaign. Yes that’s right – there are no playable units for the anti-Soviet forces in Afghanistan or for the UNITA/South African side in the Angolan campaign – for those campaigns, you can only fight in the T-62. Which was quite a tank, in its day, despite famously taking a hiding from Israeli Centurions in the ‘Valley of Tears’ during the 1973 Yom Kippur War. The T-62 introduced smoothbore guns firing fin-stabilised discarding sabot AP rounds to mainstream tank warfare and with decent armour and a low, ballistically-well-shaped profile, it was a tank to be reckoned with, in its day. The M60A1 needs little introduction to any tank enthusiast. The successor to the post-WW2 M47 and M48 Patton tanks and still in widespread service a half-century after the original version appeared, the tall but sleek M60A1 boasts the famous British L7 105mm rifled tank gun, a stereoscopic rangefinder and a good combat record...not least with the Iranian Army, as featured in this sim and seen in the screenshot at the top of this post, in one of the several paint schemes you can select. The playable SABOW tanks have excellent animated interiors, to which the new release has made some improvements (including more readable internal signage!) Below is the M60A1 turret interior, seen from the loader's position. Standing to the right is the Tank Commander. Seated to the left, ahead of him, is the gunner. You can just about see the driver, lower down, below and left of the breech of the 105mm main gun. All crew figures are nicely animated. Below is the first-person view of the Tank Commander, hands on the controls of his rotating, machine-gun-armed cupola. The sights and view ports you can see here are all usable, as are those for the other crew members. To the TC's right, you can see the back of the gunner and to the left, you can just about see the loader. To the far left are the tubes in the turret rear bussle which hold the ready-use main gun rounds. The T-62 is just as nicely done. Below is the TC's closed-up view, looking across at the loader (autoloaders in Soviet tanks didn't put this guy out of a job until the T-64 series appeared). In the pic below that, is the TC's view with both crew unbuttoned, the loader dutifully manning the formidable 'Dushka' 12.7mm machine gun. There's a goodly selection of AI-manned kit in the sim, in addition to the two playable tanks. AFV-wise, this includes the Olifant (South African Centurion) and the same army's Ratel wheeled Infantry Fighting Vehicle, both seen below somewhat the worse for wear... ..and as well as infantry, sundry APCs and IFVs and various crew-served weapons, there's my fave tank, the British Chieftain, here in Iranian service... Personally I would have preferred a ‘Cold War gone hot’, central European setting for all this nice kit and a couple or so more playable tanks, but SABOW's well-replicated tanks and three featured theatres are something of a novelty and the latter replicate real rather than imaginary conflicts, which is no bad thing. So, how does it all come together in practice? Let's find out how I got on! ...to be continued!
- 24 replies
-
- 6
-

-
- sabow
- steel armour blaze of war
- (and 1 more)
-

From the album Combat Sims
-
From the album Combat Sims
-
From the album Combat Sims
-
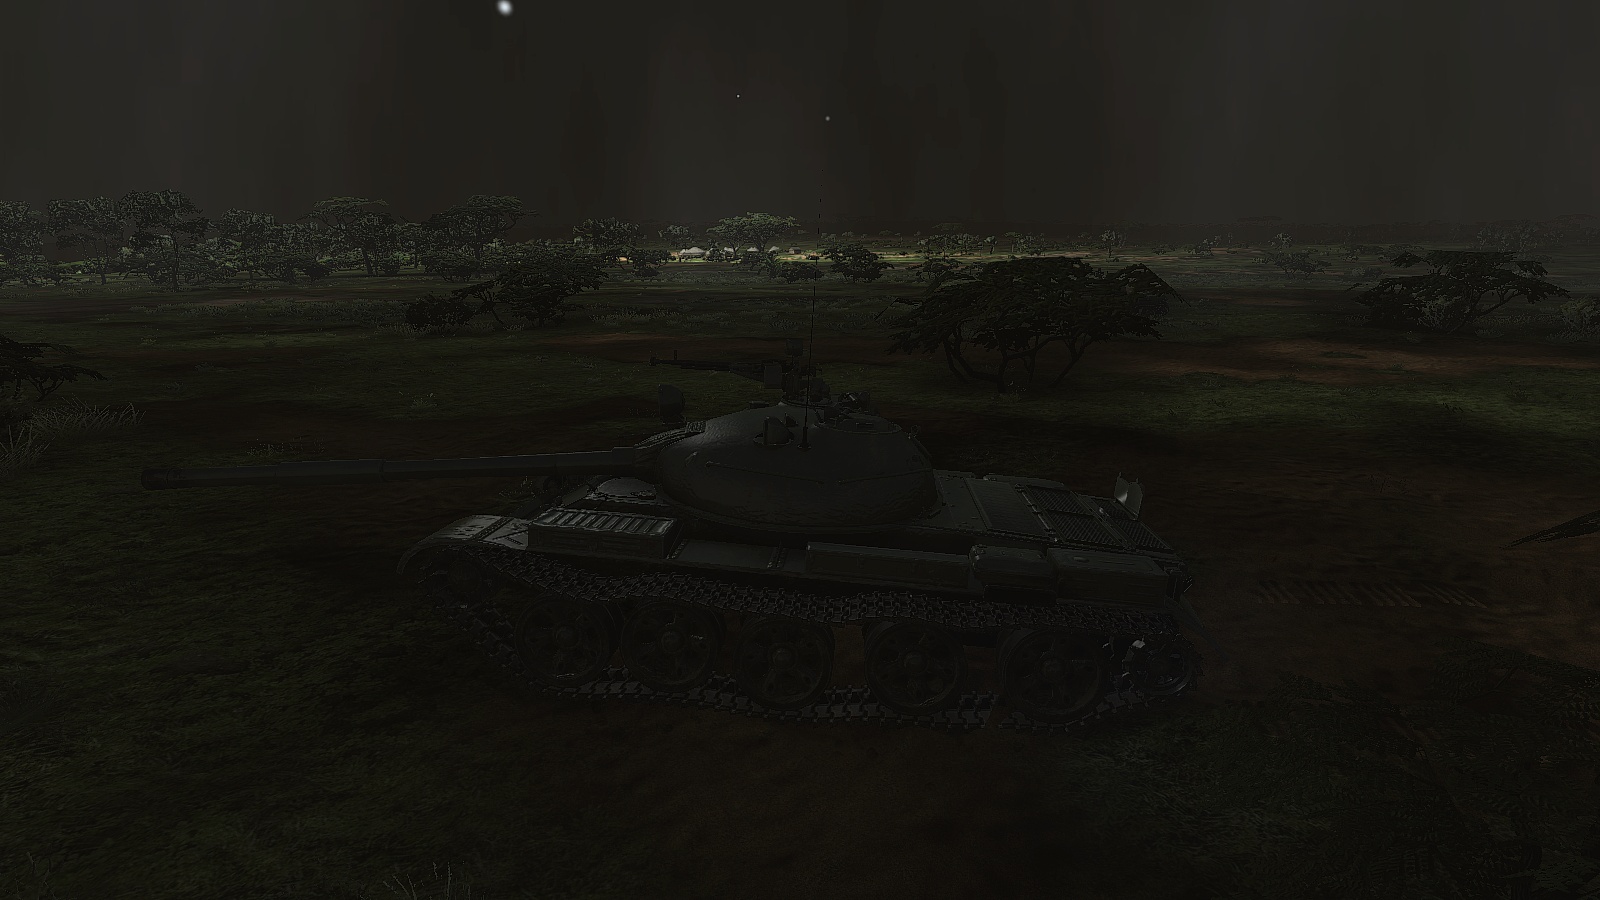
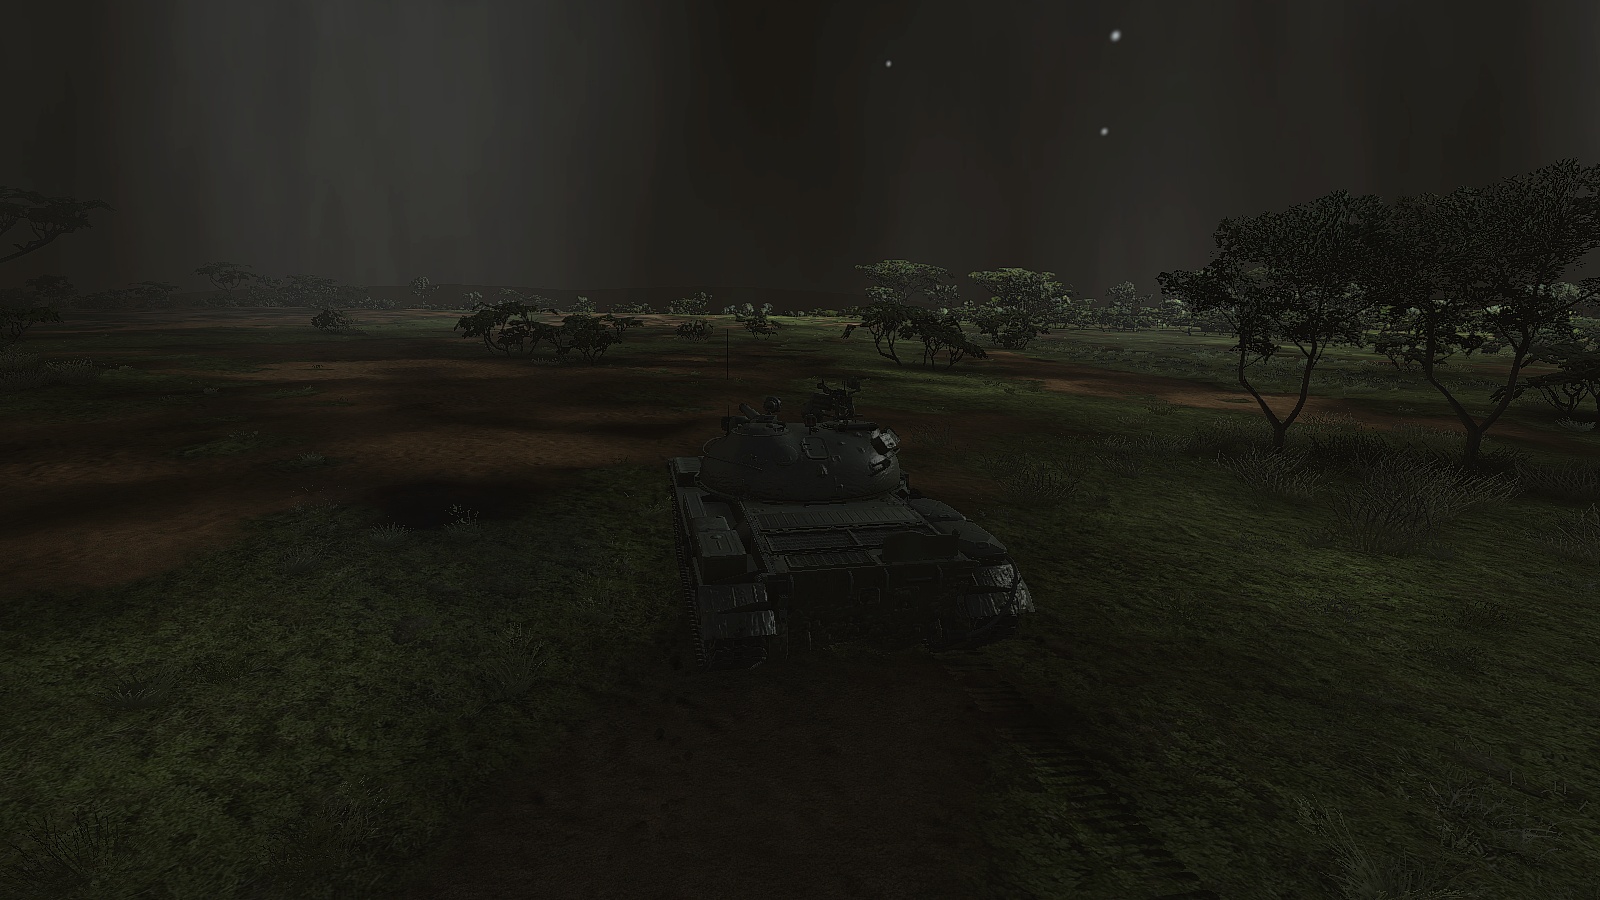
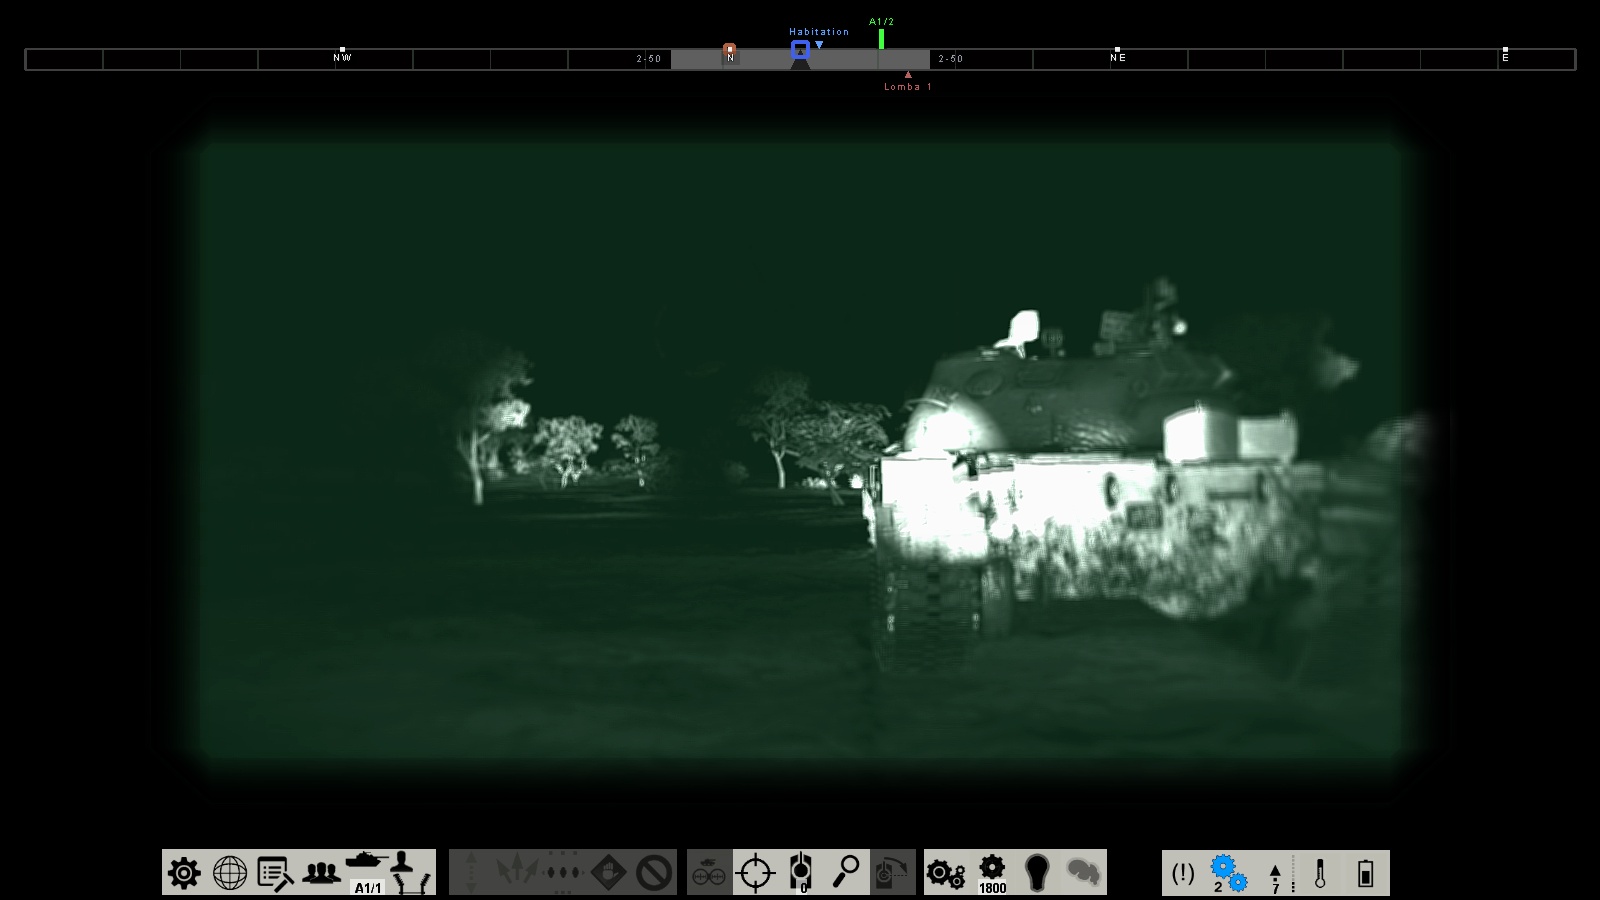
On campaign in the classic US Main Battle Tank! Having throughly enjoyed fighting in SABOW's Iran-Iraq War campaign in a T-62, I decided it was time to swap sides and have a crack with the M60A1, fighting now for the Iranians. The latest (May 2015) patch adds some graphical and other improvements, including some new training missions. Such is SABOW's considerable and admirable depth as both tanksim and tactical wargame, I'm still a relative novice and in particular, have had little 'tread time' with the elegant US MBT. This is something which the recently-once-more-expanded set of training or single missions would have allowed me to rectify. But no, impatient as always, I decided to jump in at the deep(er) end and go straight on campaign! The SABOW Iranian M60 campaign is actually chronologically ahead of the Iraqi T-62 one I played first. Both take place during the battle near Sousangerd, where, in difficult terrain, the Iranians mounted a large-scale armoured attack designed to roll back the Iraqi offensives which had started the war. This was ultimately unsuccessful, but that is yet to come. For now, the ball is in the Iranian court and we are about to launch the big counter-offensive. The campaign opens with the player in command of strong Iranian tank forces, massed to the east of the Iraqis. And my first battle in this new campaign was to be a night action! On the map below, the green tank icons represent playable M60 platoons, the red ones other player-controllable friendly forces, and the pink ones (actually yellow, against a pale red background) denote friendly, non-player-controllable units. The blue areas and icons represent Iraqi (enemy) territory and forces. As yet, the lack of markings on the enemy side indicates that we know little or nothing of the forces arrayed against us. The blue circles I believe mark 'key points' which, depending on their relative importance, represent points (in the other, scoring sense) that will contribute to determining who is winning, depending on who is left in possession of the positions they mark. SABOW allows you some scope to move units about at this 'operational' stage but there seemed to be little need here. Besides, the SABOW wargame element was already offering me two imminent battles on the map and I decided to accept one of them now - the more westerly one, IIRC. The map screenshot below was actually taken after the battle, because I I forgot to take one beforehand; but the dispositions it shows are essentially the same, as far as I can recall. In SABOW, you have the option of disabling night battles. Although I’m not especially scared of the dark, I do like to see what I’m doing! But I had resisted the temptation to turn off night fighting. It’s an important part of the SABOW campaign experience, groping around in the dark with only first generation night fighting aids. There’s none of the modern thermal imaging (aka passive Infra Red, forming images from the heat emitted by vehicles or personnel) which makes night-fighting in sims like M1 Tank Platoon II or Steel Beasts relatively easy. In SABOW, you have instead active IR: headlights or spotlights whose light, invisible to the naked eye, can be seen by anyone – friend or enemy! – with an IR-capable sight. And whose range is much more limited than thermal imaging. Having selected a prospective battle on the operational map, I entered SABOW’s tactical phase. This zooms you into a smaller section of the map, with a correspondingly smaller sub-set of the your forces on it, at your disposal. This smaller, tactical map starts in ‘Unit deployment’ mode, presenting you with a set of icon-based commands which you can - and should - now use to adjust the starting position of the platoons to whom you can give orders – in this case, no less than four platoons of M60s and two armoured recce platoons with APCs. After a quick Combat Appreciation, I decided my aim, consistent with our Armoured Brigade's declared mission, would be to take and hold the enemy position marked as ‘Abbasides 1’. to achieve this, I would mount a concentric attack by my tank platoons, while the recce troops would watch and guard our flanks, about which I was rather nervous. 'Time spent in reconaisance is never wasted' they say; but our Brigade's mission, if not also our violated country's honour, seemed to call for early offensive action at all levels. 'One engages, then one sees', as Bonaparte reputedly said. Ever noticed that there seem to be military axioms or bons mots in support of most potential courses of action? Anyway, to business. working from the map (rather than the relatively new 3-d option) I dispersed my platoons in covered positions, out of line of sight of the enemy, distributing them over an arc from the north to the east, like a concave mirror focussed upon the objective. And with a watchful recce platoon at each tip of the arc. You can skip most or all of this next bit if you're getting bored waiting for the first rounds to be fired; but looking at the map below and working clockwise, from the top: the group of 'pointy rectangles' left of our position 'Mithradates 2' (note the green/white/red Iranian flag) is one of my two mech infantry/recce platoons, in M113 APCs. Clustered either side of 'Mithradates 2' itself are six red diamonds, representing my two right-flank M60 platoons, backed into the same woods and also facing south, ready to jump off. To their east, concealed in a patch of scrub nestling in a right-angle bend of an irrigation channel, are the five red diamonds of my strongest tank paltoon, near our position 'Xerxes 3' and also facing south. South-east of them is my fourth and final tank platoon, facing east from a strip of wood on the eastern margins of a larger forest, the green triangle amongst the red ones denoting that's the tank I will occupy when I start (which I forgot about). And finally, to their south-west, marked in orange because I have currently selected their unit icon (seen bottom centre of the screen) is my second mech infantry platoon. Ok pay attention again now, please. Here's how my plan was going to work. As is done in real life, I tend to divide these things into successive phases. In Phase 1, the recce platoons would sit tight and watch the flanks. The two tank platoons to the west and north-north-west of ‘Abbasides 1’ had further to go to that enemy position, so they alone would start moving. Phase 2 would kick in when the first two tank platoons were roughly half-way to the objective, having perhaps drawn the attention of the enemy in their direction. At this point, the other two M60 platoons to the north, closer to the objective, would begin their attack. I intended that all four tank platoons would hit the objective at roughly the same time. I had further decided to play the tactical phase mainly from the platoon to the north-north west. This was the one with five tanks, rather than the usual three and as it neared the objective I intended to slow it down. Its role would be primarily as a reserve, uncommitted and therefore ready to deal with anything unexpected; but also ready to provide a base of fire, to cover the other three platoons as they closed in on to the objective. This was the bit where things were most likely to go awry, and so it proved. In Phase 3, with ‘Abbasides 1’ occupied and the defenders destroyed - I hoped - my tanks would ‘go firm’ on the objective while the recce troops, in their thinner-skinend APCs, moved up to rejoin and provide some 'boots on the ground' to help us hold onto the key point we had just secured. For whatever reason, in all the missions I’ve so far played in the Iran-Iraq campaigns, I have yet to see or be given any air or indirect fire support, which seemed to be absent tonight, too. Artillery and aircraft icons remained resolutely greyed out, on the tactical map. I would have quite liked to put in some artillery preparation and perhaps lay some smoke to cover open flanks, but it this option was anywhere available, its presence eluded me. SABOW has a good set of tools to give units their orders, but I’m not sure to what extent you can ‘layer’ these. In M1TP2, for example, you could give each platoon quite elaborate sequences of instructions, like ‘Move fast from here to there; on arrival, face this direction, fire at will and wait for 60 seconds; then move over there, face that way and halt’. Quite capable, but co-ordination between units could be tricky, even though you usually had only between one and three platoons to worry about. Anyhow, for this SABOW mission I decided I would issue each unit's orders at the start of each Phase. 'Keep it simple, stupid' often works quite well for me, for some reason I've never really paused to ponder. As for tools for marking up the map with your planned moves and actions, I may be wrong but I don’t think SABOW allows me to draw phase lines or place other markers on the map, as if on an overlay, the way the Steel Beasts Mission Editor does for its scripted missions. However, it would have been helpful if, having clicked on a spot to designate it as the objective or a waypoint, it didn't just flash briefly; I'd have liked it if both the target and the unit's route there were marked on the map, so you could see the paths you had set for each unit. Maybe this can be displayed and I have somehow or other turned it off, I’m not sure! Something to check, ahead of next time. Ok, ok, it's getting boring again. H Hour. Tme to cross Start Lines, marked or not, and get the show on the road. I kicked off Phase 1 by giving my two left-hand tank platoons the order to attack. Everyone else would wait in cover, for now. The tanksim element now loaded up and I found myself in the command tank of the left-hand platoon, not the other, 5-tank platoon that I had decided to concentrate on. It being pitch dark, it took me a little while to notice and switch to the 5-tank platoon. See anything in the screenshot below? No? Neither could I, hardly. But there are at least two M60s in that shot, one right in the middle. They are from my left-hand platoon, seen before I switched to the 5-tank platoon, further north. That platoon now needed to advance south-south-west alongside an irrigation channel, then swing right at a right-angle corner in the channel and attack ‘Abbasides 1’, due east from there. Lots of good landmarks en route equals less scope to get lost in the dark. As I‘m not sure how to set up routes with a dog-leg or intermediate waypoint(s) and didn’t want to use the faster but less cautious, less tactical ‘Move’ order, I ordered this platoon to attack their intended ‘waypoint’ first, at the corner of the irrigation channel. When they got there, I’d re-direct them, to the east. I was keenly conscious that I might be setting myself up to be smack in the middle of some careful co-ordination of platoons right about the time the enemy might decide to make a bid for some of my attention. But I decided to crack on. To be sure, in the 3-d world I could see diddly much of the time. But various tank noises - and the fact that the little vehicle symbols in the map view started almost impreceptibly to come to life - suggested that Phase 1 had in fact begun. It was time to check out the view through my active IR systems and see (hopefully literally) how things were panning out, on the ground. ...to be continued!
- 3 replies
-
- 1
-
-
- m60a1
- steel armor blaze of war
- (and 1 more)
-
From the album Steel armor - Blaze of War
-

From the album Steel armor - Blaze of War
-
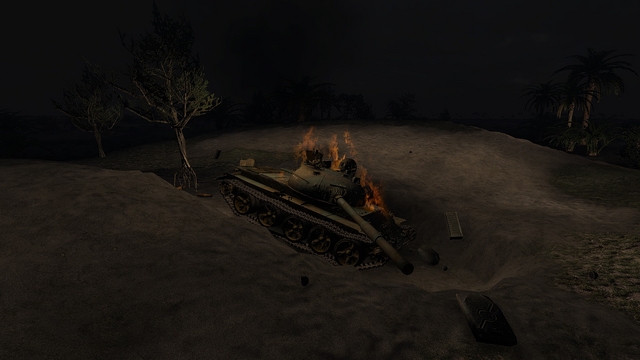
Steel Armor - Blaze of War - a knocked-out T-62 burns during a night mission
33LIMA posted a gallery image in Member's Albums
From the album Steel armor - Blaze of War
-

From the album Steel armor - Blaze of War
-
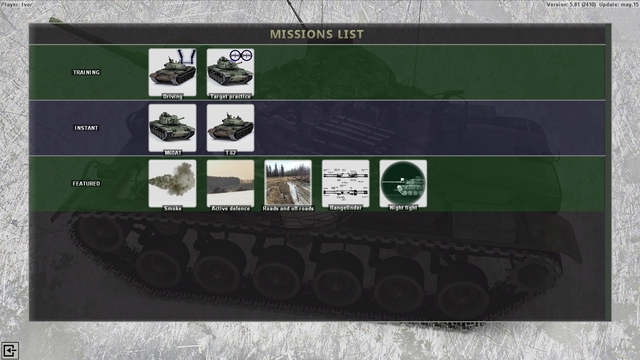
Steel Armor - Blaze of War - main menu screen as of latest, May 2015 update
33LIMA posted a gallery image in Member's Albums

From the album Steel armor - Blaze of War
-
Steel Armor - Blaze of War - latest new missions, as at May 2015
33LIMA posted a gallery image in Member's Albums
From the album Steel armor - Blaze of War
-
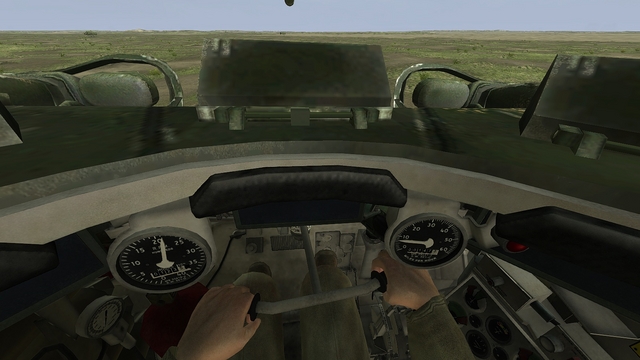
Steel Armor - Blaze of War - new M60 driver training mission
33LIMA posted a gallery image in Member's Albums

From the album Steel armor - Blaze of War
-
Steel Armor - Blaze of War - new M60 driver training mission
33LIMA posted a gallery image in Member's Albums
From the album Steel armor - Blaze of War
-
Steel Armor - Blaze of War - new M60 driver training mission
33LIMA posted a gallery image in Member's Albums
From the album Steel armor - Blaze of War