
Search the Community
Showing results for tags 'steel fury'.
Found 61 results
-

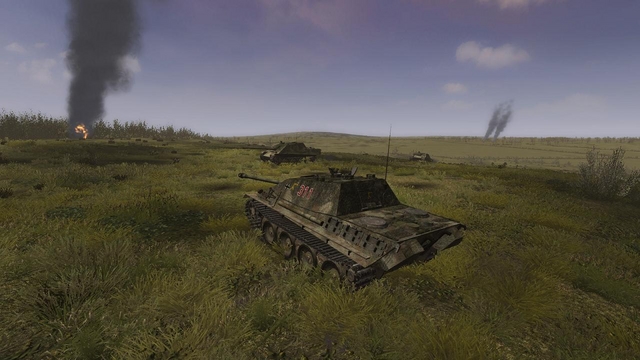
Steel Fury+STA mod: Op Bluecoat mission: Jagdpanther engaging Churchills on the reverse slope of Hill 226
33LIMA posted a gallery image in Member's Albums
From the album Combat Sims
-
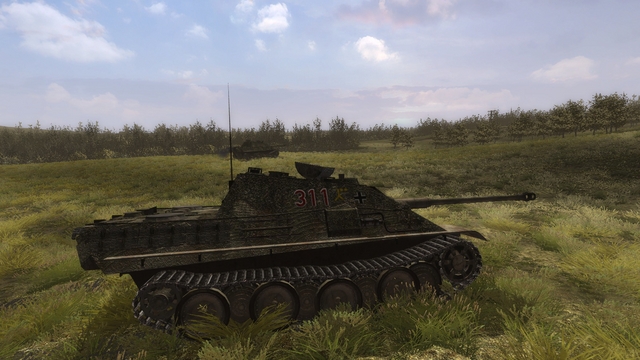
Steel Fury+STA mod: Jagdpanther stalking the Scots Guards on Hill 226, 30 July 1944
33LIMA posted a gallery image in Member's Albums
From the album Combat Sims
-
Steel Fury+STA mod: Jagdpanther engaging Churchills
33LIMA posted a gallery image in Member's Albums
From the album Combat Sims
-
From the album Combat Sims
-
From the album Combat Sims
-
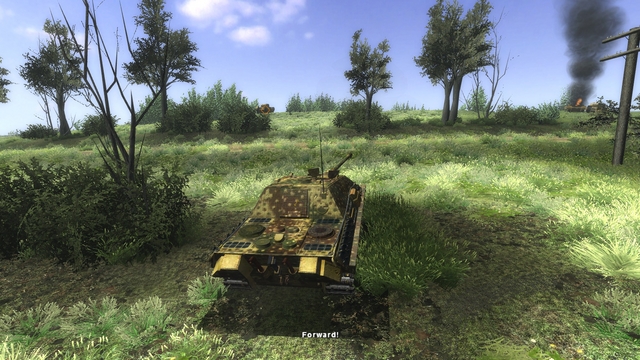
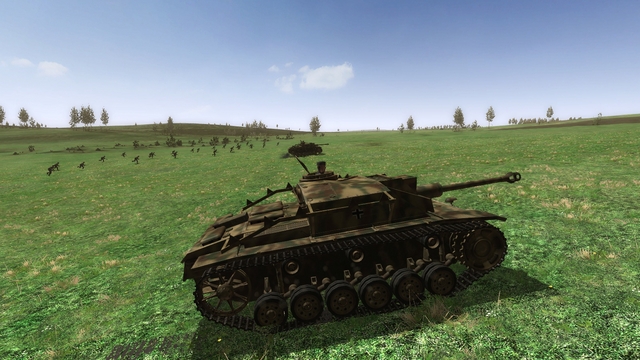
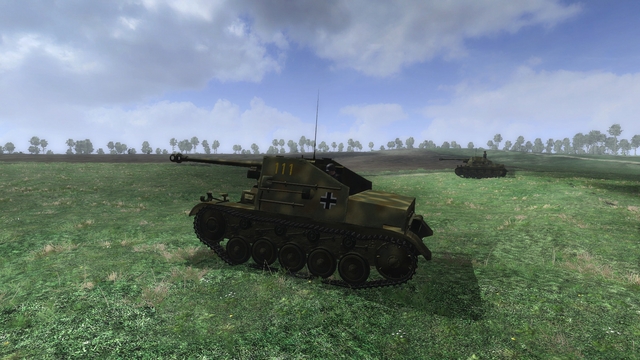
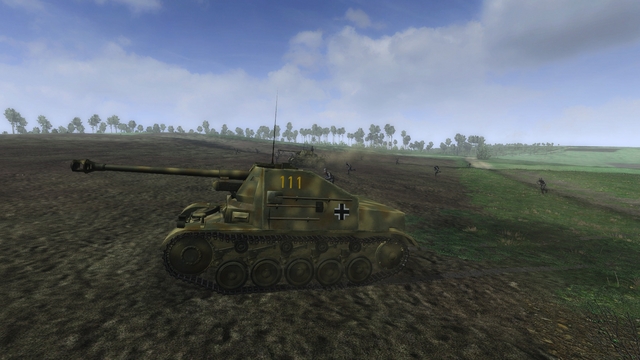
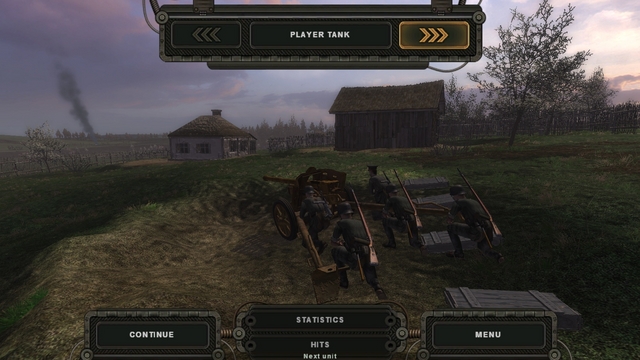
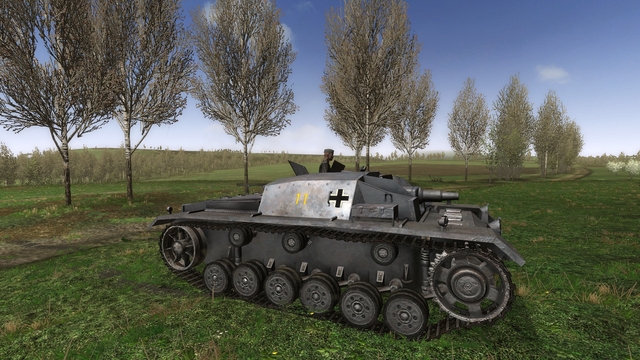
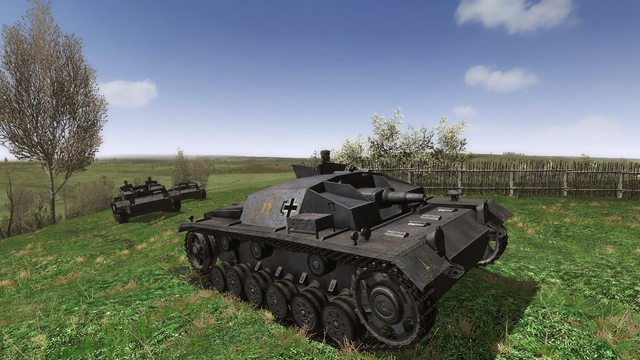
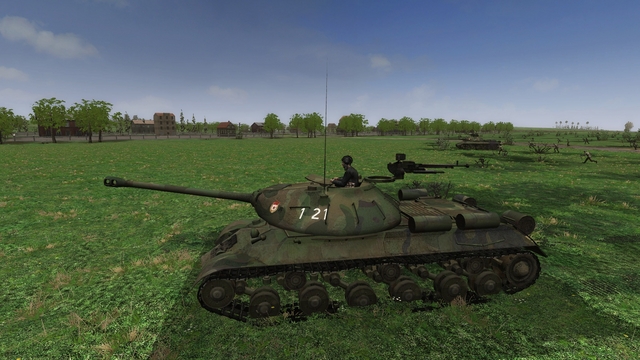
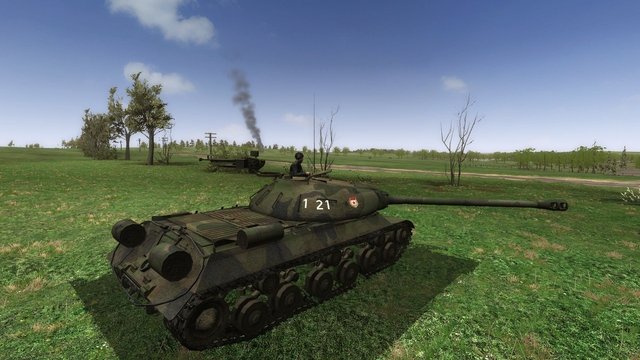
The stock Steel Fury campaigns are quite decent, and variants exist which change the player's vehicle eg from Panzer IV to Panzer III. Most of the numerous missions later added to Graviteam's excellent WW2 tanksim - many of which are gathered together in the Steel Tank Add-on (STA) mod's mission packs - are in the form of single missions, or small, themed sets of single missions. However, STA modder Lockie is now working on a series of new campaigns, bringing together adapted or new missions, grouped around a storyline. The first of these to become available seems likely to be 'Schuze's Diary', the premise being that they recreate the wartime combats recounted by a long-lost German tanker's diary. The eponymous Leutnant Erich Schuze will be an officer in a Sturmgeschutz Abteilung whose war starts with the Second Battle of Kharkov - Steel Fury's featured theatre - but moves on to different vehicles and battlefields, as the war progresses. When ready, the campaign will naturally be made available via the STA mod's website. Here are some screenshots from the first set of missions, currently under development. I have been testing some of these missions and fighting in a limited traverse vehicle is proving a whole new ball game!
-
From the album Combat Sims
-
From the album Combat Sims
-
From the album Combat Sims
-
From the album Combat Sims
-
From the album Combat Sims
-
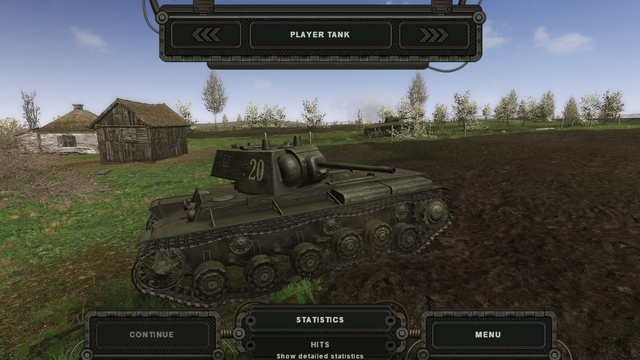
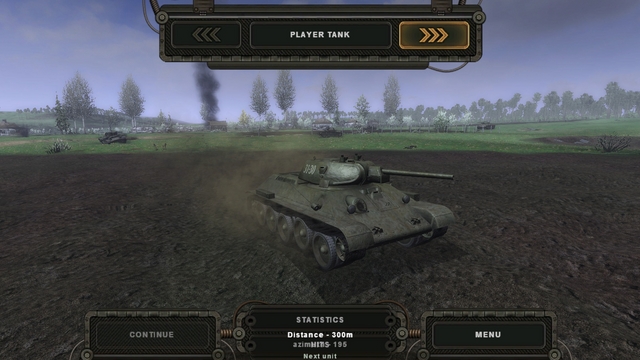
Steel Fury+STA mod - T-34-76 in StuG gunner's sight
33LIMA posted a gallery image in Member's Albums

From the album Combat Sims
-
From the album Combat Sims
-
From the album Combat Sims
-

From the album Combat Sims
-
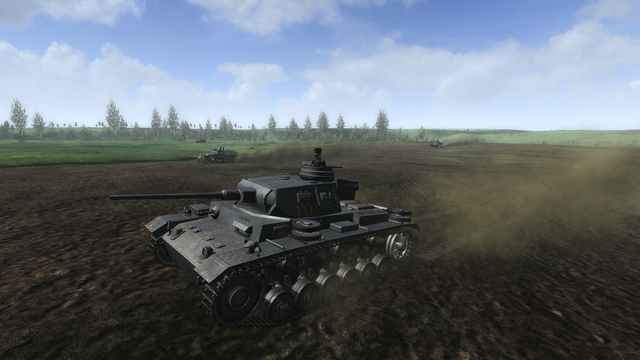
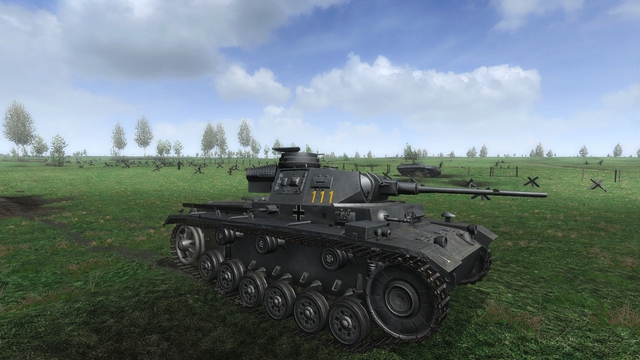
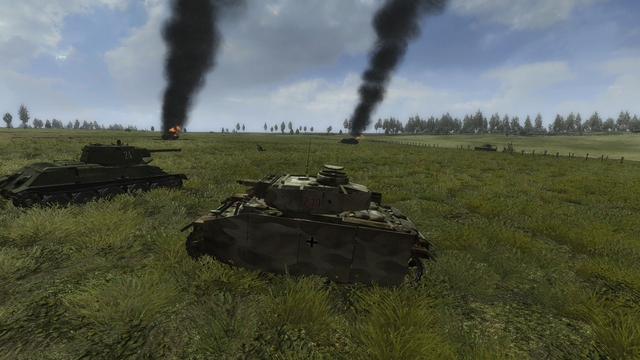
Battling the Red Army in Steel Fury – Kharkov 1942 This is another instalment in the stock German campaign from Graviteam’s excellent WW2 tanksim. Well, not quite stock. First, I’m playing with ‘mods on’; and while the STA mod I use doesn’t affect the vanilla campaign, I’m also using two other mods which do – the STA variant of ‘early spring weather’ which improves the landscapes, and the ‘grey color’ mod which - as its name suggests - reverts German vehicle schemes from the varied mid-war colours of the STA mod, to the ‘Panzer Grau’ used from the start of the war up to the period of the stock game – early summer 1942. Panzer III J, STA European camouflage scheme (header pic above is in 'Grey color' mod) And yes, I know some experts tell us panzers were brown and grey (low contrast supposedly hiding the pattern, on most B&W photos) till the summer of 1940. But I’m with those who believe plain grey was the norm before officially being so ordered during the 1940 Battle of France. Anyway, despite some exceptions like Afrika Korps vehicles being diverted to the Ostfront for the German summer 1942 offensive, it seems grey is best for the Summer 1942 Battle of Kharkov that the sim is built around. The second non-stock aspect of this campaign is that I’m using the variant that’s been modded to use the Panzer III, rather than the Panzer IV. At this time, the ‘Mark 3’ (as the British called it) was still the standard German medium tank, with the later ‘Mark 4’ only beginning to lose its original ‘support tank’ role as more of them appeared with a long 75mm gun in place of the original low velocity, short-barrelled original. Panzer VI F2, with longer-barrelled, 43-calibre 75mm KwK 40 Apart from that, I believe the campaign is the same as the stock ‘Fredericus 1’ Wehrmacht campaign – same maps, same objectives, just different tanks in the player’s platoon. As usual in Steel Fury, you start with the mission map, but can’t zoom out far enough to see the whole battlefield and must scroll about a bit, to see what’s what. Also as usual, the narrative briefing is structured in a format which may be authentic (for the Soviet side?) but is a bit discursive for someone used to the (to my mind) better-presented NATO format for orders (the British WW2 system was functionally identical). As for the content, you need to look at the map to find out what sort of force you’re operating with, because the briefing doesn’t go much below Regimental level. That’s fine as background but doesn’t tell you much at platoon or company level, which is what you need most, when playing as a platoon commander. At any rate, I can see that our objective is to attack and clear a series of enemy defensive positions, these being strung out in a rough line, over to my right. Then, we must stave off any Soviet counterattack. We have some pre-programmed artillery support – a mere platoon commander, I have no say in this – and the Luftwaffe is to drop supplies to some friendly forces besieged in the village of Ternovaya, nearby (tho not near enough to see on the map, although I'm told to advance in its general direction after fending off the counter-attack). You can see the situation a bit more clearly below, with the briefing text suppressed. We are mounting concentric attacks (the blue arrows) on the enemy defensive positions (red markings, specifically the 'dead hedgehog' graphics). My 'blue arrow' is the one coming in from the left. Historically, this is all part of a series of vicious battles near Kharkov in the Ukraine where a Red Army offensive knocked the Germans back on their heels, until the latter re-instated their own offensive plans and threw back the Soviets after much hard fighting. Looking at the map to get a better picture of our operation, I could see that my three-tank platoon - though said to be on the right – is on the left of a company-sized mixed (tank-infantry) force. With me are some panzergrenadiers, in SPW armoured half-tracks. Over to our right – rather far away, for mutual support – is another platoon of tanks – Panzer IVs as I will later discoverare and beyond them, some more SPWs. There is no ‘headquarters unit’, which should have been there to represent the company commander and his immediate entourage, who would be on the ground and in command of a group of several platoons like ours. Though long included in the ‘Army lists’ used by wargamers and having an important role in Wargame: European Escalation and the like, many tanksims omit important HQ units, in terms of their physical presence on the battlefield and not really simulating their exercise of command and control during a mission (mission designers can and should try to represent the latter with mission triggers which prompt radio messages like fresh orders, exhortations or excoriations). To help formulate my platoon plan, I spent a bit of time working out the lie of the land. SF’s maps are quite good but this can be tricky, with few spot heights, a limited zoom-out and no ability (added to Steel Armor Blaze of War in a recent update, but absent from SF) to view the ground in 3 dimensions, before you actually start the mission. I nevertheless noted that the enemy defensive positions seemed to be in a line, with little depth. This suggested we should ‘roll them up’, from left to right, pretty well straight from where we were starting. As to how, my platoon was deployed with an SPW platoon. I well knew how vulnerable the latter usually proved in SF attacks, having a tendency to advance fearlessly when discretion might be the better part of valour. So I decided to keep it simple and work closely with our grenadiers. In the absence of information or instructions on routes and formations in the briefing, I expected that the SPWs would drive directly towards the nearest enemy. So that’s what I would do, trying to keep ahead of them. The ground was fairly open, and in such country, it seemed best for the tanks to lead. I kicked off the mission and in the map view - whose icons are the main command and control tool, as there are few hotkeys usable from the 3d world – I ordered my tanks into line formation, close order and to ‘Do as I do’. As usual I switched to the gunner’s position, from where (as in most tanksims, presumably for playability’s sake) you can also do some tank commander stuff like select ammo types and give commands to the driver. Ordering an HE round into the breech, I oriented myself in the external view and off we went, uphill but directly towards the enemy’s right flank positions. Looking around, I could see the SPWs deploying and then moving off in the same direction, just behind and to my right. As usual in SF, our light armour seemed to be in a big hurry and I had to go flat out, to stay ahead of them. This left my two other tanks lagging behind on either side. And there was no time for me to scan ahead from the halt, for possible enemy positions. I’ve come to like and enjoy SF’s stock campaigns, but I do wish the attacking missions were scripted to allow a more tactical advance, with regular halts to observe ahead and time to apply a bit of ‘bounding overwatch’. If you try that in SF, the party could be over by the time you get there. And the lighter armour will likely have rushed ahead and been badly knocked about. With SF attacks, it’s often a bit of a mad charge. This mission was turning out to be no exception: get stuck in, worry about the finer points when it hits the fan. Which it did, soon enough! ...to be continued!
-
From the album Combat Sims
-

From the album Combat Sims
-
From the album Combat Sims
-
From the album Combat Sims
-
From the album Combat Sims
-
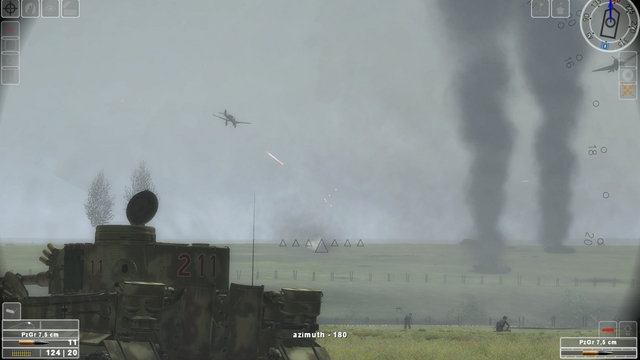
Fighting Steel Fury's version of WW2's most famous tank action! OK, so maybe Kursk was more famous, but it was a battle with tanks in it, rather than a specific tank action. In the latter category, few can be more well-known that Michael Wittman's (largely) solo action against the spearhead of the British 7th Armoured Division at Villers Bocage in Normandy, on 13 June 1944. This mission report is based on the first of three new missions by the Steel Tank Addon (STA) team, featuring the equally-new Normandy terrain; my earlier Panzer IV report was based on one of the other missions in this set. This is a very welcome addition to what's been a solidly Eastern Front tanksim, apart from a desert mod and some NW European missions, the latter nearly all based on Soviet maps. The Villers Bocage map isn't an exact replica of the actual terrain: for example, Villers Bocage itself lacks the closely-spaced rows of buildings on some narrow streets, I suspect because SF's AI would have difficulties with these. But it's pretty close, and with its hedgerows and distinctive buildings and structures, it really makes the player feel like he's somewhere different, where lines of sight are short and an A?T gun, a bazooka or a tank could be lurking on the other side of every hedgerow. As with the terrain, the mission is not an attempt to reproduce exactly the Witmann action, which itself has been the subject of different interpretations over the years. Rather, it captures the spirit of the fighting that morning, fifty-one years ago. You're playing the role of Michael Wittmann and you are ordered firstly to get to Point 213 a few hundred metres to your north, and ambush the British advance guard from there. Having done that, you are to attack into Villers Bocage itself and destroy the enemy there, too. You have just your own Tiger initially, but a second one is being made ready and will join you at some point. You are also warned to keep out of red zones marked on the map, as these areas are known to be under enemy observation and you will compromise the ambush if you're spotted first. Below is the mission map, showing the first phase. You're starting from Beauvais, marked by the blue oval. On this mission, it's important you follow your orders reasonably closely; for example, your arrival within the oval area around Point 213 will, I believe, trigger the British advance from the town, up the N175, towards you (along with simulated radio traffic warning you of this). Kicking off the mission, I ordered an AP round loaded and from the external view, had a look around. Below is my Tiger in the hamlet of Beauvais, with the as-yet-unready second Tiger stationary close by; to my front was a radio-equiped Kubelwagen field car. Wasting no time, I turned north and rattled off, towards Point 213. You can just about see Point 213 in the screenshot below: it's the rising ground more or less right behind the little house, half left. I was steering slightly right of it, to ensure that I stayed away from those darned red zones. I was careful not to smash the well or otherwise do more damage than I could avoid, to the nice Norman scenery. The fence in front of me was the exception. It was a shame to mangle that nice ironwork but the shortest distance between two points being a straight line, it just had to go. Soon, I was rattling as fast as I could go, over the relatively flat, open ground towards my first objective. I say 'open', but the terrain is a good deal less open than the usual SF landscape, criss-crossed with hedgerows and dotted with patches of woodland. Not ideal Tiger country, as I was soon to find out! ...to be continued!
- 12 replies
-
- 5
-

-
- steel fury
- wittmann
- (and 2 more)
-
Fighting the famous WW2 tank battle in a rather less-well-armoured panzer! At last, Steel Fury has arrived in Normandy! This welcome development with the Steel Tank Add-on (STA) mod for Graviteam's superb WW2 tanksim comes in the form of three new missions, based around a well-known action in June 1944 between elements of several German armoured units and a spearhead of the British 7th Armoured Division, the famous Desert Rats. The best known part of the Battle of Villers Bocage on 13 June is of course the attack on the leading 22nd Armoured Brigade by the Tiger tank of panzer ace Michael Wittmann. The latter is widely credited with destroying the British spearhead single-handed and while the truth is evidently a bit more complicated, there's no doubt that Wittmann and the other German forces involved succeeded in halting a potentially very dangerous penetration that could have had serious consequences for the German's ability to hold the key town of Caen, a lynchpin of their defence of Normandy after D-Day. Even if you're not new to the story, you'll probably enjoy the recent re-telling of the tale, available as a free online book by Akhill Kadidal, here. Thanks to the STA team - notably Lockie & Deviator for the missions, Deviator for the map/landscape and Will73 for Bitish AFVs, sorry if I left somebody out! - we now have a small set of missions based on the battle. All (so far) are from the German side; two for the Tiger I and one for the Panzer IV. I think it's fair to say that all are 'inspired by' episodes in the battle, as opposed to exact reproductions of any given action. I'll save the Wittmann fight for a later mission report, as it's still being worked on, based on feedback. For now, I decided to go with the last mission in the set, playing the late-model Panzer IV. Armed with a long 75mm gun and protected by spaced armour plates around the turret and (until they got knocked off!) either side of the hull, this was in 1944 still the backbone of the Panzerwaffe and in skilled hands, a dangerous enough opponent for Allied tankers. Earlier versions of the Panzer IV, both short- and long-gunned, come with vanilla Steel Fury but the Ausf. H version we'll be fighting in here is courtesy of SF's modders. As in fact is almost everything else in the mission, from the terrain to the buildings and their fittings. The Villers Bocage map is new for this mission set, and it's not only quite different from SF's stock eastern European terrain, it's also one of the very best seen in the sim so far. For whatever reason, you won't see the close rows of houses that lined the real main street in Villers Bocage, but the lie of the land is close to reality and the general effect is most convincing, for 1944 Normandy...even to the way your tanks will slow down and struggle to crunch noisily through thick hedgerows! The terrain looks best with the recommended 'scorching summer' terrain mod, for which there's a version specific to the STA mod. All you need is available via the STA forums, here. The mission This was my first play-through, so while I'd previously tried out the Wittmann mission and seen the terrain, the Panzer IV mission itself was entirely new to me. It's called, rather melodramatically, 'Last Nazi Chance'. Here's the start of the briefing, which, as you can see, is bi-lingual: You are cast in the role of panzer Hauptmann Helmut Ritgen. I'm not sure which of the participating German units you are supposed to be with - Panzer Lehr, 2nd Panzer or Wittman's unit, SS Schwere Panzer Abteilung 101 - but your tank will carry the 'shield and keys' emblem of 1st SS Panzer, the Leibstandarte, as also carried by the Tigers of the 101st. In short, as you'll see when you scroll down the briefing, your mission is in two phases - first, attack and destroy the British advance guard on Point 213, the high ground on the N175 road overlooking Villers Bocage to its east. Then, you are to attack and clear Villers Bocage itself, finishing with the Hotel de Ville. You're told that - prompted by a radio message you'll issue (this is actually triggered automatically, when the time is right) - some panzer grenadiers will join in and help you clear the built-up area. The bad news is that you've only got two Panzer IVs in your platoon and a glance at the map shows there's only a single SPW (Schutzenpanzerwagen, armoured half-tracked APC) of grenadiers. The better news is that there are two other pairs of tanks which seemed to be lined up for a concentric attack. The even better news is that you will discover that the other four tanks are Tigers. My impression is that the briefing could be a little clearer on the composition and tasks of your force. In real life, orders are given by your commander, at the same sitting, to you and all the other participating platoon leaders, so that everyone knows what everyone else's part in the battle is to be. For this operation, we seem to have an under-strength and hastily-assembled force thrown into battle with little time for preparation or even thorough orders. I know enough about Normandy 1944 not to expect any help from the Luftwaffe on this mission but I'd have hoped that the divisional artillery would have put in some shooting, or at least our ever-present German mortars would have softened up the enemy for us. But perhaps the idea is to take the English by surprise. As to how that turns out, we'll see soon. I took a last look at the map, before moving off. It showed Point 213 to be the wooded area we will be able to see to our front, when we leave the briefing phase and start the mission itself. You can clearly see the distinctive contours in the pic below, with the text briefing panel suppressed. My two tanks are the blue diamonds, top right; below and behind them are the grenadiers in their single SPW. Below that are two more friendly tanks: Tigers, as they will turn out to be. Off to the left (west - north is blue, in the SF compass indicator, top left) are two more Tigers, in a hedgerow. It looks like we're nicely set for a concentric attack on Point 213, with the Tigers to the west, closest to the objective and therefore likely to go in first. Not a bad idea, from the standpoint of a Panzer IV commander. I kicked off the mission and as I usually do, immediately ordered the loading of a suitable round - AP seemed best, for this party. Switching to the external view for a good look around, I unbuttoned my tank commander. I then switched to the gunner position and started swinging my gun left and right, scanning for targets. Shooting started almost immediately, tank cannon fire by the sound of it, but both shooters and targets so far 'not seen'. Hastily, I switched back to the map, gave my platoon - sorry, my other tank - the order to conform to my movements and stay close, then back in the external view, ordered my driver to move off. On we went, speeding up as we crossed the open ground towards Point 213, our first phase objective. ...to be continued!
- 15 replies
-
- 2
-
-
- villers bocage
- sta mod
- (and 1 more)
-
From the album Combat Sims
-
From the album Combat Sims