
Converting older planes to work in SF2 – a basic guide (by MigBuster)
Converting older planes to work in SF2 – a basic guide
Ok spent ages converting things over – here is some info that may be useful. The guide is not conclusive however other answers can be found be searching as normal. Some of this can be found in the older knowledgebase anyway.
1. The Basics
2. Decals (Decals not showing)
3. Propellers missing
4. Canopy glass missing
5. Bouncing planes
6. Plane disappears on the ground when its blown up (no wreckage model)
7. Limiting Jets to only appear on certain terrains (The Userlist.ini)
8. Adding new AI data to data.inis
9. Audio only RWRs
10. Upgrading your Nam era Jet to use the Vector RWR
11. Upgrading your post 1978 Jet to use the TEWs RWR
12. Certain add on Jets not showing on RWRs
13. Aircraft short names
14. New shadow format
15. Plane model not showing in game
16. Cockpit now has white parts (aka missing textures)
17. Wheels sink into the runway!!
18. Canopy opens when I take off!!
19. No sounds from my aircraft??
20. No afterburner flame on my jet!!
21. Internal Gun on my aircraft is not working!
22. Where's my Cockpit? / adding a Cockpit
23. Weapons are installed OK and are in game but my jet wont take them
24. Adding Gunpods
25. I cant see the propeller from my cockpit
26. Why are my add on Fuel / Drop Tanks not showing in the loadout screen?
27. Plane not selectable/appearing in random single mission
28. The Pilot is out of Position!
29. Some considerations regarding some early Soviet fighters
30. Missing Missile HUD symbology (From Oct 2009)
31. No afterburner on my add on jets (From Feb 2010)
32. I want my Jet to have a different loadouts from certain years (From Aug 2011)
33. I want my Jet to have a different Hangar screen depending on the skin selected (Aug 2011)
34. I want a skin to appear on my Jet on a certain Date! (~Aug 2011)
35. I want more shoulder side to side movement in a cockpit with TrackIR
1. The basics
Unlike the first series of games - all Mods in SF2 must go in the special Mod folders – which will be in a totally different location on your PC to where the game is actually installed!!
On Xp they will be here (By default)
C:\Documents and Settings\<Name>\My Documents\ThirdWire\
On Vista and later versions:
C:\Users\<Name>\Saved Games\ThirdWire\
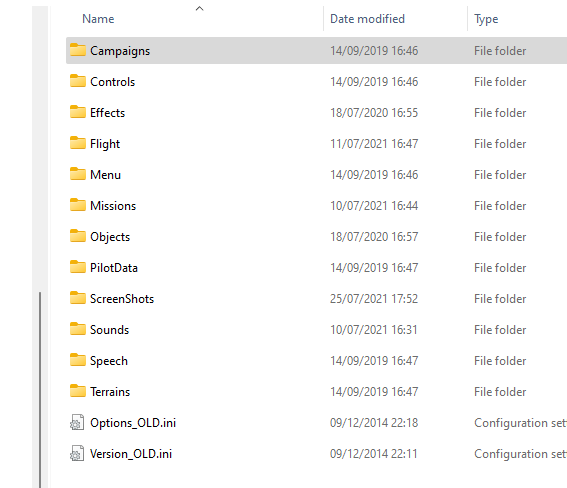
In these mod folders you will notice some folders are missing – no problem just create them. So you need to create at a minimum
….\StrikeFighters2\Flight
…\ StrikeFighters2\Sounds
…\ StrikeFighters2\Effects
…\StrikeFighters2\ Objects\Decals
…\StrikeFighters2\ Objects\Guns
…\StrikeFighters2\ Objects\Pilots
…\StrikeFighters2\ Objects\Weapons
So you will end up with a structure that looks just like the first series did :)
So move the plane to the Objects\Aircraft folder (which was already there) – then move the Sounds, effects, and weapons to the folders you have now created.
Notes
Pilots and seats must go in the Pilots folder to work now – in the last series these were in the Objects/aircraft folder. The pilots can have their own folders now also: (See my guide on adding Pilots and Ejection seats to SF2)
For Decals see step 2 below
The Guns folder is for add on Guns which can be added using the SF2 GunEditor program - available at Thirdwire (See Steps 21 and 24 for help with this).
For Weapons – well these can be added with the SF2 Weapons Editor also at Thirdwire – although if you have time you can convert the weapons into plug and play folders like the Jets are as here: (See my guide on converting Weapons for SF2)
2. Decals (Decals not showing )
All decals must go in the Decals folder in SF2 – this means you must move the “D” folder in the aircrafts skin to the decals folder. Not only that you must create the same folder structure in the decals folder – otherwise you will need to manually alter every single line the decals.ini file to tell the plane where to find the decals. To keep it simple say you were bringing over the F-101C – which has 4 skins and thus 4 sets of decals to move :)
C:\........\Aircraft\F-101C\78th \d
C:\........\Aircraft\F-101C\48th \d
C:\........\Aircraft\F-101C\38th \d
C:\........\Aircraft\F-101C\54th \d
Create the “Decals” folder in the special mod folders if not done already (as in section 1 above)
Now to save you editing the decals.ini (which will take forever) – create a folder called F-101C – then in this create 4 folders 78th , 48th, 38th, and 54th
Then you just drag the “d” folders ONLY with the decals from the plane into these new folders
(You have to keep the file path so the jet will find the files!!)
Eg
Objects\Decals\F-101C\78th \d
Objects\Decals\F-101C\48th \d
Objects\Decals\F-101C\38th \d
etc
So in the decal.ini for the skin make sure the paths are correct ie :
[Decal007]
MeshName=Nose
DecalLevel=2
DecalFacing=LEFT
FilenameFormat=F-101C/78th/D/Crew
…..
3. Propellers not showing (static and moving)
The propellers are tga files and will be in the planes actual folder. All you need to do in most cases is copy and paste them into each skin folder for the plane. Eg for the C-123K the tga file for the propeller is in the C-123K folder and called propdisk3.tga
Just drag it into the USAFSilver skin folder – that’s it.
(Afraid this wont fix the Razbam skyraiders having no static prop)
4. Canopy glass missing
The canopy / cockpit glass are tga files and will be in the planes actual folder. All you need to do in most cases is copy and paste them into each skin folder for the plane. Eg for the C-123K the tga file for the canopy glass is in the C-123K folder and called FltDeckGlass.tga
Just drag it into the USAFSilver skin folder – that’s it.
5. Bouncing planes
Some 3rd party jets go back to 2002 and so have a lot missing from their flight model file – aka the data ini. - Eg for the F-15A this file would be called F-15A_Data.ini!
Open up the jets _data.ini file in Notepad
Scroll down or find the // Landing Gears section. In here you may need to change these values to more suitable ones – which you can find by searching here or looking at stock models.
ShockStroke=0.25
SpringFactor=2.5
DampingFactor=1.8
For example with the SU-17 :
[NoseGear]
…..
ShockStroke=0.25
SpringFactor=1.5
DampingFactor=1.0
……
[LeftMainGear]
……..
ShockStroke=0.2
SpringFactor=1.0
DampingFactor=3.0
……
[RightMainGear]
….
ShockStroke=0.2
SpringFactor=1.0
DampingFactor=3.0
…
6. Plane disappears on the ground when its blown up (no wreckage model)
Applies to June 2009 versions on. If you have a merged install it will work in all SF2 sims - if not just SF2E
Some 3rd party jets go back to 2002 and so have a lot missing from their flight model file – aka the data ini. - Eg for the F-15A this file would be called F-15A_Data.ini!
Open up the jets _data.ini file in Notepad
Scroll down or find the [AircraftData]. In here add the following lines:
[AircraftData]
DestroyedModel=Su-7_Destroyed.LOD
DestroyedEffect=VehicleFireEffect
But obviously add a model that looks like the jet – for example with the SU-17 I have used the SU-7 model as above. That’s right only stock planes have wreck models – someone would have to create new 3d wreck models for all the add on jets – so you have to make do for now.
7. Limiting Jets to only appear on certain terrains (The userlist.ini)
In SF2 a new line appeared in aircraft ini files (eg F.16A.ini) called the user list
According to TK:
Each plane has UserList.INI that lists which country has used it, and between what years.
Each map, if its set to limit nations, has a list of countries in Nations.INI under LimiedNations list. (Germany and Vietnam are currently set to limted, but Desert isn't, although we might change that in the future if we get too many Chinsese planes flying around there )
The game compares the two, and if the country in the UserList.INI for the plane is in LimitedNations list on the map, then it used, if not, its not selected.
So using the add on F-16A as an example only - you add this line to the F-16A.ini
[AircraftData]
AircraftFullName=F-16A Falcon (Block 5)
..........
AvionicsDLL=Avionics70.dll
AvionicsDataFilename=F-16A_Netz_avionics.ini
UserList=F-16A_UserList.ini
Then create a new text file in Notepad but save it as “F-16A_Userlist.ini” with these contents:
[uSAF]
ServiceStartYear=1979
ServiceEndYear=1985
Availability=COMMON
And if the jet has more than one user:
[uSAF]
ServiceStartYear=1979
ServiceEndYear=1985
Availability=COMMON
[RDAF]
ServiceStartYear=1979
ServiceEndYear=1985
Availability=COMMON
Then put the file in the F-16As folder
8. Adding AI data to data.inis
You will notice in new jet Aircraft data inis sections to control AI strafing/bombing etc just after the [FlightControl] section. If your add on does not have these then you may want to add some. Again you may be able to take values from similar stock planes. For the SU-17 I added:
[RocketAttackAI]
RollInRange=8500.0
RollInAlt=1450.0
PullOutRange=1500.0
PullOutAlt=250.0
ReleaseRange=2000.0
SecondPassRange=5000.0
SecondPassAlt=800.0
ReleaseCount=16
ReleaseInterval=0.08
AimPitchOffset=0.4
[strafeAI]
RollInRange=6000.0
RollInAlt=1300.0
PullOutRange=800.0
PullOutAlt=200.0
ReleaseRange=1200.0
SecondPassRange=4500.0
SecondPassAlt=950.0
ReleaseInterval=1.0
AimPitchOffset=0.1
Again these taken from the SU-7_data.ini
9. Audio only RWRs
New in SF2 is ability to give your jet a specific audio only RWR if it has no display. Many jets particularly the early F-105D had an Audio warning of radar locks only. To give your jet this open up the avionics ini (ie F-104C_avionics.ini) and put this in
[RWR]
Type=AUDIO_ONLY
TrackSound=RWRTrackSound.wav
LockSound=RWRLockSound.wav
Then make sure the following is in the file too:
[RWRTrackSound]
Priority=HIGH
3DSound=FALSE
Looped=TRUE
NumBuffers=1
[RWRLockSound]
Priority=HIGH
3DSound=FALSE
Looped=TRUE
NumBuffers=1
Save that – then open F-104C_data.ini for example – scroll to the [DetectSystem] section and make sure you have this there
HasRWR=TRUE
RWRMinFreq=2.0
RWRMaxFreq=10.9
RWRCanDetectCW=FALSE
Then save that file too
10. Upgrading your Nam era Jet to use the Vector RWR (only applies to May 2009 SF2 versions on)
Firstly copy the following :
[RWR]
Type=VECTOR
AirSearchTexture=RWRAirVector1.tga
AirTrackTexture=RWRAirVector2.tga
AirLockTexture=RWRAirVector3.tga
GroundSearchTexture=RWRGroundVector1.tga
GroundTrackTexture=RWRGroundVector2.tga
GroundLockTexture=RWRGroundVector3.tga
SearchFlash=FALSE
TrackFlash=TRUE
TrackFlashRate=0.2
LockFlash=TRUE
LockFlashRate=0.1
TrackSound=RWRTrackSound.wav
LockSound=RWRLockSound.wav
ThreatLaunchSAMOnly=TRUE
ThreatLaunchFlash=TRUE
Open up the jets avionics ini file – ie F-104C_avionics.ini, find the exiting [RWR] section and delete the section – then just paste the above in and save the file.
Then make sure the following is in the file too:
[RWRTrackSound]
Priority=HIGH
3DSound=FALSE
Looped=TRUE
NumBuffers=1
[RWRLockSound]
Priority=HIGH
3DSound=FALSE
Looped=TRUE
NumBuffers=1
That’s it – just check the [DetectSystem] section in F-104C_data.ini fir example to make sure:
HasRWR=TRUE RWRMinFreq=0.5 RWRMaxFreq=20.0 RWRCanDetectCW=FALSE IMPORTANT define the RWRWMinFreq and RWRWMaxFreq using defined values – or use them from another jet – certain jets radars may not be detected if you omit these lines or define poor min max values!! 11. Upgrading your post 1978 Jet to use the TEWs RWR (only applies to June 2009 SF2 versions on) Firstly copy the following :
[RWR] Type=TEWS AirSearchTexture=RWR_Unknown.tga AirTrackTexture=RWR_Unknown.tga AirLockTexture=RWR_Unknown.tga GroundSearchTexture=RWR_Unknown.tga GroundTrackTexture=RWR_Unknown.tga GroundLockTexture=RWR_Unknown.tga MissileActivityTexture=RWR_Missile.tga PriorityTexture=RWR_Priority.tga SearchSize=0.20 TrackSize=0.20 LockSize=0.20 SearchFlash=FALSE TrackFlash=FALSE LockFlash=TRUE LockFlashRate=0.1 TrackSound=RWRTrackSound.wav LockSound=RWRLockSound.wav FlashActivityOnLaunch=TRUE ThreatLibraryFile=F-16A_RWR.lst <---- change this Open up the jets avionics ini file – ie F-16C_avionics.ini, find the [RWR] section and delete it – then just paste the above in. Then change the line arrowed above to ThreatLibraryFile=F-16C_RWR.lst (for example) and save the file. Then make sure the following is in the file too: [RWRTrackSound] Priority=HIGH 3DSound=FALSE Looped=TRUE NumBuffers=1 [RWRLockSound] Priority=HIGH 3DSound=FALSE Looped=TRUE NumBuffers=1 The ThreatLibraryFile is something all the stock jets with TEWs will have and is just a text file telling the RWR which radars it will recognise in game. For example here is the stock list (which you can use if you like – just copy into Notepad, save as F-16C_RWR.lst – then stick in the F-16C folder) F-4=RWR_F-4.tga F-8=RWR_F-8.tga F-14=RWR_F-14.tga F-15=RWR_F-15.tga F-16=RWR_F-16.tga F-18=RWR_F-18.tga NASARR=RWR_F-104.tga ScanOdd=RWR_MIG-17.tga SpinScan=RWR_MIG-21.tga JayBird=RWR_MIG-21.tga HighLark=RWR_MIG-23.tga FoxFire=RWR_MIG-25.tga Cyrano=RWR_Mirage3.tga BarLock=RWR_Search.tga LongTrack=RWR_Search.tga DogEar=RWR_Search.tga AAA=RWR_AAA.tga Hawk=RWR_Hawk.tga M163=RWR_M163.tga SA-2=RWR_SA-2.tga SA-3=RWR_SA-3.tga SA-6=RWR_SA-6.tga SA-8=RWR_SA-8.tga ZSU-23=RWR_ZSU-23.tga Your TEWs RWR will not show a jets radar if it’s not on the above list – You can certainly add new entries to the list above - but they may need to use tga files already in the cat files. TK has included the SU-27/Mig-29 and MiG-31 tgas so they can be used Now the important bit – back to the data.ini – or SU-15_data.ini in this case find the [DetectSystem] section and add RadarFamilyName=Oryol This adds that radar family to the game – then you would need to add the line below to each xx_RWR.lst file for each jet that uses the TEWs RWR: eg Oryol=RWR_MiG-21.tga ........ Cyrano=RWR_Mirage3.tga BarLock=RWR_Search.tga ..... So yes it will appear on the rwr as a 21!! Now for the next important bit in the [DetectSystem] – see this section from my F-16A_data.ini:
[DetectSystem] RadarType=AIR_INTERCEPT RadarFamilyName=F-16 <----------------radars family name RangeUnit=NM RadarAzimuthLimit=60 RadarElevationLimit=60 RadarSearchTime=1.0 RadarSearchRange=80 RadarSearchStrength=100 RadarTrackTime=2.0 RadarTrackRange=80 RadarTrackStrength=100 DopplerLookdown=TRUE RadarSearchFreq=9.8 <------NEW RadarTrackFreq=9.8 <------- NEW RadarMissileGuidanceFreq=6.0 <--------NEW RadarSearchCW=FALSE <----------- NEW RadarTrackCW=FALSE <----------NEW RadarMissileGuidanceCW=TRUE <-------------NEW VisualBlindArc= VisualRestrictedArc=5L,6L,7L MaxVisibleDistance=8400.0 BaseRCSModifier=0.2 HasRWR=TRUE <----------important RWRMinFreq=0.5 <--------------important RWRMaxFreq=20.0 <-------------important RWRCanDetectCW=TRUE <------------NEW From the above: Make sure HasRWR=TRUE IMPORTANT define the RWRWMinFreq and RWRWMaxFreq using defined values – or use them from another jet – certain jets radars may not be detected if you omit these lines or define min max values outside of the radars operating frequency!! Yes this applies to weapons and ground objects with radars that can target airborne objects 12. Certain Add on Jets not showing on RWRs If your RWR works but some jets are not showing then here is what you must consider: • Does the attacking jet actually have a radar?? If not then it wont show up on an RWR period. • Have you defined the radar of the attacking jet – this must be done if its an older add on. – see section 11 above • Have you defined the minimum and maximum frequencies the RWR on the jet can detect?? – if not and the attacking jets radar falls outside the frequencies – you cant detect it unless you put the right values in. See section 10 and 11 above. 13. Aircraft shortnames Used for campaigns – and came in with WOI – just add this line to the jets ini file in the [AircraftData] section AircraftShortName=F-111 For example for the F-16C.ini add: AircraftShortName=F-16 The jets ini header will now look something like this:
[AircraftData] AircraftFullName=F-16A Falcon (Block 5) AircraftShortName=F-16 AircraftDataFile=F-16A_Blk5_data.ini CockpitDataFile=F-16A_Netz_cockpit.ini HangarScreen=F-16A_Blk5_hangar.bmp .................... 14. Shadows in the new games In an objects ini file – ie F-4D.ini the shadow section may look like this [shadow] CastShadow=TRUE ShadowLOD=F-4D_shadow.shd ShadowType=1 ShadowCastDist=10000 MaxVisibleDistance=150 However in the newer versions the shadow section looks like this [shadow] CastShadow=TRUE ShadowCastDist=10000 MaxVisibleDistance=400 So alter accordingly to use the new dynamic shadows - the old .shd file is no longer needed. If you get any weird lines coming off the model then use the old method with the shd file. This problem is related to the 3D model itself unfortunately. This applies to weapons and ground objects too 15. Plane or part of plane model not showing in game SF2 is case sensitive when it comes to naming model files – so referencing Upper case model files with lower case names wont work. Open up the ini file for the jet – ie SU-15.ini and look at these lines
[LOD001] Filename=su-15tm.LOD Distance=200 [LOD002] Filename=su-15tm_lod002.lod Distance=1000 [LOD003] Filename=su-15tm_lod003.lod Distance=5000 Make sure the actual LOD files (ie su-15tm.lod) in the SU-15 folder have those exact names in the correct CASE! Change them if not. This applies to weapons and ground objects too 16. Cockpit now has white parts (aka missing textures) This is because the textures are in the object.cat file in whichever first series sim you had the aircraft in before – and TK has removed or changed files due to the new pits. You must find which files are missing, then go back to your old game and extract them from object.cat To find which files are missing you need to open the jets cockpit.lod file (ie SU15_Cockpit.lod) which will be in the jets cockpit folder – with a program like xvi32u lod viewer or similar. Once open run a search on each .bmp and list each one down. Then you look in the jets cockpit folder again to see what you have and whats missing Then you go back and extract the files from the object.cat in SF1/WOV/WOE/WOI. See the old knowledge base on extracting files etc – though best to use the newer CATPACK extractor – otherwise it will take forever!! PS - There is another SF2 knowledge base thread detailing common cockpits with missing textures already! 17. Wheels sink into the runway Open up the aircraft data ini and scroll down to the landing gear section. Then alter the RollingRadius for the gear that is sinking – Increase (Move up) or Decrease (Move down) until you are happy with the look! [RightMainGear] SystemType=LANDING_GEAR Retractable=FALSE DragArea=0.1 HideGearNode=FALSE ModelNodeName=LandingGearR ShockNodeName=LandingGearR ShockAnimationID=2 ShockStroke=0.21 SpringFactor=1.8 DampingFactor=3.00 WheelNodeName=FtGearAxle_R RollingRadius=0.275 <---------------------------------increase/decrease this number until you are satisfied that it looks ok. CastoringWheel=FALSE ReverseWheelRotation=TRUE HasBrakes=TRUE BrakingCoefficient=0.600 RollingCoefficient=0.07 RotationAxis=X-Axis MaxLoadFactor=6.0 ShowFromCockpit=TRUE If that doesn't work try increasing or decreasing this line: ShockStroke=0.21 (thanks to FastCargo for this tip) 18. Canopy opens when I take off!! Basically just find this section in the jets_data.ini
[Canopy] ......... Your entry may look totally different but you can: Remove the whole section for no canopy animation.
Comment it all out again for no animation like here: ;[Canopy] SystemType=ANIMATION InputName=ANIMATION_1 DeploymentMethod=MANUAL AnimationTime=6.0 AnimationID=4 Assign a Manual in game animation key to it like here (making sure to remove the deploy speeds): [Canopy] SystemType=ANIMATION InputName=ANIMATION_5 <----This assigns an in game animation key (shift and 0 to 9 by default) DeploymentMethod=MANUAL <------Means that canopy operation needs to be operated by a key AnimationTime=1.5 AnimationID=5 DeployWhenOnGears=TRUE MaxDeflection=30.0 MinDeflection=0.0 There are a lot of threads already out there on this so you still may need to search to solve your particular problem. 19. No sounds from my aircraft?? Well no different to the SF1 series here but guess its part of it and its easy Open up the jets data.ini and find the [sound] section
[sound] EngineSoundName=TornadoADV <--------Engine sound AfterburnerSoundName=TornadoBurner <------Afterburner sound DamagedEngineSound= <---------obvious FlapsSoundName=Flaps <-----------Flaps sound <shock> AirbrakesSoundName=Airbrakes <------------Airbrakes sound GearsSound=Gear <----------undercarriage sound LandingSoundName=TireTouch <--------sound made when hitting runway on landing StallSoundName=NotApplicable <---------sound if you stall the jet WindSoundName=NotApplicable <-----------wind loop sound To fix it -you need to find the wav files called TornadoADV.wav and TornadoBurner.wav and stick them in your Sounds folder. Where are they you say - well they will be with the jet or in the sounds folder in your old game - and of course you can make your own wav files if you like. If you cant find the files set the lines to this: [sound] EngineSoundName=JetEngine AfterburnerSoundName=JetBurner Thats right you are now using the default in game engine and burner sounds!! If you have a prop plane [sound] EngineSoundName=PropLoop 20. No Afterburner flame on my jet!! Again no different to the SF1 series here: Open up the jets data.ini and find the [Engines] section NOTE - You need to do this for each engine your jet has!!!!!!!!!!!!!!! [Engine1] SystemType=JET_ENGINE InputName=THROTTLE_CONTROL EngineID=1 ..................... ExhaustEmitterName=DirtyExhaustEmitter <-----Effect for mil power smoke AfterburnerEmitterName=DavesAfterburnerEmitter <-----Effect for Afterburner .................. [Engine2] SystemType=JET_ENGINE ............ Thats right - your jet needs the file DaveAfterburnerEmitter.ini to be in the Effects folder. Again find it with the jet or look in the Effects folder in your old game. Once you have found it open it up in notepad and look for any tga files it needs like this
[AfterburnerMaterial2] DepthBufferCheck=TRUE DepthBufferWrite=FALSE ................ TextureStage[01].TextureName=DavesAfterburnerFire5.tga .................... The file DavesAfterburnerFire.tga will be in the same place as DavesAfterburnerEmitter.ini - bear in mind the tga file might have a totally different name to the ini file. Get both files and stick them in your "Mod" Effects folder - thats it. If your afterburner looks weird you have the wrong tga file If you cant find it use an in game effect like AfterburnerEmitterName=F4AfterburnerEmitter 21. Internal Gun on my aircraft is not working! NOTE: If you are adding a Gunpod see section 24 below! Basically it means the jet is using a gun thats not in your game. With SF2 adding guns can be done slightly differently. Firstly you need to find out the gun you need. Thats easy open the jets _data.ini file and scroll to the Gun section: // --- GUNS [internalGun] SystemType=FIXED_GUN GunTypeName=27MM_BK27 <-----The name you are looking for InputName=FIRE_PRIMARY_GUN MuzzlePosition=0.57,5.3,-0.77 LightPosition=0.57,5.3,-0.77 ............ Now get the data code for the gun - it should be with the jet you downloaded somewhere - or if you brought it over from an old game it will be in the Gundata.ini in the old objects folder in your old game - OR look in the gundata.ini from an old Bunyap weapons pack (install the pack to a new empty folder on your desktop!!). Put the data section for the gun in a new text file by itself - MAKE SURE the header says [GunData001] [GunData001] TypeName=27MM_BK27 FullName=27mm Mauser BK27 Caliber=27.000000 ROF=4500.000000 MuzzleVel=2000.000000 AmmoWt=0.007000 WarheadWt=0.001000 etc ........... save it as whatever.ini Download and install the SF2 Gun editor from here or Thirdwire, start it up, select your game when prompted, Then hit the Import/Merge button, then find and open up whatever.ini. This should add it to the list of guns. Now hit Save If you look in your \SF2\Objects\Guns folder you will now see the folder for the gun. - thats it. 22. Wheres my Cockpit? / adding a cockpit Ok so youve got your plane in SF2 but there is no flippin cockpit!!!. I will say now that the reason for this is that it was using files in SF1/WOE/WOV that are not in the SF2 Games. If you have the SF1 series then you need to go back to where that is installed and, using the CATPACK tool (In the downloads section ) extract all the files from object.cat (ie in the WOV\objects\ folder) then move the files you need, to the jets cockpit folder. What files do you need um......well you need to go through the jets cockpit.ini file and avionics.ini file because they reference the files needed. If you cant be bothered with that (because im not going into it in detail) or dont have the first series games then you can: Use another you already have / download a full pit. Use the new hi res in game stock pits. Ok starting with the very easy - using an in game SF2 cockpit. Find a stock jet in your mod folders - like say the F-4D_67 - go into the folder and open up the F-4D_67.ini file and look at the following: [AircraftData] AircraftFullName=F-4D Phantom II (67) AircraftShortName=F-4 AircraftDataFile=F-4D_67_data.ini LoadoutFile=F-4D_67_loadout.ini CockpitDataFile=F-4D_67_cockpit.ini <--------------copy this line LoadoutImage=F-4D_loadout.tga UserList=F-4D_67_UserList.ini HangarScreen=F-4D_67_hangar.bmp LoadingScreen=F-4D_Loading.bmp AvionicsDLL=Avionics60.dll <---------copy this line AvionicsDataFilename=F-4D_67_avionics.ini <-----------copy this line Then transfer the above lines to the ini file of the jet you want the pit in - for example i want the stock pit and avionics in my F-4K: [AircraftData] AircraftFullName=F-4K Phantom II AircraftShortName=F-4 AircraftDataFile=F-4K_data.ini LoadoutFile=F-4K_loadout.ini CockpitDataFile=F-4D_67_cockpit.ini LoadoutImage=F-4K_loadout.tga UserList=F-4K_UserList.ini HangarScreen=F-4K_hangar.bmp LoadingScreen=F-4K_Loading.bmp AvionicsDLL=Avionics60.dll AvionicsDataFilename=F-4D_67_avionics.ini Make the changes and save the file! Got to say it couldn't be simpler Okay so what if you want to use a pit that's in jet you downloaded!! say the MiG-29A - and the pit works in SF2 already. You do exactly the same thing as i've shown above - for example - me sticking the pit in a an SU-27: [AircraftData] AircraftFullName=SU-27 Flanker AircraftShortName=SU-27 AircraftDataFile=SU-27_data.ini CockpitDataFile=MiG-29A_cockpit.ini HangarScreen=SU-27Hangar.bmp LoadingScreen=SU-27Loading.bmp LoadoutImage=SU-27_Loadout.bmp LoadoutFile=SU-27_loadout.ini AvionicsDLL=Avionics70.dll AvionicsDataFilename=MiG-29A_avionics.ini UserList=Su-27_UserList.ini Note in the above most modern jets need to use avionics70.dll for the newer avionics Now you just copy the Cockpit folder from the MiG-29A into the SU-27. Job Done. The workings of the avionics and cockpit files are slightly beyond the scope of this guide - all the info you need is already in old forum threads anyway!! 23. Weapons are installed OK and are in game but my jet wont take them Note: Fuel Tanks are slightly different - see section 26 Okay this one must be everywhere - but as its part of putting planes in SF2 I suppose I will reluctantly say something!! Firstly download and install the StrikeFighters2 weapons editor from Thirdwires site or on here - you will be needing that. If you are really sure the weapons are installed properly, and the weapon is in service in the years you want it - then you need to check the weapons stations section in the jets data.ini. Taking the F-102A_Data.ini as an example lets look at the Right Missile Bay and see what can cause the weapon not to show up: [RightMissileBay] SystemType=WEAPON_STATION StationID=4 <------this is the number of the station in the loadout.ini if you didnt know StationGroupID=4 <------This actually controls its grouping on the in game loadout screen - very useful!! StationType=INTERNAL ................ NumWeapons=2 DiameterLimit=1.164 <------if the weps diameter is larger than this - it wont show LengthLimit=4.021 <---------If the weapon is longer than this it wont show LoadLimit=250.0 <-------If the weapon is heavier than this it wont show AllowedWeaponClass=IRM,SAHM <-----If the weapon isn't one of these then it wont show SpecificStationCode=AIM4 <----If the weapon does not have this code it wont show AttachmentType=USAF <--------if the weapons attachmentcode is different to this it wont show ModelNodeName=RightWepsBayPylonMountRail MovingPylon=TRUE RotatingPylon=FALSE ................... Okay so how do you know what weight etc your weapon is??? - open up the weapons editor, select your game, then select the dodgy weapon and choose the "Edit Weapon" button. You will now see all the bits you have to check so you can make the changes to the weapon station shown above - i.e. Mass, Diameter, Length etc However the most common problems just involve these: SpecificStationCode=AIM4 In the weapons editor this is "Station Code" and if the weapon does not have the AIM4 code its never going on this station I tell you now. AllowedWeaponClass=IRM,SAHM In the weapons editor check the "guidance type" and then change the above accordingly to the code (which isnt in the weps editor!!) - You will need to look at other jets to get the code - but hey for an example if I want an ECM pod on this station: AllowedWeaponClass=IRM,SAHM, EP Job done AttachmentType=USAF In the Weapons editor this is Attachment Type funnily enough, so if its not USAF just change the above to what you need: AttachmentType=USAF, NATO or whatever! Note: You cant load weapons for nations defined as ENEMY onto Jets defined as FREINDLY and vice versa. So putting AttachmentType=USAF, NATO, Soviet Just wont work I'm afraid. If you are not sure look at other jets data.inis for attachment types etc 24. Adding Gunpods Firstly a gunpod and the gun it uses are 2 separate items! First add the gunpod like any other weapon to the weapons folder (See me guide on converting weapons over) Once you have added the gunpod open its xxx_data.ini file in Notepad to see which gun it actually uses: [WeaponData001] TypeName=upk-23-250 FullName=UPK-23 Gun Pod ModelName=upk-23-250 Mass=350.000000 ................ GunTypeName=23MM_GSH23 <---------------- this is the name of the gun it uses MaxRounds=250 Then see which gun it uses Open up the SF2 GunEditor(which you can get from Thirdwire) and see if 23MM_GSH23 (for example) is in the list. If it isn't you need to add the gun (ie 23MM_GSH23) using the method in section 21 (Skip the bit about finding the gun in the jets data.ini file though ) 25. I cant see the propeller from my cockpit If you have added a cockpit to an A-1H for example you may wish too see the spinning prop in front of you. No problem - open up the A1H_Data.ini and go to the nose section
[Nose] ParentComponentName=Fuselage ModelNodeName=Cowling ShowFromCockpit=TRUE <----------changed to TRUE and save and that's it 26. Why are my add on Fuel / Drop Tanks not showing in the loadout screen NOTE: New in SF2 - Most of the in game Thirdwire aircraft models have inbuilt fuel tanks and so the fuel tanks and skins are part of the model. For most add on jets fuel tanks must be installed as Weapons as they were before in SF1. Although the fuel tanks can be affected by the same things in section 23 - The most common problem for it not showing in the loadout is because the weapons station needs these two things: So as an example - if we look at the weapons stations in F-16A_Data.ini [LeftInnerWingStation] SystemType=WEAPON_STATION StationID=5 StationGroupID=4 StationType=EXTERNAL AttachmentPosition=-1.77,-0.31,-0.40 AttachmentAngles=0.0,-3.0,0.0 LoadLimit=1587.6 AllowedWeaponClass=BOMB,LGB,TER,MER,FT <-----code FT must be on here AttachmentType=NATO,USAF ModelNodeName=pylon_inner_L PylonMass=86.18 PylonDragArea=0.02 FuelTankName=Tank370_F16 <-----this must be the EXACT name of the fuel tank you want to use 27. Plane not selectable/appearing in random single mission No different to the SF1 series here - using the F-16A as an example: the F-16A.ini file must have this line:
[AircraftData] AircraftFullName=F-16A Falcon (Block 5) AircraftShortName=Viper .............. CockpitDataFile=F-16A_Netz_cockpit.ini If you don't have a cockpit.ini file or cockpit for the jet see section 22 If its still not appearing: Check the service year entries in F-16A_data.ini Make sure the F-16A files are in the F-16A folder (\Objects\F-16A) and not in another SUBfolder (i.e. objects\F-16A\F-16A) 28. The Pilot is out of Position! Open up the data ini file (e.g. F-16A_data.ini) and find the [Pilot] section
[Pilot] SystemType=PILOT_COCKPIT PilotModelName=F-16_Pilot SetCockpitPosition=TRUE PilotHeadNodeName=head Position=0.0,4.10,1.10 <-------------- Pilot position coordinates SeatModelName=seat_F-16A SeatPosition=0.0,4.20,0.40 ............ NOTE: If you don't have that line just add it in!! See here it has 3 parameters: Position=0.0, 4.10, 0.86 Just change the values accordingly If we call the above Positions = 1, 2, 3 then here is what each bit does: 1. Move pilot sideways 2. Move pilot Forward(increase value) or backwards (Decrease Value) 3. Move pilot Up (Increase value) Or Down (Decrease) then save the file 29. Some considerations regarding some early Soviet fighters The MiG-17, MiG-19, MiG-21, and MiG-23 are the only Soviet types TK has included as fighters and they are the most effective. Reason being they have Guns, Missiles and kick ass attitude. The Su-9,SU-11, SU-15, and MiG-25 will look great in your game but bear this in mind - in the 60s/70s they will only be carrying missiles that couldn't hit the floor if they fell out of bed!! So by adding them you might make your sim slightly less of a challenge. So heres some tips: In their data.inis Make their availability RARE Availability=RARE Set them to INTERCEPT and only CAP if they have the range PrimaryRoles=INTERCEPT SecondaryRoles=CAP Put the start date for a soviet gun pod (ie the SPPU-22A) to about 1964 using the weapons editor so the SU-9/11/15 can fire at something at least. 30. Missing Missile HUD symbology (From Oct 2009 SF2I) With version Oct 2009 - If you are missing HUD symbology for missiles on modern 3rd party jets like I was (Tornado F3/MiG-29s/FA-18 etc)then you may need to add some new code to the xxx_avionics.ini [HUD] HUDMaterial=HUDMaterial <--------- add this HUDColor=0.36,1.0,0.82,0.7 BoresightOffset=0.0,0.00 ViewportTopLeft=-0.140,-0.195 And all of this below the [HUD] section [HUDMaterial] EffectShaderName=fltHUD.fx DepthBufferCheck=FALSE DepthBufferWrite=FALSE RenderedInOrder=FALSE AlphaTestEnabled=TRUE CullMode=NO_CULL LightEnabled=FALSE UseLightLevel=FALSE SpecularEnabled=FALSE EmissiveEnabled=FALSE FogEnabled=FALSE AmbientColor=1.000000,1.000000,1.000000,1.000000 DiffuseColor=1.000000,1.000000,1.000000,1.000000 ZBufferOffset=0 PriorityLevel=1 BlendOp=BLEND_SRC_ALPHA NumTextureStages=1 TextureStage[01].TextureName= TextureStage[01].MipMap=FALSE TextureStage[01].FilterEnabled=TRUE TextureStage[01].StageColorOp=TEXTURE_MODULATE_DIFFUSE TextureStage[01].StageAlphaOp=TEXTURE_MODULATE_DIFFUSE 31. No afterburner on my add on jets since the Feb 2010 patch The game now uses certain advanced shaders for use with Direct X 10 if your system supports it which comes into play when using high/unlimited graphics settings. The most likely issue here is using old effects carried over from a previous version, or you have just downloaded some old effects with a jet. Go to the "Effects" folder - you will need to check each old ini file in there Open up each ini and add this line under each heading usually ending with [xxxxxxMaterial ] For example I opened up "AfterburnerF6.ini" which is the Lightning F.6 afterburner effect. In there I scrolled down to this section:
[AfterburnerMaterialF6] EffectShaderName=twColor1.fx <-----Added this line DepthBufferCheck=TRUE DepthBufferWrite=FALSE IgnoreRenderOrder=FALSE AlphaTestEnabled=FALSE LightEnabled=FALSE UseLightLevel=FALSE SpecularEnabled=FALSE EmissiveEnabled=FALSE AmbientColor=1.000000,1.000000,1.000000,1.000000 DiffuseColor=1.000000,1.000000,1.000000,1.000000 ZBufferOffset=2.000000 PriorityLevel=3 BlendOp=BLEND_INV_SRC_ALPHA_ADD_SRC NumTextureStages=1 TextureStage[01].TextureName=AFTERBURNERF6.tga TextureStage[01].MipMap=FALSE TextureStage[01].FilterEnabled=TRUE TextureStage[01].StageColorOp=TEXTURE_MODULATE_DIFFUSE TextureStage[01].StageAlphaOp=TEXTURE_MODULATE_DIFFUSE 32. I want my Jet to have a different loadouts from certain years (Aug 2011) Each jet has a loadout.ini text file - for example F-4E_Loadout.ini that specifies the exact loadout for each mission. If you want a jet to have a certain loadout we can now add more flexible code. Here the Jet has a normal [Attack] loadout:
[Attack] Loadout[03].WeaponType=Rockeye Loadout[03].Quantity=3 Loadout[03].RackType=TER Loadout[04].WeaponType=Rockeye Loadout[04].Quantity=3 Loadout[04].RackType=TER Loadout[07].WeaponType=AIM-7E-2 Loadout[07].Quantity=1 Loadout[08].WeaponType=AIM-7E-2 Loadout[08].Quantity=1 Loadout[09].WeaponType=AIM-7E-2 Loadout[09].Quantity=1 Loadout[16].WeaponType=TANK600_F4 Loadout[16].Quantity=1 Loadout[17].WeaponType=ALQ-101 Loadout[17].Quantity=1 Now below that I can add another Attack loadout to the same loadout.ini - but give it a different name - in this case Attack_73
[Attack_73] StartDefaultDate=1973 <-----------the date the loadout replace the one define in [Attack] above. DefaultFor=CAS,ARMED_RECON <-----------It will be default for these missions Loadout[03].WeaponType=AGM-65B Loadout[03].Quantity=3 Loadout[03].RackType=LAU-88 Loadout[04].WeaponType=AGM-65B Loadout[04].Quantity=3 Loadout[04].RackType=LAU-88 Loadout[07].WeaponType=AIM-7E-2 Loadout[07].Quantity=1 Loadout[08].WeaponType=AIM-7E-2 Loadout[08].Quantity=1 Loadout[09].WeaponType=AIM-7E-2 Loadout[09].Quantity=1 Loadout[16].WeaponType=TANK600_F4 Loadout[16].Quantity=1 Loadout[17].WeaponType=ALQ-101 Loadout[17].Quantity=1 Well we can do the same for Air to Air - from F-4D_67
[AirToAir] Loadout[06].WeaponType=AIM-7E-2 Loadout[06].Quantity=1 Loadout[07].WeaponType=AIM-7E-2 Loadout[07].Quantity=1 Loadout[08].WeaponType=AIM-7E-2 Loadout[08].Quantity=1 Loadout[09].WeaponType=AIM-7E-2 Loadout[09].Quantity=1 Loadout[10].WeaponType=AIM-9J Loadout[10].Quantity=1 Loadout[11].WeaponType=AIM-9J Loadout[11].Quantity=1 Loadout[12].WeaponType=AIM-9J Loadout[12].Quantity=1 Loadout[13].WeaponType=AIM-9J Loadout[13].Quantity=1 Loadout[16].WeaponType=Tank600_F4 Loadout[16].Quantity=1 [AirToAir_72] StartDefaultDate=1972 DefaultFor=CAP,INTERCEPT Loadout[07].WeaponType=AIM-7E-2 Loadout[07].Quantity=1 Loadout[08].WeaponType=AIM-7E-2 Loadout[08].Quantity=1 Loadout[09].WeaponType=AIM-7E-2 Loadout[09].Quantity=1 Loadout[10].WeaponType=AIM-9J Loadout[10].Quantity=1 Loadout[11].WeaponType=AIM-9J Loadout[11].Quantity=1 Loadout[12].WeaponType=AIM-9J Loadout[12].Quantity=1 Loadout[13].WeaponType=AIM-9J Loadout[13].Quantity=1 Loadout[16].WeaponType=Tank600_F4 Loadout[16].Quantity=1 Loadout[21].WeaponType=ALQ-101 Loadout[21].Quantity=1 Finally the F-4 can get an accurate loadout for later years - here TK even added an extra weapon group for the ECM pod to go in the front Sparrow bay! 33. I want my Jet to have a different Hangar screen depending on the skin selected (Aug 2011) Using the F-8E_FN as an example - reference the hangar screen once from the F-8E_FN.ini file as normal: [AircraftData] AircraftFullName=F-8E(FN) Crusader AircraftShortName=F-8 AircraftDataFile=F-8E_FN_data.ini LoadoutFile=F-8E_FN_loadout.ini UserList=F-8E_FN_UserList.ini CockpitDataFile=F-8E_FN_cockpit.ini LoadoutImage=F-8E_FN_loadout.tga HangarScreen=F-8E_FN_hangar.JPG .......... Now a separate hanger screen needs to be created for each skin you have (JPG probably best). Create each hanger screen and put the copy into the skins folder you want to use it with: So for example \Aircraft\F-8E_FN\FNGREY1\F-8E-FN_HANGAR.JPG \Aircraft\F-8E_FN\FNGREY2\F-8E-FN_HANGAR.JPG \Aircraft\F-8E_FN\FNBLUE1\F-8E-FN_HANGAR.JPG The game basically now looks for the hangar screen in the folder the selected skin files are in. 34. I want a skin to appear on my Jet on a certain Date! (~Aug 2011) This applies to texture entries in the skins textureset.ini and Jets ini file from F-8E_FN.ini:
[TextureSet001] Directory=FNGrey1 Name=French Navy Grey and White Nation=FrenchNavy StartDefaultDate=1 <--------------starts with Jets default service Date Specular=0.400000 Glossiness=0.400000 Reflection=0.200000 DecalNumberRandomize=TRUE <-----------Note the decal randomiser also new DecalNumberEnd=41 <-----------also new define the ending decal [TextureSet002] Directory=FNGrey2 Name=French Navy Grey Overall Nation=FrenchNavy StartDefaultDate=1979 <------------Starts in 1979 Specular=0.400000 Glossiness=0.400000 Reflection=0.000000 DecalNumberRandomize=TRUE DecalNumberEnd=41 Now in Textureset.ini for the FNGREY1 entry above would be like this:
[TextureSet] Name=French Navy Grey and White Nation=FrenchNavy StartDefaultDate=1 Specular=0.400000 Glossiness=0.400000 Reflection=0.200000 DecalNumberRandomize=TRUE DecalNumberEnd=41 35. I want more shoulder side to side movement in a cockpit with TrackIR Helpful for those with a cockpit like Razbams F-102A pit - which is superb but you cant see past the front pillar without this mod. So as an example open up F-102A_cockpit.ini and add these 4 lines
[CockpitSeat001] ModelName=Cockpit Position=0.0,5.8,1.0 Offset=0.0,0.0,0.0 ViewAngles=0.0,0.0,0.0 MaxYaw=180 MinYaw=-180 MaxPitch=90 MinPitchFront=-90 MinPitchRear=-60 LightRange=1.5 MinMovementX=-0.16 <---------------------- MaxMovementX=0.18 <---------------------- MinMovementZ=-0.08 <---------------------- MaxMovementZ=0.10 <---------------------- LightInnerConeAngle=65 LightOuterConeAngle=70 ...... Then save - that's it.
-
-
- 0 replies