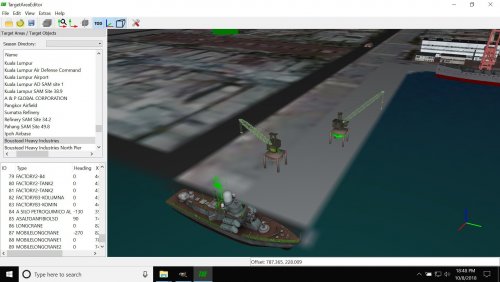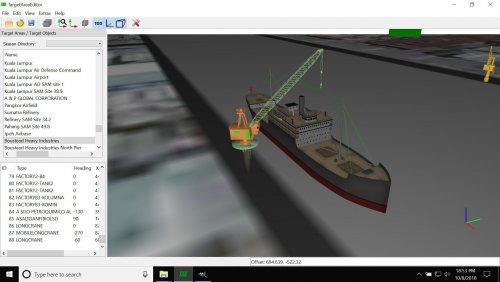
HarborCrane
-----------------------------------------------------------------------------------------------------
This is freeware from "www.Archive3D.net"
Category: "Port handling cranes" - Collection
Size: 1.82MB
Downloads: 2202
Added by: Filip
Resource: Free 3d models
Additional Info: Crane 3 - 3D model (*.gsm+*.3ds) for exterior 3d visualization.
Tags: Crane, harbor crane, lifting crane, port crane
. This 3D model is provided "as is", entirely at your own risk.
2. Archive3D.net doesn't accept any claims regarding quality of 3D model or any standards conformity.
3. Archive3D.net is not responsible for the further use of this 3D model and does not consider the usage claims due to lack of tools and authority to control, confirm or guarantee the accuracy of personal data and law information.
4. This model may be freely modificated or elaborated.
-----------------------------------------------------------------------------------------------------
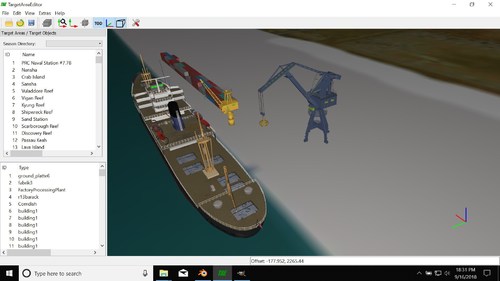
This is a modification (painting) of this harbor crane.
I wish I were this capable at modeling but sadly I am not there yet.
Good eye-candy for the targeted port of your choice.
To add to your terrain of choice simply add the following entry into your terrain_TYPES.INI
[TargetTypexxx] <------- make sure to add your sequence number
Name=HarborCrane
FullName=Crane
ModelName=HarborCrane.LOD
TargetType=MISC
ActiveYear=0
TargetValue=0
UseGroundObject=FALSE
DamagePoint=10.0
ArmorValue=0.0
ArmorType=0
RepairRate=0.150
StartDetectChance=100
StartIdentifiedChance=20
IncreaseDetectChanceKey=0
MaxVisibleDist=4000.0
CollisionMesh=
DamagedModel=
DestroyedEffect=LargeTallStructureCollapseEmitter
DestroyedModel=
SecondaryChance=100
SecondaryEffect=MediumExplosionEffect
Kindest regards - Krfrge
September 2018.
SF2 Short Take off and Landing Airfield v0.1
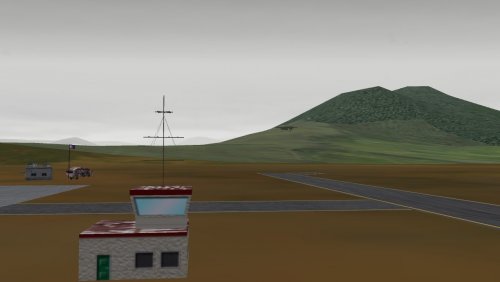
This is my attempt to create a small 830m STOL Airfield for SF2. It was built using Blender. I have tested O-1's and OV-10's and the runway is long enough for them to get airborne. The drones MQ-1, MQ-1C and MQ-9 work well from this field as well.
Installation:
Take items from "Drop into terrain folder" and place them into your terrain folder.
Add the following entry into your terrain TYPES.ini
[TargetTypexxx] <---- Change to the next number at the
Name=RunwaySTOL bottom of you types listing
FullName=Runway
ModelName=RunwaySTOL.LOD
TargetType=SMALL_RUNWAY
ActiveYear=0
TargetValue=1000
UseGroundObject=FALSE
DamagePoint=140.0
ArmorValue=0.0
ArmorType=0
RepairRate=10.0
StartDetectChance=100
StartIdentifiedChance=50
IncreaseDetectChanceKey=10
MaxVisibleDist=10000.0
ZBufferOffset=6.000000
FlatObject=TRUE
DamagedModel=
DestroyedEffect=
DestroyedModel=
SecondaryChance=0
Add the following entry into your terrain TARGETS.ini
[TargetAreaxxx]
Name=San Roque Airstrip
Position=x.00,x.00
Alignment=FRIENDLY
Location=2
AirfieldDataFile=RunwaySTOL_DATA.ini
ActiveYear=0
Radius=4313.708984
Target[001].Type=RunwaySTOL
Target[001].Offset=-195.00,-1.00
Target[001].Heading=0
Target[002].Type=CIVIL_TOWER
Target[002].Offset=-245.00,180.00
Target[002].Heading=0
Target[003].Type=STR_HAN6
Target[003].Offset=-344.00,221.00
Target[003].Heading=-90
Target[004].Type=FLOODLIGHT12M
Target[004].Offset=-363.00,149.00
Target[004].Heading=-135
Target[005].Type=FLOODLIGHT12M
Target[005].Offset=-276.00,148.00
Target[005].Heading=135
Target[006].Type=BLASTSHIELD
Target[006].Offset=-289.00,156.00
Target[006].Heading=0
Target[007].Type=TRACTOR
Target[007].Offset=-301.00,151.00
Target[007].Heading=0
Target[008].Type=FLOODLIGHT12M
Target[008].Offset=-363.00,294.00
Target[008].Heading=-45
Target[009].Type=FLOODLIGHT12M
Target[009].Offset=-276.00,295.00
Target[009].Heading=40
Target[010].Type=PIT1
Target[010].Offset=-298.00,283.00
Target[010].Heading=180
Target[011].Type=CRATE
Target[011].Offset=-330.00,293.00
Target[011].Heading=0
Target[012].Type=SUPPLIES
Target[012].Offset=-333.00,293.00
Target[012].Heading=0
Target[013].Type=PALLET
Target[013].Offset=-334.00,288.00
Target[013].Heading=0
Target[014].Type=PALLET03
Target[014].Offset=-348.00,287.00
Target[014].Heading=35
Target[015].Type=FORKLIFT
Target[015].Offset=-346.00,281.00
Target[015].Heading=-120
Target[016].Type=UNIMOG
Target[016].Offset=-340.00,280.00
Target[016].Heading=120
Target[017].Type=MAINT SHED
Target[017].Offset=-349.00,194.00
Target[017].Heading=-180
Target[018].Type=PIT1
Target[018].Offset=-350.00,162.00
Target[018].Heading=90
Target[019].Type=MAINT CART
Target[019].Offset=-342.00,195.00
Target[019].Heading=-55
Target[020].Type=MSTAND1
Target[020].Offset=-338.00,232.00
Target[020].Heading=0
Target[021].Type=AIRSTARTUNITC
Target[021].Offset=-329.00,213.00
Target[021].Heading=-90
Target[022].Type=COMMTRAILER1
Target[022].Offset=-313.00,152.00
Target[022].Heading=85
--NOT FOR USE IN ANY PAYWARE--
Please credit me if you modify.
Any issues, contact me here at Combat Ace.
Krfrge
23 March 2019
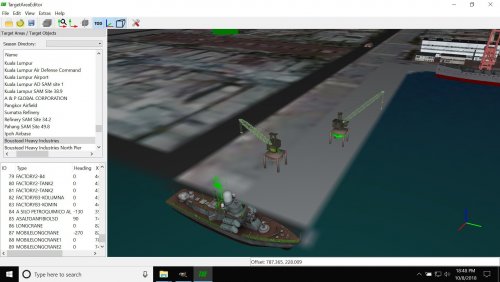
SF2_MobileLongCrane2
Freeware from "Yobi.com"
Author is unknown.
This is a modification by my of the original (painting and adding a large base) to this port crane.
The crane is oriented with the rollers for active operations.
I have attempted a damage and destroyed model which are included.
To add to your terrain of choice simply add the following entry into your terrain_TYPES.INI
[TargetTypexxx] <------- make sure to add your sequence number
Name=MobileLongCrane2
FullName=Mobile Port Crane
ModelName=MobileLongCrane2.LOD
TargetType=MISC
ActiveYear=1941
DamagePoint=100
ArmorValue=0
ArmorType=0
TargetValue=250
UseGroundObject=FALSE
GroundObjectType=
RepairRate=0.150
StartDetectChance=50
StartIdentifiedChance=0
IncreaseDetectChanceKey=0
MaxVisibleDist=1000.0
DamagedModel=Damgd_MobileLongCrane1.LOD
DestroyedEffect=DustCloudEffect
DestroyedModel=Destryd_MobileLongCrane.LOD
SecondaryEffect=LargeOilFire
SecondaryChance=100
Comments are encouraged and welcomed.
Kindest regards - Krfrge
October 2018.
SF2_MobileLongCrane1
Freeware from "Yobi.com"
Author is unknown.
This is a modification by my of the original (painting and adding a large base) to this port crane.
The crane is oriented against the rollers for stored operations.
To add to your terrain of choice simply add the following entry into your terrain_TYPES.INI
[TargetTypexxx] <------- make sure to add your sequence number
Name=MobileLongCrane1
FullName=Mobile Port Crane
ModelName=MobileLongCrane1.LOD
TargetType=MISC
ActiveYear=1941
DamagePoint=100
ArmorValue=0
ArmorType=0
TargetValue=250
UseGroundObject=FALSE
GroundObjectType=
RepairRate=0.150
StartDetectChance=50
StartIdentifiedChance=0
IncreaseDetectChanceKey=0
MaxVisibleDist=1000.0
DamagedModel=Damgd_MobileLongCrane1.LOD
DestroyedEffect=DustCloudEffect
DestroyedModel=Destryd_MobileLongCrane.LOD
SecondaryEffect=LargeOilFire
SecondaryChance=100
Kindest regards - Krfrge
October 2018.
SF2_LongCrane
This is freeware from "Yobi.com"
The author is unknown.
This is a modification (painting and adding a large base) to this port crane.
I wish I were this capable at modeling but sadly I am not there yet.
Good eye-candy for the targeted port of your choice.
To add to your terrain of choice simply add the following entry into your terrain_TYPES.INI
[TargetTypexxx] <------- make sure to add your sequence number
Name=LongCrane
FullName=Long Crane
ModelName=LongCrane.LOD
TargetType=MISC
ActiveYear=1941
DamagePoint=100
ArmorValue=0
ArmorType=0
TargetValue=250
UseGroundObject=FALSE
GroundObjectType=
RepairRate=0.150
StartDetectChance=50
StartIdentifiedChance=0
IncreaseDetectChanceKey=0
MaxVisibleDist=1000.0
DamagedModel=
DestroyedEffect=DustCloudEffect
DestroyedModel=
SecondaryEffect=LargeOilFire
SecondaryChance=100
Kindest regards - Krfrge
October 2018.
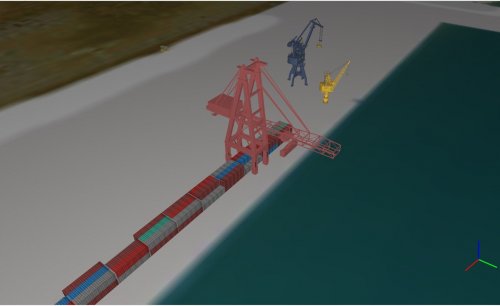
SF2_GantryCrane
-----------------------------------------------------------------------------------------
This is freeware from "Free-3d-models.com"
3d model Name: Crane 3D Model
download Type: ZIP
package size: 1018 kb
info: Crane N110208 - 3D model (*.gsm+*.3ds) for interior 3d visualization.
note: 1. This Crane 3D Model is provided "as is", entirely at your own risk.
2. free-3d-models.com doesn't accept any claims regarding quality of 3D model or any standards conformity.
3. free-3-dmodels.com is not responsible for the further use of this Crane 3D Model and does not consider the usage claims due to lack of tools and authority to control, confirm or guarantee the accuracy of personal data and law information.
4. This model may be freely modificated or elaborated. The models are provided in *.3DS and *.GSM formats. The basic ways of use are 3D Visualisation, Interior Design, Architectural Visualisation, Landscape Design, 3D Animation and 3D Art.
The author is unknown.
-----------------------------------------------------------------------------------------
This is a modification (painting) to this port gantry crane.
I wish I were this capable at modeling but sadly I am not there yet.
Good eye-candy for the targeted port of your choice.
To add to your terrain of choice simply add the following entry into your terrain_TYPES.INI
[TargetTypexxx] <------- make sure to add your sequence number
Name=GantryCrane
FullName=Port Gantry Crane
ModelName=GantryCrane.LOD
TargetType=MISC
ActiveYear=0
TargetValue=0
UseGroundObject=FALSE
DamagePoint=10.0
ArmorValue=0.0
ArmorType=0
RepairRate=0.150
StartDetectChance=100
StartIdentifiedChance=20
IncreaseDetectChanceKey=0
MaxVisibleDist=4000.0
CollisionMesh=
DamagedModel=
DestroyedEffect=LargeTallStructureCollapseEmitter
DestroyedModel=
SecondaryChance=100
SecondaryEffect=MediumExplosionEffect
Kindest regards - Krfrge
September 2018.
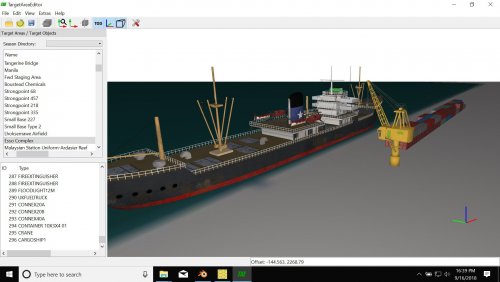
CranePort1
This is freeware from "Free-3d-models.com"
3d model Name: Crane 3D Model
info: Crane 4 - 3D model (*.gsm+*.3ds) for exterior 3d visualization.
note: 1. This Crane 3D Model is provided "as is", entirely at your own risk.
2. free-3d-models.com doesn't accept any claims regarding quality of 3D model or any standards conformity.
3. free-3-dmodels.com is not responsible for the further use of this Crane 3D Model and does not consider the usage claims due to lack of tools and authority to control, confirm or guarantee the accuracy of personal data and law information.
4. This model may be freely modificated or elaborated.
The models are provided in *.3DS and *.GSM formats. The basic ways of use are 3D Visualisation, Interior Design, Architectural Visualisation, Landscape Design, 3D Animation and 3D Art.
free download: Crane 3D Model
The author is unknown.
This is a modification (painting and adding a large base) to this port crane.
I wish I were this capable at modeling but sadly I am not there yet.
Good eye-candy for the targeted port of your choice.
Happy hunting Wrench
Drop the folder into the terrain of choice.
Add the following entry into your terrain_TYPES.INI
[TargetTypexxx] <------- make sure to add your sequence number
Name=CranePort1
FullName=Crane
ModelName=CranePort1.LOD
TargetType=MISC
ActiveYear=0
TargetValue=0
UseGroundObject=FALSE
DamagePoint=10.0
ArmorValue=0.0
ArmorType=0
RepairRate=0.150
StartDetectChance=100
StartIdentifiedChance=20
IncreaseDetectChanceKey=0
MaxVisibleDist=4000.0
CollisionMesh=
DamagedModel=
DestroyedEffect=LargeTallStructureCollapseEmitter
DestroyedModel=
SecondaryChance=100
SecondaryEffect=MediumExplosionEffect
Kindest regards - Krfrge
September 2018.
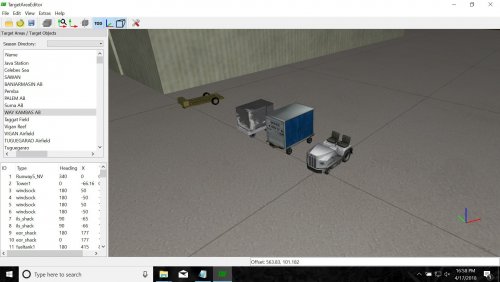
Airport Items 2018 Krfrge - Apr 2018
Here are three pieces of 'eye candy' to support commercial aircraft on your commercial airfield of choice. See ***** note below.
Place these 3 folders in your xxx_terrain folder.
For example: F:\SFP\StrikeFighters2 WestPAC\Terrains\WestPAC3K
Airport Cargo Trailer
Airport Baggage Cart
Airport Baggage Tractor
Add these entries into your terrain_TYPES.ini
[TargetTypexxx]
Name=AirCgoTrailer
FullName=Air Cargo Trailer
ModelName=AirCgoTrailer.LOD
TargetType=MISC
ActiveYear=1970
TargetValue=100
UseGroundObject=FALSE
DamagePoint=5.0
ArmorValue=0.0
ArmorType=0
RepairRate=0
StartDetectChance=0
StartIdentifiedChance=0
IncreaseDetectChanceKey=0
MaxVisibleDist=1000.0
DamagedModel=
DestroyedEffect=SmallOilFire
DestroyedEffect=
SecondaryEffect=SmallBombEffect
SecondaryChance=
[TargetTypexxx]
Name=BagCart
FullName=Baggage Cart
ModelName=BagCart.LOD
TargetType=MISC
ActiveYear=1970
TargetValue=10
UseGroundObject=FALSE
DamagePoint=5.0
ArmorValue=0.0
ArmorType=0
RepairRate=0
StartDetectChance=0
StartIdentifiedChance=0
IncreaseDetectChanceKey=0
MaxVisibleDist=10000.0
DamagedModel=
DestroyedEffect=SmallOilFire
DestroyedEffect=
SecondaryEffect=SmallBombEffect
SecondaryChance=
[TargetTypexxx]
Name=BagTractor
FullName=Airport Baggage Tracotr
ModelName=BagTractor.LOD
TargetType=MISC
ActiveYear=1970
DamagePoint=10
ArmorValue=3
ArmorType=3
TargetValue=25
UseGroundObject=FALSE
RepairRate=0.150
StartDetectChance=50
StartIdentifiedChance=0
IncreaseDetectChanceKey=0
MaxVisibleDist=15000.0
DamagedModel=
DestroyedEffect=
DestroyedModel=
SecondaryEffect=SmallOilFire
SecondaryChance=
***** Disclaimer - These are free 3d models I pulled down from Cadnav. I simply converted them into SF .LOD format using Blender and Mue's LOD exporter pug-in. *****
Any issues please contact me here at CombatAce.
===================================================================
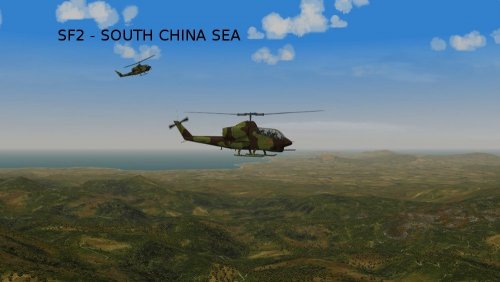
South China Sea 250m v 0.1 BETA December 2017
===================================================================
This is a work-in-progress (BETA project) developed as a stand-alone for a merged Strike Fighters 2: Vietnam and North Atlantic.
Included are 2x 7z files; Project South China Sea-pt1.7z (contains the menu and objects) and Project South China Sea-pt2 (contains the terrain).
This project has been underway for over two years and started as a Strike Fighters Project One terrain add-on. Initially I used a standard resolution terrain but thanks to Stary's terrain tests I have managed to develop this terrain at the 250m scale. Not all locations are accurate due to game engine limitations.
This terrain is massive and covers an area 3000x3000km. Currently there are 511 tiles, which is a byproduct of building custom local/islands tiles for the region. I am not able to build all islands due to game engine limitations. Some Island tiles are very simplistic while others are pulled from Wikimapia and reworked.
Due to the large area coupled with 250m resolution you will need a strong system to run the game.
Please send me feedback if you find issues with the terrain.
===================================================================
REQUIRED for this terrain.
1. A merged copy of SF2V and SF2NA.
2. Terrain: Stary's Green Hell 3.5
You sir are truly a master!
My customized special tiles compliment Stary's work.
These include additional terrain, river, stream, mountain and Island tiles (some fictional).
===================================================================
Optional
I used a lot of helicopters for this project (AH-1 series, AH/OH-6, CH-47, CH/HH-53, UH-1, UH-60). If you have Yakarov79's AH-1F, I added an Australian skin to the basic AH-1F model. Yakarow79 was gracious enough to provide 2x regional specific cobras; AH-1J_PinoyCobra & AH-1J_TOW_PinoyCobra. Jarek thank you for taking the time to customize these cobra's for the South China Sea project!
The OV-10D - I took the OV-10 and modified the DATA.INI into an OV-10D NODS platform. I know the Philippine Air Force is still using the OV-10 airframe. Its not perfect but it is the best I can do currently. All I did was some .INI work and skinning (my skinning skills for this a/c aren't so good).
The PC-9A - I created a Philippine Air Force skin for DELS PC-9A using existing templates.
As an added option, I created 2 new screens; Main Screen and Single Mission. Drop the JPGs into your Menu folder.
===========================================================
License:
This is a freeware; yet it can be redistributed ONLY in other CombatACE mods/mod packages.
This terrain may NOT in any way, shape or form be used in any payware additions.
===========================================================
Final Words.
A lot of thanks to Menrva and Stratos for their continuous support during this process.
Stary, thank you for the superb GH tiles and allowing me to take some artistic license with your excellent work.
Erik, Wrench and the other administrators at Combat Ace. If it weren't for this site, no one would be reading this.
I am solely responsible for this project. I hope you enjoy it.
Krfrge - December 2017.

Gimp tutorial for creating Thirdwire-like maps.
I have always liked the Thridwire maps but have never been able to replicate them until now. This project all began when my computer crashed and I lost my copy of Adobe Photoshop. At that point I moved to Gimp and most of my discoveries of how to create maps was through trial and error.
This tutorial is possible due to two individuals who greatly contributed to this effort; namely Gerwin and Menrva.
Gerwin generously modified his TFDtool to produce overlays (512, 1024 and 2048) that can be used to create Thirdwire style maps.
Menrva created 3 master templates, any one of which can used in paint programs such as Paint.NET, GIMP, etc. to create the Thirdwire series maps.
This package contains 2x attachments; the tutorial [Final TW MapTutorial_v1] and the master template [IraqWA_PSD Layers]. The tutorial describes the procedures for building a Thridwire-like map using the master template.
This should ease your map-making.
Questions please contact me here at Combat Ace.
Krfrge
December 2017
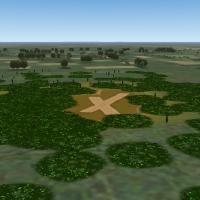
Hasty Airstrip by Krfrge - April, 2014
This was built in response to a question on Combat Ace.
Credits go to Mitch for the original desert factory. I used one of the ground platte to make the aristrip. Next to Stary for his great terrain mods. If I have missed anyone please let me know so you are given proper credit.
This was originally designed in WoE.
What's in this package:
1. GERMANYG9.bmp tile
2. GERMANYG9.LOD
3. HastyAirstrip1.LOD
4. HastyAirstrip1.TGA
5. Jungle.TGA
6. Airfield9.ini
7. Airfield9.LOD
8. Airfield9_DATA.ini
Installing:
1. Place all 8 items into a terrain folder of your choice.
2. Add the GermanyG9 tile entry to your terrain_data.ini.
To do so, open the terrain_data.ini file with notepad and add the following entry:
[Texturexxx] <--------make sure to change the XXX to the next number
Filename=GERMANYG9.BMP
HasWater=0
Color=0.352682,0.385123,0.234305
SolidObjectTexture=
AlphaObjectTexture=jungle.TGA
3. Add the GermanyG9 tile to your terrain_texture.ini.
To do so, open the terrain_texture.ini file with notepad and add the following entry:
[GERMANYG9.bmp]
TextureType=4
DetailType=0
HeightMapScale=100.000000
TransitionType=0
TransitionTo=0
3WayTransitionTo=0
RiverType=0
RoadType=0
RandomFactor=100
ExclusionRegion=0
ExcludeMaxX=0
ExcludeMinX=0
ExcludeMaxY=0
ExcludeMinY=0
LimitRotation=0
Allow0deg=0
Allow90deg=0
Allow180deg=0
Allow270deg=0
SolidObjectTexture=
AlphaObjectTexture=jungle.tga
4. Add the following to your terrain_targets.ini
[TargetArea490] <-----------Renumber to the last target entry
Name=Hasty Airstrip <-----------You can rename this
Position=XXX000.000000,XXX000.000000 <-----Adjust the location
Radius=2485.281250
ActiveYear=1950 <-----------You can adjust the year
Location=1 <-----------You can adjust the location (1 or 2)
Alignment=FRIENDLY <-----------You can adjust the alignment (FRIENDLY or ENEMY)
AirfieldDataFile=airfield9.ini
NumSquadrons=1
Target[001].Type=HastyAirstrip1
Target[001].Offset=0.00,0.00
Target[001].Heading=0
Target[002].Type=ZPU-2
Target[002].Offset=227,235
Target[002].Heading=45
Target[003].Type=AAA
Target[003].Offset=8,67
Target[003].Heading=45
Target[004].Type=ZPU-2
Target[004].Offset=-121,325
Target[004].Heading=345
Target[005].Type=Camonet
Target[005].Offset=250,360
Target[005].Heading=0
Target[006].Type=Camonet
Target[006].Offset=278,340
Target[006].Heading=17
Target[007].Type=AAA
Target[007].Offset=47,274
Target[007].Heading=17
Target[008].Type=ZPU-2
Target[008].Offset=-316,-351
Target[008].Heading=220
Target[009].Type=Camonet
Target[009].Offset=-222,-117
Target[009].Heading=220
Target[010].Type=ammo
Target[010].Offset=278,-132
Target[010].Heading=220
Target[011].Type=ammo
Target[011].Offset=250,-171
Target[011].Heading=217
Target[012].Type=ammo
Target[012].Offset=296,-160
Target[012].Heading=178
Target[013].Type=Camonet
Target[013].Offset=282,-195
Target[013].Heading=178
Target[014].Type=AAA
Target[014].Offset=-16,-121
Target[014].Heading=180
Target[015].Type=AAA
Target[015].Offset=47,39
Target[015].Heading=100
Target[016].Type=BRDM
Target[016].Offset=172,133
Target[016].Heading=183
Target[017].Type=AAA
Target[017].Offset=235,-281
Target[017].Heading=77
Target[018].Type=Camonet
Target[018].Offset=24,-325
Target[018].Heading=7
Target[019].Type=Camonet
Target[019].Offset=-7,-363
Target[019].Heading=7
Target[020].Type=Camonet
Target[020].Offset=-211,-250
Target[020].Heading=187
Target[021].Type=Camonet
Target[021].Offset=-289,-156
Target[021].Heading=237
Target[022].Type=AAA
Target[022].Offset=317,168
Target[022].Heading=237
Target[023].Type=ZPU-2
Target[023].Offset=-218,-39
Target[023].Heading=260
You can substitue any of the above targets with others of your choice and additional targets to fit your requirements.
5. Add the following entries into the terrain_types.ini
[TargetTypexxx]
Name=HastyAirstrip1
FullName=Hasty Airstrip
ModelName=HastyAirstrip1.lod
TargetType=SMALL_RUNWAY
ActiveYear=0
TargetValue=1000
UseGroundObject=FALSE
DamagePoint=140.0
ArmorValue=0.0
ArmorType=0
RepairRate=10.0
StartDetectChance=100
StartIdentifiedChance=50
IncreaseDetectChanceKey=10
MaxVisibleDist=30000.0
ZBufferOffset=6.000000
FlatObject=TRUE
DamagedModel=
DestroyedEffect=
DestroyedModel=
SecondaryChance=0
[TargetTypexxx]
Name=Runway9
FullName=Runway
ModelName=airfield9.lod
TargetType=SMALL_RUNWAY
ActiveYear=0
TargetValue=0
UseGroundObject=FALSE
DamagePoint=10.0
ArmorValue=0.0
ArmorType=0
RepairRate=10.0
StartDetectChance=100
StartIdentifiedChance=50
IncreaseDetectChanceKey=10
MaxVisibleDist=30000.0
ZBufferOffset=6.000000
FlatObject=TRUE
DamagedModel=
DestroyedEffect=
DestroyedModel=
SecondaryChance=0
6. You can takeoff using the north-south runway currently. I am working on improving the line-up and use of the 30 degree offset runway.
I subscribe to the Comabt Ace Freeware Policy.
If you have questions contact me at Combat Ace.
Krfrge April 2014.
~~~~~~~~~~~~~~~~~~~~~~~~~
Change 1 - Adjustment to airfield9_DATA.ini
The below adjustment should correct the displacement off the airfield
[Runway001]
Heading=0
Offset=135,-145
Length=300
Width=50
TouchDownHead=0,125
TouchDownTail=0,-125
TakeOffHead=0,130
TakeOffTail=0,-130
TaxiHead[01].Heading=90
TaxiHead[01].Offset=-10,143
TaxiHead[02].Heading=90
TaxiHead[02].Offset=-10,-143
Infantry Outpost version 1 February 2011
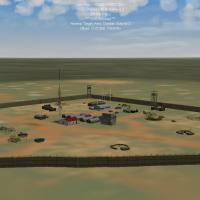
I got this idea from observing and learning from many terrain / modeling folks here at CA.
Since I am a ground guy (INFANTRY) I have always wanted to see more CAS against good ground targets. This is my very humble attempt to create realistic ground targets and I know there is a lot more to do.
This Infantry Outpost is a friendly outpost but can be easily converted to an enemy outpost.
It has been tested in the TW Series One terrains.
Suggestions / problems please contact me at Combat Ace.
Enjoy
KRFRGE
Feb 2011.
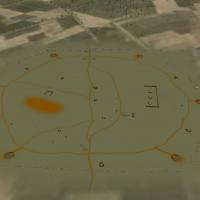
Artillery Firebase Ver 1 February 2011
This is my second attempt at creating good ground targets. My first is the Infantry Outpost.
The Artillery Firebase is friendly but can be easily converted to an enemy firebase.
What's included in this file:
1. Arty_Firebase.LOD - a converted groundplatte LOD from Mitch's original Factory Place. Drop it into the terrain of your choice.
2. ground_plateFB.TGA - my attempt on a artillery battery. Drop it into the terrain of your choice.
3. Add-ons needed to make this mod work. Drop these into the terrain folder.
The following items were borrowed from:
Bunker03 from ODS terrain
af63tentround from ODS terrain
hwzsite01 from ODS terrain
barbwire2 from ODS terrain
wall03 from ODS terrain
M109A1 by Rebel Rider at http://combatace.com/files/file/9015-m-109/
af1aaagun_single from Major Lee's DBS (rename this to Defensive_pos_
unimog Argentine Trucks models for Mod Malvinas by BANIDOS TEAM and SUICIDAL at http://combatace.com/files/file/10868-camiones-argentinos/
Australian M113 ACAV from Timor Ground Units at http://combatace.com/files/file/2574-timor-ground-units/
Pillbox from Wrench's Southwest terrain
Sign from Wrench's Libya terrain
Flagpole from Wrench's Libya terrain
4. Add to your terrain_TYPES file
[TargetTypexxx]
Name=Arty_Firebase
FullName=Artillery Fire Base
ModelName=ground_plate_Firebase.LOD
TargetType=MISC
ActiveYear=1960
TargetValue=0.0
UseGroundObject=FALSE
DamagePoint=0.0
ArmorValue=0.0
ArmorType=0
RepairRate=10.0
StartDetectChance=100
StartIdentifiedChance=50
IncreaseDetectChanceKey=10
MaxVisibleDist=10000.0
ZBufferOffset=6.000000
FlatObject=TRUE
DamagedModel=
DestroyedEffect=
DestroyedModel=
SecondaryChance=0
[TargetTypexxx]
Name=defensive_pos
FullName=Vehicle defensive position
ModelName=defensive_pos.lod
TargetType=AAA BUNKER
UseGroundObject=FALSE
ActiveYear=1915
TargetValue=0
RepairRate=0.0
StartDetectChance=50
StartIdentifiedChance=10
IncreaseDetectChanceKey=10
MaxVisibleDist=6000.0
DamagedModel=
DestroyedEffect=SmallRocketGroundExplosion
SecondaryEffect=VehicleFireEffect
SecondaryChance=100
5. Add to your terrain_TARGETS
[TargetAreaxxx]
Name=Allied Fire Base
Position=###000.000,###000.000
Radius=2000
ActiveYear=1969
Location=1
Alignment=FRIENDLY
Target[001].Type=Arty_Firebase
Target[001].Offset=0,0
Target[001].Heading=0
Target[002].Type=bunker03
Target[002].Offset=25,62
Target[002].Heading=10
Target[003].Type=defensive_pos
Target[003].Offset=189,305
Target[003].Heading=200
Target[004].Type=defensive_pos
Target[004].Offset=376,-2
Target[004].Heading=260
Target[005].Type=defensive_pos
Target[005].Offset=268,-270
Target[005].Heading=320
Target[006].Type=defensive_pos
Target[006].Offset=-184,-289
Target[006].Heading=50
Target[007].Type=defensive_pos
Target[007].Offset=-338,48
Target[007].Heading=80
Target[008].Type=defensive_pos
Target[008].Offset=-165,293
Target[008].Heading=140
Target[009].Type=M109A1
Target[009].Offset=189,305
Target[009].Heading=20
Target[010].Type=M109A1
Target[010].Offset=376,-2
Target[010].Heading=80
Target[011].Type=M109A1
Target[011].Offset=268,-270
Target[011].Heading=140
Target[012].Type=M109A1
Target[012].Offset=-184,-289
Target[012].Heading=230
Target[013].Type=M109A1
Target[013].Offset=-338,48
Target[013].Heading=260
Target[014].Type=M109A1
Target[014].Offset=-165,293
Target[014].Heading=320
Target[015].Type=camonetstorage
Target[015].Offset=-74,-230
Target[015].Heading=15
Target[016].Type=unimog
Target[016].Offset=-42,-204
Target[016].Heading=195
Target[017].Type=camonetstorage
Target[017].Offset=8,-238
Target[017].Heading=30
Target[018].Type=bunker03
Target[018].Offset=68,-310
Target[018].Heading=175
Target[019].Type=USArmyM79
Target[019].Offset=58,-309
Target[019].Heading=181
Target[020].Type=camonetstorage
Target[020].Offset=252,-163
Target[020].Heading=220
Target[021].Type=camonet
Target[021].Offset=282,-090
Target[021].Heading=50
Target[022].Type=unimog
Target[022].Offset=315,-029
Target[022].Heading=230
Target[023].Type=camonetstorage
Target[023].Offset=289,083
Target[023].Heading=60
Target[024].Type=M113
Target[024].Offset=261,161
Target[024].Heading=240
Target[025].Type=camonetstorage
Target[025].Offset=173,228
Target[025].Heading=0
Target[026].Type=USTruck
Target[026].Offset=72,113
Target[026].Heading=180
Target[027].Type=USTruck
Target[027].Offset=79,081
Target[027].Heading=175
Target[028].Type=USTruck
Target[028].Offset=88,037
Target[028].Heading=195
Target[029].Type=M113_Ambulance
Target[029].Offset=98,-022
Target[029].Heading=180
Target[030].Type=unimog
Target[030].Offset=102,-070
Target[030].Heading=210
Target[031].Type=M113
Target[031].Offset=89,-118
Target[031].Heading=0
Target[032].Type=USJeep
Target[032].Offset=56,-147
Target[032].Heading=180
Target[033].Type=camonetstorage
Target[033].Offset=-83,252
Target[033].Heading=15
Target[034].Type=camonetstorage
Target[034].Offset=-169,206
Target[034].Heading=195
Target[035].Type=af63tentround
Target[035].Offset=-102,115
Target[035].Heading=30
Target[036].Type=camonetstorage
Target[036].Offset=-231,048
Target[036].Heading=210
Target[037].Type=pit1
Target[037].Offset=-132,13
Target[037].Heading=200
Target[038].Type=af63tentround
Target[038].Offset=29,-015
Target[038].Heading=70
Target[039].Type=camonetstorage
Target[039].Offset=-219,-106
Target[039].Heading=0
Target[040].Type=af62tent_lg
Target[040].Offset=125,-090
Target[040].Heading=0
Target[041].Type=af62tent_lg
Target[041].Offset=135,-90
Target[041].Heading=0
Target[042].Type=Tent1
Target[042].Offset=155,-90
Target[042].Heading=0
Target[043].Type=ammo
Target[043].Offset=50,-100
Target[043].Heading=20
Target[044].Type=ammo
Target[044].Offset=65,-105
Target[044].Heading=0
Target[045].Type=tools
Target[045].Offset=62,-110
Target[045].Heading=0
Target[046].Type=ammo
Target[046].Offset=-45,138
Target[046].Heading=0
Target[047].Type=ammo
Target[047].Offset=-89,7
Target[047].Heading=0
Target[048].Type=ammo
Target[048].Offset=-48,-7
Target[048].Heading=0
Target[049].Type=barbwire2
Target[049].Offset=-154,-164
Target[049].Heading=0
Target[050].Type=tools
Target[050].Offset=-64,-180
Target[050].Heading=0
Target[051].Type=ammo
Target[051].Offset=318,12
Target[051].Heading=0
Target[052].Type=barbwire2
Target[052].Offset=17,-332
Target[052].Heading=0
Target[053].Type=barbwire2
Target[053].Offset=75,-331
Target[053].Heading=0
Target[054].Type=barbwire2
Target[054].Offset=107,-330
Target[054].Heading=0
Target[055].Type=barbwire2
Target[055].Offset=144,-330
Target[055].Heading=0
Target[056].Type=barbwire2
Target[056].Offset=181,-329
Target[056].Heading=0
Target[057].Type=barbwire2
Target[057].Offset=218,-325
Target[057].Heading=0
Target[058].Type=barbwire2
Target[058].Offset=255,-320
Target[058].Heading=0
Target[059].Type=barbwire2
Target[059].Offset=293,-296
Target[059].Heading=320
Target[060].Type=barbwire2
Target[060].Offset=-16,-331
Target[060].Heading=0
Target[061].Type=barbwire2
Target[061].Offset=-53,-330
Target[061].Heading=0
Target[062].Type=barbwire2
Target[062].Offset=-90,-330
Target[062].Heading=0
Target[063].Type=barbwire2
Target[063].Offset=-127,-329
Target[063].Heading=0
Target[064].Type=barbwire2
Target[064].Offset=-164,-329
Target[064].Heading=0
Target[065].Type=barbwire2
Target[065].Offset=-201,-329
Target[065].Heading=0
Target[066].Type=barbwire2
Target[066].Offset=-233,-301
Target[066].Heading=40
Target[067].Type=barbwire2
Target[067].Offset=319,-257
Target[067].Heading=310
Target[068].Type=barbwire2
Target[068].Offset=349,-197
Target[068].Heading=309
Target[069].Type=barbwire2
Target[069].Offset=369,-147
Target[069].Heading=308
Target[070].Type=barbwire2
Target[070].Offset=391,-96
Target[070].Heading=307
Target[071].Type=barbwire2
Target[071].Offset=408,-47
Target[071].Heading=270
Target[072].Type=barbwire2
Target[072].Offset=414,-7
Target[072].Heading=270
Target[073].Type=barbwire2
Target[073].Offset=414,33
Target[073].Heading=260
Target[074].Type=barbwire2
Target[074].Offset=402,66
Target[074].Heading=250
Target[075].Type=barbwire2
Target[075].Offset=378,112
Target[075].Heading=240
Target[076].Type=barbwire2
Target[076].Offset=356,156
Target[076].Heading=240
Target[077].Type=barbwire2
Target[077].Offset=331,198
Target[077].Heading=230
Target[078].Type=barbwire2
Target[078].Offset=305,242
Target[078].Heading=225
Target[079].Type=barbwire2
Target[079].Offset=289,282
Target[079].Heading=220
Target[080].Type=barbwire2
Target[080].Offset=266,317
Target[080].Heading=210
Target[081].Type=barbwire2
Target[081].Offset=226,356
Target[081].Heading=190
Target[082].Type=barbwire2
Target[082].Offset=197,357
Target[082].Heading=0
Target[083].Type=barbwire2
Target[083].Offset=160,357
Target[083].Heading=0
Target[084].Type=barbwire2
Target[084].Offset=124,357
Target[084].Heading=0
Target[085].Type=barbwire2
Target[085].Offset=87,357
Target[085].Heading=0
Target[086].Type=barbwire2
Target[086].Offset=50,357
Target[086].Heading=0
Target[087].Type=barbwire2
Target[087].Offset=20,357
Target[087].Heading=0
Target[088].Type=barbwire2
Target[088].Offset=270,-314
Target[088].Heading=300
Target[089].Type=barbwire2
Target[089].Offset=308,-277
Target[089].Heading=90
Target[090].Type=barbwire2
Target[090].Offset=334,-227
Target[090].Heading=300
Target[091].Type=barbwire2
Target[091].Offset=359,-171
Target[091].Heading=90
Target[092].Type=barbwire2
Target[092].Offset=379,-120
Target[092].Heading=90
Target[093].Type=barbwire2
Target[093].Offset=405,-73
Target[093].Heading=300
Target[094].Type=pillbox
Target[094].Offset=396,-21
Target[094].Heading=270
Target[095].Type=pillbox
Target[095].Offset=381,80
Target[095].Heading=270
Target[096].Type=barbwire2
Target[096].Offset=366,134
Target[096].Heading=90
Target[097].Type=barbwire1
Target[097].Offset=345,177
Target[097].Heading=90
Target[098].Type=barbwire2
Target[098].Offset=318,221
Target[098].Heading=270
Target[099].Type=barbwire2
Target[099].Offset=298,260
Target[099].Heading=300
Target[100].Type=barbwire1
Target[100].Offset=278,300
Target[100].Heading=290
Target[101].Type=barbwire2
Target[101].Offset=247,339
Target[101].Heading=270
Target[102].Type=wall03
Target[102].Offset=218,79
Target[102].Heading=0
Target[103].Type=af62tent_lg
Target[103].Offset=216,45
Target[103].Heading=90
Target[104].Type=af62tent_lg
Target[104].Offset=214,12
Target[104].Heading=90
Target[105].Type=af62tent_lg
Target[105].Offset=211,-22
Target[105].Heading=90
Target[106].Type=wall03
Target[106].Offset=218,-43
Target[106].Heading=0
Target[107].Type=wall03
Target[107].Offset=237,-23
Target[107].Heading=90
Target[108].Type=wall03
Target[108].Offset=237,12
Target[108].Heading=90
Target[109].Type=wall03
Target[109].Offset=237,57
Target[109].Heading=90
Target[110].Type=barbwire2
Target[110].Offset=-255,-272
Target[110].Heading=60
Target[111].Type=barbwire2
Target[111].Offset=-270,-239
Target[111].Heading=58
Target[112].Type=barbwire2
Target[112].Offset=-282,-212
Target[112].Heading=65
Target[113].Type=barbwire2
Target[113].Offset=-294,-182
Target[113].Heading=60
Target[114].Type=barbwire2
Target[114].Offset=-306,-153
Target[114].Heading=80
Target[115].Type=barbwire2
Target[115].Offset=-316,-124
Target[115].Heading=55
Target[116].Type=barbwire2
Target[116].Offset=-332,-89
Target[116].Heading=60
Target[117].Type=barbwire2
Target[117].Offset=-348,-55
Target[117].Heading=60
Target[118].Type=barbwire2
Target[118].Offset=-356,-28
Target[118].Heading=80
Target[119].Type=barbwire2
Target[119].Offset=-363,3
Target[119].Heading=80
Target[120].Type=barbwire2
Target[120].Offset=-371,35
Target[120].Heading=90
Target[121].Type=barbwire2
Target[121].Offset=-372,71
Target[121].Heading=100
Target[122].Type=barbwire2
Target[122].Offset=-369,90
Target[122].Heading=105
Target[123].Type=barbwire2
Target[123].Offset=-353,119
Target[123].Heading=125
Target[124].Type=barbwire2
Target[124].Offset=-340,138
Target[124].Heading=120
Target[125].Type=barbwire2
Target[125].Offset=-316,168
Target[125].Heading=130
Target[126].Type=barbwire2
Target[126].Offset=-298,198
Target[126].Heading=110
Target[127].Type=barbwire2
Target[127].Offset=-282,242
Target[127].Heading=130
Target[128].Type=barbwire2
Target[128].Offset=-248,273
Target[128].Heading=140
Target[129].Type=barbwire2
Target[129].Offset=-231,306
Target[129].Heading=50
Target[130].Type=barbwire2
Target[130].Offset=-215,322
Target[130].Heading=330
Target[131].Type=barbwire2
Target[131].Offset=-180,333
Target[131].Heading=0
Target[132].Type=barbwire2
Target[132].Offset=-153,336
Target[132].Heading=0
Target[133].Type=barbwire2
Target[133].Offset=-115,337
Target[133].Heading=0
Target[134].Type=barbwire2
Target[134].Offset=-78,337
Target[134].Heading=0
Target[135].Type=barbwire2
Target[135].Offset=-41,337
Target[135].Heading=0
Target[136].Type=barbwire2
Target[136].Offset=-25,337
Target[136].Heading=0
Target[137].Type=hwzsite01
Target[137].Offset=19,-253
Target[137].Heading=0
Target[138].Type=hwzsite01
Target[138].Offset=-35,270
Target[138].Heading=0
Target[139].Type=hwzsite01
Target[139].Offset=2,272
Target[139].Heading=0
Target[140].Type=barbwire2
Target[140].Offset=-219,320
Target[140].Heading=90
Target[141].Type=barbwire2
Target[141].Offset=-295,217
Target[141].Heading=90
Target[142].Type=barbwire2
Target[142].Offset=-265,260
Target[142].Heading=120
Target[143].Type=pillbox
Target[143].Offset=-223,307
Target[143].Heading=60
Target[144].Type=barbwire2
Target[144].Offset=-5,347
Target[144].Heading=90
Target[145].Type=barbwire2
Target[145].Offset=-26,356
Target[145].Heading=0
Target[146].Type=barbwire2
Target[146].Offset=-37,347
Target[146].Heading=90
Target[147].Type=pillbox
Target[147].Offset=17,340
Target[147].Heading=180
Target[148].Type=M113
Target[148].Offset=-22,268
Target[148].Heading=0
Target[149].Type=camonet
Target[149].Offset=1,252
Target[149].Heading=0
Target[150].Type=Flag
Target[150].Offset=38,57
Target[150].Heading=0
Target[151].Type=Aus_M113_ACAV
Target[151].Offset=-215,-157
Target[151].Heading=260
Target[152].Type=bunker03
Target[152].Offset=-269,-132
Target[152].Heading=220
Target[153].Type=bunker03
Target[153].Offset=-250,180
Target[153].Heading=320
Target[154].Type=bunker03
Target[154].Offset=316,149
Target[154].Heading=40
Target[155].Type=bunker03
Target[155].Offset=319,-155
Target[155].Heading=130
Target[156].Type=FB Sign
Target[156].Offset=-12,327
Target[156].Heading=180
Target[157].Type=FB Sign
Target[157].Offset=31,-317
Target[157].Heading=0
Suggestions / problems please contact me at Combat Ace.
Enjoy
KRFRGE
Feb 2011.
Allied Base Camp version 1.a (updated 20 February 2011)
I added Hesco barriers around some of the billets.
This is my third addition at creating good ground targets. My first two are the Infantry Outpost and Artillery Firebase.
Tested in TW Series One games.
Suggestions / problems please contact me at Combat Ace.
Enjoy
KRFRGE
20 Feb 2011.
Combat Outpost Ver 1 October 2011
This is my fourth attempt at creating good ground targets. The others have been: Infantry Outpost, Artillery Firebase and Allied Base Camp.
This basically a friendly combat outpost that should fit in well on the Afghanistan terrain but can be easily used on any terrain.
See the READ_ME for instructions.
Suggestions / problems please contact me at Combat Ace.
Dedicated to those currently serving!
KRFRGE
Oct 2011.
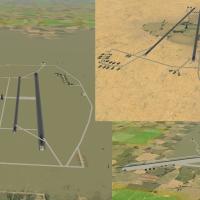
NOTE THIS IS A WORK IN PROGRESS!!
Here is a small collection of "blue" airfields I have built for use in the TW series (specifically SFP1 and the WoX series).
This project is a collection of my thoughts along with other folk’s talent. It is not perfect and I am working to improve them all the time.
****************************************************
Credit goes to the following:
The creator's of the CA forum. It has provided me a lot of ideas, some which have been realized.
I have used the work of the individuals below in this project.
Comrpnt - His airfield light program inspired me to attempt lighting up these airfields.
http://forum.combatace.com/index.php?autoc...p;showfile=6863
CA_Stary for the Generic hangars pack
http://forum.combatace.com/index.php?autoc...p;showfile=7221
Gepard for use of the New Airbases for SFP1 / WOE v. 2.0
http://forum.combatace.com/index.php?autoc...p;showfile=5078
wingwiner for the Tactical Control Centre and Gas Station
http://forum.combatace.com/index.php?autoc...p;showfile=4989
wingwiner for the Control TowerH1
http://forum.combatace.com/index.php?autoc...p;showfile=4168
Mitch's "Factory Place"
http://wrench1smog.com/wrench3.html
The Wrench
I don't think I missed anyone but If I did please let me know.
*****************************************************
What's included:
AIRFIELD_HAGARRS.ini (used for lighting the airfield)
AIRFIELD_IBERIA.ini
AIRFIELD_METRO.ini
Hagarrs Airbase.txt (add this to your XXX_targets.ini listing)
Iberia Airbase.txt
Metro Airport.txt
*****************************************************
Installation:
You will need the objects listed in the credits to populate the airfields.
Just drop the AIRFIELD_XXXX.ini into the terrain folder where you plan to use the airfields. This will light the airfield.
Copy and paste the ***.txt into the ***_target.ini folder, making sure to number the target accordingly.
Go fly and enjoy.
Questions / comments / concerns please contact me here at Combat Ace.
As I subscribe to the freeware policy at Combat Ace, this is a FREEWARE product.
KRFRGE
March 2009
14 Apr 09 - Fixed the A/C lineup
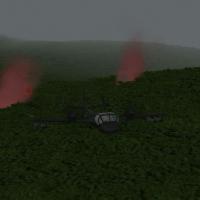
Infantry Squad with Smoke
First credit goes to Kesselbrut for his Infatry squad files.
Secondly Papa Goat for his "Pop Smoke" idea.
I expanded on Papa Goat's idea of using a single soldier with smoke. I basically took the stock US_Squad and Soviet_Squad by modifing the X_Squad_data.ini file to have the smoke deployed.
These squads will "throw" fire their smoke at any ground object designated "ENEMY". That way the squad still can fire its normal assortment of weapons and still mark enemy targets.
I have tested this on random generated CAS missions in SFP1 and WOV. Anytime a squad is generated during a mission, each squad will deploy their smoke at the nearest enemy target.
Mind you, it's not perfect but I think it gives a great effect.
I've only built one smoke color for the Soviets. The US squad can select from 4 colors Red, Green, Violet (Purple) and Yellow. You have to manually select the color you want them to use by removing the "//" in the data entry line.
Installation:
1. Make a back up of the original squads just in case you don't like this mod.
2. Add the two squads to the GroundObject folder.
3. Drop the effects into your EFFECTS folder.
4. Add the bulletobject data to the BULLETOBJECT file.
5. Add the gundata to the GUNDATA file, open the guneditor and click on one weapon, then click SAVE.
Comments are always welcome. I subscribe to the FREEWARE Policy at Combat Ace.
KRFRGE Jan 2010
CV-22B for SFP1, WoE, WoI. '08 Patch level
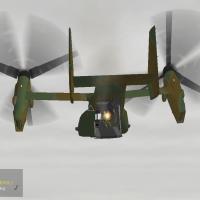
This is my modification of Zurawski's MV-22B into the USAF's CV-22.
The CV-22 is the Special Operation Forces variant of the U.S. Marine Corps MV-22 Osprey. The first two test aircraft were delivered to Edwards Air Force Base, Calif., in September 2000. The 58th Special Operations Wing at Kirtland AFB, N.M., began CV-22 aircrew training with the first two production aircraft in August 2006.
The first operational CV-22 was delivered to Air Force Special Operations Command's 1st Special Operations Wing at Hurlburt Field, Fla., in January 2007. Initial operational capability was achieved in 2009. The 27th Special Operations Wing, Cannon Air Force Base, NM, received its first CV-22 in May 2010.
Credit:
Zurawski for MV-22
Kesselbrut for the 160HeloGunnerR
If I missed anyone please let me know and I will update this accordingly.
Questions / comments / concerns please contact me here at Combat Ace.
KRFRGE
January 2013


