33LIMA
-
Posts
3,749 -
Joined
-
Last visited
-
Days Won
7
Content Type
Profiles
Forums
Gallery
Downloads
Store
Everything posted by 33LIMA
-

OFFice or immersion mods for WOFF UE?
33LIMA replied to hyperstork's topic in WOFF UE/PE - General Discussion
Work was started on WOFFice, but was 'suspended' nearly three years ago, as per this thread. -
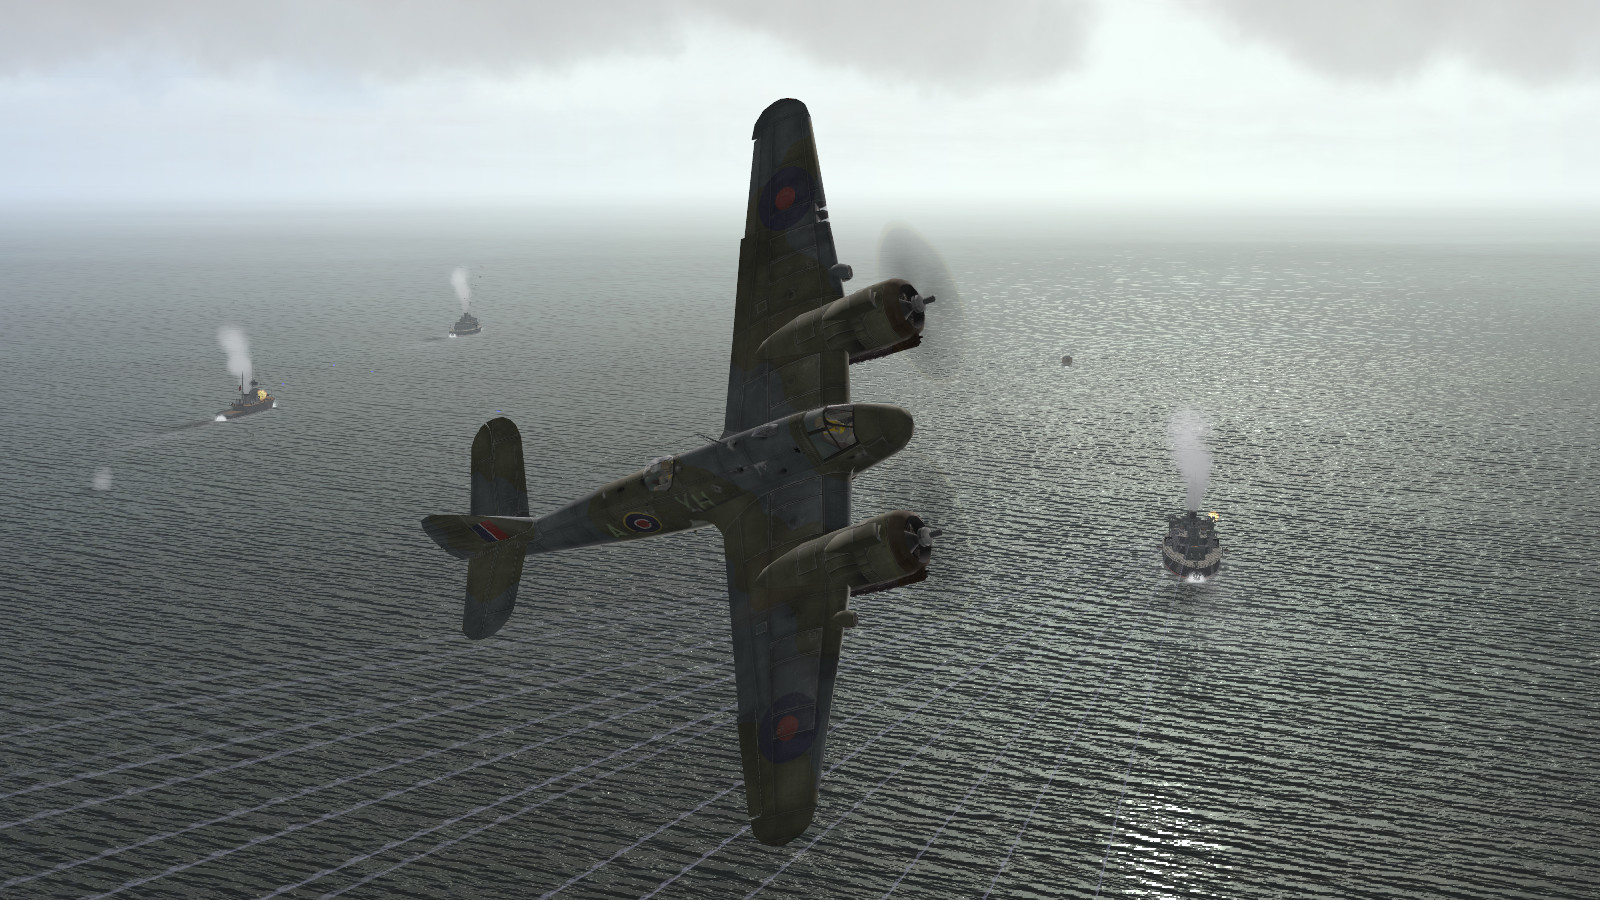
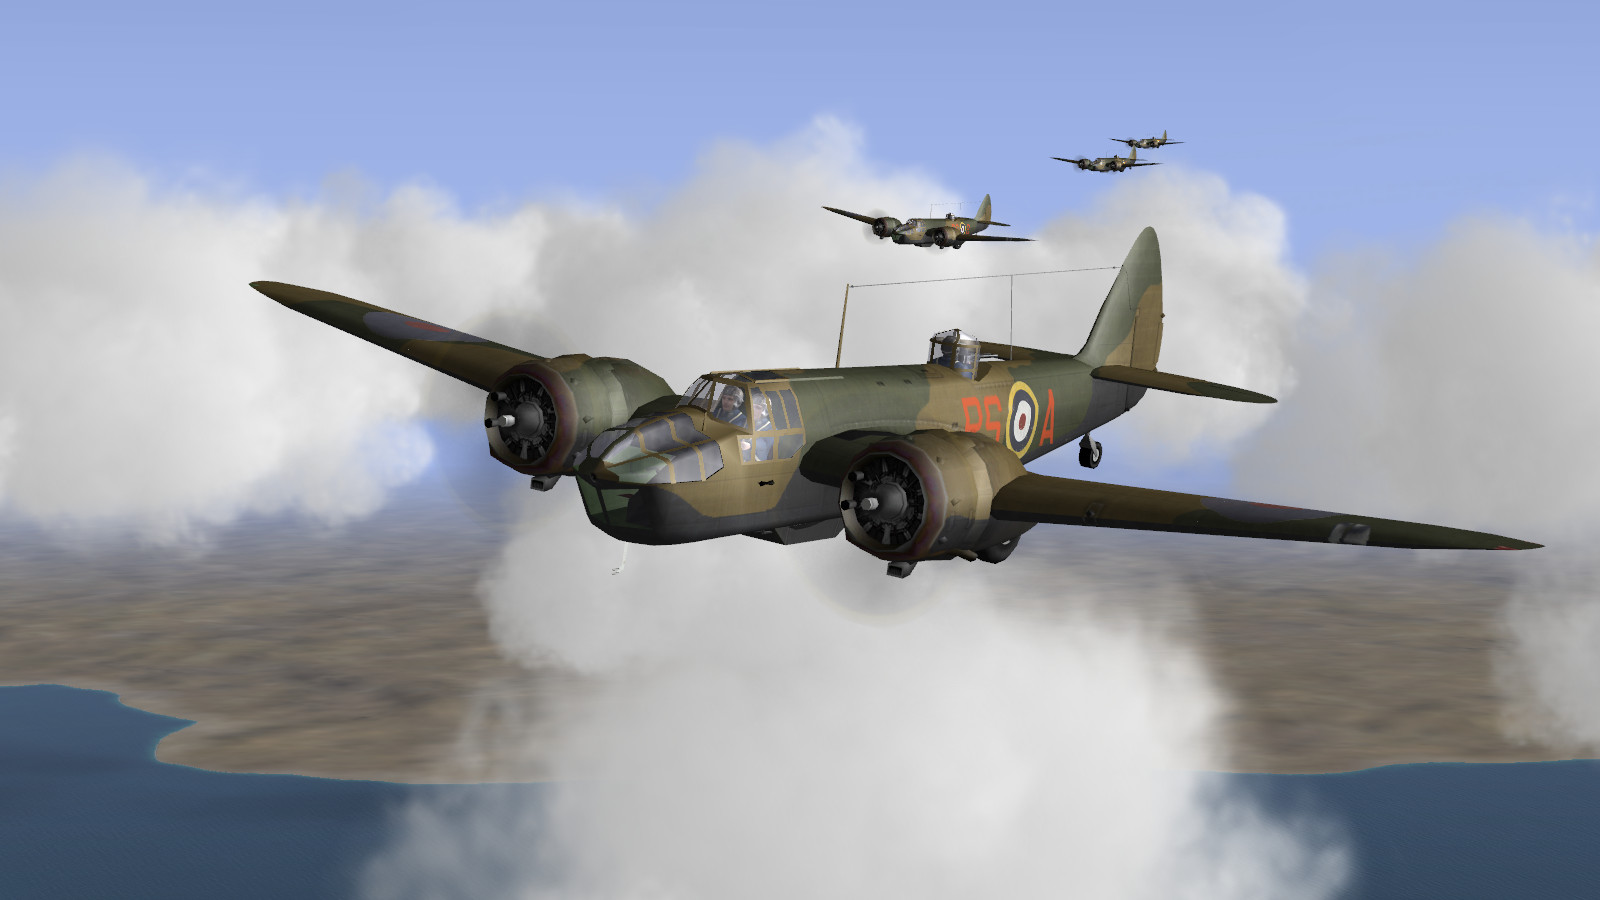
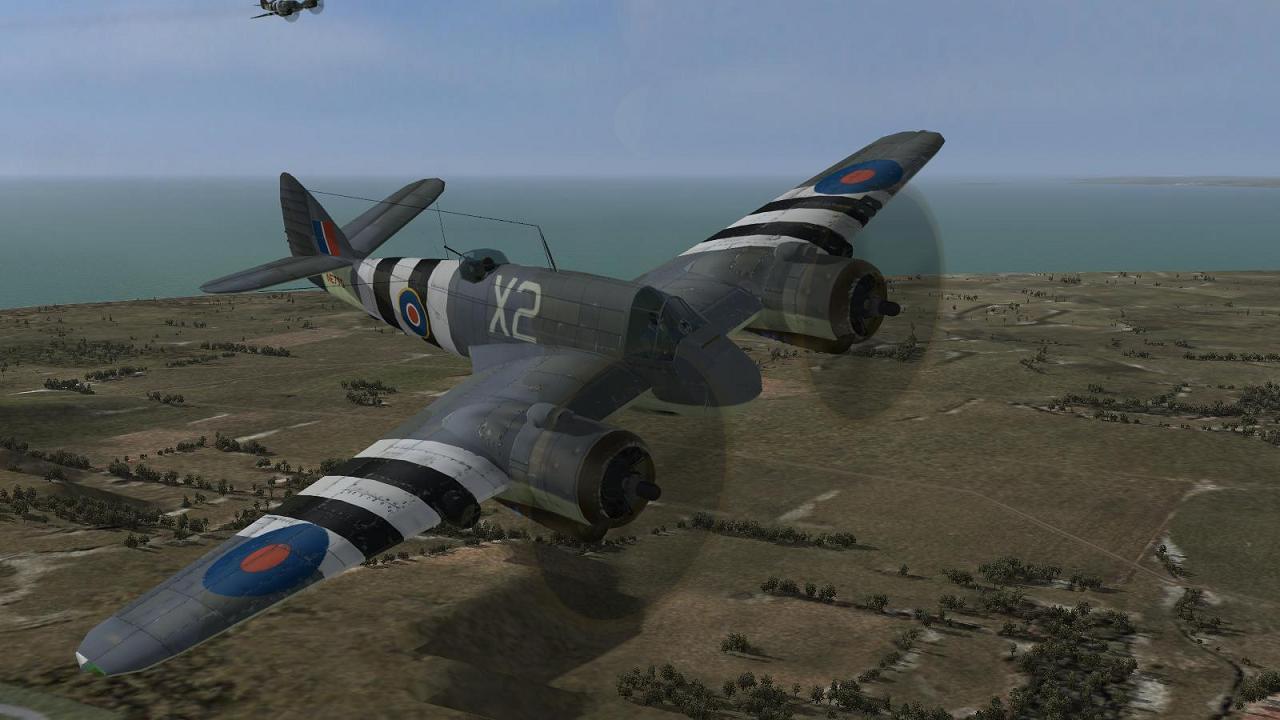
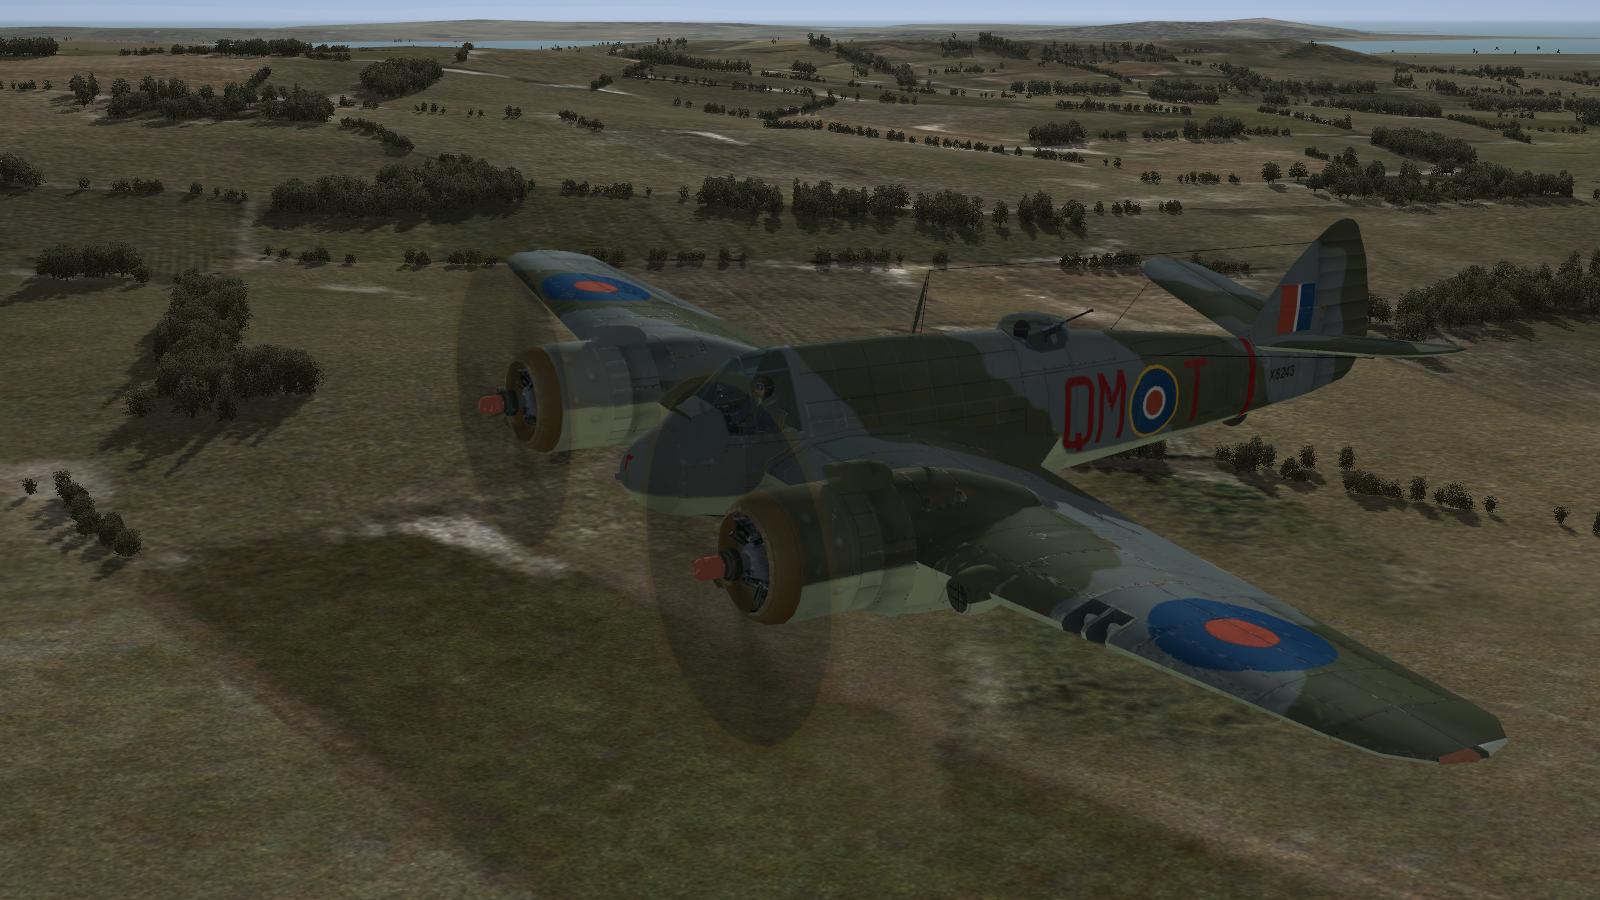
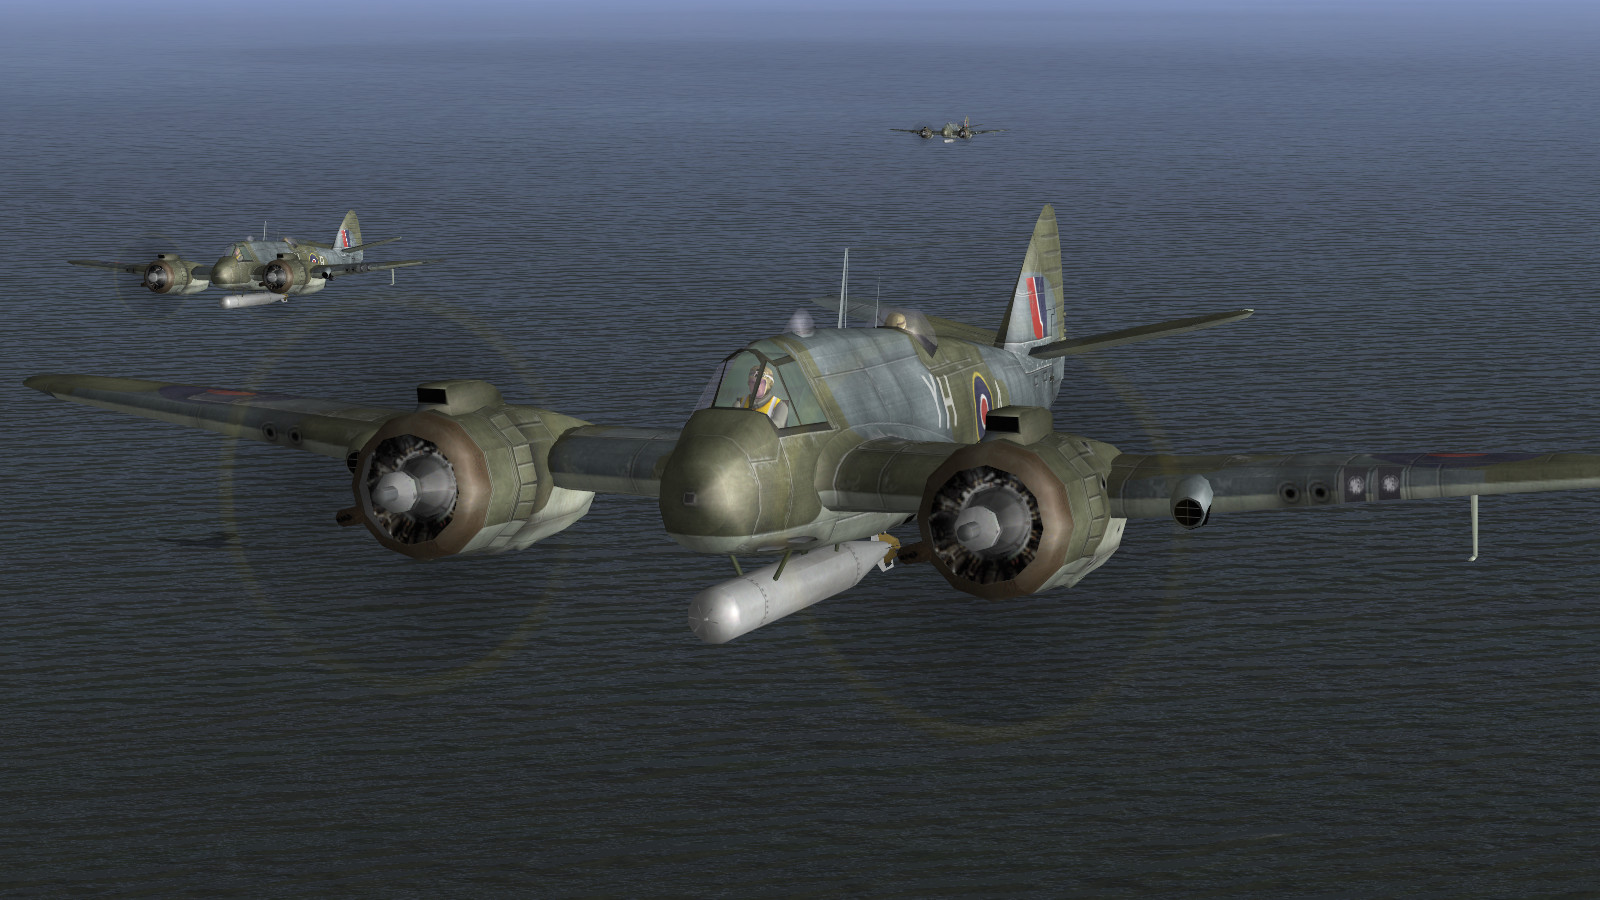
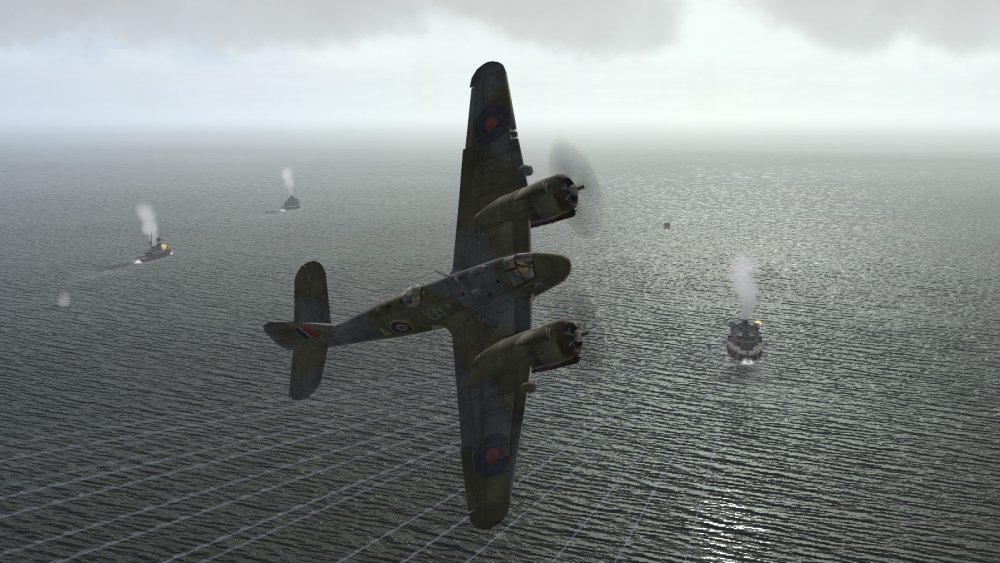
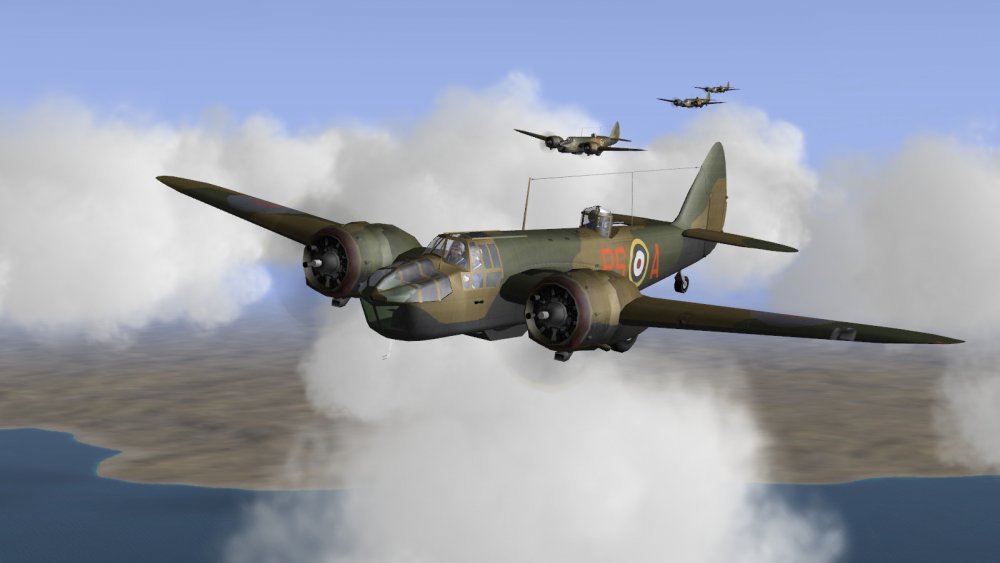
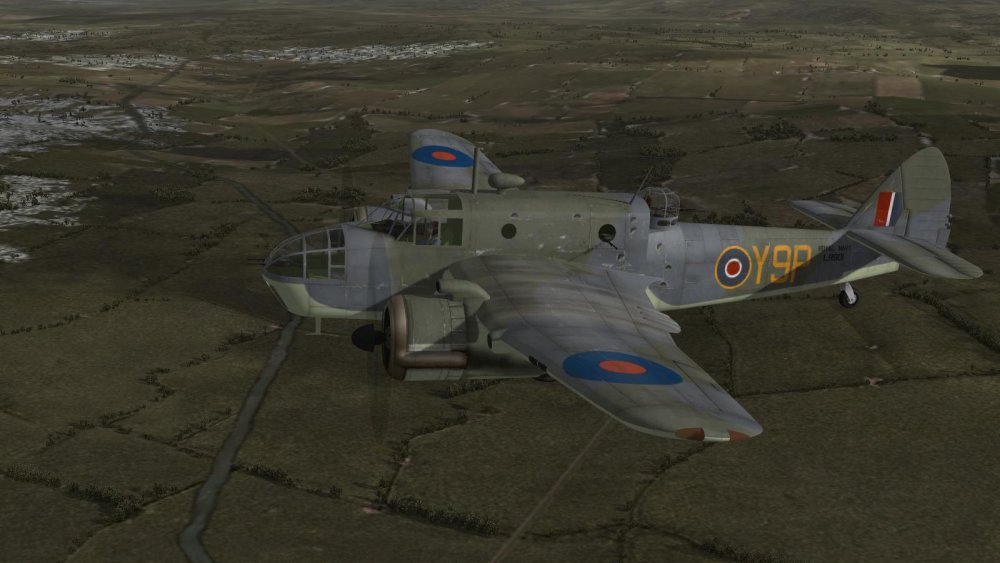
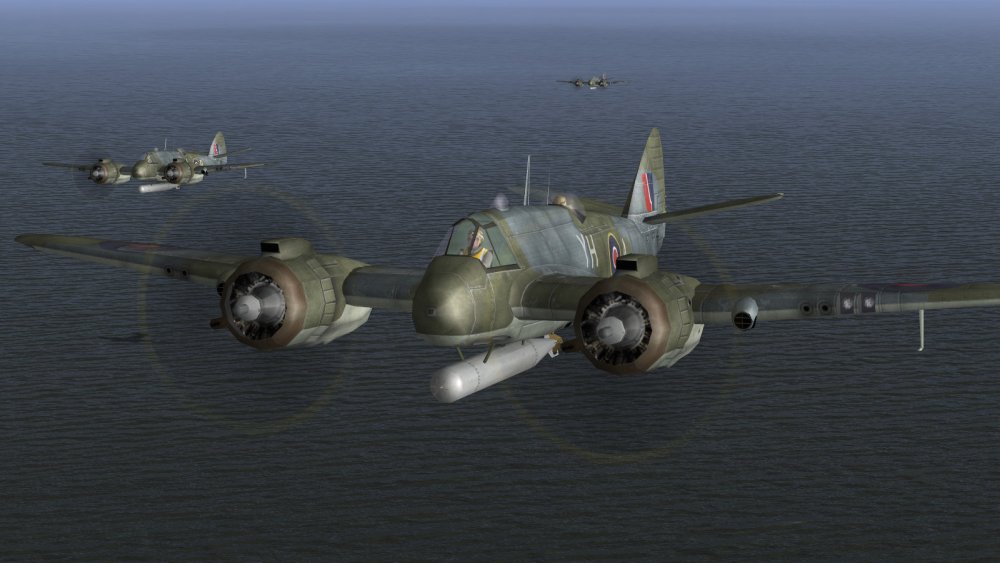
I'd tend to agree with much of that, although you definitely can fly the Beau (and I think maybe also the Blenheim) in both Il-2 '46+DBW and in CFS3+ETO expansion. Il-2: CFS3: Ok this is a Beaufort but I think there's a flyable Blenheim, too.


-
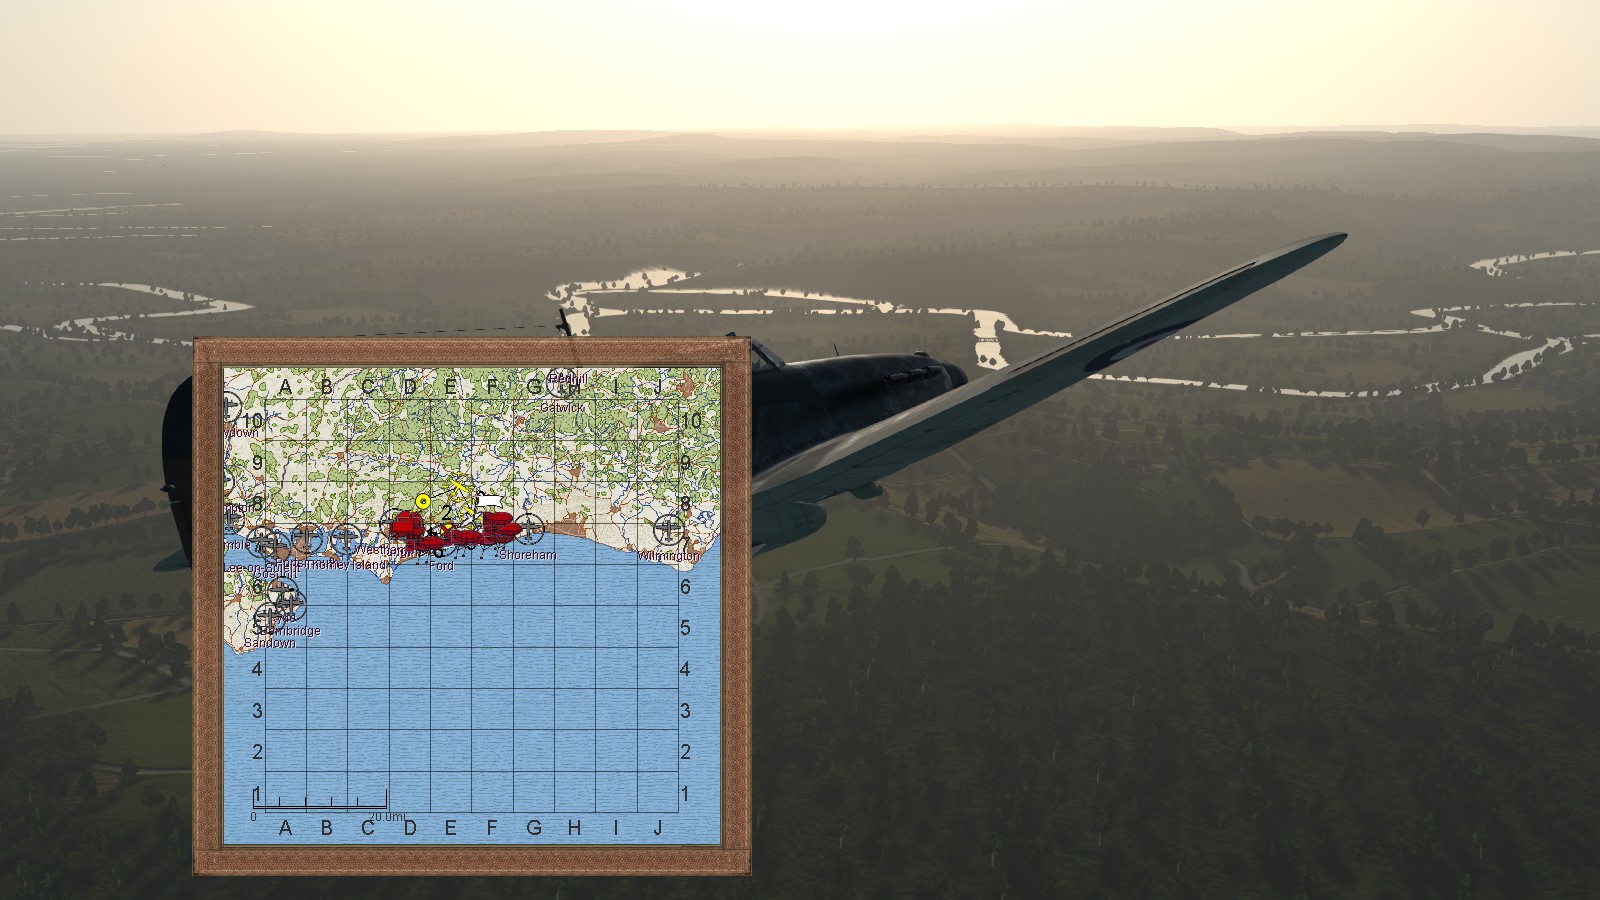
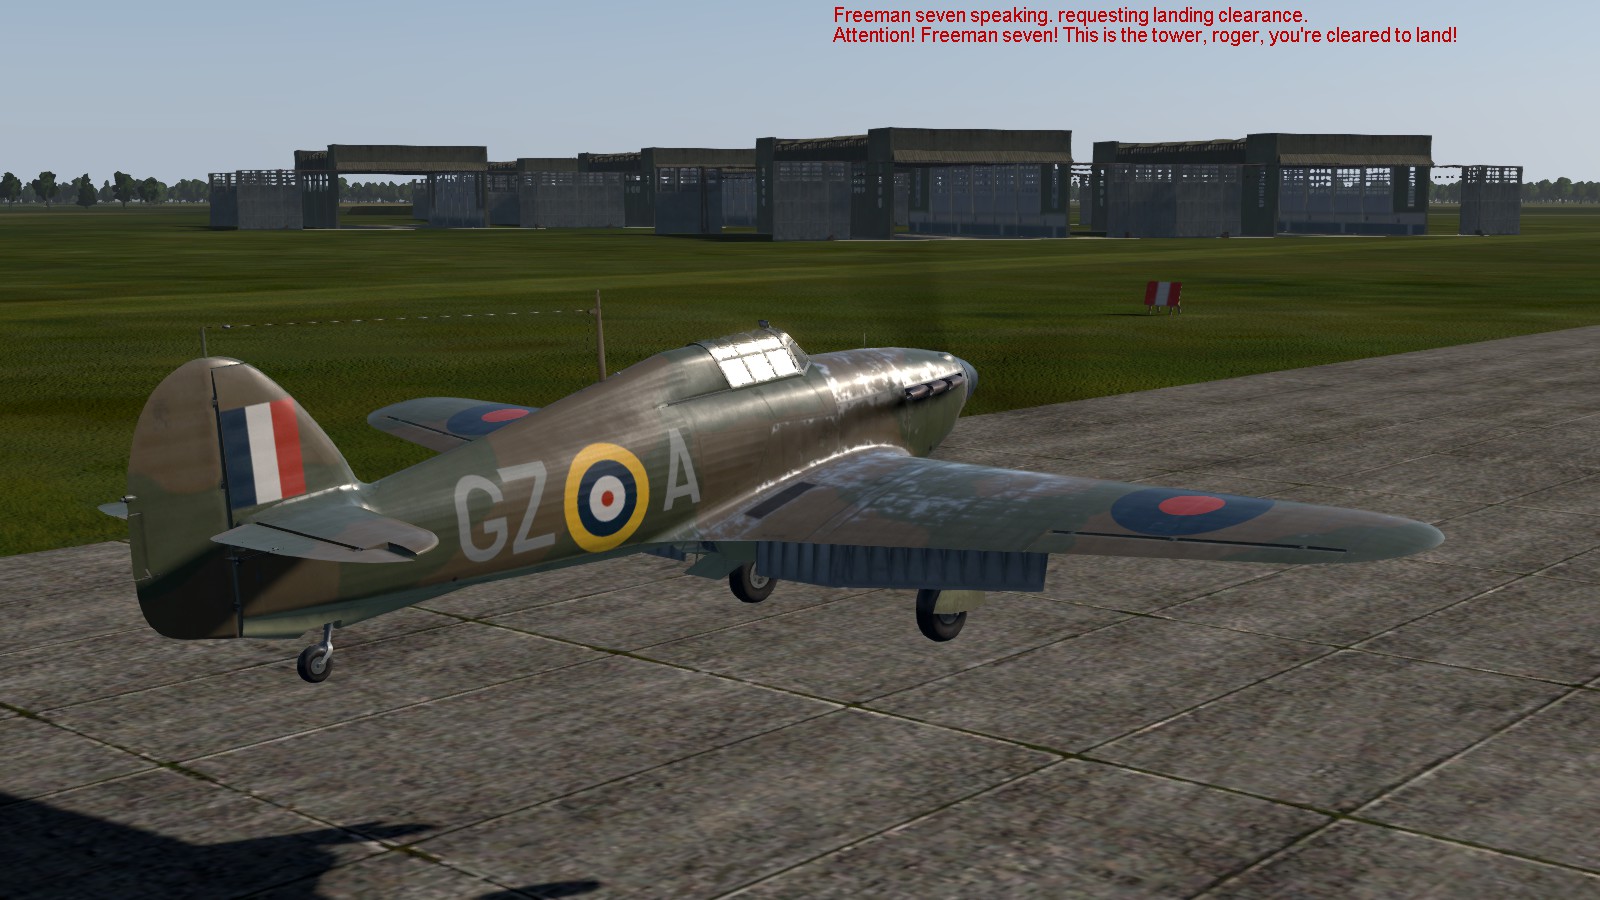
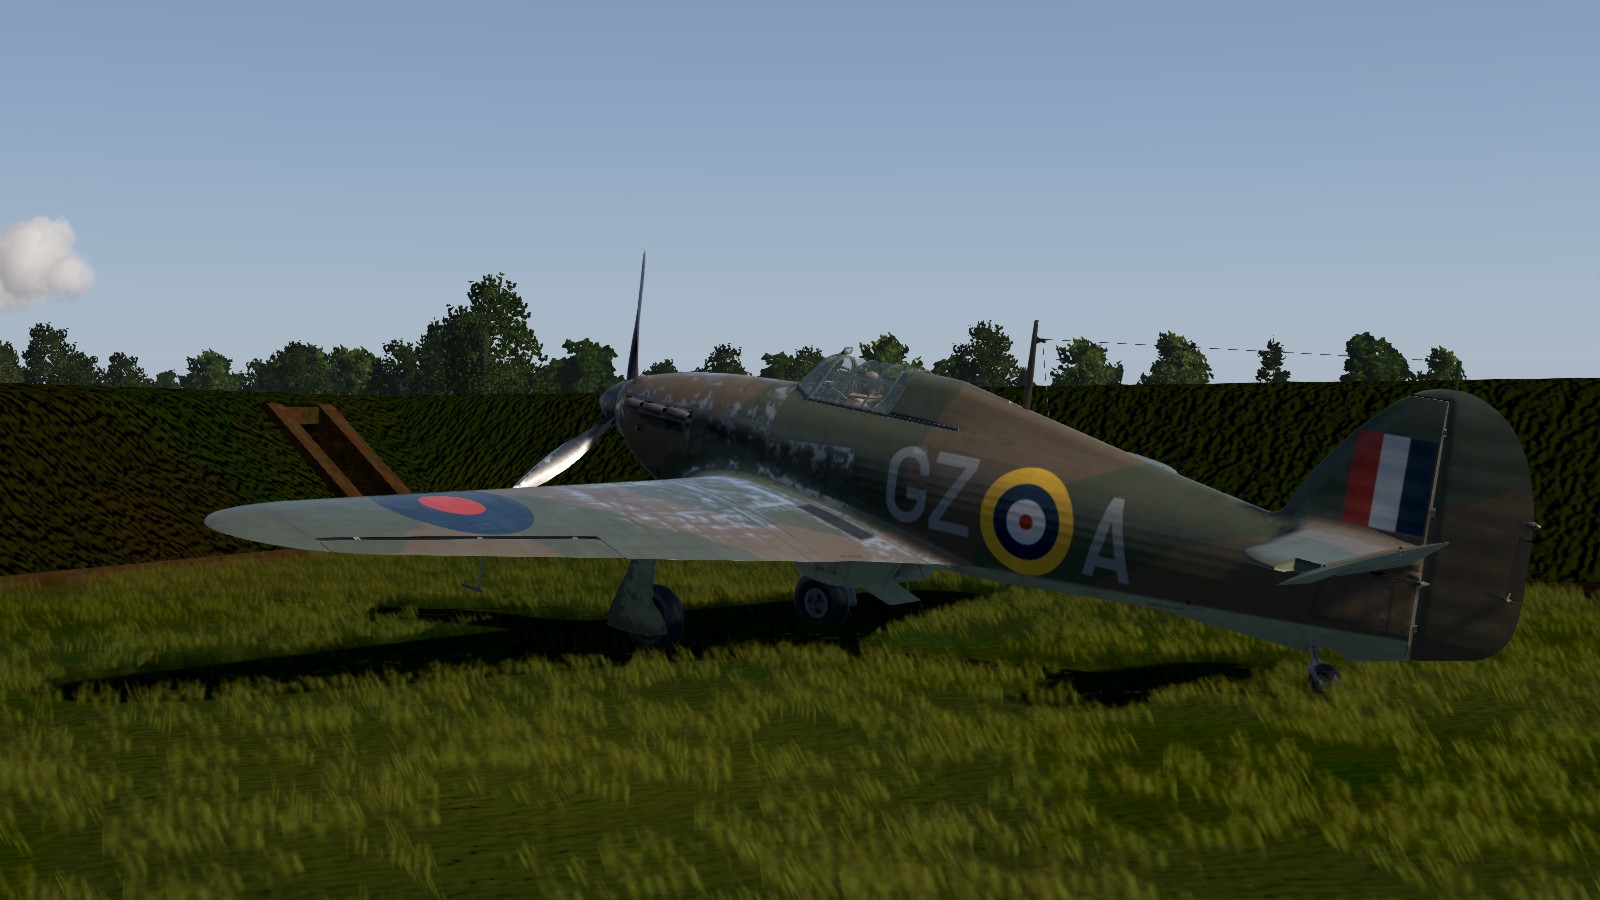
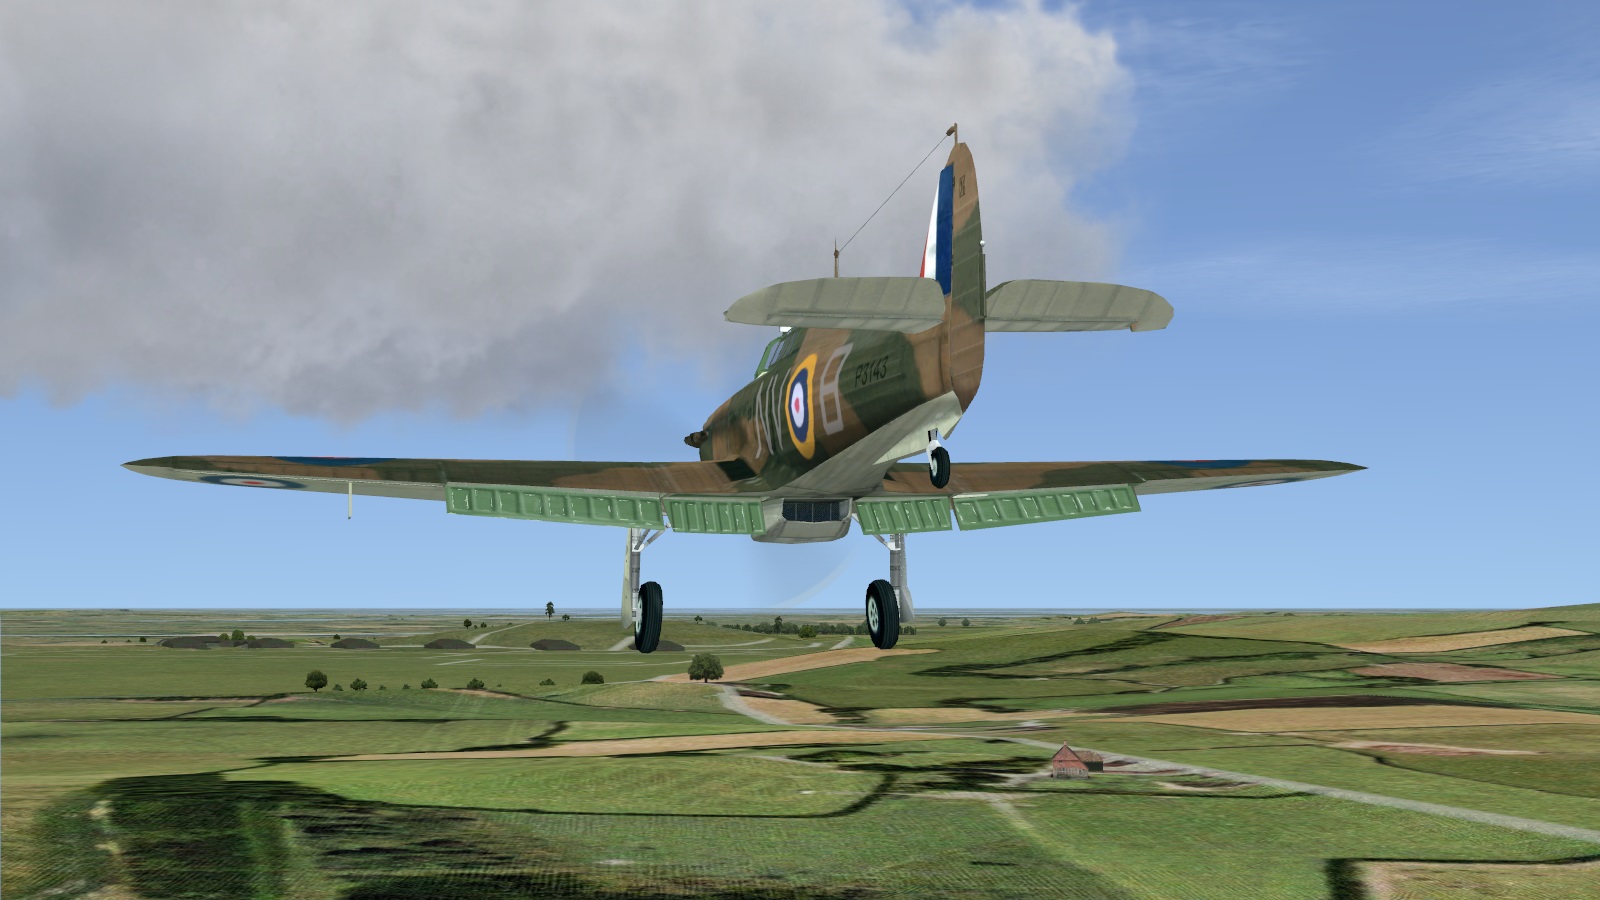
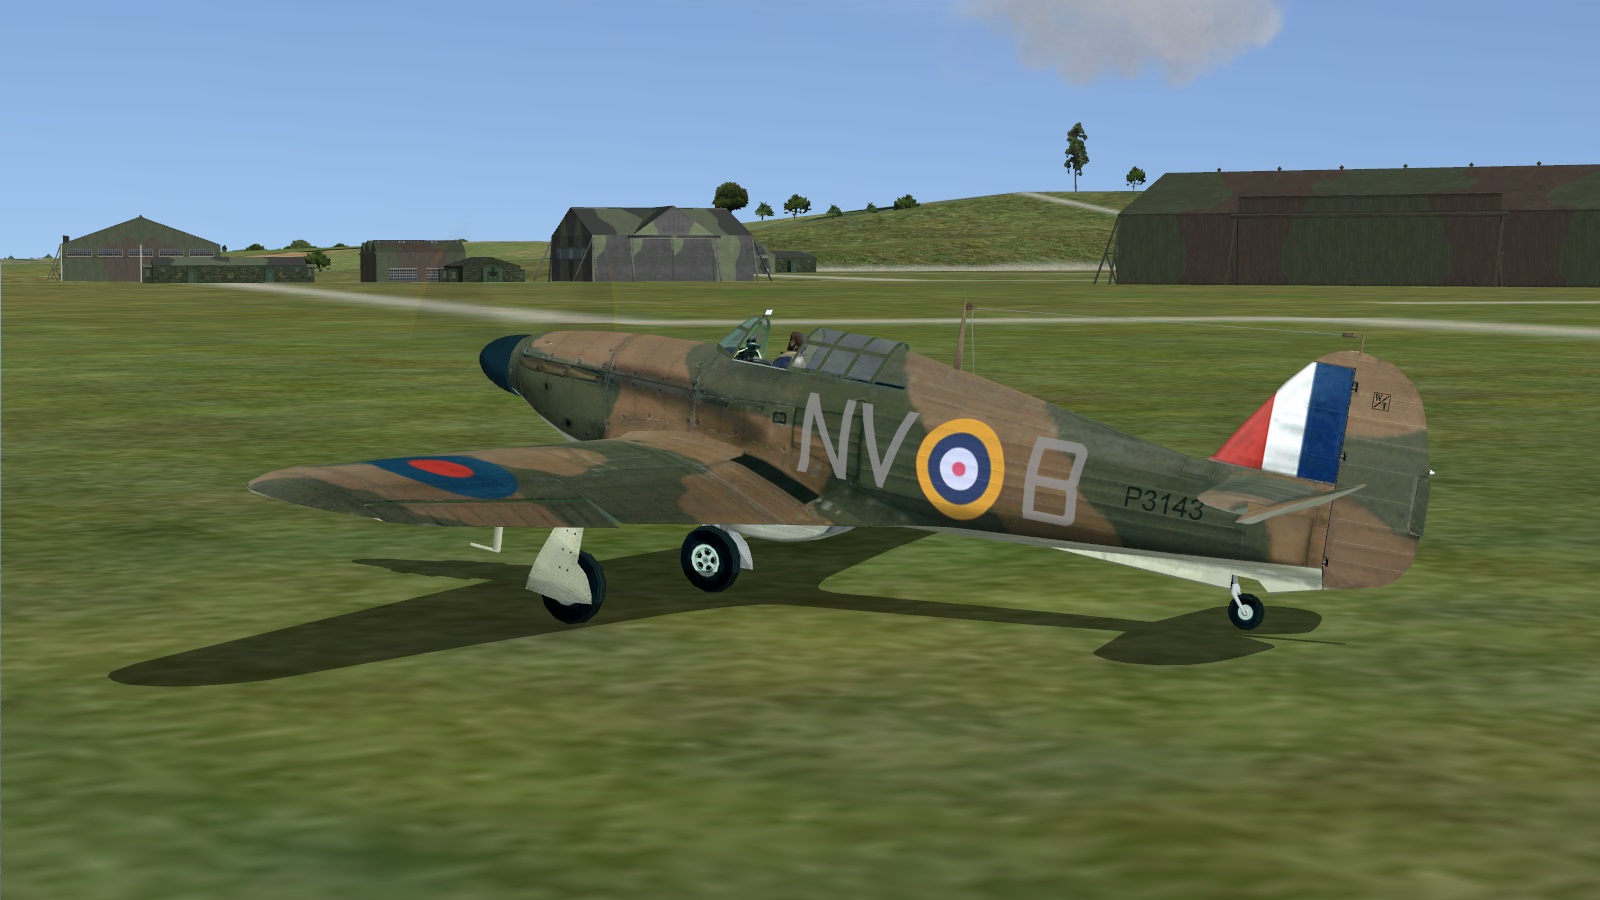
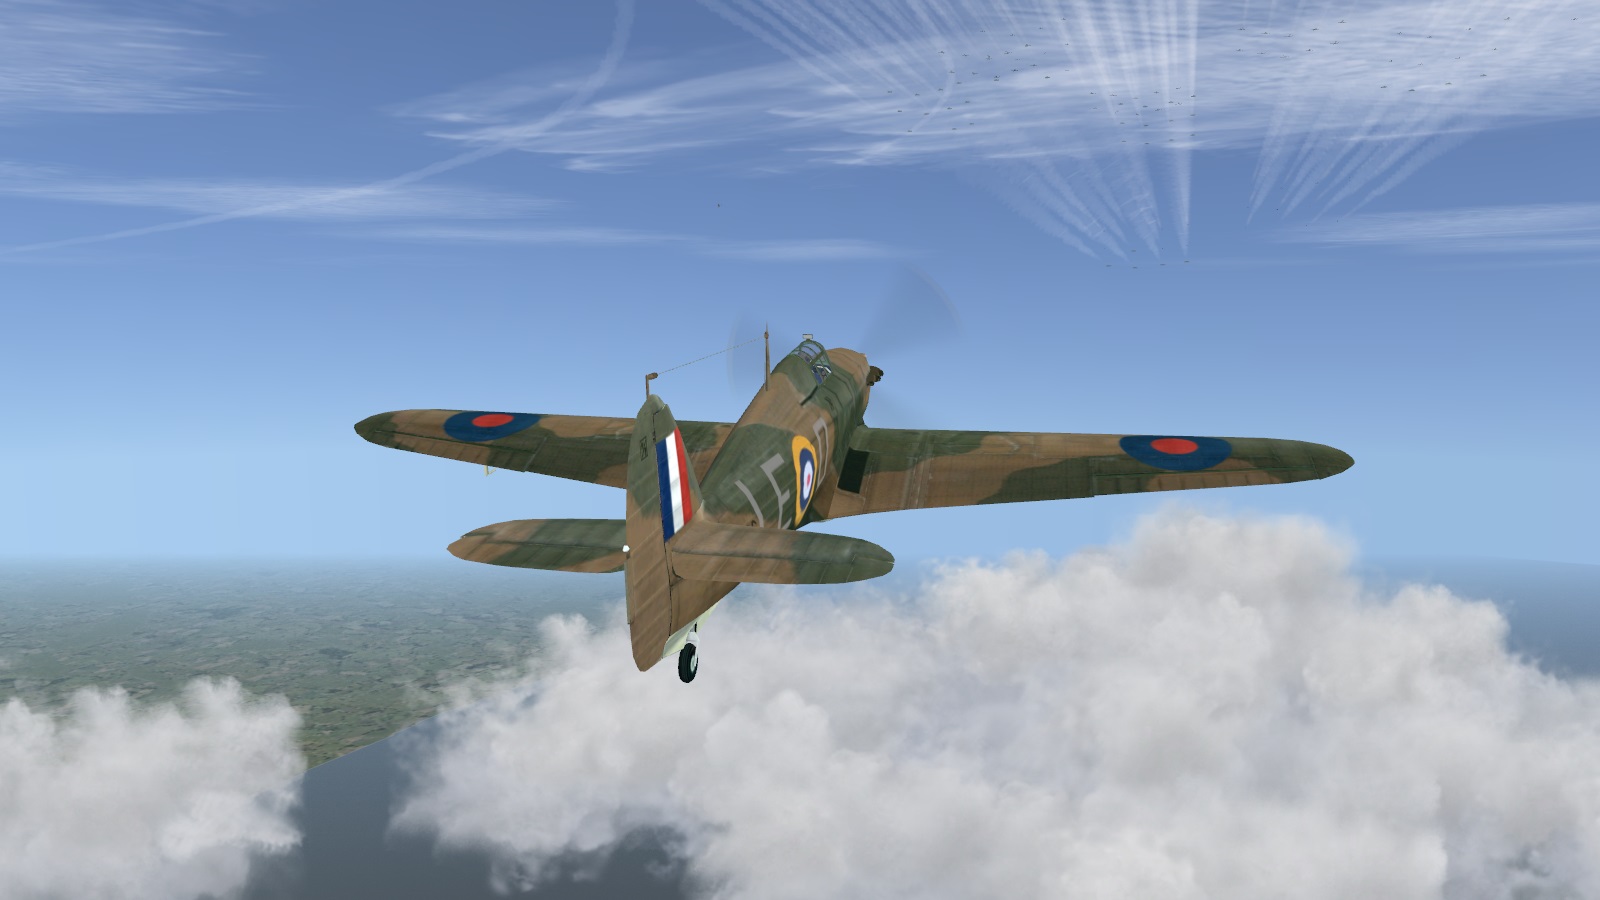
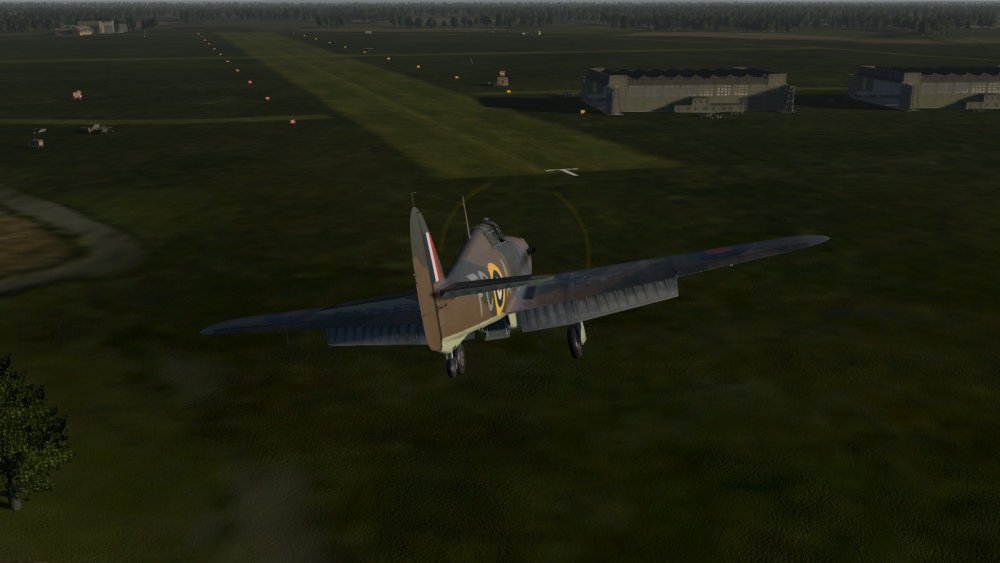
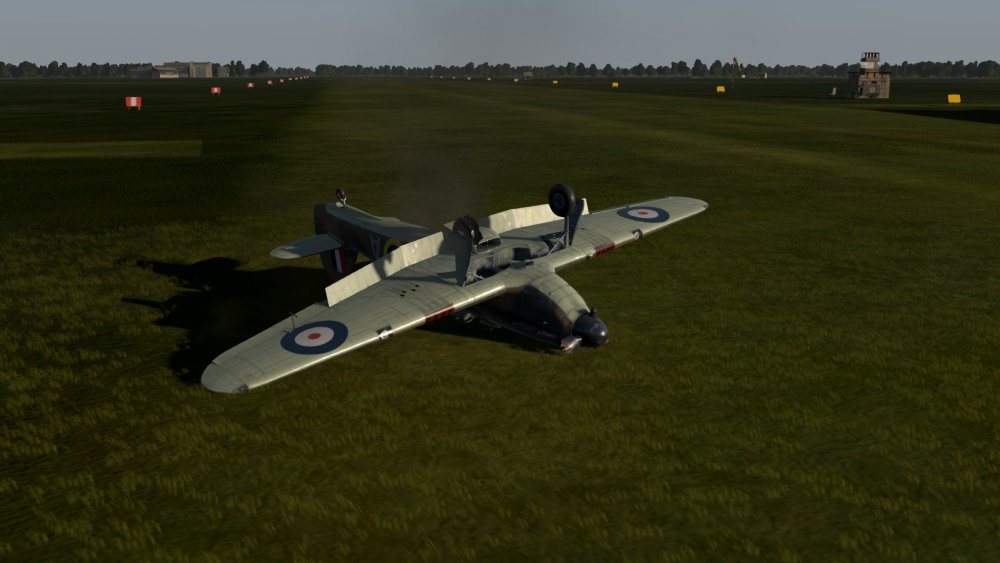
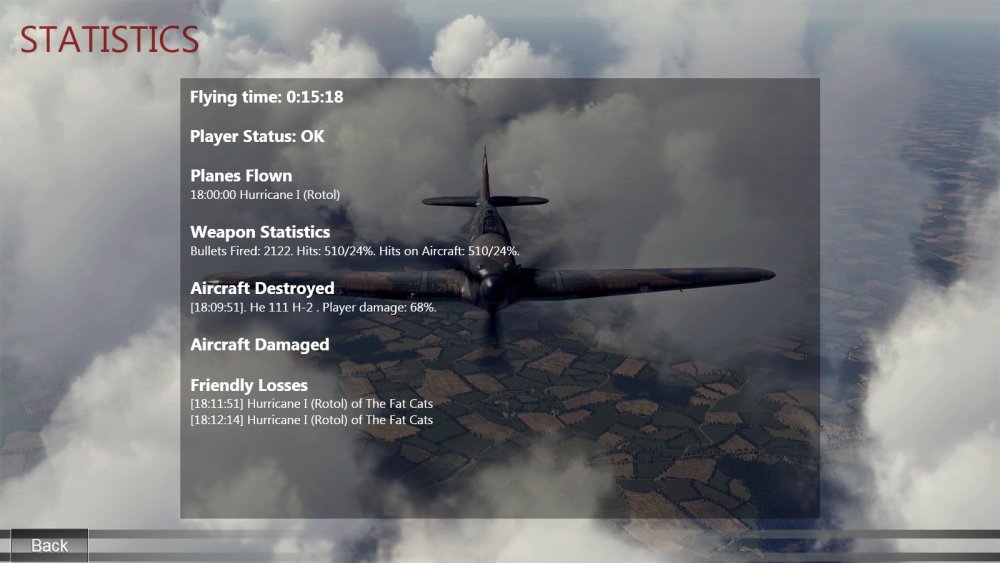
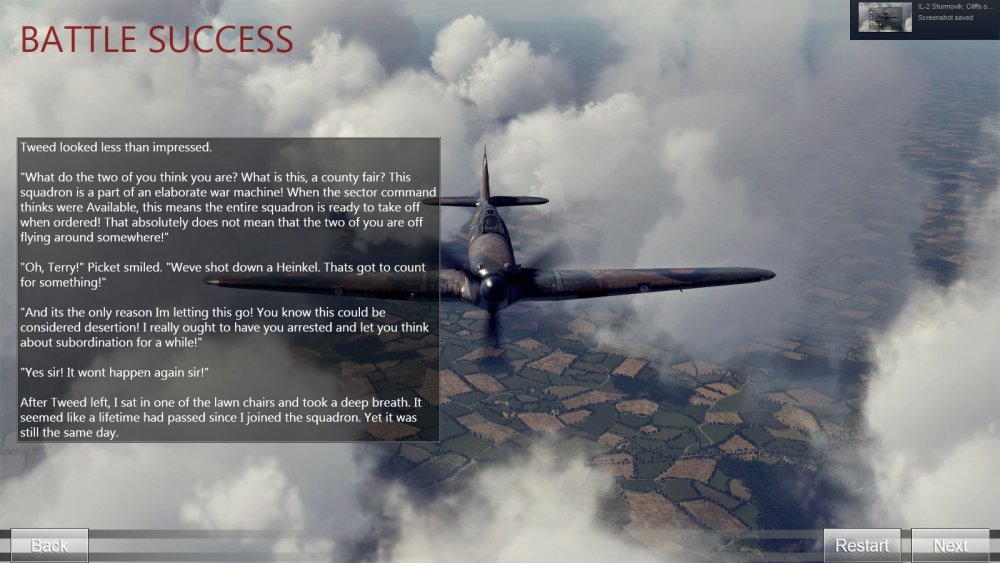
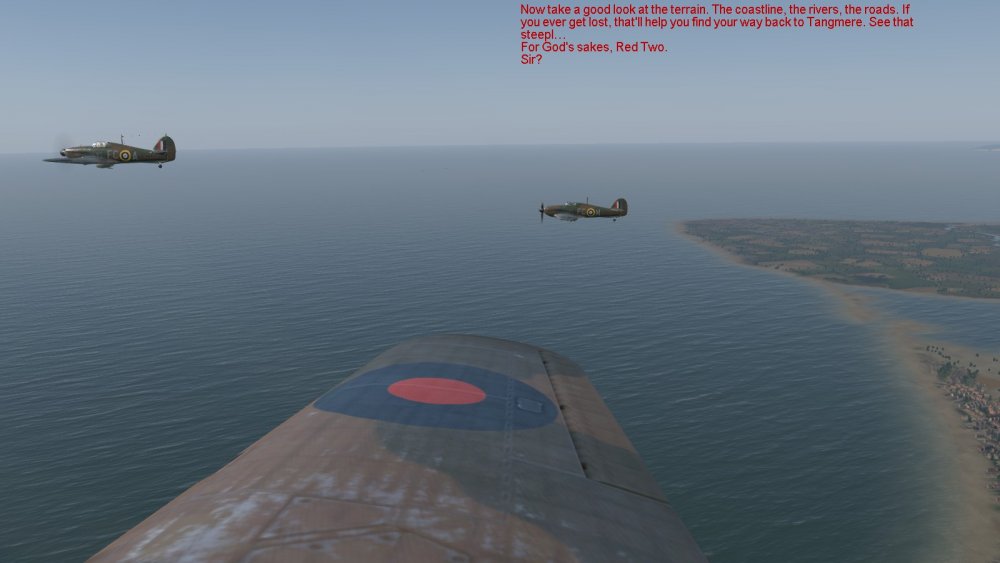
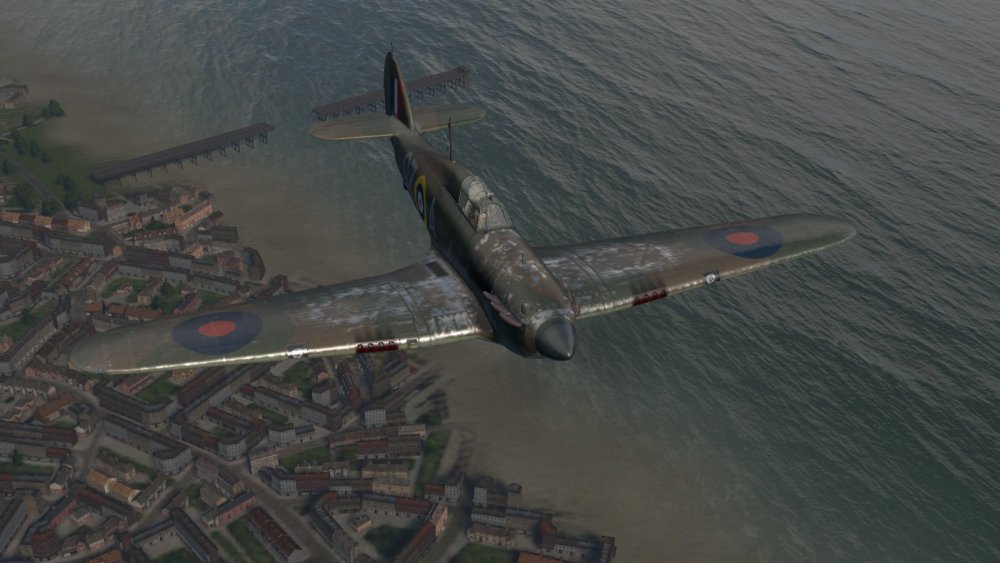
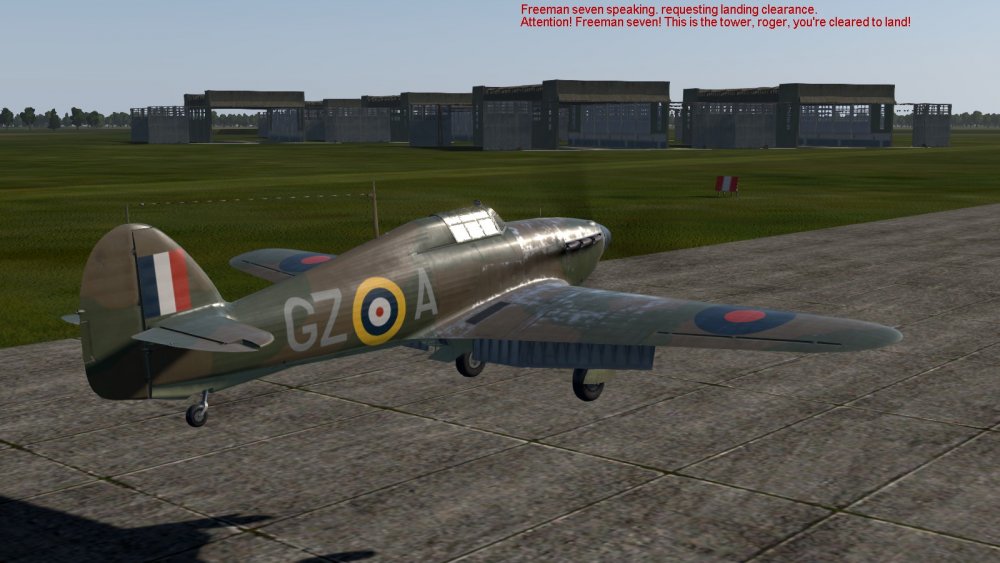
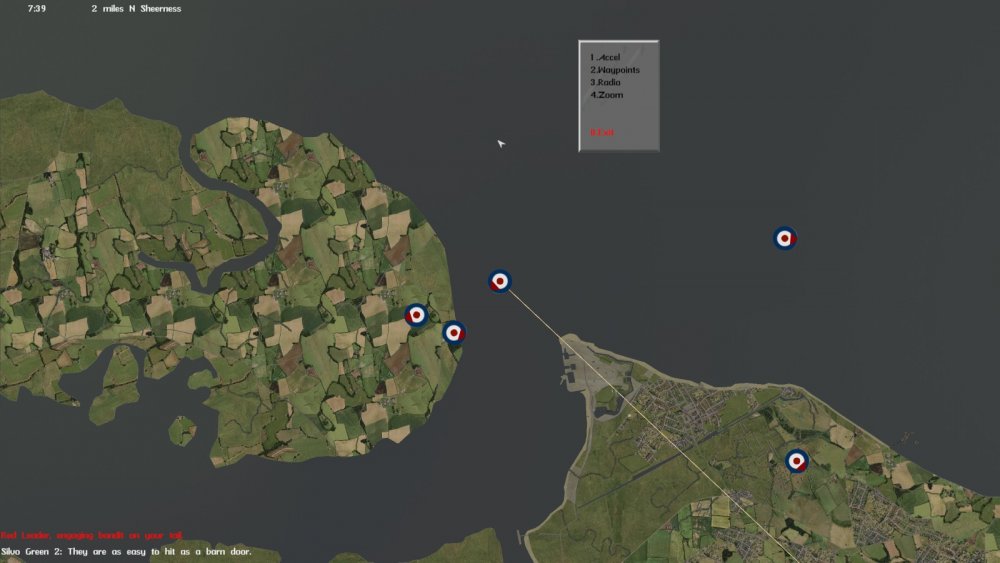
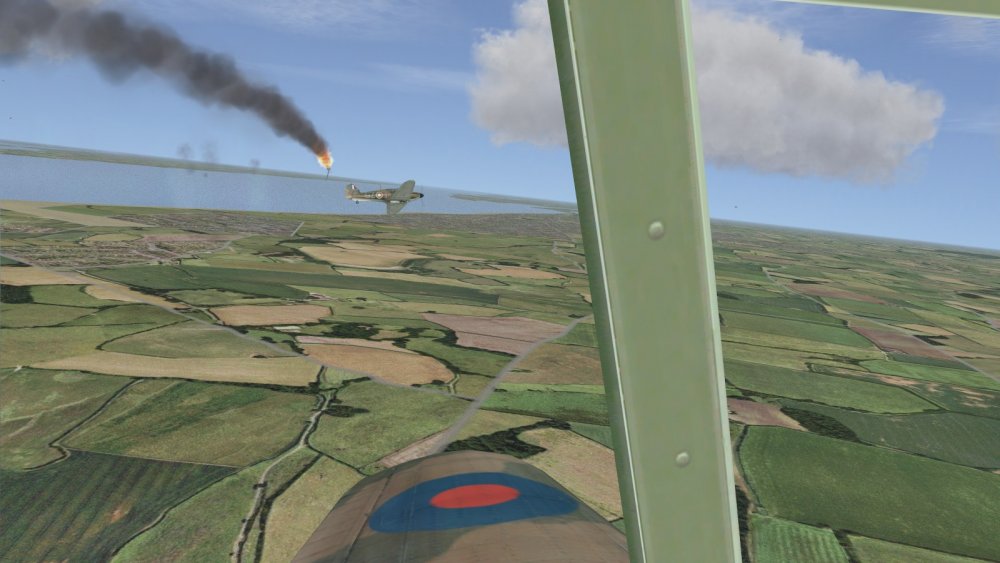
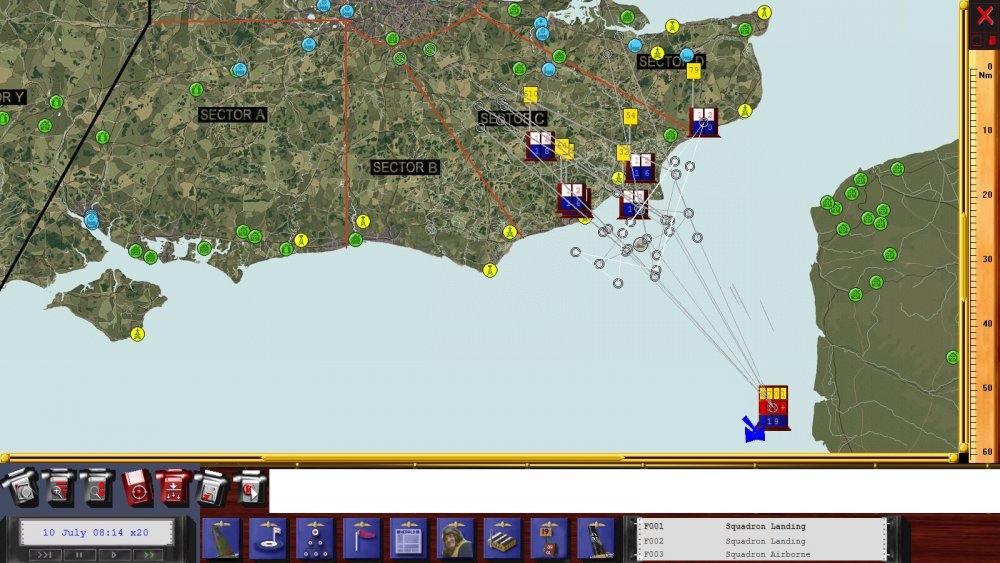
Home...and tea! This was the last time I saw Picket, my friendly flight leader, shortly after the Heinkel went down. Had I turned on labels, I might have been able to keep track of him, but I didn't, probably because I haven't yet set up or memorised all the important keystrokes. Anyhow I knew roughly were I was in relation to our airfield, so I turned around in a wide sweep which took me away from the coast and then back to the west, slightly further inland than I judged base to be, so I could pick it up visually to port. This is what the inflight map looked like, fully zoomed out, during this manoeuvre. I'm not sure Gatwick deserves to be so prominently marked on it, as it was probably an insignificant village with a small commercial airfield in 1940. Tangmere being a grass airfield it wasn't the easiest to pick out at the low level at which I was flying, but I eventually spotted it, having slowed down and opened the canopy - which I see is common practice in multiplayer, for better visibility. Tut, tut. I usually land (and take off) from the external view - yes I know, tut, tut - but the lack of peripheral vision and the limits of MonitorVision make precise judging of height unpleasantly difficult, unlike the handful of Cessnas I have actually flown, where you could always pop open the flimsy little door, lean over a bit and look down (only kidding but you get my point). At this juncture, while sticking to the external view, I decided to do something different. Apparently WW2 fighter pilots often landed off a curving approach, so they could keep the landing ground in view the whole time, rather than lose it under the long nose during a conventional approach. So that's what I decided to to. Somebody had come up on the R/T telling me to join the circuit, which sort of thing I normally try to do since taking those flying lessons. But this time, I looked to be in a decent position to go straight in and my speed was already low enough to drop the undercart and commence my approach. So that's what I did. For a while, my first landing off a curved approach seemed to be going tolerably well, although not having done it before, it was hard to be sure. What caught me out in the end was pausing to take pictures and not picking up smoothly where I'd left off. So I bounced badly, failed to catch her in time, plonked down heavily and after a few more wobbles, pitched slowly over onto my back. Ooops! This seems to be the standard form of a CloD 'debriefing'. It looks like I'm getting the credit for the Heinkel, and that both Hurricanes were written off. How the boss's kite came to grief, I have no idea. However, looking at the results screen, it seems the show was rated as a win for the good guys. Even if Terry Tweed, the stuck-up squadron leader, was still clearly not best pleased. And the 'lawn chairs' should really be called 'deck chairs' (although I daresay pilots used whatever they could get hold off). Will future missions stay small scale, or will I see something more in line with the scale of the real Battle? If so, will my PC still be able to take the strain? Will duff AI let down the whole thing, especially when we meet the escorts? Will I become exasperated by the gaps in the comms menus? Will the storyline continue to hold my interest? I'm going to play on, so I'll find out in due course. So far, having started with the expectation that I'm not going to get a Battle of Britain experience as comprehensive or as authentic as BoB2, and not having been out a lot of money, I'm quite liking the experience and have found a couple more SP campaigns I may try. Incidentally, I see there's a pic in the Haynes 'Owner's Workshop Manual' for the Hurricane of a MkIIa, Z2487, coded FC-T, which the caption says is from the Station Flight at RAF Northolt in 1941; while Wikipedia says squadron code FC was carried by the same flight but from Kenley. At any rate, the code is not entirely fictional. That book and the excellent 'Gun Button to Fire' by 249 Squadron BoB Hurri pilot Tom Neil I have been encouraged to pick up through flying the virtual Hurricane in BoB2 and now concurrently in CloD. Tom, who was credited with no less than 13 victories during the Battle, including six 109s, passed away during 2018 and so this mission report is humbly and respectfully dedicated to him, and to all his comrades in RAF Fighter Command. Per ardua ad astra


- 8 replies
-
- 1
-

-
- blitz edition
- cliffs of dover
- (and 1 more)
-
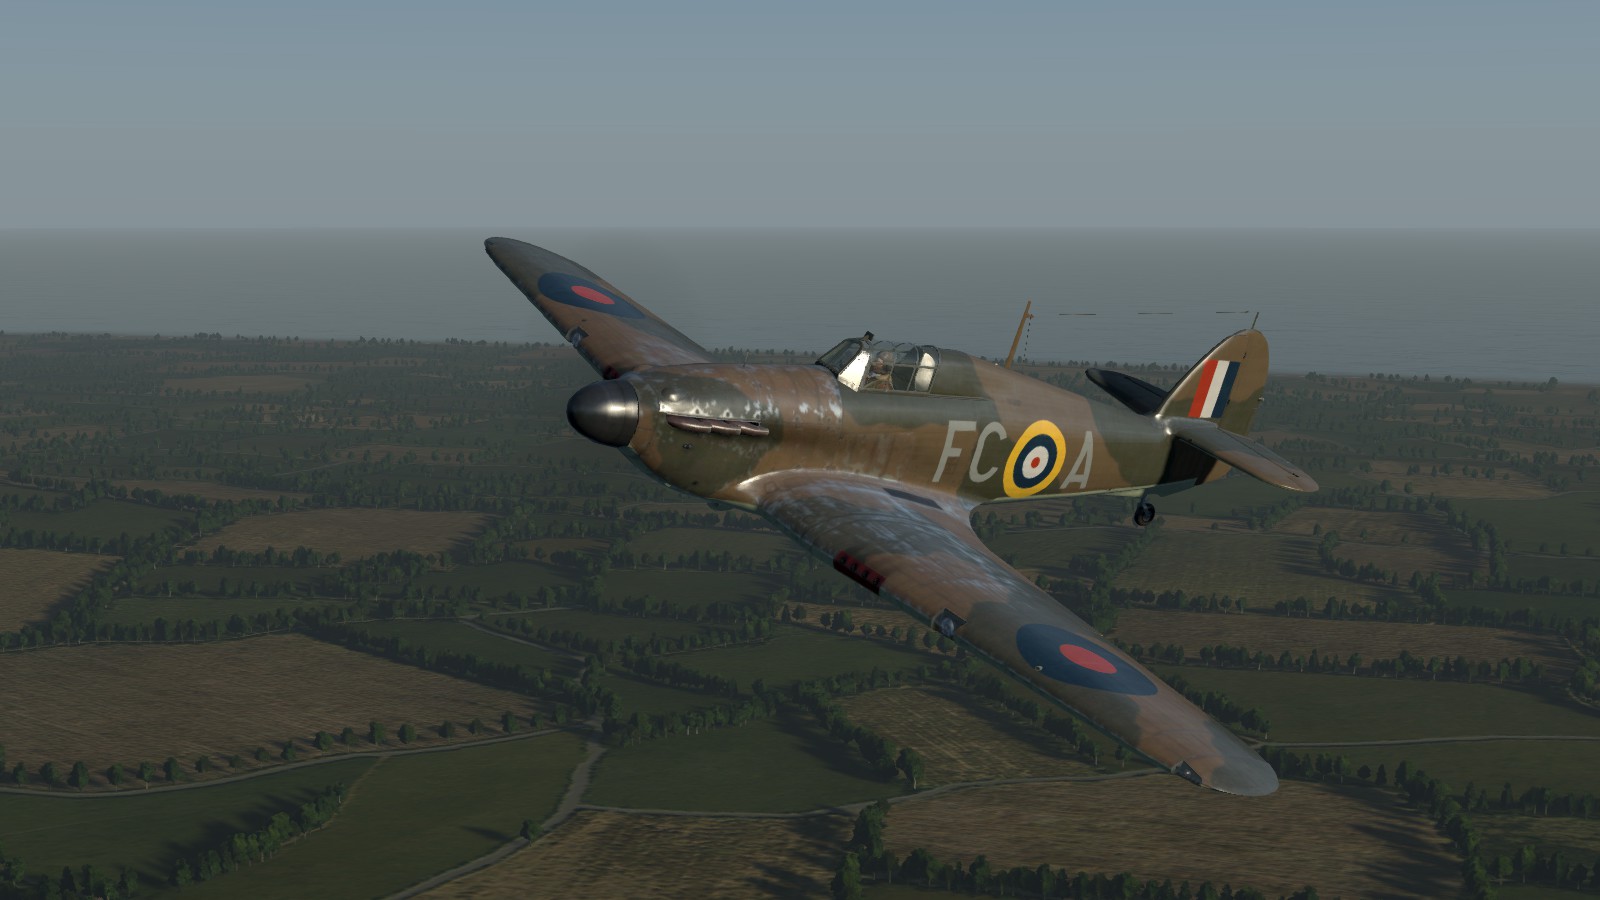
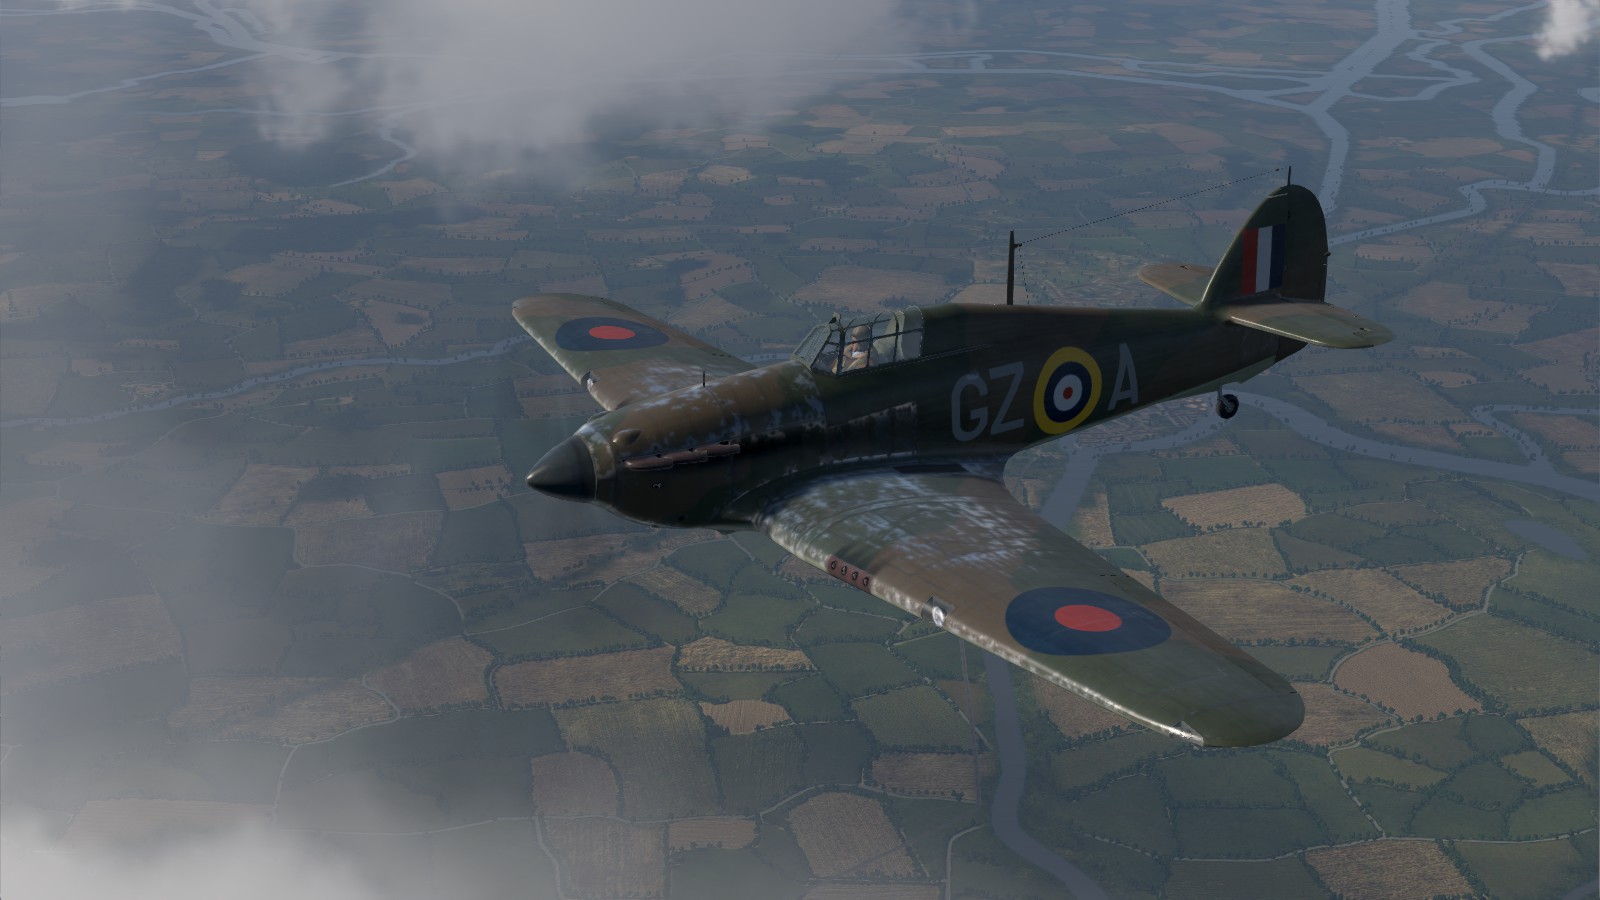
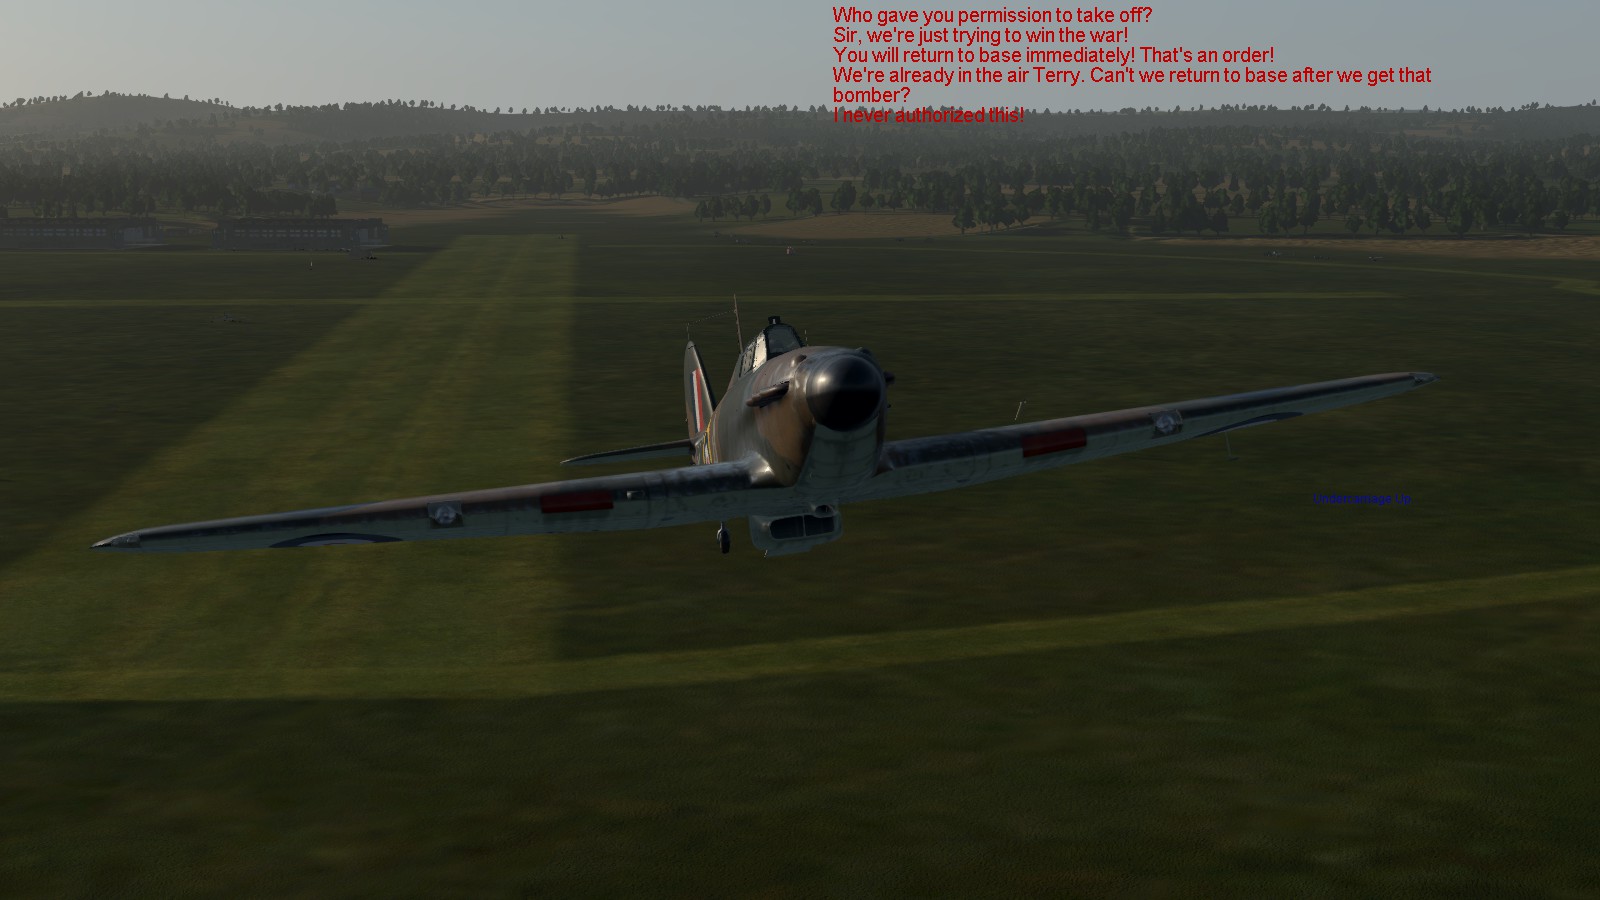
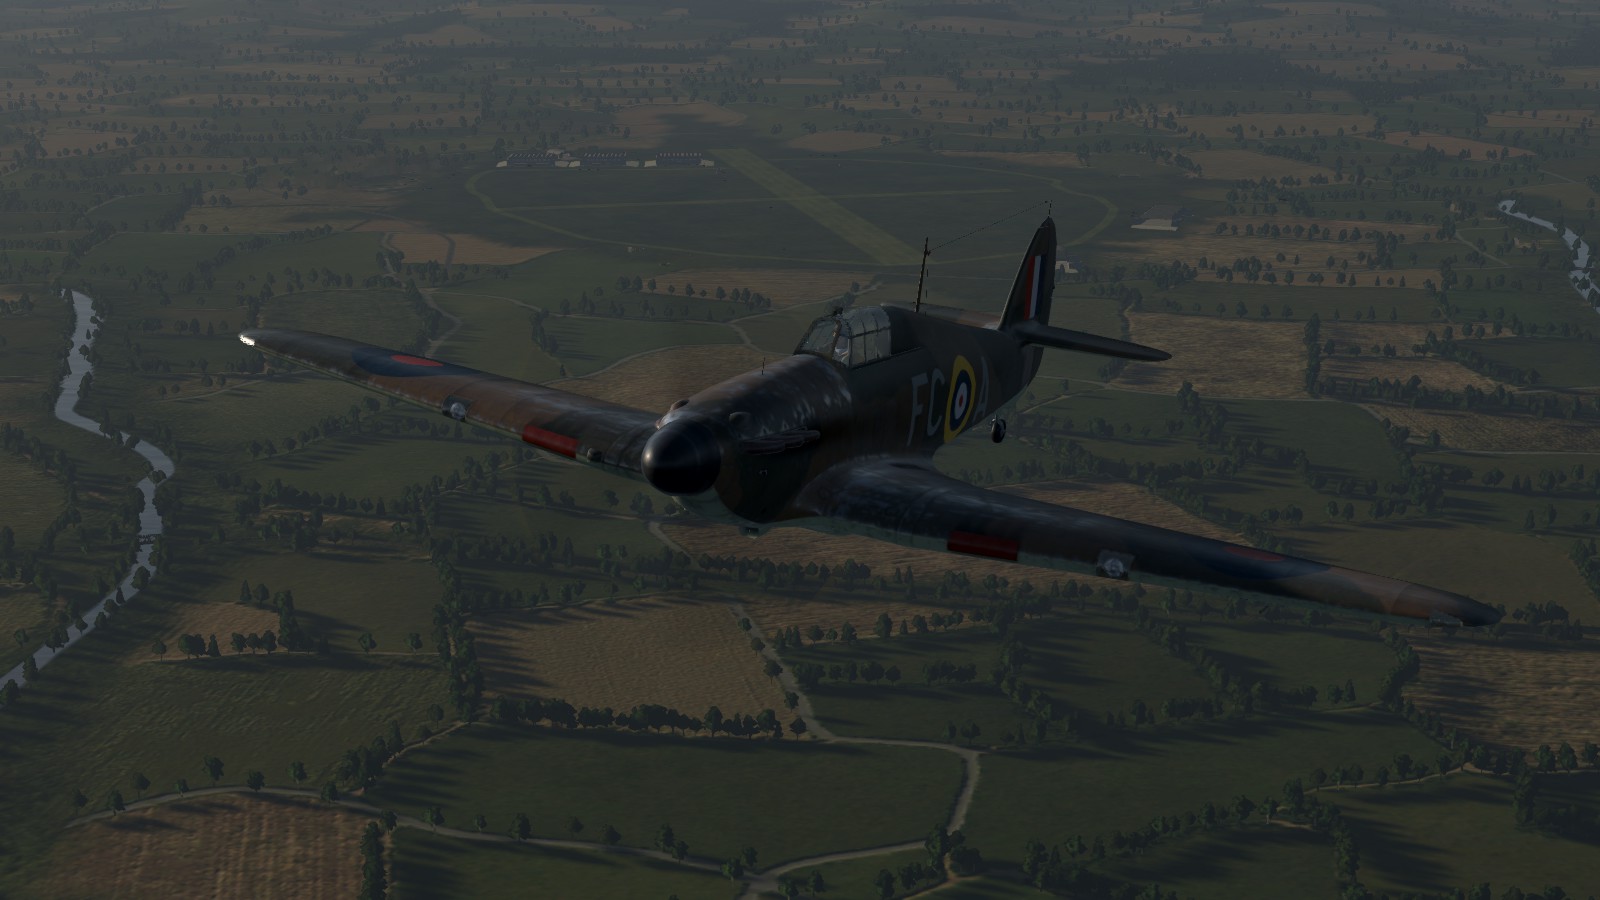
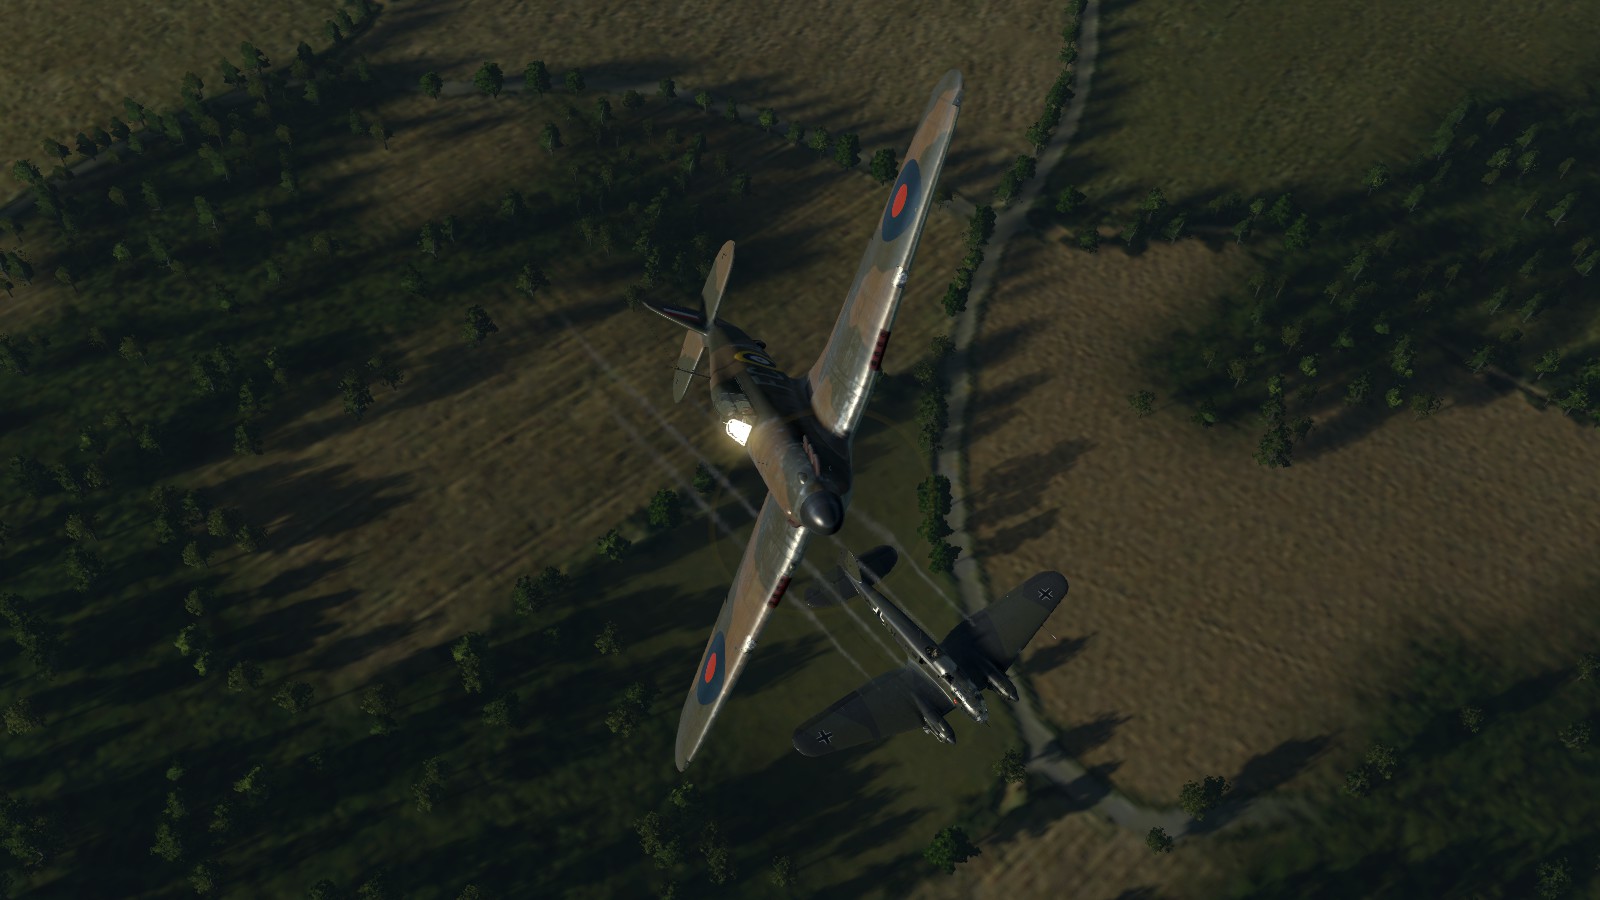
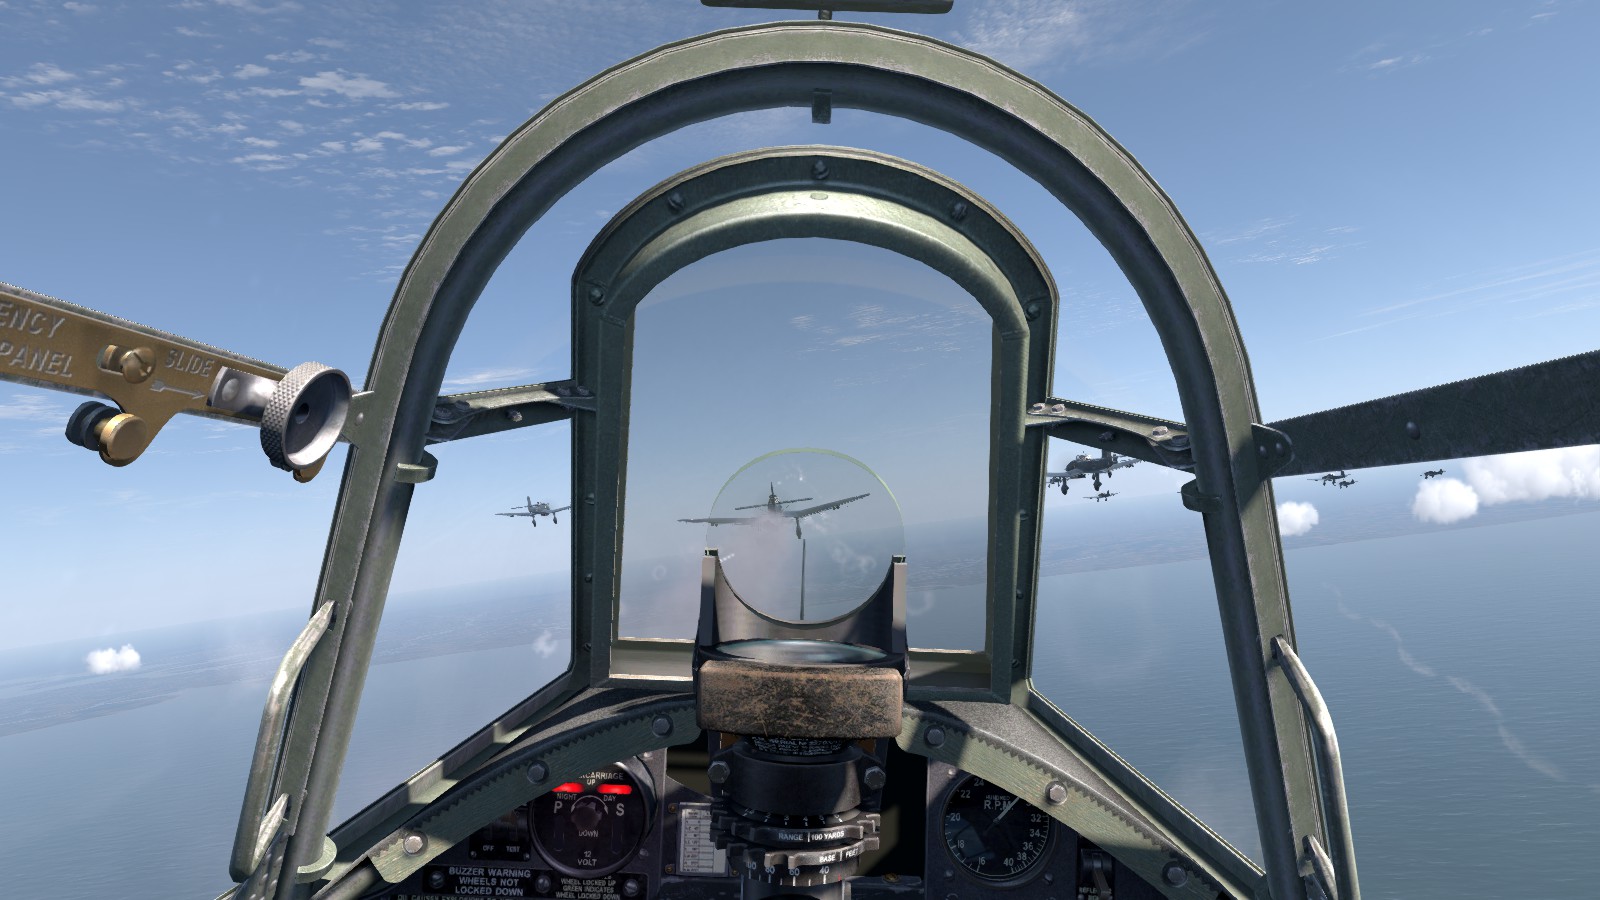
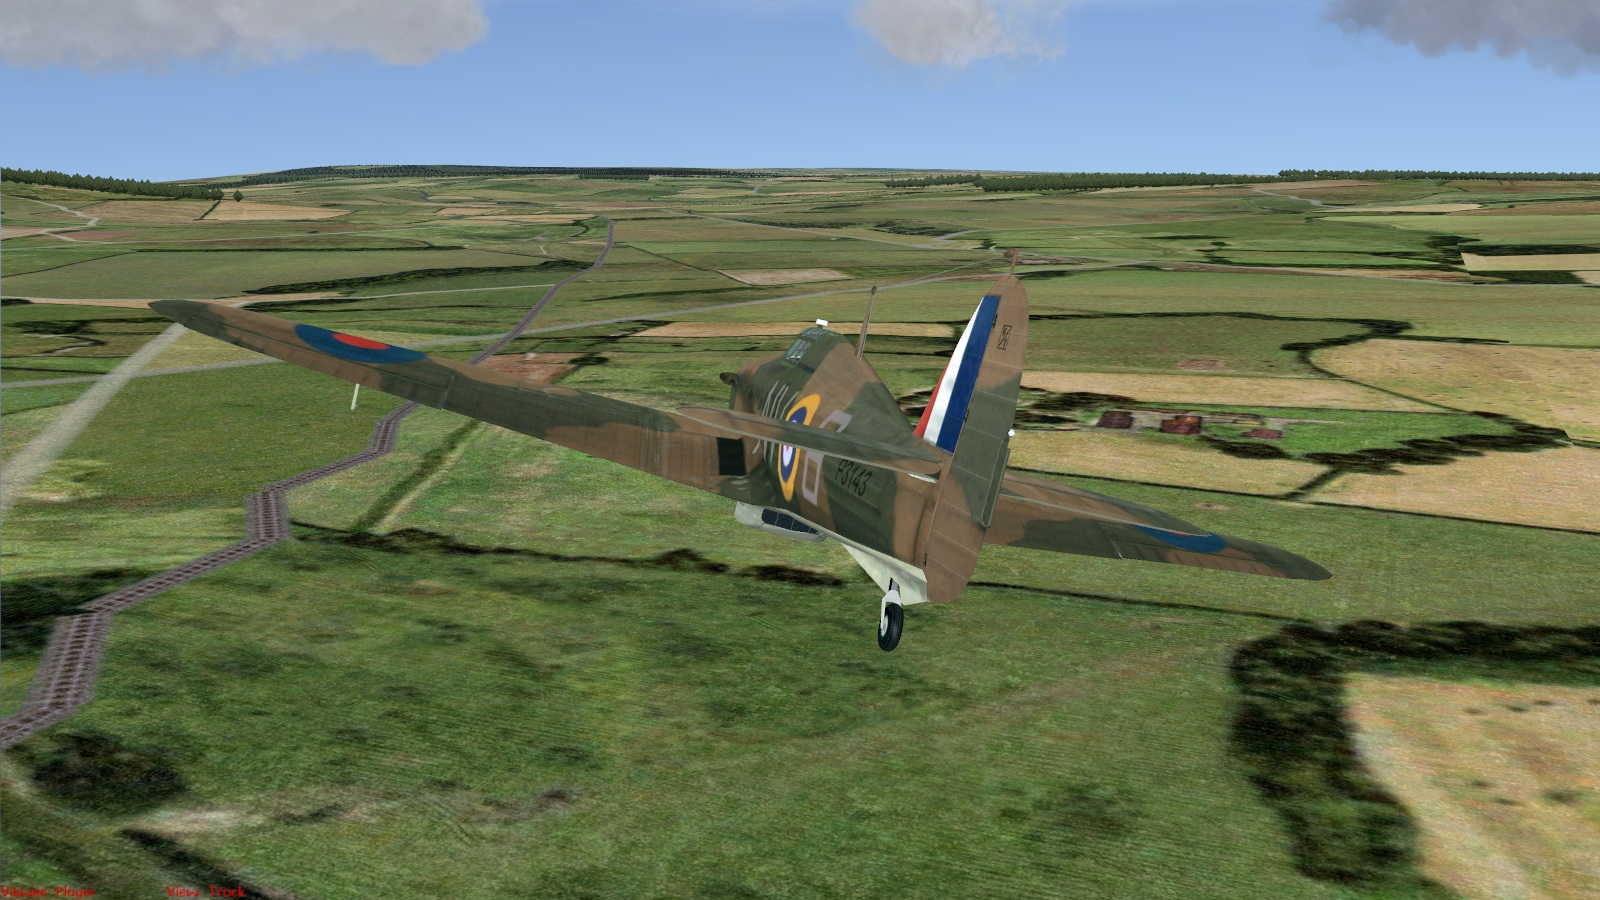
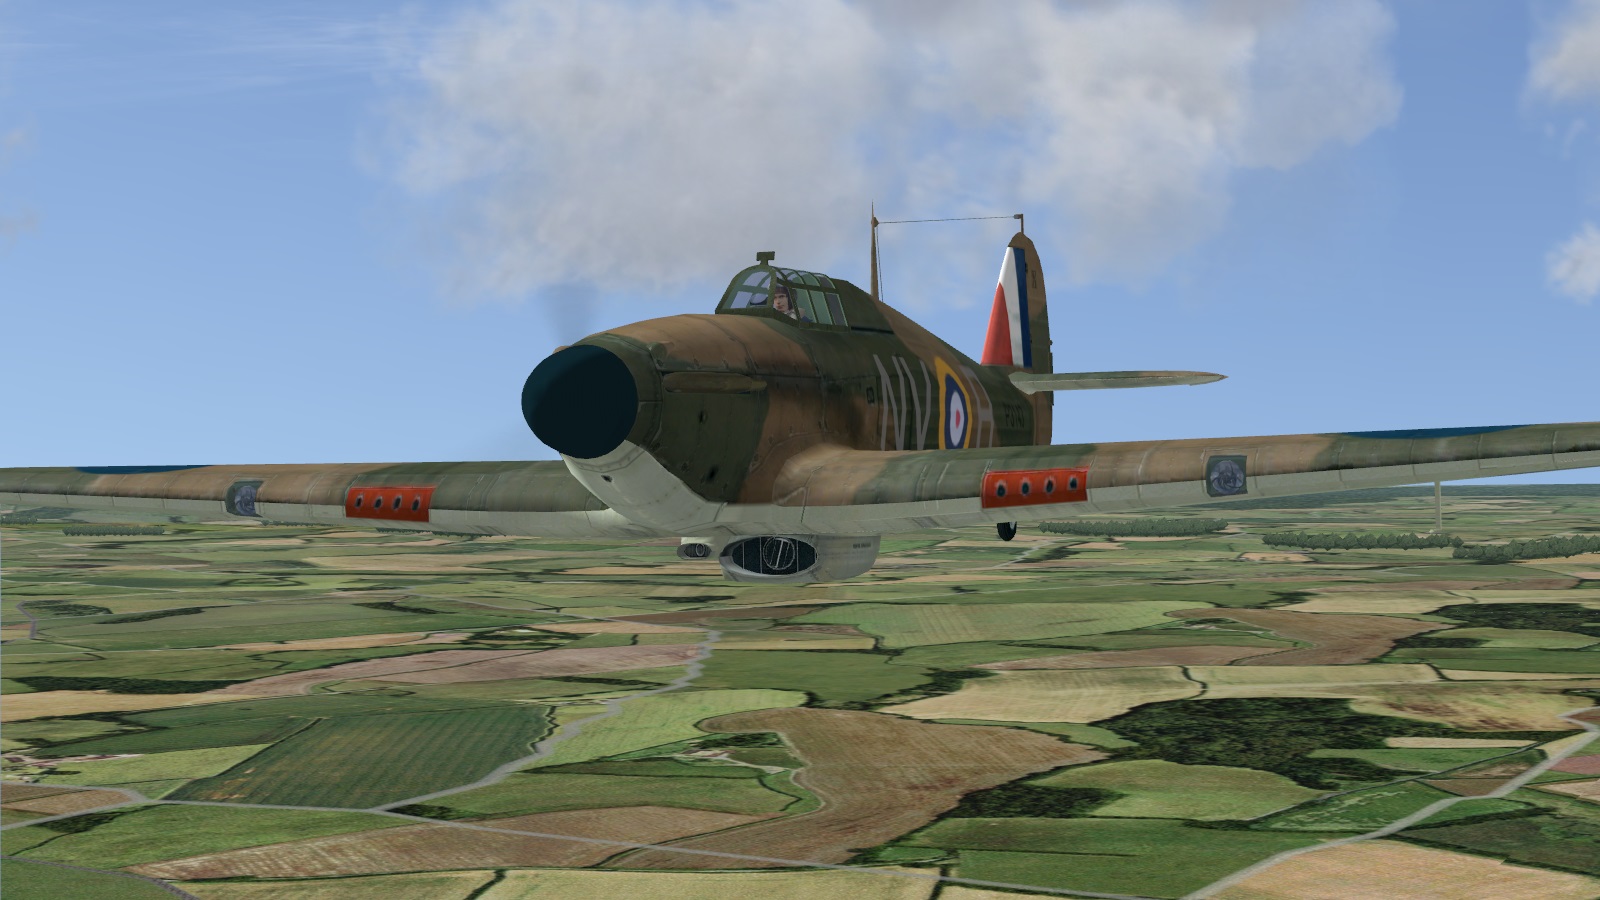
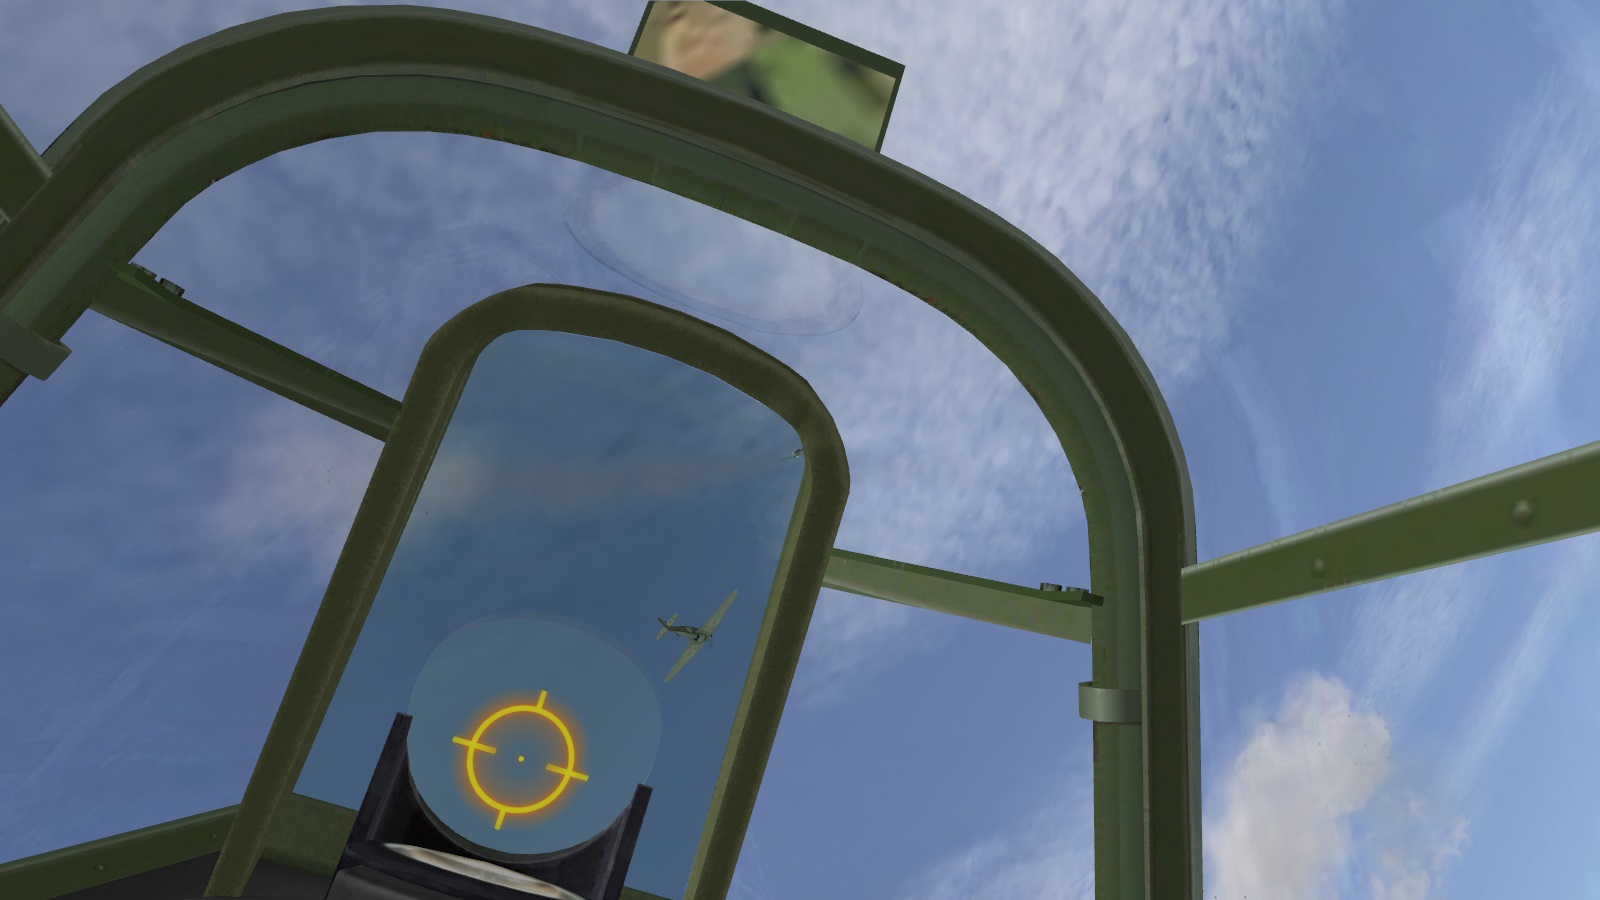
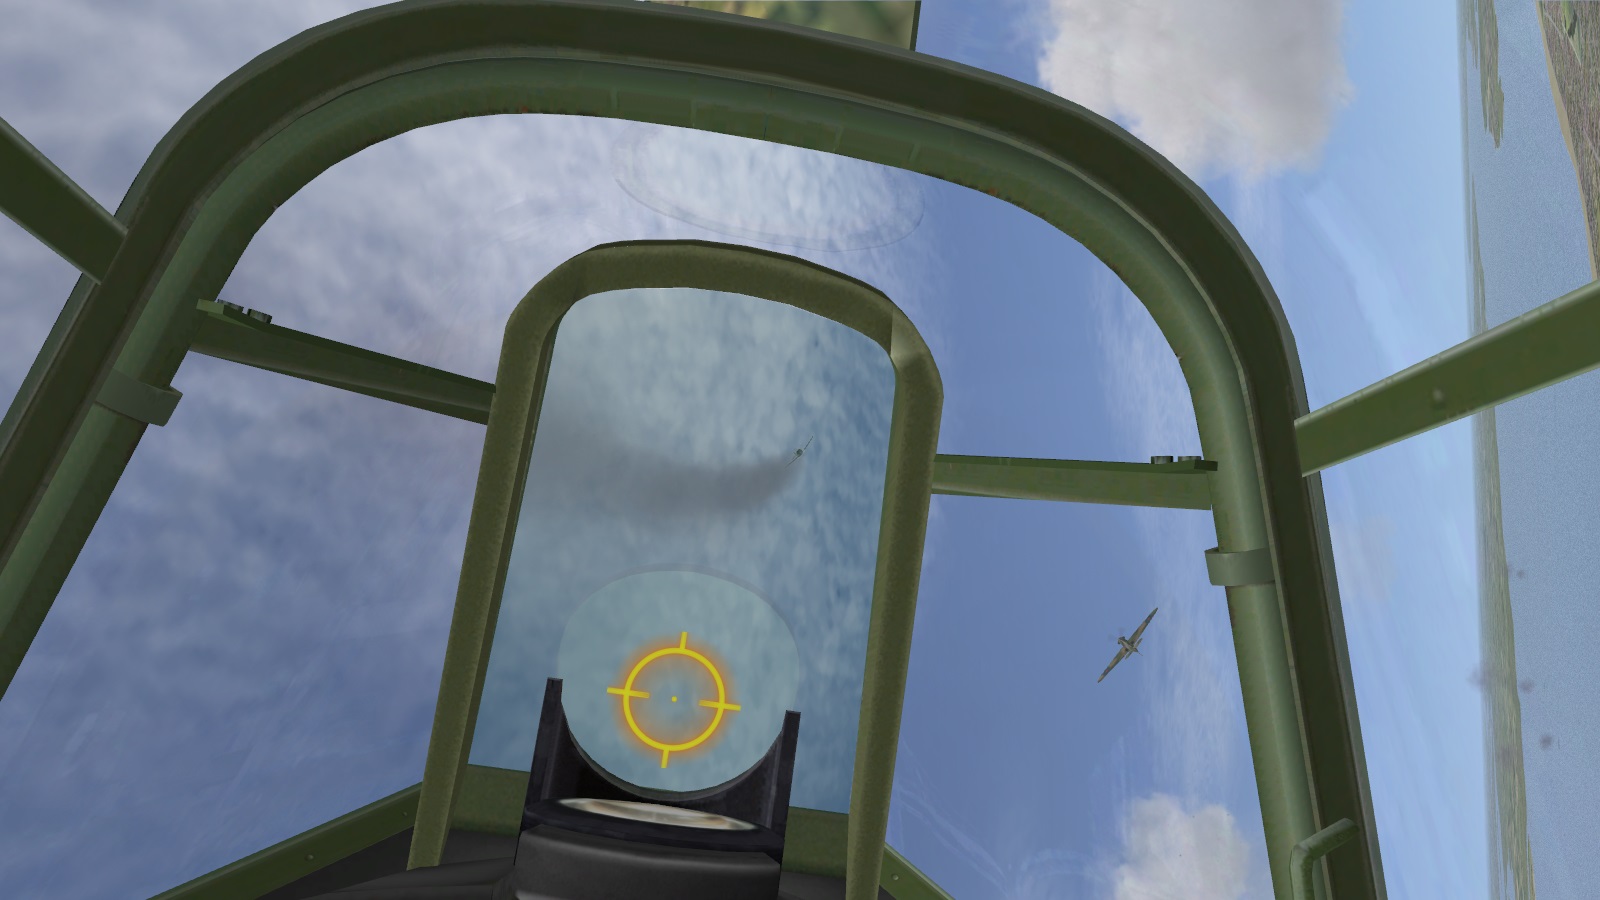
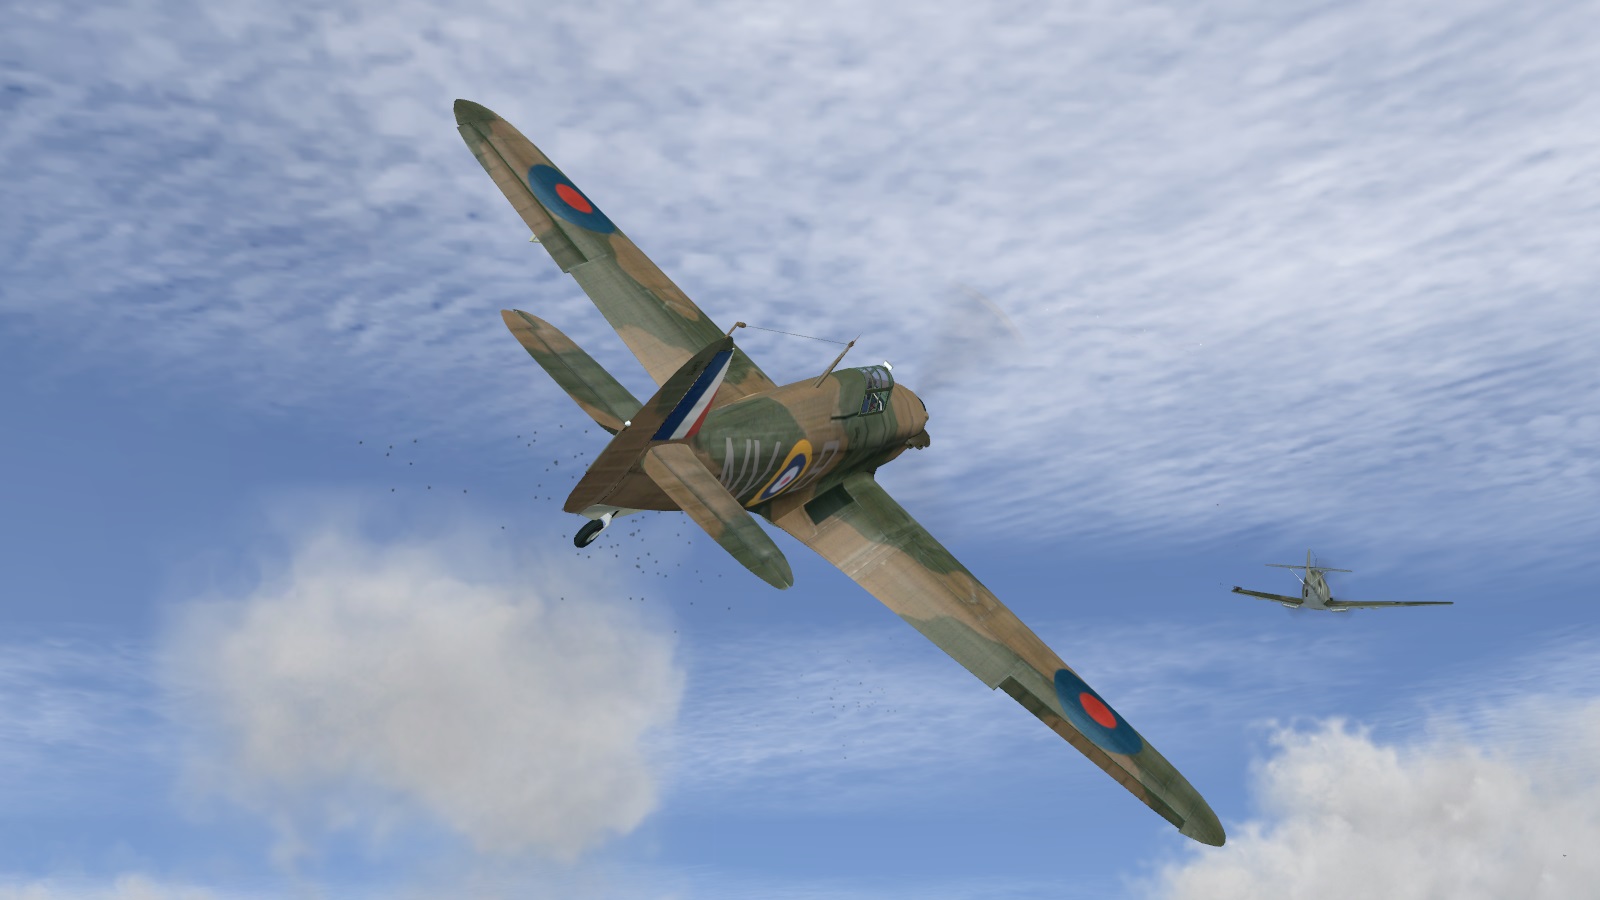
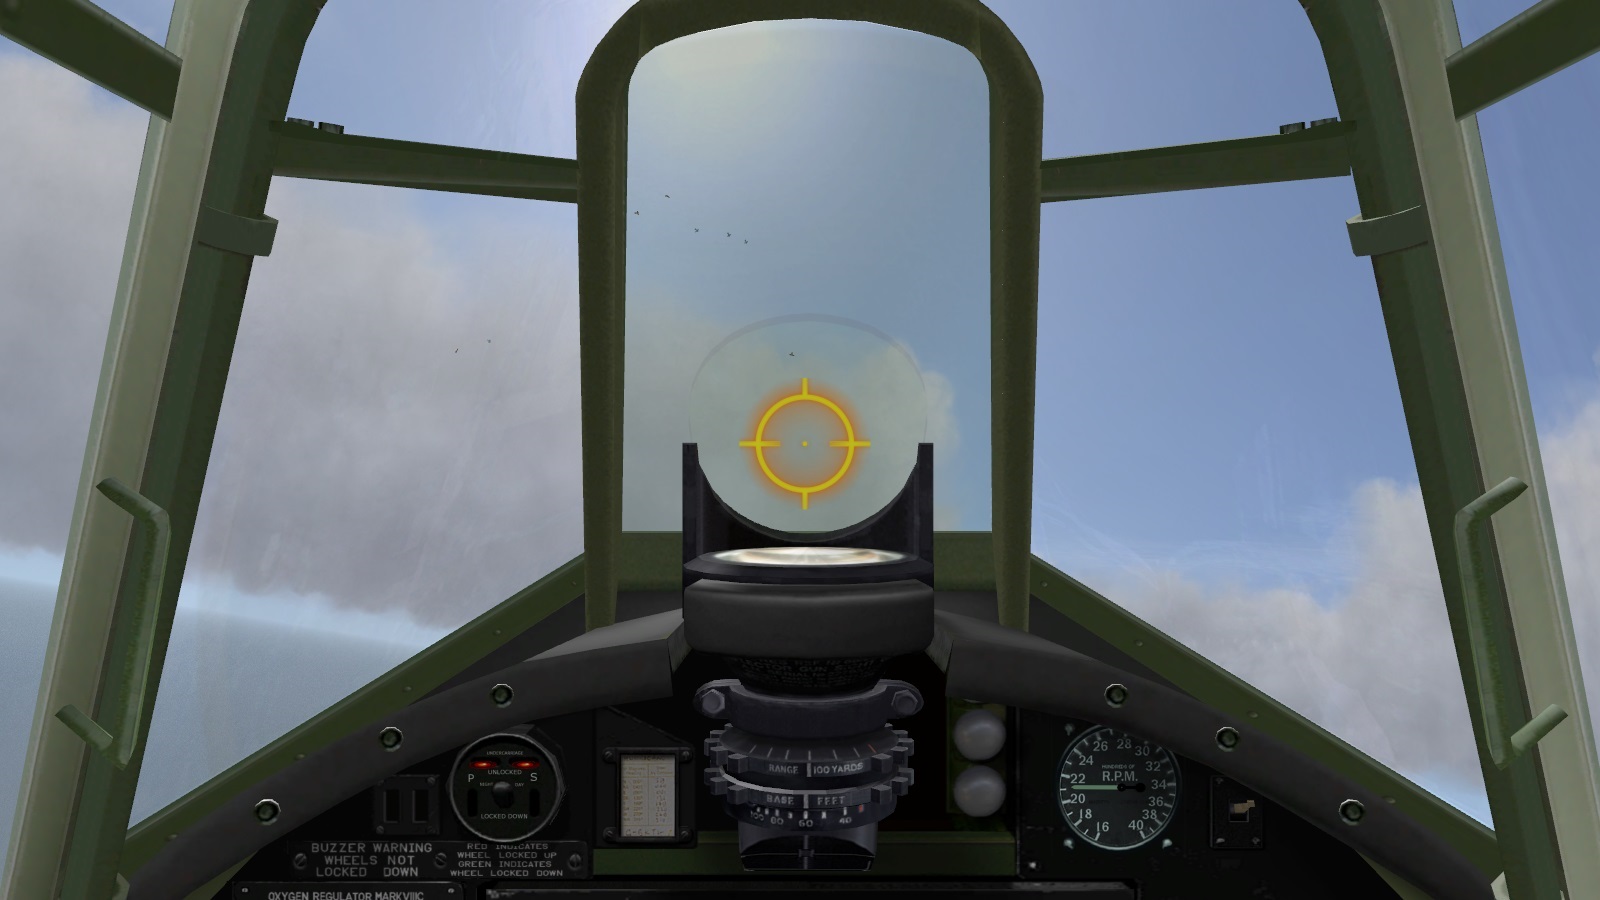
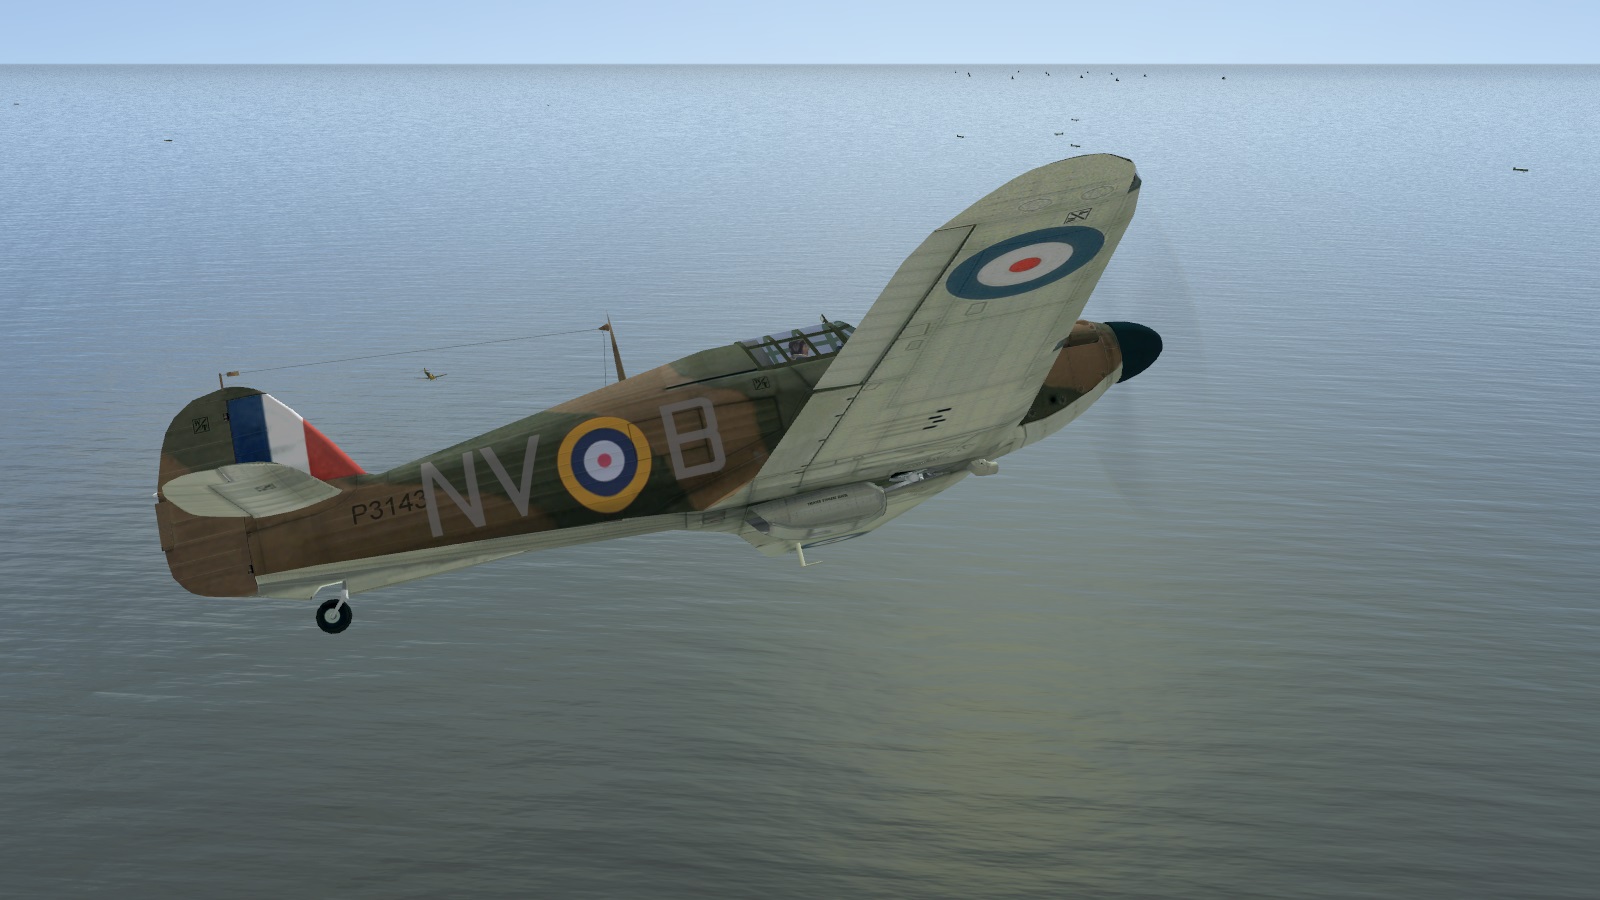
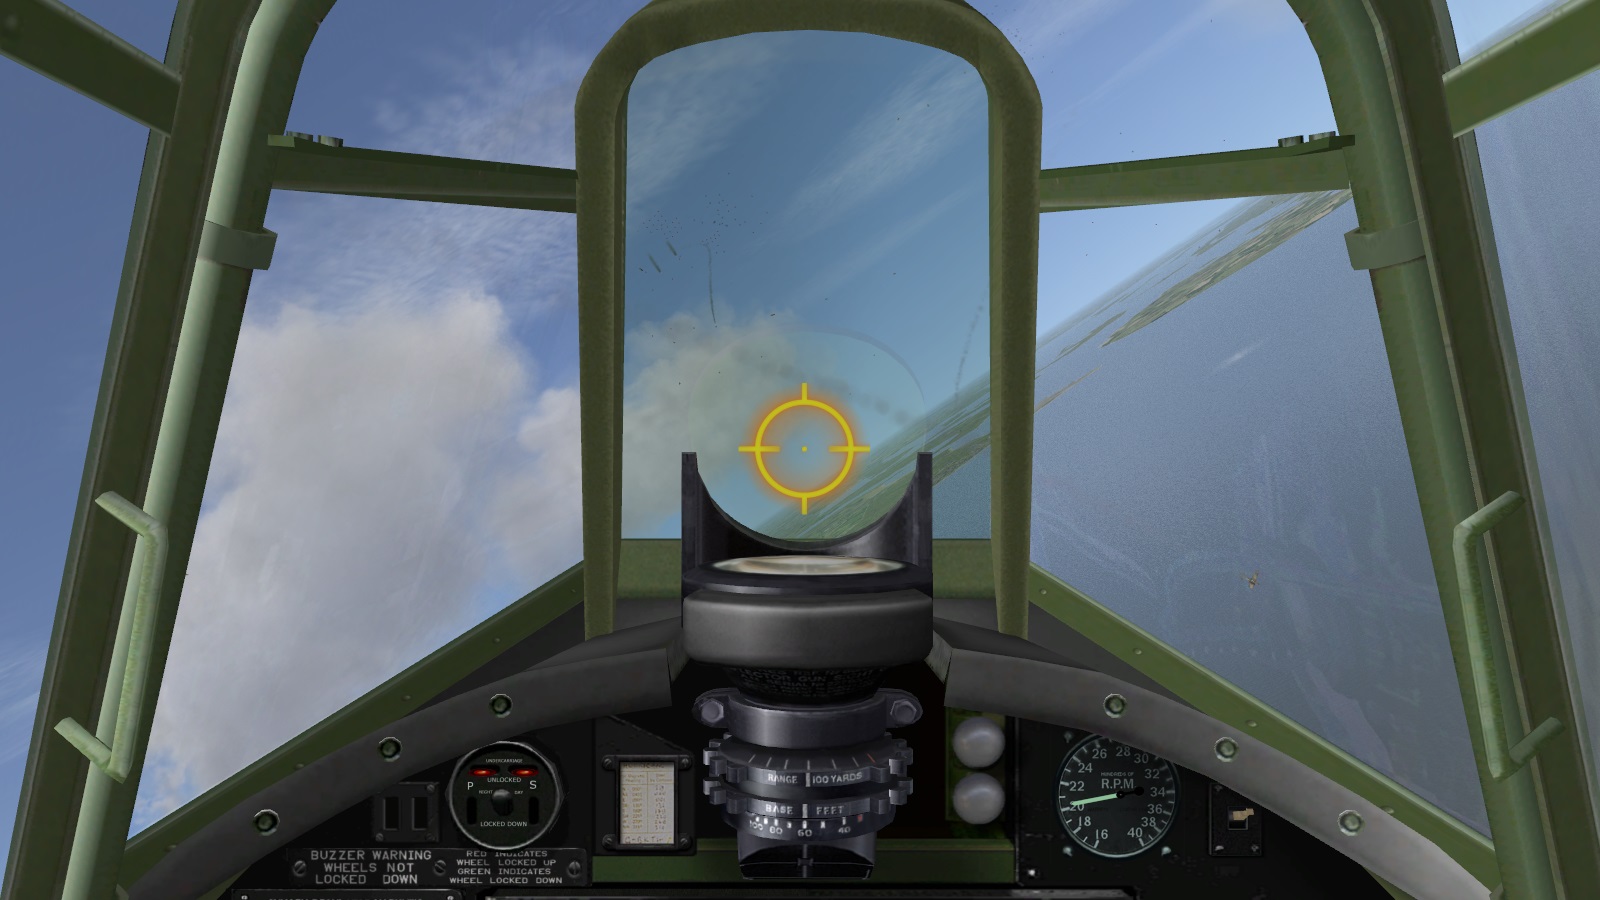
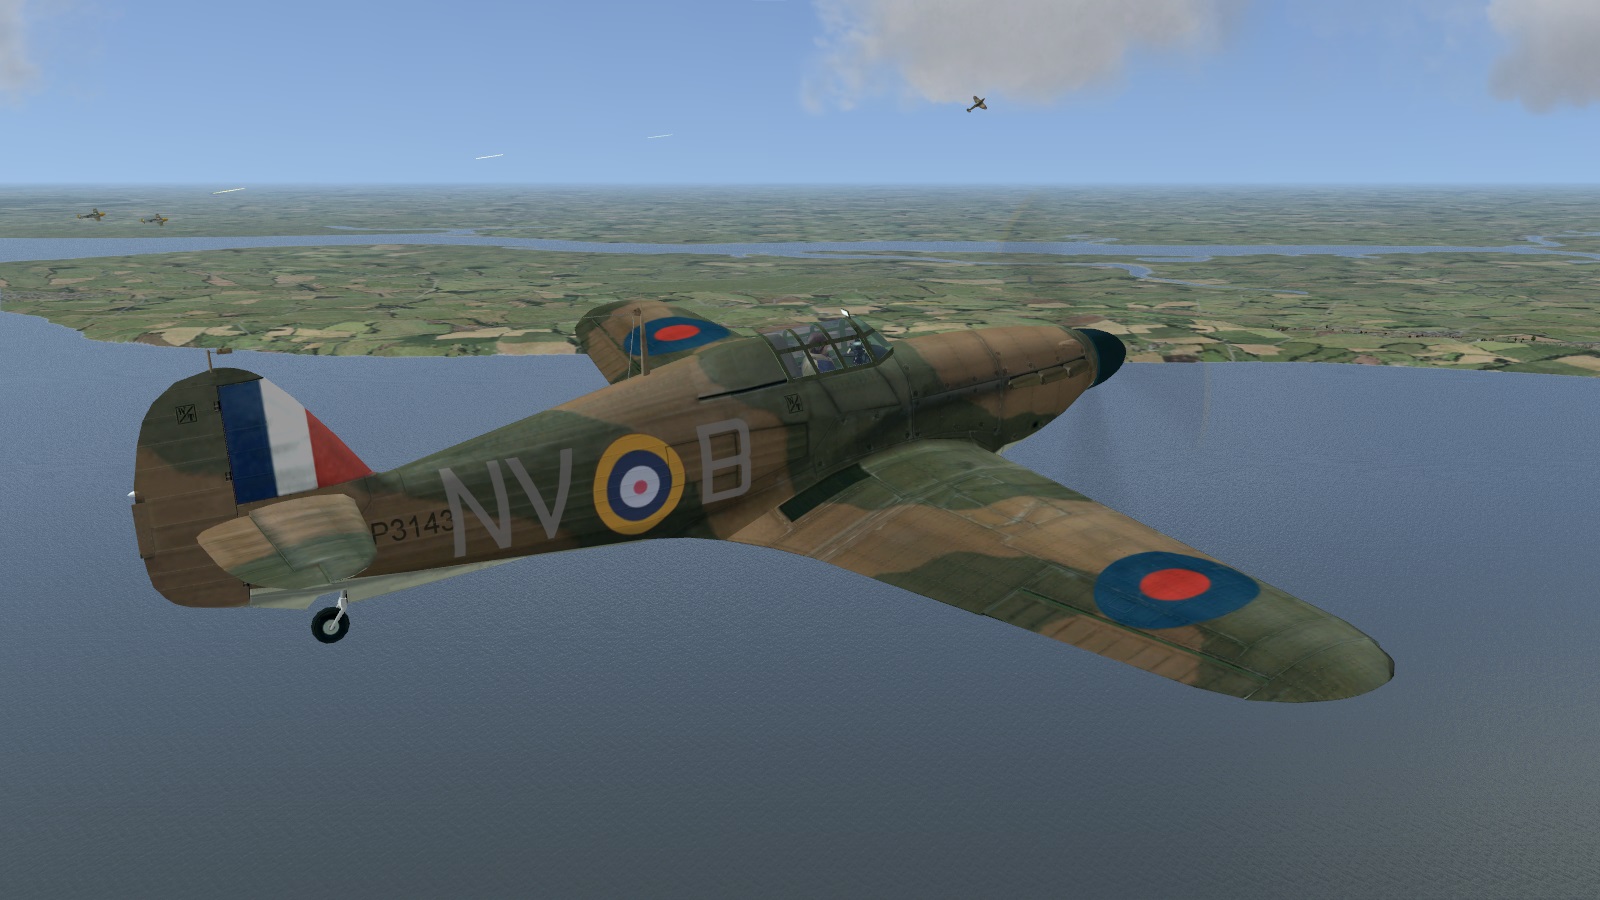
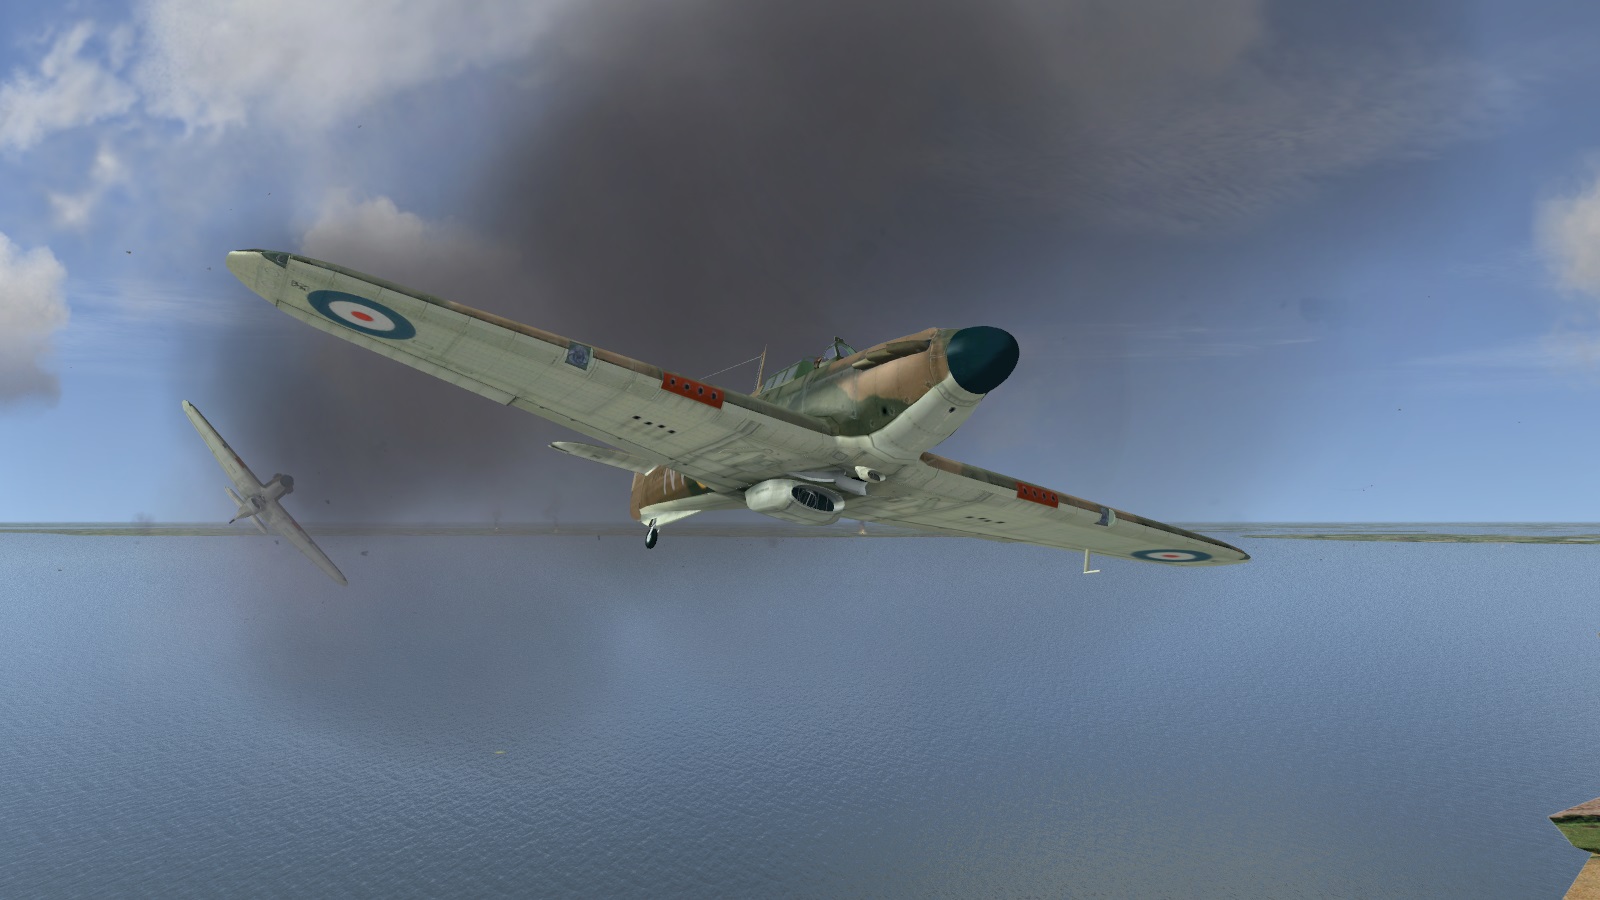
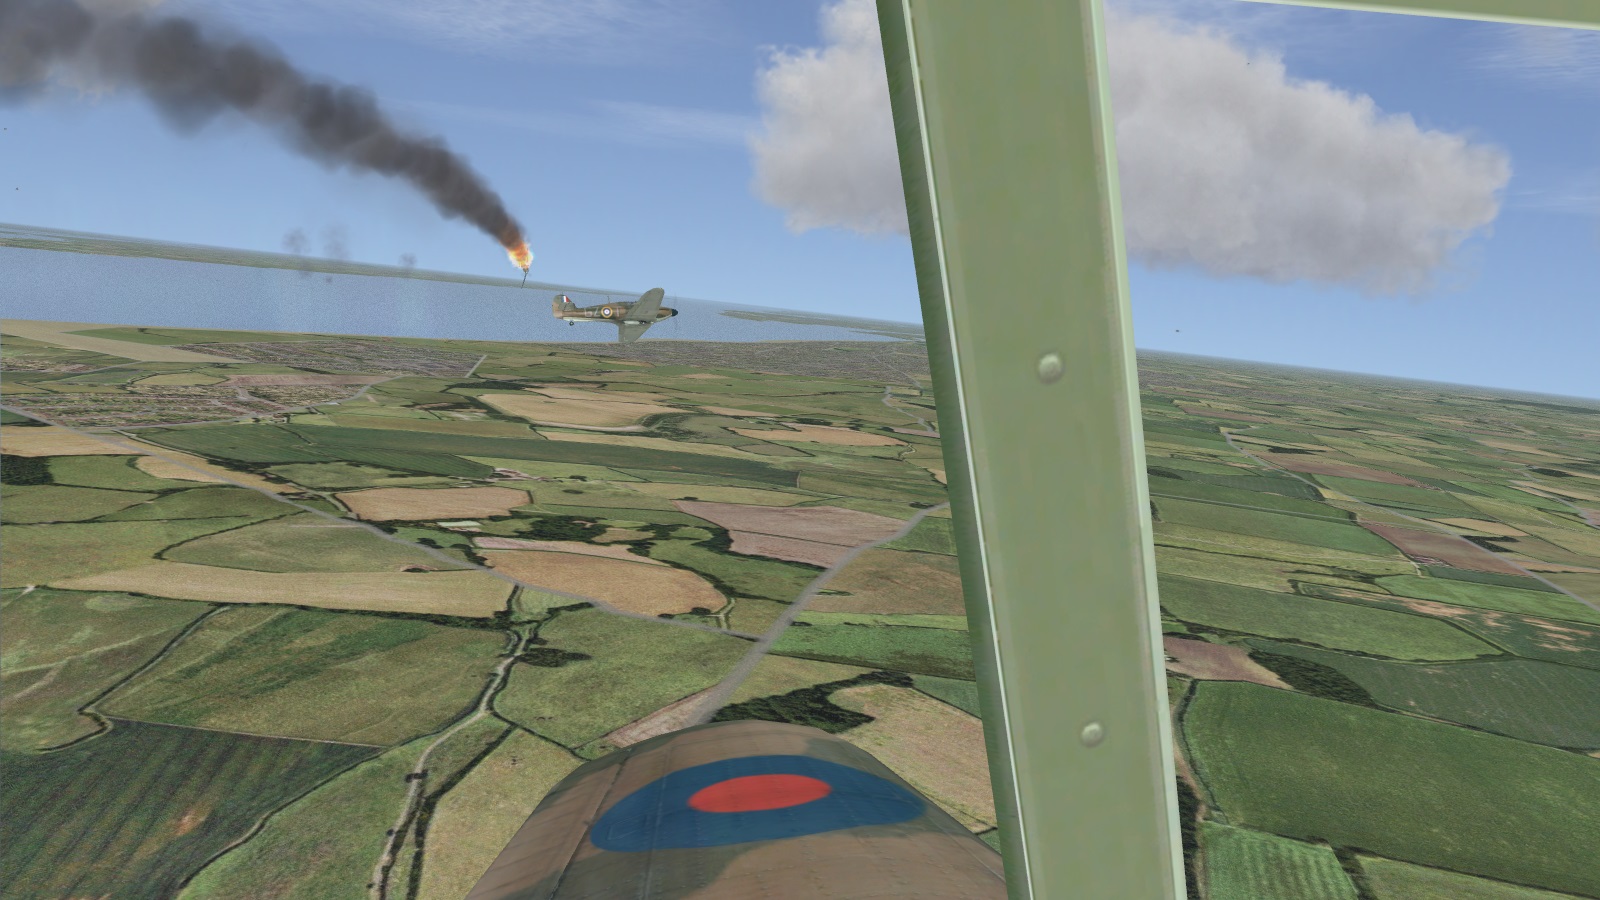
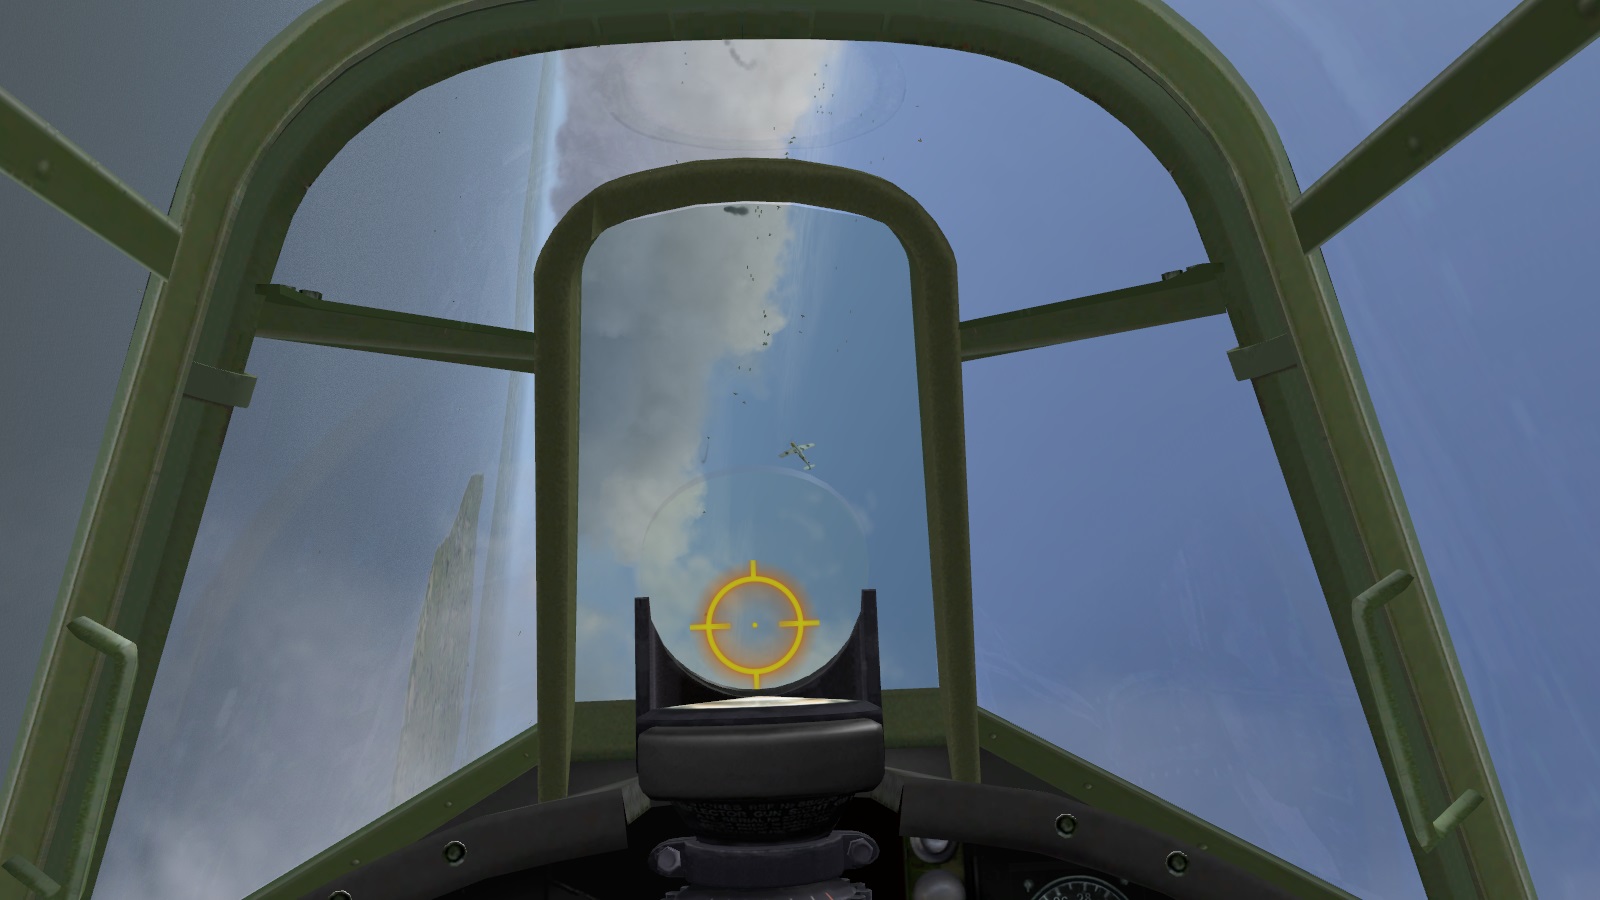
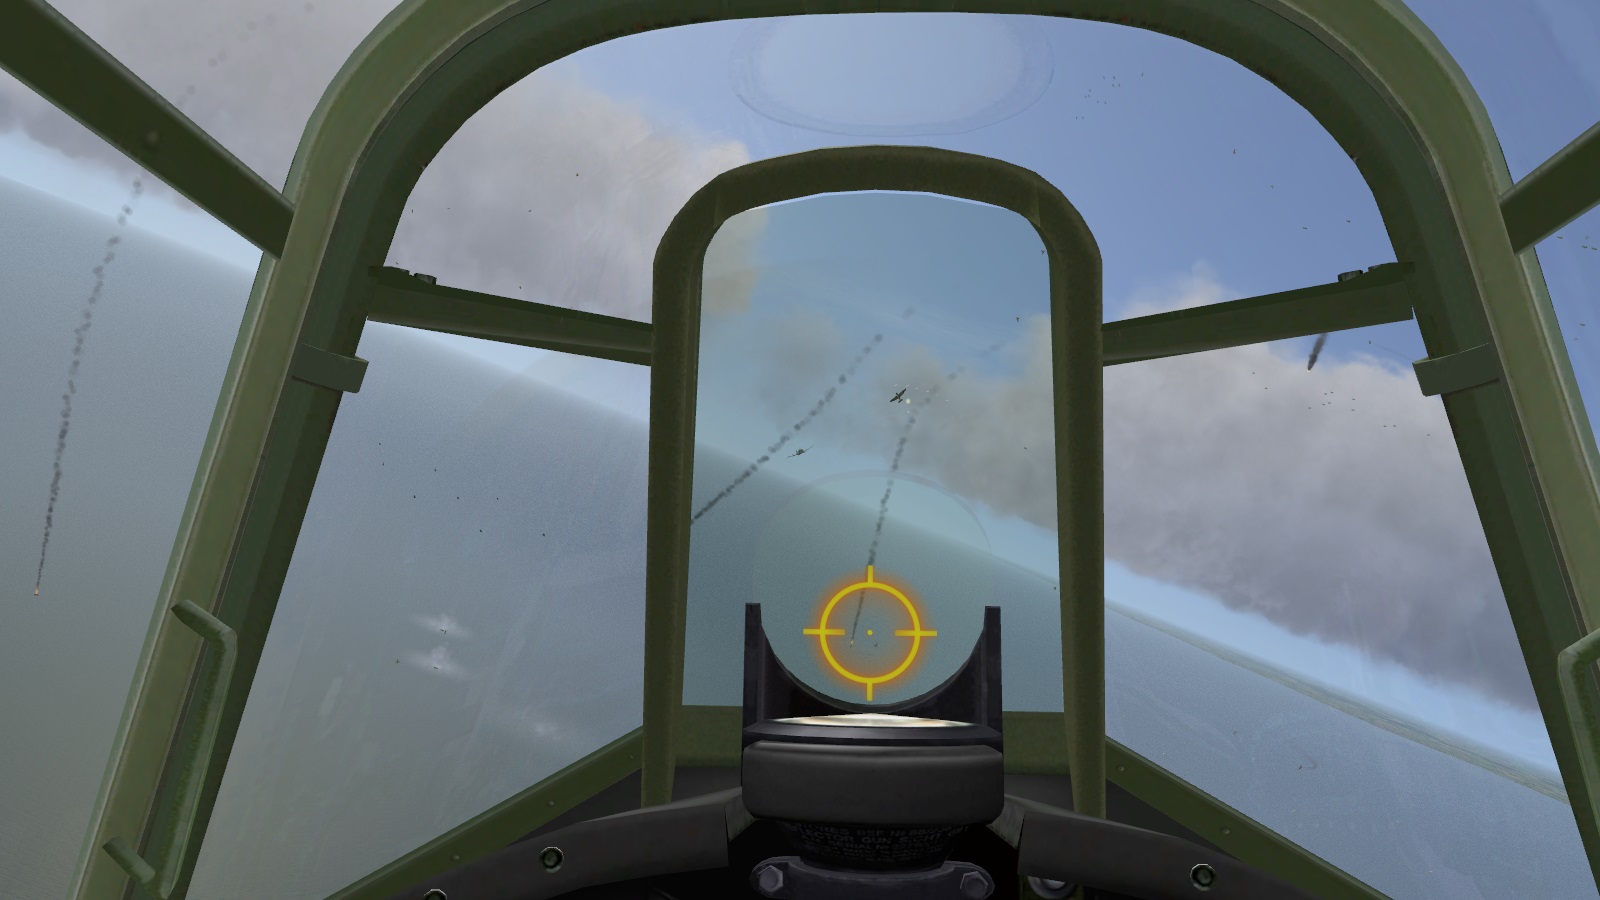
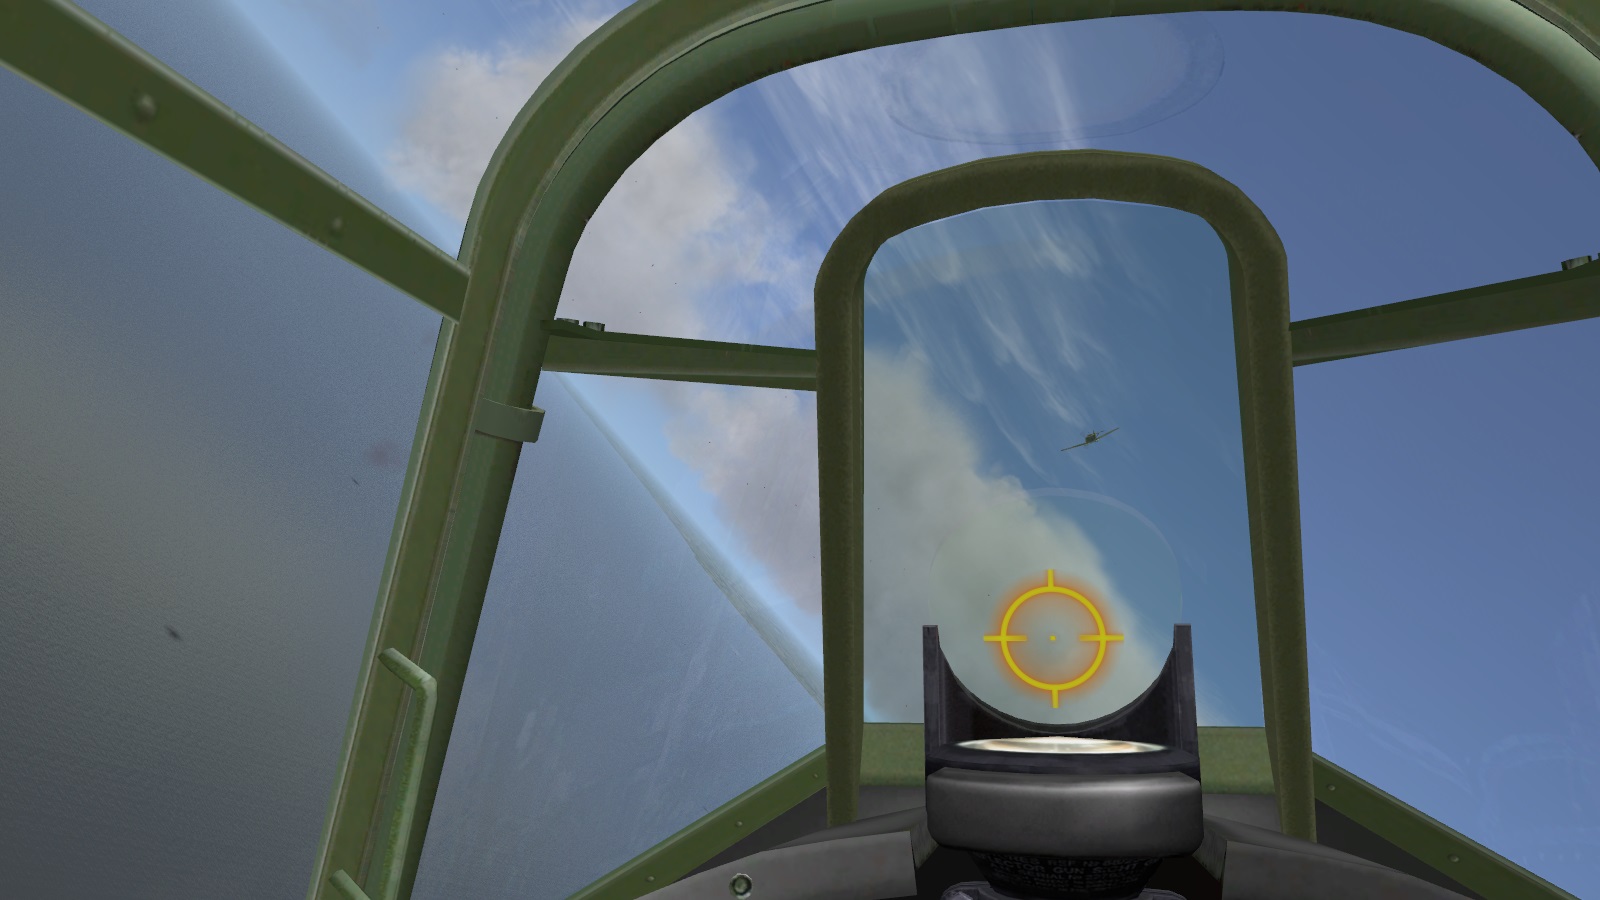
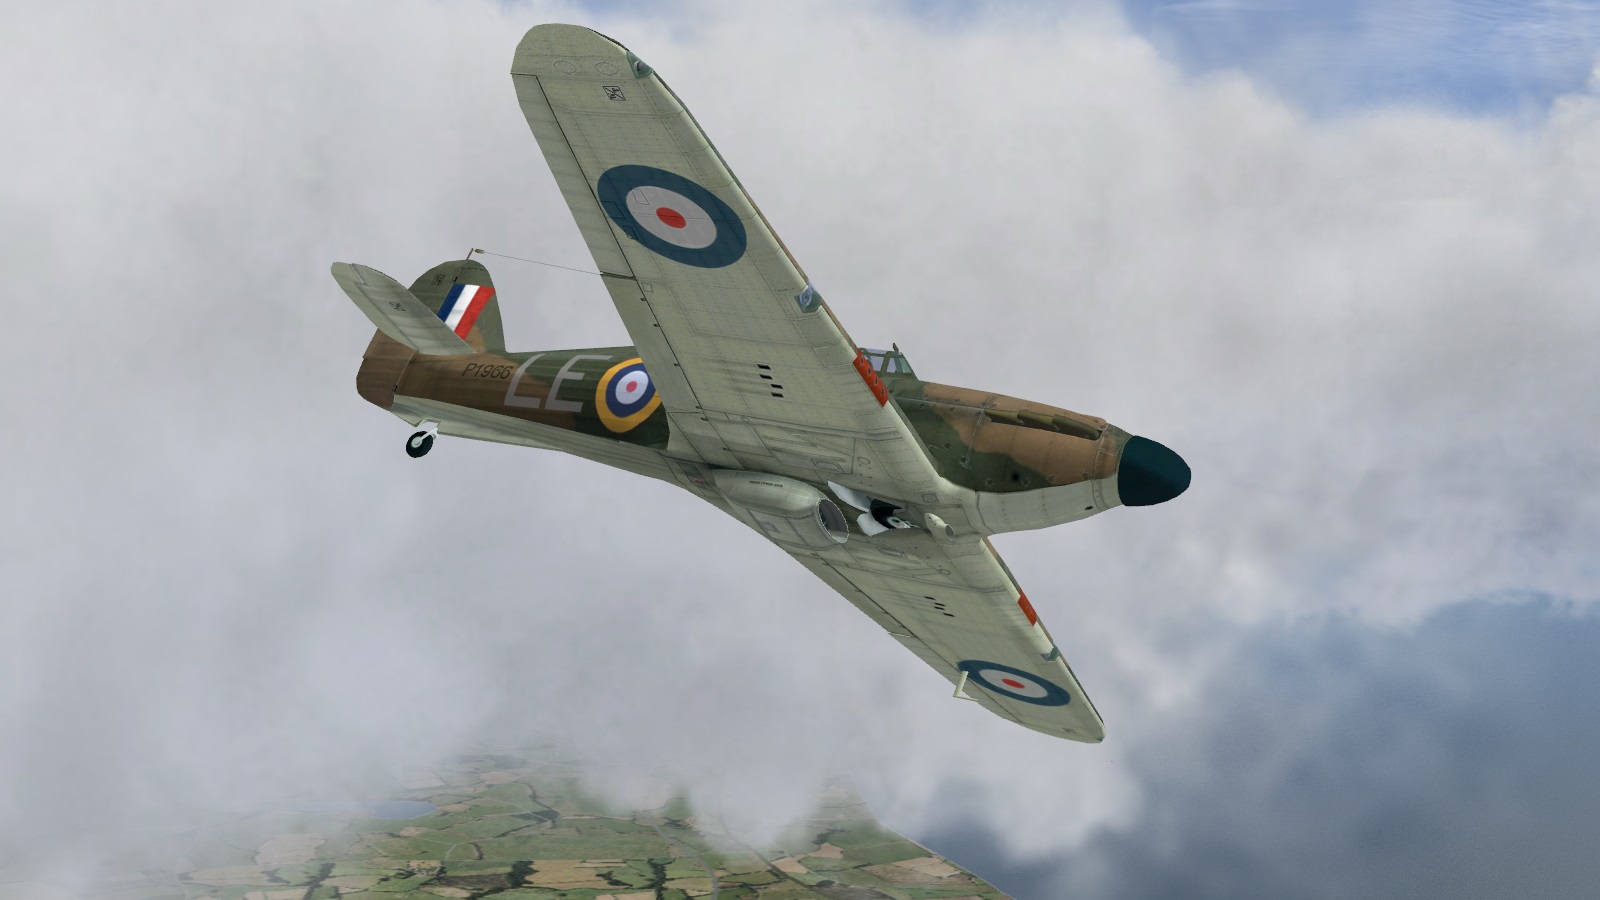
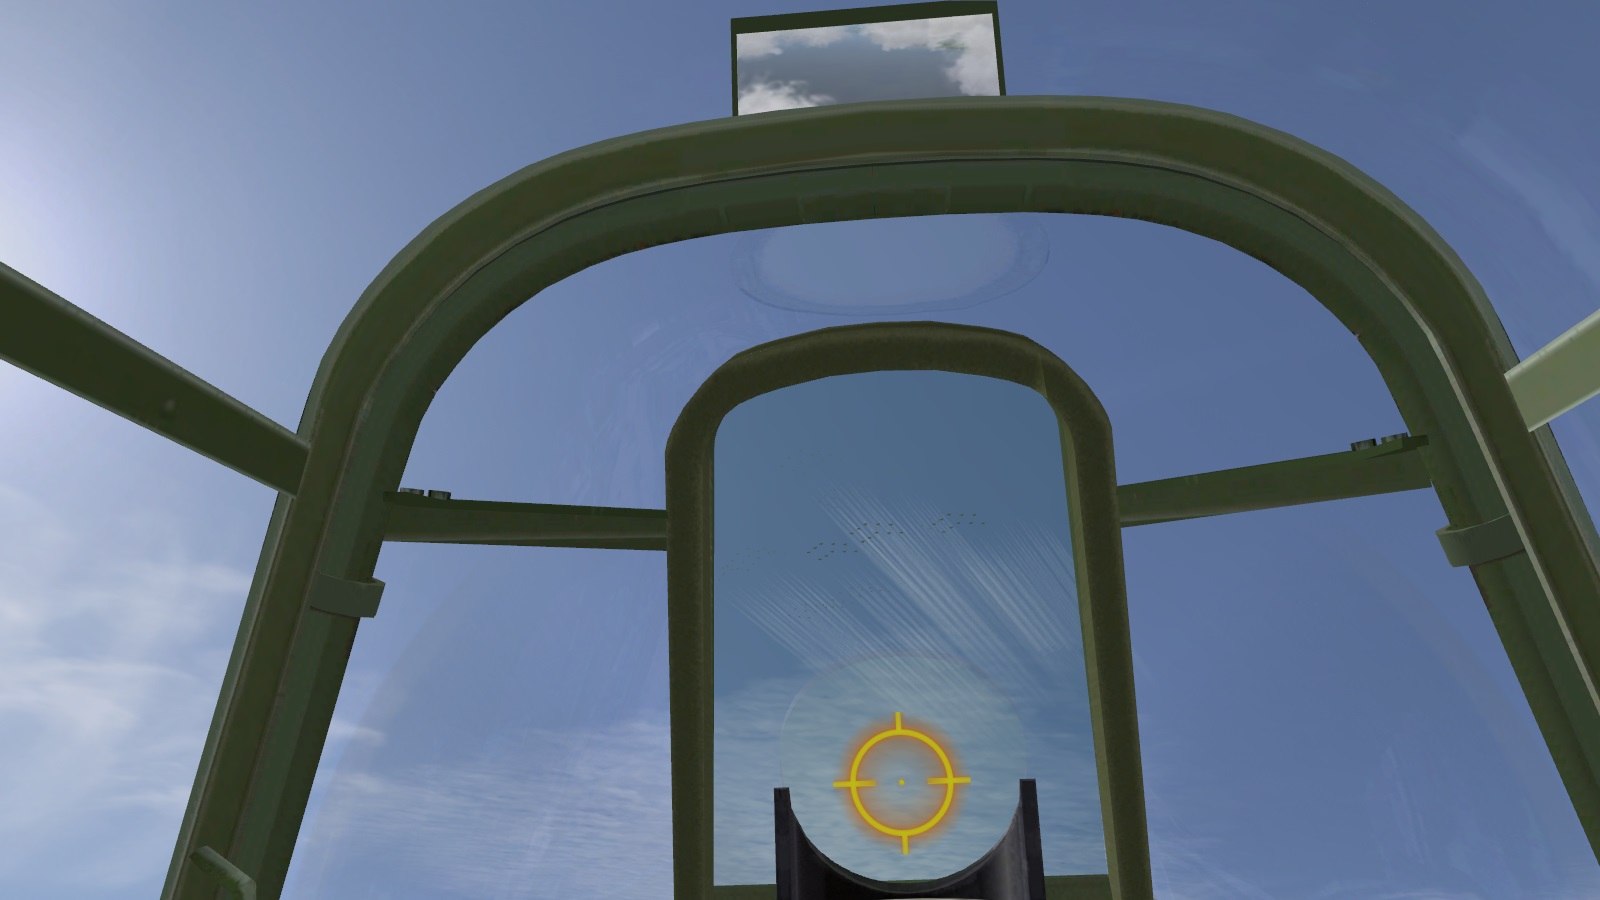
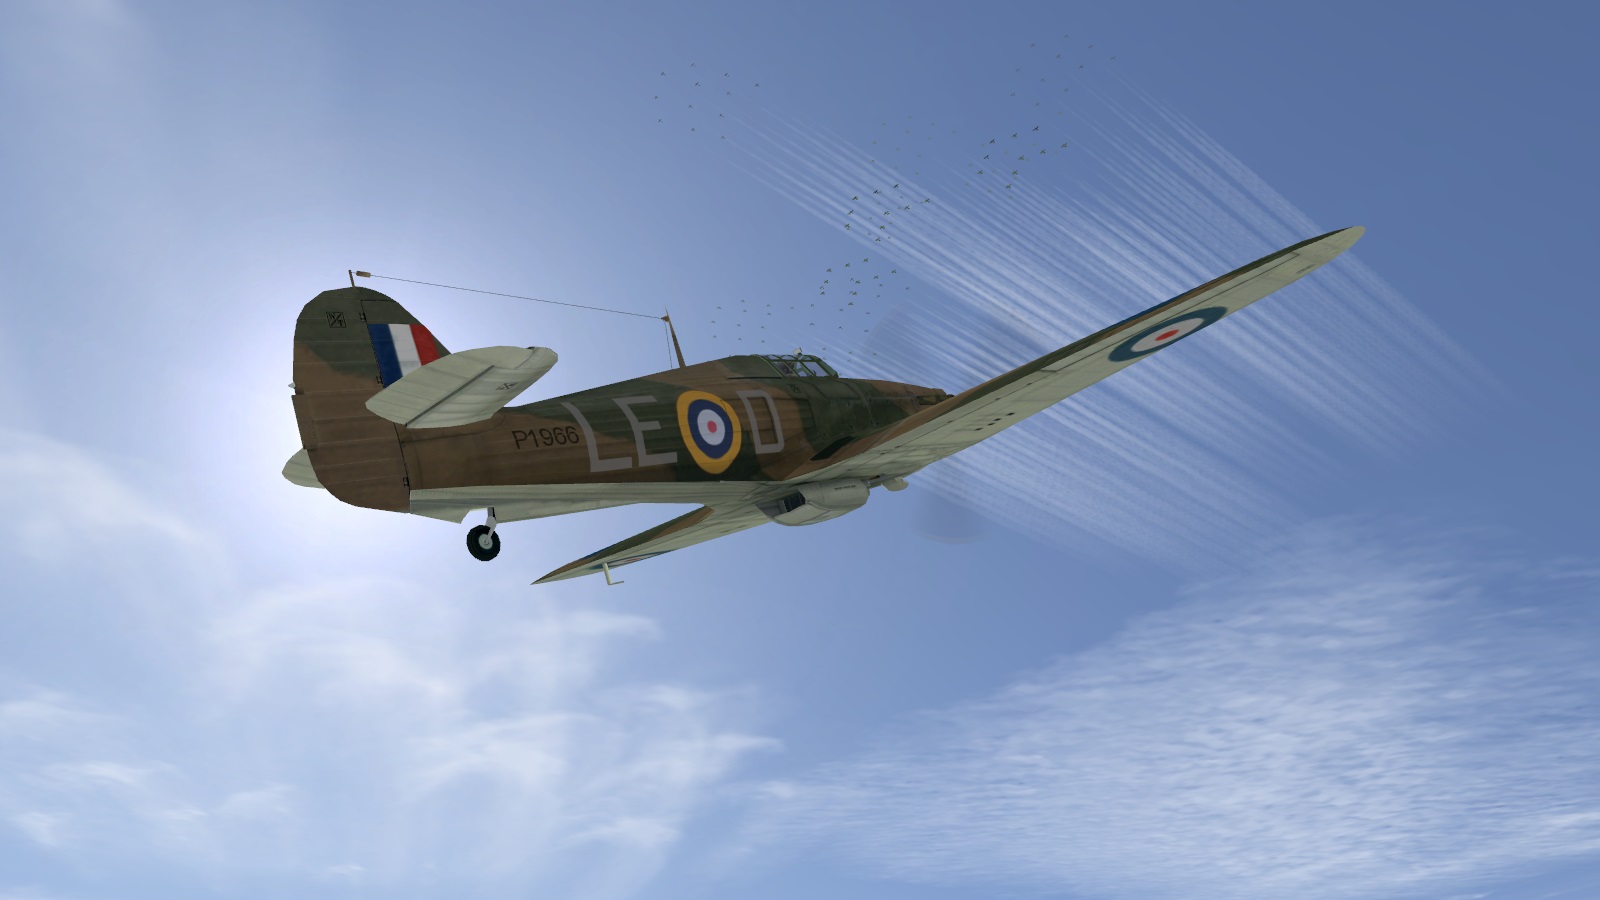
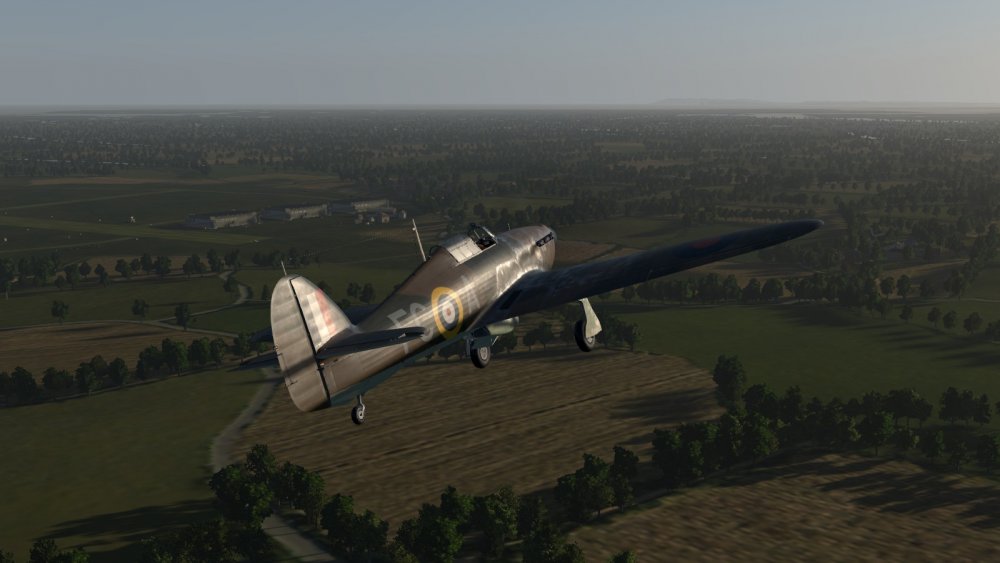
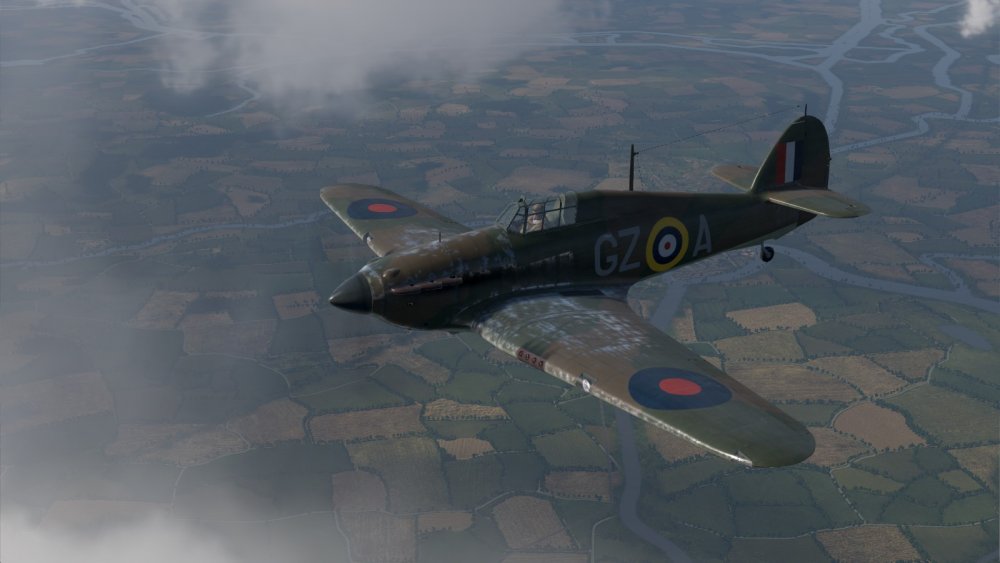
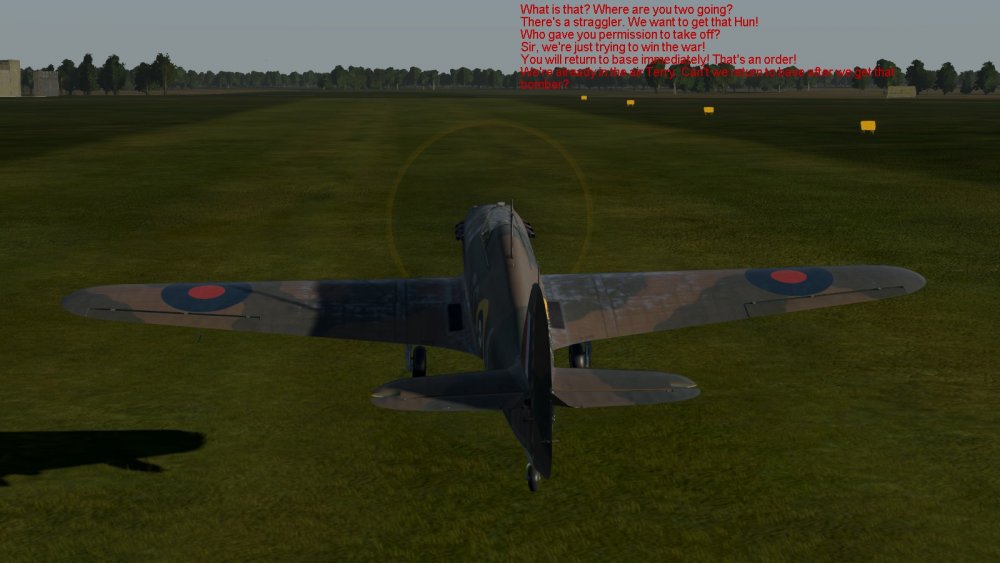
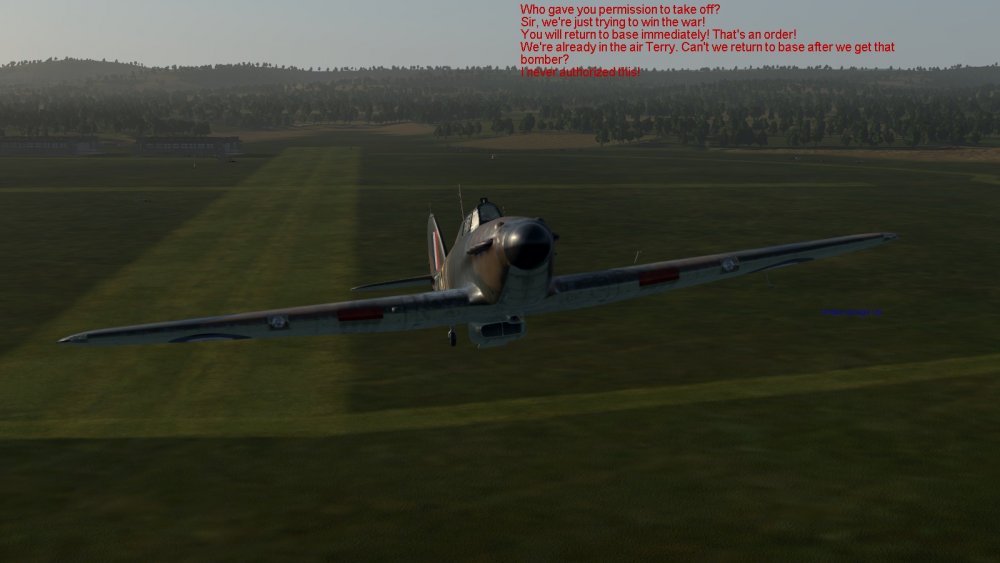
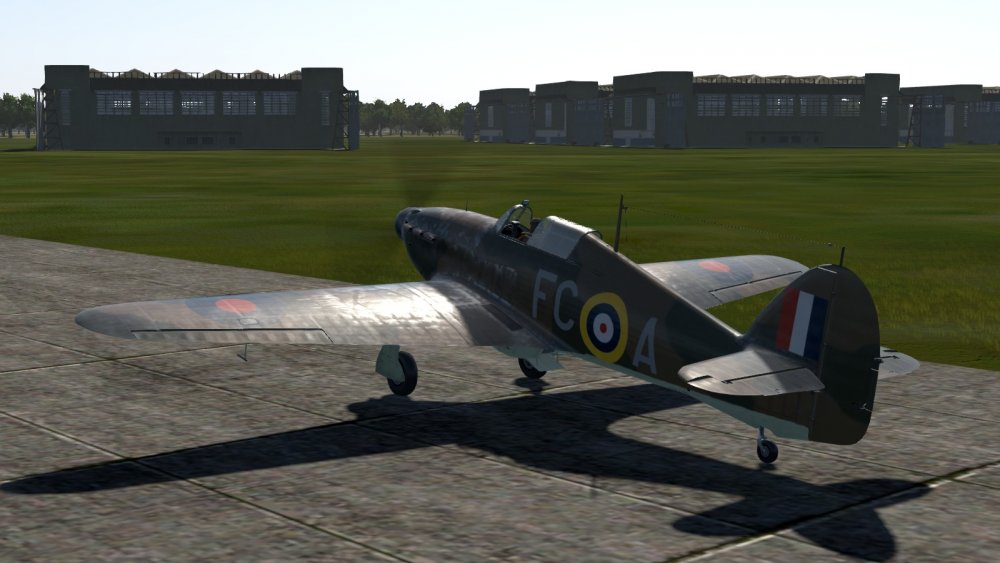
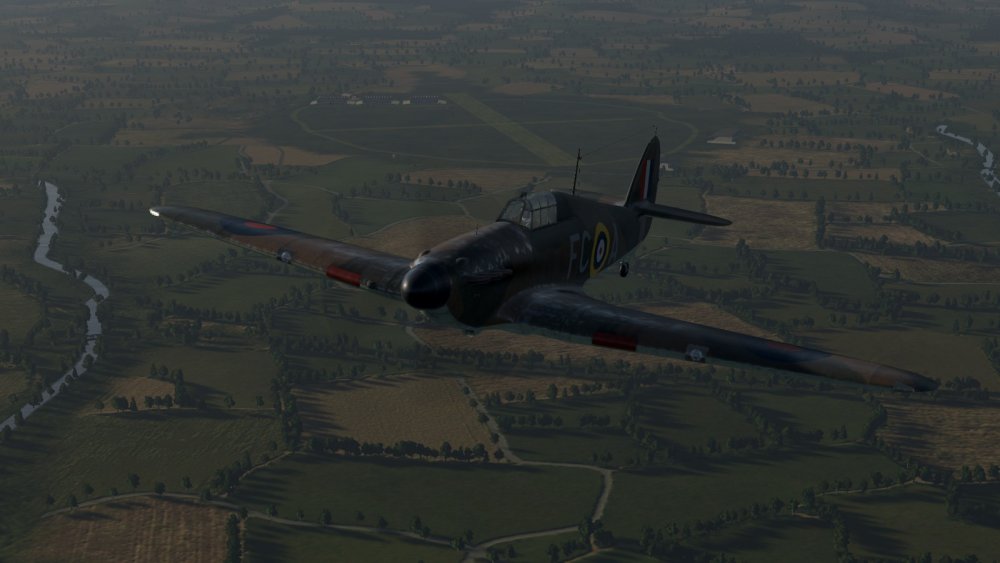
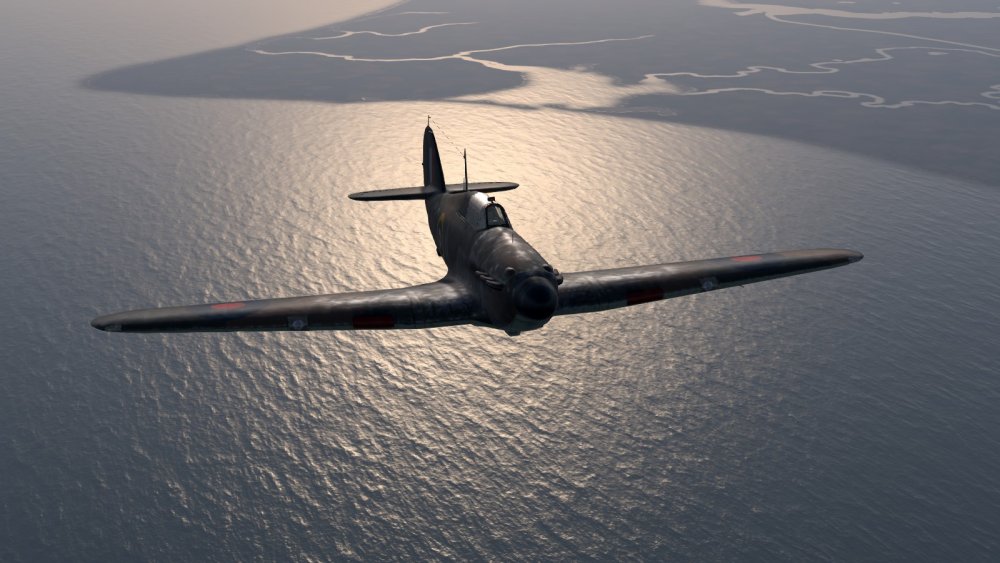
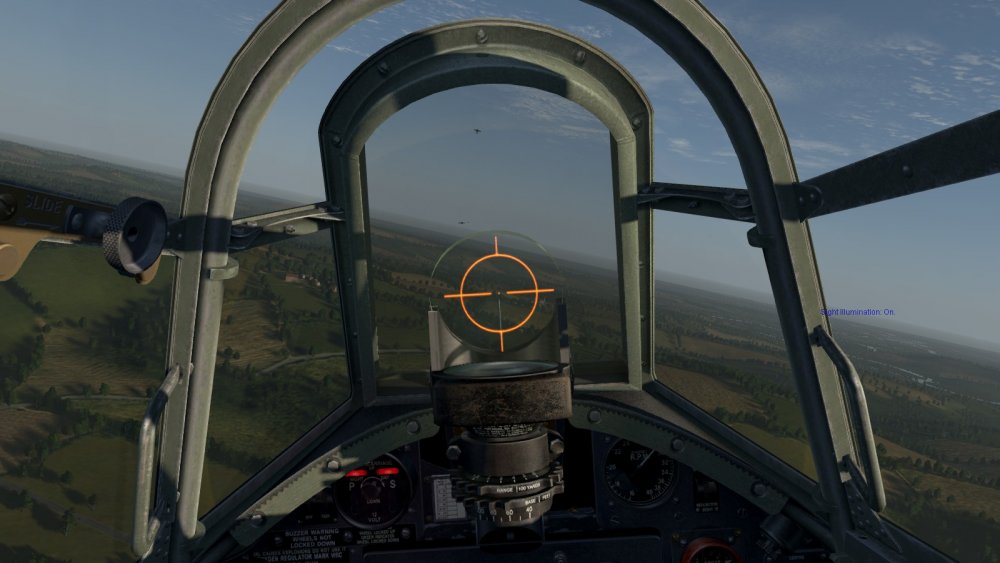
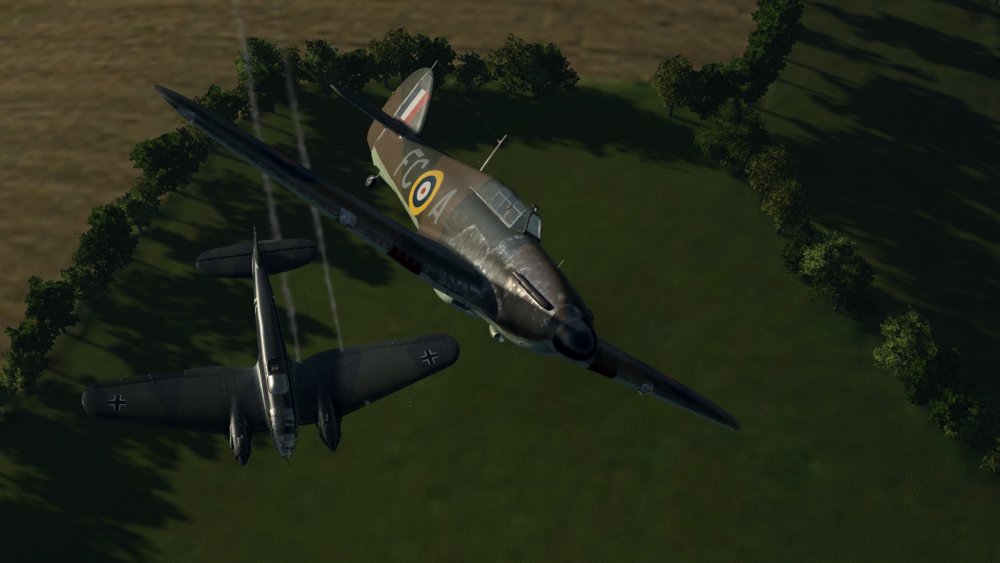
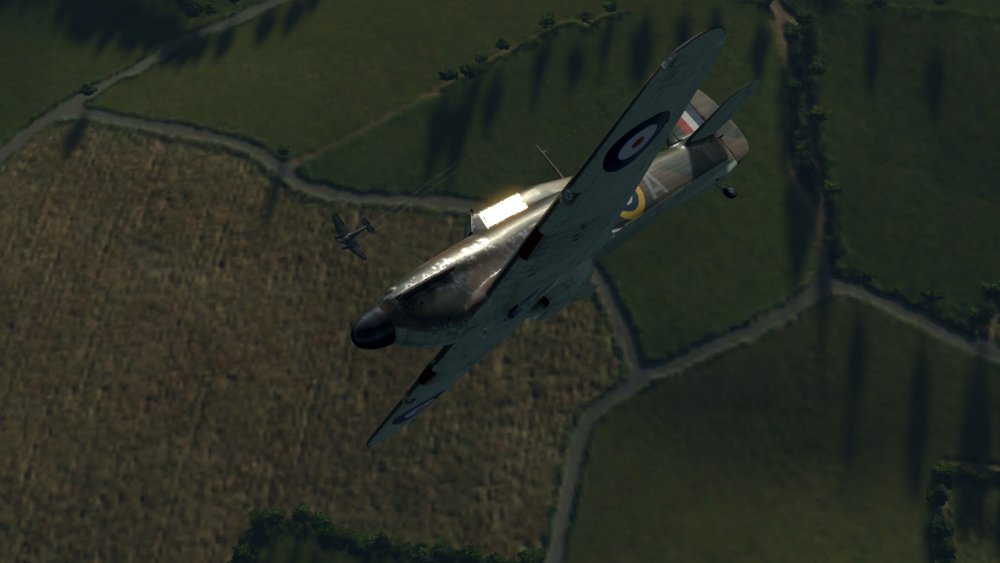
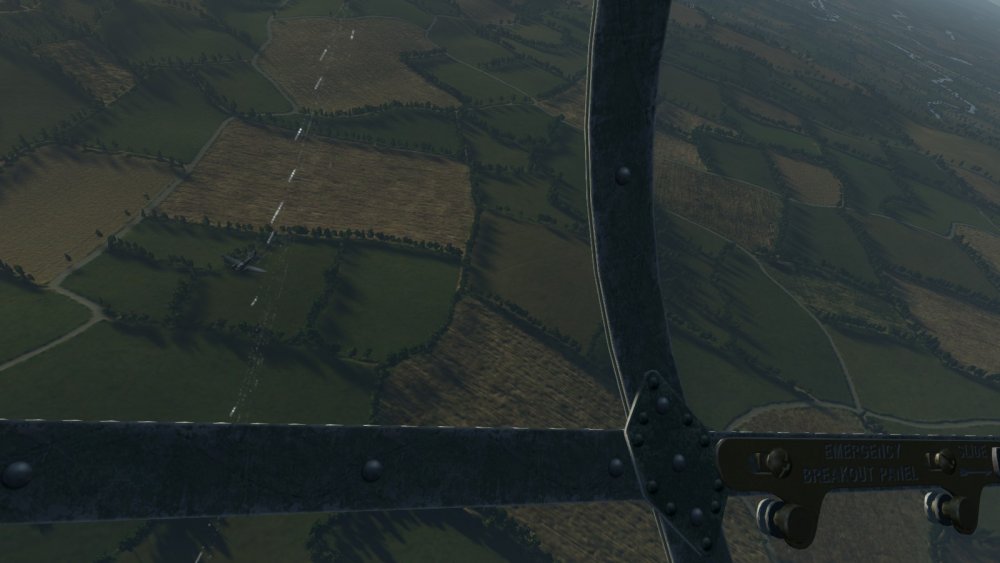
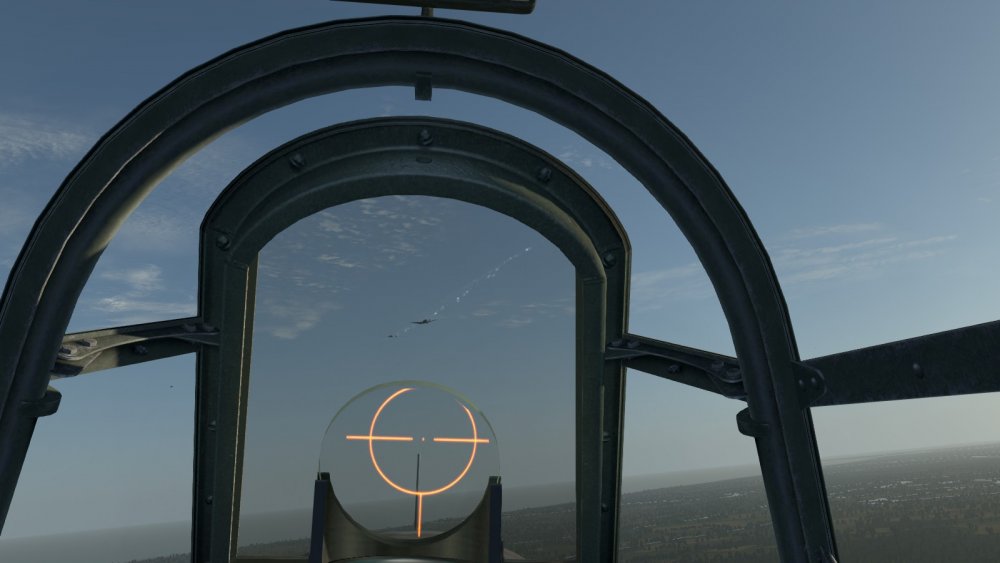
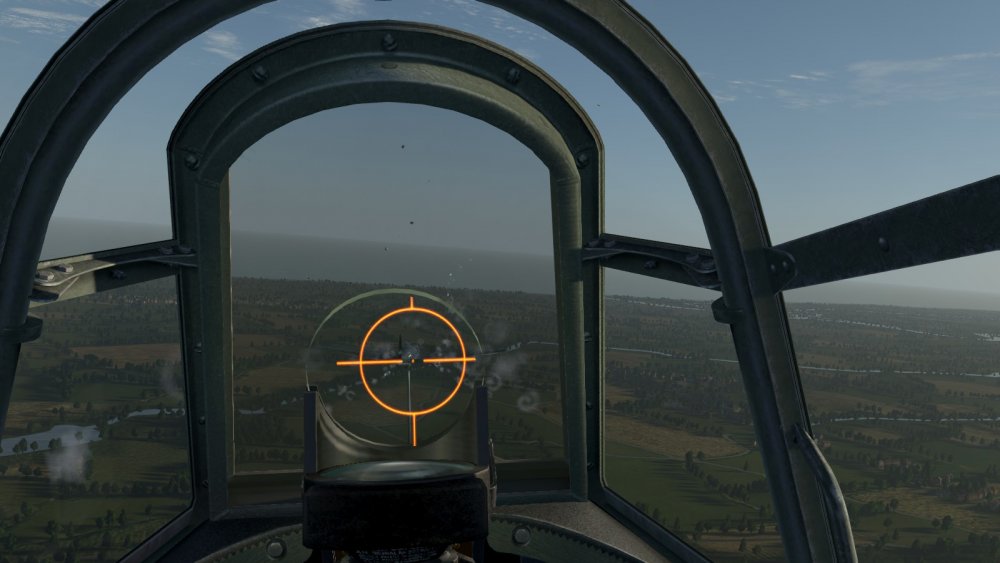
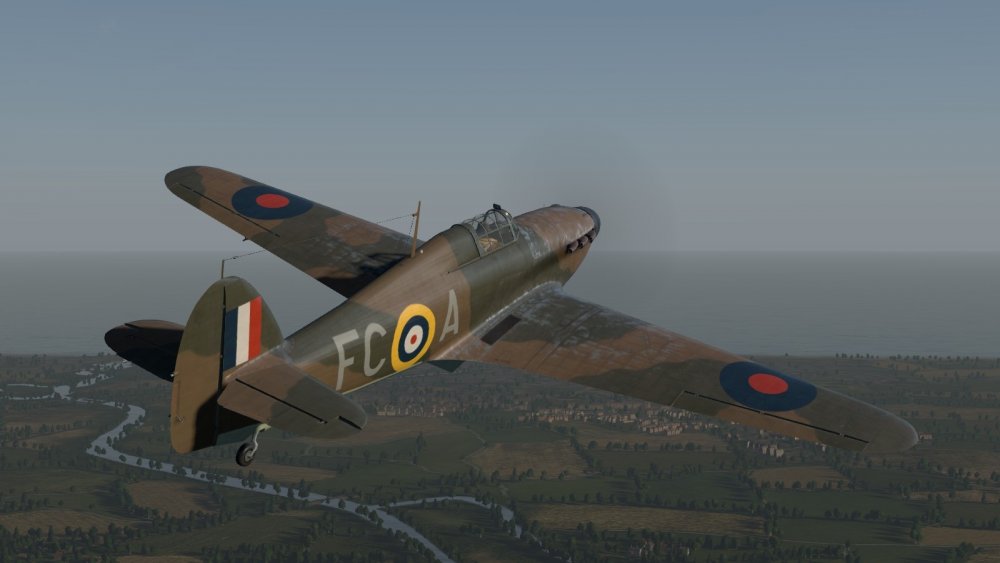
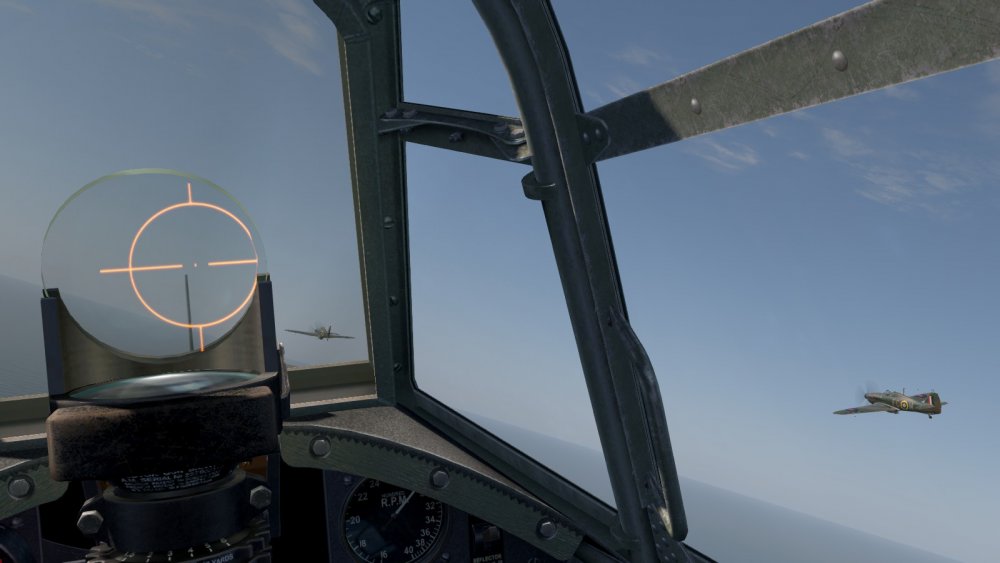
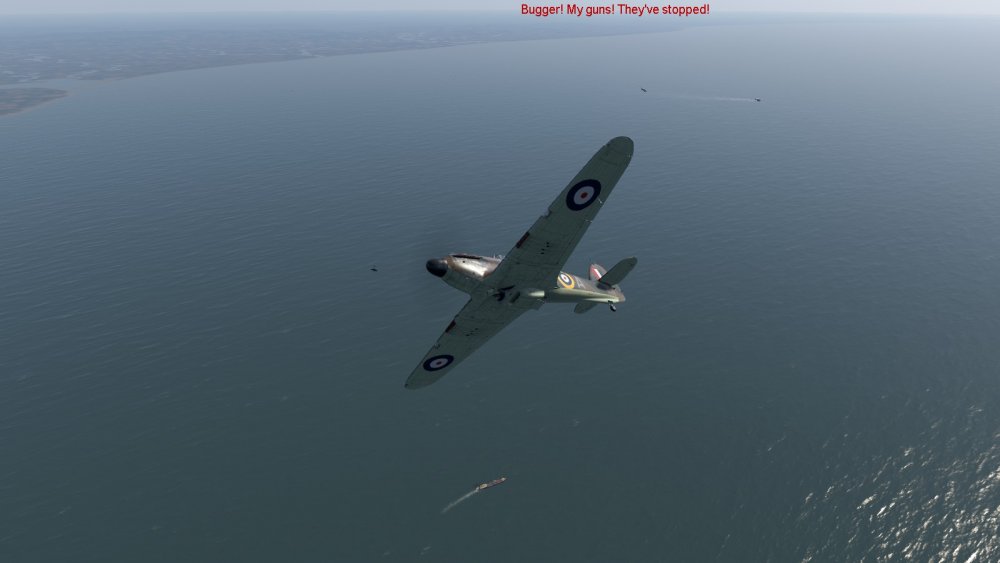
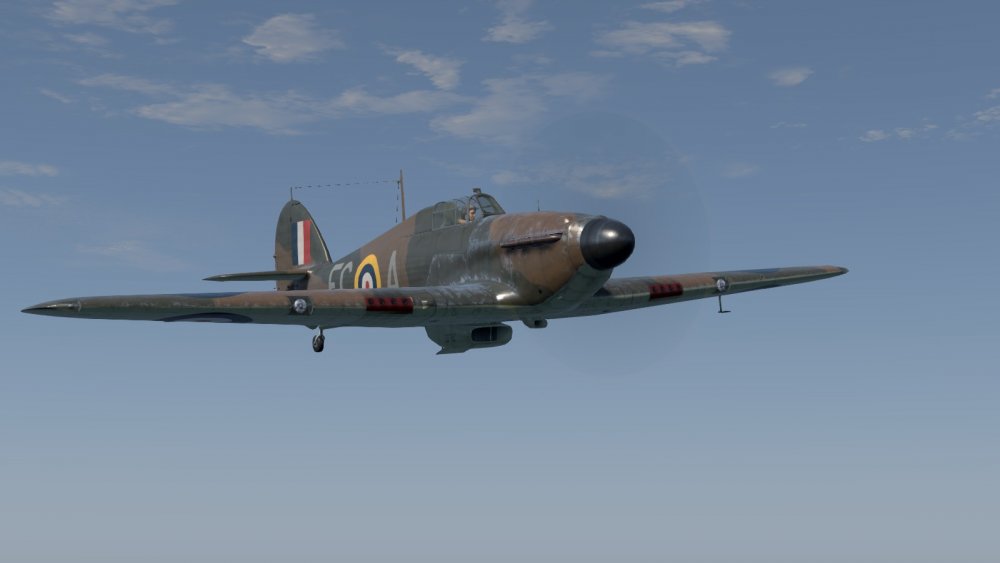
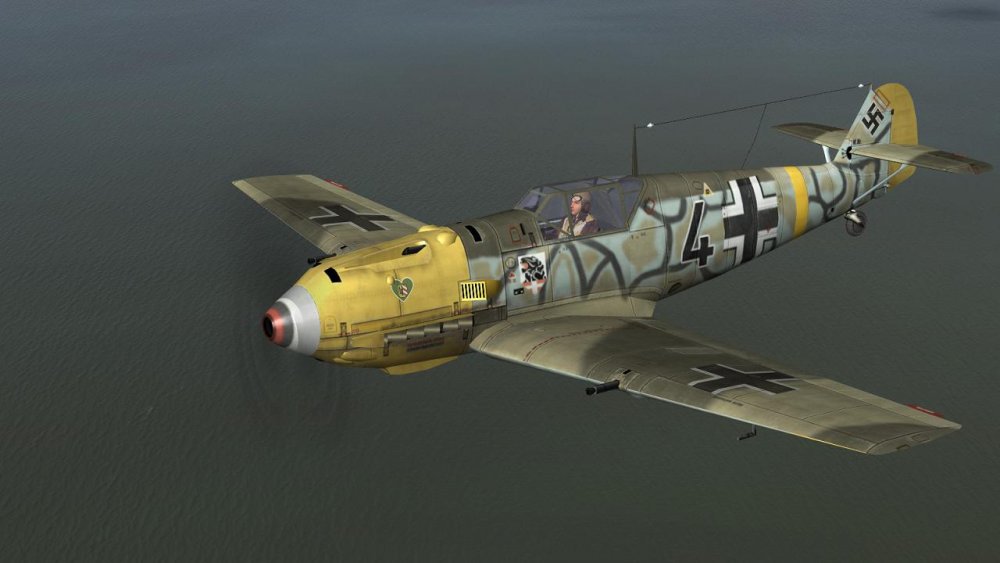
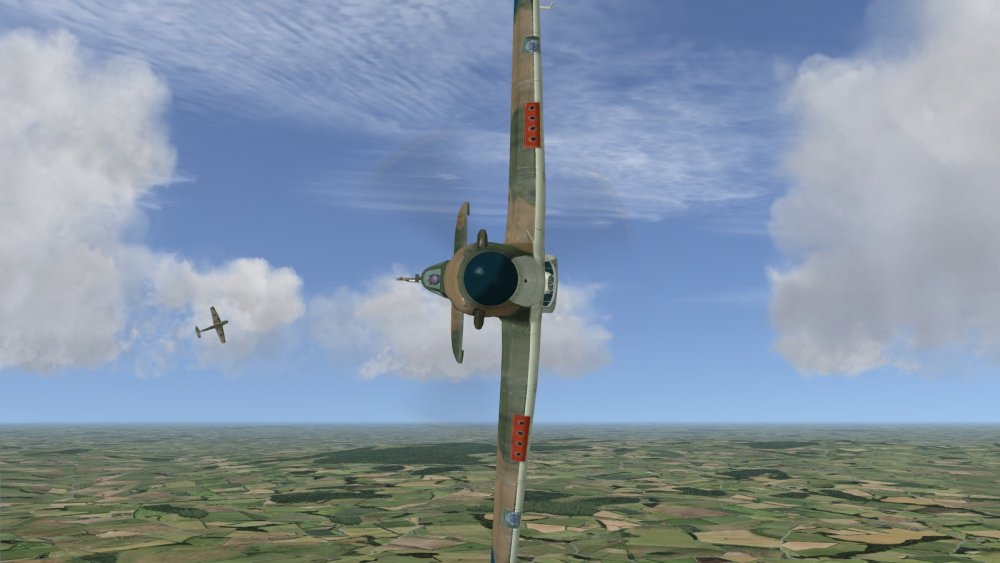
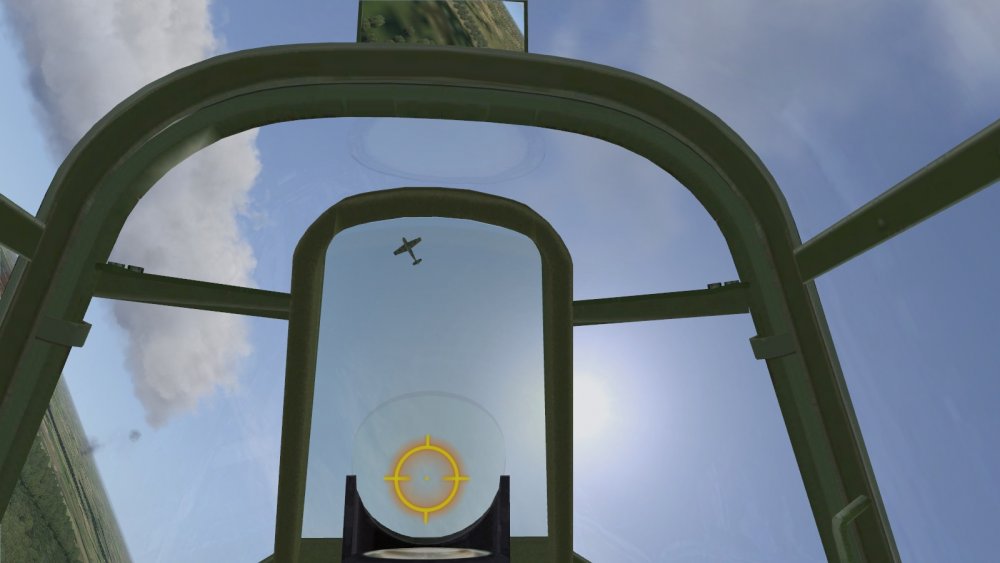
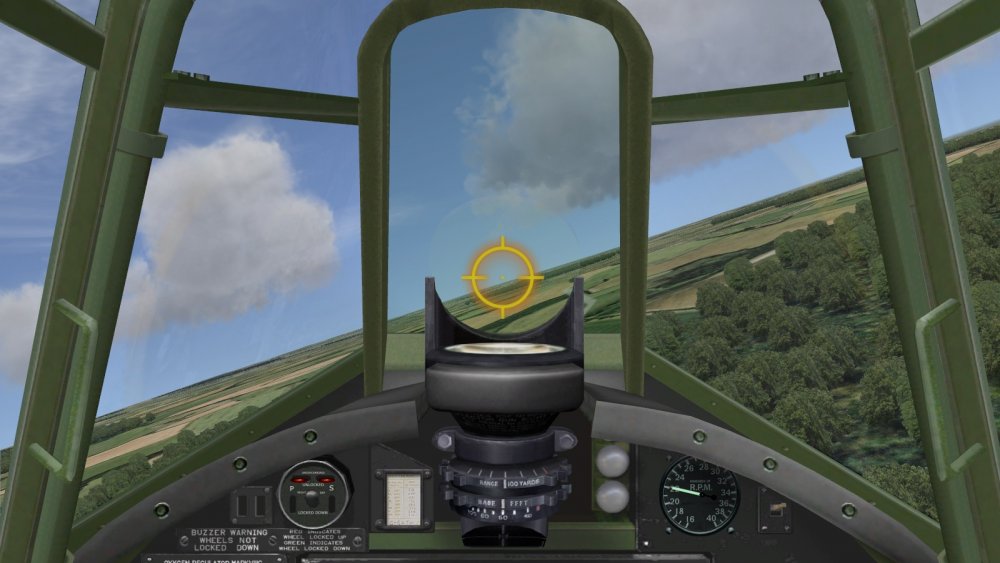
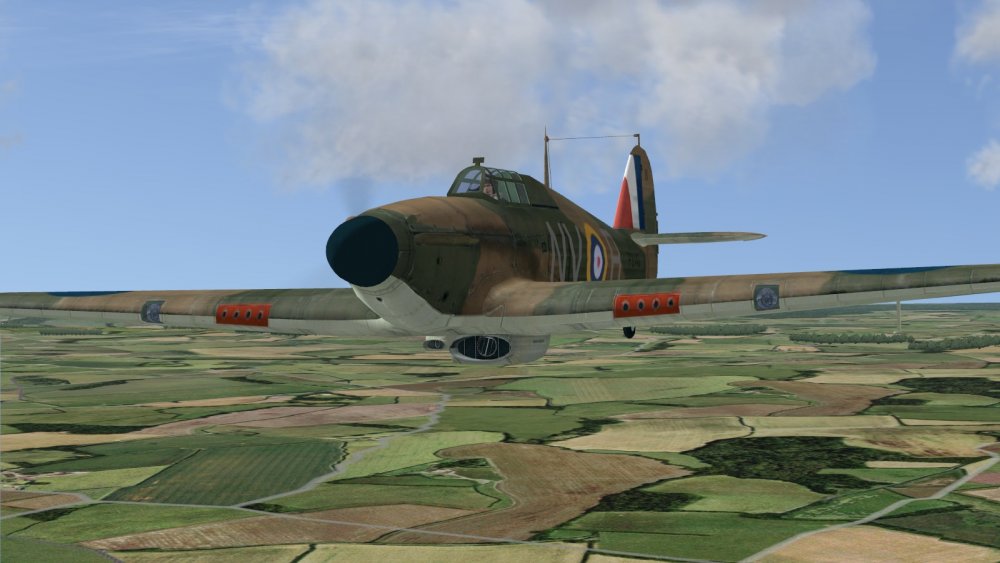
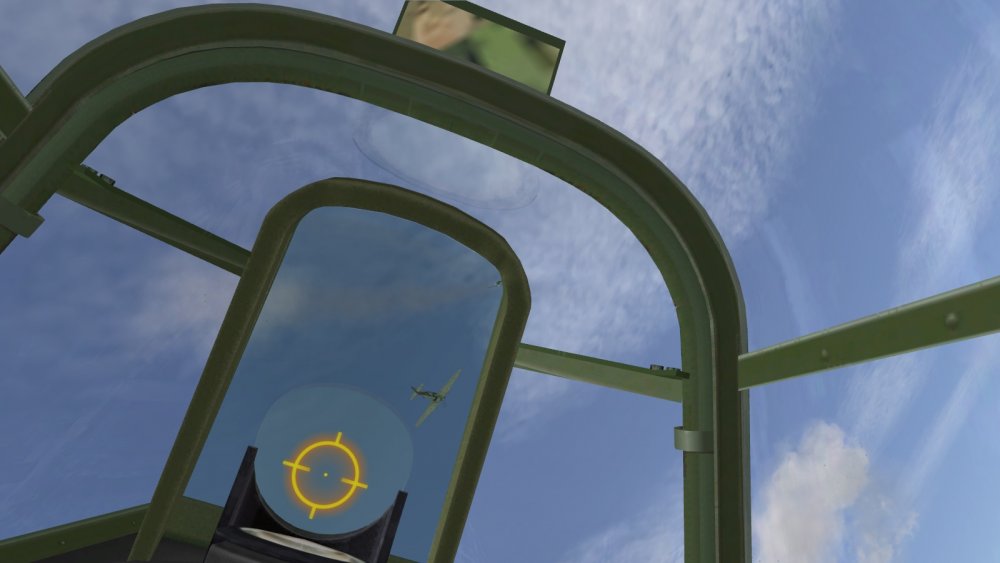
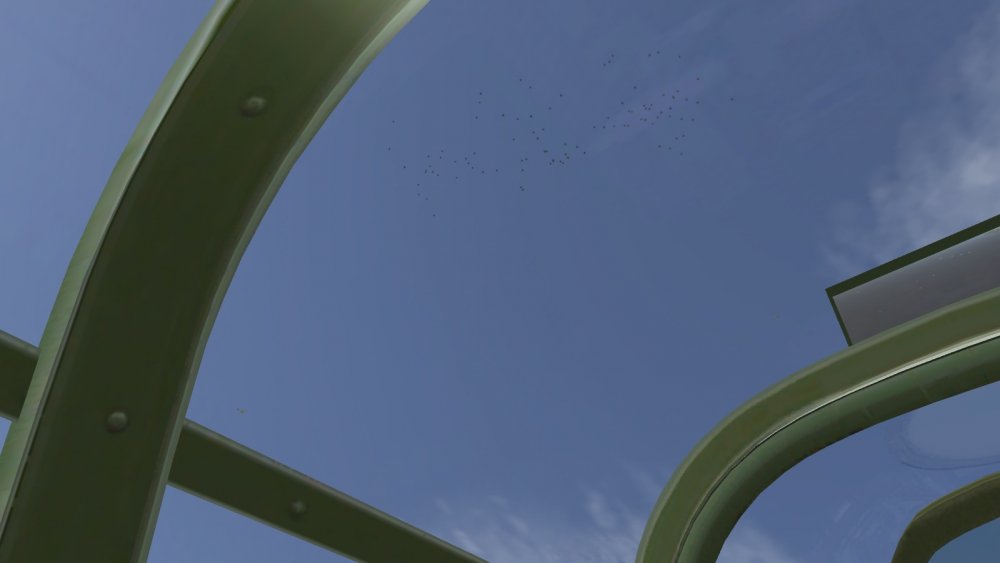
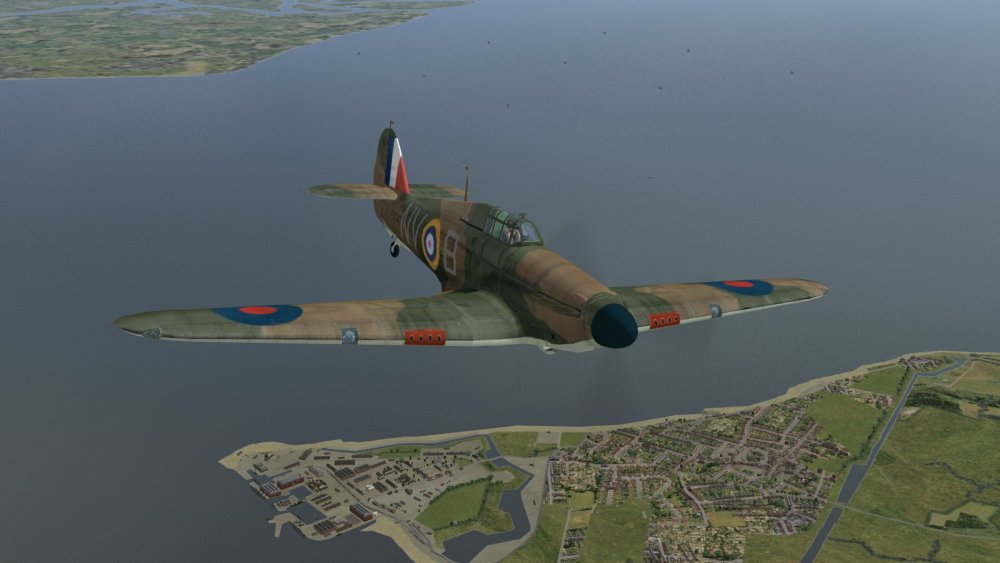
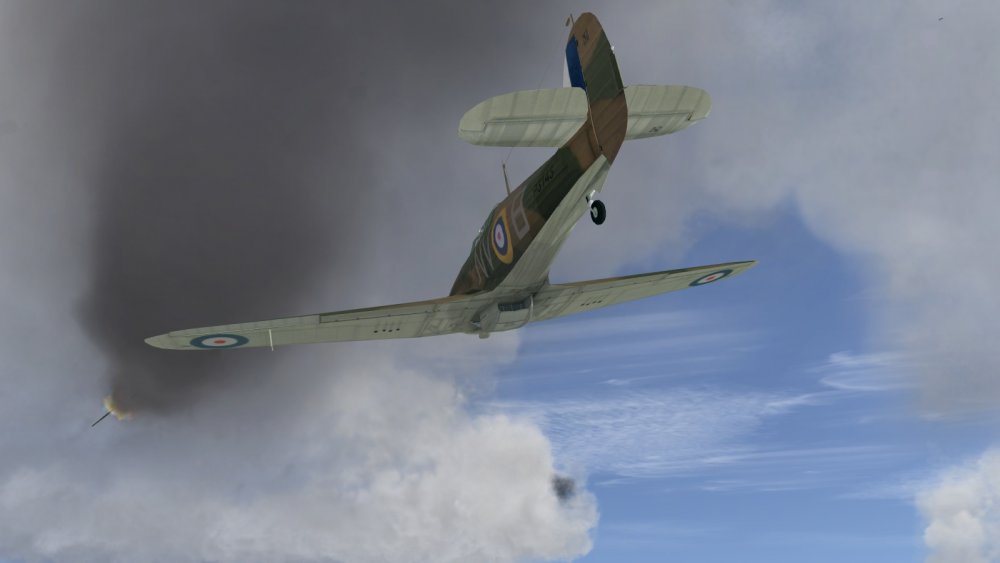
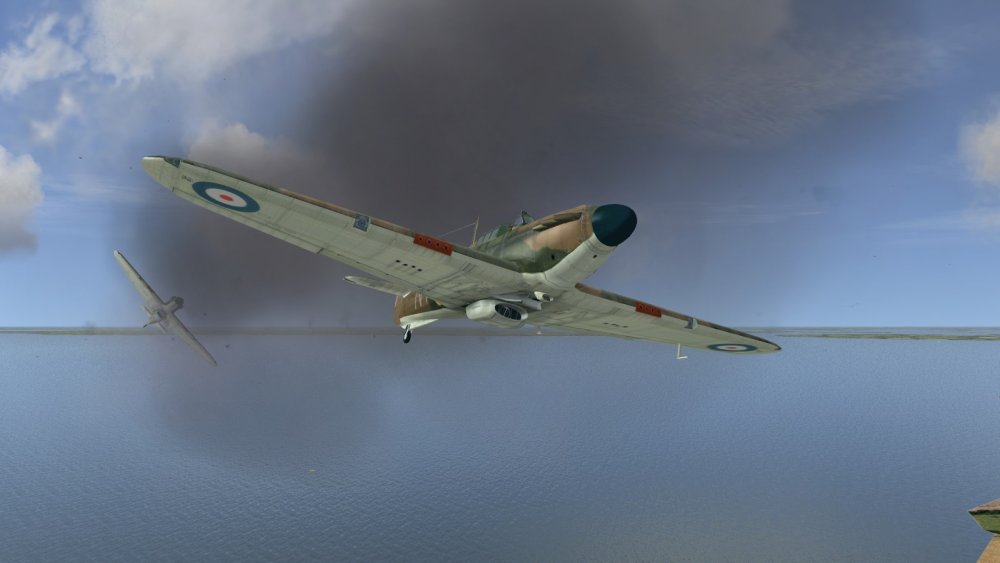
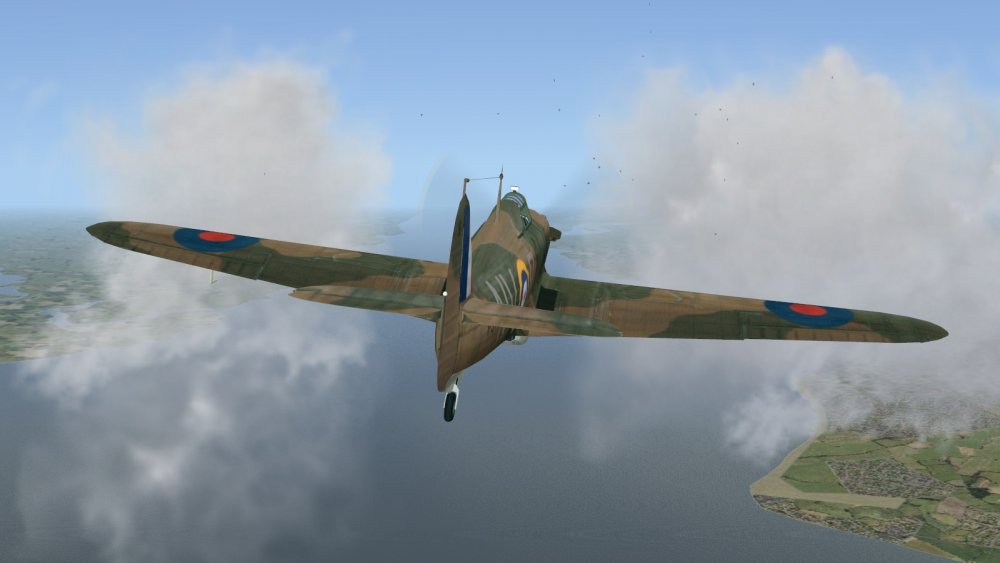
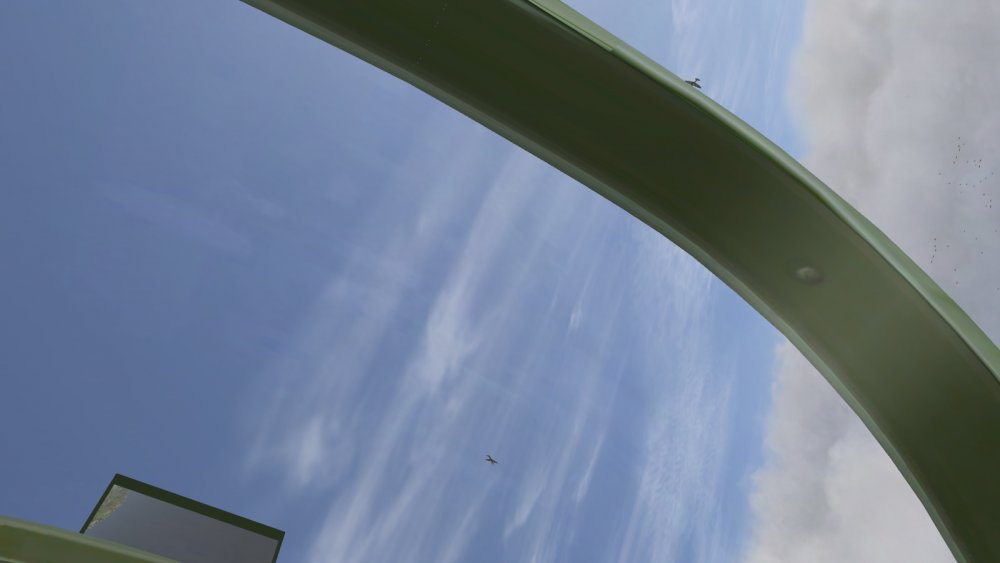
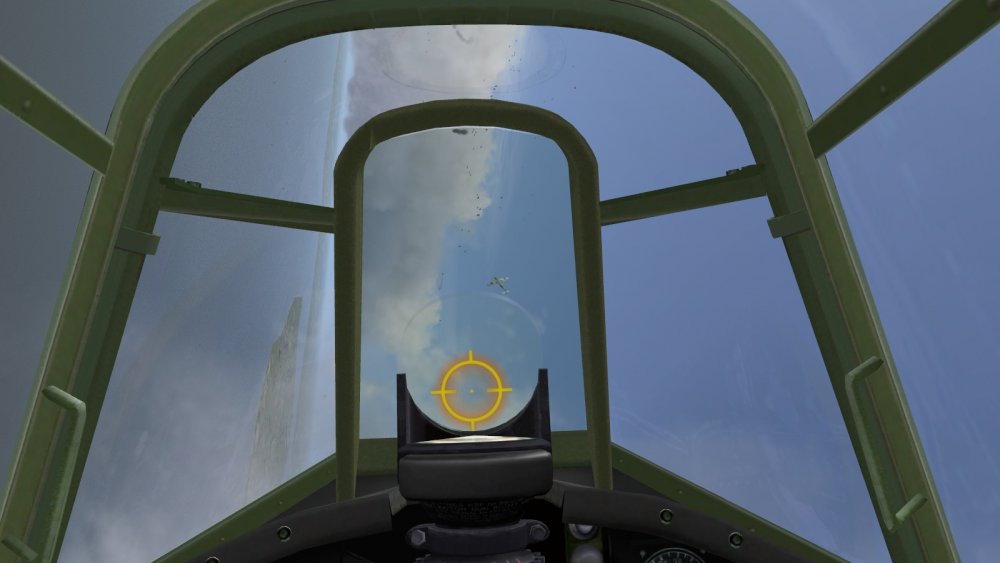
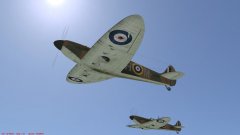
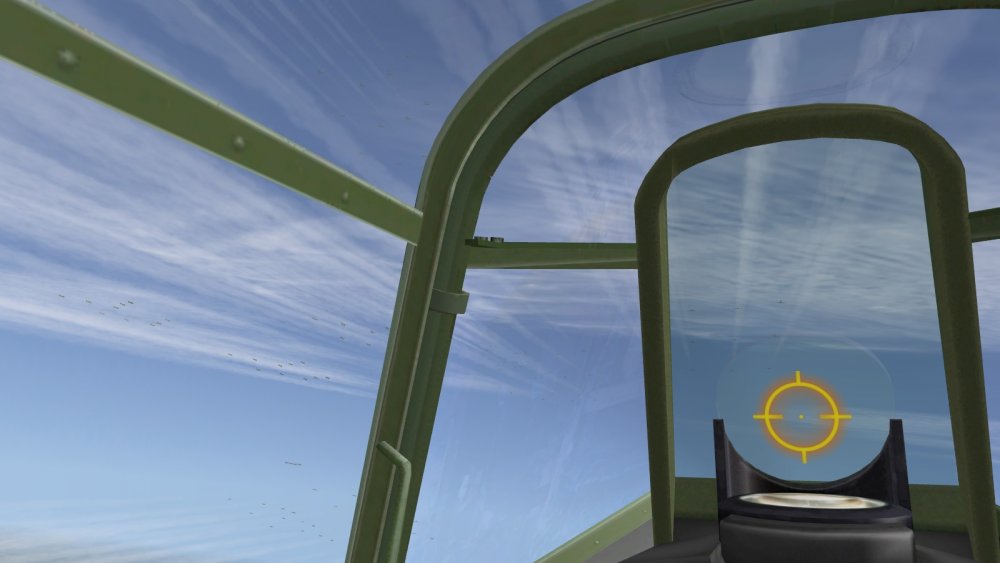
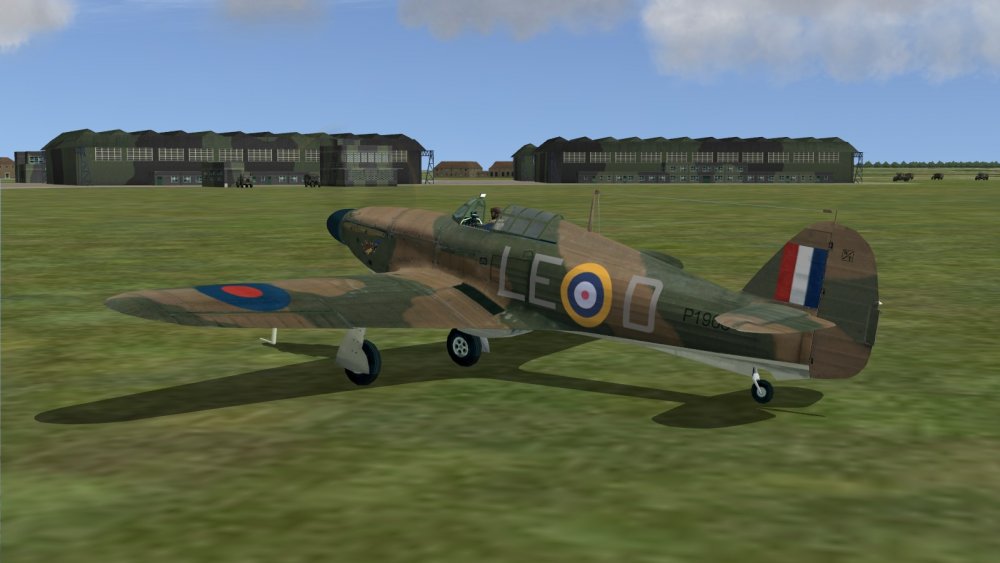
Up and at 'em! After a bit, an interesting conversation developed on the airwaves between my flight leader and the CO, as you can see from the on-screen text. Must see if there's a way to zap this, or at least confine it to a single line, like you can do with a conf.ini edit in IL-2 '46. After a while, thinking that the Heinkel would be well away by the time we got off, I quit waiting for my boss to stop chatting and start flying, and took off on my own. The take-off itself reminds me, in general feel, of the original sim. I climbed away coastwards, wondering how the boss had spotted the Hun when I could not, but thinking that was the most likely direction in which he lay. You might just be able to make out the other Hurricane on the grass strip, towards the far end on the right. Incidentally I really like the engine and other sounds in CloD, though the R/T chatter is a bit low-volume with default settings. Why there is such a visible strip on a grass airfield, I'm not sure. In fact, come to think of it, there was a concrete runway in one of the two previous missions - here it is, in case you don't believe me... Perhaps we had changed bases, and I hadn't paid enough attention. Anyway, off I went. As you can see, my kite has the bulbous Rotol constant speed airscrew spinner which was designed for the Spitfire, with a backplate slightly too big in diameter for the Hurricane (the later Hurricane Rotol spinner, fitted to later MkIs and the MkII and onward, is the more elongated, bullet-shaped one). DeHaviland two-speed props had smaller, pointy spinners, the Spit version also being a bit big for the Hurri. CloD seems to model Spit Rotol and Hurricane DH props ie you can choose a plane with either. I flew out to sea for a bit... ...but seeing nothing, I decided that something was amiss. So I turned on the in-flight mini-map and noticed my 'flight plan' lay in the opposite direction. I swung around, speeded up and finally, well off to the east-north-east of Tangmere (and well beyond my flight-leader's legitimate range of vision, which must be Superman-class) I finally spotted him getting stuck into the Heinkel. That's him, zooming after an attack from astern. I would have missed them both had I not got aircraft icons turned on, in the mini-map. Calling Control for an enemy vector is one of the few things in the CloD Blitz comms menu that seems to work, but I haven't yet figured out such basics as whether the bearing he gives you is relative to your heading, or absolute, from North. So I opened the throttle and had a pop at the Hun. The boss had survived making a stern attack, and so did I. Gunnery seems not too hard but there's more smoke than tracer, besides which my rounds seemed to be consistently going high, so perhaps I need to adjust the range setting on my reflector sight, or learn to use it better. Anyhow I got some hits, seeing pieces fly off, which is always a good sign. But on the Hun flew. As I wheeled around for another attack, my boss made his next one. Then it was my turn again. The enemy air gunners were no snipers, though I think I heard one hit on my machine. But a bit of jinking as I came in - not all of which was deliberate - seemed to keep me from serious harm. As I was coming in for my third pass, I saw the boss make one from dead ahead... ...shortly after which, I clobbered Jerry from behind again. Note the additional bits flying. Surely that must be it, I thought. And so it was. When I Iooked back, the Heinkel had gone, down amongst some trees, but with no particular sign of a crash. Strange, like the wreck and any trace of it had 'de-spawned' almost instantly, faster even than they do in Rise of Flight. Oh well, job done. Now, back to Tangmere, to find out if our upper crust squadron leader would forgive us our youthful indiscretion. ...to be continued!


- 8 replies
-
- 1
-
-
- blitz edition
- cliffs of dover
- (and 1 more)
-
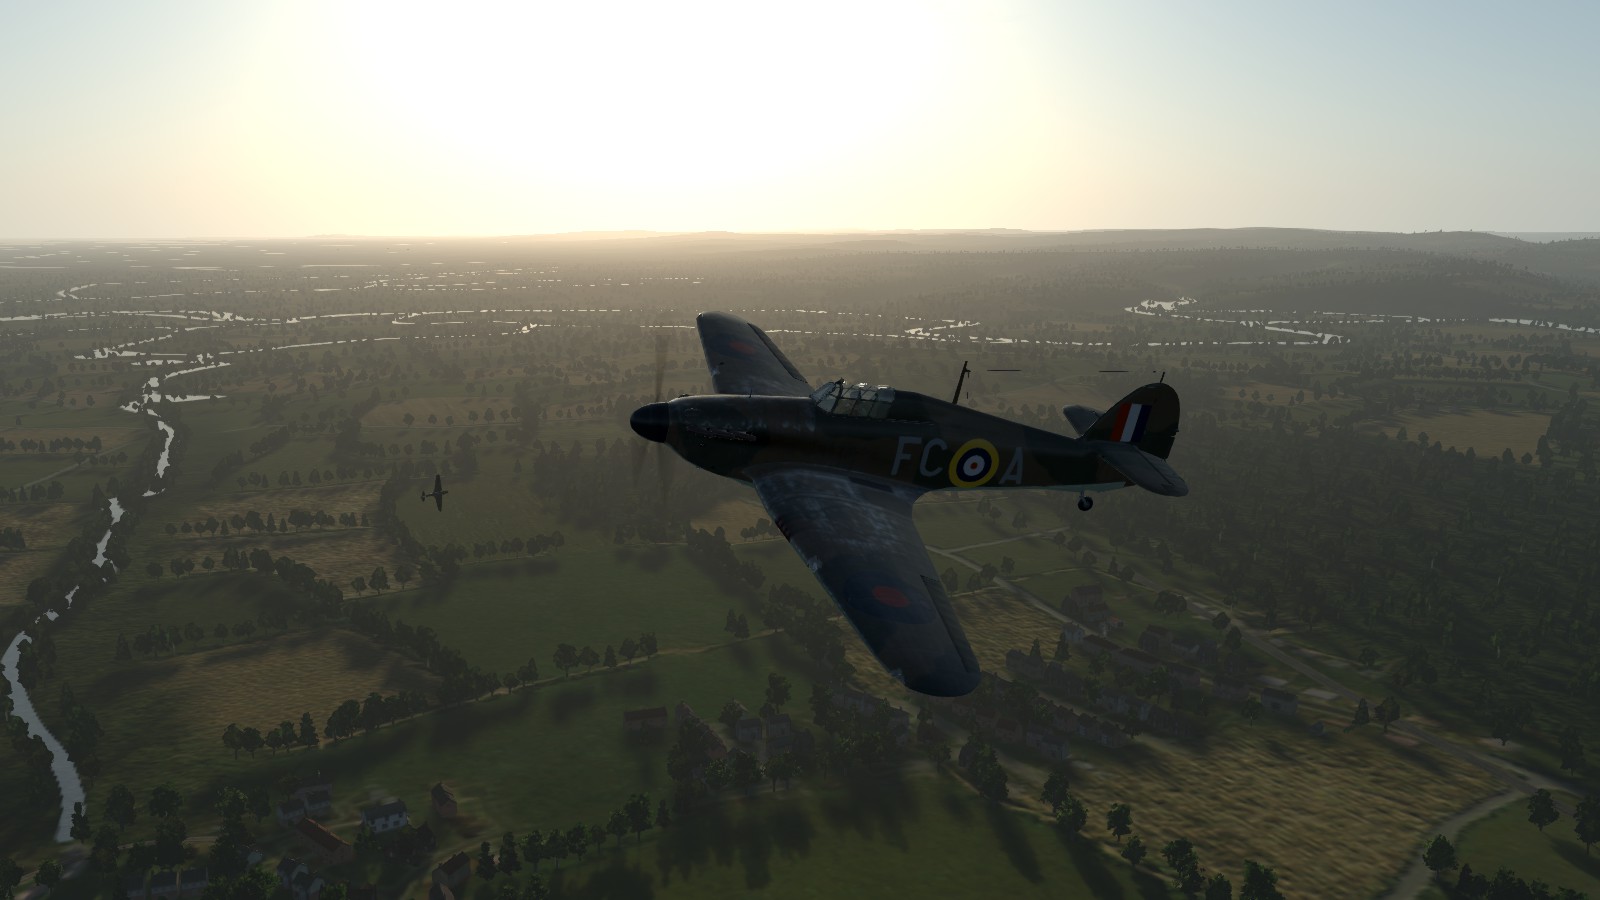
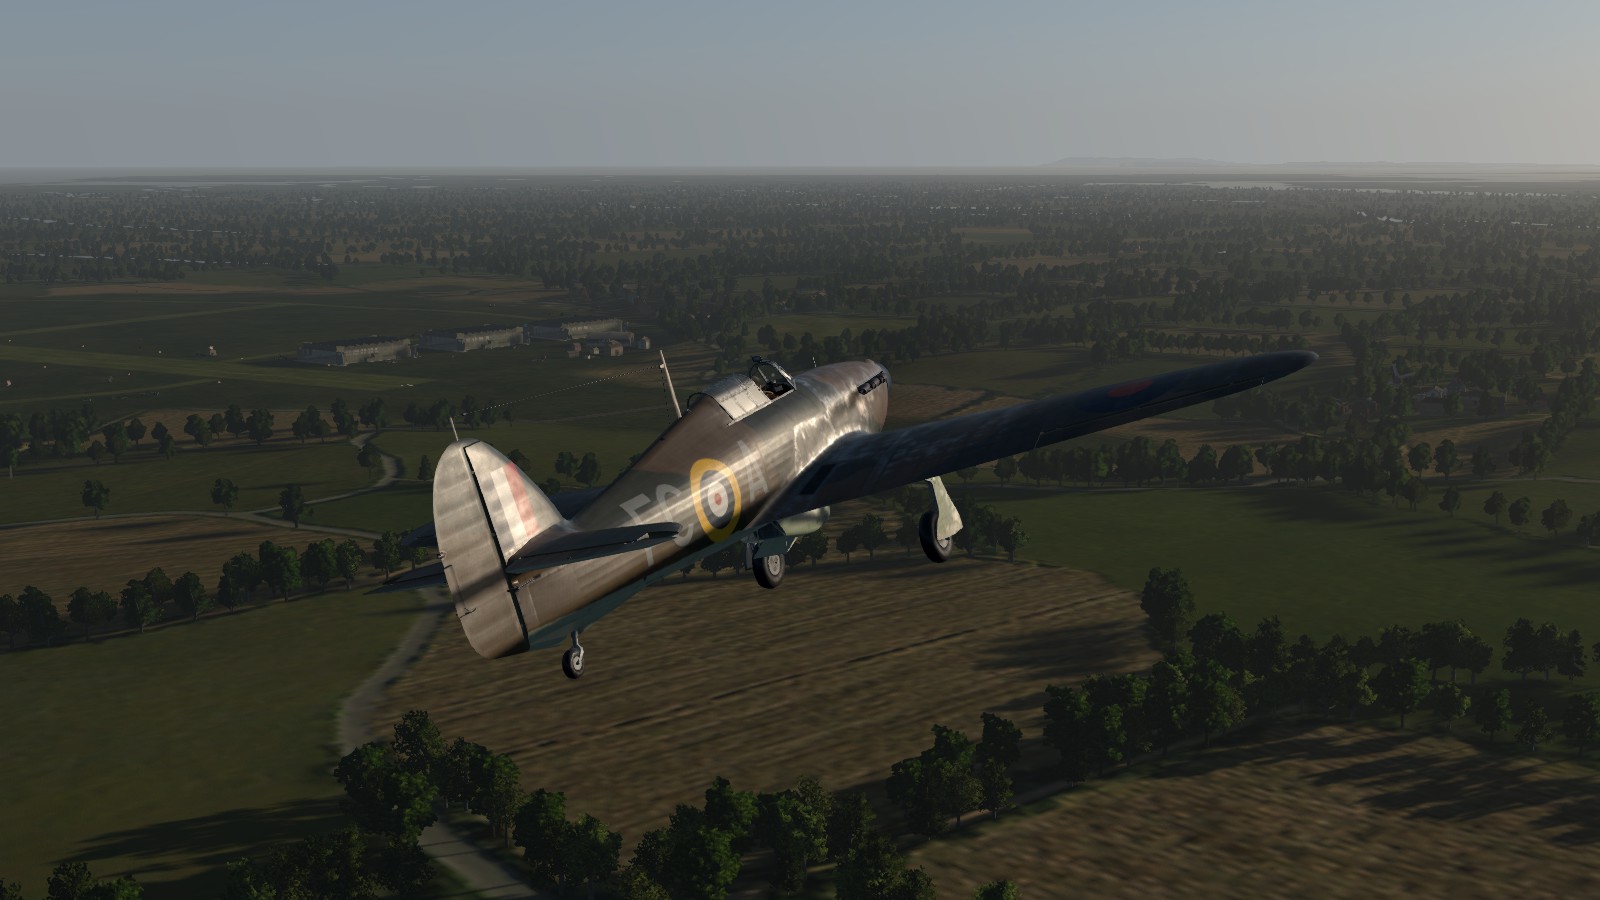
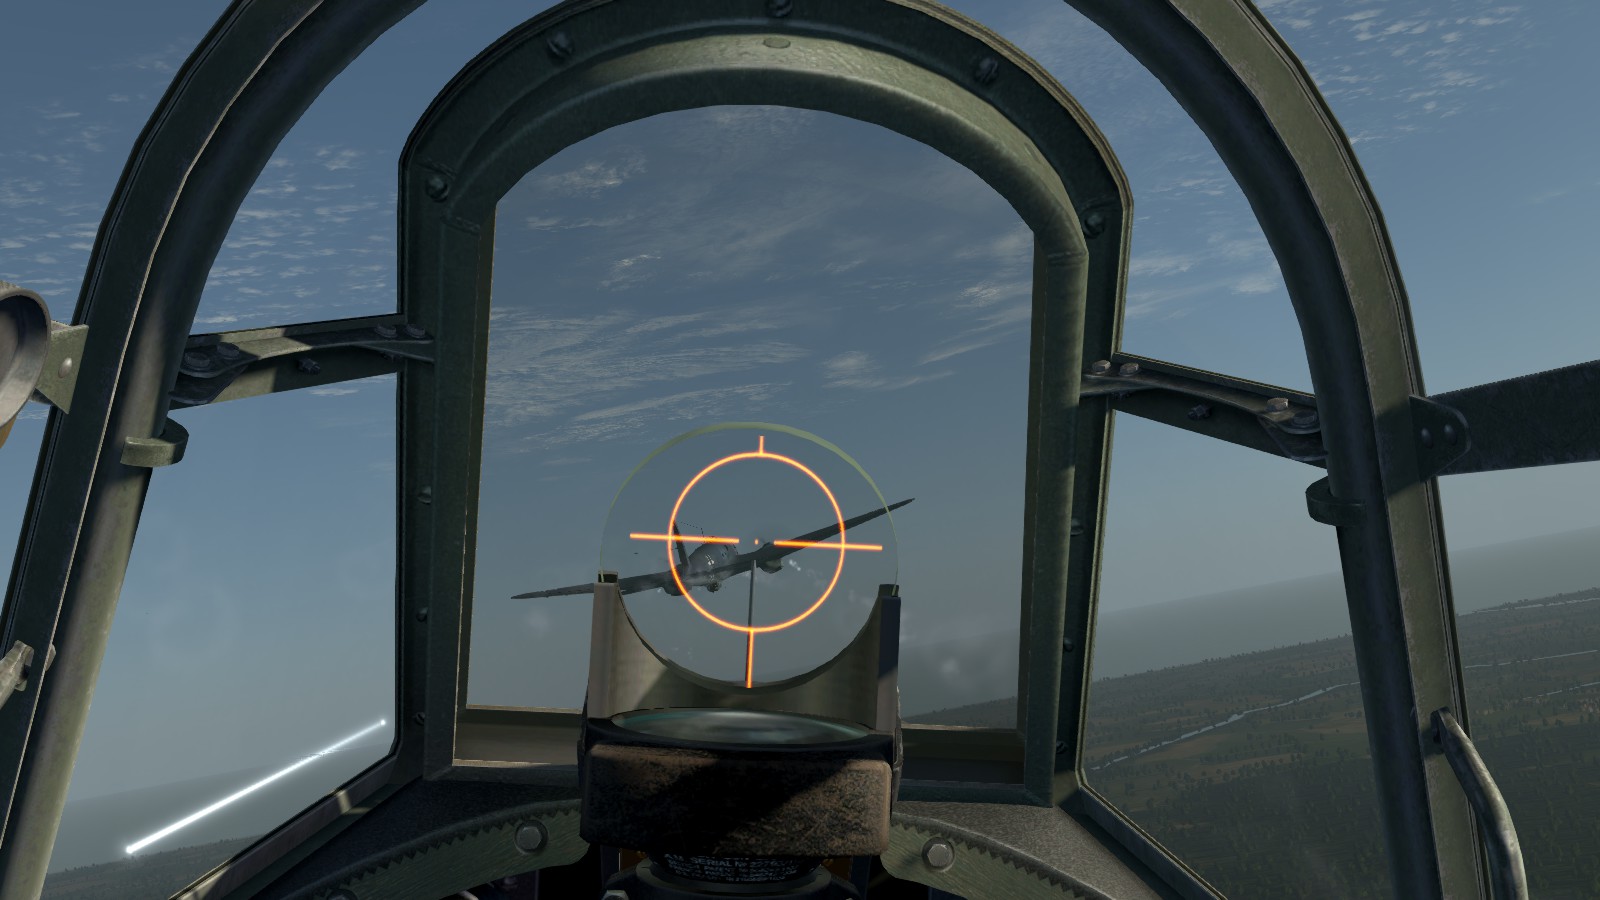
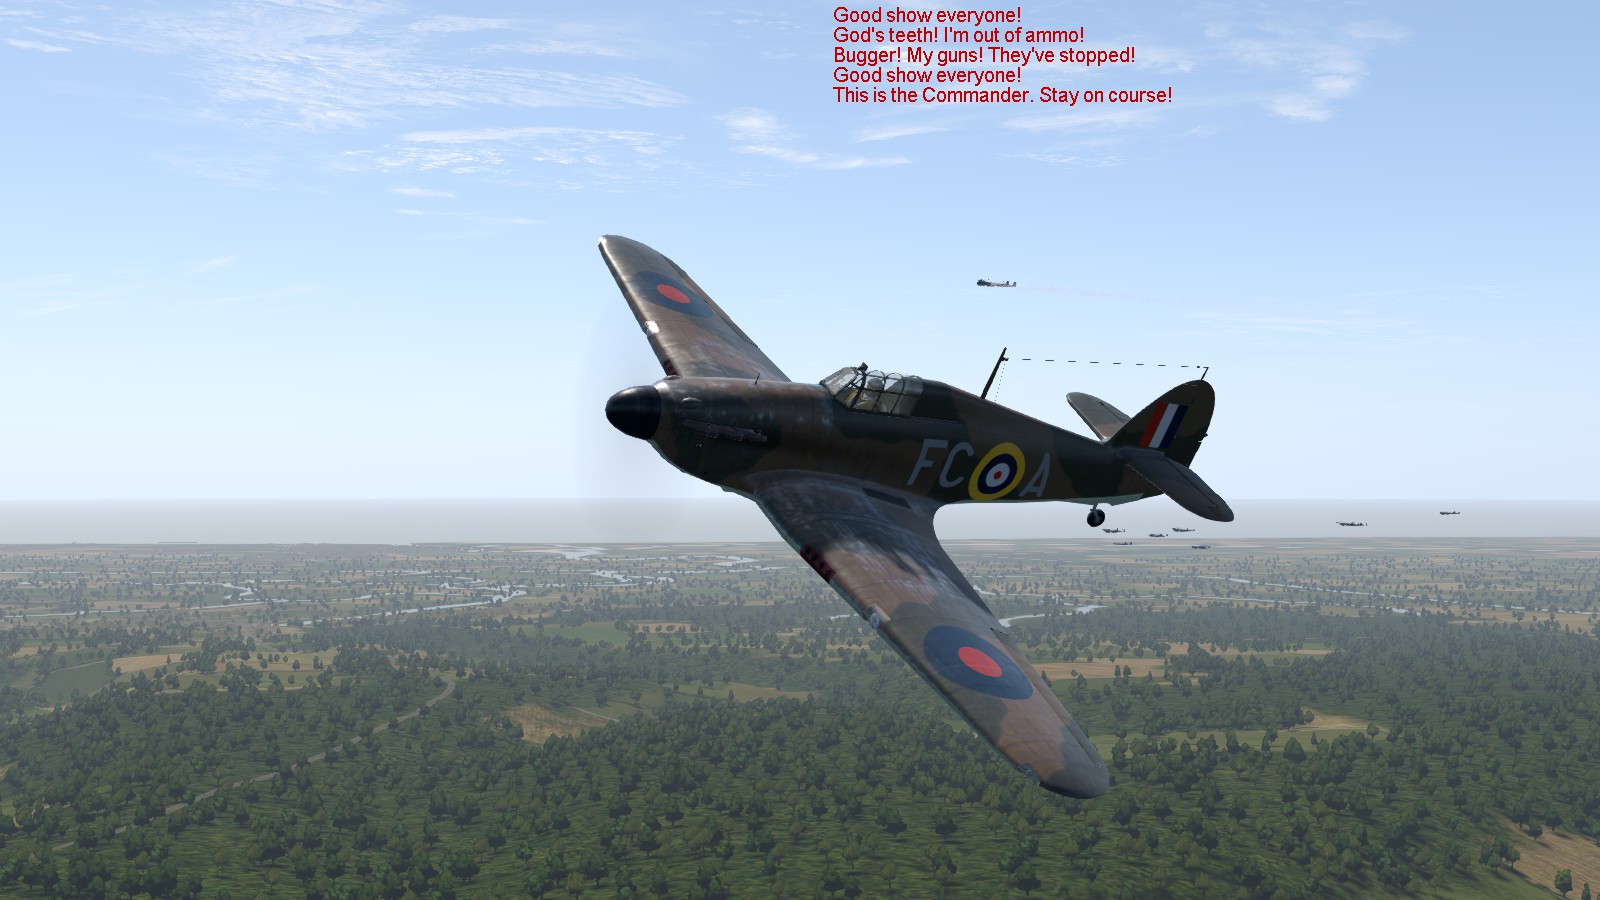
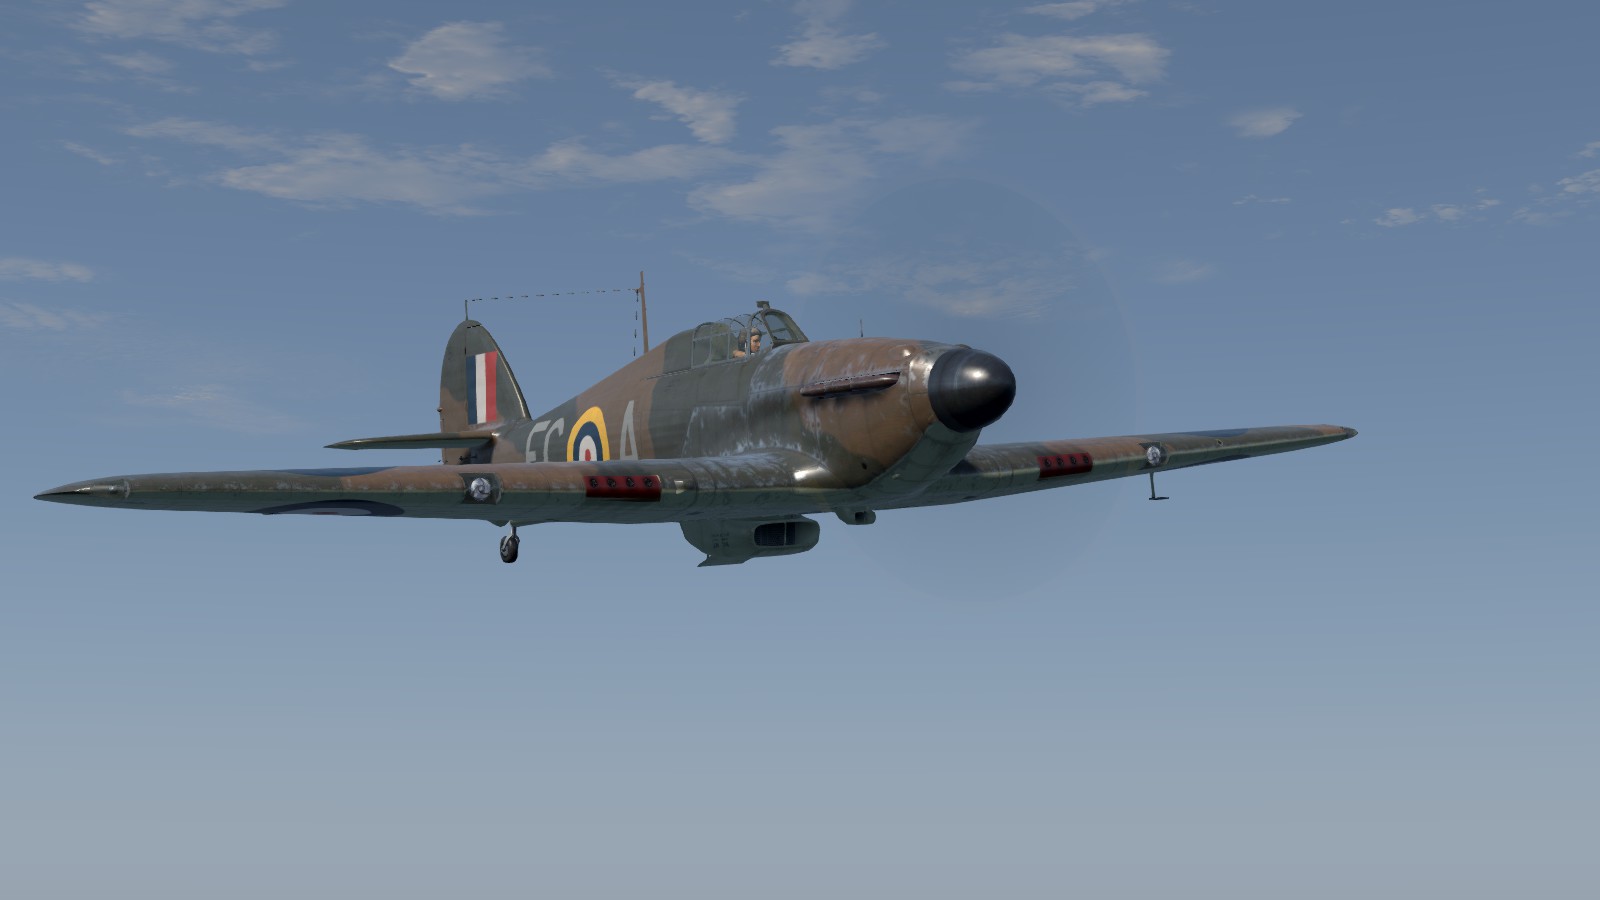
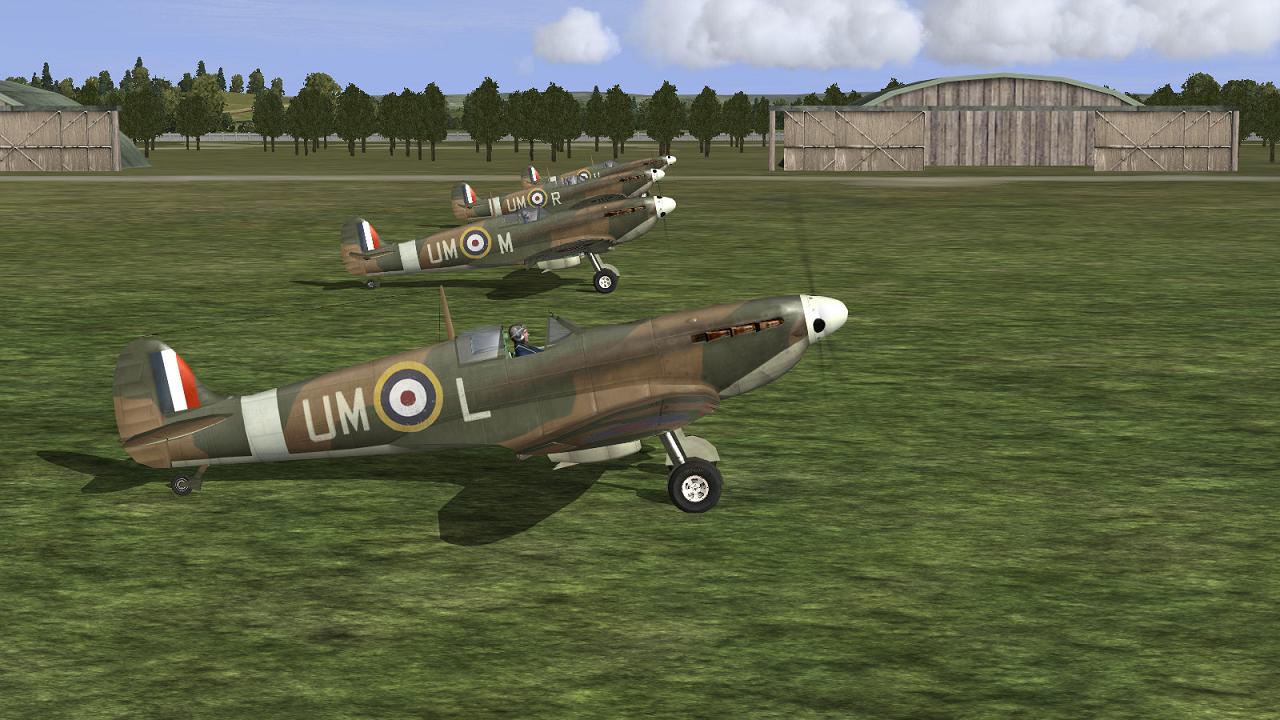
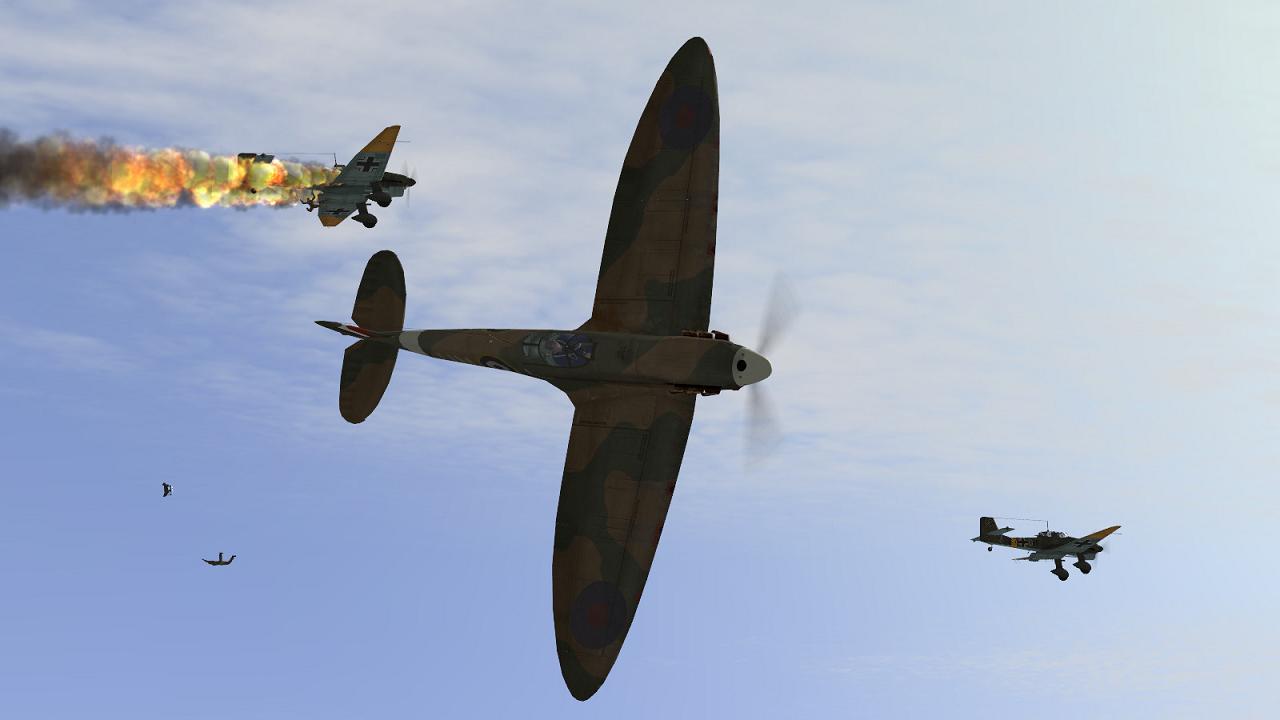
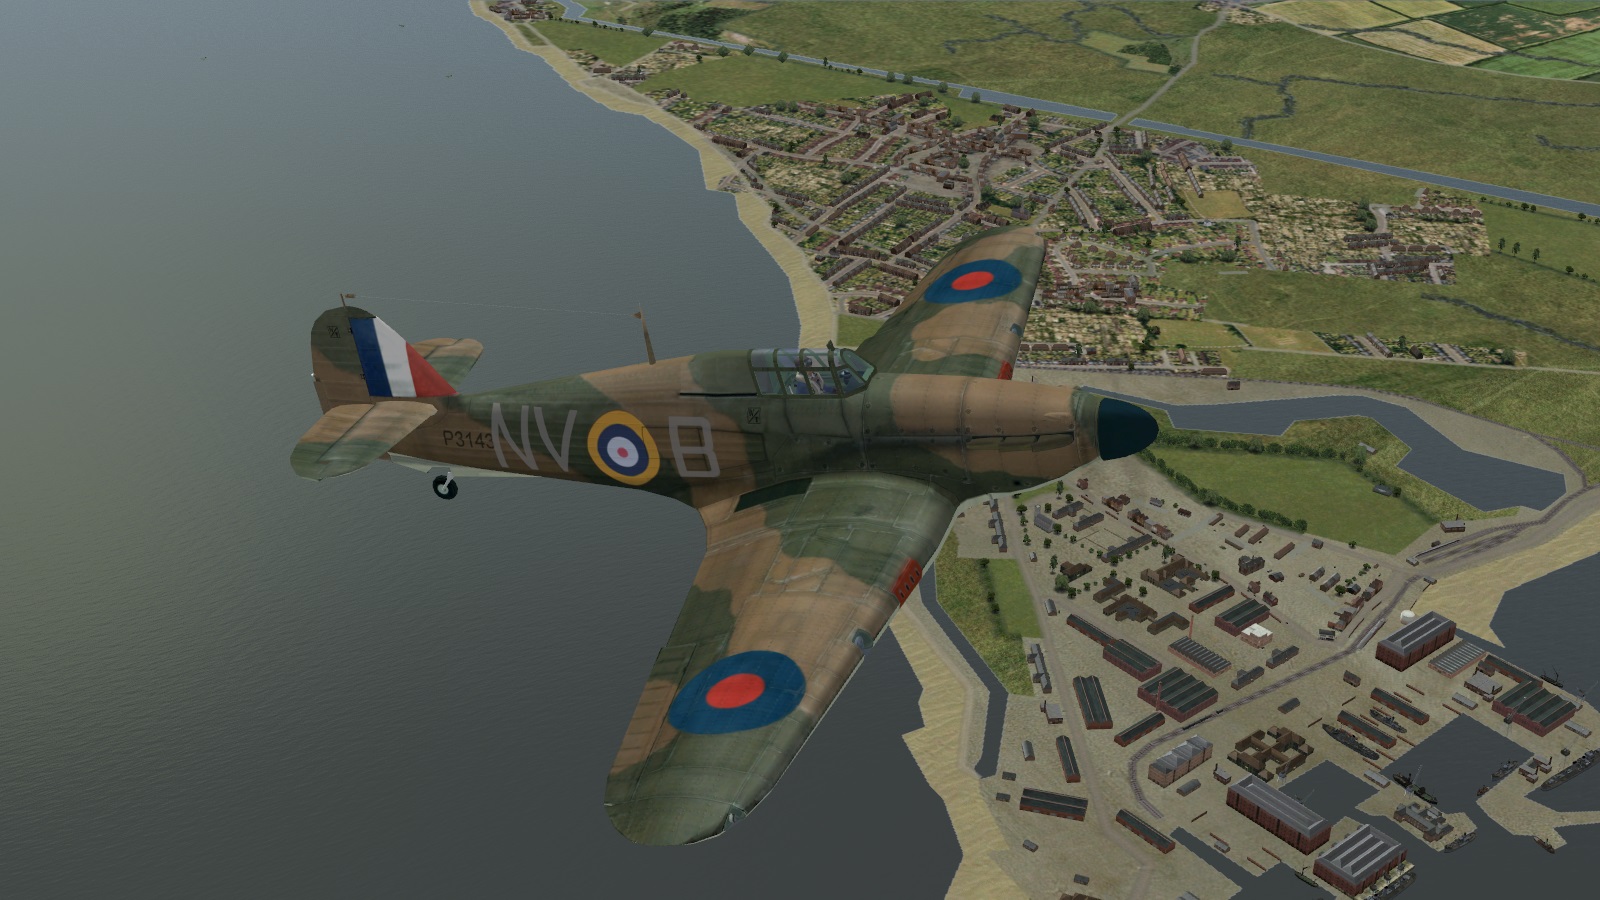
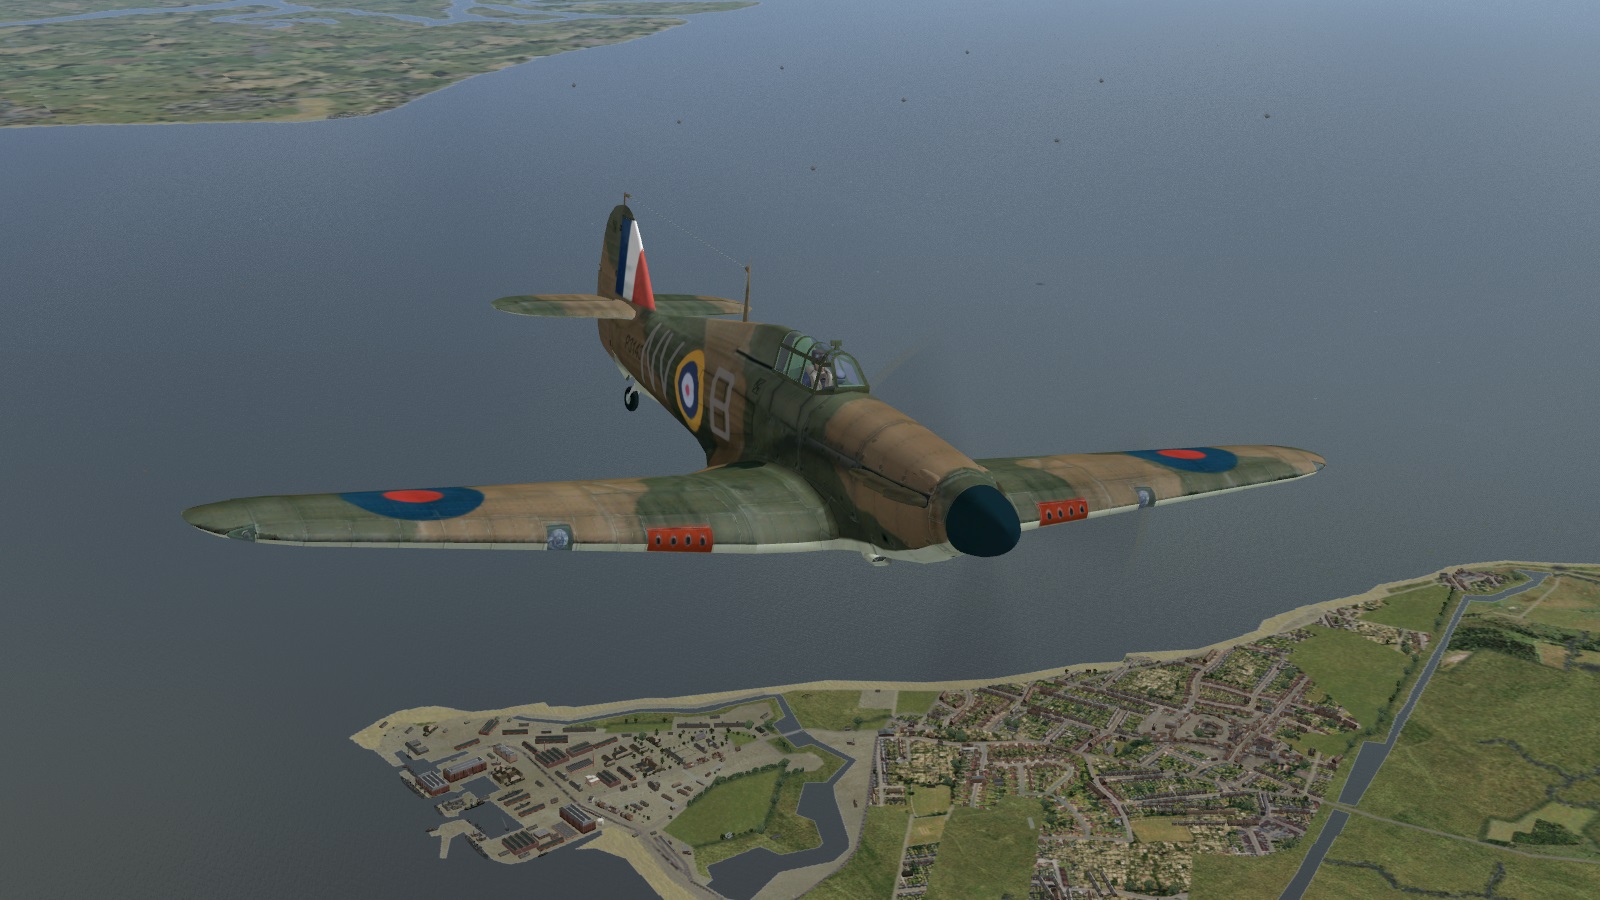
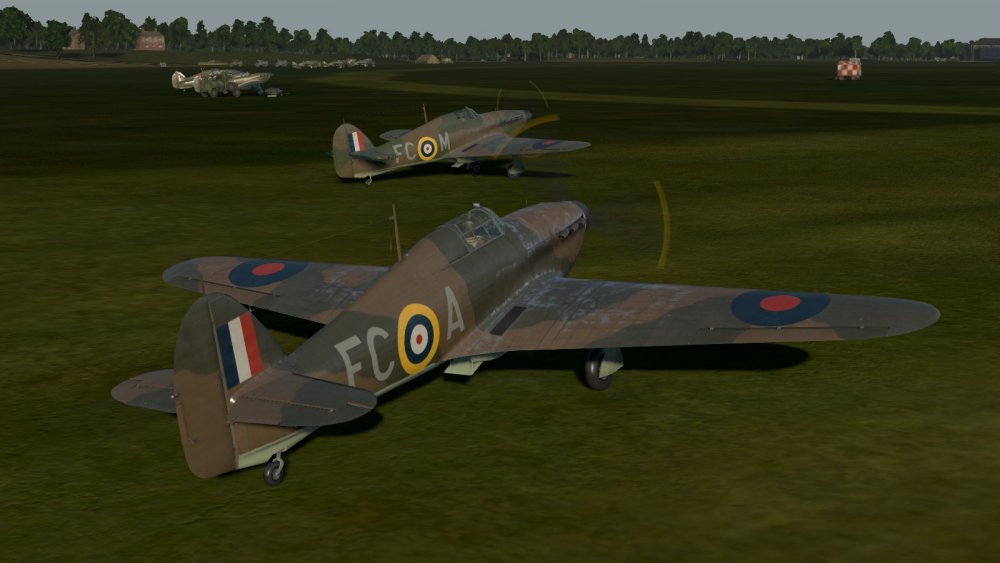
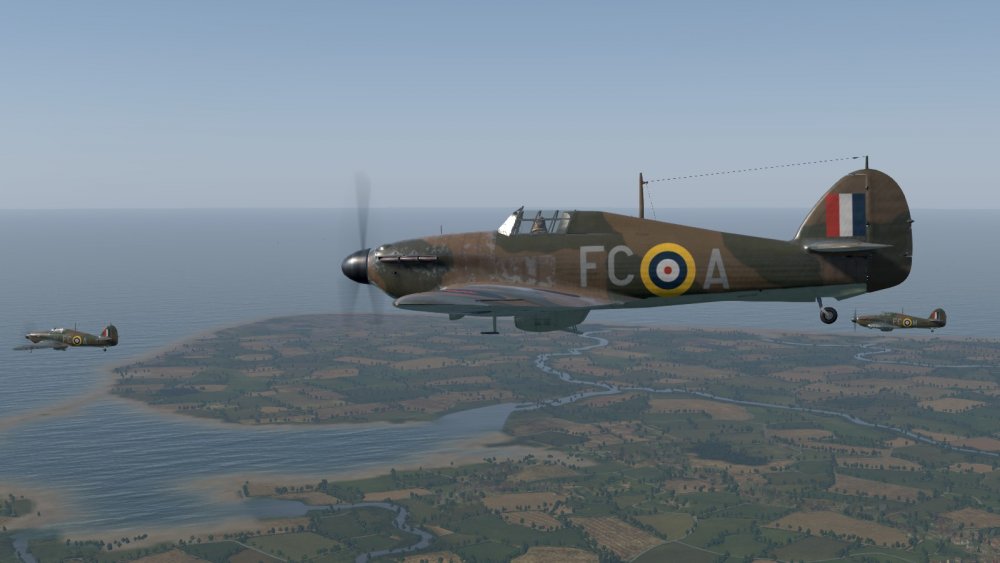
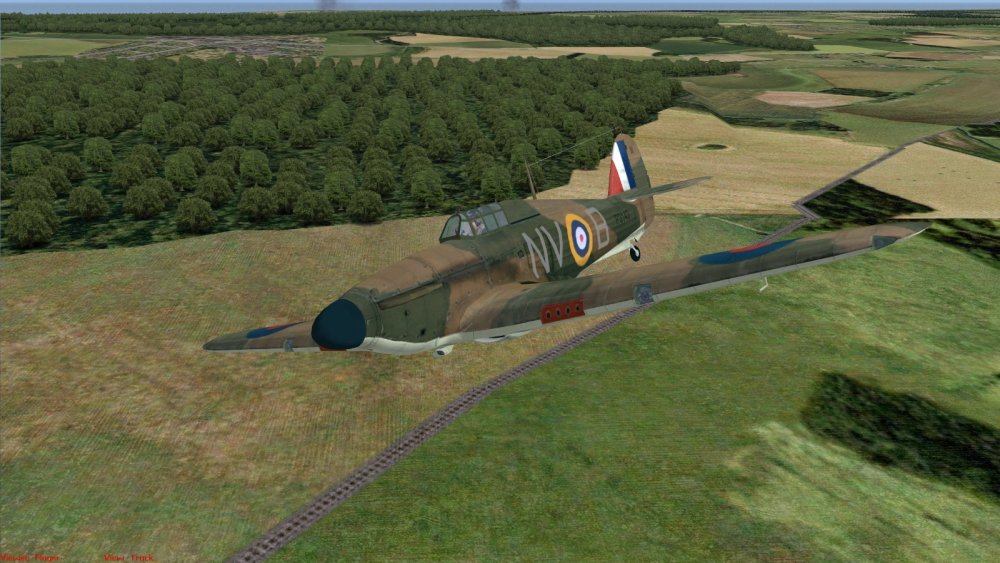
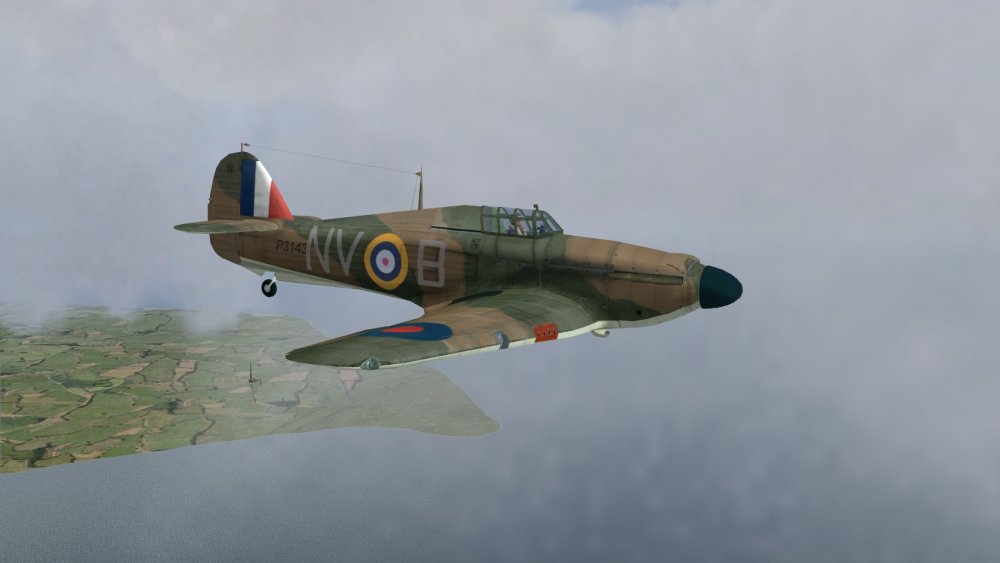
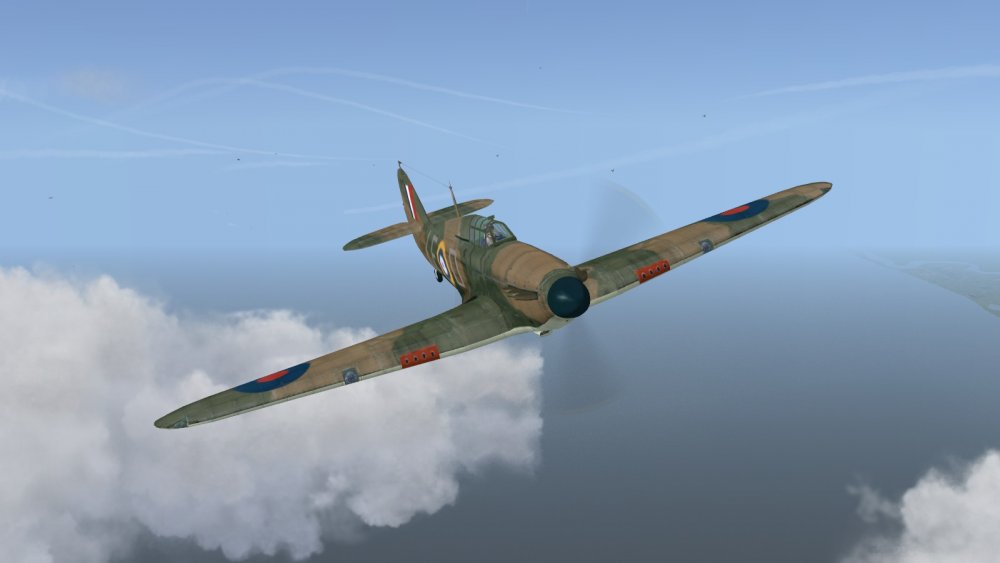
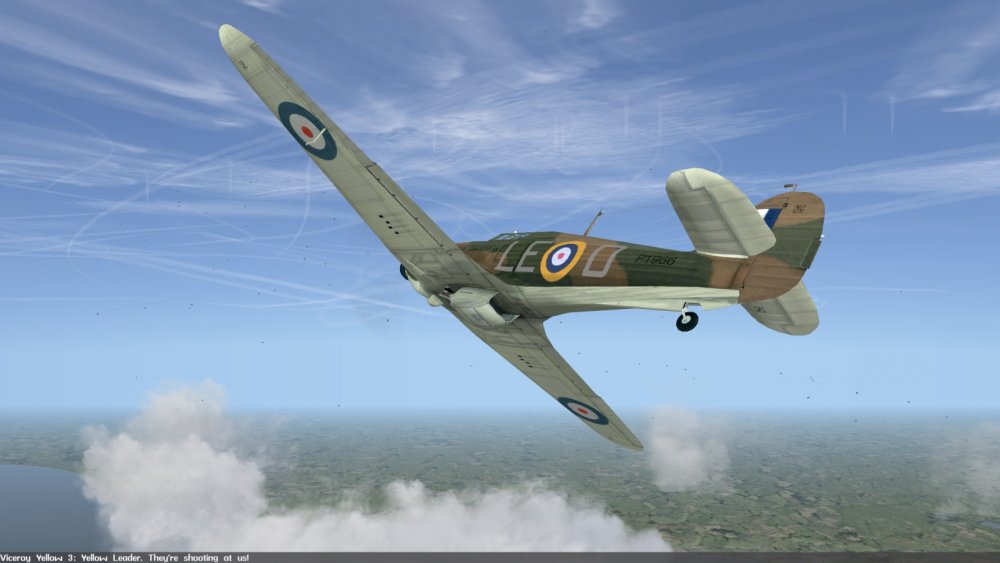
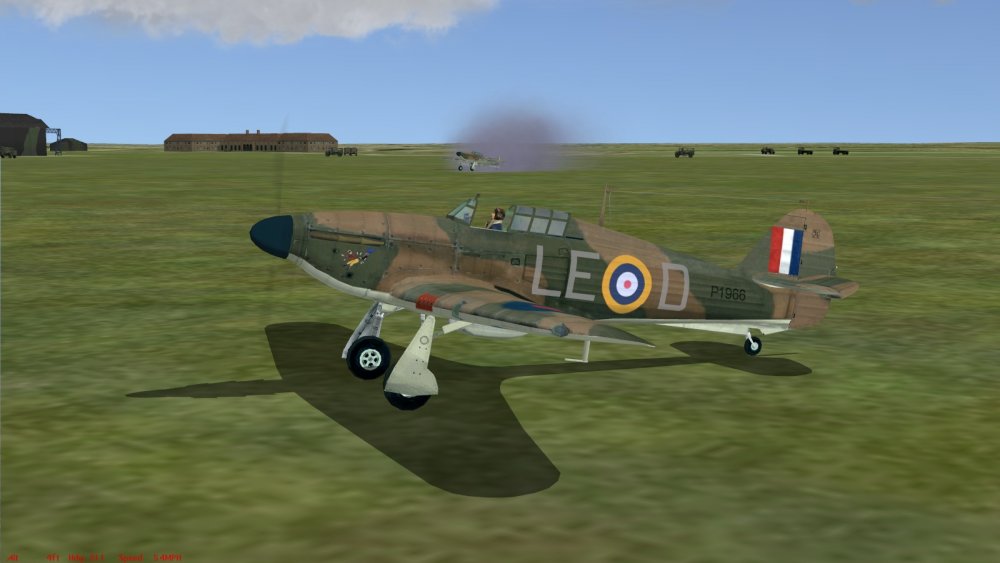
The gentlemen versus the players versus the Germans! Until a few days ago, having no interest in multiplayer, I had steered cleared of Cliffs of Dover. Until recently, I didn't have a system anywhere near the minimum spec of the current version on Steam, the Team Fusion 'Blitz Edition' (although it turns out to run smoothly, so far, at good-looking settings on a 1.5Gb GTX580, a lot less that the minimum 4Gb stated). So, how come this mission report? Well despite reports of poor AI, broken radio commands and limited single player content, I got it cheap enough to mitigate the limited satisfaction which I was resigned to expecting. First forays with my new toy confirmed the presence of several things I didn't like. Dispersion of effort into planes with little or no role in the Battle of Britain proper, which must be at the expense of something. Hedgerows replaced with 'tree-rows' and rather strong terrain colours (if not as cartoon-y as early versions). Over-weathered Hurricanes looking like ex-Japanese Army Airforce stock. Reasonable levels of radio traffic, but with some howlers like the boss being described as the Commander, instead of the Leader. Radio comms menu present but seemingly, much of it non-functional. Key commands a chore to set up, partly thanks to confusing duplicate labels in the settings table. Aircraft very hard to spot, without labels. RAF squadron codes vary from unit to unit, but are in too round a font. And that was before finding out whether the doubtless delectable but totally silly Spitfire Girl was still lurking in the wings (pun intended). However... ...if you can get over some quirks, the visuals are pretty good, especially the cockpits, and as I said performance was surprisingly smooth. I tried a few of the included single missions for the RAF, and found them passable fun, again apart from some more quirks mentioned here. So I decided to have a look at the current CloD single-player campaign, despite not having every last key properly set up, and in particular not having worked out how CloD's padlock works (I use mouselook but don't like head tracking systems). I soon found that the SP campaign is for an RAF fighter pilot, and apparently consists of a set of scripted missions, of unknown number so far. They have imaginatively-written briefings, which remind me of the best to be found in user-made campaigns for IL-2 '46, such as Blinding Sun and Faltspinman's Willi Jedermann series. Except that the briefings, creative though they be, are in some places bit twee - how do you say it in the US, 'cheesy'? The back-story is that you are a working class boy, or perhaps lower middle class, recently signed up in the RAF and posted to your Hurricane squadron, which is based at Tangmere, close to the Channel coast, at about the time the Battle of France ends. Your squadron is fictitious, but nicknamed the Fat Cats Squadron, because its pilots are basically rich kids. In this respect it sounds a bit like 501 Squadron, Royal Auxiliary Air Force, which really was like that, being known as 'the millionaire's squadron'. In this CloD equivalent, the first briefing puts you firmly in your place, socially-speaking. But you are taken under the wing of a friendly flight commander with a similar 'limited background' to yourself, also from the Manchester area, a 'northerner' not a proper chap from the jolly old Home Counties. Your first mission with this less than friendly lot involves a scramble against a sudden, low-level raid by three Dornier 215 bombers which catches you on the ground, followed closely by a larger wave of maybe another nine. Second time up, you are scrambled to protect a Channel convoy against an attack by a large-ish bunch of Stukas, apparently unescorted. There are some screnies and brief notes on both missions in the post linked to above. Tolerably good, I found both, and the briefings link the missions together quite well. This report is from mission number three. The briefing begins with you and your friendly flight commander having a rather sad bitching session about the toffs who won't accept the likes of you and he into their circle, and ends when he breaks off to point out a damaged German bomber he's just spotted, apparently making for the coast on its own, in an effort to get back to France. 'Our planes are ready to go, let's go get him and orders be dammed!' is the gist of what he says next. So here we are. The mission has loaded and I'm sitting, engine running (no complex engine management mouseclick madness for me), in FC-A, with my new-found friend-for-life the flight commander in FC-M. The Fat Cats probably have personalised number plates on their MGs and Aston Martins, so I suppose it's no wonder they have their own fictional squadron code. The grass colours are really a bit dark but the airfield detail, as you can see, is fairly decent. It includes moving vehicles, notably some idiot racing around at about 50 MPH in a fifteen hundredweight truck or the like, fortunately well clear of any aircraft. Probably, it's some bored fat cat whose MG is in for a service. But where is the Hun? No-where to be seen, is the answer, so, slightly deflated, I wait for something to happen. ...to be continued!

- 8 replies
-
- 1
-
-
- blitz edition
- cliffs of dover
- (and 1 more)
-
Battle of Britian Simulators for 75th anniversary
33LIMA replied to sixstrings's topic in General Discussion
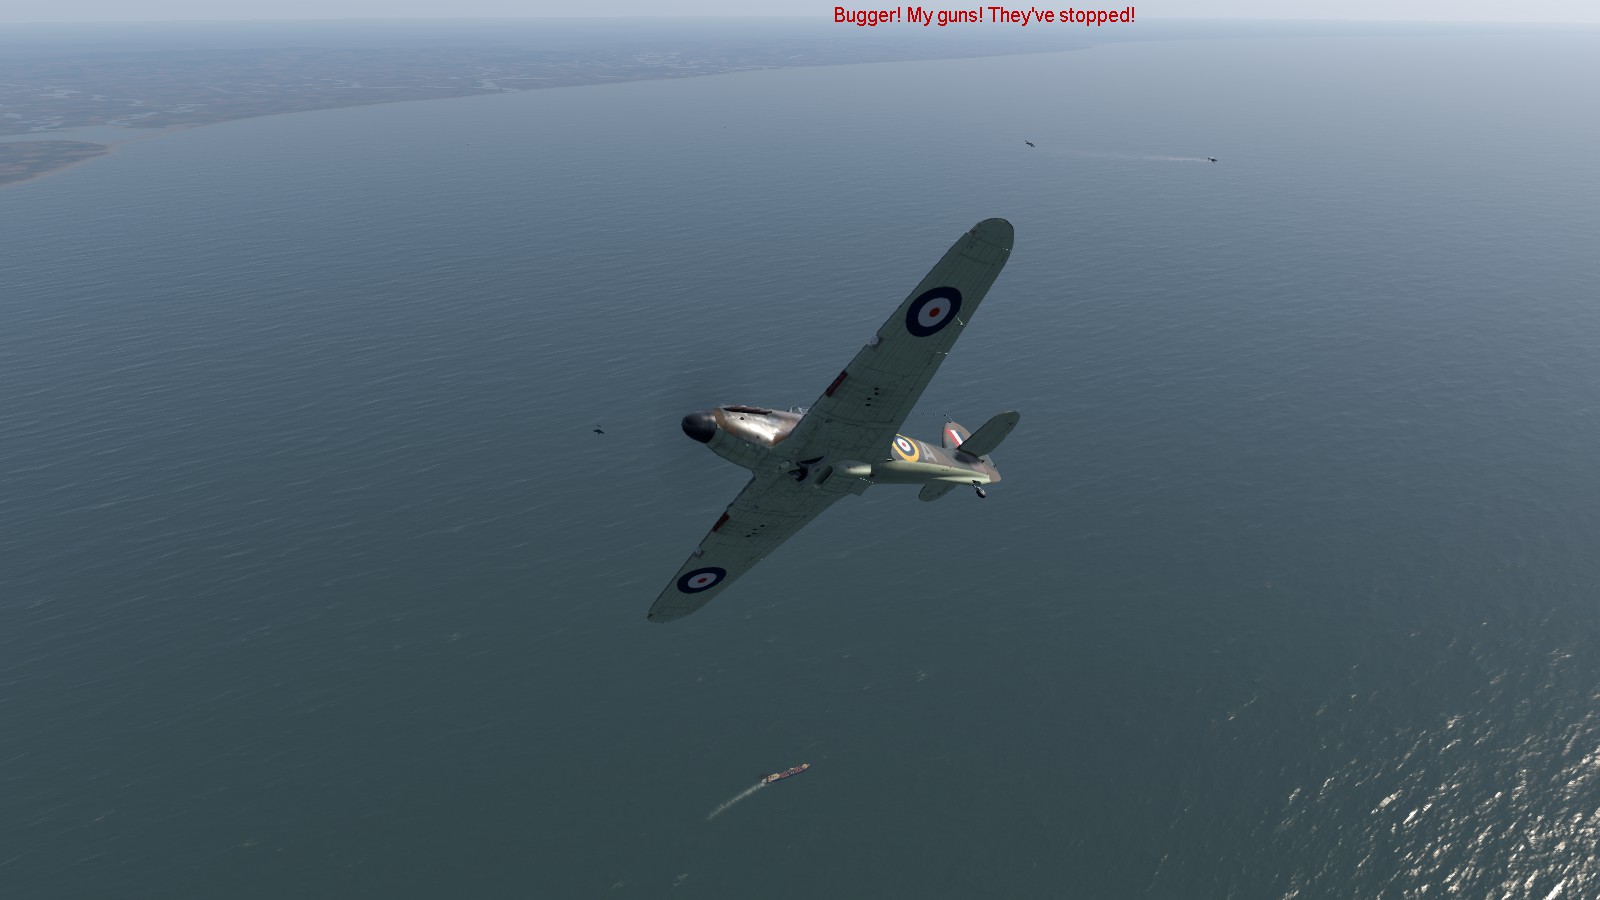
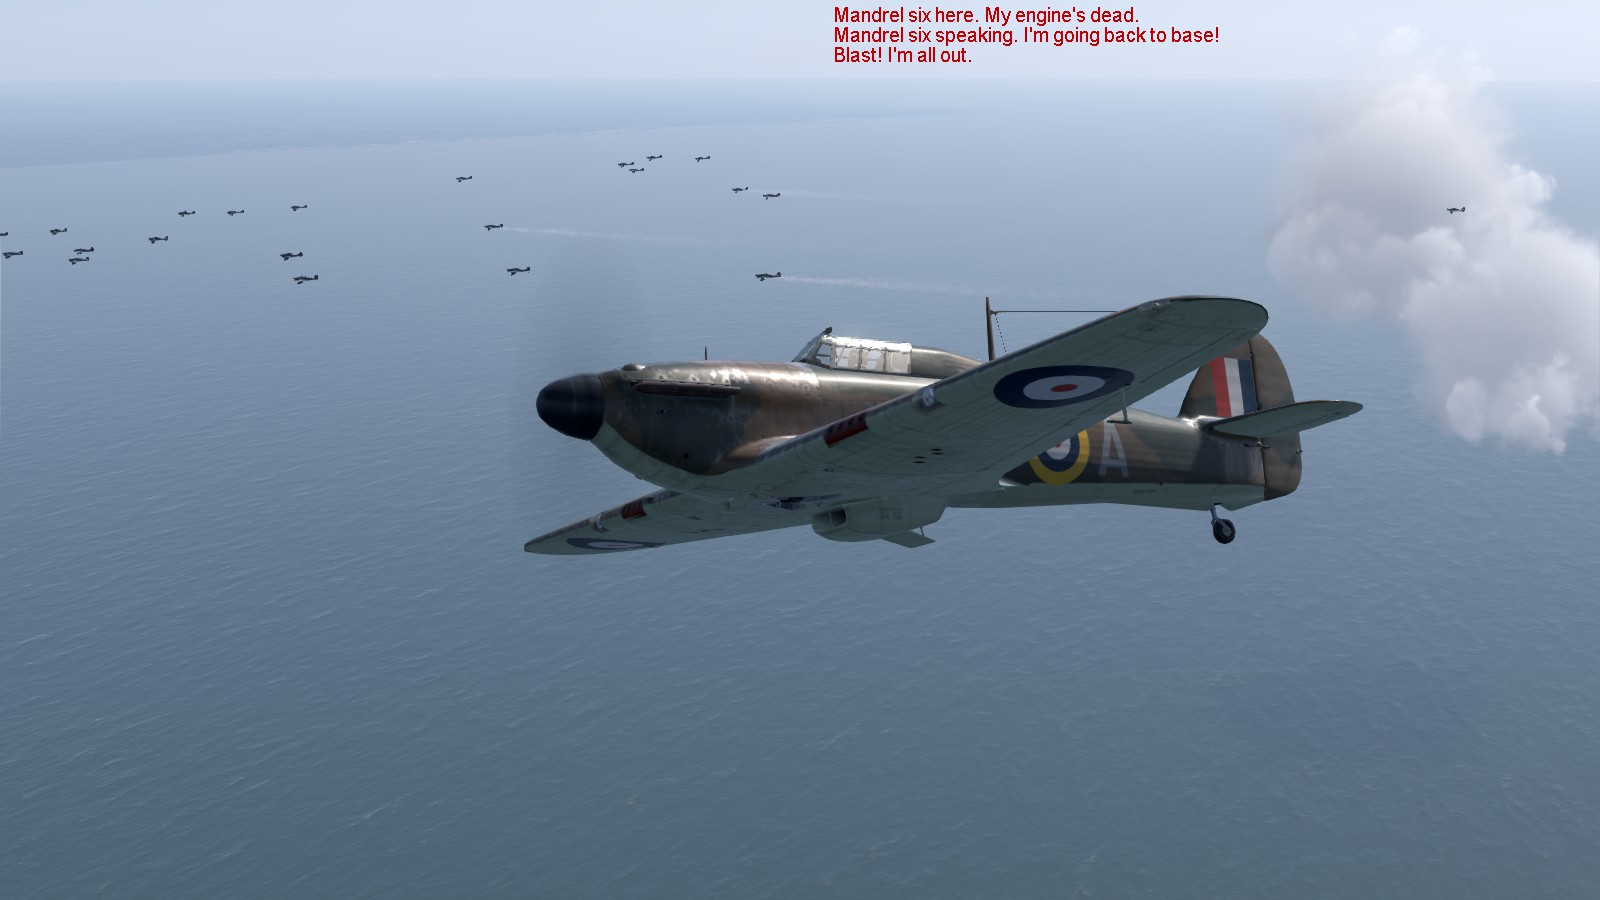
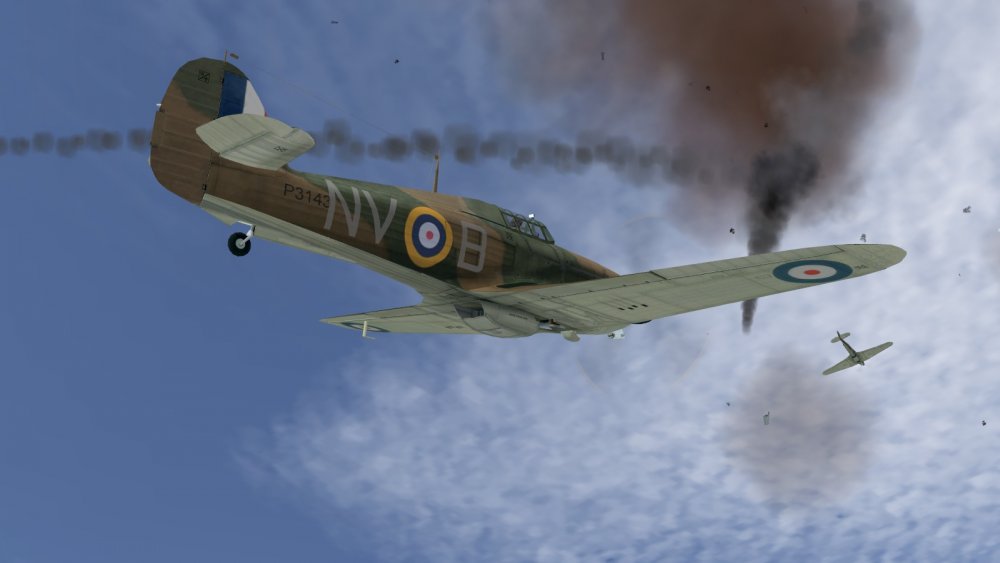
Agreed, BoB and BoB2 are in the 'When comes such another?' category. Having said that and early days yet, but so far I'm having a decent time playing the CloD Blitz (RAF Hurricane) campaign. As those who've tried it will know by now, it's storyline-based and presumably scripted. So far I've played the fist two missions, a scramble against a low-level Do17 raid on your airfield (Tangmere) and another to meet a Stuka raid on a Channel convoy. The storyline I find reasonably well written, apart from a lot of missing apostrophes and the working (or middle) class heroes versus the toffs aspect, set as the campaign is in a fictitious 'fat cats' squadron, fictitious code FC, perhaps intended to resemble 501 ('the millionaire's) Squadron - and so hardly representative of the RAF. This is me pulling away after damaging a Dornier - the one above the others trailing faint grey smoke - from the second, larger wave. It took me a few replays before I realised I was nosing over on takeoff because I had the wheel brakes fully on! There's plenty of R/T chatter, but I wish I could replace 'Commander' with 'Leader' and as in IL-2, either supress the text or limit it to a single line at a time. In the Stuka intercept, some of the R/T chatter is my section leader proffering advice to my character - a new arrival, looked down on by the toffs but befriended by the aforementioned section leader. Which would hardly happen on an operational sortie. But the backstory is I think commendable, reminiscent of the better efforts in scripted campaigns for Il2 '46, and so far it's pulling me in. This is about as good as my formation-keeping got in mission 2 - the boss is leading six of us with me as Red 2 in FC-A on his left.... As I think in WotR, we left climbing for height a bit late, especially as our airfield is right on the coast. Sadly I got no pics of my attacks on the formation of Stukas, which was large enough not to look...well, small. We got them before they dived onto the convoy, but could not prevent it being attacked - you can see one of the beggars diving steeply, but not very accurately, on a tanker in the next pic. I could not find the others after the air fight. Many pilots describe how the sky could suddenly empty of planes, but they seem particularly good at disappearing from view in CloD - unlike say BoB2 when you can often see specks at some distance, at least against sky or clouds. Anyhow, this is me heading home afterwards, on my own. I got told off by my leader a few times for this, much as happens in BoB2. The transmissions are a bit low volume but mostly seem well done; a fair bit of time, effort and creativity has gone into them and I appreciate that. The radio menu seems to work to the extent I can get from Control bearings to my home base, although I'm not sure about anything else. And this is me back at Tangmere. Landings I find easier than in BoB2, although the quirky key binding screen is a hindrance, likewise the fact that you seem to have to tap keys for flaps and undercart twice (once is a 'neutral' setting, whatever use that is). The Junkers were unescorted and I was credited with no less than three of them. They mostly stick closely together but I have seen stragglers jink. I think only your own successes are reported. Each subsequent mission briefing seems to pick up the story neatly where the last one left off. If in movie terms, BoB2 is the Battle of Britain, you might say that the CloD SP RAF campaign is more like Dark Blue World - or perhaps the more recent Hurricane, though the CloD scriptwriting is much better and the action, so very much better again than in the latter film with its awful air combat CGI. Microprose's B17-II managed to produce an immersive Flying Fortress simulation despite ridiculously small bomber formations, because it focussed so intensely on what was going on inside and immediately around your own B17. Perhaps I will find that for me, the CloD RAF campaign manages something similar, if the reportedly poor AI doesn't kill the experience when we run into the 109s, and the more typical bomber raids we will likely meet later are not too small. I have also downloaded this quaintly-named campaign and will give it a go too.

-
Battle of Britian Simulators for 75th anniversary
33LIMA replied to sixstrings's topic in General Discussion
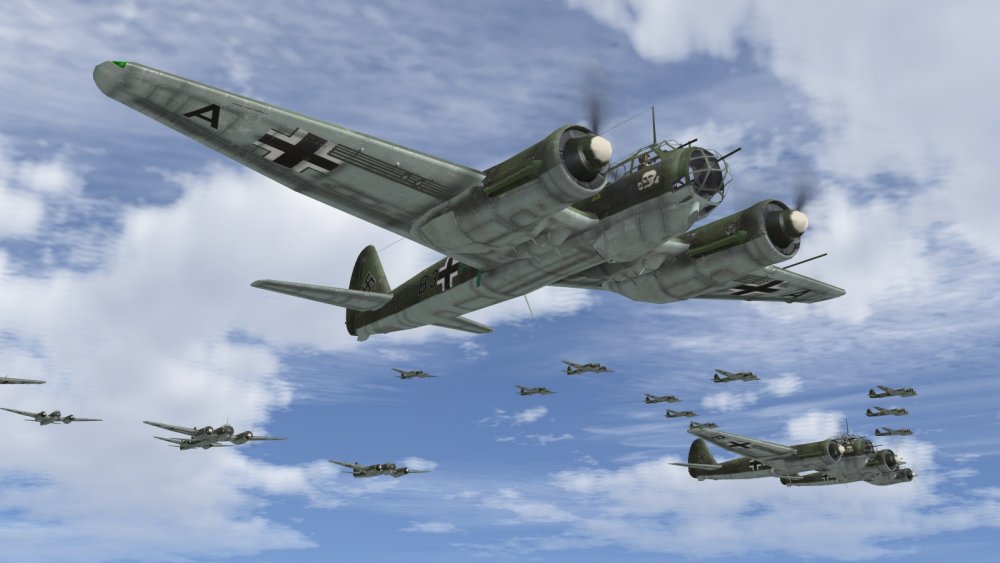
PS we needs must mention Wings over the Reich as a contender here. But haven't got it so can't say much other than what I've seen and read from those who have. German raids seem wildly small, the bomber formations are way too wide and seem readily to break up, all of which is really bad for the BoB and disastrous if carried forward into US daylight raids. There seems to be no Controller, save what he tells you before you scramble rather than letting you get off then telling you when you're in the air. R/T traffic is better than CFS3 but a bit twee at times. Specs are high, possibly as resources are wasted (IMHO) running flights the player will never see if he sticks to his mission - apart very largely from weather, channel or photo recce flights, the Luftwaffe activity should be simulated as consisting of large, discrete raids not separate much smaller formations, which the player is scrambled against if in his Sector, or knows little or nothing about if they're not. Multi-skin is only a little multi. May still be some irritating anachronisms or Americanisms like 'intel' (yuk). The 109s don't have operating slats. Bailouts are not very well done. The in flight map is not as bad as CFS3 but still not good (no Solent, last time I saw). And the port wing Hurricane camo pattern is missing some prominent Dark Earth, a very basic research gaffe! Playable planeset is very small but a Spit is planned along with the Battle of France. The air combat AI is reportedly good, tho AI-led flights seem as in WoFF to spend a bit long after a scramble pottering about near the deck. You can play a proper squadron campaign, picking any Hurricane squadron or 109 gruppe. Currently seems good value for a full-feature sim, if you can forgive the small, wide bomber formations and the apparent lack of ground controllers, which I regret to say I can't. Call me inconsistent but CloD-B's sins I forgave, though only as it was going for £8.99 :) Would be good if someone who has WotR would do a mini-review or maybe a decent-length, imagination-free screenie-based mission report or two over here, with particular reference to things like formation size that other reports seem a bit vague about. -
Battle of Britian Simulators for 75th anniversary
33LIMA replied to sixstrings's topic in General Discussion
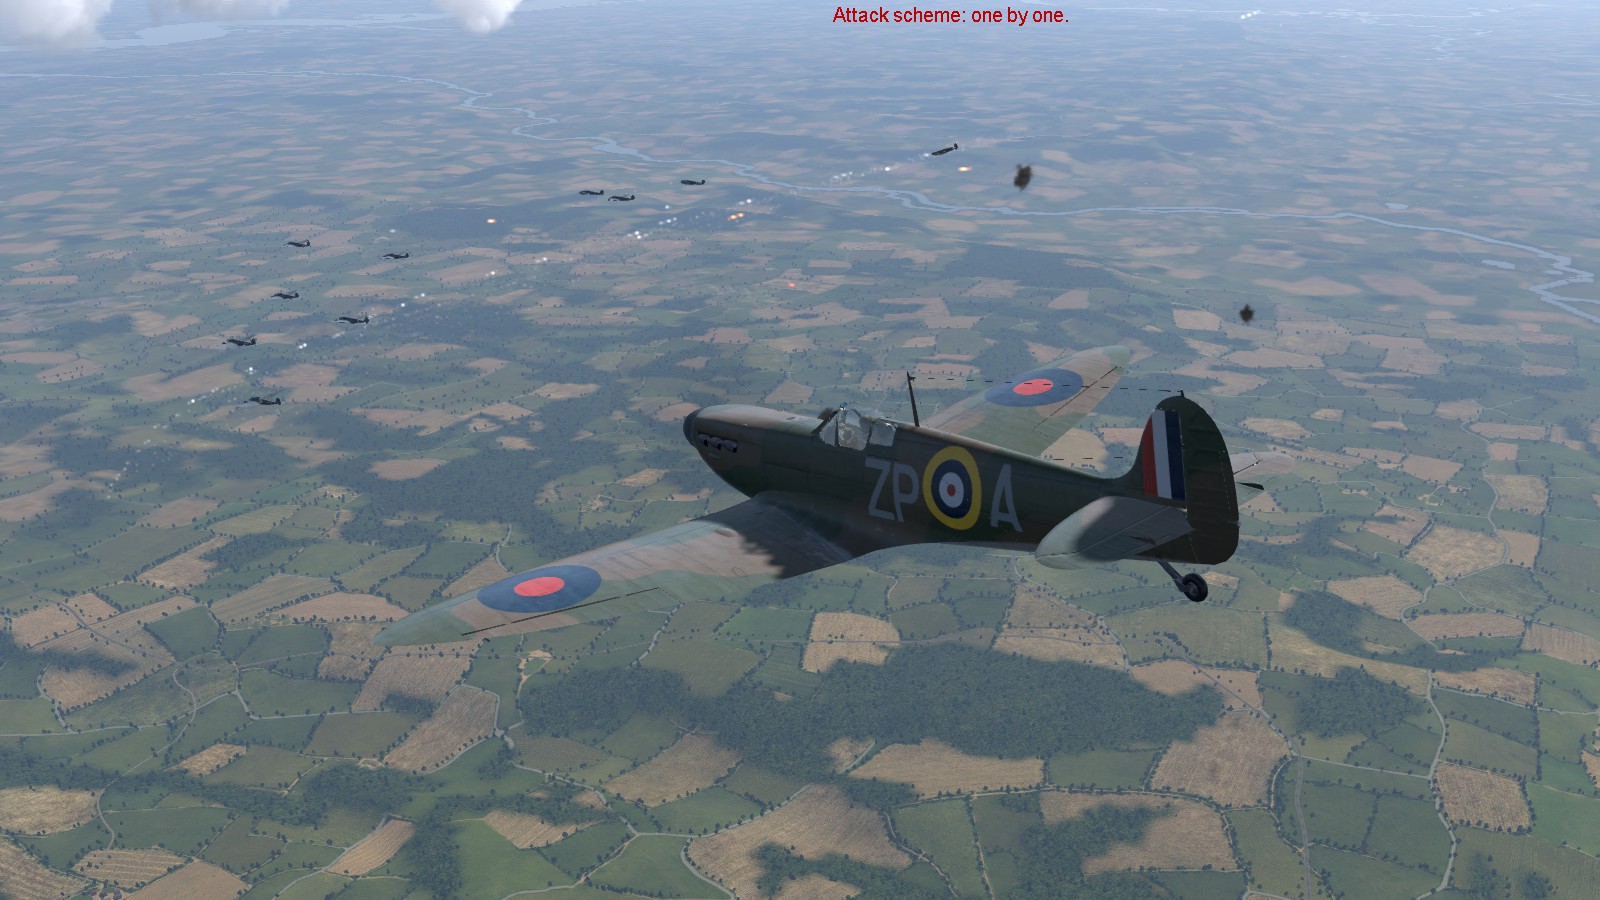
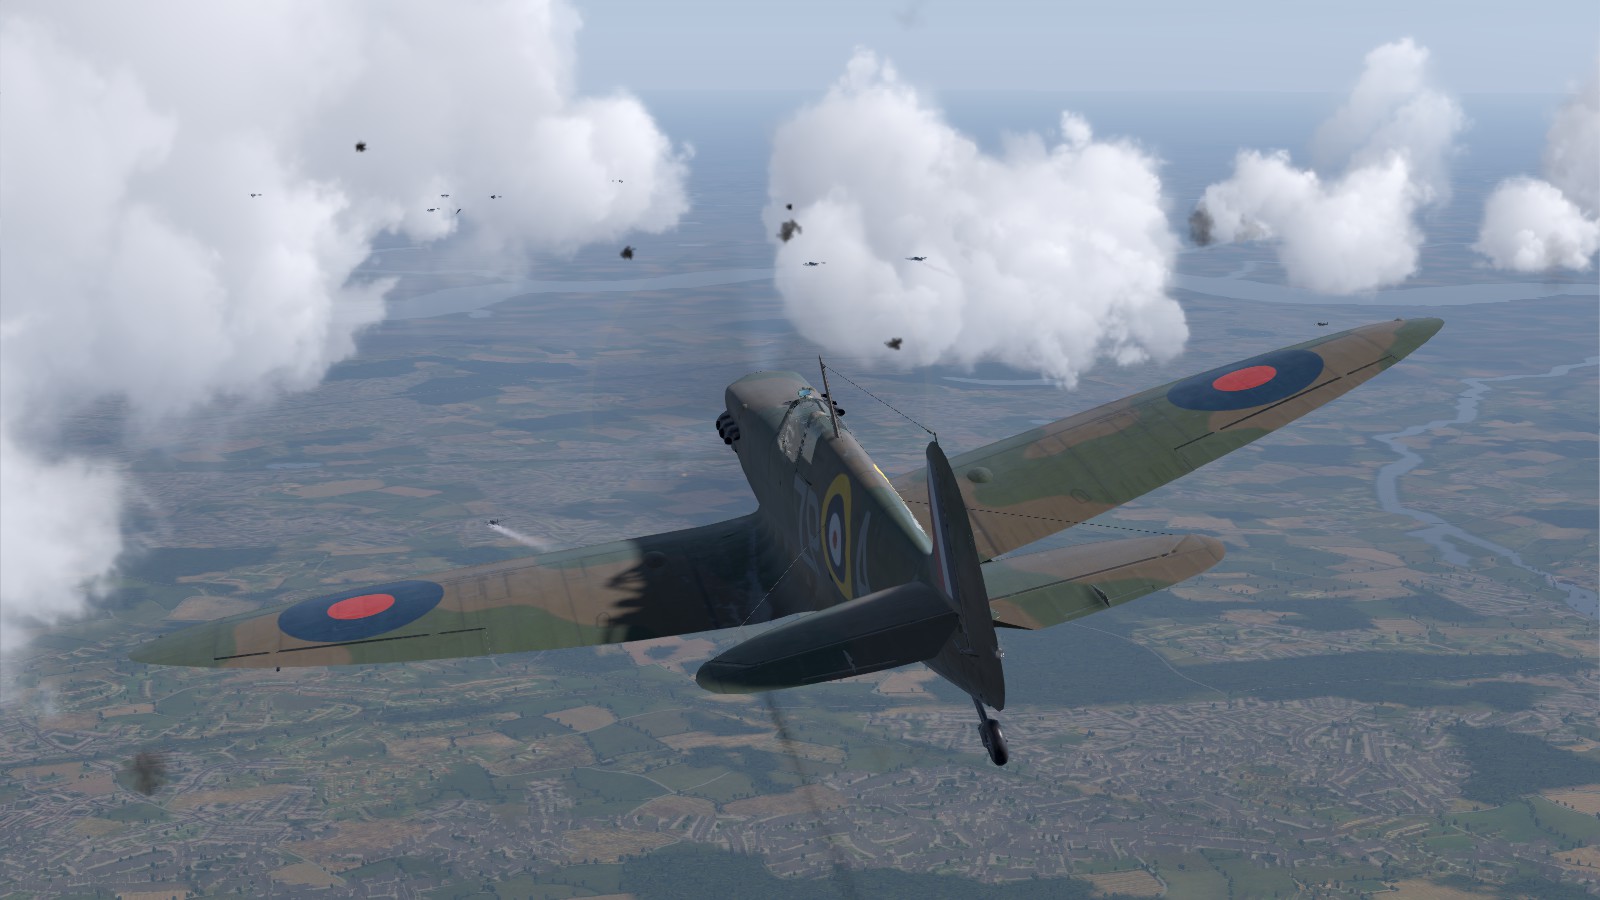
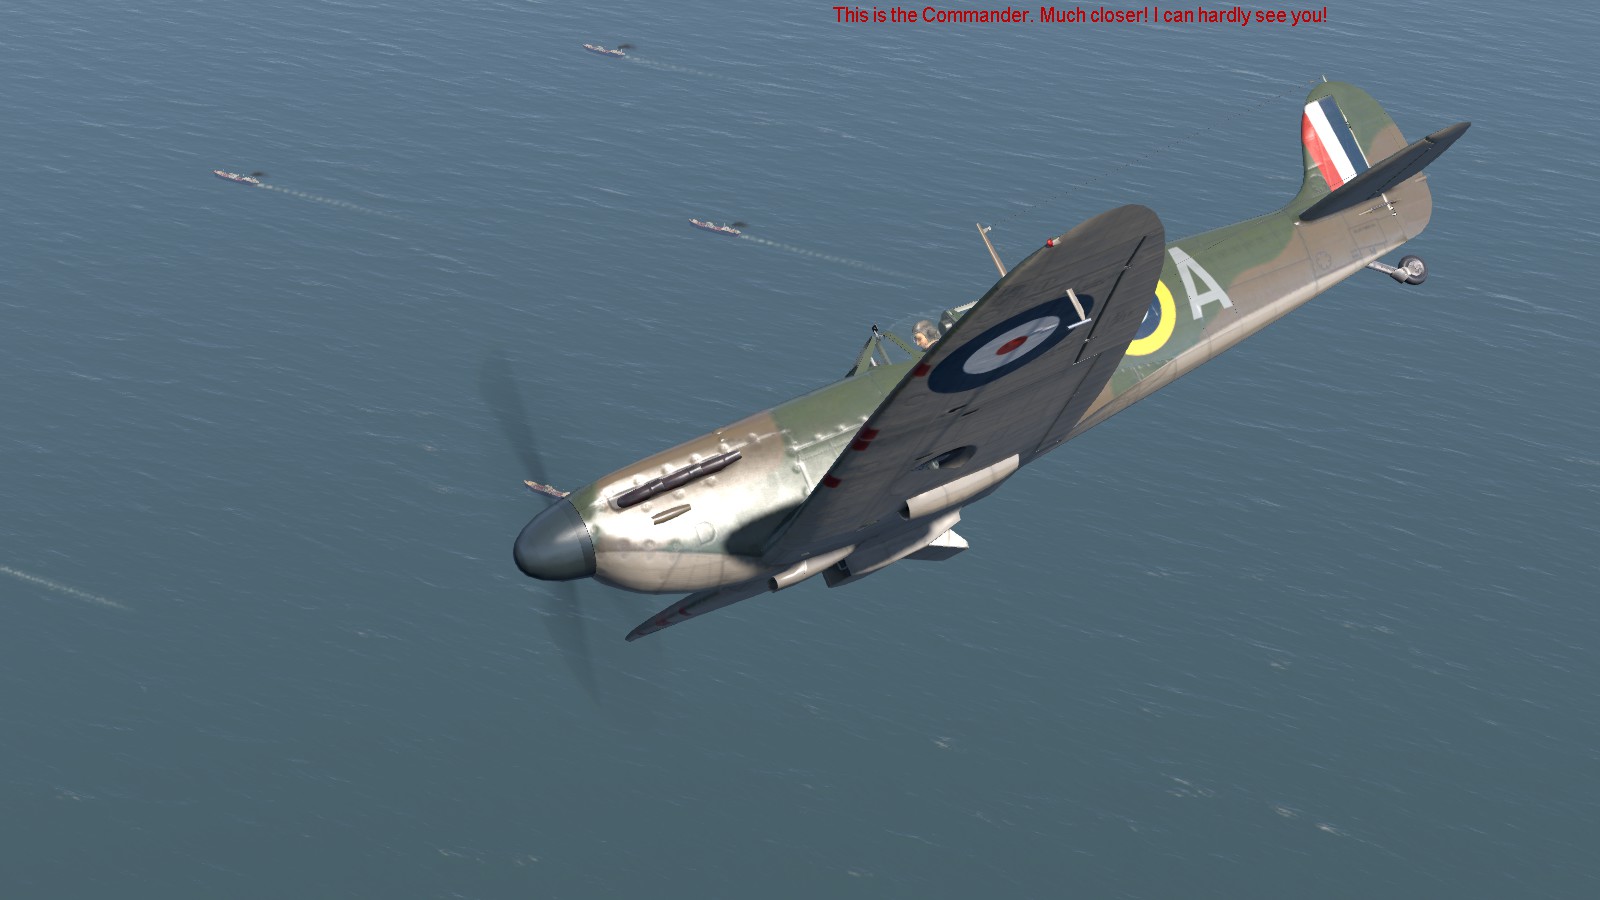
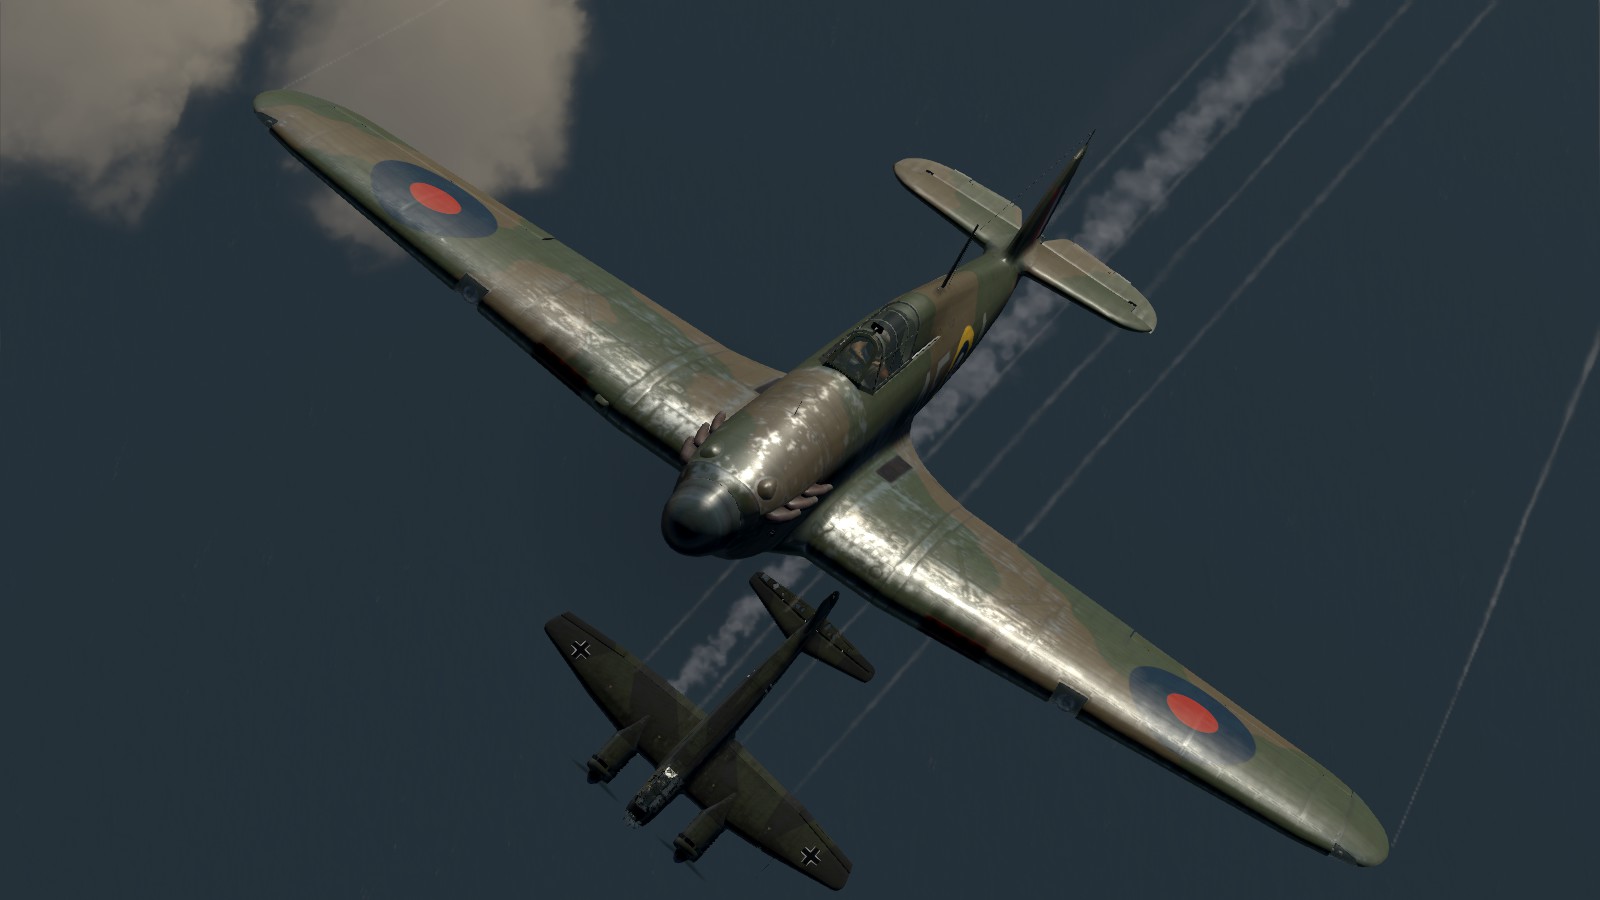
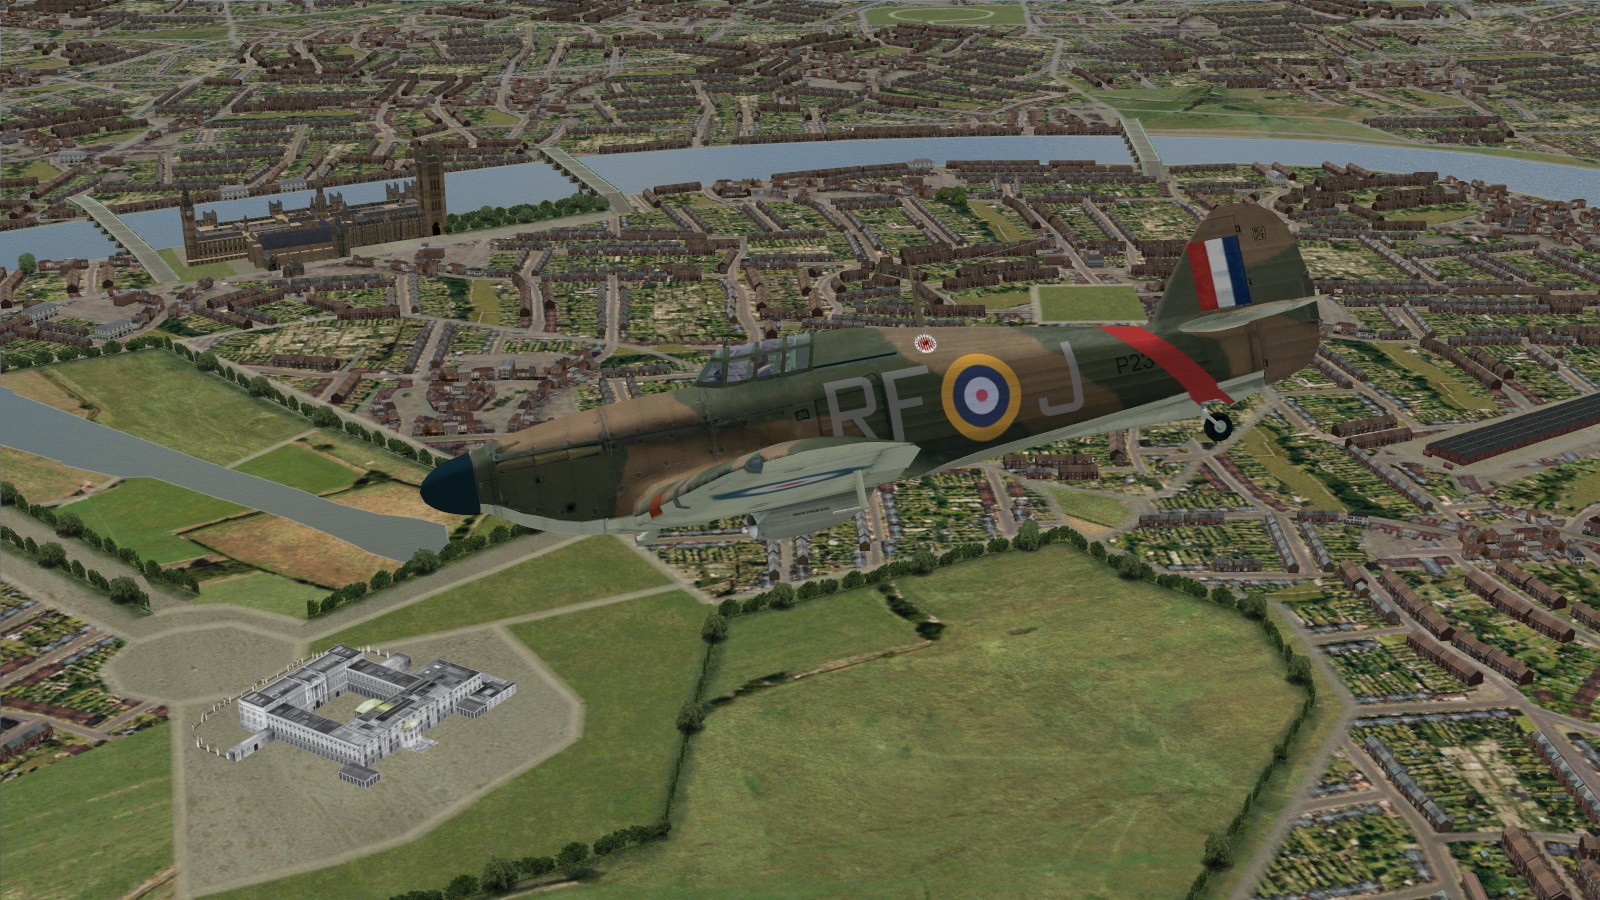
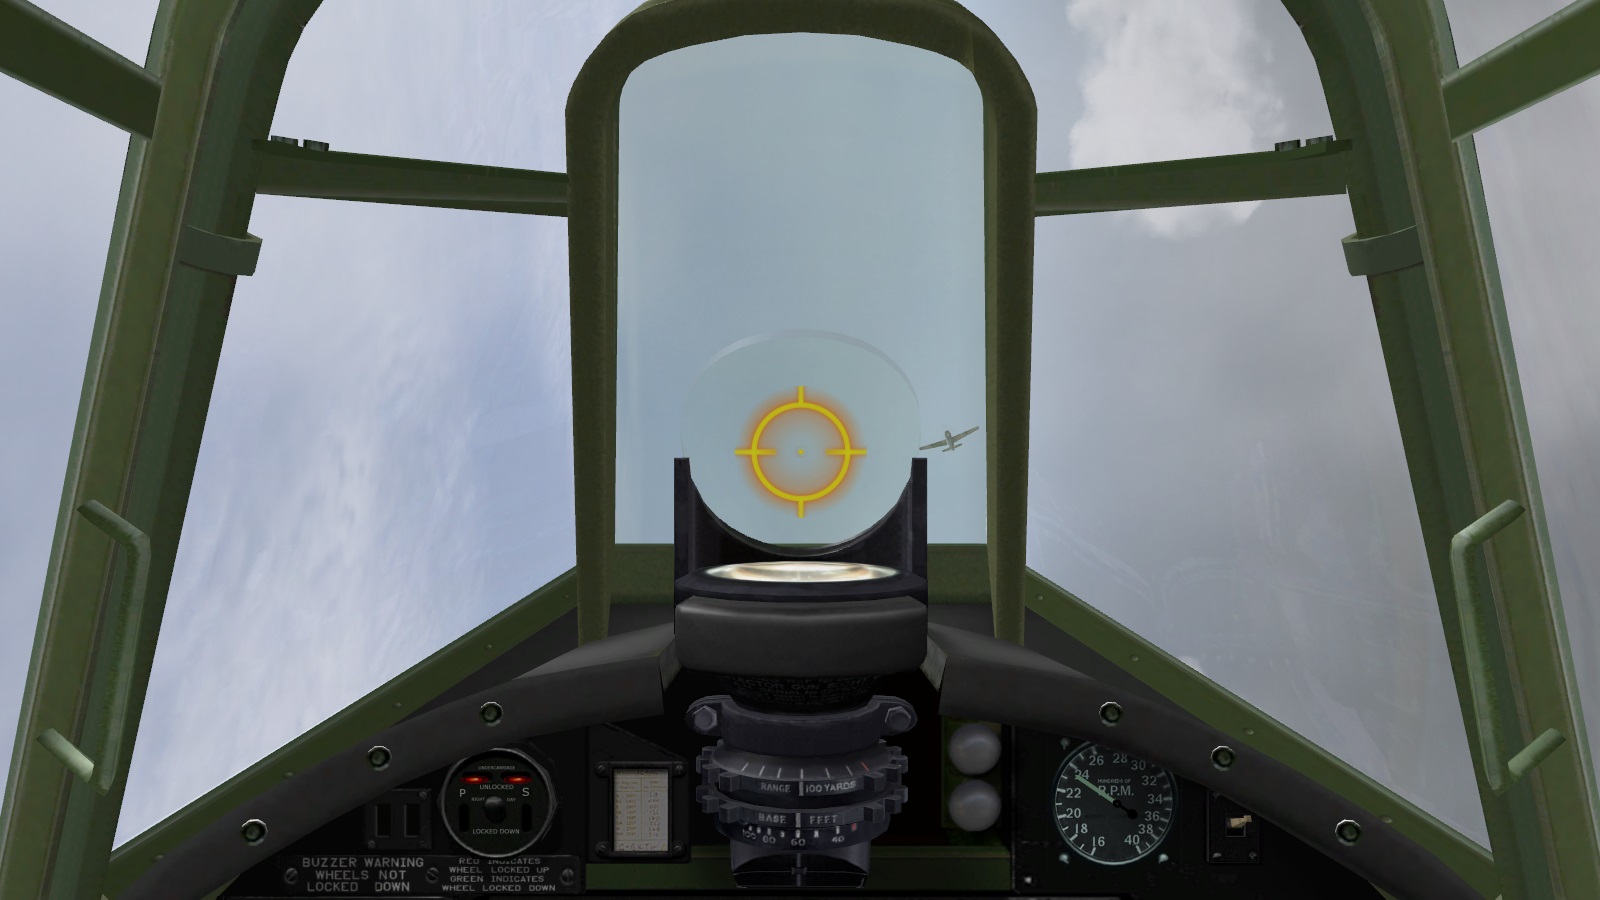
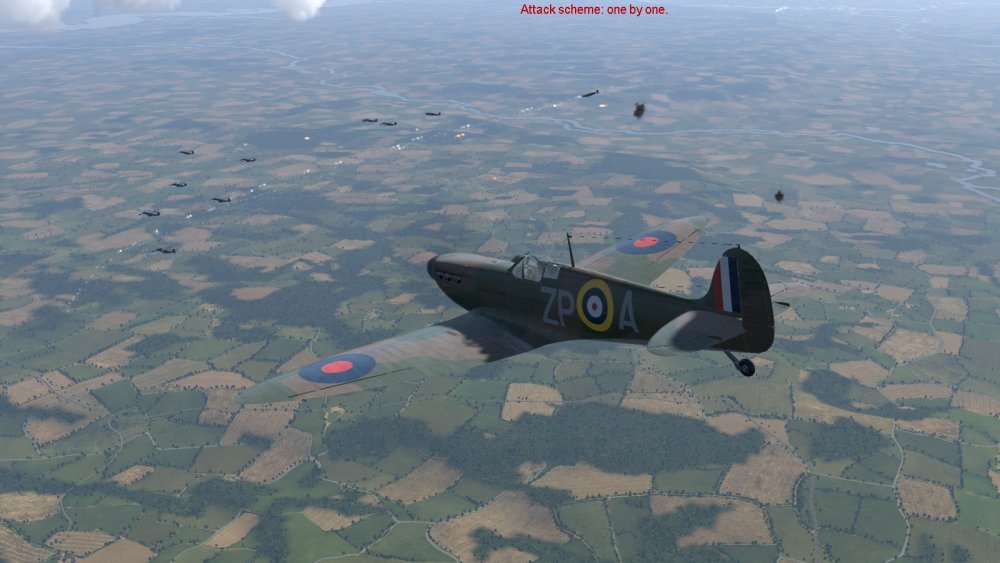
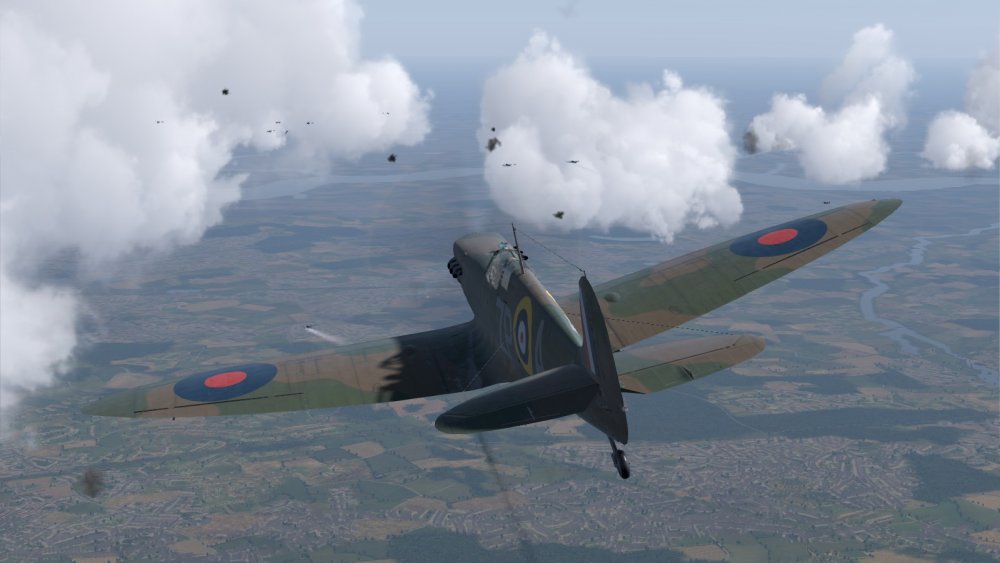
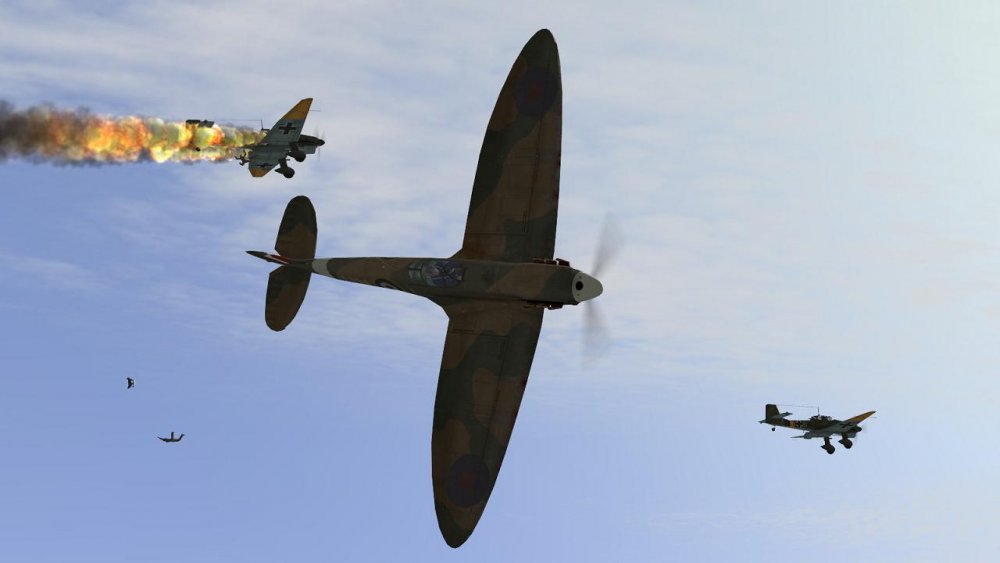
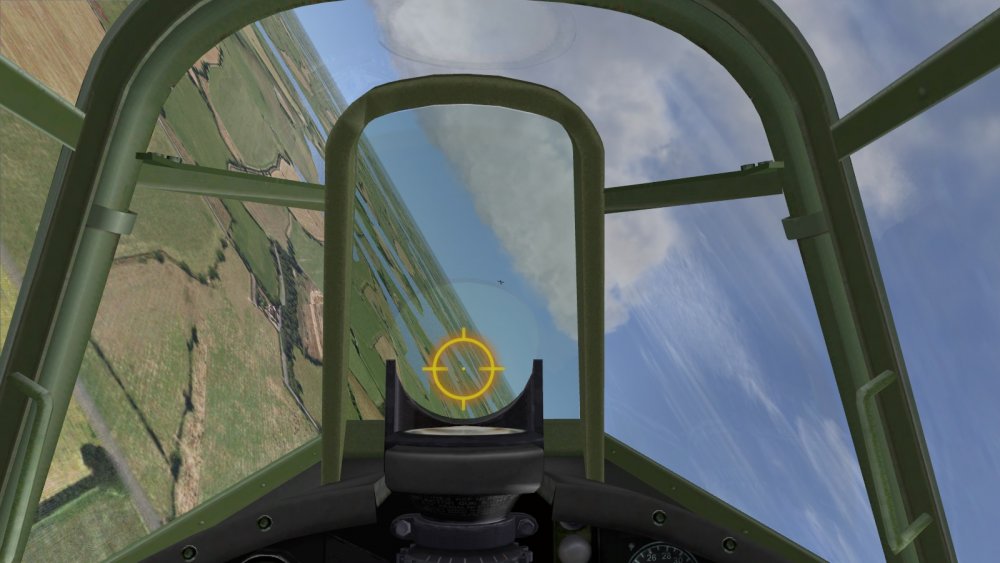
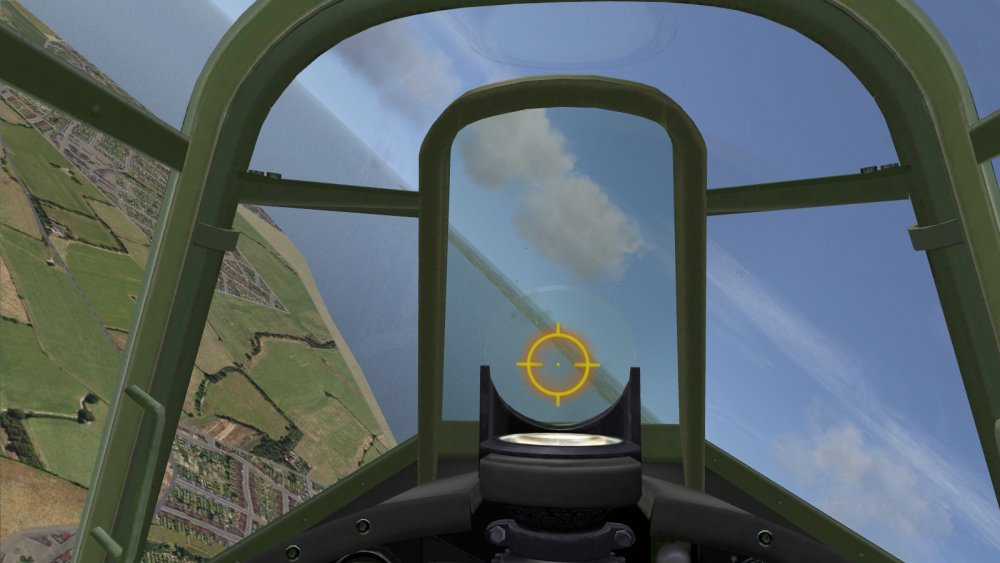
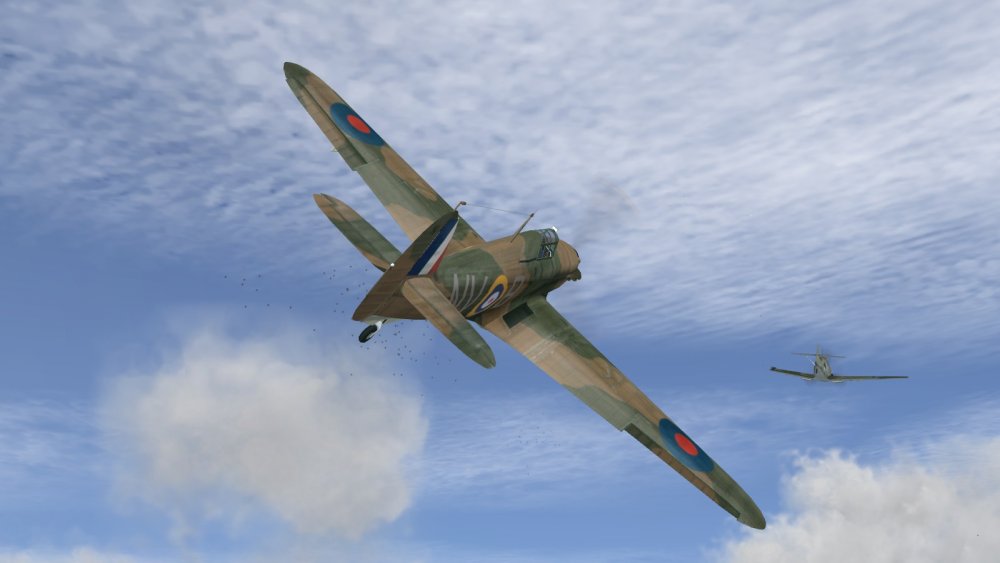
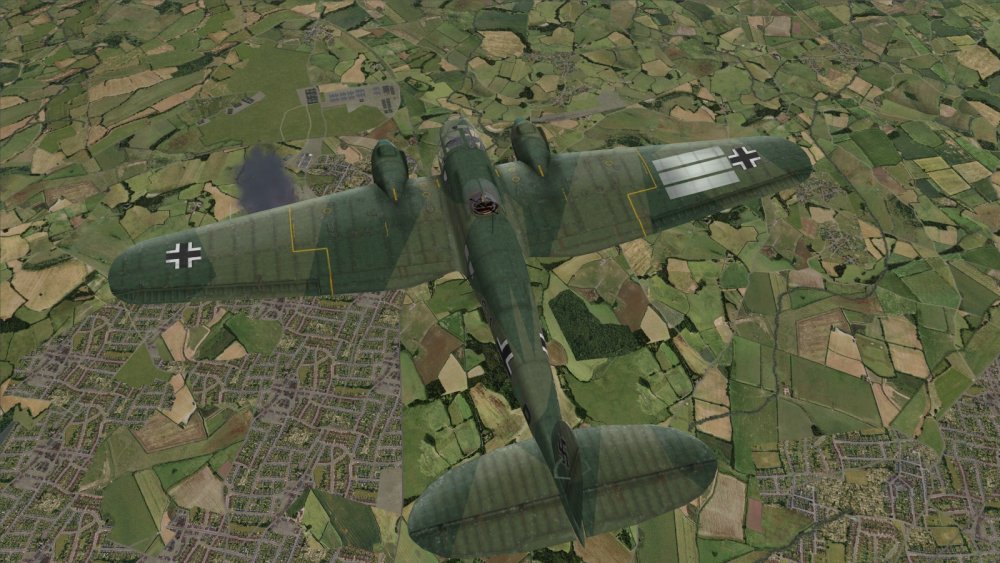
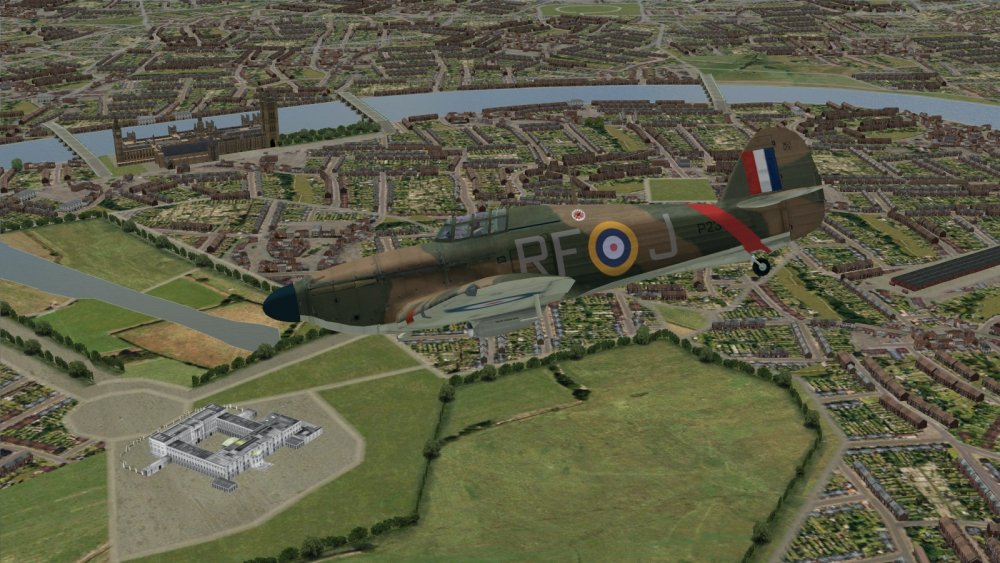
Many thanks for all the tips, Sky High, time to grab some mods and dust off EAW! SGSS seems to be a good shimmer-killer; I am using it in BoB2 and with MSTS content in Open Rails and it certainly sharpens up that which was not previously sharp. I could not resist a bit more dabbling in CloD-B last night, playing some of the included missions. Despite being under min spec as regards GPU RAM, it runs very smoothly so far, even pushing the slider up so 6 of us ended up trying to stop 24 Stukas from bombing Hawkindge (they spell it with the 'd', so no surprises they didn't get Lympne quite right either). The bad news is that having failed to stop many of them... ...we were treated to the spectacle of twenty-plus dive bombers level bombing their target. And yes I hadn't discovered that Alt+L turned on the reflector sight when I took that pic. Maybe because the missions are scripted, there are transmissions from the controller, telling you where the Bandits are, plus a certain amount of R/T chatter. You'll know all this already, but perhaps because the radio commands are there but broken, combat missions (which seem to be air starts) often seem to begin with you hearing or seeing yourself, the leader, giving attack orders, then off everybody goes, reforming automatically at some later point. This is seen below; the last line of 'my' orders is still visible as my flight of 6 Spits (the max) wades into 9 Heinkels (also the max available for this mission, a daylight defence of London - though I was able to replace all 24 Stukas attacking 'Hawkindge' with Dorniers). I was able to bunt after the straggling Heinkel streaming white vapour in the pic below, without the motor missing a beat that I noticed. So the effect of negative G on Merlin carburettors of the period is not modelled, it seems. This pic from a convoy patrol illustrates another research gaffe. I thought absolutely everyone within the English-speaking world and many without knew that the chap in charge of a fighter formation was called a Leader not a Commander, but it seems that 1C didn't, and didn't bother checking with anyone who did. At least, unlike the Hurris, the Spits aren't excessively weathered, though if I was painting a model, I would prefer it ended up looking like the ones in BoB2, as regards representation of the camouflage colours and level of shine. The inability of the latest version to accept accurate German national markings is a pain. In these one-size-fits-as-many-as-possible days, we seem to be going back to the 1960s, when FROG was the only company whose models often had swastikas and you had to buy the Almark or Escii ones separately for your Airfix and Revell kits, and exotics like the Lindberg He100 and Me163. And after we chased these Ju88s back from Manston... ... it was odd to see one the survivors half-looping like an oversized Pitts special when it reached France. Maybe this is what the CloD-B AI gets up to, when the mission script runs out of more sensible things for them to do. Or more charitably, perhaps it was the Ju88 I attacked earlier, whose crew ditched the rear half of the canopy and bailed out, flying on for a bit before going out of control. Enemy air gunners don't now appear to be the snipers of some reports, which is something. If the AI is as poor as they say (RoF's wasn't much admired but I could live with it) and the radio commands are U/S, then those and its very small scale will be its main major weaknesses as a single player BoB air combat sim. So my gold still goes to BoB2. EAW I might draw with IL2 '46 (with suitable campaigns like Spitfire Scramble) for the silver, with EAW well ahead in scope for the BoB but well behind with graphics, plus of course IL2 '46 modded has a scope beyond the Battle pretty well as wide as modded EAW.


-
Battle of Britian Simulators for 75th anniversary
33LIMA replied to sixstrings's topic in General Discussion
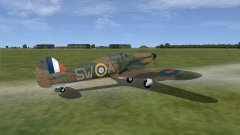
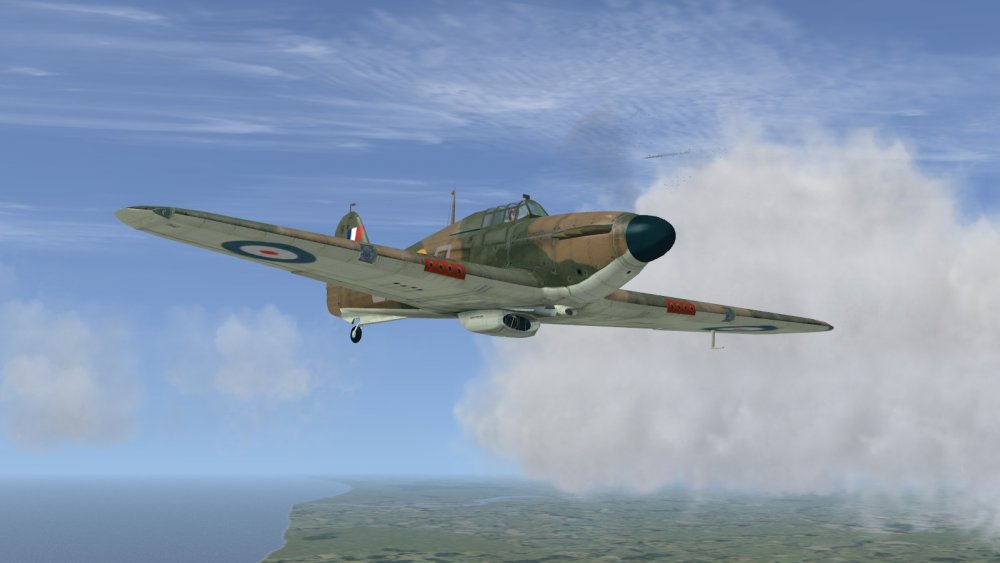
What mods (terrain expecially) and EAW version are you using, Sky High? If my EAW install looked like that I'd probably play it more than occasionally. As far as I'm concerned, EAW, like most of Microprose's other late 1990s combat sims like M1 Tank Platoon II, B17 II and of course European Air War itself, are still shining examples of how these things should be made, and the yardstick against which they should be judged. Sadly the visuals and some under the hood detail has been improved but few subsequent ones come even close to the depth and breadth of Microprose's classics. I took the plunge and got Cliffs of Dover Blitz Edition last night - no interest in multi-player so wouldn't have bothered except it was on sale cheap on eBay. So I thought I may as well have it for the odd flight or combat. Have had a bit of a struggle getting things set up, even the Joystick needed every axis set individually. Pics below are from my first real flight, a cross-country job in one of the minor Hurricane variants you can pick, in this case with the DH two-speed prop, smaller-diameter spinner Hurricane model (pointy unlike the Spit [bulbous] or Hurri [longer, bullet-shaped] constant-speed Rotol, both variants of which Hurricanes had, as well as either Spit or Hurri DH jobs). First impressions include: - many sims have issues with object draw in but unless there's a setting I've so far missed, CloD is one of the worst offenders I've seen, with piers, jetties, hangars etc popping suddenly into view when far too close; - my Hurricane is excessively weathered, looking like somebody started and then gave up a half-hearted effort to sand it back to a natural metal finish, and the camouflage is a bit too shiny on metal panels, more like a Luftwaffe one than RAF; - RAF squadron codes look to be one size fits all, in a rather too rounded font, and planes may lack the prominent serial numbers; - water, cloud and lighting effects are very good and give a realistic impression, including of the lie of the land at lower altitudes (though I do think the terrain hues look a bit dark or strong); - cockpits are very nice; - there are no hedgerows in southern England apparently, just 'tree-rows', and the trees are evidently a special, salt-water-resistant sort, as they run right up to the sea and in some cases, thrive at the foot of limestone sea cliffs; - the land-sea transitions in urban areas are poor, with no seafronts; houses and streets run randomly up to and sometimes on to beaches; - the empty, open-door hangars look like they are paper-thin despite their substantial size and height; - on autopilot, reminiscent of Il-2, the AI seem to turn on rudder only, and after landing, keep the stick pulled back like their lives depended on it, even after stopping and switching off. How it flies and fights, and what sort of air-to-air AI and SP missions or campaign it has, I'll find out for myself soon enough.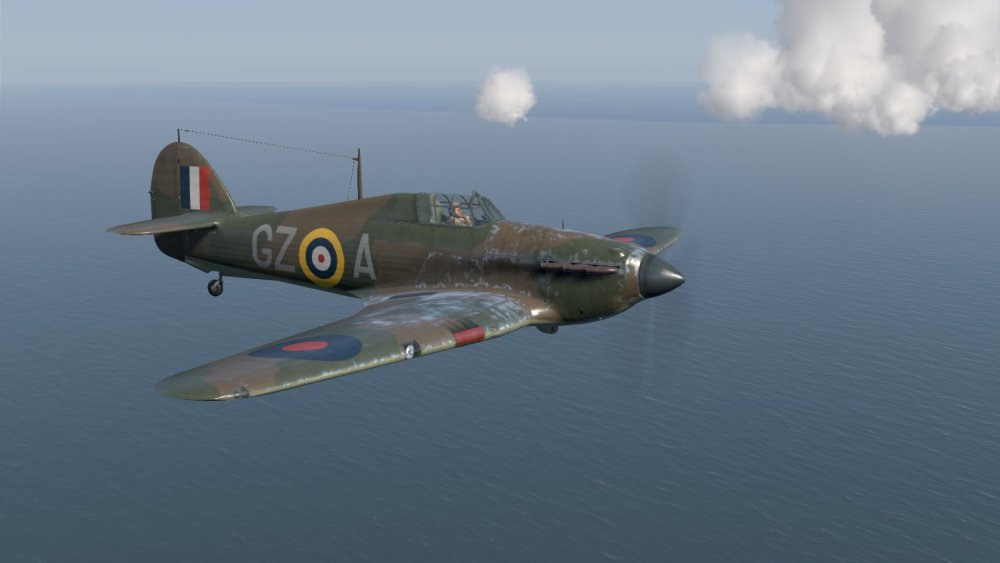


-
Home, James, and don't spare the horses! Needless to say, I made the best of my Hurricane's turning abilities to get out of the Hun's line of fire! BoB2 gives very good 'shake, rattle (but no roll)' audible stall warning when you're on the edge, so I was able to hold her there quite happily. Another few circles and I was gaining on him. He was faster but I could turn tighter. I was a bit alarmed when a completely different Hun whizzed past. I didn't fancy a sustained low-level dogfight against two or more 109s, especially as there seemed to be no friendly fighters about to come to my aid, this time. So as soon as I was able to put a bit of distance between myself and the 109s, I bravely ran away. Discretion being the better part of valour, he who fights and runs away, and all that. The railway lines in BoB2 can be a bit badly laid in places, and this was one of those places. However, the woods look a lot better with autogen trees turned on, which is a very simple hand edit of your BDG.txt configuration file. And at low level, you can see that the lie of the land is reproduced, even though this is not so readily apparent from higher up. The red low fuel warning lights must have come on in those 109 instrument panels, for they made no effort to pursue me. So I was able to level off and call up Control, asking for my nearest landing ground. I could murder a cup of tea, I thought; no need to wait till I got all the way back to Biggin Hill. To be honest I'm not sure where it was, that got down. I just followed the bearing given, as it was only a few miles away. Compared to our sector airfield, the premises looked a bit on the Spartan side, and the grass field itself seemed a bit small. But I only bounced once, and then I was down and rolling up to the sheds, tapping the brakes with the elevators well up to keep the tail down till the speed came off, and wondering where the officers' mess was. Or even the NAAFI, if all else failed. If nothing else, the mission has got me hauling out the keycard (I have a copy of a 'big box' version of the Rowan original, which includes the old-style printed manual) and the modern BDG soft copy equivalent, which includes some new keystrokes and a tabular explanation of what each does. Not flying as a leader makes life a bit less busy, but there are still some basic skills and sim-specific drills I need to learn, to get the best of my BoB2 experience. Which so far - just in case you haven't noticed - I am finding lives up to the very best I've long heard about Rowan's classic in its A2A Wings of Victory form.


- 6 replies
-
- 2
-
-
- battle of britain 2
- bob2
- (and 1 more)
-
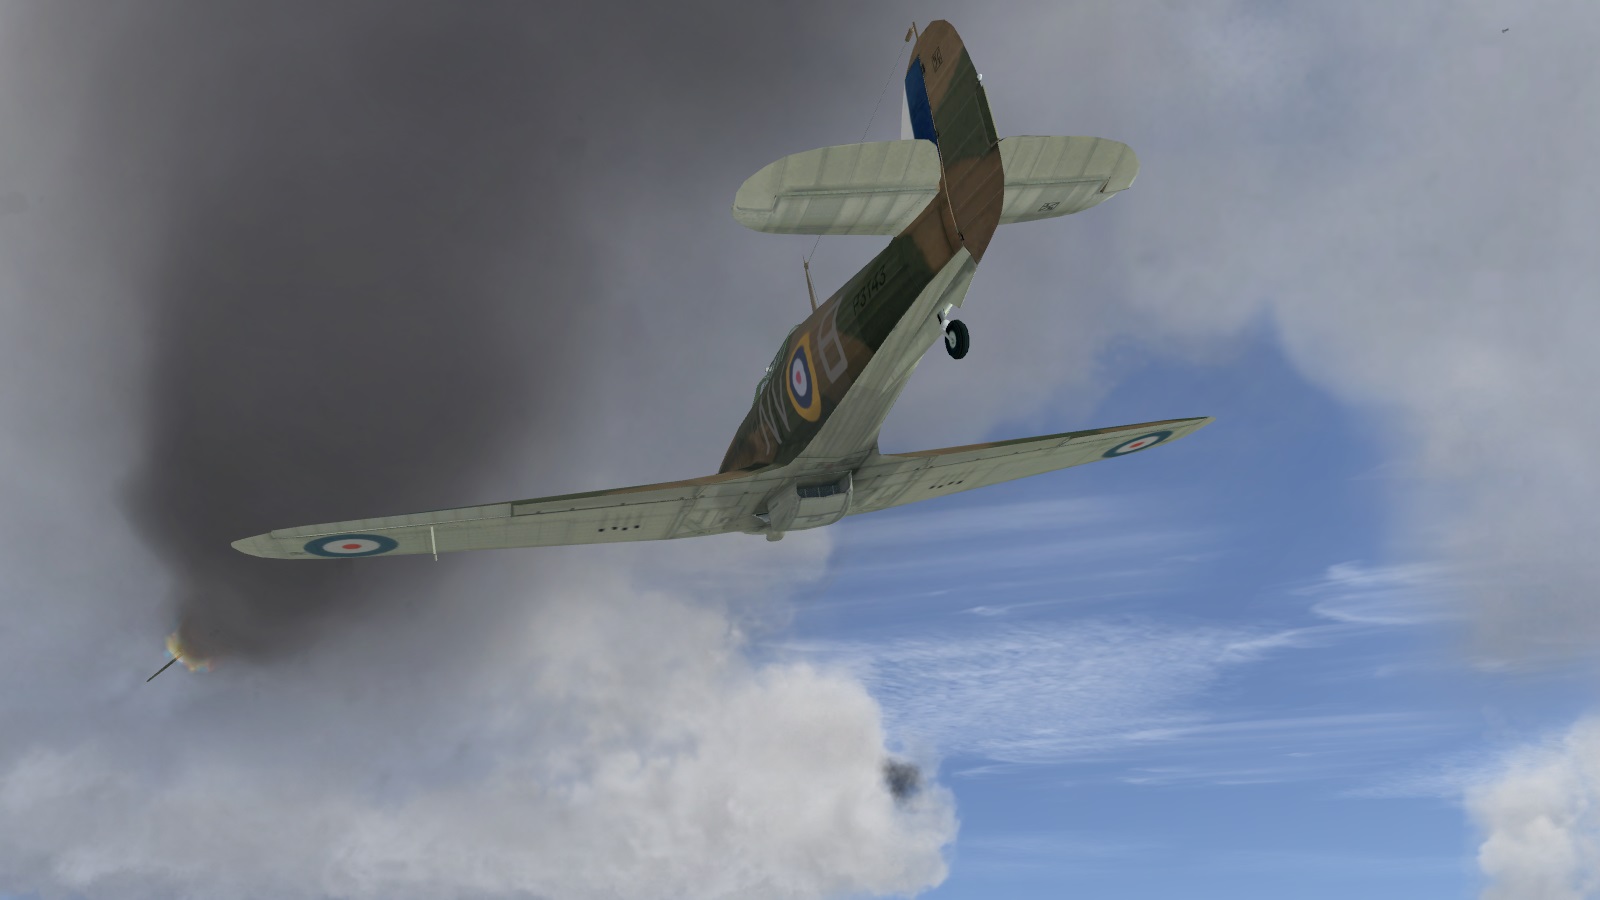
Plink! Plink! BOOM! Plink! At this point, I thought that maybe it was time to go home, with or without more than a Probable. While I was thinking this, someone else was thinking that perhaps I should do no such thing. My first warning of this was that plinking sound again, as his rounds hit me. Naturally, I did my level best to get out of his way. After a bit of obligatory whirling around at increasingly lower level, I managed to get out of his way so well that I was actually behind him, although quite a long way back. However, any thoughts I might have entertained that this, at last, might be MY 109 were rudely dispelled, when just as I was working my way closer, another Hurricane - possibly that chap from Thirty-Two again - decided that he could do better. Which he could, as it happened. After a few bursts from the other Hurri, the 109 started trailing smoke. Suddenly, the 109 blew up and disappeared into smoke and fragments! Thoughts of going home were put aside, knowing that we - if not necessarily me - seemed now to have the whip hand in this fight. Likely by now, the Huns were short of fuel and needing to make their own way home. I headed back out over the estuary, to where I could see an air fight in which I might be able to make myself useful, rather than leaving others to it. This turned out to be a deuced clever move, if I say so myself. I managed to do the sneaking up this time, catching an unsuspecting 109 and removing his port outer wing. He rolled left and fell like a stone right after this picture was taken. You'll do me! Looking around for any further trade, all I could see was a pretty serious ack ack barrage, quite a long way up and drifting away to the south. I thought of trying to get up to it, but at last decided that honour had been satisfied. So I headed home, back to base. Below me you can see the Naval dockyard at Sheerness, one of many historical sites and targets recreated in BoB2 and refined by BDG. And here's a view of the BoB2 map, zoomed in. I think the yellow line is pointing to the south-east and not south west towards my base at Biggin Hill, where I'm now heading, is because a programmed waypoint I have not flown to lies in that direction. BoB2's Sheerness, realistically, has its very own balloon barrage, which may be why the Stukas haven't paid it a visit. Anyhow, the skies down here look clear now, so I hold my course for home. The 109 you can see in the next pic curving in from below and behind had other plans for me, however. I woke up to this when I heard that plinking sound again, of bullets striking airframe! ...to be continued!


- 6 replies
-
- 1
-
-
- battle of britain 2
- bob2
- (and 1 more)
-
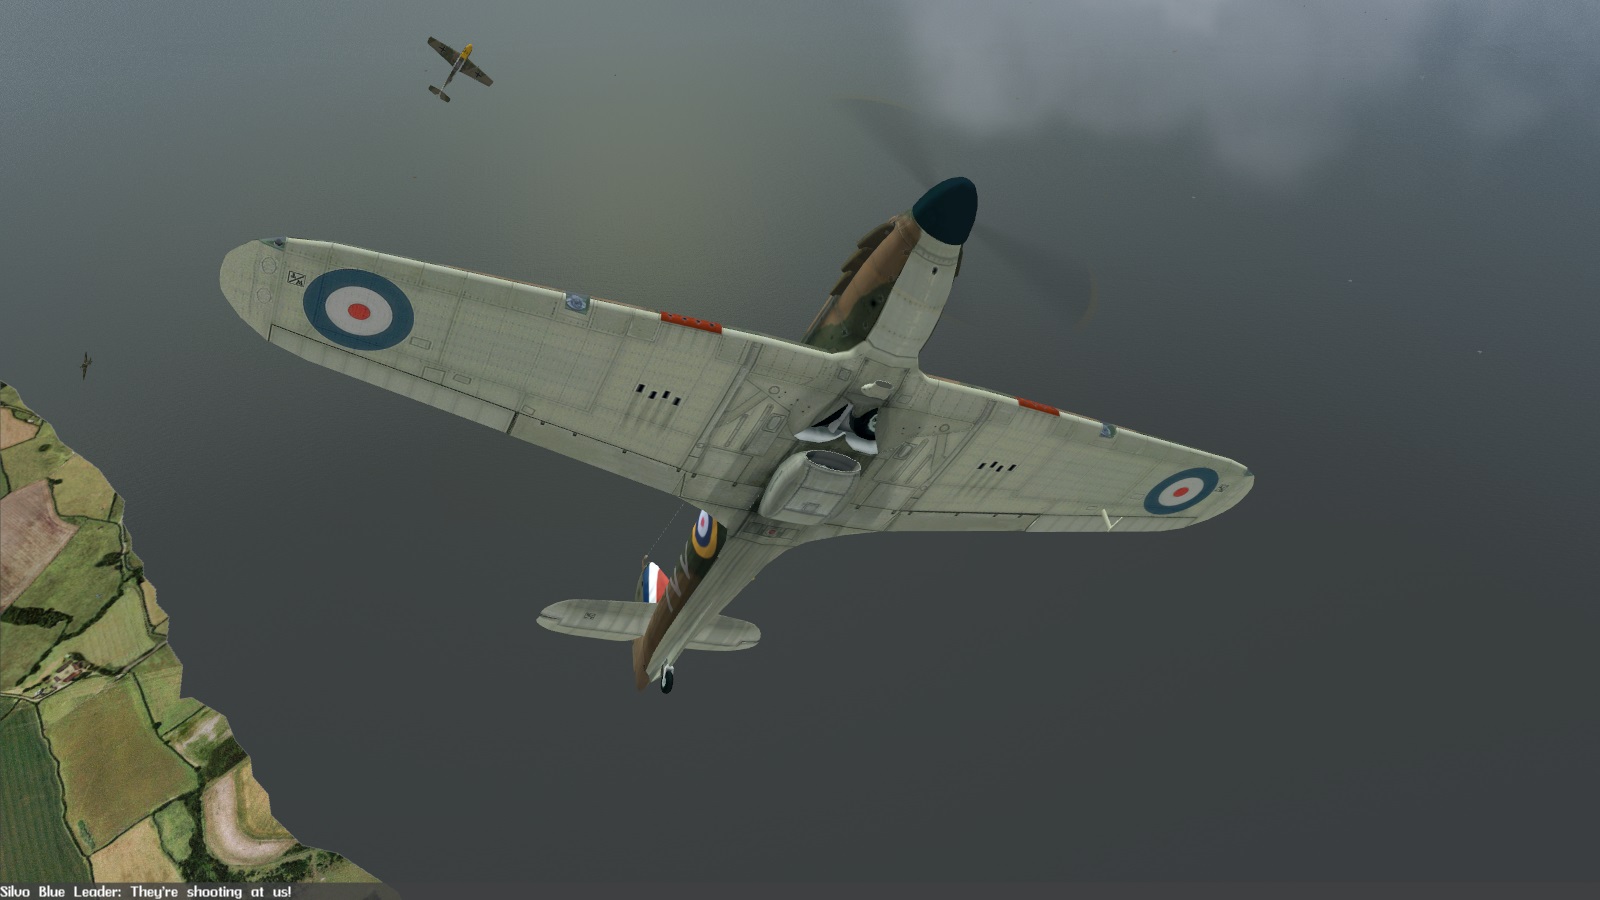
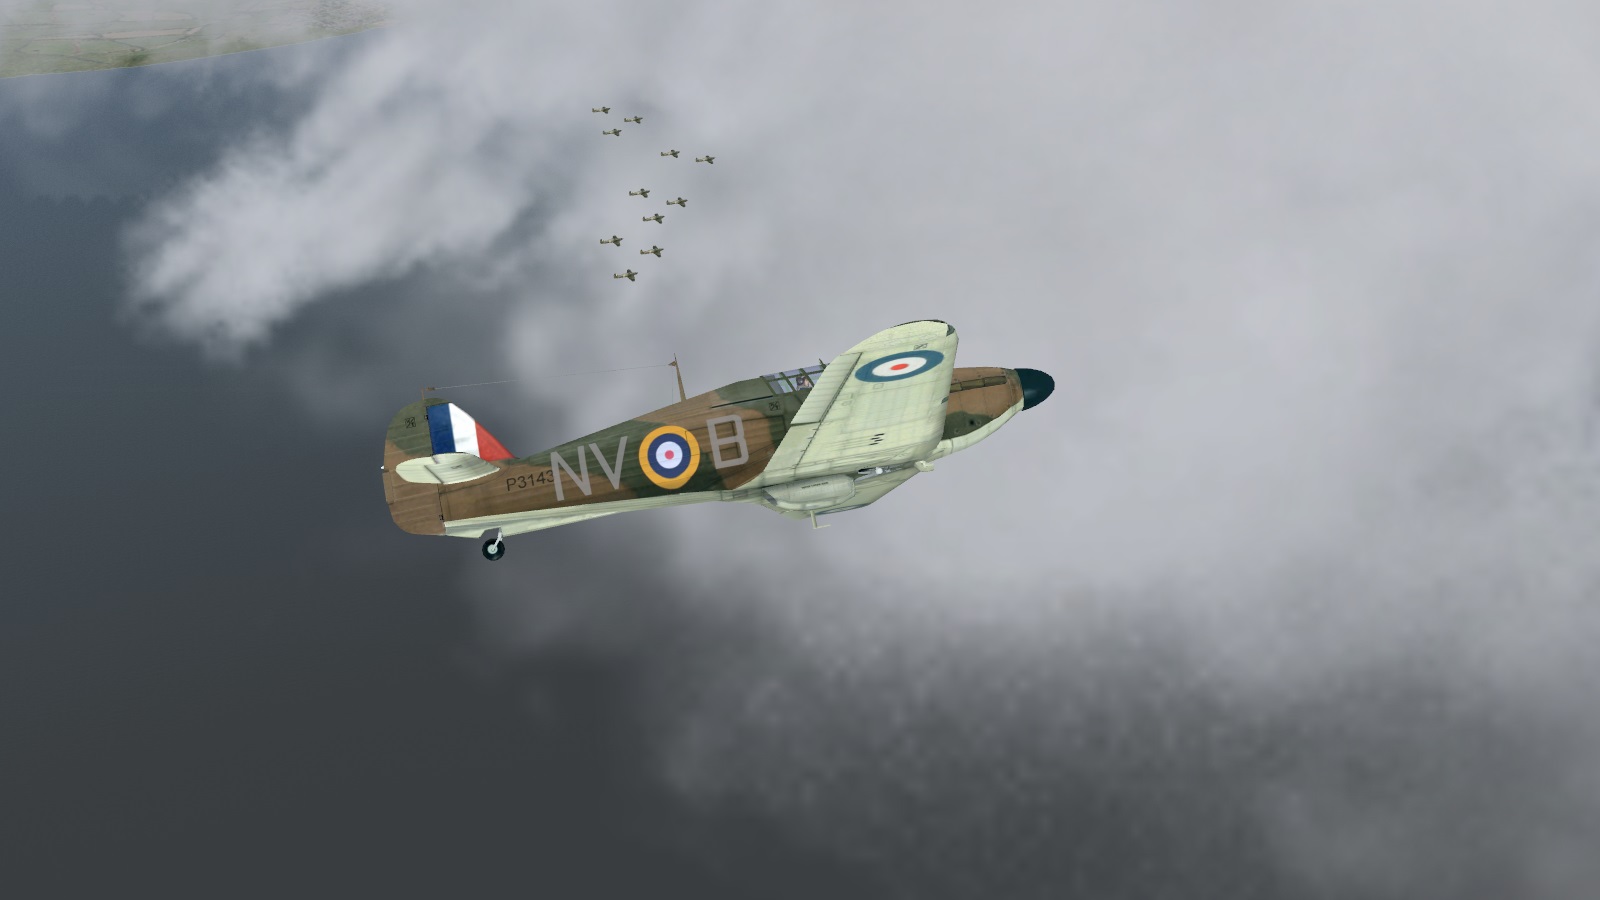
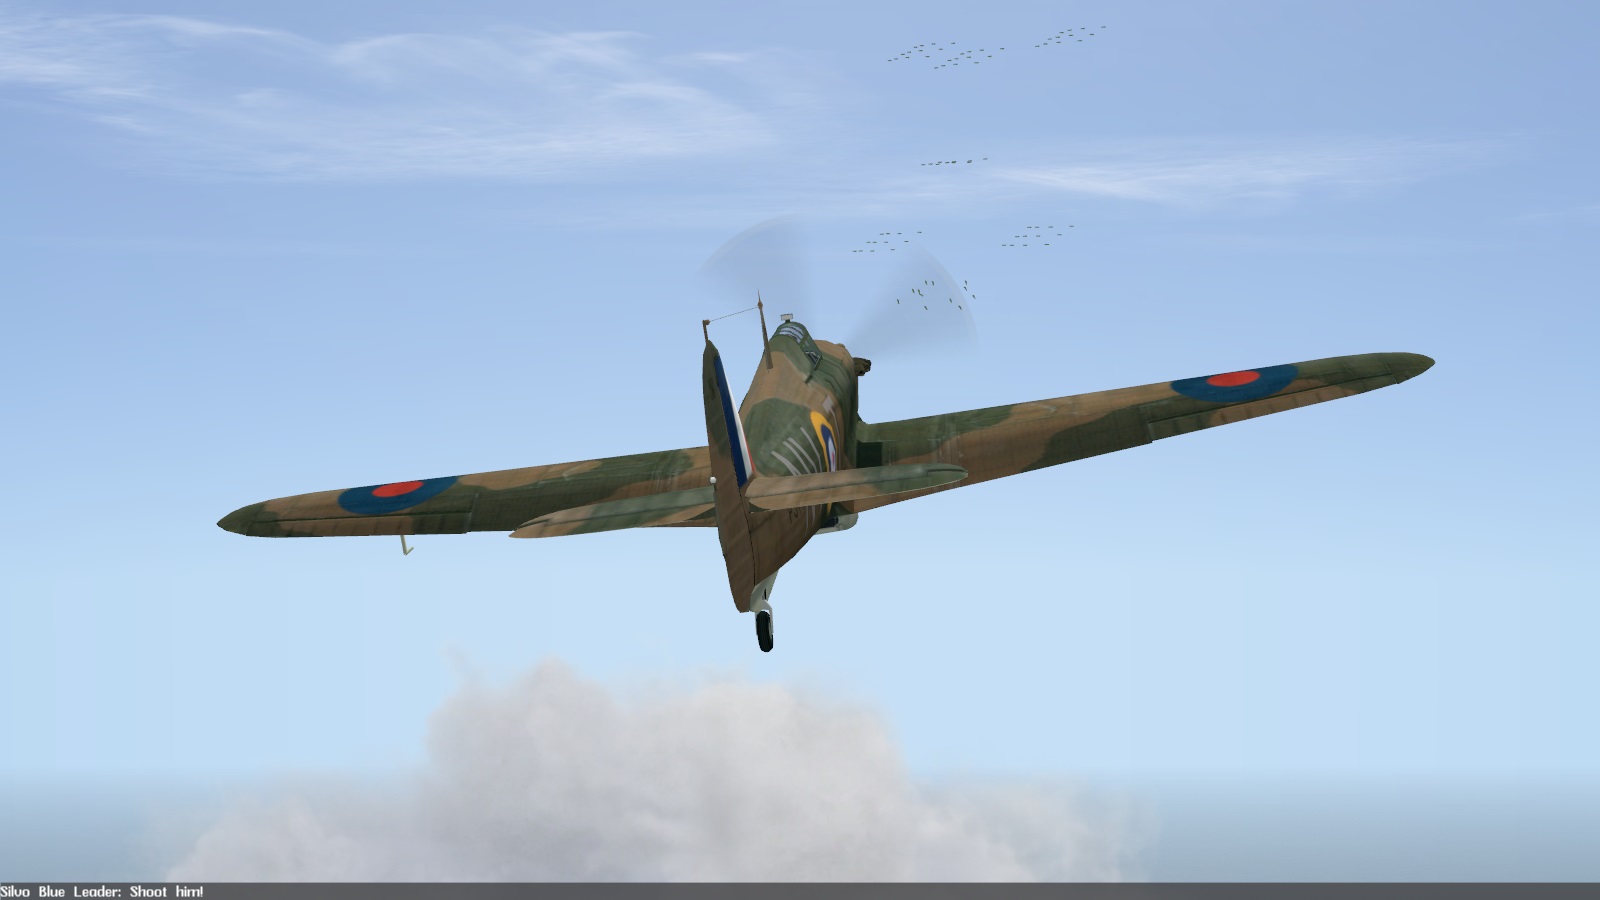
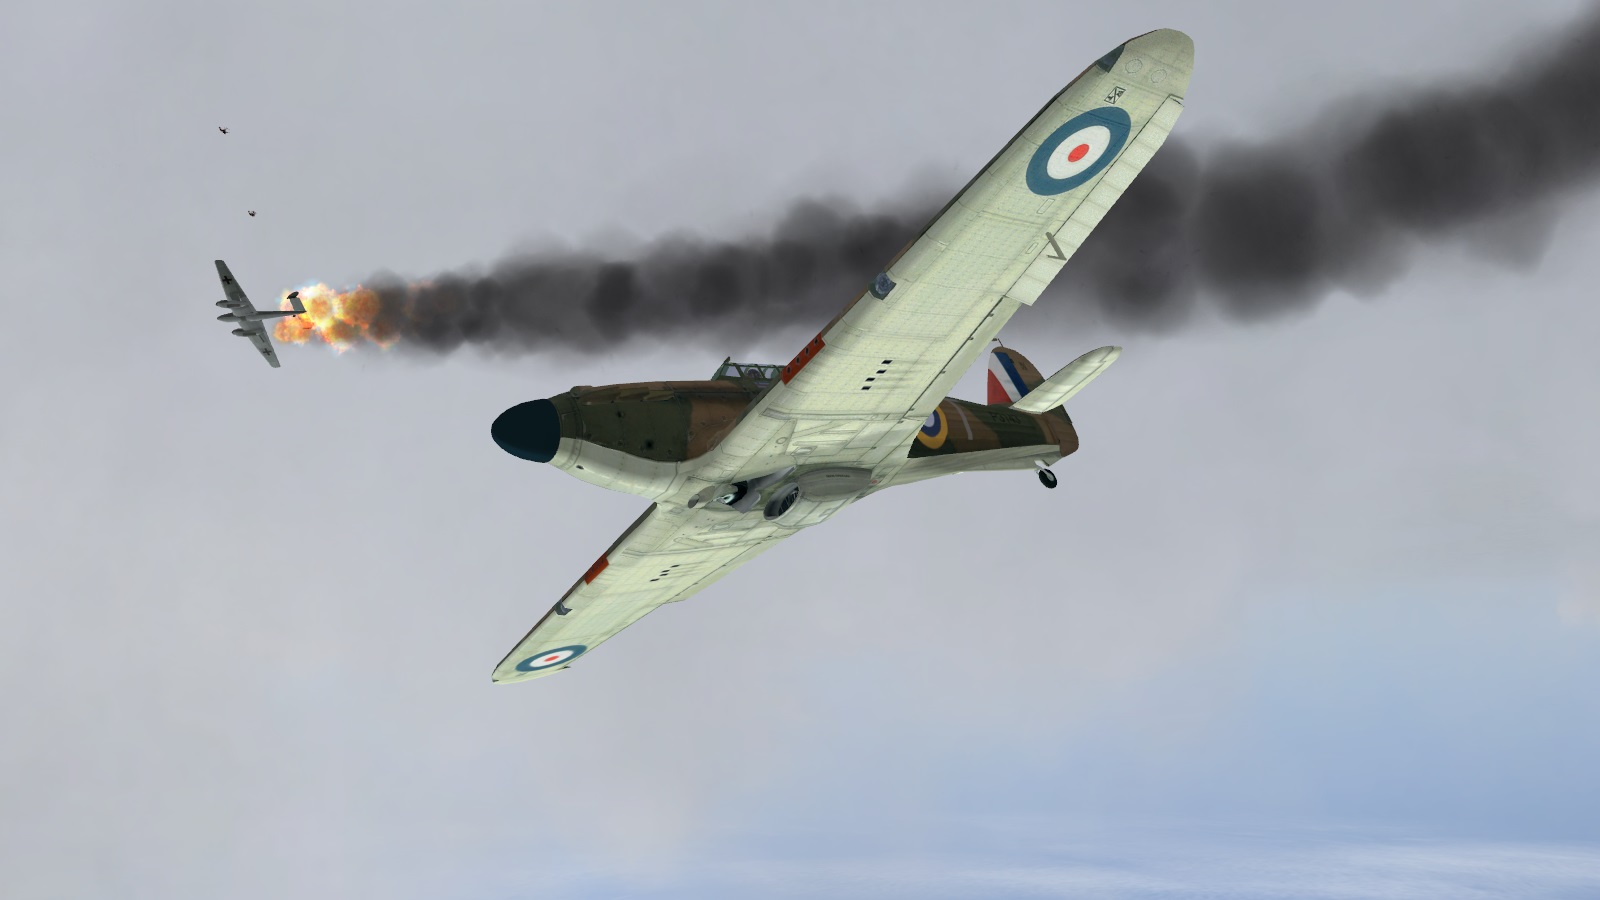
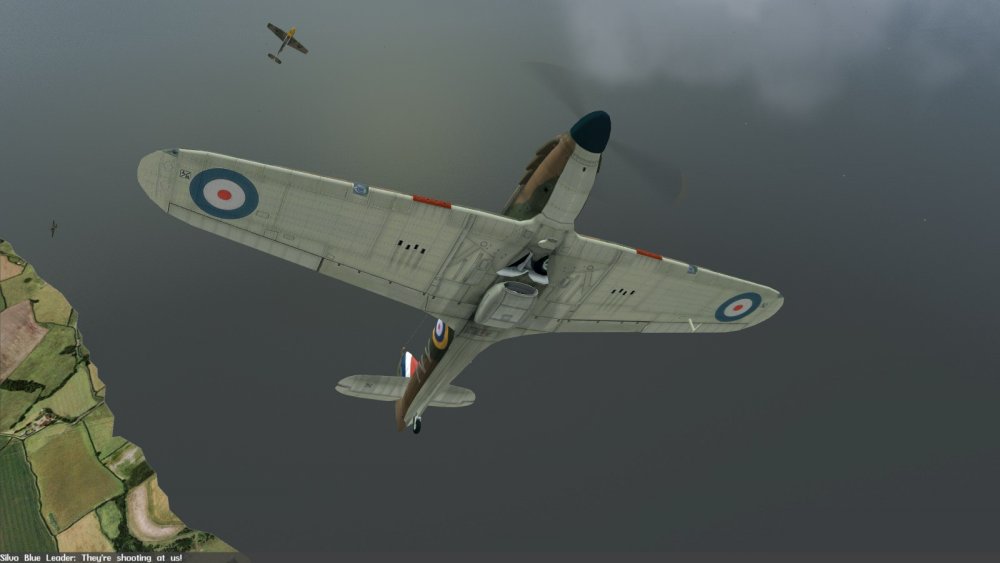
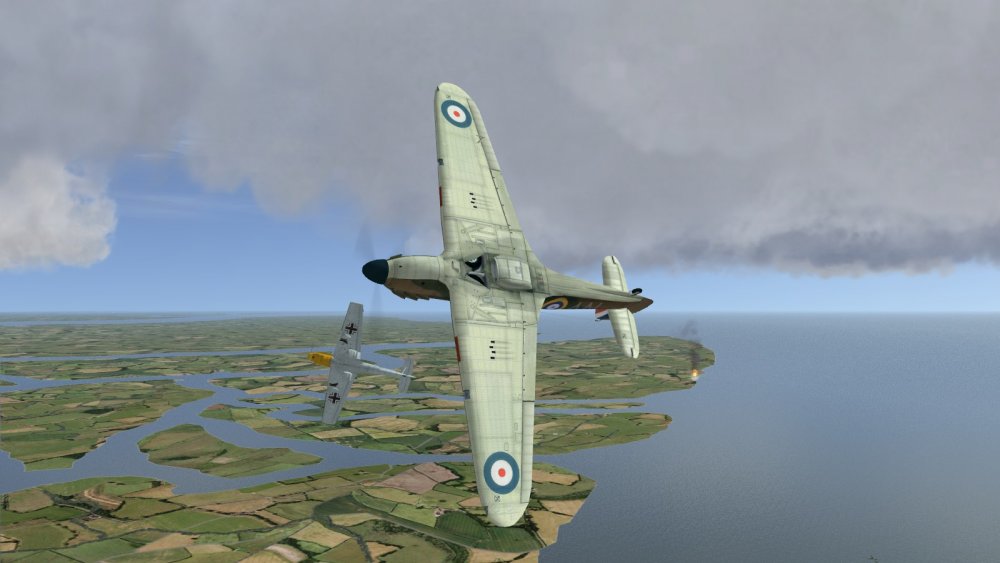
Please sir, can I have one? Looking up, I saw another group of specks wheeling and falling from the sky, one somewhat ahead of the others. Stukas diving, maybe? But there was no ack ack. Friendly fighters chasing a Hun? Huns chasing one of ours? Having failed to save the Spit earlier, I wasn't going to wait until it was too late, to find out if a friend needed help, even though I wasn't conscious of somebody calling for it - which they do, in BoB2. Those aircraft seemed to drop like hail and as I tried to work out what I was flying into, the 'flying' bit nearly came unstuck. I suddenly realised I was diving steeply and the water was rushing up to meet me. I managed to pull out but lost track of the other aircraft. Instead, I now saw more specks at sea level, with another layer above, or perhaps further away. It took my brain a second or two to resolve what I was seeing. This was Convoy Whiskey, apparently at anchor. Of more immediate concern, a 109 was racing in from my left, skimming the wave tops. Here we go again! I tried to pick him up, but lost track of him as he slipped underneath me somewhere. Up ahead, a lot seemed to be happening - circles of white water where planes had gone in, others falling trailing smoke, and more specks, planes or AA fire I could not tell, further up ahead. I could have identified the planes by turning on labels, but I hate to clutter the virtual skies with the little beggars, and in BoB2, I find I can manage without them somewhat better than in IL-2, for example. Even if it leaves the element of confusion, that can help create the tension of uncertainly, that you're in a untidy air fight not playing a video game. Tracers off to my left revealed two 109s shooting up a Spitfire, which like the first one, went down before I could intervene! The 109s cut across me at an acute angle. Of course I went for them, but pulled up hard in a panic when something plinked noisily into my airframe. The 109, for of course that's what it was, had the cheek to come up after me. You can see on the bottom the text of an R/T message heard at that moment - Silvo squadron is us, so this is Blue Section's leader, stating the fairly obvious. How I got out of his way I have no idea, but I did, and then chased after another 109 that had yet another hapless Spitfire in his sights. This time I shot him off the Spit's tail. I should have knocked him down, too, but I was so keen to get a picture as my rounds delivered the coup de grace that I missed and overshot, leading to this interesting situation. More through luck than judgement I had rolled the same way as he did and I got onto him again. There was no visible sign of it but I fancy I had damaged him, which will have helped. Smoke and flames belched from the Messerschmitt. Got him! Or had I? At the last minute I'd noticed yellow tracers passing close to me and flying into the 109, as well as my own. Sure enough, I wasn't alone. Looks like I'll be sharing this kill. You can see that the other Hurricane is from a different squadron, no under wing roundels and code GZ - that'll be 32 Squadron. Oh well, this is a team game and they all count. Still, I do wish that, having gone to all this trouble, I'd got a 109 of my own. I'll need something to placate the boss when he tears strips of me back at base, for deserting my post. My chance would come soon enough. ...to be continued!


- 6 replies
-
- 1
-
-
- battle of britain 2
- bob2
- (and 1 more)
-
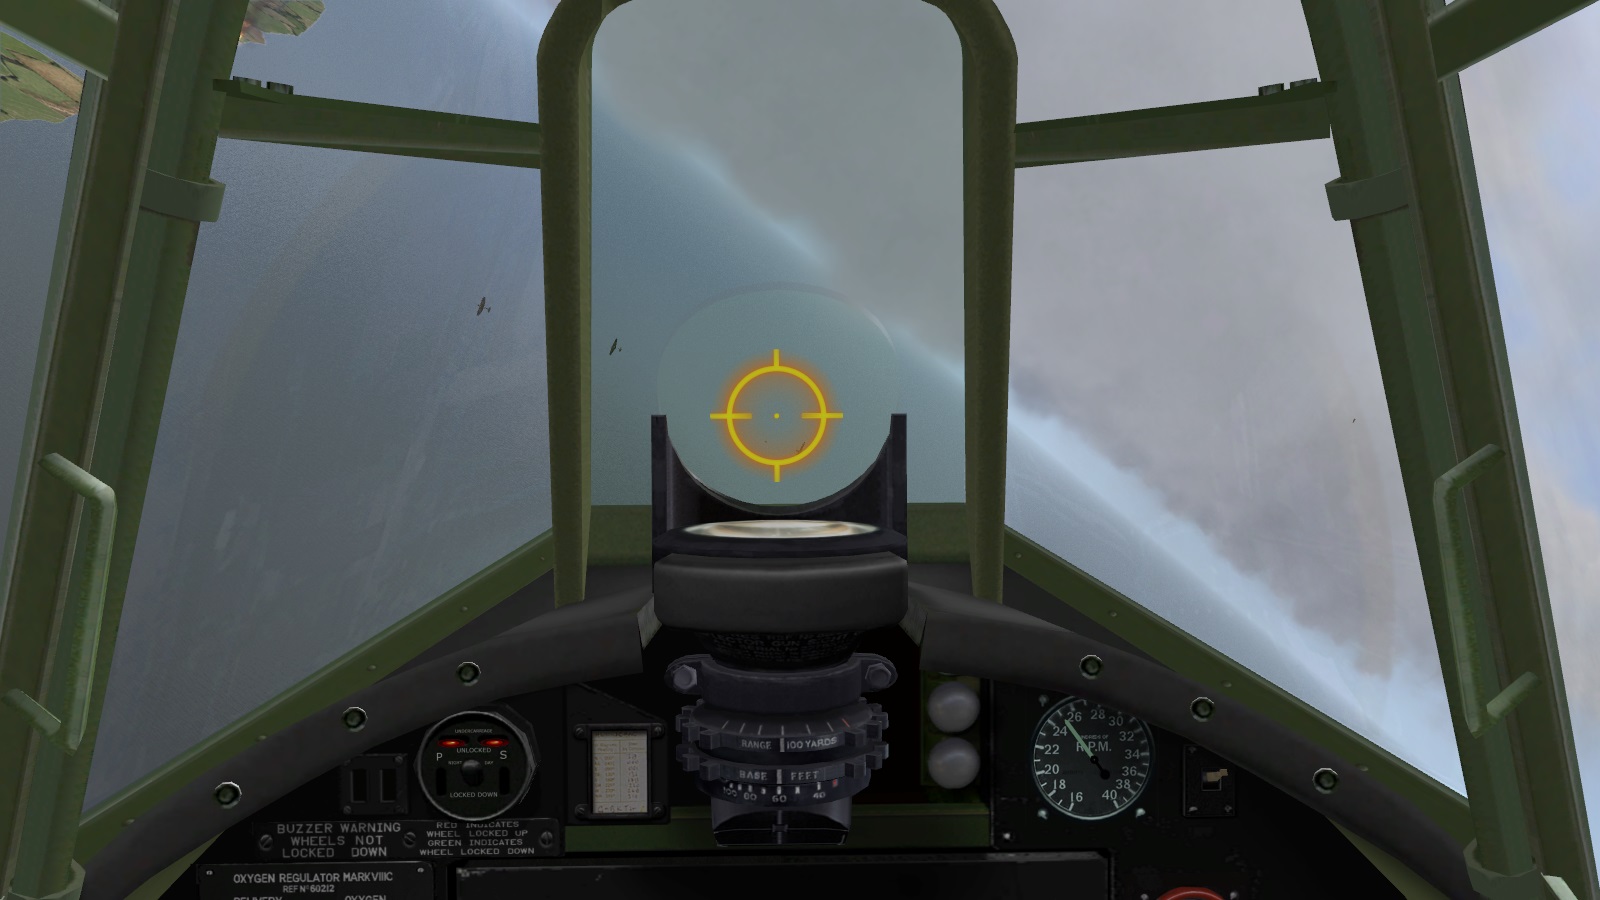
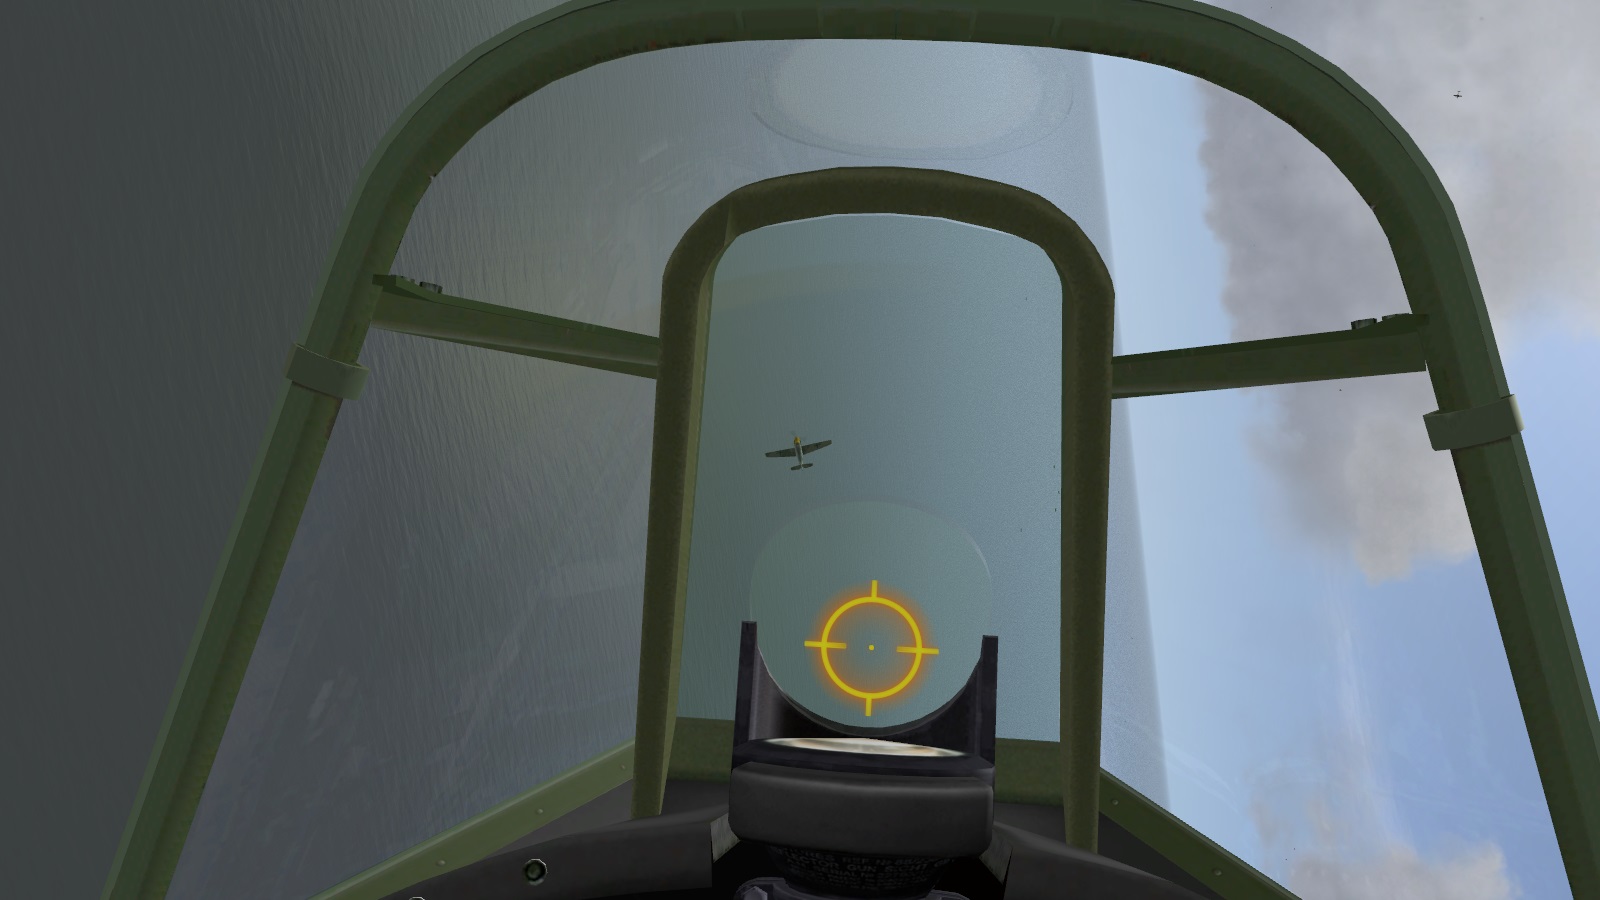
The shooting starts! As I approached the enemy, I wished I knew where the others were. I could have asked, but the R/T was silent and I didn't want to advertise my absence from formation. Some of the distant specks ahead started to descend steeply - Stukas! But I was too far away to help whatever it was they were dive bombing. So I kept my height and waded into the bunch who were by now twisting and turning up top,. This lot turned out to be the 109 escorts, who were in an air fight with some Spitfires, possibly from 54 Squadron which I recalled had also been scrambled against this raid. I went for a 109, only to see that he already had a Spit after him. By this point the airwaves were beginning to fill up with radio calls, so I reckoned that Seventy-Nine was in action now too, wherever they were. The skies below and all around me seemed to be filled with aeroplanes doing all kinds of things. It was all very disorienting. Every so often there was the roar of a Merlin as a Spit shot past somewhere, or the harsher whine of a 109's Daimler Benz, sending me into a break while I scanned to see where the beggar was and ideally, avoid being shot down. I latched onto this fellow as he flashed past on the tail of a Spitfire... I tried really hard to shoot the Hun off the Spit's tail, but his shells wacked into the RAF fighter, and down the latter went. I was furious of course and went for the yellow-nosed b*stard like a bat out of hell. However, one of the Spit pilot's mates got there first, and sent the 109 down in flames. Retribution having been meted out, I cleared my tail and got my bearings again, in a gentle spiral climb. I was well out over the Thames Estuary and the skies in my immediate vicinity seemed clear, but there was plenty of action going on. Time to get stuck back in. ...to be continued!


- 6 replies
-
- 2
-
-
- battle of britain 2
- bob2
- (and 1 more)
-
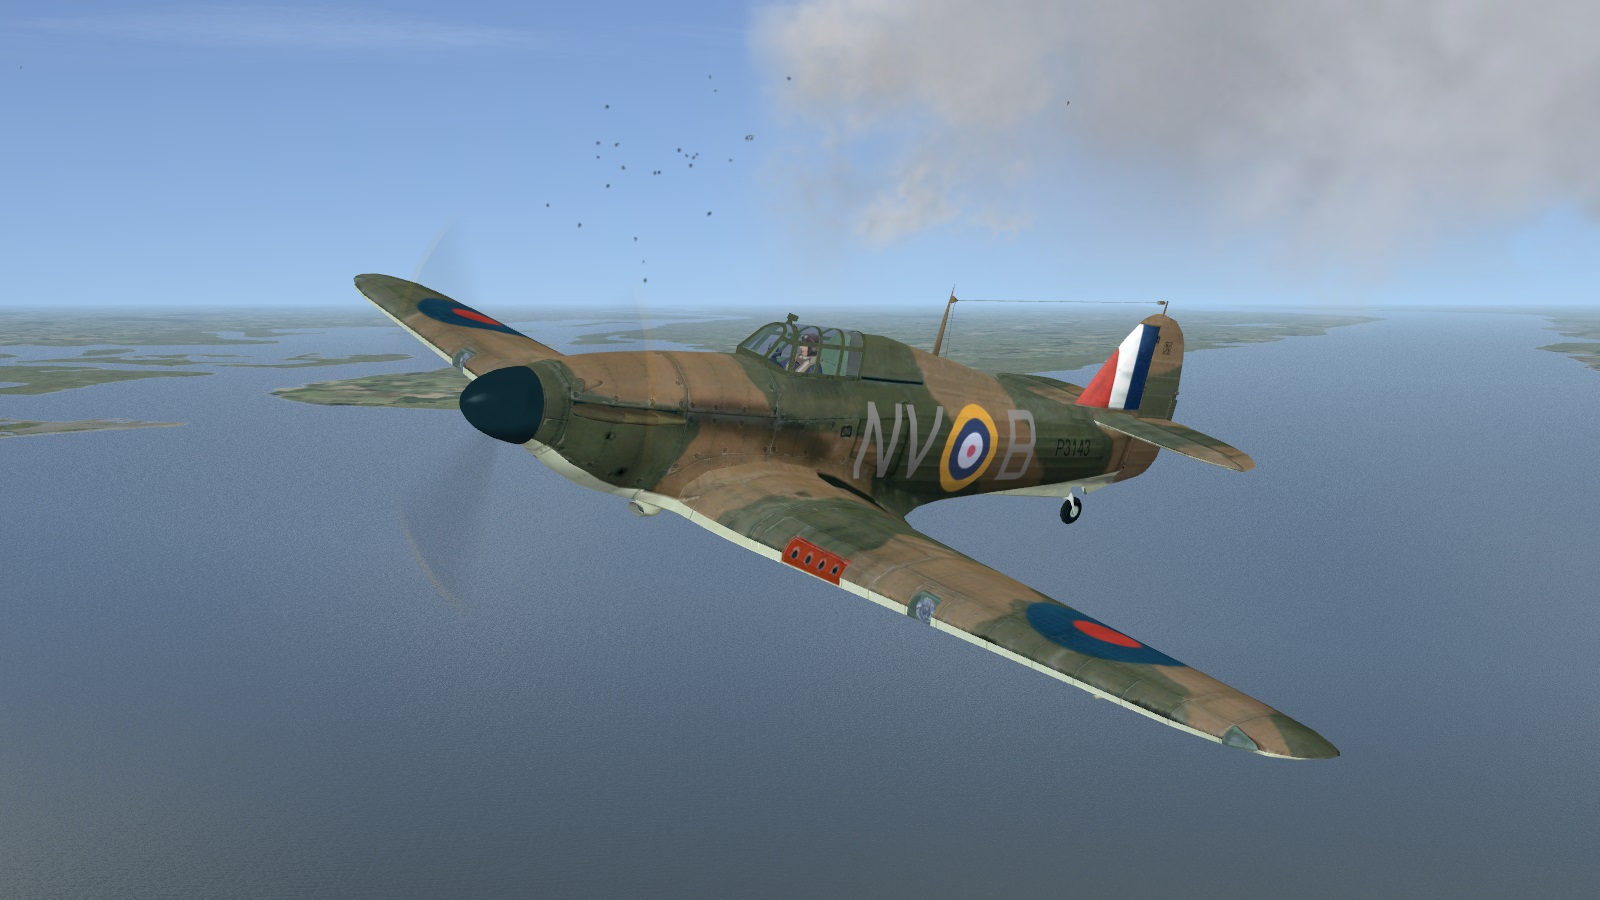
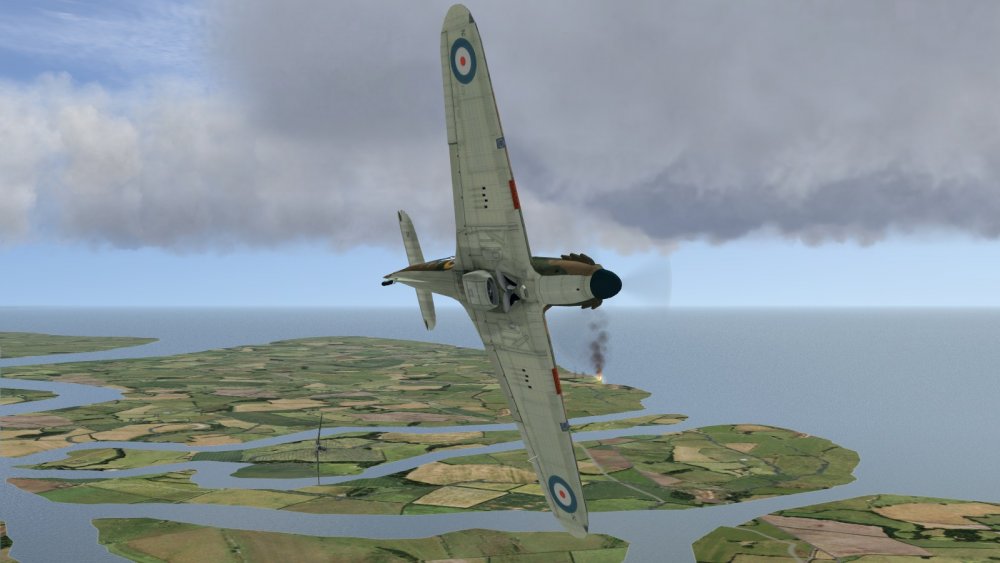
Tally ho! One of the things I have learned since starting seriously playing BoB2 is that if you don't opt to join a flight when it's taking off but instead do so for BoB2's equivalent of an air start, this generally happens at the moment the enemy is sighted. This is the point the leader gives the 'Tally ho!' report to the ground controller in the sector control room who is directing the interception. Anyhow it's a really good idea to pause things as soon as the 3d loads (or enable the setting which does that by default), and orient yourself - height, heading, location, position in formation, and of course, direction, numbers and heading of the enemy. This is where one of the things I hadn't learned bit me - enough keyboard commands. Un-pausing the sim, I tried 'A' to turn on autopilot, so that I could watch what was going on while my alter ego kept my place in the very tight formation - I have friendly collisions turned off but wanted to stay with the chaps. Sadly, in BoB2, 'A' is the quick radio command for 'Break!' Issuing this needlessly literally got me a testy rebuke on the R/T from my leader. Suitably abashed, I edged out of formation but still headed for the enemy, instinctively climbing a bit harder. The others didn't match this and I soon found them falling away below, to port. You can see my empty position in the formation, just to the leader's right. Perhaps because he'd already told me off once, and I was making an effort to re-join, he didn't snap at me again. At this point, the cloudy conditions took a hand. The others started dipping into and out of cloud, and the next thing I knew, I was ahead of them and on a diverging course, before they slipped out of view again. When I emerged into clearer skies, I found I had entirely lost sight of the squadron. By now, I was well out over the Thames Estuary. The town visible below and to port is I think Southend - BoB2 is excellent for VFR-type navigation, when you can actually see the ground of course. And in the map view, while the map itself is like an unlabelled version of the 3d world, you conveniently get your position displayed as so many miles N, S, E or W of some prominent place or landmark. Incidentally both Spit and Hurri in BoB2 feature the B Scheme, the A Scheme having a reversed or mirror image dark green and dark earth 'shadow shading' camouflage pattern. Apparently A was applied to the first aircraft of a given production batch, and B to the next, alternating thereafter. Wings over the Reich has the B Scheme on its Hurricanes but unaccountably gets the port upper wing's pattern wrong, missing a prominent area of dark earth. Having for the time being lost sight of my friends, perhaps I had better check on the whereabouts of my foes, I thought. There they were, just off Southend, a compact mass of dark specks. Instinctively, I steered in their general direction. As I watched, the compact mass expanded then began to break up. Some of the specks broke well off to the left. This all looked rather ominous, like a disturbed octopus spreading out its tentacles. I could feel the tension rising. What was happening? Stukas beginning to make their attacks on unseen targets down below? Their fighter escort, reacting to our presence? As I was soon to find out, what I was seeing was both of these things. ...to be continued!

- 6 replies
-
- 2
-
-
- battle of britain 2
- bob2
- (and 1 more)
-
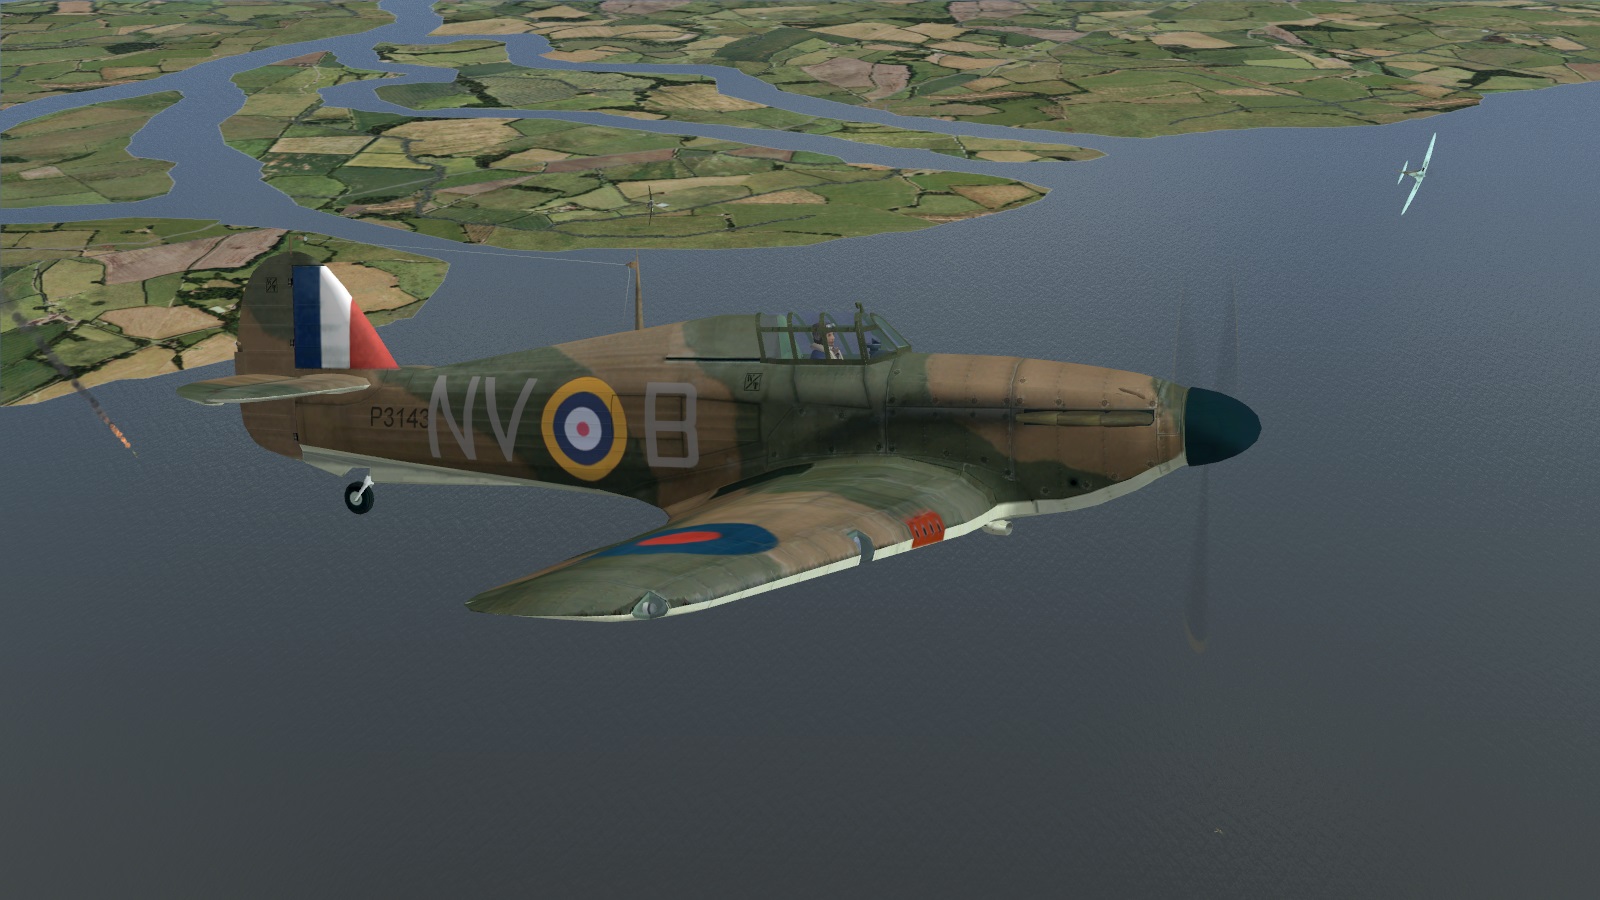
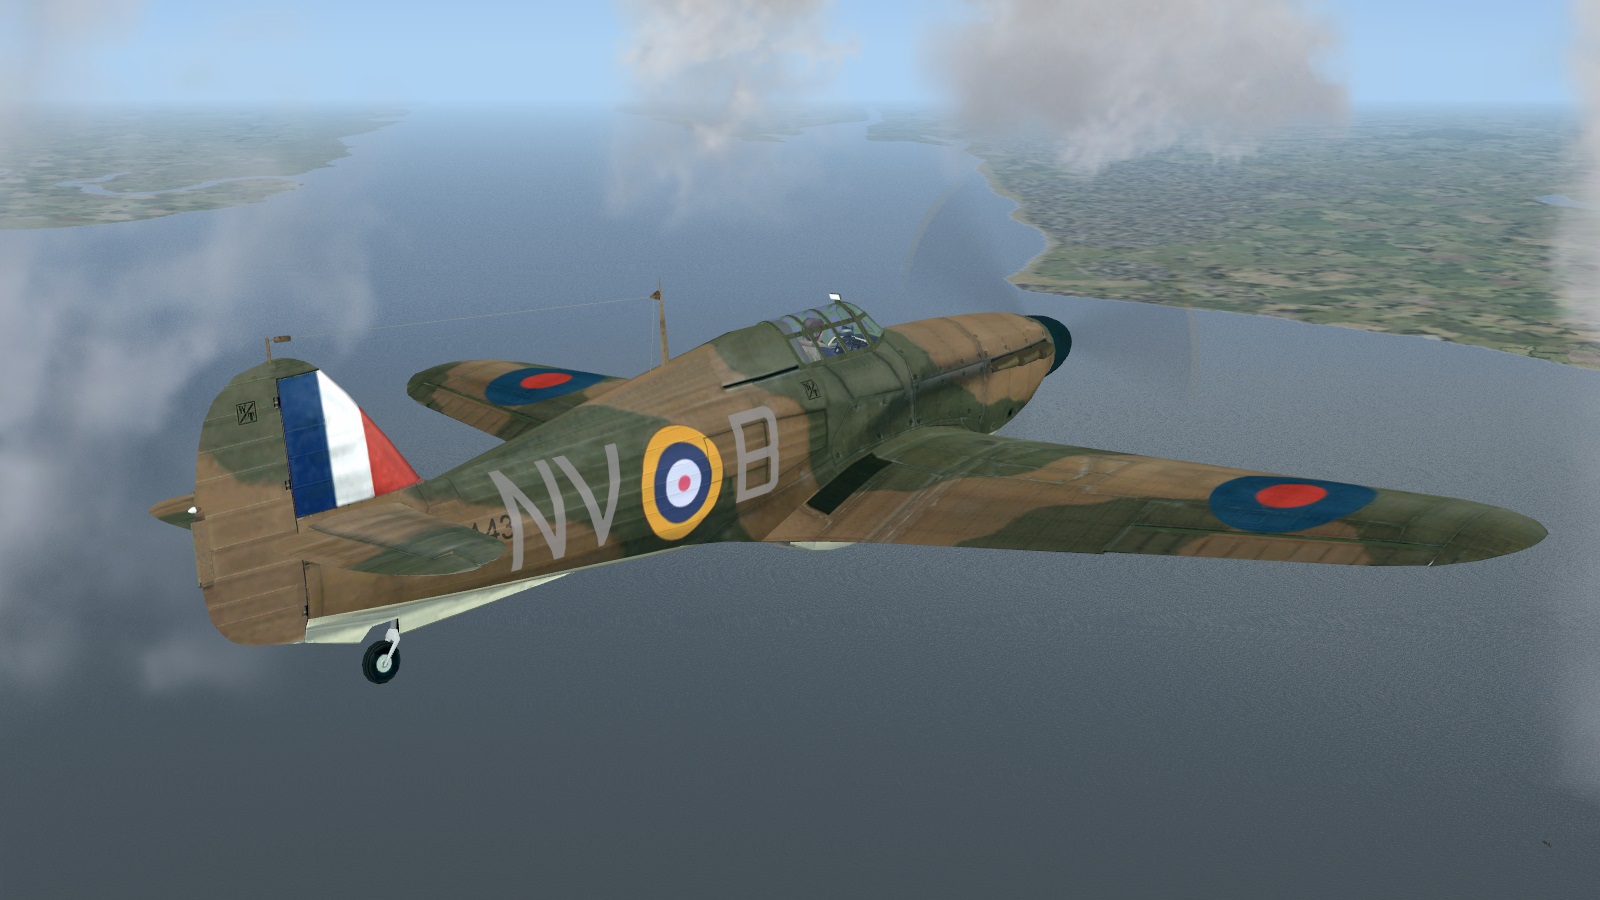
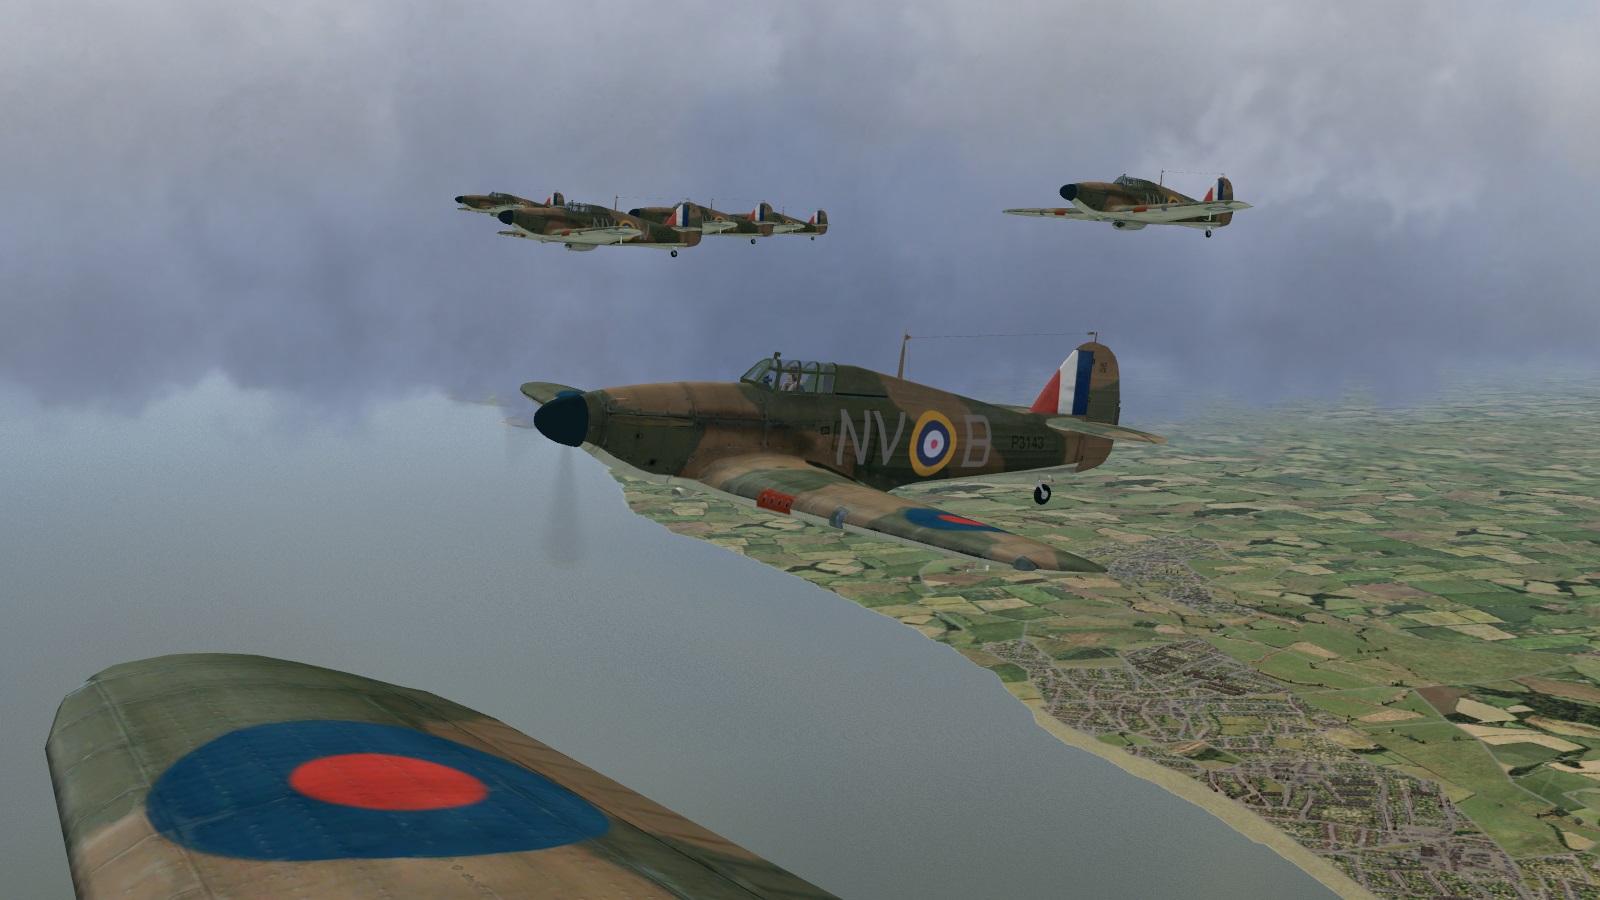
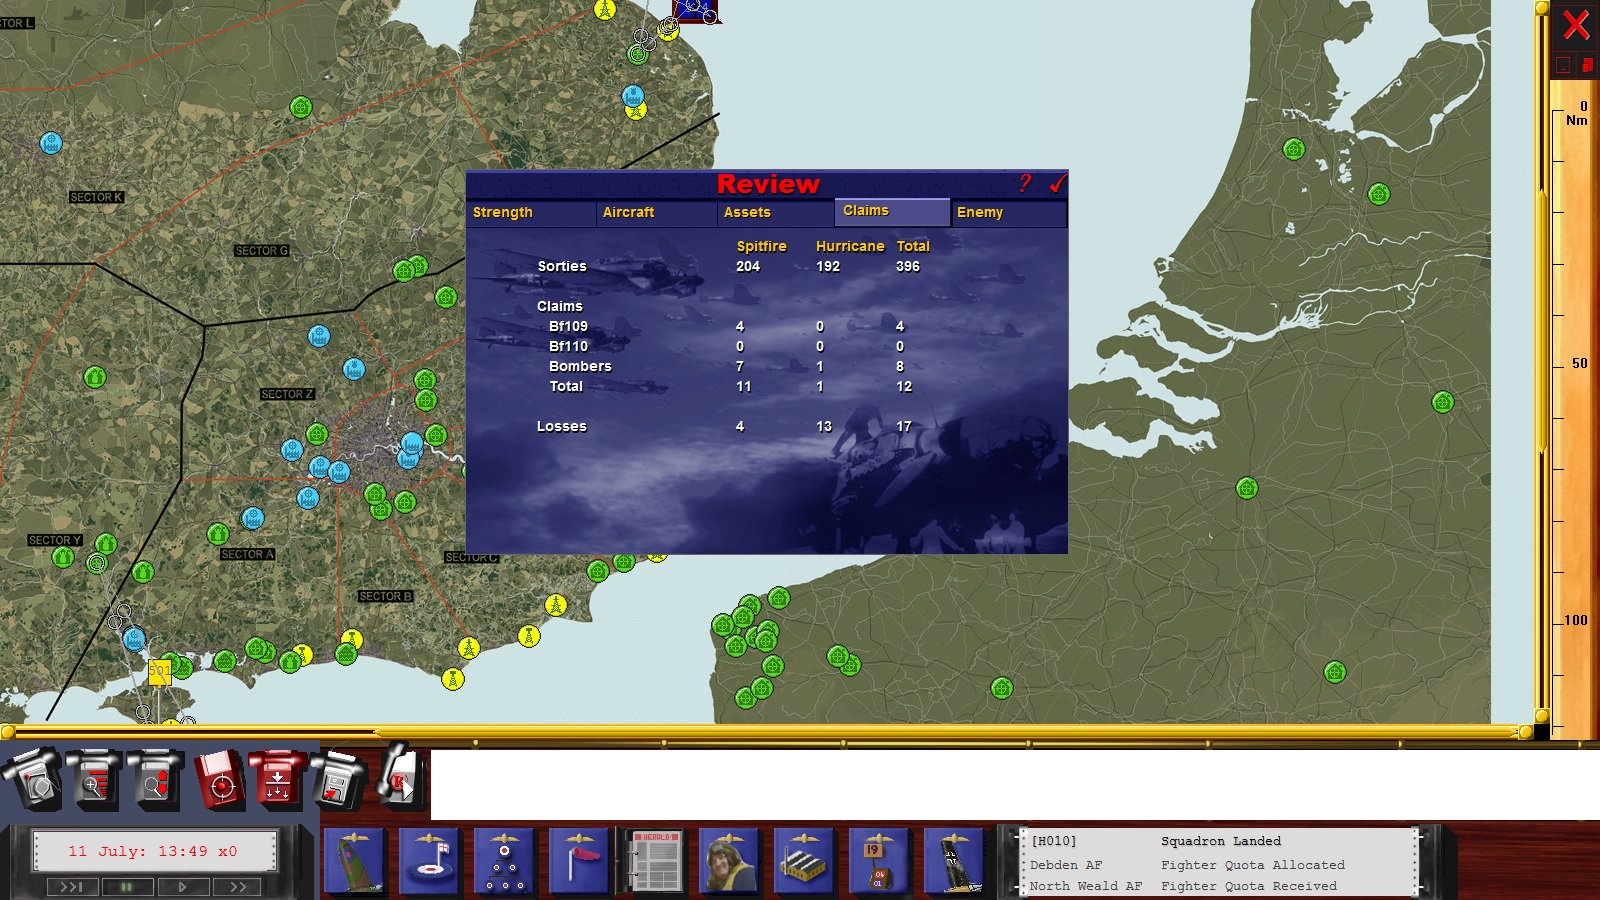
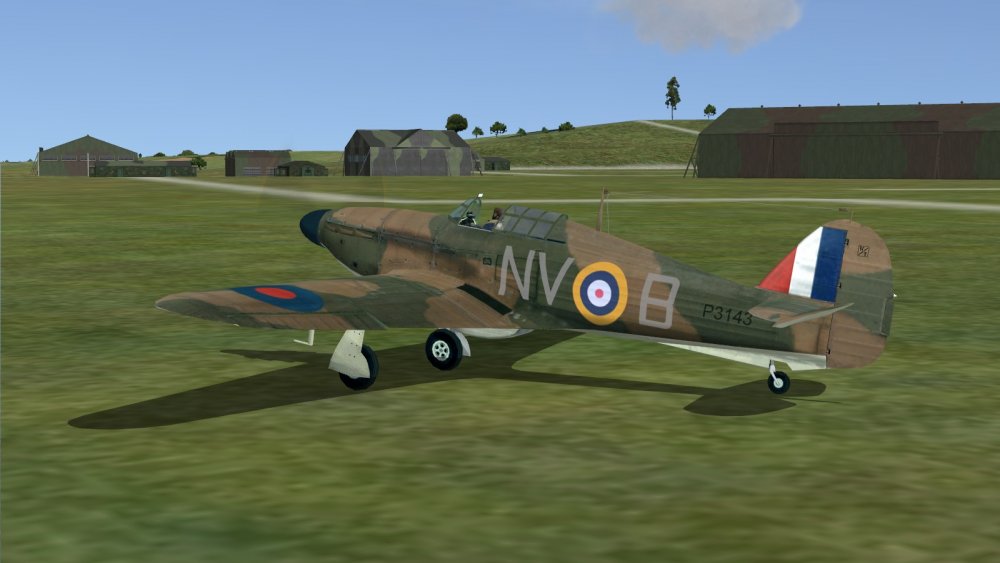
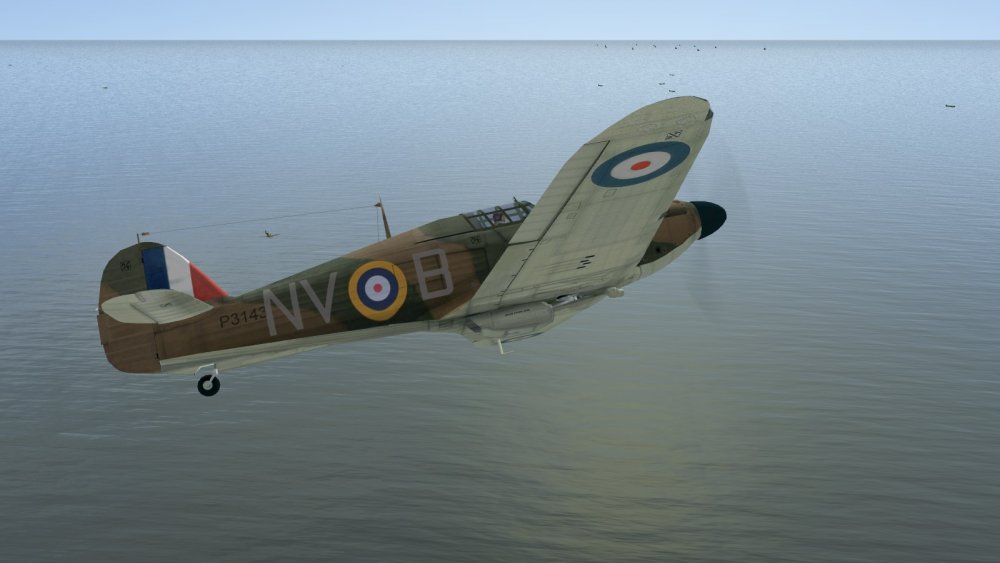
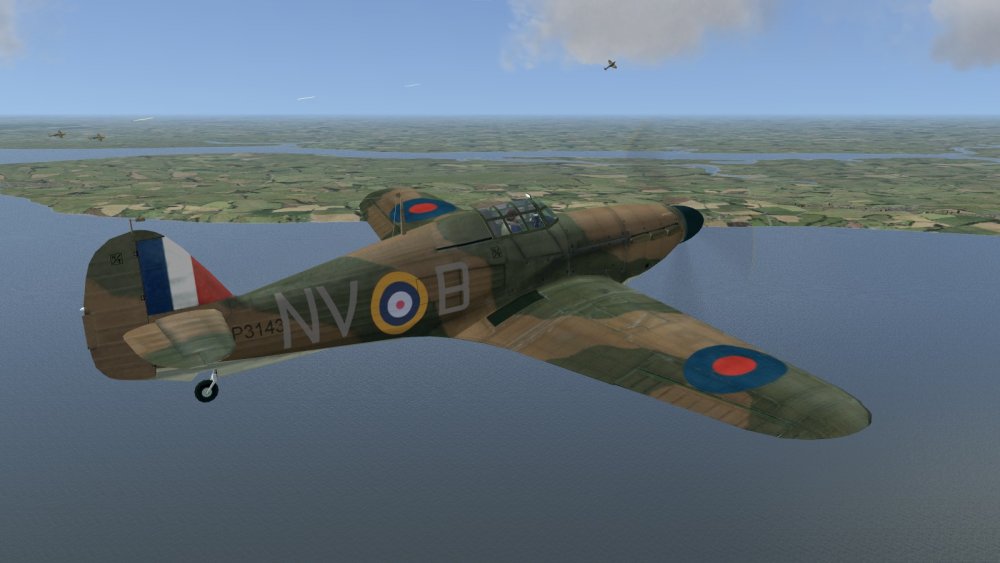
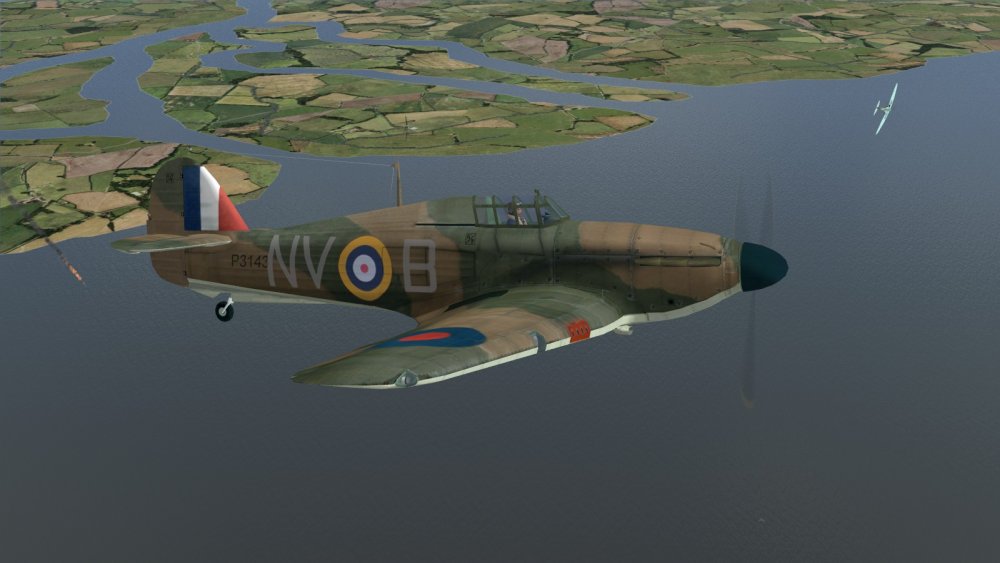
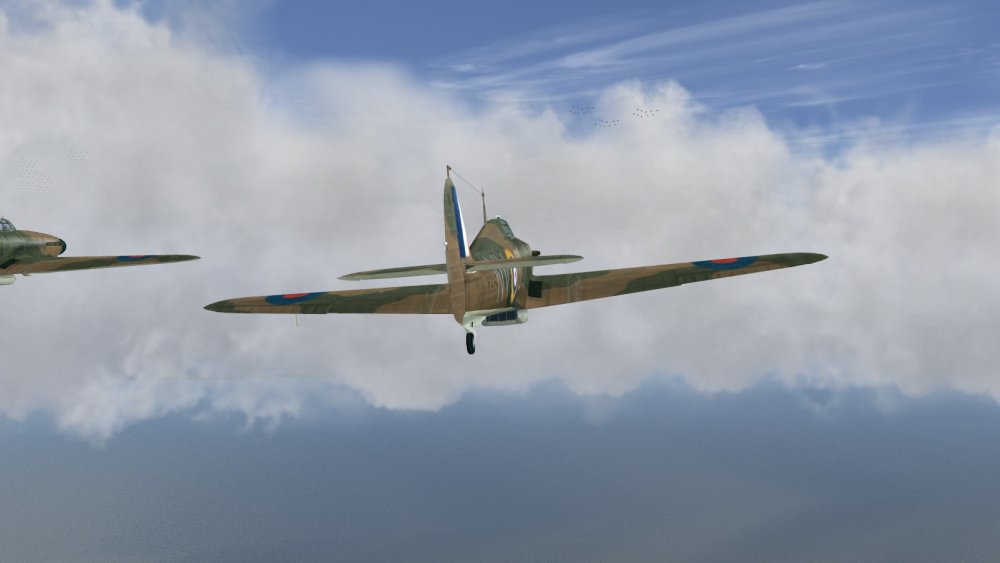
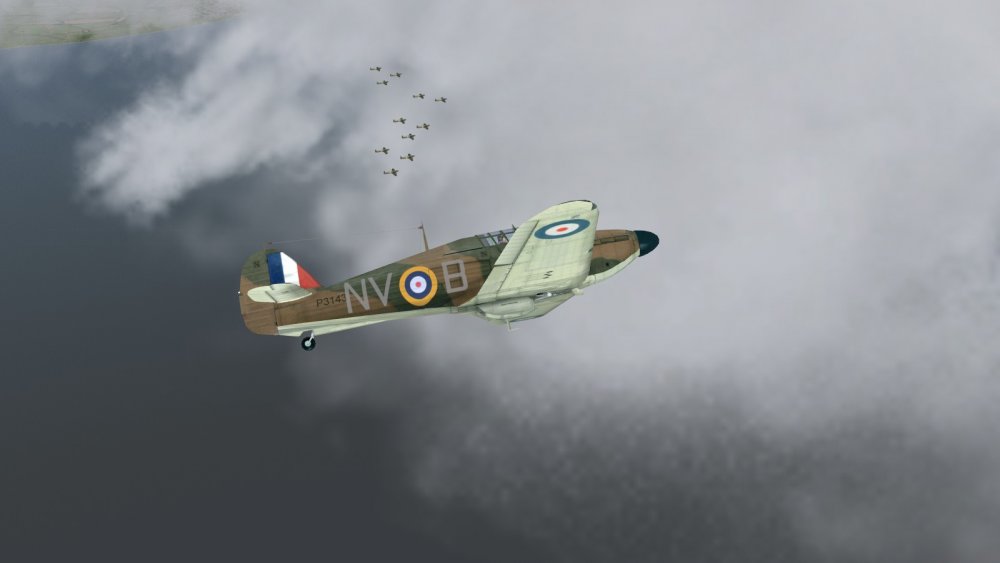
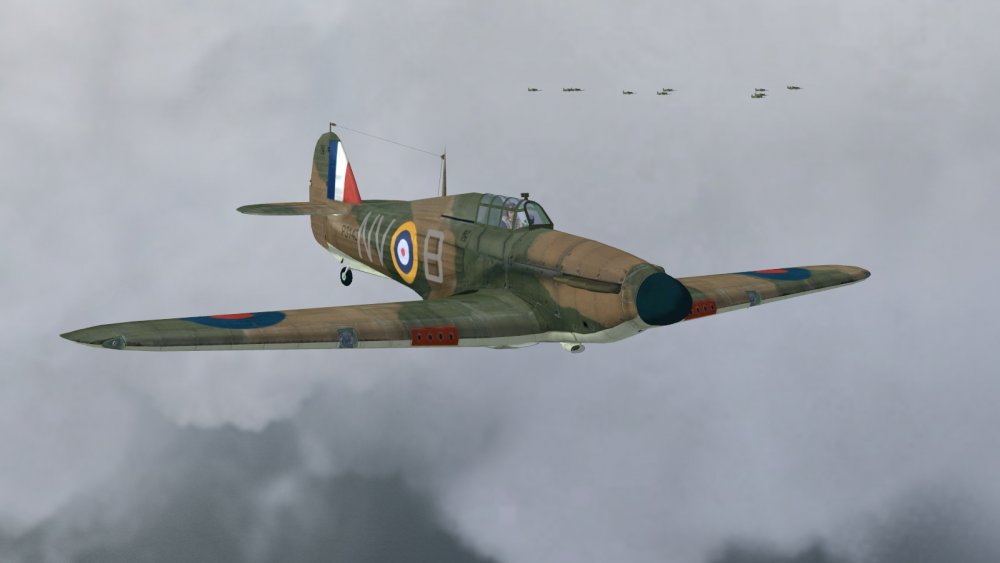
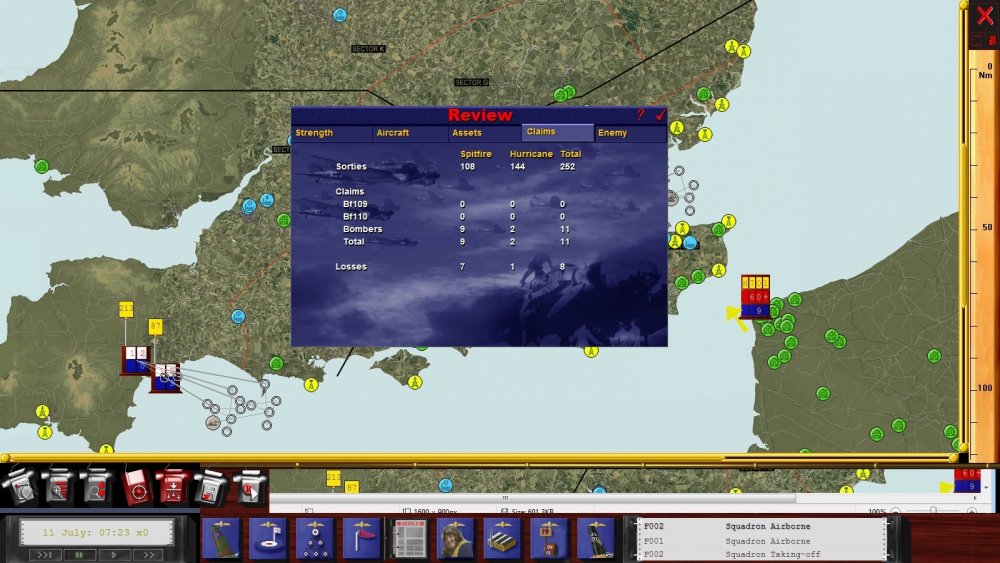
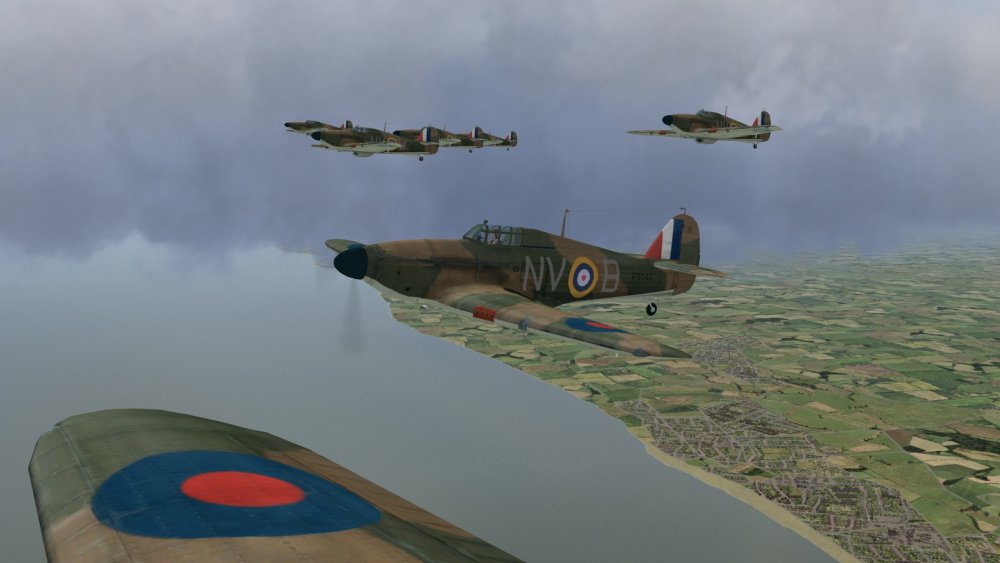
Defending the convoys again, on Day 2 of the Battle of Britain This was my first mission on 11th July 1940, the day after the RAF traditionally considers that the Battle began. At this stage in the BoB2 RAF campaign, as in the real one, the Navy is still insisting - in the face of some German-supplied evidence to the contrary - that Britannia rules the waves. And that this being so, coastal convoys should carry on, rather than shifting everything they're lugging about onto the already-busy railways. So the principal commitment of Fighter Command at this stage is flying standing patrols to provide air cover, with additional fighter squadrons on standby, ready to scramble if an incoming raid is detected by the Chain Home radar network. This is the balance sheet as of early that morning. From flying 252 sorties, many of which never saw a Hun, we have claimed eleven kills, all of them bombers, against seven Spitfires and one Hurricane definitely lost. Hopefully our over-claim rate is not high, as this is not a great exchange rate. However, having re-started my RAF campaign afresh, I am not so far seeing the very high and hugely imbalanced losses from first time around, possibly down to me messing up saves or something. You can see patrols 'changing shifts' over Convoy Bosom out to the west, while an incoming raid, marked up as Hostile seven zero one, strength sixty plus, has been detected over the French coast. As it happens, this raid's target is Convoy Whiskey, whose circular grey marker you can just about see to the centre right edge of the Review box, in the outer reaches of the Thames Estuary. Following the default Directives which I accepted, controllers soon scrambled four squadrons, a mix of Spits and Hurris, to join the one on patrol over Whiskey. Seventy-Nine Squadron - flying Hurricanes out of Biggin Hill south of London, squadron code NV - was the first to sight the enemy. So when offered, I accepted the chance to fly with them, opting to be Red 2 on the right of the squadron leader. This is me seen from his machine, in NV-B, as we climb gently in four, tight three-plane vics, going north over the coast near a town which might be Allhallows on Sea. I had hoped to be on the edge of the formation but mis-read the layout and ended up smack bang in the middle. Combined with the cloudy conditions, this was to have interesting consequences later. ...to be continued!
- 6 replies
-
- 2
-
-
- battle of britain 2
- bob2
- (and 1 more)
-
Battle of Britian Simulators for 75th anniversary
33LIMA replied to sixstrings's topic in General Discussion
An old thread now but for anyone dropping by I just want to update my earlier lukewarm comments. Now that I have a system that can play BoB2 + BDG patch 2.13 acceptably at or near near max settings, and the patience to try the wargame side (if only so far as to generate dynamic missions I can choose to fly) I'm a true BoB2 believer, fickle or not. The scope of the air action dwarfs CloD and WoTR and is the only one I've seen that recreates this acceptably (not even modded EAW was close), the depth and accuracy with which history is recreated is unlikely ever to be equalled let alone exceeded (both as regards aircraft markings and ground object/terrain details); the amount of content (flyables and missions) is very high; and the air combat AI is superb. And with autogen trees enabled and other settings higher including terrain tile shimmer fixed, the landscapes look a lot better than in the screenies in my original post.


-
From the album: Combat Sims
-

From the album: Combat Sims
-
From the album: Combat Sims
-
Yeah, I've been thinking I should fly as someone on the outside of a formation to start with. Anyway I've cleaned out my saved campaigns and started a fresh one, and after the morning of the first day, odds are a bit more even. My own part in the air fighting was not particularly illustrious. I am claiming two Stukas as Probables, but after my second attack they got me and I had to run for home, throttled back and trailing smoke. Happily I managed to avoid bending my kite when I put down at the nearest airfield, Tangmere I think. Anyhow no major disparities in losses so far but this time, I'll keep an eye on the stats as I go, and possibly drop the Luftwaffe skill modifier a notch, as recommended in the manual for playing RAF, if things start nose-diving again.


- 6 replies
-
- 1
-
-
- battle of britain
- battle of britain ii
- (and 2 more)
-
Yes, that's what I'm worried about! They'll be 'marching up Whitehall' any day now, and it'll be all my fault!!!
-
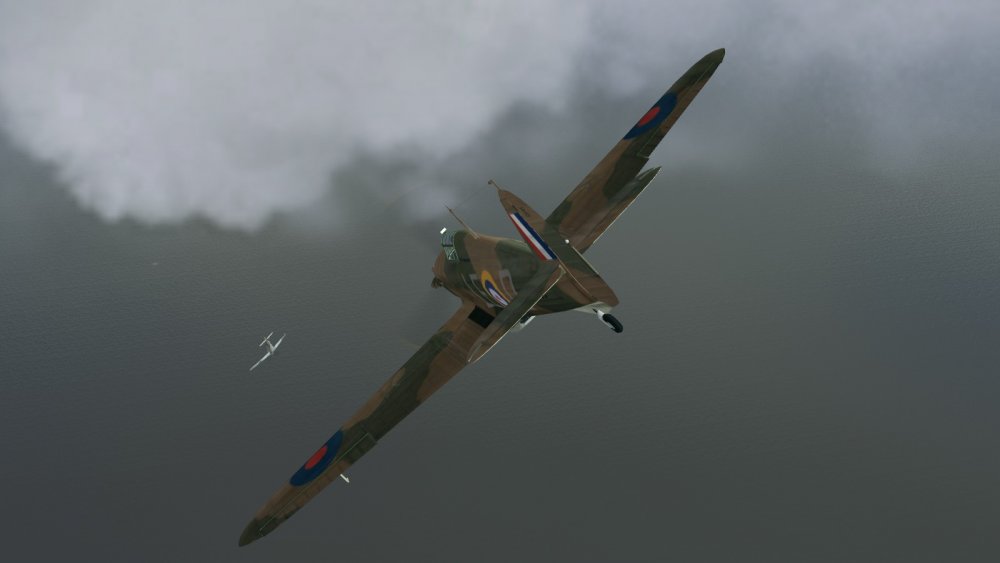
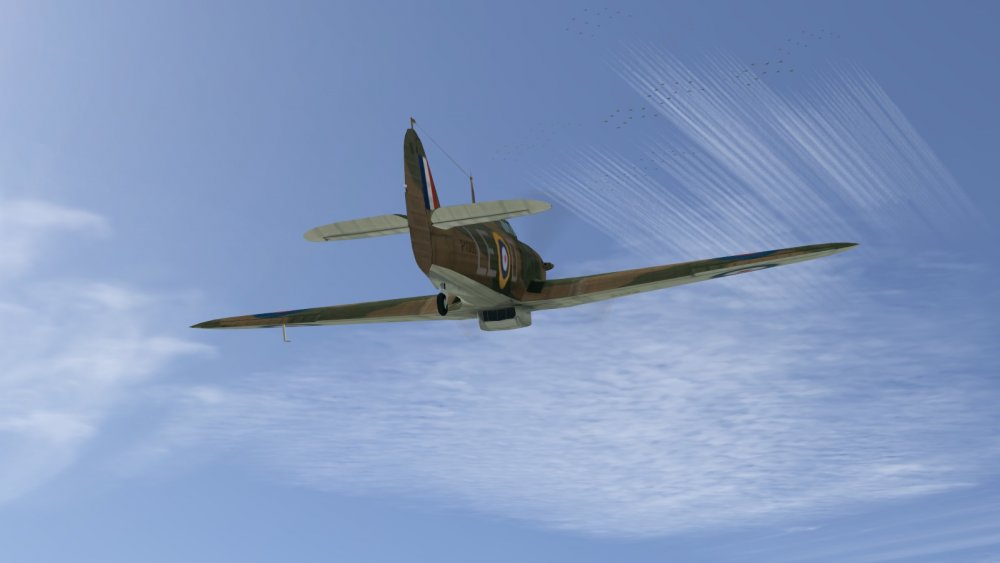
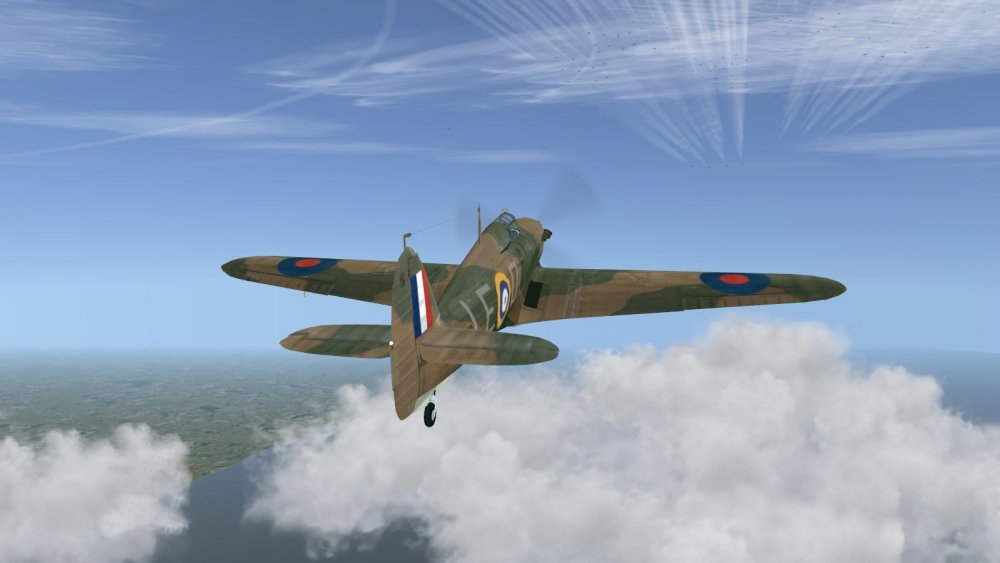
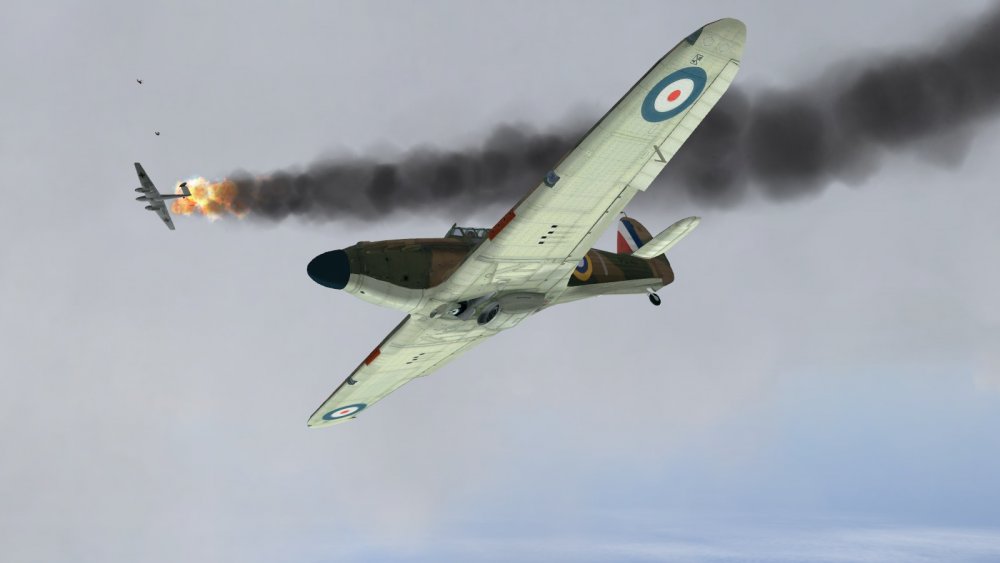
Now you see them, now you don't... Unfamiliar with how to get the best from BoB2’s radio command menus, I had ordered everybody to get stuck in, of their own accord. As by that time our four vics - three Hurricanes each - was closing with the German raid from behind, I sort of expected they might open out a bit. But – the shortest distance between two points being the straight line I was flying – that the boys would stay more or less with me. My plan, such as it was, being that we would all wade into the enemy formations ahead, more or less together, just not in rigid formation. Alas, a quick look behind revealed that this plan had pretty well evaporated. I was alone. The rest of 242 had spread out behind me, the dispersed specks and white contrails indicating that the escorting 109s had arrived and that a general melée was in full swing. The airwaves had already begun to fill with the usual excited chatter. What to do? I don’t think there’s a way of recalling just your own section (3-plane vic), BoB2 not having the nested commands enabling you to choose whether the order you want to give is to your wingman/section. to a particular flight, or to the whole squadron. And anyhow, it looked a bit late to recall anybody. Either I rejoined them, and pitched into the air fight behind, or I took the opportunity to carry on and come in behind the now possibly unescorted bombers. I considered briefly, then chose to carry on. Keeping a wary eye on my tail. I edged out towards the right of the mass of contrailing enemy aircraft, picking out the right-hand Stuka for my attack, from below and behind out of his gunner’s field of fire. As I closed in, I noticed that my chosen Stuka had neither fixed undercarriage nor cranked wings. I was closing in on a bunch of snappers – Me 109s to be precise. All on my own. Well they hadn’t seen me, so I decided I’d press on and try to clobber one of them before the rest woke up to what was going on. My target first knew I was behind and below him only when I pressed the t*t and let fly with a short burst at eight times a thousand rounds a minute. Evidently somewhat put out by this, the 109 broke down and right towards some clouds, with me hard on his heels. The cloud cover didn’t save him but it may have saved me from his friends, whose reaction I could not see. After some more hits, the 109 went down towards the North Sea minus a significant part of his outer right wing. No need to follow that one down, he’s out of the fight if not doomed. In the circumstances, it’s more important that I avoid target fixation. That need was sharply brought home when, looking around, I suddenly saw a falling Spitfire, just above and to my right, emitting gouts of burning fuel as down he went. I hadn’t seen any Spits to that point, nor did I see his attacker. Not wanting to be the next victim, I pulled up and broke hard right and towards the nearest clouds. Finding myself alone again, I pulled clear of the clouds. Heading south again, I saw ahead of me that the rest of 242 was still hotly engaged, about where I last saw them. I could still hear their radio calls, including a few reporting that they were pretty well out of fuel. They must have been my boys, as I think that in BoB2, as in Fighter Command at that period, it’s one squadron per radio net. But how could they possibly be low on fuel? Damaged, perhaps? Either way, hopefully they tried to get down onto terra firma somewhere, while they could. Catching a call for help, I raced over to the scene of the action; but broke hard when sharp plinking sounds indicated hits on my airframe, from an unseen 109 behind me. He must have been moving a lot faster because he promptly overshot me and turned left. With me now after him. I got a couple of good bursts into him before he drew out of range and saw what might have been his canopy fly off, before he too went down somewhere below. Again, on my own in a dangerous place, I had better things to do that try to confirm his fate. Soon after, I spotted a second lone 109 over on my left, headed towards the coast, and again tried to catch him. He was too far away and going too fast - I could not gain any ground. I don’t have manual engine control active, but nevertheless I was trying to keep my engine boost gauge in the red only for short periods, concerned at seeing my oil temps up near that gauge’s limit. Eventually the 109, now just a speck, joined up with three or four others headed south. Together, they disappeared into the upper reaches of a cloudbank and I grabbed this opportunity to take my leave of them. I levelled off and came back onto a northerly course, just out to sea, now much lower of course from where I’d started. Where was everybody? The airwaves seemed to have gone quiet, no more cries of ‘Shoot him!’ or calls for help. At this lower level, all this bloody cloud very much limited one’s field of view. Where indeed was everybody? After a bit, I spotted a bunch of distant specks, which looked to be the raid making its way back down to the south, perhaps a little diminished in numbers and with one machine trailing smoke. No point going after them, I was low on ammo and my concern now was for my boys. Time to order a recall, which I did. I orbited, but no-one showed up. A request to report in produced a response from Blue 2…then silence. ‘Go home’ I ordered, and then set my own course back to Coltishall, up to the north-west.It wasn’t a long flight but it gave me plenty of time to wonder what I had done with the rest of the Squadron. I made a careful half-circuit on arrival... ... and, as if in mockery of my recent, lamentable performance as a squadron leader, I made the best landing I had ever managed in BoB or BoB2, in which getting down without lots of rattling, bouncing and maybe even a nose-over is much more difficult than in about any other sim I have played. On the ground as I came in, I could see Blue 2, rolling very slowly towards the hangars amidst a cloud of smoke, with no help from the fire truck or blood wagon. So that was it, just two out of twelve had got back. Crikey! And all I’d got in return was a couple of Probables. The debrief confirmed we had lost ten aircraft and nine pilots, all for claims of three Destroyed and another three Damaged, all 109s. BoB2 provides other status reports and I consulted the Squadron Diary for 242, which added the shocking detail that we reckoned we'd been up against over a hundred 109s, more than seventy 110s (which I for one never even identified) and thirty Stukas. That’s a really big fighter escort, especially for such an early phase of the Battle – equal numbers of fighters and bombers might be more usual in July. No wonder we got hammered! Goodness knows what happened to the convoy. Worse still, a look at the overall summary of claims and losses (‘Review’) indicated that in the first three days – it was actually July 12th, not the 11th as I mentioned originally – we had lost over 120 fighters, nearly four times what we’d claimed shot down! Such extremes seem to indicate I had messed up more than merely running the campaign or a squadron. It’s as if I have invoked hidden AI skill settings so the Luftwaffe are all set to ‘Nazi Superman’, while the RAF are all at ‘English Nanny’ – a bad illustration perhaps since though unable to speak from experience, by repute one English nanny is a match for any number of supermen, Nazi or otherwise J Apparently older versions of BoB2 had a bug whereby 2d (campaign) results might not match what was experienced in 3d (flying), but that was fixed and seems not the issue here anyway. Odd things can happen if you load a campaign from an old version of Bob2 into a more recent one, which I don’t think I did, although I confess to restarting the campaign at least once, not following the manual’s advice on naming conventions when saving, and loading saves indiscriminately between the two default names offered (BoB and Savegame). Anyhow, disaster after days via massively lopsided losses not being commonly reported from players, there’s something amiss here which I will need to troubleshoot and fix. Perhaps deleting my saved campaign files and starting one afresh would be worth trying. I’ll make some enquiries over at A2A, before I resume campaigning. In the meantime, there is plenty for me to do flying BoB2’s historical and training missions. And as experienced players have advised, that’s really the best way to build up before you pitch into the deep end, actually flying the Battle itself.


- 6 replies
-
- 4
-
-
- battle of britain
- battle of britain ii
- (and 2 more)
-
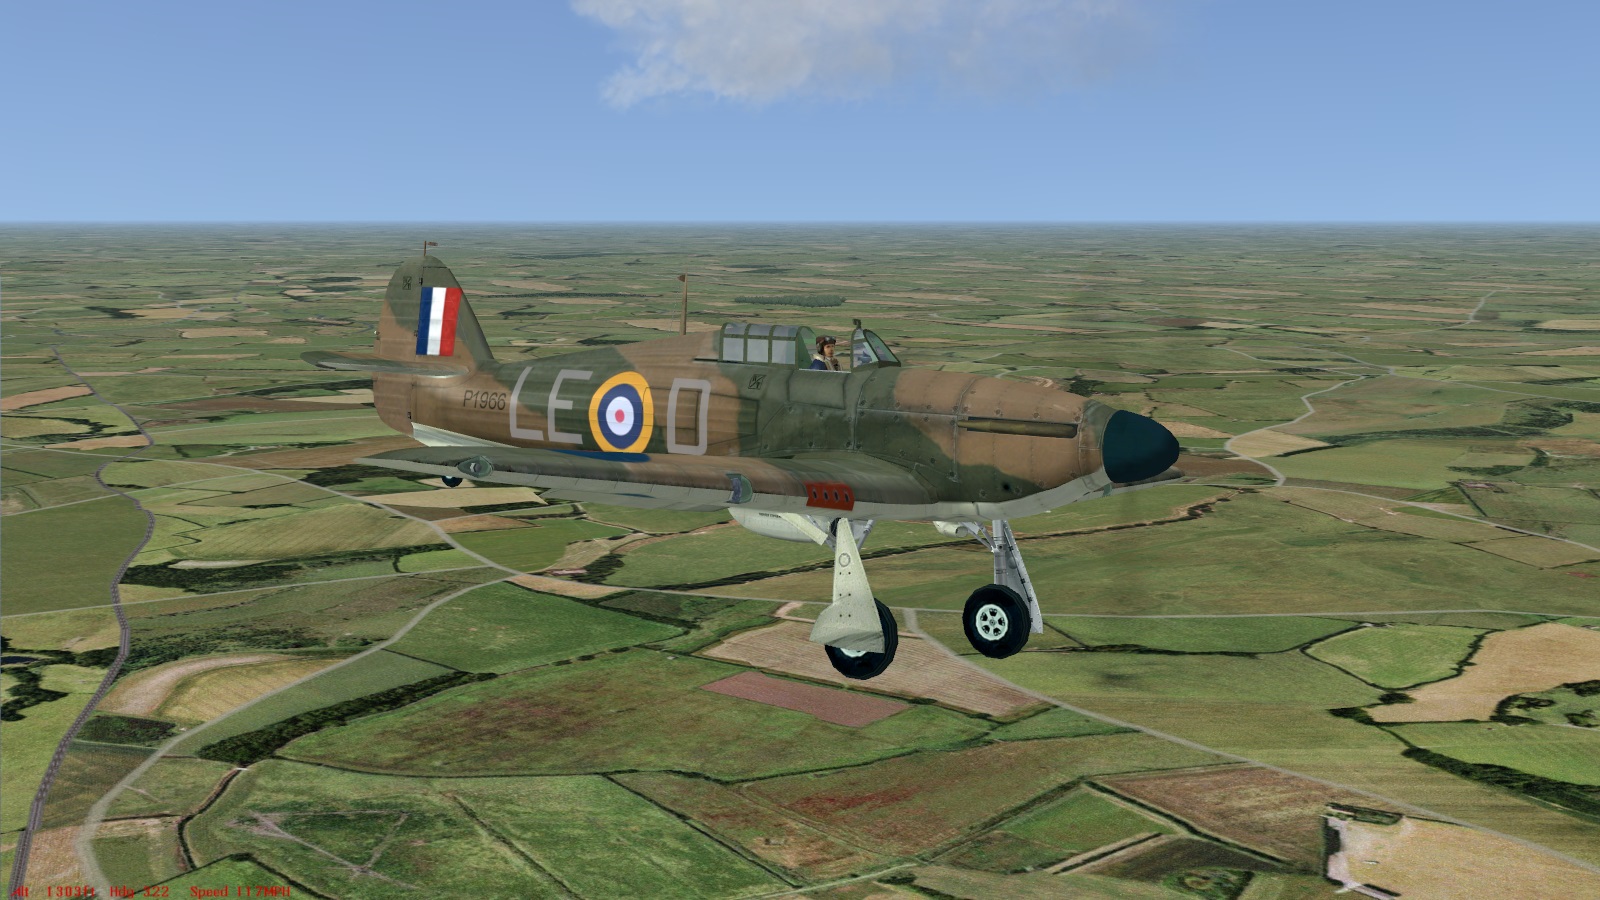
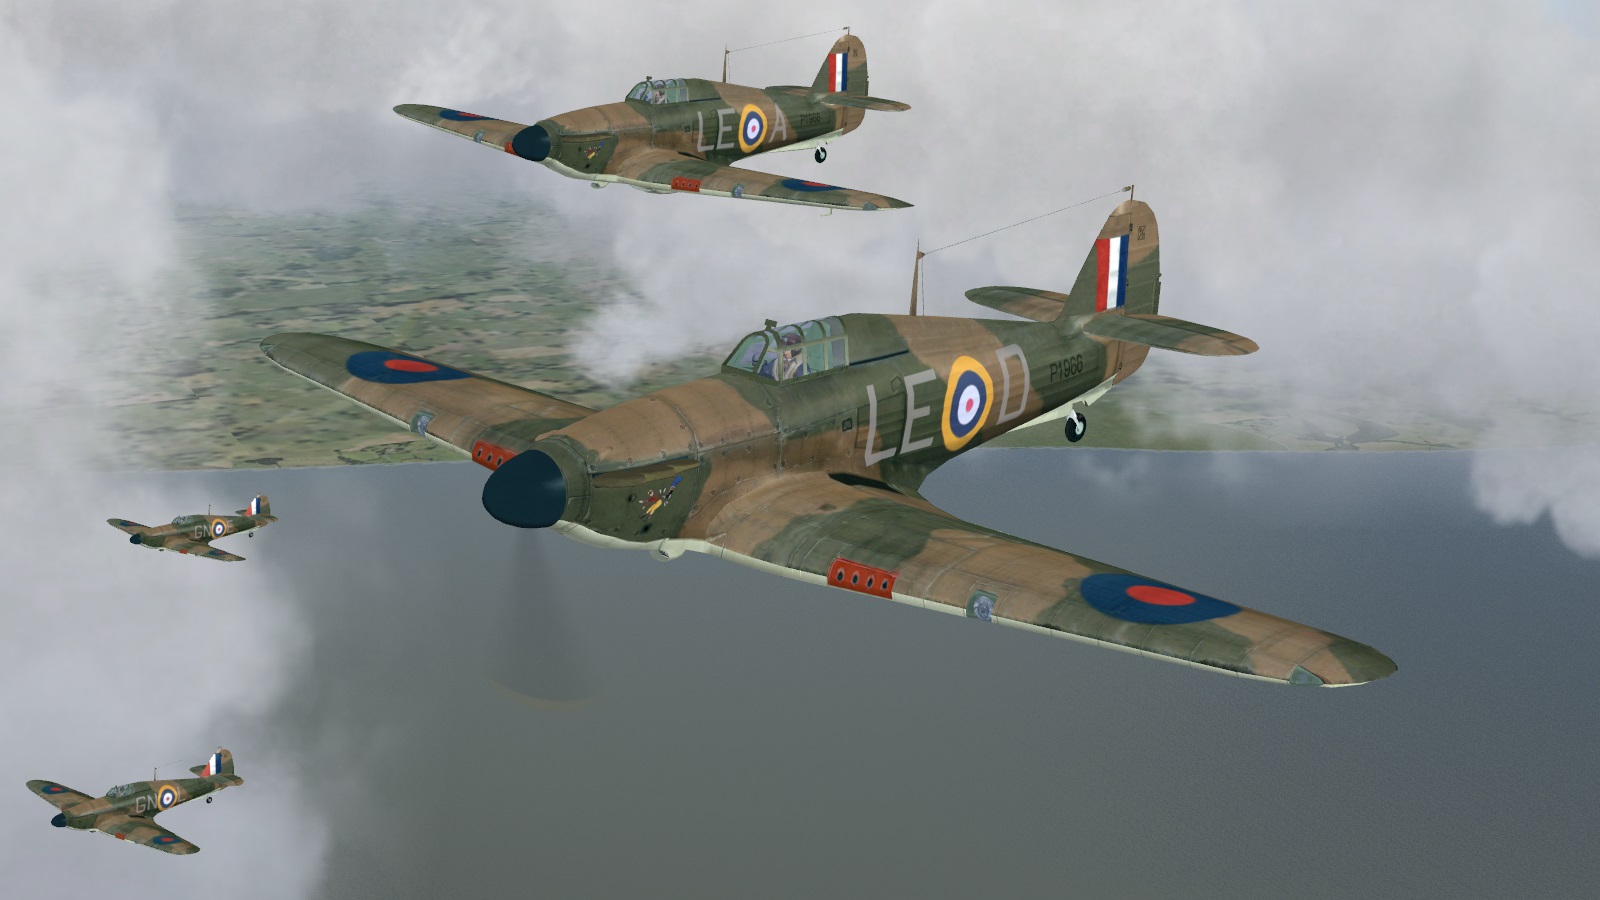
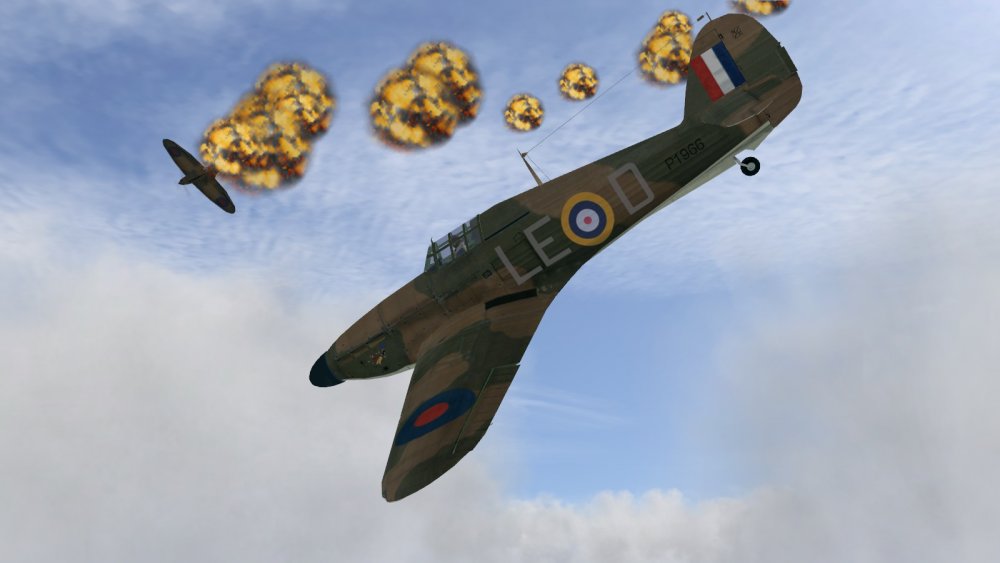
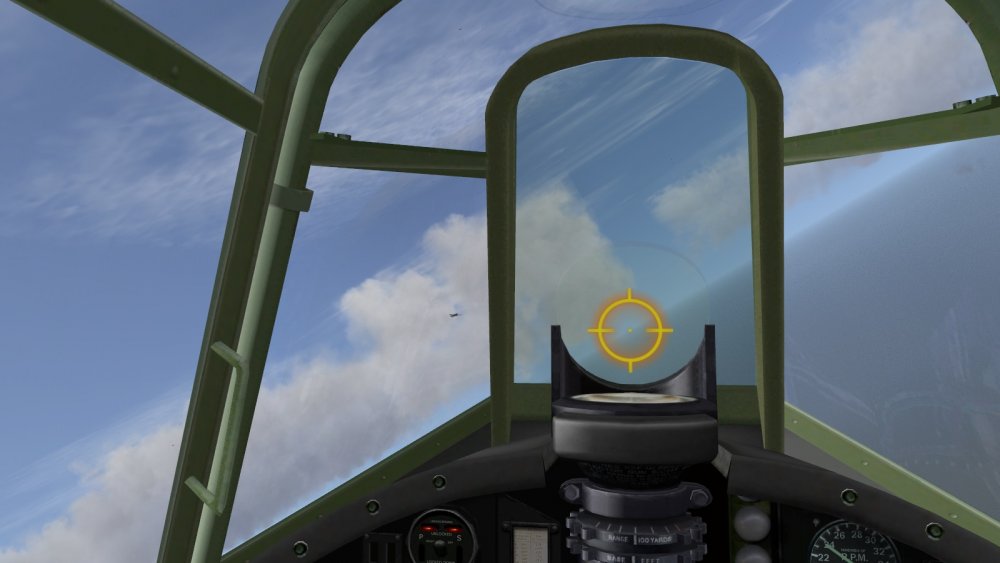
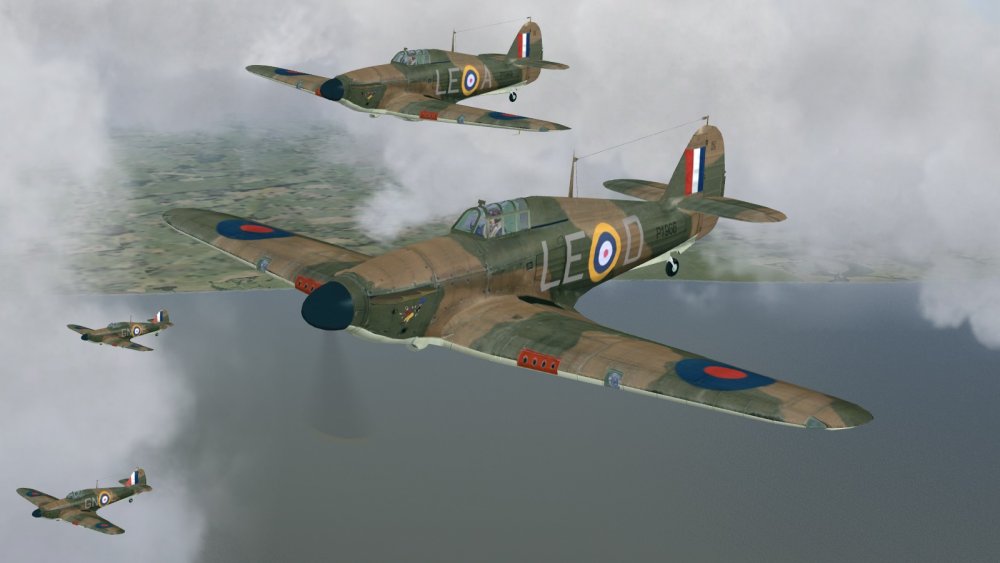
Tally Ho! Here we are, on a vector to the bandits. When I say 'we', I realise that I mean both 242 Squadron which I'm leading in LE-D, but also the chaps down below and to our right. The eagle-eyed will have noticed that these Hurricanes carry larger fin flashes and fuselage roundels - and different squadron codes: GN, indicating they are from 249 Squadron. I had thought from the campaign map when I took over 242 that we were on our own, ahead of the pack of three or so squadrons scrambled to intercept the raid on the convoy off Folkestone. Must pay a bit more attention to that map in future, I told myself, like pausing and zooming in (to uncover markers hidden beneath other markers). Before I jump into the hot seat. The BDG manual does recommend that when taking over a flight about to hit contact, you pause the game once in the 3d to re-orient yourself. In fact there's a setting that does that by default. As with any new sim, I have a lot to learn, perhaps more than most as, like Steel Armour - Blaze of War, BoB2's sim-within-a-wargame approach repays taking time to learn the greater number of ropes. Not jumping straight in, like me. My first inkling that this very lesson was going to be mercilessly drummed into me came when I got my first clear view of the raid, coming up from the south. Gave me a right good sense of what Dowding's boys felt like, that did; scrambled in individual squadrons to intercept raids of a hundred or more. Yes there were almost certainly others on their way but the sense of being outnumbered was brought home with a bit of a shock, when I saw that little lot up there. OK I've got a fully functional rear view mirror, but do I miss the dynamic shadows or higher-res cockpit textures of more modern sims? They're nice to have, but no, not really. As in IL2 '46, you have much more pressing things to be aware of and indeed, appreciate. Not least the 'Now, THAT'S what I call a raid!' moments, coupled with the sense that you are not fighting in the Minor Skirmish of Britain. Much more important. For a while, I flew dumbly on. There was Jerry, and there was I, wondering what the Hell to do about it. For a while, I couldn't think of anything better to do, than take some more screenshots. So that's what I did. While I climbed hard and watched this armada go sailing past on a reciprocal course, up above us. Wisely, 249 seemed to have decided to do something different, for they were gone. Straight home, if they had any sense. I was fearful of being bounced of course, but I recalled enough of my WW2 air combat tactics to know that turning in under a higher enemy to force him to make a head on-steeply diving pass was a defence in this situation. Here, I didn't even need to turn. But no attack came. Perhaps wisely, Jerry resisted the temptation and ploughed on. Feeling a bit less scared, and still climbing, I began to lead 242 around and after them. Soon, we were coming up behind the beggars, still with a bit of catching up to do. The Huns looked like single seaters, possibly Stukas, but likely also with 109s for escort. Very likely, since I could see some contrails peeling off to the left of the main formation. Probably snappers (fighters) turning to come in on us from abeam or astern. It was at this point that I finally had to admit to myself that I had not practiced nearly enough squadron-leading using the BoB2 radio command system. This is different but quite sophisticated, coupled as it is with what they call an 'auto vectoring' AI which aids control - after giving certain combat orders, you can actually hear yourself on the R/T translating that into some sort of drill or tactical response, which might be 'Pick your own targets - there's dozens of them!' Or something a bit more sophisticated. But of course I had read and dabbled, but not practiced sufficiently. So I basically ordered a free for all, and that's what I got. ...to be continued!


- 6 replies
-
- 3
-
-
- battle of britain
- battle of britain ii
- (and 2 more)
-
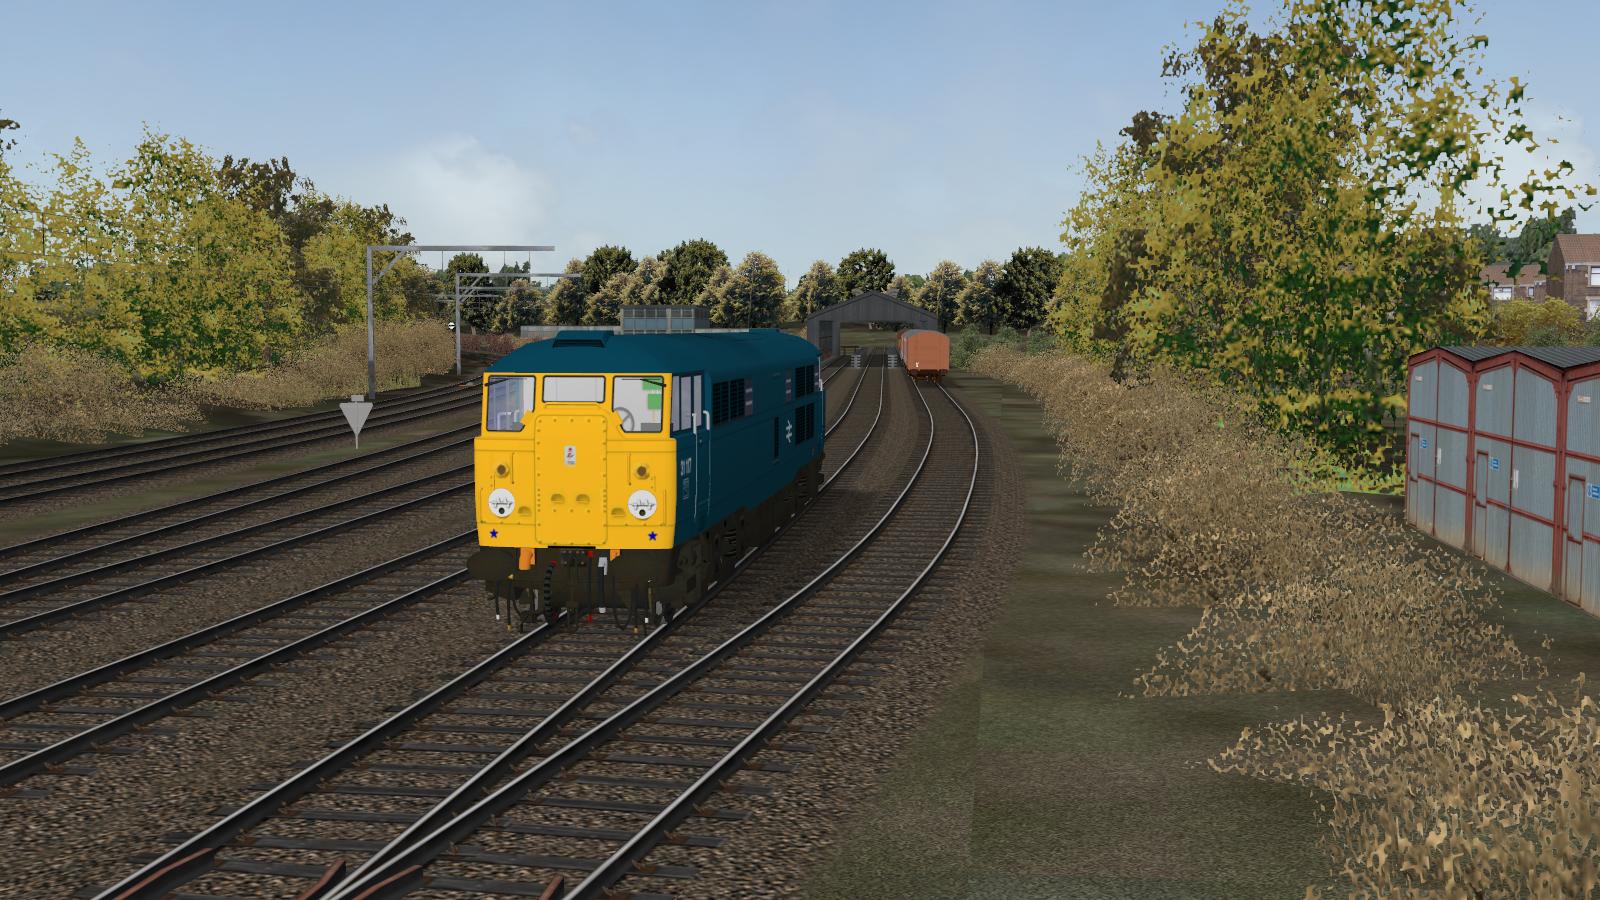
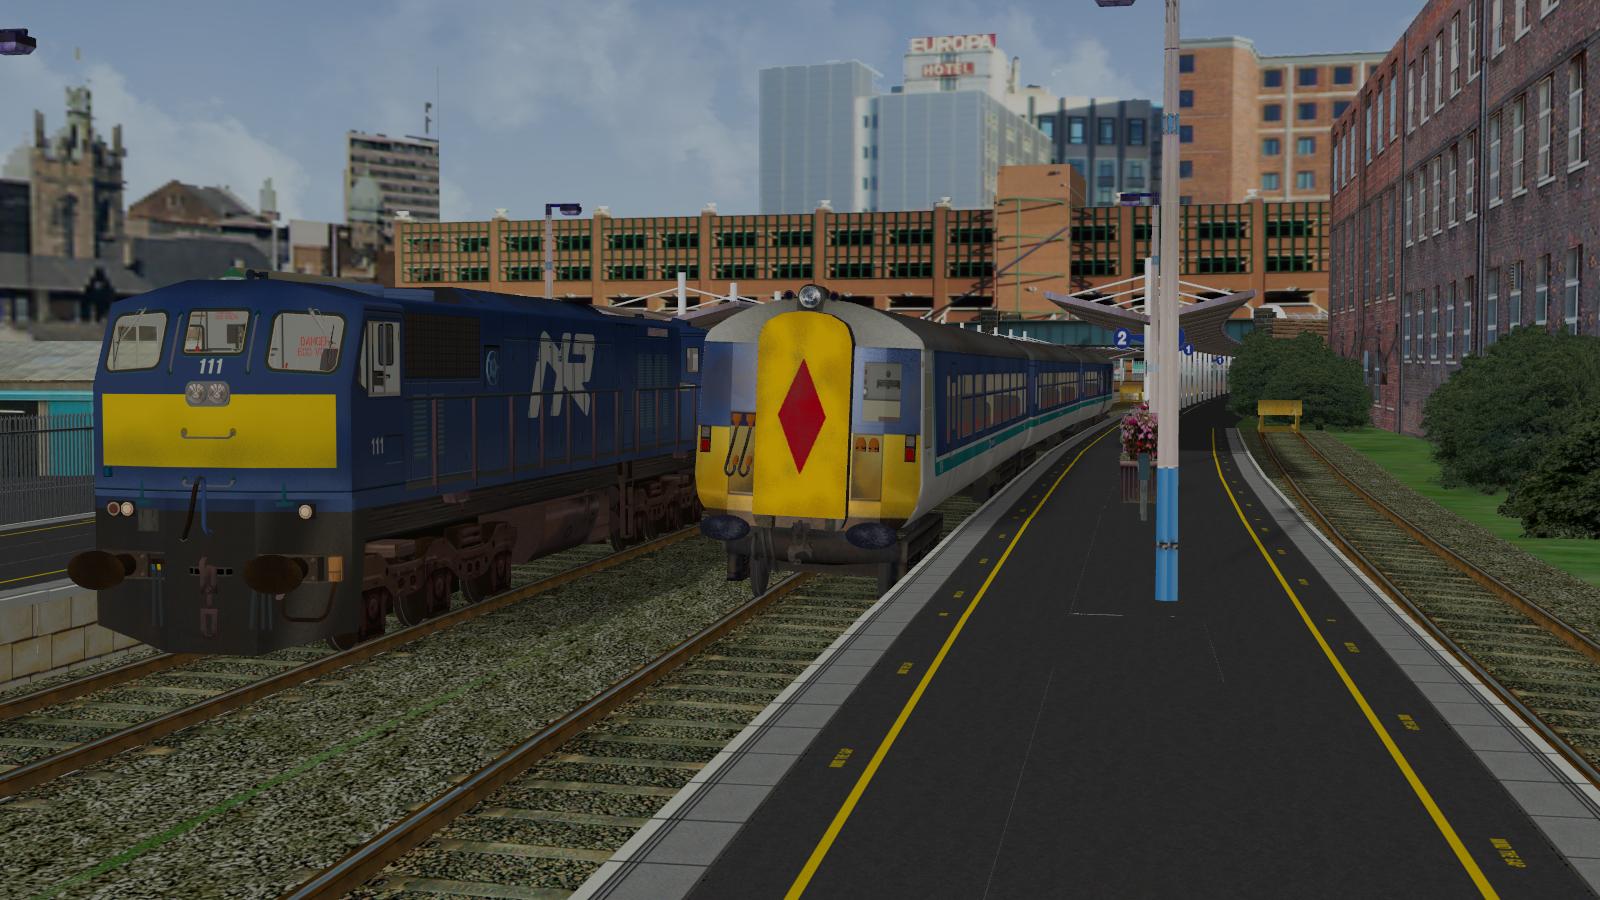
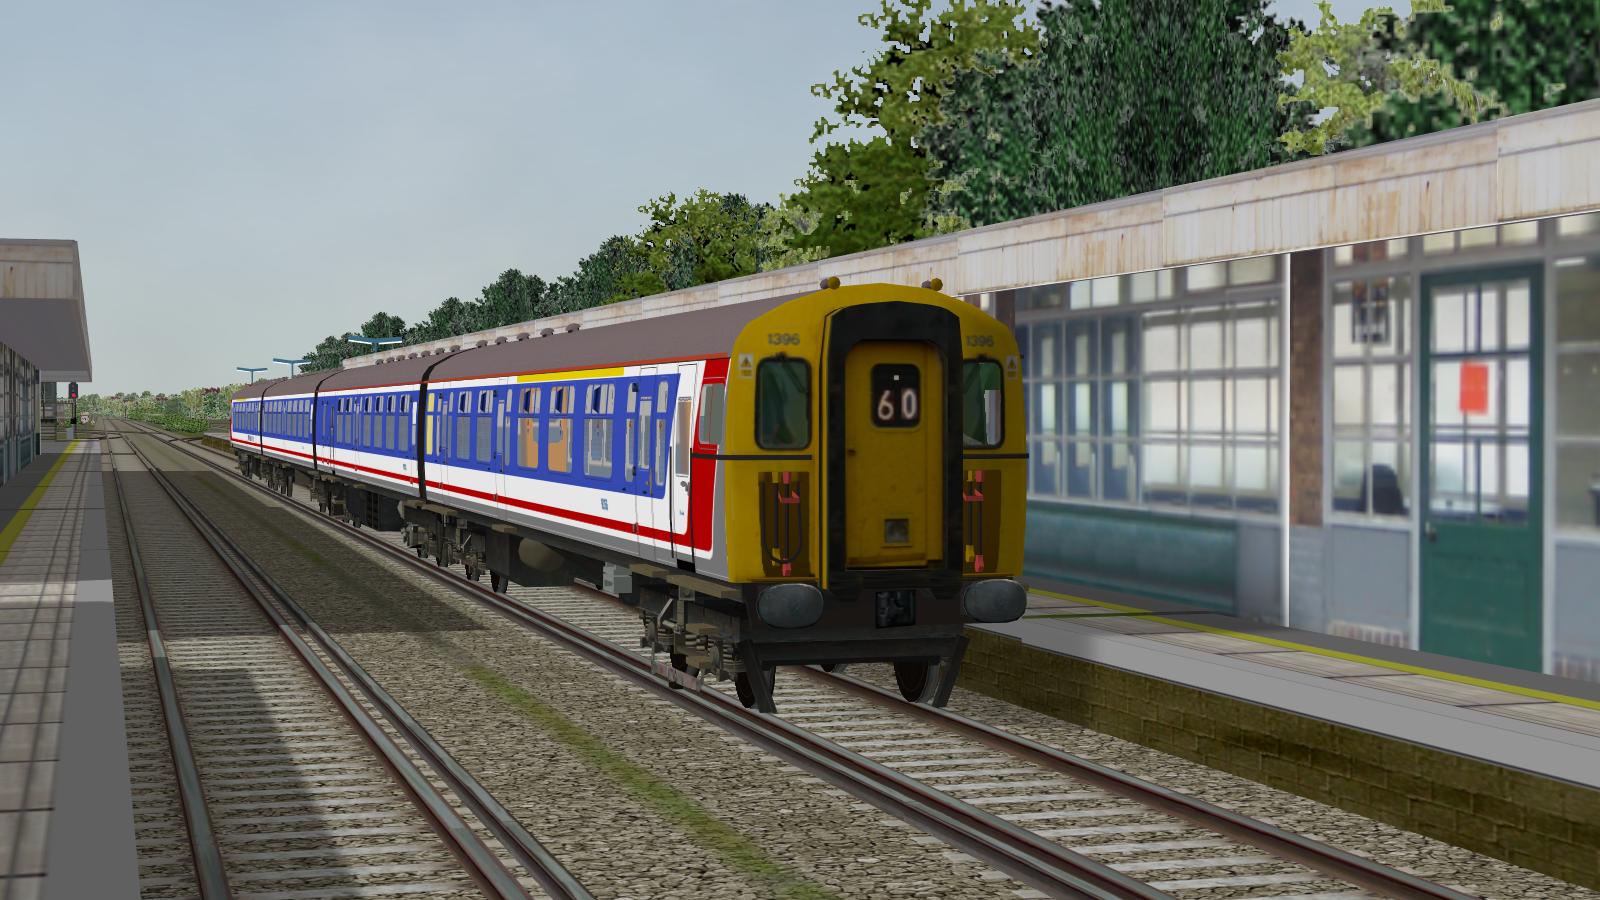
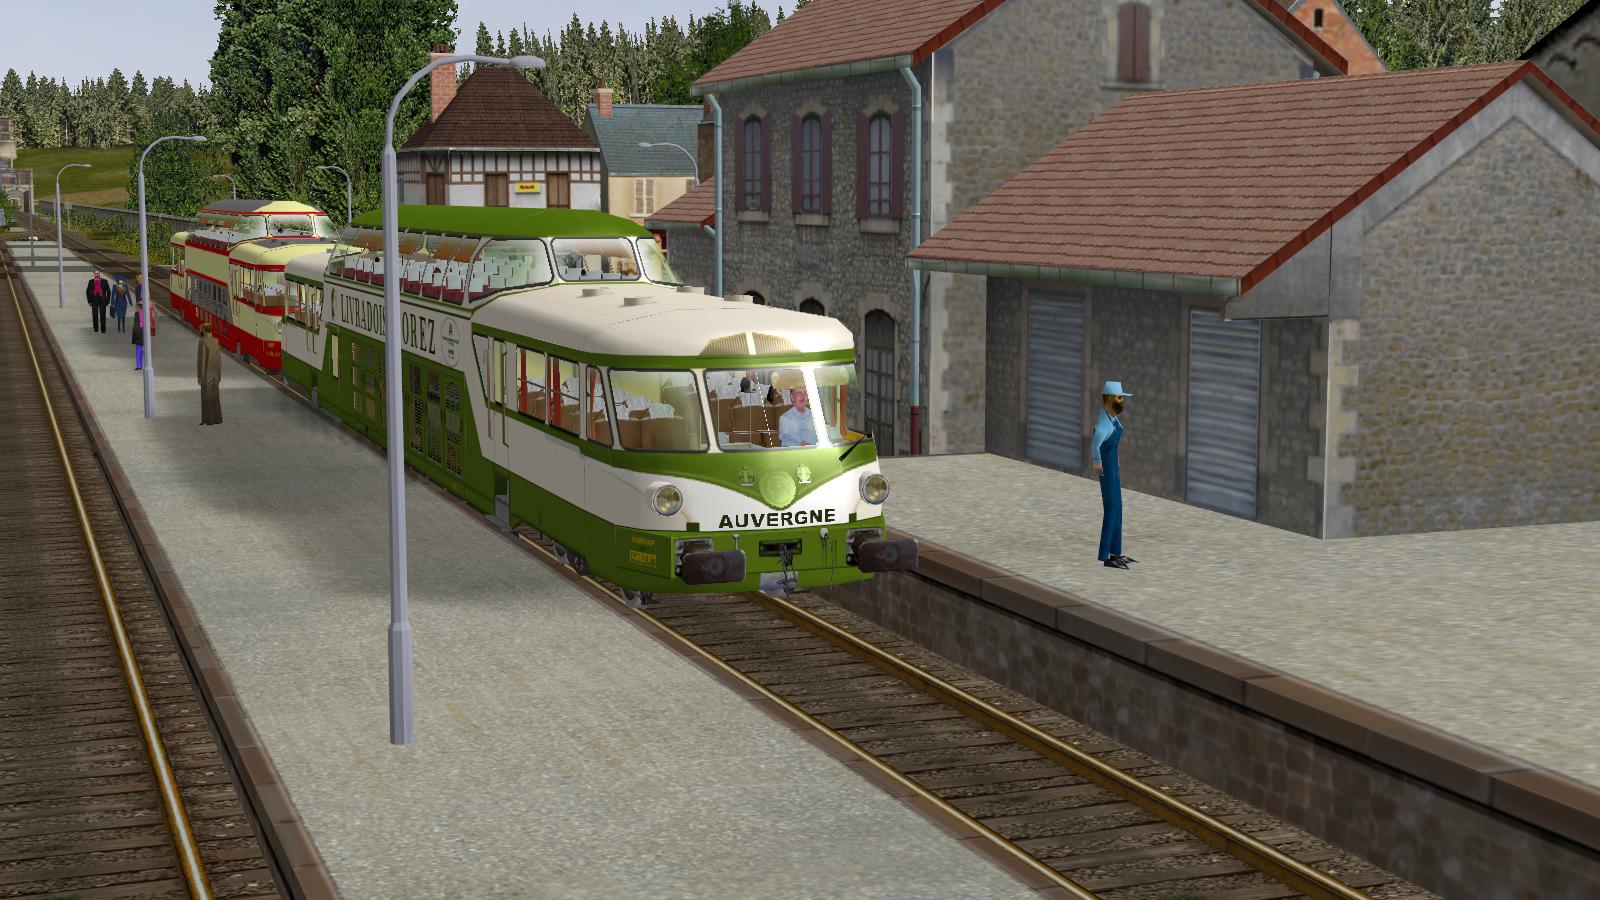
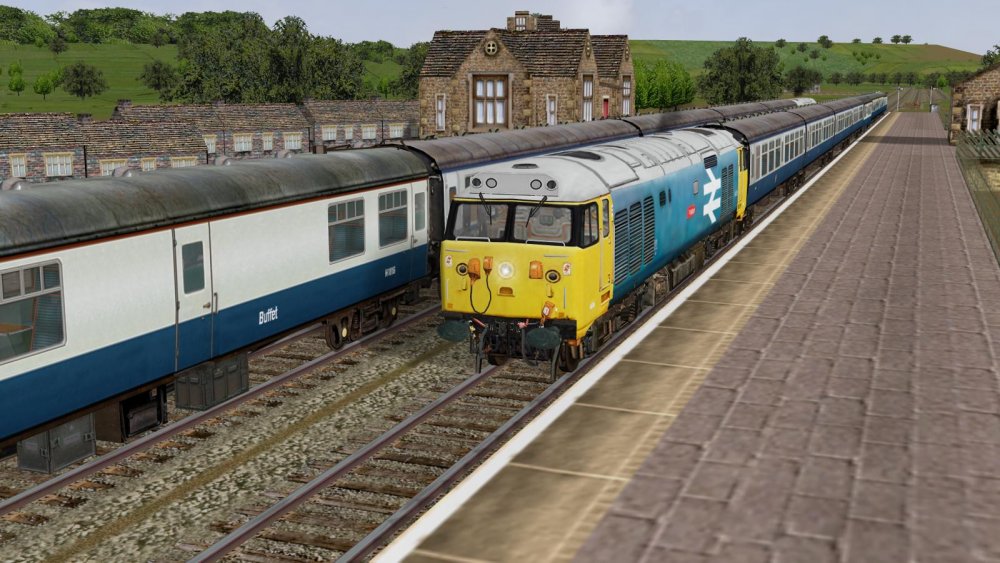
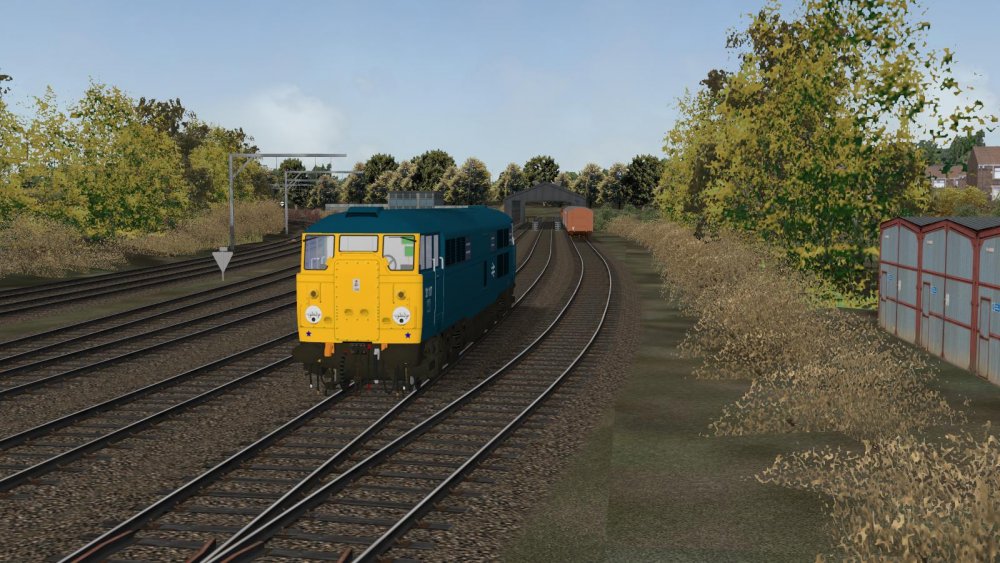
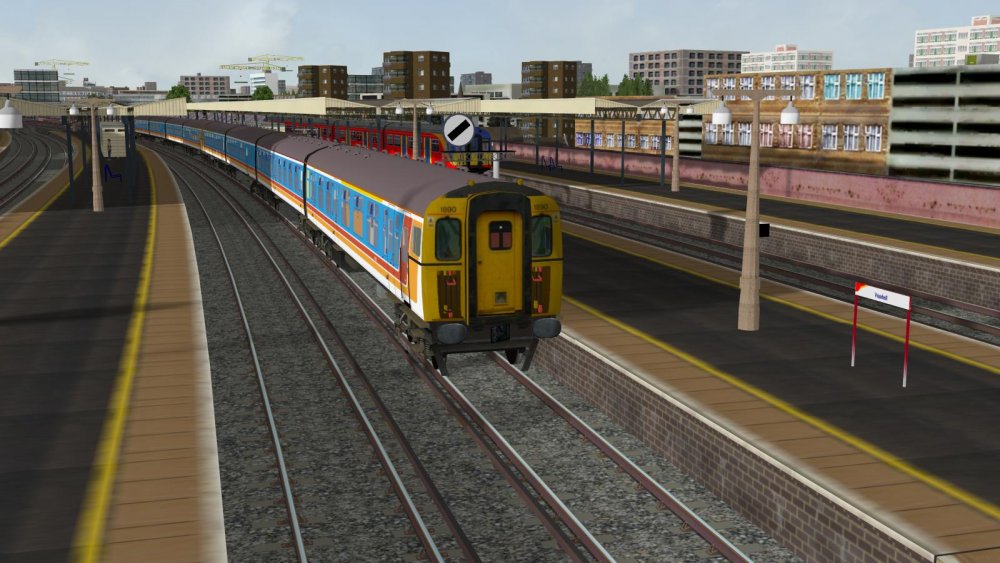
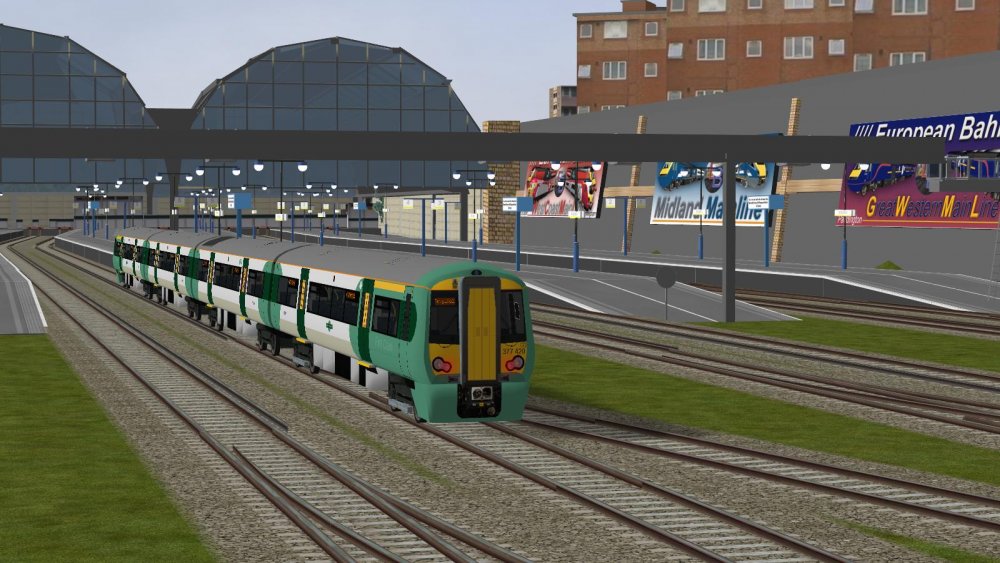
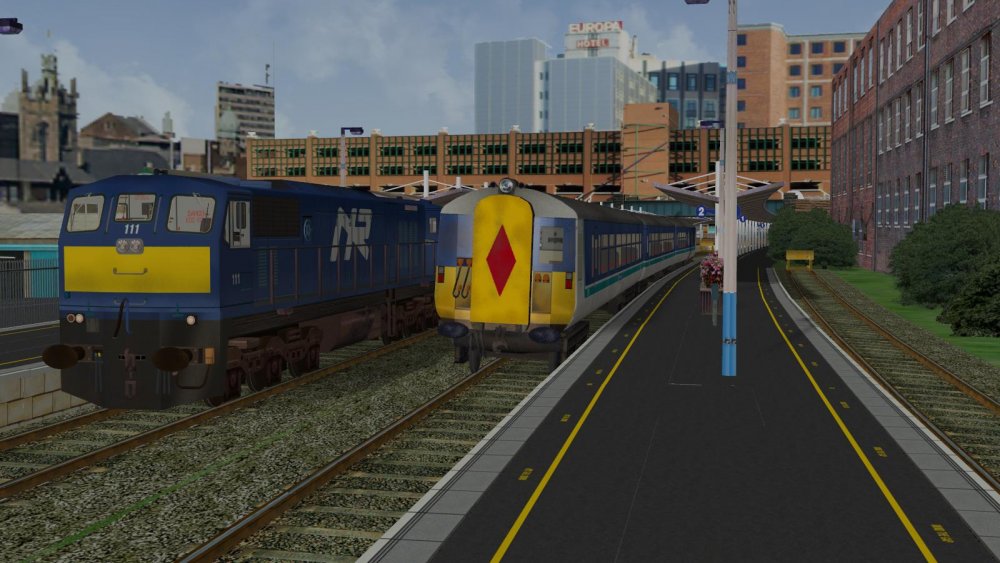
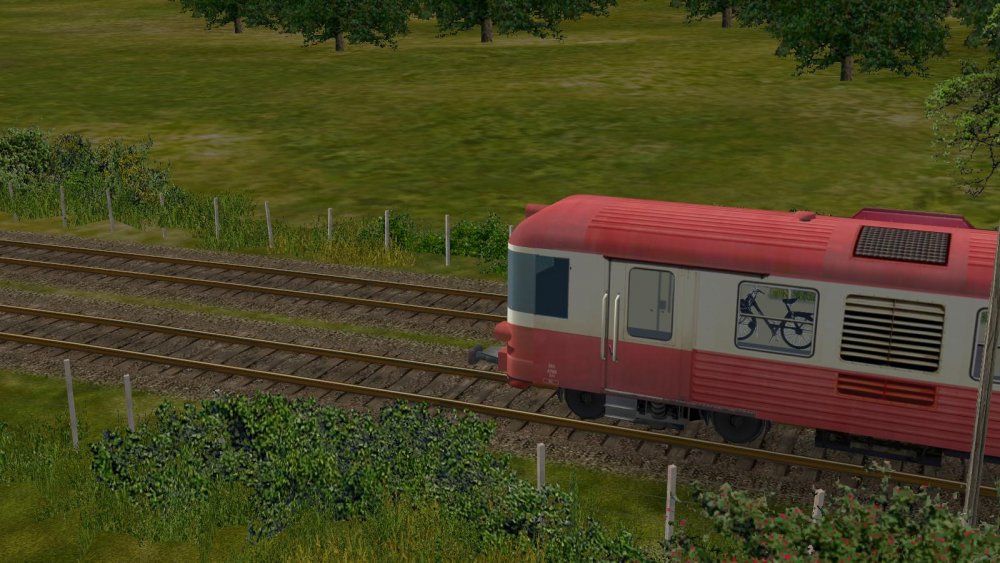
Open Rails, mainly. 'Tis a train simulator without trains. Although now available with some trains, as in a sample route. Main reason for the interest is that it's designed so as to run the massive amount of content made for Microsoft Train Simulator (which it does with better realism, visuals and performance), including the UK routes, payware and freeware, that I favour. Like these: In the freeware category I have this one called appropriately enough, La Belle France: Also have Trainz 2009 and the London-Brighton route on TS201X.


-
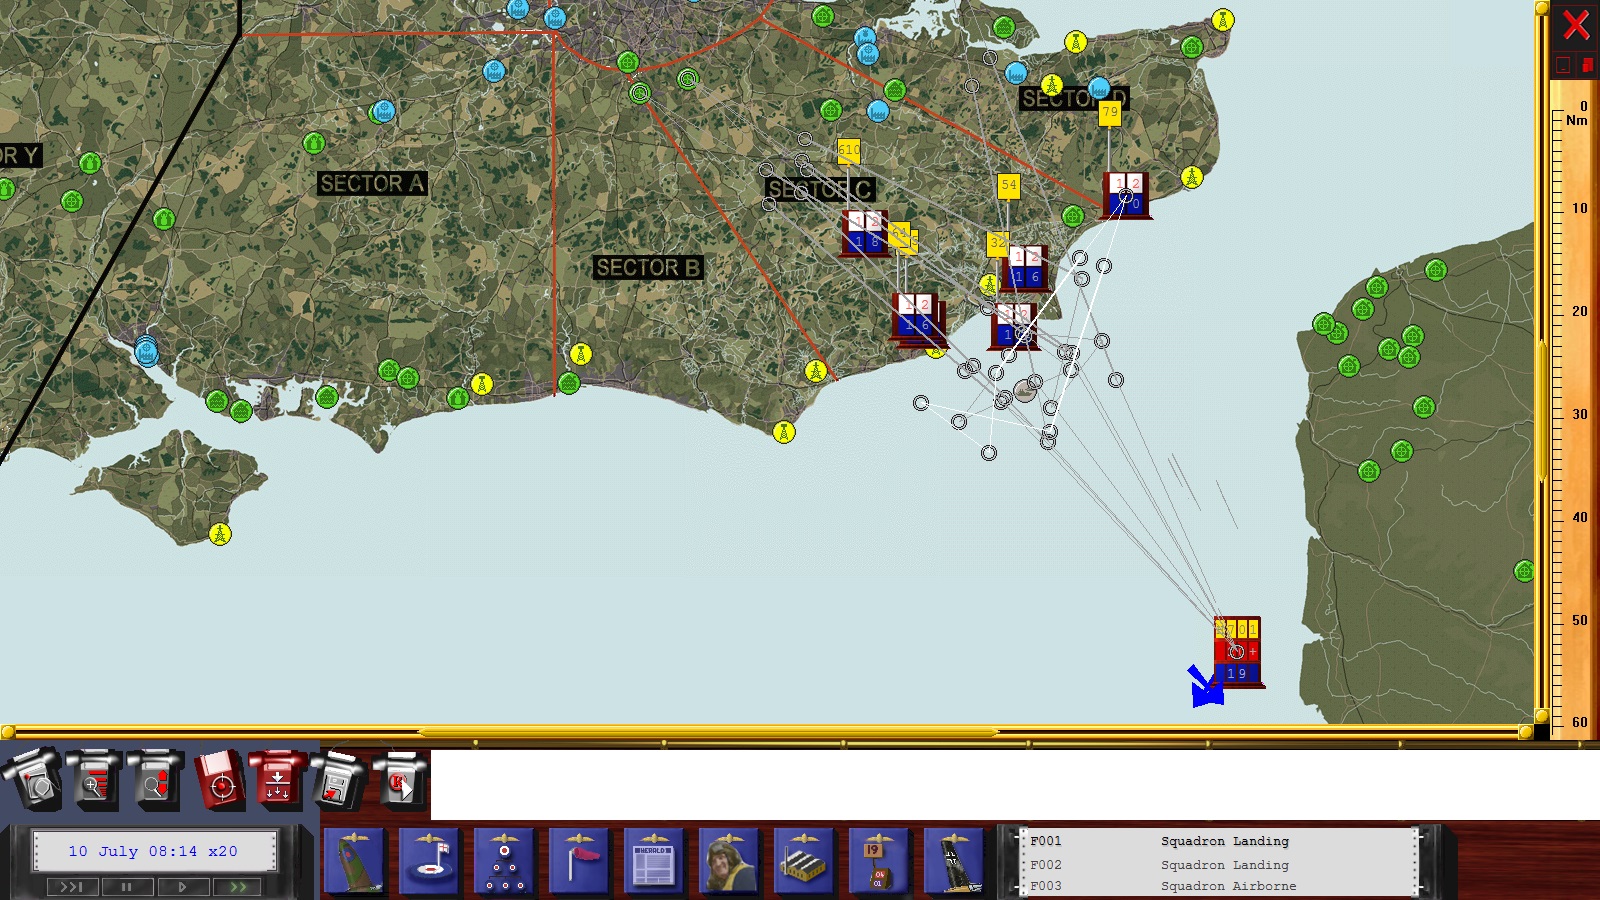
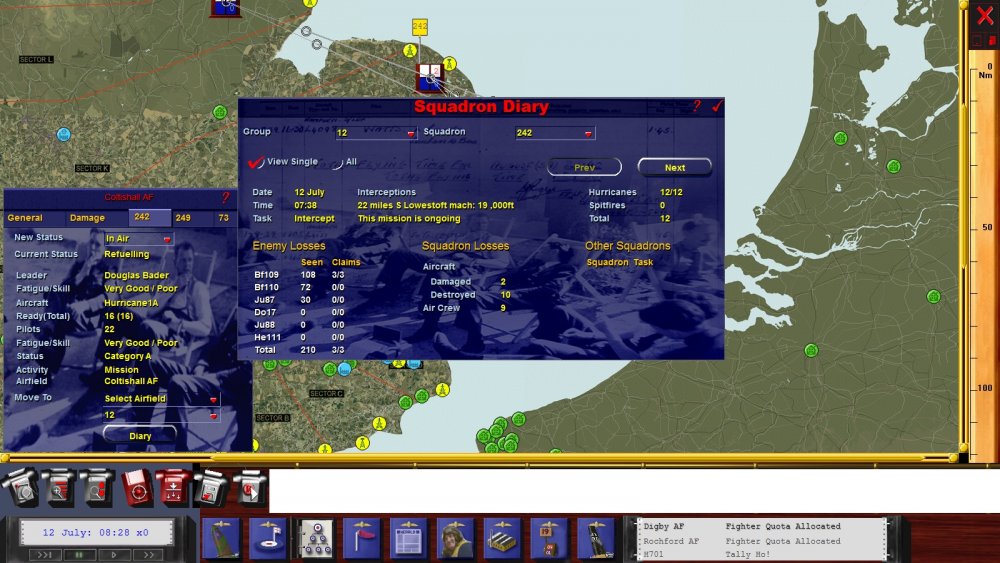
Flying a sortie in the RAF campaign This is my second mission report from my new (or at least, new-found) toy - A2A's Battle of Britain II - Wings of Victory. In case anyone's wondering, I didn't set out for them all to be called 'A bad day for...' - that's just how it's working out, so far. A bit of a give-away, or spoiler if you like, but I trust it won't last, and that future mission report titles will be a tad more cheerful. Anyhow now that I've made a start with a BoB2 campaign, I'm wondering why I didn't take to it years ago, when I first got Rowan's original, or A2A's remake. Especially since both are so much better with the BDG updates. Now, you can even play a more conventional campaign, as described in the comprehensive BoB2/BDG manual, which enables you to have a log book-carrying, squadron-based pilot persona. This uses the underlying dynamic campaign 'wargame' to generate your missions. But for now I'm doing a conventional BoB2 'commander' (not 'pilot') campaign. The main difference is that the commander version allows you to act as any and all of the Air Vice-Marshals commanding 10, 11 and 12 Groups, Fighter Command, plus jump in and fly any squadron scrambled or tasked to patrol, either on takeoff or on meeting the enemy. Also at other points but the latter is the most interesting, and enables the player to jump in just before the start of any air fight, in any of the aircraft in the squadron about to engage. I opted to start at the beginning of the first phase into which the Battle is conventionally divided - the channel convoy phase, starting 10 July 1940, just after the fall of France. Among the many options, you can set things so that the AI Luftwaffe you will be facing starts the battle mainly by attacking British coastal convoys ('historical' tactics), or using 'optimal' ones - which likely involves going for more beneficial targets earlier, like your airfields or aircraft factories. I opted for 'historical' and as expected, ended up with the RAF campaign AI flying standing patrols to protect convoys, plus scrambling squadrons to intercept raids as they come in. This campaign AI presents you with 'directives' which set rules your deployed forces will follow, and allows you both to vary these or create your own. It also takes decisions on what and when to scramble, abiding by these directives. The BDG manual gives excellent, detailed and illustrated advice on how to do all this, but the AI is quite good for the RAF anyway. I opted to accept all the defaults and let the AI fight the Battle, so that all I had to do was wait for something to happen and then dive in to any action that developed. As each campaign day accelerates and decelerates time as needed, you are not kept waiting staring at the map for long. And even while you are, it's a not uninteresting experience; you can watch convoys moving, patrols orbiting, raids developing and squadrons scrambling, while listening to reports as they come in. 'Hostile seven zero one is now a hundred plus' sounds positively sinister, even though spoken softly in the polite tones of an invisible but obviously efficient and very possibly pretty virtual 1940s WAAF at the plotting table. Above is my campaign map near the end of the first of three sections the campaign day is broken into - morning, afternoon and early evening. The aforementioned raid Hostile 701 is near bottom right, returning to base after attacking Convoy Jaunty (authentic convoy and squadron reporting names are a feature), which is the grey ship marker in the Channel between the headlands at Beachy Head to the west and Dungeness to the east. The blue and white markers are RAF fighter squadrons, either the convoy's standing patrols or those scrambled as the raid came in and now heading home. During this raid I jumped in with 79 Squadron as the leader (the top right blue/white marker) when it intercepted Hostile 701. Here I am contemplating the incoming raid, from a not-terribly favourable position... ...and here I am dealing with a Messerschmitt 110 which objected to our presence... But this mission report is about a sortie I flew the following day, 11th July. A convoy had left the dangers of the channel behind and sought safety off the North Sea port of Felixstowe. Not so safe, as it turned out, for Luftflotte 2 decided to have a go at them. Once again, we were up against a raid reported as 'a hundred plus'. Being keen, I accepted the first offer of combat that the campaign AI offered me, for the first squadron to sight the enemy in the air. This was no less than 242 (Canadian) Squadron, commanded by no less than Squadron Leader Douglas Bader. BoB2 being the stickler for unit-level historical detail that it is, it was no surprise when I therefore found myself in the cockpit not only of a Hurricane, and not only of one bearing authentic squadron codes ('LE') with each aircraft in the squadron with its own unique individual aircraft letter; but my mount was no less than the boss's own machine, LE-D, with my blue and red leader's flash below my starboard cockpit and the unofficial unit emblem, Adolph getting a kicking, adorning the nose. My Corgi diecast 1/72 has the leader's flash on the opposite side, the mirror image A (camouflage) Scheme, and is serial V7467 not P1966, but such minor details apart, BoB2's version is a pretty good replica. Would I do the illustrious pilot justice, whose flying boots this sortie had found me filling? Well, yes and no... ...to be continued!

- 6 replies
-
- 3
-
-
- battle of britain
- battle of britain ii
- (and 2 more)