

p10ppy
-
Content count
329 -
Joined
-
Last visited
Everything posted by p10ppy
-
I don't know much about RNAS formations... do Sq's really have 48 aircraft either way its still more efficient to use decals rather than whole skins just think of the wheelcovers as a type of serial numbers (though with the alias.lst thingy you can use 1 numbered decal for more than 1 aircraft...i think) When you are mapping a new decal it does not work off the UVmap/skin (unfortunately) but off the actual models world space [Decal002] MeshName=Fuselage P //the mesh that you want the decal stuck to...(fuselage in this case) DecalLevel=2 DecalFacing=RIGHT //what way the decal faces on the model FilenameFormat=SPAD7_180\Decals\Spa3Fus Rotation=180.0 //rotation of the decal...useful for text sometimes Position=-1.38,-0.72 //the position of the decal on the overall model in this case 1.38 metres behind and .72 metres below the aircraft's centre Scale=2.14 //the size of the decal DecalMaxLOD=3 trial and error is the ONLY way to work out the placement i'm afraid to find out the mesh/meshes name a hex editor on the main *.lod and good guessing/searching is the best way (TK is pretty logical with his naming) wheel_L and wheel_R is probably the right MeshName in this case hope that helps there is an old (very old) decal tut in the dl section ...things have changed but its still mostly the same... http://forum.combatace.com/index.php?autoc...mp;showfile=345 this may help as well http://forum.combatace.com/index.php?showtopic=33899&hl= have fun
-
with the wheel cover decals and I'm assuming you are decaling them rather than painting them on the skin (I'm still a bit confused about that bit ) you assign the wheel decals a number sequence just like a sq number or aircraft number and set them to the appropriate decal level in the decal.ini and then they only appear on that particular aircraft (numberxxx) I'm a long way from home so I'm not being very specific, I'm sorry edit: have alook at the SPAD7_180 repaint i did (the decal structure is a mess but it should point you in the right direction) [Decal001] MeshName=Fuselage P DecalLevel=2 //(from memory) squadron level decal DecalFacing=TOP FilenameFormat=SPAD7_180\Decals\Spa3TopFu//Spa3TopFu001 goes on the first aircraft ...etc Rotation=270.0 Position=0.0,-2.4 Scale=1.4 DecalMaxLOD=3 there's a new feature in the latest patch, an alias.lst (again from memory ) which used in conjunction with the DecalLevel should be quite efficient (search the TW forum) PS as far as i know the game doesn't ever generate random decals.... hope that helps
-
check out Mark Miller's 10 sq camels for some inspiration (if you haven't already) http://www.wwi-models.org/Images/Miller/re...amel/index.html ps you "should" be able to decal the wheel covers
-
Decals Post Patch
p10ppy replied to Hinchinbrooke's topic in Thirdwire: Strike Fighters 1 Series - Mods/Skinning Discussion
at somepoint the naming convention/pathing changed (don't know that it affects ships ) http://forum.combatace.com/index.php?showtopic=33785 post 9 -
Le Missioneur
p10ppy replied to johnrey's topic in Thirdwire: Strike Fighters 1 Series - General Discussion
http://www.checksix-fr.com/bibliotheque/in...ail&ID=4496 -
INI / Mapping Problem
p10ppy replied to Timmy's topic in Thirdwire: Strike Fighters 1 Series - Mods/Skinning Discussion
Timmy its totally up to you how many maps you use I paste all of TK's (and your Mig-9) together in a grid anyway when i skin them and cut them apart at the end big file, but if you use lots of PS overlays its the best way to colour/effect match To disagree with Stiglr a little When I UV map (which is by far the hardest part of modelling IMHO) I focus on things in this order... 1. Good unwrap with no distortion and the ability to paint features fairly easily in PS (panel lines perpendicular to the BMP if possible, etc) 2. Packing the UV chart as tightly and efficiently as possible, Every blank unmapped pixel on a bmp is still loaded in the game you are wasting resources if you don't do this, fill all the holes and have the wires almost touching 3. Scaling thing fairly consistently and as large as possible, the widest mesh span should go from one side of the map to the other etc... Sometimes its a good idea to upscale small but important features so you can paint them reasonably (and you may as well fill those holes completely) downscale things that are not seen often or are very dark so you can get a bigger overall scale on the rest of the model 4. Making it easy for the skinner (what Stiglr is talking about), a well named template with wires will achieve most of this anyway in game efficiency and as large a scale mesh UV per map as you can achieve is more important than being able to line up a few bits easily in PS a little trial and error in and out of the game soon fixes that.... :yes: You have to juggle all this stuff and it never quite works out... but that's the way I prioritise my compromises IMHO -
If you are using FE+EP+Peter01FM unpatched which seems to be recommended practise (all my installs are fully patched though) there's a possibility that TK used some new video/DX9 features in the newest patches (and since the shaders et,al work in vista now, its a reasonable bet that he has imho) which might explain the difference you are seeing between the two versions...
-
INI / Mapping Problem
p10ppy replied to Timmy's topic in Thirdwire: Strike Fighters 1 Series - Mods/Skinning Discussion
with the damage boxes I've overlapped them before with no noticeable problems each inied mesh is its own entity with hitpoints so you are in theory giving the total vert tail area double the structure you can always compensate with a smaller hit box or reduced structural factor if it seems to be a issue 4 x 2k maps you say just let me expound the virtues of a single map a little more (4k now giggle) makes it easier to understand the whole model and means you can do much longer continuous segments of individual mesh parts (up to 4k/2k long instead of 2k/1k) only one map to worry about much easier to keep it all in scale just my opinion :yes: reduced rez -

From the album FE Wips
-
INI / Mapping Problem
p10ppy replied to Timmy's topic in Thirdwire: Strike Fighters 1 Series - Mods/Skinning Discussion
map the whole airframe to a 2k bitmap ;) I've never understood the reason for multiple smaller bitmaps except for modular bits (other aircraft) makes it a pita to camo and colour match and there's more bigger holes to utilise for small things on a single 2k map otherwise you are right you need to do what you are saying for the damage modelling and it works fine -
Bloch 210
p10ppy replied to LloydNB's topic in Thirdwire: Strike Fighters 1 Series - Mods/Skinning Discussion
Using decals works fairly well for this the main problem is the pseudo projection mapping used in decals, so they don't wrap so well It was pretty funny reading very old posts at TW about decals, describing them as a high rez solution to insignia, skins seem to have left them way behind these days on the rez front I try to make my decals at atleast the same rez as the underlying skin...(can get unmanageable if you have a lot) while I haven't done quite what you are talking about I do use the skin bmp under all my airframe specific decals now at full skin rez registration skin for the fuse decals above the hard part is lining them up with the skin (trial and error) I usually make a "line up" skin with some registration marks / squares on it where the decal is to go and a line up decal of the same skin cropped (but not scaled) to the decals size with corresponding line up marks then spend a couple of hours playing with scale and position in the decal.ini... and testing in game... its usually possible to make them match to within a pixel...(persistence) and that's the only hard work then its just a matter of using the cropped decal,removing the line up marks (layers) and blending your decal over the top...full size decal template matching the underlying skin clear as mud Ps 520x520 32bit TGA = ~1 meg -
From the album FE Wips
-

From the album FE Wips
-
can not replicate it sorry Southside Bucky my default clean install and my "proper" install won't do it... and I think I tried most of the graphic settings maybe post your graphic setting (option.ini) mine are [GraphicsOptions] DisplayDeviceID=0 DisplayWidth=1680 DisplayHeight=1050 DisplayDepth=32 AspectRatio=1.600000 LensFlare=0 DetailLevel=4 ObjectDetail=2 ObjectTexture=3 CockpitTexture=3 CockpitMirrors=0 CockpitReflection=0 EffectsDetail=2 TerrainDetail=2 TerrainTexture=3 HorizonDistance=3 GroundObjectDensity=3 WaterDetail=2 CloudsDetail=0 Shadow=1 AntiAliasing=0 if you have any 3rd party effects packages installed, they may cause it as well check near the end of your PARTICLESYSTEM.INI (shudder ) that the fire material looks like this (PARTICLESYSTEM.INI lives in the FlightData.cat) [FireMaterial] DepthBufferCheck=TRUE DepthBufferWrite=FALSE IgnoreRenderOrder=FALSE AlphaTestEnabled=FALSE LightEnabled=FALSE UseLightLevel=FALSE SpecularEnabled=FALSE EmissiveEnabled=FALSE AmbientColor=1.000000,1.000000,1.000000,1.000000 DiffuseColor=1.000000,1.000000,1.000000,1.000000 ZBufferOffset=2.000000 PriorityLevel=3 BlendOp=BLEND_INV_SRC_ALPHA_ADD_SRC NumTextureStages=1 TextureStage[01].TextureName=Fire.tga TextureStage[01].MipMap=FALSE TextureStage[01].FilterEnabled=TRUE TextureStage[01].StageColorOp=TEXTURE_MODULATE_DIFFUSE TextureStage[01].StageAlphaOp=TEXTURE_MODULATE_DIFFUSE I'd be surprised if it didn't though...and it would affect much more than the muzzle flashes maybe try updating your directx9 and vidcard drivers (always a pain I know) post TK a screeny he will be able to help I'm sure
-
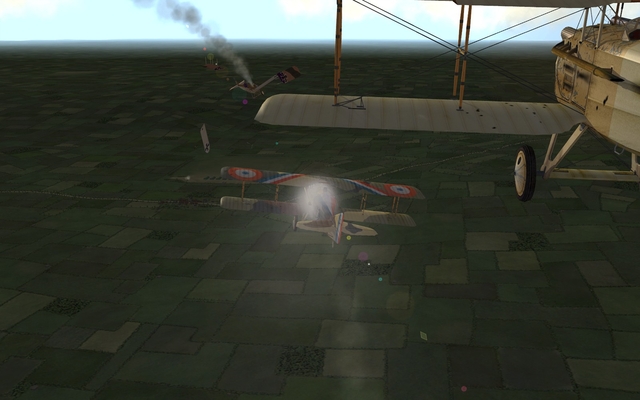
Screenshot Thread
p10ppy replied to Dave's topic in Thirdwire: Strike Fighters 1 Series - General Discussion
yeah Franco's always been one of my favourites... :no2: -
Screenshot Thread
p10ppy replied to Dave's topic in Thirdwire: Strike Fighters 1 Series - General Discussion
-
From the album FE Wips
-

From the album FE Wips
-

From the album FE Wips
-
no worries glad to help :yes:
-
ah ok thats much clearer :yes: glad you worked out the stock problem Southside Bucky the decal setup on those 3rd party planes is a little weird... and out of date I presume if it used to work.... you need a fuller path to the decal folder replace things like FilenameFormat=Jasta4/D/TCross with FilenameFormat=SchuckertD3/Jasta4/D/TCross and all the decals should appear fine find and replace with a competent text editor makes it semi painless... (i use Notepad++)
-
I had a better play with this and I don't think I have been able to replicate your problem So it probably isn't anything to do with the alias.lst... I have found one weird bug that may be related running at default graphics (from a clean install) that seems to be related to the Camel (atleast i never saw it anywhere else...) the fuselage roundel being randomly replaced (during the mission,multiple times) by random tga files... which flick back to the roundel with a view change or Screenshot so that bug is most likely graphics related, I never saw it with my normal install (max graphic settings) only with the lower "default" settings... where it was quite regular note it could just be a weird thing with my vid card running non-native examples If this is the problem you guys have, TK's probably got no idea what you mean... If its a different problem (as i think) you probably need to post more info, flight date specific aircraft reproducible drinking a cup of tea at the time graphic settings modded install screen shot etc before TK can help you sorry i couldnt help more
-
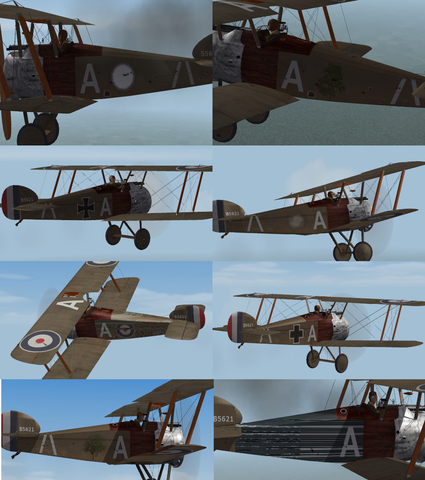
From the album FE Wips
-
http://forum.combatace.com/index.php?showt...mp;#entry212044 think it maybe a bug...
-
i had a quick look at it it "looks' like the alias.lst may not be working for you guys (its a new feature) i have not tested enough to see if i have the problem as well there's 3 "new" nations and they use some of the decals from older nations which is pointed to by the alias.lst NATION.ini [Nation019] Name=GERMANY_TEMP ActiveDate=03/20/1918 AlternateDecal=GERMANY_OLD [Nation020] Name=GERMANY_OLD [Nation021] Name=RAF_OLD DisplayName=Royal Flying Corps [Nation022] Name=USAS_OLD DisplayName=US Signal Corps Aviation Section ALIAS.LST Insignia021.tga Insignia003.tga Fuse021.tga Fuse003.tga Insignia022.tga Insignia001.tga Tail022.tga Tail001.tga you can try extracting the second decal (objectdata.cat) on each line of the ALIAS.LST to your object/aircraft folder and renaming them to the first decal on each line bypassing the ALIAS.LST worth a try anyway i will try to have a better look in the next few days... (busy weekend) good luck :yes: