


33LIMA
-
Content count
3,749 -
Joined
-
Last visited
-
Days Won
7
Everything posted by 33LIMA
-
From the album Steel armor - Blaze of War
-
Learning a hard lesson in Wings over Flanders Fields! 'Knights of the Sky', they called them, the aircrew of the First World War. They fought their jousts above the battlefield, in personal combat with their foemen, their flimsy mounts often bedecked with the sort of personal markings or colours that would have marked out the mounted warriors of a bygone age - the so-called Age of Chivalry. Most of us have heard of the fellow feeling sometimes displayed between aviators on opposite sides, notably in WW1, when aircraft were initially unarmed (barring side-arms). When, at first, enemies met in the sky, the encounter was as often marked by curiousity and perhaps a comradely wave, as by hostility and the exchange of gunfire. Well, that didn't last long, and by the war's end, fighting pilots thought nothing much of gunning down an unspecting foe from behind, whenever they could. Examples of chivalrous or sporting conduct were sometimes still reported, though, like Ernst Udet's famous solo fight with a French ace he believed to be Georges Guynemer, which ended with the latter waving farewell after seeing that Udet's guns had jammed. The less romantically-minded might have concluded that Udet's foe was beset with similar problems, rather than motivated by a chivalrous reluctance to knock down a worthy foe in other than a fair fight. By all accounts, much of the time, things were rather more ruthless; as I was to find for myself, thanks to my latest campaign mission in Wings over Flanders Fields! The mission It's early on the morning of 14th May 1917, and apart from some clouds, the weather is fine and clear. I'm leader of 'B' Flight in No. 56 Squadron, based at Vert Galand, and this is my third show. It's a Line Patrol up to the trenchlines, in this case slightly south of east, opposite the major town of Cambrai in the German side. 'A' Flight is joining us on this trip, so there are nine S.E.s on the flight line - I'm leading five of them and 'A' Flight has another four. You can see from the picture below that we have several 'historical aces' with us (visible from their machines having a 'skin' of their own, not just the default one for 56 Squadron). And I've decided to pick a skin for myself, from the many avaiable. In fact, I've chosen the markings of Albert Ball - as he was killed a few days before, there should be no chance of seeing a duplicate, today. My machine, A4850, looks unusual because of its white centre section. Here, Ball, in modifying his S.E.5 to his own tastes, had the prominent 'raised teardrop'-shaped gravity fuel tank removed, and a more conventional centre section fitted - a modification copied by the rest of the squadron, and standardised on the production lines. This was how A4850 appeared when photographed in England; I don't know if the white was overpainted in France, but in WoFF, it makes for a nicely distinctive colour scheme. Amongst the pilots accompanying me in 'B' Flight are two aces. One, with a red crocodile on the nose, is Eric Broadberry. I'm not sure who the fellow with the completely red-nosed machine is, but the other members of my flight are Barlow, Hoidge and Maxwell, all real-life aces, so it's one of these three. The first excitement of the day comes over the town of Bapaume, about half-way to the front. We're at about eight thousand feet and climbing gently, when I see three specks in a clear patch of sky, about three-quarters left and somewhat higher. They seem to be flying west, deeper into our territory. They could be our people, returning from a sortie, but as I watch them, I notice faint grey puffs in the sky nearby - British AA fire. That seems to settle the matter. These are Huns. As I watch, one of the Huns dives and comes towards us. The other two stay high, but also turn in our direction. This feels a bit dangerous, as if they are setting us up for a co-ordinated attack. Hun scouts shouldn't really be so far over our side of the lines, but these particular people seem to have their own ideas. I pull up and bank around as the lower Hun runs in, giving the boys the order to attack as I do so. The Hun flashes past below me, at which point I see that he is in fact a Roland, a two seater. These were fast and advanced machines when introduced during 1916, although back then, the man whose machine I'm flying today rather specialised in knocking down Rolands, describing them as 'the best German machine now'. In mid-1917, they haven't got much longer before being withdrawn from active service on the Western Front. And they should really know better, than to try to tangle with a larger formation of modern single-seaters. Perhaps they mistook us for obsolete B.E.12s. If so, I hope we'll give them a nasty surprise. But it's me, who gets the first nasty surprise. In my effort to level-turn sharply after the Roland while staying above him, I push my S.E. too hard, and spin out. This gives the Hun the opportunity to turn the tables, which he duly does. By the time I have recovered, he's coming for me. However, by pushing my nose down as I come around, I manage to get out of his way and then turn inside him. This is more like it! By this point, I've briefly committed the cardinal sin of losing track of the others. But I go for the Hun, relying on the fact that I have four other S.E's in the air nearby to keep the other two Rolands occupied. In the picture below, you can see two other aeroplanes up above, just left of the drum of my wingtop Lewis Gun. But at the time, I had eyes only for my Hun. I get my sights onto the Roland and crack out a few short busts. This does the trick. The Roland rolls over...and dives away hard for the ground. He recovers, and I spiral down, thinking that I'm going to need to make another attack. However, the Hun falls into a series of spins and finally crashes into a cornfield by a railway line, just west of Bapaume. I pull up in a spiral climb at full power, finally clearing my tail. But the only machines that I can see around me are the other S.E.5s of 'B' Flight. Soon, all five of us are back in formation. I look around for the other two Rolands, just in time to see two specks disappear into a cloudbank to the north-west, a good deal higher up. I'm slightly miffed that the others don't seem to have had any luck with them, but I'm glad all the same that there have been no friendly casualties. I decide that rather than get into what's likely to be a long and uncertain tail chase, I'll leave the other Rolands and resume my mission. 'Selection and maintenance of the aim', and all that. I climb back up, and by the time we are nearing the front, we are at just over ten thousand feet, nearly as high as the summits of the big cloudbanks nearby. Reaching the lines, I wheel around and we begin to patrol our beat, up and down above the trenchlines in our appointed sector. So far, so good, but it's early days yet. ...to be continued!
-
Sportmanship takes a back seat! The onrushing five aircraft are, of course, Huns. In fact, they are Albatros D.IIs, readily distinguished from the more modern D.IIIs by their parallel, rather than V-shaped, interplane struts, and their square-cut wingtips. Happily, I get a burst into the leader as our two formations come together, forcing him to pull up and out of my way. A glance behind shows the two flights merging, as I give the attack order and re-focus on the fellow I have hit. Not to be left out, Archie is now blazing away into the middle of it all, silly fellow that he is. By this time, I'm pulling hard around to get after my intended victim. I get in another burst and am gratified to see the Albatros apparently dropping out of the fight! This is where I begin to come unstuck. In my haste to get onto the Hun's tail, I fluff my turn. In many WoFF aircraft - Albatrosses and Nieuports come to mind, as well as my present mount - ailerons have little effect, in producing a turn - you need a good dose of rudder, not just to balance a turn but to get and keep it going. This is much more pronounced than other sims I've 'flown', WW1 or otherwise. Not only that, but often, when I'm in a turn, I seem to hit a 'hard stop' at about 45 degrees of bank - further stick deflection to the side will not roll me beyond this. It's not quite adverse yaw, where aerodynamic forces can roll you out of a turn, in the opposite direction. I think this hard stop may happen when I don't use enough rudder - it's hard for me to get into the WoFF rudder habit as it's not the only propsim I 'fly'. It's like I have allowed my plane's nose to drift high, out of the plane of the turn, so that an increased angle of attack or greater lift on the lower wing is preventing it going down any futher. To break this, I usually either back off the turn and apply the correct rudder to get it going again; or, if I'm high enough, push the nose down really hard, so that I go into a steep downward spiral, which enables me to get the nose around the turn, but with a realtively huge loss of height. This time, I make matters worse by spinning out of my turn. By the time I recover, my intended victim has got away. Worse, a friend of his is now having a pop at me. The first I know of this is the sound of bullets zipping and whacking into my S.E.5. Looking behind as I try to get out of the line of fire, I see him boring in. By pushing my nose down again, I manage to tighten my turn - this time, without inducing a spin - to the point he starts slipping wide. Now, to turn the tables! But it's not to be! Suddenly, I can feel the power and hear the sound of my engine fading away. My machine begins to decellerate. Soon, I'll be flying a glider, and this is no place for that. I dive away with what speed I have, and quickly come around till I'm heading west, towards relative safety. I'm still over No Man's Land, but it looks like I have a fighting chance of making it to our trenchlines. But first, I need to get clear of the dogfight. At this point, my engine dies completely and my prop spins to a halt. I push the nose well down, to build up speed before levelling out on my run for home. I usually leave the Tactical Display turned off, except to initiate padlocking, but now, I turn it on, the better to keep tabs on my recent assailant. This reveals two things, neither of them terribly welcome. First, I see that I am still some way short of the middle of No-Man's Land, indicated by the crooked black line across upper part of the display. And it tells me that my foe is no beginner - he's an historical ace, Hans Auer (according to the Aerodrome website, at this time serving with Jasta 26). It's worse than that. Leutnant Auer, it seems, has no intention of taking a chance on my reaching friendly territory and living to fight another day. He slips in behind me and starts pumping nickel-coated lead into my near-helpless machine. So much for chivalry! Would he have relented if I had opted to force land where I was, behind German lines? I have no intention of finding out. Instead, I jink as best I can, at the cost of more of the precious altitude that I need to expend my glide far enough to reach safety. My tormentor overshoots, but wheels around to come in for another crack at me. My S.E. survives more hits from his next burst, but catch a bullet wound in the process. Before he can attack again, I run out of height and plonk my kite down onto the shell-scarred ground. By some miracle, the terrain here is reasonably level and I manage to get down without a wreck. And to my boundless joy, I find that I am on our side of the lines! Looking up, I see Auer fly off to the east, through blood-spattered goggles. Was he put off by MG fire from our trenches? I didn't see any, so perhaps I should be grateful that he wasn't so unchivalrous as to strafe me on the ground. Perhaps I'll have the opportunity to discuss the matter with him on another day, I tell myself...preferably, with my guns doing the talking. I'm mollified somewhat to find that I'll be back at the front after another short spell in hospital, and that I'm not the only one in 'B' Flight to make a claim today - Hoidge got one, though also lightly wounded, as did old Broadberry. I submit my claim form, noting witness name, type brought don, location, height and time. Hopefully, all three of us will get confirmations. We'll certainly be able to lord it over 'B' Flight, who missed all the excitement and fired not a round! It's hard to believe I'm just three missions into my 56 Squadron campaign. I've certainly had an eventful enough time of it, a heady mixture of experiences - flight-leading; navigating across a convincing WW1 landscape, with suitably majestic visuals; scanning the skies; being 'Archied'; the suspense from sightings of other aircraft, friend or foe, going about their business; manoeuvring my flight to best advantage; the thrill of combat; the fight to survive, and bring my boys home too, if I can. Wings over Flanders Fields certainly brings it all to life...if those darned Huns let you live long enough!
-
Over the front! Having reached the front, I’ve swung ‘B’ Flight around, to follow the trenchlines back up to the north-west. In doing so, like a sentry on his beat, I've turned towards the enemy, into Hunland, so as not to expose our backs to the enemy. This brings me closer to the large town of Cambrai, near to which are several German airfields. There’s no sign of aerial activity, though, but as if to make up for it, we are heavily 'Archied'. The black bursts of shellfire fall sufficiently close and thickly that I fear somebody will be hit, so I throw in some changes of height and heading to fox the gunners. Soon, the fire becomes more scattered and less intense as the range increases, and we all appear undamaged, much to my relief. After a few miles, I decide it’s time to reverse our course and patrol back down the lines. But as I’m about to turn about, I see several dark specks in the sky up ahead. All I can tell is that they’re not drawing ground fire, and are just inside Hunland but drifting slowly to the west, towards our side of the lines. They could be friend or foe. Hedging my bets, I adjust our course so as to cut them off. They’re slightly lower, so I maintain my height, with the intention of still having that advantage when I get up to them. The unidentified aircraft slip over onto our side of the lines, then begin to turn left, drawing steadily closer. Soon, I can make out that there are four of them. They seem to be making a wide left turn which, if held, will take them back into Hunland. I adjust my intercepting couse accordingly. Whoever they are, we won't be long in finding out. They could well be our boys, but if not...well, it does no harm to err on the side of caution. The specks grow bigger and become biplanes. It’s not long afterwards that I decide they look like S.E.5.s, just like ours. A closer look confirms that they're ‘A’ Flight, flying the same patrol but not seen since a few minutes after take-off. The other S.E.s pay us no particular attention, but slowly swing around in their wide left-hand turn, until they are headed back down the lines to the south-east. That’s where I’m going, too, so I tag along, slightly higher and to their right. Nine S.E.s should be enough to give any bunch of Huns we're likely to meet a fairly hot time. In fact, I begin to worry that the enemy might be put off from making an appearance. So, when we reach the point where we originally reached the lines, opposite Cambrai, I turn around again, and let ‘A’ Flight continue on to the south east. This time, we're more or less directly over the lines, a little further away from those nasty men on the ground who shelled us heavily, the last time we passed this way. Cambrai, sitting just outside the shelled area, can be seen to the centre left of the picture below. I'm hoping we will be far enough away to escape Archie's attention, this time. We're not fired on, but it seems that other hostile eyes may be watching us. Right and ahead, at about the same level and well on the enemy side of the lines, I notice a cluster of dark specks. As I turn into them, I can see that they have already opened out, which indicates that this formation is rapidly drawing closer. In fact, they seem to be coming straight for us. This doesn't look terribly friendly! ...to be continued!
-
From the album Steel armor - Blaze of War
-
From the album Steel armor - Blaze of War
-
From the album Steel armor - Blaze of War
-
From the album Steel armor - Blaze of War
-
From the album Steel armor - Blaze of War
-
From the album Steel armor - Blaze of War
-

From the album Steel armor - Blaze of War
-
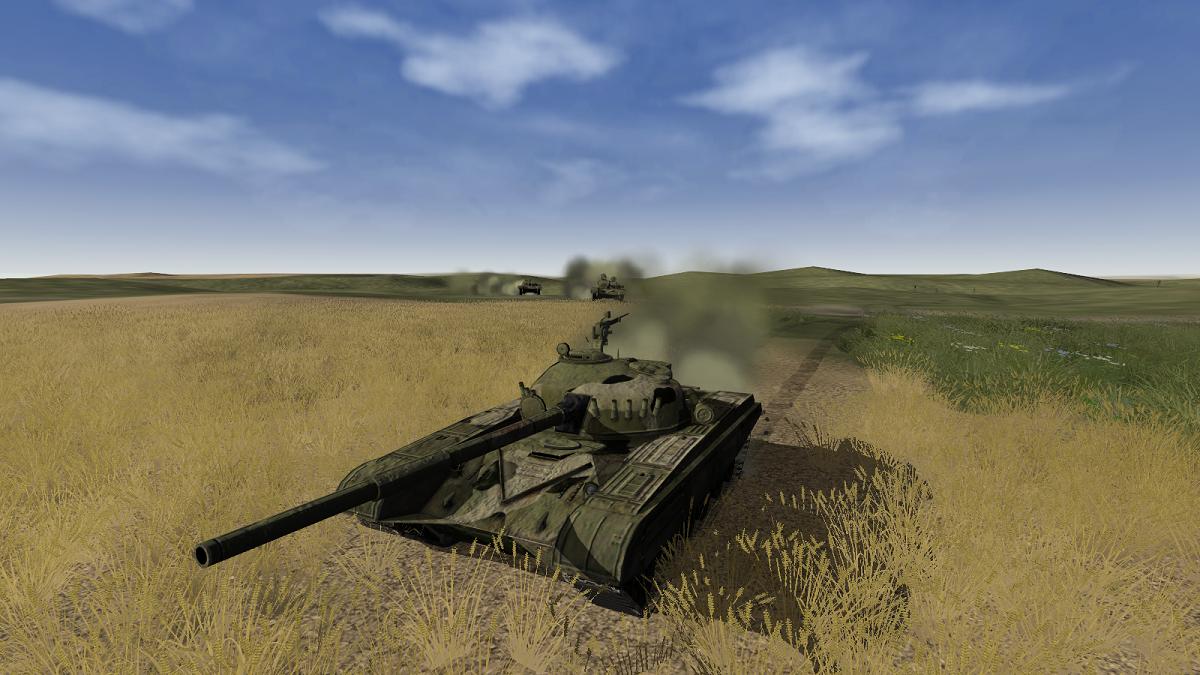
I give myself a fright, in my second Ostfront campaign battle! Having gained ground on my first mission, in my effort to sieze bridgeheads over the river Mzha at Pavlovka, I'm keen to use my gains as a springboard to get over the river and give the Soviet 104th Motor Rifle Brigade another bloody nose. As a newly-arrived kampfgruppe commander in Das Reich, I'm also keen to prove myself, though anxious not to foul it up, either. And it looks like I am about to be given ample opportunity to make a mess. For some reason, the mission 'briefing' credits us with capturing a bridgehead - perhaps something is lost in translation here, as the best we have done in my sector is to reach the river on our side, not actually get across it. But my real problem now is that Ivan is reported to be throwing a tank brigade against us, from the north-east. I don't know what sort of tanks they have, but this really doesn't sound good. Nevertheless, if at all possible, I want to throw some troops over the river, before going over to the defensive to meet this counterattack. I'm hoping that my own heavier armour will have arrived on the scene by now. But my hopes are dashed when I find that they are still not deployable. All I have is the same re-inforced Grenadier (infantry) company to the west of Pavlovka, and the Panzer Pioneers who fought my first battle, now depleted by the loss of one of their SPWs. A look at the map shows there is a small pocket of Ivans to the south, but I'm more interested in pressing on than wiping them out. Nevertheless, in moving my Panzer Pioneere towards the river, I keep one platoon in reserve, to the east of the little pocket, where it can contain them...or perhaps destroy them, if the opportunity presents itself. On my left flank, I move my footsloggers west, heading for Pavlovka. In GT:OS, there are limits as to which squares (even within move distance) you can move a platoon onto, and in this case, my rear platoon, near the river bank, is left trailing behind the lead platoons. I can see that these fellows are going to be quite isolated until they can close up with the rest of the company, but I'm in a hurry, and accept the risk. Which I am about to be given cause to regret. These moves trigger two battles. To the east, a Soviet counterattack is coming in at the point where my Grenadiers and Pioneers have come together. This one doesn't worry me unduly, as it involves infantry only. But on the left, as luck would have it, more bad boys from the 104th Motor Rifles have decided to go for my isolated Grenadier platoon, which has reached a wood to the west of Pavlovka, close to the river. I took a chance, and now I'm going to have to pay the price. I have visions of the Ostfront equivalent of Custer's Last Stand, a platoon wiped out that I will surely miss later. I put such thoughts aside, and choose to fight this battle first. At least this time it's daylight, and I'll be able to see what I'm doing. Time for the Das Reich to show the Bolshevists what we're made of! ...to be continued!
-
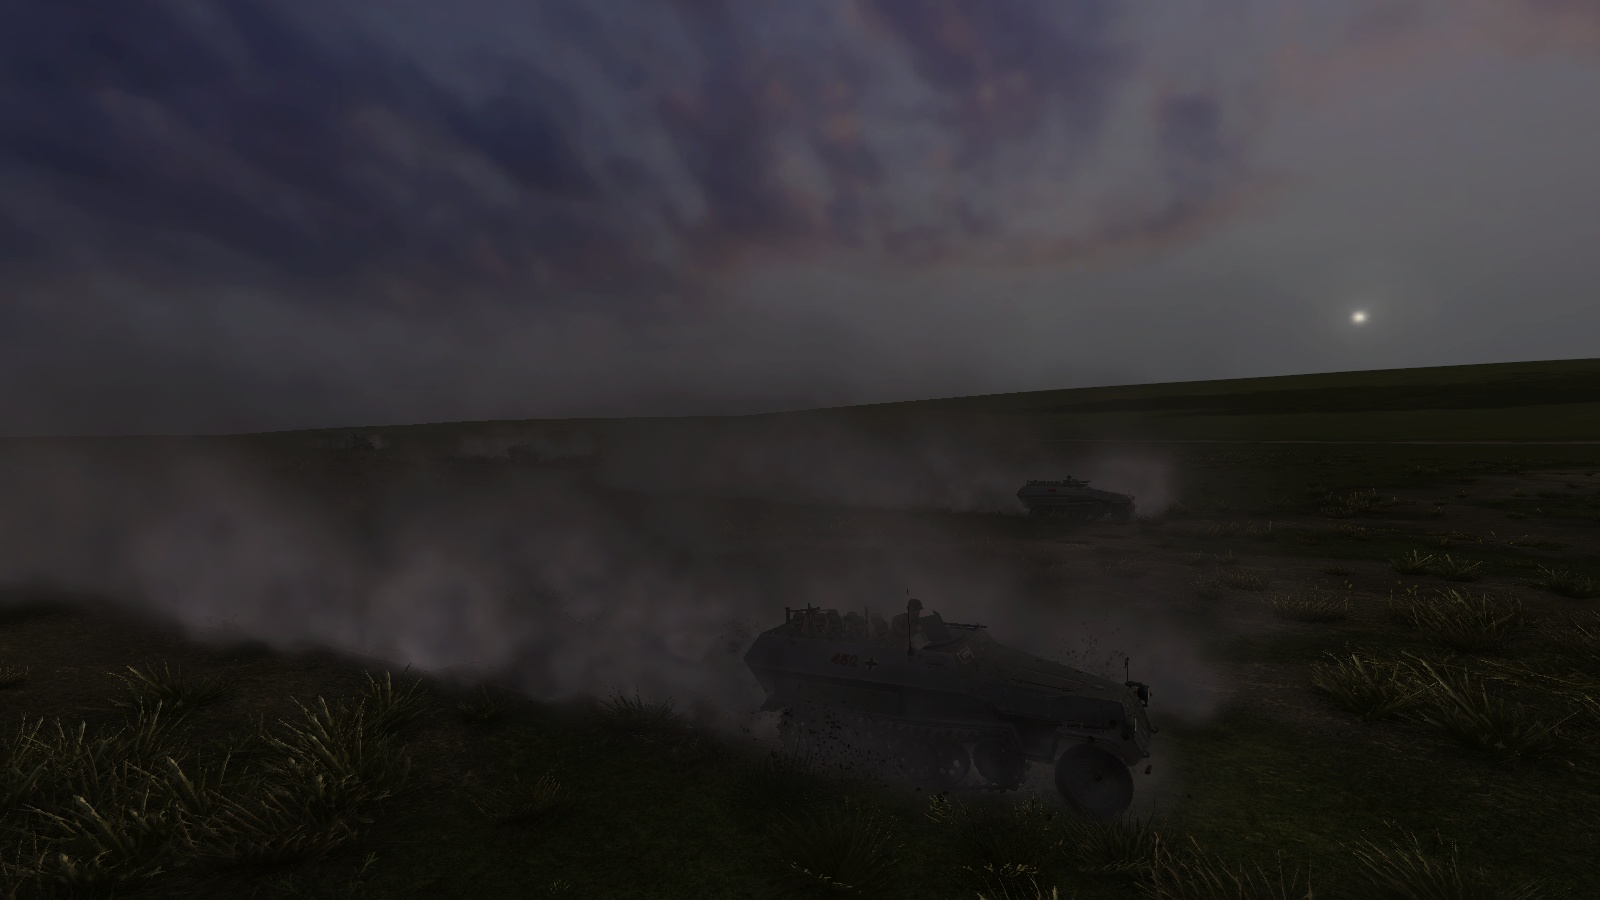
The Russians are coming...again... There's a bang amongst the mounting rattle small arms fire, and a dark fountain of earth springs up in the open ground to the north-east of my little bridgehead, across which the Soviets are advancing. I realise my kanonenwagen has joined the fray. She's firing from the position down by the river to the right, where I'd moved her to provide a good field of fire into my killing ground. The enemy is not the human wave I feared, more like a fighting patrol, maybe weak platoon strength. From what I can see of them, the Reds are working their way forward in short rushes, pausing to fire their bolt-action Mosin-Nagant rifles and PPSh submachine guns. The combination of disciplined fire from my Grenadiers and HE rounds lobbed over by the kanonenwagen cuts them down as they try to cross the open snowfields. Like the poor fellow below, who has slumped to his knees as the flying dirt from the HE round which got him falls back to earth all around. Next second, he groaned and slumped forwaed onto the snow-laden soil of Mother Russia...or rather, considering where we really are today, Mother Ukraine. I try to set up a mortar shoot, but fumble the drill half way through and the rounds are never fired. Fortunately, they’re not needed. The attack withers away. Taking advantage of a lull in the combat, I adjust the positions of my three sections over the bridgehead, pushing them slightly further out, towards the edges of the wood. And I bring platoon HQ over the river to join them. Another group of enemy infantry is reported emerging from the treeline further to the east, but this effort is just as feeble at the first attack, more infantry without and supporting fire. It’s not for want of courage that it fails. The Reds make a very determined attempt to get at us, across the open ground. I don’t know whether they are near-fanatical patriots, have been well topped-up with Vodka, or have Commissars behind, threatening to shoot anyone who goes back. Maybe all three. But from what I can see, they won’t stop until we drop them in their tracks. Some of them nearly reach my foremost positions, before crumpling into the snow. As usual, I’m relishing being able to play from a ground level view, with all labels and markers turned off, switching to the full-screen map view to check contact or other reports, give orders and in general, to follow the ebb and flow of battle. Not for me the God’s Eye view, or markers turned on. It’s less convenient and more confusing, certainly but it feels a whole lot more real. If I could, I would pass a law, effective world-wide and imediately, outlawing the incorporation of a God’s Eye view in PC wargames. Why? Well, to compel developers to ensure that their games are fully playable without it. A well marked-up map should be more than enough. PC wargames should simulate war, not a wargame. But I digress… We have now defeated two waves of attackers – quite small waves, admittedly, but defeated they’ve surely been. And not only has the counterattack been beaten off, we’ve secured a bridgehead over the Mzha in the process. Not where, when or how we originally intended – the plan was to seize the bridges on the far, eastern side of Pavlovka, or at a pinch, the ones in the village itself. But the opportunity presented itself, and we took it. How the kampfgruppe adapts its plans to this development, will be something I’ll have to think about in the next turn. I do know that it would be good to get a bridge or two as well, rather than relying on a ford which I still haven’t established is passable to any kind of vehicles. By this time, the clock is counting down towards the end of the turn. A last ‘crazy Ivan’ is shot down as he makes a hopeless rush towards our bridgehead, his demise observed through binoculars from the position of the kanonenwagen. Then, all is still once more. The troops in the bridgehead begin to relax. There seem to be two casualties here, regrettable but modest enough for the outcome. By contrast, the field in front of us is liberally sprinkled with the enemy's dead. The results screen credits us with a minor victory, which I think is fair enough. We haven’t taken any key points, but have inflicted significantly more casualties than we suffered; albeit that's clearly a reflection of our greater strength and firepower. And we’re over the river. Considering that I started the battle fully expecting to be wiped out, I’m more than content with all this. As in fact I am, with the mission itself. I wouldn’t like it in real life, if every operation resulted in a desperate fight to the death, killing or wounding many of my men. Nor would real armies last very long, at such rates of attrition – as Phyrrus of Epirus supposedly said after one of the kind of victories named after him, ’Another victory like that will be the end of us’. Or words to that effect. So I don’t much like that kind of fight in a simulated campaign either, where losses are cumulative and resupply is nether automated not guaranteed. The interest and the challenge of planning and conducting a simulated military operation, as part of an interwoven series of such operations, is what I’m liking most about GT:OS. The battles which result are just a part of that experience; the icing on the cake, almost. I really appreciate the time and the space that GT:OS is providing me, in my efforts to apply something akin to realistic military drills and solutions to simulated military problems. The antithesis of the click fest, if you will. The uncertainty and the anticipation are as immersive as the flying tracers and the booming shells. I’m sure there will be more desperate battles at some point, when it’s the enemy, not us, who has ‘Got there firstest, with the mostest’, when we are swarmed by T-34s, or perhaps human waves with fixed bayonets. But that’ll be for another day. Now, I need to get over to the east, where my kampfgruppe's main force has also been engaged. Is this another desperate attack by penny-packets of infantry from the hard-pressed 104th Motor Rifles? Or something altogether more dangerous? Whatever it is, I need to deal with it quickly, then get across those bridges, before the advance guard of the 195th Tank Brigade, reported coming down from the north-east, threatens to turn the tide of battle against me. Suddenly, that staff job I left behind in Berlin just a few days ago is but a distant and fading memory! Before I dash off to rejoin my Panzer Pioniere at Pavlovka, I want to share some links to the best GT:OS videos I’ve so far found. They are by Guetapens, and (with an EMB graphical mod, I think) nicely illustrate how the battles look (and sound), when played as I play them, from more realistic viewpoints - and without those intrusive labels. The clips also depict some neat touches, like the ability to lock the camera to an individual vehicle or soldier. This is surely Graviteam Tactics: Operation Star at its very best! And that is very, very good indeed!
-
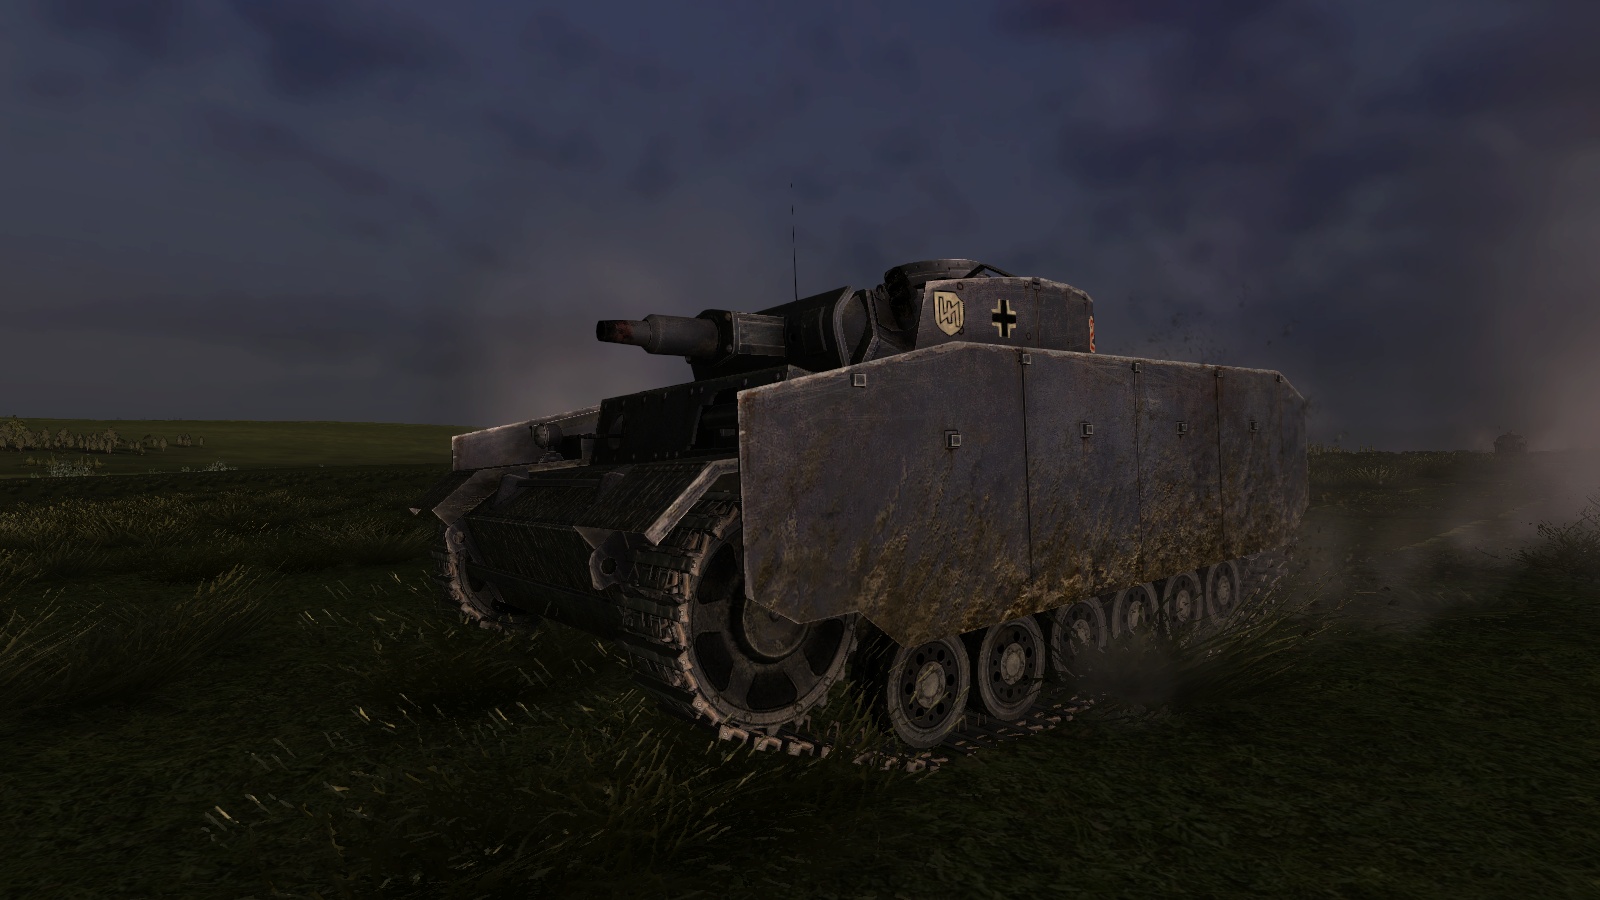
Watch your arcs! I waste no time in orienting my Grenadier platoon to meet the expected attack. We deploy inside the wood, in a flattened triangle with its base at right-angles to the direction of the expected incursion, and platoon HQ roughly in the middle. I keep all four sections/squads back from the enemy side of the wood. Long lines of view and fire work in both directions! My plan is to hit the enemy as they enter the wood, from close range, using the depth section for local counterattacks as the opportunity arises. If we need to re-orient, the woods will provide some cover. If there’s a way of deploying scouts as OPs closer to the northern, enemy edge of the wood, I don’t know what it is, but the leafless trees are fairly sparse and we have some visibility towards the far side of the river, from whence the attack will likely come. The good news is that I have some armoured fire support – a half-tracked SdKfz 251/9 kanonenwagen, mounting the same short 7.5cm gun as early Panzer IVs and StuG IIIs (and the last model of the Panzer III). I position this in the middle, well covered by infantry, and set his priority arc of fire. We haven’t been here long enough to dig in, but I give everybody the order to stay concealed and defend. This is my virtual persona, the grenadier platoon commander, and he looks a bit worried, for reasons which are perfectly understandable. We’re on our own out here, the rest of the reinforced company having pressed on to the east, towards Pavlovka. There’s a lot hanging on the poor fellow’s shoulders. We wait, then wait some more, for something to happen. Nothing does. After another few minutes, deciding that hiding in the middle of the wood like an ostrich is, perhaps, not such a wonderful idea, I push my troops a little further north, in case we’re missing something important, and to give me fields of fire down towards the river obstacle, just to the north. But still, nothing happens. Right, that’s it! I’ll be dammed if we’re going to sit here all day, waiting upon Ivan’s pleasure. Our kampfgruppe’s mission is to seize crossings over the Mzha. And one such crossing - a ford. by the look of the map - is but a short distance directly north of us. I might as well make a dash for it! If the enemy attack comes in, well, then we’ll meet it from a bridgehead on the far bank. Let’s do it! From the map, I plan my move. First, I order two sections and the kanonenwagen up to the northern edge of the woods, to cover the crossing. Then I order two other sections to leapfrog them and cross. I am a bit wary of the crossing itself, but the leading section is able to walk over the evidently-frozen river at the site of the ford. The other section reaches the bank further east, and without needing any prompting, decides to stick to the ford, turns left to reach it, then follows the leading section over. Good work, meine herren! I spread out the two sections in a rough, flattened arc, in a straggling patch of trees on the far bank, facing north-east. Then I bring a third section across, and slot it into the gap on their right, nearest the river where they are mostly in dead ground. Platoon HQ, the fourth section and the kanonenwagen I place on the southern bank, to cover the troops who’ve crossed the river. Right – now get down! Take cover! And watch your arcs! No sooner have I begun setting the aforementioned arcs, than small-arms fire breaks out to our front. Contact! Enemy front! Give me an effing minute, will you, I just got here, I tell the unseen Reds, in my head. But I know I'm lucky - a minute or two earlier, and they'd have caught us on the hop. Well, come and have a go, if you think you're hard enough! We're the Das Reich, and now, we're ready for you! ...to be continued!
-
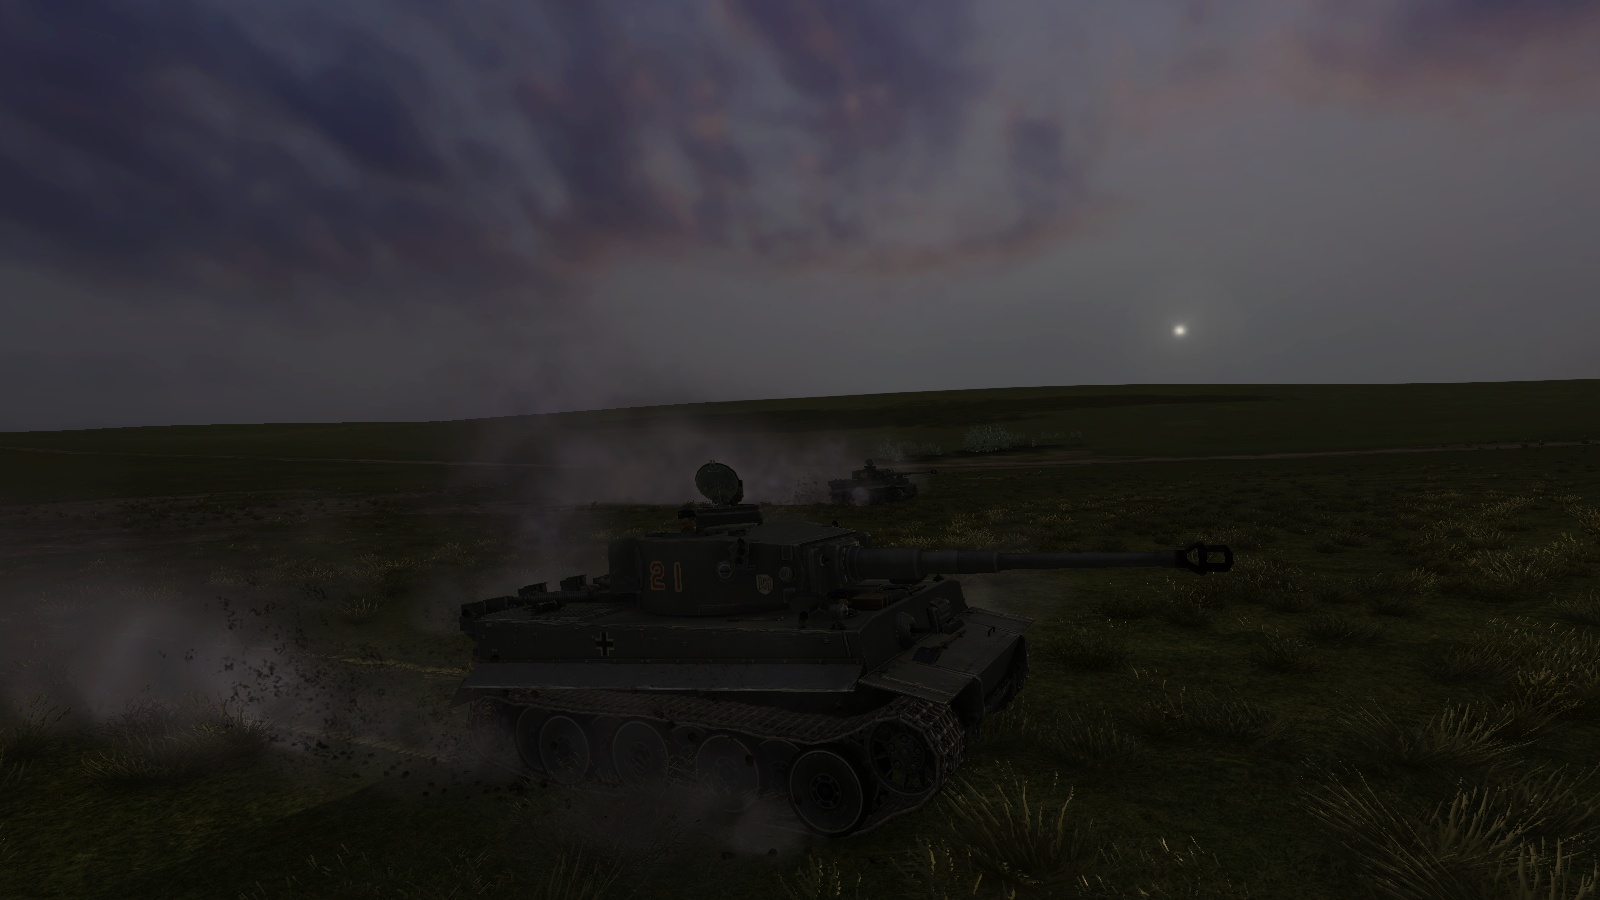
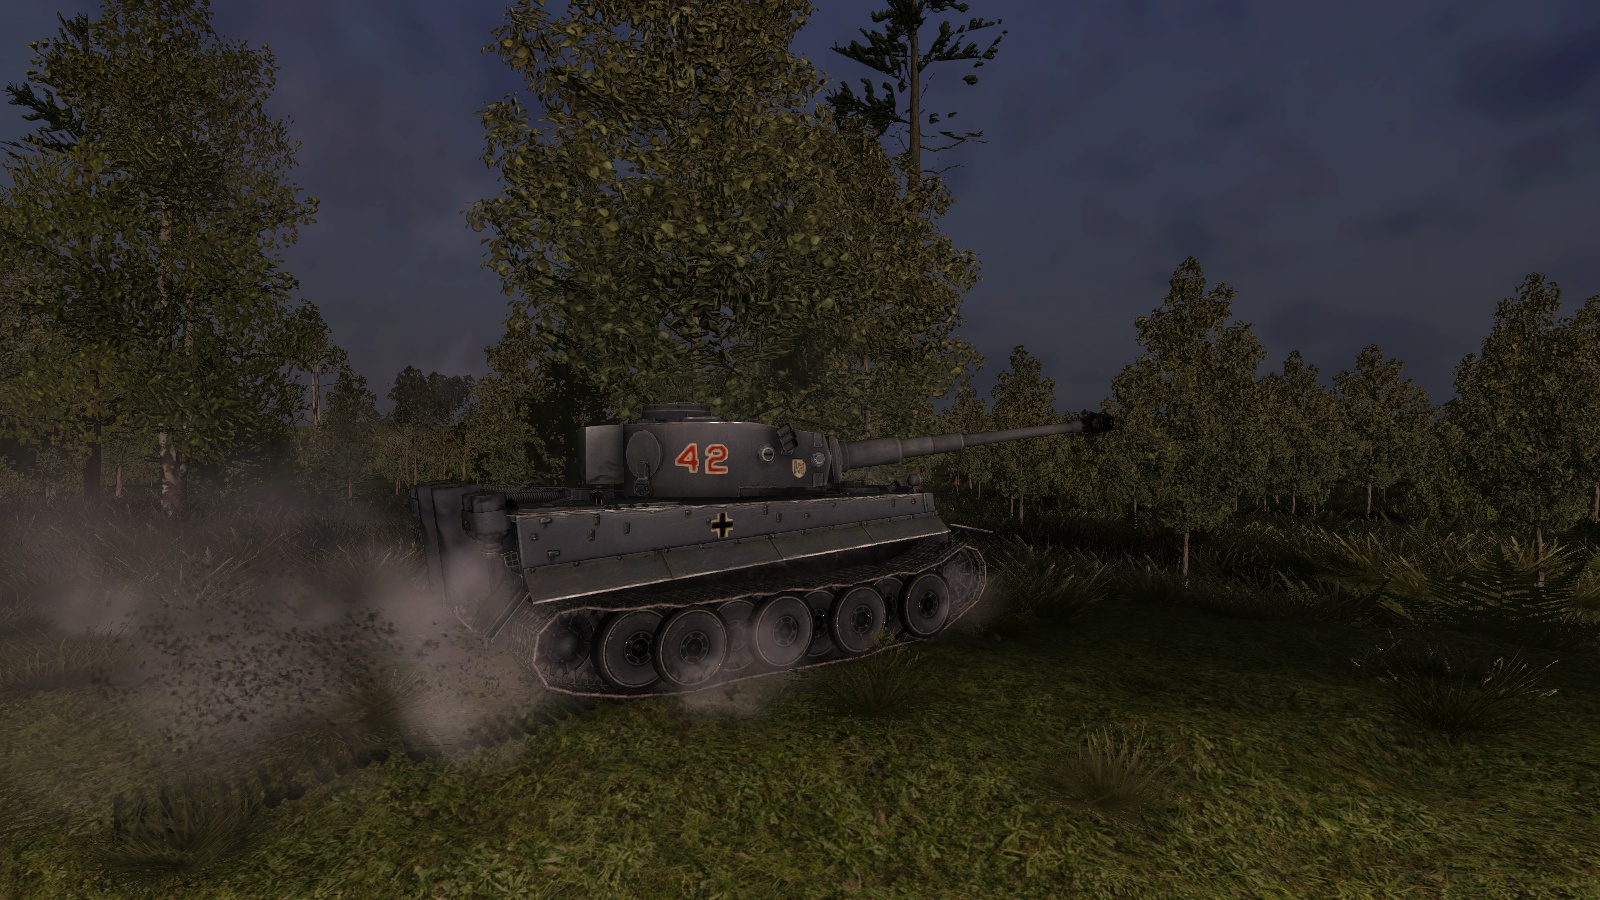
A first campaign in Graviteam's classic wargame Picture it for yourself. It's late winter 1942-43, just after the German disaster at Stalingrad. You've been recalled to the Eastern Front from your cosy staff job in Berlin, and assigned to the command of a battalion-sized battlegroup in your former division, 2nd SS Panzer Grenadier Das Reich. No sooner have you arrived, than you're pitched into the deep end, as your kampfgruppe is already fully committed. Your first mission is to throw the Reds out of a small riverside town and sieze some crossings. So get a grip of your command, study your maps, and make a plan with your staff. And make it fast - there's a war on out here, you know! That's about how I felt, taking on my first campaign in GT:OS. In fact, my first mission, apart from a couple of quick battles, mainly to try out the modern AFVs in the WW2 battlefields. True, playing Steel Armor - Blaze of War (SABOW) has taught me some basics, but that just scratched the surface of the sophisticated command interface of Graviteam's magnum opus. So it was with a mixture of excitement and trepidation that I approached my first campaign battle. I confess that I am rather more interested in western front action, preferably including Normandy, or North Africa at a pinch; though I've read my Guderian and my von Mellenthin, Craig's Enemy at the Gates, even Plevier's novel Moscow. And I know well enough my BTs from my KVs. But GT:OS's WW2 experience has remained firmly rooted on the Ostfront. So having picked up the base game and no less than 8 DLCs in an epic BundleStars sale, I knew the time would come when I went east. And this is that time. The campaign and the mission I know enough about the Eastern Front to be well aware that T-26s and BT-5s or 7s aren't too much of a problem for 1941-era German tanks and A/T guns. But if the Red Army of Peasants and Workers brings along some T-34s or KV-1s, it's not quite so much fun, playing Wehrmacht. So I decided to run with a later campaign, settling on what's described as the 'Kharkov Defence Operation, 2-15 March 1943'. I think this one comes with the base game. The missions ('operations') in this campaign swap between playing for each side, and I opted to start, not at the Soviet beginning, but at the third one - Pavlovka. Its entry featured a picture of Tiger tank, which I took to indicate that I might actually get to play with some of these beasts. I know that 8.Kompanie, SS Panzer Regiment 2 had some Tigers as early as February, some months before the formation was elevated from a Panzer Grenadier to a Panzer Division. One of 8.Kompanie's Tigers is quite well known from photographs - 812, delivered in 'panzer grey', given a temporary white winter paint job on arrival, and later treated to what's interpreted as dark yellow stripes over the grey. And at some point christned 'Tiki', as seen below. According to the excellent Mig Jimenez colour profile book Waffen SS Colors, 'Tiki' is a contraction of 'Tiger kind' (tiger child) and was inspired when the Kompaniefuhrer said to the new Tiger's crew, 'That is now your child, take care of it!' As usual, a GT:OS (or SABOW) mission kicks off with the sort of 'operational' level screen shown below. I've chosen to use NATO unit symbols and to colour-code friendlies as blue, enemies as red (the latter all shown as question marks at this stage, as the enemy strengths and dispositions are so far unknown). While at this map, you can, within limits, elect to move any deployable friendly forces - which excludes those in the grey margins of the map, which are 'arriving' but not yet deployable. the screenshot was actually taken after I had made my moves (indicated by the blue arrows). The 'briefing' is top left. In armies, commanders are given orders, not briefings, and these typically contain a lot more information than you get in any GT:OS (or SABOW) briefing I've ever seen. It's more of a general directive, which may be adequate in some situations but lacks much of the info I should have as a commander in this situation, like who I am, what forces I have, what artillery and air support is available, what's known about the enemy and so on - Ground, Situation, Mission, Execution, Service/Support, Command & Signals in NATO format. You are left to glean as much as you can of this by studying the map. Which is quite a lot, and thus ok up to a point. And it may be hard to script more formal orders for the dynamic GT:OS campaign. But this rather lacks the sense of person and place which you get from a more role-playing approach to a commander's...well, role. That being as it may, I was about to discover how, from this so-so start, GT:OS grabs you by the proverbial short and curlies and immerses you neck-deep in an authentic-feeling and beautifully-rendered battlefield, in the role of a company-to-battalion-level commander in a desperate fight against a determined, unpredictable and at time invisible enemy. They told me GT:OS was this good, and I was about to find out that they did not lie. My mission is to kick the retreating Soviet 104 Rifle Brigade out of Pavlovka and grab some river crossings, which is clear enough. For this task, while the greyed-out oval-in-blue-rectangle symbols to the left in the map above indicate that tanks may be available to me later, for now, my forces are limited. And rather un-concentrated, to boot. On the left, I have five Grenadier platoons (unarmoured), roughly a reinforced company. In my centre, to the south east, I have have three Panzer Grenadier platoons (I have already moved them north-east, and the Grenadiers west, in the pic below, which I'll explain in a moment) . Actually these troops are Panzer Pioneers, assault engineers. If I'd not been in my customary rush, I could have checked out their detailed organisation, but I decided to see for myself, at the deployment phase. Suffice to say that they were, as expected, equipped with SdKfz 251 half-tracked SPWs (Schutzenpanzerwagen=APC), though not of the specialised 251/7 variety usually issued to engineer units, with their little side-mounted bridging sections. So, to a plan. Sensing that Division is unlikely to be happy if I wait out this turn till the tanks and other forces come up, I decide to launch concentric attacks from east and west, with the forces I do have. On the west, the Grenadiers will advance directly into the Soviet salient south of Pavlovka, with their left flank protected by the river Mzha, while the Panzer Pioneere, starting in my centre, will move north-east then north, from where they can either catch the Soviet salient in a pincer, or drive north towards the nearest Mzha crossings. Yes I know - I'm opening up the gap in my forces, but not by a lot, and I think this is preferable to butting up everything directly against the salient, where the main enemy strength might well lie. The player having made his initial moves, GT:OS then determines if a battle has taken place, which the player then fights. That is what has happened here - the large, unfriendly red arrow spearing into my freshly-positioned Panzer Pioneere from the Soviet salient indicates a counterattack is expected, and the flame symbol calls me to fight the resulting battle. Here we go! ...to be continued!
-
Go! Go! Go! I quickly make my plan. The company will attack due west into the enemy salient, two up – a platoon on the left, another platoon on the right, and the third behind, in depth. While you can issue orders to individual units to squad/section level in GT:OS, sensibly the default is platoon. So all it takes is a click to go to the map, at which point the orders panel (bottom right, in the pic below) becomes available (I turn this off in the 3d world). Another click selects a platoon; a third selects the ‘attack’ order (one more will select formation, if needed); and a last click designates the objective on the map. Repeat, for each of the other two platoons. Soon, all three are moving out as ordered. Distances are relatively short, so I have kept everybody dismounted. A report comes in of a contact with some kind of enemy towed weapon to the west, but by this time the attack is in full swing, the fine blue lines on the map below indicating the move directions of my three platoons. I switch back and forth between map and 3-d worlds as my force advances. We’re leaving behind some scattered Soviets to the north by the river, but they won’t distract us now. Snow falls as SPWs grind over the white fields and the troops advance at a walking pace. My right-flank platoon is soon fighting its way into the eastern outskirts of Pavlovka. There, they pass by a knocked-out 76.2mm field gun. This was the enemy artillery reported a short time before, and I remember from my earlier 'clearing patrol' seeing it there in the same condition. Had it not been battlefield junk, it could have made a bit of a mess of my attack. It's clever that it was reported as a threat in the dark, even though it was knocked out! The first serious problem comes when the left-hand platoon comes under heavy small arms fire from a little crossroads to our south, on the left flank of my attacking force. Incoming green tracers indicate that at least one enemy MG is involved. I contemplate by-passing the Soviets but decide to divert my reserve platoon to deal with them. The necessary orders are soon issued and the troops and SPWs swing from west to south and make a dismounted attack. Meanwhile, the right-flank platoon of the assaulting force pushes into the eastern outskirts of Pavlovka. Enemy infantry fire from amongst the hovels, but are soon shot down; the combination of SPWs and dismounts working closely together (without the need for any fancy player interventions) seems to be effective, though it helps that the opposition is scanty. The platoon reaches the base of the salient and goes firm. This area is now firmly under my control. Further south, I divert the left-hand platoon more to the left, to drive into another possible enemy defended locality at the southern tip of the salient. They meet no opposition, and also go firm. While all this has been going on, the depth platoon's attack against the enemy threat to our southern flank has been going in. Who's firing the illuminating rounds down here, I have no idea... ...but it's my troops that mostly seem to get illuminated... ...though as the round drifts on its 'chute, it also picks out the terrain into which we are assaulting, revealing not very much... All seems to go well, until one of the SPWs is hit hard and flares up briefly, clearly knocked out. I’m suddenly alarmed that the Reds seem to have an anti-armour weapon of some sort up there, possibly one of their big A/T rifles. But just as I’m considering pulling the platoon back, or at least halting its attack, the enemy fire dies back. We reach the crossroads, and I order the platoon to defend from there, to cover the assault on the salient, which is going in a couple of hundred yards behind them. The illuminating round finally falls away to the west. The enemy attack has been met and defeated. We have gone onto the offensive and cleared the Soviet salient. The way is now clear for us to make a move to the north, and grab some of those river crossings. Which is what I want to be able to report to Division, and the sooner, the better. A quick look at the map shows me that there are crossings just to the north. I decide to assault them immediately. The nearest platoon, in Pavlovka, will stand fast, acting as a base of fire for the platoon to the south, at the tip of the salient. That platoon will attack north, past the left flank of the covering platoon, towards the nearest bridges. At the same time, the rear platoon, which has been covering the crossroads to the south, will close up again, ready to provide depth to the attack, or to act as a mobile reserve against anything untoward or unexpected. Orders are quickly given, and my trusty pioneere begin to advance again. At this point, I notice that the clock is in the final stages of counting down towards the end of the operation. This is somewhat artificial, but I know that with GT:OS’s dynamic campaign, the battle will continue from pretty well where I left off, in terms of ground gained and damage done or suffered. Sure enough, the curtain comes down before my attack is able to make any significant progress. It’s time to find out how well, or how badly, I did. And the answer is ‘quite well’. Based mainly on SABOW experience, I’m conscious (and others have reported) that Graviteam’s battle result assessments can be rather at odds with the statistics presented, which cover territorial conditions as well as losses for each side. It seems that if you win with much superior forces, you might only get a draw. So I’m quite pleased to find that I’m awarded not merely a victory, but a ‘total’ one. I’m not so sure, but hope Division will agree, and will therefore not be too cross that I haven’t yet grabbed those river crossings. At this point, I was a bit pressed for time, so I didn’t spend long on the ‘Statistics’ phase, wandering the virtual battlefield to check out the damage in person. At this point, the game lightens the skies again so you can see what you maybe wouldn’t, if it was still dark. I did take the time to check out what got my knocked-out SPW, and was a bit shocked to see that it was basically small-arms hits which seem to have got into the engine compartment via the steering gear, starting a fire. Losses are cumulative and it’s a bit disappointing to have lost a valuable SPW, and some personnel, in this fashion. I’d have preferred not to fight any battle until some more forces had come up and I could deploy tanks, infantry and artillery together. But the opposition was weak, so I got away with it – this time. Returning to the 'operational phase' map where this all started, GT:OS calculated the impact of our battle and summarised its impact. We are said to have defeated two Soviet infantry squads and routed a platoon. We have also begun to reveal more of the enemy's dispositions. Not a bad night's work for a force such as ours in such conditions. Despite a feeling of being still handicapped by considerable unfamiliarity with some of the features I’m sure I’ll need to do well against more serious opposition, I thoroughly enjoyed the battle. I heartily dislike the ‘space invaders’ approach to PC wargames – evident in the otherwise excellent Wargame: European Escalation, which as the campaign progresses, throws increasing numbers of enemies against you at a rate which means to survive, never mind win, you need to forget about trying to fight a more realistic, ground level, close up or map-based battle, but zoom out, turn on the labels and prepare for a click fest. By contrast, so far, GT:OS is very much more like my idea of an attempt to provide the player with an ‘all arms platoon-to-battalion level combat simulator’, such as professional armies might use for training, a bit like Steel Beasts without the tanksim – and indeed, exactly like SABOW without the tank sim. I expect the many future battles I’ll fight in Graviteam Tactics: Operation Star could be considerably more challenging, but I hope will still lack (or at least, not over-do) the ‘space invaders’ factor. And by that time, I hope I’ll have a better idea of what I’m doing…and maybe some Tigers, if Division thinks that my return to the front has been sufficiently successful to trust me with them. Already, there’s talk of a big attack somewhere along the Ostfront, in the better weather, big enough to restore our fortunes after Stalingrad. But first, I’ll have to grab those bridges!
- 4 replies
-
- 1
-

-
- graviteam tactics
- gtos
- (and 1 more)
-
The Russians are coming! The battle has begun. I can see almost nothing of it. Small arms fire breaks out. Short chains of pinkish tracers zip out into the darkness from our positions. Their targets remain invisible but I see no need to spoil the delicious effect of being in the middle of a developing firefight in darkness by turning on labels or moving the camera to ‘God mode’. I’ve made my dispositions, now it’s my job to monitor the development of the battle and give fresh orders if and when necessary. Ok, the enemy’s attacking. Let them come. They’re expected, and the plan is to shoot them down in the open. Let’s see how this plays out. The small-arms fire continues. Nearly all of it seems to be ours. The Marders don’t shoot and there are no reports of enemy vehicles; nor is there any indirect enemy fire. All I can see are the outgoing tracers, from the SPWs and dismounted MGs. Shouts and commands in German continue to be heard. The next development is another contact – enemy infantry heading directly towards our position, from the west! Both located enemy units appear to be attacking to the south-east. I had positioned a couple of SPWs near the western end of the woods specifically to protect against such a move, like a cut-off party protecting the flank of a linear ambush. With the camera acting like a CO going over to check the situation first-hand, I find my troops are holding their own, engaging targets I can’t see on the open snowfields to the west. I afford myself the small luxury of moving the camera a short distance out in front of our positions to get a better view of the firefight, and see the Reds for the first time – just a few scattered riflemen, working their bolt-action rifles, shouting occasionally, rising and falling as they try to work their way forward. Their casualties mount steadily. I see one pinned down, apparently wounded, another falling for good. Occasionally, somebody fires a red or green flare. So far, so good. The first unwelcome change to all this is another contact report to the north - more Red infantry, towards the rear of my positions. I now have enemies on three sides, which is a little uncomfortable. I let the situation develop a little longer, the only result being that the enemy to the north is starting to penetrate our woods. It’s time to act. From the map, I order my nearest platoon, in the centre of my line, to counterattack to the rear. The SPWs begin to rumble out, accompanied by the dismounted pioneere. This seems to have the desired effect. The small-arms fire increases in volume, then slackens off again. There are still some reports of possibly stray enemy infantry near the river, but our northern perimeter has evidently been stabilised. It’s at this point that I notice that my Marder III, in my centre, has moved out from the woods into the snowfields to the south and turned right, towards the west. Some of his platoon are beginning to follow. It looks like there’s been some confusion. The Marder is out in the open, with no infantry in close support. There are, or were, enemy infantry out there somewhere, and I’m worried that a Red A/T gun or Molotov cocktail is suddenly going to make short work of one of my two AT weapons. But the fire to the south and to the west seems to have died down, and my Marder isn’t immediately flamed. So rather than pull back the errant platoon, I decide the time is right for us to go over onto the offensive. We seem to have blunted the Red attack, which has turned out to be a bit of a damp squib. It’s time to pay him back with some German steel! …to be continued!
-
Contact! So I’ve ended the deployment and orders phases, and the battle-fighting phase begins. It’s at this point that I realise it’s pitch dark and snowing, and that I have placed my units without that knowledge. This, despite having read of this very pitfall, on the Failteam Tactics blog. I should have checked the time, but GT:OS rather misleads you by starting the deployment in the 3d mode with the conditions artificially brightened – so you think it’s clear and daylight, even if it isn’t. Helpful, but a trap for the unwary. Like me. As it happens, it’s no big deal. I reckon that from our present positions, we can see and shoot anything that comes close enough to be a threat. In fact the darkness - in particular, the deep shadow amongst the trees - will help conceal our force, in the not-particularly-dense wood. I do wish, though, that I had at least some mortars which could fire illuminating rounds when needed, but I’ll manage without. in the pics below, you can just about make out an MG34 gunner, and an SPW, with some of my other white-washed vehicles behind. What you can’t do, is hear the sounds of idling engines and German voices. If there’s a way of stopping this low-level racket (or getting that Marder II to turn off his tail lights) I don’t know what it is. At night, you can often hear the enemy before you see them, but not tonight. But there’s no enemy to see or hear. Nothing happens, and the minutes tick by. I begin to think that I should have pressed on for the bridges rather than sitting here waiting for an attack which may never come. Division will be not best pleased, if I blame faulty intelligence for my failure to get on and seize those crossings. I can hear them muttering already, about lazy, useless officers posted straight to a combat command after a spell on the staff in Berlin… Setting such thoughts aside, I’m playing with all labels turned off, switching to the map view to check the position of my own troops and any spotted enemies. Of which latter there being done, I take the 3d camera for a little wander around my position at or near ground level, the equivalent of sending out a clearing patrol to check the perimeter and the camouflage of my own positions. This reveals some nice touches, like a knocked out and abandoned panzer hulk nearby. I don’t know if I could have put an OP into this, but it offers little extra observation beyond what I have from the woods. I do wish that I could order my troops to cut some branches and use them to break up the silhouettes of my winter-camouflaged vehicles, but in the darkness amongst the trees, they appear reasonably well hidden, regardless. I return the camera to my own positions, and we settle down in the cold, to wait. Suddenly, there is a loud bang. I think maybe one of my Marders has let fly, though I don’t notice the muzzle flash. There’s some shouting. A beep indicates a message and as expected, when I call up the map, I see it’s a contact report, from my westernmost platoon. Enemy infantry, entering our killing ground and moving south, where two tracks run close together! This is it! …to be continued!
-

OBD's Next big Project Revealed! And It's Big!
33LIMA replied to Hauksbee's topic in WOFF UE/PE - General Discussion
Sounds great - whether CFS3-based or not, it'll be what CFS3 should have been and more, sort of EAW2. Perhaps we will, once again, be able to tune in the radio in the Nissen hut and listen to the news or some music, and hear the bed-springs creak and the bloke in the next bed cough, as we study our logbook or our tickets for the show we're taking in, on our day off...or the OBD equivalent in immersion. -
Deployment and orders! Right, so the Reds have responded to my moves with an attack of some description, launched from their little salient against the Panzer Pioneer Kompanie which has moved up towards the river crossings, east of the aforementioned salient. I now need to fight the resulting battle. So I click on the site of the clash and this takes me to a screen where I can place my forces in detail. A further click will activate the menu options which enable me to give orders to the deployed units. It's actually straightforward, once you get the hang of it; the trick being to master it, so that it becomes as second nature as grabing a map, doing a combat appreciation, making a plan and then giving orders over a radio would be, in real life This is how the Unit Deployment screen looks, initially. My units are scattered fairly randomly, so I've a bit of work to do. This will include changing the unit markers from the default coloured circles to geometric symbols which better identify the circle is actually a tank, an APC or whatever. The flags indicate key points, ours and theirs, which incidentally will contribute to the assessment of victory or defeat, depending on who dominates them after the fighting. I know the enemy in this sector is a motor rifle brigade, but have no information on the forces they’re attacking me with. Such a unit doesn’t have ‘organic’ tanks, for example, but that’s not to say they mightn’t have scraped some together to welcome us to Pavlovka. At the very least, I might face waves of great-coated infantry, bayonets fixed and shouting ‘Urrah!’ - perhaps with mortar or artillery support. I know that I could chose to ignore this prospect, and instead, drive for the river crossings – after all, persevering with the mission objective in the face of distractions is generally considered the done thing. But the advance of my infantry from the west has evidently not totally succeeded in tying down or pre-occupying the enemy, and I can always return to my objective when I have dealt with this threat to the rear of my forces in the east. The best way of doing this is not to run headlong into the enemy, out in the open, in a meeting engagement. So I decide to pass temporarily onto the defensive. That way, I can do the attacking Reds maximum damage with minimum losses. So I place my three platoons in the oblong wooded area east of the salient, where the map shows cover (from view, anyway – ‘concealment’ as the US Army calls it) is good. I find that two of my three platoons have an SP AT gun attached – one a Panzer II-based Marder II, the other a Panzer 38(t)-based Marder III. As I was trained to do against the descendants of my opponents today, I place my AT weapons to cover my chosen killing ground and my infantry sections to cover my A/T weapons. My killing ground is the open area south of the woods, over which the enemy attack is expected. Being self-propelled, my Marders will, I hope, l be able to redeploy quickly enough if I have guessed badly - or our intelligence is defective. As they say, the enemy usually has three options, of which they will choose the fourth. I set the Marders’ arcs of fire to overlap. I position the SPWs individually around them and adjust their facings, so that they provide some depth to my position within the limits of the cover I occupy, and some all-round defence. I keep my troops back from the northern edge of the wood, as I don’t want to attract attention, or get sucked needlessly into fighting, from that direction. I end up with three platoons more or less in line, the easternmost one without the SP gun, which will act as a mobile reserve eg for local counterattacks or to deal with anything unexpected. Not an ideal disposition, but we’ll see how it works out. Unhappily, I don’t seem to have any indirect fire support - I don’t have a company HQ or a spotter element, which may be why. I hesitate, but then decide to order my Pioneere to dismount from their SPWs. This makes them more vulnerable to artillery or mortar fire, but I accept that risk in return for more eyes, and weapons, on the ground. These are the dispositions I end up with - same map as the previous one, but zoomed in, and the unit markers are now the geometric symbols. The 'pointy rectangles' are my SPWs (APCs)...except that a few are command versions with old 3.7cm AT guns mounted instead of the forward MG, so they appear as SP guns (diamonds with a gun symbol in the middle), like the two real SP guns I have. The dots are dismounted troops - I mustn't have finished ordering them to de-bus, as not all have done so. The SPW left of top centre is orange because I've currently got this individual vehicle selected (shown green in the read-out at the bottom sentre of the screen, which has expanded the selected platoon to show the platoon's five vehicles individually, with the command vehicle on the left of the row and the attached Marder SP gun on the right). I do all this, having switched to the map from the alternative 3-d view. When I move from ‘unit deployment’ to ‘initial orders’, I have little left to do, but confirm target priorities are set and that everyone is ordered to stay in cover and defend. I take a deep breath, held just long enough to realise that I should have spent more time familiarising and preparing. But the die is cast. Time to go to war! And to discover my first mistake… …to be continued!
-
The 'anti-Richthofen squadron' is tested in battle! My first show with No. 56 Squadron in France, flown in the superlative Wings over Flanders Fields, saw me wounded and hospitalised for nearly two weeks. My recovery complete, it's now 13th May 1917 ('Lucky for some', as they say) and I'm once again leading 'B' Flight. This time, there's three of us - my companions are Dixie and Prince, names it will help to remember if I need to identify witnesses to any victories I may manage (I have WoFF's victory claim form option turned on again). I'm glad to see the weather is once again cloudy but fine, though disappointed that our mission is a patrol behind our own lines, down to the town of Albert a short distance to the south east. Albert was famous during World War 1 for the statue of the Virgin Mary atop the town's basilica. Knocked askew into a gravity-defying angle by shellfire in 1915, the legend grew that the statue's fall would signal the end of the war. It didn't, but the statue was still hanging on for dear life at the time of this mission, in mid-May 1917 I waste no time in leaving Vert Galand behind and as soon as the three of us are in formation, I begin to climb. I'm following the route indicated on the Tactical Display, which generally throws in some extra waypoints that are not indicated on the in-flight map, seemingly designed to enable you to gain height in a wide spiral before you settle onto your course for the patrol area. This also helps stay reasonably close - for a while, anyway - to any supporting flight. Which we have on this show, as 'A' Flight is said to be flying top cover. For a while, I see them below and ahead of us, but our paths soon diverge and I'm not sure if we'll see them again. You can just about make out the four S.E.s of 'A' Flight at about eleven o'clock of my nose, in the pic below. I'm soon turning onto the the last leg of our course down towards Albert, still climbing to the ten thousand feet I want to be at. This will give us a decent chance of spotting any Huns trying to slip in below us, but should be just about high enough to see, and hopefully intercept, any higher-flying customers, like the DFWs I ran into on the last show. In fact I'm rather hoping to renew my acquaintance with these gentlemen, two-seaters on a recce being the most likely trade I will get behind our own lines. A few minutes more and I see a town ahead and left, which a glance at my map tells me is Doullens. It will be a useful landmark on the way home, too. Visibility is rather hazy towards the horizon, but not too bad at altitude. Except for the longest hops, I enjoy flying my WoFF missions in real time - none of the WW1 air combat sims I have flown do such a good job of creating the sights, sounds and general ambience of WW1 in the air and the flight to and WoFF, for me, manages to make what in other sims is something I'd prefer to fast-forward through, an experience to savour rather than skip. My reverie is cut short as I see a small group of specks in the sky ahead, slightly right and at about the same height. I have 'dot mode' turned on, set to 4,000 metres if I recall right. The specks are moving left to right, deeper into our territory. They aren't being shelled, so they could be friendlies, though the ample cloud cover may be the explanation for that. I turn right and settle onto an intercepting course, keeping them just left of my nose and gaining a little height. It occurs to me that this could be the same five DFWs I met yesterday; if so, this time they'll have the three of us to reckon with, not just yours truly. As I watch, something odd happens. One of the specks detaches itself from the rest and falls away. I can't work this out. Is it a member of a frindly formation, going down to land? Or an EA ('Enemy Aircraft') making a solo attack of some description? The other specks hold their course, leaving me a bit worried about what it is the one who dived away is up to. I bank left to watch him but can't pick him out against the ground. After A second or two I give ip, and look ahead again. Not a moment too soon, for the other specks are specks no more; they are four Albatros Scouts heading straight at us! Crikey! ...to be continued!
-
Thanks Silberpfeil, and yes, I'd definitely recommend WoFF UE to anyone with a latent or actual interest in combat flight sims in general and the pre-jet age or WW1 genre, in particular. Whether it's busting balloons... ...beating up enemy airfields... ...knocking them out of the sky... ...or strutting your gaudily-painted stuff while knocking them out of the sky... ...it's all there!
-
Next, please! Behind me, the dogfight between the rest of my flight and the other Huns is still in full swing. In fact, there seem to be two distinct air fights, one a bit higher, the other lower down. The former is one-a-side, but below me, two Huns are fighting with a single S.E. I'm reluctant to lose height but clearly, I'm needed down below. I roll over and pick a target. This turns out to be another ace! I catch him by surprise - always a good idea, when up against a skilled foe-man - and get in a decent burst, before he turns inside me. This time, I have taken care to retain the speed built up in my dive, and I pull up to stay above him. Looking around for the second Albatros before having another crack at the fellow with the pretty red and white fuselage, I see that there are in fact two other V-strutters. They are curving in aggressively, so I decide to switch my attention to them. I slot in behind the two Huns and find that I'm at the end of a rapidly-developing conga line. The S.E. which I dropped by to help is on the tail of the red and white V-strutter. The latter's two friends have fallen in behind the S.E.. And I'm behind the two Huns. I'm closing with the hindmost Albatros, ready to shoot first, him and then the other fellow, off my man's tail. But at that moment, the S.E. nails the leading Albatros, which rolls over and falls like a rock. The S.E. breaks up and right. Now, it's my turn. I let the last Hun have it. Taken completely by surprise, he rolls right and breaks downwards. I come around in a tight turn to the right and get behind him again. Smoke and pieces fly off him as my rounds hit home. The Hun suddenly noses down and to the right, then falls away. Down he goes in a vertical dive. There's a plume of orange fire from him as something takes light... ...then his wings collapse and flutter down behind the fuselage, which falls earthward like a giant dart, down towards the northern bank of the River Somme. No doubt about that one! I turn my attention to the third Albatros. I finally pick him out, lower down, still close to Albert, evidently making for the front lines. He's yet another ace! I'm not sure how much ammo I have left - as far as my wing-mounted Lewis Gun is concerned, there are no reloads in WoFF; you just get your full load in one drum as it were, which makes it harder to keep track. But in for a penny, in for a pound - this fellow may be an ace, but he seems to be meat on the table just now, especially if I can knock him down in one pass from behind. Which is precisely what I do... ...and down he goes! Like my previous victim, the vertical plunge tears off the Hun's wings. Would you believe it - I've scored a hat-trick, in fairly spectacular fashion, including not one, but two aces! Howzat! I believe that in WoFF, historical aces die only when they really did, so perhaps today, their aircraft were being flown by someone else, whose luck ran out. No matter! I gain height and fly north-westwards, roughly on a course for home. I throttle back and look around. The fight seems to be over and I hope some of my flight-mates will rejoin. They often make their own way home after a fight - which often happened, in real life - but it would be re-assuring to see at least one of them now. My pleasure at my victories will be gone, if it has come at the cost of the lives of my virtual men. All I see is a speck crossing to my right rear, down near the river. I have no idea who he is, so I swing around cautiously, to help him link up if he's one of mine, or to knock him down if he's one of theirs. But I lose sight of him in my turn. All I can see is an aircraft burning on the ground, on the outskirts of Albert...possibly one of my earlier victims. Then I spot another aircraft, higher up and on a reciprocal course. I pull up and come around after him. The unidentified aircraft flies steadily northwards, ignoring me. This is roughly in the direction of Vert Galand, so perhaps it's Prince or Dixie, and he just hasn't seen me. I trail him, cautiously. Even with my virtual binos, I can't make out what type of machine he is, except that he's not an S.E., because his wings lack dihedral. Suddenly, he breaks to the right, and I begin to think he's a Hun who has just spotted me. But I needn't have worried. He doesn't come at me, but instead, slips below and to my right. I can see that he's a tan-coloured SPAD with RFC roundels, so he must be from either 19 or 23 Squadrons, the two British outfits which operated this type on the Western Front. The SPAD slips away, behind and below. Quite possibly, he's landing at the airfield I can see down there, on the north-western outskirts of Albert. I carry on, beginning to relax. Before long, the town of Doullens is slipping past, over to my right. And soon after that, I'm back at Vert Galand, switching off just in front of the sheds. There's no sign of my two flight-mates, so I'm quite keen to hear what news there may be of them. The news is good! Both Dixie and Prince made it home intact. Dixie has claimed a victory - evidently, it was he whom I saw despatch the Hun with the red and white fuselage. I quickly fill in a claim for my three victories, naming Dixie as my witness and giving time, location and details of the fight as best I can remember them I get some times mixed up and I confuse my first victim (Voss) with Dixie's, but I am delighted to find that all three claims are confirmed next day! I'm perhaps even more delighted to get a gong for my troubles - the MC in fact. not a bad day's work! Apart from the fact that German fighters very rarely operated so far over the lines, this was a classic mission in a classic combat flight sim. The trip to the front, with my flight-mates on either flank and towering clouds all around under 'the blue dome of the heavens', could have come from scenes in a classic war movie like Aces High or Hell's Angels. It was like aviation art brought to life. The fighting, when it came, developed unexpectedly and was alternately scary and thrilling. If there's a combat flight sim which brings its subject matter to life better than Wings over Flanders Fields, I've not played it...and I don't ever expect to!
- 4 replies
-
- 2
-
-
- 56 sqn
- wings over flanders fields
- (and 1 more)
-
In at the deep end! If there's one thing I have learned to hate in combat flightsims more than a head-on pass against another fighter, it's a head-on pass against multiple other figthers. I especially hated it in another WW1 sim, Rowan's Flying Corps Gold...which I liked a lot, nearly as much as Red Baron 3d...except that the AI nailed you nearly every time, in a head-on pass. As if the risk of collision wasn't bad enough. I am well aware that the Dicta of Biggles includes the one about never turning away from a Hun coming at you head on. And that Boelcke and others said much the same. And I understand why. But it's not quite the same in a combat flight sim. If it's Flying Corps Gold, hold your course and the AI will kill you (or clobber your motor, if you're lucky). In other sims, I am not prepared to bet my virtual life that an AI pilot's sense of self-preservation is sufficiently highly-tuned for him to blink at the last moment, if I don't. Soon this occasion, as is my wont, I line up my opposite number in the centre of the rapidly-oncoming enemy formation, crack off a quick burst when the sight picture looks as good as it's going to get, then break. To avoid getting a burst in the belly, I do this in two stages - first, just enough displacement to avoid a head-on, then immediately I'm clear, a hard turn, to come around after my chosen enemy. As I start my turn, I briefly switch on the Tactical Display to padlock one of the Huns - hopefully the one I've been shooting at - and give the order to attack. Looking behind, this is what I see. Notice that the text under the TAC - you can cycle through variants of this - is telling me something I don't especially want to know. Which is to say, that we're up against some of Germany's finest - specifically Jasta Boelcke, with my very own target being no less than famous ace Werner Voss. The fact that the real Voss was killed in a famous single-handed dogfight with my very own 56 Squadron in September 1917, isn't much consolation. As I come about, the party begins. All over the sky are aircraft, twisting and turning like snipe. But one aircraft isn't twisting, or turning. The V-stutter I attacked is flying away from the flight, lower down and wings level. I must have winged him! I clear my tail and dive after him. I catch up quickly and hold my fire until the range winds right down. He makes no move, and this lulls me into a false sense of security. Instead of keeping up my speed, I throttle back so as not to overshoot, closing right in for a final burst at point-blank range. Voss has other ideas, though, and as soon as I start firing, he turns left, causing me to miss with all but my first few rounds, and what is worse, to overshoot. In my carelessness, I've dumped so much speed that it would be fatal to attempt to climb up and away - I haven't used enough 'boom' to get a decent 'zoom'. In something of a panic, I roll over and split-arse for the deck, desperate to get away quickly. My luck holds. Voss doesn't follow and as I pull up and around after picking up speed again, I see that he has resumed his attempt to get away. He's not going too fast and I slant up at him, to cut him off. Reaching his level, I roll in from behind and above him, but stop shooting when I see his propellor wind to a halt. Got him! There's no chance that he will regain his own lines, from this distance. As I sail past Voss, I get a good look at his Albatros D.III's distinctive personal markings. I could shout for joy! One up, for Fifty-Six! It's only my second show with the Squadron, and I've knocked down one of Germany's top aces! Like the Lothar von Richthofen character in the awful Red Baron movie, I pull up my map to check the location of my victory. This is one 'kill' I most certainly want to see confirmed, and a decent location on my claim form will help. Let's see...on the south-western outskirts of Albert...yes, that'll do nicely. So far, so good. But the battle's not over yet! ...to be continued!
-
Hunting the Red Baron...in a dud aeroplane! You might be forgiven for thinking that the combination in spring 1917 of Britain's leading fighter pilot and the country's greatest fighter plane would have been the combat aviation equivalent of a marriage made in heaven. Far from it, for Captain Albert Ball DSO, MC (and later VC) was not at all impressed with the Royal Aircraft Factory's new Scouting Experimental 5. 'The S.E.5 has turned out a dud... It's a great shame, for everybody expects such a lot from them... it is a rotten machine', was his verdict. He'd been posted as a flight commander to the recently-formed No. 56 Squadron, working up at Colney Hatch in England before deploying to France. 'There were rumours of an anti-Richthofen squadron' wrote Alexander McKee in The Friendless Sky, 'and this was it.' Or as near such a thing as ever existed. "Fifty Six" was certainly something special. Not only was it first to be equiped with the first of the Royal Flying Corps' new types of fighter ('scout') aircraft, intended to match the Hun's Albatros V-strutters; to the squadron was posted an unusually high proportion of especially skilled and/or experienced pilots. Hence likely the rumour, which reached the ears of the great man himself, that the squadron was tasked with bringing an end to the career of Manfred von Richthofen. Such was Ball's antipathy to the S.E.5 that he tinkered considerably with his own machine, adjusting amongst other things seat height, windscreen and armament. Some of these modifications were adopted for all the squadron's machines and those produced afterwards, like replacing the semi-enclosed 'glasshouse' windscreen with a smaller, conventional one and removing the little gravity-fed fuel reserve tank atop the wing centre section. Here is Ball in his modified machine, in typically bare-headed fashion despite the wintry conditions. Not only that, but on arrival in France, Ball pleaded with RFC boss Hugh Trenchard to be given a Nieuport Scout. 'Boom' agreed, with the proviso it was to be used only for solo missions, with the S.E.5 employed for all flight operations. While as squadron mate and Sagittarius Rising author Cecil Lewis said, the oiginal 150 hp version of the SE was not quite a match for the Albatros, it was, despite Ball's misgivings, a worthy contender in mid-1917 - and, with a more powerful motor, still a front-line fighter at war's end, a year and a half after it first saw action. Ball seems to have warmed to the type, for he scored eleven of his last thirteen victories in the S.E.5, before being killed in one in unclear circumstances during a disastrous series of patrol actions against Jasta 11 on 7th May 1917. Ball's memory lived on, and the S.E.5 went on to carve out an equally illustrious name for itself, in the hands of men like Jimmy McCudden, Arthur Rhys-Davids, 'Mick' Mannock and Billy Bishop. A campaign in S.E.'s with 'Fifty Six' is something any WW1 simmer is likely to fly at least once; and this set of mission reports is from my own latest effort, flown in Wings over Flanders Fields. Now in its Ultimate Edition, with its hugely-immersive single-player experience, WoFF can fairly lay claim to being the ultimate WW1 air combat sim. And it wouldn't be WoFF if it didn't feature both 56 Squadron and the S.E.5. Thus equipped, I decided to start my campaign at the beginning of May 1917, at the point the tide had begun to turn and 'Bloody April' was, at last, behind the RFC. It's good that WoFF features the S.E.5, because it's quite different visually from the 200 hp version we usually get in flightsims, and which didn't appear till late summer 1917. To digress, it's generally stated, based on official rigger's notes, that it was the S.E.5a version which introduced the more powerful 200hp motor, with a visibly-larger frontal radiator. However, in Crowood's Aircraft of the Royal Aircraft Factory, author Paul Hare reveals that works drawings show that the S.E.5a was created after only 23 'true' S.E.5s had been built, by cutting the length of the rear wing spars, reducing considerably the pronounced rake of the original wingtips. The early production S.E.5a retained the 150 hp engine. As well as the early model I'm flying on this campaign, WoFF features S.E.5as with the geared 200hp Hispano-Suiza and the later (and more reliable) ungeared Wolesley Viper engines. A 'Hisso' S.E.5a is seen below, in foul weather over southern England; I think the wingtips should be a little less raked but she's a fine replica and looks much better since WoFF enabled us to lose the former wide-angle lens external view. The Viper engine had more angular edges to the radiator and a noticeably-lower thrust line/prop. The mission It's 1st May 1917 and the weather is fine. 'Fifty Six' has settled down to the war at Vert Galand in northern France and today, I'm leading 'B' Flight on a Line Patrol up to the north-east, near Arras. 'A' Flight has two machines on this show, in addition to my four. You can see one of the others - Rhys-Davids, no less, from his white fuselage marking - taking off to my right front, as I open up the throttle to start my own run. You can also see that painting the upper (and lower) wing roundels well inboard was an unusual feature of the markings of early S.E.'s I'm soon airborne and climbing away. The WoFF S.E.5 is a fine piece of work, and she sounds just as good as she looks. What sort of fighting machine she is, I expect soon to find out...which I will, though not quite as I might have expected... ...to be continued!