


33LIMA
-
Content count
3,749 -
Joined
-
Last visited
-
Days Won
7
Everything posted by 33LIMA
-
A narrow escape I have already attacked this Hun two-seater twice and he can clearly see that another attack is coming. As I close in to make it, he begins a turn to the left, as if to give his observer a clear field of fire... I cut inside his turn, jink, and then go straight at him. All rather unsubtle, and hits are exchanged on both sides. At about 75 yards, I break low and left. This has the desired effect of taking me quickly out of his line of fire. But on he flies, seemingly no nearer to going down. I come around in a tight turn, looking back at the Hun. I can see now that he is losing altitude, and while he keeps his wings level, he is flying a tad erratically, porpoising slightly every so often. Sensing that another attack will do the trick, I tighten my turn...too much! I promptly spin out, treating the Hun to the sight of my S.E. spiralling earthwards like a falling leaf. The DFW promptly turns away, to make good his escape. I chop the throttle, put the controls neutral and apply opposite rudder. Nothing happens, except the spinning continues and the earth rapidly draws closer. I feel a tinge of panic. Have my controls been damaged, leaving me to keep on spinning until I hit the ground? Is this the end, already? Finally, my machine responds to the controls, and I come out of the spin. I keep the nose down to build up speed, then begin pulling up. but at that moment, my engine splutters and the prop spins to a halt. I push the nose down again and try to re-start the motor, but she chugs then comes to a stop again. Now, all thought of knocking down the Hun is gone and my attention turns to finding a decent field for a forced landing. There are plenty to chose from, but many of them are rather small or lined with trees. I am mightily relieved when I see that I am close to an airfield. I turn directly towards it, keeping my nose well down in the turn to avoid another spin, which woud be extremely dangerous at this height. A rather steep, curving approach is the best that I can do, but it seems to go well enough. I see that am coming in rather fast and that I need to be careful not to run into the sheds. The fellows down there will surely not appreciate such a clumsy visitor. My wheels bounce once and then I'm down. I let the speed drop enough then pull back on the stick, so as to dig in the tailskid. This brings me to a halt opposite the hangars, where the ack emmas won't have too far to haul my kite. My S.E. is somewhat knocked about but repairable. As am I, apparently. The debriefing tells me that I'll be in hospital for nearly a fortnight. Hopes that my Hun might have come down after my last attack appear to have been dashed; if he did, it won't be credited to me. Not a great start! I should have washed out the patrol after inadvertently send my flight-mates away. Having decided to fly on alone, I shoud not have repeatedly attacked a superior enemy formation. Oh well. At least I came down in friendly territory, didn't completely wreck my machine, and wasn't hurt too badly. I'll soon be back at the front, ready for another crack at the bally old Hun, and this time, I'll be a bit more careful!
-
Up and at 'em! I turn back west and run ahead of the Huns, climbing as I do so. I find that despite losing speed in the climb, I am still slowly drawing ahead of them. So far, so good. The enemies fly on impassively, maintaining formation. Evidently they are not terribly worried about a single enemy fighting machine, even if it is from the anti-Richthofen squadron. The fact they seem so singularly unworried about me serves only to increase my desire to interrupt their cosy little sight-seeing trip. I decide that I am going to attack from head on, which should give them the wind up, good and proper. So I continue to climb. Looking down from the Huns' viewpoint, it's not hard to see why they appear so unconcerned. My S.E.5 looks rather lonely and insignificant, hardly much of a threat to the impressive Hun phalanx above and behind me. But soon, I'm up at their level, and I turn left into them. It's time to put a stop to their damned impertinence! However, I have turned in too soon, and find myself closing from an angle off their course. So I end up attacking the nearest DFW in a curve, pulling around to the right to keep my sights onto him as he flashes left to right across my nose. I get some hits, but am hit in return as one or more of the enemy observers get me in their sights. A light spatter of blood on the goggles indicates that I have been hit, as well as my machine. This isn't going so well! I tighten my turn and bank away to get out of their line of fire as quickly as possible, nosing down as I go. At this point, I really should have packed it in. But I can't bear the thought of those Huns smugly flying on as they watch me slink away with my tail between my legs. So I reverse my course and come back after the same DFW. If there is a way of attacking without coming into the field of fire of at least one of the enemy observers, I can't think of it, so I just go for him, coming in from the outside of the formation so as not to make it too easy for the beggars. I'm not sure who starts shooting first, but very soon, light pencil lines from tracer fire are criss-crossing the skies between us. Bits fly off my target, and suddenly, he noses down to the left. Got him! I break up and right but collect some hits before I am again out of range. The DFW I have attacked levels out and clearly isn't going down just yet. But I've certainly knocked him out of formation. Now, he's on his own. Not feeling so smug now, are you, I ask him in my mind. The DFW flies to the east, with me in hot pursuit. This is one enemy machine which won't be making it back to Hun-land, if I have anything to do with it. ...to be continued!
-
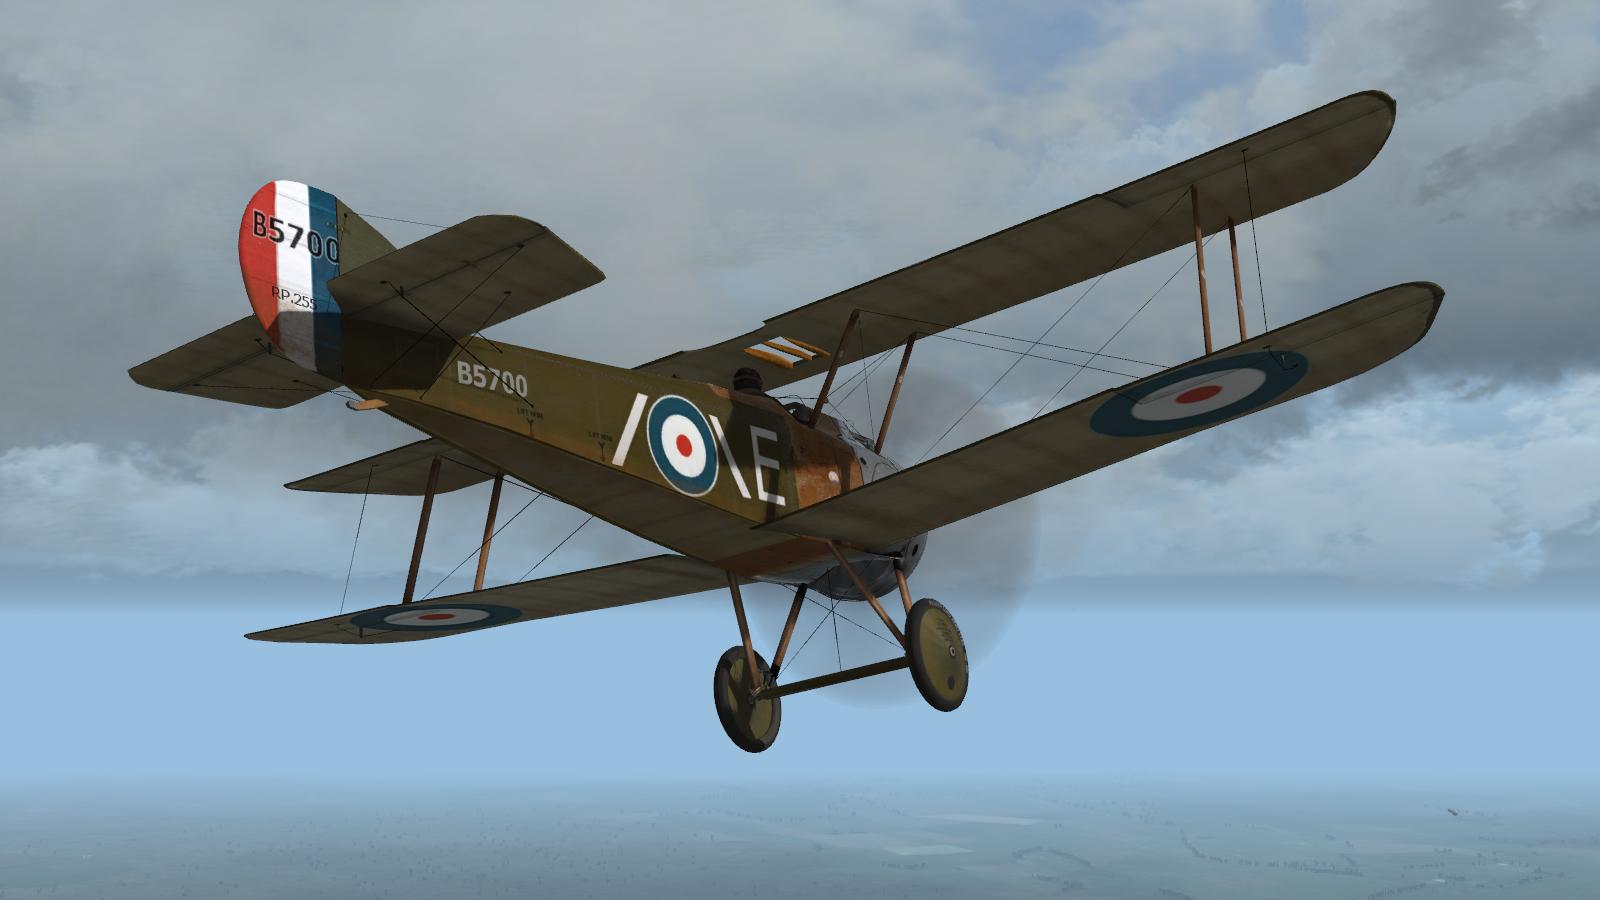
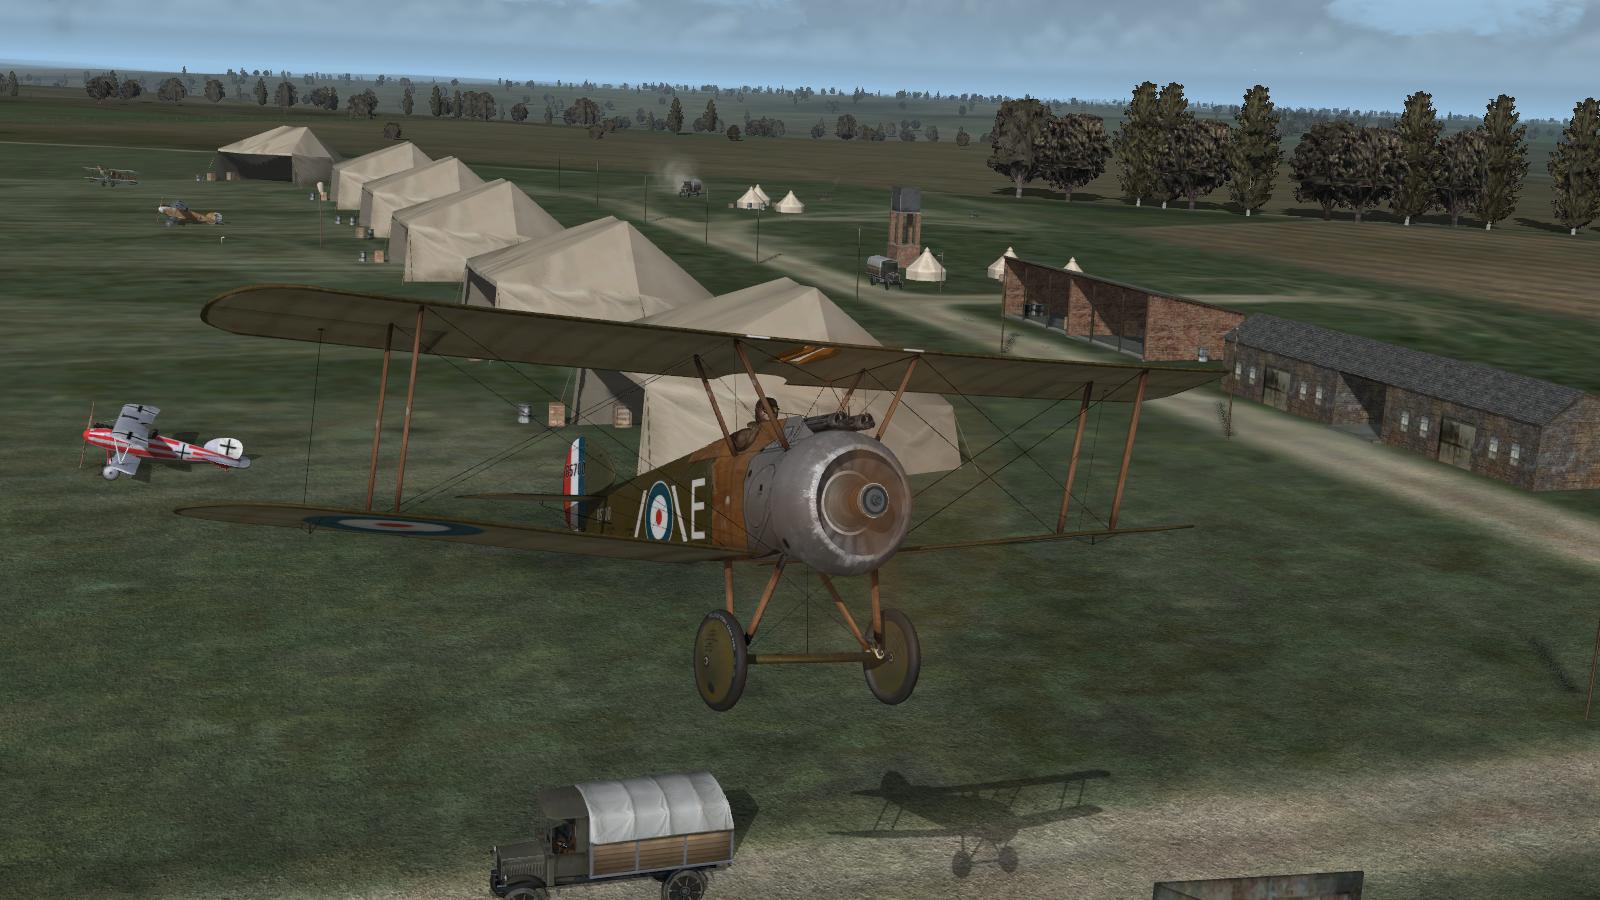
An unfortunate misunderstanding... We have a moderately long leg to the front so I have plenty of time to get up to our assigned patrol altitude of just over eight thousand feet. In 'V' formation, we begin the climb, with one SE to my right... ...and another two on my left... I have plenty of time to look around my nicely-rendered virtual cockpit... ...and to admire the dramatic cloudscapes as we plough onwards and upwards, towards the front lines to the north-east. My machine carries a real 56 Squadron scheme, serial B'514 which was flown by Lt Richard T. Leighton. As well as flight and individual aircraft letters (and wheel hubs in flight colours) I have a red dumbell on the rear fuselage. I think the latter is a personal marking, as I think a wide white rear fuselage band was the first official squadron marking, later changed to two thin white bars angled inwards towards the top. In plan view, I reckon the wing-tip profile - which I think is shared with WoFF's later-production SE's - is somewhere in between the sharply-raked tips of the S.E.5 proper and the much more squared-off wingtips of the 5a. Shortly after levelling out at our patrol altitude, like the best laid plans of mice and men things go awry. I realise that I haven't checked to see that my labels are set to display dot mode (which renders distant planes as specks, which would otherwise be invisible until they were rather unrealistically close). I decide I should rectify this. Having forgotten the keystroke to cycle through label types, I foolishly resort to trial and error. First, I manage to turn on text labels. Then, I try Ctrl+L. This turns out to be the (non-reversible) command for my flight to land. My comrades obey promptly, breaking formation and falling away! This leaves me in something of a quandrary. I don't particularly fancy washing out the mission completely, but I don't care much for going on alone, either. But as it happens, my faffing about with the labels helps me make up my mind. For it reveals one or more DFW two-seaters high and right, coming my way. Our AA boys aren't engaging them, so I might have missed them had it not been for the labels, though dot mode might have brought them to my attention soon enough, had I enabled it. It's strange that the Huns are from Flieger Abteilung 208 A, because the 'A' means their speciality is artillery observation, which they would not generally be doing this far behind the lines (the small 's' in their designation I believe means their unit is from the Kingdom of Saxony). But I can't possibly know any of this. What I do know is that these Huns are on our side of the lines and that it's now my job to deal with the blighters. I turn off the labels, pull up my nose and turn gently onto an interception course. The Huns are just specks against the blue, but I can just about make out that there's no less than five of them! This is going to be interesting... ...to be continued!
-
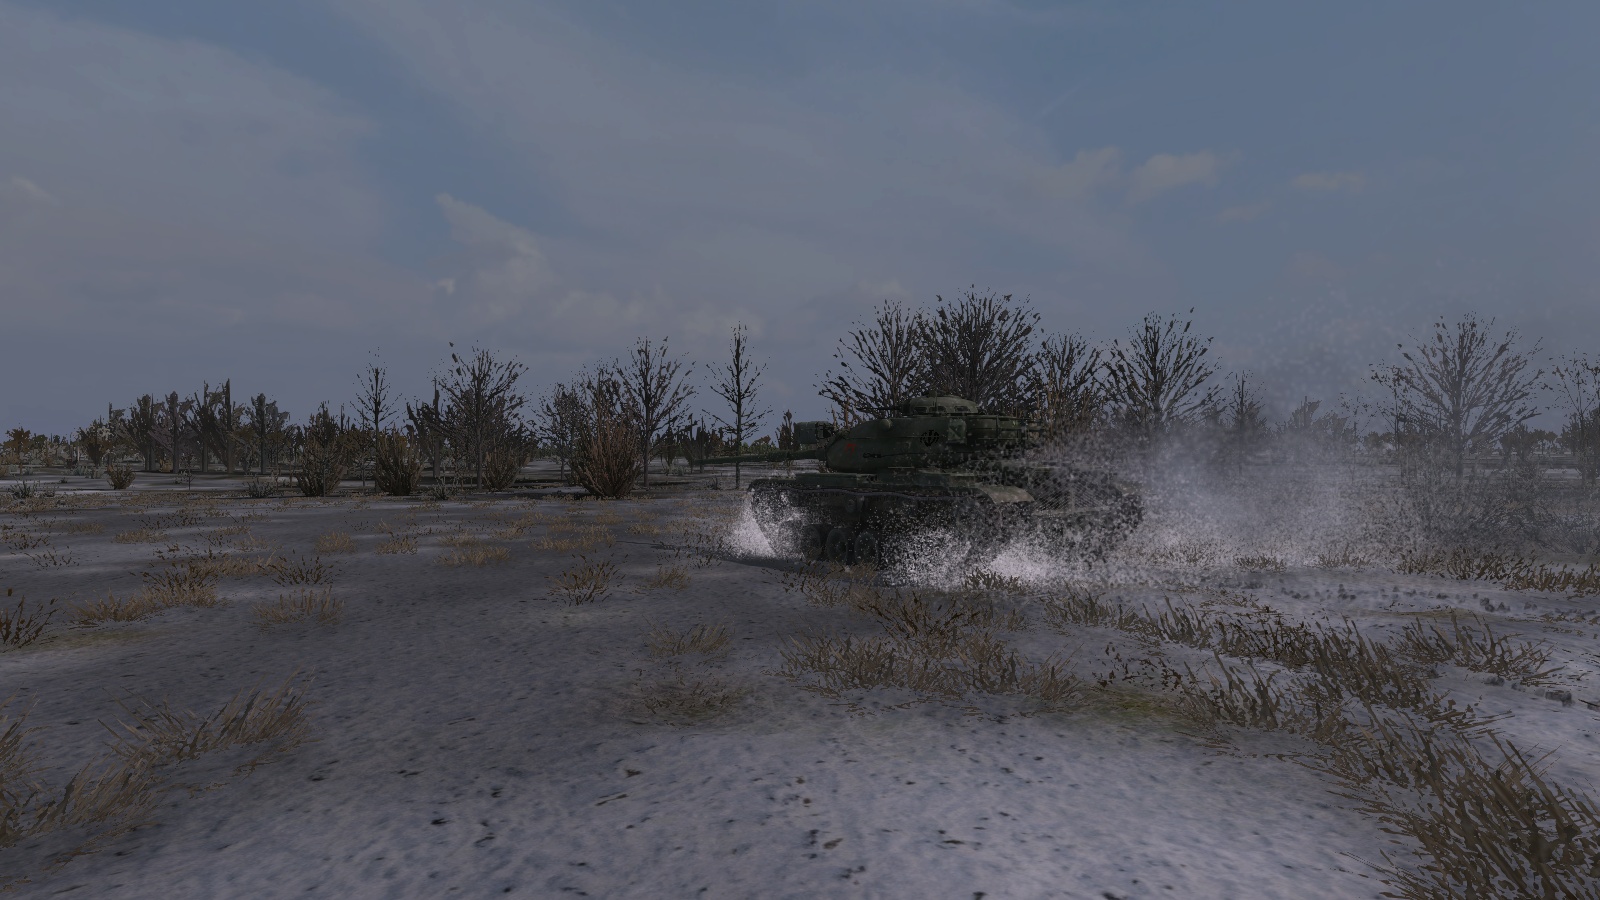
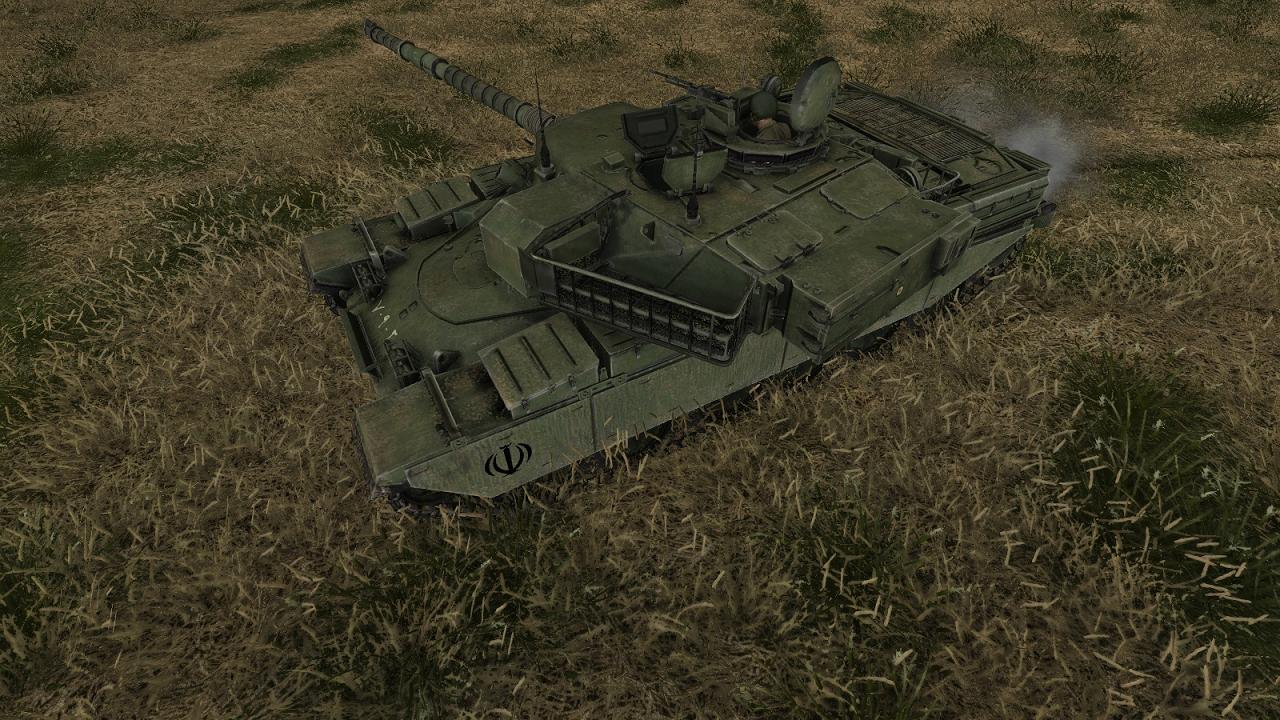
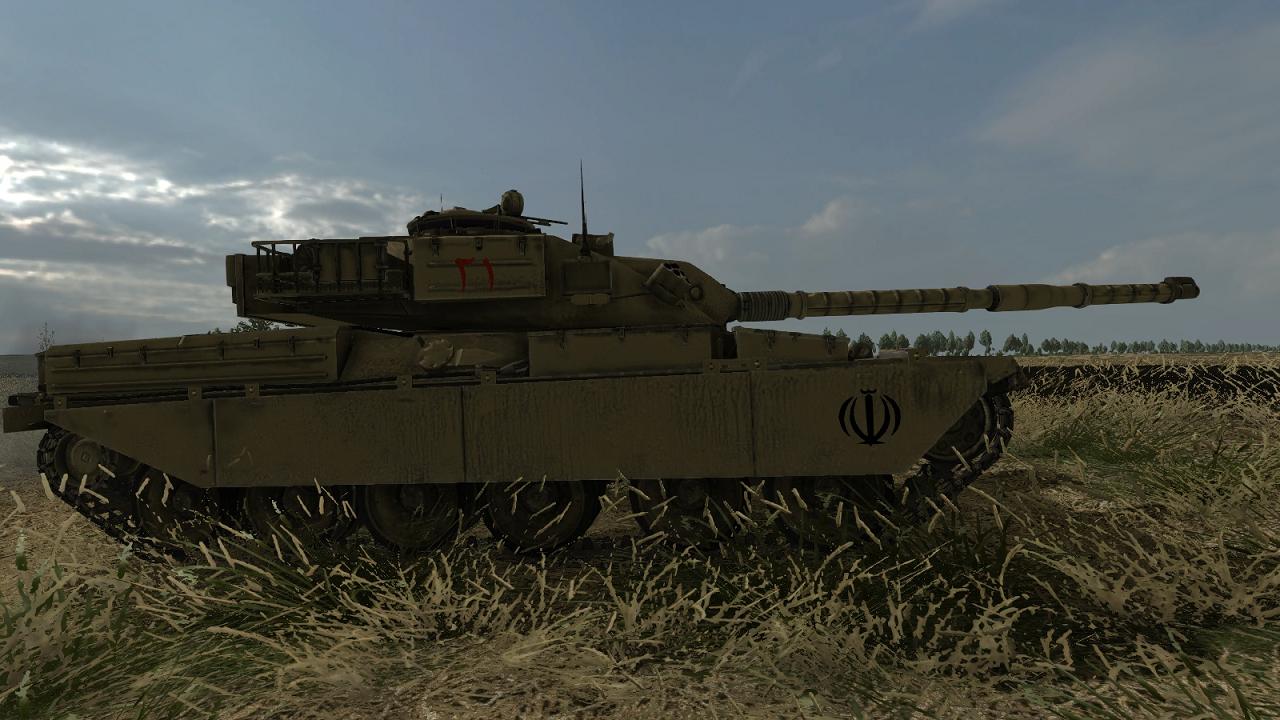
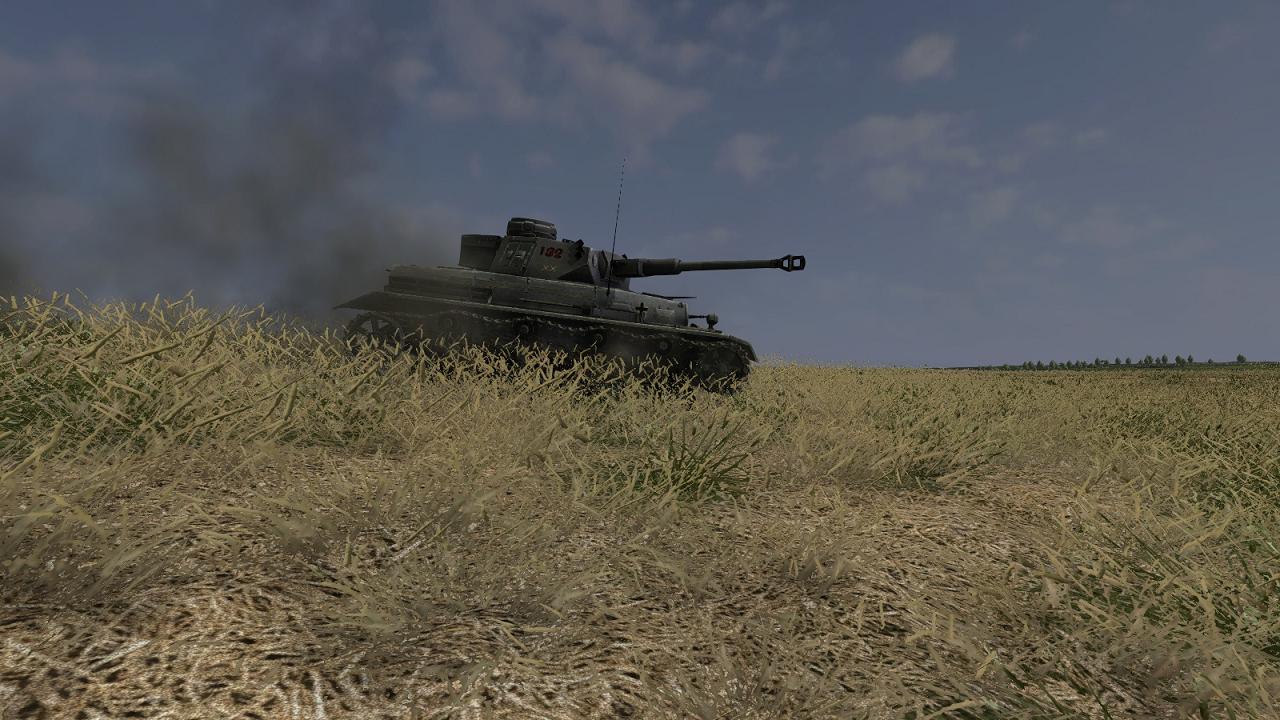
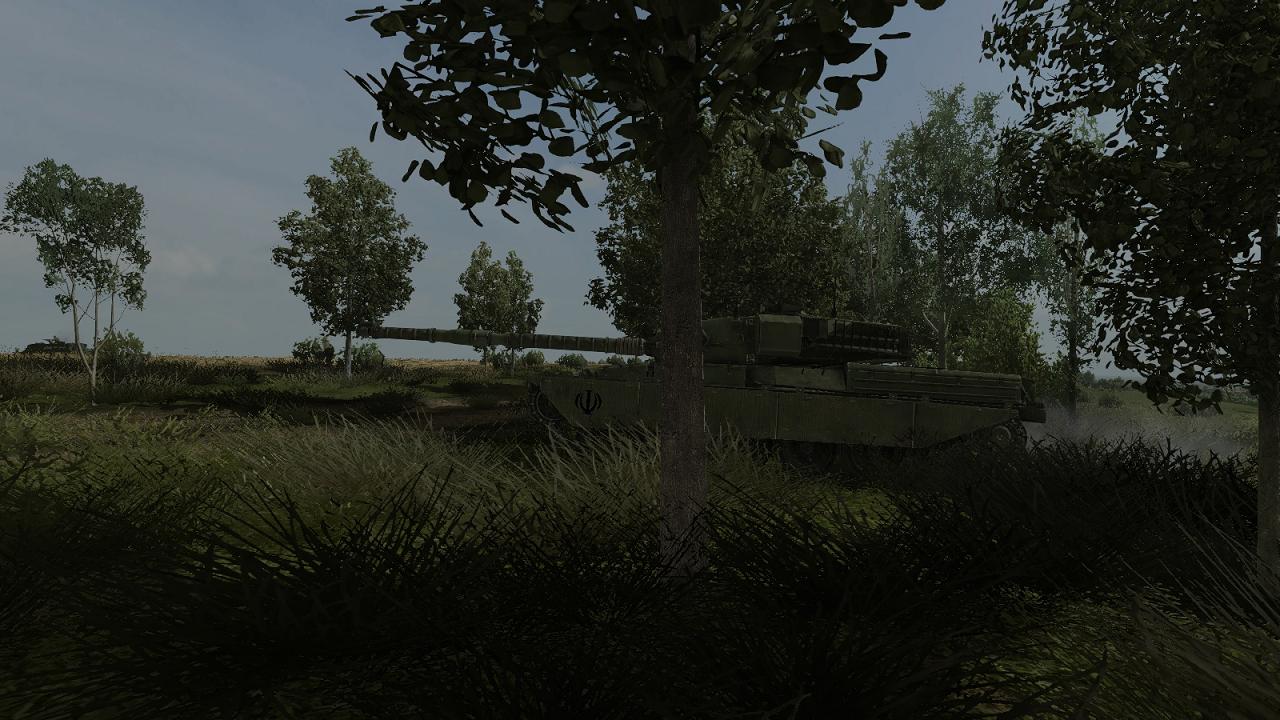
New tanks on an old battlefield! Ukrainian developer Graviteam's widely-acclaimed wargames have entered their third generation with the arrival of Mius Front, but my introduction has come only lately, and with their second-generation series - Graviteam Tactics - Operation Star (GT:OS). Why the wait? Well, I've tried a few PC wargames over the years, namely the original versions of Combat Mission and Theatre of War, and I haven't been massively impressed. Which may seem strange, given that I've been dabbling in wargames for many years - I still have my 1/300 models and terrain for NATO -v- WARPAC, last seen in action circa 1990. Below, Scotia Micro Models T-72As lead BMP-2s as they move up behind smokescreens, before shaking out into line for an attack on an enemy-held ridgeline. Overhead, home-made MiG-27s help keep NATO heads down. I played solo, using concepts aired in the Wargames Research Group's Programmed Wargames Scenarios, but with my own method of drawing playing cards to determine the presence and types of enemy units as my force advanced. Rules were WRG's 1950-1985 set, but adapted to use the more realistic concepts in their 1988 rules for the 1925-50 period (preferred over the 'rival' Challenger rules, with their rather complex move sequence). I also dabbled in a game based on home-made rules for 1/76 scale models - which again, I still have. I much referred the larger battles possible in 1/300 scale, though it's interesting to see that, even in the computer age, wargaming with miniatures, and fairly big ones at that, is enjoying something of a revival with the Bolt Action system from Warlord Games. When PCs arrived, my preference was very much for tanksims over wargames, starting with SSI's Panzer Commander... ...then moving on to Novalogic's Armored Fist 2 and Microprose's M1 Tank Platoon II... I didn't much like Combat Mission Beyond Overlord or, more recently, Theatre of War because to me, they simulated wargaming rather than war. Let me explain myself, here: tactical-level wargames - I have no interest in the strategic variety - cast you in the role of your side's commander. But they seem usually to make you play like a miniature wargamer, with far too much ability - or worse, need - to micromanage, to control individual vehicles or even soldiers. If - as is normally the case, in a post WW1 tactical scenario - you are wargaming the role of a company commander, your 'pieces' should be you platoons, not your individual tanks; if a battalion commander, your pieces are your companies, not your platoons. PC-based wargames seemed to me to lack suitable AI to play the role of your subordinate commanders, and therefore, as I said, simulated wargaming, rather than war, by encouraging - or requiring - micromanagement. To me, this was also true, in their own way, of many rules for miniature wargames. The set which broke this mold in my eyes was the aforementioned WRG WW2-era set. These made your platoons, not individual vehicles, the pieces whose moves and tactics you, the player, directed. I make no apology for quoting some telling lines from Phil Barker's introduction. 'In the hope that players are tired of the traditional fascination with minor and often irrelevant differences in tank armour and penetration, we emphasise tactics, terrain and control. This does not mean that the technical content is inaccurate, but that differences in performance not substantiated by careful research or that are insignificant compared with random factors have been given only the attention they deserve...We pay much attention to troop psychology, to what is possible to and with the men who control the weapons, and how these men can be effectively commanded. Real battles are not fought by nicely-painted model tanks, but by men who are tired, frightened, dirty and often cold and hungry. These rules are set in the real world of rain and mud, dust and mirage.' That's the way to do it! For me, the Graviteam wargames seem to stand out in the genre much as did these WRG rules in their day, and for much the same underlying reason - that they aim to simulate war, rather than simulate wargaming. This is a recent discovery, and was made, not with GT:OS, but with SABOW, Steel Armor - Blaze of War. I tried the GT:OS demo a year or more ago, but it featured a little skirmish in near darkness, which, I decided, made it hardly worth making the effort to get to grips with the complex interface. It was SABOW that helped me learn this interface, because its rather excellent tanksim element is embedded in the same sort of wargame. So when BundleStars very recently renewed its amazing deal for GT:OS - £4.45 Sterling for the original game plus 8 DLCs - I decided it was time to take the plunge. Or should that be, 'pull the trigger'? The mission This being a mission report rather than a review, there should be a mission, right? So here it comes. It's nothing elaborate, or even terribly challenging but it is somewhat unusual, because it mixes and matches different GT:OS elements. This is possible because the game developed from its WW2 Eastern Front roots - sadly not towards the Western Front, but post-war. So my GT:OS bundle includes the following, on top of the basic game and a pack of high-resolution textures: - Krasnaya Polyana 1943 - Shilovo 1942 - Volokonovka 1942 - Sokolovo 1943 ...and post-war... - Shield of the Prophet (Iran-v-USSR in Afghanistan, complete with Chieftains, yay!) - Op Hooper (Angola) - Zhalanashkol (USSR-v-China) While each of these has one or more 'operations' or small campaigns, which are excellent in their own right if SABOW's are anything to go by, the GT:OS Battle Editor allows you to generate fights on any of the included maps, using any of the included side's weapons. You can't have KV-1s on the same side as M60s, but you can take one of the Soviet maps and set up a fight between post-war Soviet and Western troops and tanks. Which is what this mission is about. I really wanted to fight with Chieftains, which are on Iran's side in the Shield of the Prophet DLC, and despite the Iranian markings, look great outside of the Afghan setting... ...but either I'm missing something important, or there's a bug, as I can't for the life of me get Chieftains to respond to orders. So they just sit there, looking and sounding great, but quite immobile. So instead, I set up a fight for the Iranian M60A1s. These have no such qualms! Here's the setup screen, after a few clicks have plonked my chosen friends and foes onto the Eastern Front Sokolovo (winter) map. I have opted to use NATO-style unit symbols, as you can see. In the blue corner, on the left, we have two tank-heavy Combat Teams (in British Army parlance), each with two platoons of M60s and a platoon of mechanised infantry in M113 APCs. There's also a separate company HQ element (which I forgot to add also to the northernmost team); this includes a mortar section, perhaps it is based on Iranian Army ToE's. In the red corner, to the right, we have Chinese forces from the People's Liberation Army (from the Zalanashkol DLC), not using NATO symbols as I now see. This is a practice mission so the enemy is just an infantry company, with no heavy weapons, nothing more dangerous to my tanks than RPGs. The enemy is a company defended locality, with two platoons up (in front) and a third one in depth (behind), with company HQ nearby - a fairly standard deployment, giving both depth and a degree of all-round defense. It has taken just a minute or so's clicking to get this set up. Next step, just as per SABOW, is another click to start the 'Unit Deployment' phase. This takes a little longer, because I take the time to adjust the initial settings to bring each platoon into close formation. Below, you can see the result. In each Combat Team, a four-tank platoon (blue diamonds) is either side of a mech inf platoon (blue 'pointy rectangles'), all facing east. The enemy is indicated only by the red PLA flags north and south of Animal Farm (somebody who built this map was maybe a fan of George Orwell, because the Soviets certainly were not). The conventional symbols on the map indicate things like the cover available at each spot you can place a unit. There is also a 3-D 'real world' view for this purpose, which is handy if you want to place units with more care (eg hull down or in cover, for defensive operations) but I'm not hanging around and am usually happy to use the map view, if I'm attacking. The next step, when happy with deployment, is to click forward to the Unit Orders phase. The main difference is that from the same map, you get access to the full in-game set of command icons. This being a try-out rather than a deadly serious battle, I keep my orders simple. Each infantry platoon is ordered to attack frontally the nearest enemy position. On either flank of the attacking APCs, a tank platoon is to advance to a fire position short of the enemy positions (hopefully at no closer than extreme RPG range) from which they can shoot the infantry onto the objective. Wider angles between covering fire and assaulting troops would have been better but otherwise, it's all fairly conventional. The blue lines show the lines of advance for each platoon; you can set up dog-leg routes. This pic was taken just after I started the battle, hence the clock at the top is ticking. I haven't yet worked out how to control indirect fire support, but I try to set the company HQ mortar section to hit the enemy localities, though I am not sure if it will work. I'm even more clueless as to whether I could have opted to have off-map artillery in a quick mission. But until I can control my organic supporting weapons, there's not much point. This will be mostly or wholly a direct fire job. Below is the bird's eye view - drone's eye, these days - as my troops begin to move off. I hadn't ordered my troops to mount up - I wasn't sure if they would debus to make the final assault, and don't yet know how to make them do that. There's a choice of icons, but I just turn them off. From Youtube videos, a lot of people play with these turned on - or maybe it's just for their videos. I hate markers with a passion; I would simply not play a game that wouldn't let me turn them off. The currently-selected (M60) platoon is on the left, with the M113s and dismounts bottom centre and right. Another thing people seem to do (again, maybe only for videos, but I have my doubts) is play GT:OS from an airborne, God's Eye view. Again, to me this is unrealistic and anathema, even if it is a convenient way of monitoring the battlefield. The pic below shows the view with the hated icons turned off and the camera lowered. Much better! Again, this is the southern company group; the right-flank M60 platoon can be seen moving up to support the mech infantry in the foreground. At this point, I drop the camera to ground level and track over to the right-flank tank platoon. One day, I may have a go at making a little mod without Iranian markings (they are more conspicuous on the 113s) as I plan on doing a lot of simulated NATO -v- WARPAC stuff in GT:OS. A single keystroke will, for as long as I need it, bring up the command interface or (as below) the location markers, which are useful for orientation. For now, as my AFVs grind forward noisily through the snow, I'm content to use what time I have to watch my southern Combat Team advance. I've made my plan, given my orders, and now it's time to see how it pans out. Like real life, GT:OS plays out in real time - you can pause, speed up or slow down the action, but the only turns are in the operational level in GT:OS campaigns. This is a big plus for me. I don't have too long to wait before the balloon goes up. Automatic weapons fire breaks out somewhere up ahead and left. I see red and green tracers cutting back and forth. A beeping sound, familiar from SABOW, tells me there's a message 'on the air', and I know that it must be a contact report. Which is exactly what it is. Lt. Kashani, on the left of the southern company group with his four M60s, is reporting in, confirming that the party has begun! ...to be continued!
-
...and while GT:OS in NATO -v- WARPAC mode can't compete with the authentic settings of W:EE, and has nothing like the latter's huge range of kit from that theatre, there's still more than enough for the sort of operations pictured with my 1/300 miniatures, except I have to use T-62s instead of T-72s, and BMP-1s instead of BMP-2s... If only Graviteam would yet make a mainstream Cold War DLC! But I'm rather delighted with what's possible by simply combining Eastern Front maps with the units from the modern DLCs. 'Hello Charlie Charlie 1 this is India 1, Phase 1 complete, MOUNT UP for Phase 2 now, out to you... ..Hello Tango 11 this is India 1, can you please pull Tango 11 Bravo free from that bloody shellhole! ..Ignore my callsign India 31 Bravo, he'll need more than a quick tow! Out!'
-
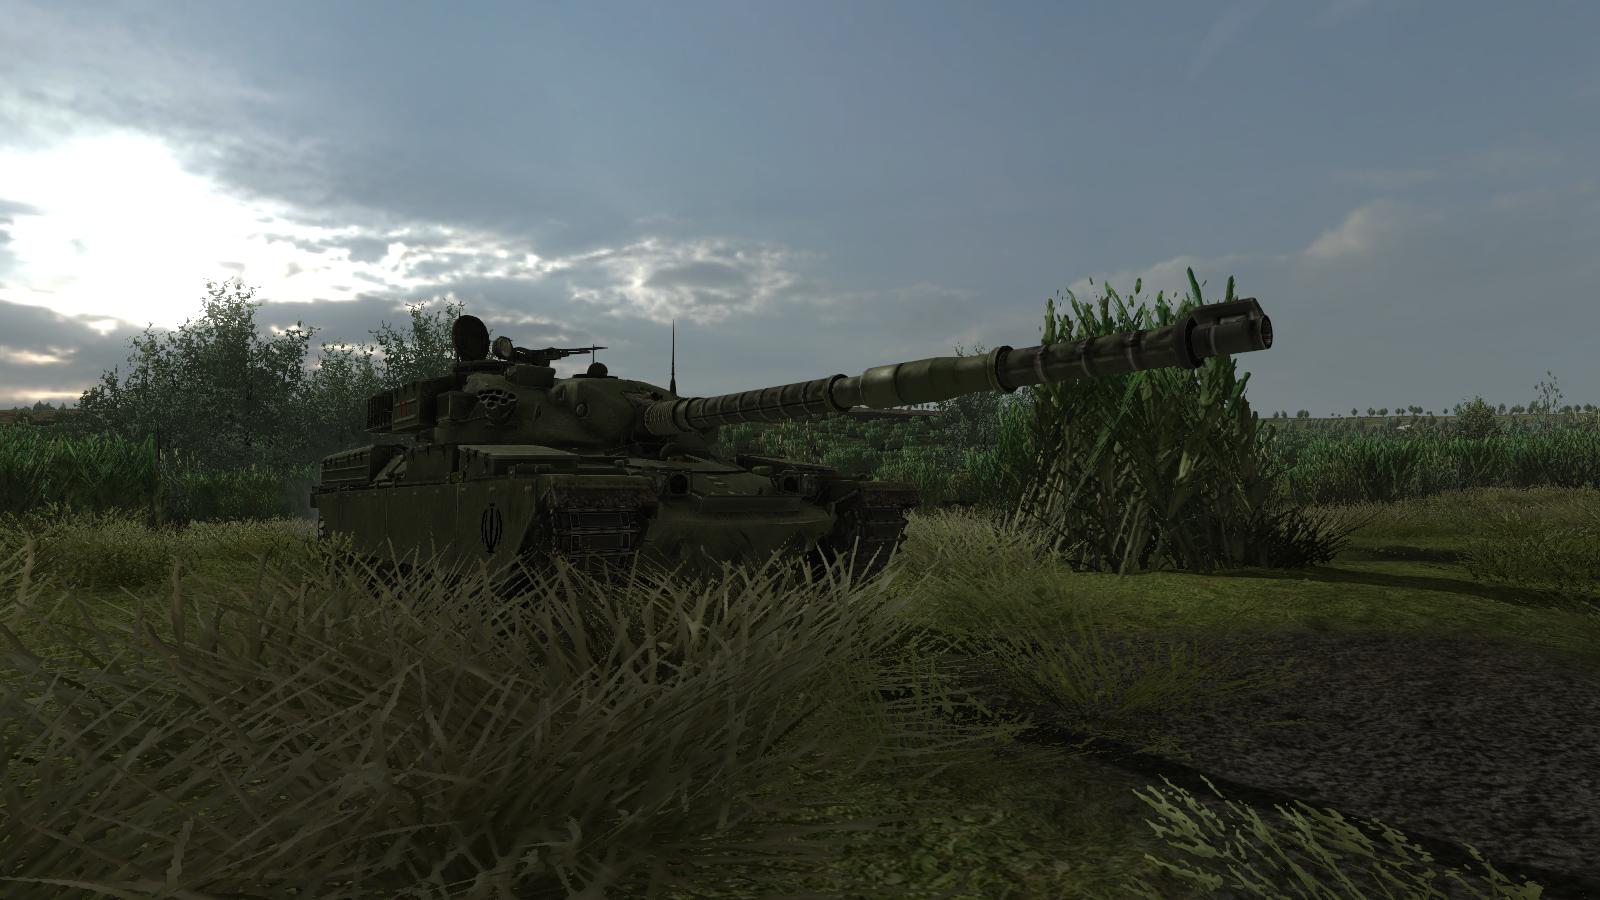
...and to conclude, here's some Chieftain action, as, on the Shilovo map, a tank-heavy Combat Team (company group) attacks a dug-in enemy infantry platoon. A Chieftain troop grinds slowly but purposefullly forward on each flank, to make first contact, on the left,,, ...and on the right... The tanks bump the enemy and take them under fire. The APCs now move forward in the centre, to a position from which the troops will dismount and make their assault... Company HQ calls in an artillery strike before the APCs get 'danger close'... ...but I've been too hasty, for my fire falls about a hundred metres south of the enemy positions... The indirect fire support having mis-cued, some further direct fire does the needful. The left-hand tank troop moves onto the flank of the enemy position, their enfilading fire causing the defenders further casualties and suppressing the survivors... This leaves the mechanised infantry little to do, but gun down some enemies who leave their trenches and try to make a run for it... Meanwhile, tracers fly as the right-hand tank troop faces north-west and engages the second enemy platoon position, preparatory to the whole force re-organising and then re-orienting for Phase 2... With those painfully slow Chieftains, everything has to be played out at their pace - lose patience and let the APCs get ahead, and things can turn nasty, rather quickly. But I'm getting the hang of it. And before I have even tried any of the many operations that come with the super BundleStars package, I'm finding that GT:OS is a great little sandbox for just the sort of wargames I played with miniatures, all those years ago.
-
...and I got the Chieftains moving, in the Shilovo map, though they are VERY reluctant to start moving, and when they do step off, they creep rather than move, with frequent halts. You really need to get them moving the day before the APCs move off! But at least they're moving, though even Chieftains should move faster. It's not quite NATO -v- WARPAC, but it's close.
-
Assault and fight through As my attack goes in, I keep the camera on the southern Combat Team, whose mech infantry platoon is soon crossing the tree-lined road which runs diagonally across their route to the objective. Meanwhile, as intended, the tank platoon on their left, which hit contact first, is engaging unseen enemy troops to the east with co-ax and main gun fire. With considerable success, apparently, because I suddenly hear another beep and this time, when I pull up the map, the message tells me that the southern key point has been taken, already. In the pic below, this is signified by the flashing green circle overlay (clicking on each message in the list top right causes its sender and subject to be highlighted in this fashion, which is neat). Territory is generally a key victory condition in GT:OS (or SABOW) and you gain ground by occupying these key points. By this time, the paths of the attacking infantry and the right-flank M60 platoon have converged somewhat. In the picture below, you can see two of the tanks sliding in from the right as the dismounted troops advance, covered by the .50 calibre HMGs on their M113 'battle taxis'. The manoeuvre goes to plan, however. The tank platoon - which started behind the 113s but has edged ahead as the latter were moving slowly with the dismounted mech infantry - halts to shoot the infantry onto their objective. In this flat landscape, there's not a lot of cover for big things like M60s, so it's hard to tell if they are making much use of what cover there is. There are orders about taking up defensive positions which you may be able to batch with attack orders, but so far, I'm reasonably happy with the tactics my platoons are employing, without my having to micromanage them. The southern mech infantry is soon passing in between the halted tank platoons on either flank and presses on to the objective. Even though the foremost enemy platoon must have been destroyed or driven off, a second platoon is in depth here and my troops are soon engaging it, with little streams of reddish pink tracer lacing the landscape up ahead - unfortunately the combat photographer hit the shutter in between bursts, in the picture below. The effects are quite realistic; there's no Holywood nonsense involved. This M60 seems to have done a decent job of using the limited cover from view that's available in their platoon's battle position... At this point, GT:OS decides the battle is over and brings up the results screen! The detailed statistics seem quite satisfactory, but the overall result is plain daft. I guess the battle has been concluded because both key points are reckoned to have been taken - the attackers dominate them and outnumber the few surviving enemies. But the 'Draw' result is just nonsense, since the stats show that we have taken all the enemy's territory and inflicted very heavy casualties, out of all proportion to those we have suffered. This happens in SABOW as well as GT:OS - you get a draw or even a minor defeat, even though you have clearly won. I find convincing, neither of the reasons I have seen mooted for this. In a campaign battle, things may not have gone so well outside your area of operations, but even if that's so, you have still won your own particular battle, since you fought it successfully. In any kind of battle, as in this one, you may have had significantly more powerful or more numerous forces, but a not-especially-glorious win is still a win. Let's say the Iraqi and coalition forces kick ISIL out of Mosul and mostly destroy them, with few casualties - that's a clear victory, right? Not if you're playing it in GT:OS or SABOW - because you had an overwhelming advantage in forces, you'll likely get awarded a draw. This of course is not sour grapes. It's just plain daft. I seem to recall a patch toned down this tendency in SABOW but I think it's still there, and it certainly seems to be, in GT:OS. I've seen at least one other player say he just disregards the headline results. If it can't be changed, a mod which alters the text from 'Draw' to 'Minor victory' and from 'Minor defeat' to 'Indecisive' might be better than nothing. It's not a killer, but I find it highly and needlessly aggravating, when the headline result is so completely at odds with the reality on the virtual ground. As with SABOW, while (IIRC) you can't continue the fight after the outcome is announced, what you can do is inspect the battlefield, via the 'Statistics' phase. Here are some of the sadder statistics from this battle, in the form of enemy casualties. It's noticeable that the enemy were entrenced, even though I made no effort to arrange this, in setting up the battle. It's unfortunate I can't fight on, becasue my original orders did not provide for an attack in depth to match the depth of the enemy defences. Now, my platoons have halted on their original objectives, the tanks short of the enemy forward positions and the APCs just beyond them. As the battle ended, freezing the action, the tanks on the extreme southern flank were still firing at possibly fleeing enemies, their tracers zipping rather dangerously past and over the heads of the 113s and their prone dismounts. Yes, I know - I did say earlier that I should have chosen fire positions for the tanks that were more at right angles to the axis of the assaulting troops. Below is the Statistics screen with the main interface turned back on. This illustrates the mini-map, top left, and top right, the unit status read-out, here displaying the unfortunate fate of the enemy HQ trenches. You can also opt to display hits and penetrations on vehicle targets. I did tell you at the outset that this wasn't an especially interesting or exciting little battle. But even just using the most basic commands from the many more available, it did confirm to me what GT:OS is capable of. I will want to learn now how to control on- and off-map fire support, and to make more sophisticated plans and give more sophisticated orders. I hope also that I can get the Chieftains working properly, because even in Iranian markings, they look very much at home in a more European battlefield... And of course, there's always where it all started, on the steppes during the Great Patriotic War, aka the Eastern Front of World War 2... In terms of gameplay, GT:OS has a very different take on things from the other PC wargame that I have found generally met my particular expectations - Wargame: European Escalation, with more realistic command and control than W:EE's point and click methods. And GT:OS's sounds and visuals are mostly well up to tank sim standards. Despite an apparent tendency to bring down the curtain somewhat abruptly and a penchant for making screwball assessments of the results of a fight, I'm really liking what I'm seeing so far in GT:OS.
-

From the album Steel armor - Blaze of War
-

GT:OS, M60A1s and M113s assaulting dug-in troops, using a WW2 map.
33LIMA posted a gallery image in Member's Albums
From the album Steel armor - Blaze of War
-
From the album Steel armor - Blaze of War
-
From the album Steel armor - Blaze of War
-
From the album Steel armor - Blaze of War
-
From the album Steel armor - Blaze of War
-
From the album Steel armor - Blaze of War
-

From the album Steel armor - Blaze of War
-
Graviteam Tactics: Operation Star bundle (8xDLC) on massive sale on Bundlestars
33LIMA posted a topic in The Bunker
Just bought this, just £4.45 Sterling (requires Steam account), for this lot, sale on for a further 3 days only: - GT:OS - Shield of the Prophet (Iran-v-Iraq, complete with Chieftains, yay!) - Op Hooper (Angola) - Zhalanashkol (USSR-v-China) ...and on the Eastern Front... - Krasnaya Polyana 1943 - Shilovo 1942 - Volokonovka 1942 - Sokolovo 1943 - Hi-res textures. Having now played SABOW, hopefully the wargame side of that product will be a decent intro to the mechanics of these dedicated and widely-acclaimed wargames. -
Graviteam Tactics: Operation Star bundle (8xDLC) on massive sale on Bundlestars
33LIMA replied to 33LIMA's topic in The Bunker
Just playing around with the quick battle option at the moment. Having played SABOW definitely makes the GT:OS wargame easier to pick up, though there is still a lot to learn. Panzer IVs attack and fight through a hapless Soviet infantry platoon... ...while Iranian Chieftains provide a taste of what a Cold War NATO-v-WARPAC DLC might look like, using maps from a different DLC... The problem I'm having at the moment is that Chieftain platoons are simply refusing to move or attack, in any quick battle; other tanks respond to orders in similar scenarios, but the Chieftains just sit tight and let the armoured infantry I want them to support - which obey similar orders - get beaten up by the defenders. Weird. Edit - Chieftians now moving - they are just glacially slow. -
From the album WOFF
-
Camel shooting down observation balloon, Wings over Flanders Fields
33LIMA posted a gallery image in Member's Albums

From the album WOFF
-
Camel strafing Hun aerodrome, Wings over Flanders Fields
33LIMA posted a gallery image in Member's Albums
From the album WOFF
-
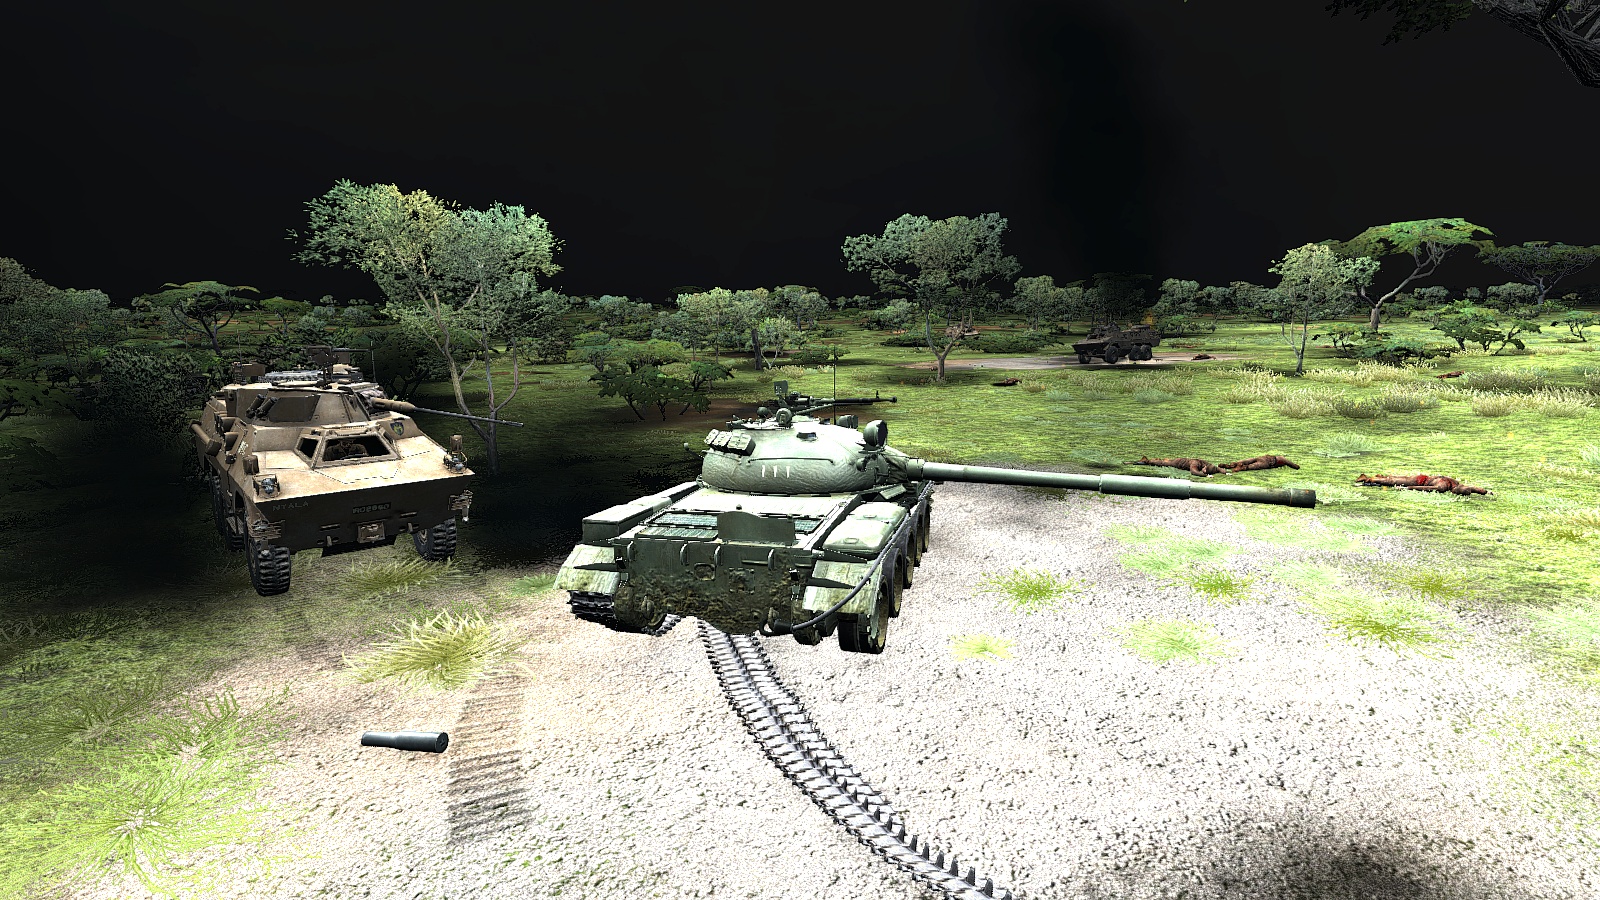
Ratel IFV & knocked-out Cuban T-62, Angola, Steel Armor Blaze of War
33LIMA posted a gallery image in Member's Albums
From the album Steel armor - Blaze of War
-
South African infantry, Angola, Steel Armor Blaze of War
33LIMA posted a gallery image in Member's Albums
From the album Steel armor - Blaze of War
-

From the album Steel armor - Blaze of War
-
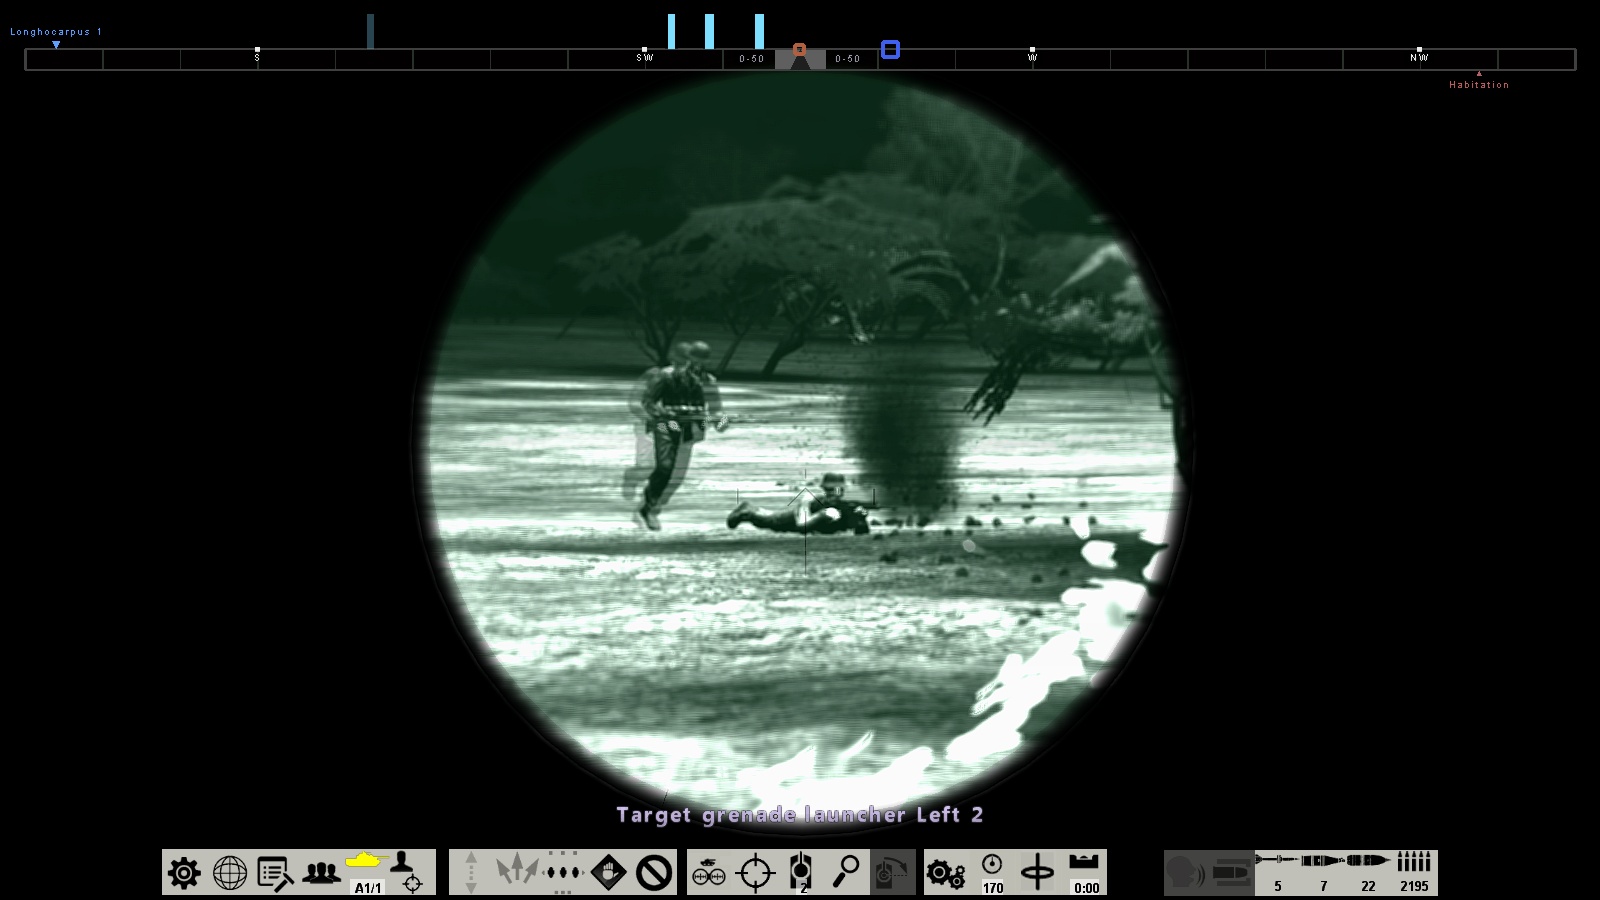
Recoilless rifle through T-62 gunner's night sight, Steel Armor Blaze of War
33LIMA posted a gallery image in Member's Albums

From the album Steel armor - Blaze of War
