


33LIMA
-
Content count
3,749 -
Joined
-
Last visited
-
Days Won
7
Everything posted by 33LIMA
-
From a view to a kill! A check of my map confirms I've been rather too hasty in my identificatyion of the group of vehicles I can see, as my objective. They're too close, and more to the point, they're in the wrong direction - just north of due west at a few hundred yards, when they should be nearer a mile away to the west-south-west. Nevertheless, I mark their apparent position on my map, for future reference - in the red oval below. I back off and choose a new route. I will return to the first RV and from there, head south, along a roadside hedge running in that direction; then I'll turn west, to the second RV. The dashed red line shows the route I plan to take. The map tells me there is a long break in the hedge but there is no continuous cover in any direction. The next cover along the road looks a long way off - in fact, it's only just about a hundred yards - but I decide that's where we're going. We'll rely on the long summer grass to keep us out of sight. For the first time, I use my sniper scope to scan, but see nothing. There's no point hanging around any longer. Time to go. As we move, one at a time, the Luftwaffe continues to make its presence felt. There are two FW 190s in trail formation, buzzing back and forth every so often. I'll take a chance on them not spotting us; nothing else for it. Why are they here? Is that group of vehicles, or the man I've come here to kill, what they're flying cover for? I have no way of knowing, so I put then out of my mind. Nevertheless, with those two enemy fighters adding to my sense of exposed vulnerability, I'm in such a hurry to get us over that open ground that I keep us both moving at the same time. Most of the way, it's uphill and we crawl on our way as fast as we can, without rising above grass-stalk level. At last, I reach the cover of the shrubbery, and halt. I have no sooner stopped, than I am horrified to see a German walk down the track in the opposite direction, passing by so close I could reach out and grab him through the hedge. Concern for my companion is my first reaction but before I can act, there's a burst of SMG fire directly to my rear, from the bush the German's just disappeared behind. I see the grey smoke from his weapon. There isn't a second burst. I can't hear my buddy's whispers at this range but he's not dead. The Kraut was firing at him, no doubt at all - I'd have been dead meat, if I'd been the target. I lie still, watching for the rest of this new patrol. They don't come. The German seems to be on his own. 'Seems to have been', I should say. Past tense. Slowly, the tension lifts. It's been a close call, but we're still in business! ...to be continued!
-
'To get to the other side!' I quickly decide to cross the road at this point, before heading west the short distance to the first RV. When I get there, I will plan the rest of my route, in the expectation I will not be taking a direct line between each of the RV points, but using whatever cover I can find en route. I call my buddy forward, to join me near the gap in the hedgerow by the road. We wait a few seconds, then it’s time to cross. This time, I decide I will move first, so that I can see for myself whatever there is to be seen. I crawl out into the road, looking left and right. At first, I can see nothing in either direction, just the grey strip of the road, unrolling on either side between those Norman hedgerows. I am about half-way across when I glance right again - and freeze. It’s the movement which gives them away. There, to the west, a couple of hundred yards away, hugging the right-hand side of the road, is the enemy patrol – several soldiers in single file, trudging in our direction. I spin around to face them and immediately start edging to my right, back the way I came. You can’t see the enemy in the screenshot above, but they’re there! In Iron Front, as in Arma2 and OFP before it, holding down the right mouse button pulls a limited zooming effect, at the cost of cropping your peripheral vision. It’s a good way to focus on something, in a way which compensates for the limitations of MonitorVision. If I hadn’t used this when looking up and down the road, I might have missed the enemy completely. I get back into cover off the road and breathe a sigh of relief. It very much looks like the patrol is running a circular route, and that they will turn north again before they come close to our current position. This sort of predictable patrolling is a big no-no, an open invitation to be ambushed. But not by me - I am here on more important business. I decide to move directly away, to the east, along the hedge beside the road. While looking in that direction earlier, I had noticed a slight dip in the road a few yards away, before it rose up to a low crest; we will crawl across in that dip. I nearly foul this up by switching to the ‘Tactical View’ which Iron Front provides if you have other troops under your control. I haven’t been using this at all so far, but for some reason, I decide to check it out now. Here’s what I see. The mistake I make, thinking about it later, is that I inadvertently order line formation, which causes my buddy to go back across the road, since that formation places him on my right, out in the open. I only notice something is amiss when he doesn’t crawl past me as usual, when I order him to leapfrog ahead of me, along the hedge. Instead, he comes in from the road. Again, we get away with it, because the ‘Stealth’ tactical mode I had sensibly ordered at the start, keeps his head well down. Like my own! On we go, passing a gap in the hedge. See what I mean, about dragging the muzzle in the dirt? About this time, I get a fright when I hear engine noise, but it turns out to be not a vehicle, but an enemy aircraft with a rather truck-like motor sound, reported by my ever-alert buddy. Some Luftwaffe crew evidently hasn’t heard, or doesn’t care, that the Allies have air supremacy in the daylight skies of Normandy! We come to a side-road which we cross with the usual precautions. I’ve been expecting this from the map and it helps me confirm my position - this little 'T' junction is in fact the location of the first RV. We’re perhaps a little too close to the enemy patrol route for complete comfort, but in good cover. The RV is in a bit of a fold in the ground and I decide to crawl just a little further, to see what’s visible from the low crest up ahead. I’m soon glad I did so. From my vantage point, I can see a group of sand-coloured and evidently man-made objects, in a row in front of the tree-lined skyline a few hundred yards ahead. I don’t need my telescopic sight to see that it’s the enemy; only in the less authentic movies are later-war German military vehicles painted ‘panzer grey’. The more prominent object on the left I can see is a truck with a box body, just like a conversion I made many years back of the Italaeri 1/35 Opel Blitz. This is probably an HQ vehicle and its location, about where the target should be, tells me I’m probably now looking at my objective. Less happily, the object on the right looks like a Panzer IV, its turret pointing north above the flat protective plates which clad its hull sides. OK, now we’re getting somewhere and better still, that ‘somewhere’ isn’t ‘lost’! Despite the close country, short lines of sight and making that unplanned detour, my navigation has proved to be up to the job. So far… I take a last look at my objective…’last’ for now, at any rate. I need to head over there and get into a more suitable firing point, avoiding the temptation to make a beeline for the enemy HQ. I'm too far for a good shot and don't have a decent view of the objective from here, either. Besides, that patrol is likely due back in the vicinity at any time and I don’t want to be here when it arrives. I need to backtrack, then re-orient myself and plan my next move – literally. ...to be continued!
-
'Why did the sniper cross the road...?' If you're still reading this, you're likely either exceptionally patient, or like me, you find crawling around in the grass (real or virtual) trying 'not to be seen', more fun that merely 'running and gunning'. I hope it's the latter, because we're by no means finished with the crawling. Having decided to turn east, away from out objective, we have some luck, in that the hedgerow we're using for cover is actually two rows, between which we can more, staying in the shadows. The enemies we've spotted so far are to the south and south-west, so I keep my number two covering that arc as we move one at a time, advancing along the same line close to the right-hand hedgerow and leapfrogging one another as we go. Soon, the hedgerow peters out and we cross a short open space to link up with the next one, which is more an intermittent series of clumps of shrubbery, running roughly south. I know from the map that this will take us down to a road, just west of my first RV point. Here's the map again. It's not shown in-game, but the red dotted line and arrow which I added later show the route we're taking...if I'm not lost, that is... And here we are, heading south. Although now being on the eastern edge of the shrubbery means we're no longer in it's shadow, we're keeping such cover as there is, between us and the enemy...the ones we've spotted, anyway. On we go, always one moving while the other covers. And crawling the whole time, both of us. The crawling animation in Iron Front is OK, unlike the 'walking/squatting crouch', except that your soldier commits the cardinal sin of not keeping both his hands on the weapon. The right hand grips the rifle in the usual position on the stock. However, instead of holding the handguard, the left hand is on the ground, allowing the muzzle to drag in the dirt. Not so clever. You may also think that we're rather too exposed, but here's what I can see from eye level. Which is, not a lot. An enemy will be need to be almost on top of us, before he sees us. And with one of us static at all times, hopefully even then, we'll see him, first. As it happens, no enemies have been spotted for some time. But it's still pretty tense, when we have to crawl across a stretch of open ground between cover. I use standard obstacle-crossing drill here - sending my buddy over first, covering him from the near side. Once across, he 'goes firm' and covers me over. Finally, after what seems like an eternity, we come to the road! ...to be continued!
-
Out in the open! Crawling forward one at a time, it seems we have not gone very much further when the enemy patrol returns. It's not me who spots them first - my ever-vigilant buddy, who is on my right between me and the enemy, does the needful. He calls out sightings to our right rear, which drift from right to left. I turn and see them, the same single file of Germans and this time, tI see that heir rifles are at the ready, not slung as I had thought before. We lie still and once again, they pass us by without spotting us. I watch as they turn right and move away at right angles, perhaps along the very road we're aiming for, which must be close ahead somewhere. You can just about see one of the enemy patrol in the pic below; he's just left of the bush at the base of the prominent tree, to the right centre of the screen. We lie quite still for several long seconds after the last of the enemy disappears from sight. But they are not alone. My number two reports seeing more enemies up ahead, a few hundred yards off. It looks like this neck of the woods is not a healthy place to be, for a pair of GIs. I lie still for a bit longer, considering my options. I look at the map and deside I'm not going to risk another encounter with the patrol, or wheover might be up ahead, in this strip of woodland. The map tells me there are other broken strips of woodland or thick hedgerows leading off from the one I'm in, to the east. And that if I follow one of these for a short distance, I can turn right along another hedgerow leading back south. This hits the east-west road just east of my first RV point. In effect, I can break track and displace my leg to the south, by about 50 -100 yards to the left or east. I backtrack to where there's a gap in the woods, looking for one of the east-west hedgerows. I can't see one, so I slide sideways into the gap for a better field of view. My buddy dutifully covers to the south. I send my number two out into the field first. He's proved to be an excellent spotter, and I fell sure he will warn me if there's anything nasty out there. All is clear. Not daring to rise from the prone position and relying on the long grass to keep me concealed, I move out into the open. I quickly pick up an east-west hedgerow and start moving along it, keeping the cover between me and the enemy to our south and west. You can see that we're now moving east, from the fact we're heading towards the rising sun. The hedgerow is thick and tall but not continuous, as the map indicated. But there's no point in dallying further, we're soon on our way. Once, my spotter reports enemies to the south, but they are now distant and no immediate threat. I relax a little. We seem to have extricated ourselves from a rather dangerous spot. But we haven't made even the first RV yet. At least body and soul are still together! ...to be continued!
-

WoFF screenshot of the month, August - V-strutters
33LIMA posted a topic in WOFF UE/PE - General Discussion
Not many people wanted to 'Meet the Fokkers' so how about pics of planes with V-shaped interplane struts, for August 2016? I reckon that's the Albatros D.III, D.V and the Nieuport 10, 12, 16, 17, 23, 24 and 27. To get started, here's a D.V of someone who sounds like he's on the wrong side, Olivier Beaulieu-Marconnay -
WoFF screenshot of the month, August - V-strutters
33LIMA replied to 33LIMA's topic in WOFF UE/PE - General Discussion
Homeward bound...Albatros D.III of Jasta Boelcke returning to Proville: -
'If you go out in the woods today...' Right, off we go! It’s just after dawn amongst the hedgerows of Normandy, July 1944. I’m a sniper with a scoped Springfield bolt-action rifle and in ‘belt order’, just the minimum of kit slung from my web belt. Of course, I and my M1 Garand-armed partner should be properly ‘cammed up’ - if not wearing gillie suits, then at least with helmets camouflaged, exposed flesh blackened and some local foliage strung about our persons where it won’t easily fall off. Without any of this, and no option to acquire it, I feel a tad exposed, already. Perhaps we’re just regular GIs who have been ‘volunteered’ for this show, rather than a professional sniper team. But even common-or-garden line infantrymen know how to do better than this, ‘Fieldcraft 101’ as it were. But at least we’re travelling light, which is sensible. There is a track to our immediate left and to the left of that again, a strip of woodland, both running south, roughly the way we want to go. Down the track a little way, there’s some knocked-out German armour. Ahead and to our right, there’s an open field, bounded by hedgerows, not the sort of open ground I want to cross in daylight. From what I can see for myself and from the map, I decide I’ll use the south-pointing finger of that strip of woodland on the left, to cover my leg down to the first RV point. The German forces in Normandy were stretched so thinly that at any given point in time, some sectors lacked anything resembling a continuous front line. This must be such a sector, I tell myself, or they wouldn’t be sending us, right? The 'briefing' certainly has no useful information on enemy strength, dispositions or routine and there's no time for anything but a 'map recce'. So I decide that what I need to be prepared for is the sort of things a well-stretched force would have deployed – standing patrols on foot or in light vehicles, and possibly some static OPs or listening posts. I will avoid contact at all costs. If we do nevertheless bump the enemy, we will immediately break contact – using fire and movement, in reverse - and possibly scrub the mission. Which is to locate and kill an enemy commander, not risk death in a firefight for the sake of clobbering some mere underlings. The settings I’m using show nothing on the map, beyond markers placed either by me or the mission designer. In the Iron Front missions I have – a mix of stock, D-Day DLC and user-made - some builders don’t even bother marking your start position, which is just plain bonkers. Not a problem this time. But because the map will display neither friendly nor enemy units, once I’ve started moving I’ll have to navigate by map, compass and Mark I eyeball. Which will be part of the attraction of this mission. I’ll just have to try extra-hard not to get lost! I’m well used to playing OFP missions where I’m on my own, so I’m comfortable enough with this one. The extra eyes, ears and firepower of a single companion will be a big plus, without the hassle of managing a large squad via IF/ARMA2’s arcane key combos, which I’m still working on mastering. We get into cover and I set up my oppo (‘opposite number’) to cover to our front. We watch and wait, but see or hear nothing, apart from birds chirping. So I slide to one side, then turn left, get up and double across the track, going firm on the other side amongst the thick foliage cover there. After hitting the dirt, in the approved fashion I crawl to one side, so as not to reappear in the same position an enemy may have seen me disappear. I have no idea if such things help in soldier sims, but I find it more immersive, applying the drills I’ve been taught. Nothing happens. I scan my front, left to right. The fairly dense growth all around amongst the trees limits my view in all directions, but provides good cover from view. I have already decided that we will advance individually in short bounds, one man halted and covering the other. As the instructors say, like a parrot climbing a cage, with one foot firmly on the ground at all times. The next choice to be made is whether, in so moving, we will prioritise stealth or speed. In fact in IF/ARMA2 there is a scale - which you set using a ‘tactical mode’ – ranging from ‘slow but stealthy’ to ‘fast but incautious’. I set my buddy’s mode to ‘Danger’, one step less than the slowest, ‘Stealth’. All remains quiet, so I call my buddy over to join me, sending him off deeper into the woods, on my left. He moves a bit faster and less cautiously than I would have liked. I cringe, waiting for the burst of fire and the sight of him crumpling to the ground. But no shots come and he makes it, dropping out of sight. Now, it’s my turn. Still prone, I edge back and left from my fire position, rise to a crouch, and move off. The 'running crouched' animation is fine, but the walking crouch in Iron Front is a bit naff, sort of like moving while squatting, legs bent far too much. Armies teach their soldiers precise methods of moving, from the normal ‘Walk’ to the prone ‘Leopard Crawl’, to use the terms I’m familiar with. The IF/ARMA2 ‘squatting crouch’ movement just looks un-natural. I’d have preferred either a more natural, bent over crouched run, or something like a ‘Monkey Run’ option, where you stay on your knees, balance your weapon in one hand and move forward, staying low, with the fist of your free hand forming a third point of contact with the ground. I go down again, taking up position so as to be able to fire around the right-hand side of the base of a solid-looking tree. If you’re right-handed, it’s best to fire around the right side of cover, as that exposes less of you as a target. If I really had to use the left side, I generally swapped shoulders with my weapon, but you can’t do this in Iron Front. Facing nearly south, I mark a tree slightly right of my axis of advance – maybe ten yards or so ahead, any further and he’ll be out of sight in the dense shrubbery. ‘Move there!’ I order my buddy, and off he goes. ‘Observe to the south!’ I tell him, and he duly spins around and watches along our axis. I, too, watch and wait. I see and hear nothing, and nor does he, for he makes no report. As I have been given no idea where the enemy are, and could bump them any time, I decide that from here on, we will both crawl forward, as a rule. Very, very slow, but much safer. So I order my buddy into ‘Stealth’ mode. This time, he crawls forward to the next position I designate for him, just as I want it. I'm now keeping him offset to my right, so we'll not mask one another’s fields of fire ahead; and keeping our bounds short, so that neither of us should run into something that the other will not be able to see. I get a bit of a scare when I notice a metallic-looking object like an aluminium toffee apple planted in the ground, as I take cover beside my next tree. My first thought is that it's some kind of booby trap, even if it's a bit conspicuous. I see no trip wires and it doesn't go 'Boom!' as I lie close to it. What could it be? I have no idea. It might be a geophone to detect the sound of movement, though I'm not sure the Germans used such things in WW2. But it seems benign and is a bit too colourful to be real military hardware, so I ignore it. At one point, I hear voices. Not my buddy’s sotte voce acknowledgements, but somebody talking briefly - in German, I am convinced. We freeze and watch our arcs. I think the sound comes from somewhere outside the woods on the right, not especially close. We wait a bit longer. It is quiet again. So we resume our slow advance. In these conditions, amidst all the foliage, fields of view are so short that my sniper scope is of no use to me. At one point, we come to a spot where the shrubbery is less dense on either side, giving me narrow arcs of view out into the fields to left and right. There's no sign of life, neither friend nor foe. I re-orient myself with map and compass, but it’s hard to decide how far we have gone along the stretch of woodland that will take us to the first RV point, where the woodland is cut by a road running left to right, which will be clearly recognisable when I get there. I hope... I spend a bit longer here, scanning out to either side, watching for any movement or other sign of the enemy. I see none. We carry on moving. Crawling forward again, I weave between bushes and the thinner tree trunks till I find another one solid enough to provide decent cover from fire. After a pause for observation, I mark out my companion's next fire position, keeping him on a tight rein, consistent with the very close country we're now moving through. On my order, my number two crawls past to my right and takes up his next position. I wait a few seconds for him to report anything he can see from there. Nothing happens, so I slide back and to the side and start crawling forward again. At grass level and moving, I can see almost nothing ahead, so dense is the foliage in this particular stretch. It's slow, but I find it quite absorbing, requiring patience and concentration. The enemy could be yards away and the moment I ease back on the cautious approach, could be the moment we run smack into him. Rinse and repeat. Go firm. Scan. Listen. All clear? Order my oppo forward on the next, short bound. And so it goes on. Suddenly, as I'm crawling up level with him again, my buddy starts to whisper sightings – first one man, then another, ahead and slightly right, and at close range! Staying prone, I slide rapidly to the left into the shadow of some bushes, spin around to 'face front' again, and freeze. Perhaps fortunately, I had, early on, given my buddy the order to hold fire. Now, I see him track something to his right front, but not shoot. Then I see them: German soldiers walking in single file, well spaced out and moving on a reciprocal course as if to pass us. They seem to have their rifles slung on their shoulders, not expecting trouble. They’re maybe 30 yards to our right, just inside the woods. You can just about see one of them below, just left of the birch trunk to the centre left of the picture. They flit into and out of sight behind the intervening shrubbery; there seem to be three or more of them. If I try to pick up one of them in my sniper scope I will break my line of sight and narrow down my field of view, so I just watch, knowing that if they spot us, we are in big trouble. The German patrol comes level with us and walks on, my number two slowly moving on the spot, to keep them in his sights all the while. I wait until the last one is out of sight, somewhere behind us. Then I wait some more. Nothing happens. We have escaped detection, by the narrowest of margins. Thus far, our slow but stealthy approach is paying off. Will the patrol come back the way it came, a threat to our rear? Patrols are trained not to do such things, you don't come in the way you went out, so as to avoid hasty ambushes. But there are Germans somewhere behind us now; the next threat could come from any direction. …to be continued!
-
La Guerra Civil Espanola in the CFS3 ETO Expansion! The Spanish Civil War, fought between 1936 and 1939, foreshadowed the monumental clash that was to follow between fascism and communism, with the Italians and Germans backing the Spanish nationalists and the Soviets backing the republican side. For all that, this was a distinctly Spanish affair, the product of a deeply-divided society. Matters came to a head in 1936 when the Left, having secured a narrow electoral victory, nevertheless pressed on with a radical programme. Divisions deepened and political violence spiralled. The Right responded with an attempted coup, led by elements of the army, which failed in places like Madrid the capital, culminating there in siege and massacre at the Montana barracks. These events set the tone for the long, bloody and vicious civil war which ensued, won in the end by the nationalists under Franco. Air power played a key role from the start. Fanco's leadership was established after the revolt's original leader, General Sanjurjo, was killed when the DH Dragon Rapide carrying him back to Spain crashed, supposedly from overloading with all the personal luggage the 'Jefe' insisted on bringing. Later, Hitler commented that Franco should set up a victory monument to the Junkers 52 transport, the type having flown in from Spanish North Africa colonial troops who helped secure, then advance, the nationalist cause in mainland Spain. In the actual fighting, the German Condor Legion despatched to Franco's aid played an equally important part and tested out many tactics and weapons that would be used to good effect in WW2, including the Ju87 Stuka, the Bf109 fighter and the 88mm flak gun. The devastating Condor Legion air raid on the Basque town of Guernica became infamous, and was one of many air raids on urban areas in which civilians suffered badly. The Italian Regia Aeronautica also contributed 'volunteer' personnel and aircraft, while the Soviets supplied the republican side with some of their own latest military hardware, including I-15 and I-16 fighters and SB-2 fast bombers. Thus was the scene set for some of the fiercest air operations in Europe since the World War. If you want to 'fly' in the SCW, there are several options, including the venerable Luftwaffe Commander (which actually runs on my Vista 64 machine) and the Strike Fighters SCW add-on, available at the A Team Skunkworks, under 'All inclusive installs', which looks great and I'm looking forward to trying out: http://cplengineeringllc.com/SFP1/[link] This mission report features a different option - the CFS3 ETO Expansion. Amongst the Expansion's many and varied additional aircraft is a decent selection suitable for this conflict, all in appropriate markings. From a quick look, this comprises: Nationalist: Messerschmitt Bf109E Henschel Hs123: Fiat CR-32 'Chirri' Breda 25: Savoia Marchetti SM 79: Cant 501 floatplane Junkers 52 bomber: Fiat G50 Republican: llyushin IL-15 'Chaika': Ilyushin I-16 'Mosca': Grumman G23: ...plus some aircraft captured and repainted eg the CR-32 and the Il-16. the main gap seems to be a bomber for the Republican side; the Soviet Tupolev SB-2 fast bomber would have been ideal. Although the Expansion doesn't feature a CFS3-style dynamic campaign for the Spanish Civil War, there is a good set of single missions which enable you to fly in - and against - the appropriate aircraft in Spanish skies, for both sides. And stock CFS3 covers much of northern Spain, no messing about here with mere map segments. The mission Before firing up the ETO Expansion, I used the supplied 'spawn selector' to set 'stock spawn mode' and then the 'era selector' to start the ETO expansion in '1936 to spring 1940'. To be honest, I've not yet worked out exactly what difference this era selection makes, as planes from different eras seem to be available no matter which is selected; I suspect it's a way of getting around a CFS3 limit I've forgotten on the number of installed planes, which in CFS2 was 90, if I recall right. No matter; thus prepared, I opened the list of Historical Missions and selected the first one labelled 'SCW' - titled 'Air conflict over Llanos airfield'. This assigned me the role of a fighter pilot in the Nationalist Air Force, flying an Italian Fiat CR-32 biplane fighter and leading a formation of six. The mission was an air start, flying on the northern front. This was one of the country's few industrialised regions, where the Spanish coastline meets the Bay of Biscay. It was October 1937, over a year into the war. Our task was described as a Combat Air Patrol - a piece of (originally USN WW2?) jargon I dislike to see used out-of-context - what other sort of patrol are combat aircraft going to fly? Anyhow, the briefing helpfully described our patrol as part of a 'Nationalist Air force attack on Llanos airfield', which is on the coast between the towns of Oviedo and Santander. Looking at the mission 'Assignments' tab, I could see that we were not on our own. Our order of battle for this mission comprised: - six SM81 'Pipistrello' bombers (a type I missed when looking up the available planes, so not listed above - it's a 3-motor bomber like the SM79 but with fixed undercart); - six Breda Ba 25 biplane army co-operation planes (what their role was, I have no idea, but I'm relieved not to have been flying one on this trip!); - another flight of six CR-32 biplane fighters, like my own flight. The default loadout gave us a pair of small bombs. These, I kept: I reckoned that we could always ditch the bombs if we encountered aerial opposition. And if we didn't, we should hopefully do some useful damage with them, down below. Here's the briefing. As well as our flight (yellow aircraft icon), you can see other icons representing what I take to be other flights. Friendlies are blue; enemies red. I'm not sure why there appears to be an enemy airfield well out to sea (red crossed runways icon, there's one just off the top edge of the map in this screenie); maybe it's on a small island. Anyway at least I was now able to orient myself. And here's my mount. The CR-32 was apparently one of the best of the pre-WW2 biplane fighters, lightly-armed but highly manoeuvrable; a good match for most enemy machines iin spanish skies and seemingly superior to the mediocre Heinkel He-51s which formed the fighter component of the Condor Legion until the early Messerschmitt 109s were rushed into action to replace it. The Fiat is a neat bird, sleeker than the later tubby radial-engined CR-42 and she looks the part in her ETO Expansion incarnation, complete with Nationalist Spanish camouflage and markings. I'm not clear whether my unit or my machine's 'skin' represented one of the Italian 'volunteer' formations or an indigenous unit flying the sleek Italian fighter, but no matter, she looks like a typically racy Italian job. And here's the 'office'. In flight, you'll notice the benefits of the extra power if you've been used to the biplanes of Over Flanders Fields; one being that your wingmen keep formation better, recovering more quickly during course changes, instead of drifting well wide and being left behind. Even if they still look rather far away, thanks to the CFS3 'wide angle lens' look, which tends to distort things, especially in the external, 'spot' view. Below us were the hills of northern Spain. Having flown over this area often enough on holiday trips, the topography looks to be captured fairly well, although the textures are to my eye a little green and lush for the region and the field patterns and hedgerows look more northern European. Turning on aircraft labels. I was a little bemused to find we were all apparently Germans. Strange, as I don't think the Condor Legion flew Italian fighters in Spain, unhappy though they may have been with their Heinkels. Perhaps we were on an unofficial exchange programme...yes, that must have been it. I turned on the CFS3 Tactical Display and cycled through target types. It picked up a flight of aircraft some distance to our left. Part of our attacking force...at least I hoped so. I kept a better watch in that direction, just in case, even though such use of the 'TAC' was a bit naughty - lacking radios, we should not have been able to get any help from a ground controller in locating stuff we couldn't see for ourselves. I considered for a while orbiting to let the other friendly flights catch us up, but we seemed to have been awarded the dubious honour of going in first so I kept on my way. As for the actual flying, I had trimmed elevator to keep my kite's nose from dipping at a fast cruising speed but the torque kept pulling down my left wing, which I contented myself with correcting without resort to aileron trim. And what were we flying into? 'Light air opposition' the briefing said. Were the Republican pilots going to come out to play, or were they not, I wondered? So far, the six of us seemed to be on our own in this particular patch of sky, and at least until we'd dumped those bombs - preferably upon something deserving of them - I was quite content for it to remain so. ...to be continued!
- 5 replies
-
- 1
-

-
- cfs3
- eto expansion
- (and 1 more)
-
Thank you! TBH I don't recall the voices, but if the labels visible in one of the screenshots is anything to go by, they will have been in German! I didn't think the NEK added localised voices, just the slots that the aircraft are grouped into, and related stuff like pilot uniforms, ranks and bases. Maybe I need to try out the NEK voicepack, if it's not included in the base ETO Exp install. Perhaps if there are only three sets of voices available at any one time, there is a step you have to take to enable anything but British or US English, or German. Anyhow, the SCW planes look a lot better with Ankor's mod...
-
I and I think others tended to think Pacific Fighters was not the strongest Il-2 release. A poor selection of warships was one issue; it was a bit disconcerting to see only the RN KGV Class at Pearl in Battleship Row, for one thing, even if the scenery was generally ok... ...that is, if and when you could see anything but Wildcats... Still, the selection of aircraft is most impressive, since the mods filled serious Pacific Fighters gaps like the Avenger... ...while DBW and CUP probably improve the warship count. And there's an impressive variety of additional PTO campaigns over at M4T, along with many simply exquisite skins. Since the modders got hold of the thing, good old II-2 is a much more impressive proposition. I can't imagine anyone with an interest in any aspect of WW2 combat flightsimming being without her.
-
Not for the faint of heart - battling Huns and high ground in scenery to die for! The latest campaign for World War 1 air combat sim First Eagles/First Eagles 2 is by Gterl and covers the fighting between Italy and Austria-Hungary, 1915 to 1917. Those of us who have been following the development of this new terrain have been slavering over Gterl's screenies and waiting keenly for its release, which has now come: http://combatace.com/files/file/14440-italian-terrain-incl-1915-1917-campaign/ Better still, the terrain comes complete with a campaign, which - as usual with FE campaigns - you can play from the perspective of any of the flyable planes in any of the featured squadrons, on either side - so it's actually a set of campaigns, covering both scouts (as fighters were called in those days) and the two-seater 'working planes' which mostly did the important stuff - reconnaisance and bombing (although this distinction evolved over time and was only coming into vogue about the time this campaign starts). As the download page says, you need also to download and install the listed freeware aircraft, most available here at CombatAce, the others at the A Team Skunkworks. Be careful to respect and observe the different registration and download rules at each site. http://combatace.com/files/category/360-first-eagles-add-on-aircraft/ http://cplengineeringllc.com/SFP1/ Many FE players will already have most or all of these planes installed - I had all but one of them! If not, it's more than worth the effort. The campaign is built for First Eagles Gold (=original First Eagles plus the Expansion Pack) but works equally well in First Eagles 2, which is what I play. Only thing to note here is to observe the slightly different installation drill for FE2 - for example, the stuff in the folder 'Groundobjects' [plural] should, for FE2, go into a mod (sub-) folder called 'Groundobject' [singular]. Old hands with Third Wire sims like FE and Strike Fighters will know the drill; anyone else can get the 'gen' here at CA on the SF2 knowledge base, or ask for advice. It's not needed, but I made a second install of FE2 just for this campaign; amongst other things this means if I fly a single mission, I'm less likely to find myself fighting against or alongside planes that didn't serve on the Italian Front. Again, there are posts here at CA which describe the drill for both first (FE) and second generation FE2) Third Wire sims; ask if in doubt. Not difficult and second nature once you know the drill. The Campaign begins! I elected to kick off playing for the Italian air arm, which I gather was called the Servizio Aeronautico before it became independent of the Army and adopted the more familiar title of Regia Aeronautica. I usually favour the 1916-1917 era as the earlier planes are decidedly underpowered even by 1917 standards. But this time I decided to start at the beginning, in June 1915. So I created my pilot - Umberto Bernadotte - and found myself assigned to 1a Squadrigilia Veneto, based at San Giovanni. First thing I noticed was the quality of the opening campaign briefing. It was short but nicely written, I thought, and brought a wry smile to my face. A perfect mood-setter. We were allocated the Voisin LAS, 120 HP engine version. This is a pusher biplane with a radial engine, unusual compared to the more common rotaries. It's also a two-seater, with the pilot in front and the observer behind, with a Hotchkiss machine-gun mounted on a frame above and behind the pilot's head. I believe this type of machine scored the first recorded air-to-air kill back on the Western Front. Although later, bigger and more powerful Voisins gave sterling service as night bombers, even by mid-1915 they were rather obsolescent and I was not entirely looking forward to taking one of these machines to war, over potentially mountainous terrain, and likely against better-equipped foes. But I had signed up and orders were orders! And for my first mission, those orders were to carry out an offensive patrol over Flugfeld Galital. This was an Austro-Hungarian aerodrome some distance to the north, on the far side of what looked from the planning map to be some rather high ground. I decided to take five of us, using the 'Roster' screen to select four companions from the bottom of the list. I got Biron, Pinna, Buscaglia and Novelli - yes you get decent localised names! I'm not sure if this is because I have Capitaine Vengeur's medals pack, or some other mod, installed, but it's a neat touch. I didn't waste any time, accepted the default loadout (no bombs, I was not going to weigh us down on our first flight over high ground) and headed to the flight line, where my virtual mechanics had the prop swinging as I popped into the cockpit. I opened the throttle immediately, countering a tendency for my machine to nose up on its four-wheel, cart-like undercarriage. Any attempt to pull her off quickly seemed futile and my heart was in my mouth as we got closer and closer to the trees at the end of the airfield. In FE you can 'ghost' through trees but it was still pretty scary! I managed to edge her gently off the grass just as the boundary came up and just about cleared the tree-tops, knowing from past experience with the Voisin that she would happily stall if pushed too hard. Phew! I gained height slowly, being careful to keep the speed up and not pull the nose up too steeply, for fear of a stall close to the ground, which could have only one ending. Gradually, as we gained height, I was able to spare a bit of time to observe and admire my immediate surroundings, which consisted of pleasant, arable land, fairly level and scattered with many tracts of woodland. So far, so good! But there was a long way to go. If I had known what lay ahead, I would have been a lot less keen to keep going! ...to be continued!
-
First outing with Stephen1918's latest addition to First Eagles/FE2 Of the three current WW1 airwar sims, one of the areas where First Eagles is ahead (and likely to remain so!) is its planeset. Including variants, I have about two hundred installed! This is not just padding - one of the features which distinguished WW1 in the air was the considerable variety of aircraft which fought it. As FE shipped with a small set of planes which just about covered its intended 1918 era, this particular advantage is entirely owed to Third Wire for making its sims so 'open architecture'...and even more, to the many modders who took full advantage. Amongst the most prolific of late, in the FE field, has been Stephen1918, who has added many a fine machine to the WW1 skies. Recently, a good few of these have been from the eastern or Italian theatres, which both now have planesets about as good as the western front in other sims. But with his latest release Stephen's back on duty on the classic, Western Front - it's the Royal Aircraft Factory BE2c. This machine needs little introduction. It was a mainstay of Royal Flying Corps combat operations from the very first days of the war until about mid-1917, when it was finally replaced, at the front anyway, mainly by the same manufacturer's RE8. First Eagles has had the BE2 for some time, of course, available from the A Team skunkworks. But with skid-type landing gear and an uncowled sump/lower nose, these really portrayed the machine as it would have flown in the first year or so of the war, 1914-15. The new model provides FE with a long-needed version that's representative of the BE as it appeared from sometime during 1915 to 1917. In this form, though benefitting from a lower-drag V-type undercarriage and a cowling around the angular engine sump, it's still armed with a Lewis gun on a mount operated by the observer from his seat ahead of the pilot. Along with a comparatively low-powered engine, this arrangement was of course the BE2's main weakness, long after the Germans had switched the observer and his gun to the rear seat, with the introduction of the 'C' type machines. It's often reported that the BE2d version moved the pilot to the front cockpit too, but I think this is an incorrect reading of the introduction of basic duplicated controls for the 2d's front cockpit observer. Basically, the BE2 was a good machine that was retained in service long after it should have been replaced by a better type. Those who flew it sang its praises thus, in imitation of the 23rd Psalm: The BE2c is my bus; therefore shall I want. He maketh me to come down in green pastures. He leadeth me where I wish not to go. He maketh me to be sick; he leadeth me astray on all cross-country flights. Yea, tho I fly o'er No-Man's Land, where mine enemies would compass me about I do fear much evil, for Thou art with me. Thy joystick and Thy prop discomfort me; Thou preparest a crash for me in the presence of mine enemies; Thine RAF annointeth my hair with oil; Thy tank leaketh badly. Surely to goodness Thou shalt not follow me all the days of my life Else I shall dwell in the house of Colney Hatch forever. Having found that two-seater careers in FE can be dangerous and short, and knowing the BE's reputation, I was somewhat dreading my first campaign mission in the 'Quirk', as it was known. Ever the optimist, I created a brand-spanking-new pilot. I named him Harvey-Kelly, in memory of the pioneer RFC aviator who landed first amongst the RFC's first arrivals in France in August 1914 and served with distinction until, flying a SPAD, he was killed during 'Bloody April' by von Richthofen's Jasta 11. As the new BE is not yet included in an existing campaign, rather than just flying some single missions, I hand-edited Ojcar's Flanders 'Armchair Aces' campaigns to feature the new plane. Foolishly, I elected to start my campaign in May 1917. By that time, the Eindekkers were long gone and I was thus unlikely to become 'Fokker fodder' - as critics dubbed RFC machines during the 1915 'Fokker scourge'. Furthermore, 'Bloody April' was over and the RFC was beginnng to receive better aircraft, not least the excellent SE5 from the same Royal Aircraft Factory as the machine I would be flying. But this was still a very dangerous time to be flying a BE...as I was soon to find out! ...to be continued!
-
I have used different versions of Ankor's mod since the originals, first in OFF and CFS3 (stock and ETO Exp) and now also in WOFF. All in Vista 64. My monitor is 1600x900 native which is nothing special and I don't think there is anything in the mod which is dependent on the screen res which you have set in-game, or via CFS3config (or in the options 'Workshop' for WoFF, which no longer uses CFS3config). What happens when you actually drop all the DX9 mod files into your root CFS3 folder (d3d8.dll, d3d8.ini, and the two folders 'shaders30' and 'Effects' with their contents)? doesn't work, as in, what happens - no visible effect? If the latter, thing to check is probably that the two d3d8 files are both in your root CFS3 folder (by default, Program files (x86)/Microsoft Games/Combat Flight Simulator 3, leave out the (x86) if not Vista or later) and that those two folders are also in that same root folder.
-
Apart from the odd 'Generation one' sim like the original first Eagles, which you might be able tp pick up in a store or more likely online in CD/DVD case, all the 'Generation Two' Third Wire sims like FE2 are only available by download via the TW store: https://store.thirdwire.com/store_w7_all.htm Though billed as not compatible with Vista, FE(1) with the latest official patch certainly runs under Vista complete with improved bump mapping via the 'Advanced Shaders' option, but while some folks say FE has things they prefer, FE2 most find is better and generally runs with higher FPS under Vista or later than FE(1). Apart from that performance edge, and a different method of installation for mods, there is very little practical difference in any sense that I have noticed, between FE and FE2. The latter has longer view distances I think, setting for setting, but I needed to hand-edit a graphics settings (.ini) file to avoid scenery visibly being drawn in at the longer settings. I have both and now only fly FE2 (separate installs for stock, North Sea and Italy).
-
Sadly, Jeanba, cockpits don't seem to be a strong point in either CUP or DBW WW1 planes. Nieuport Bébé, CUP, complete with clipping... ...and SE5, DBW 1916; clipping happens, just not showing in this view... With the availability of really top-notch WW1 sims like WoFF and First Eagles 2 I don't think the IL-2 WW1 mods can compete; likewise with SF2 and jets. But there's more than enough content in between, with either CUP or DBW; I mean, who could resist fighting in battles like these... (SAS_Monty's 'Flying Tigers' campaign, real IJA bombers now available mean the repainted Tupolev is no longer needed) ...or in cockpits like these... (101tfs's Westland Whirlwind in Poltava's 'Reaping the Whirlwind' campaign) Despite buying all the releases and many of the payware add-ons over the years, I never warmed to Il-2 until it acquired a serious ETO capability, which it now has thanks to the modders finally finding their way in, and now we have an ETO well beyond anything in payware addons like Battle over Europe... Now, I would not dream of not having '46 on my hard drive, having finally pushed modded CFS3 into second place for my WW2 air combat fix. Even to the extent of appreciating some Eastern Front action, summer or winter ...
-

From the album Combat Sims
-
Iron Front: Liberation 1944 - Waffen SS infantry section - advance to contact mission test
33LIMA posted a gallery image in Member's Albums
From the album Combat Sims
-
Iron Front: Liberation 1944 - Waffen SS infantry section - advance to contact mission test
33LIMA posted a gallery image in Member's Albums
From the album Combat Sims
-
Iron Front: Liberation 1944 - Waffen SS infantry section - advance to contact mission test
33LIMA posted a gallery image in Member's Albums

From the album Combat Sims
-
Iron Front: Liberation 1944 - Waffen SS infantry section - advance to contact mission test
33LIMA posted a gallery image in Member's Albums
From the album Combat Sims
-
Ahh, thanks, had forgotten about dropping the gear manually, will try to remember that, next time! The CFS3 planes, stock and user-made, sure look a whole lot better since that report was written, thanks to Ankor's DX9 mod, with dynamic self-shadowing...and at long last, with the latest versions, the ability to lose the external view wide-angle lens look!
-
There are two kinds of serious flightsimmers in the world. those who play IL-2 '46, and those who're going to. With the Combined Universal Patch and suitable missions of campaigns, you've got WW1, Spanish Civil War/inter-war, multiple WW2 theatres and the jet age, and a picture being worth a thousand or so words, here's some stuff you won't have seen in the original game... ...and the Dark Blue World mod is still worth a separate install, for the considerable range of compatible campaigns... All available over at SAS and Mission4Today for...well, missions, campaigns, skins and other stuff indispensible and magical stuff. '46 is the base for these so even if like me you've got a drawer full of previous versions, this one is still worth getting, especially at that price.
-
Real-world infantry tactics in the Arma2-based Iron Front: Liberation 1944 Hey, you! Get down off that effing skyline! Section attacks - ask anyone who's had even basic infantry training, and they will tell you it's the point all the training comes together - the weapon handling and marksmanship, camouflage and concealment, tactical movement, formations, field signals, target indication, fire control orders and all the rest of it. Since at least the time of the Romans, whose legionaries were organised into squads of about eight men who trained, ate, slept and fought together, the infantry section ('squad' in US Army terms) has been the very building block of larger units. And by the end of World War 2, the section's tactics had evolved into the same basic form they still follow today. The foundation stone of those tactics is section attacks - the drills the infantry use to accomplish their mission in battle, which is to close with the enemy, day or night in any weather and in any terrain, and destroy him, or force his surrender. Fire and movement, or fire and manoeuvre, is the foundation of modern infantry tactics. To get close enough to the enemy to destroy him, you must move. To move in the face of his fire, you must supress him, and win the fire-fight. So a section operates in two teams, called fire teams these days. When in contact with the enemy, or when advancing to contact, one team moves while the other fires - or covers, from a position from which it can fire. No movement without fire. No fire without movement. In my day, infantry sections were organised into a 'gun group' and a 'rifle group'. The former was typically three men, the lance corporal section 2ic (second-in-command) and the number 1 and 2 on a GPMG (spoken as 'gimpy'). The rifle group, under the corporal who was section commander, was five or so men armed with the magnificent SLR, supplemented by smoke and fragmentation grenades and a couple of 'sixty-sixes', disposable AT rocket launchers. We trained and practiced section attacks using 'Section Battle Drills' - Preparation for Battle, Reaction to Effective Enemy Fire, Winning the Fire-fight, The Assault & Fight-through (sometimes taught as two distinct drills) and Re-organisation. I was quite chuffed to find on Youtube a while back a Services Kinema Corporation training film that nicely illustrates all of this in action - and that I found I still remembered nearly by heart! https://www.youtube.com/watch?v=ciFnTiacaDU There were variations of course and one I was taught - and preferred when I was acting as a section or patrol commander - was, having numbered off my rifle group, to put odd numbers on the left in any formation, and even numbers on the right. When the rifle group needed to start skirmishing on its own (typically in the final assault), or just if we needed to move 'tactically' (US 'bounding overwatch') we could move in turns, as odds and evens, better spread out than if people were moving in an 'interleaved' fashion, which was normally the 'official' drill for skirmishing. 'Pairs fire and manoeuvre' is what skirmishing's commonly called in the days of two four-man fire teams. So, you may be asking by now - if you have read this so far, rather than deciding 'TLDR' - where does the mission report come in? Patience, not long now! Soldier sims as I see 'em In my search for a decent simulation of infantry soldiering - the combat part of it, anyway, foot drill we can live without - I have bought and played a good many; single-player only, as I have no interest in multiplayer. I go airsofting, if I want that! After putzing about with Novalogic's Delta Force, Ghost Recon was one of my early purchases, and the first with really decent visuals. But I disliked the 'missions on rails' feeling, with impassable scenery objects regularly channelling my movement. Same with the likes of Call of Duty (1) and Brothers in Arms. I much preferred Hidden and Dangerous, whose 'channeling' seemed less obtrusive, while the ability to 'operate' each of your men in turn, in between the AI controlling them, made the game feel more tactical for me and reduced the impact of AI limitations. And I quite liked the fire-team based concept of Full Spectrum Warrior. But the best of them all for me was Operation Flashpoint - Cold War Crisis. Whole, vast islands to fight over, a real open environment 'sandbox' with driveable cars, AFVs and even helos and jets, all coming together in nicely-scripted campaigns, complete with cutscenes. I was hooked, my favourite campaign being the Red Hammer add-on, fighting as the disaffected ex-Speznaz soldier Dimitri Lukin. Having found a while back my OFP Game of the Year edition would no longer work in Vista 64, I was delighted to find that developers Bohemia Interactive had released a free version, ARMA Cold War Crisis (the OFP label having moved on, in a different direction) - playable in Vista with my original software key. in the meantime, I had bought ARMA2 and the Reinforcements add-on which included British forces - even though in desert rather than temperate DPM and with SA80s rather than SLRs. Somehow, I never warmed to ARMA2. It was a bit hot for my system at the time (not that it's much better now!). And I like to play in the 3rd person view except while shooting, but hated the replacement of the full-height OFP view by one from the backside up. One day, I will get the Operation Arrowhead version that works with most of the current mods, including one designed to enable you to adjust the 3rd person view. Despite some mixed reviews, the one ARMA2 spin-off I did buy, from Gamersgate (also available on Steam), was X1 Software's World War 2 standalone derivative, Iron Front: Liberation 1944. I knew that an Operation Arrowhead-based WW2 mod, Invasion '44, was available, and that modding in Iron Front was limited (to comply with their licence for use of the BI game engine, apparently). Some reviewers really didn't like it, I could see. But it was available at a good price, with a D-Day DLC which added Normandy to the Eastern Front of the original game. Mainly, I was interested in the tanks, and though few are playable, they are great to look at, so I took the plunge... That, despite the fact that I knew vehicles had never been OFP's strong point and that ARMA2 wasn't much better - stock, anyway. The vehicles don't slip and slide about like hovercraft anymore, but Iron Front's no tanksim. For one thing, the crew are either fully unbuttoned, sitting well out of hatches, or fully closed up - there's no tank commander 'heads out' view. See what I mean? And closed up, the Tiger I commander has a rotating periscope view, not the ring of fixed episcopes he really had, although the gunner's sight is realistic and functional. Still, all the Iron Front AFVs are lovely renditions, and one day, I will make more of an effort to make the most of Iron Front's tanking. There is a lot to learn, both how best to manage your own tank and control your platoon or other attached forces, and the ARMA2-style keyboard control set-up is truly arcane, more cold-keys than hotkeys as it were. Nowadays - again if you have ARMA2 OA, which I don't yet - you can install Iron Front as if it were an ARMA2 mod; also for ARMA3. Which sounds promising. One of these days... But for now, I downloaded several user-made missions for Iron Front - it shares OFP's easy-to-use but powerful Mission Editor - and playing one of these, I found myself as a section commander in a fairly open-ended mission that gave me plenty of scope and time, rather than pitching me quickly into a scary contact. Which you'll appreciate is not an environment conducive to familiarising yourself with a complex system of keyboard commands. This mission report, such as it is, describes a play-through after several efforts to decide on a system and acquire an imperfect but just-about-adequate familiarity with the basic controls. Most of my gameplay in the original OFP was solo missions, so I really have been learning pretty well from scratch, how to play the role of an infantry sectrion commander in an ARMA2-type sim. How did it work out? Let's find out - it's time to get moving! ...to be continued!
-
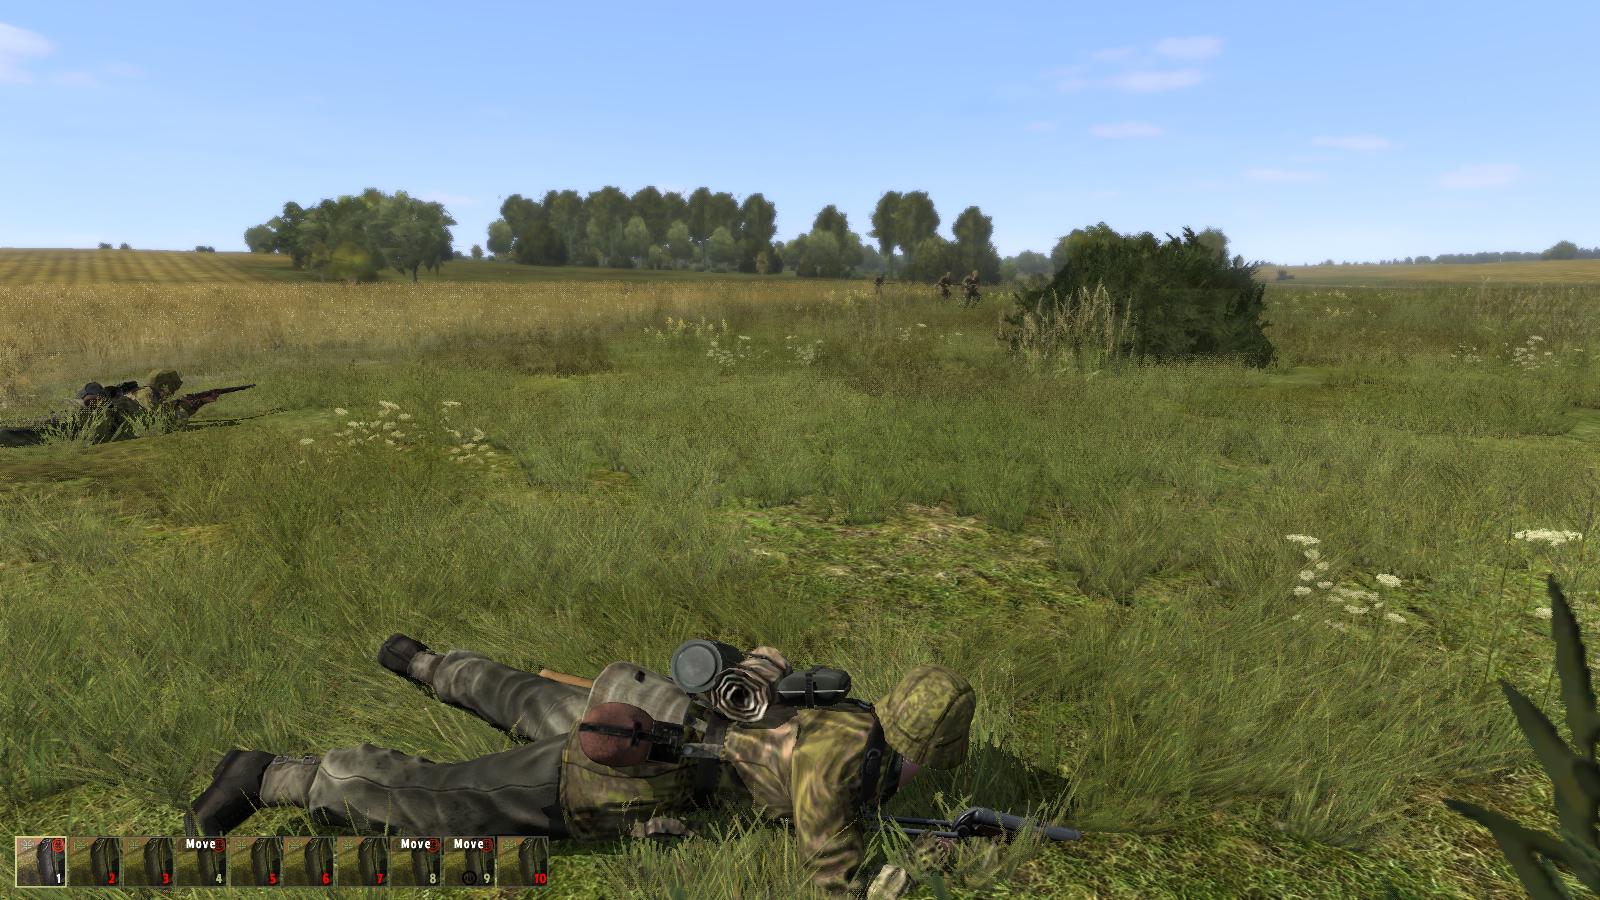
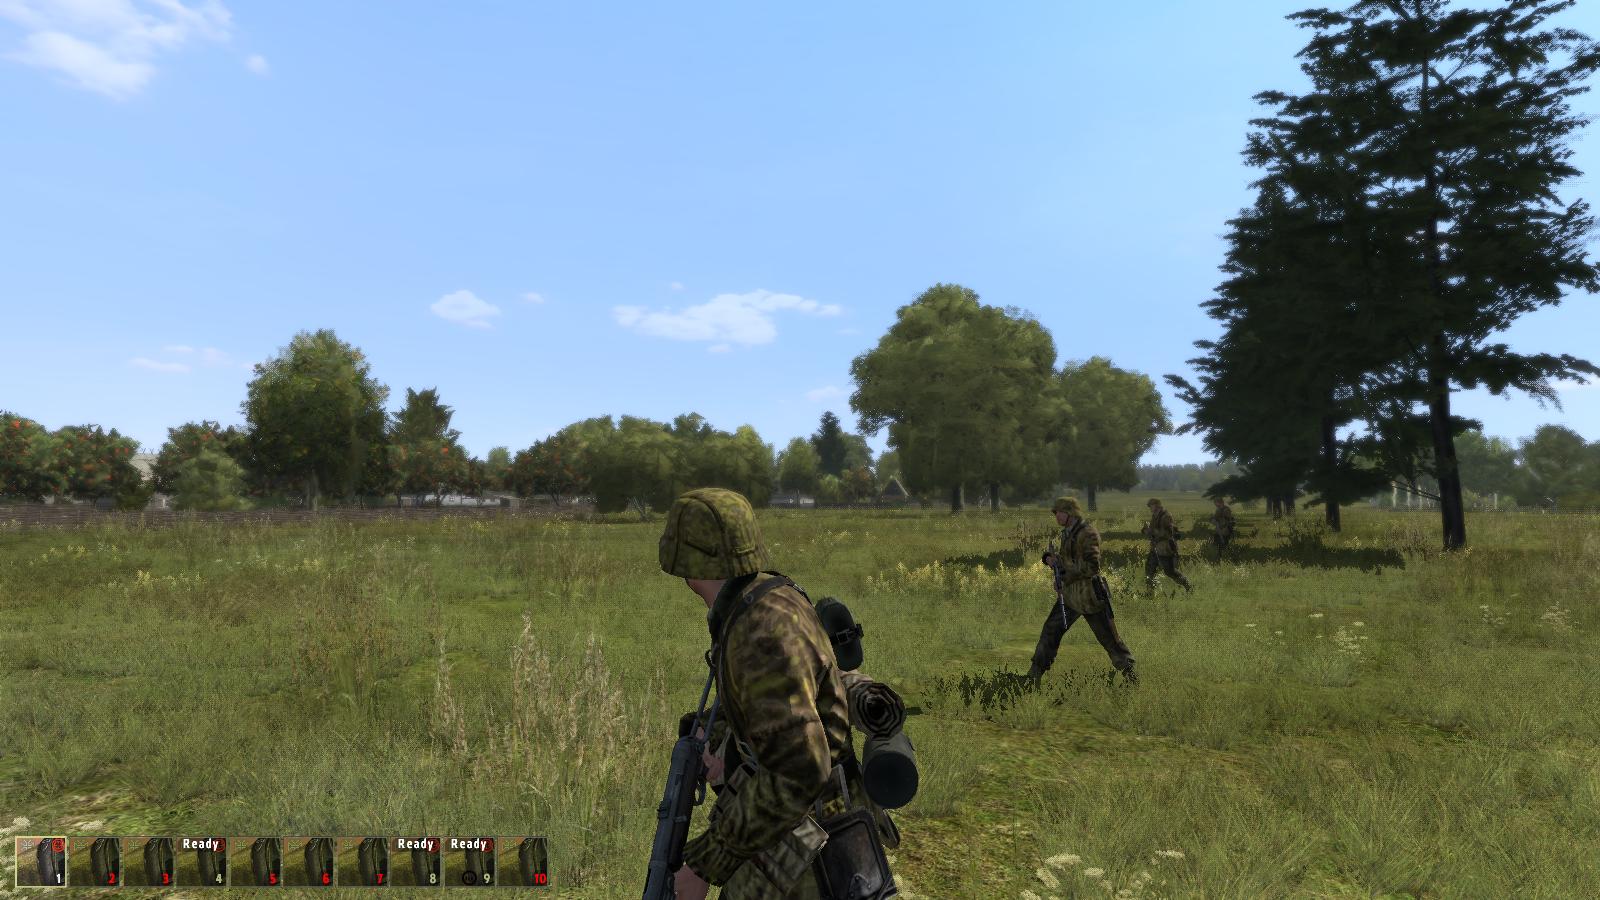
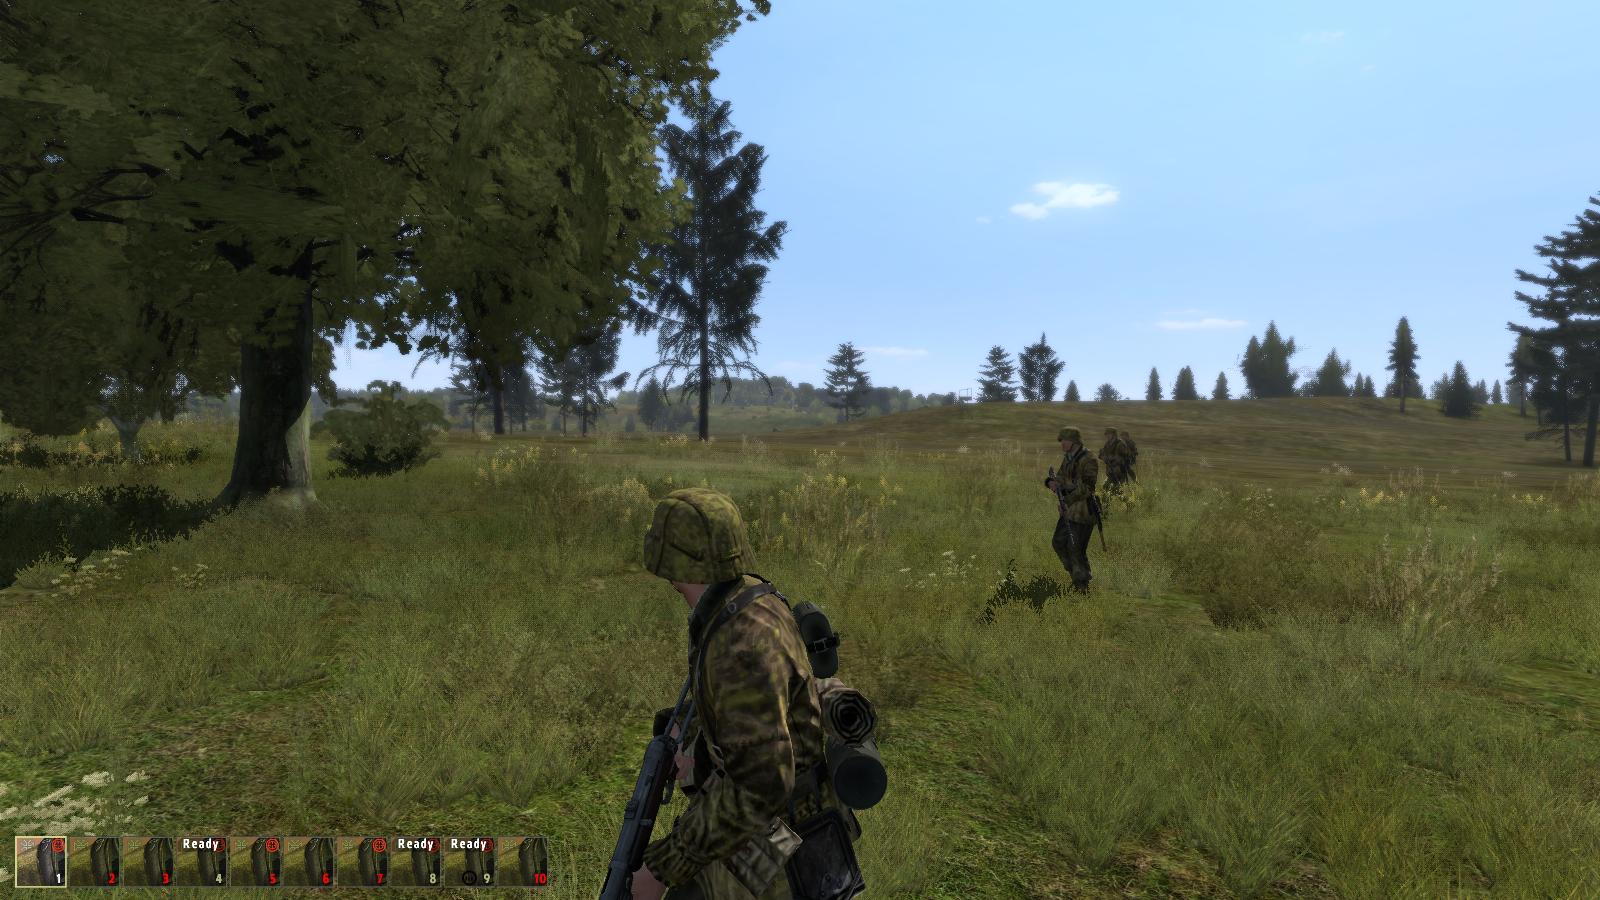
An unexpected ending... I wait until I am sure the enemy has moved on, then decide my next bound will be to some trees on the far side of the metalled road to our front. From my prone position, I side-crawl a few feet to the left, to make sure that I do not stand up in the same place where I've been lying. I suspect this may be too subtle for a sim to confer any advantage, but it feels more realistic to me! As I move forward, a glance right and left is enough to re-assure me that the rest of the rifle group is moving with me, while the gun group maintains its covering position, to my immediate right. As I come up to the road, I break into a run, which carries me over the open ground and onto the opposite side. Once at the base of the trees between the fork in the road, we go firm again. By now, I've more or less got the hang of moving my section tactically in Iron Front and the gun group is soon rejoining, once again on my right. Re-orienting myself establishes that the road to my left leads directly to the objective. There's the road... ...and there's the objective, which has turned blue again. You can see that a bunch of friendly blue dots have occupied it. Having come all this way, I decide we will continue there, and perhaps link up with the other section. And it won't do any harm for those of us who have fired our weapons to get 'bombed up' at the resupply point up there. At this point, I get the unexpected ending of the title, in the form of a black screen. The game is stull running and keystrokes still work, but the mission is over. This is the first crash or similar problem I've had in Iron Front, though I can't say I have played it really extensively, thus far. However, I have to say that I have enjoyed this mission. The visuals are generally great, the sounds are ok, and the overall experience is very good. I could wish for a simpler, faster and less error-prone way to issue common commands. As it is, I find that I call up the first level 'action menu' that I think is what I need, only to find that some of the options I want are greyed out. Probably, there are more optimal ways of doing what I want to do much of the time, which I will find with a bit more practice. And I have hardly scratched the surface - tactical movement is one thing, but I also need to master directing the fire of my section, as well as its movement. In short, I need to do more rehearsals in missions like this, including developing and practicing 'Immediate Actions' or 'Actions on...' - drills I can initiate very quickly and with little conscious thought, in specific situations, like reacting to effective enemy fire. I suppose that's the good thing about the BI sims - their close affinity to the VBS military simulation software means they are designed with real-world small unit operations in mind. So I shouldn't be surprised that they support quite well the sort of tactics I have been trying out. Whether typical Iron Front missions are more designed to be entertaining than practice small unit leadership skills is another matter, so I may end up making missions which conform more closely with my own particular interests and preferences, using the excellent Mission Editor. In the meantime, while not designed or presented as a realistic, co-ordinated company-level attack or advance to contact, the Battle for Panovo has proved a good platform for practicing at least some of the battle drills required in section attacks, and I'm not finished with it yet! And I'll have another go sometime at those tanks - they look much too good to pass by!
-
Contact! I advance warily across the open ground, with the other members of the rifle group skirmishing forward on either side. I then halt the bound at another group of trees, just beyond a track, with the others settling in to my left... ...and to my right... I now signal the gun group to move forward to rejoin us, from the fire position from which they have been covering the rifle group's advance. That done, I take time to re-orient myself with the aid of my compass. It isn't long before the gun group is coming up on our left. You may have noticed that I have been keeping them fairly close, rather than pushing them out to a flank. There are two reasons for this. First, I don't want them to run into an enemy off to the flanks whom the rifle group hasn't seen - the gun group being my main firepower. This is also why we are moving by 'caterpillaring' (US 'successive overwatch') and not 'leapfrogging' (US 'bounding overwatch'). The other reason is that I'm concerned that the precision of my firing point selection decreases with distance. I believe there's an overhead view you can use to get around this, and can also set waypoints on the map. The map view below illustrates the tactical situation at this point, with my section amongst the bushes towards the top left, near what appears to be an arrow marking an ammunition point. Our objective is still in enemy hands, being occupied by a single red dot. I can hear the sound of a motor vehicle, what kind I don't know, but possibly armoured and dangerous, and probably what that dot is marking. Naturally, this is not a particularly welcome development. I decide to move forward to cover on the near side of the road between us and the objective. If the enemy vehicle moves off, we'll move in. If it doesn't, I'm going to need another plan. Whatever the vehicle is, it doesn't sound like a truck, more like a tracked vehicle of some sort. Not something I'm going to want to tangle with. There's a small stand of trees to our right front and I decide that's where we'll go. It's a bit open and by the time I'm half-way there, I'm wondering if I have made a bad mistake. I kneel in the lee of the sparse treeline. Ahead and left, I can see the edge of a small village...more accurately, a few houses either side of the road ahead. The zoomed view makes the latter look closer than it really is, but if that vehicle drives along it, it'll be a bit too close for comfort. We go firm and I call the gun group forward again. This time I want him on my right flank. My next move will be half left up to the fork in the road over that way, and I think the gun will be better on the other side. At this point, the engine noise to my left becomes louder and I don't need to check the map to realise that whatever it is, it's coming our way. We go prone. To my immediate left, you can see the section medic, in his white red-crossed helmet. Really, proper medics should not be armed and I tell myself that if we survive, I'll make him stick a camouflage cover on his helmet, which far from identifying him as a non-combatant, just picks him out as a target. Just as I'm considering pulling back, the gun group arrives and goes to ground on my right. Just as well, for at this point, it kicks off. A shouted target indication reveals a enemy half-track moving in from the fork in the road to our left front. I hesitate, for though it's Soviet green, it is clearly a German Hanomag SPW. By the time it's registered in my mind this is a captured vehicle in enemy hands, the guys on my right have started shooting. No time to wonder know if this would have turned out any better if I'd ordered them to hold fire. We're committed! In the pic below, you can just about see the half-track just above and slightly right of my helmet. It has come down the fork in the road and is moving fast across our front, travelling left to right. The enemy vehicle hesitates, then swivels and I see somebody bailing out of the back. Rounds really are flying now and my first thought is to get off some of my own, too. I leave the 3rd person view and crawl to my left front, to get a clear line of sight through the grass and bushes. In doing so, I briefly lose sight of the target. By the time I get eyes back on what's become the killing ground for our hasty ambush, there's nothing to be seen. The half-track seems to have driven off to the right. I bring my rifle to the aim and scan through my sights, but I can pick up no targets. The shooting dies away, and the engine noise starts to fade. The short, sharp firefight has ended as quickly as it began, giving me no chance to fire a round in anger myself, or to practice the appplication of my section's fire. At least, we have driven off the enemy without suffering any casualties. A check of the map view indicates the enemy has suffered at least one loss, with the others bugging out to the south. So far, so good. We're lucky it wasn't a tank! I should have issued a general 'Hold fire till I say otherwise' order, but I wasn't expecting the AI to crack off without my say-so, unless very seriously threatened. However, it seems to have worked out for the best. Now, to see if we can turn that left flank objective, just to our front, back from enemy red to friendly blue! ...to be continued!