


33LIMA
-
Content count
3,749 -
Joined
-
Last visited
-
Days Won
7
Everything posted by 33LIMA
-
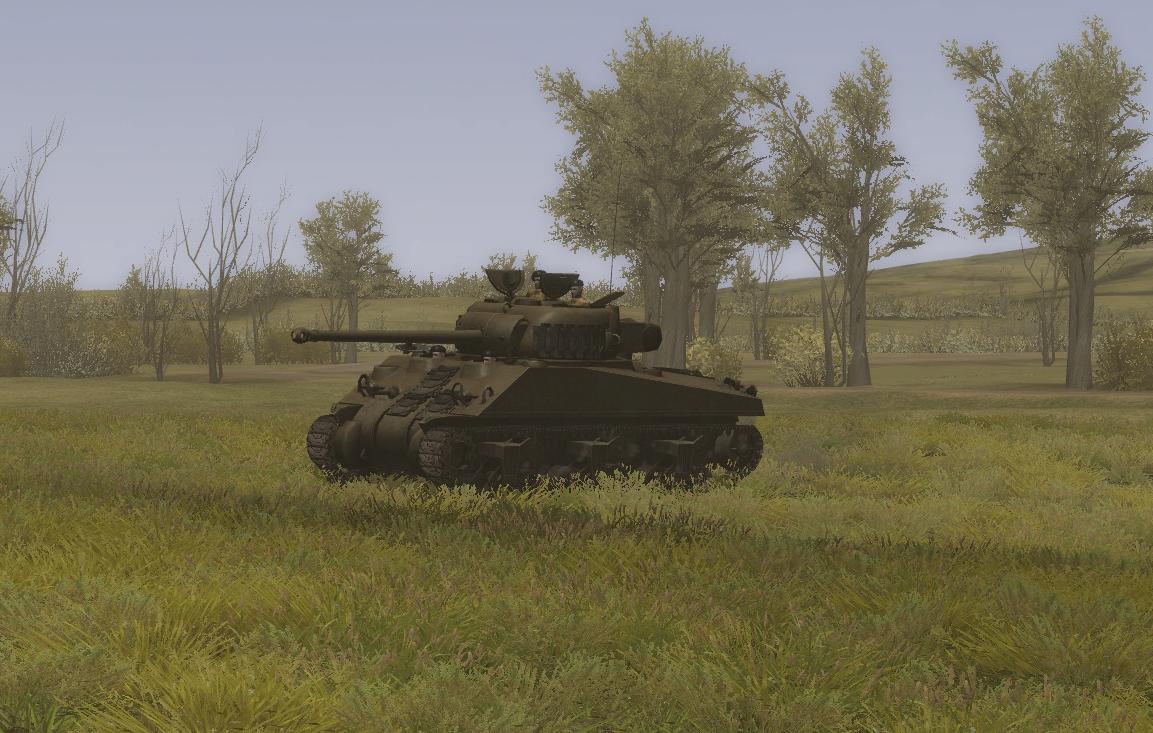
From the album Combat Sims
-
The Community User Patch (CUP) is now available, via SAS There have been various flavours of mod for the venerable but still outstanding IL-2 1946. Now there's a new kid on the Il-2 block and you can read all about it on the Special Aircraft Service site, here. This new mod brings together and builds on three of the best things to happen to Il-2 in recent years - the Dark Blue World mod (DBW), IMHO much the best Il-2 add-on for Single Player use; The Full Monty mod (TFM), which was another must-have but something of a headache to download and install; and the work of Team Daidalos, whose work has improved several core features of the sim, notably the Artificial Intelligence. Now all three are brought togther in a new evolution, the Community User Patch. There's still quite a lot to download but (i) not as much (ii) there's a torrent option and (iii) installation is just a matter of unzipping stuff into a clean Il-2 install patched to 4.12. When done you have the ultimate set of planes and maps for IL-2 from WW1 through to the jet age, compatible with the latest, TD AI and features. CUP also includes a great set of extra mods which you can enable at will, notably one which lets you choose many more maps in the Quick Mission Builder, whereas the stock sim's choices were quite limited. You can be over sunny Spain one mission, enjoying the breeze in your open cockpit, and shivering over the wintry Ardennes, the next. And of course there's the Pacific Theatre, with many new ships, to which you can do various nasty things. I'm not sure which existing campaigns - notably the many great ones available over at that great resource for things IL-2, Mission4Today - will work with this and which would need tweaked, but there are some good (presumably stock) campaigns which seem to work fine with CUP, including one of my favourites, 'Blinding Sun': So...why are you still sitting there, reading this? Go get it!
-

WOFF: Screenshots and Videos
33LIMA replied to RAF_Louvert's topic in WOFF UE/PE - General Discussion
One of my favourite planes in WOFF, a super recreation of a super machine: -
How about doing us a review Dave, so we have something to drool over, while we wait?
-
Another eventful trip... It’s not long before I have the opportunity to make any amends necessary, after leaving my flight due to engine and airframe damage, during the battle with the three DFWs. My machine has been repaired and ‘B’ Flight, of which I’m effectively the leader, has licked its wounds from the earlier patrol. We have four aircraft and crews on the roster for the day, ready for operations. Our mission this time is similar, another trip up to the Lines, this time with three Bristols. The weather has improved somewhat. There’s still quite a lot of cloud, but not so much. We’re soon away and climbing up to our patrol altitude of between seven and eight thousand feet. Our route this time is somewhat shorter and more northerly, with a little dog leg up and across to the Lines, not far to the east. No sooner have we reached them, than I spot two dark specks, right and about the same level. They are moving from right to left – and moving quite quickly, at that. As we draw nearer, roughly on an intercepting course, the two specks separate. One keeps moving quickly left across our front, while the other hangs back. This doesn’t look like the behaviour of 2-seaters, which typically stay together for mutual protection. And it doesn’t look terribly friendly, either. In fact it’s all decidedly menacing – deliberate, and aggressive. Huns, and probably hot-shot Huns at that, I have no doubt. I turn in towards the enemy aircraft and make my first mistake, The WOFF Bristol Fighter is rather tail heavy and requires strong forward pressure on the stick, to maintain level flight. I don't recall if the real Bristol had elevator trim but, though I can use CFS3's trim controls to apply it - simulating the rigging of my plane, if real trim wasn't available - I haven't set it. In a turn, it's easy to back off the forward pressure without realising it. This is what I do, and my plane mushes rather badly, giving the second Hun a chance to slot in behind me. Fortunately, he's a long way off - and I'm not alone. I correct my mistake and concentrate on the enemy leader, giving the attack order. The hostile red icons that appear on the Tactical Display confirm what I had already deduced. In my settings for the 'TAC' I had turned off the ‘tactical advice’ sub-text, but it still identified my opponent - not just as an Albatros D.II, but one flown by a particularly dangerous foe, Historical Ace Eberhard Voss of Jasta 20 - ironic, as that's the name of my inspiration and my pilot in this campaign. Incidentally, WOFF uses the abbreviation HA, unfortunate since this was a ‘reserved term’; a long-standing RFC abbreviation for ‘Hostile Aircraft’, later replaced by ‘Enemy Aircraft’ when the top brass decided that ‘hostile’ somehow didn’t convey quite the right message. Anyway, there was I, and there was the Hostile Ace – sorry, Historical Ace...well, both, actually. As it turns out, he is extremely hostile. And he is exhibiting said hostility by throwing his kite about the sky in a most ace-like manner. In what seems like no time, he has turned the tables and is now above and behind me. Round and round we go in the approved fashion, like two dogs trying to get a bite at each other’s tail. I even throw in a bit of the vertical, trying to do what they nowadays call high or low yo-yos. None of this seems to do me a great deal of good. It certainly doesn’t get me onto his tail, and barely manages to keep him off mine. I don’t recall my observer doing much if any shooting, but considering that both Bristol and Albatros seemed to be constantly changing relative positions, I’m not terribly surprised or disappointed. After a bit, for some mutual support, I try to steer the action towards where I could see the other two Bristols fighting the other Albatros, which seems to help a bit. I’m acutely conscious, though, that I’m being forced increasingly onto the defensive, with the Hun spending more time behind my ‘three to nine [o’clock] line’ than I behind his. In these circumstances, retaining altitude seems less important than keeping body and soul together. I have already lost some height but I now start making altogether more aggressive low yo-yos, regardless of height loss. This seems to work rather better and by the time we are near the deck, I have actually managed to get off a couple of short bursts at him, from my Vickers. The down-side is that I am now so low that the only way is up. And I must be careful in my turns, not to spin out. Worse, there’s the crackle of MG fire and grey lines of tracer smoke trails come arcing up at me from the ground. I am no longer over friendly territory and now the Huns on the ground are also after me. I twist and turn. But a burst from somewhere down below whacks into my Bristol and blood spatters my goggles. Coming around in as tight a turn as I dare after another snap-shot at the Albatros, with mounting elation I suddenly realise that the Hun has not turned after me, but away. He’s had enough! I whip around after him, but – just when I didn’t need his help any longer! – a flight mate cuts in, behind me. Hopefully he will cover my tail as I make the kill, rather than try to steal it from me! I hesitate, then suddenly fling the big Bristol into a sharp right-hand turn, as the second Hun comes at me from a flank. No fair! One of the other chaps - who should have been covering my tail, instead gets to finish off the hot Hun I had shed virtual blood to best, then to top it all, a fresh enemy gets to finish off me! I’m back where I started, except this time wounded and no height to play with. I soon notice, though, that the Hun seems to have different ideas. Not contenting himself with level turns to get onto my tail, he starts some yo-yos of his own, up and down. Dangerous stuff! I manage a quick pass without getting my sights onto him, but after flashing past, I can see his diving escape is taking him nearly vertically towards the ground, ground which is so very close...too close. I suddenly feel calm, certain that he is doomed! And so it comes to pass. I don’t see or hear him crash, but looking back, there he is, the proverbial smokin’ hole in the ground. I am sure I won’t merit a confirmed kill for that one, but equally sure that I don’t care. Survival is victory enough. That I had bested the hot-shot Hun, and then seen his kamerad augur in, is sufficient icing on the survival cake. This time, wounded, low, under fire from the ground and with no other aircraft in sight, I feel no compunction at going home. Once again, a glance at the map shows me the way to the nearest friendly airfield and once again, I am soon there and back on terra firma. The mission debrief brings me mixed news. We’ve had no further casualties - barring myself and my observer, who will both be spending a week and a bit in hospital. But the flight has brought down that pesky ace in the first Albatros and confirmation has come in of my own claim from my first operational flight. Not so bad a day’s business! Coming up to two years on from my CombatAce review, with a good many more hours on the sim under my belt, I have a few niggles with WOFF. These range from the ‘minor/easily remedied’ end of the scale (eg some of the terminology is unduly idiosyncratic or irksome, like ‘craft’ for ‘aeroplane’ or ‘aircraft’; and the very modernistic ’Intell’ for ‘Intelligence’) to the more significant (eg the lack of a fully-functional ‘recall/rejoin formation’ command, and the relative lack of single aeroplanes plying their trade, either 1915-16 or, later, 2 seaters near the Lines doing ‘art obs’ or strip photo shoots). In between, there’s the limited view system and the relative paucity of AA fire (and sometimes also, planes for them, or the player, to see and shoot at). Even with the welcome addition of the Nieuport 12, there still just aren’t enough French 2-seaters, while a DH-4, an FK-8 and a representative 1916-17 German 2-seater would also be good (as would giving squadrons with missing planes a suitable substitute, rather than leaving them present, but inactive, in the otherwise hugely comprehensive WOFF Orders of Battle). Unsurprisingly, I remain a big fan of First Eagles 2, which does rather better in many of these areas, with great air-to-air and (with freeware mods) a much bigger planeset, complete with additional theatres and individual markngs for every plane in the air. However, playing WOFF regularly over all this time, I've found nothing to sway my review opinion, that this is truly a sim amongst sims, one of the best ever and a 'must have' for any WW1 fan. I can't imagine not playing WOFF, regularly; not least, being able to step back into the shoes (ie the squadrons) of just about any of the writers of the iconic WW1 air war memoirs, knowing the unit will be there, where it should be, and finding yourself transported back to their world, recreated with hugely immersive effect by a team whose love and grasp of their subject matter shines through so strongly. Wings over Flanders Fields still earns my very highest recommendation, two years on.
- 5 replies
-
- 1
-

-
- f2b
- wings over flanders fields
- (and 3 more)
-
Alarms and excursions! Nearing the Lines at the head of my flight of four Bristol Fighters, I cut out the sight-seeing and concentrate on scanning the cloudy skies all around, for any sign of the enemy. I also take the opportunity to pick out the major landmarks, comparing what I could see with the map. The in-flight map was one of WOFF’s big improvements over CFS3’s truly awful one, and now I’m using a modded version by Nibbio (of CFS2 'rollfix' fame, if I recall right) which helpfully improves the correspondence between what you can see in the 3D world and the map itself. Another WOFF improvement over OFF is aircraft visibility, which without labels or the ‘Tactical Display’ was poor. Aircraft 3d models are still not visible as far away as they should be. But to remedy this, WOFF introduced a ‘dot more’ for labels, whereby you can choose the range at which planes are rendered as a small dot. I have picked 6 Km as the dot rendering distance and use a ‘black dot’ mod by Robert Wiggins which replaces the default lightish grey version. So equipped, I suddenly see three aircraft ahead and slightly below, on a roughly reciprocal course a short way to our right. They show no particular sign of reacting to us, so it seems likely they are friendly. However, in such situations I apply the advice of RFC ace Mick Mannock, to treat all spotted aircraft as hostile, until proved otherwise. As the other formation comes abreast of us, I lead our formation around in a ‘curve of pursuit’, calculated to take us in behind and above them. As I do so, I realise that these are indeed friendlies, three British 2-seaters - almost certainly our very own ‘A’ Flight, which we had not seen since soon after we all took off. Better safe, than sorry! I turn back onto our previous course and complete the run-up to our turning point, at the limit of our patrol, above the front. I had intended to patrol around our final turning point for a time, but these plans are duly interrupted. Ahead and slightly right, somewhat higher up, I spot three more aircraft, just distant specks against a patch of blue between white and grey cloudbanks. As I watch, I can see that their track is taking them across our front, from right (friendly territory) to left (the enemy side of the Lines). It seems unlikely they are ‘A’ Flight, last seen not long ago, headed away and lower down. There is no Archie, so I have no particular clue as to their identity – black bursts would have indicated friendlies engaged by enemy AA fire, white, enemies, shot at by our own. At full throttle I start climbing gently, concerned that we might be up against enemies with a height advantage. We draw steadily closer, but the other formation flies steadily on, the lack of an aggressive reaction hopefully indicating they are not enemy scouts (as fighters were then known). A friendly flight, outbound for Hun-land, perhaps? Or maybe enemy two-seaters, returning from a raid or a recce? I begin to turn in behind them, ready to attack if they should prove to be Huns. And Huns they are! As the aircraft cross ahead of us, I can see they are German aeroplanes, DFWs by the look of it, mainly from their 'wing nut' tailplanes. I swing in behind and below them. The range winds down quite rapidly. With three aircraft in Vic formation able to cover each other’s blind spots, there is little prospect of a surprising them, and even if we get underneath the tail of one, we will be exposed to crossfire from the others. But I am anxious to catch the Huns before they get too far over on their own side of the Lines. So I select the enemy on the right of the formation and continue to close, giving the order to attack as we do so. My observer seems keen to contribute for as we close, I suddenly see the muzzles of his twin Lewis Guns appear, just above my head. I wait for him to fire, but he doesn’t, so I wait no longer. Probably blocking his line of fire with my upper wing, I pull up my nose and cut loose with the Vickers. Correcting my aim from the tracer smoke trails - which are rather nicely done, in WOFF - I am soon getting hits. The DFW ploughs on, though. Worse still, return fire from an enemy on my left whacks into my machine, about the same time as I pop up into the field of fire of my target’s own observer. I push down the nose then pull up again, for a final burst before breaking away. That does the trick! Suddenly, the DFW rolls over to his right and falls away, his nose dropping. Got him! I am sure of it. I break right and watch him fall into a vertical nose dive, from which I feel sure there will be no recovery. Looking back to my left, I can see the other two DFWs are maintaining formation, harried by at least one other Bristol. No longer receiving fire, I reverse my turn and head back into the fight. I very quickly become aware that all is not well with my machine. She seems to want to roll right and it takes significant opposite stick pressure, to overcome this; even more, to turn left after the DFWs. Rolling out of my turn behind and below them, I under-correct and nearly spin out. By the time I am back in control, I can see what looks like a second DFW going down vertically, trailing steam and black smoke. By now, I am conscious also that my motor doesn’t seem to be developing full power. My efforts to catch up on the rapidly-receding air fight seem to be getting no-where. As the flight leader, I am reluctant to leave, but with the three Bristols now against one DFW, no sign of further Huns, and the fight now heading over the Lines, I decide to call it quits. Unfortunately, I cannot not resort to WOFF’s ‘Rejoin formation’ command (‘Rally’, in RFC terms, usually signalled by a pre-arranged colour of flare) because this only works to recall planes previously ordered to attack ground targets (strange, but there it is). It's time to go home, I decide. My engine could fail at any time and I'm not going to chance ending my career prematurely, with a forced landing on the wrong side of the Lines. I throttle back and dive gently away to the west. The others are soon out of sight. A decent amount of aileron is needed to stop my kite rolling over and holding this on, I check my map. My home base lies quite a way to the north west, but I can see that there is a friendly airfield much closer, a short way to the west. A minor course adjustment is all that's needed to take me there and I am soon into a right-hand circuit for landing. This time I am more careful to keep things gentle, as a loss of control at lower level could easily end in disaster. But I am soon down safely, chopping the throttle then switching off as I bump and roll across the grass towards the sheds....and a nice strong cup of tea in a friendly mess. Mission over, and having taken the proverbial and virtual tender back to la Bellevue, I am able to review the mission results. We no longer have the rather cryptically-annotated, Red Baron-like mission replay feature of Over Flanders Fields, but WOFF has a much better post-mission info screen. From this, I am pleased to see that my kill has been recorded - as a victory claim, but guaranteed to be credited as, for this career, I have turned off the claim form submission drill (I will likely turn this back on as it’s not only a nice feature, but also because the ‘automated claims’ option doesn’t record the aircraft type of your victory). Less pleasing is the fact that two machines had been destroyed, with one crew killed and an observer wounded. Feeling rather guilty at having missed all of this and that perhaps as flight leader I now have something to prove, I am keen to return to the fray. ...to be continued!
-
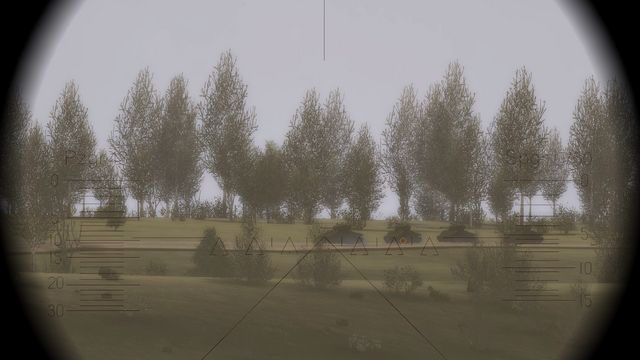
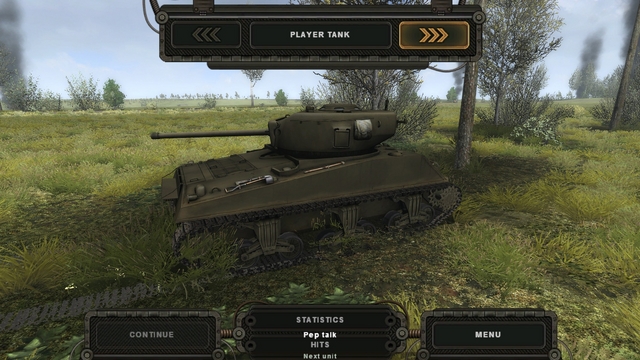
The stock Steel Fury campaigns are quite decent, and variants exist which change the player's vehicle eg from Panzer IV to Panzer III. Most of the numerous missions later added to Graviteam's excellent WW2 tanksim - many of which are gathered together in the Steel Tank Add-on (STA) mod's mission packs - are in the form of single missions, or small, themed sets of single missions. However, STA modder Lockie is now working on a series of new campaigns, bringing together adapted or new missions, grouped around a storyline. The first of these to become available seems likely to be 'Schuze's Diary', the premise being that they recreate the wartime combats recounted by a long-lost German tanker's diary. The eponymous Leutnant Erich Schuze will be an officer in a Sturmgeschutz Abteilung whose war starts with the Second Battle of Kharkov - Steel Fury's featured theatre - but moves on to different vehicles and battlefields, as the war progresses. When ready, the campaign will naturally be made available via the STA mod's website. Here are some screenshots from the first set of missions, currently under development. I have been testing some of these missions and fighting in a limited traverse vehicle is proving a whole new ball game!
-
The last mission (#11) in this campaign has been completed and I'll post here when the campaign is released. In the final battle, using Jagtigers, to adapt the comment of a German prisoner in Italy, the main challenge can be not running out of ammo, before the enemy runs out of tanks! Typical engagement from the mission, before... ...and after... Coming soon, to a gunner's sight near you...
-
My old system's low spec for WOFF (Core 2 Quad 2.33 and 1 gig 250GTS, before that a 512 meg 8800GT), but runs WOFF very acceptably, and on quite high graphic settings (I don't play much late war stuff but could dial back that era's higher air activity, if I needed to). And that's with Ankor's shadows mod which much improves the visuals. I have OFF+HITR but WOFF is such a massive step-up over OFF, that it's very well worth the move, unless your rig is well off the lower end of the WOFF scale. OFF: WOFF: ...and the visuals are only one part of the upgrade. But then, you probably knew all this already!
-
Off-hand, does anybody know...?
33LIMA replied to Hauksbee's topic in WOFF UE/PE - General Discussion
It's just one of several variations, trying to find the right balance between camouflage and visibility, from different aspects. Your pic is the 1939-40 era. Just before the war, the standard was Type B roundels (red and blue) on fuselage and upper wings: The red/blue roundels would have been better for camouflage on the ground, from the air. The higher-vis fuselage roundels would have improved air-to-air recognition, without unduly compromising camouflage while on the ground. The 'Battle of Barking Creek' would have emphasised the desirability of that (a couple of Hurris were shot down by Spits, when a radar masking problem led to friendly aircraft being reported as incoming bogies). At that time and up till about mid-1940, there were no roundels under the wings - for recognition from the ground, RAF fighters 1939-40 swapped 1938-era overall aluminium undersurfaces for half black, half white (or aluminium), with some variations. About the time the upper surfaces were changed from dark green/dark earth to dark green/ocean grey in 1941 IIRC, roundel styles changed again, with thinner white and yellow rings, and for head-on recognition, yellow outer leading edges on wings. -
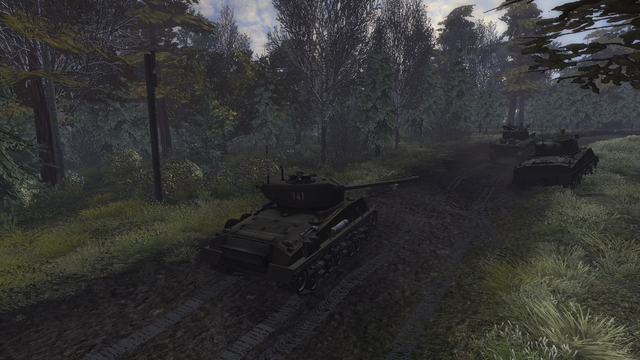
Steel Fury+STA mod: forest ambush mission from 'Fury' mini-campaign
33LIMA posted a gallery image in Member's Albums
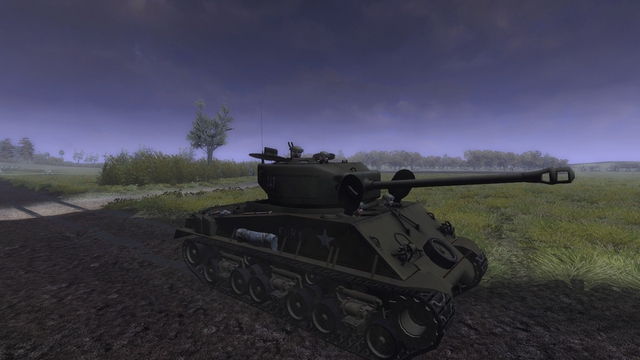
From the album Combat Sims
-
Steel Fury+STA mod: forest ambush mission from 'Fury' mini-campaign
33LIMA posted a gallery image in Member's Albums
From the album Combat Sims
-
Steel Fury+STA mod: forest ambush mission from 'Fury' mini-campaign
33LIMA posted a gallery image in Member's Albums
From the album Combat Sims
-
Steel Fury+STA mod: forest ambush mission from 'Fury' mini-campaign
33LIMA posted a gallery image in Member's Albums
From the album Combat Sims
-
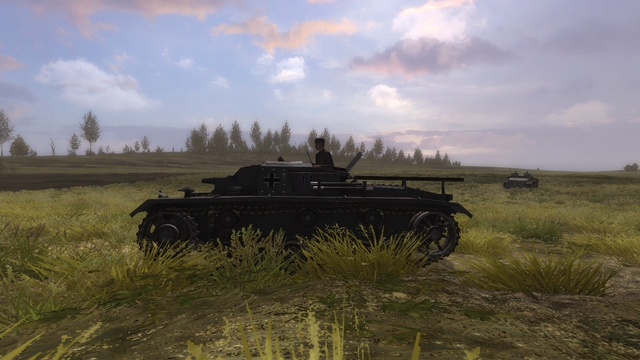
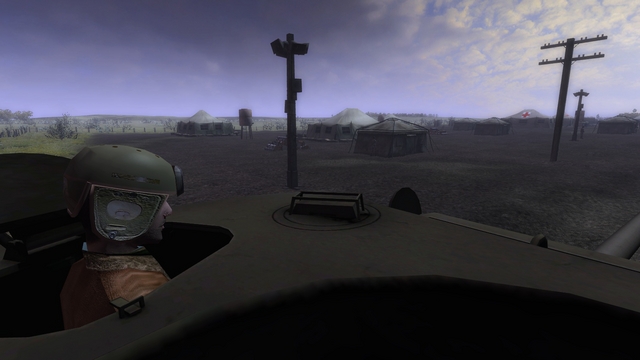
From the album Combat Sims
-
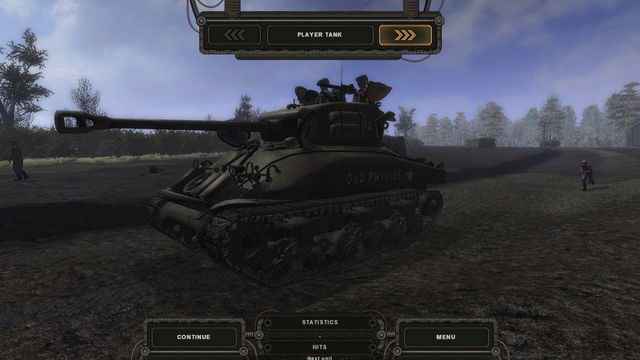
From the album Combat Sims
-
From the album Combat Sims
-
From the album Combat Sims
-
From the album Combat Sims
-
From the album Combat Sims
-
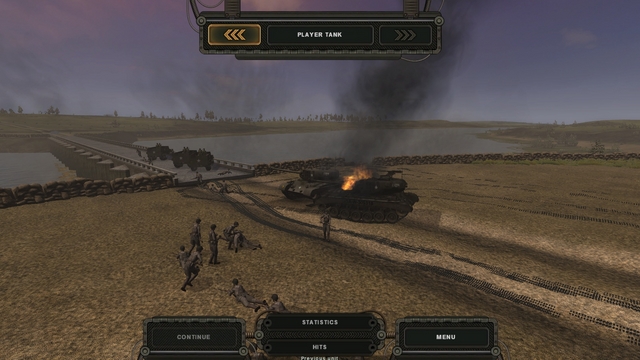
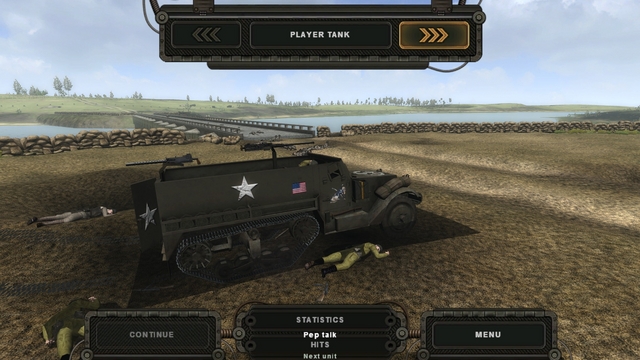
Here's ome scenes from Mission 11, the final one in this three-theatre campaign and last of the three missions made by me (with a LOT of help from Lockie!). We move out from the Forming Up Place to firing positions overlooking the semi-fictional Hockenheimer Brucke... The vehicle commander puts the gunner onto an approaching enemy armoured column, so far oblivious to our presence but about to get a rude awakening... The accompanying Shermans plaster us with 76mm APC and HVAP, but fare little better than the armoured infantry's half-tracks... Pershings! The 'heavy brigade' has arrived, to rescue their lighter cousins... But now, it's our turn to be re-inforced, as the 17th SS Panzers line up next to us and open fire... Anyway, the 'Erich Schulze's Diary' campaign is nearing completion. Having finally 'taken the plunge' with the Steel Fury Mission Editor, my impressions are that the initial learning curve is quite steep, but once yuou're past that (preferably with the much-needed help of an expert like Lockie) it's not very difficult to set up quite a lot of useful or interesting things. It's useful that the ME, with its satellite, 3d view of the game world, will let you start the AI moving following the scripts you have devised for each unit, while you watch from above and zoom in or out. The ME's manual is a bit hard to follow in places, and there's some detailed and tricky work needed outside the ME, in doing the right edits to the right files, following conventions that are a tad arcane, to get things like messages, waypoint markers and all the sundry, lesser-but-important details working. Not to mention the time spent in testing, tweaking and retesting (backing up as you go, against the one edit that will break something so badly even the Mission Editor won't load the mission again). There's a lot to learn and much that I still understand poorly - or not at all! But if you're thinking of having a go, fire away. It can be quite addictive, and nothing beats seeing your creation finally come to life, with tracks rattling, engines growling and shot & shell flying, as the Steel Fury STA mod's world springs into violent and noisy life!
-
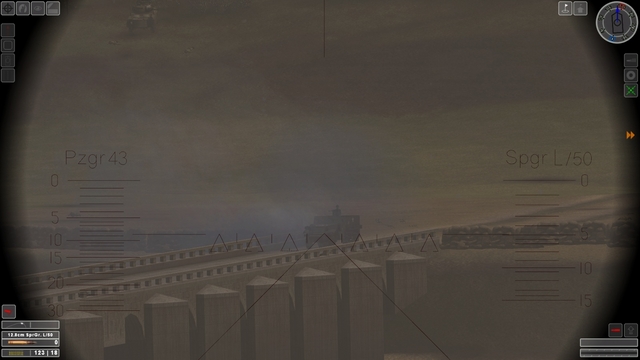
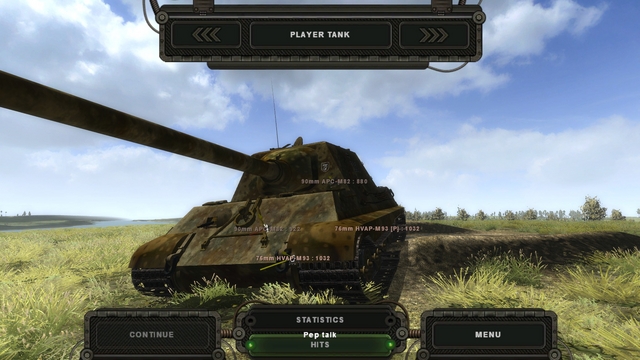
Some scenes from a more recent test of the Jagdtiger mission! It's late March 1945 and schwere Panzerjager Abteilung 653 is in action in the Rhineland, near Schwetzingen. The Americans have already got across the Rhine at Remagen and it looks like they're about to capture another bridge, in the chaos undefended and not yet wired for demolition. The only hope is my platoon of three serviceable Jagdtiger, tasked with holding on until a kampfgruppe of 17th SS Panzer Grenadier division can arrive, to secure the area properly. But the Amis are closer. After a hasty approach march which we hope hasn't destroyed the zero of our big but sensitive 12.8cm guns, we near the high ground overlooking the bridge. I order the platoon from column into line formation. As the river comes into sight ahead, I order a halt, driving my own vehicle into a shallow revetment - just in time, for the leading Amis are motoring right to left along the road on the opposite bank. It's a platoon of M8 armoured cars, out on point. Behind the light armour, the first Shermans pull off the road and turn to face us. Our cannon have a low rate of fire, but they are pleasantly accurate. With the range set only at a 'battle sight' setting, even crossing targets can be engaged with consistently successful results. Enemy infantry who have debussed from their half-tracks are working their way towards the bridge... ...covered by yet more Shemans... As we engage the Shermans, some half-tracks make it over, but they and the Shermans are quickly dealt with.... Reinforcements arrive - unfortunately enemy ones, in the form of M26 Pershings. Under cover of their fire, the leading enemy infantry sprint over the bridge...this is going to be tricky... Lots more work to be done to this mission yet but so far, I'm enjoying even the testing...there's something to be said for fighting in a big monster of a virtual tank (or tank destroyer) against more numerous but smaller, weaker enemies!
-
From the album Combat Sims
-
From the album Combat Sims
-
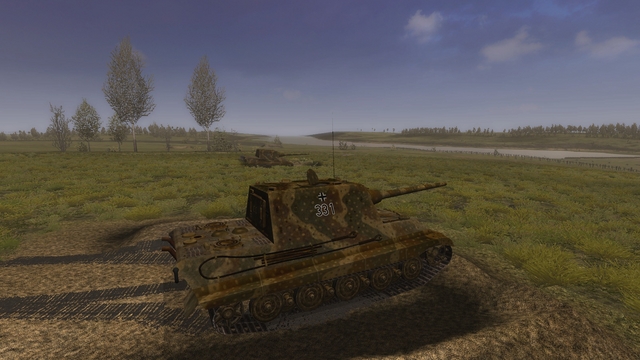
Steel Fury+STA mod: immobilised Jagdtiger, showing hits
33LIMA posted a gallery image in Member's Albums
From the album Combat Sims