-
Content count
3,749 -
Joined
-
Last visited
-
Days Won
7
Content Type
Profiles
Forums
Calendar
Gallery
Downloads
Store
Everything posted by 33LIMA
-
Villers Bocage, hin und zuruck Through the sunflowers we went, crop damage be damned. Time to get that anti-tank gun! We rolled out the other side and there he was – a 6-Pounder. He was a bit to far away to rush him so I stopped to shoot instead - this time with the correct round, having loaded HE after emptying my chambered AT round at him, earlier. Strange! He was just sitting there, side on. Was he tracking the other Tiger? His crew seemed to be down – perhaps he was out of action, from my earlier fire! I was in no position to take chances, so I let him have the HE round. That put matters beyond doubt! My tank commander started calling in more infantry targets, slightly right, where an smaller road or open area joined the N175. As we were shooting these people, a radio-equipped jeep was silly enough to drive up the street and was suitably dealt with. As if to avenge him, to the accompaniment of more ‘lawnmower amok’ noises which caused me to back up again, a Cromwell barged out onto the road, just in front of us. He got rather clsoe but lasted no longer than the jeep, perhaps in part because the other Tiger had showed up again. Which one of us got him, we could settle later. The second Tiger started off down the N175. Abandoning my plan to keep off the road, I decided to conform to his movements, for better mutual support. Whatever one Tiger can do, two can surely do better. I slipped in behind and left of him, glad to have some friendly company in this dangerous close quarter battle zone. A quick look at the map showed that not far beyond the turn in the road, lay the Hotel de Ville. With our two big tanks now poised to sweep aside any remaining opposition, I looked forward to sampling Monsieur le Maire’s best cognac...should any remain. At that point, it all went tits up. As we were stopped to shoot up some more seemingly-helpless enemy troops who lay prone on the road in front of us, first one, then another Cromwell turned onto the road just ahead of us. I started shooting at once, only to find out that I was quickly down to my last AP round. Bad drills, that I hadn’t checked the supply at the start of the mission, but I was now rather shocked to find that I had no other anti-tank rounds, either – no hollow charge, no tungsten-cored Panzergranate 40. Just High Explosive. I laid into the Cromwells with this, hosing them with the co-ax in between reloads and praying the other Tiger would get them. But this wasn’t just a tank battle. In amongst all the shooting, I heard the distinctive ‘whoosh’ of an infantry anti-tank weapon firing; then again. Strictly speaking, this sound isn’t really right for the spigot-fired PIAT used by the British rather than bazookas, but when you’re under attack with the things, you have more pressing concerns. Like preventing you and your crew from being incinerated. I backed up and traversed right, but it was too late for the other Tiger. He was further forward and on my right. The PIATs must have got him. The crew bailed out into the roadway. I hosed some troops I could see over there, but could not be sure that I got the Tiger’s killer. One of the Cromwells seemed to be out of it but the second one advanced, even as I backed up. He halted next to the disabled Tiger and we exchanged rounds. With only HE left, I tried to break his tracks, clobber his optics, anything. In the end it seemed to work, for he fell silent. Now what? I still had a fair bit if HE left but that was it. After this tank-infantry ambush, it seemed to me that the prospects of our completing the mission had just slipped from excellent to abysmal. To match the mood, the skies darkened and the rains came down. But we’re the Hundred and First SS Heavy, I told myself, panzer men as tough as our tank's Krupps steel, and we don’t give up easily. I was going to make a last, death-or-glory push for the Hotel de Ville. What I wasn’t going to do, was drive any further down than particular stretch of road. Instead, after checking my map, I backed up and turned off to the right. I didn't get far. The silent Cromwell came back to life, putting a round into my side. My left-hand tracks parted and unrolled behind me as I pitched into the roadside ditch. It seemed that all I could do now was let fly at the Cromwell from where I sat, with the remains of my HE ammo, hoping he would go down before one of his 75mm rounds did me more serious damage. So that's what I did. I took a certain amount of satisfaction in winning this particular duel, when his hatches opened and the crew started to bail out. But we weren't done yet. I had forgotten that crews in Steel Fury can do a certain level of repair work in the field. Happily, track repairs come into this category. IIRC there's a gameplay option to speed this up and I must have had it selected, for in a matter of minutes we were mobile again. I wasted no time in pressing on and emerged from cover with an open area to my left, where most of the infantry had been. Fearful of a getting a PIAT in the flank, I rattled on without pausing, coming finally, as planned from the map, to a minor road running parallel to the N175. Here, all was clear . I breathed a sigh of relief that I was finally out of that hornet’s nest behind me. At full speed again, we moved down the road to the next junction and there, turned left. Still no opposition! Maybe we might yet be relieving Monsieur le Maire of some of that cognac! ...to be continued!
- 12 replies
-
- 1
-

-
- steel fury
- wittmann
-
(and 2 more)
Tagged with:
-
Where Tigers fear to tread... I sat for a while, scanning left and right, across the vista of Villers Bocage, waiting for something to happen. Something, anything, that might relieve me of the necessity of driving into what should be the last place anyone would take a tank, even a thick-skinned Tiger. A place where a single infantryman with a hollow-charge weapon or even a sticky bomb could end my mission in unpleasant fashion. Where an anti-tank gun or a tank could be lurking behind each piece of cover, ready to slam a solid shot into my thinner side armour, at point-blank range. But of course, nothing happened. In Panzer Elite, I would have been saving my artillery support for moments like these, to flatten as much of the town as possible before venturing into it. But this wasn't Panzer Elite. In Steel Fury, artillery is pre-programmed and in any event, there was none, not on this mission. Not so much as a mortar bomb fell from the heavens onto Villers. Nothing else for it, then. Time to motor on, into town. There was no way I was going to drive straight down the main road. Instead, my plan, such as it was, was to move via the back gardens of the houses, parallel to the N175 and with the intention of outflanking anything that was set up to ambush the road itself. And I would do it in short bounds, pausing frequently for observation, before making my next bound. I would use the same cover that might hide my enemies, to hide my own tank, until the last minute. I covered the stretch of open ground in front of Villers as quickly as I could. About three-quarters of the way there, scanning to both sides for possible targets, I suddenly saw one - a low, rectangular object, about half right, between two houses. I should have turned into him but my gun was already laid in his general direction so I just halted in place and steadied my aim...onto a garden shed. Had he known, the owner would doubtless have been grateful I'd noticed, before pulling the trigger. And that I didn't shoot anyway. I don't know about you, but I don't take kindly to being frightened by garden sheds. I moved off again and soon arrived at a low fence. Just before churning my way across the unfortunate householders' gardens, I stopped to scan again for targets. And this time, I spotted a real one. It was a prone soldier, presumed enemy, near the base of a telegraph pole, where the road turned to the right. He was unfortunate enough to be lying in a short stretch of the N175 which I could see, between the buildings and foliage. I quickly shot him with the co-ax, firing short bursts until I was dropping the rounds right onto him. At this point, I became aware of what sounded like a very large petrol lawnmower, running amok. I realised quickly that it was a tank on the move. Where he was, I could not see. Except that he seemed to be getting closer. At first, I thought it might be the other Tiger; but no, this was quite a different sound, smaller, faster. More from instinct than anything else, I started backing away, across the field behind me. Whatever it was, it seemed to be somewhere to my front...and coming right at us. As I backed up, I looked desperately to see what it could be. And there he was! A single Sherman, dodging between the houses and shrubbery but headed my way. My tank commander spotted him at the same moment and called him in. My mind registered the fact that he wasn't a Firefly, but at close range, winding down rapidly, I couldn't afford to stretch my luck. I stopped and fired as my turret traverse took my point of aim across him. A hit, but low and right, with no penetration, just a metal scar where it glanced off the point his transmission housing meets the glacis plate. He kept coming and put a round into us, which seemed to do no serious damage. I took more time to aim the next round, but too long - he jinked right disappeared behind the nearest house, just as I let rip. I laid the gun onto the spot on the other side where he should re-appear, but he didn’t. Damn and blast! Had I got him, perhaps? I could still hear his engine. Suddenly, he burst out into the open, to the right of the house, and turned again towards me. Resisting the temptation just to let fly, I forced myself to fine-tune my aim, going for the turret. He had got off only one round but I needed to get that gun before he fired another - at such short range even a 75 could do me some harm. Got him! The hatches flew open and the crew bailed out - some of them, anyway. They ran off to my right into cover, pursued by tracers from my co-ax. After my earlier experience with the grenade-throwing tankie back up the road, I was disinclined to be merciful to bailed out crewmen. While collecting my wits for my next move, I had a quick look through the gunsight at my latest victim, noticing for the first time the spash mark made on his front hull by my first round. The hole in the turret to the right of the gun mantlet told its own story. The bow gunner's and loader's hatches were shut, which confirmed that not everybody had made it out. Details like that bring SF to life in a way that few other tanksims can match. Right, now, where was I? Ah yes, the plan. Get into Villers and drop by the Hotel de Ville. I advanced again, driving past the Sherman I had just knocked out and halting in the lee of the first houses. Between the cover ahead, I could see again that stretch of the main road, at the point it turned to the right. It was starting to rain and visibility was deteriorating. But I could make out some more prone infantrymen, lying near the road. I started shooting, short bursts with the co-ax, feeling for the range, dropping bursts onto the enemy, one at a time. Suddenly my tank commander called out an anti-tank gun, just left of the troops, on the other side of the road. I laid my gun in the direction indicated but saw nothing, just a murky area of shadow in the lee of some shrubbery. Ordering HE loaded next, I rather desperately hosed the dark area with the co-ax, feeling rather helpless and thinking that instead I should be backing up, rather than messing about with a potentially deadly enemy I could not yet see. This opinion was confirmed when a tracer round flashed out of the murk and crashed into us. Keeping my finger on the co-ax trigger, I let fly also with the AP round I had up the spout. At the same time I ordered the driver to charge forward, to take us into cover. We were out of sight in seconds, thereby escaping further unpleasantness...for the time being. ] Now what? Get that anti-tank gun, obviously. But how? Time for a rapid Combat Appreciation. A quick look at the ground ahead decided the issue. I would swing slightly left, keeping a large house between me and where the gun seemed to be. When I got there, I would halt, then plan another short bound forward, again keeping left of the gun but steadily getting closer. Once I had got close enough, I would make a final rush at him from cover, on a flank, at point-blank range. Plan made, it was time to get weaving. I picked my next fire position in the lee of a house and broke cover, making straight for it. I reached the side of the house and edged up to the corner. From there, I scanned in all directions, to make sure that I was clear, before making my next move. My tank commander must have been feeling safer here, for he was heads out of the turret again. You can order your crew members to duck down and/or close hatches but the AI tank commanders in SF seem quite capable of behaving sensibly, according the the actual or perceived threat. It's another nice feature that helps make Steel Fury rather special. But let's get back to the business at hand... I set off across a short stretch of open ground towards a patch of what looked like sunflowers, standing tall as my tank, as sunflowers are apt to do. A reminder to my crew of sunny days on the Soviet steppes, no doubt. The sunflower patch seemed to extend up to the road on my right, roughly to where I thought the anti-tank gun should be. It was all a bit disorienting. To hell with it. We would get into those sunflowers, drive diagonally across them and come out the other side. The closer to the gun, the better. If all else failed, I wouldn’t stop, I’d just roll straight over the b*****d. ...to be continued!
- 12 replies
-
- 1
-

-
- steel fury
- wittmann
-
(and 2 more)
Tagged with:
-
Grunt troubles I didn’t have much time to recover my composure after being rushed by the Cromwell which now lay just to our rear. There was a loud bang as something hit us, up front. My tank commander started calling out infantry targets. I immediately started backing up again, onto the road, applying the principle ‘distance is your friend’. Until I had identified whatever it was that had hit us, getting further away from it seemed like a good first move. As it was, I soon picked up the enemy in my gunsight – a single soldier, standing in the road just in front of us. Even as I saw him, he threw a grenade, which explained the earlier bang. He was in fact a bailed out tankie with a bad attitude. He should have stayed down the road, instead of trying to kill a Tiger tank with hand grenades. Down he went. Why is my commander - we are 'Elephant 1' - announcing the destruction of the enemy light tanks? No idea...maybe the crewman was the last survivor from one. He wasn’t alone, though. Further down the road were proper infantrymen, skirmishing towards us. I spent a bit of time putting a stop to that, with the co-ax. Some of them had worked up onto the high ground to the right, but my alert boss spotted them. The enemy troops seemed intent on infiltrating past me and were rather hard targets in the undulating ground and long grass. Fortunately, they didn’t seem to to have brought with them any serious anti-tank weaponry and after some more busy work with the co-ax, the supply of targets dried up. By now, we had already been reminded that our next task was to assault Villers Bocage and clear up to the Hotel de Ville or town hall. So I rolled forward again down the N175, towards the crest in the road. Happily, we managing to avoid squishing the bloke who’d grenaded us. There seemed little point killing dead things; besides, the driver wouldn't have thanked us if we had added to his maintenance tasks the job of cleaning up the tracks, afterwards. Looking down, the wrecks of my original victims lay where I’d left them, now with a scattering or enemy dead in front and around. I rolled on down and past the crest. No fresh targets appeared and we were not fired upon. I had lost sight of the second Tiger, but glance at the map told me he was just to the left of the ambush site. I considered briefly going wide on either left or right flanks. But for no better reason than that was how Wittmann did it, I decided that I would now go ‘straight down the middle’ - just drive down the road, straight to Villers. About half-way down the hill to the ambush killing ground, feeling sure that the risk of bumping live enemies must be increasing, I swung left, off the road. The other Tiger had cleared this flank – witnessed by a string of knocked-out British AFVs in the field – and the road and associated shrubbery on both sides of it would help cover my right. To my front, the map showed that two hedgerows ran left to right across my line of advance. These would cover my approach to the town, which was still out of sight on the other side. Running along parallel to the road, I passed the ambush site, keeping a careful look-out all around. There was no sign of life. Neither could I see the other Tiger; I was reluctant to call up the map to see if I could locate him even for a second, while in my current rather exposed position. I ploughed on, until I had reached the first hedgerow. I nosed slowly into this, just far enough to be able to see what lay on the other side. The answer was, not a lot. In fact, nothing at all, enemy-wise. So I pushed on through the hedgerow and out the other side, towards the next one, maybe a hundred metres to my front. This time, nosing into the next hedgerow, there they were: two enemy tanks, facing off to my left. They looked undamaged but didn’t move. The nearest one was a Stuart. Partly hidden the other side of him, was a Cromwell. Halted, I put a round into the Stuart, as much to prod them into life while I had them at a disadvantage...if life there was, left in them. This produced no reaction, so I drove on. The Cromwell looked equally undamaged so before driving close to him, I stopped and let him have a round, too. I was conscious by this time that my supply of AP was dwindling – though as yet, I was unaware that I hadn’t started with a full load! But I was disinclined to take any chances. Finally, I rolled up to the last hedge and getting my first real view of our Phase 2 objective, Villers Bocage. I halted and scanned hastily left and right, then settled down to a more careful check of the view that now presented itself – scattered houses on either side and stretching away along the N175, with lots of foliage cover around and between them. This was quite different to Steel Fury’s usual Soviet hovels – hardly Park Lane, but much more ‘up market’. It was also a going to be a bit of a tactical nightmare: short lines of sight everywhere, a good place to get ambushed, where a single infantryman with an A/T weapon would be deadly for a even a Tiger. No place for any tank, especially a single one. This was going to be scary. Maybe I should have gone wide on a flank, after all? ...to be continued!
- 12 replies
-
- 2
-

-
- steel fury
- wittmann
-
(and 2 more)
Tagged with:
-
Up close and personal! My ambush of the British spearhead had gone much as planned, even if that had meant interpreting my orders somewhat widely. Their tanks lay smashed or burning in my chosen killing ground. Some lighter armour had escaped, but had run into the second Tiger, now in action down on my left. The fly in this particular ointment was that one of the Cromwell tanks had escaped both my ambush and the attentions of the other Tiger. He had made it off the road to the left of the ambush site and from the occasional falling tree, I reckoned that he was creeping up the left verge of the road, evidently intent upon getting a crack at me. Head on, his 75mm gun should not be able to kill me, even at very close range. But he might break a track (an 'M' or mobility kill, in more modern tankspeak) or get onto a flank, from whence he might just be able to do me more serious damage. To counter this threat, I had reversed back down the road, back from the point it dipped down to the ambush site. This meant that when he came to the point the road levelled out and we saw one another, he would not be at point blank range and I should be able to kill him, before he got close enough to get me, instead. The first part of this little scheme went pretty well to plan. I had suspected the Cromwell was using the shrubbery along the road's left-hand verge for cover, and I was right. The boxy shape of his turret pushed into view, almost exactly where I had laid my gun, in anticipation of him breaking cover. I shot him straight away and I'm pretty sure I got him, though he fell back amidst a plume of dispersing dust and muck from the impact. My tank commander, optimistic as ever, had evidently come to a similar conclusion. At any rate he directed me to engage some infanty to our front, possibly the bailed-out tank crews. I wasn't having any of this, for I now saw that the Cromwell was still on the move, slipping down the roadside embankment, further to our left. A tough cookie, as the Amis would have said. He turned towards us again and I let him have another round. But the b***er kept coming and drifted left, behind a large bush. Though he didn't immediately re-appear, I was sure he was still in action. This was becoming rather worrying. I backed up some more. That Cromwell was getting too close for comfort. He appeared again and my commander directed me to engage him. The Tommy broke right, out of the bush, moving uphill but fast. By this time, I had rolled back off the road and was sat at an angle, on the verge. From there, I put yet another round into the Cromwell and saw the muck and dust fly again. I was getting hits, but he was still coming. This wasn't how it was supposed to happen! He reached the road and drove in our direction, looking massive in my gunsight, framed by the smoke from his burning comrades on the road behind. I've never had the feeling in a tanksim before that I was being rushed by a zombie, but I had that feeling now. I fired again. Whether I hit him or not I don't know, but he swung sharply left across my nose and drove past me, seemingly centimeteres away. My turret traverse wasn't fast enough and I was lucky he didn't shoot me in the flank. I can only guess that his turret crew had become casualties or my damage had knocked out his gun. The Cromwell crashed into some bushes just behind me and lurched to a sudden stop, like he had run into a giant net. As my sights came onto him I let him have it. Then a second round, right into his rear. Probably overkill, but after what I'd just seen, I was taking no chances. That did the trick. About time, too! ...to be continued!
- 12 replies
-
- 2
-

-
- steel fury
- wittmann
-
(and 2 more)
Tagged with:
-
From a view to a kill... From my vantage point looking down the N175, I waited just long for the leading Tommies to come into the open; a troop of three Cromwells, they looked to be. My first round crashed into the leading tank...which kept coming. My tank commander insisted that I do something about this and I obliged, with another round. The good part was that this stopped the Cromwell. The not-so-good part was that the two behind him - not entirely unexpectedly - promptly took advantage and scattered off the road, one each side. The Cromwell which went right didn't get very far. Estimating where he had got to, I let rip into the shrubbery. I didn't really expect to hit him, so I was quite pleased to see a column of smoke appear above the tees, evidently coming from my point of aim. Not a bad start. I tried the same with the Cromwell that had gone left, but while I didn't see any results, my tank commander seemed to think we had got him, for I 'heard' him announce the destruction of a group of enemy tanks, on the radio. I think maybe he was exaggerating a little, or at least, just a tad optimistic. Even so, things weren't going too badly. I rolled back a little way up the N175, to get a bit more hull down, knowing now that the element of surprise was lost. I also wanted to see if I could open up a line of sight amongst the vegetation, to the left of the road by the kill zone, where I suspected the third Cromwell might have gone to ground. But my attention was quickly drawn back to the road, with the appearance of two Shermans - Firelfies, as it turned out. Their hatches were open and they didn't seem to be put off by the knocked-out Cromwell sitting in front of them. Events began to move pretty rapidly, from this point. I immediately engaged the lead Sherman. One or two rounds, and he ground to a halt, just behind the Cromwell, the crew bailing out. My tank commander promptly ordered me to switch targets to the second Sherman, which had started to evade, backing up to the left. Even as he did so, more British armour turned the corner, into my line of sight. I needed no urging and let the other Sherman have it. There was a brief but satisfying explosion as my 88mm AP round smashed into him. No time to lose, though. My boss was already indicating a third target, which seemed to be a Stuart light tank. By the time my loader had chambered the next round, the Sherman I'd just shot was burning, but the Stuart had disappeared somewhere to the right. At about this time, I noticed some trees falling on the left of the road, indicating that the Cromwell that had driven off the road down there was still in action and on the move. I'd need to watch that! Now would be a good time for the second Tiger to show up, I thought to myself. To my surprise, at this point the Stuart re-appeared, having driven back onto the road in front of the tanks I had clobbered. My ever-watchful tank commander saw him, too, and directed me onto him. To digress briefly, I like to turn off the on-screen targeting aid you can see marking the enemy tank below and rely on the voices, but while there is a brief on-screen text display of the intercom traffic, SF uses a rather weird system, giving the compass bearing of the target. This seems to be the Soviet system - in the SABOW T-62, you can see, next to the gunner, a little compass repeater disc that seems designed for this purpose. SABOW backs this up with a more intuitive target indication system but the SF one is rather harder to follow, without using on-screen aids. Anyway, there was I, and there was my target, the foolhardy Stuart, driving up the road towards me... ...but not for long. Another 88mm AP round saw to that. Even as he jerked to a halt and the crew bailed out, more enemy armour appeared, this time, a group of the little 'Carriers' so widely used by the British Army in WW2. I was soon laying into these. I should perhaps have changed to HE rounds at this point and conserved my supply of AP but I decided just to crack on. The Carriers were small and quite fast-moving targets and at that range, the higher velocity and flatter trajectory of the AP rounds would give a higher hit probability. It wasn't long before the scene down in my chosen killing ground was a jumble of smashed British armour, reminiscent of the well-known German Propaganda Kompanie photographs of the actual battle (a clip of newsreel footage they took is featured as a video intro to this mission). Some armoured half-tracks which joined the party just added to the mess. At this point things seemed to settle down and I backed up a little further, to take stock of the situation from better cover. My tank commander - Michael Wittmann himself, presumably - took the opportunity to provide HQ with another upbeat Sitrep. Some of the half-tracks had escaped off the road to the left and now, some carriers took the opportunity to do the same. I got one of them, but the ones in front made it into cover. A lot of good it did them. At last, the second Tiger had appeared and they ran straight into him. You can see him about half-left in the screenshot below, in the field, just left of the telegraph pole in the foregrround. At this point I was backing up again, because some more tumbling trees along the roadside on the left indicated that the missing Cromwell was working his way up towards me, out of my line of sight in the dead ground to my front and probably concealed from the other Tiger by the foliage. If he got close enough or flanked me, his 75mm gun might immobilise or even kill my Tiger, and I wasn't going to let that happen, not now...not if I could help it, that is... ...to be continued!
- 12 replies
-
- 2
-

-
- steel fury
- wittmann
-
(and 2 more)
Tagged with:
-
On to Point 213...sort of... As my solitary tank roared and rattled over the undulating countryside towards the covered side of Point 213, I had a bit of free time to admire my mount, which is a mid-production model Tiger with, amongst other things, ribbed ‘Zimmerit’ anti-magnetic mine paste and a low-profile commander’s cupola. Modder Lockie has provided a ‘dirtied up’ version of the common three-colour later-war camouflage scheme, complete with tactical number 205, which was carried by one of Wittmann’s Tigers in Normandy. The vehicle is well animated and the engine sound is well above stock SF standards. It also has a detailed interior complete with animated crewmen, which is unusual for modder-made vehicles. I don’t tend to spend much (if any) time in these views and can well play entirely without them, but they are certainly very nice to have; below you can see the tank commander’s closed-up view, with my gunner (left) and loader (right) sitting tense but ready for action. If you know the story of the real battle, you’ll appreciate that Wittmann wasn’t ordered to set up an ambush at Point 213. Rather, he acted on his own initiative after the British column drove up the road and halted, just a few hundred meters from where his newly-arrived Tigers had harboured. He first attacked the halted column on the road itself, mostly half-tracks and carriers, defended mainly by some infantry 6 Pounder A/T guns. This mission doesn’t attempt to recreate precisely the actual action fought that morning; instead, it presents the player with some different challenges. Starting quite early! At this point I should confess that this report isn’t describing my first play-through. I’ve been testing different versions of the mission for Lockie and in fact, I ‘came unstuck’ on Point 213 the first few times i played. Carefull choice of fire position is the key issue here, methinks, followed by sensible tactics when you get there. [spoiler alert - you may want to skip this next bit, if you want to find all this out for yourself!] First time out, I set up in defilade, on the side of Point 213 that’s away from the enemy. There, I turned back to face the way I had come, watching over the N175 where it passed the high ground, so as to catch the enemy from the flank, as they drove along. Lined up like little metal ducks in a fairground shooting gallery; you get the idea. The first problem here is with the lie of the land around Point 213, your nominated ambush position. There’s lots of shrubbery, many dips and folds in the ground and a generally convex shape to the hill. This means that wherever you set up, there’s a lot of dead ground, close around you (‘dead ground’ meaning ground which is not visible to the observer). In particular, it can be hard to get a decent line of sight onto the N175, unless you sit dangerously close to it. Or, to open out the range, you can move further back, to where the hill falls away and the N175 comes back into sight. But that leaves the door, which you're trying to keep shut, half open, letting the enemy come rather too far past Point 213 itself. The second problem here is that you’re on your own. Firing from defilade – to one side, with an obstacle in front, hiding you from an advancing enemy until you can shoot them in the flank – is generally a good idea. But not so much, when you’re alone and aren’t planning for just a quick ‘shoot and scoot’ kill. To hold your ground, you really need other friendly forces, all in defilade, either side of you, and indeed behind, in depth. This gives interlocking (or better still, overlapping) fields of fire, covering the complete front and in particular, each other’s blind spots. Without this, once the enemy knows you’re there, it’s only a matter of time before he flanks you, possibly using your own cover to close in unseen, for the kill. Don't believe me? Have a look at this, then: There's my Tiger, in a decent defiladed position. Hidden from the enemy coming up the N175 in front of me. Until I started blasting them...witness my victims, one afire. Note also the Sherman Firefly, on the right, who crept over the hill, and got me from the flank. See what I mean? On your own, firing from defilade works...for a while. After that, you need to move, or you'll get the chop. I also tried setting up just over the enemy side of Point 213. There’s a good deal of cover; and from there, you can shoot the enemy as they come into sight, just beyond Villers Bocage, at longer range. But unless you drive right onto the forward slope and make a clear target of yourself - not a brilliant idea, need I say - the enemy can quickly get into dead ground, in the lee of Point 213, under your nose as it were. In fact, the leading tanks will likely have passed out of your field of fire, by the time you get into position. This leaves you with some light armour to shoot up...while the leading tanks are steadily closing in, out of sight. [spoiler alert ends!] Anyhow...I knew (or believed) that I had to get close to Point 213, to trigger the enemy advance. But I didn’t really want to set up there. Decisions, decisions! And all the while, my Tiger rolled on, towards the fateful Point 213. Just ahead now, I could see the row of trees, interspersed with telegraph poles, which a quick glance at my map told me must be the N175. My speed fell off and my Tiger struggled noisily as it lurched up the bank onto the road. While well away from those red ‘danger zones’, I came a bit too close to the crest of the road. But a nervous look down the long, nearly straight section I could see of the N175 as I crossed it, showed the road to be clear. The same view also confirmed my plan, which was simple enough. I would drive up towards Point 213 until I heard the radio message announcing that I was in position and to wait for confirmation the enemy was moving my way. I would then retrace my steps – or my tracks, to be more precise. Just a little way. I would in fact set up on the road itself, facing back down towards Villers Bocage. The road levelled out near Point 213, so I could be hull down, by sitting back from the crest. Backing up would take me out of sight or turret down. There was tree cover on both sides, to screen a move to either flank if need be. The long straight stretch of road which I could see offered a decent field of fire. The Tommies would not see me until they turned the corner at the end of this straight stretch, offering me targets at about 6-800 metres, where my combination of a big gun and thick armour would be more than a match for even the 17 Pounders. In fact this is a classic ambush position for enemies moving along a stretch of a road or track. Shoot down the length of it, at a point there’s a curve which keeps you out of sight, except to the people you are shooting, with the rest behind wondering what the hell's going on. Hopefully. I duly got the message that confirmed I was in the ambush area. Now, I had to get into position and await confirmation from our recce people that the enemy were enemy were on the move up the N175, towards Point 213. I stopped and backed up, down towards the N175. As I was nearing the road, I received another radio message telling me - lest I had forgotten - to do what I was now doing - get into position and await the signal from callsign Viper, the recce boys. These in-mission messages help remind players who may be inclined to go swanning off, doing their own thing, that they need to stick to the plan. Reaching the road, I swung around, still in reverse, then stopped, facing the enemy. At this point, with near perfect timing, came the news I was waiting for. My guests were on their way. I tested and adjusted my position, mainly from the gunsight, lining her up and setting the range for the point a little closer than where the road curved right, out of sight. A hint of a smile doubtless played around the corners of my mouth as I realised that I now had a nice little killing ground set up ahead of me, into which the Tommies were obligingly about to drive. The main problem was that there was good cover left and right of the road, into which the emeny could quickly scarper. The trick would be to do as much damage as I could, while I had the chance. Sherman Fireflies, with their dangerous 17 Pounders, would be my priority target, though hard to distinguish, seen from the front. I’d have to treat any Sherman as a potential Firefly. At some point, the second Tiger, from Beauvais where I’d started, should be able to cover the open left flank.Or so I hoped. From where I sat, I had a clear line of sight into my kill zone. I was parked far back enough from the crest in the road just ahead, to be mostly hull down to the enemy, when they came. I had an AP round loaded and my sights were set for the range. The Tommies were about to pay me a visit and I was now quite ready to ensure that they received an appropriate welcome. I didn't have long to wait. ...to be continued!
- 12 replies
-
- 2
-

-
- steel fury
- wittmann
-
(and 2 more)
Tagged with:
-
From the album Combat Sims
-
From the album Combat Sims
-
From the album Combat Sims
-
From the album Combat Sims
-

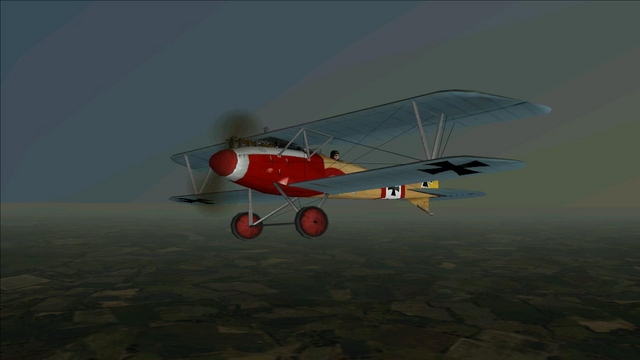
Albatros D III, FS:WW1 (freeware mod for Fighter Squadron: Screamin' Demons over Europe
33LIMA posted a gallery image in Member's Albums
From the album Combat Sims
-
Glad you got sorted! You can also get another free low-systems-requirement WW1 sim, Red Baron 3d, here: http://www.virtualaces.net/redbaron/redbaron.html ...well, actually what you get is Red Baron 2 plus the official patches to upgrade it to RB3D. You'd also want the Western Front Patch (WFP2, the latest version I think is available here: http://www.redbaron3d.net/- one of these unofficial user-made patches ('UOPs') is essential to get an improvment on the crude stock graphics, and WFP2 includes the terrain from the Promised Land payware addon. WFP is a 'time-based' patch which needs a utility like Campaign Manager to change the era, a bit like the one used for the CFS3 ETO mod. IIRC CM didn't work in vista and I had to track down an alternative - or maybe I just needed to install that vbrun300.dll that's on Al's Red Baron site. A Glide wrapper like nGlide or Glidos is also needed to get the best graphics. Still not as good looking at FS:WW1 but with Screamin' Demons' lack of a proper campaign system and that being Red Baron's strong point, it's worth all the rigmarole.
-
Try the links for FS:WW1 here, the D/Ls for its components seem to be working: http://www.fsww1.com/ I just checked and the 'Install Option 2' links for standalone FS:WW1 and ther planepack - the option which doesn't need FS:SDOE, possibly the one you'rer after - seems to be working fine including the one to MoDB (whch site I have found to be a bit tricky to find the right item, without a direct link). Edit - the Mod DB download link worked most times for me, others not, strange. I found clicling on the d'l link top left of the advert window, without waiting for the ad to play, worked. Good hunting!
-
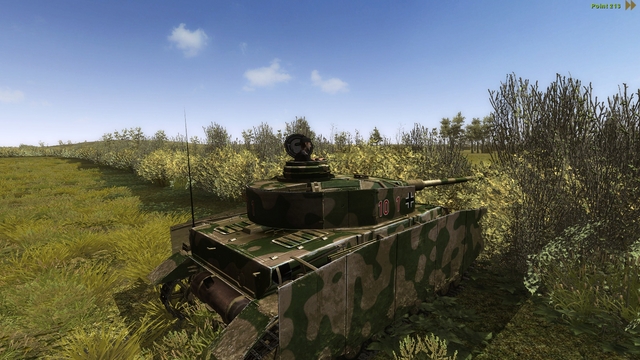
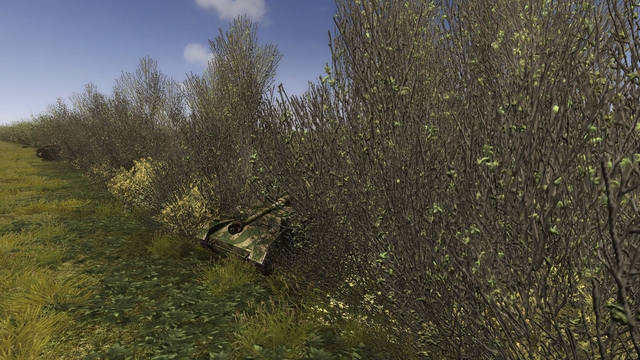
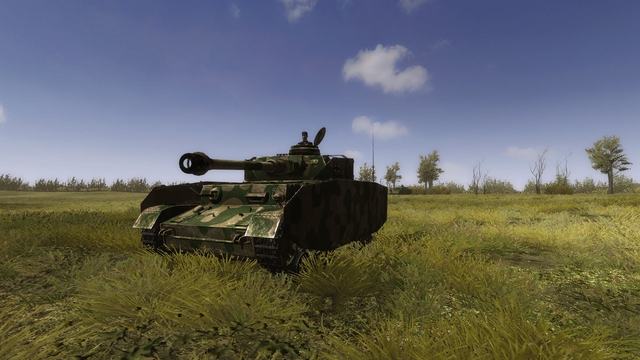
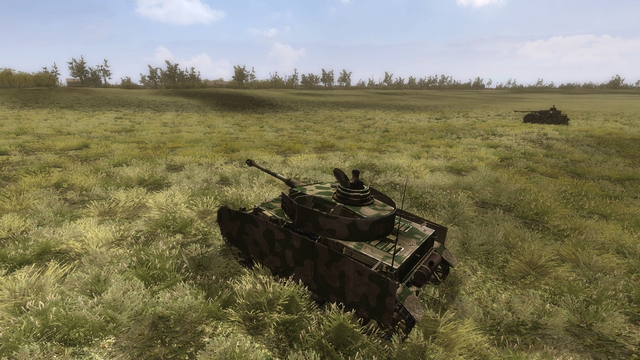
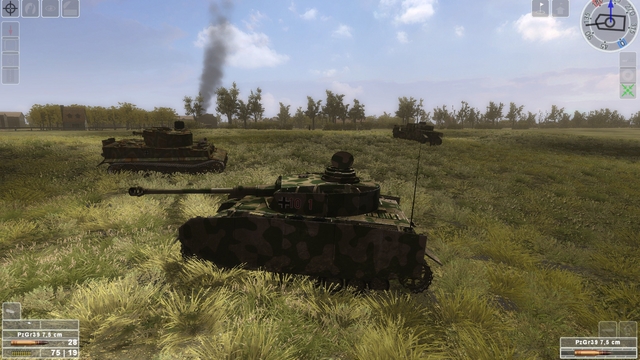
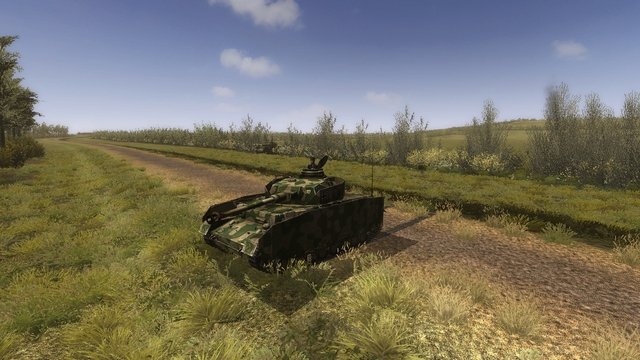
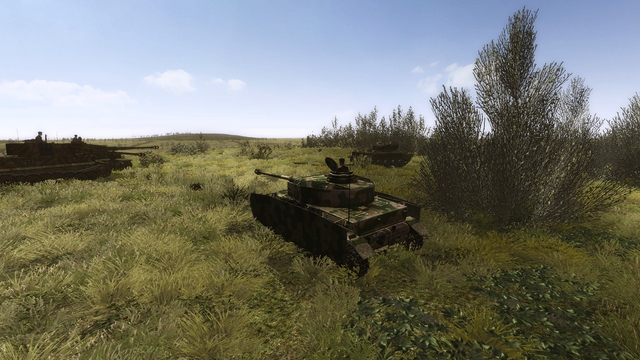
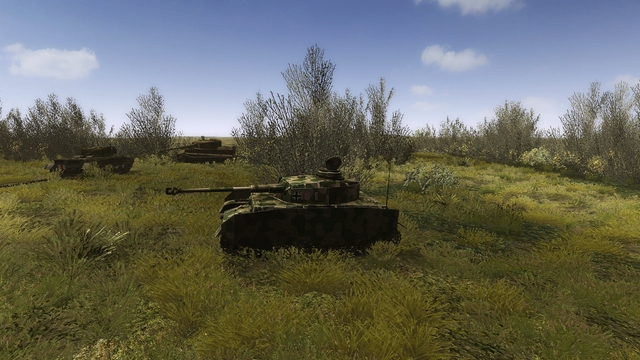
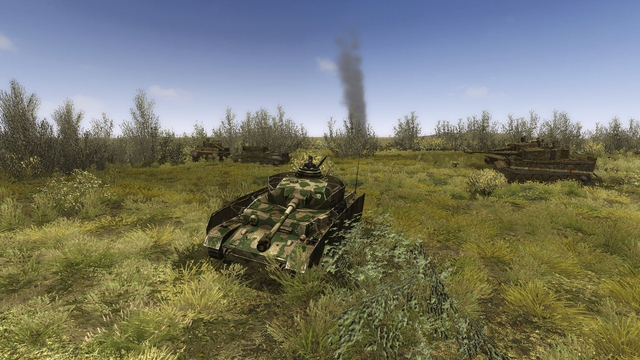
Fighting the famous WW2 tank battle in a rather less-well-armoured panzer! At last, Steel Fury has arrived in Normandy! This welcome development with the Steel Tank Add-on (STA) mod for Graviteam's superb WW2 tanksim comes in the form of three new missions, based around a well-known action in June 1944 between elements of several German armoured units and a spearhead of the British 7th Armoured Division, the famous Desert Rats. The best known part of the Battle of Villers Bocage on 13 June is of course the attack on the leading 22nd Armoured Brigade by the Tiger tank of panzer ace Michael Wittmann. The latter is widely credited with destroying the British spearhead single-handed and while the truth is evidently a bit more complicated, there's no doubt that Wittmann and the other German forces involved succeeded in halting a potentially very dangerous penetration that could have had serious consequences for the German's ability to hold the key town of Caen, a lynchpin of their defence of Normandy after D-Day. Even if you're not new to the story, you'll probably enjoy the recent re-telling of the tale, available as a free online book by Akhill Kadidal, here. Thanks to the STA team - notably Lockie & Deviator for the missions, Deviator for the map/landscape and Will73 for Bitish AFVs, sorry if I left somebody out! - we now have a small set of missions based on the battle. All (so far) are from the German side; two for the Tiger I and one for the Panzer IV. I think it's fair to say that all are 'inspired by' episodes in the battle, as opposed to exact reproductions of any given action. I'll save the Wittmann fight for a later mission report, as it's still being worked on, based on feedback. For now, I decided to go with the last mission in the set, playing the late-model Panzer IV. Armed with a long 75mm gun and protected by spaced armour plates around the turret and (until they got knocked off!) either side of the hull, this was in 1944 still the backbone of the Panzerwaffe and in skilled hands, a dangerous enough opponent for Allied tankers. Earlier versions of the Panzer IV, both short- and long-gunned, come with vanilla Steel Fury but the Ausf. H version we'll be fighting in here is courtesy of SF's modders. As in fact is almost everything else in the mission, from the terrain to the buildings and their fittings. The Villers Bocage map is new for this mission set, and it's not only quite different from SF's stock eastern European terrain, it's also one of the very best seen in the sim so far. For whatever reason, you won't see the close rows of houses that lined the real main street in Villers Bocage, but the lie of the land is close to reality and the general effect is most convincing, for 1944 Normandy...even to the way your tanks will slow down and struggle to crunch noisily through thick hedgerows! The terrain looks best with the recommended 'scorching summer' terrain mod, for which there's a version specific to the STA mod. All you need is available via the STA forums, here. The mission This was my first play-through, so while I'd previously tried out the Wittmann mission and seen the terrain, the Panzer IV mission itself was entirely new to me. It's called, rather melodramatically, 'Last Nazi Chance'. Here's the start of the briefing, which, as you can see, is bi-lingual: You are cast in the role of panzer Hauptmann Helmut Ritgen. I'm not sure which of the participating German units you are supposed to be with - Panzer Lehr, 2nd Panzer or Wittman's unit, SS Schwere Panzer Abteilung 101 - but your tank will carry the 'shield and keys' emblem of 1st SS Panzer, the Leibstandarte, as also carried by the Tigers of the 101st. In short, as you'll see when you scroll down the briefing, your mission is in two phases - first, attack and destroy the British advance guard on Point 213, the high ground on the N175 road overlooking Villers Bocage to its east. Then, you are to attack and clear Villers Bocage itself, finishing with the Hotel de Ville. You're told that - prompted by a radio message you'll issue (this is actually triggered automatically, when the time is right) - some panzer grenadiers will join in and help you clear the built-up area. The bad news is that you've only got two Panzer IVs in your platoon and a glance at the map shows there's only a single SPW (Schutzenpanzerwagen, armoured half-tracked APC) of grenadiers. The better news is that there are two other pairs of tanks which seemed to be lined up for a concentric attack. The even better news is that you will discover that the other four tanks are Tigers. My impression is that the briefing could be a little clearer on the composition and tasks of your force. In real life, orders are given by your commander, at the same sitting, to you and all the other participating platoon leaders, so that everyone knows what everyone else's part in the battle is to be. For this operation, we seem to have an under-strength and hastily-assembled force thrown into battle with little time for preparation or even thorough orders. I know enough about Normandy 1944 not to expect any help from the Luftwaffe on this mission but I'd have hoped that the divisional artillery would have put in some shooting, or at least our ever-present German mortars would have softened up the enemy for us. But perhaps the idea is to take the English by surprise. As to how that turns out, we'll see soon. I took a last look at the map, before moving off. It showed Point 213 to be the wooded area we will be able to see to our front, when we leave the briefing phase and start the mission itself. You can clearly see the distinctive contours in the pic below, with the text briefing panel suppressed. My two tanks are the blue diamonds, top right; below and behind them are the grenadiers in their single SPW. Below that are two more friendly tanks: Tigers, as they will turn out to be. Off to the left (west - north is blue, in the SF compass indicator, top left) are two more Tigers, in a hedgerow. It looks like we're nicely set for a concentric attack on Point 213, with the Tigers to the west, closest to the objective and therefore likely to go in first. Not a bad idea, from the standpoint of a Panzer IV commander. I kicked off the mission and as I usually do, immediately ordered the loading of a suitable round - AP seemed best, for this party. Switching to the external view for a good look around, I unbuttoned my tank commander. I then switched to the gunner position and started swinging my gun left and right, scanning for targets. Shooting started almost immediately, tank cannon fire by the sound of it, but both shooters and targets so far 'not seen'. Hastily, I switched back to the map, gave my platoon - sorry, my other tank - the order to conform to my movements and stay close, then back in the external view, ordered my driver to move off. On we went, speeding up as we crossed the open ground towards Point 213, our first phase objective. ...to be continued!
- 15 replies
-
- 2
-

-
- villers bocage
- sta mod
-
(and 1 more)
Tagged with:
-
PS this mission is likely not yet final; I am currently trying out a new version. Likewise, the one based on Michael Wittmann's attack. I'll file a report on that one too, in the not too far distant future!
- 15 replies
-
- 1
-

-
- villers bocage
- sta mod
-
(and 1 more)
Tagged with:
-
From the album Combat Sims
-

Steel Fury+STA Mod - Panzer IV Villers Bocage mission
33LIMA posted a gallery image in Member's Albums
From the album Combat Sims
-

Steel Fury+STA Mod - Panzer IV Villers Bocage mission
33LIMA posted a gallery image in Member's Albums
From the album Combat Sims
-

Steel Fury+STA Mod - Panzer IV Villers Bocage mission
33LIMA posted a gallery image in Member's Albums
From the album Combat Sims
-

Steel Fury+STA Mod - Panzer IV Villers Bocage mission
33LIMA posted a gallery image in Member's Albums
From the album Combat Sims


