


33LIMA
-
Content count
3,749 -
Joined
-
Last visited
-
Days Won
7
Everything posted by 33LIMA
-
I'm a bit like Father Dougal and that big Red Button on the plane. I know I shouldn't, but I'm just irrestibly drawn to it! https://themaresnest.files.wordpress.com/2011/05/father-dougal-presses-the-button.gif
-
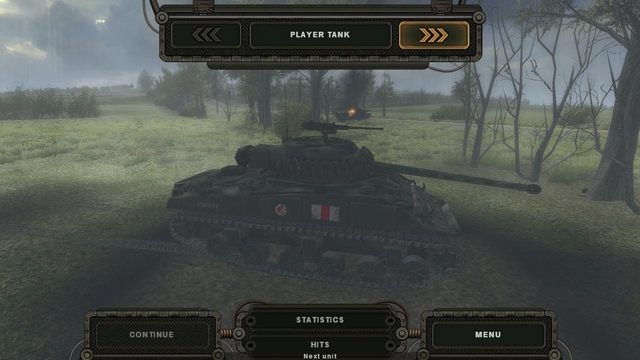
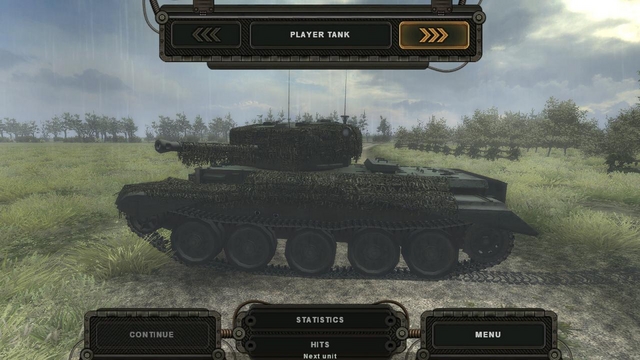
The butcher's bill One of Steel Fury’s many good features is the ability to tab from vehicle to vehicle (or gun) after the mission, calling up either the target’s stats or little annotated arrows which show any hits made on each. My own tank had been knocked out by an AP round of unspecified calibre, which I believe was actually from a Firefly, one of two hits from these dangerous 17 Pounder rounds. My own stats confirmed my suspicion that the Firefly next to me was my only kill. I had hit the Sherman at the start of the mission, but his demise had been credited to one of the Tigers. My platoon-mate lay forlornly where I’d last seen him. As well as the one I’d seen, two more Tigers were burning. Another one was immobilised, with the crew apparently ok but his right track broken. The panzer grenadiers didn’t seem to have done terribly well, either. As for the enemy, there were Cromwells and Shermans all over the place. Most of them had been knocked out, and nearly all of these kills were down to the Tigers. The Cromwells seemed to be a mix of 75 mm-armed Mark IVs, identifiable mainly by the single baffle muzzle brake, and Mark IIIs armed with the earlier 6 Pounder (as in the last pic above). Note how these excellent models have several other variations, including optional and very realistic camo net camouflage and rear wading vents. There was also a variety of Shermans, not only some Firefies but at least two 75mm variants, including a cast-hulled M4A1. I believe that the Desert Rats’s tank squadrons (US/German companies) didn’t have these – they were equipped with Cromwells, with the three or so Fireflies allocated to each squadron their only Sherman gun tank. There was also a Royal Artillery OP Sherman at Villers, but it had a dummy 75mm gun! At least three Shermans, and one of the Cromwells, were still in action at the end of the mission. The Tommies also had several 6 Pounder A/T guns – standard equipment for British infantry units, the more powerful 17 Pounders being concentrated I think in units manned by the Royal Artillery, rather than parcelled out to the infanteers. One of these guns had survived. Another survivor was a 25 Pounder gun-howitzer, placed for the direct fire role, which had lost a crewman but was otherwise ok. He had actually nailed one of our tanks! The massive, accurate and rapid bombardments fired by these and other British artillery weapons in Normandy led to reports of German prisoners asking to be permitted to see with their own eyes the infamous British multi-barrelled, belt-fed 25 pounder! The British had come out of this battle in much better shape than we had. And they seemed to have a good hold on Villers. So how we came to win –even before my own tank had been clobbered - I’m not too clear. It had been a bit of a strange battle. In a typical SF mission, you are deployed with a platoon of three or so tanks and start and move with a larger force, which you can usually see around you – and therefore co-operate with. Here, a combination of unusually small friendly platoons and shorter lines of sight in the Normandy map created a very different feeling. Apart from the fact that I had only two tanks and saw less action, the mission reminded me strongly of many of the campaign missions in Panzer Elite, which tend to resemble tank platoon drives in the countryside, ‘bumping’ the enemy every so often. As usual I had problems with SF’s platoon command and control, which is rather poor compared to PE. There should have been hotkeys for most common platoon commands and the AI is too keen to break formation and charge off on their own. And too hit-or-miss, if you notice and try to recall them. Platoon command and control isn’t broken, it’s just limited and takes a bit more effort and attention...usually when you can least spare it. I would have preferred to have three or four panzers in my platoon; for the grenadiers also to have been in platoon strength, say four SPWs; and for there to be fewer Tigers if necessary to maintain mission balance, in default settings. I’d also have liked the briefing to tell me something more about where everyone else was and where they were to go: just being told I was to operate in the centre, with a pair of Tigers on either flank, going in on the left and the right, would have helped me feel that I was part of a proper plan of attack, made by whoever was in command...whose command vehicle(s), incidentally, should have been present on the battlefield. I was also a bit surprised not to see dismounted enemy infantry in Villers, the best type of troops for such tasks and certainly present in the real battle. On the ‘plus’ side, the late-model Panzer IV has always been one of my favourite tanks and it’s good to have another SF mission for it. And the Villers Bocage map is fantastic, with great terrain, lots of vegetation and marvellous buildings and objects. The new British units are detailed, excellent and numerous. Not so long ago, all we had was a few repainted lend-lease tanks and Soviet troops disguised as British. Now, thanks to the modders and in particular, to the STA team, we have nearly everything needed for respectable NW European scenarios, from softskins to towed guns! It started as ‘Steel Fury –Kharkov 1942’ but truly, ‘Steel Fury – Normandy 1944’ has arrived with a bang!
- 15 replies
-
- 1
-

-
- villers bocage
- sta mod
- (and 1 more)
-
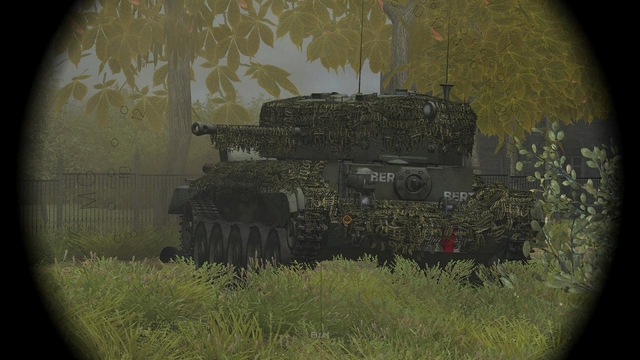
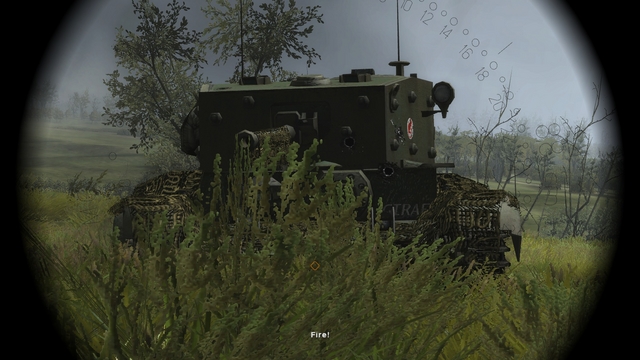
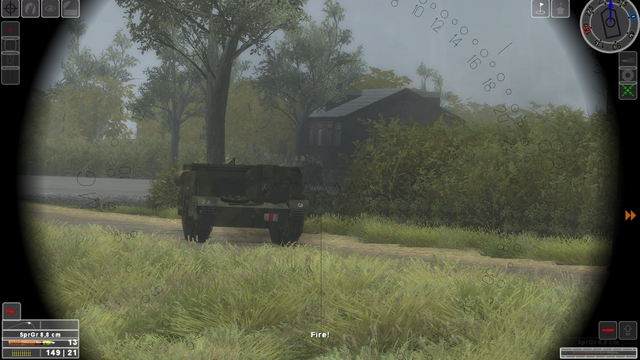
Defeat, snatched from the jaws of victory! My Panzer IV was now at the last gap, before the terrain opened out to my left, beyond Villers Bocage. Here, I followed the same drill – halt with the gun laid into the gap and quickly jump to the gunsight, ready to adjust my aim onto anyone there. Behind me, the pathetic remains of my other crew, doggedly now following their leader, was a reminder of the price of failure. So far, the gaps had all been clear. This one wasn’t. Sitting back in the gap, there he was. A Sherman, and a Firely to boot, looking huge in the sight and with that wickedly-long gun. Whose muzzle, fortunately, I wasn’t looking down. Yet. The commander and loader were standing in their hatches, rather too relaxed for the tactical situation. Even as my AI tank commander was barking out his fire order, I lined them up and delivered their wake up call. The round hit home – at that range, it would have been hard to miss. As the loader chambered my next round, I waited for the Firefly to ‘brew up’. But instead of bailing out, the crew closed up, the tank rolled forward a couple metres and that big, long gun was turned on me. We must have fired in the same split second. I have a vague recollection of his tracer flying at my face, a bang, noticing we were reloading and realising we were still alive and in action. Time seemed to stand still. Then my loader beat his to the mark and I let fly again. The Firefly’s hatches were suddenly flung open and the crew tumbled out. As if not believing what I was seeing, I put another round into him, automatically, without conscious thought. Then I unclenched my teeth and took a deep breath. Talk about staring virtual death in the face! But we’d got him, and lived to tell the tale. Recovering my composure, I took a quick look around, back in the external view and then moved off again, feeling a little more secure. But where there was one Tommy, there could be others. I crept up to the corner of Villers, gun laid towards the threat, and checked out the open area a little at a time, as we edged around the corner. Beyond my victim, another, larger AFV was burning fiercely, mostly hidden in dark smoke. One of the Tigers! The Firefly had got him, probably, and possibly my number two as well. My bow gunner was evidently not in a good mood, for he cracked off a couple of bursts at the bailed out Firefly crew. Otherwise, the ground ahead and right seemed clear of the enemy, so as I edged forward, I traversed left and kept my own guns on Villers itself. A single enemy infantryman ran left to right across my line of sight. I gave him a short burst from the co-ax and he disappeared from view. He seemed to have been on his own and thinking only of escape. Which was a good sign, I thought to myself. To my left as I advanced, the main feature was a burning building, but there was no further sign of the enemy. Suddenly, the word came through that the mission had been won! How, I don’t know, since I had reached Villers but not penetrated it. Had some of the Tigers got through? Or had the panzer grenadiers done the trick? I had not seen them since getting confirmation that they were on their way. I should possibly have watched and waited for the grenadiers, before mounting an attack with mutual support. But our little battlegroup’s rather vague plans had said nothing about routes or RV points and we platoon commanders had all been left to our own devices. Still, it had worked, somehow or other! If you win, Steel Fury will let you check the battlefield and statistics, or carry on the mission and make the check later. I chose the latter option, but didn’t get far. Can you see the hidden enemy or enemies, lurking in the screenshot below? Neither could I... ...with the result that, after the next move, I rather complacently spent too long sitting still in one place, trying to check out all the lines of sight into the town before making for the centre. A round whacked into my panzer from an unseen assailant. I started backing up, then put in a turn, away to the left. Too late! We were hit again and I was badly injured. My tank halted and the gun swung around, but for me, the war was over. Time to check out what had happened! ...to be continued!
- 15 replies
-
- 1
-
-
- villers bocage
- sta mod
- (and 1 more)
-
Your wish, is my command... :) ...or should I say, 'Zu befehl!'
-
Back to Plan A! Whatever had got my other Panzer IV was still shooting at the bailed-out crewmen, from somewhere out of sight. Much as I'd have liked to put a stop to this business, I wasn't about to move my tank forward and into a zone obviously under deadly enemy fire. Revenge would have to wait. I dallied a little longer, scanning again to see if I could pick up any line of sight with a view of an enemy, any enemy. All I saw was dirt being thrown up by direct-fire HE rounds, falling a few yards ahead. I was doing no good at all here. Time to get moving. I started backing up, my gun traversed right, the better to engage quickly whatever came into view between the buildings and trees as I went. My plan was to move back alongside the track, slowly - oh, so slowly! I'd move just a few metres each time, then halt to scan for the enemy who must be there, somewhere. I'd get him, then return to Plan A - which was to stay the heck out of Dodge, and instead, circle closely - and slowly - around its northern outskirts, shooting into it, at any targets that came into view. But firs,t I had to get than damn tank or A/T gun...the one who had killed my mates, most of whom were now lying still, around the knocked-out Panzer. I moved in reverse a few metres then spun around and moved off again. All the time, I kept my main gun laid into Villers, ready to blast anything that came into view...hopefully, before he blasted me. If my virtual life hadn't depended on my spotting the enemy first, I'd likely have taken time out to admire the craftmanship of the local artisans...in reality Deviator and Lockie, for the terrain and objects that made up Villers. As it was, when I peered into my sights at each halt, it wasn't the nice ironwork or the workmanlike tiled roofs and stone walls I was studying, but the gaps, where might lurk a deadly enemy, intent upon my destruction. This tense business went on for some time. Move on a few meters. Driver, halt! To the gunsight at the double, scanning the gaps for targets. Nothing seen? On again, another few meters. Tense, nerve-wracking stuff. I reached a point where the buildings started to thin out. Still I hadn't spotted the enemy that I knew had to be there. Had he moved? Was he now stalking me? ...to be continued!
- 15 replies
-
- 1
-
-
- villers bocage
- sta mod
- (and 1 more)
-
On into Villers! My next bound took us up to, then into, a fairly deep hedgerow running east-west. Emerging cautiously from the far side of this, I got my first good look at Villers Bocage, now perhaps 100 metres away at its closest point. A jumble of various buildings, set amidst trees and shrubs. Like a picture postcard view of the Norman countryside, marred only by the din of gunfire and the occasional dark columns of smoke from burning buildings or vehicles. From this point – and while I still had two tanks to play with - I should have adopted the tactics I have tried to describe elsewhere, and moved ‘tactically’ – one tank back and covering, while the other moved - in nice short bounds. But I decided we'd make the next bound together, up to the limited cover afforded by the edge of a small track which ran across our front, on the north-eastern edge of the town. On over the short stretch of open groundwe went, as fast as we could go. About three-quarters of the way across, I got I fright, when hard to my left I saw from the corner of my eye a low, square shape, like the front view of a tank. I swung towards him and halted, scanning frantically through the gunsight, expecting his first round to crash into me at any second. Where was he? No-where to be seen. Had he changed position? Was he stalking us? Finally I realised I’d been spooked by a distant outbuilding. Better safe than sorry, though! Moving off again, I realised my second tank had turned left and was heading for a spot where the main N175 road from Point 213 ran into Villers Bocage, about 200 metres to my left front. I tried to recall him, but without success; he seemed to have the bit well and truly between his teeth. What was he after? He'd seen something, for sure. Ordering 'Do as I do!' and then 'Line formation, close order!' really ought to have had had the desired effect but when it didn't, I should perhaps have tried a 'Platoon, halt!' commmand instead. But it's a bit of a nuisance in Steel Fury, that the few platoon commands you have aren't available as hotkeys, but have to be issued by switching to the map view then mouse-clicking on the appropriate icon. all the while, you've lost your view of the 'real' world. I quit the map just in time to see my number two disappearing behind some trees, at about the point where the N175 entered the town. Damn and blast! Or 'Donner and blitzen!', as the stereotypical Germans used to say, in those little 'Commando' comic books I read as a child. OK then, if he won’t support me, I’ll just have to support him. I turned half left and rattled after the other panzer, scanning for signs of the enemy. As I closed in, the virtual radio came to life. It was me, I think, callsign Viper, telling callsign Wolf - the panzergrenadiers, still waiting back on the Start Line - that we had reached Villers and it was time from them to join the party. Unfortunately, the party was refusing to wait for the new guests to arrive. My number two started shooting into the town, at targets I could not see amidst the near-unbroken line of trees, shrubs and buildings now to my right. As I came up to him at the junction ahead, I came in close against the little track to my right, slowed down, and started scanning again for his target. Or any target. Of such things, I saw nothing. But I did see rounds whack into the ground near the other Panzer IV. Then I realised that he was not firing any more, and that a couple of panzer crewmen were crawling in the road behind the tank. Another panzer man's head bobbed up and down in the long grass in front of the corner building, just to my right. My second tank had been knocked out! ...to be continued!
- 15 replies
-
- 1
-
-
- villers bocage
- sta mod
- (and 1 more)
-
Over the hills and far away... To the accompaniment of continued cannon and MG fire from unseen friends or foes, my Panzer IV crept cautiously up to Point 213. While Steel Fury’s sound effects are generally well done, they don’t appear to be directional and certainly don’t fall off in volume as they should, with range; so quite distant shots and impacts can sound rather close. Nervously therefore, with my number two beside and just behind me, I began to edge to the right, where the ground rose less. I didn’t want to go too wide, but equally, I also didn’t want to skyline myself badly, going over that crest up ahead. I slowly crawled the last few metres. Just short of the crest, I came to a halt hull down, depressing my main gun. I scanned left and right. Like the bear who went over the mountain, all that I could see was...the other side of the mountain. Or crest, in my case. My sight picture was just a confused jumble of uneven ground, bushes and trees. Nothing man-made. No sign of the Tiger which had gone over some time before me. Nor of any enemies. What I did see, though, was a message, confirming that phase 1 of the message was complete, already. The party had moved on! Time to get going again. Off the highest point of the crest line and screened from more distant foes by the terrain and shrubbery ahead, I rumbled up and over. There were longer, clearer lines of sight to my right and half-right but no fire came at us as our two Panzers rattled and growled across a hundred metres or so of rough ground to the next hedgerow, ignoring a couple of knocked-out Cromwell tanks on the skyline to our left. We were now on the north-western side of Point 213, with that objective already behind us, safely 'in the bag'. This was satisfactory, even though our own part in all this had been rather minor. In fact, I wasn’t even sure the knocked-out Sherman was my kill. Though partly screened from them by a line of trees, the Sherman was also in the field of fire of the two Tigers to my left front when the mission began. They almost certainly got a second British tank in that area, which I hadn’t even seen. Nevertheless, my little two-tank platoon was still in business and the overall operation was going well enough. Thank goodness for sims which don’t make mission completion solely down to the player’s actions! Military opperations are a team affair and so should be any self-respecting simulation thereof. The order came through to go for phase 2 – the capture of Villers Bocage. There was still some shooting to be heard, but I could see nothing of this, nor of the little town. A look at the map showed the disposition of our forces. Even with an all-seeing eye disabled, this still ploted the last-known (greyed out) or present position of units either in sight or (I think) able to report their position by radio. So I was able to form a reasonable picture of what was happening. My platoon-mate was lagging a bit behind my own tank (the brighter blue diamond, above the tail end of the blue arrows). One of the four Tigers was hanging back over the skyline to my left, beyond the killed Cromwells; another Tiger was in a hedgrow well ahead and left of us, just short of Ferme Lemonie, getting quite close to Villers. No point hanging around to 'develop the situation' as the US Army seems to call waiting to see what happens next :) Let's get cracking again, I said to myself, taking the opportunity, while at the map, to call my other panzer into line. The other Panzer IV looped around to my left, disappeared over the skyline then, after keeping me on tenterhooks for a second or two, came back into into view next to the knocked-out Cromwell, heading my way. Soon, he was back where I wanted him and we continued upon our merry way, together once more. Swinging more to the south-west, I could at last make out the distant shapes of the roofs of Villers Bocage, nestling amongst a large cluster of trees and glimpsed between the corners of two strips of wood or hedgerows. I paused hull down in a fold in the ground and scanned ahead. Still, there was shooting somewhere up ahead; but still, no sign of whoever was doing the shooting, or doing the getting shot at. How strange, I thought...to be in a battle, but not in a battle. Time to remedy that. With my number two tank still keeping company on my right, I moved off again, down onto the level. My next bound took us up to, then through, the gap in the shrubbery, into a field with a high hedgerow on the other side. We were now lower down, so this hedgerow pretty well removed the view we'd had of Villers Bocage, from further back and higher up. I edged slightly left, as we came up to the hedgerow, knowing that a couple of hundred metres or less on the other side, lay Villers itself. Whatever lay waiting for us there, we would soon be making its acquaintance. ...to be continued!
- 15 replies
-
- 1
-
-
- villers bocage
- sta mod
- (and 1 more)
-
Thanks Gatling and I hope you're enjoying Steel Fury, too! You can get all you need for these missions here, post #123: http://stasf2008.ephpbb.com/t137p120-mission-battle-of-villers-bocage-pz-vi-tiger#3833 The Normandy map (or 'polygon') and its contents will be in there somewhere, likely in the July update, which goes up top of the Feb update, as indicated in the install order. I believe this and the missions are still a beta, and that Lockie is considering incorporating the updates into a new base version of STA. The new map is a bit FPS-heavy for me in the Tiger mission (not in this Panzer IV one, for some reason) but still playable (I have a dated-spec PC). Lockie has suggested enabling 'Decrease amount of plants' (sounds good for lazy gardeners like me too) in the video settings.
-
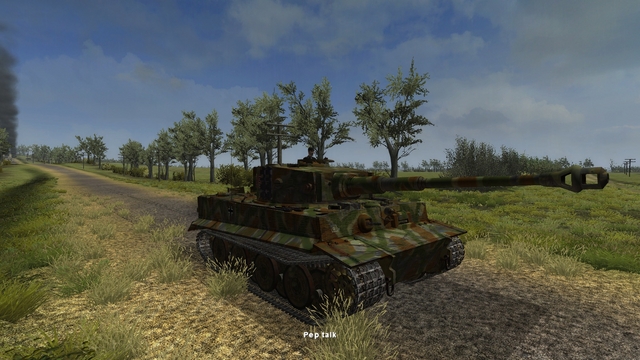
An early start... Normally, I don't much like to be rushed. In Steel Fury, I find I get rushed quite a lot. The mission starts, and before I have time to get my bearings in the 3d world, it's kicked off. Quite often, in attack, your friendly forces have gone charging at the enemy, leaving you little time to plan your own moves, for fear of being late for the party. In this mission, the party had already begun without me, from the noise the neighbours were making, up ahead out of sight somewhere. To my left, I barely noticed two Tigers forming up, as I rattled off towards Point 213, partly to cover the open ground quickly, partly 'marching to the sound of the guns'. One of our platoons - doubtless the other two tanks out to the west, closest to Point 213 - were already engaged and it made no sense to feed Oxo cubes to the lion, as one British general observed about Arnhem. We all needed to get stuck into the enemy with the minimum of delay, now that the hot metal had started flying. For some reason, in my haste, I must have switched to another crew member because my tank's AI started taking over. The AI tank commander gave a new loading order, followed by a fire order, and the AI gunner dutifully started laying onto the target - an enemy tank, no less, which trundled into sight to the right of a clump of trees, up ahead. I quickly took over as gunner and fine-tuned my aim as my panzer came to a halt. He was a Sherman and I wasted no time lettng him have the AP round I had up the spout, urged on by the boss. 'Keep shooting till it changes shape or catches fire' is often my motto in these situations. Even if you get a hit, there's no guarantee it will be lethal. By the time I'd fired Round Number Three, I could see that it was time to stop. The Sherman's hatches swung open and then the crew bailed out of the smoking tank. One man crumpled to the right and lay still. A second fell in flames on the other side, while a third - the first man out - swerved around the rear of the tank, avoiding a rather unsporting burst from my co-ax. I let him go, after that. Enough is enough, even in war, virtual or otherwise. I looked for other targets and seeing none, moved off again. My number two seemed to have disappeared out of sight somewhere, on the other side of a hedge to my right. There's a lot more cover like this in the Villers Bocage map; it's not at all what I'm used to, from fighting on Steel Fury's virtual steppes. Disconcerting, but in a refreshing sort of way, if that makes any sense. The other Panzer IV emerged into view beyond the far end of the hedgerow, maybe 200 metres ahead and slightly right. Typical! In SF, your AI platoon mates appear quite happy to charge ahead. Once they see the enemy, orders seem to go out of their heads in their enthisiasm to get to grips with the other side. If like me you try to take your platoon leader role seriously, you really have to keep an eye out for this sort of thing and get a grip, to nip it in the bud, as it were. Or try to. I went to the map view - unfortunately SF makes you compromise situational awarness like this, to give orders, although map markings can help compensate - and re-issued my orders - 'Do as I do!' and 'Line formation, close order!' Thankfully - perhaps because there were no more visible enemies, to distract him - the panzer swung around had headed back to me. I should have let him sit where he was and caught him up. but never mind now, it would do. I stopped to cover him back and scanned through the gunsight. I got a bit of a surprise, to see a Tiger, seemingly come from no-where, climbing the slope to Point 213, well ahead. I know cats, big and small, are supposed to be masters of stealth, but this was too much! At least I now knew that it was clear, a good distance up ahead. No need to faff about. On I went again, ordering the driver to speed up, till we were going full tilt once more. As I rolled on, we passed the Sherman we'd knocked out, which was by now living up fairly well to its various unsavoury nicknames, like 'Ronson' (slogan, 'Always lights first time!') or worse, 'Tommy cooker'. Hopefully, it would not be our turn, next. More re-assuringly, my number two was back with the programme, keeping station not too far out, on my right. That would do nicely. Soon, we were through some shrubbery - glad to say, there really is a lot of it about in SF's version of Normandy, certainly compared to its Soviet Union. Our speed dropped back sharply as we began to climb the slope up to Point 213. Cannon and machine gun fire continued unabated, up ahead somewhere. We were a little late for the party, to be sure, but it was obviously still in full swing and we would surely be in the thick of it, in a matter of seconds. ...to be continued!
- 15 replies
-
- 1
-
-
- villers bocage
- sta mod
- (and 1 more)
-

Steel Fury, STA mod: Cruiser Tank A27M Cromwell IV, Lockie's Villers Bocage mission
33LIMA posted a gallery image in Member's Albums
From the album Combat Sims
-
Steel Fury, STA mod: Sherman VC 'Firefly', Lockie's Villers Bocage mission
33LIMA posted a gallery image in Member's Albums
From the album Combat Sims
-
Steel Fury, STA mod: Cruiser Tank A27M Cromwell IV, Lockie's Villers Bocage mission
33LIMA posted a gallery image in Member's Albums
From the album Combat Sims
-
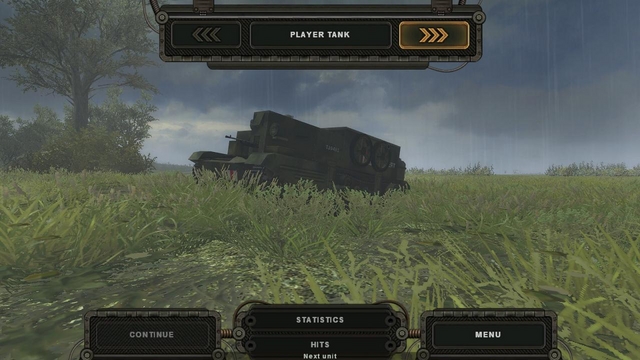
Steel Fury, STA mod: Universal Carrier, Lockie's Villers Bocage mission
33LIMA posted a gallery image in Member's Albums
From the album Combat Sims
-
Steel Fury, STA mod: Tiger I, Lockie's Villers Bocage mission
33LIMA posted a gallery image in Member's Albums
From the album Combat Sims
-
Steel Fury, STA mod: Cromwell, Lockie's Villers Bocage mission
33LIMA posted a gallery image in Member's Albums

From the album Combat Sims
-
Steel Fury - Cromwell, Lockie's Villers Bocage mission
33LIMA posted a gallery image in Member's Albums
From the album Combat Sims
-
Steel Fury - Universal Carrier, Lockie's Villers Bocage mission
33LIMA posted a gallery image in Member's Albums
From the album Combat Sims
-
Steel Fury - Tiger I, Lockie's Villers Bocage mission
33LIMA posted a gallery image in Member's Albums

From the album Combat Sims
-
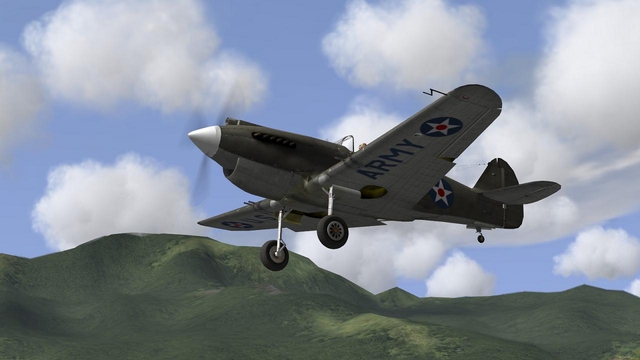
ATAIU SEA was the Allied Tactical Air Intelligence Unit, South East Asia. They evaluated captured enemy aircraft. I haven't seen those interesting pics before, but others of Zeros, Bettys etc in similar markings are fairly well-known.
-
From the album Combat Sims
-
From the album Combat Sims
-
From the album Combat Sims
-
From the album Combat Sims
-
From the album Combat Sims
-
Sorry, don't know and can't check, because the selector proggie that switches between eras has stopped woking in my CUP install, leaving me stuck in the WW2 era - which is fine by me as I don't think Il-2 can really compete with sims with the radar age built in. If it's there, it's probably restricted to guns and Sidewinders, doubt very much you can track and engage multiple targets with BVR missiles.