33LIMA
-
Content count
3,749 -
Joined
-
Last visited
-
Days Won
7
Everything posted by 33LIMA
-
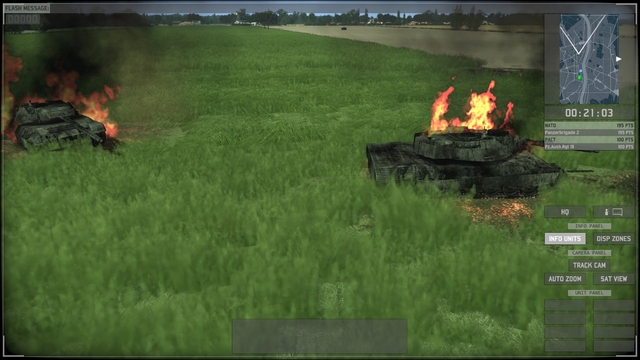
Revenge of the Banzai Bruder? At about this time, things started to become a bit more complicated. First, I was presented with two more on-screen objectives, my last two as it turned out. They're on the screen below, the primary one higher up, descreasing in size as it fades (destroy an alpha sector bridgehead) and a secondary one in the centre (destroy an HQ at a checkpoint, wherever that is). I think the distinction is that primary goals are mandatory for mission success, sesondary ones are not, just earling extra victory points, Command Stars or whatever. don't ask me why the screen is darkened but it's in the 'satelite' view I think, well zoomed out at any rate. At this point, another complication appaeared. A pop-up top left of the screen offered me some more troops which I could deploy. Not the most warlike ones, unfortunately, a couple of Magirus Deutz 'Jupiter' 7-tonner suply trucks. Thanks, guys, that will come in really handy. True enough, my Leos' volleys had used up a fair bit of 105mm bit two supply trucks weren't the most welcome addition to my force, at that point. Could I have used them to pick up the un-horsed BGS troops? Probably not as the latter were non-playable. Impatiently, I just ordered the two trucks forward, to join us in the woods, from which I was about to move forward. I didn't know how to 'bomb up' from them and didn't pause to try. If we ran low on ammo, they would be close behind us...assuming they were carrying any. Resupply is apparently an important part of W:EE but I recckoned on fighting out this battle with the resources I'd started with. Accordingly, I leapfrogged my three remaining Leos, forward to the right-hand edge of the strip wood from which the now-defunct T-55s had emerged. Once there, I zoomed back out a bit and looked at the ground. The next move would be the Hotchkiss leapfrogging us. The question was, which way should our advance now develop - to the left, to the centre, or to the right? I considered each option in turn, in the approved manner, as I'd been trained many moons ago. On the left, relatively open, with a series of hedge or tree-rows which would provide respectable fire positions on the way. In the centre, some urban close cover in the form of small industrial development, good cover but too close, better bypassed than driven into with tanks. On the right, much more open country than on the left, with less cover and East Germany to the right across the river, in range of tank guns and ATGMs. Decision - swing left, use what cover there was to advance in bounds, watching both flanks, as well as ahead. This is where I started to lose the plot. I was well cheesed off by the loss of a Leo to the Banzai Brigade; and that with closer country looming ahead, the best re-inforcements HQ would send me was a couple of effing trucks. Stupidly, I failed to slip the Leos across from the right of the strip wood to its left hand side, before sending the Hotchkiss forward from that position. So when he very quickly spotted a T-34-85 next to the buildings and a BMP-1, no less, in open country, he was on his own; the Leos were well out of the picture. From that point on, the battle was...well, not lost, but I could feel control, and therefore the prospect of victory, slipping through my fingers. Cursing my laxity, I quickly pushed my three remaining Leos ahead. They leapfrogged the Hotchkiss, shot up the T-34, and laid into the BMP. The latter cut loose with a Sagger but from what I could see from its smoke trail, it went out of control just before reaching us, possibly because we hit the BMP (Saggers being first-generation ATGMs requiring a skillful gunner to 'fly' the missile all the way up to impact). The visual effect of the Sagger going haywire just before reaching us was rather nicely done. This wasn't too bad but the BMP wasn't alone. To the right were a couple of BTR-60 APCs and a UAZ 469 jeep. They kept our gunners busy for a little while but we soon made short work of them. The little '+10' tag you can see in the first pic below is rising up from a killed BTR, like the ghost leaving the body. I think this represents the points we earn from its destruction. Neat but I wish such 'gamey' displays were provided instead as post-mission stats. OK, I had been rattled, but I was still in business. Time to get back on top of the battle. I ordered the Hotchkiss SPz to leapfrog our concealed Leopards, and off he went. These light recce vehicles are definitely worth their weight in gold in W:EE, surprisingly survivable and most effective at spotting bad guys you might otherwise just bump into. I was still on course for my final objective. Whatever way this mission was going to end up, I wouldn't be long in finding out. ...to be continued!
-
Good result. I only had one SPz, must have missed the option to deploy an extra one.
-
Hide and seek with the bruder By now, I was geting into a steady rhythm with this. A sort of hunter-killer cycle. Push the recce Hotchkiss forward a bound. See what he spots. Then push the Leos up to a position from where the can shoot the identified targets, from cover. Trouble was, the targets the Hotchkiss now spotted from the strip wood were bigger and badder...specifically, a pair of T-55s. Decent armour, thicker than my Leos, and a good enough gun too, 100mm rather than the previous generation 85 of the T-34s. Not so easy, this time. I was aghast when the Hotchkiss suddenly started shooting at the enemy tanks with his 20mm pop gun. Hadn't I been careful enough in chosing his position, so he was further back in the woods? Too late now. I suppose I should have immediately pulled the Hotchkiss back, but instead, I chose to push my Leopards forward, to shoot the T-55s while they were otherwise occupied. Fortunately the Leos didn't have far to go. They charged forward, halted at the hedgerow I'd selected as their fire position, and laid into the T-55s. I got away with it. We clobbered the T-55s and somehow neither the Hotchkiss nor my Leos took any damage. In the pic imediately above, you can see a piece of text near the latter ('Combat Level 2') which I think indicates this unit has gained some 'experience points'. This display is a bit 'gamey'; I'd prefer this sort of stuff was notified at the end of each battle, rather than floating over the unit. Even a message top or bottom of screen would be less obtrusive. Maybe I'm only seeing this, because this first mission is a sort of training one, with various on-screen tips. I dunno. At this point, for a reason I can't remember now, I decided my Leos would now leapfrog my Hotchkiss, rather than the previous practice of the recce vehicle clearing ahead. For their next fire position, I chose the left-hand edge of the wood from which the T-55s had emerged, believing that area was now clear of the enemy. It was. But the woods to my left were not. My first inkling of this was bursts of automatic weapons fire from there, directed at my tanks, which cleverly pivoted left automatically, to face the threat. Whatever it was. In fact I already knew what it was, pretty well. It was the thing which had ended my previous try with this mission. By this time, I had deduced that the same enemies tended to appear in much the same place, each playithrough. There doesn't seem to be any variability. This didn't spoil the immersion or the fun for me, but it is a bit First Person Shooter-ish. As happened last time, we were being attacked by a BTR-60-equiped Motor Rifle platoon. And as before, the beggars were charging us, the dismounted infantry led by the BTRs which pushed ahead. All that was missing was cries of 'Banzai!' At least Japanese forces usually waited for cover of darkness and tried to infiltrate before making suicidal assaults. This was pretty poor AI. I hadn't detected or engaged the BTRs. They should have sat tight or even withdrawn, or at most, tried to infiltrate their dismounts into RPG range. But no, they just charged, out into the open, right at us. C'est magnifique, mais ce n'est pas la guerre. The first time this happened, I was caught by surprise. I let the Leos sit tight, killing the BTRs. This gave the charging dismounts just enough time to get close enough to unleash a spectacular little barrage of RPGs. Game over, near enough. This time, correctly but sadly anticipating the same inhuman tactics, I pulled the Leos back fairly quickly. They still managed to clobber the BTRs before moving but I lost my nearest Leo in return - a lucky hit from a 14.5mm MG or more likely a long-range RPG effort before he could open the range. In the pic below, incidentally, you can see the on-screen tip telling me that my losses and experience gains will carry over to the next mission. Anyway this time at least, we wiped out the Banzai Bruder. Our MGs and main guns mowed 'em down as they charged us. Serves 'em right. Absolutely no sympathy for any of them, charging tanks over open ground, like that. I appreciate that a desperate, direct charge is appropriate in some situations, like when you are caught at very close range in the kill zone of an ambush. That didn't apply here. The BTRs should have sat out the war, rather than charging us. Besides the destruction of these rather silly people, the other consolation for the loss of one of my precious Leopards was the announcement that we had achieved our current objective. Could have been worse. For the loss of one tank, we had gained a fair bit of ground and wreaked a goodly bit of havoc upon the enemy forces. The latter, fortunately, had not been concentrated, but instead, were deployed about the place in the proverbial penny packets. Perhaps the teachings of Heinz Guderian weren't much studied in the Socialist paradise of the Deutsche Demokratische Republik, otherwise they might have thought, 'Klotzen, nicht klechern'. Anyway, we were still in business, while the other bruder's balance sheet was looking a bit shaky. No offence to the DDR by the way, I still treasure my Praktica BX-20. ...to be continued!
-
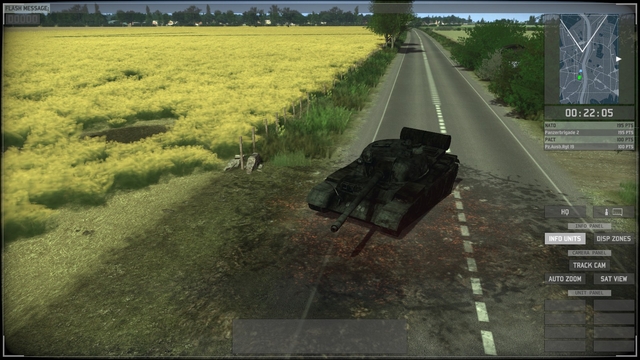
Any more bruder out there? My next objective was displayed to be reconnoitoring Bravo sector, just to our north. Time to get moving again! Baby steps, though. Baby Leopard steps, you might say...another fast dash as a platoon, just as far as the next hedgerow. This was accomplished without incident. At this point, I was spared the need to split my platoon for tactical movement by the arrival of a little recce vehicle, a French-designed Hotchkiss carrier, or SchutzenPanzewagen 11, which the Bundeswehr operated in quite large numbers in a variety of roles. The recce version which now joined us, I could see, was usefully one with a turret-mounted 20mm autocannon. He had starting orders of his own, for without any action on my part, he appeared at the bottom of the map and rattled north after us, up the central road. Roughly level with where my Leos had stopped, he halted and 'went firm' at the junction with a side road. Now, he was under my control. So I ordered him to leapfrog beyond, from his present slightly-exposed position. I sent him up to the better cover of a small stand of trees, next to a lateral track. From here, I expected that he would be able to observe the terrain over which my Leos would next be advancing. This move accomplished two things. Firstly, as another on-screen message told me, my recce objective was counted complete. Secondly, we had now acquired visual contact with the enemy. Sorry, yes I know, I know - 'DON'T USE THAT WORD, UNLESS YOU MEAN IT!!!' 'Contact' means 'contact with the enemy'! Not just a sighting. I should know better. OK...we had now got 'eyes on'. The new sighting, with whom we were not yet in actual contact, was another trio of hapless but not entirely helpless T-34s. Believe it or not, the East Germans did still have some of these museum pieces in service in the early-to-mid-1970s, apaprently. But they really should have kept them well away from any risk of bumping into modern MBTs. Intent on proving the truth of this observation, I made a simple plan for their rapid destruction. I would go left-flanking. Not too wide, as I didn't want to be caught in my own flank, by getting too close to that big wood over there. First hop was across a field to the side of a pair of houses. There we halted, but as expected, we were still out of sight of the enemy and unable either to shoot or be shot by him. Next move was along the axis of a track for easy orientation, steeling slightly left, for the cover of another hedgerow. Once there, we halted. Still no shooting. Time for my cubs to close for the kill, I decided.I selected yet another a fire position, this time ahead and right, towards the enemy tanks. My Leos responded rapidly. This move finally brought us into cannon-shot of the foe and the Leopards cut loose. Usually the AI seems quite good about adjusting their positions, when halting, to take advantage of the cover that is hopefully present at the spot you have chosen for your unit(s) to move to. Which is good as you have limited control over individual units. On this occasion, however, one of my tanks stopped a bit too far forward, ending up just on the enemy side of the hedgerow. The trick may be to try to bring your unit in nearly at right-angles to any linear cover that you want them to hug. We got the two nearest T-34s - the one beyond was still out of sight - but the foremost Leopard was damaged by return fire. To get at the third T-34, I took my Leopards back to the left. You can see that the nearest tank exhibits the slightly blackened look which is the first W:EE visual indication of damage. I then chose a new firing position back to the left. further north from our first one. And from there, we spotted and shot him. By about this time, as you can see from the on-screen message in the pic above, our next objective had become pushing further back the enemy breakthrough in Bravo sector. With this aim in mind, I turned again to my trusty Hotchkiss. Recce units like this in W:EE are not mere cannon fodder, to be sent ahead to reveal enemies by suicidally drawing fire. They have both extra spotting capabilities and more of what today tends to be called 'stealth' - the ability to move about less conspicuously than other units. I sent my Hotchkiss forward again and off he went, up the main road between the concealing hedges, past T-34s burnt out in the fields. Notice that in W:EE, you can see grass or crops where they have been flattened by the passage of vehicles! Whatever was up ahead, I was relying on my Hotchkiss once again spotting it, before it spotted us. ...to be continued!
-
Bruder gegen yet more bruder... My next move was a simple repeat of my first one. Click on my Leopard tank platoon, click on my next chosen fire position and off they go, through the tree line, down the edge of the plateau and across a field of ripening crops to the next hedgerow. The silly mistake I made here was to forget about a second pair of T-34s which had been reported at the start of the mission - presumably by the un-horsed BGS troops, up ahead - at the far, eastern end of the river bridge, over to my half-right. Perhaps because the BGS lost line of sight and my Leos didn't acquire it, they were by this time, no longer tagged or marked up on the min-map. This changed when my Leos reached the hedgerow. With no need for micro-management for me, they swung right and started shooting at the vintage East German panzers. You can see the situation in the semi-zoomed-out screenshot below. My Leos are shaded blue so I can see them in cover, beneath their blue label or tag. The green-labelled BGS are in the fields ahead of us. Over on the far side of that bridge are tagged in red the two T-34s. What you can't see are the 105mm tracers crashing into and around the T-34s and you can't of course hear the crash of the gunfire. But it's all happning, and quite impressively, in a suitably small-scale way. One of the T-34s survived our volleys for a few seconds, but it wasn't long before both were knocked out. We can't claim any credit for the killed BTR-60 wheeled APC sitting in front of the tanks; likely, this was a victim of the BundesGrenSchutze, before their own M113s went under. At this point, we were rewarded with an 'Objective complete' message. To the right of the bridge in the first screenshot below, you can also see W:EE's quite impressive rendition of the Inner German Border, complete with twin walls and watchtowers, with the ground in between presumably mined. I should probably have split my Leos into two pairs and moved them tactically, leapfrogging or caterpillaring them separately, in what the US Army calls 'bounding overwatch'. W:EE lets you split and recombine units for this and other purposes. But I'd got away with it. Leopard 1s are thin-skinned but were amongst the fastest Main Battle Tanks on the battlefield in their heyday, the post WW2 Germans having concluded that heavy armour was no longer much use, given the thickness (and thus the weight!) needed to make a difference against modern HEAT and kinetic energy projectiles. For now, I decided to stick with short, fast platoon dashes from cover to cover. So far, so good! ...to be continued! PS thanks for the tips, Swordsman!
-
Yes Swordsman that's just the sort of thing I'd want. To be able to start every campaign with a credible (say) company-sized, balanced all-arms force - say a tank or mech infantry company with a platoon or two of the other arm cross-attached. Plus a recce section, a Mortar Fire Controller and a Forward Observation Officer, also a section with manpad AA or a tracked system like Shilka, Gepard or Tracked Rapier. Maybe an ATGM section like FV438, BRDM-3 or M901 ITV. [in a similar vein, I remember hand-editing the Panzer Elite unit files so I could choose a platoon with all the same type of tanks, instead of the often rather silly mix of 'vanilla'.] With the option to swap to different base vehicles eg M60A1+M113, M1+M2, or British or Soviet equivalents. If I want to roll over a NATO defender who for that mission sd designed, happens only to have with Leo 1s or M60s with a force headed by T-80BVs rather than T-62s or export T-72s, let me. Better still let me have similar options for both sides, so I might face tough opposition with inferior forces, or light opposition with superior ones. But let me generally start off each campaign as the boss of a realistic, balanced Combat Team (as the British Army of the time called a company sized all-arms force). The sort of unlocks and restrictions I'm finding in W:EE may be fne for a competetive, multiplayer wargame. Still for all that, so far I'm finding W:EE more than good enough at what it does do well to grab and hold my interest, even though it'd be a whole lot better with a more open approach, better suited to the interests of single player gameplay. While the enemy AI seems to have some Banzai tendencies, it's not too bad and the basic approach (to command and control -vs- micomanagement) seems much superior to other PC wargames I have tried, however nicely rendered or accurately specified their units may appear. I mean, it was Rome Total War that taught me that the Ancients had developed a reliable system of instantly and accurately conveying unit orders across active battlefields which would be the envy of many a 21st Century army; and that the Greeks and Romans were wasting their time, training their armies to deploy and fight in organised lines or phalanxes, when they could do so equally well as separate mobs :) Anyway, coming shortly, Part the Next.
-
Cast to the Lions Leopards The way W:EE missions seem to work is that on-screen prompts give you a series of objectives, one at a time, as the mission develops. Sometimes you may also get a secondary objective. Objectives seem generally to relate to maked zones on the map, which become visible when you zoom out into a sort of satellite view. Complete the primary objectives, and you win. In doing do, you gain points, in the form of 'Command stars'. A win enables you to progress to the next mission. 'Command stars' enable you to unlock more or better units from those available to your side; sometimes, these can be obtained as reinforcements, which you can deploy during the mission you are playing. What you have available at any point in time seems to be called a 'deck' and you can have two of these, one for playing as NATO, one for playing as WARPAC. In single player, which side you play for may be determined by the campaign - eg in Bruder Geben Bruder, as far as I can see at this early stage in my W:EE endeavours, you can play only for West Germany/NATO. I'm still learning the command interface but it seems amongst the more straightforward ones I've seen, with its own quirks but fairly intuitive. Basically, at its simplest, you mouse click on a unit, then mouse click the spot you want it to move to (or a visible target that you want your unit to attack). That's basically it. Sensibly, units are platoons, except where you might have a single vehicle of a particular type. Also sensible, the unit AI looks after nearly everything else. Like formations, taking cover where you ordered it to halt, and engaging spotted enemies. This may not be what PC wargamers are used to, if they have played games where micromanaging your units is the norm - 'chess with different pieces and rules' as I've been calling that approach. But in my experience, W:EE provides a much more realistic simulation of the mechanics of military operations, beyond the tactics of individual tanks and infantrymen. So in my book, top marks for W:EE. It's got exactly the right approach for any simulation which puts the player in the role of the overall commander. As opposed to simulating a chess game variant. And yes I know chess is a sort of wargame, but a very highly stylised one. Of course, with the player largely unable to micro-manage, and the local stuff left to the AI, the latter needs to be that much better. Fortunately W:EE's AI, while it seems to have some quirks of its own, seems generally good enough to step up to this particular plate. Here's a case in point. My first objective is to destroy the T-34s who have harried the BGS and established themselves on West German territory. The T-34s are in dead ground, hidden from my Leo 1s who are on a sort of plateau. But the bad guys have evidently been spotted by the dismounted BGS and reported to me on the radio net. To destroy the enemy, I decide I will simply roll forward to a convient treeline on the northern edge of the plateau and shoot the WW2 vintage T-34s from there. I accomplish this simply by left clicking my Leo platoon, then right-clicking my chosen firing point or battle position. That's all I do. I can't control speed or set complicated paths. I can, however, cancel orders, order faster movement by roads, select targets, and break up units (eg for 'bounding overwatch') and then re-join them. But I don't need to do any of this for now. My Leos move rapidly over the interventing field in a decent inverted wedge formation, come into line as they reach the treeline and halt, in decent cover. As soon as they see the T-34s, they start shooting. The enemy initially turn and charge at us, perhaps to close the range or get into dead ground or better cover. Their 85mm guns, given a hit, will be dangerous for my fast but thinly-armoured Leos. But this avails them nothing. One T-34 is soon burning amidst our M113 wrecks while the other pulls back, his tag indicating that he has had enough and is routing. He doesn't get far before 105mm rounds whack into him. PanzerAusbildungsRegiment 19 should have stuck to its training role, rather than ending up confronting the Bundeswehr's modern Leos in their obsolete machines. As far as I know you can't turn off the unit tags. I find them slightly more prominent and/or informative than I'd like them to be but they are quite effective and not too conspicuous. Likewise I understand you can't turn off other on-screen aids, like the command interface on the right, which includes a useful mini-map. My prefence would be to have control over what was displayed, item by item. Anyway, so far, so good. The enemy AI had seemed a bit suicidal but my own side's had done a pretty good job of managing without needing the player unrealistically to micromanage. Just what the Wargame Doctor ordered. The unit models are nicely-done and have respectable animations, like turrets swinging and vehicles rocking on their suspension when firing. It's nice to zoom in and watch this but when an enemy is spotted you will probably find yourself zooming quickly out to assess the situation and direct units accordingly. If possible I would like to develop a play style which is mostly zoomed in and relies on the mini-map as far as possible but events - especially bad ones - can arrive and develop very fast in W:EE and this may or may not be feasible. I may resort to pausing the game at interavals, mostly to look around and take stock, if that's feasible; a bit like a turn-based approach. Somewhat slower-paced battles would help but so far it seems hectic enough and this is just a minor skirmish. Or a series of them, for there's plenty more to come. In the screenshot below, you can see that a message is ordering me to eliminate an enemy breakthrough in Charlie sector. My Leopards are temporarily shaded blue, which happens to units in foliage cover (WARPAC ones going red) so you can see them. I decide that my next move will be another short platoon dash, this time down off the edge of the plateau to fire positions in the next hedgerow, just short and right of the T-34 burning on the road. So far, so good. ...to be continued!
-
In the beginning, there was brother against brother To digress for a bit, if you took much of an interest in the Cold War - apart from maybe learning to stop worrying and love the bomb (with apologies to Dr Strangelove and the Campaign for Nuclear Disarmament) - you may like me have read some of the literature it spawned, books like defector 'Victor Suvorov's' classic Inside the Soviet Army and David Isby's encyclopaedic Weapons and Tactics of the Soviet Army. If you were in the forces during that period, you may like me remember seeing your first picture of the T-72 or T-64 (accompanied in my case by a melodramatic remark about the fate of the person who got the photo to the West) or being warned against siting your platoon's trenches on a forward slope when the Soviets had a tank which could put a first round into a six-foot-square window from 3,000 metres. Or words to that effect. There were also books which portrayed the possible course of a World War Three in Europe. Tom Clancy did one I remember reading; but my favourite from this genre was First Clash by British tanker Kenneth Macksey, which was not a novel but a dramatisation written for Canadian forces for training purposes. This described a possible conflict between the M113-equipped and Leopard 1A4-supported 'Vandoos' (the Royal Vingt-deuxieme Regiment) and the expected Soviet armoured onslaught, in the sort of soldierly detail you don't get in other books. I think it was in John Connells New Maginot Line - a critique of the foibles of modern (mostly US) defence spending unmatched until Lewis Page's literary demolition job on the British equivalent in Lions, Donkeys and Dinosaurs - that the author recorded the difficulty NATO planers had, in constructing a believable scenario in which WW3 would actually start, thus providing the higher-level 'battle picture' that doubtless kicked off many a NATO Reforger-type exercise. W:EE actually makes a brave attempt here - each of its four stock campaigns takes some trouble to construct a casus belli to get things started. The first campaign is a case in point. It's called 'Bruder Gegen Bruder' and starts with a video compliantion from the period, which moves from real-life world events of the mid-1970s onto the fictional story of an East German border guard who kills two comrades in defecting to West Germany. His former employers request his extradition and are most unhappy when Bonn - then the capital of Bundesrepublik Deutschland, remember? - say 'Nein.' Unhappy, to extent that next thing you know, there's an East German incursion into Federal German territory and war is declared. The combination of voiceover, period photos and news clips is blended pretty seamlessly with map animations and game footage as you are led into the scenario. Likely or not as the fictional sequence of events portrayed might be, it's really rather neat that the developers have gone to the trouble. Not since the 'MPS News' segments from M1 Tank Platoon 2 have I seen such a laudible effort to get a single player campaign off to such a good start. Not often, anyway. It's a nice touch. You are drawn into the storyline till the point where an in-game camera sequence pulls back from one of the river bridges the East German forces have crossed, past their tanks and the knocked out West German BundesGrenSchutz (BGS, the border guard force) M113s, to the platoon of four Leopard 1s with which you are ordered to repell the enemy incursion. To anyone who was interested or immersed at all in military affairs of the period, it's like it's all coming back into focus; deja vu all over again :) Rather excellent. In the screenshot above, you can see, near the bottom, the blue tag indicating our Leopards, next to some commercial buildings and their car park. Left of top centre - tagged green, and thus not playble, though friendly - are two squads of BGS, escaped from their knocked-out APCs, which you can see burning on the road, top centre. Just to the right is the enemy, tagged red - and yes, they are in T-34/85s. This is 1975 and the National Volksarmee is - fortunately for us - still a way off getting T-72s. It seems the East German's own border forces in this sector are not the best equipped, though they've been more than enough for the M113 APCs they have met so far. But these obsolete tanks are not the worst we will come up against, on this, our first mission in defence of the West, perhaps the first shots of World War Three. ...to be continued!
-
Now it was time for Phases 3 and 4. My forces would swing through 90 degrees from south to west and hit the enemy positions over there, finishing up at an Iraqi-held ford over an irrigation channel running nearly north-south. Our Phase 3 objectives would be the 'Ishaar al Hamar hills' position and the position marked 'Sumer 1', just south (the latter has confusingly changed names, during the course of the mission!). The 'hills' position would be hit by a concentric attack from two M60 platoons. In the screenie above, you can see that on my right, the blocking platoon (3 red diamonds) has begun to move south-west from its Phase 2 fire position at the corner of the rectangular woods, while my strongest platoon (4 orange diamonds) is closing in from the east. Meanwhile, my third platoon has just started to move west from the key point it occupied in Phase 2, now headed for the Iraqi post at Sumer 1. By this time, as you can see from the 'message log', top right, the emeny has been asking for a cease fire. Which I naturally ignored. This time I led my right-hand platoon, coming down from the north-east. We had a tense time in the run-up to the main Iraqi position but when we got there, found that it, too, was no longer occupied. The position further south also fell without a fight, to my right-hand platoon. Phase 3 complete and not a shot fired! I quickly re-organised for Phase 4, the final drive to the irrigation channel ford, due west. My left-hand platoon I ordered to sit tight, to cover our open flank to the south and west. The other two platoons I sent due west, side-by-side towards the Phase 4 objective. Seemingly, it was now all there for the taking but there was still plenty of time for something, somewhere to go badly wrong! Once again leading my right-hand platoon, it wasn't long before I had my first contact. We spotted what appeared to be a solitary T-55 and thus certainly an enemy tank. He was completely still and though apparently intact, could have been abandoned. But I took no chances and halting as he re-appeared from behind a prominent rock or termite mound, I started firing into his flank. He was soon smoking. 'Where there's one enemy tank, there will be others', I thought, anxiously scanning left and right, waiting for the shooting to start. But all seemed still again. Nothing to be seen ahead, but the single T-55, now blazing steadily. With the platoon back in line formation, minimum spacing, we moved off again. Still the enemy was nowhere to be seen, apart from that solitary burning tank. As it turned out, the knocked-out T-55 was just the other side of the irrigation channel which marked our intended limit of exploitation to the west. He seemed to be the only defender. And that was indeed the case. My other platoon rolled up beside us, ending any doubt that our Phase 4 objective, the ford, was firmly in our hands. Six Iraqi flags have been cleared from the map and replaced by our Iranian ones! A clean sweep, you might say. By that time, more than the weak enemy opposition, I had become increasingly worried that SABOW would bring down the curtain before I had completed my little organised night tour of the batlefield and scooped up all the territorial gains I could make. I needn't have worried. If there's to be an Iraqi counterattack, it'll come in a future mission. The results screens appeared right on cue and confirmed what I knew already, that we had won. The 'minor' part of the 'victory' assessment may be because the stats showed that we had outnumbered the enemy and inflicted modest casualties; any way I'm glad that Graviteam have said they are going to make some adjustments to the scoring system, to give somewhat greater credit for territorial gains. While I would prefer to see, in the average SABOW campaign battle, more representation of unit command elements and their role and presence on the battlefield; infantry (and artillery) more often under the player's direct command; and better marking up (eg of orders and objectives/waypoints) on the tactical map, I really can't fault SABOW. There's still stuff I haven't worked out (like the significance of the 'Objectives changed!' messages you see from time to time) and features I haven't used but I now firmly agree with others who have already said that it's a superb tanksim. I'm finding the extra tactical or wargaming element adds a very immersive and complementary role for the player, presenting you with various kinds of tactical problems and situations to solve or otherwise respond to, which I am really relishing. Thanks partly to this and partly to the excellent implementation of the virtual tanking itself, even a relatively uneventful mission has plenty of interest and challenge. There's still plenty of opportunity for 'pure' tanksimming; and as with that other top-notch tanksim, Steel Beasts, you also get to play both a first class tanksim and an excellent platoon-company-battalion level tactical simulator. Not to be missed, in my book.
-
For Phase 2, my attention turned to the two small enemy positions to our south. My plan was now as follows. On my left, my five-tank platoon would ford the irrigation channel to its front and drive south, attacking the enemy at Babylon 3 (I have no idea why its name changed from the original map sceenshot, despite still being in Iraqi hands). In my centre, a second platoon would also drive south, attacking and clearing the Iraqi position, nearby to the west. Conscious that stronger Iraqi forces lay further west, my third platoon would move up and adopt a blocking position on my open right flank, where a small pond lay at the south-eastern corner of a large rectangular wood. Having given each platoon its orders, I jumped to the platoon leader's tank in my 5-tank platoon, anxious to supervise its risky crossing of the irrigation channel at the start of its move. In line formation, down we went, into what looked like a shallow channel with not-too-steep banks...I hoped. The SABOW AI drivers seem quite competent if sometimes a bit hesitant and this time, they generally got across fine, though one tank struggled to get up the bank on the way out, as did my own, perhaps because I took over the driving! One of the tanks seemed to hesitate on the near bank and I jumped to this and drove that over too, at one point sufficiently concerned to allow headlights to be turned on. As the last tank was climbing up the bank and out of the channel, I noticed that our five tanks were actually four, plus what appeared to be the dismounted crew of the fifth tank. Strange, but there was no time to ponder what was going on there. Off we went! Without the need for obstacle-crossing, the other two platoons had made good time. While one held the blocking position on my right, the other had soon moved ahead and occupied its objective, which was duly re-marked with the green-white-red Iranian flag and re-named accordingly, becomming Assyria 2. The only excitement that I recall in all of this was that the blocking platoon had a brief contact with some enemy infantry in the woods, whom it drove off to the north. It seemed possible that these men were refugees from our Phase 1 objective. I thought for a little while about mounting an operation to hunt down and destroy them but the contact quickly faded and I guessed that these Iraqis likley didn't amount to a serious threat to our positions, now behind us. So I decided that it was time to apply the master principle of war - selection and [as in this case] maintenance of the aim. I would proceed with Phase 2. My four-and-a-half-tank platoon had a more exciting time in taking its objective, so I was glad I'd stayed with that one. First, we had a slightly errie encounter with the wrecks of some of our own AFVs from a previous battle, as they came into the range of our IR spotlights. The next sighting was the enemy! I was playing as the gunner in the platoon leader's M60 when my TC called out an APC, slightly left. Laying the gun onto the direction indicated, I got a shock to find myself staring at the business end of what looked like a BMP-1, with many infantry scattered around him. He fired first - I think it was with his 76mm gun, rather than a Sagger ATGM - but the tracer seemed to flash past somewhere overhead. A narrow escape! I wasted no time in letting him have several APDS rounds, a wild overkill but he seemed to be on his own and I was taking no chances. In the pic below, my IR spotlight is briefly turned off for some reason; you can clearly see the difference that the IR illumination makes. With the BMP finally starting to smoke, what followed was more of a massacre than a battle. We simply stood off and machine-gunned the dismounted enemy infantry. There were so many of them that I was concerned that there might be more APCs or IFVs nearby but I never saw any. Some of the enemy went to ground, some of them crawled, some of them ran briefly. We poured co-ax fire into anything that moved, conscious of the RPG threat. The tracer effects in SABOW are rather good; they burn out at about 1100m as they should and they glow bright pink, which is just as I remember the 7.62 NATO variety. You have the option of letting tracers produce their own illumination, which you can see in the little pool of light on the ground under the nearest tracer in the screenie below. Beyond that, you can see some tracers ricochetting skywards, another well-done SABOW effect. Finally, we were done and both the southern enemy outposts were in our hands. The BMP burned and the enemy casualties lay still and scattered round, pay-back for the Iranian AFV hulks we could still see from a previous battle for this very ground, now back in the hands of its rightful owners, hopefully there to stay. Phase 2 complete! Two down, two to go...but would our good fortune continue to hold? ...to be contiued!
-
From the tactical map, I could see that I had a range of different Iraqi positions which looked worthy of attack. A prime aim would be to keep my force concentrated, for best effect and mutual support, 'Concentration of Force' being one of the more important principles of war. I wanted to defeat the enemy positions in detail, one at a time if possible, screening or avoiding other positions until their turn came. I quickly decided to attack the main enemy position in a wooded outcrop of the Ishan al Khamarah hills, just north-west of a smaller friendly position at a nearby crossroads. This would both eliminate a threat to our crossroads position and provide a stepping-off point for my next move. This second phase would be to drive south and take the two smaller enemy positions at Ummayad 2 and Sumer 3. For Phase 3, I would re-orient and attack to the west, destroying the enemy positions at another outcrop of the Ishan al Khamarah hills and to the south at Jalairid 1. Finally, if all still went well, for Phase 4 we would regroup, continue west and hit the enemy position at an irrigation channel ford. Now, that would be a good night's work, clearing the map of marked Iraqi positions and driving a big wedge between the enemy forces to the west and the soith-east. In the tactical map screenshot above, you can see my three platoons ready for Phase 1, the attack on the nearest Ishaan al Hamar hills position (the alternative spellings on the map may reflect the neat SABOW approach of using Persian names for Iranian positions, and Arabic ones for those held by the Iraqis!). Tthe tanks are the diamonds (this is one of several selectable marking schemes you can choose between). My assault would consist of concentric attacks mounted by two of my three platoons - one coming in from just south of our position Darius 1, and the other starting south of Mithradates 2, on its left. My third platoon - the one with five tanks, indicated by the orange diamonds - I have placed further south-east. This will sit tight for Phase 1, acting as a reserve and as flank cover, in particular, preventing any interference from the enemy positions further south. Having started the action, I jumped to the attacking platoon closest to the objective, as this seemed most likely to hit contact first. Sometimes, I will try to time attacks like these to be simultaneous; but this time, I wanted a slight gap between the two attacking platoons arriving on the objective: hit them with the second punch, while they're still dealing with the first one. Nothing new there; I believe it was standard practice for the Romans, in taking British hill forts, to mount a second attack from the opposite side, timed to catch the natives after they had all rushed over to fend off the first one. I really like the SABOW active Infra Red night vision effect. It's rightly quite different from representations of passive IR (thermal) imaging and as well as seeing what your own tank's lights illuminate, you can also see the IR spotlights or headlamps of other AFVs, sweeping back and forth across the ground ahead. Ranges are realistically limited to a few hundred metres. The overall effect I find exceptionally convingng, limitations and all. This particular night, the ambient light wasn't too bad; it was far from pitch black. In the screenshot below, you can see a little light escaping from open turret hatches (which I quickly ordered closed!) and vision ports and on my own tank, the brake lights have come on briefly. As I have said before, your AI driver feels like he's a real artificial intelligence, even to the point where, if baulked by an obstacle but ordered to carry on, he will attempt an avoiding manouevre. It's touches like this that I think make SABOW one of the very best tanksims, to my mind the best. The fight I was anticipating never happened; the Iraqis had evidently bugged out (which subsequent sightings seemed to confirm). Nevertheless, I had a few tense minutes rolling up to and then into the broken ground of the objective, expecting something nasty to hit us from every dip in the ground or from behind every rock or piece of shrubbery. But nothing came. With both attacking platoons having gone firm on the Phase 1 objective, I hardly needed to consult the tactical map, to see confirmation that we had taken our first key point. Phase 1 complete! So far, so good. ...to be continued!
-
...and as for 'the next round' in my M60A1 Iran-Iraq War campaign, that was another daylight battle. I say 'daylight', but it was dark and dull with rain coming down in sheets. If nothing else it was a decent showcase for the recently-added shiny wet surface effect on your tanks. And the terra-forming from the passage of vehicles seems to result in a different, bumpier ride, as well, which was a nice effect. The vehicle physics in SABOW are about the best I have seen, to the extent that in the mission's poor conditions, I could see and almost feel my driver struggling to keep her rolling in the ground softened by the drenching ran. Never mind the actual fighting, the experience of simply operating tanks 'in the field' is top notch. Your AI drivers feel human, not mere executants of keystrokes, all the more so with the latest pyhisics effects. Climbing a bank, now more than ever you can see the tank struggling and the fear of bogging down is palpable. The fighting when it came was somewhat inconclusive. We gained a bit of ground but one of my M60s lost a track to an enemy round. SABOW awarded me a draw, which seemed fair enough, not least as having been on holiday for a while, I was about as rusty as any bare metal left out in the mission weather! Speaking of weather, this is another SABOW strong point. Weather and with it visibility can not only change between missions, but even during the course of a single mission. The rain eventually stopped and I drew another night mission. At the 'Operational' level map, I could see that my territorial gains over previous missions had driven a salient into the eastern flank of the Iraqi forces. I could also see that I had two potential opportunities for another advance. I could drive due east towards a village south of the small town of Derkhimi, where there was a significant key point (the large blue disc) but uncertain, possibly strong enemy forces. Or I could attack to the south-west, towards a less important key point defended by what appeared to be relatively weak enemy infantry and armour. I juggled my (green) playable tank platoons so that I could pursue either option and having made my move, waited to see what battles SABOW would offer me. I got the south-western option, with three playable tank platoons, plus some static dismounted infantry over which I had no control and whose task would thus be to hold our own positions while I did the offensive bit. It may well be that both sides' tanks in the Iran-Iraq War tended often to operate independently but I would like more often to find myself commanding a more balanced tank-infantry force. More often than not in this campaign, playing from either side, my tanks seem to be on their own. And either I haven't been allocated any artillery support, or haven't understood the manual's instructions for its use, for once again on this mission it was all down to my M60s. Fortunately, apart from some tricky terrain, we are operating in pretty good tank country and in the dark, their night-fighting systems mean my M60s can make the best of it. It also helps that I have ended up with three platoons at my disposal, one of whch has five tanks, against the more common three. My next task was to look at the tactical map and make a plan, nased on which I would deploy and give orders to my three platoons.! ...to be continued!
-
Thanks - glad you liked the report - and the sim!
-
From the album Wargame - European Escalation
-
-
-

From the album Wargame - European Escalation
-

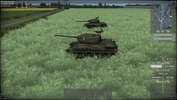
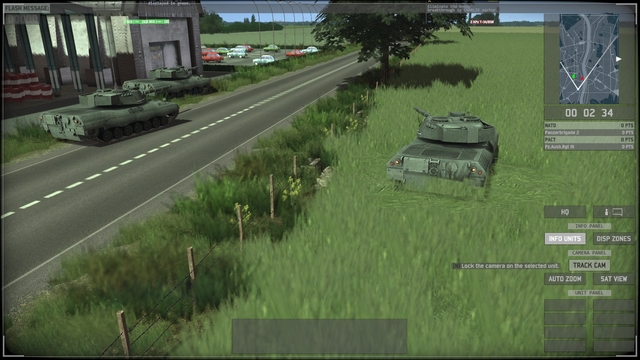
Wargame - European Escalation - Bundeswehr Leopard 1 platoon prepares to move
33LIMA posted a gallery image in Member's Albums
From the album Wargame - European Escalation
-
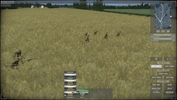
Wargame - European Escalation - Bundeswehr Bundesgrenschutz
33LIMA posted a gallery image in Member's Albums

From the album Wargame - European Escalation
-
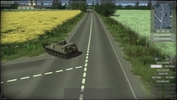
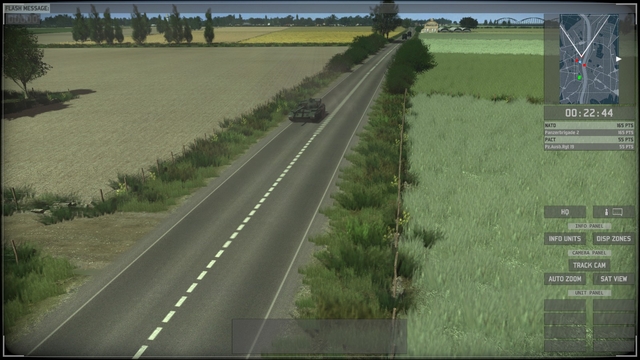
Wargame - European Escalation - Bundeswehr Hotchkiss SPz-11
33LIMA posted a gallery image in Member's Albums

From the album Wargame - European Escalation
-
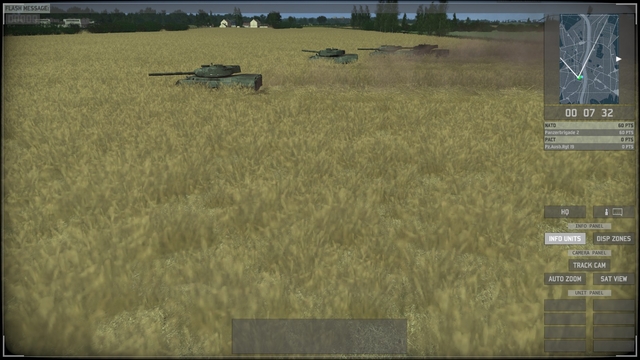
Wargame - European Escalation - Bundeswehr Leopard 1 platoon advancing
33LIMA posted a gallery image in Member's Albums
From the album Wargame - European Escalation
-
Wargame - European Escalation - NVA BTR-60s & UAZ-469s
33LIMA posted a gallery image in Member's Albums
From the album Wargame - European Escalation
-
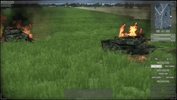
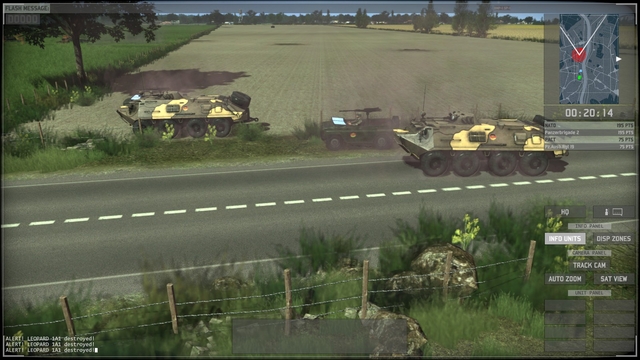
Wargame - European Escalation - knocked-out Bundeswehr Leopard !s
33LIMA posted a gallery image in Member's Albums
From the album Wargame - European Escalation
-
Wargame - European Escalation - knocked out NVA T-55
33LIMA posted a gallery image in Member's Albums
From the album Wargame - European Escalation
-
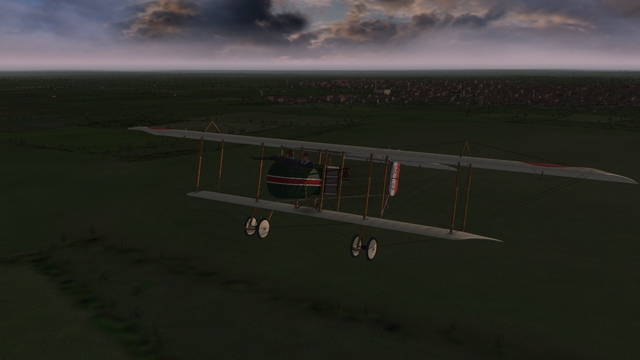
From the album Combat Sims
-
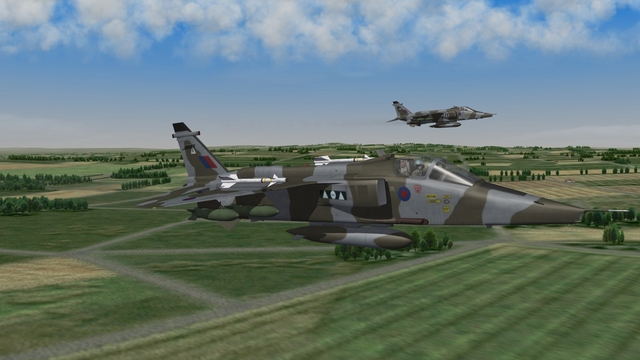
From the album Combat Sims