


33LIMA
-
Content count
3,749 -
Joined
-
Last visited
-
Days Won
7
Everything posted by 33LIMA
-

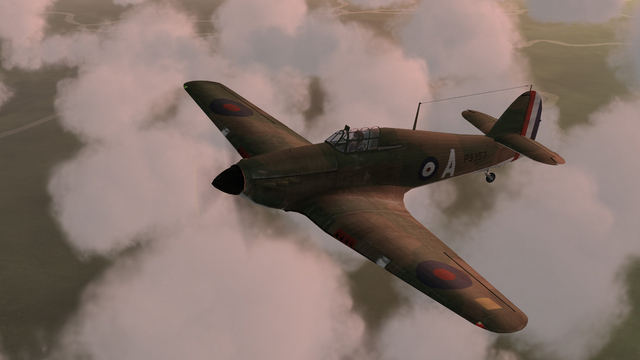
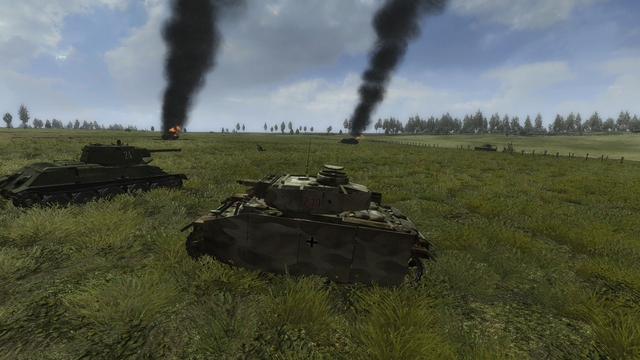
Il-2 1946+CUP: Hurricane Mk1, Air Component BEF, France 1940
33LIMA posted a gallery image in Member's Albums
From the album Combat Sims
-
From the album Combat Sims
-
From the album Combat Sims
-
From the album Combat Sims
-
From the album Combat Sims
-

From the album Combat Sims
-
From the album Combat Sims
-
From the album Combat Sims
-
'That's the way the world mission ends...' For this phase of the battle - the assault on the enemy 'Crossroads' position - I spent some time with each of my tank platoons and lapped up the suspense. The first dose of the latter was from my five tanks driving across the front of the enemy to our south. The range was long but it was still a risk. I got as far as the large woods to the west without incident but instead of driving on into them and then turning sharp left, I decided to cut the corner and turn early towards the objective. This meant our left was less exposed to any possible last-minute interruption from the enemy. Side by side, we wound down the range to the crossroads and whatever waited for us there. At this point I switched to my other M60 platoon, coming down from the north on the other side of the north-south irrigation channel. Even in the now-murky conditions, the two M60s made a fine sight, with the M113s and their dismounted infantry shuffling along to the rear. As we closed in on the objective, I saw that there was a low bank running across my front and made for that cover, without pausing. As we rattled on, the five M60s coming in from our half-left started shooting, MGs mostly so likely at enemy infantry. The bad guys must have been on the far side of that little embankment, for I could not see them. Some of our other tanks had somewhat bunched up across the irrigation ditch; in fact, I think one of them had slipped down and into the channel, to become my second ditched tank of the mission. As I watched through my gunner's sight - resisting the temptation to switch to the other unit, in favour of staying with the tanks supporting our more vulnerable APCs and infantry - I could see the muzzle flashes from coaxial MGs, snapping out intermittent bursts at a still-unseen enemy. My own two M60s reached the low bank and halted. No sign of the enemy, apart from more corpses. Leaving the mech infantry to catch up, I now switched to the other M60 platoon and, with the first platoon covering from the bank, pushed across the channel. Naturally, having learned my lesson, we used the ford, right next to the crossroads. Climbing out the other side, I tried not to squish under my tracks the dead Iraqis scattered around. This time there were no further drowned M60s and soon, my whole force had gone firm on the enemy side of our objective. Another piece of Iranian soil was back in the hands of its rightful owners! However, there was to be no Phase 3 assault on the smaller enemy position to the east. SABOW now brought down the 'results' curtain, telling me that I had in fact been defeated! This, despite gaining ground, losing none, and having no casualties (the waterlogged M60s weren't counted) and killed some of the enemy. I gather that Graviteam plan to adjust the scoring mechanism to give greater credit for ground gained. The fact that - unknown to me before the battle - my forces greatly outnumbered the enemy may also have been taken into account, as may events beyond the immediate scope of this little fight. OK this particular minor skirmish certainly hadn't been a glorious victory, but it was clearly a win of sorts, for the Iranians. So the mission had ended '...not with a bang, but with a whimper' and I'd have liked the chance to play on a little longer. But sometimes, missions which allow the player to pactice decision-making and the tactical handling of his troops - served up with a generous accompaniment of rather tasty suspense - can be more satisfying that Space Invaders-style shoot-'em-ups. So it was for me, with this mission. I've been playing tanksims since the late 1990s, working my way through Panzer Commander, Armored Fist 2 & 3, M1 Tank Platoon 2, Panzer Elite, Steel Beasts, Steel Fury, T-34 -vs- Tiger and even some less well-known ones like iM1A2 Abrams and Spearhead! They have all had some features I enjoyed and I still play some of them today, for the things they do well, not least that other Graviteam product, Steel Fury - Kharkov 1942 which in its modded form, is one heck of a WW2 tanksim. Despite some initial reservations over the interface and the wargame element, I have to say that the re-launched Steel Armor - Blaze of War I have found to be simply the best tanksim I have ever played, certainly from the single player standpoint. And this, from someone not especially interested in its particular star tanks or theatres. The detail in which the tanks, their systems and their crews are modelled is outstanding and SABOW's terrains, missions and campaigns provide an exceptional living and growing battleground upon which to experience them. If and when Graviteam's plans for more tanks and more content for SABOW are realised, the future for tanksimmers will be a bright one indeed!
-
'A fist into water' Approaching the western edge of the woods, I ordered my three M60s from column formation into line, keeping the spacing low in the close country. By this time, automatic weapons fire had broken out. From what I could see, most of the tracers were outgoing, .50 calibre stuff fired by our mechanised infantry at the enemy they had spotted to the west. In the screenshot below, you can see both the situational awareness 'header tape' at the top of screen, and the crew position-sensitive command icons along the bottom, above which intercom and many radio transmissions appear as text. I still sometimes turn these off for screenshots but have got quite used to leaving them on, even though I use hotkeys for some commands. They are well-designed, useful and relatively inconspicuous. All crew voices in SABOW are in Russian and while you do pick up some phrases, it's definitely useful to have the text display that comes with the lower icons. For some radio messages, you just get a sort of electronic beep which prompts you to call up the tactical map, where you can read the message in the message log. Reaching the north-south irrigation channel that skirted the woods, I halted and searched for, but could not see, the reported enemies. Firing had died away, too. Now what? Our mech infantry reported enemy troops withdrawing south, towards a crossroads which was marked by a large Iraqi flag and was thus a relatively important key point. This was now a tempting target, more so than 'Babylon 1' to the south-east. I made another Combat Appreciation and from that, a new plan. My aim would be for the mech infantry and my three-tank platoon, now in a good jump-off position on our right flank, to assault west over the irrigation channel and clear that flank. They would then go firm over there. While this was happening, my five-tank platoon would at first hold its position, covering my original killing ground, just in case the Iraqis down there showed up. If they didn't, we would move on to Phase 2. For this, my five-tank platoon would move west, to the front of the woods where my other forces had started. If the Iraqis still had not mounted their attack by this time, the five-tank paltoon would wheel left, face south, and assault the enemy 'Crossroads' position, with the irrigation ditch acting as their right-hand boundary. On the other side of the ditch, the other M60 platoon would lead the mech infantry and assault the same objective. A concentric attack would be delivered on two closely-spaced and mutually-supporting axes. Open flanks were a risk that seemed worth courting, for the prize that lay before us. I didn't take a map screenshot at this point but below is one taken before launching the mission. By now, my three-tank platoon had moved back and up, and was set up on the left-hand edge of the woods overlooking the north-south irrigation channel, just under the word 'Initial'. The mech infantry (orange markers) are still just left of our flagged position at 'Xerxes 2'. My five-tank platoon is lined up in the trees to the lower right, at our position 'Darius 1'. My objective now is the position marked 'Crossroads', whose tactical importance is shown by the larger Iraqi flag there. If as planned we seized that position, we could exploit back to the south-east and attack 'Babylon 1', a smaller flag and thus a less important objective but a very possible Phase 3. A few seconds at the map screen was all the time needed to convert this plan into orders. First, the mech infantry were ordered to attack due west. They encountered no opposition so I wasted no time pushing my three M60s over the ditch to support and join them, keen to acquire a line of sight beyond the shrubbery blocking my view due west. By this time, the weather had got rather duller but with some offensive action now developing, my morale was high and my senses, sharp. Unfortunately, high morale and sharp senses are not an antidote to deep water. The irrigation ditch had shallow banks and didn't look that deep, but it was deep enough to choke the engine of my lead M60, whose crew quite understandably decided they weren't in the navy and it was time to get back on dry land. The AI guiding the M113s and their infantry seemed to know better, for they sought out a ford. I led my two remaining M60s down to join them and was soon making my own way over, past a knocked-out BTR wheeled APC, this time without incident. Once across, I ordered the mech infantry out to the west, to take up a covering position at the end of a row of trees. Off they went. Before moving on to Phase 2, we needed to go firm on the Phase 1 objective. In particular, I didn't want to be caught in the right flank by enemy forces who might be unseen, over to the west in the territory they still held. For now, the only enemies I could see were some scattered dead infantrymen. Having ordered the M113s and our dismounted infantry out to cover us to the west, I turned my two remaining M60s south, to face our Phase 2 objective, the enemy-held Crossroads. The last live enemies the mech infantry had seen, had been troops withdrawing in that direction. Now came the scary part. I ordered my 5-tank platoon to break cover and move west. I quickly put them into column formation, anxiously scanning left as we drove over the open stretch of ground we needed to cover, to get to the woods where we would wheel left and face the foe. I should probably have taken a route further north, opening the range to the enemy position at 'Babylon 1'. But as usual I was impatient and for the second time on this mission, I took a chance. If we took any fire, I was ready to turn into it and face the music. Off we went, ready for anything but hoping for the best. ...to be continued!
-
The fourth option So far, I've continued to deploy my forces using the map, rather than the 3-d option that recently became available in the re-launched SABOW. So my first task on starting a battle is always to have a look around. The three M60s to the north were on the southern margins of the wood, just where I had placed them on the map. I backed a couple of tanks individually, further back into the woods. They had no cover from view or fire to their direct front but set back inside the woods, the three tanks had decent fields of view and were reasonably inconspicuous, able to see and kill before they were detected. After the first few rounds, it would be 'shoot and scoot'. Settling down behind the gunner's sight of one of these tanks, I scanned the open ground ahead, where the expected enemy attack could appear at any time. It was pretty barren, a good killing ground, just as I had planned. It had also proved to be a happy hunting ground for the enemy in the last mission! There were several knocked out tanks out there, including some of my M-60s from last time. Having been lost close to the front line, they had not been recovered. All part of SABOW's immersive dynamic campaign experience. Continuing to check, test and adjust my positions, I switched to the right-hand tank in the platoon, which was facing more to the west, where I had deployed our mechanised infantry to cover our right flank. From the gunner's sight, between the trees, I could see the M113 APCs, facing enemy territory out to our west. I next checked the positions of my five-tank platoon, and backed them individually behind the treeline, closer to the irrigation ditch to their rear. Then I switched back to the other tank platoon and settled down to wait. I'm not sure if it was Clausewitz or another German general who said that in war, the enemy usually has three options, of which they will generally choose the fourth. So it was to be on this occasion. The Iraqis resolutely refused to drive into my more or less well-laid trap. At least, not right away. For a time, it was quiet. Then, suddenly, there was a contact report. The mech infantry had spotted movement - but it wasn't where expected, down to the south. It was way up on our western flank! Confusingly, at that point there was an offer of a cease fire. I ignored this, and watched my right flank with some anxiety. I was naturally concerned about being attacked over there, where our mech infantry lay. But I was also reluctant to give up my area ambush plan...at least, until I really had to. Of course, if I didn't react quickly enough, I might be too late. Decisions, decisions! I decided to take a chance. I watched and waited a little longer. I think they call this 'Developing the situation', in US Army Field Manuals. It went quiet for a while, and I was beginning to think it was just a random sighting. But after a few minutes more, there was another contact report. Enemy infantry, again. And for the second time, they were reported to be coming our way. Was this a feint from the west, ahead of the attack we had expected from the south? Whatever it was, would I wait and see if our mech infantry could hold it, before committing my heavy armour? There was some covered ground on our right flank - where the enemy had been first sighted. Some of them could get quite close before I saw what was coming. I decided my five-tank platoon to the east could still 'man the fort', while I would take my three-tank platoon in a loop back through the woods and in come in behind my mech infantry. If the bad guys were mounting a serious attack from that direction, they were going to meet a little more than a few infantry weapons. I ordered column formation and led the three M60s back into the woods. ...to be continued!
-
On campaign in the classic US Main Battle Tank! Having throughly enjoyed fighting in SABOW's Iran-Iraq War campaign in a T-62, I decided it was time to swap sides and have a crack with the M60A1, fighting now for the Iranians. The latest (May 2015) patch adds some graphical and other improvements, including some new training missions. Such is SABOW's considerable and admirable depth as both tanksim and tactical wargame, I'm still a relative novice and in particular, have had little 'tread time' with the elegant US MBT. This is something which the recently-once-more-expanded set of training or single missions would have allowed me to rectify. But no, impatient as always, I decided to jump in at the deep(er) end and go straight on campaign! The SABOW Iranian M60 campaign is actually chronologically ahead of the Iraqi T-62 one I played first. Both take place during the battle near Sousangerd, where, in difficult terrain, the Iranians mounted a large-scale armoured attack designed to roll back the Iraqi offensives which had started the war. This was ultimately unsuccessful, but that is yet to come. For now, the ball is in the Iranian court and we are about to launch the big counter-offensive. The campaign opens with the player in command of strong Iranian tank forces, massed to the east of the Iraqis. And my first battle in this new campaign was to be a night action! On the map below, the green tank icons represent playable M60 platoons, the red ones other player-controllable friendly forces, and the pink ones (actually yellow, against a pale red background) denote friendly, non-player-controllable units. The blue areas and icons represent Iraqi (enemy) territory and forces. As yet, the lack of markings on the enemy side indicates that we know little or nothing of the forces arrayed against us. The blue circles I believe mark 'key points' which, depending on their relative importance, represent points (in the other, scoring sense) that will contribute to determining who is winning, depending on who is left in possession of the positions they mark. SABOW allows you some scope to move units about at this 'operational' stage but there seemed to be little need here. Besides, the SABOW wargame element was already offering me two imminent battles on the map and I decided to accept one of them now - the more westerly one, IIRC. The map screenshot below was actually taken after the battle, because I I forgot to take one beforehand; but the dispositions it shows are essentially the same, as far as I can recall. In SABOW, you have the option of disabling night battles. Although I’m not especially scared of the dark, I do like to see what I’m doing! But I had resisted the temptation to turn off night fighting. It’s an important part of the SABOW campaign experience, groping around in the dark with only first generation night fighting aids. There’s none of the modern thermal imaging (aka passive Infra Red, forming images from the heat emitted by vehicles or personnel) which makes night-fighting in sims like M1 Tank Platoon II or Steel Beasts relatively easy. In SABOW, you have instead active IR: headlights or spotlights whose light, invisible to the naked eye, can be seen by anyone – friend or enemy! – with an IR-capable sight. And whose range is much more limited than thermal imaging. Having selected a prospective battle on the operational map, I entered SABOW’s tactical phase. This zooms you into a smaller section of the map, with a correspondingly smaller sub-set of the your forces on it, at your disposal. This smaller, tactical map starts in ‘Unit deployment’ mode, presenting you with a set of icon-based commands which you can - and should - now use to adjust the starting position of the platoons to whom you can give orders – in this case, no less than four platoons of M60s and two armoured recce platoons with APCs. After a quick Combat Appreciation, I decided my aim, consistent with our Armoured Brigade's declared mission, would be to take and hold the enemy position marked as ‘Abbasides 1’. to achieve this, I would mount a concentric attack by my tank platoons, while the recce troops would watch and guard our flanks, about which I was rather nervous. 'Time spent in reconaisance is never wasted' they say; but our Brigade's mission, if not also our violated country's honour, seemed to call for early offensive action at all levels. 'One engages, then one sees', as Bonaparte reputedly said. Ever noticed that there seem to be military axioms or bons mots in support of most potential courses of action? Anyway, to business. working from the map (rather than the relatively new 3-d option) I dispersed my platoons in covered positions, out of line of sight of the enemy, distributing them over an arc from the north to the east, like a concave mirror focussed upon the objective. And with a watchful recce platoon at each tip of the arc. You can skip most or all of this next bit if you're getting bored waiting for the first rounds to be fired; but looking at the map below and working clockwise, from the top: the group of 'pointy rectangles' left of our position 'Mithradates 2' (note the green/white/red Iranian flag) is one of my two mech infantry/recce platoons, in M113 APCs. Clustered either side of 'Mithradates 2' itself are six red diamonds, representing my two right-flank M60 platoons, backed into the same woods and also facing south, ready to jump off. To their east, concealed in a patch of scrub nestling in a right-angle bend of an irrigation channel, are the five red diamonds of my strongest tank paltoon, near our position 'Xerxes 3' and also facing south. South-east of them is my fourth and final tank platoon, facing east from a strip of wood on the eastern margins of a larger forest, the green triangle amongst the red ones denoting that's the tank I will occupy when I start (which I forgot about). And finally, to their south-west, marked in orange because I have currently selected their unit icon (seen bottom centre of the screen) is my second mech infantry platoon. Ok pay attention again now, please. Here's how my plan was going to work. As is done in real life, I tend to divide these things into successive phases. In Phase 1, the recce platoons would sit tight and watch the flanks. The two tank platoons to the west and north-north-west of ‘Abbasides 1’ had further to go to that enemy position, so they alone would start moving. Phase 2 would kick in when the first two tank platoons were roughly half-way to the objective, having perhaps drawn the attention of the enemy in their direction. At this point, the other two M60 platoons to the north, closer to the objective, would begin their attack. I intended that all four tank platoons would hit the objective at roughly the same time. I had further decided to play the tactical phase mainly from the platoon to the north-north west. This was the one with five tanks, rather than the usual three and as it neared the objective I intended to slow it down. Its role would be primarily as a reserve, uncommitted and therefore ready to deal with anything unexpected; but also ready to provide a base of fire, to cover the other three platoons as they closed in on to the objective. This was the bit where things were most likely to go awry, and so it proved. In Phase 3, with ‘Abbasides 1’ occupied and the defenders destroyed - I hoped - my tanks would ‘go firm’ on the objective while the recce troops, in their thinner-skinend APCs, moved up to rejoin and provide some 'boots on the ground' to help us hold onto the key point we had just secured. For whatever reason, in all the missions I’ve so far played in the Iran-Iraq campaigns, I have yet to see or be given any air or indirect fire support, which seemed to be absent tonight, too. Artillery and aircraft icons remained resolutely greyed out, on the tactical map. I would have quite liked to put in some artillery preparation and perhaps lay some smoke to cover open flanks, but it this option was anywhere available, its presence eluded me. SABOW has a good set of tools to give units their orders, but I’m not sure to what extent you can ‘layer’ these. In M1TP2, for example, you could give each platoon quite elaborate sequences of instructions, like ‘Move fast from here to there; on arrival, face this direction, fire at will and wait for 60 seconds; then move over there, face that way and halt’. Quite capable, but co-ordination between units could be tricky, even though you usually had only between one and three platoons to worry about. Anyhow, for this SABOW mission I decided I would issue each unit's orders at the start of each Phase. 'Keep it simple, stupid' often works quite well for me, for some reason I've never really paused to ponder. As for tools for marking up the map with your planned moves and actions, I may be wrong but I don’t think SABOW allows me to draw phase lines or place other markers on the map, as if on an overlay, the way the Steel Beasts Mission Editor does for its scripted missions. However, it would have been helpful if, having clicked on a spot to designate it as the objective or a waypoint, it didn't just flash briefly; I'd have liked it if both the target and the unit's route there were marked on the map, so you could see the paths you had set for each unit. Maybe this can be displayed and I have somehow or other turned it off, I’m not sure! Something to check, ahead of next time. Ok, ok, it's getting boring again. H Hour. Tme to cross Start Lines, marked or not, and get the show on the road. I kicked off Phase 1 by giving my two left-hand tank platoons the order to attack. Everyone else would wait in cover, for now. The tanksim element now loaded up and I found myself in the command tank of the left-hand platoon, not the other, 5-tank platoon that I had decided to concentrate on. It being pitch dark, it took me a little while to notice and switch to the 5-tank platoon. See anything in the screenshot below? No? Neither could I, hardly. But there are at least two M60s in that shot, one right in the middle. They are from my left-hand platoon, seen before I switched to the 5-tank platoon, further north. That platoon now needed to advance south-south-west alongside an irrigation channel, then swing right at a right-angle corner in the channel and attack ‘Abbasides 1’, due east from there. Lots of good landmarks en route equals less scope to get lost in the dark. As I‘m not sure how to set up routes with a dog-leg or intermediate waypoint(s) and didn’t want to use the faster but less cautious, less tactical ‘Move’ order, I ordered this platoon to attack their intended ‘waypoint’ first, at the corner of the irrigation channel. When they got there, I’d re-direct them, to the east. I was keenly conscious that I might be setting myself up to be smack in the middle of some careful co-ordination of platoons right about the time the enemy might decide to make a bid for some of my attention. But I decided to crack on. To be sure, in the 3-d world I could see diddly much of the time. But various tank noises - and the fact that the little vehicle symbols in the map view started almost impreceptibly to come to life - suggested that Phase 1 had in fact begun. It was time to check out the view through my active IR systems and see (hopefully literally) how things were panning out, on the ground. ...to be continued!
- 3 replies
-
- 1
-

-
- m60a1
- steel armor blaze of war
- (and 1 more)
-
Updates to SABOW just keep coming! The second May 2015 update, available first for the GamersGate version, includes some new training & familiarisation missions. One of these features close air support, though controlled by an AI forward observer, not the player. The CAS looks to consist of a pair of MiG-27s, which make a series of noisy rocket and gun passes on a UNITA-held village, as the player's mixed T-55 & T-62 platoon attacks, in support of a motorised rifle company assault in Angola. Here, the crew of my T-62 have turned out to watch the fun, before we move off again. One of the MiGs is roaring off the target as the second makes a pass with a rotary cannon. The sound effects are most impressive, complete with the speed of sound, so you see the burst, then hear it after a suitable interval. Once you have finished watching the airstrikes, the mission itself is actually quite a tense and exciting 'rumble in the jungle', worth playing on with. We cleared the first village without undue difficulty, working closely with the motor rifle people in their BTRs and BMPs. The jungle really does limit your lines of sight so for the second phase, clearing more enemy positions to the south, I went wide to the left, where there was an area of more open country. It turned out we weren't the only ones with air support. A trio of South African Alouette armed helos showed up and started strafing our forward troops! I tried hosing them with the co-ax, whcih was fun but ineffective. They came around for a second pass and I decided to try my luck with a sabot round, relying on its very high velocity and flat trajectory. Despite being a crossing target, I actually managed to wing the chopper, who flew off trailing smoke. Others were firing at him too but I'm sure I hit him. In the screenshot below, where his smoke trail starts you can see the little puff of smoke in the sky, marking my hit. Again working with the motor rifle company, we captured the second village. The battle ended after I took my platoon around its right-hand perimeter and had a great little shootout with dismounted enemy infantry, which was rather tense in the close country. Graviteam's plans for SABOW include additional content in the form of DLCs, which will be very welcome. As a tanksim fan since the days of Panzer Commander and Armored Fist 2, I'm glad that SABOW's revival spurred me into getting acquainted with Graviteam's most impressive and immersive offering. And they're not done yet!
- 3 replies
-
- 1
-
-
- m60a1
- steel armor blaze of war
- (and 1 more)
-
From a view to a kill... I really should have turned my IR searchlight back on. If you have been spoiled by thermal imaging in Steel Beasts or M1TP2, you tend to forget about such things...or I do, at any rate. In the end, it was almost certainly the spotlight of one of my other tanks - possibly, from the two platoons converging on the objective from the north - which finally revealed the enemy to me. There they were! The bright green outlines of two tanks, side on. I hesitated for a second, conscious that we had friendly armour rolling into the area ahead of me. They were silent and still, but facing north, as if to confront my tanks coming down from that direction. And even in the artificial light, I could see they were clearly not M60s, but Soviet tanks of some description. I had a sabot round loaded and at this range I could hardly miss, which I didn’t. Nothing much seemed to happen to my target, but the other tank backed out of sight behind him and I quickly lost sight of the beggar in the shrubbery. In frustration, I hosed the objective with the co-ax, succeeding only in wasting more ammunition. I seemed to be the only one shooting, though I had given ‘fire at will’ orders..I think. Perhaps the scrub was blocking the view for everyone else. I rolled forward again a short distance. To my left, were two M60s. To my front, now just scrub, in near-total darkness... ...but not in total darkness. My view latched onto another group of those darned lights or reflections, amidst the scrub. I was so fixated on them, that at first, I didn't see it. But there it was, to my direct front, the dark, angular shape of a BTR wheeled APC, just sitting there facing me. A second one sat behind and to one side, guns silent and no sign of the occupants. I blasted both, thinking rather desperately, does nobody else see these guys, why am I the only one shooting? As with the switched-off IR searchlight, I might have been responsible - in one of the earlier map screenshots you can see 'Cease fire!' in the message log top right. Maybe I had inadvertently given that order. Maybe it signified the enemy, for some reason, offering an early cease fire (which facility exists, for both sides, in SABOW). I'll never know because I didn't expand the message at the time or later. Anyway, there I was, and there were the BTRs, so I did the honours. The second BTR soon shared the fate of the first one. As did a third, caught side-on as he tried to escape. Too late, chum! My crew seemed to relish the sudden excitement, and so did I, although I was conscious that I was rather leaving everybody else to their own devices, for now. Not a very good performance from the chap who's supposed to be runing the show. I resumed my platoon's advance and we came up to the area where lay the three knocked-out BTRs. Until I was sure that we had hit a quiet spell, I would continue to concentrate on running this platoon, I decided. And let the others shift for themselves, for the time being. When I could, I would step back, find out precisely what the feck was going on, and regain control. But not just yet. Helpfully, somebody in my tank - it might even have been me - had turned the IR searchlight back on and it promptly illuminated another enemy tank. I took no chances and shot him. He didn't burn but he didn't react either so I gave him another round and left it at that. Traversing right we illuminated another potential target, but this time I hesitated. There seemed to be two blurred tank shapes mixed up close together; but there was something familiar about the shape of what looked like an open hatch atop the right-hand vehicle. By the rapid recognition of such minor details, tragedies are sometimes averted. It was an M60 all right, although possibly abandoned. From one of the two platoons from the north, most likely, who now seemed to have arrived on the objective. Some ghostly figures flitted between bushes, likely escaping crews. They were soon out of sight and I chose not to engage them. As planned, I had played the tanksimming element of the battle from my 5-tank platoon, hanging back from the objective and shooting the others onto it. Despite a certain amount of blundering about in the dark, Phases 1 and 2 had ended up going broadly as intended. Phase 3 would involve a re-organisation phase. I would now regain control of my tank platoons, shaking them out into a defensive arc facing west, south and east, while my recce troops moved out of their covered flanking positions and joined us in securing our newly-won ground. It was not to be. I’m not yet quite clear what criteria SABOW applies when deciding to call time, but one or more were now met, for the curtain came down, in the form of the mission results screen. Not for the first time, this was a bit of a puzzler, telling us we had suffered a defeat, with some 'achievements' (seen at the bottom of the lower screen) as if in consolation. Unknown to us when we started, the enemy forces at ‘Annabasid 1’ had been weak, about a platoon of tanks and another of armoured infantry. Most of these, we had destroyed or driven off, including some tanks knocked out. We had lost one of our own. Damage, casualties and ground gained were all strongly in our favour, yet somehow we had lost. This wasn’t a stellar performance, not least as we had outnumbered the enemy by more than the 3:1 recommended minimum for an attack. But it was by no standards a defeat. Others have reported similar experiences, so it’s not just me, and it’s not always a matter of not appreciating some of the finer points about just how SABOW (or the related GT:OS wargame series) decides who’s won. Nor is a matter of 'sour grapes' - I was equally miffed at being awarded an un-merited victory in an earlier mission. Unfortunately by moving on, I soon over-wrote the log file that Graviteam needed to analyse this case. In the meantime I’ll make my own judgements, assisted by the statistics presented. My judgment here was that we won, clearing about as much territory of the enemy as the map allowed us and with low losses, inflicting significantly more damage on the (admittedly not very well prepared) enemy. One thing you really don’t want to miss after any Graviteam battle is the ‘Statistics’ option, which lets you ‘free cam’ around the virtual battlefield and inspect the damage wrought. It’s similar to, but somewhat different from, the system I’m used to from WW2 tank sim Steel Fury. For this, it seems that SABOW turns night into day when necessary – there is a game option to increase the light level for night battles, which perhaps does the same thing. Using this, I could see the large platoon I’d taken personal charge of, lined up where they’d been when the show stopped, facing the enemy position. Ahead, the knocked-out M60 I had spotted in the dark looked to have been lost in a very up-close-and-personal fight with an Iraqi T-55, resulting in the loss of both tanks - seen in the screenshot at the start of this mission report. At least, holding the battlefield, we should be able to recover both vehicles and hopefully repair my casualty (I believe SABOW will return repaired tanks to the user, if they are in territory they hold). Of the four enemy tanks, two were kills and two were damaged (which doesn't seem to match the stats in the results tables). One of the T-55s had managed to escape and was withdrawing to the south with his gun laid over his rear deck, in the approved fashion for a retreating tank not wanting to end up as a friendly fire victim. It’s neat that SABOW’s AI simulates morale in this fashion, with troops beating a retreat rather than just fighting to the death every time. I should perhaps have pushed my left-hand platoon further to the south, to act as a cut-off for any such escapes. But I wanted to keep my force compact and concentrated in the dark, unsure about what we might be running into out there. A platoon thrown further out down that way might have got into serious trouble, before anyone could have come to its aid. I was in a hurry but a bit more time spent checking out the battlefield would have made it a bit clearer who had ended up where and who had shot whom. This might have dispelled or explained my impression that I'd had to to a disproptionate amount of the shooting, myself. Perhaps it was my fault; in my anxiety to identify those strange lights, I had perhaps got ahead of the others, instead of hanging back as planned. Overall this was an interesting and mostly satisfying battle. The poor visibility, the consequent uncertainty and tension I think conveyed very well the experience of trying to run a small battle in darkness with basic night vision kit. Given I’m still learning the ropes handling troops SABOW-style, I’m quite glad that we didn’t come up against stronger opposition. Hopefully I’ll be better at it, by the time I do! For my part, I much prefer it not to be faced with Space Invaders shoot-em-ups too often, preferring a more cerebral, sneaky-beaky kind of challenge which nevertheless reflects the mess and confusion of the battlefield. Better still, if I can bring most of my boys home. Which it seems is a good thing to do in a SABOW campaign, because the results will carry forward into your subsequent operations, even to the extent of knocked-out and un-recovered AFVs hulks rusting where they were left, to be encountered on your next mission. And in conclusion... Though I’ve been playing SABOW campaign missions on and off over maybe a couple of weeks now, there’s still a lot to learn and explore. Even so it’s already been a thoroughly interesting and immersive experience. I do have some quibbles. I accept that dynamic campaign missions are liable to lack the sort of detailed briefings you get in scripted missions (‘orders’ is the correct term, ‘briefings’ are for flyboys and newshounds). The opening campaign ‘briefing’ gives you a fairly generic order like ‘Make a flank attack on the advancing enemy’, after which your boss goes rather quiet, for your superior officer on the battlefield. You might expect that you would get fresh orders at the start of each turn/after each tactical battle, but no, you just seem to get a sort of situation update, like ‘The Xth Armoured Brigade is advancing from the south and east’. Fine, but it would be helpful – as well as re-inforcing the sense that you are part of a realistic chain of command – if this was followed by something as simple as ‘You will continue to attack the enemy to your west, towards [feature name]’. Even if this was repeated at the start of every one of the battle’s 8 or so turns, with zero variation, it would be much better than nothing. Especially if you are coming back after a break in play. The others quibbles are that – as happened in this mission – the 'headline’ result displayed at the end of a tactical battle sometimes seems completely at odds with the actual outcome and the statistics presented. And that this ‘results curtain’ is sometimes brought down with a bump as it were, at what can feel like a rather arbitrary and/or inconvenient point, with no particular warning. But these are quibbles. Overall, in SABOW you have a single player campaign system that is possibly the best any tank sim has ever had, certainly one of the very best. You don’t get the neat little ‘MPS News’ clips that book-ended the M1TP2 campaigns or the detailed ‘briefings’/orders of Panzer Elite. But you do get a dynamic campaign, with gains and losses on both sides carried forward, to the extent that the wrecks of un-recovered AFVs will be rusting where they lay, in your next battle. And replay variability is relatively high. The wargame element, far from being a distraction, adds a whole new layer of tactical opportunities you just don’t get in your average tanksim. Not interested? A few clicks will give other platoons basic attack or defend orders and you can then just play your own platoon, like any other tanksim. Though I haven’t seen much of it yet in Iran, there is air as well as indirect fire support, and repair and replenishment elements. The multi-layered and sophisticated interface is initially daunting but once you have cracked the basics it is actually rather easy to use, after which you can gradually pick up the many other little things it lets you do. The AI is generally competent and believable, with morale factored in - scared or beaten units are liable to rout (‘panic’, in SABOW terms). Weather can change during a mission, or night turn to day, with associated changes in visibility. Tank systems and crew drills are nicely implemented. For example, even though it is AI-only, the Chieftain will use its distinctive ranging machine gun – when you see that chain of tracers arc towards your T-62, you know what is coming next! Night vision aids and their limitations are well replicated, the M60 has a functional stereoscopic rangefinder and the T-62 its distinctive spent case ejection system. It's quite fun to trundle about in the new M60 driving mission, checking out both closed down and opened up driving positions and watching the animated tiller move as you practice steering. The re-released SABOW and the subsequent series of updates have added graphical and functional improvements, not least several new single and training missions, on top of the mission generator and four campaigns we already had. Now that it’s using the GT:OS engine, we can hope SABOW will be expanded in similar vein, with new downloadable content (DLC) – a pack to make some of the current AI vehicles playable would seem a good place to start and a 1973 Arab-Israeli War expansion a logical move, with many of the necessary vehicles already available. With maps and other content likely interchangeable with or adaptable from GT:OS, World War 2 may also be a possibility. The renewed availability of map, object and mission editors may be a shot in the arm for would-be SABOW modders. SABOW may have been something of a diamond in the rough on first release. But with the new version and its several updates since, Graviteam have polished up a real gem, the sort of simulation package we are often told is a thing of the past. Not so for SABOW redux. If there’s such a thing as an instant classic, in my book, this is surely one.
-
All together now... Moving in the lead tank of the 5-tank platoon was rather hairy. The darkness was such that the external view I like to use pre-combat didn’t do quite as much as it usually did, in daylight, for my situational awareness. The view through the gunner’s sight was better but had a much narrower field of view; though with the IR searchlight on, at least gave me some idea of what was around me, out to about 800 metres. Seen below, with maximum zoom, is the M60 to my left, with a third tank just beyond him. To my right, are the other two tanks in my large platoon. I should have tightened formation or switched to echelon left but it was so dark that i didn’t realise that the two tanks to my right were rather too close to the irrigation channel, which, in trying to maintain spacing, one of them ended up crossing. Or trying to cross! The first I knew something was wrong was a ‘Vehicle lost! message. Looking around I realised what the problem was, but was relieved to see through the darkness the vague but distinctive shape of an M60 struggling back up the bank on the other side. On we trundled, through the night, over the mostly barren Iranian landscape. SABOW's AI drivers are not mere automated, unthinking executors of the player’s every keyboard command. You can order them to speed up as much as you like, but conditions might limit their willingness or ability to do so. Like driving in the dark. And even with ‘Attack’ orders, they will sometimes turn on their lights. This can be somewhat disconcerting, when your are expecting to be shot at any moment by a hidden enemy. I suppose you can’t blame them, if they are exposed to the more immediate danger of falling into some b***dy great ditch in the dark. If you want to go faster or keep the lights off, you can always drop in and drive yourself. The AI drivers will generally ‘Put that light out!’ if you issue the ‘Stay concealed’ command...but this also makes them extinguish the IR lights. So it gets really dark, even throught the sights. The view through the night sights is now relying on ambient light, with no IR illumination. Anyway, on we crept, the drivers cautiously crawling ahead, sometimes making short halts, me intervening every now and then to curtail a particularly flagrant use of headlights, then relaxing things again to get the IR ones back on. Typical night exercise stuff, just maintaining control can be hard enough, even without an enemy lending a hand. Checking back with the map, I watched the symbols representing our two advancing platoons edge towards the turn in the irrigation channel where our paths would cross. Back at the gunner’s sight, I finally saw the other platoon coming in from slightly left. As expected, they would reach the corner of the ditch just ahead of us, although we were rather in danger of bunching up there in a sort of tank version of Picadilly Circus...or whatever the equivalent is, in Tehran. At any rate, the objective now lay just a few hundred metres beyond that point. I decided it was high time for the other two M60 platoons, still concealed in a wood to the north of ‘Abbasides 1’, to begin converging on the objective. A couple of clicks on the tactical map set their attack in motion. With much less ground to cover but a channel to cross, I hoped they would reach the objective about the same time as the platoon just ahead of me. For now, we were still doing an advance to contact, towards ‘Abbasides 1’. If the shooting started, I would give new orders as the emerging tactical situation seemed to dictate. Reaching the corner in the irrigation channel, I turned my 5-tank platoon right and we ran in towards the objective. The other left-flank platoon was only just left and ahead of us. A quick glance at the map showed the two right-flank platoons, converging from the north. Within minutes, they would be successfully starting their crossing the channel to their front. Clever AI, no need to micro-mamage those guys, thank goodness. For whatever was going to happen, must surely happen soon. I scanned ahead towards ‘Abbasides 1’ through my M60’s gunner’s sight, with the IR searchlight off. The objective was now maybe 500 metres away, partly concealed by some fairly extensive scrub or bushes. Amongst this shrubbery was an intermittent string of indistinctly-shaped but much brighter objects, some brighter than others. The M60 model we're using doesn’t have a stabilised armament or gunsight so I halted to get a better look at them, before something really bad happened. They reminded me a little of distant lights seen in an image intensifier. Or perhaps more accurately, apart from the greenish hue, distant objects, more reflective than their neighbours, catching the light of a torch as I swept it over them. What were they? Rocks? Particularly shiny shrubs? Reflective parts of enemy equipment? Lights on invisible vehicles? Or perhaps the heads and shoulders of enemy soldiers, staring at us from trenches but half-hidden by the intervening foliage? I couldn’t make them out at all. Nervously, I hosed the nearest of them with the co-ax, which produced no reaction. So I rolled ahead a little further, to open up some new lines of sight into the underbrush, feeling increasingly vulnerable. I halted and scanned again. One of the leading platoon's M60s was slowly rolling forward, just ahead and left. His red tail lights came on, as he halted. Something was about to happen, I was sure of it! ...to be continued!
- 3 replies
-
- 1
-
-
- m60a1
- steel armor blaze of war
- (and 1 more)
-
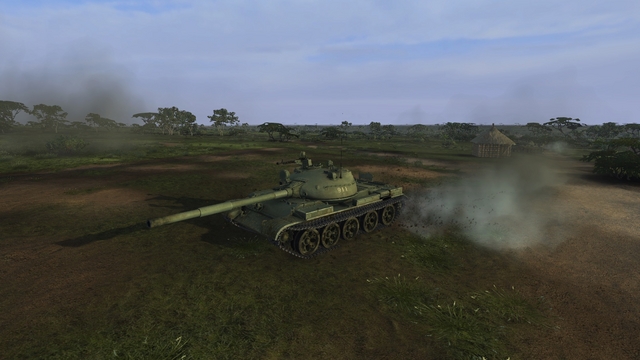
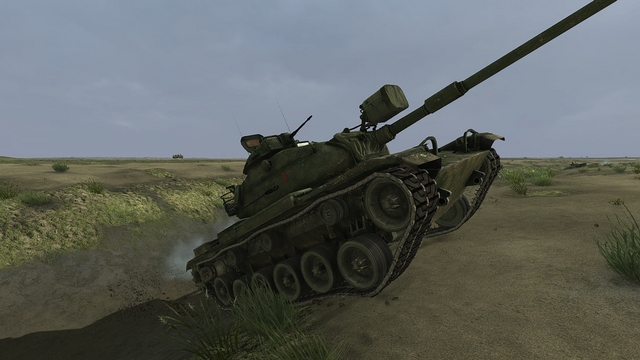
From the album Steel armor - Blaze of War
-

From the album Steel armor - Blaze of War
-
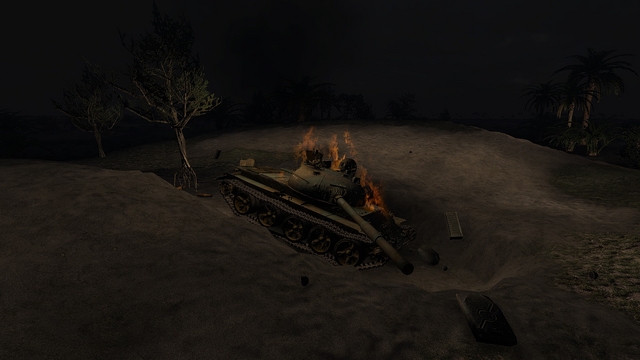
Steel Armor - Blaze of War - a knocked-out T-62 burns during a night mission
33LIMA posted a gallery image in Member's Albums
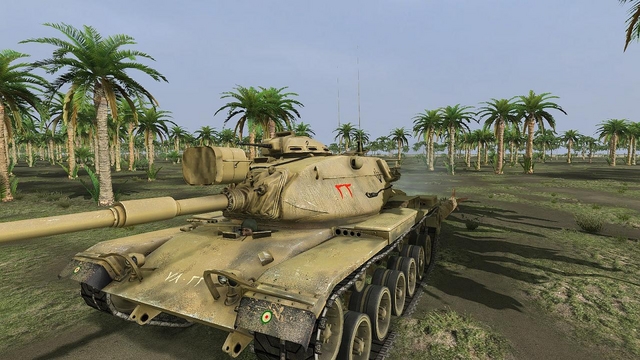
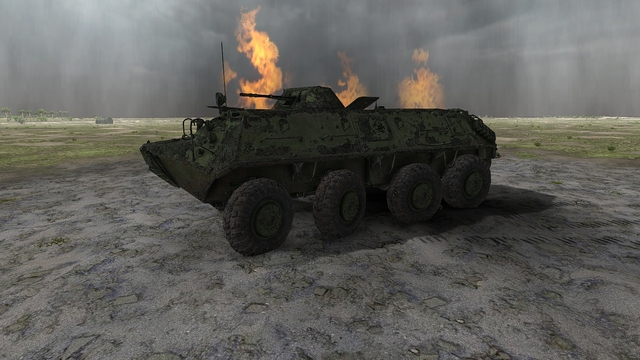
From the album Steel armor - Blaze of War
-

From the album Steel armor - Blaze of War
-
Steel Armor - Blaze of War - main menu screen as of latest, May 2015 update
33LIMA posted a gallery image in Member's Albums

From the album Steel armor - Blaze of War
-
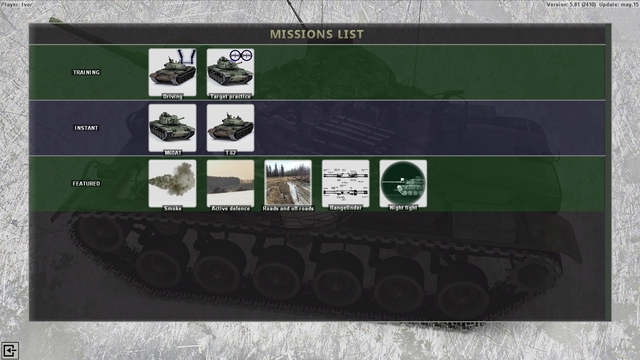
Steel Armor - Blaze of War - latest new missions, as at May 2015
33LIMA posted a gallery image in Member's Albums
From the album Steel armor - Blaze of War
-
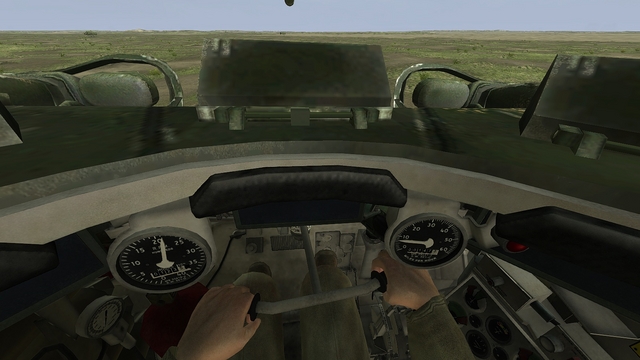
Steel Armor - Blaze of War - new M60 driver training mission
33LIMA posted a gallery image in Member's Albums

From the album Steel armor - Blaze of War
-
Steel Armor - Blaze of War - new M60 driver training mission
33LIMA posted a gallery image in Member's Albums
From the album Steel armor - Blaze of War
-
Steel Armor - Blaze of War - new M60 driver training mission
33LIMA posted a gallery image in Member's Albums
From the album Steel armor - Blaze of War
-
Back for more! To digress briefly, you may have noticed that the Japanese bombers we are attacking look suspiciously like repainted Soviet Tupolevs, which is in fact what they are. There is a Ki-21 'Sally' bomber in modded IL-2 these days, but though updated for Il-2 version 4.12, our targets on this mission still date from an earlier time. The ersatz Sallys are nicely turned out, though, even if they don't look much like the real ones, seen in the second pic below. Manwhile, back at the action...I had just sent one Japanese bomber down in flames, having left another one with an engine smoking. I'd been conserving my ammunition and reckoned I had enough for at least one more good pass. I was right. By the time I had completed another 360 degree right-hand turn, the skies were rather more empty. Ahead, I could see the remains of the enemy force under attack from my squadron mates, whose radio chatter filed the air. The party was still in full swing, so I hurried to rejoin it. One of the enemy bombers had spun down on fire before I got there so I charged at the right-hand plane in a pair ahead, which was all that I could now see of the second flight that I'd attacked. As before I closed in at full throttle, swerving as I came in. As the range wound down I let her have it...and was quite surprised when the enemy bomber suddenly nosed up, prompting me to pull up too, to avoid a collision. Almost immediately, the crew started bailing out! I came around again and by the time I was back in position, there seemed precious little left of the enemy formation. This looked like a real Red Letter day for the AVG! I picked out a bomber flying on his own and closed in fast. Even as I did so, another enemy spun down over to the right, minus part of a wing. I soon gained ground and had a rattle at my intended victim. But my ammo ran out before I could do much more than pepper his tail feathers. He lost a bit of height and I watched him, hoping he would go down. No such luck. In fact he continued on nearly up to our airfield - which was likely his target - before turning for home, shrugging off some AA fire. If he bombed, I didn't see what, if anything, he hit. At this point I heard my flight leader calling it quits. I flew off in search of them for a while but they were heading west, for some reason, away from base. So I decided to go home on my own. En route, I dropped down to do a bit of aerial sight-seeing, admiring the architecture of the walled town from which our Kunming base presumably took its name. It wasn't long before I was joining the circuit over the airfield. Getting back home early has its advantages; there was no hesitation from the tower, in clearing me to land. That darn hump in the runway threw me back into the air for a more bouncy landing than usual but I managed to catch her and get down without breaking anything important. Beyond the end of the runway, something was burning, but the base appeared undamaged and everybody seemed to be going about their business as if nothing in particular had happened. The results screen confirmed my three kills, so my first AVG campaign had got off to a good start. Maybe all that training had been a worthwhile investment, after all! So far, so good. The aircraft, the scenery and the missions in this campaign are all of the very highest standard, so I have no hesitation in recommending it to anyone else, whether you are a flying tiger or a mere snake in the grass!
- 11 replies
-
- 2
-
-
- flying tigers
- il-2
- (and 2 more)