


33LIMA
-
Content count
3,749 -
Joined
-
Last visited
-
Days Won
7
Everything posted by 33LIMA
-

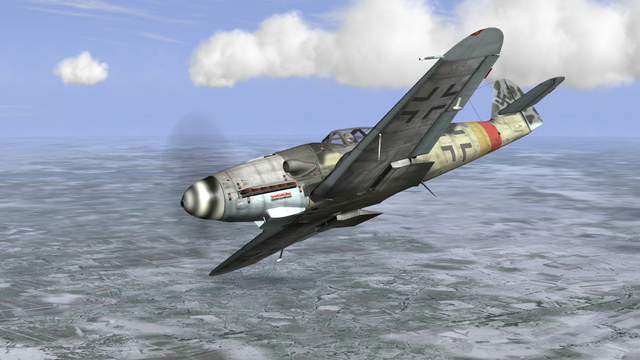
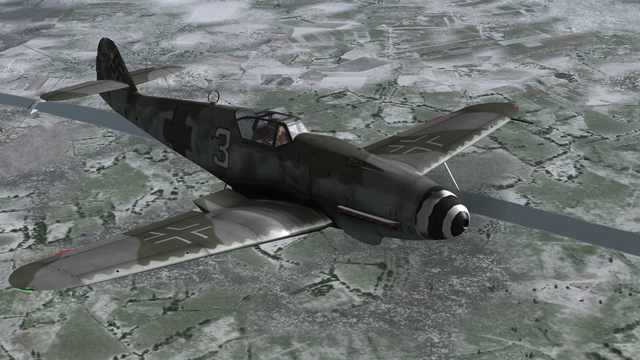
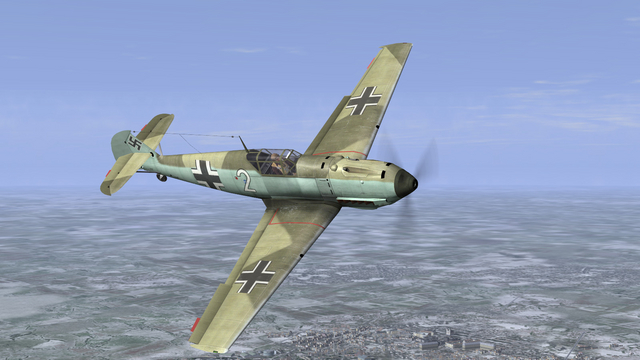
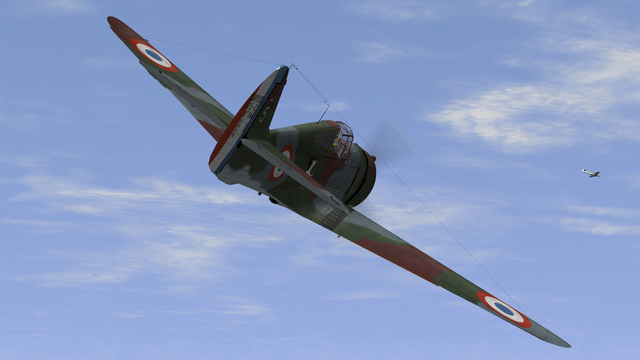
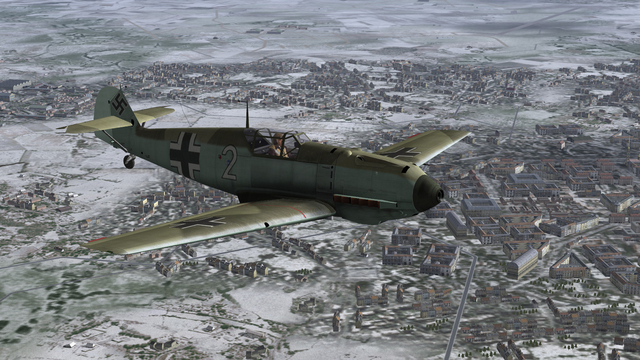
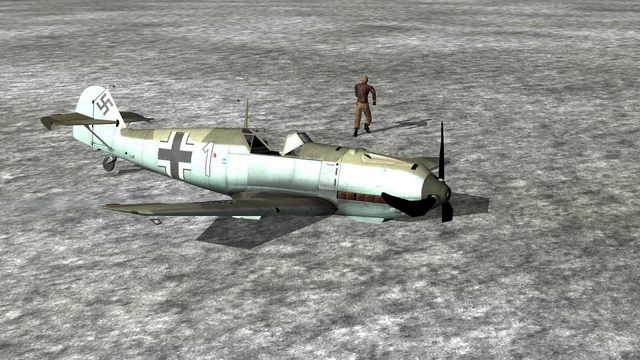
Bf 109K, Il-2 1946 + CUP, CUP Western Front Winter terrain
33LIMA posted a gallery image in Member's Albums
From the album Combat Sims
-
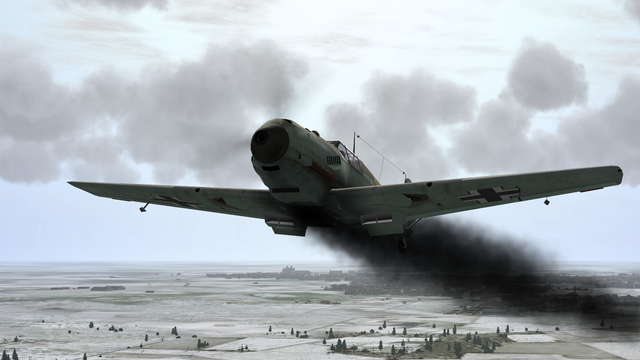
Bf 109K, Il-2 1946 + CUP, CUP Western Front Winter terrain
33LIMA posted a gallery image in Member's Albums
From the album Combat Sims
-
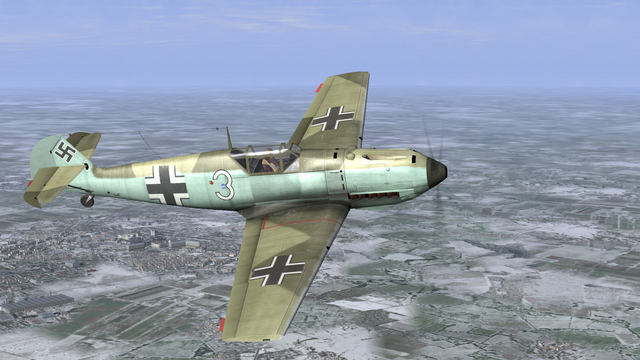
Bf 109K, Il-2 1946 + CUP, CUP Western Front Winter terrain
33LIMA posted a gallery image in Member's Albums
From the album Combat Sims
-
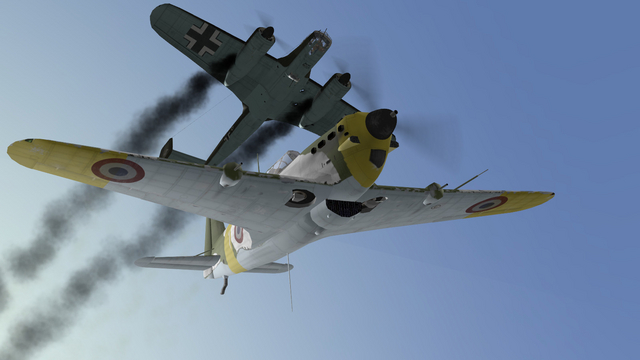
Dornier Do 217M, Il-2 1946 + CUP, CUP Western Front Winter terrain
33LIMA posted a gallery image in Member's Albums

From the album Combat Sims
-
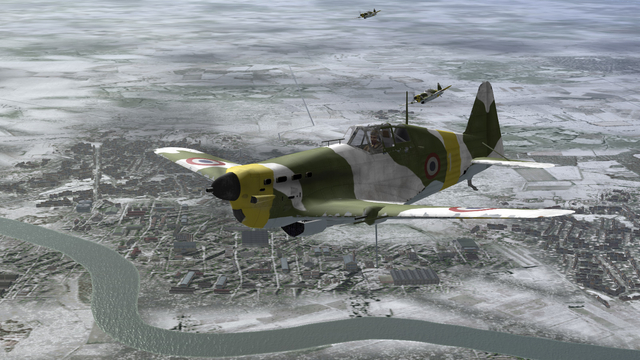
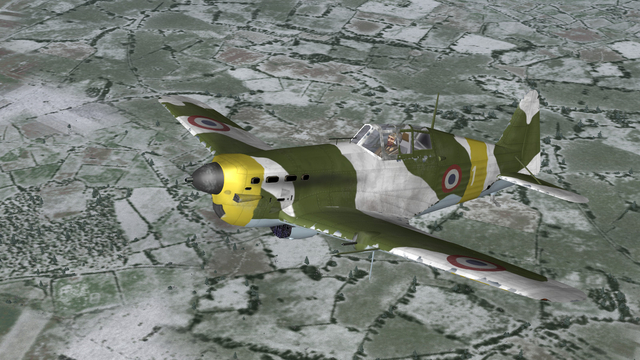
MS 406, Il-2 1946 + CUP, CUP Western Front Winter terrain
33LIMA posted a gallery image in Member's Albums
From the album Combat Sims
-
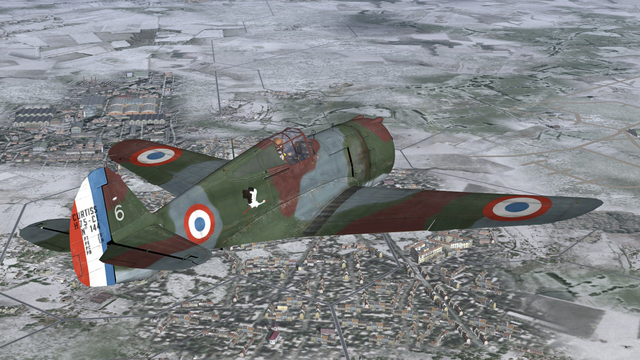
curtis Hawk 75, Il-2 1946 + CUP, CUP Western Front Winter terrain
33LIMA posted a gallery image in Member's Albums
From the album Combat Sims
-
Bf 109E-1, Il-2 1946 + CUP, CUP Western Front Winter terrain
33LIMA posted a gallery image in Member's Albums
From the album Combat Sims
-
Bf 109E-1, Il-2 1946 + CUP, CUP Western Front Winter terrain
33LIMA posted a gallery image in Member's Albums
From the album Combat Sims
-
Bf 109E-1, Il-2 1946 + CUP, CUP Western Front Winter terrain
33LIMA posted a gallery image in Member's Albums
From the album Combat Sims
-
Curtis Hawk 75, Il-2 1946 + CUP, CUP Western Front Winter terrain
33LIMA posted a gallery image in Member's Albums
From the album Combat Sims
-
Bf 109E-1, Il-2 1946 + CUP, CUP Western Front Winter terrain
33LIMA posted a gallery image in Member's Albums
From the album Combat Sims
-
MS 406 & Do 17Z, Il-2 1946 + CUP, CUP Western Front Winter terrain
33LIMA posted a gallery image in Member's Albums
From the album Combat Sims
-
MS 406, Il-2 1946 + CUP, CUP Western Front Winter terrain
33LIMA posted a gallery image in Member's Albums
From the album Combat Sims
-
Bf 109E-1, Il-2 1946 + CUP, CUP Western Front Winter terrain
33LIMA posted a gallery image in Member's Albums
From the album Combat Sims
-
33 Lima, roger. That pretty closely follows my route into SABOW. The Battle Editor with the enemy set to be targets is a great start, as now is the M-60 firing range option. Going straight into campaigns or the 'two-way range' in the Battle Editor until you have learned a certain amount about both the handling of your chosen tank and the use of the SABOW interface, is indeed a recipe for getting zapped, probably more so than your average tanksim. Reminds me of starting with M1 Tank Platoon II; even though both tank and interface are simpler than SABOW, there was still a fair bit to master, including managing other platoons (even if that only consisted of keeping them hidden or moving, to avoid near instant deluges of deadly Soviet artillery!) As far as pics are concerned, the last mission, reported on above, doesn't really do SABOW's visuals justice, thanks mostly to the dire weather, but while I haven't tried Afghan yet, Angola is very lush and gorgeous and likely shows SABOW at its best. Out!
-
At this point I called up the tactical map, which identified the enemy as a couple of tanks in the vicinity of the crossroads, which was our Phase 2 objective. In retrospect, my flanking move should have gone wider. I had wanted to attack the crossroads from the south, with at least two platoons in line ('two up' company formation). Instead, my more shallow swing had brought my right-hand platoon into early, unsupported contact with the enemy at the objective. The SABOW maps aren't huge and you do need to maintain a sense of scale and distance, to make the best use of the elbow room available, in planning such moves. To be fair to my original plan, my right-hand platoon had been ordered to move south west on my flank, to the right of the ford I'd intended to use; but it had in fact for some reason drifted well nort..and run into the enemy. My failing might therefore have been a lack of control, in not detecting and correcting this drift to the right. Faced with this unwelcome development, I made a quick Combat Appreciation: Aim - to destroy the enemy tanks to the north west Enemy - so far, just those two tanks, seemingly fully occupied with my right-hand platoon. Ground - LEFT, very open, plus movement's blocked by the irrigation channel across my front; CENTRE, a ford allows restricted movement ahead, but ground also very open and fully exposed to the fire of those two Iranian tanks; RIGHT, good cover from those trees, thickening into a small wood, though movement beyond that is limited by the other channel to our north. Plan - With my platoon, I would back up through the trees, swing slightly left and move up northwards, keeping the treeline between me and the enemy. Then I would turn right and face them. Even if I could not flank the bad guys to the north, I would at least concentrate fires by adding my own platoon's fire to that of the engaged one. So that's what I did. At one point as we moved, I got a target indication for some troops (who might have been 'unhorsed' enemy tankies) but saw nothing. However, the report of ground troops made me advance along the treeline more cautiously, scanning for any infantry ambush. suddenly nearing the point level with the rear of my engaged platoon, I came under fire! Single tracers, from some sort of large-calibre weapon it seemed, zipped out of the treeline to my half left and crashed into my tank, generating angry and venomous comments from crew members and causing a strange sound which seemed to confirm something was going wrong with my tank. Unable to see anything worthy of even speculative return fire, I speeded up, hoping that the trees would break the enemy line of sight, just as they were limiting my own. That seemed to work, for I stopped taking hits, from whatever it was. Now what? I didn't have long to wait. As I pondered my next move and before I could get a damage report from my crew with the appropriate icon click, a Chieftain rattled out of the trees, just ahead and slightly left! His gun was tracking my platoon-mate, who had drifted over to my right. I fired at once, then froze as the Chieftain halted and his gun came around in my direction, while my own was locked in the reloading sequence. Time seemed to stand still. Before he could get off a round, my platoon-mate whacked one him; at this range, it would have been hard to miss. I moved off again while my reloaded completed, then stopped and fired again. To my very great relief, the Chieftain's crew started to bail out! By this point, it had lost both tracks and was obviously an 'M' (mobility) kill, at the very least. I recovered from my moment of mixed elation and relief and settled down to hosing the enemy crew with my co-axial MG. As I did so, the Chieftain's turret started to swing again. Somebody in the turret still in the fight? I didn't wait to find out but sent another sabot round into him. That did the trick. The Chieftain was finally well and truly out of it, with the last crew members bailing out. It didn't burn - wet stowage for those 120mm bagged charges probably helps - but its inert hulk lay there before us, motionless. Both the Chieftain's tracks had been severed and on the near side, the 'bazooka plates' had been torn off. Job done! I rolled on and halted nearby. Firing had stopped, and there was no sign of the other enemy tank. Perhaps my right-hand platoon had got him? If so ,they had paid a high price - all three T-62s had been knocked out, confirmed by a glance at the tactical map. It was only at this stage that I realised my tank cvommander had been badly injured, evidently when my tank first came under fire seconds before. Switching to his view for a scan through his periscopic sight, this is what I saw instead: Ignoring one of the enemy crew crawling away to the north, I decided that my heavy losses - five tanks out of seven clobbered, and my current tank's own commander hurt - made it pointless to continue with my little, unsupported ad hoc offensive. After a last look around, I turned my tank about and headed back whence I had come. No point in trying to hold the ground we'd gained with just two tanks, without infantry support. I laid my gun over my rear deck in the approved fashion for a withdrawing tank and rattled off back to the east. Below is the tactical map at the close of the fighting. Just below the green-white-red Iranian flag at the crossroads, lined up between the irrigation channel and the woods, are the three grey diamonds indicating my knocked-out right hand platoon. Just above the middle block of icons is the left-flank T-62 knocked out early on, with its bailed out crew (yellow pips). It was only at this point I noticed I had somehow left a tank behind, in our original defensive positions, visible just left of the Iraqi flag, centre right. Top right of the map, you can see the event log, which includes a report of prisoners being taken. Of that I saw nothing, perhaps because the victors didn't live to tell the story. Back I went, with the other surviving T-62, past the still-burning wreck of our first casualty. I neglected to order the bailed-out crew also to return; hopefully they used their initiative! Nor did I explore the possibility of using SABOW's repair facilities, to recover any of my casualties. And all the while, the rain fell in sheets. At this point I called it quits, without using the SABOW 'statistics' phase to review the battlefield in 3-D. I knew enough to know that my unauthorised foray had turned out to be every bit the bad idea I probably knew it likely would, at the outset. I could only hope that SABOW's reinforcements facility would enable me to recover some of our lost strength, before the next operation. The strike marks on the front of my own tank showed how narrowly we had escaped, ourselves. I've still a lot to learn with SABOW but I'm getting there, largely thanks to the impetus and improvements afforded by the new release. Next time, I will try to apply a few of the lessons I've learned on this mission, like thinking not twice but three times at least, before venturing out of a good defensive position. And coming from more conventional tanksims, where all you need to manage is your own platoon, it's easy to forget that even after the mission begins, you have - and sometimes do need to exercise - control over what your other platoons are doing, too!
-
Off we trundled, our T-62s roughly in line abreast, which is probably SABOW's default formation for units given 'Attack' orders. Although I could have given 'move' orders for the first phase, I have found troops act less cautiously with these (for example, turning on lights, if it's dark) so even though were were just moving up to our jump-off point for the real attack, those are the orders I used. And it seemed to be working out, as we trundled across the flat open terrain. I usually turn off HUD-type displays as far as possible, convenient though they are, but as I'm new to SABOW I need all the help I can get...besides, the SABOW on-screen aids I'm finding relatively unobtrusive, as well as useful. I am quite glad that Graviteam's re-release has killed off the unit markers option previously available, which displayed a marker above every unit. This looked really awful in the 3-d world, like everybody was running around with huge samurai banners strapped to their backs. anyway, the open ground to our front was...well, open, very open, up to the line of vegetation wich marked the irrigation channel whose crossing was our Phase 1 objective. My right flank was the one I was worried about, as there lay enemy territory and, as we advanced, dangerous tree cover which could conceal any number of nasty things. I should perhaps have left my right-hand platoon behind, to cover our move across the open ground; but I reckoned they needed to be up with us, to have any real chance of supporting the move. Looking over at them, however, I did decide that they really needed to be in right echelon formation, which would give them better arcs of view and fire to that flank. A few mouse-clicks on icons gave them the order to change formation. This seemed to produce a certain amount of disorganisation, initially. The platoon's lead tank stopped, while the other two began to manoeuvre. At that point, with perfect timing, the enemy intervened, from exactly where I was expecting them - from the cover on my right flank. A firefight broke out, with my righ-hand platoon exchanging shots with an unseen enemy. By this time I was back manning the command tank of my lead, centre platoon and instead of jumping back to the engaged unit - I like to stick as far as possible with a single platoon leader role - I jumped to the gunsight and started scanning to the right. My AI tank commander gave me a target indication for an enemy tank - they use hundreds of mils, not the clock code, but the turret position indicator icon gives you a good read-out on this scale - and I soon spotted the source of the trouble. It was an Iranian Chieftain tank, rumbling from left to right amongst some trees, maybe 750 metres away. I had a sabot round 'up the spout' and let him have that. I got a hit and fired another, aiming lower, but he rolled on a little way, taking him out of sight behind some vegetation. When the reloading cycle ended - the T-62 has a rather low rate of fire and reloading locks out elevation and traverse, so I was pretty impatient - I traversed slightly right, laying my gun onto the point he would come out, on the other side. But he didn't appear. I waited in case he was making a short halt, then moved off ahead, to bring him back into view. At this point I saw him and fired again. Tracers flew as other T-62's did likewise. As my gun elavated for the reload, I saw that he was burning! Unfortunately, if not suprisingly, we had paid a price. To my left, a T-62 had been hit, with the crew bailed out and gone to ground around their crippled tank, To my right, a T-62 was on fire - one of my own platoon! However, with my own assistance, my right-hand platoon had done just what I put it there to do - cover that flank while we ran in to the first objective. I scanned for a while, thinking it most unlikely that the Chieftain had been on his own. But the shooting had stopped and there was not the slightest sign of any more enemy activity. So on we went, the burning T-62 jarring my nerves every so often as a lond bang, which could have been another firefight starting, turned out to be the blazing tank's ammo cooking off. Moving ahead again, we steadily closed the range to the Phase 1 objective, the gully to our front. At this point, all hell broke loose. The right-hand platoon, back in formation, had got a little too far ahead and hit contact just as it came out of the far side of the line of trees beside the gully. Over there, the trees formed a small strip of denser woodland and I could see nothing of what was going on. I'm still at the stage in SABOW where I haven't yet mastered the art of using to best effect the tools available, to keep track of what's going on. But I knew enough to realise that my right flank was in contact and that I needed to deal with that, preferably by supporting them, sooner the better. I swung right and nosed cautiously through the treeline between me and the irrigation channel, scanning for targets as I came out the other side. The crack of cannon fire still filled the air, punctuated with short bursts of MG fire. All I was able to see as I nudged ahead was a burning T-62. This wasn't looking good! ...to be continued!
-
Speaking of Chieftains, my Susangerd campaign just went down the toilet, in somewhat confusing circumstances. And this was the way of it... It was Turn 4 in the campaign. Turns may well generate some fighting, but not always in your sector of the battlefield, reasonably enough. Turn 3 had generated a lot of fighting and a mission for me - the flanking attack described above, which had resulted in a draw officially, although we seemed to have had the better of the encounter. For Turn 4, the briefing told me that the 6th Armoured Division - friendly forces, being one of the Iraqi formations participating in this battle - was advancing from the east and the south. That was all. It looked like we were turning from the defensive and local counterattacks, onto the offensive. My own company-sized command - based around First Company, 10th Detached ('Independent' might be a better translation) Armored Brigade, was part of (or represented) the other participating Iraqi formation; that is, the aforementioned Brigade. But what was my role to be, in this stage of the battle? The briefing panel said nothing. After a little while though, things changed. As I was clicking on our units to bring up their details, a little 'battle flame' symbol sprang up right amongst the three platoons of T-62s that were my own command, bottom right if the map. This was obviously connected with a red enemy arrow, now showing an attack coming right at us! Time to jump to the boots of one of my platoon commanders and do some fighting! I neglected to take a screenshot of this but when you move from the 'operational' or wargame more to the tactical or simulation mode, you are first given a chance to fine tune the placement of your platoons (in the 'Unit Deployment' map screen, which has a 3d alternative, both seen earlier in this thread); you can then give them orders (in the 'Initial Orders' screen, also seen earlier). I saw that my platoons were marked as being in defensive positions facing roughly west so I left that as it was. I just checked that their default orders were as I wanted them (including 'fire at will' set) and allocated them overlapping arcs of fire; in retrospect these were a little too oriented towards the open ground to our west but they at least covered also the main threat zone, to our north-west. This done, I jumped into the tank of the commander of my first platoon and had a good look around. The rain was coming down in sheets and visibility was not great, but it was quiet. The good news was that our tanks were well dug in and facing roughtly west, well enough able to engage any enemies coming from either that direction or from the north-west. One of my tanks was sitting out in the open - if I had used the 3-d deployment facility earlier, I would have been able easily to see and correct that - but the quiet start enabled me to do that now. There are probably different ways of doing this but I jumped into the tank and moved it myself, after a false start when I forgot to tell the other tanks in the platoon not to move with me. The ground was very open but I moved him behind us to a 'depth' position, into a slight fold in the ground. That would have to do. I waited, and nothing happened. Now this was the second time I had played this turn and the previous time, no enemy had showed up. It seems that 'battle flame' can burn out before it gets started, that the anticipated contact doesn't materialise; or that the enemy attack takes longer to develop, or maybe gets bogged down (as happened a lot, to the Iranians, in this particular battle in real life). This time, realising I was acting without orders and taking a big risk, I decided to go looking for trouble. I consulted my map and decided that I would make an attack of my own. I had no attached light units to throw out ahead as a recce screen and as far as I could tell, no artillery or mortars for indirect fire support. The dismal weather ruled out air support. But foolishly, off I went. Looking at the map I decided to make a left hook. Phase 1 - we would advance to the south-west, up to an irrigation channel that crossed our front. This had a ford in the middle. I would cross this tactically, one platoon at a time while the other two covered. Once firm on the other side, we would move onto Phase 2. I would make an advance to contact to the north and destroy the enemies marked on the map as being in the area of a crossroads, near a ford or bridge over another irrigation ditch. A few clicks converted this into attack orders for the first phase. I would move with first platoon in the centre, with a platoon either side. For reference, I believe the big squares on the map below are 1Km across, which would make the smaller ones 250m x 250m. Casualties or damage from pervious turns left me with seven T-62s stepping off for the first move. Although commanding in effect a (slightly understrength) tank company, I did not have the normal company HQ element, which is generally two tanks in Western armies, and one on Soviet or Warsaw Pact style tank companies. So there was just the seven of us. The ground to our front was clear for a good distance but there was a fair bit of cover on our right. If trouble developed, that was likely were it would come from. And so it came to pass. ...to be continued!
-
I take back what I said earlier, about not liking the 'Star Wars'-like situational awareness tape that you can display along the top of the screen. Once you learn to interpret this, it's actually a very sensible device to compensate for the limitations of 'MonitorVision' and I am finding it less obtrusive than the tank graphic turret position indicators and other devices used by some other tank sims. For example in the pic below, the two light green ticks to the riight tell me that my two 'wingmen' are to my right rear (had they been ahead, the ticks would have been just above the tape, not below it), thus acting as the peripheral vision you lose from a monitor. As you can see the tape also provides a compass read-out; it can also display key point directions, target directions and other information. The SABOW on-screen aids (header tape and icon blocks) I'm finding not just well designed, packing a lot of features, but also amongst the least obtrusive. Another welcome feature of SABOW is the level of detail with which the playable tanks' features are implemented. For example the T-62 has a fully-functional 'azimuth indicator' showing the relative position of the turret, just to the gunner's left: As for the SABOW campaign system, while you do need at least to dabble with the wargame element to make the best of it - and for many, the wargame side will be a welcome feature in itself - it may actually be the best single player campaign system featured in any tanksim. You don't get mega-detailed briefings or a great sense of identity - in part because on campaign, you play both the role of the 'company group' commander and in action, play any platoon or tank commander (in a playable tank). But what you do get, are missions generated for you which flow from and fit into the wider battle, as the latter develops. And the campaign has dynamic elements, like losses, re-inforcements, damage, supply, morale and territorial gains or losses, which carry forward from mission to mission. There's nothing wrong with a campaign composed of scripted missions, especially if they follow an historical campaign, like those in Panzer Elite or Steel Fury. But now that I'm learning how the wargame side works in SABOW, I'm finding it less of an impediment to the tanksimming side, but rather an additional feature which adds a new layer of immersion and is also a sound basis for a campaign which makes you feel like you are really participating in a linked series of actions in a battle which is developing over the hours and days. SABOW is quite a remarkable package. Now, if only we had a playable Chieftain...!
- 24 replies
-
- 1
-

-
- sabow
- steel armour blaze of war
- (and 1 more)
-
Just a heads up that there are some new updates to the Community User Patch (CUP), available via the SAS site.... ...one, available here, includes a new Burma map... ...and another, available here, which includes some additional planes and updates to one of my favourite birds, the 109...
-
I think that's as good a potted description of SABOW as we're ever going to get!
-
Hi 55Delta and thanks also for the positive feedback! Is SABOW worth it? Well for me, it certainly was. Probably you too, certainly if you are interested in the wargame side. If, like me, you come to SABOW looking mostly or only for a tanksim, the answer is still 'yes' I would say, provided: 1. you are not going to be greatly disappointed and let down that it doesn't surpass or equal SB Pro or even SF, in every respect - it's different, not better in all ways than either. Expect still to enjoy and/or rate SB highly for its peerless technical authenticity as a simulator of tank and platoon-to-company level combat in the modern era, and Steel Fury for its less sophisticated but wide, capable and immersive recreation of much the same thing, in WW2; AND 2, you are keen (or at worst just prepared) either to: (i) have the patience and perseverance to learn (and then either embrace or tolerate) the wargame side, which on campaign is really a near-unavoidable partner of the tanksimming component. Having finally made the effort and 'got over the hump' I'm beginning to see the value in the excellent wargaming side, which at the start I just saw as something that got in my way, en route to the tanksimming; OR (i) content yourself with just the tanksimming component, forgetting about campaigns and instead playing one of the three current 'instant action' missions and 'quick battles' you have created using the Battle Editor. The latter I would liken to the Il-2 '46 Quick Mission Builder, as modified by the QMB Pro mod (which expands the choices you can make). It's a lot more capable than the 'Quick mission' option in Strike Fighters sims, to offer another comparison. And easy to use: you can have a different battle going in a minute or three. Both 'instant action' and Battle Editor get you to the tanksimming, bypassing (fully and partially, respectively) the wargame element. As a sort of chargeable full demo version, if you're from the UK as your choice of currency suggests, you might want to look in Game, a similar store or online for this BlackLime version, which was in some Game shops until at least recently: http://www.hixxysoft.com/steel-armor-blaze-of-war-pc-game.html?gclid=CjwKEAjw0q2pBRC3jrb24JjE8VgSJAAyIzAd6sdwdfzHOswbgw0uKRIYzCINk_vaNobCxhy69hZOehoCu9vw_wcB I think this version CANNOT have the latest patches applied, so while its min specs are a little lower, no Graviteam Tactics engine (with whatever that brings, see the graviteam forum or Facebook page) but possibly more importantly, no 'instant action' options. If you fancy the wargame side, go for it but definitely the new version rather than saving a few quid for the sake of an older model. If not sure, my suggestion would be: re-read the review, watch all of SimDeck's youtube SABOW videos (the one I linked to, plus another set which illustrates a campaign, played by someone who seems not too impatient to get into a tank) and then decide. Sorry about the long-winded reply but as a practicing tanksimmer you will have an interest in the detail combined with finely-developed tastes in these matters, already. And of course, a certain combination of flair and down-to-earth doggedness which these head-in-the-clouds, combat-flightsim-only boys surely lack Good hunting!
- 24 replies
-
- 2
-
-
- sabow
- steel armour blaze of war
- (and 1 more)
-
Thanks PCPilot, and I'm glad you enjoy the reports!
-
No, sorry, not a review, just a link to my recent mission report, as it sort of developed into a more review-like thing. But rather than now move it here, I thought I should post a link. And it's an excuse to post some screenies and offer a few more observations. The mission report/review thing is here. This new release of SABOW has succeeded in getting me playing a sim that I had left in a drawer for over a year, deterred by the fact I wasn't massively a fan of either of the two playable tanks, the steeper-than-usual learning curve and the 'sim within a wargame' approach (which also reduced the appeal to me of Rowan's Battle of Britain/BoB2). However - partly thanks to elements in the new release that make it easier to get to the tanksimming - see mission report for details! - I'm now a fan. Even to the extent that I'm beginning to see the wargame side less as something to be bypassed as far as I can, and more as a feature with a lot of potential and depth; one which I can actually enjoy as I choose, as well as the tanksimming side. Even though everybody in SABOW seems to speak Russian - possibly an advantage, as I know nothing of Farsi or Arabic and am at least beginning to learn some of the Russian terms used on the intercom- I am really digging the animated crews and the fact that all my tank commanders have names as well as unit IDs. And now I'm getting the hang of it, I'm finding there's attention to realistic crew drills that are approaching the technical excellence of Steel Beasts, with the advantage of being able to see the guys alongside me. Panzer Elite still has more hotkeys and an interface more optimised for a tanksim rather than a wargame. Steel Beasts better implements the team radio net and the use of callsigns on the map as well as on the air. But with the relaunch, SABOW has for me the mark of a really top-tier tanksim. And I believe we can expect further updates - there have been several already, since the relaunch, including those which added 'instant action' options and now also a firing range variant, complete with on-screen tips which play out as your M60 drives up to the firing point. Using these tips, for the first time I tried out the drill for getting a range from the tank commander. Go to the gunsight that has the simple reticle. Hit Ctrl (this gets you into 'cursor mode') and with the mouse, put the little crosshairs which appear onto your chosen target. Click on the rangefinder icon - it's the one on the left of the third-from-the-left strip of icons, below seen from the gunner's station... ...and you will then see the icon grey out briefly, hear some clicking sounds and then see the icon light up again. This tells you that your TC has ranged the target with the stereoscopic rangefinder and keyed the result into the analog ballistic computer, setting up your sight for that range. Lay your gun and fire! And you can use a similar drill for the other, graduated sight in the M60 or T-62 and get a verbal range, estimated visually instead. All rather sophisticated, and the firing range mission with its tips is just one example of how the new release's features seem intended to improve the accessibility of the tanksim element. It certainly worked for me! I've still a lot to learn about SABOW but I'm now hooked and would definitely recommend it as a tanksim, alone, whether or not you expect to appreciate the wargame element. Gotta go - I'm due back on the range!
-
Thanks! BTW a new, April 2015 patch for the Gamersgate version is now available: http://graviteam.com/forum/index.php?topic=10223.0 This adds a firing range ('Target practice') option - see the new icon on the right of the main menu: If you select this, you start with an M60A1 that is automatically driving up to the firing point on a range, with various hard targets laid out for you. The firing point is a flat-topped low mound, accessed via the side track leading off to the left in the pic below. As you approach, text messages give you some tips as to what to do. Initially your targets are static AFV hulks, mostly WARPAC stuff like T-55s and BTR-60s, as you can see... ...but after a while, they are joined by some crossing targets, both MBTs and APCs... This is a neat addition to SABOW - reminds me of the gunnery training missions in M1 Tank Platoon II and Steel Beasts! PS since playing the M60A1 more, now that it's the tank featured in the 'Target practice' mission, I'm beginning to see my SABOW tank commander in whole a new light... I've realised that Ctrl+mouse clicking on a target in my sight will cause the TC to take its range on the stereoscopic rangefinder and set that on my battle sight, so that all I have to do is get it in the crosshairs, allowing for lateral movement and wind. I must check and see if trunnion tilt is also replicated! And my AI TC is quite good as spotting fall of shot, when the considerable obscuration from firing lets him, giving me corrections left or right in target widths, as well as over or short. I haven't seen and heard such authentic crew drills since Steel Beasts! Neat also that co-ax tracers realistically burn out at about 1100m. More playable AFVs would be great but even the two we have now, done to the standard Graviteam have achieved, are well worth going to virtual war with; they're both capable of some serious tanking!
- 24 replies
-
- 1
-
-
- sabow
- steel armour blaze of war
- (and 1 more)