33LIMA
-
Posts
3,749 -
Joined
-
Last visited
-
Days Won
7
Content Type
Profiles
Forums
Gallery
Downloads
Store
Everything posted by 33LIMA
-

From the album: Combat Sims
-
From the album: Combat Sims
-

From the album: Combat Sims
-

From the album: Combat Sims
-

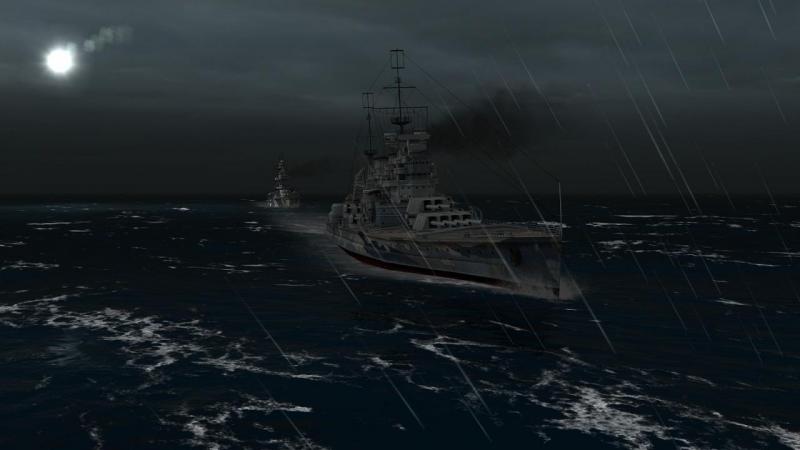
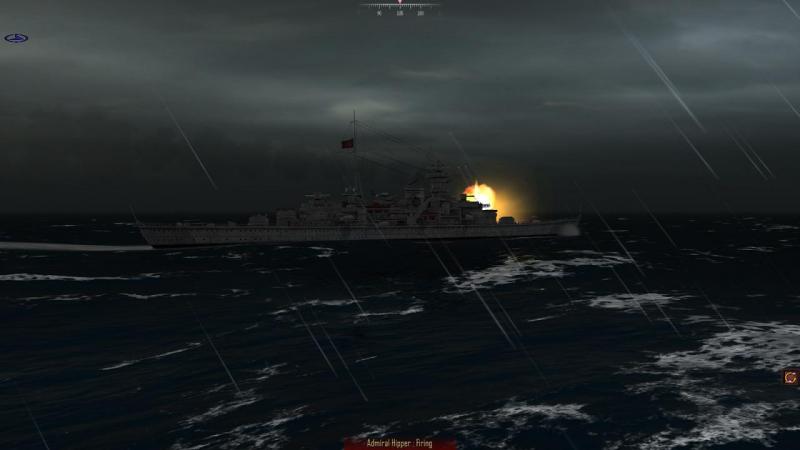
Atlantic Fleet - 'Lucky Scharnhorst' has a lucky escape...
33LIMA posted a gallery image in Member's Albums
From the album: Combat Sims
-
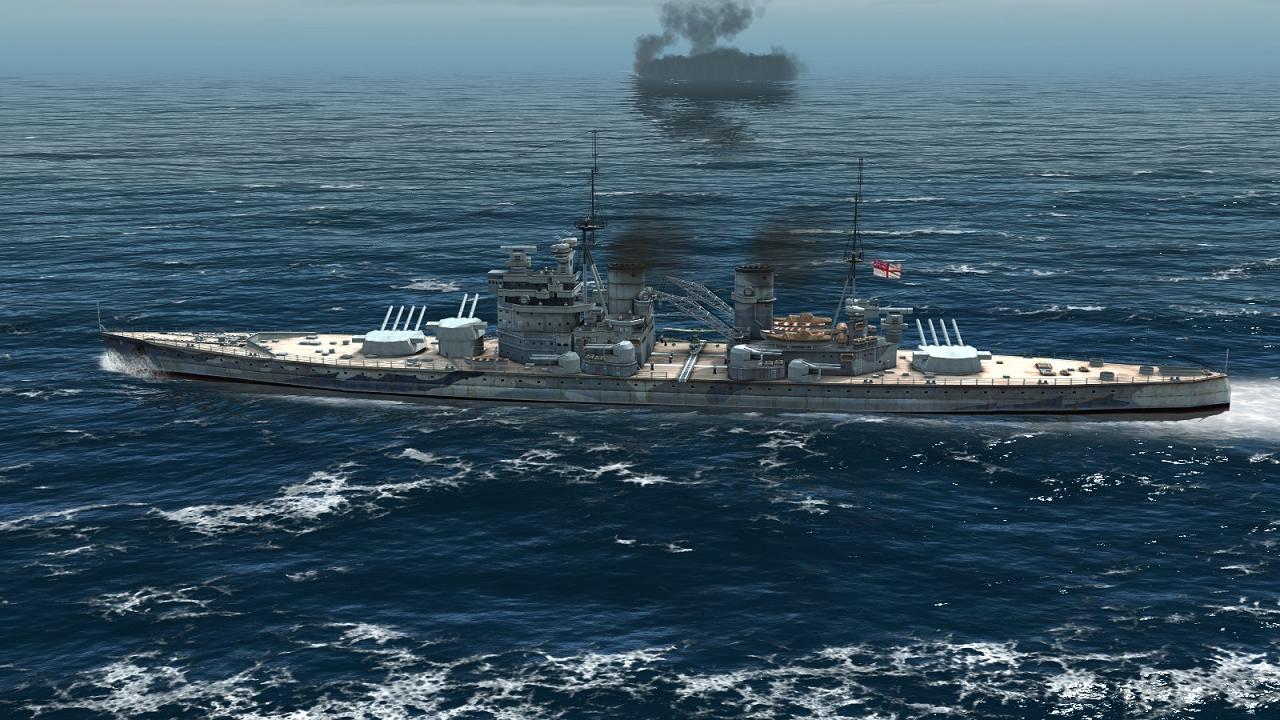
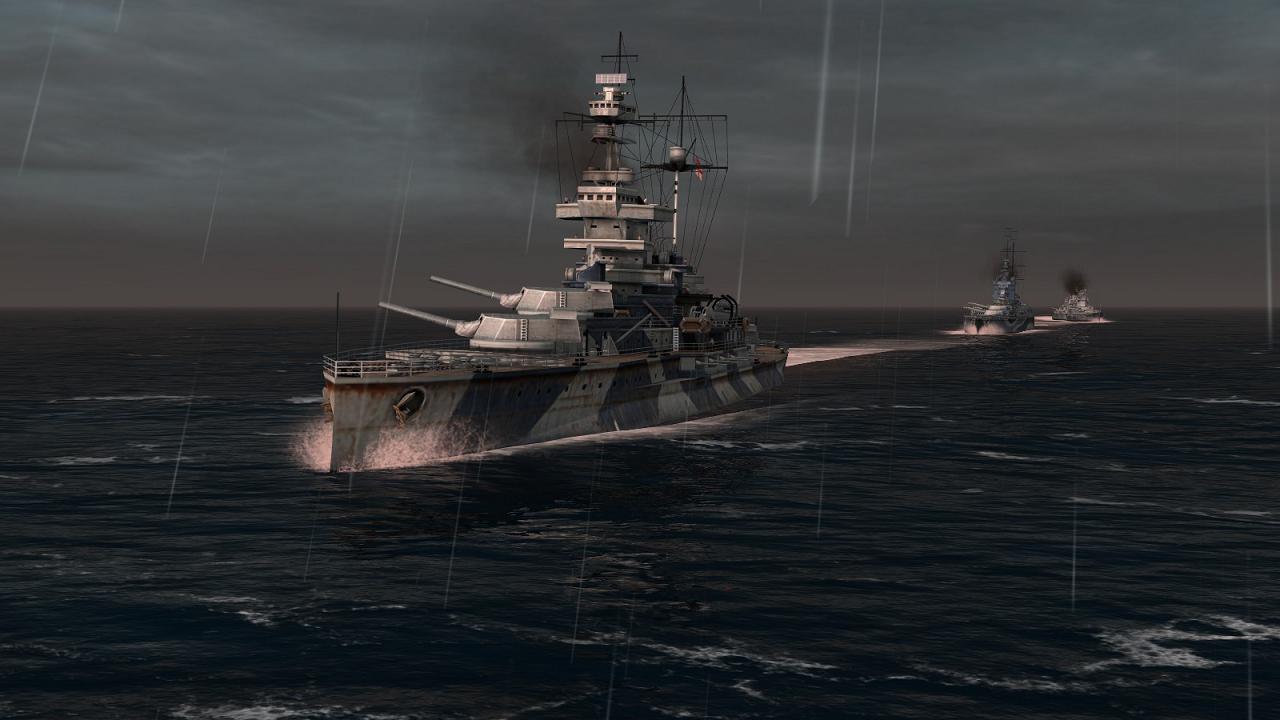
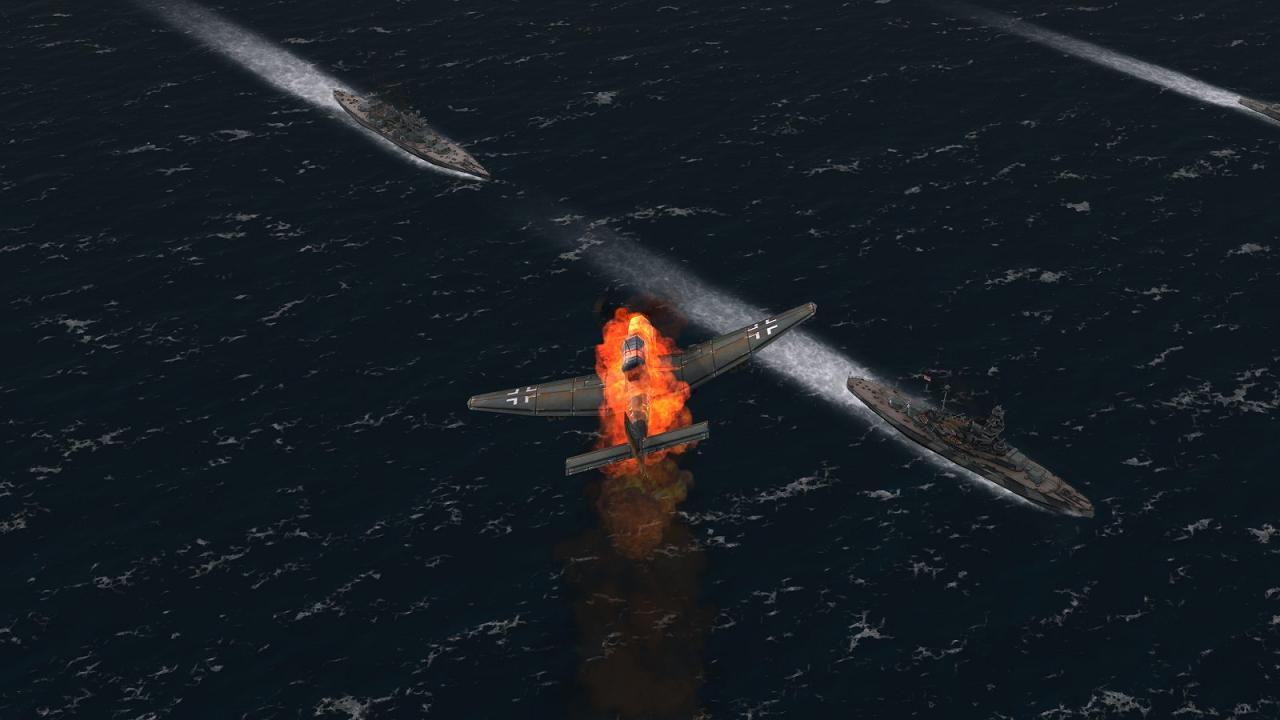
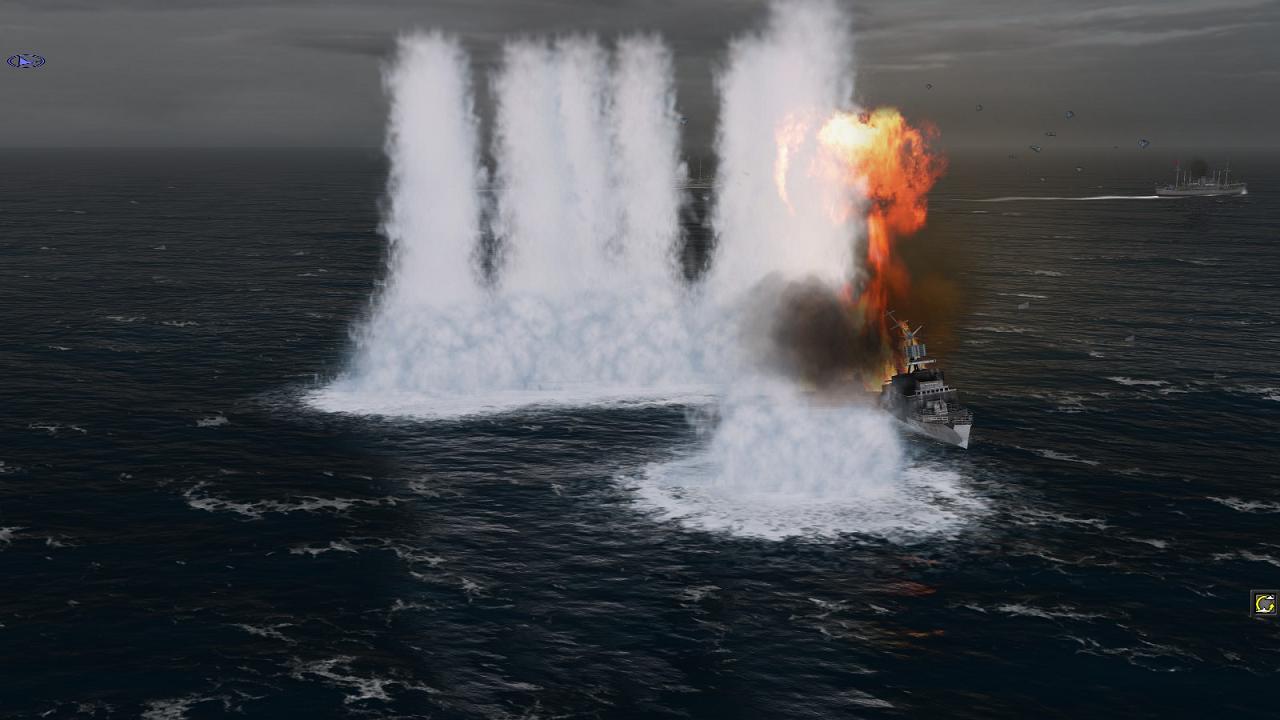
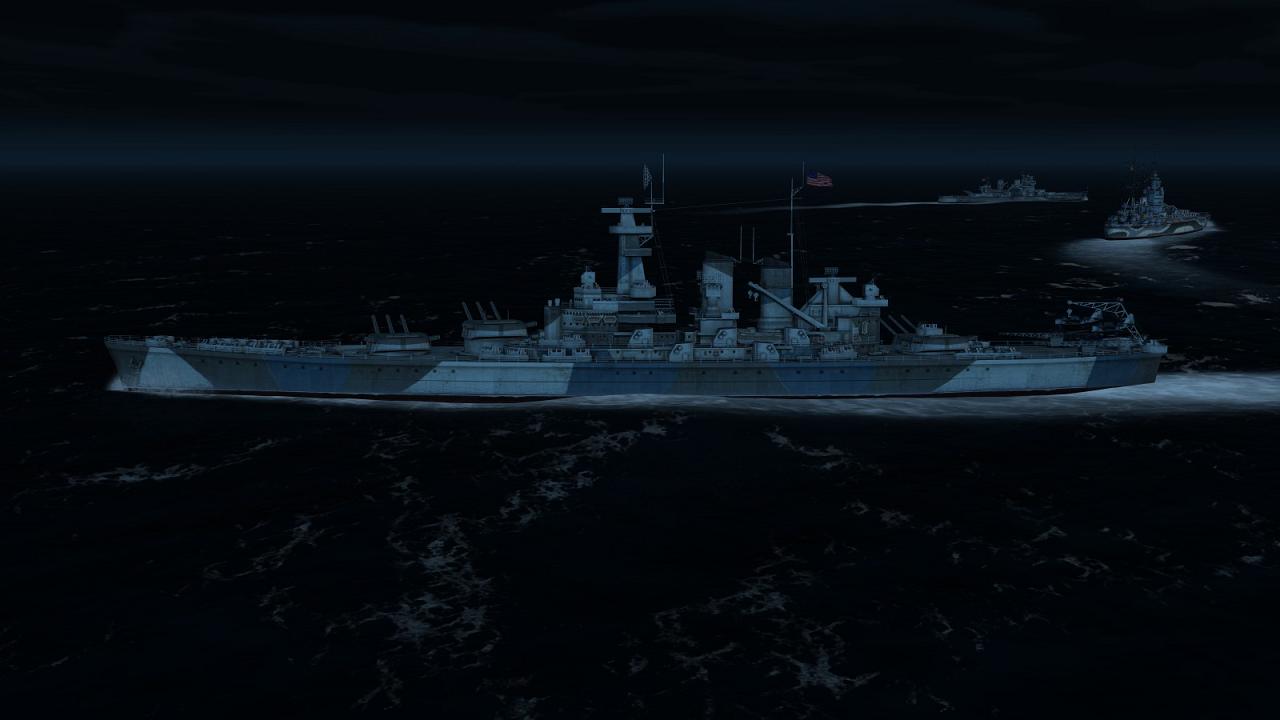
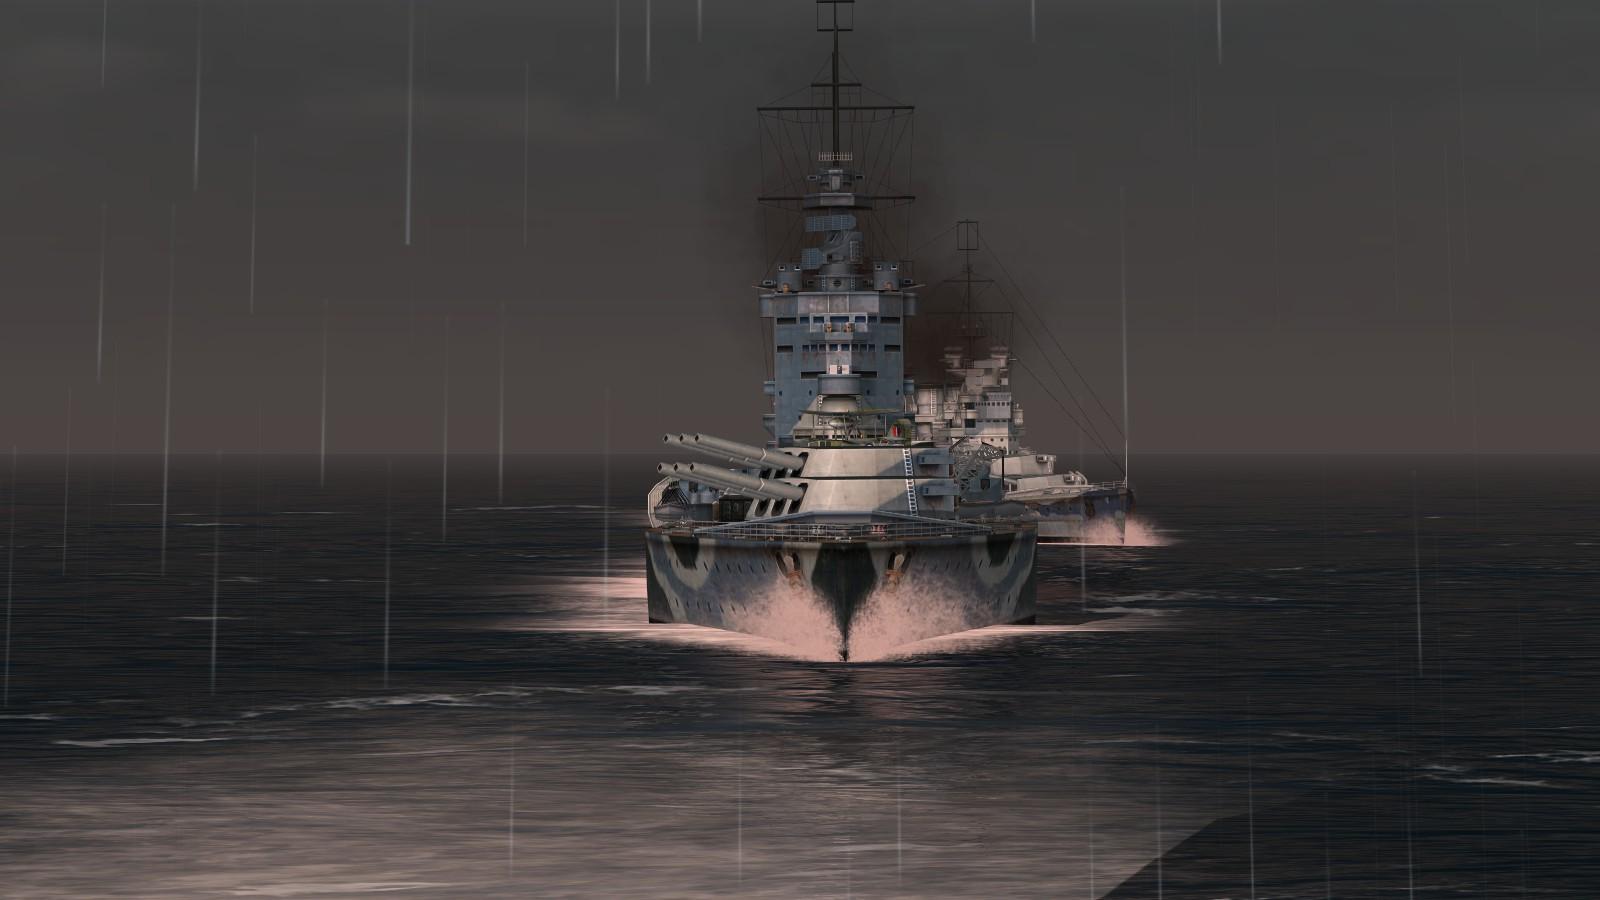
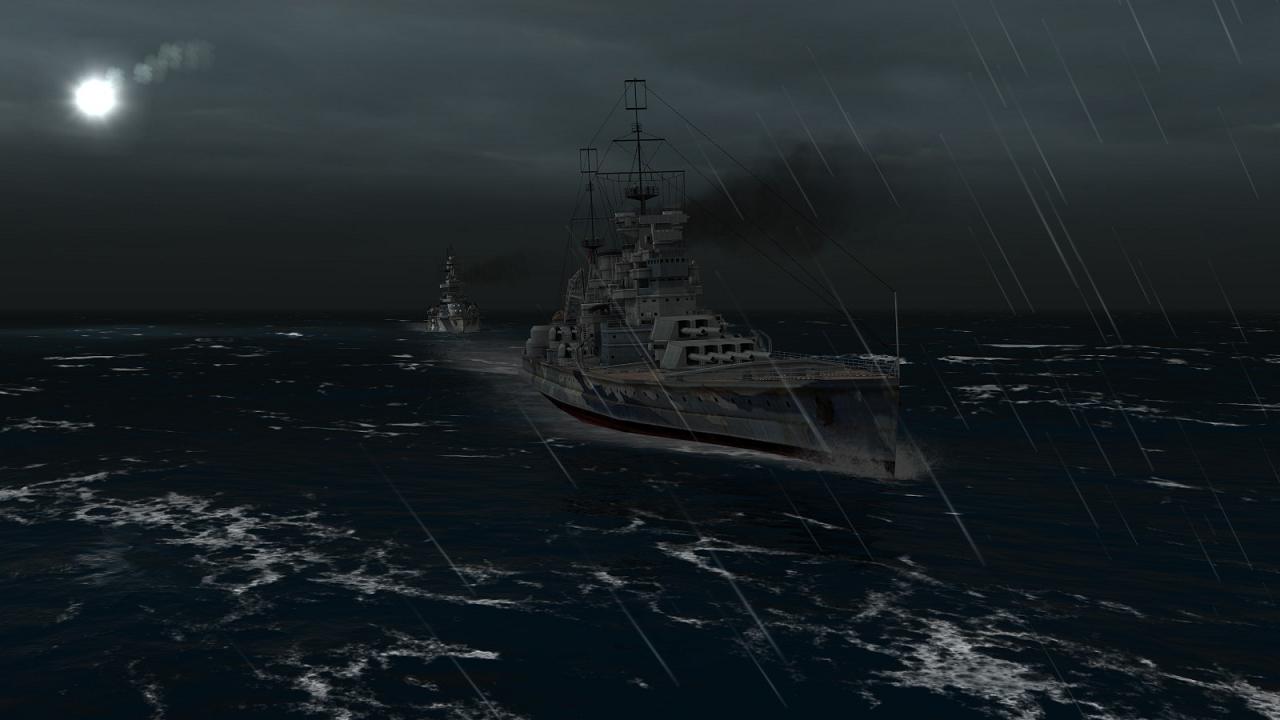
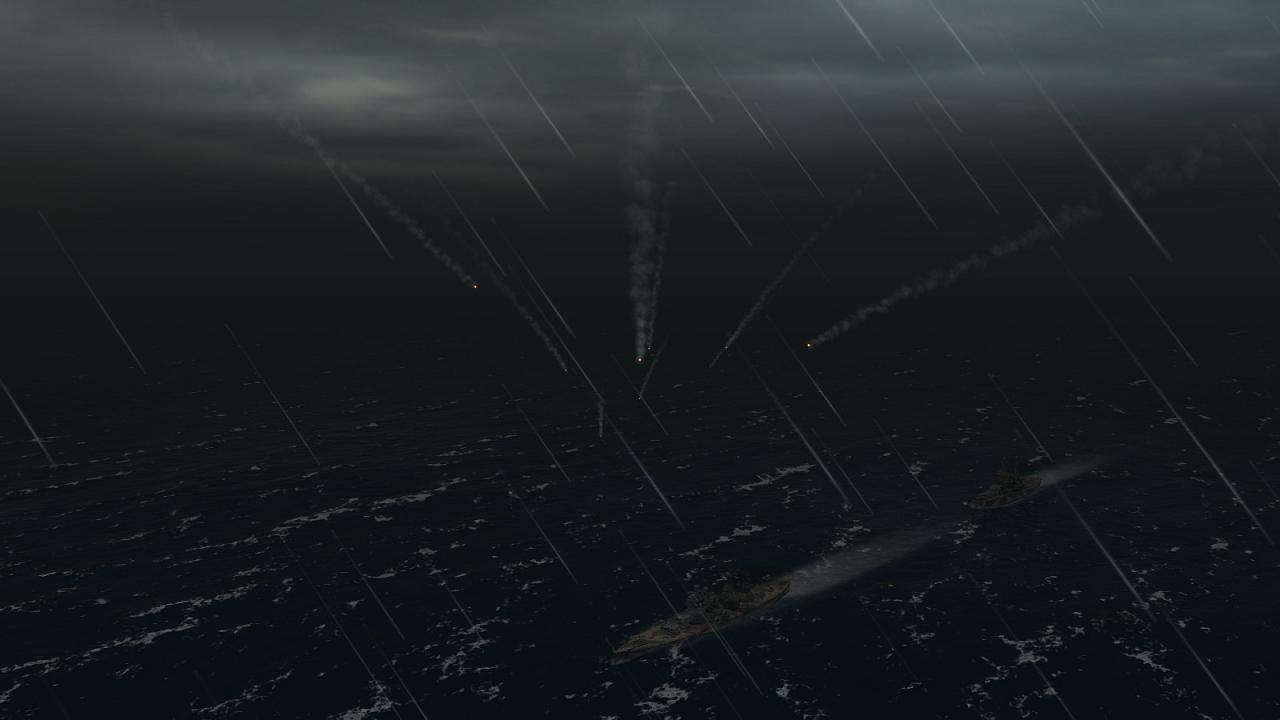
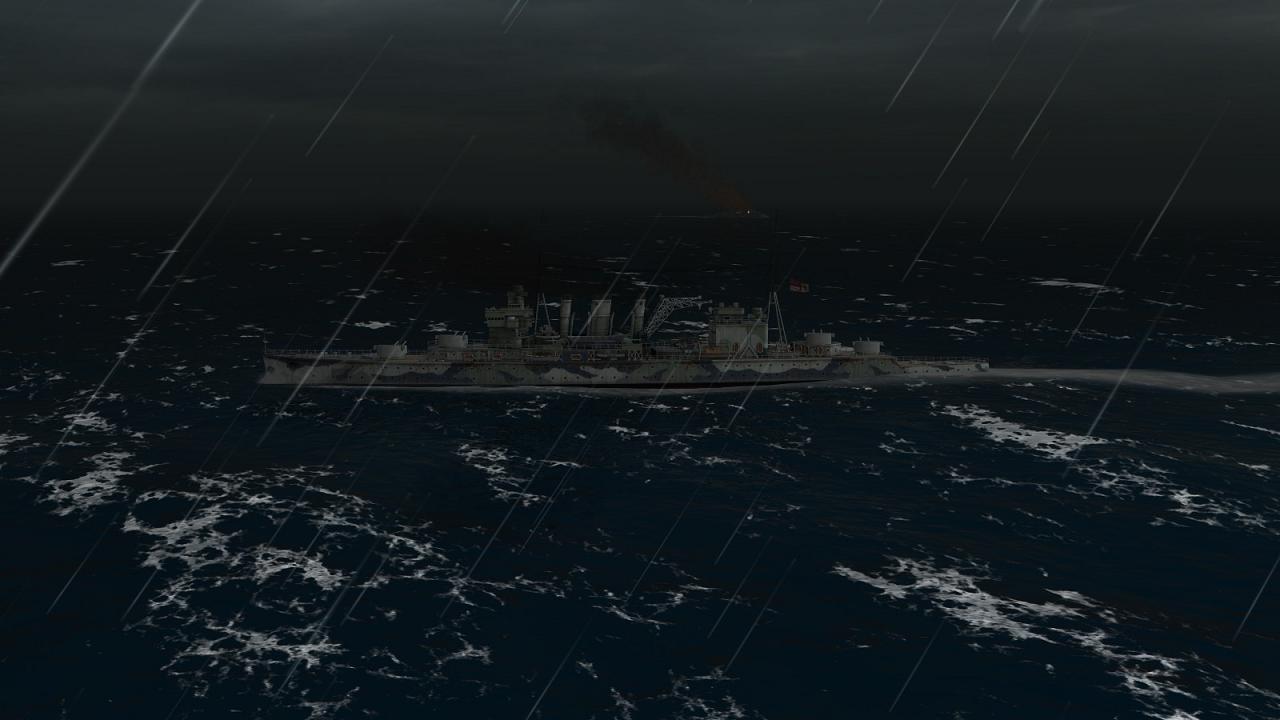
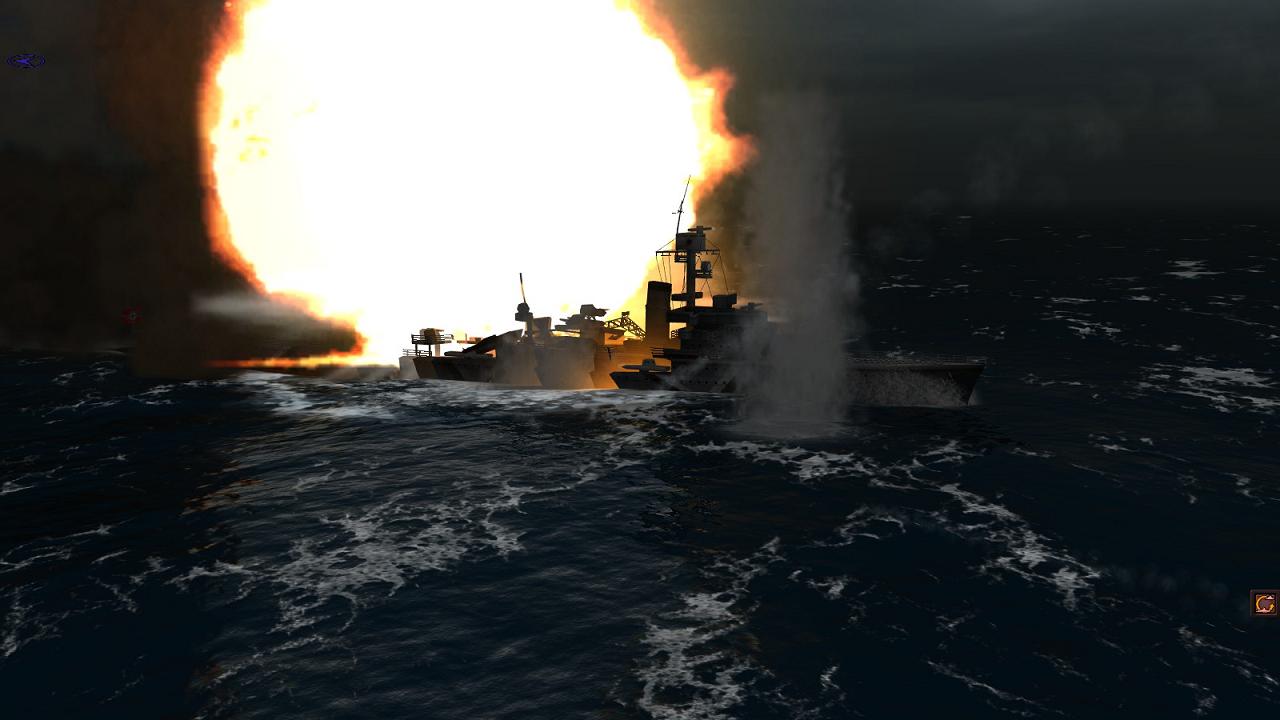
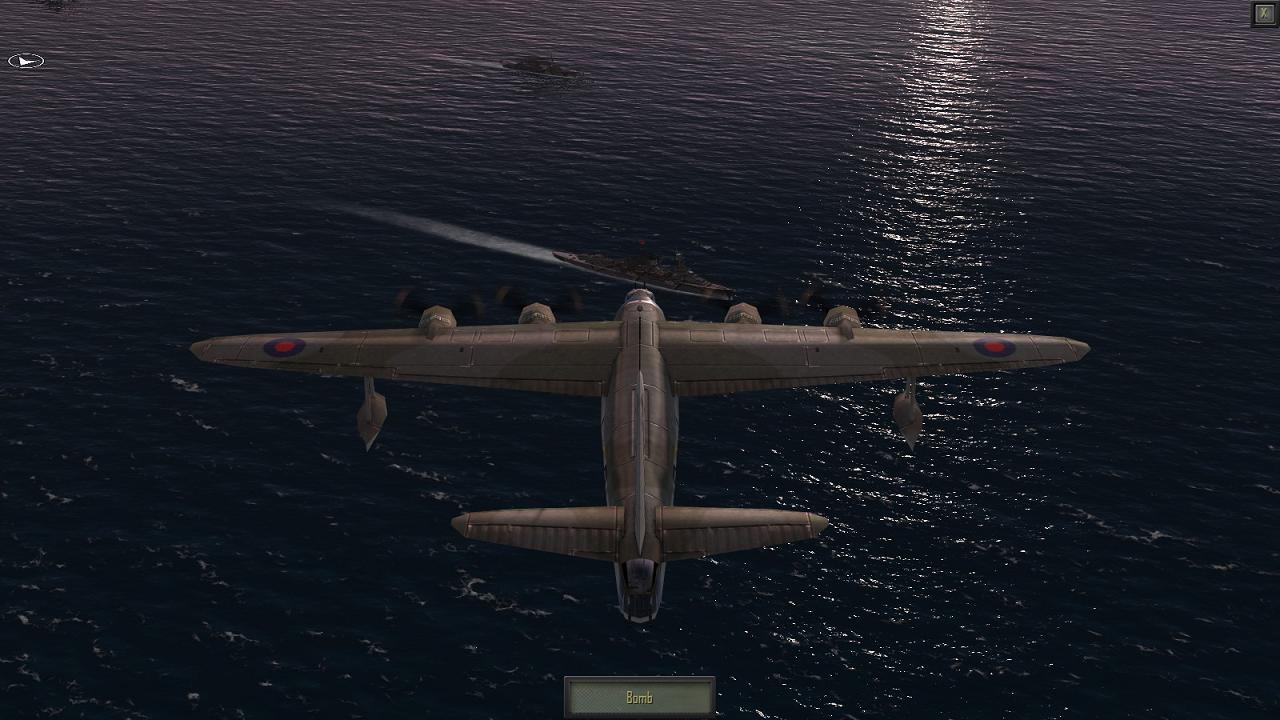
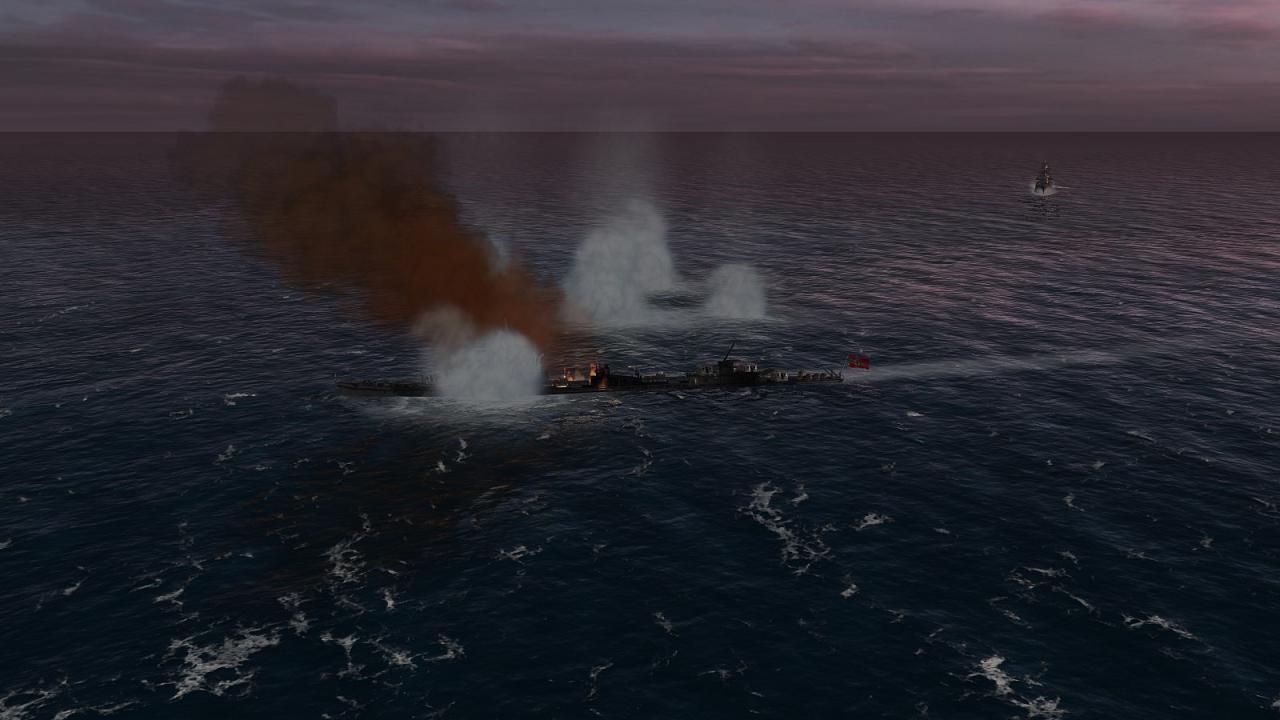
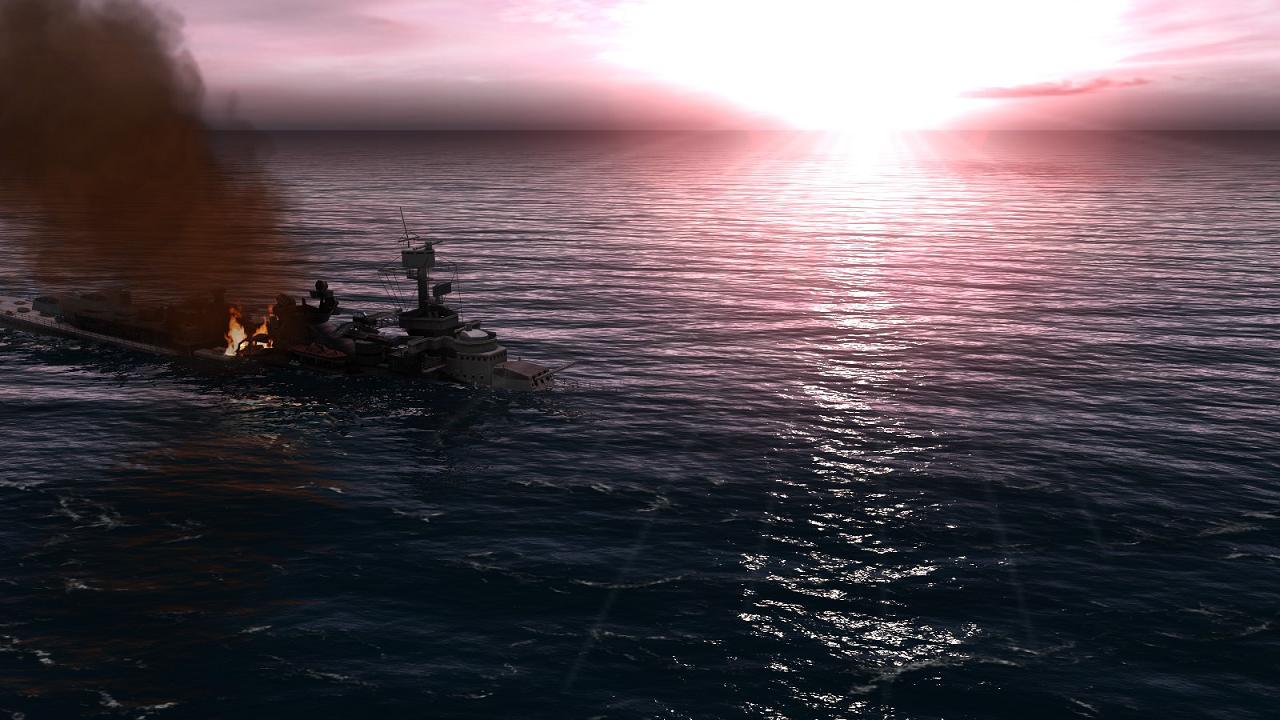
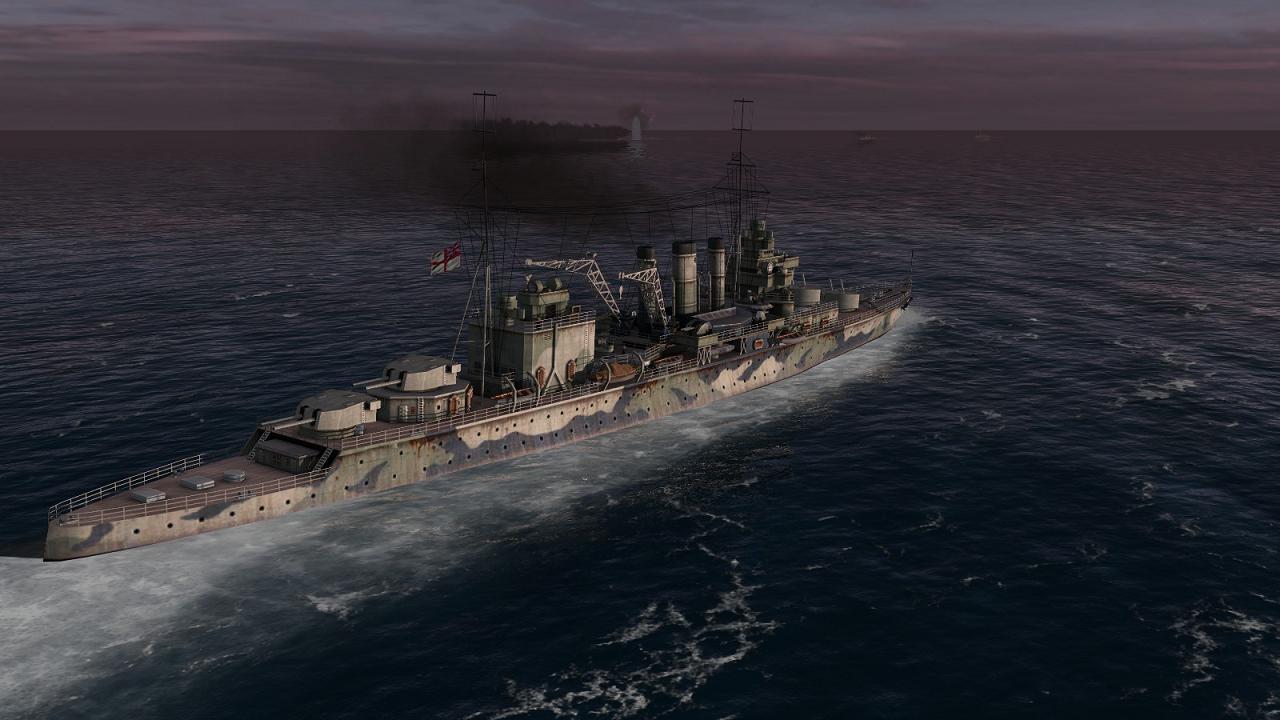
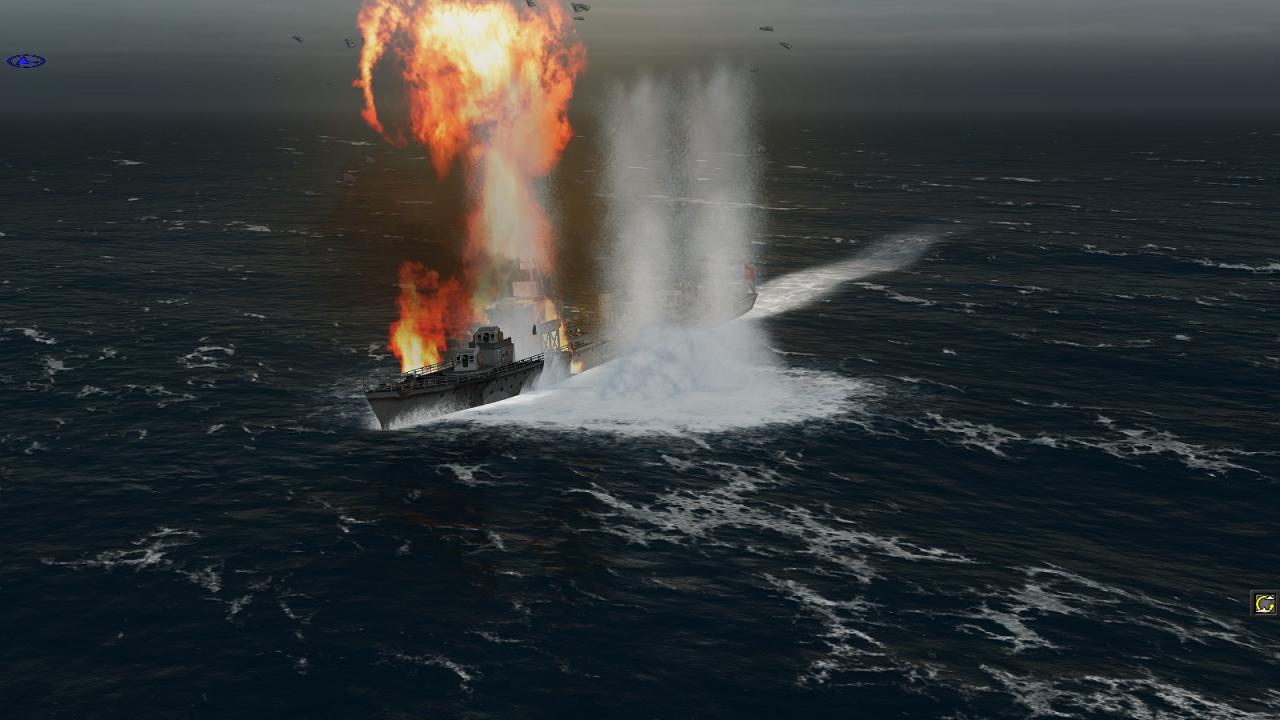
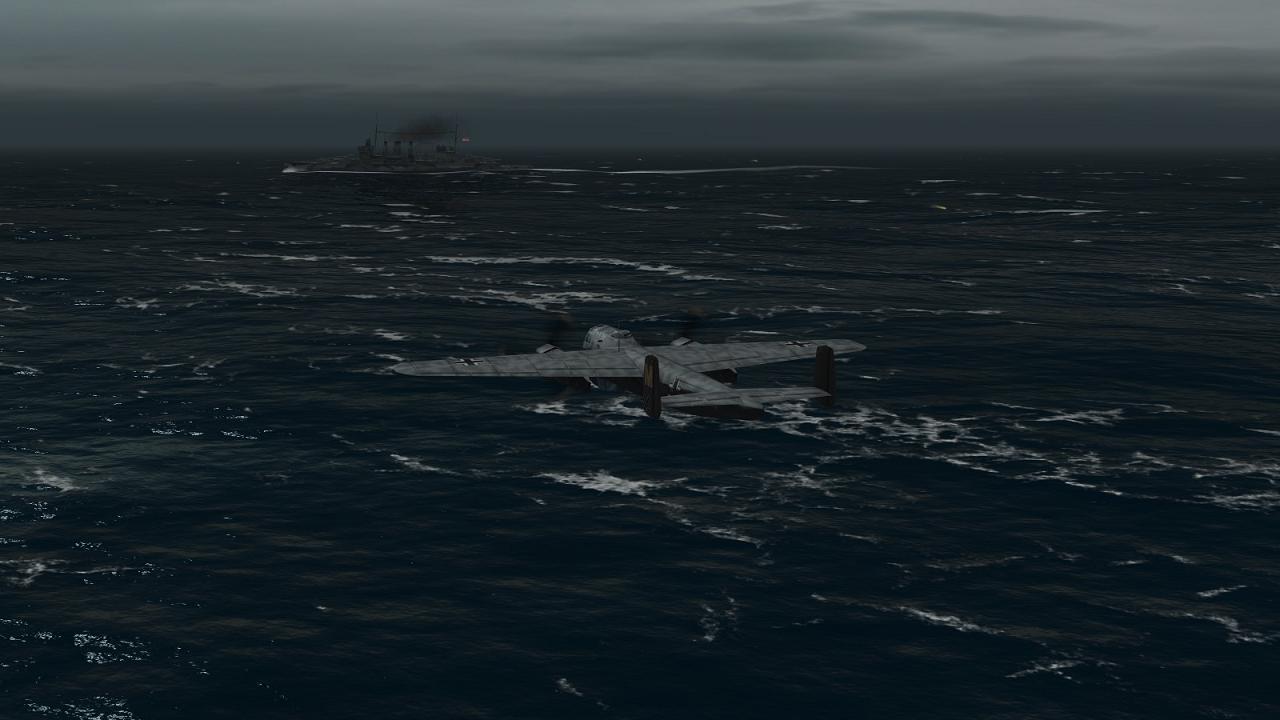
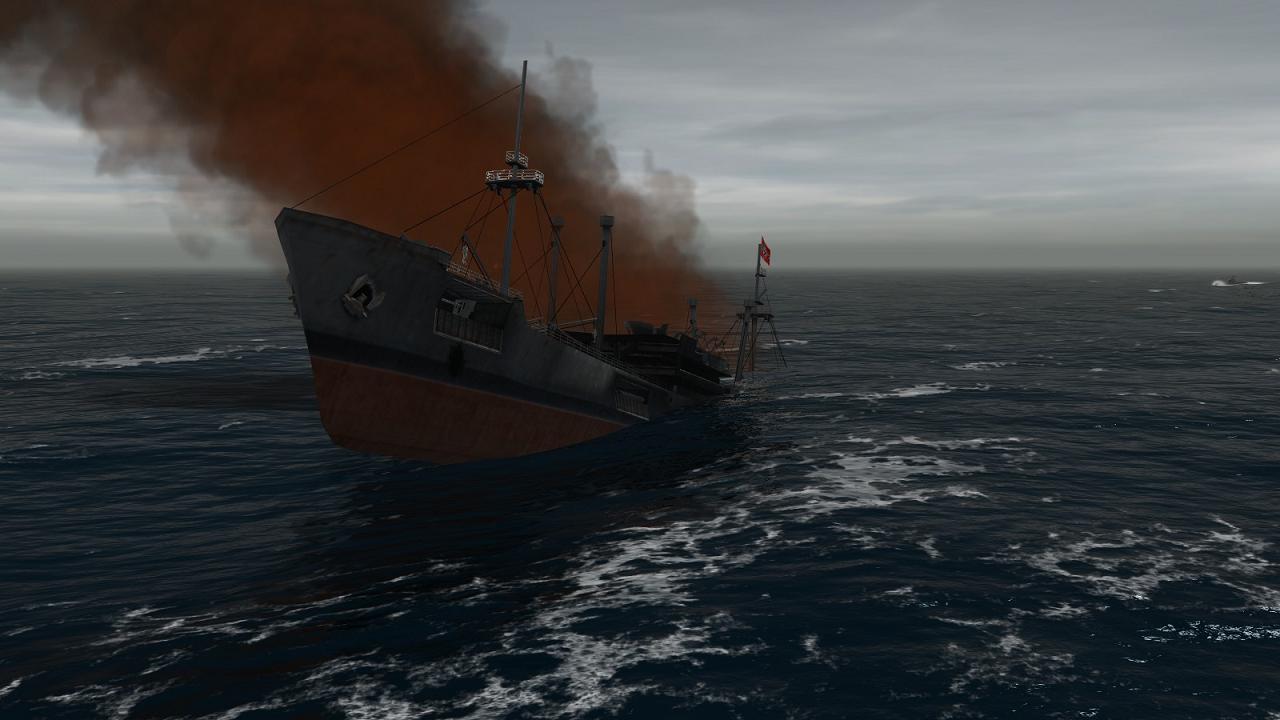
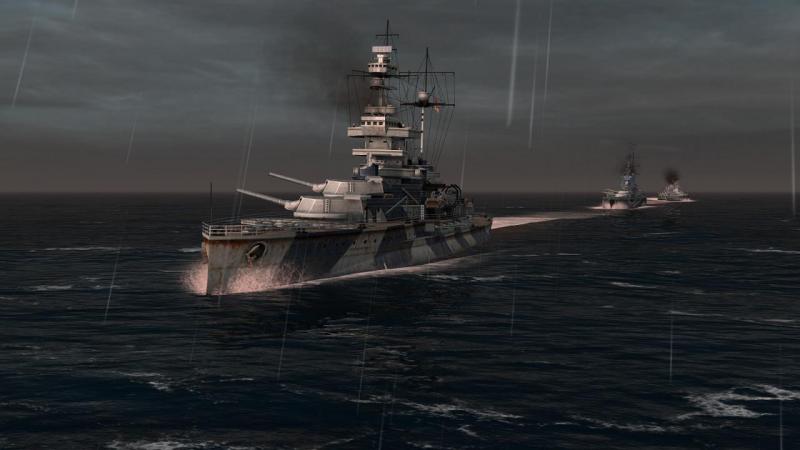
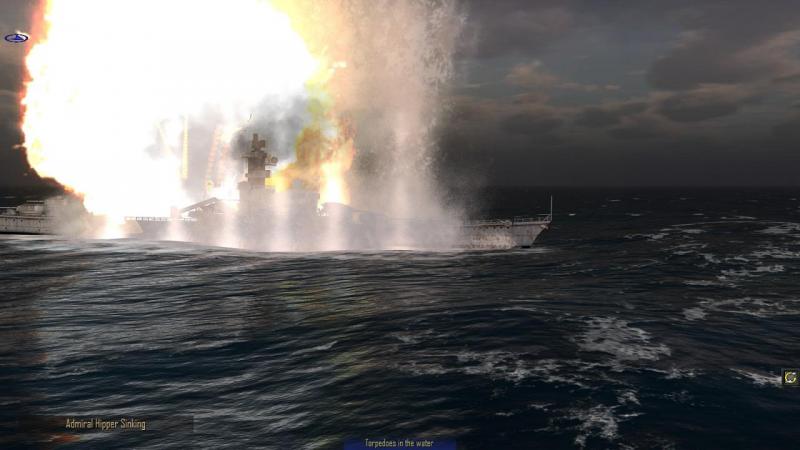
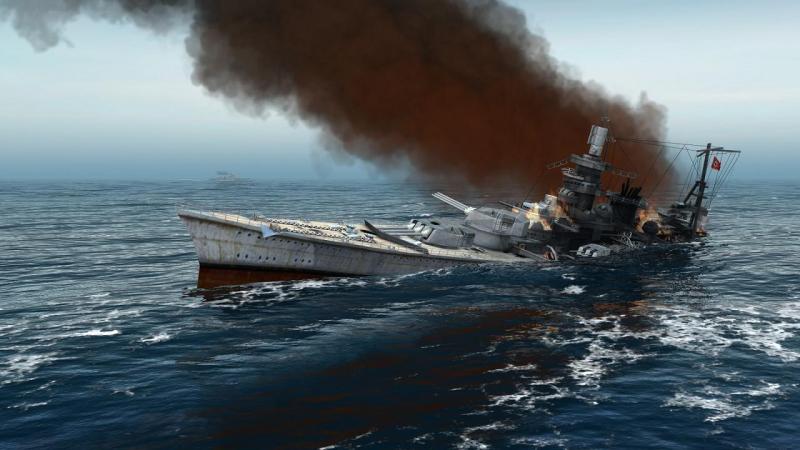
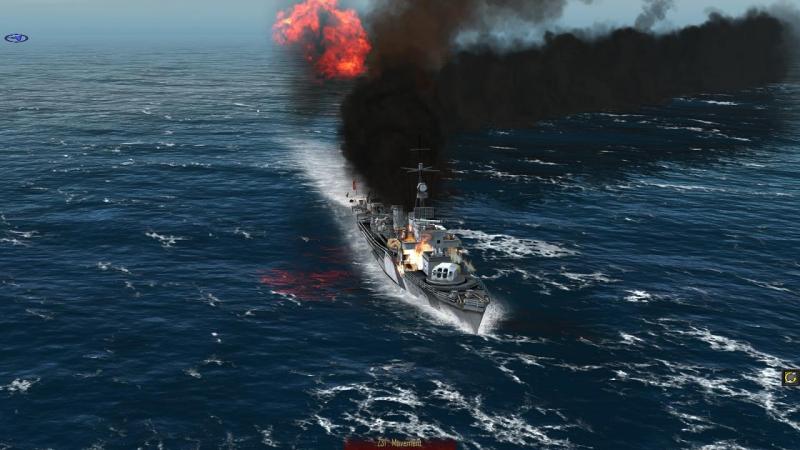
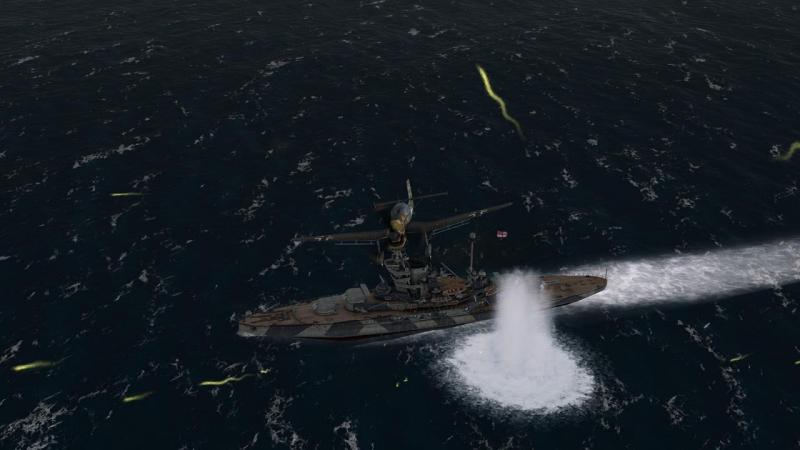
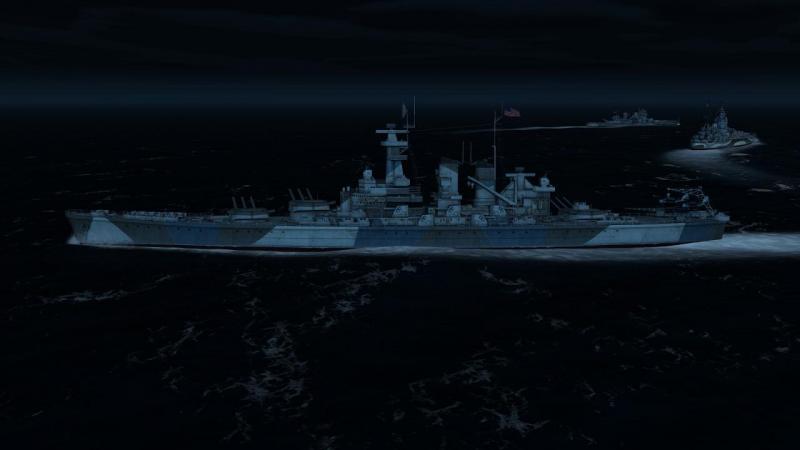
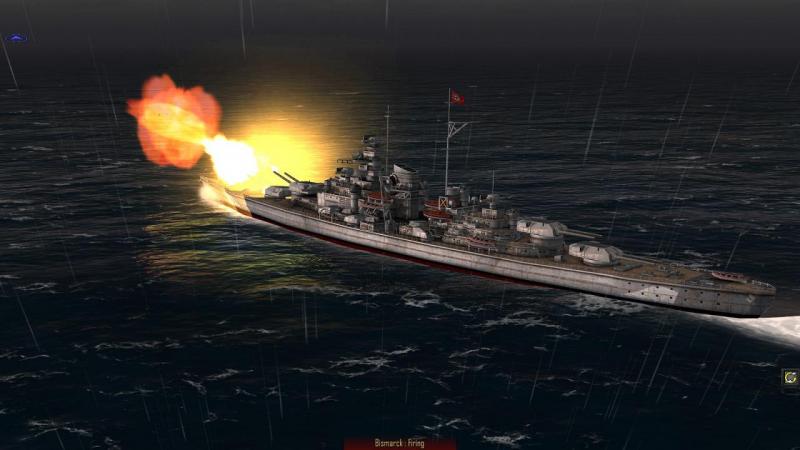
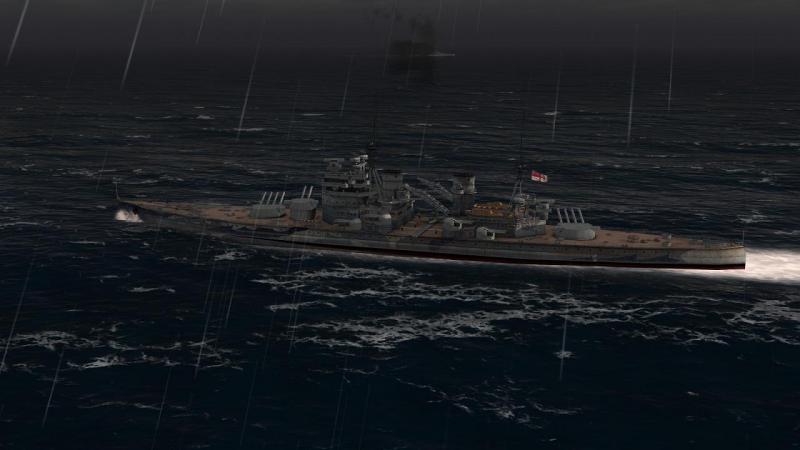
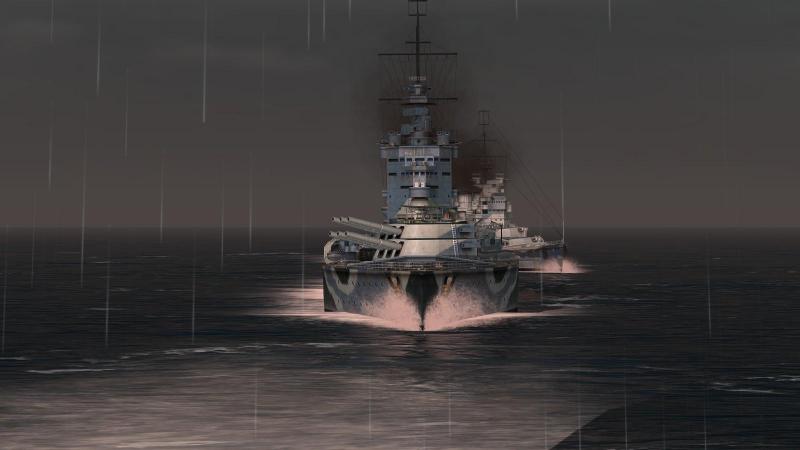
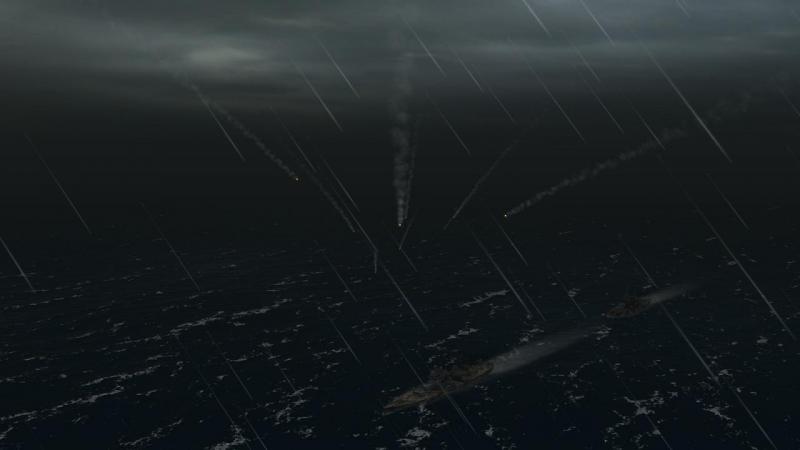
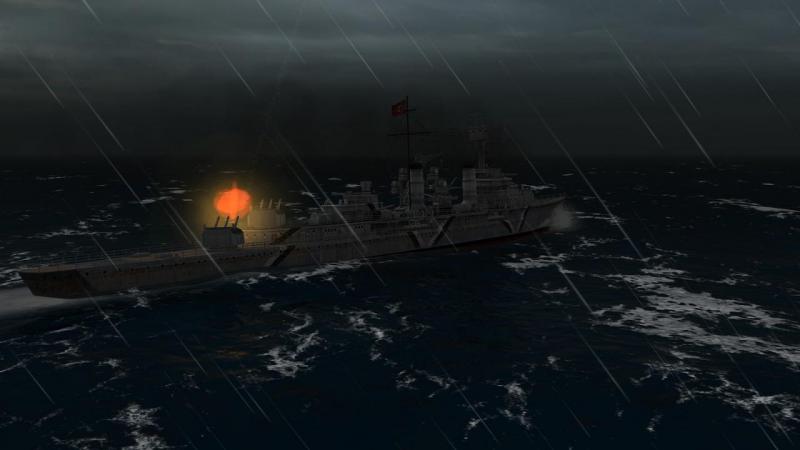
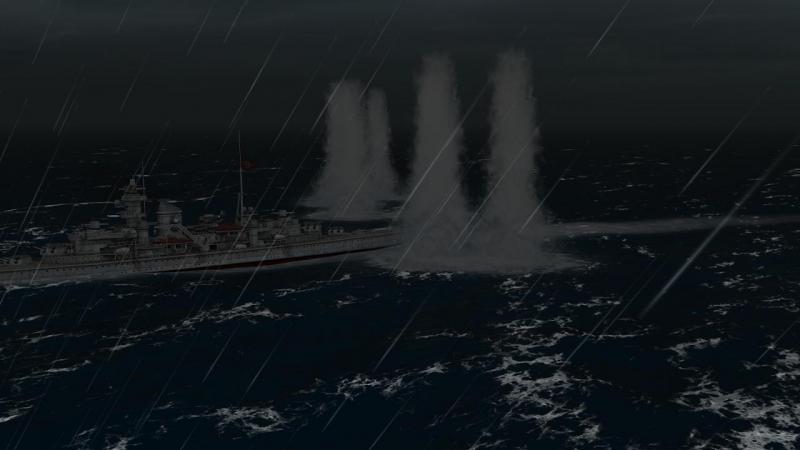
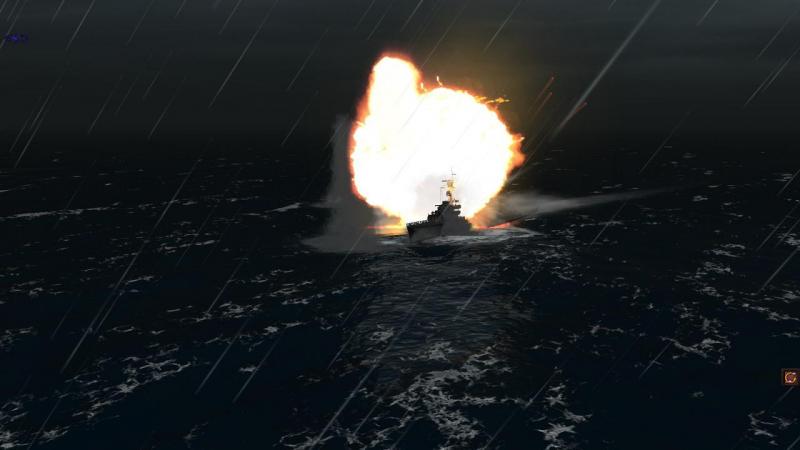
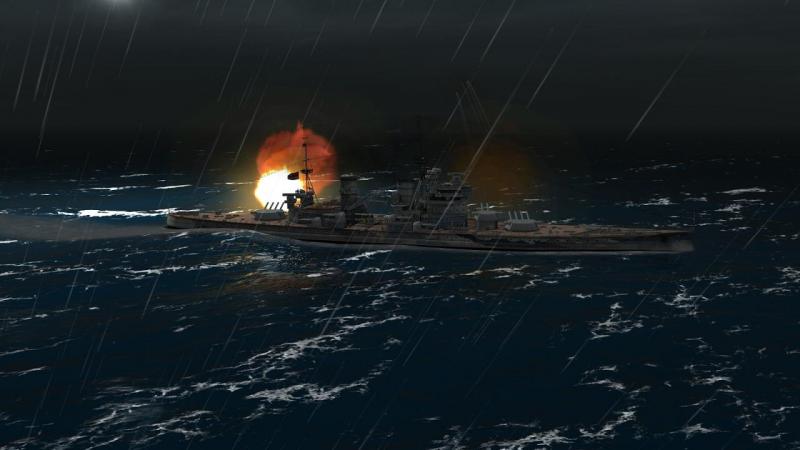
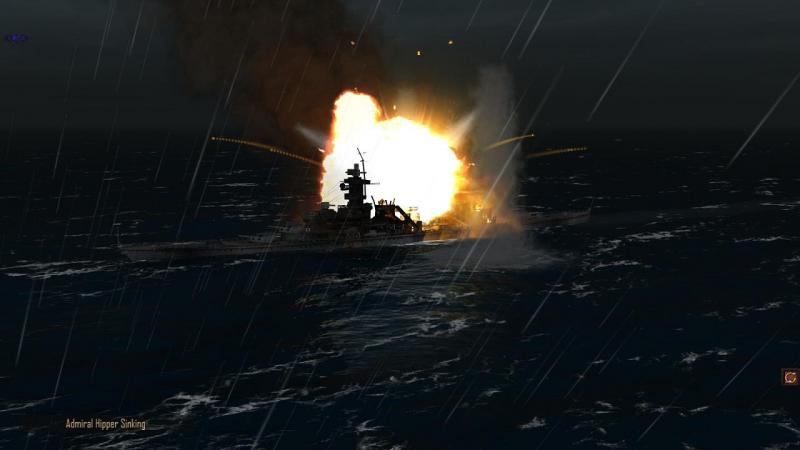
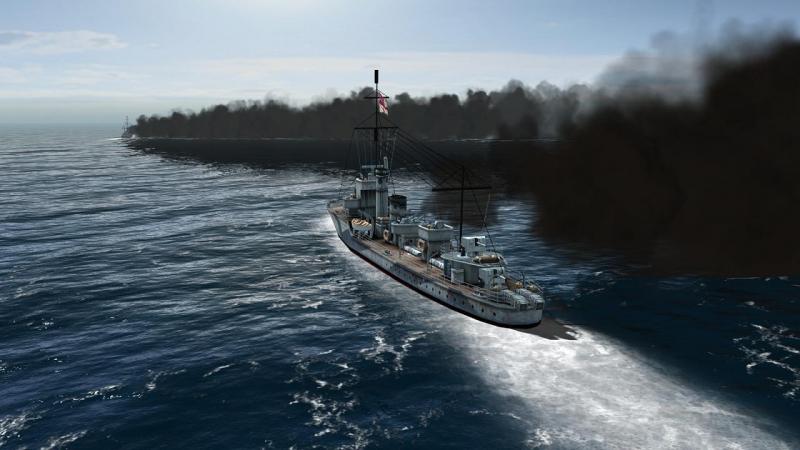
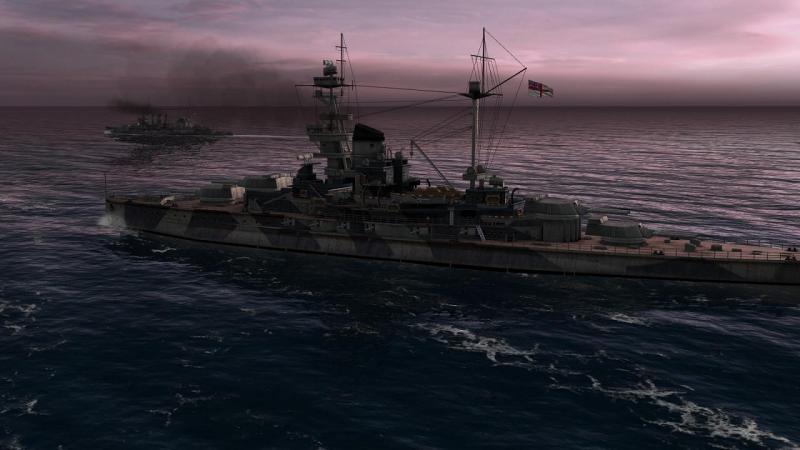
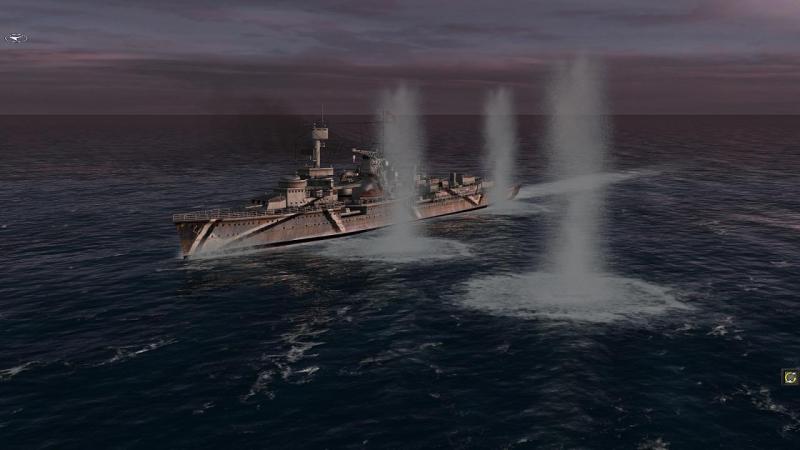
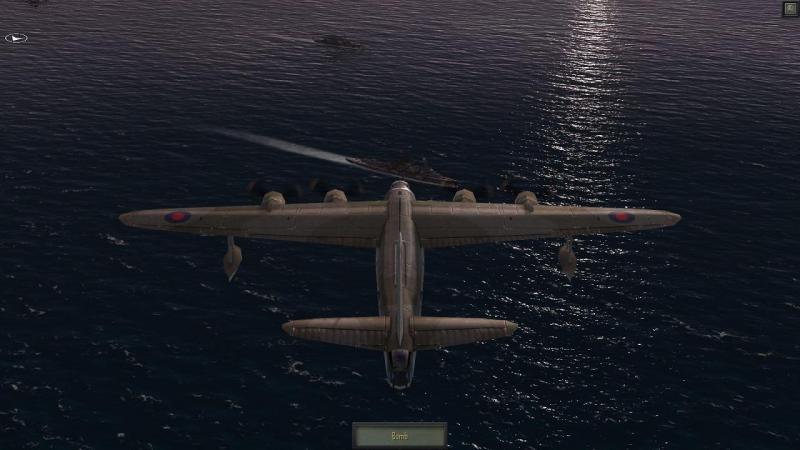
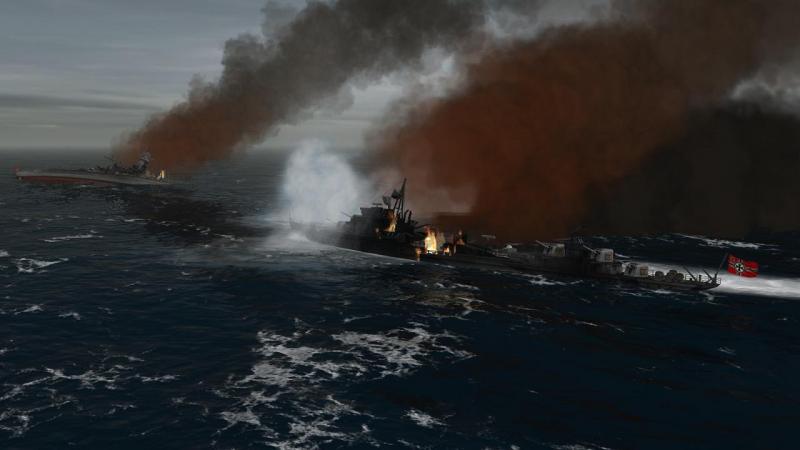
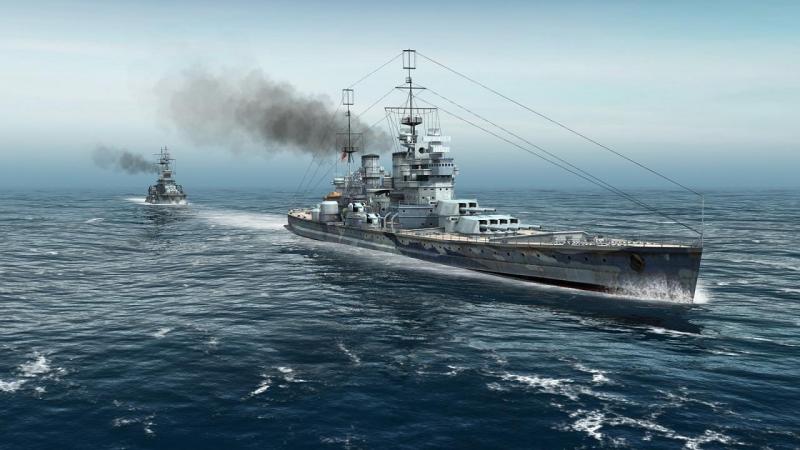
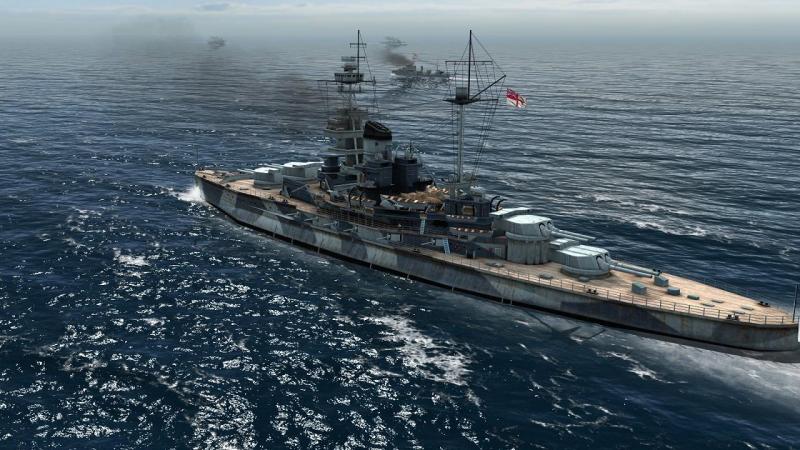
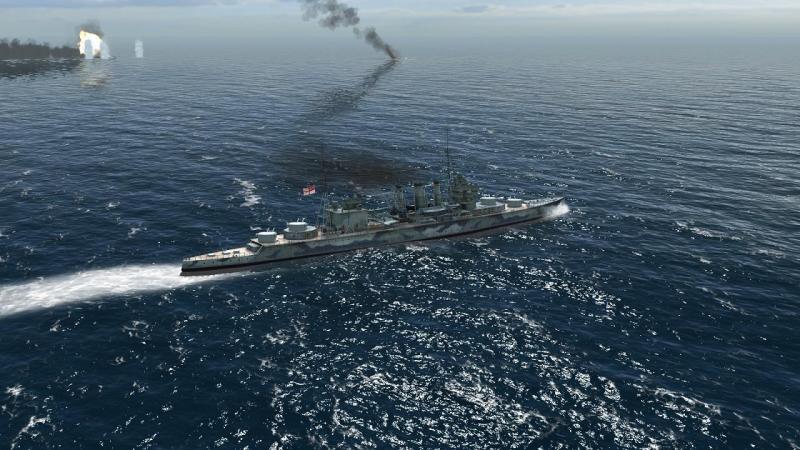
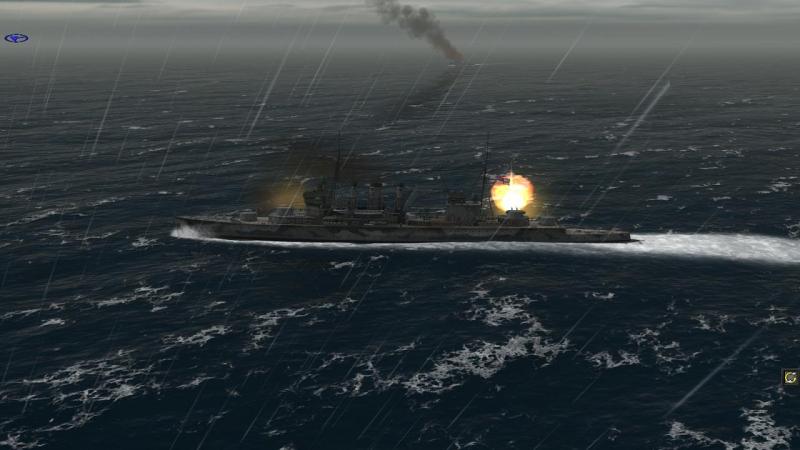
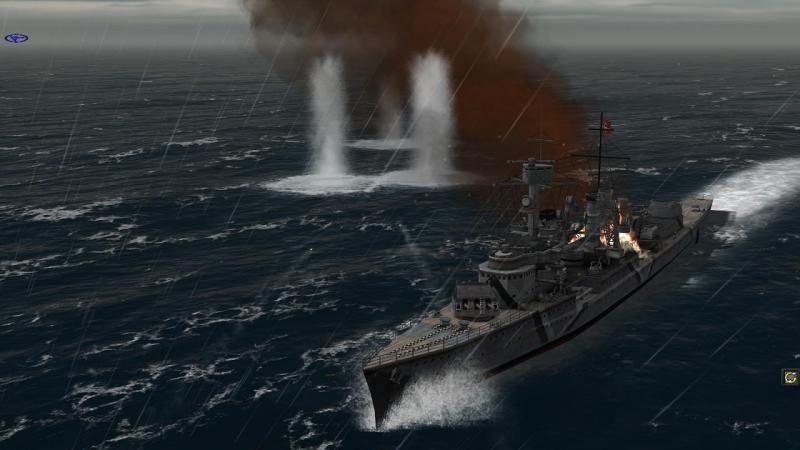
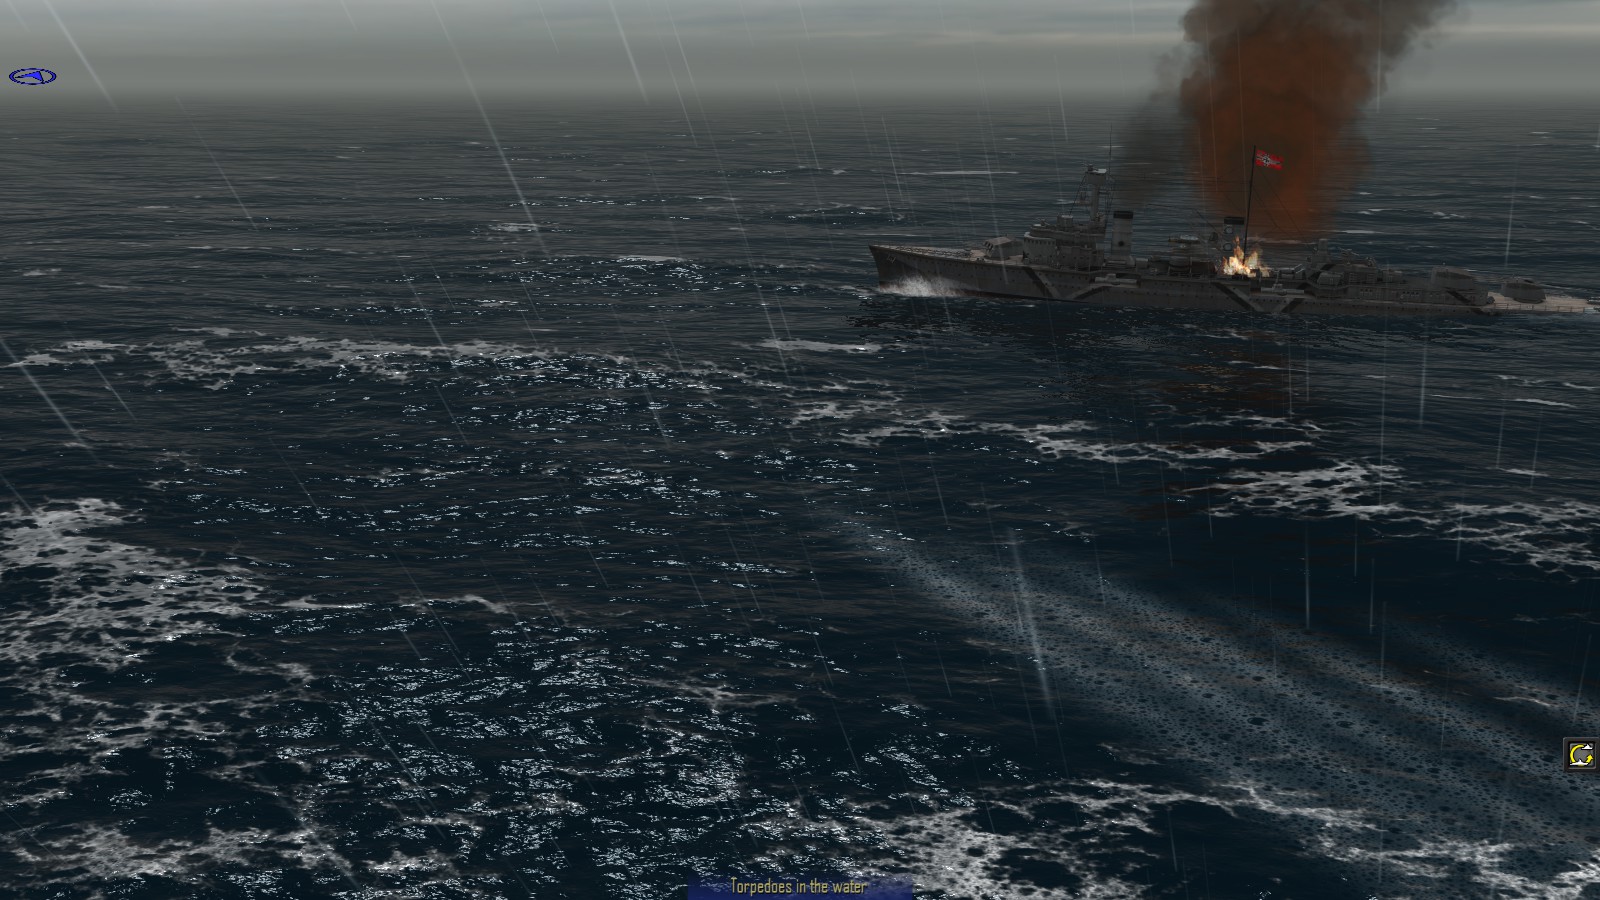
Random scenes and despatches from the middle campaign... I’m not sure why, but so far I’m doing rather better in this second Royal Navy static campaign, than I recall from my first pay-through. And both times, I’m finding it lacks the frustration of the RN dynamic campaign. The German version is excellent, but playing the British side, there's an excessive frequency of U-Boat ‘area ambushes’ of fast-moving warships in open ocean. Coupled with excessive torpedo accuracy, this is frustrating...though now that I think if it, I will turn on the 'dud torpedoes' option, to help simulate a greater probability of a miss than exists now. Back to the static campaign, and this time, I got so far ahead in the ‘arms race’ that I had plenty of renown points in hand, even after buying several battleships. I had two or three of these by the time the Germans had started to appear with heavy cruisers or ‘pocket battleships’, and four or five by the time the Scharnhorst or Bismarck class began to appear. As well as Revenge and King George V, my battlefleet now features three 16-inch gun battlewagons - sister ships Nelson and Rodney, and the USN's North Carolina. So I’m having fun, smashing my through the opposition, and while it's an unequal fight, there is definitely a certain satisfaction to be gained in using the 'from firer, to-shell-in-flight, to-impact' camera option to get a good view of the effect of a well-aimed 15-inch salvo on some hapless destroyer... I'm also getting valuable gunnery practice in windy conditions..and occasionally getting a fright, when the Luftwaffe shows up without warning, as it its wont. Even then, a single bomb or torpedo hit is not enough to seriously hurt the three battleships I now generally bring to every fight - as seen below, where, guns trained out, Revenge leads Nelson, with 'KG Five' at the rear of the line, turning to port. Except when the enemy has U-boats. Even one U-Boat. As they had in one mission, against two heavy cruisers, Hipper and Blucher and a U-boat, U-37. Rather than risk surface vessels, I bought another two ‘T’ Class subs to join the one I had already acquired to replace the late lamented Triton - another Triton (seems you are not prevented in 're-ordering' a lost ship). I pitched all three subs into the fight, three being the maximum from your total allowance of ten ships at any point. Better a partial victory, than run needless risks. Unfortunately, the automated force deployment didn’t place any of my submerged subs in a good firing position on the cruisers, and the U-boat was no-where to be seen/detected. The good news was that I had a single airstrike available (you soon get used to the the fact that the wargame mechanics deploy these like an on-board weapon, launched at an enemy by the ship or sub which has the strike in hand). Less good was that this strike was a rocket-equipped Liberator. I have been attacked by these but never deployed one myself. A bunch of ballistic rockets may be fine against a surfaced U-boat or unarmoured surface ship, but against heavy cruisers, was not likely to achieve much. I sent in the B-24 against the cruiser nearest one of my subs, in the hope that she might take enough damage to slow her down, or might be persuaded to turn towards me. Once you have selected your target ship and oriented the target marker to set up the attack direction, you click the ‘Launch’ button and in goes your plane, straight and level, a few seconds out from the target and already under AA fire. Your sole task is to his the spacebar to start the final attack, having judged the right position from the external viewpoint (no bombsights involved). For rockets, doing this causes the plane to begin a steep dive, hopefully towards your target. A second keystroke fires the rockets. Leave it too late, and your plane auto-aborts the attack! That’s assuming the defending AA doesn’t auto-abort your whole aircraft, first. This time, lo and behold, I got it right and most of the Liberator’s rocket salvo smacked into my target cruiser, roughly amidships. I was so surprised i didn't take any screenshots! This didn’t seem to have any observable effect, but the chance long range salvo which followed from the nearest sub sent Hipper to the bottom, which I did manage to snap. The other cruiser escaped and the U-boat pottered about without coming into view let alone range. Happily, the single warship kill got me through to the next mission. I really like the damage modelling in Atlantic Fleet. On-board fires can often be put out by your invisible and entirely AI damage control parties, or lists halted. Conversely, fires or torpedo, gun and bomb hits can result in delayed internal explosions, evidenced below by the rising, dispersing fireball over Z-31 as she tries to escape under cover of smoke. I still get caught out, sometimes, by enemy airstrikes, but at this stage I'm relying mainly in the ability of my big battlewagons to shrug off most bomb hits... ...IF they land a hit, that is, which they don't always... ...or don't get shot down in the attempt, which can certainly happen... Night actions can be fun, and though using radar estimates for ranging is possible, unless you fire starshells, the enemy, until close enough, can be invisible in the 3d world and just markers with no ID or course, on the map, which is a neat 'fog of war' feature. Below, North Carolina goes one way while Nelson and KG Five go the other, in a night fight in murky weather. By the time Bismarck showed up, I was well ready for her... ...and she and her consorts soon succumbed to my usual battleship pincer movement... I have now got to Mission 30 out of 50, and an having a blast, in various senses of the word. I now have a top- (battleship-) heavy fleet, well able to take the worst the Kriegsmarine can thow at us, even when they come in the form of 'H-39' Class battleships with 16-inch guns of their own. These gave me some serious concern in my first RN static campaign, but with battlewagons a-plenty and renown points to spare, I am already looking forward to the extra rum ration that will doubtless be issued to celebrate my eventual victory...I hope..!


-
From the album: Combat Sims
-
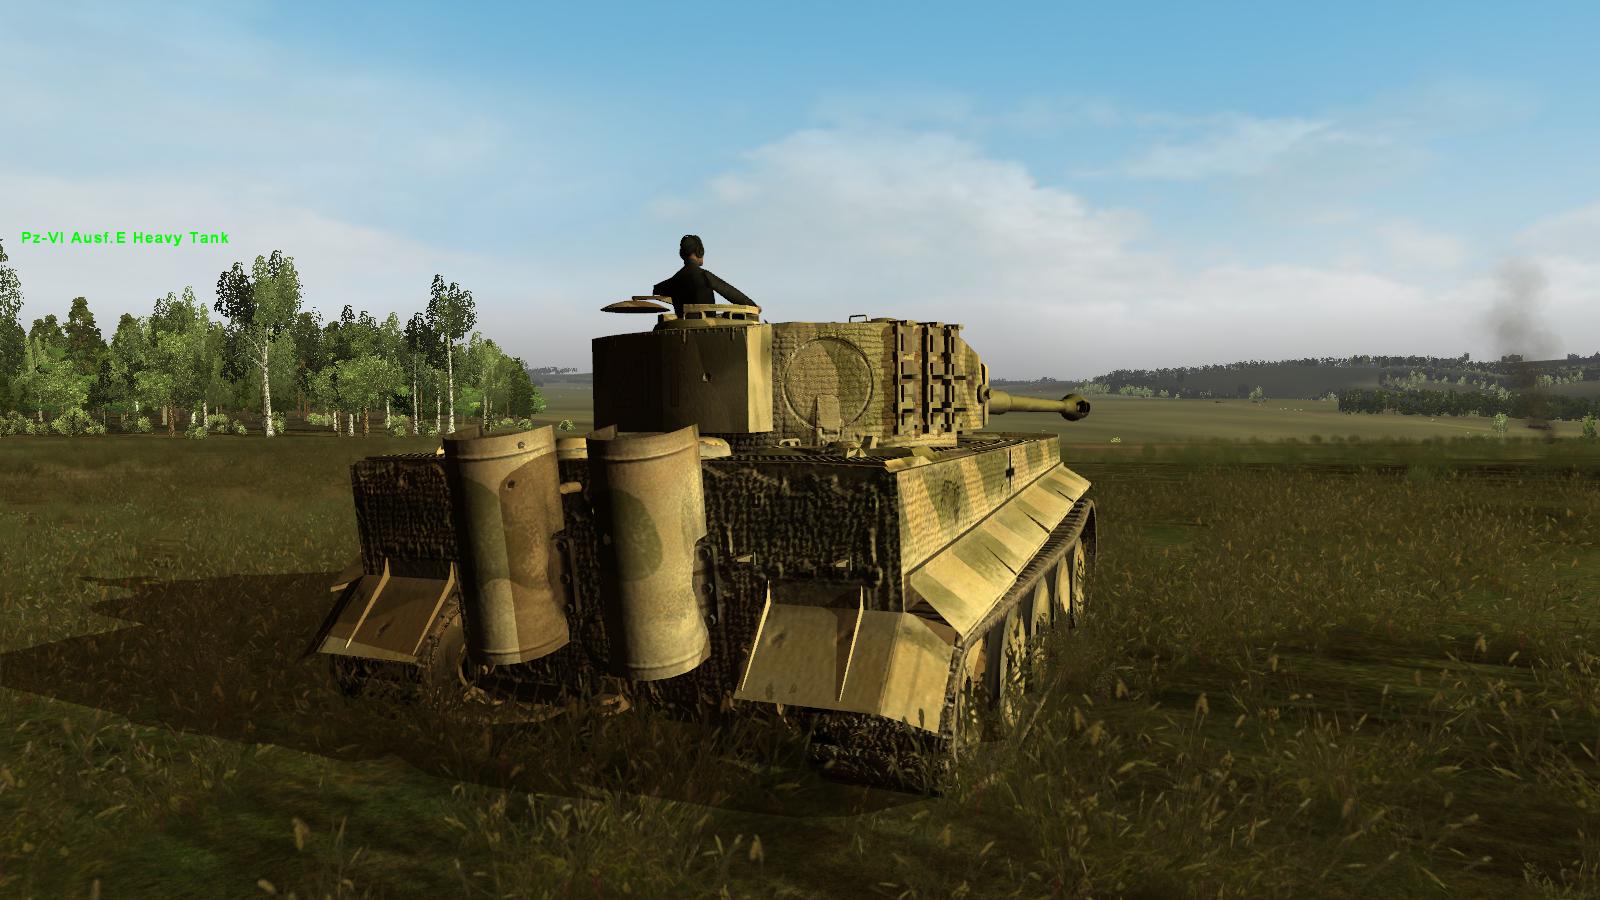
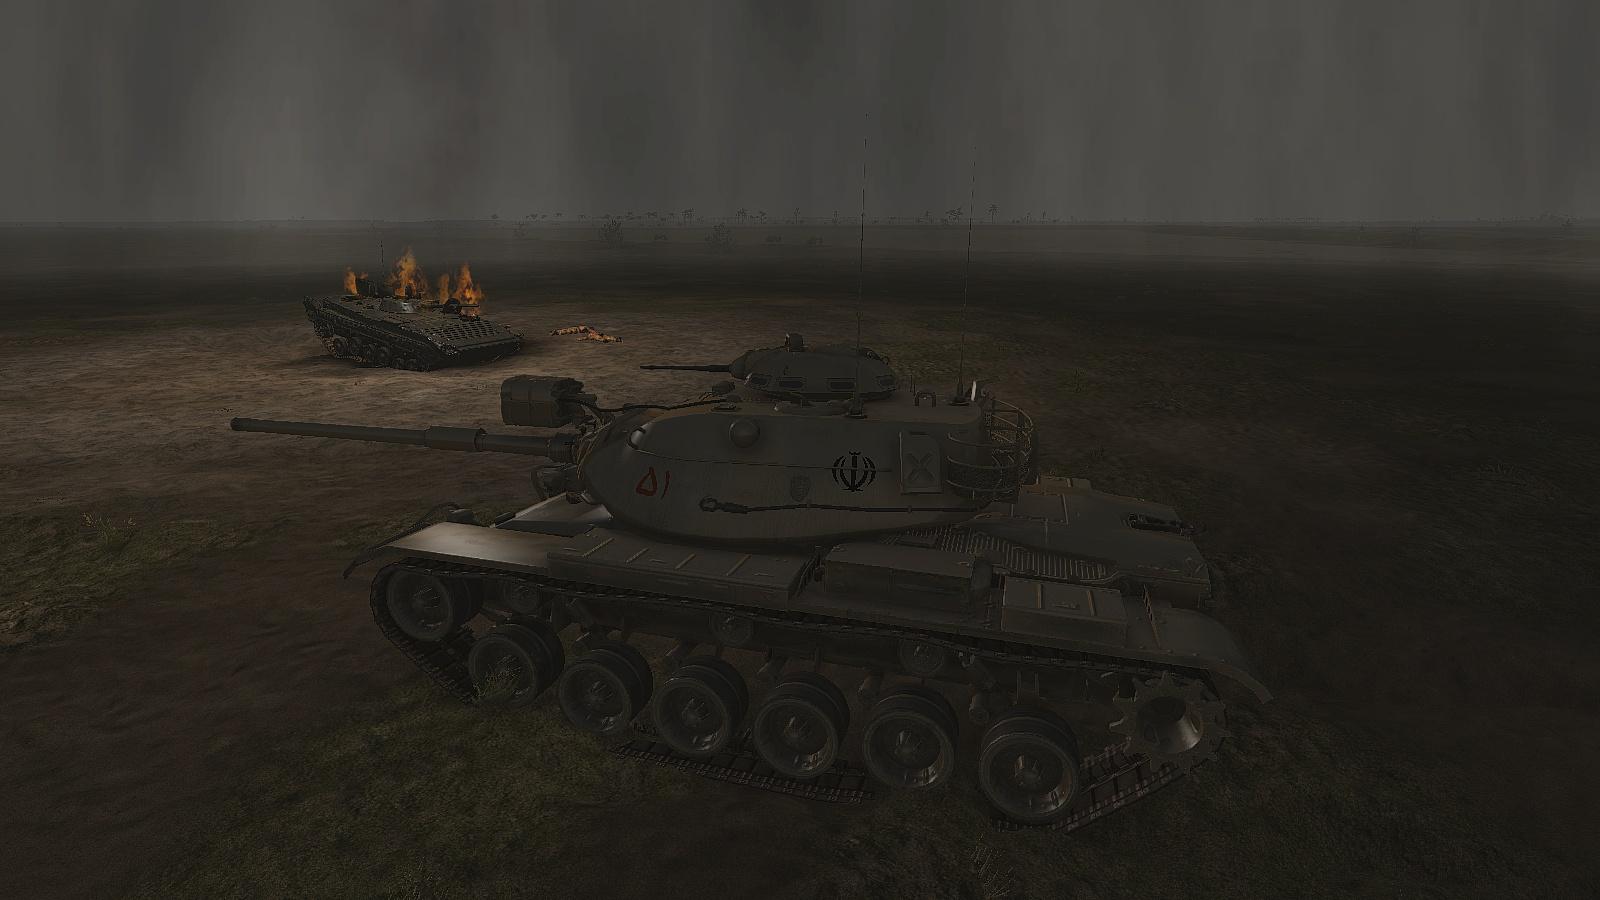
WW2 Battle Tanks - T-34-vs-Tiger - knocked-out Soviet armour
33LIMA posted a gallery image in Member's Albums
From the album: Combat Sims
-
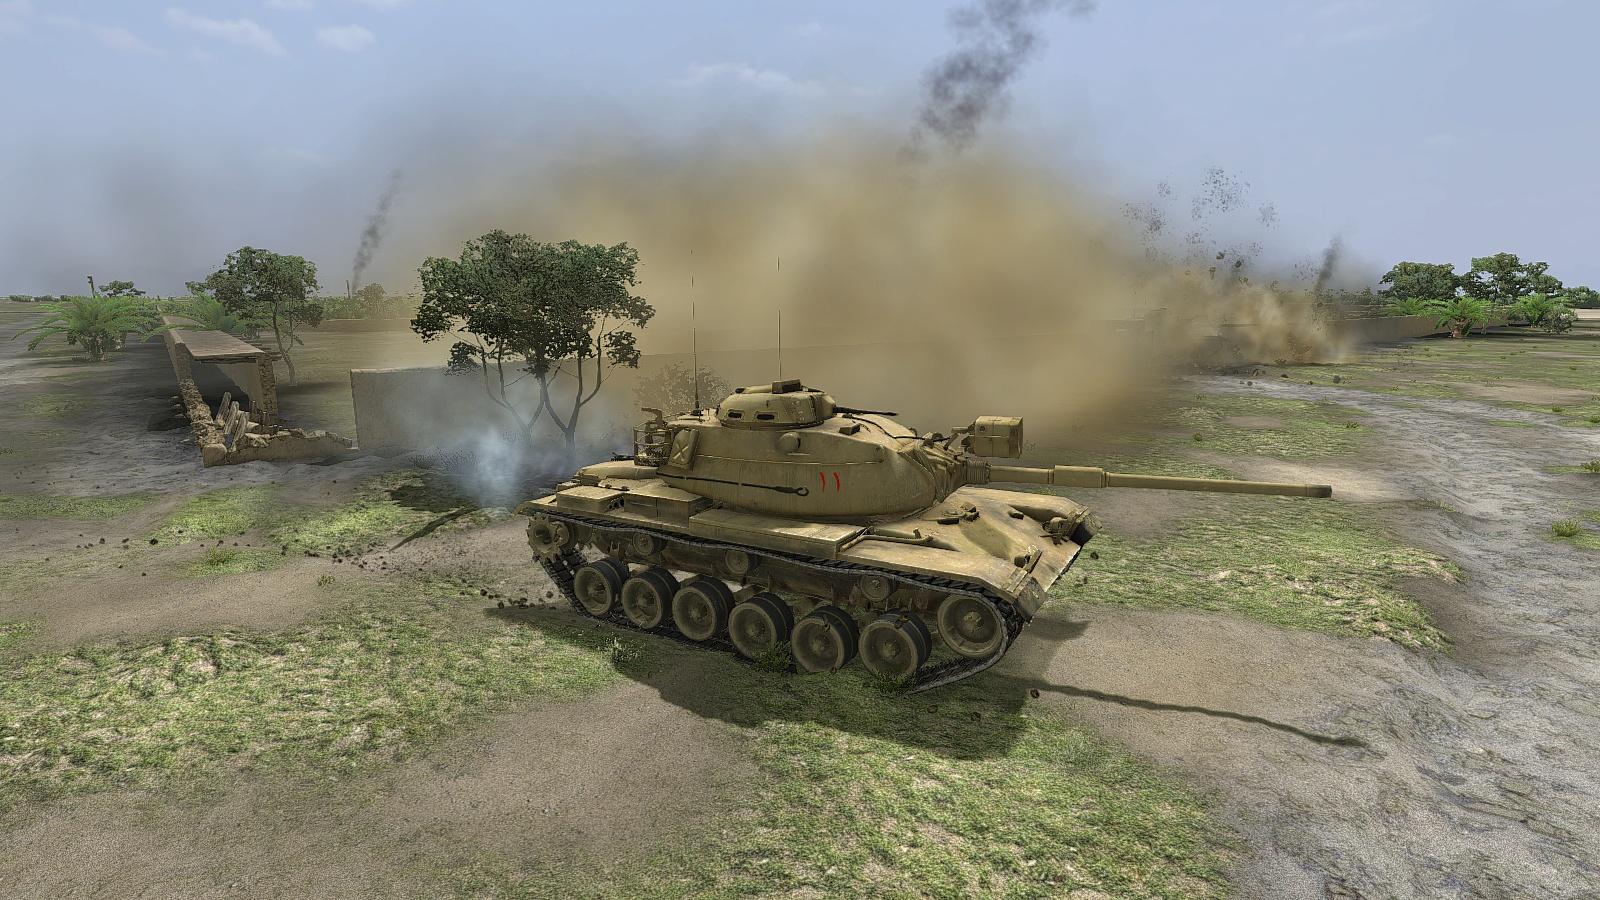
From the album: Steel armor - Blaze of War
-

From the album: Steel armor - Blaze of War
-
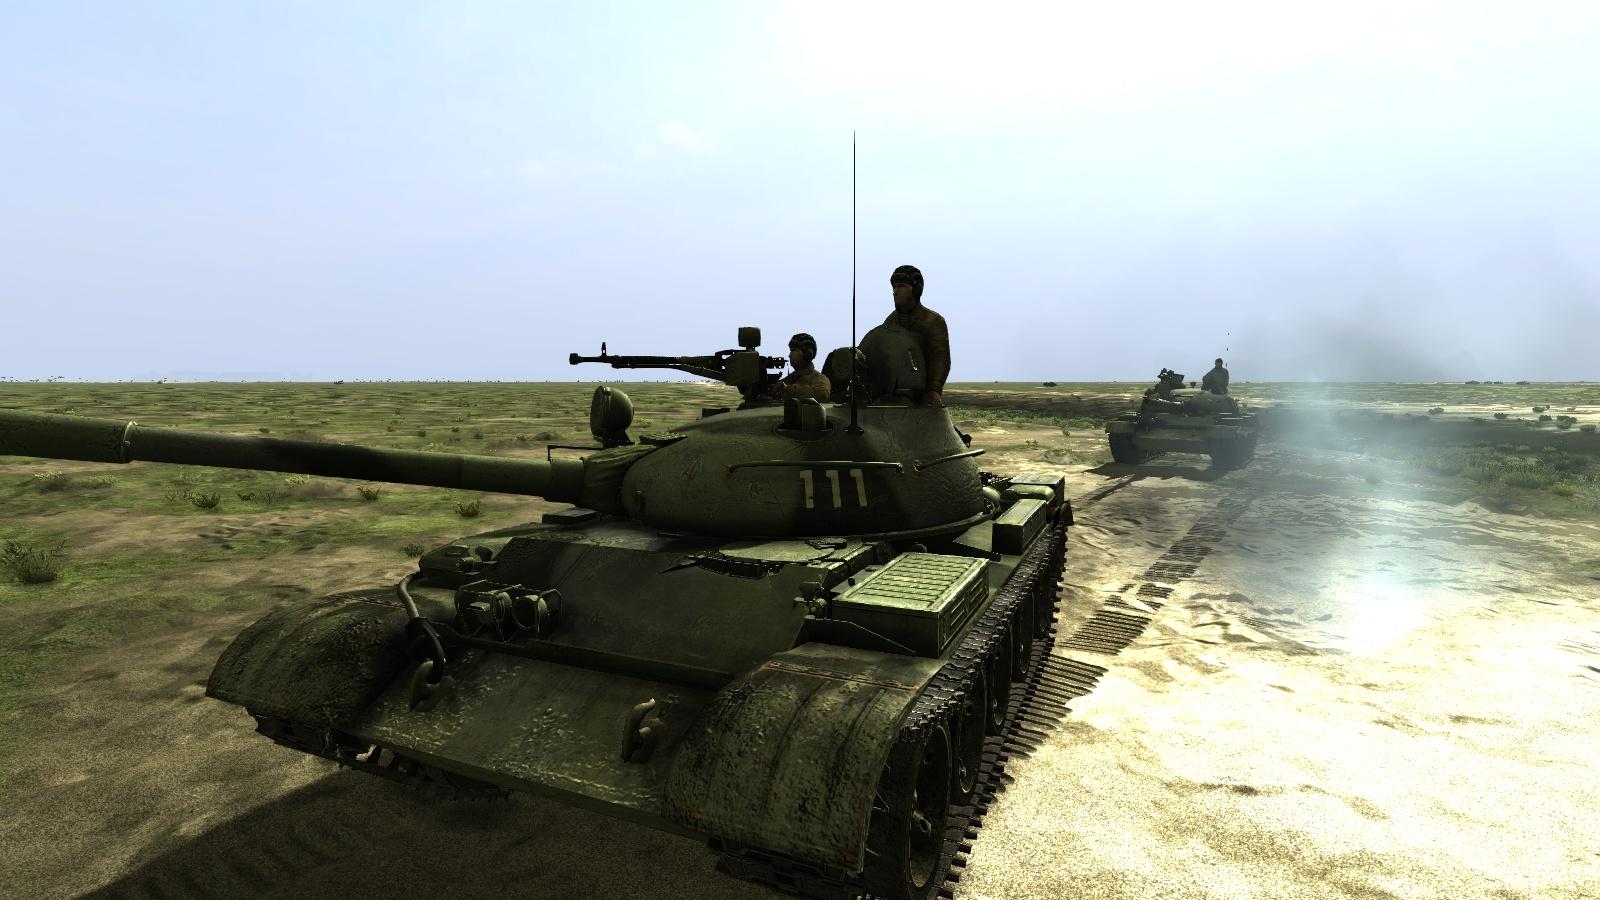
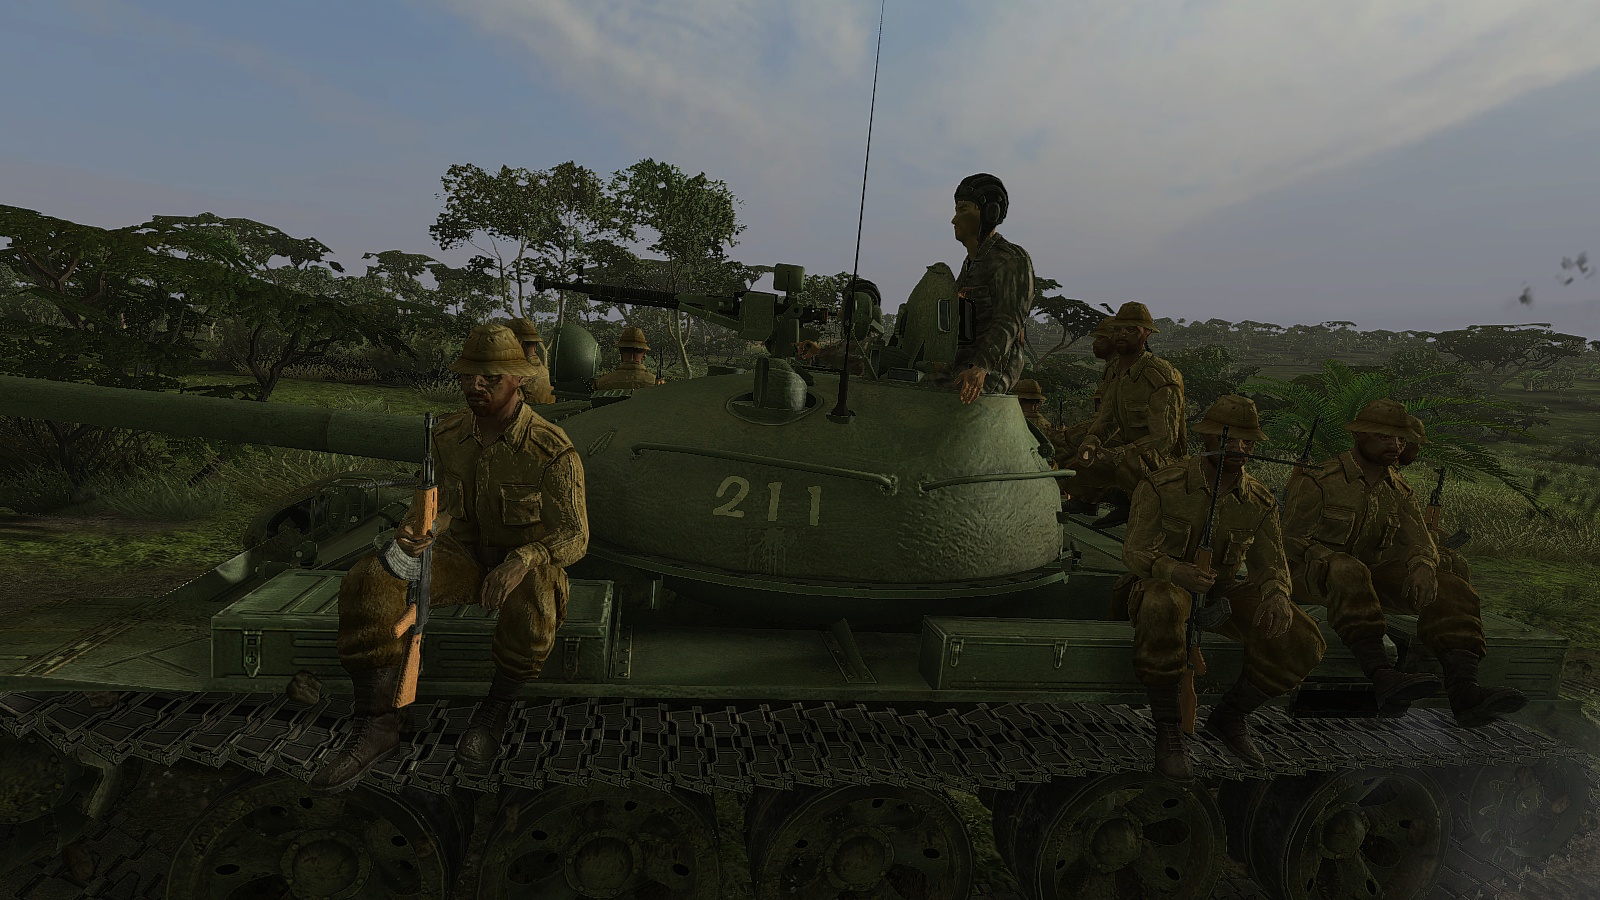
Steel Armour Blaze of War - Angolan T-62s with tank riders
33LIMA posted a gallery image in Member's Albums

From the album: Steel armor - Blaze of War
-
Steel Armour Blaze of War - Angolan T-62 with tank riders
33LIMA posted a gallery image in Member's Albums
From the album: Steel armor - Blaze of War
-
Steel Armour Blaze of War - Angolan T-62 with tank riders
33LIMA posted a gallery image in Member's Albums

From the album: Steel armor - Blaze of War
-

From the album: Steel armor - Blaze of War
-
From the album: Steel armor - Blaze of War
-
From the album: Steel armor - Blaze of War
-
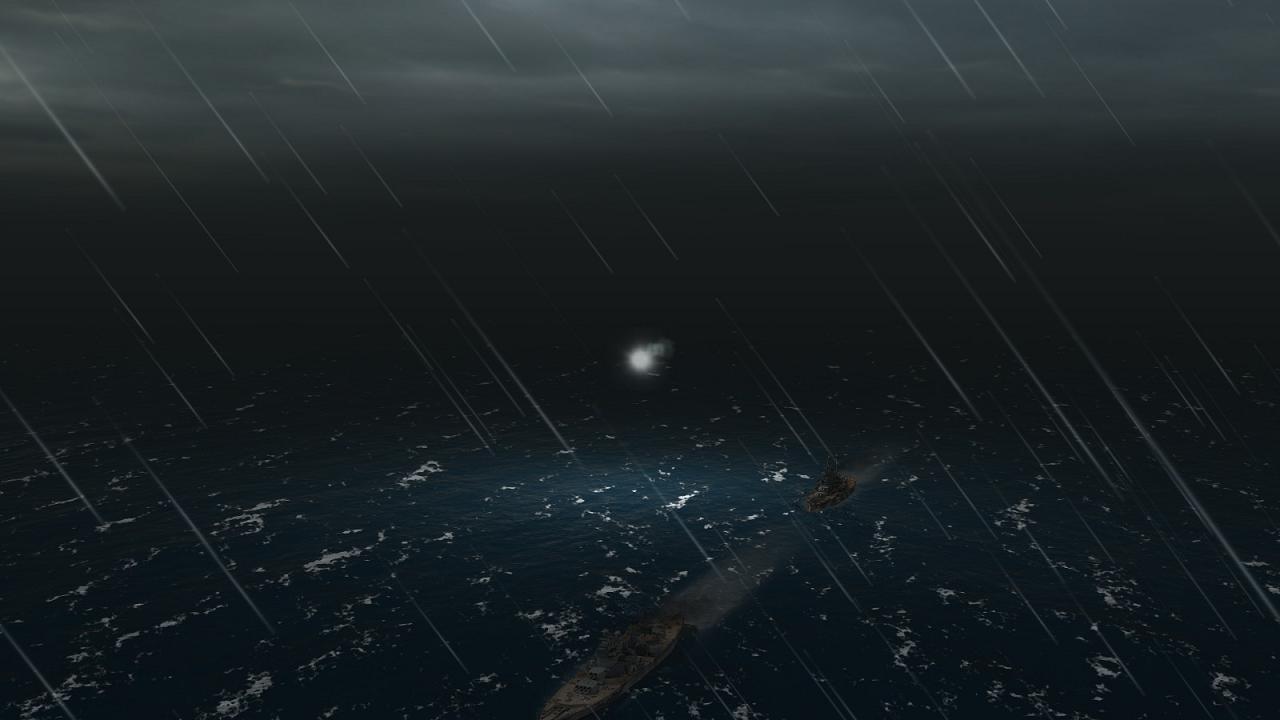
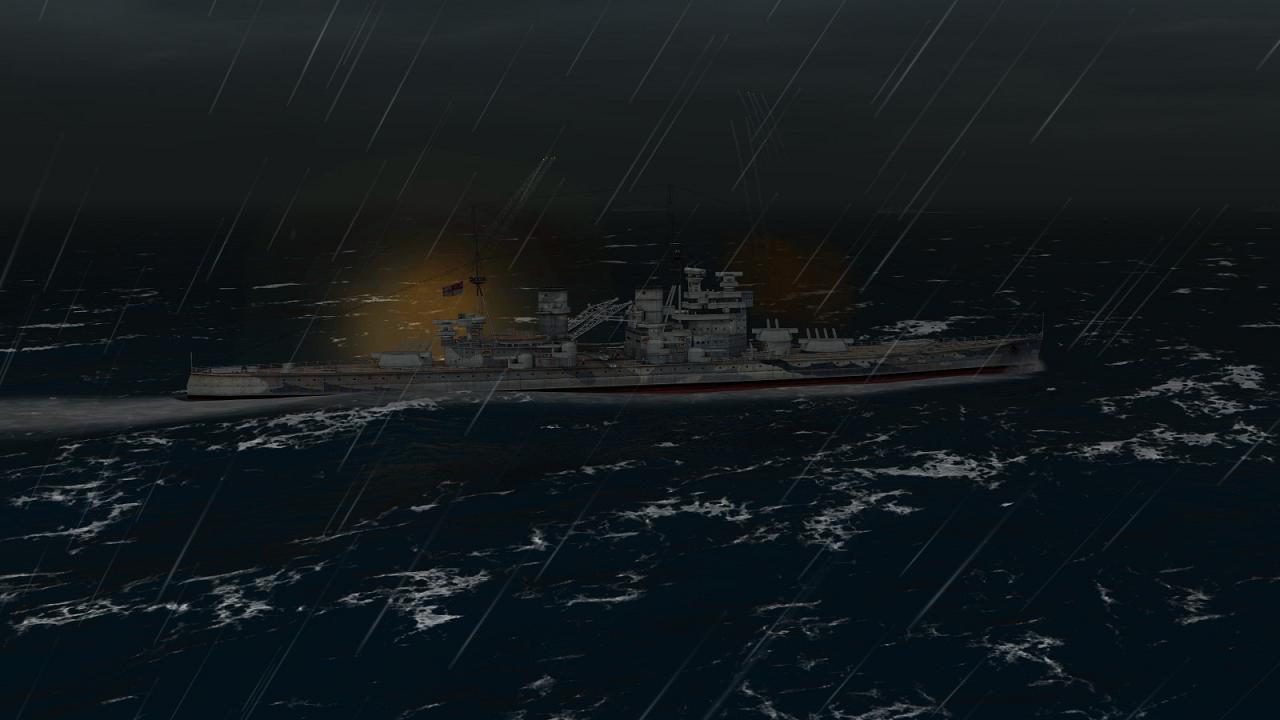
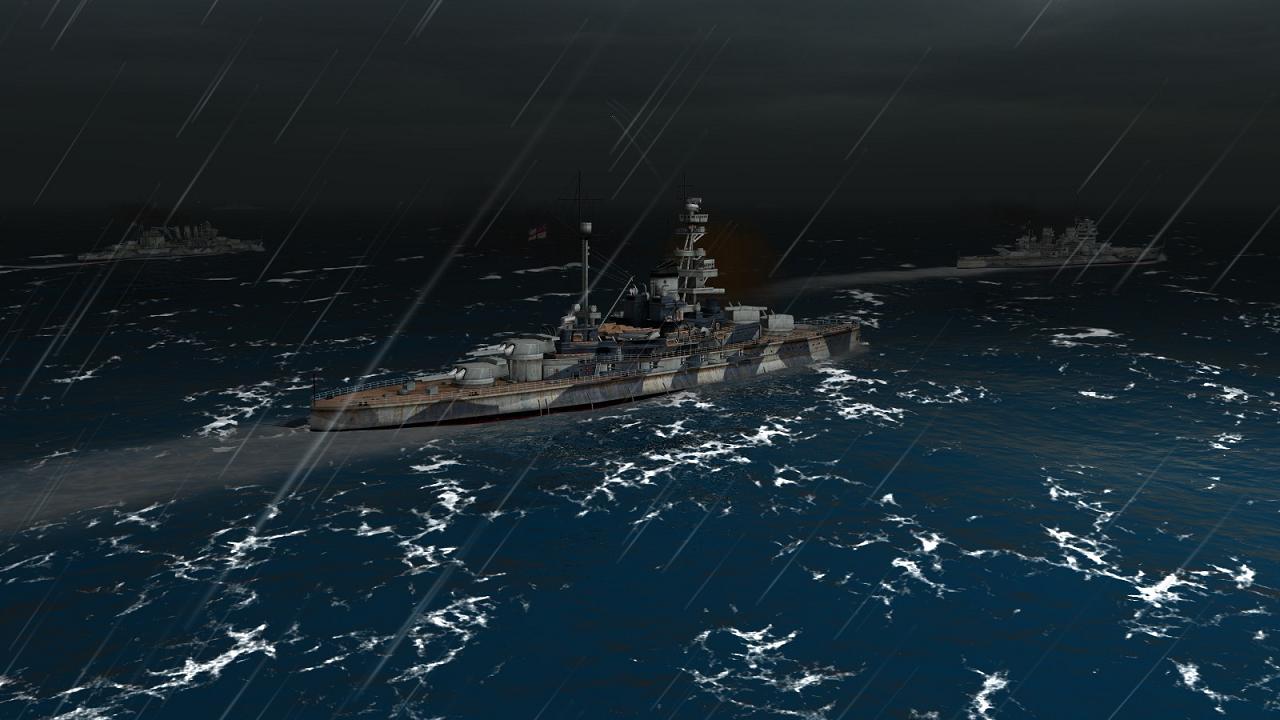
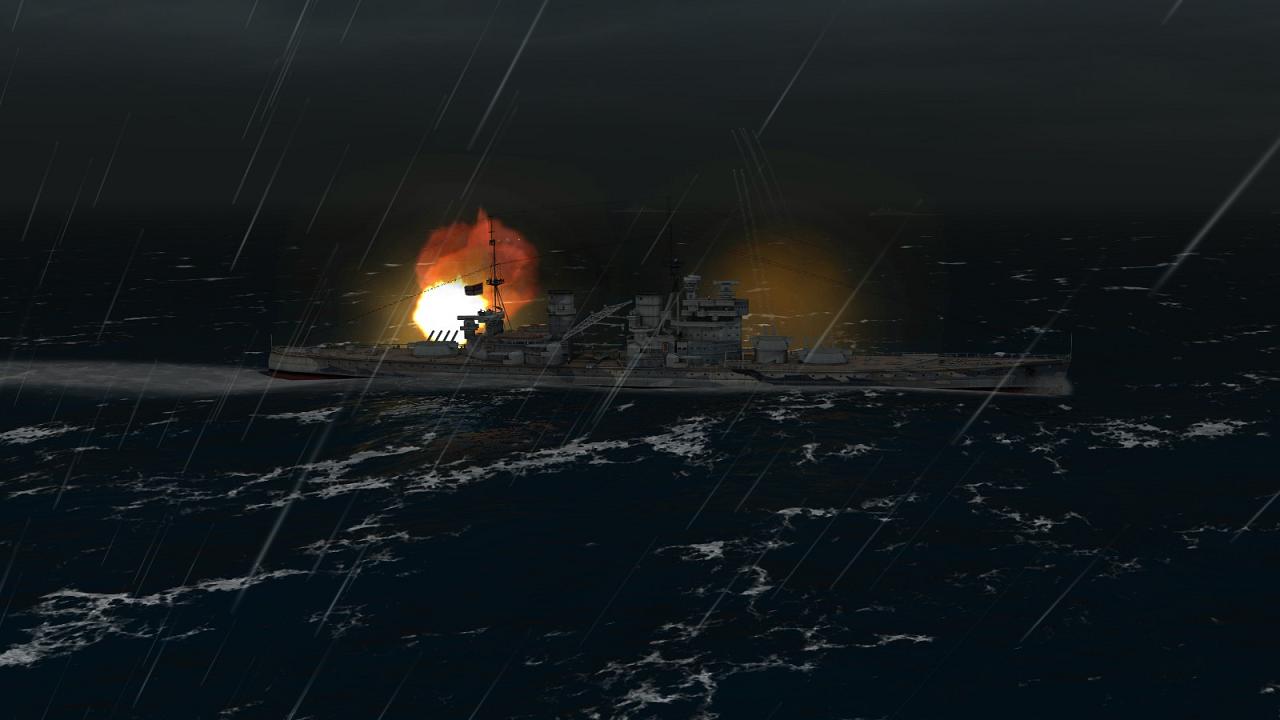
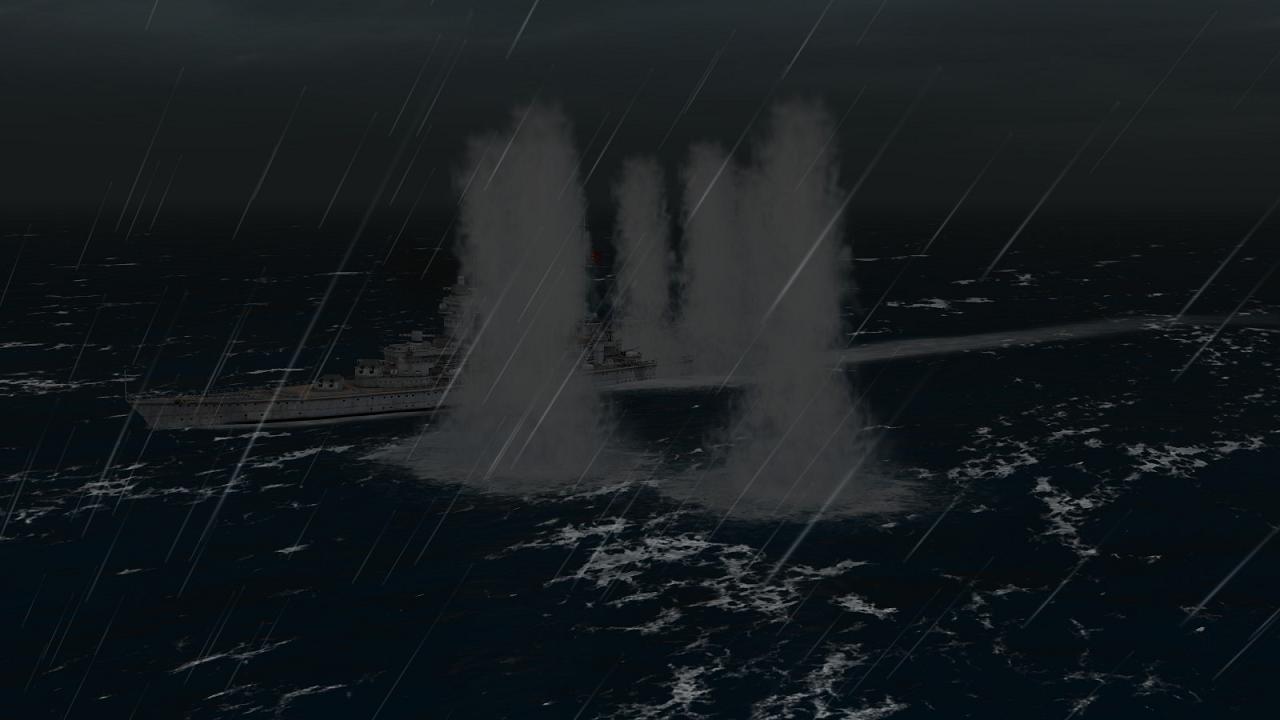
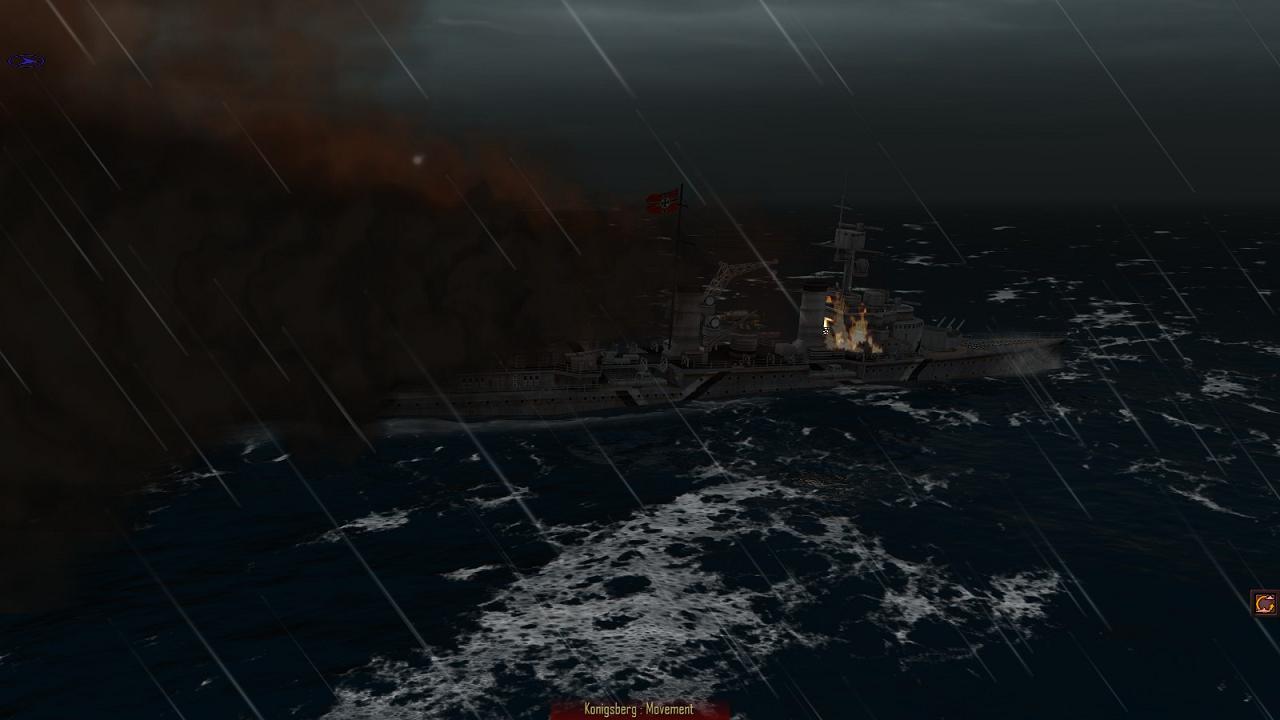
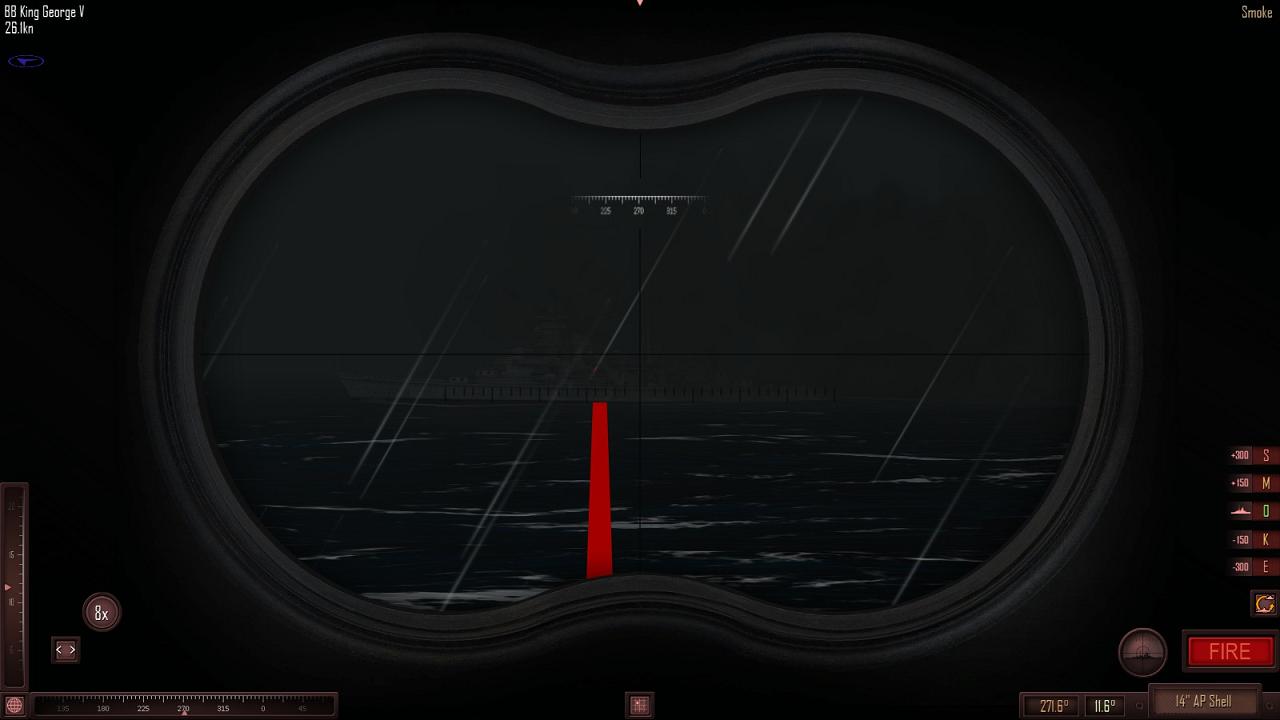
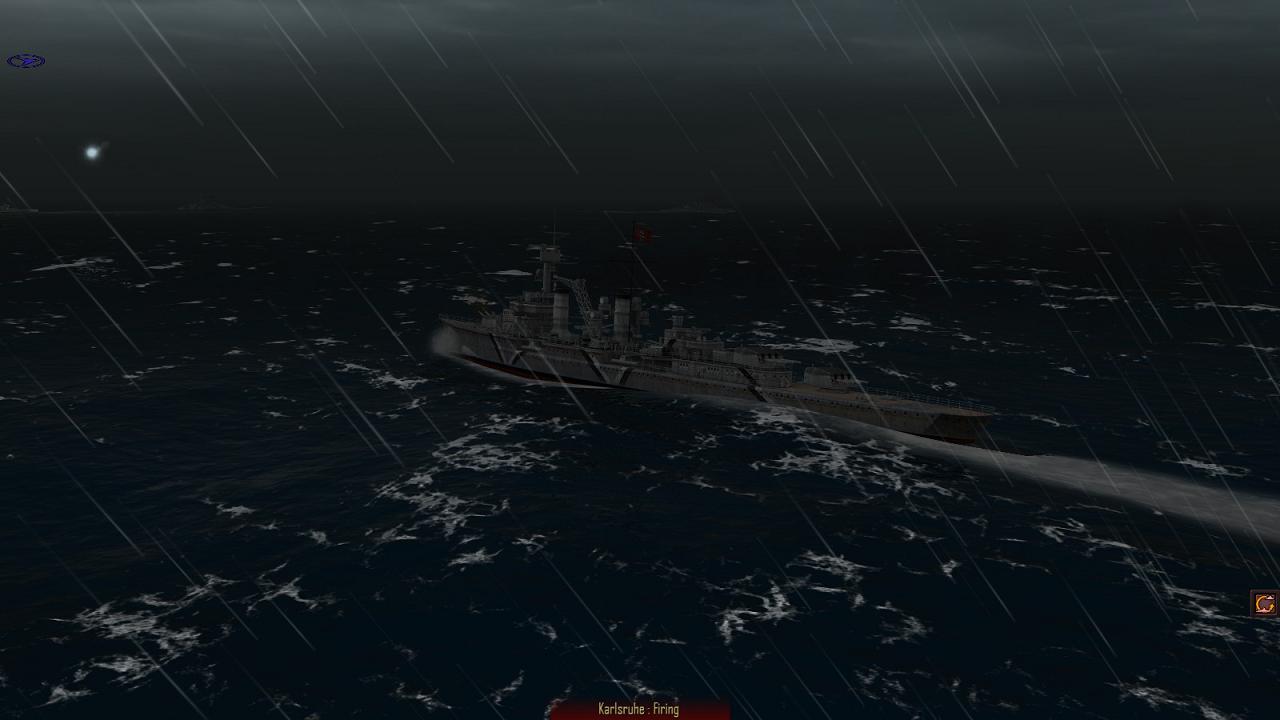
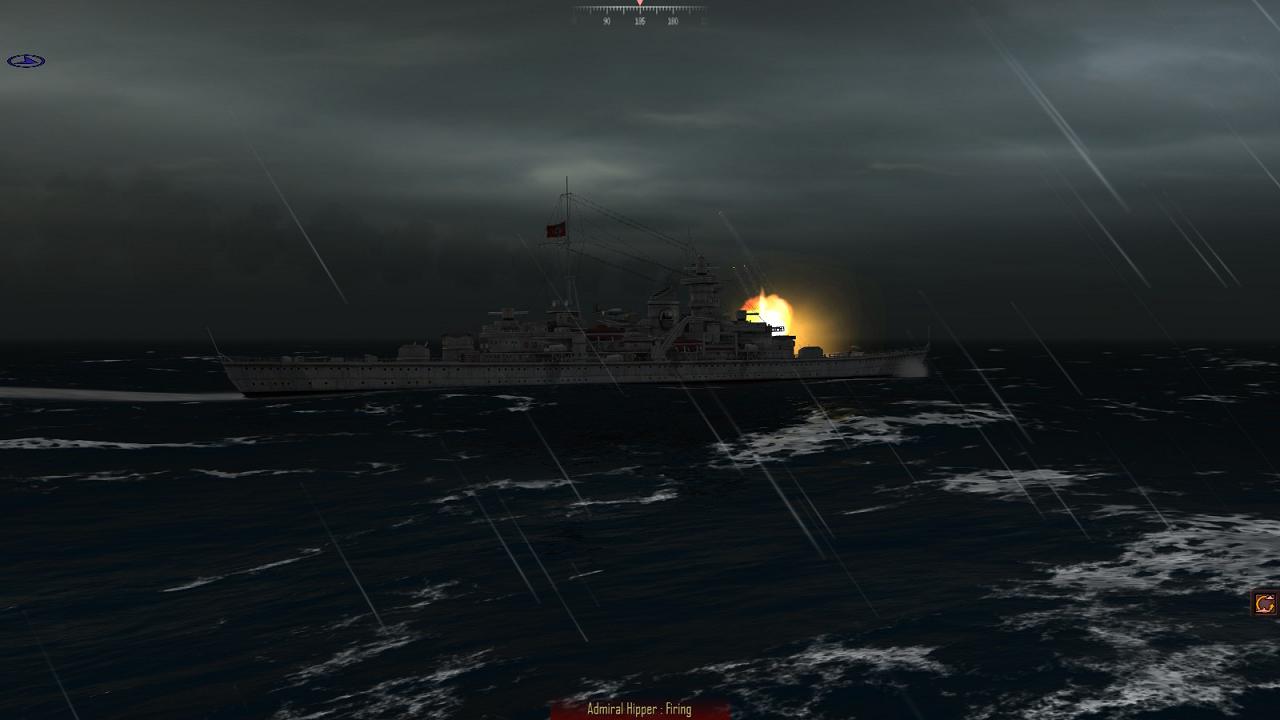
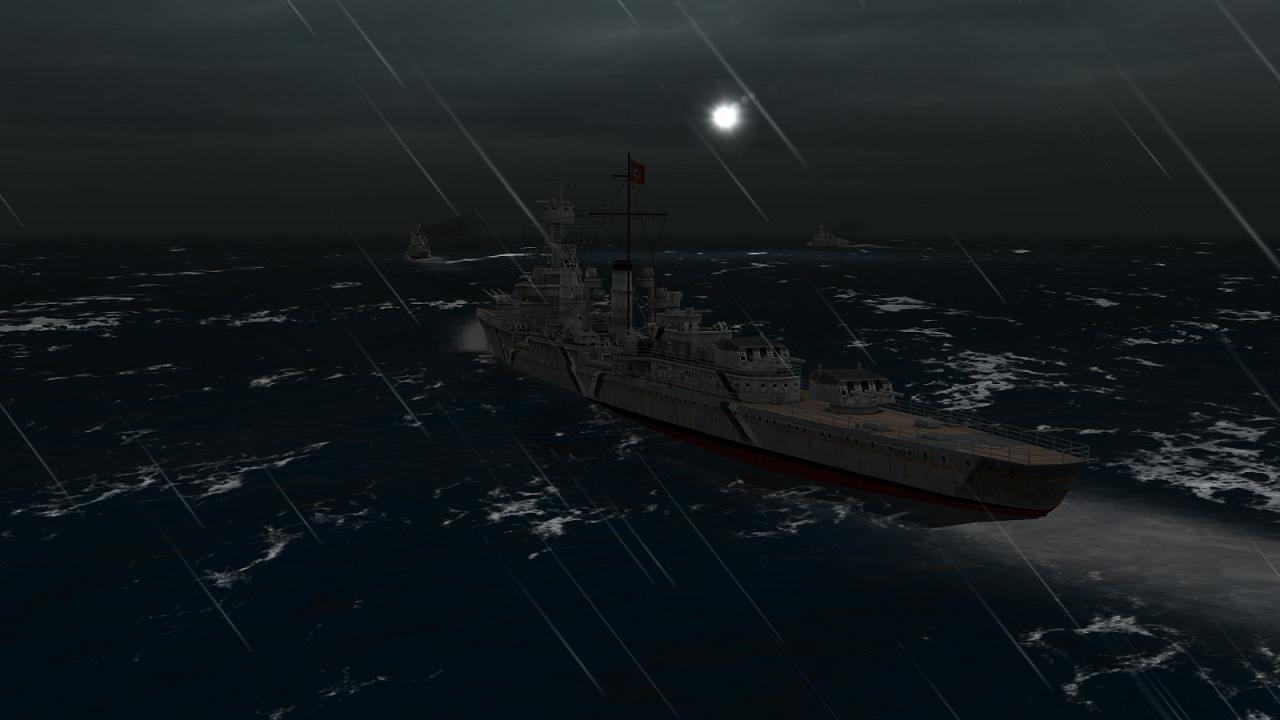
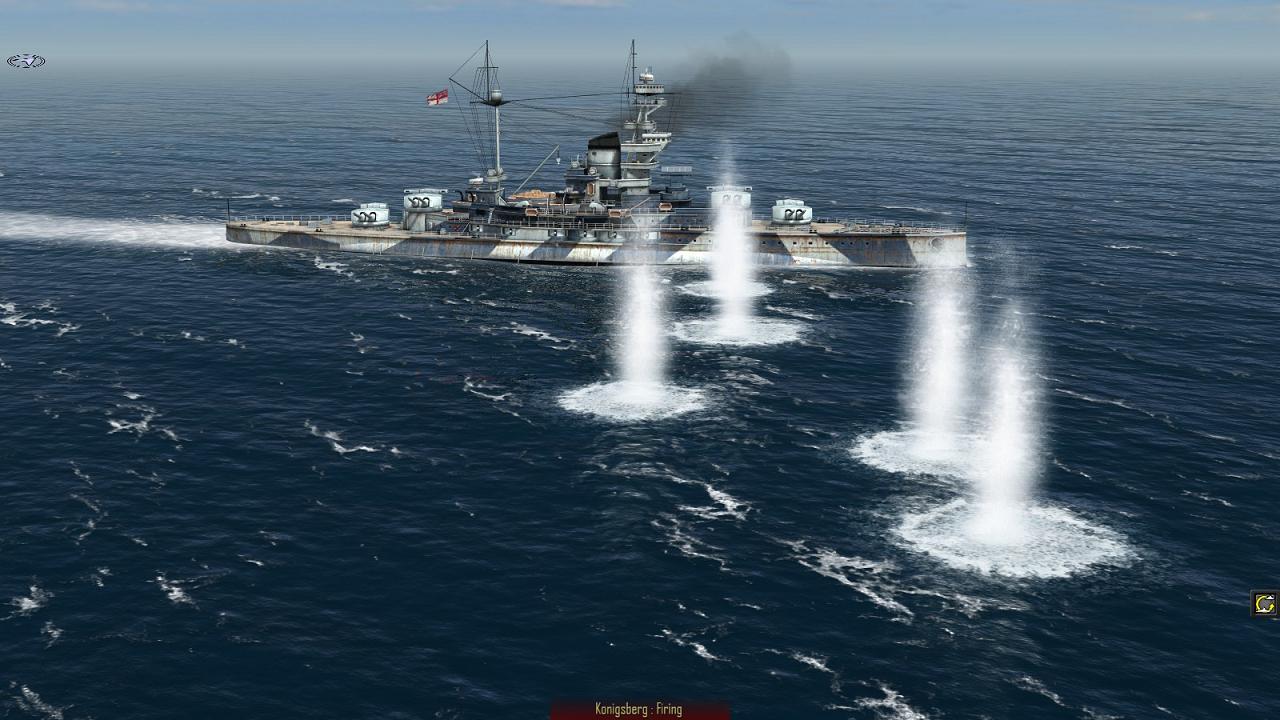
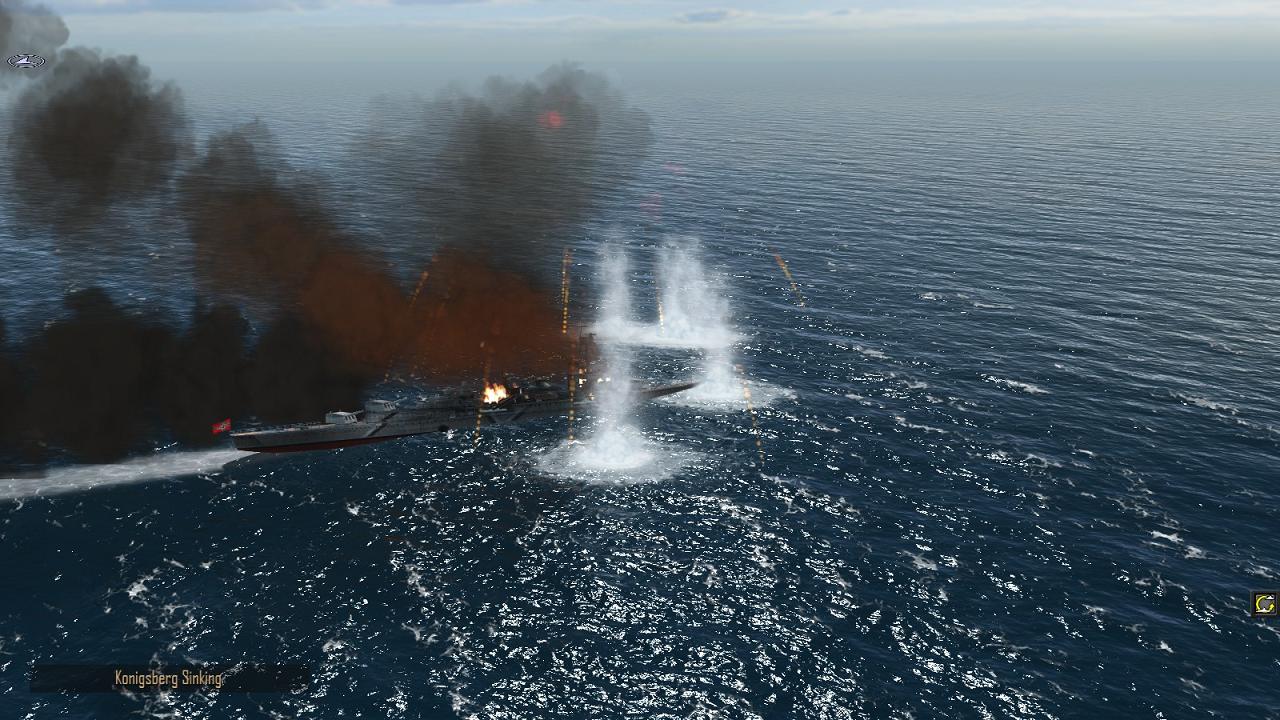
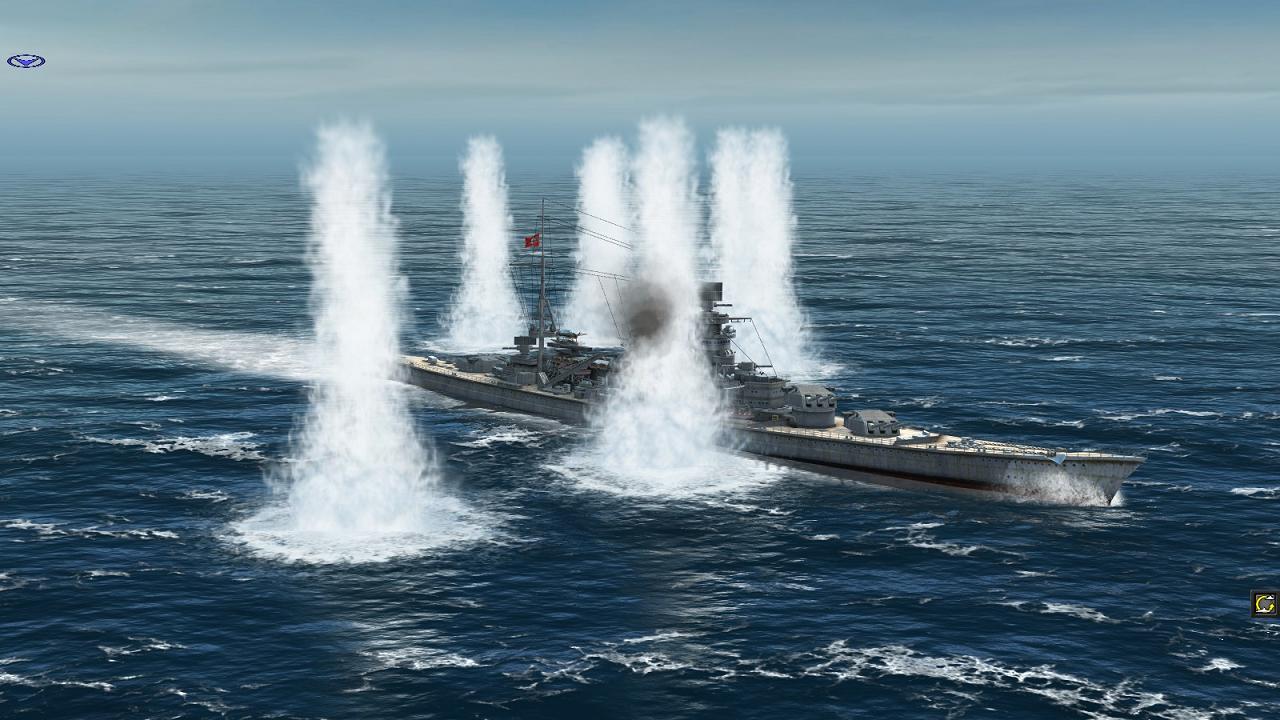
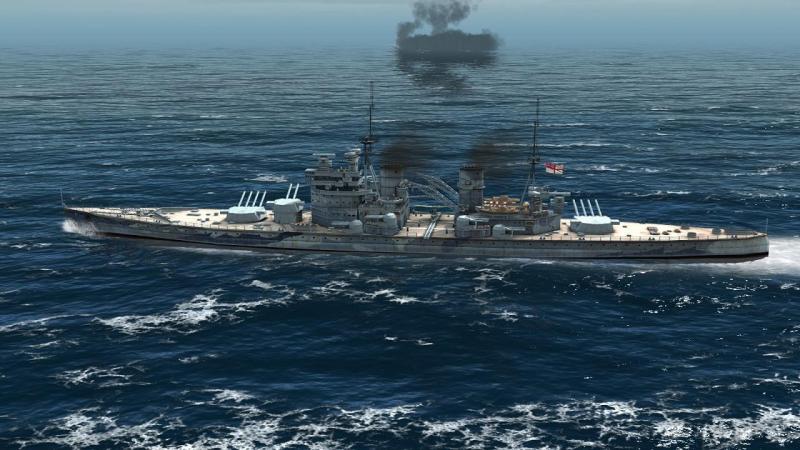
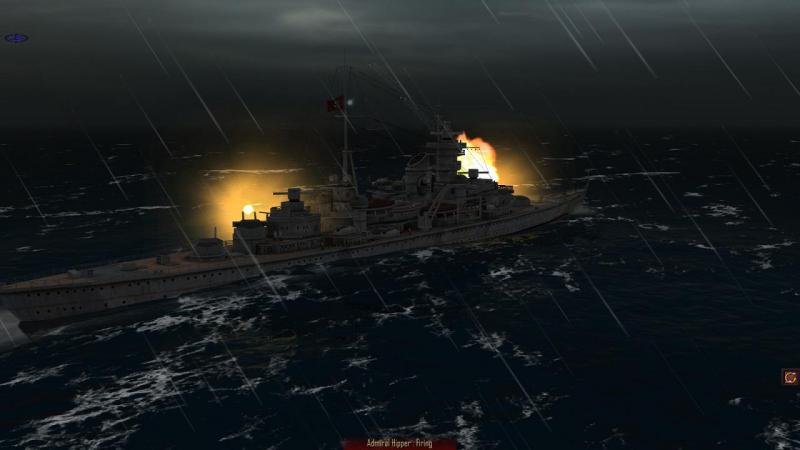
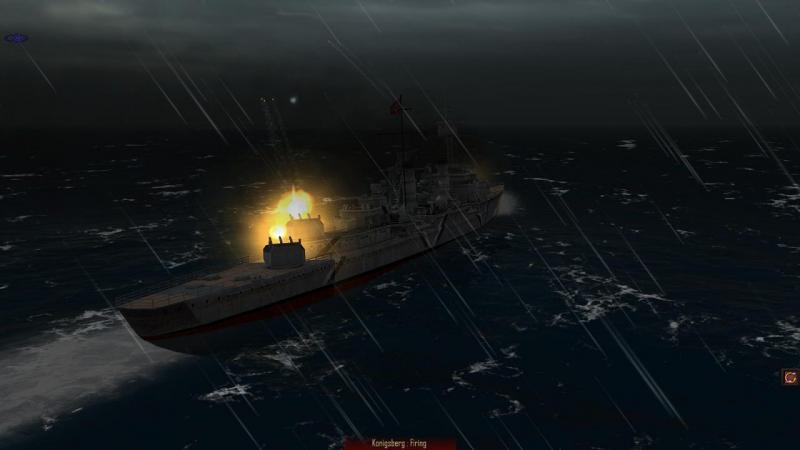
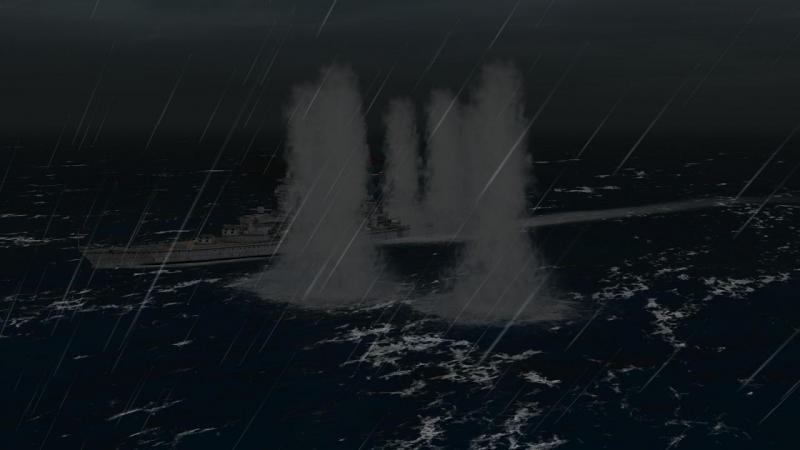
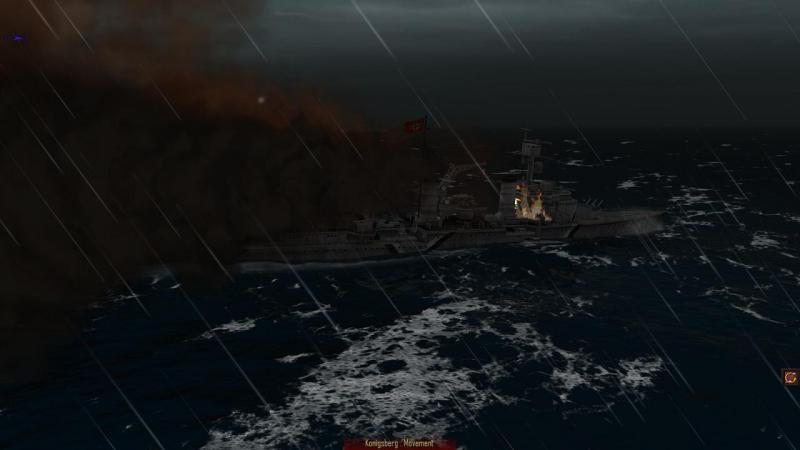
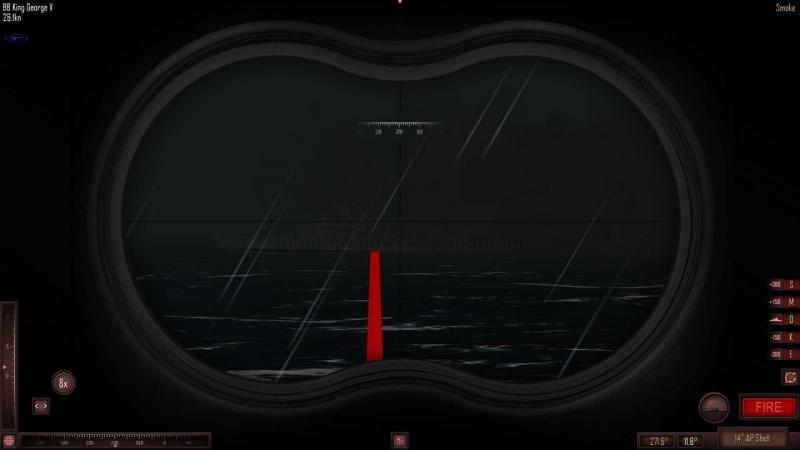
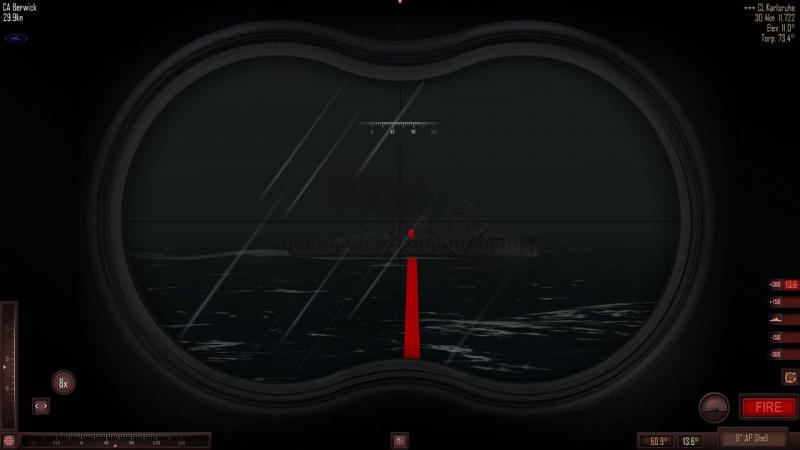
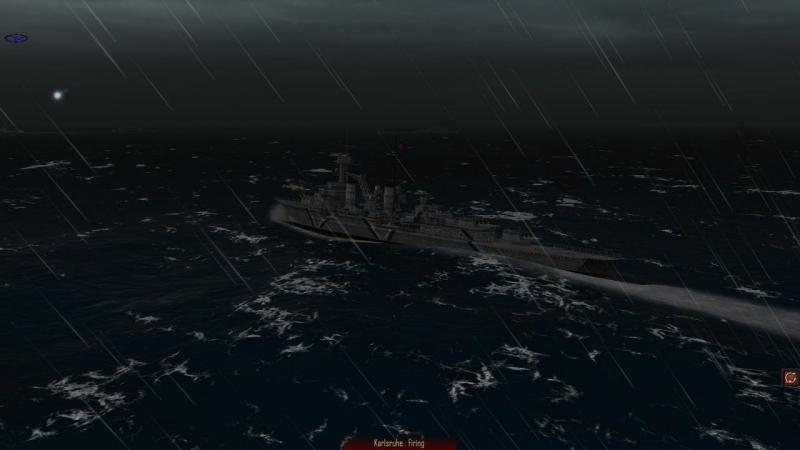
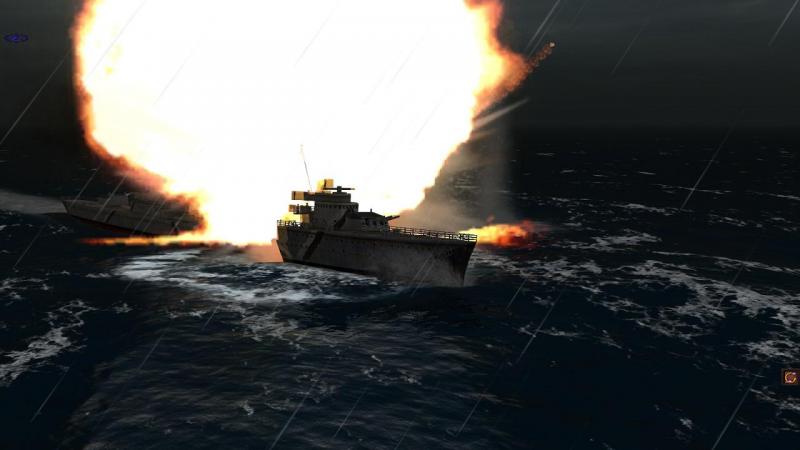
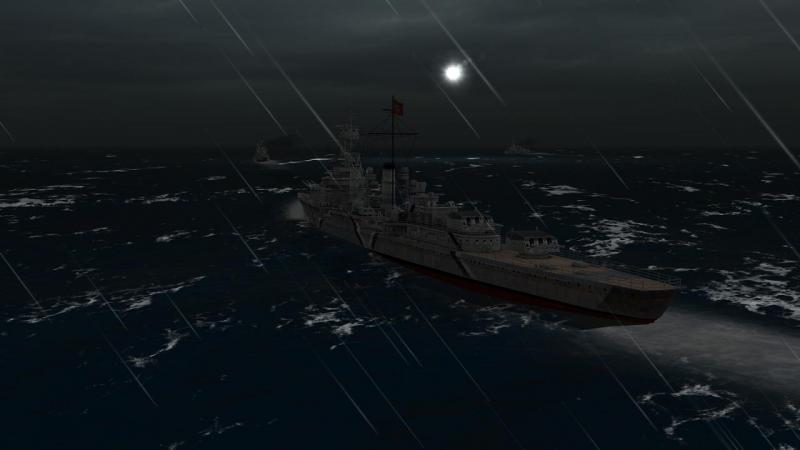
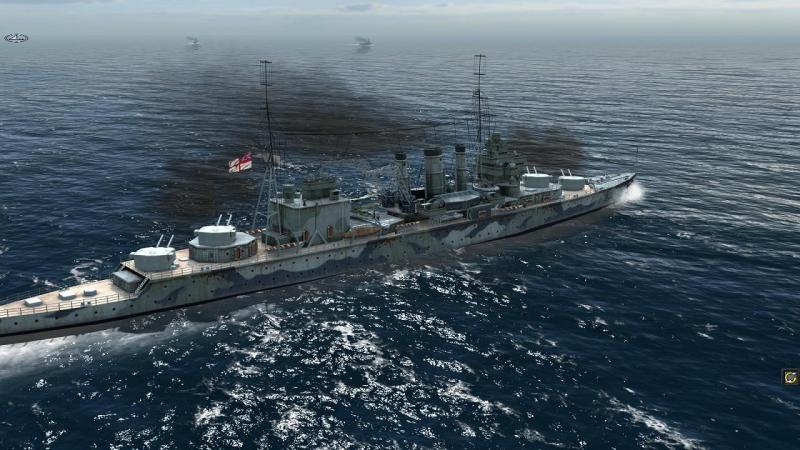
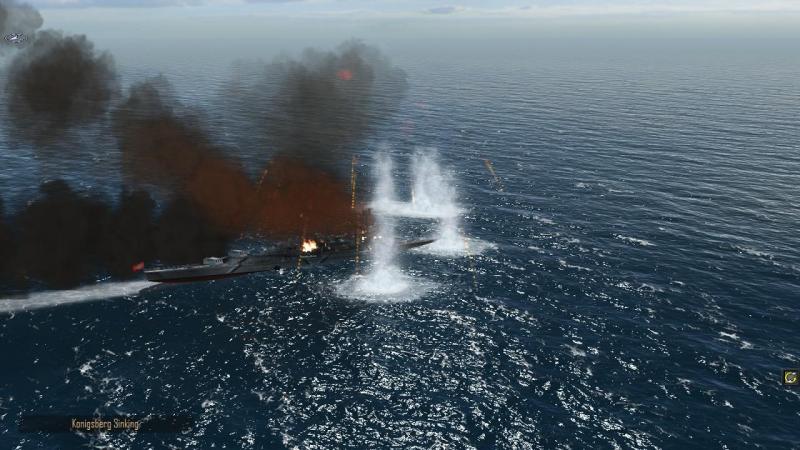
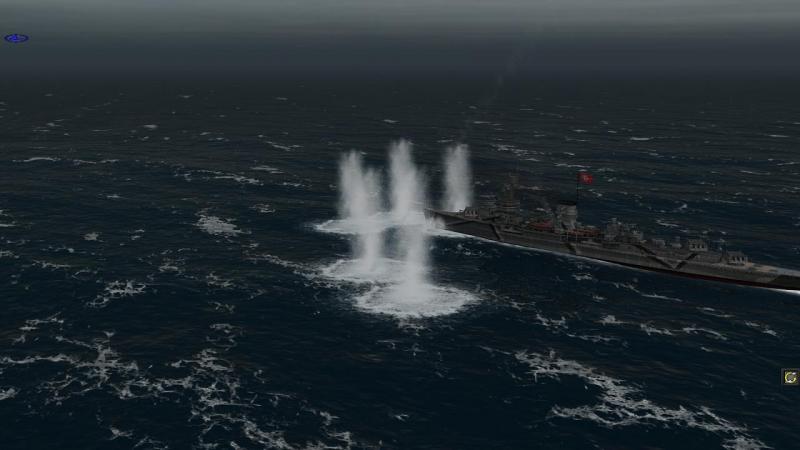
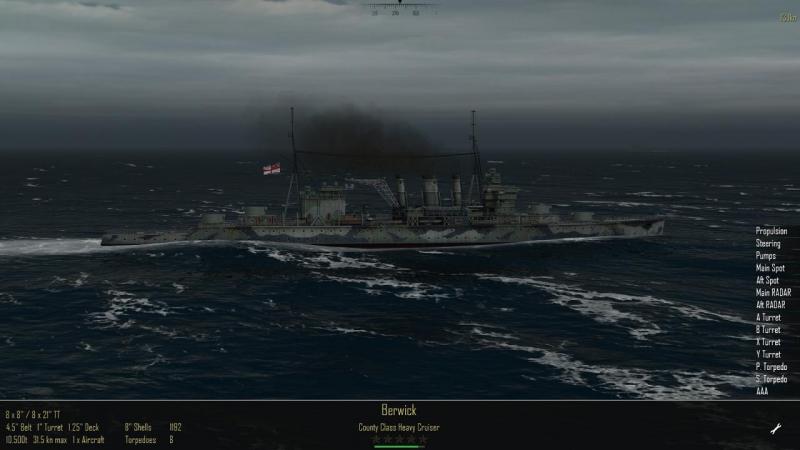
Ill met by starshell! My first chance to slug it out with my two battleships came in the form of a night action against two light cruisers, Konigsberg & Karlsruhe, and one heavy cruiser, Hipper. Individual enemy ships lost in one battle may re-appear the next in the static campaign, otherwise many would end before 50 missions, since the real Kriegsmarine had a rather limited supply of surface vessels! The enemy had the initiative/first move this time so I had to put up with watching as they cut loose, without the ability to do anything about it. Hipper opened festivities with a full broadside directed, as usual, at the nearest dangerous target, King George V. Happily, this went over. Then it was the turn of her lighter consorts. One of them opted to illuminate us with starshell. I tend to use these rarely, becasue unless visibility is exceptionally poor, they help only the default firing solution, and I normally revert to the more accurate shot or spalsh history tools to correct my fire, after the first salvo. For the AI enemy, though, illumination, I believe, improves their shooting. So for them, it's very worthwhile, not just eye candy. Knowing that certainly helps concentrate the mind, when you've been illuminated. You don't have any control over ship placement at the start of a battle. And opposing sides nearly are always within gun range from the outset. My very first move was for KGV to turn to starboard and let fly with a broadside of her own. There was a significant crosswind and while this was all right for range (I usually find that about half a degree less than the recommended elevation is better for the first salvo), my rounds landed just astern of Hipper. Not a bad start, by my standards! Revenge was next. I turned her less to port than KGV, and did not increase the revs, intending that she should open up a bit of distance from my leading battleship. Never mind the risk of collision, there's no point in presenting the enemy with a dense target zone, where shells directed at one ship might actually hit another. Revenge's first salvo was from 'A' and 'B' turrets only, since 'X' and 'Y' were not yet able to bear on her target. This was one of the light cruisers, my superiority in firepower rendering it un-necessary for me to concentrate on one or maybe two targets at a time. Berwick turned the other way, to set up my usual naval pincers movement. Soon, everybody was banging away at everyone else, in a classic surface engagement of the sort that Atlantic Fleet does so well. The difference, of course, was that I was banging away with mainly 14-inch and 15-inch guns, against enemies with just 6- and 8-inch weapons (although AF does 'weight' these broadsides, to allow for the lighter weapons' higher rates of fire). Konigsberg was the first ship to suffer serious damage, probably hit by Revenge. If so, the cruiser was lucky to stay afloat long enough to make smoke and turn away, after suffering a secondary explosion By this time, Hipper had been hit hard enough to persuade her, too, to try to disengage under cover of a smokescreen. King George V gave her no respite. The fight was not entirely one-sided, however, with Hipper for a time coming out from her smokescreen to land an 8-inch hit or two on KG V. Meanwhile, Berwick was hammering away at Karlsruhe, but with no observable success. Gamely, the light cruiser zig-zagged towards us, firing as she came, and gradually closing the range. Karlsruhe's luck was bound to run out sooner to later. Which it duly did, in firey style. She didn't go down, but meanwhile, Hipper went under instead, hit by more 14-inch rounds from King George V. The damaged Karlsruhe was now facing impossible odds, but on she came. Perhaps her steering had jammed; this is not uncommon in Atlantic Fleet and can take a variable amount of time to be repaired. She was, by this time, abeam of Berwick. Next move, all three of my warships were able to engage Karlsruhe .A first salvo is always something of a ranging effort but with Berwick hammering away and the two battleships joining in, it wasn't long before the plucky cruiser met her inevitable end. That's as far as my current Royal Navy static campaign has got, so far. I have found it most thoroughly enjoyable, more so than the dynamic equivalent for the RN, which suffers from too-frequent U-Boat 'area ambushes' of surface ships, as well as alert convoy escorts being significantly too vulnerable to the same foe. As a dilletante wargamer of old well accustomed to alternate move gameplay, I have long ago become entirely comfortable with Atlantic Fleet's non-continuous gameplay. The many beautifully-rendered ships, and the visual and environmental effects, I find as much of a delight as I did when I first clapped eyes on them; likewise the sounds and music are a most effective accompaniment. Two campaign systems for each side, a custom battle generator and a pack of 50 historical battles provide exceptional scope for all this content. Great artwork and clean and effective interface design complete a PC package which entirely belies its mobile device ancestry. I would dearly love to see some measures to make subs slightly less deadly; and a few other realism improvements here and there, within reasonable limits, would be nice to have. But the simplified representation of the deployment and tactics of subs (and planes) is a small price to pay for their presence at all, and readily rationalised as a feature of many wargame rules. In about sixteen years of playing PC combat sims and games ranging from European Air War to Operation Flashpoint, I have found many I enjoyed greatly, and of those, some which stand out above the others, in their ability to recreate and immerse me in the essence of the conflicts they bring alive so vividly on my PC screens. I have no hesitation in placing Atlantic Fleet right at the very top of the latter category. Nearly three months of playing little else has done nothing to diminish my enjoyment of the game and my respect for the team at Killerfish who have designed, developed and delivered such a magnificent package. Truly exceptional and rather brilliant! Love it!


-
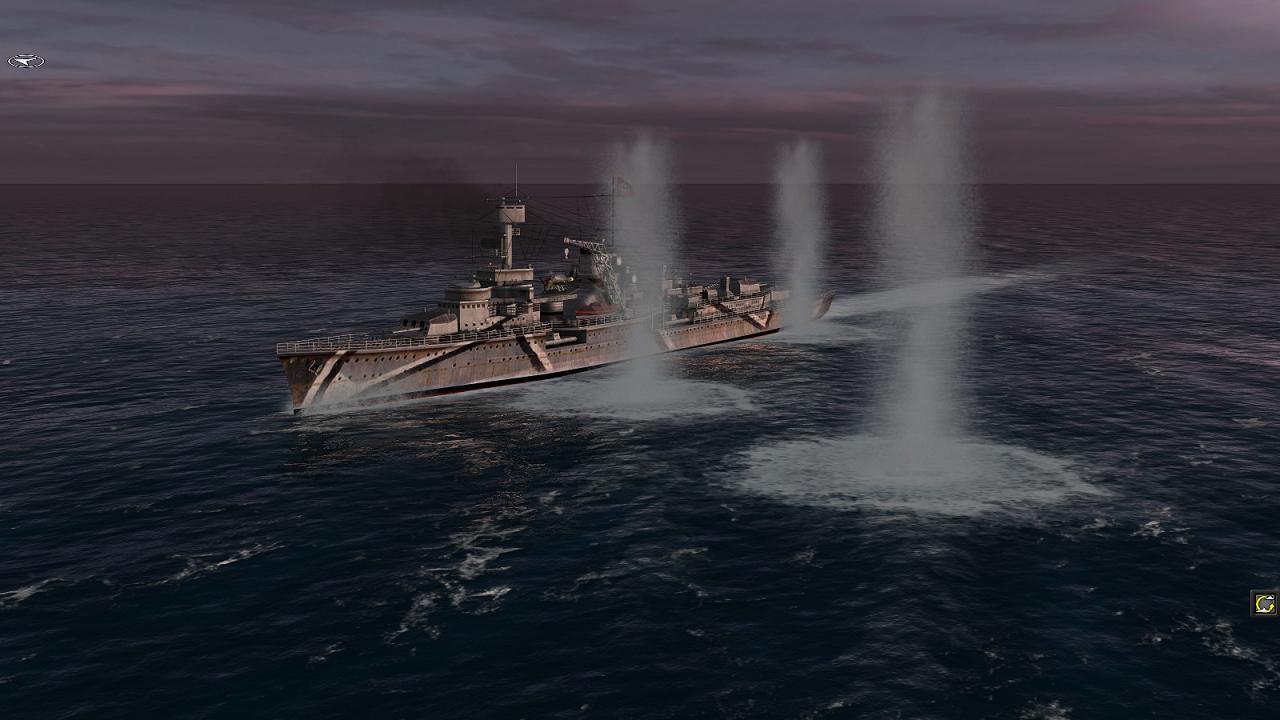
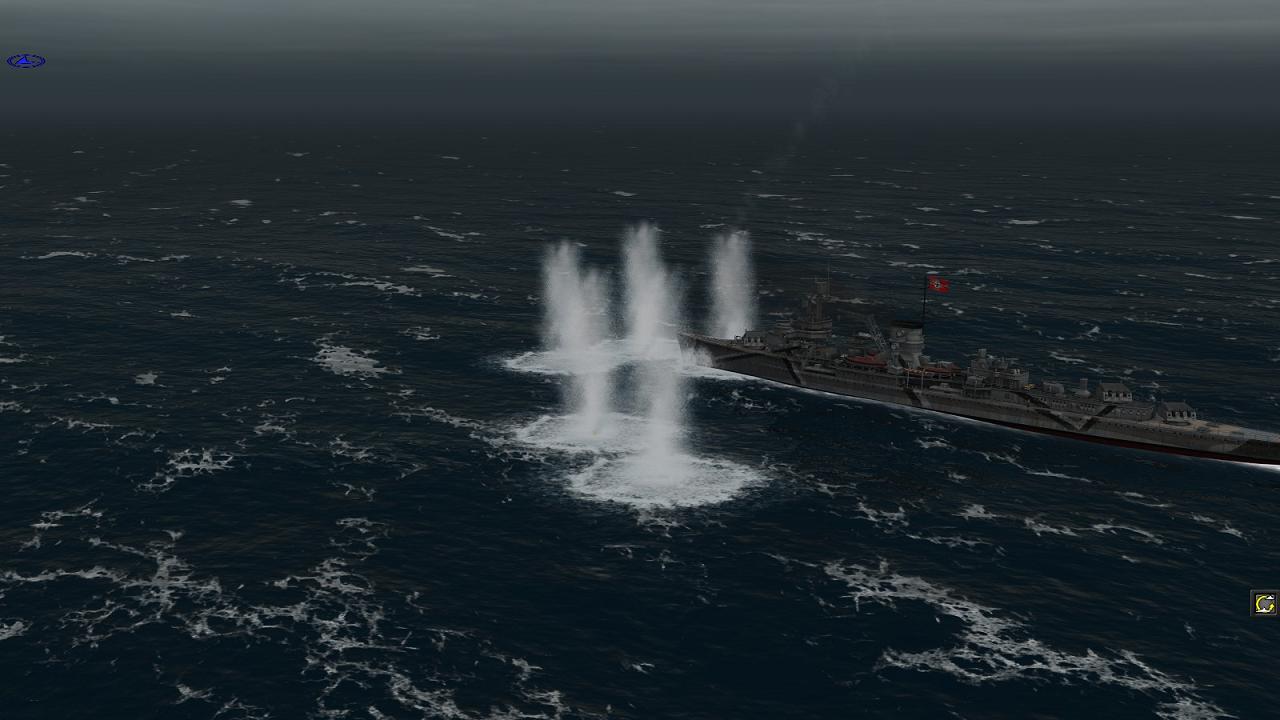
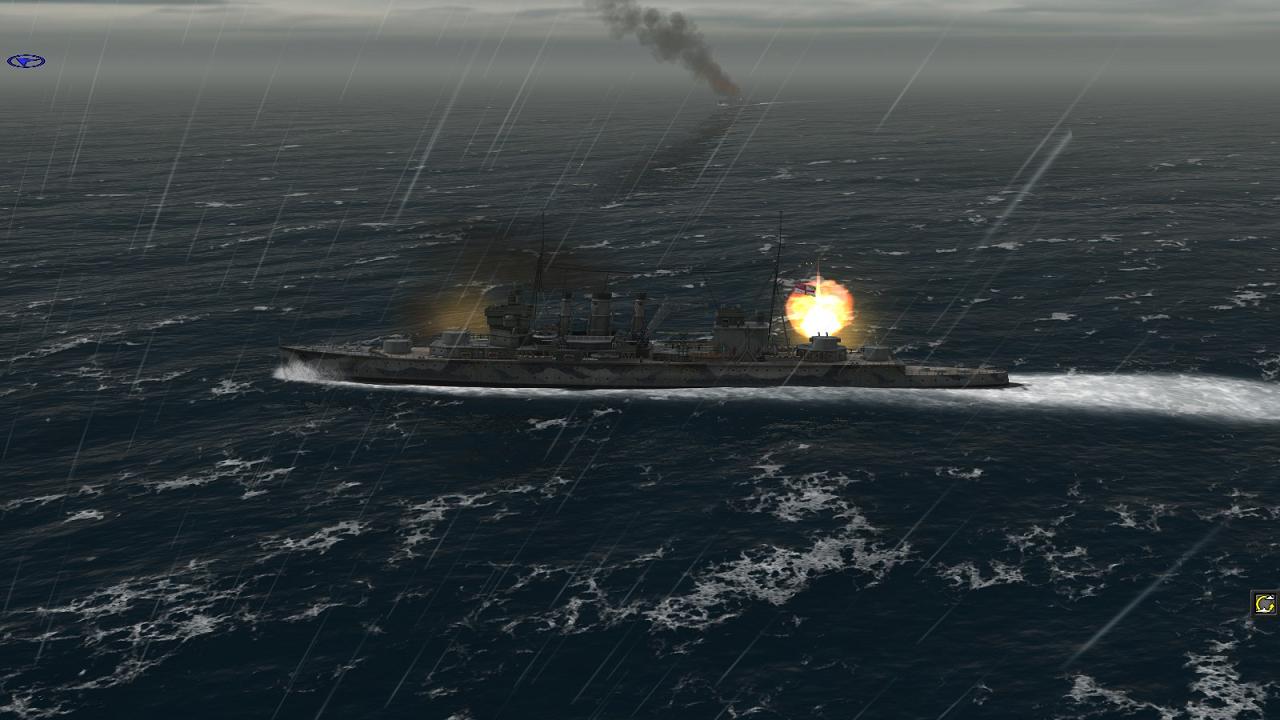
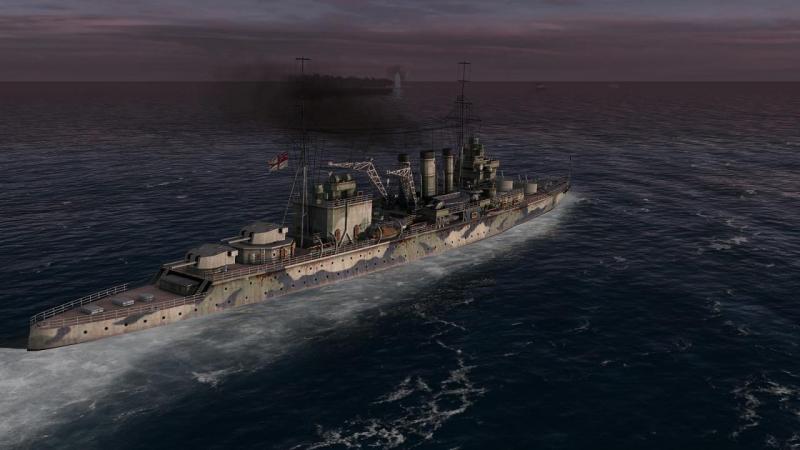
Yet more heavy metal... My next encounter also pitted us against an inferior force, but with one of the two enemy cruisers now a heavy Hipper Class unit. Again, I deployed battleship Revenge, County Class cruiser Berwick and 'H' Class destroyer Hardy. The winds were light and this doubtless helped me find the range. The enemy AI seems untroubled by the effect of wind on sheel trajectories but I still like to play with this enabled. There is an 'elite' enemy gunnery option but I find their shooting is good enough without this! Below, 8" rounds from Berwick fall close abeam of Leipzig or Nurnberg. Atlantic Fleet uses the same fine 3-d model to represent these very similar ships, distinguishable from the earlyer pre-war German light criusers by having their two funnels trunked into a broad single one, but sharing the same unusual main gun layout, with two out of three triple turrets astern. I have often seen near misses like these cause damage in Atlantic Fleet battles, which is entirely realistic from either splinters or 'diving' shells hitting below the waterline. In this mission, I had a couple of Sunderland flying boats on call and duly called these in. I've got a little rusty judging the right aiming point and while one of my runs produced only more near misses, another was more successful. The best tactic is set up the attack direction so that it goes diagonally across the target, so that one bomb in a stick is likely to get a hit; attacks along the line of the target seem harder to get lined up right. While Revenge turned away to fire longer-range broadsides, Berwick turned the other way in a race to cross the enemy's 'T'. You can see top centre in the pic below that one of the German cruisers, almost certainly Hipper, is taking hits from Revenge and is making smoke in an effort to escape. At this point, Revenge shifted fire to the enemy destroyer, which was in danger of getting into torpedo range. I got lucky and obtained an early hit, which was enough to wreck Z-31. Both enemy cruisers soon followed her to the bottom. A night action followed, but with no more powerful opposition, and no aircraft or U-boats to level the playing field, the result was never really in doubt. Next time out, the Kriegsmarine had a 'pocket battleship', but though she landed some 11-inch hits on Revenge, she was soon rolling over and going down, soon to be followed by an escorting destroyer. The net result of all of this was that I earned enough renown points to obtain a second battleship, this time a more modern or powerful one. I chose the name ship of the King George the Fifth class, generally known as 'K G fives'. With a modern armour scheme, a decent dual purpose secondary armament, a respectable top speed and ten 14-inch guns, she would be a useful complement to Revenge and should keep me ahead in the Atlantic Fleet arms race, which was showing signs of heating up. ...to be continued!


-
Enter the Very Heavy Metal... One of the engaging features of the Atlantic Fleet 50-mission campaign is that you are quite conscious that you're in an arms race of a sort. The opposition you face gradually increases. If you don't earn enough renown (one point per enemy warship ton sunk) to keep up with this escalation, you can fall behind and end up in a sort of death spiral, from which it can be hard to recover. Tactics to avoid this include deploying subs rather than surface ships if you cannot readily overmatch the enemy, or if you are operating inside enemy air cover. And not committing heavy units you can ill afford to replace, if faced by enemy subs. In this play-through, I was having no such worries. In fact, I was winning the arms race comfortably, to the extent I was able to afford a battleship, at a point in the game where the enemy was just starting to deploy cruisers. Admittedly, the battleship I could afford was a Royal Sovereign/Revenge Class. These were built in World War 1 as a sort of slower, poor man's version of the Queen Elizabeth Class, super dreadnoughts which were superb combinations of armour, speed and firepower in their day. By WW2, the QEs had just about managed to stay competitive, helped by inter-war rebuilds, but the 'R' Class were showing their age. Nevertheless, their 15-inch guns and decent armour make them useful enough in Atlantic Fleet, even if a maximum 20-degree elevation limits the range of their main batteries. The next mission pitted us against two German light cruisers, at a point where I had one heavy cruiser (Berwick), a destroyer (Hardy) and my first batleship, HMS Revenge. We were not inside the range of enemy land-based aircraft and there were no U-boats about. So I had little hestiation in committing all three ships. This time, I had the initiative/first move and I wasn't too long in finding the range, partly thanks to light winds (the windvane arrow, top left in the screenshot below, is a darker blue, the stronger the wind). I turned Revenge hard to port, and my other two ships hard to starboard, to open their 'A'arcs as soon as possible and confront the enemy with fire coming from different directions. The German cruisers were soon returning fire... ...and their shooting was not too bad, either, although their 5.9 inch shells were not a major worry, even for an old battleship... Soon, Berwick was making to cross their 'T' and had also started shooting... Caught in a crossfire, the German cruisers started to turn away, but it was too late... I think it was Berwick who sank Konigsberg. Before the former could train her guns onto sister ship Karlsruhe, massive shell spashes and a fireball marked the spot where 15-inch salvoes from Revenge had already finished the fight. So far, soo good. Provided the next few missions didn't throw up encounters with subs or aircraft, I now had the nucleus of a force strong enough to smash in similar fashion the likely opposition. And I was acquiring renown points at a sufficient rate to keep ahead in the arms race. What would the next encounter bring? Whatever that was to be, I was now feeling increasingly confident. ...to be continued!


-
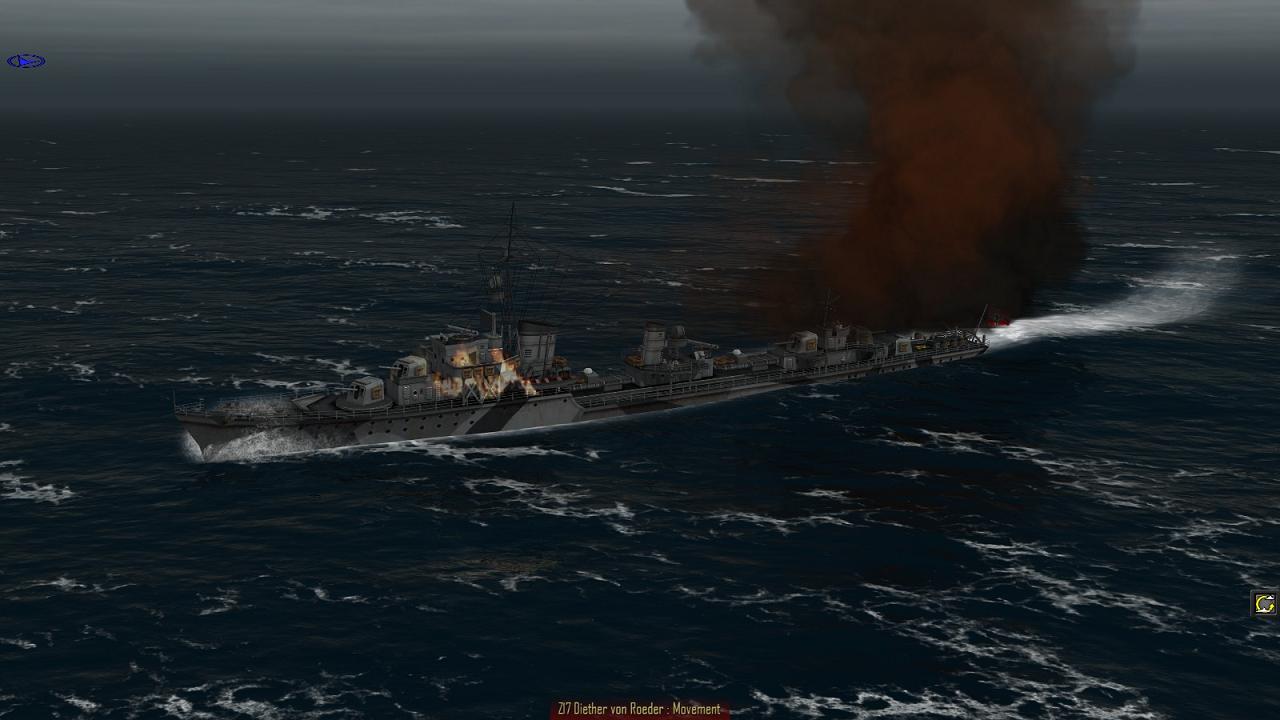
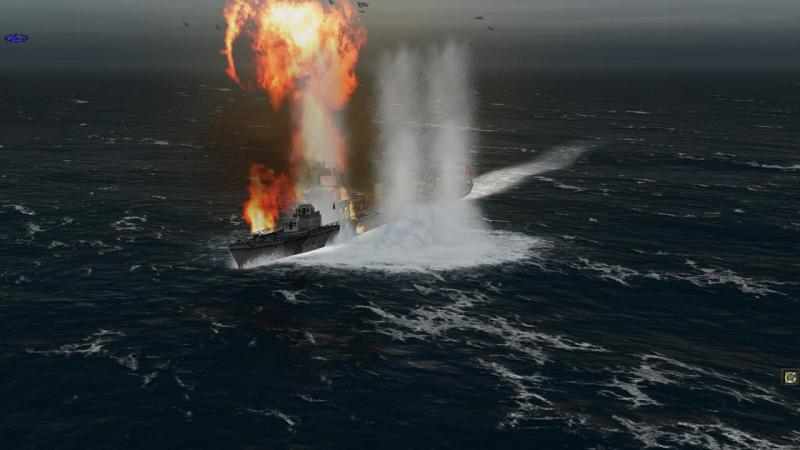
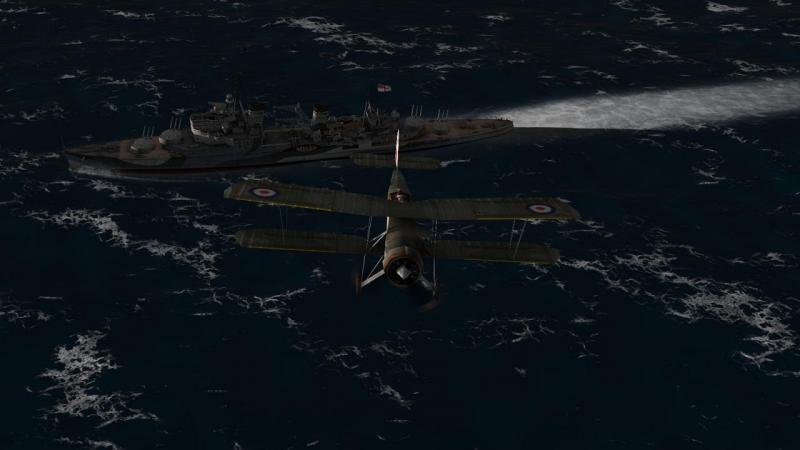
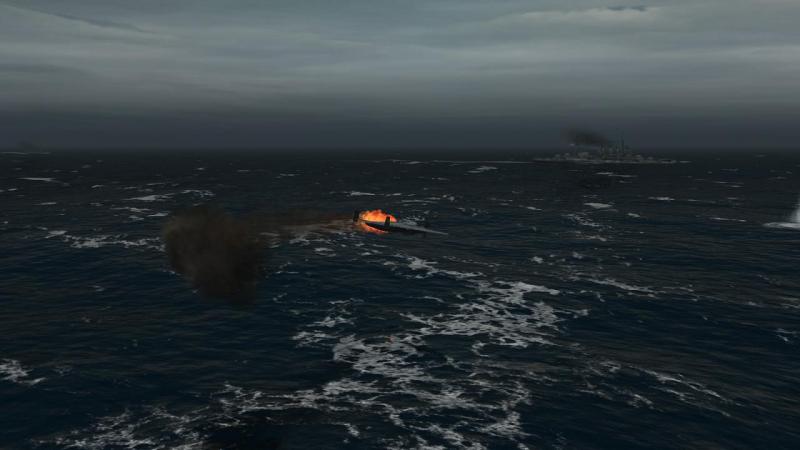
Heavy Metal versus...not-so-Heavy Metal... The enemy light cruiser, Leipizig, started to turn away as Berwick took her under fire. My sub, Triton, was too far off to do much initially but I steered her on a course calculated to cut across Liipzig's mean track. Deither von Roeder was coming at us while my oew destroyer, Hardy, moved to cut her off. Before too long, I had got the range and was beginning to find the correct degree of aim-off for the crosswind. However, before I could do Leipzig serious harm, she landed a devastating broadside on poor Hardy. Edit - that pic, now that I look again it, is of von Roeder catching a packet, not Hardy! By this time, von Roeder had started hitting Berwick and before she could get into torpedo range, my heavy cruiser switched fire to the big German destroyer. Soon, von Roeder was burning and making smoke as she tried to get away. It makes sense to switch targets once an enemy is disengaging behnd a smoke screen, as they are no longer the most immediate threat. But they often resume firing at some point, so it also makes sense to let them have a last salvo while you still have the range. Which I did in this case, and that settled von Roeder's hash. So our attention could now be turned to the withdrawing Leipzig. Below the surface, Triton was closing in, although she had to dodge around von Roeder as she sank ahead of her. At this point, from no-where that I could see, another Dornier appeared, not wave-hopping this time, but at meduim altitude. Horrified, I watched as she bunted over in to a dive-bombing attack...on Triton! The stick of bombs straddled the sub and even at periscope depth, the effect was deadly. I had lost my trusty Triton! Happily, that was definitely the last of the Dorniers. Also happily, Hardy's damage from the 6" hit or hits from Leipzig hadn't affected her fighting abilities. Hardy to port and Berwick to starboard, we ran down Leipzig and showered her with shellfire. No pictures survive of Leipzig's final moments, so this one, taken of the two-funnelled but similar half-sister Konigsberg in similar dire straits, will have to serve... So we'd won the battle, but I was upset to lose my submarine, even though I already earned more than enough renown points to replace her. In fact, I had earned enough to acquire my first battleship, which was soon to see action. But another lesson had been re-learned. Though much simplified in method of deployment and attack, the aircraft in Atlantic Fleet are a force to be reckoned with. As well as good to look at. I am well pleased that Killerfish took the trouble to add them to this gem of a naval wargame. ...to be continued

-
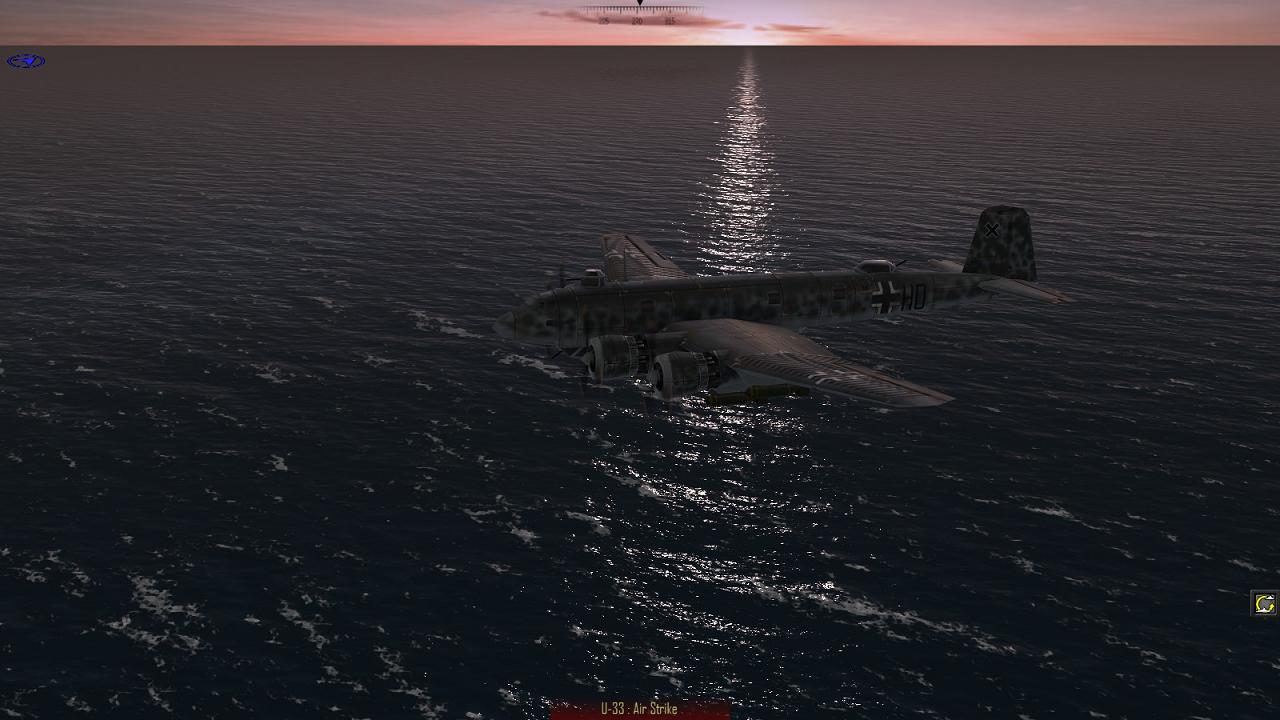
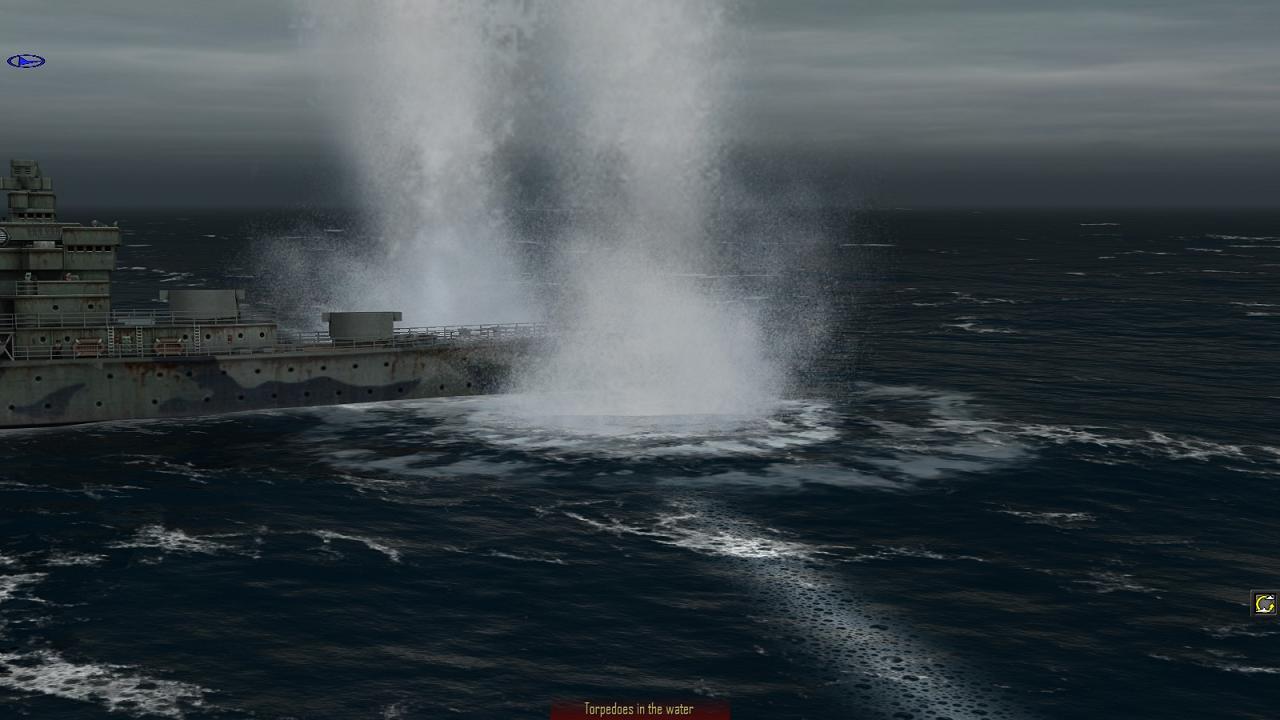
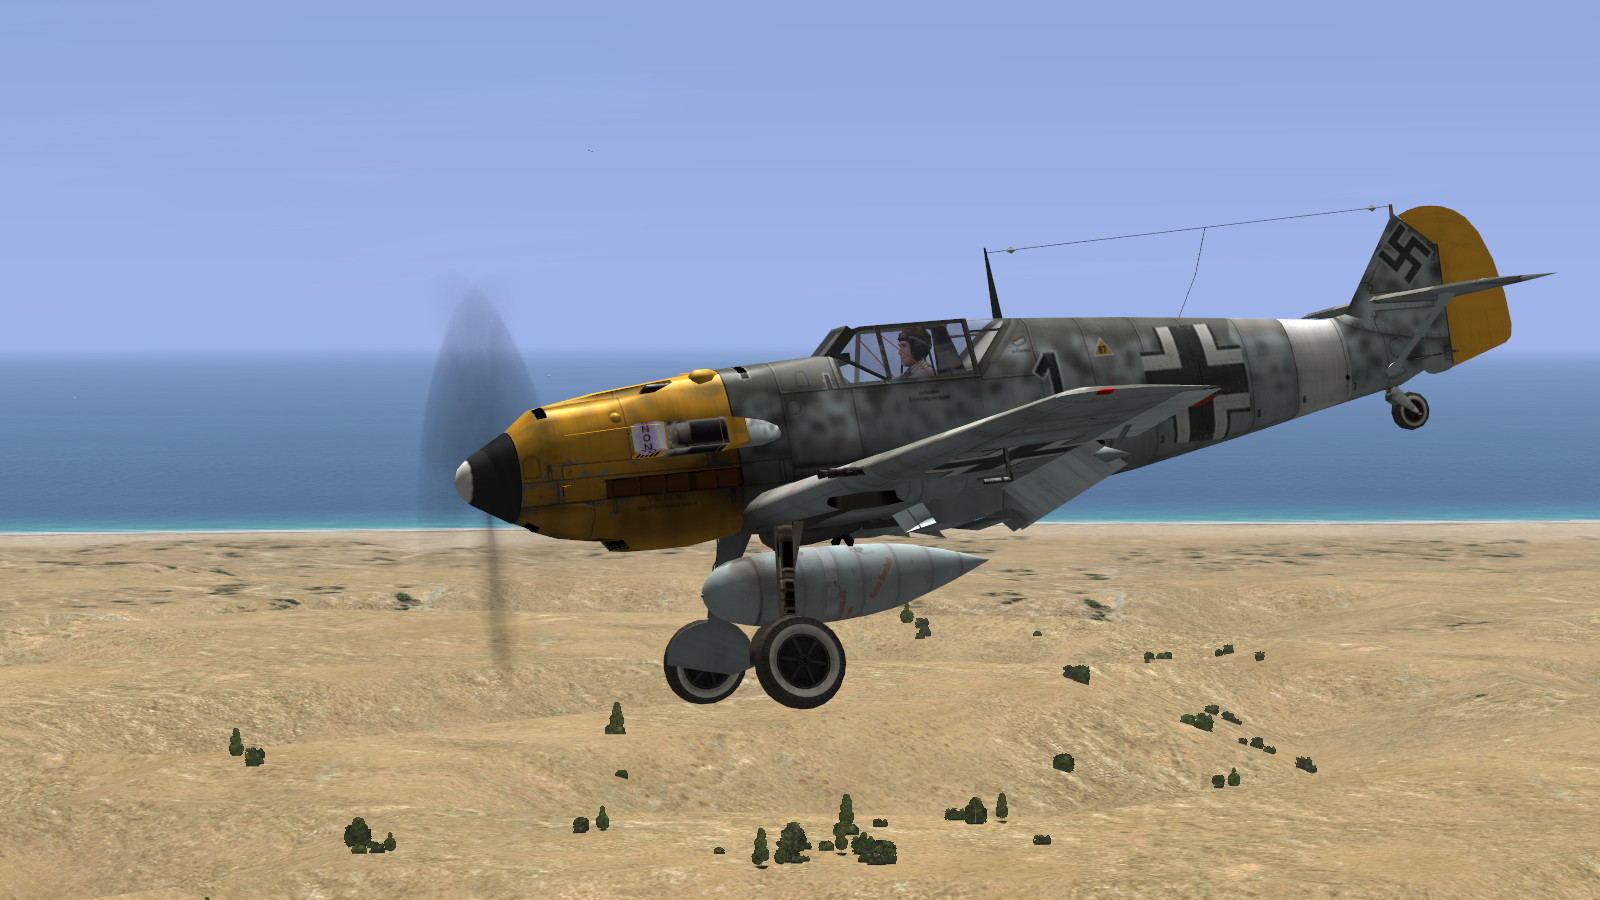
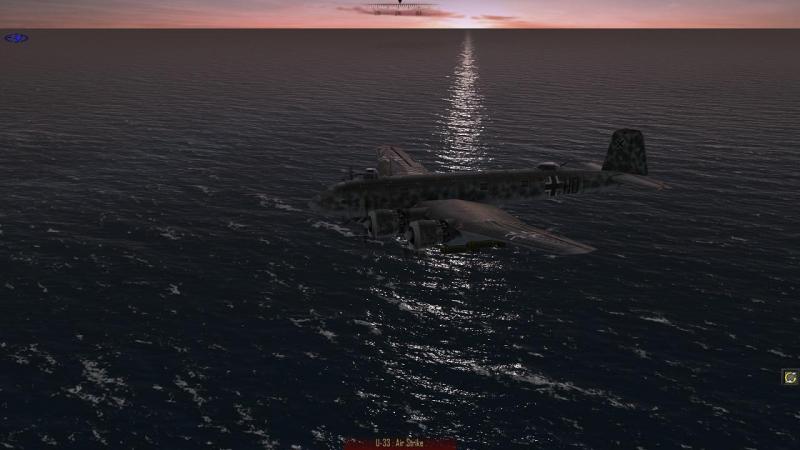
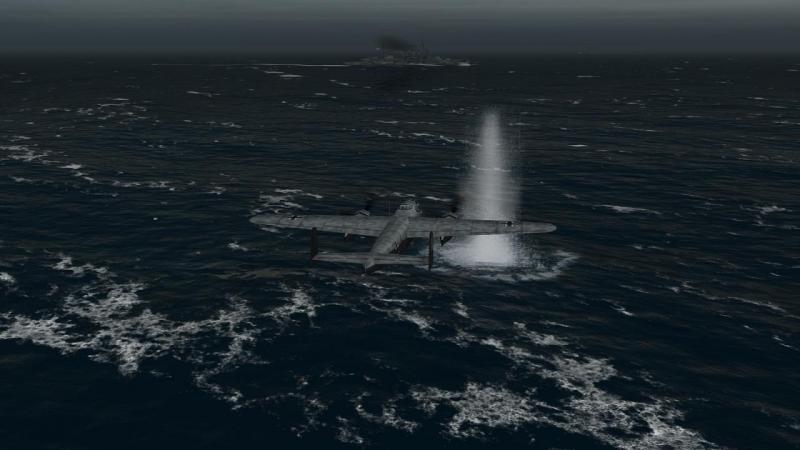
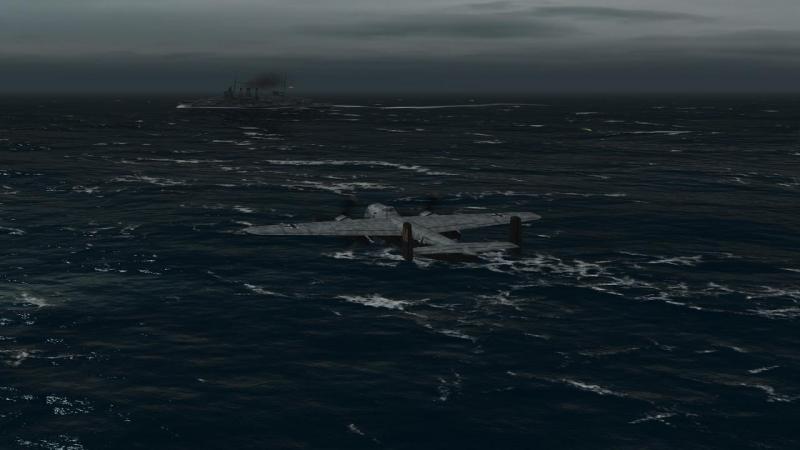
Heavy Metal versus Death from Above By the time I had got to Mission 11 (out of 50), I had a heavy cruiser, Berwick, a destroyer, Hardy and my trusty submarine, Triton. I deployed all three for the battle, which pitted us against the light cruiser Leipzig and the destroyer Deither von Roeder. I wasn't expecting too much trouble, but I had recokned without the participation of the Luftwaffe! Before deciding which ships to commit to any battle, it is always a good idea in AF to check if the scene of the action is likely to be within range of enemy land-based aircraft. This battle was to be fought in the North Sea near Norway and AF seems to treat as in German hands from the satrt all the ports in the lands occupied in 1940...including the Norweigan ones. Thus it was that - the Germans having the initiative/first move - the fight begam with Berwick attacked by a torpedo bomber, a Dornier 217 coming in from off the starboard bow. The AA let fly at him - this is AI-controlled - but on he came, finally releasing his torpedo from a range that I knew was going to be too close to dodge, in such a big warship. As if that wasn't bad enough, the Hun wasn't alone. A second Dornier came in from port, and once again the AA boys failed to knock him down. I knew that unless I was very unlucky, the damage to my heavy cruiser from a single torpedo hit was unlikely to be fatal. But now, I was faced with the probability of two such strikes. I judged that I would be certainly struck somewhere between midships and bow on either side and decided that it was pointless, and possibly more risky, to turn into either torpedo track. Instead, I decided to do two novel things. Firstly, I ordered full astern, to reduce the possibility of a hit near the boilers or in the forward magazines. Secondly, I decided to try to cut the damage I was going to take in the bows by half. I trained my eight 8" guns to starboard, any purely by gueswork, depressed them to point at the sea just ahead of the torpedo track coming in from that side. Then I let fly, and crossed my fingers for luck. My luck was out. Both torpedoes hit in the bows, more or less directly opposite one another. If I had turned as well as putting my engines astern, I might just have avoided both, for they hit well forward, as you can see. Worse still, the next turn saw yet another Dornier making a torpedo attack. This time, though, the AA gunners earned their keep. Maybe my luck hadn't deserted me after all, because a quick check for damage showed that all was in order. We weren't even listing or noticeably down by the bows. Fortunately, that was the last of those pesky Dorniers...or so it seemed. Now, it was going to be a straightforward gunnery duel, with weight of broadside in my favour and a friendly submarine available to snap up any targets of opportunity. Time for some payback! ...to be continued!

-
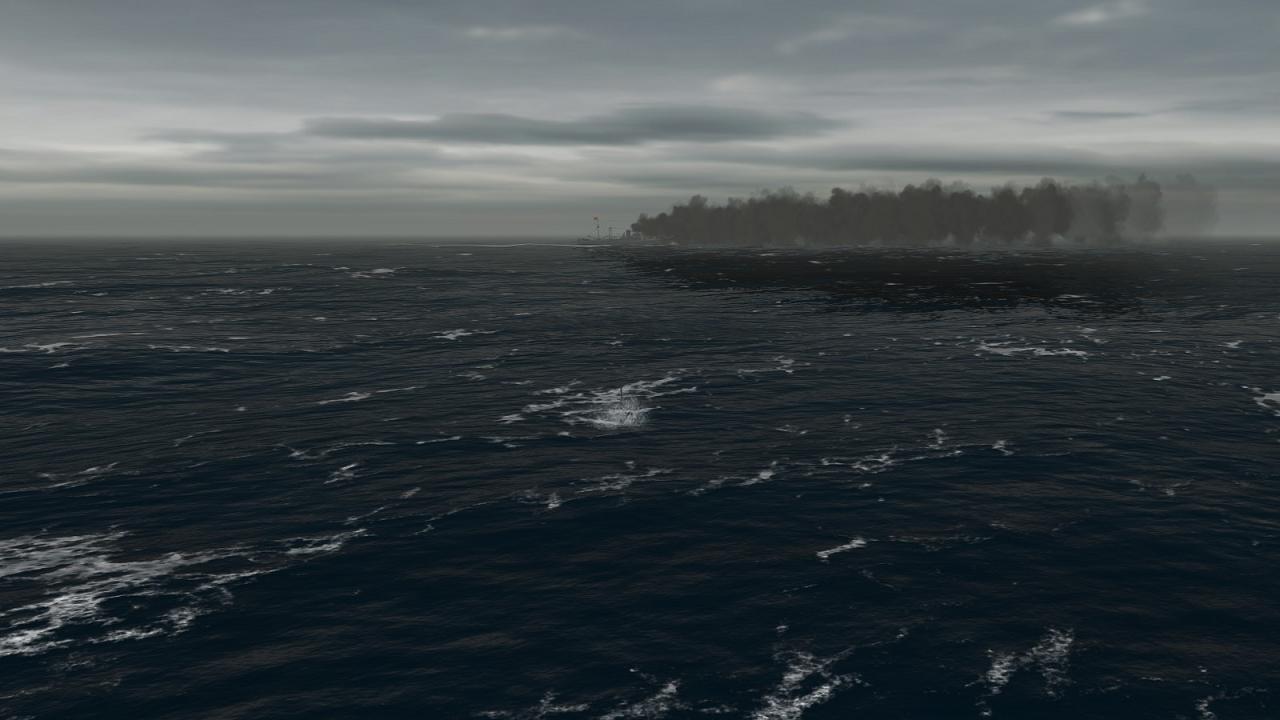
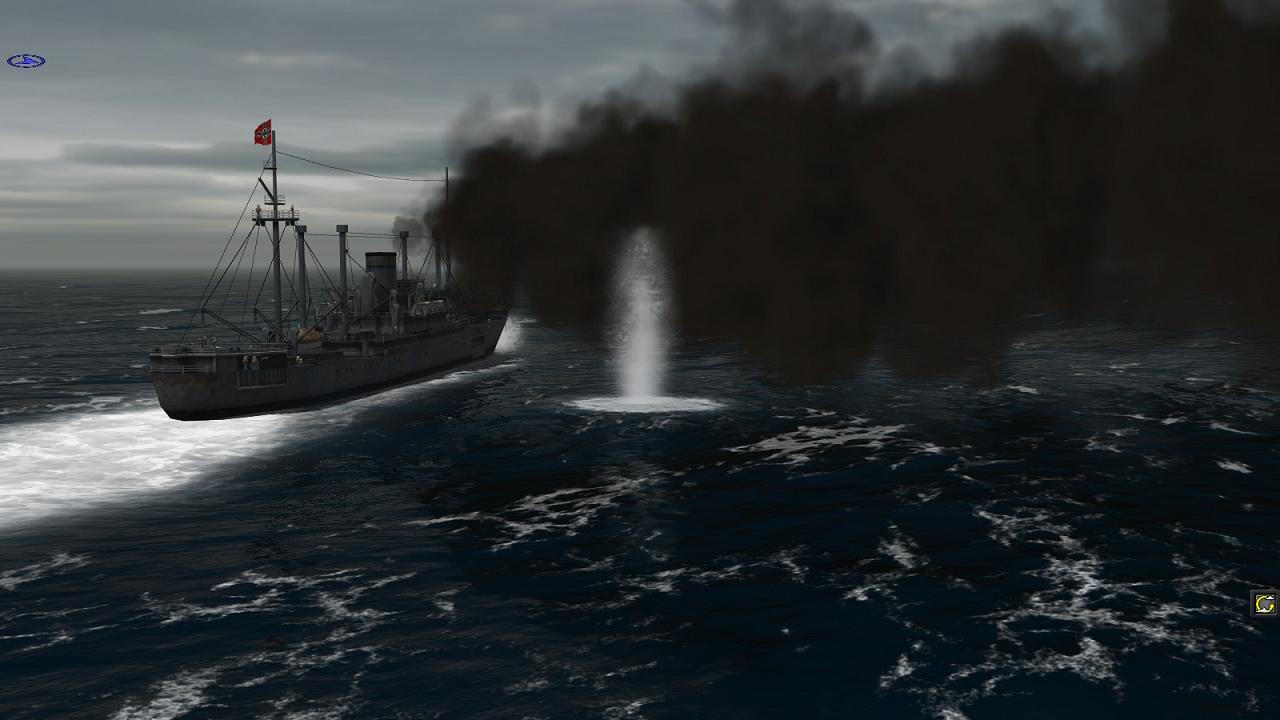
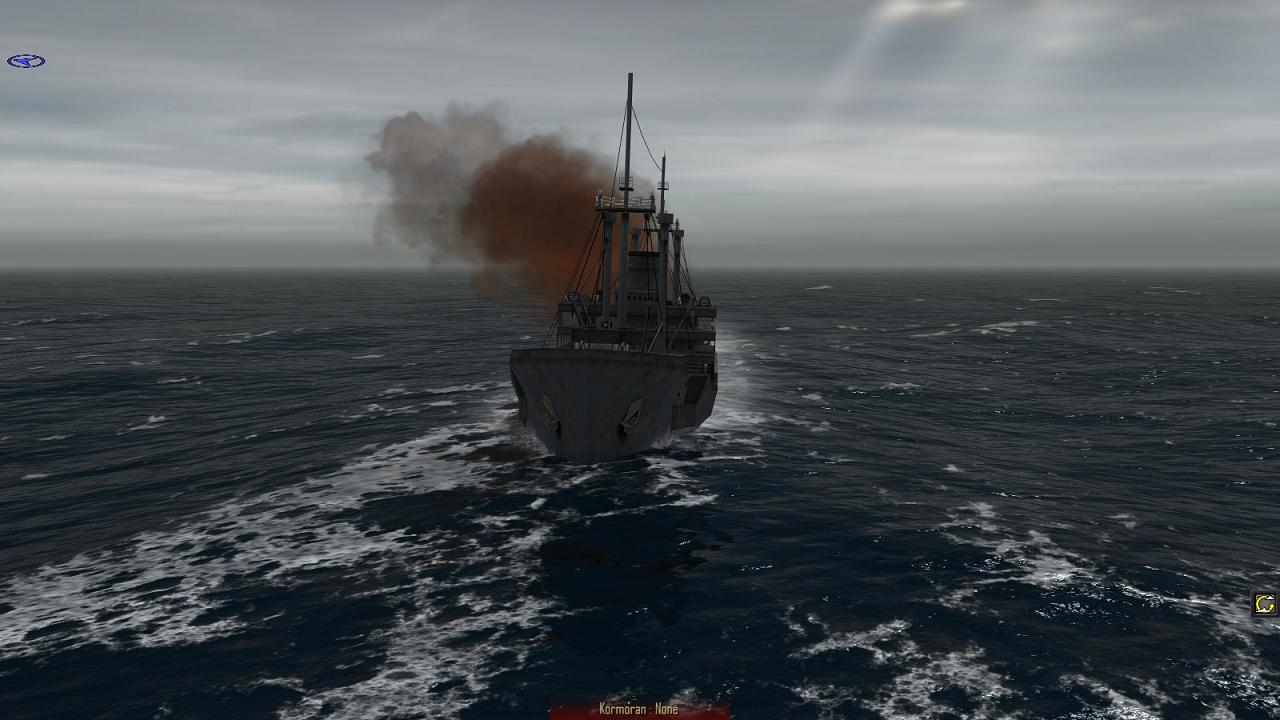
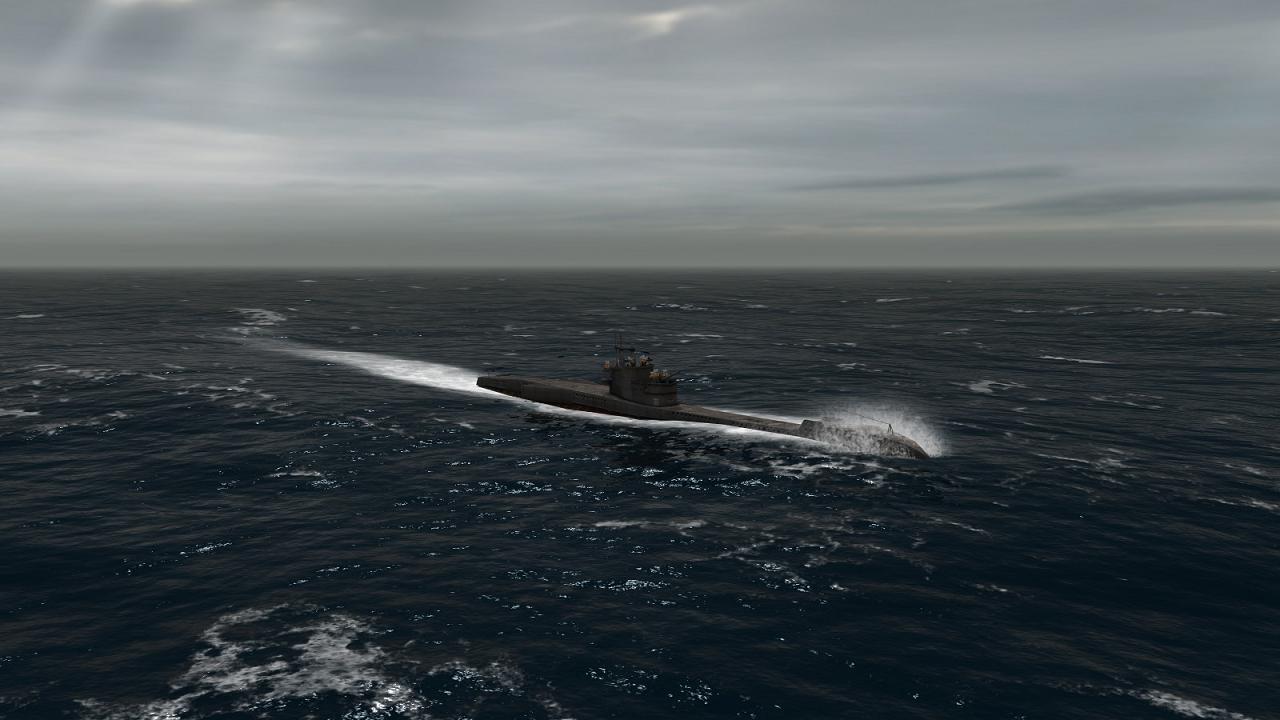
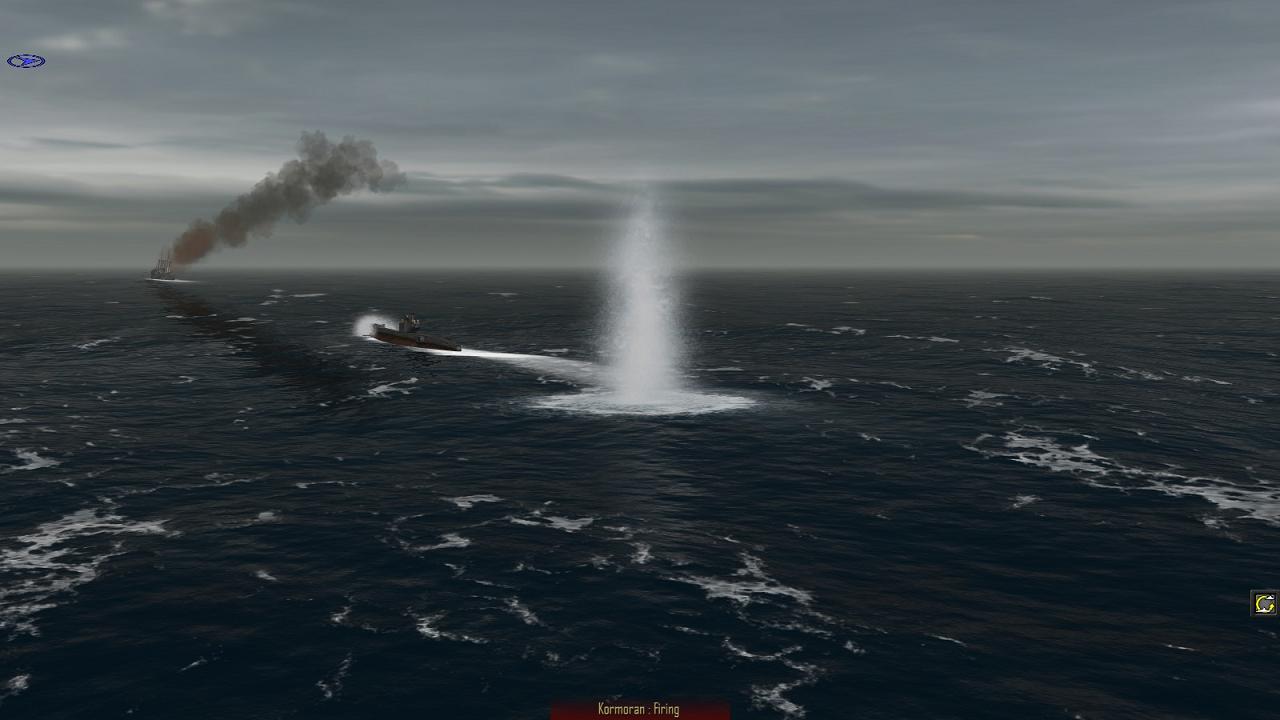
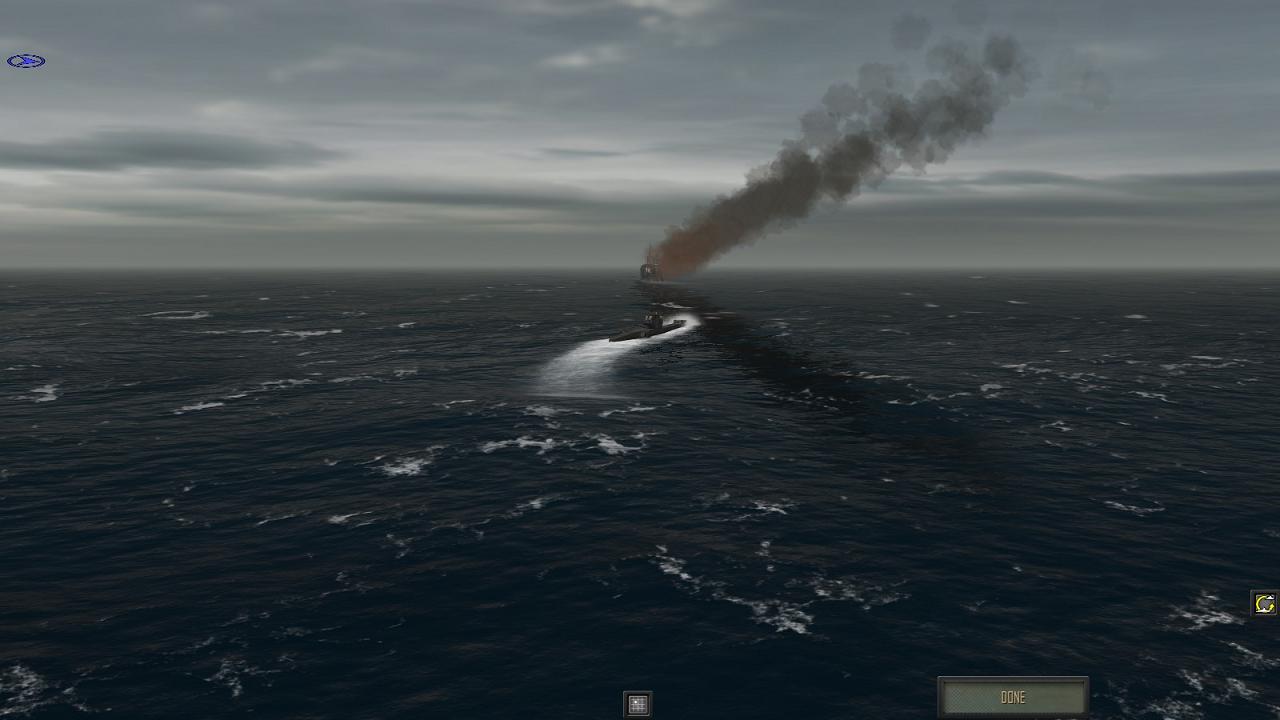
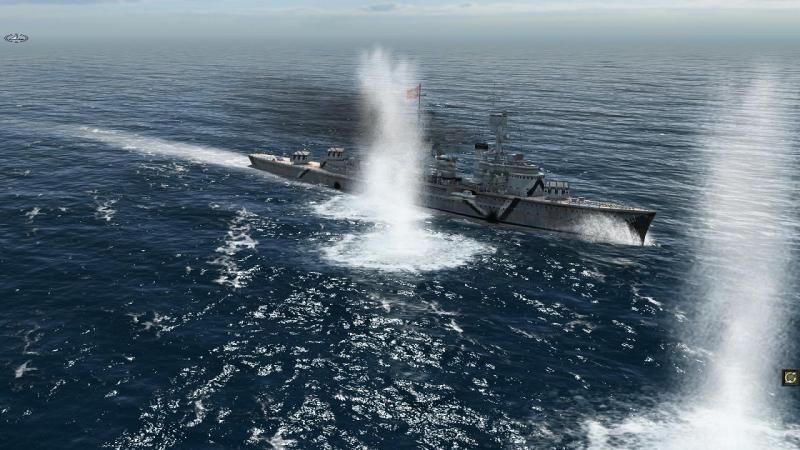
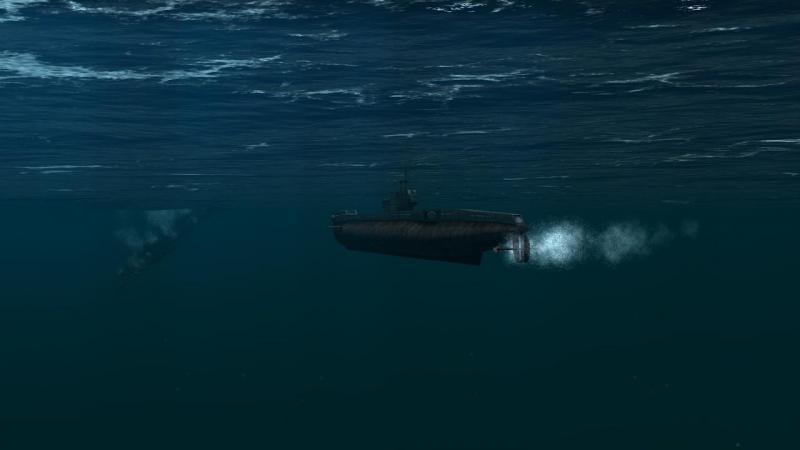
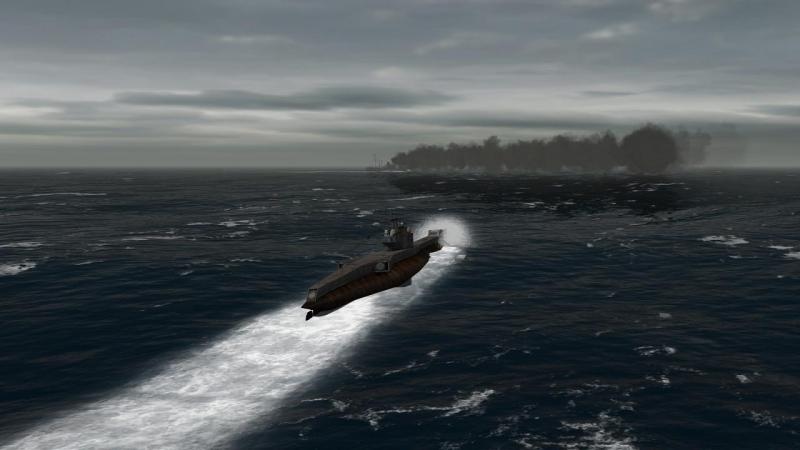
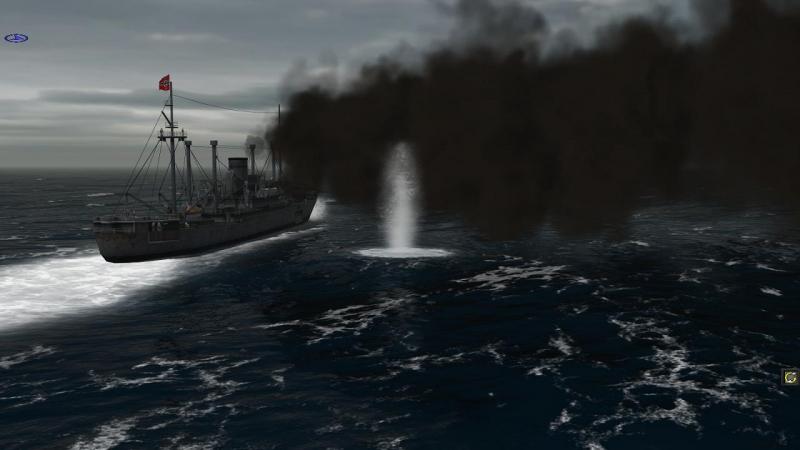
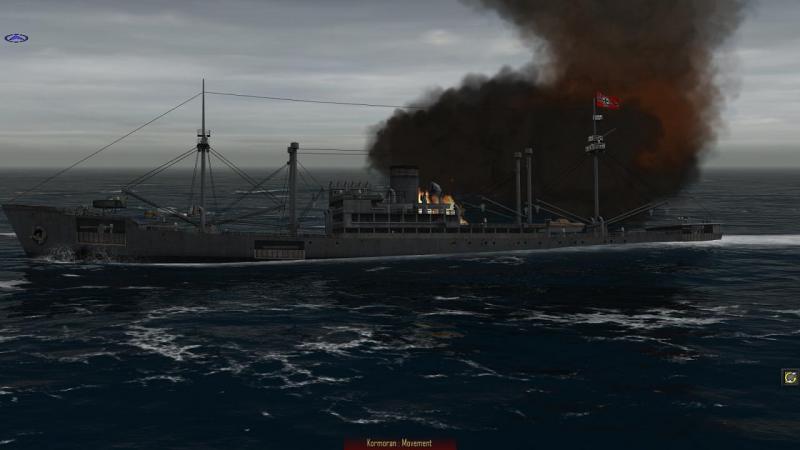
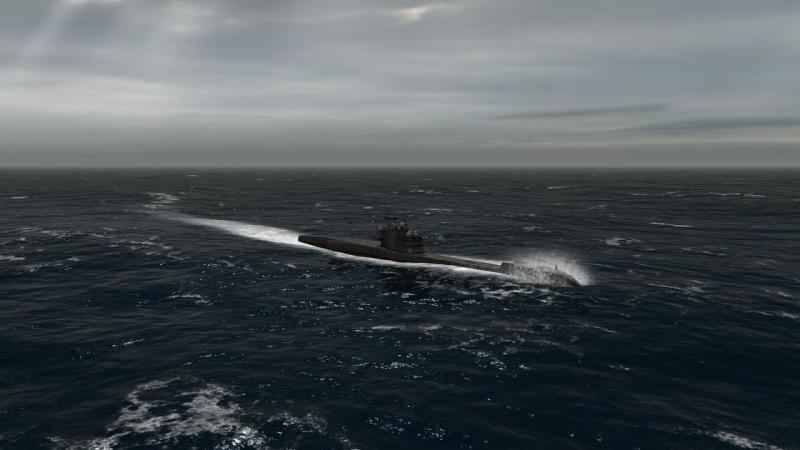
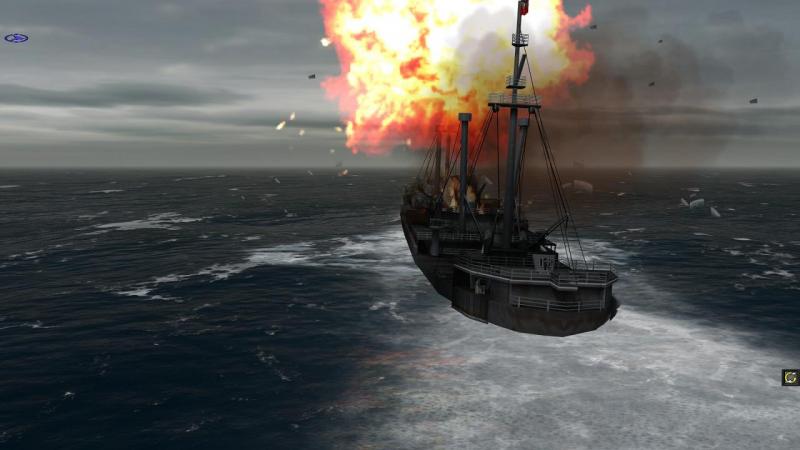
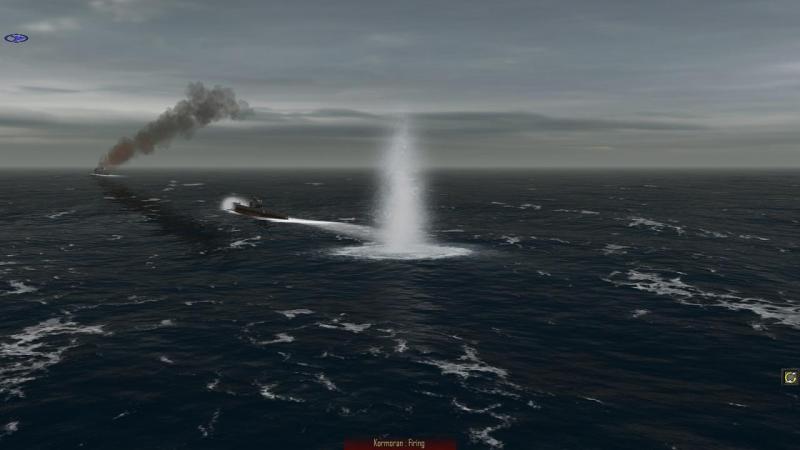
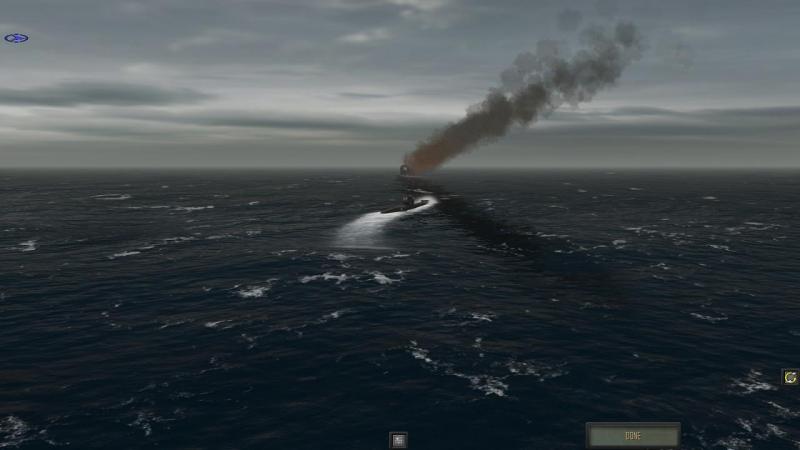
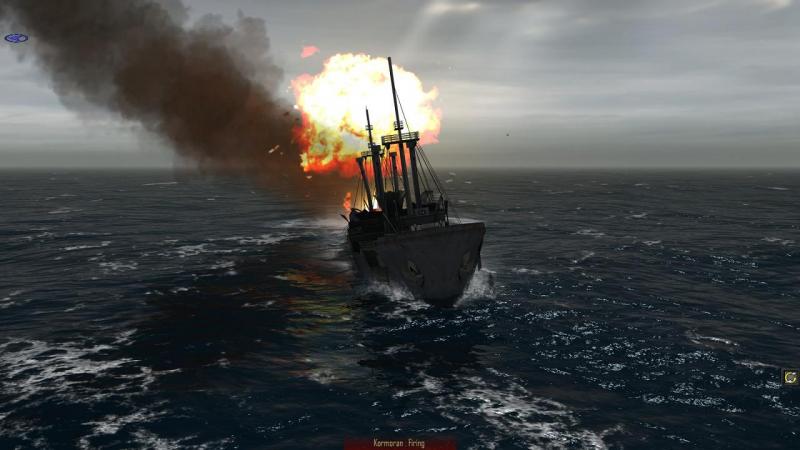
The chase is on! By this time, Kormoran had turned off her closing course and was evidently intent on getting well clear of this dangerous vicinity. She was still at rather long range. And from here on, it would only get longer. As soon as my first torpedo tube was reloaded, I let fly with it, having turned towards her, then another. These missed, having only the effect of inducing Kormoran to make smoke. This action deprived me of my firing solutions, so that any further shots would have to be fired blind. Which I started doing as my torpedo tubes were reloaded, with Kormoran turning away across my bows. A further fan of two or three tin fish followed as the enemy raider settled onto her new course. But the range was extending rapidly and she managed to outrun them. My top speed submerged was only a fraction of what the enemy could make. A brief hesitation, then I surfaced to engage with the deck gun, where I’d be able to keep up with Kormoran using my diesels. I knew that if the raider decided to fight rather than run – or even if she stopped making smoke, and fought while she ran – I would be taking a big risk, with only the much smaller target size of my sub in my favour. To heck with it! If things got too hairy, I could always dive again. I would gamble against Kormoran landing a lucky hit before I could get below. Triton found the range fairly quickly, but because of the strong crosswind, the correct line was harder to obtain. My first rounds fell well to starboard of their target. But they gradually crept closer onto line. I was slowly closing all the while, compelling me to drop the range at intervals. But eventually, I started landing hits every so often, though without visible effect at first. Kormoran stopped making smoke for a time, and my heart was in my mouth as I waited for her first shells to splash nearby. But for some reason, none came. I decided to ride my luck a bit harder and stayed on the surface, firing as I came. I suspected few of Kormoran's guns could bear dead astern – most were on the broadside, I knew that much – so perhaps I had knocked out her stern gun, or damaged it, or was just out of her arcs of fire. Emboldened, I kept on after her. After a little while and several more hits, I began to see that the range had started to fall off more noticeably. Evidently, the damage was beginning to tell. Kormoran could have turned at bay to fight, and with her much heavier broadside – not to mention torpedo tubes – she would have been more than a match for Triton. But she was evidently persuaded to run, and then keep on running, by the threat of our own tin fish. And in escaping these, her tactics had been successful. Turning to fight, forcing me to dive then running away again would likely just have postponed the inevitable. Another round smacked into Kormoran and this time the results were more satisfactory. A large secondary explosion smashed her superstructure and sent an orange fireball rolling skyward. Finally, perhaps because, in creeping out from under the lee of her stern, I had come into a new arc of fire, Kormoran started shooting. Just when I thought it was all over, as a certain football commentator at a certain World Cup final famously put it. My gunnery now needed the shooting skills of Geoff Hurst to settle this particular England -vs- Germany fixture! I could - and doubtless should- have dived and used torpedoes. But I sensed - or gambled! - that Kormoran was in her death throes. So I stayed on the surface, but turned hard a-starboard to come in directly behind her, once more. Kormoran got off one more round, just as she was wracked by another internal explosion. The round missed and I kept on turning, to get back astern of her. I needn't have worried. Kormoran lost the remaining way she had left on her and began to settle by the stern. Having got outside torpedo range, Kormoran had banked on also getting outside effective deck gun range before hits slowed her down. We had both gambled; Kormoran had lost. Thus was ‘destroyer disaster’ followed by ‘submarine success’, with my single ‘T’ Class boat having sunk a fellow sub and a disguised surface raider. All in a good day’s work for the Silent Service! I now had sufficient spare renown points to add a destroyer to join Triton and the heavy cruiser Berwick. Despite previous losses to whatever cause, I felt I now had a fighting chance of meeting on at least even terms whatever the Kriegsmarine might throw at us next. And I had certainly seen again for myself how useful submarines can be in Atlantic Fleet. Splice the mainbrace! ...to be continued!


-
Atlantic Fleet - Graf Spee, Battle of the River Plate
33LIMA posted a gallery image in Member's Albums
From the album: Combat Sims
-
From the album: Combat Sims
-
Atlantic Fleet - a destroyer's torpedoes near their target
33LIMA posted a gallery image in Member's Albums
From the album: Combat Sims