33LIMA
-
Posts
3,749 -
Joined
-
Last visited
-
Days Won
7
Content Type
Profiles
Forums
Gallery
Downloads
Store
Everything posted by 33LIMA
-
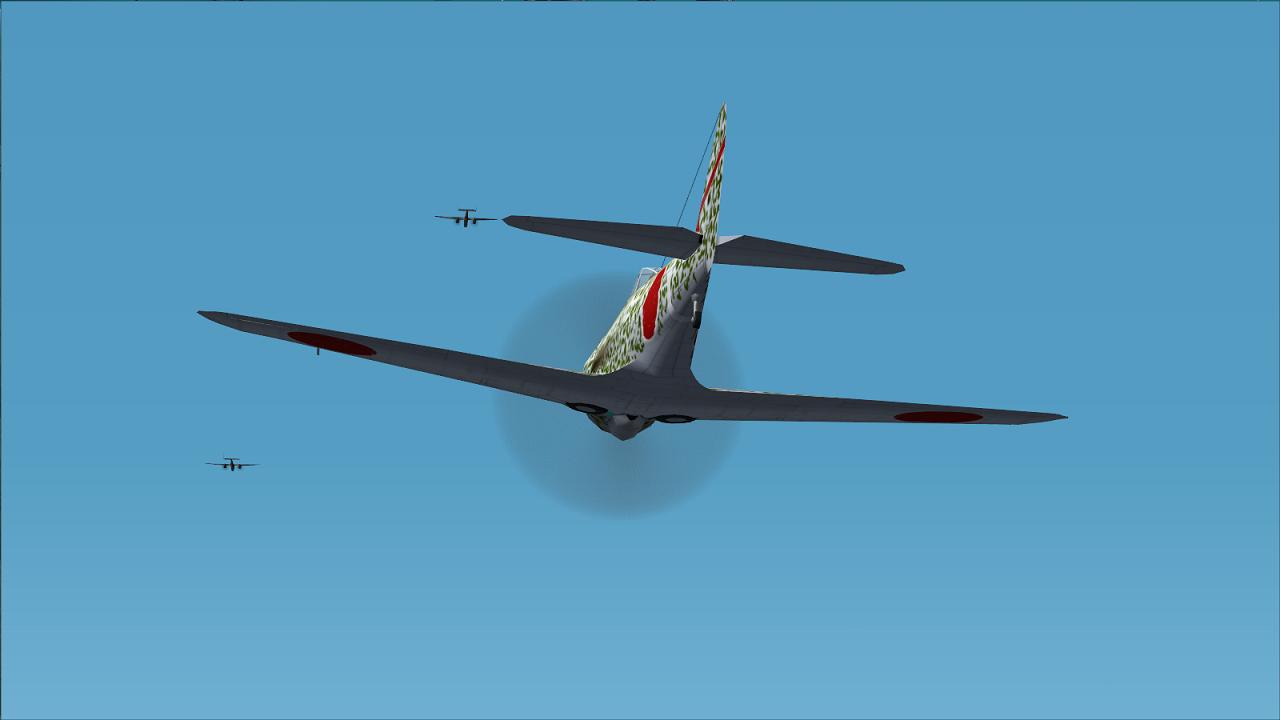
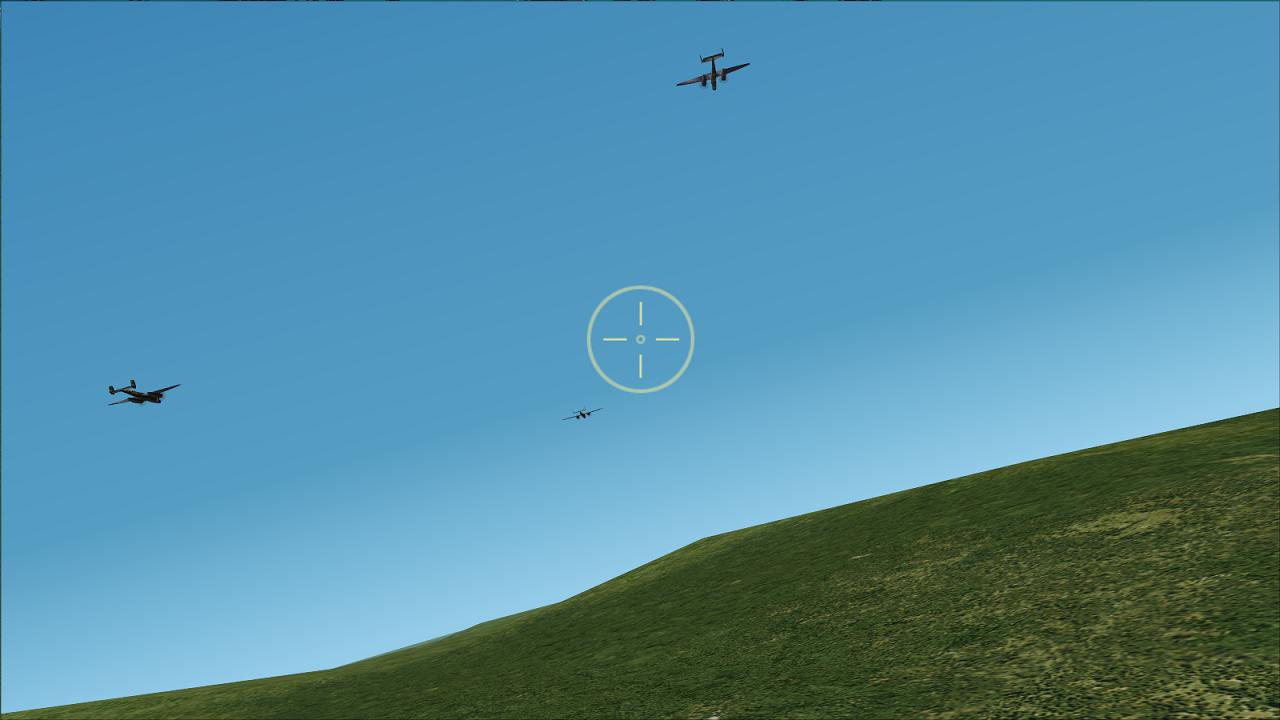
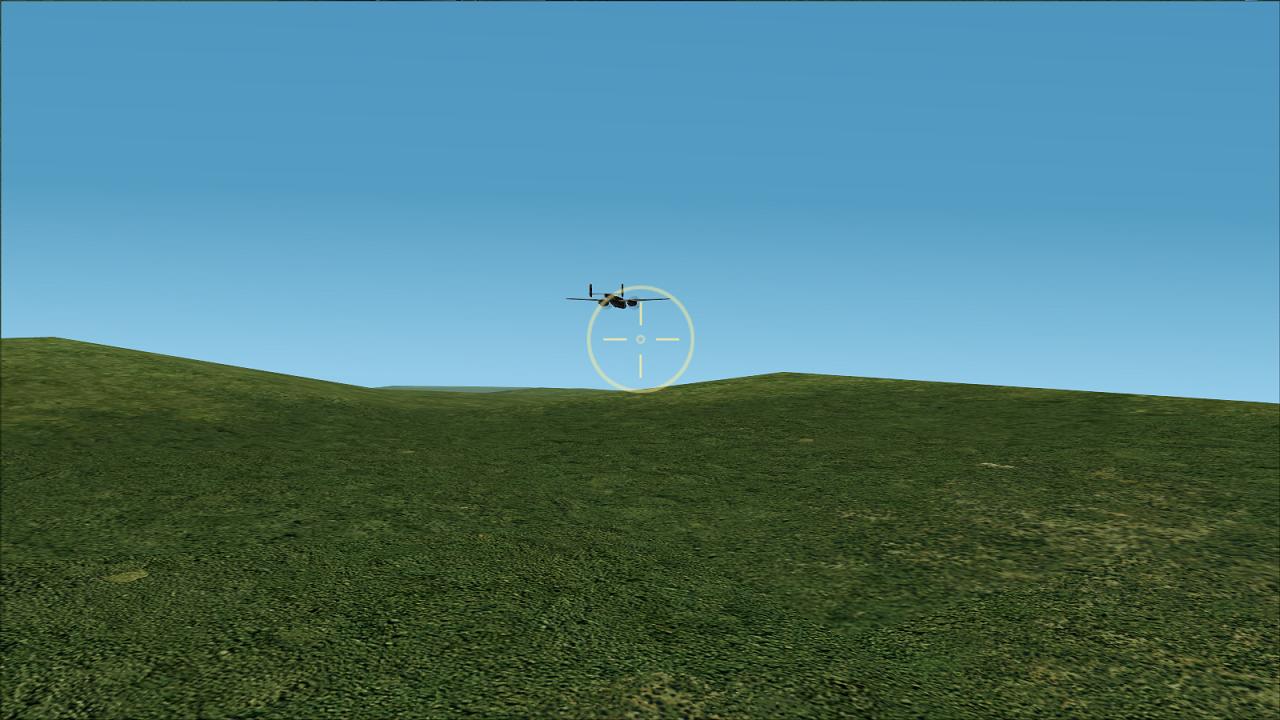
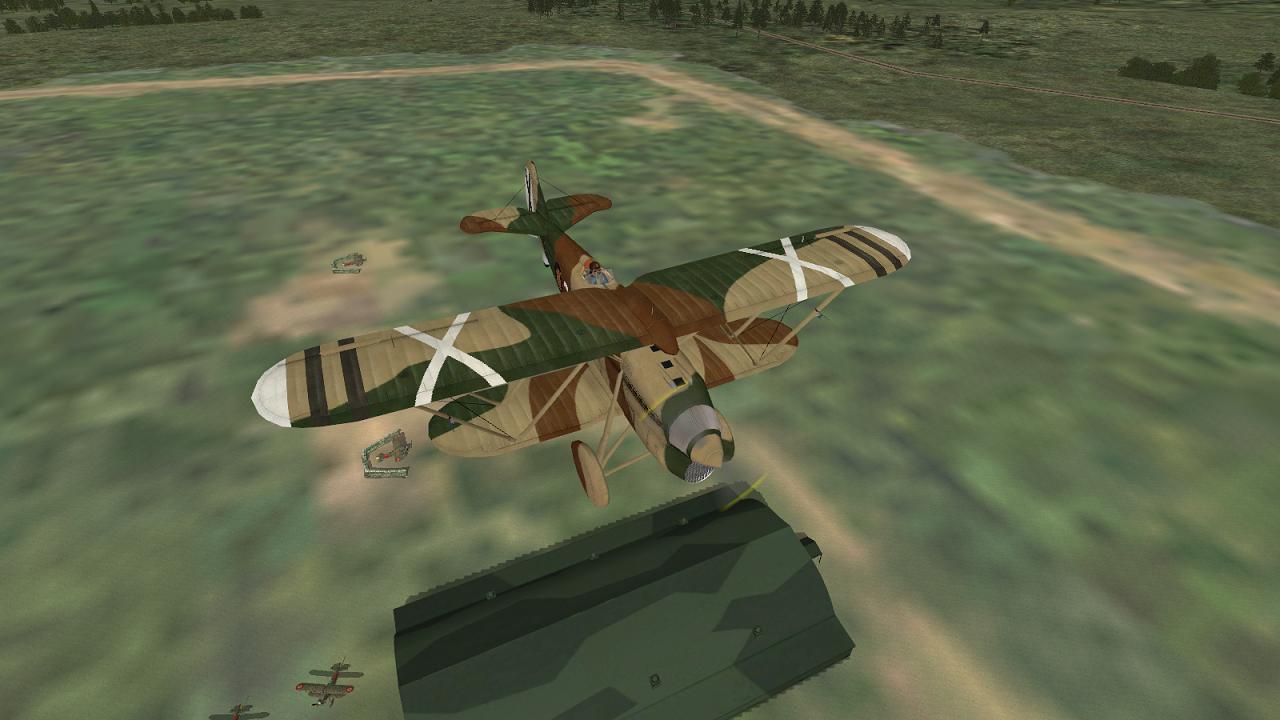
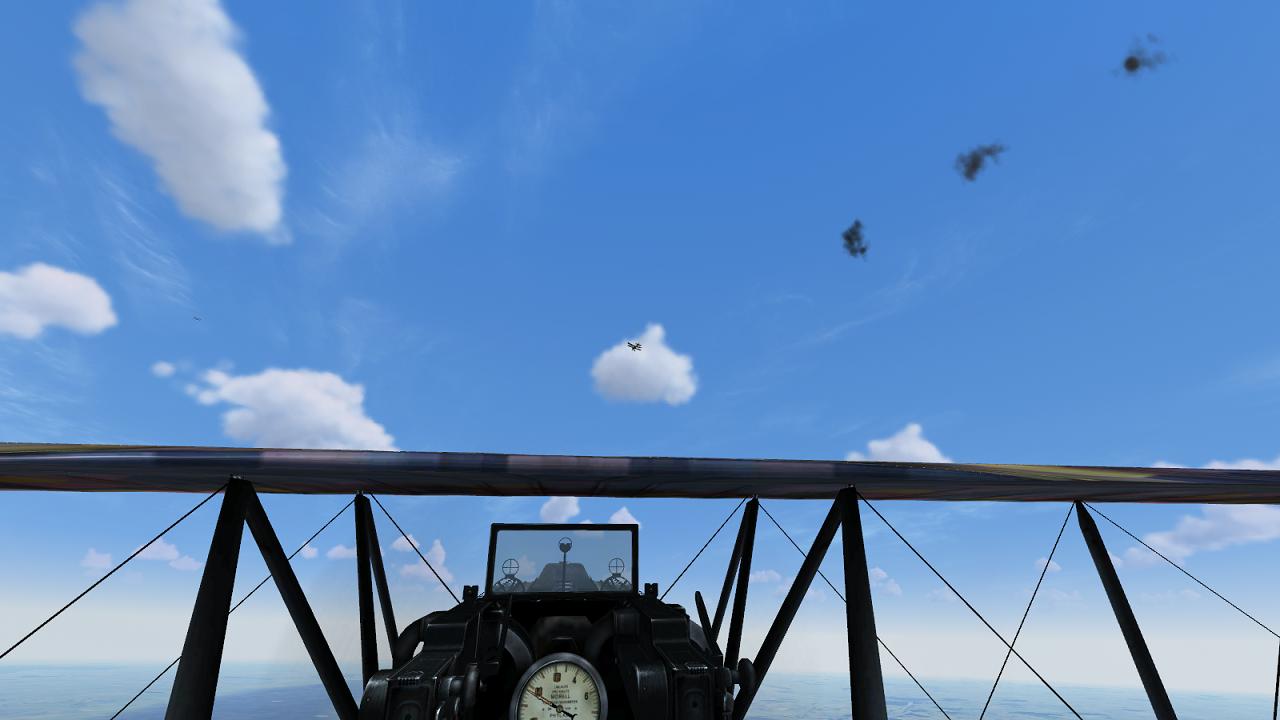
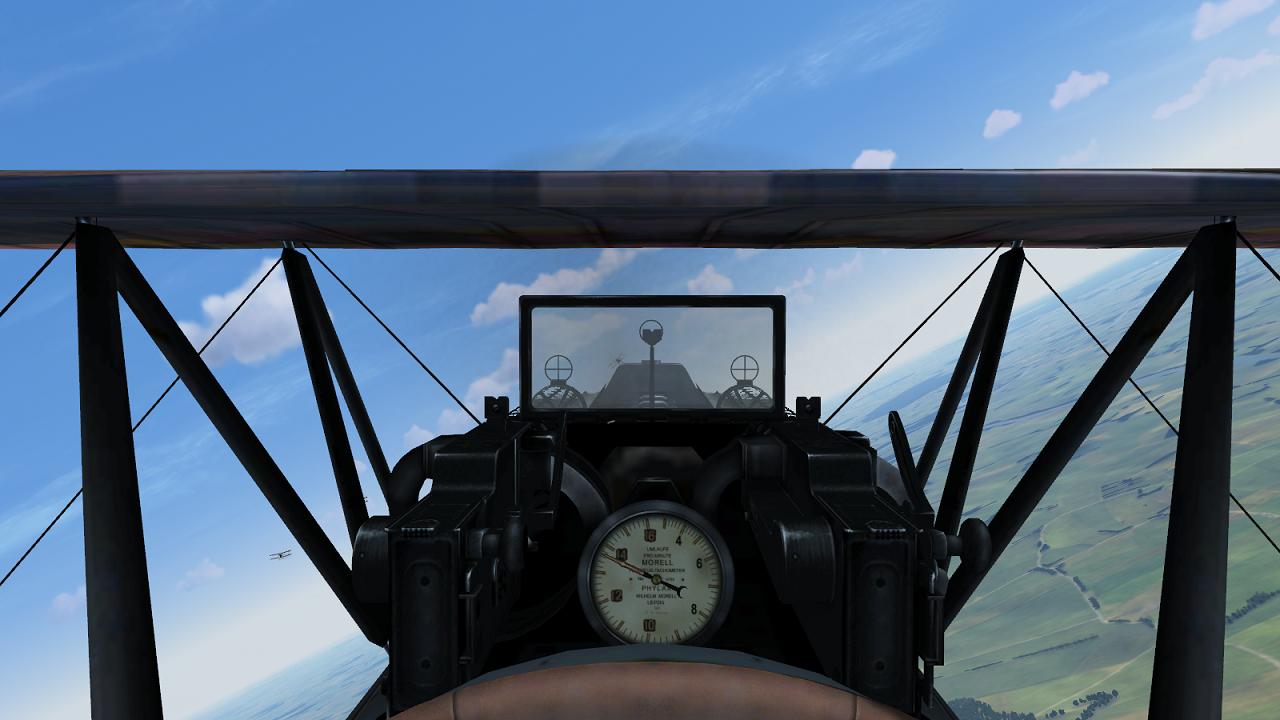
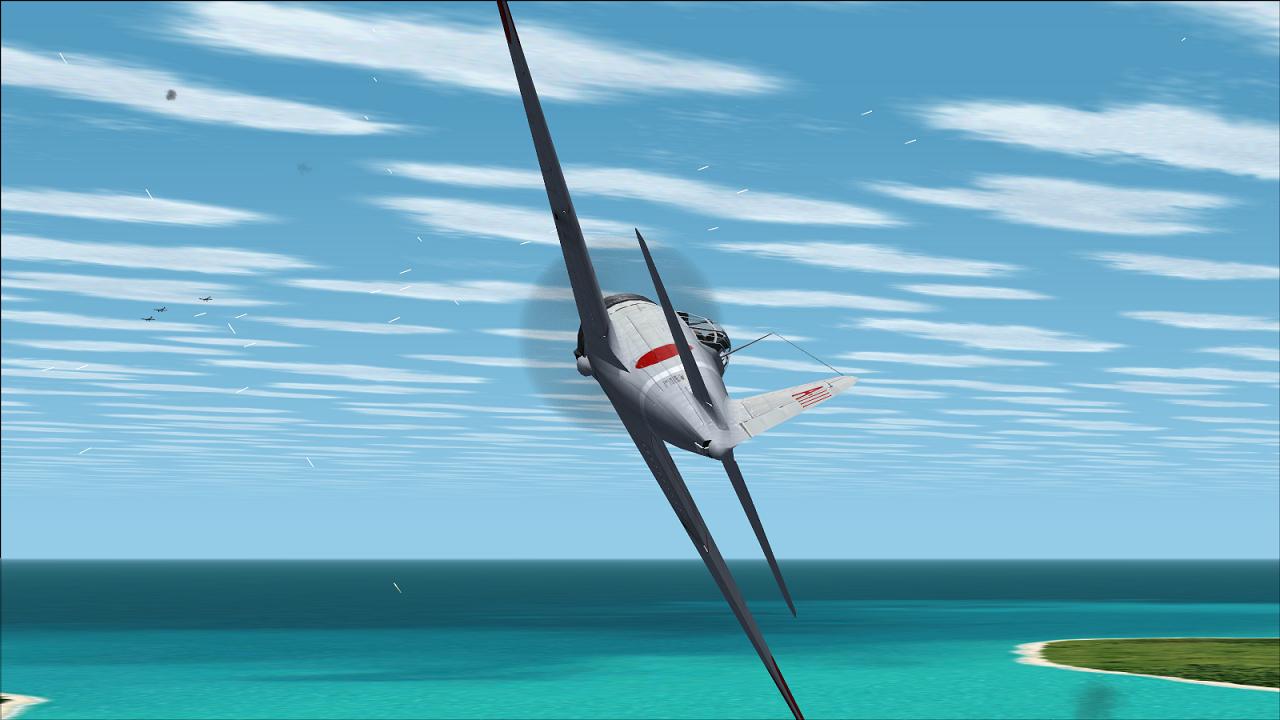
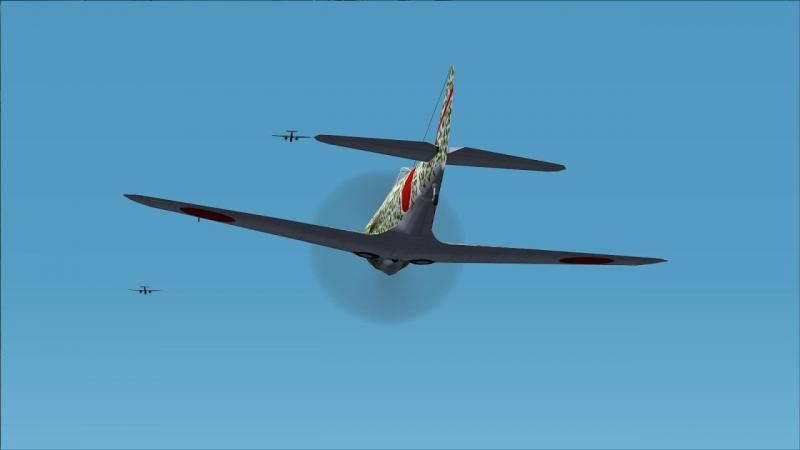
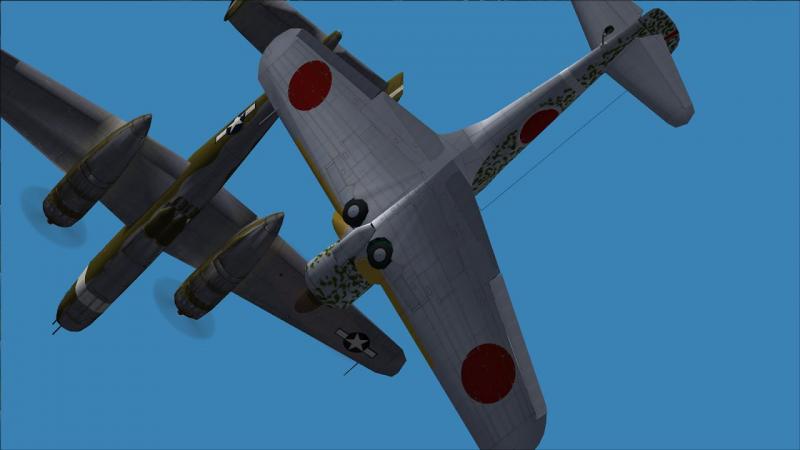
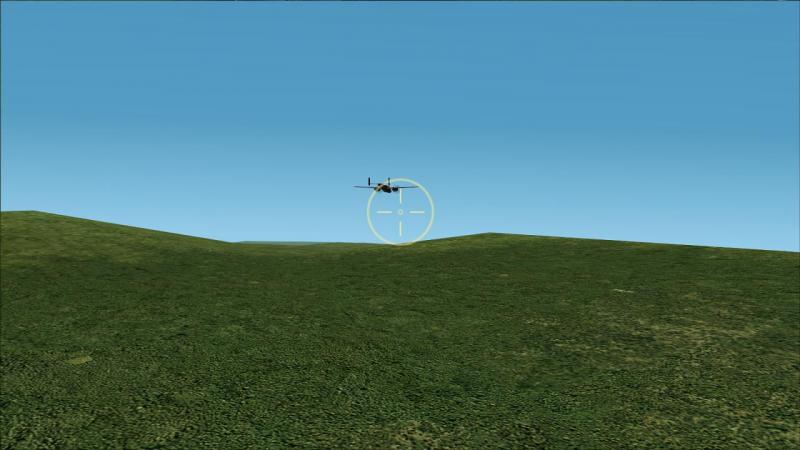
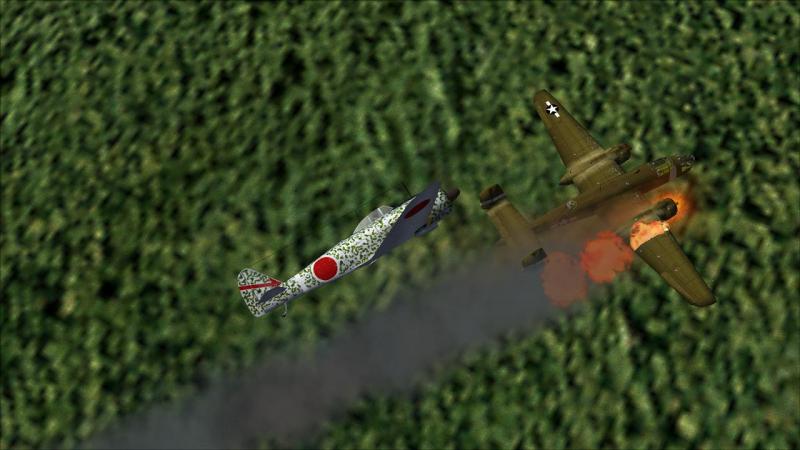
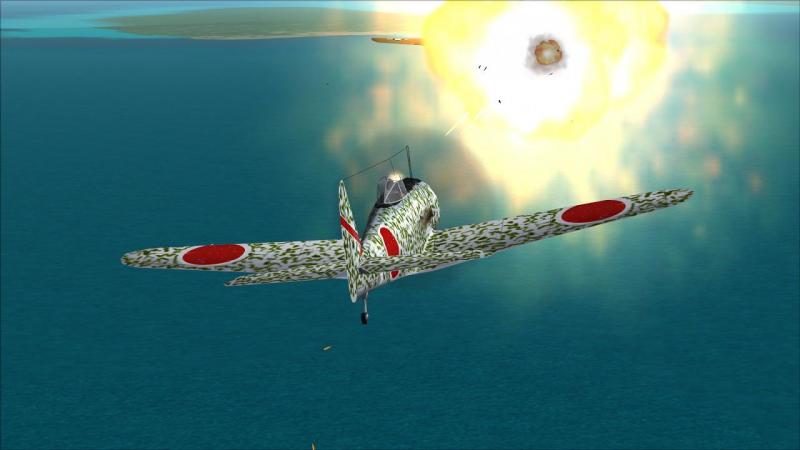
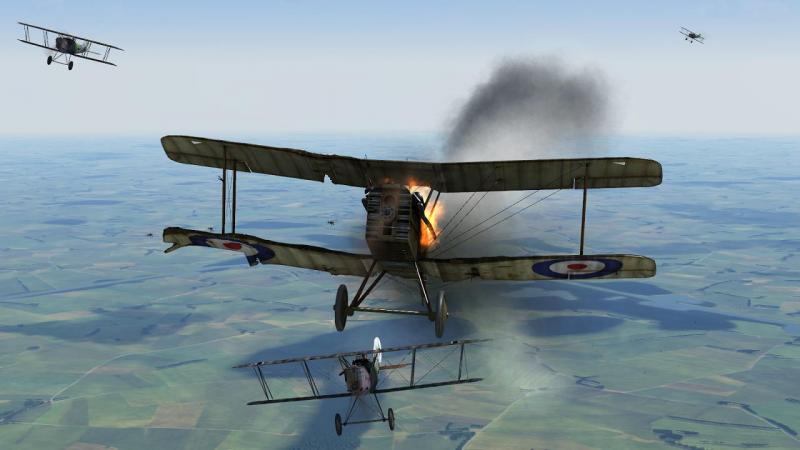
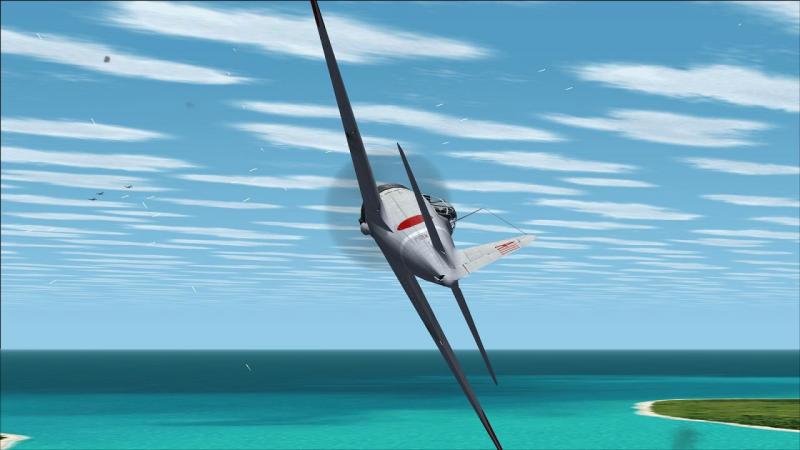
First blood! Slowly, we closed in on the three presumed enemy bombers. As they neared landfall, I thought they had the look of twin-engined aircraft with twin tail fins - B-25 Mitchells! We continued to gain ground and I nosed down slightly, both to gain a bit of speed and to bring myself in below the rear gunner's field of fire. The excitement mounted as the enemy flight, to start with just a group of indistinct specks in the sky, assumed the shape of a vee formation of Mitchells running at full tilt but armed to the teeth with heavy machine guns. Time to get busy! I switched to the cockpit view - well, ok, the no-cockpit, gunsight reticle view - and prepared to make my attack. So far, this seemed to be working. There was no return fire - yet. I hadn't realised that these early B-25's lacked the tail turret later fitted. So I was still more than a bit anxious, waiting for the moment the enemy gunners would decide to do something about my approach. I decided to attack the right-hand bomber but underestimated my closing speed. I had to break away below him without firing more than a few rounds, jinking to avoid return fire and nosing down again to pick up speed and get out of danger. At this point I remembered to give my squadron the order to attack, too. I seemed to have escaped this rather ropey performance without sustaining any damage. That was not my only piece of good fortune. I found that my speed had carried me past the two rearmost bombers and into a decent position from which to have a crack at the leader. So that's what I did. I got some hits on his left wing then, levelling out, fired again. His starboard engine burst into flames and he curved away, trailing a long streamer of dark smoke. So far, so good - one down, two to go! ...to be continued!


-
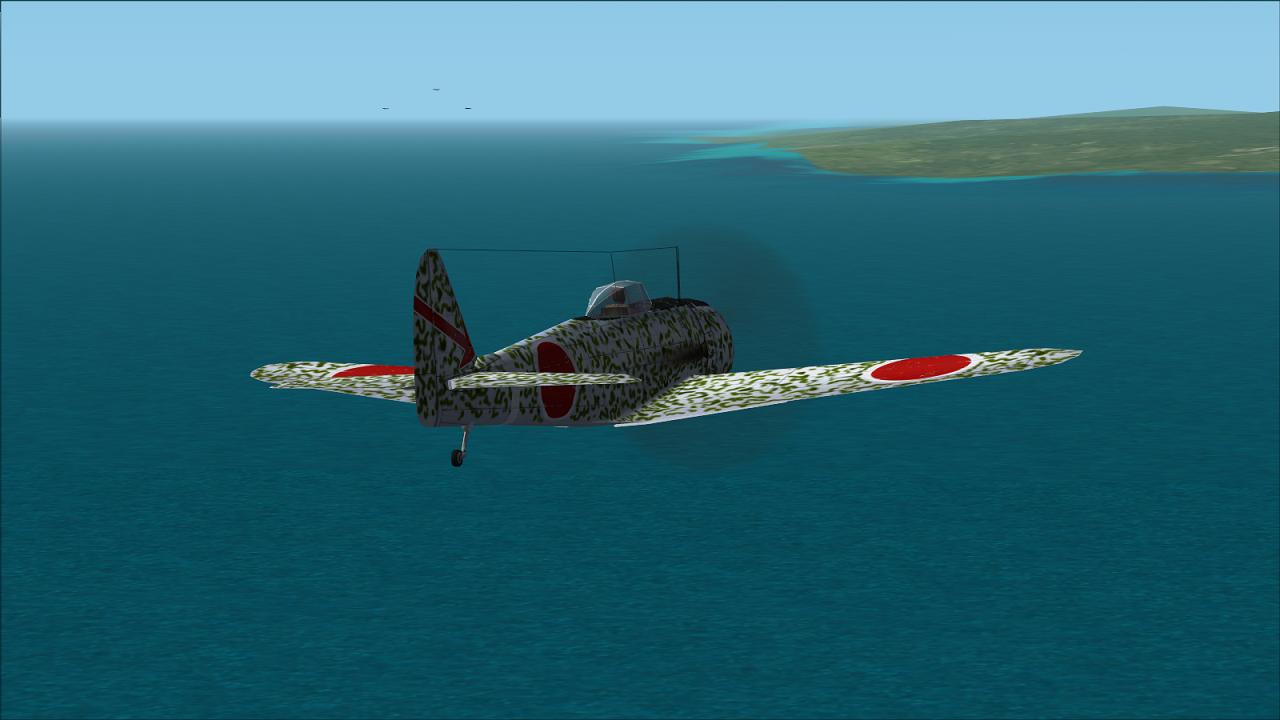
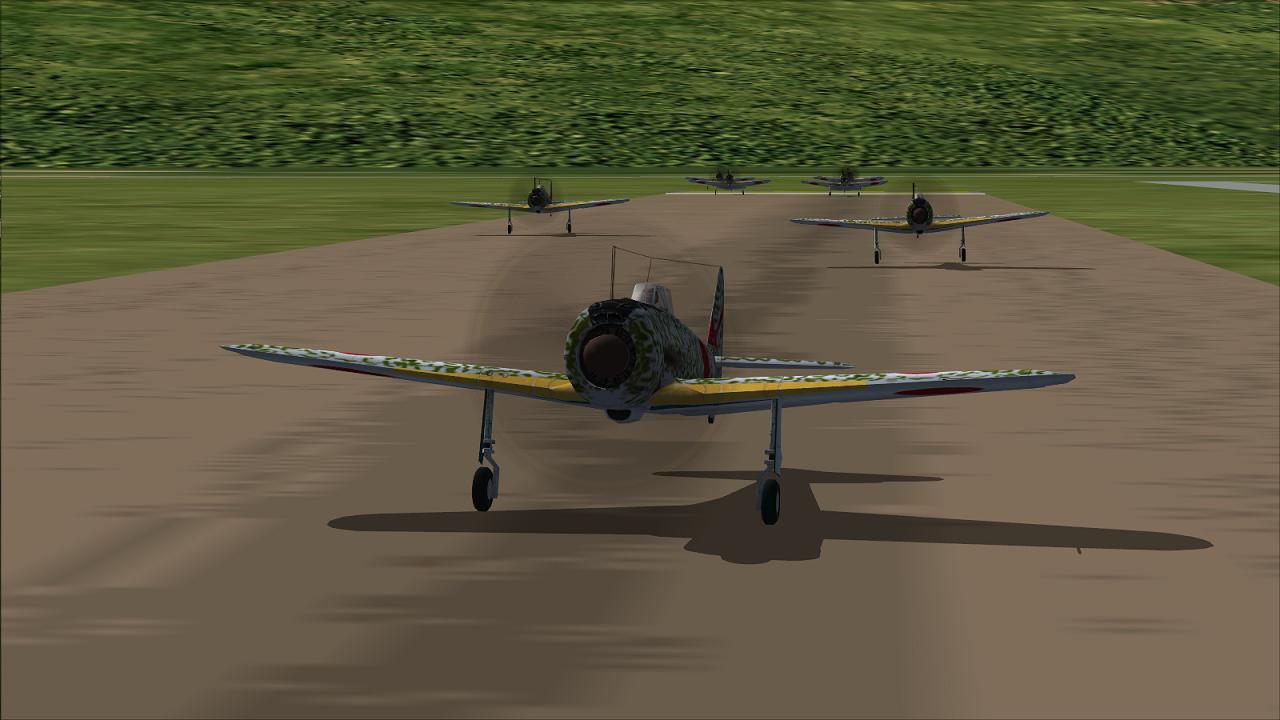
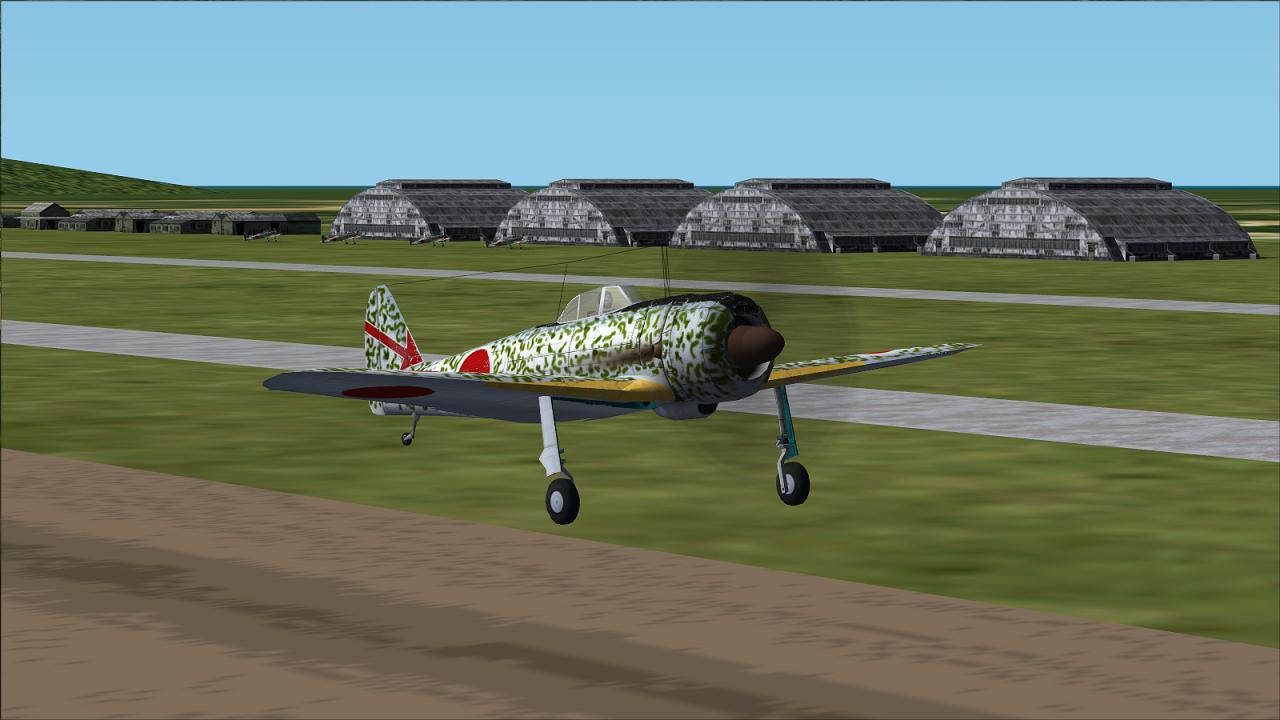
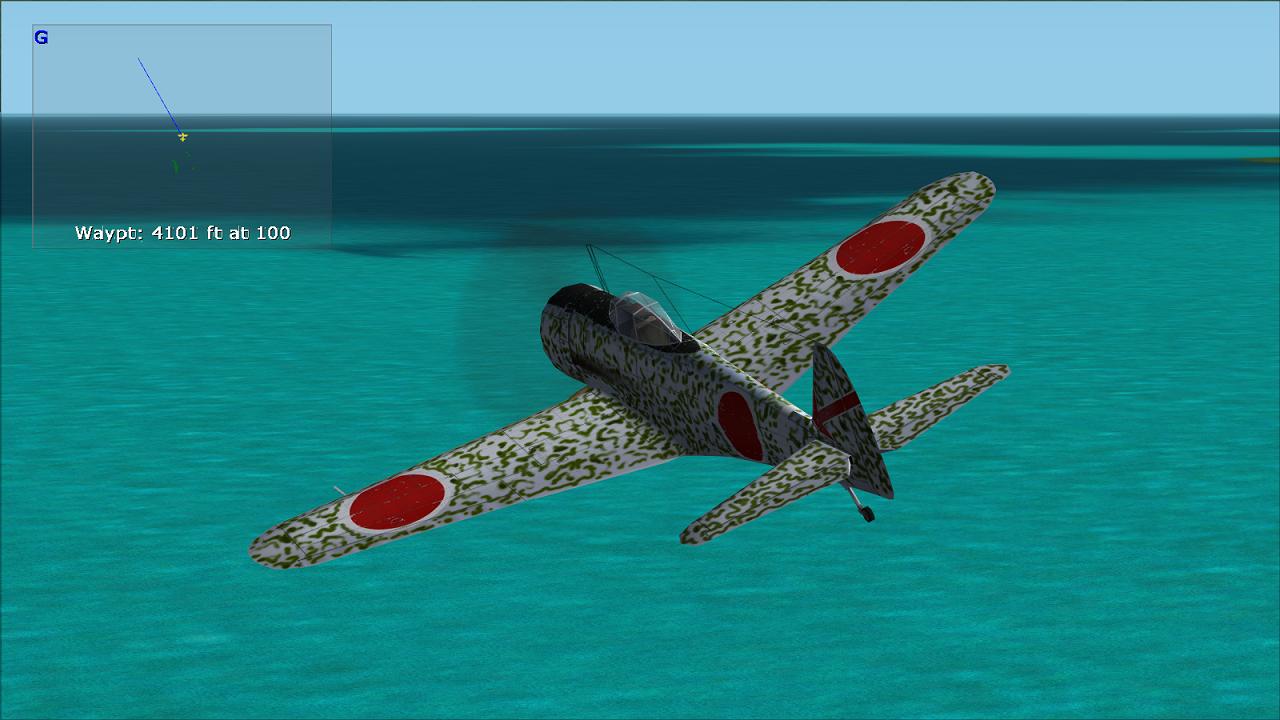
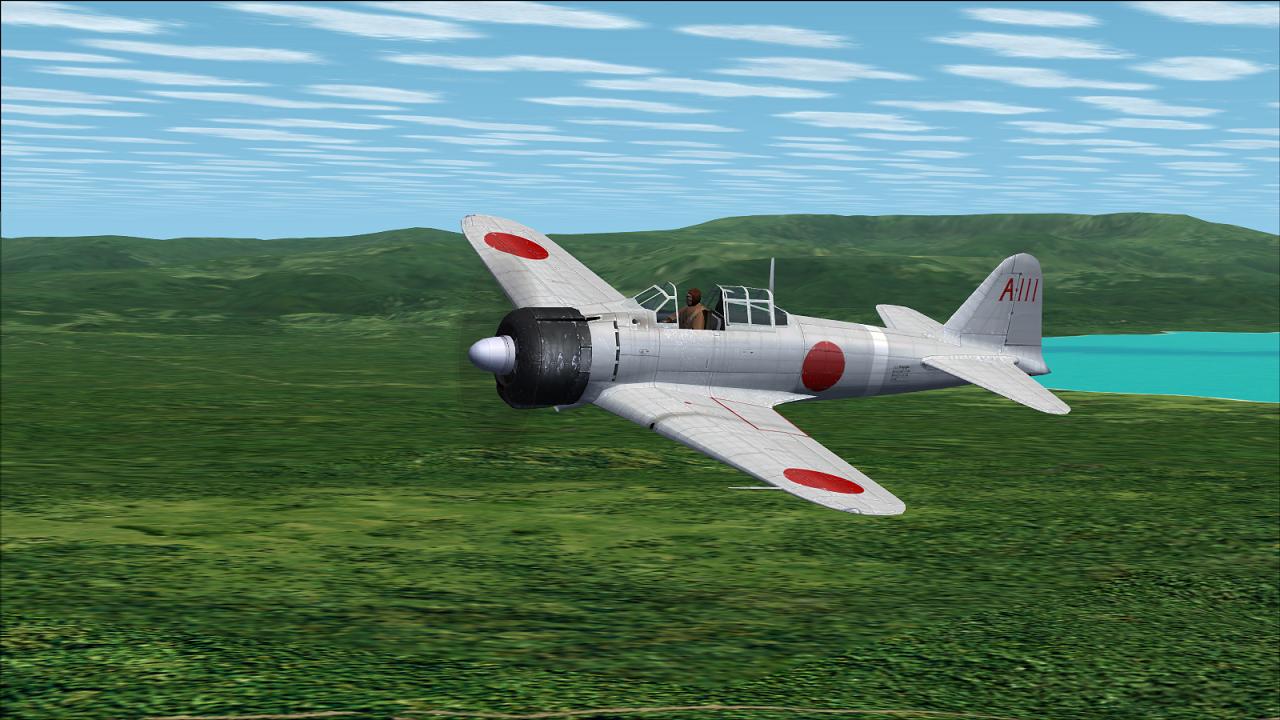
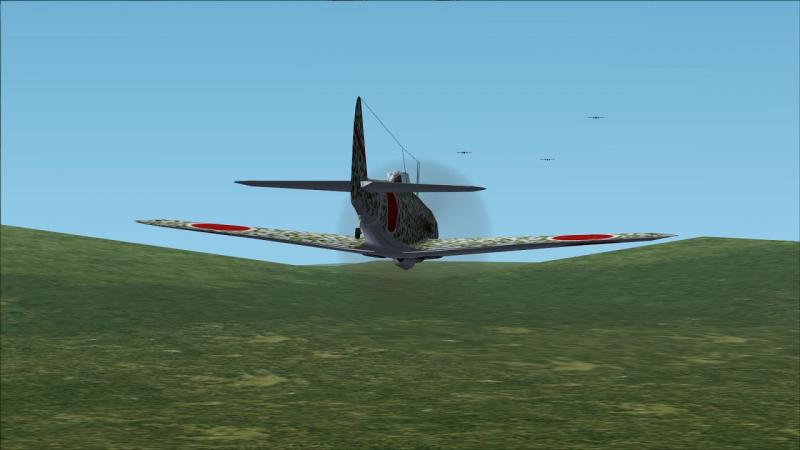
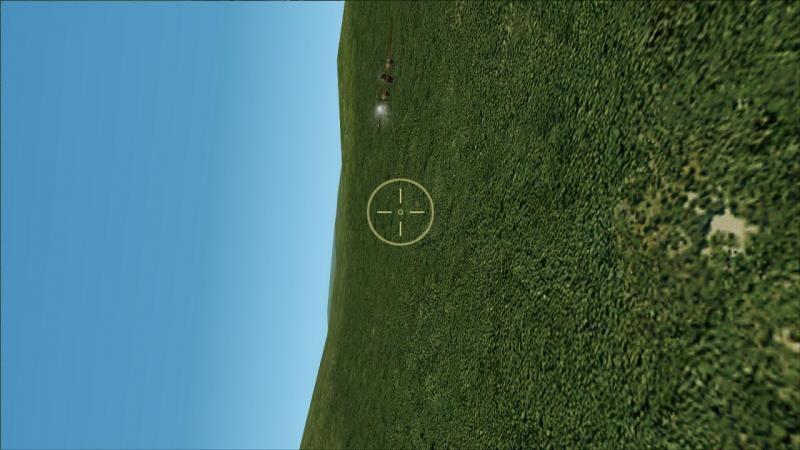
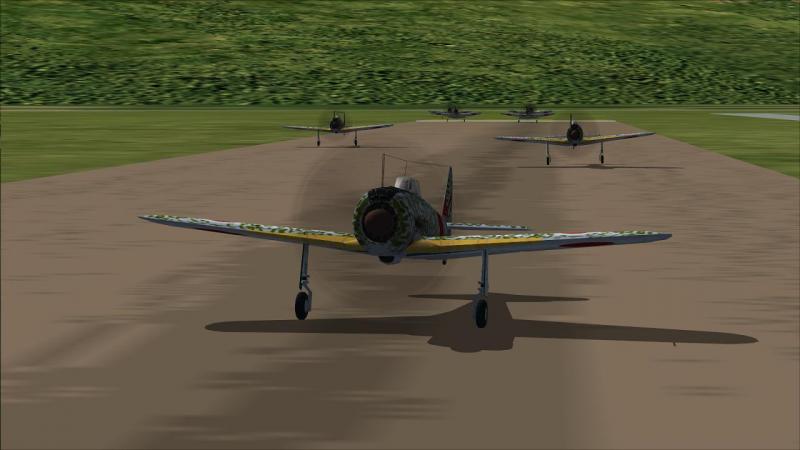
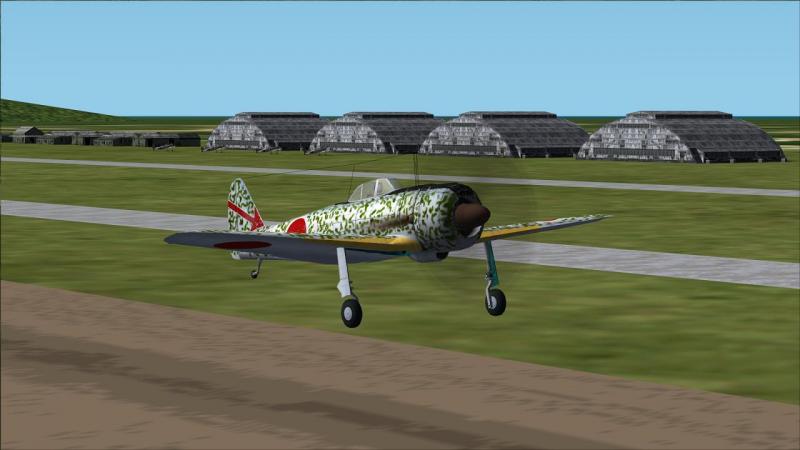
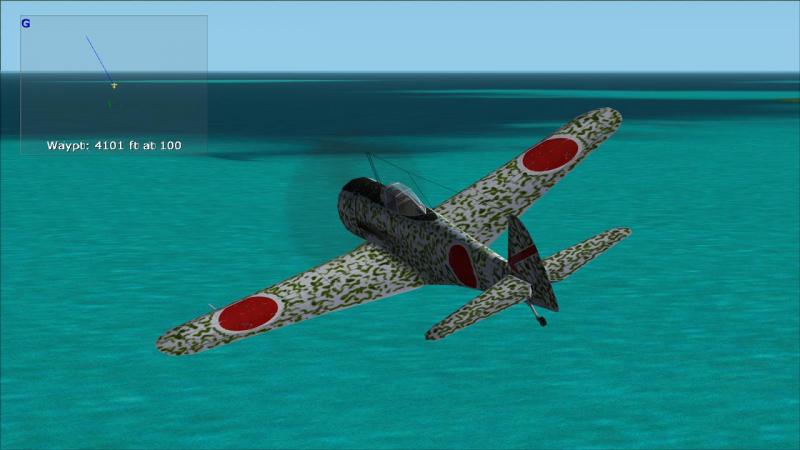
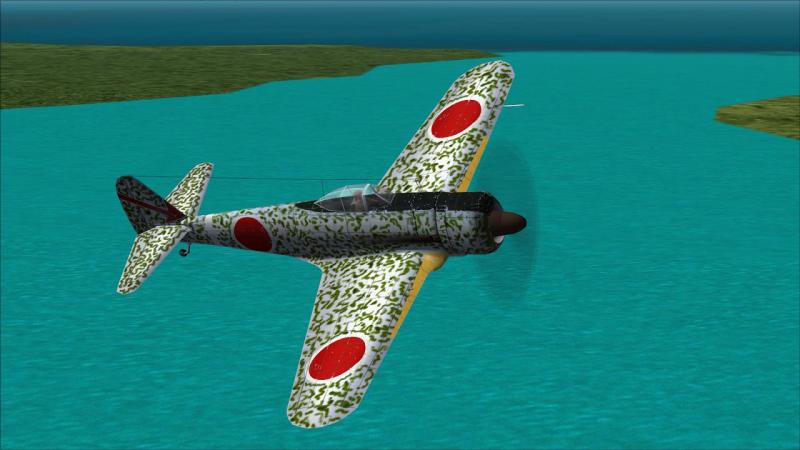
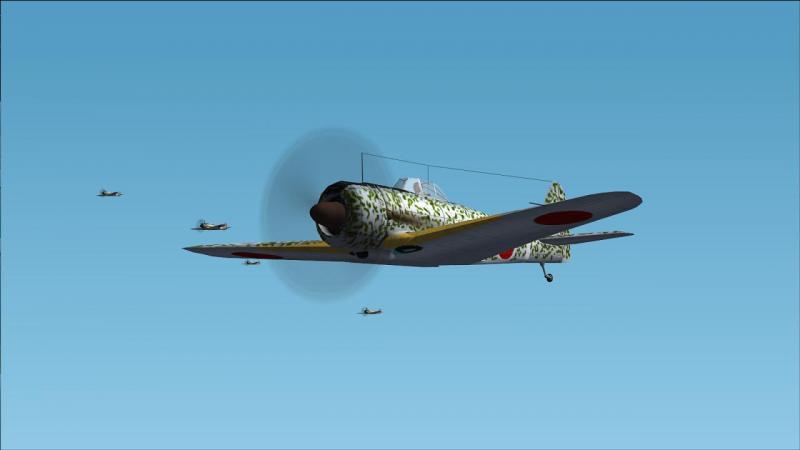
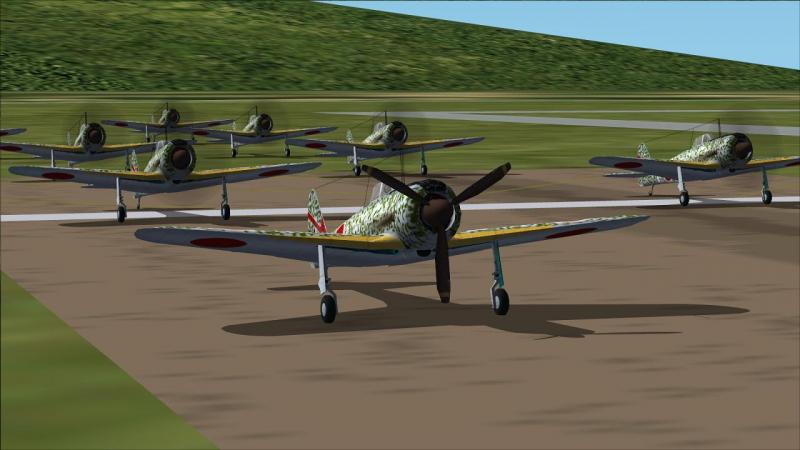
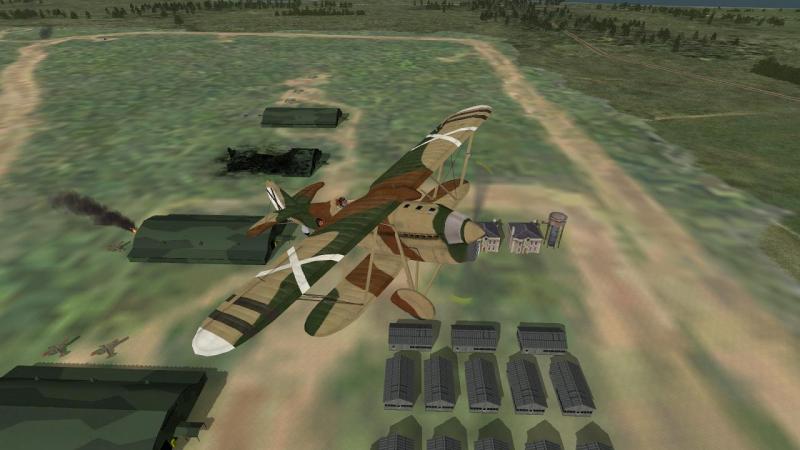
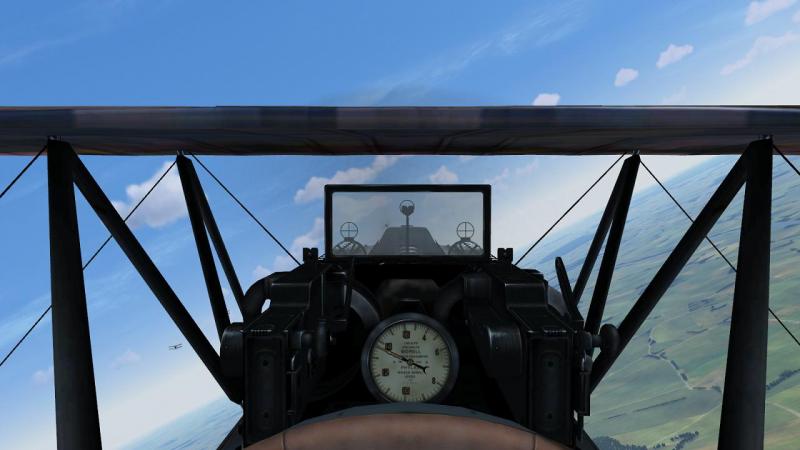
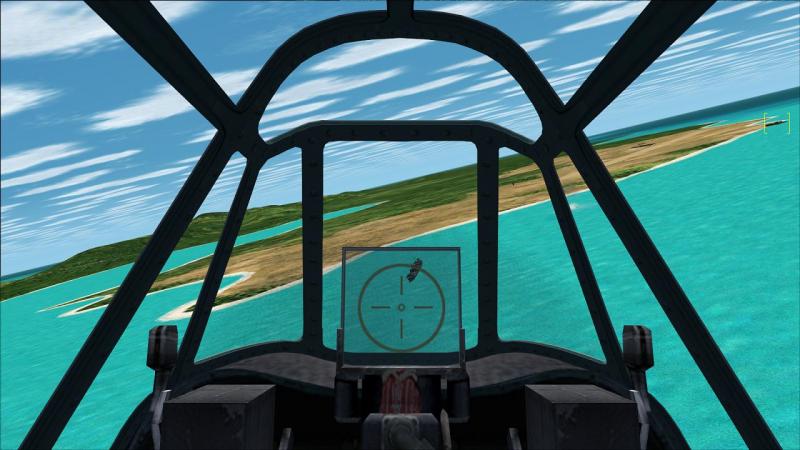
Up and at 'em! I started up, checked the controls and set flaps for takeoff. With incoming fast bombers to catch, there was clearly no time to hang around. I opened her up and roared off down the runway, correcting the swing with a touch of rudder. My squadron wasted no time and was soon doing the same, right behind me, an impressive spectacle. My morale rose accordingly as I climbed up and away from Kitanodai, leaving behind the large hangars, the parked planes and all the other paraphanalia of a secondary but well-appointed island airbase. I cleaner her up, turned on the Tactical Display and began a climbing turn to the left, to pick up the displayed blue route indicator line. This was a short leg and I was soon turning again, this time onto a course which seemed calculated to intercept the US bombers in the vicinity of their likely target. I'm not sure why the leg ran so far to the north-east, unless it was intended to take us along the enemy's line of retreat. Hopefully we would make contact long before coming to the end of the leg. This gave me the opportunity to admire my mount. CFS2 may be rather long in the tooth but though lacking modern graphic features like bump mapping or self-shadowing, its aircraft still look good in both outline and in finish, with realistic and sharp nicely-weathered textures. To my eye, they have stood the test of time pretty well, a fitting tribute to their builders. And while the exterior view zooms in fixed steps, there's none of the horrible CFS3-style 'wide angle lens effect' to distort the image. Back to business! From the map I was expecting to meet bombers over the next island, perhaps catching them on their way out as they crossed from right to left ahead of us. But instead, scanning an arc of sky ahead, I spotted a 'vic' of three aircraft coming in from the sea to my left, at about 10 o'clock, and fortunately not above us. They looked too big to be fighters, so I took them for an incoming enemy raid, targetting our forces on the island across the channel. They were moving fast and if I wanted to have any chance of catching them before they bombed - if they hadn't, already! - I could not afford to get dragged into a long tail chase. So I turned so as to set up the 'Tizzy Angle', named for the Polish RAF pilot who realised that the easiest way to set an optimal interception course on a bandit crossing your flight path was to adjust your course so that the enemy just grew as you closed, without seeming to drift either ahead or astern as the range wound down. With my squadron at my heels, I slowly edged closer. ...to be continued!


-
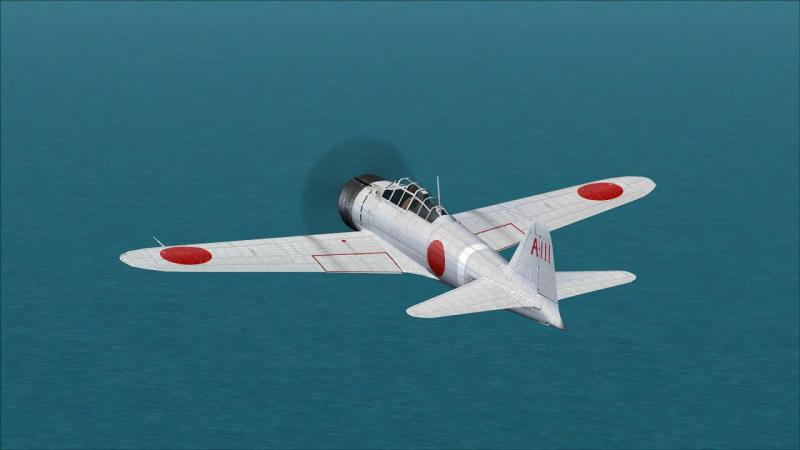
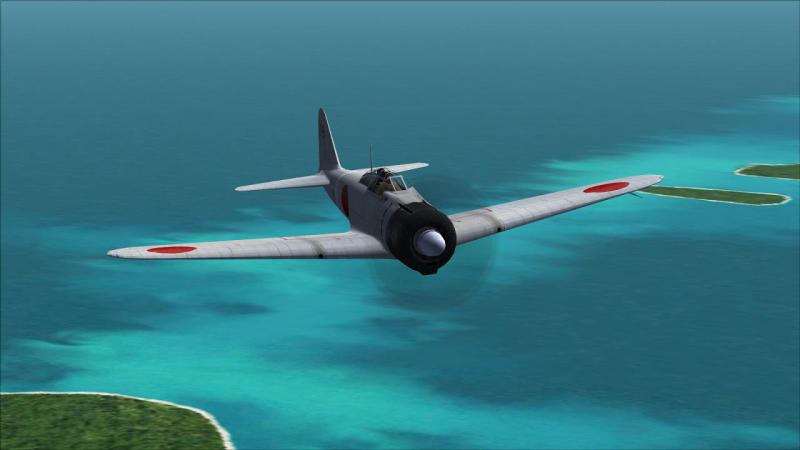
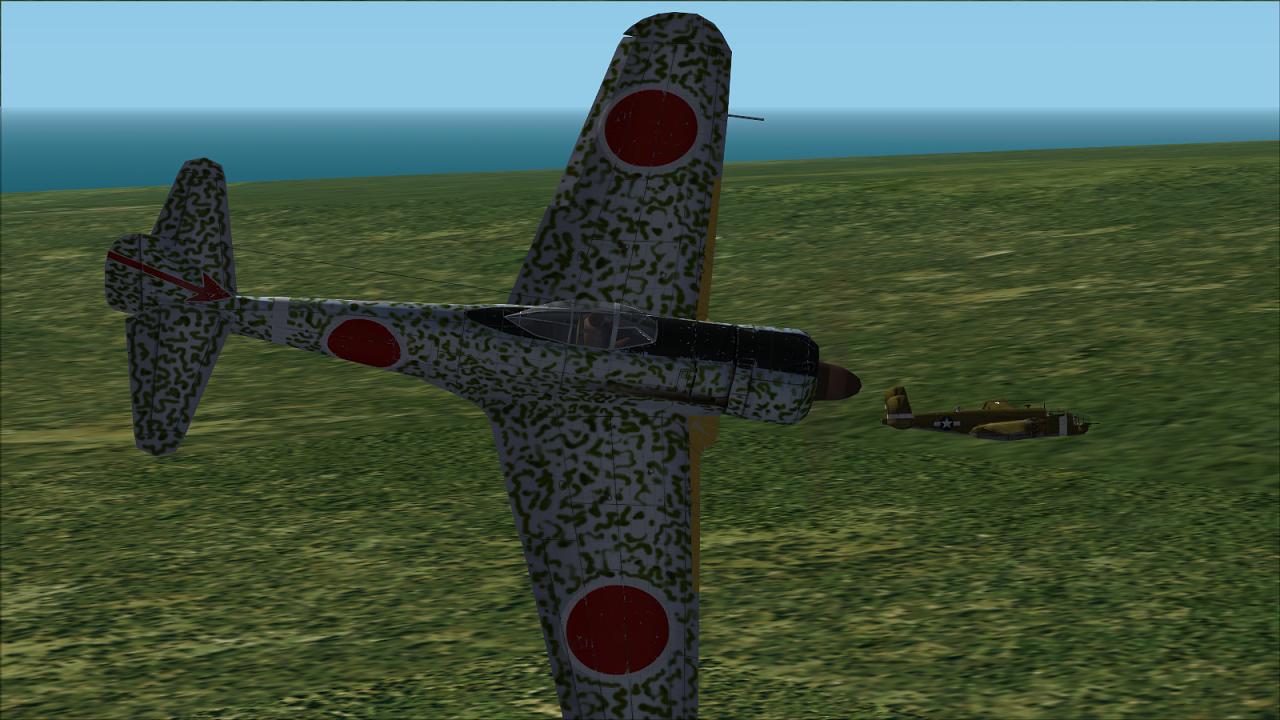
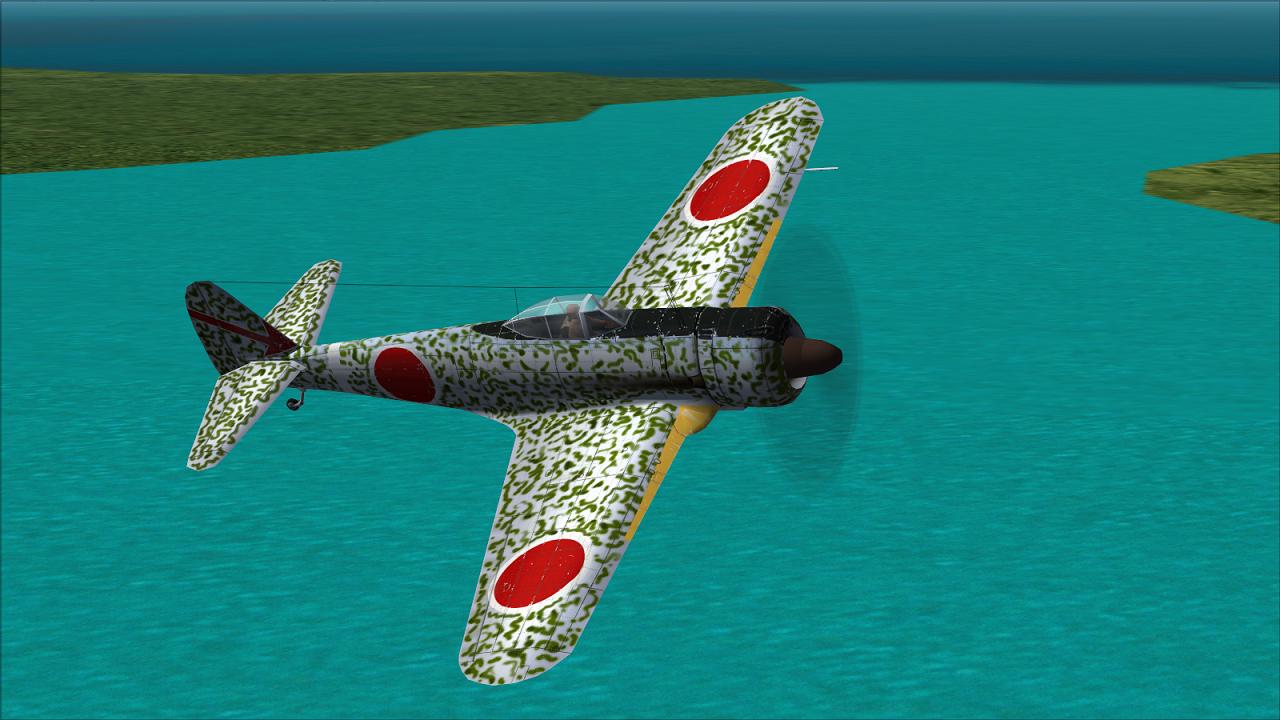
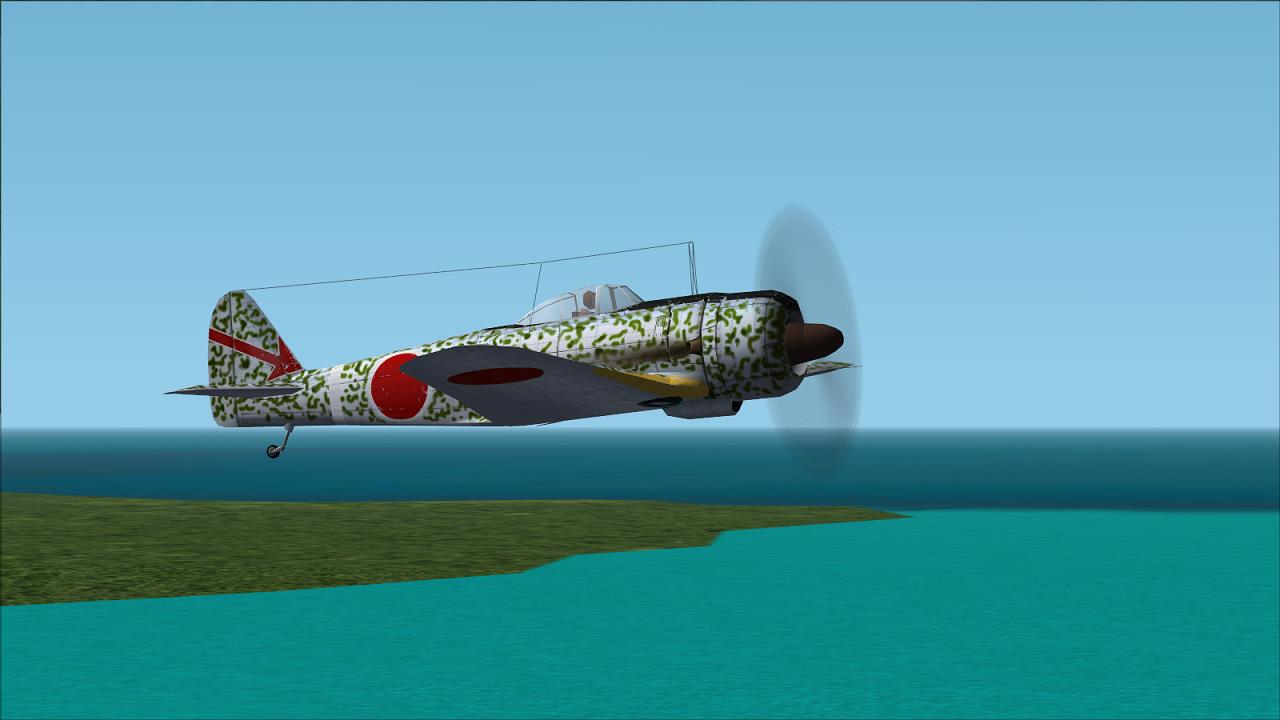
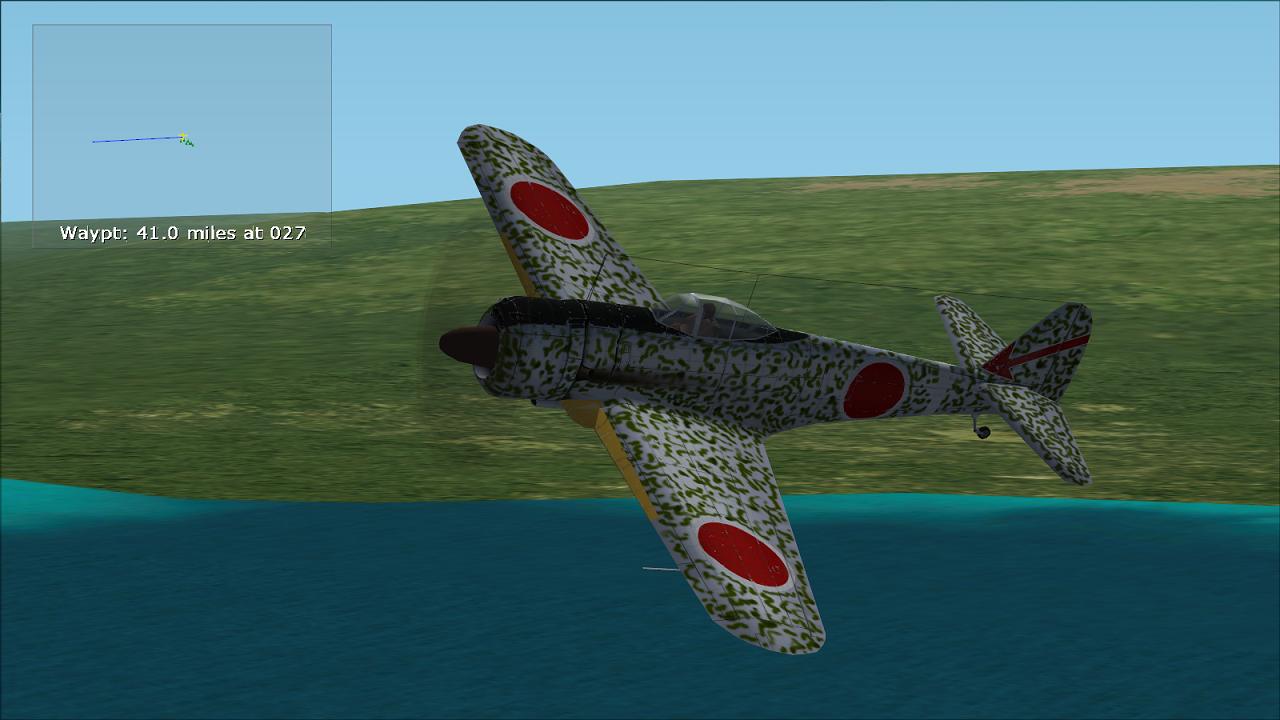
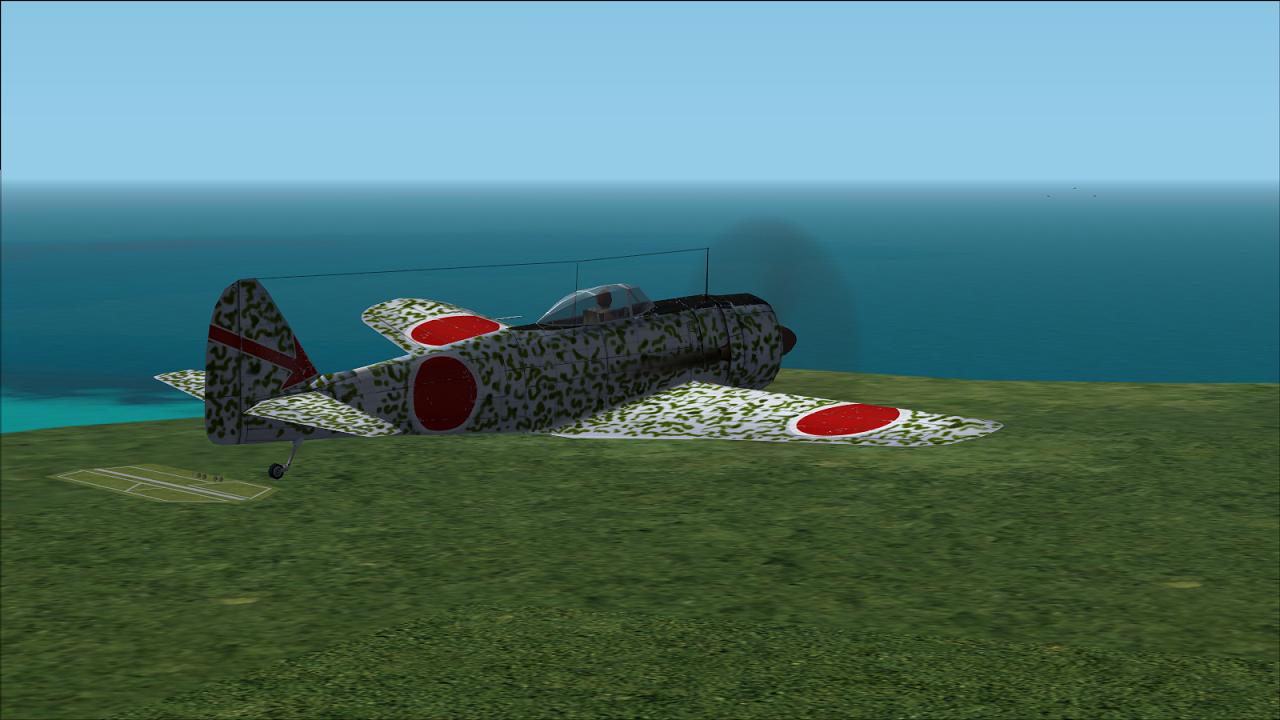
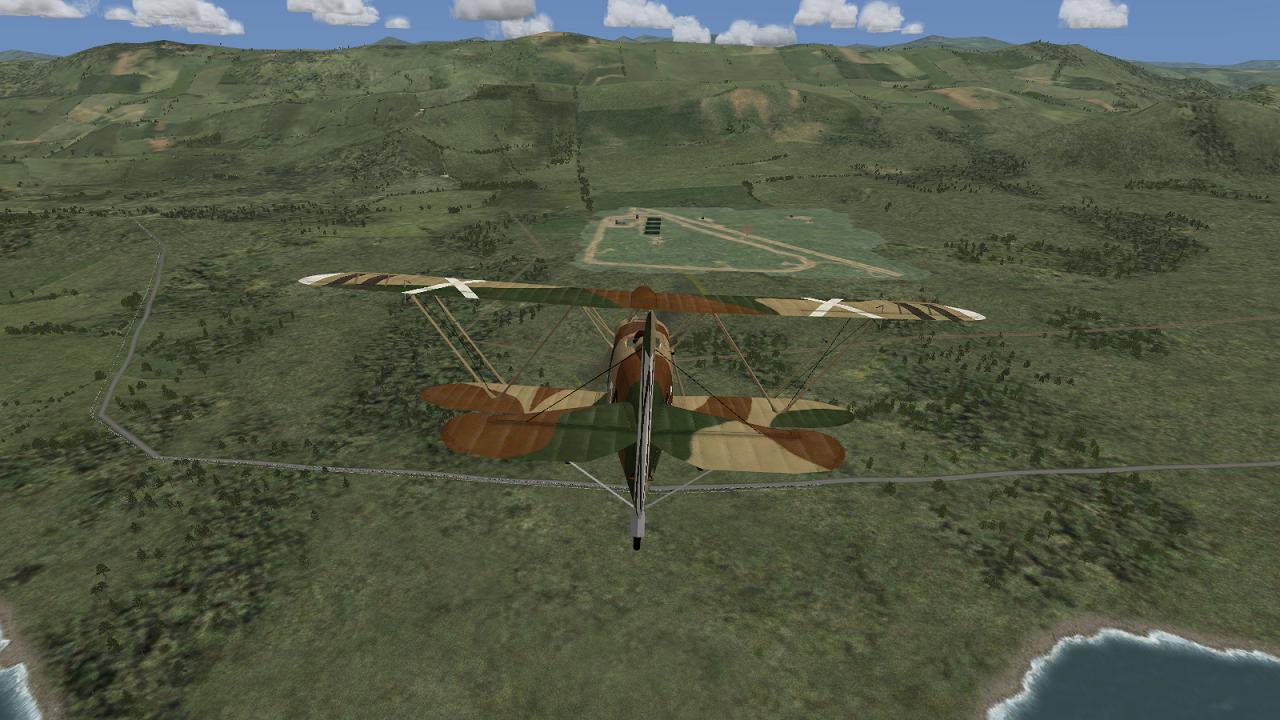
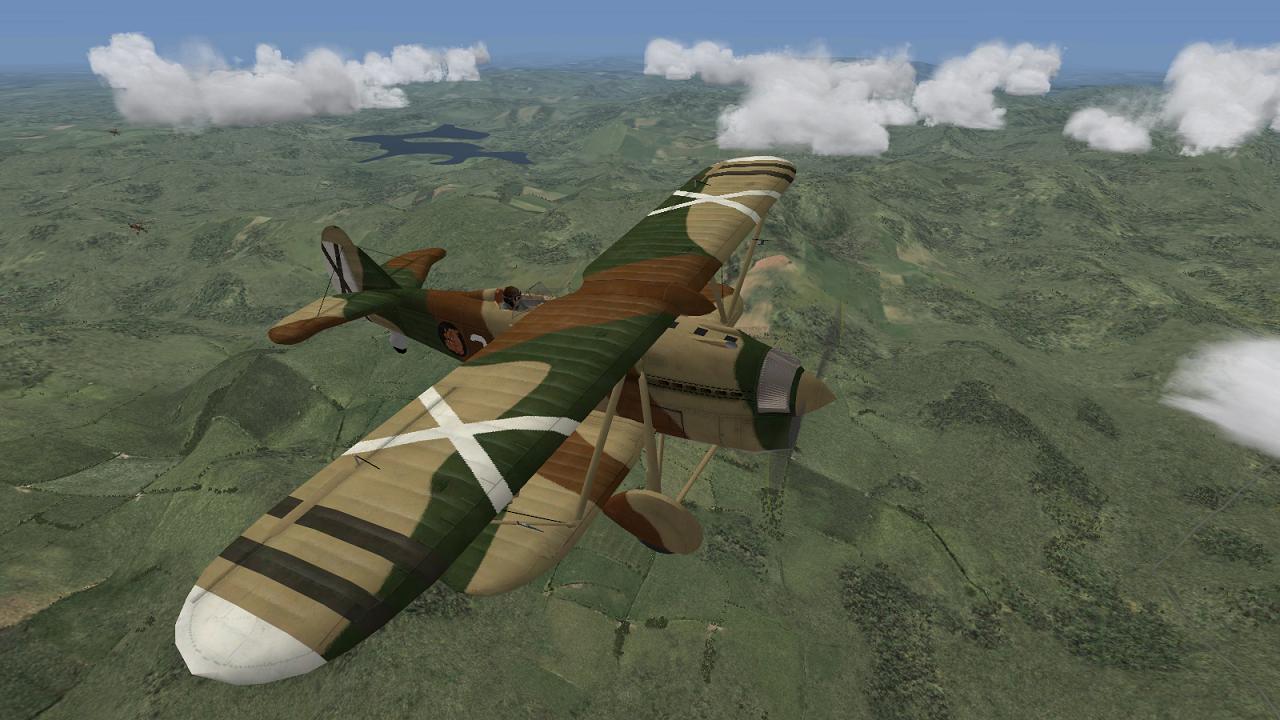
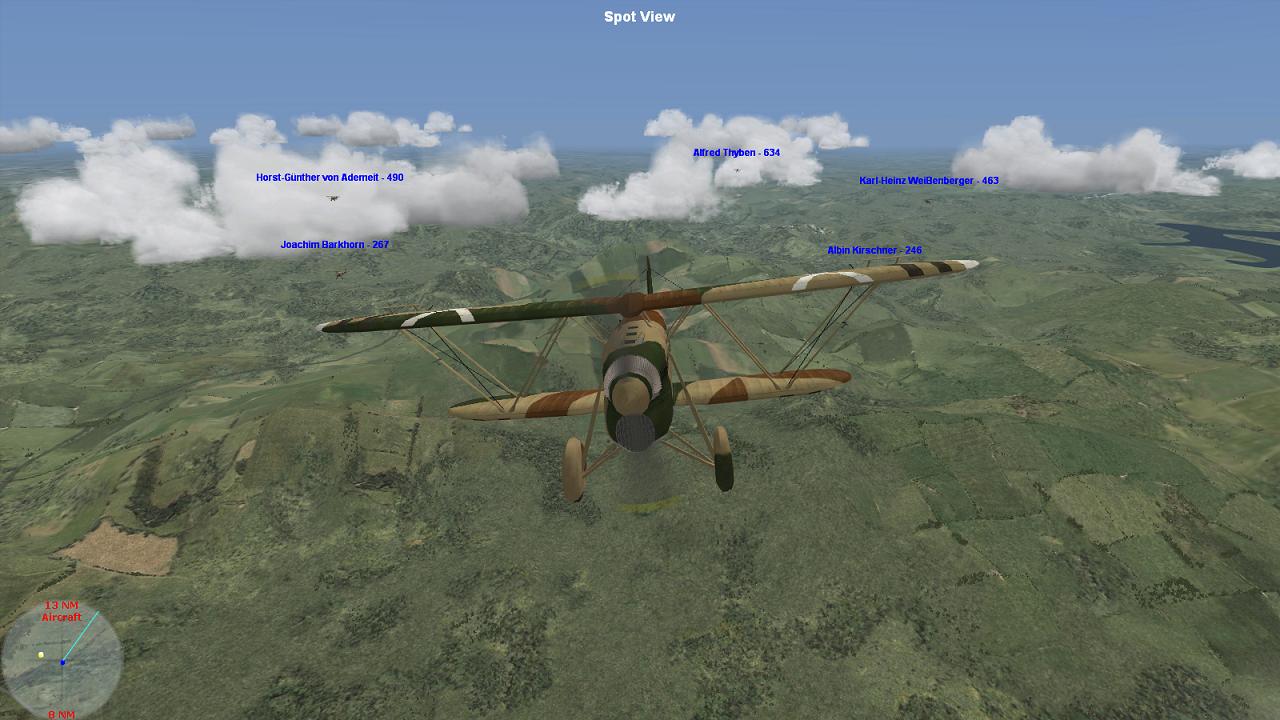
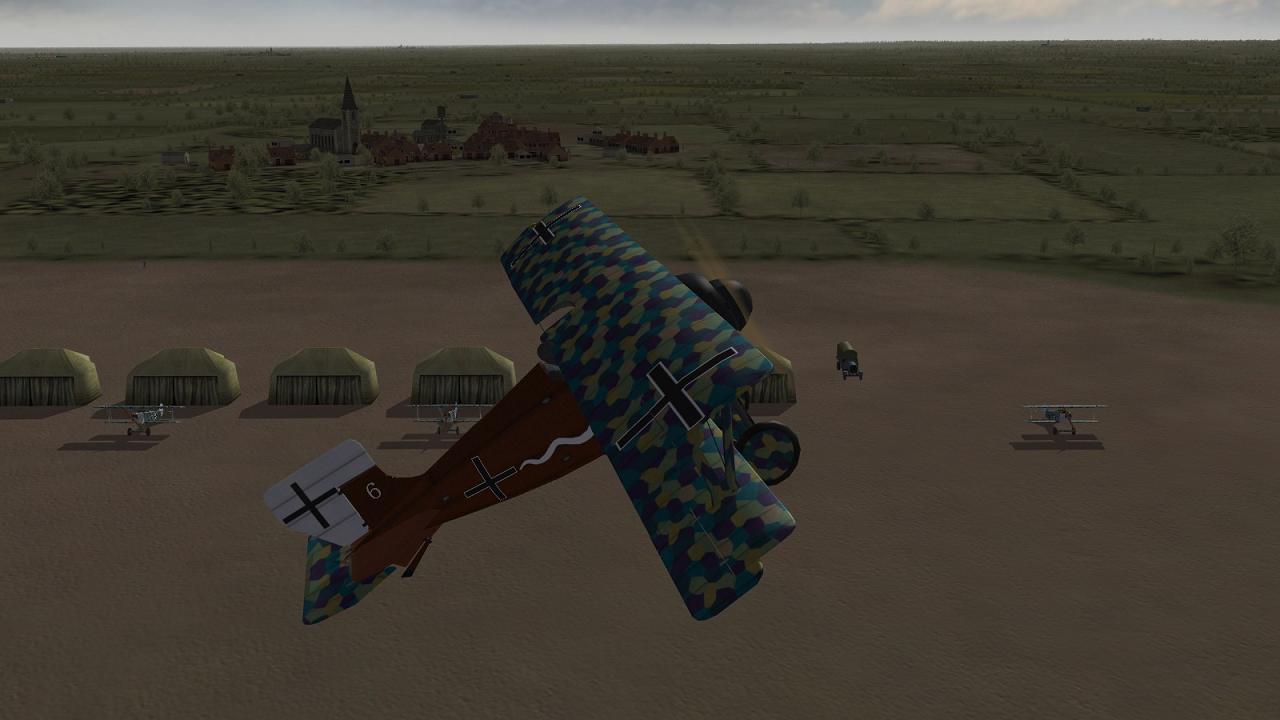
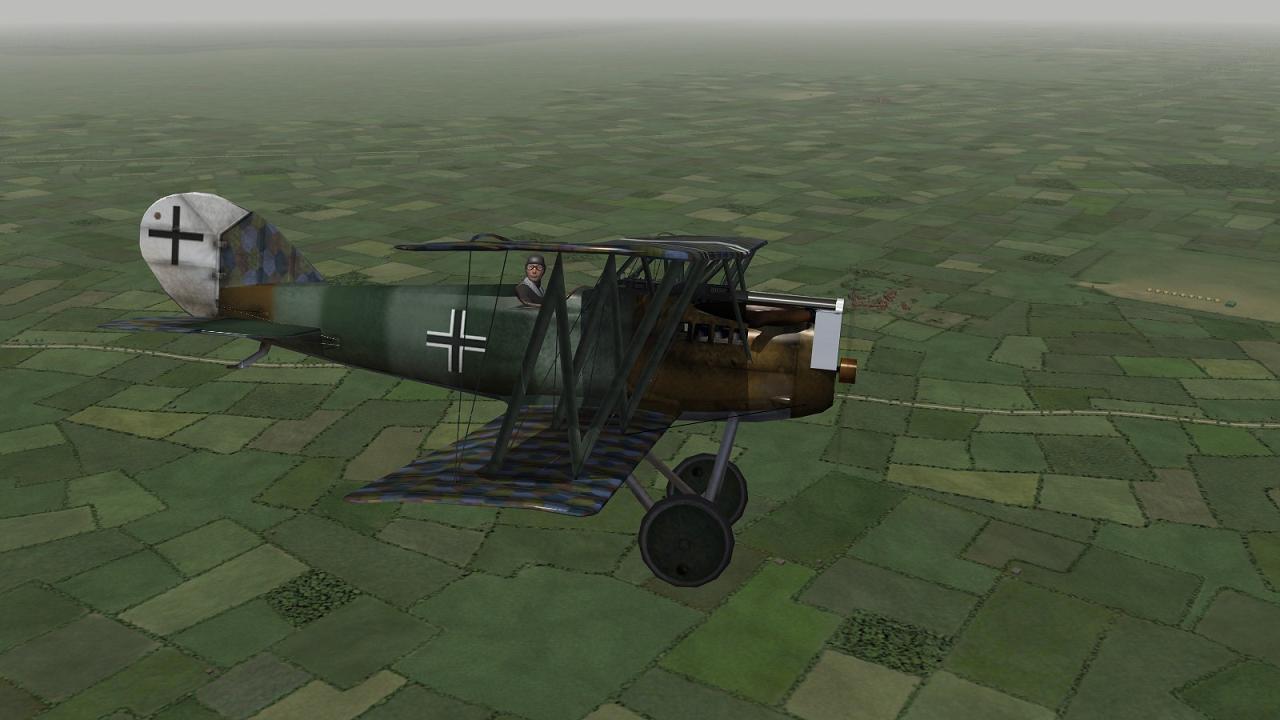
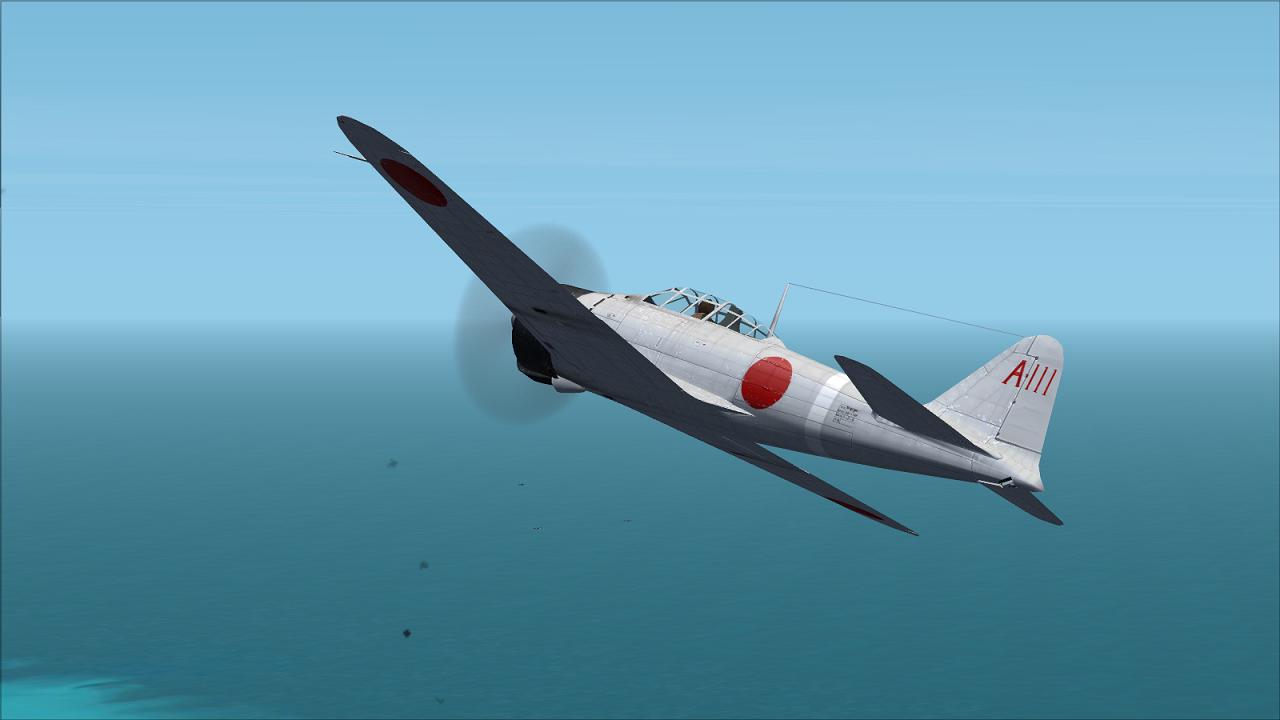
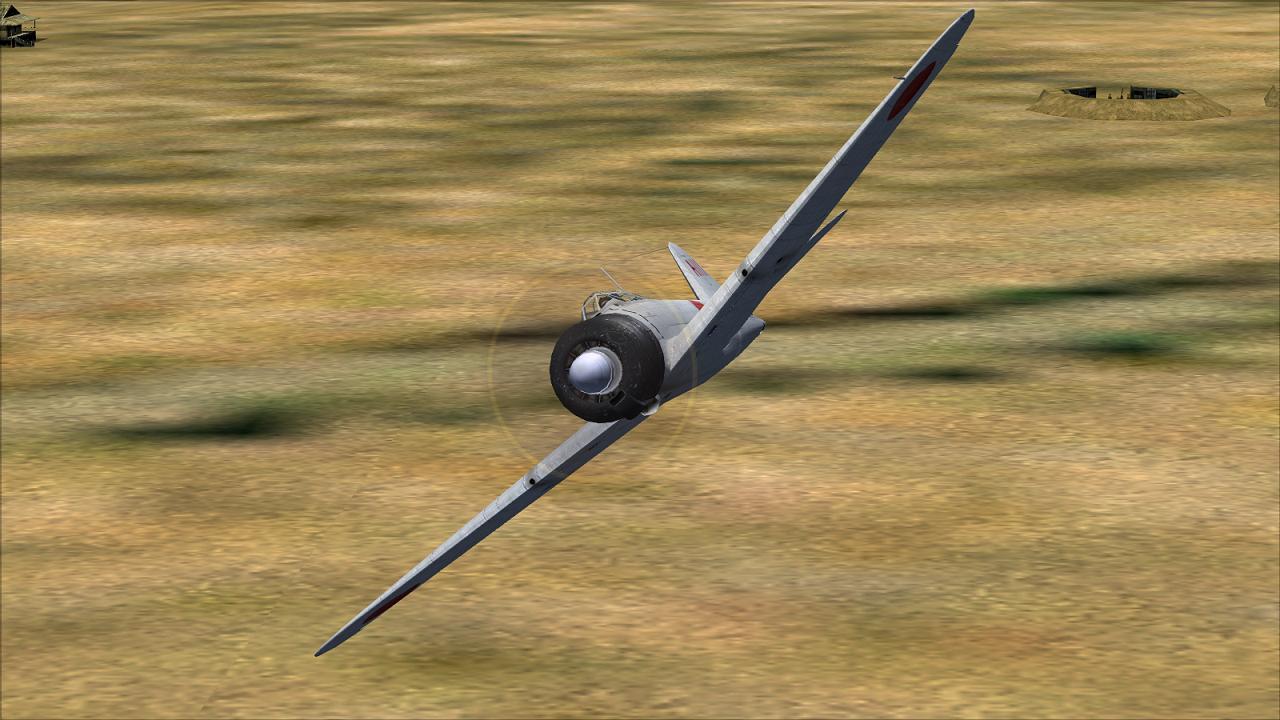
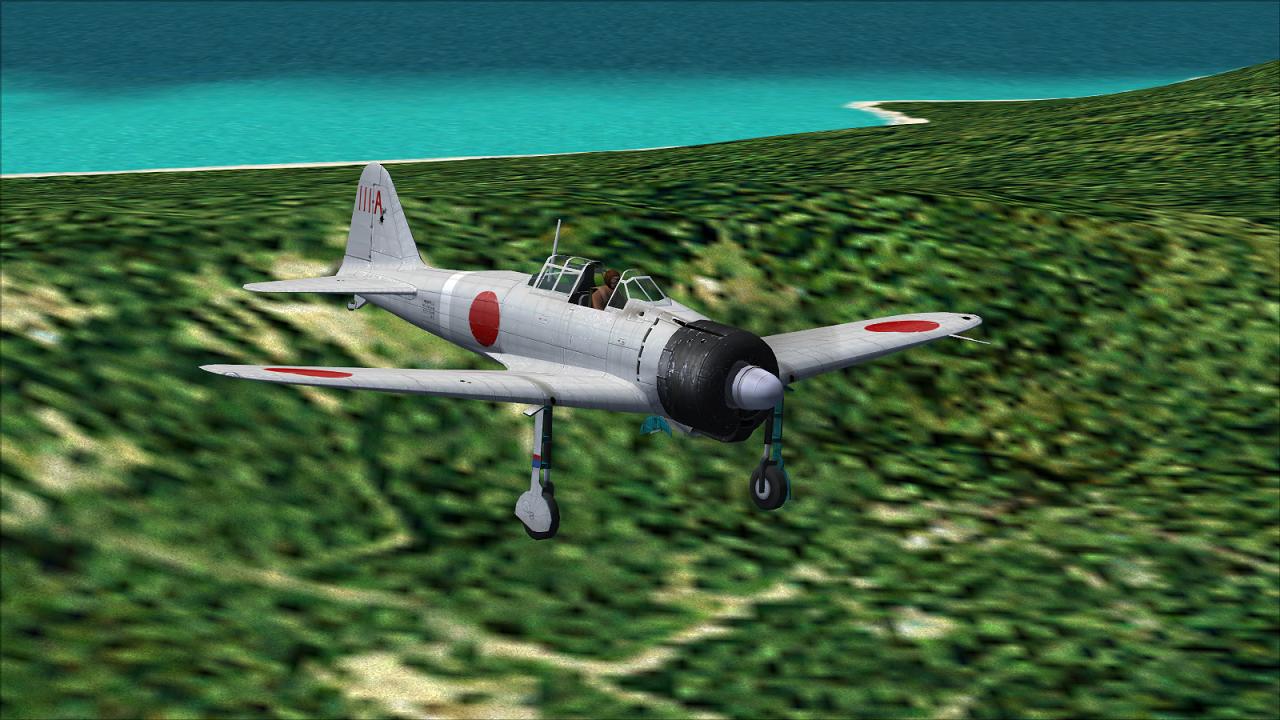
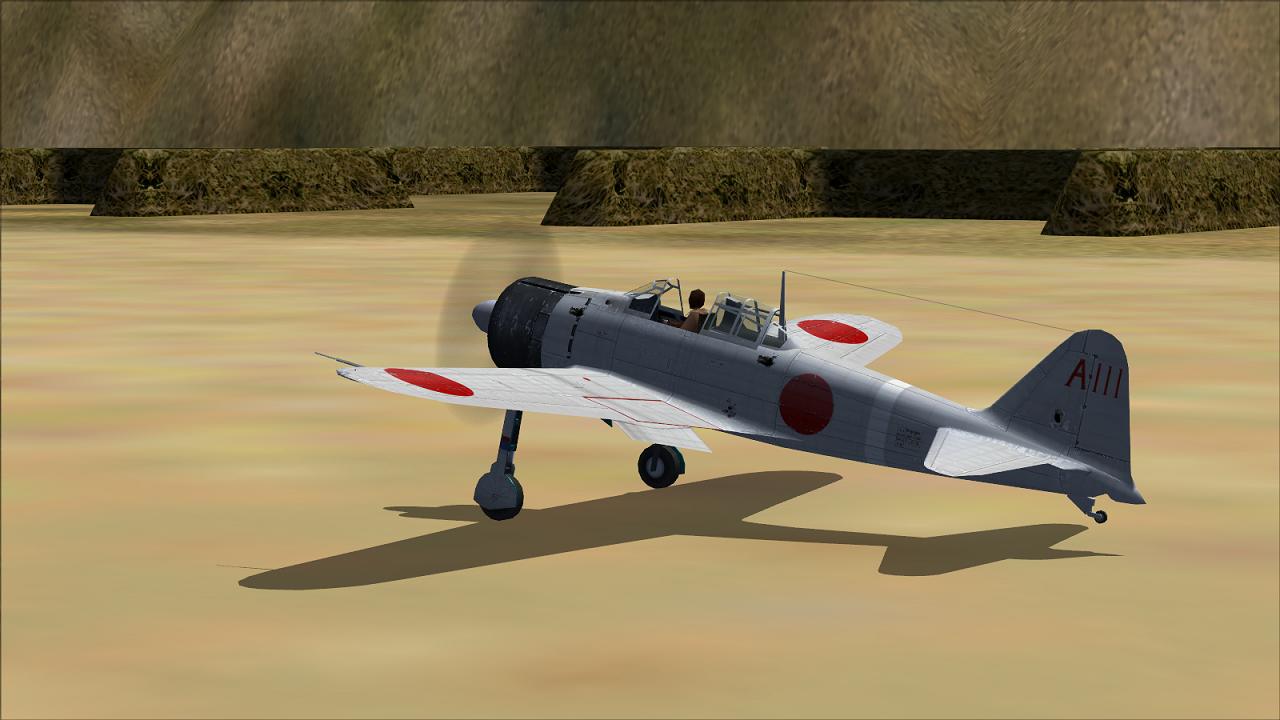
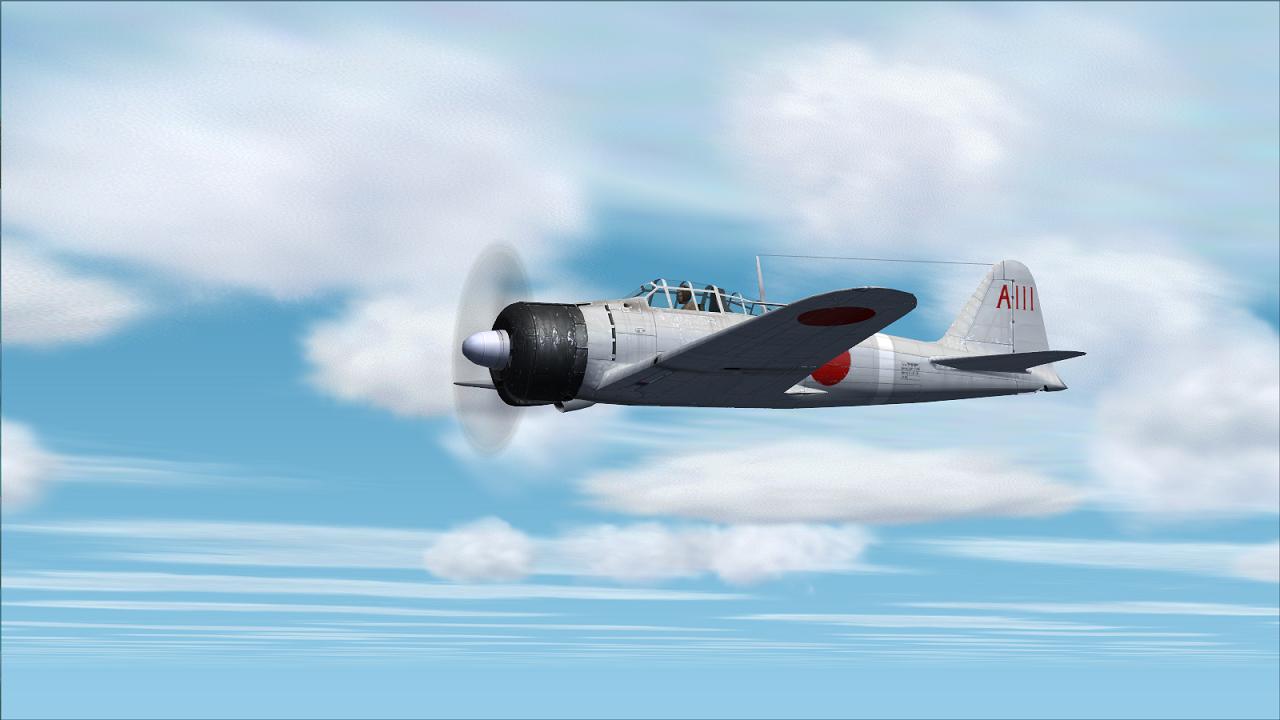
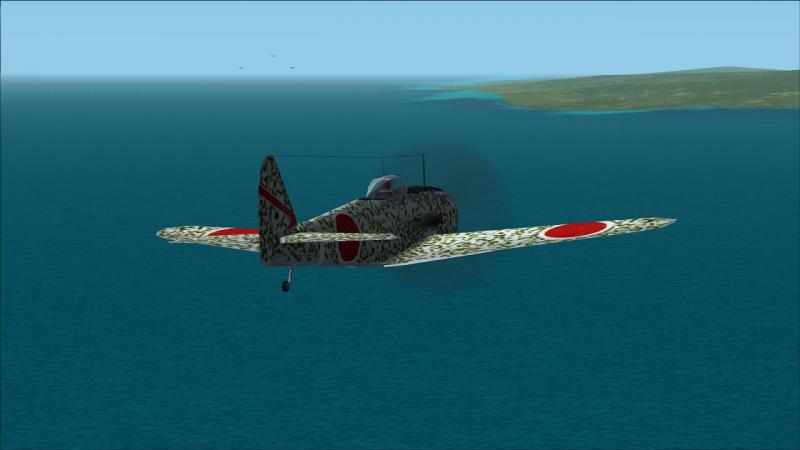
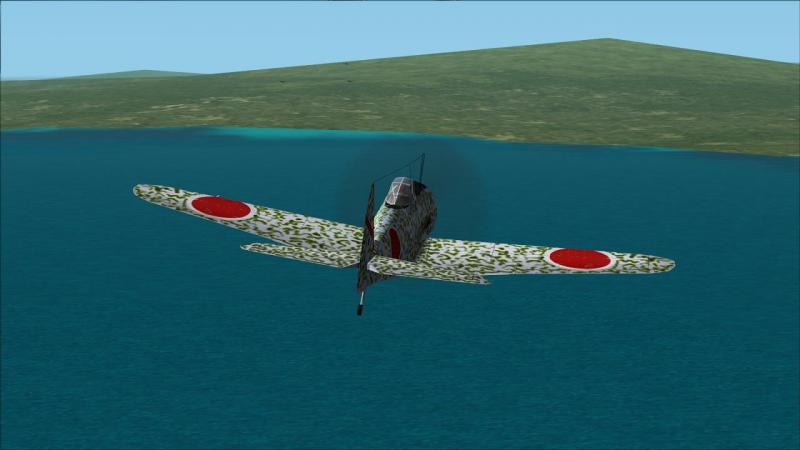
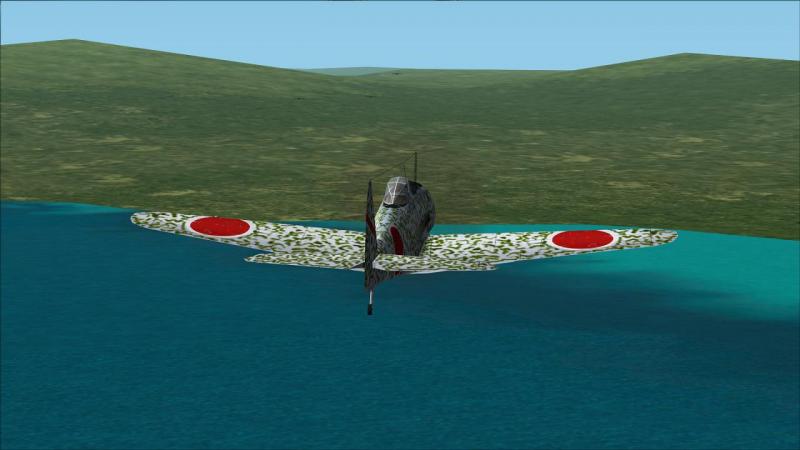
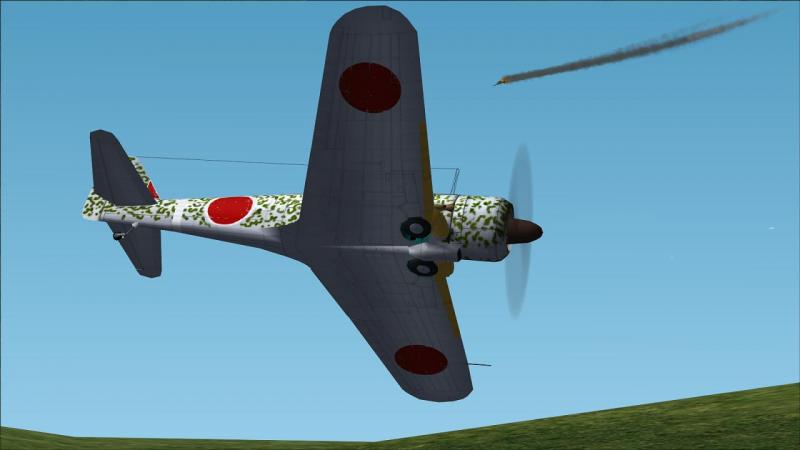
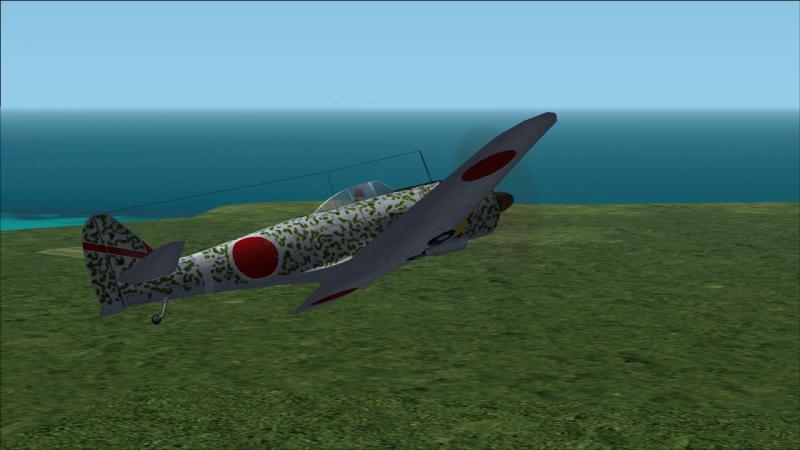
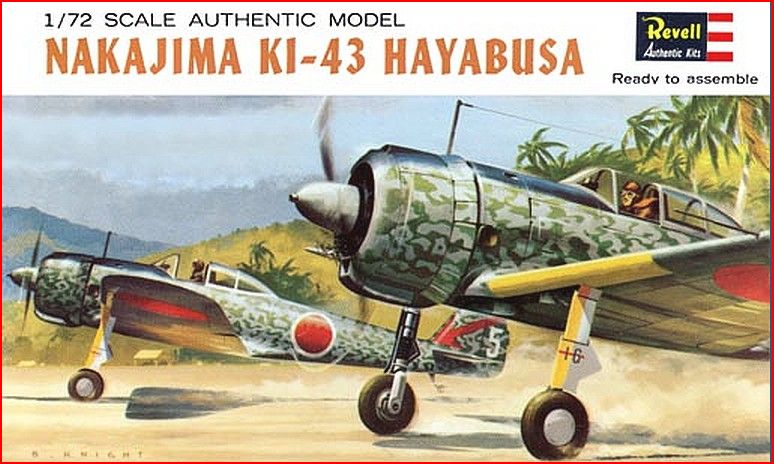
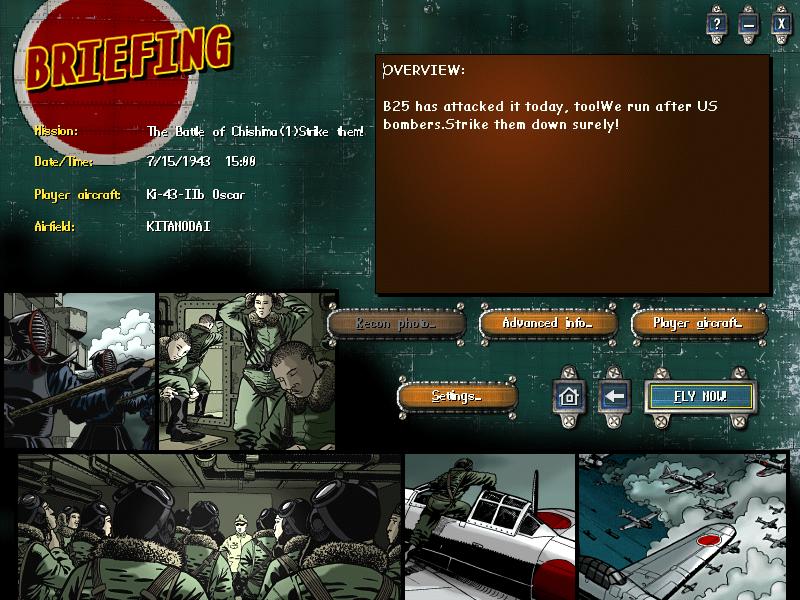
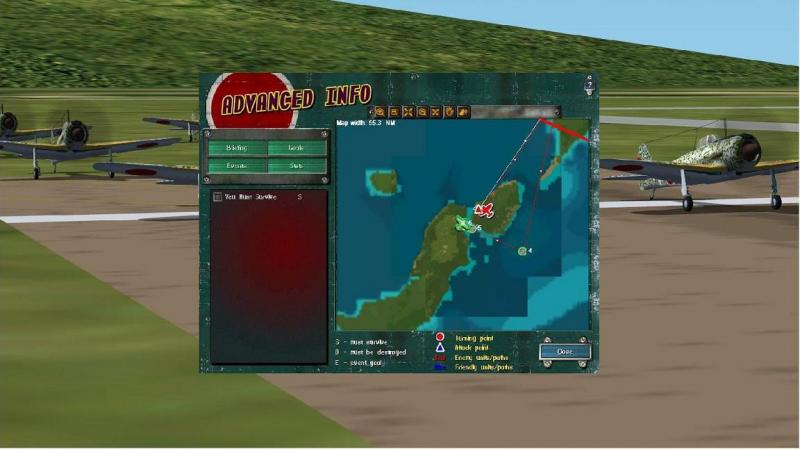
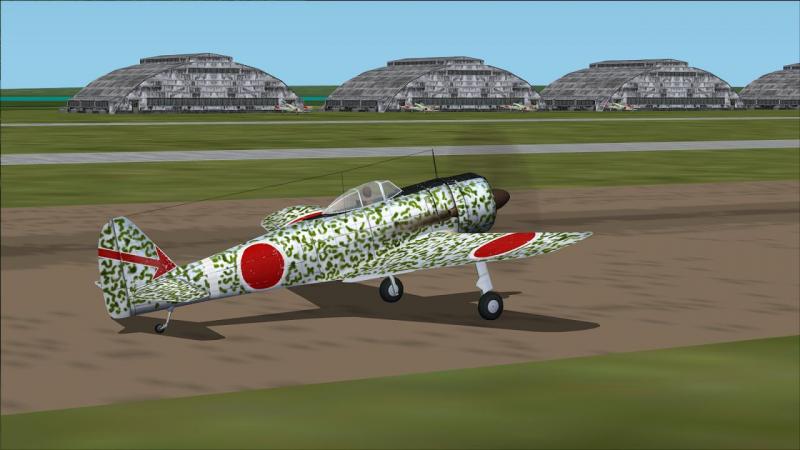
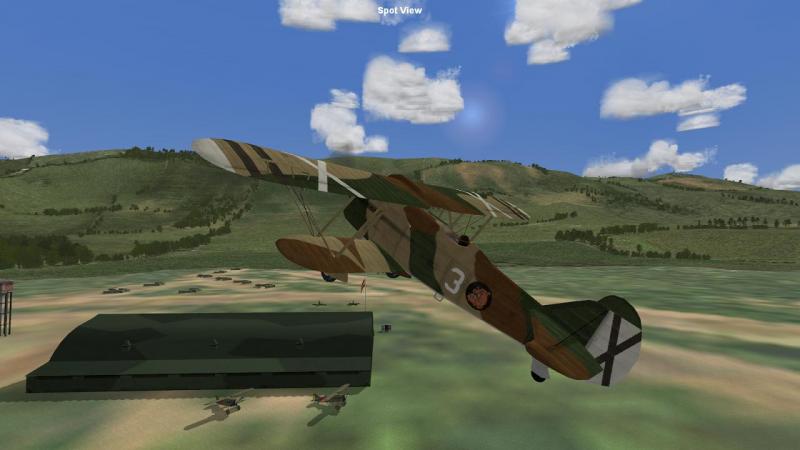
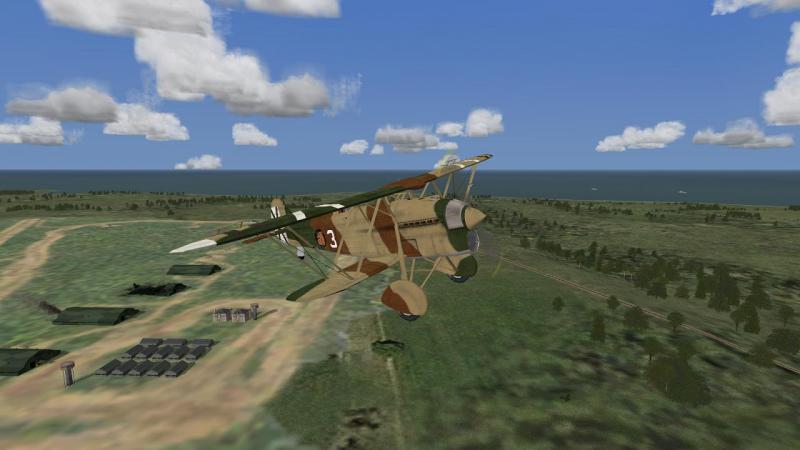
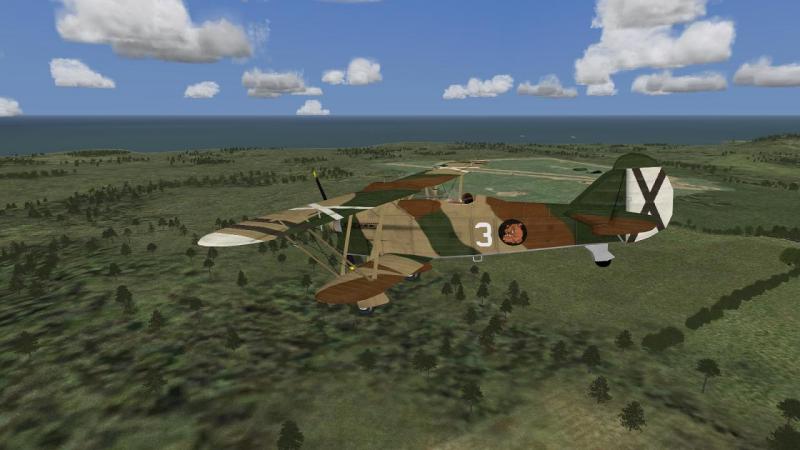
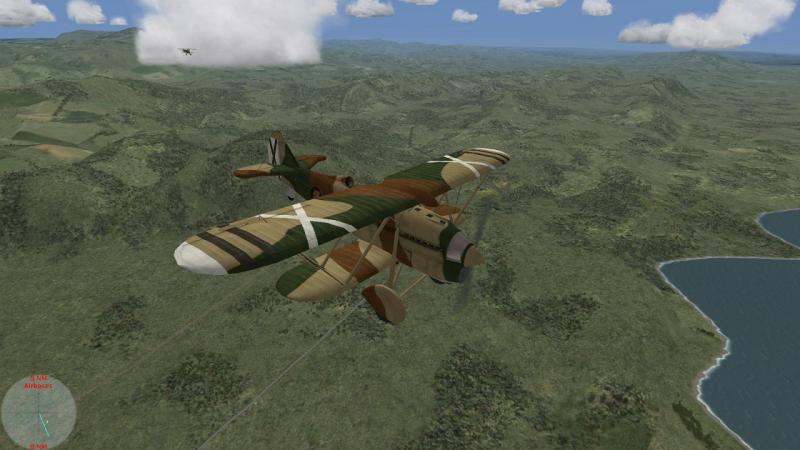
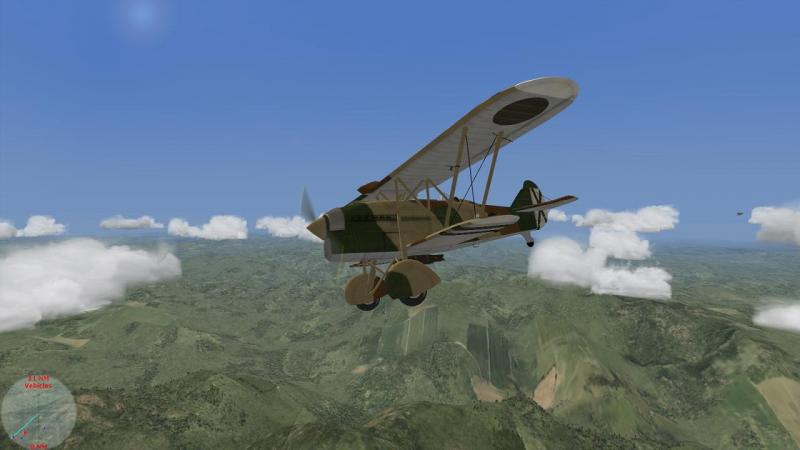
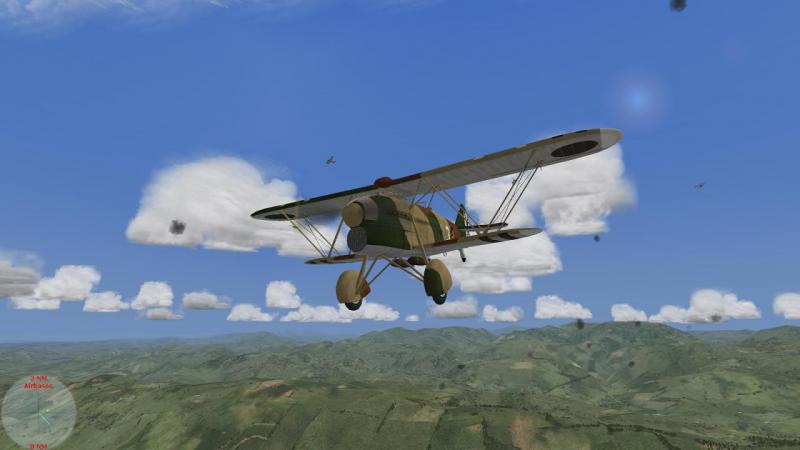
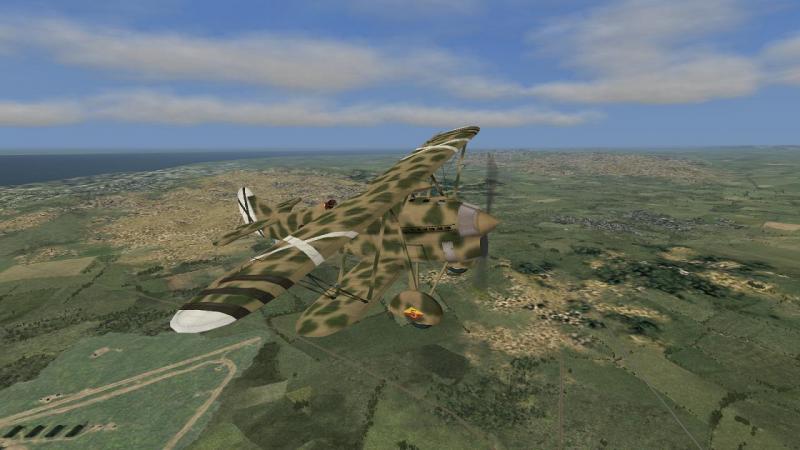
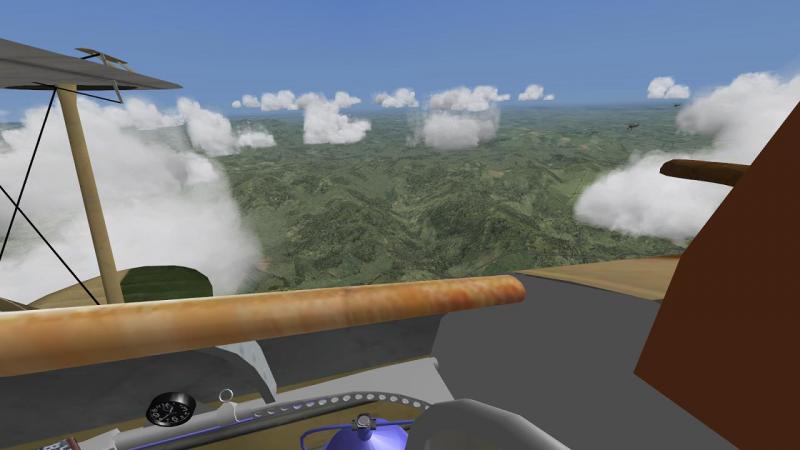
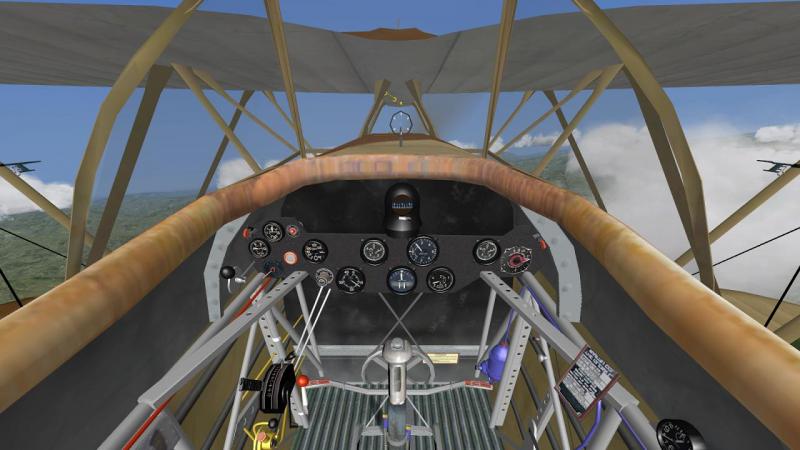
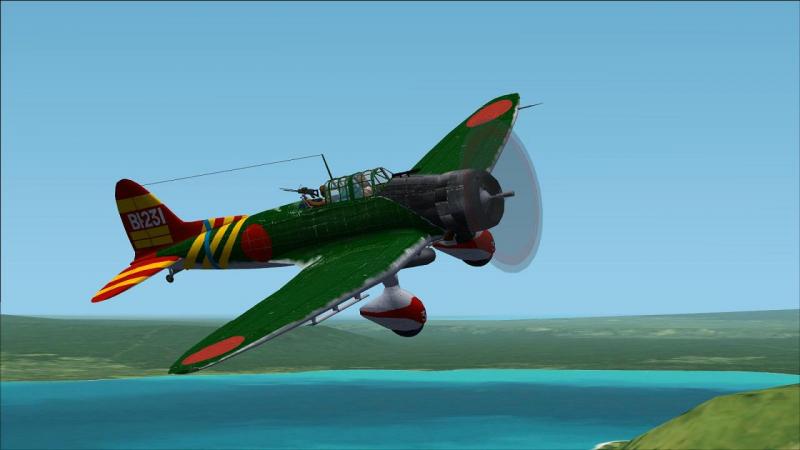
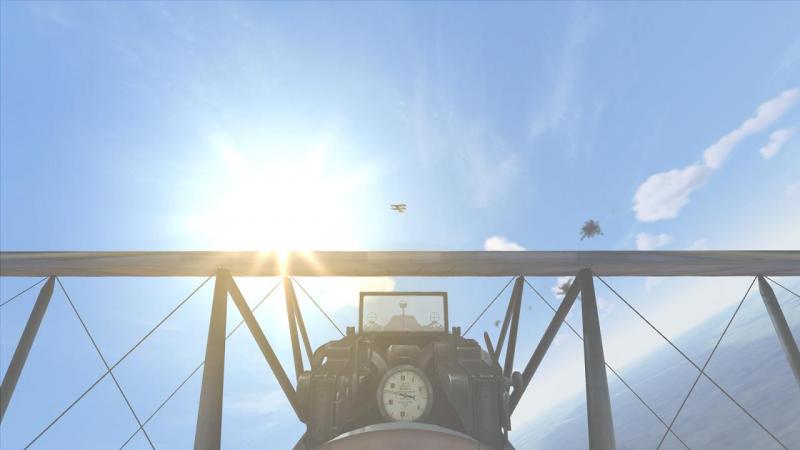
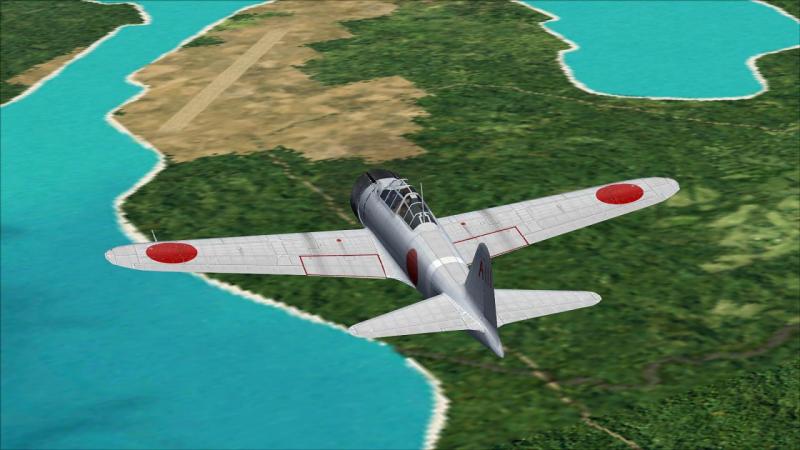
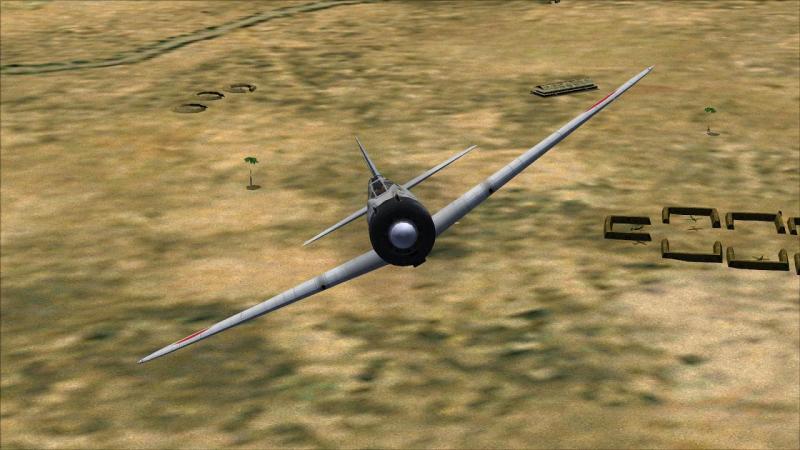
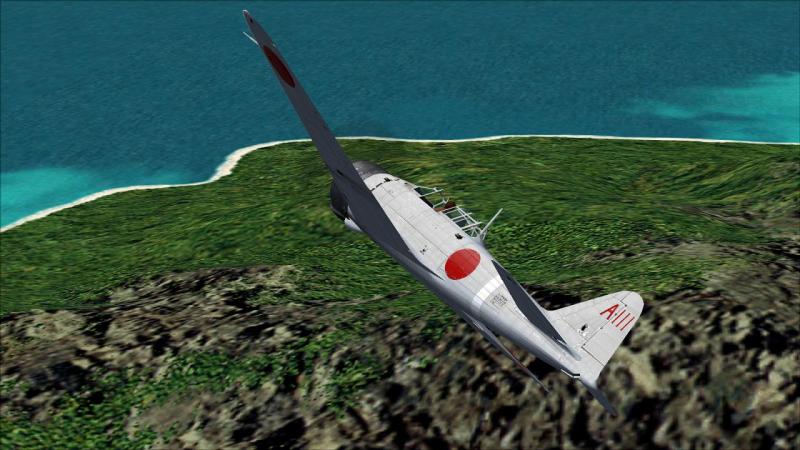
Flying for the Imperial Japanese Army in Yoshi's 'Battle of Chishima' campaign! Having recently had a lot of fun spending more time with CFS2, one campaign I was keen to revisit was 'The Battle of Chishima' by Yoshitsugu 'Yoshi' Nagata, which I'd last enjoyed maybe 10 years ago. My original interest in this campaign sprang from an interest in Japanese WW2 warplanes. One of my favourite 1/72 kits 'back in the day' was Revell's Nakajima Ki-43 Hayabusa (Peregrine Falcon). I had my model painted up just like the box art, silver overall with wavy green camo on top and yellow leading-edge prop warning panels. By pulling off the two-bladed prop you could remove the engine cowling to reveal the radial engine, the cockpit canopy could slide back and I even managed to make the undercart retractable (albeit they didn't pivot, but could be manually pushed in place, either up or down. My kind of kit! The real Hayabusa was very popular with its pilots despite being rather underpowered, under-protected and under-armed by the standards of the time, even it first entered service in 1941. According to Osprey's 'Dogfight - P-40 Warhawk -vs- Ki-43 'Oscar' ' only 40 were in service by the date of the attack on Pearl Harbour and the first models had a two-blade fixed-pitch prop and just two rifle-calibre machine guns. However, its superb handling and manoeuvrability reportedly endeared the US-dubbed 'Oscar' to its pilots and it was certainly more modern that the even more manoeuvrable but slower, spatted-undercart Ki-27 that it supplemented then replaced as the IJA's premier single-seat fighter. Vulnerable to enemy fire it may have been, but it was no pushover. CFS2's Hayabusa is, I believe, the Ki-43IIb model with more powerful engine, stronger, shorter-span wings, some protection for pilot and fuel tanks and two heavy MGs, in full production by October 1942. Although it's one of the Artificial Intelligence-flown planes in CFS2, this is one sim that has no shortage of freeware and payware mods, including ones to make the AI planes flyable. The only catch is that some of these come with no cockpit so you just have external and 'gunsight' views (with the reticle hanging in a clear sky, not what I'm used to but great for gunnery and a good view!) This time around I wanted to fly the Hayabusa in both CFS2 and IL-2. The former is first up for a mission report here at CombatAce and features Yoshi's Chishima campaign. Chishima is better known to Westerners as the Kurile Islands, which stretch in an arc from the north-east tip of the Japanese mainland all the way to Russia's Camchatka Peninsula, just across the northern Pacific from Alaska. In mid-1943, US air raids began to probe the Japanese defences in this region and it's these relatively small-scale tussles that this mini-campaign represents. There's a set of five single missions designed to be flown in sequence, which is fine by me as I can live without the rather excessively goal-oriented CFS2 approach to campaigns. The Chishima missions aren't all intercepttions: for example the third mission has you providing air cover for a submarine whose engines have failed. Here's the link for the campaign: http://simviation.com/1/browse-Missions+%26+Campaigns-85-2 And here's the brief for mission number one. It's short and sweet but you get the picture! There's no indication of the enemy's strength, but I was leading a flight of no less than eight Hayabusas so, sensibly or otherwise, I was feeling fairly relaxed about the odds. Given that the local air defence set-up was liable to be a tad primitive, I suppose the limited 'int' is perhaps realistic! We were operating from Kitanodai airfield, which was on the island of Paramushiro (see pic of the real airfield here: http://pwencycl.kgbudge.com/P/a/Paramushiro.htm ) and was apparently used as a base by the 54th Sentai. The sim crashed if I tried to open the map (it's on the 'Advanced Info' tab) in the briefing screen so without further ado, I kicked the tires and lit the fires, and consulted the map once the mission had loaded. Here it is. The enemy bombers - as in, the red plane icon - are evidently targeting installations on another island just across a narrow channel from our sea-side base. Sensibly, you can see that the only mission goal is to survive; there's no silly requirement to destroy at least a fixed number of enemies. And here we are, good to go. I've always liked this camouflaged natural metal finish on the 'Oscar' and the CFS2 version, though designed for the AI, is fully up the the high standard of the CFS2 player planeset, complete with animated parts like extending flaps and wheels which bounce on their oleo legs as you roll on the ground. Bring on the Yanquis! ...to be continued!
-

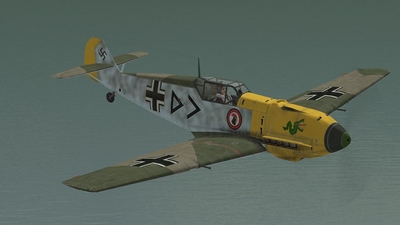
Stab I/JG3 Bf109E, summer 1940, in Battle of Britain - Wings of Victory
33LIMA posted a gallery image in Member's Albums
From the album: Combat Sims
-
Stab I/JG3 Bf109E, summer 1940, in Battle of Britain - Wings of Victory
33LIMA posted a gallery image in Member's Albums

From the album: Combat Sims
-
79 Sqdn Hurricane MkIs, summer 1940, in Battle of Britain - Wings of Victory
33LIMA posted a gallery image in Member's Albums

From the album: Combat Sims
-
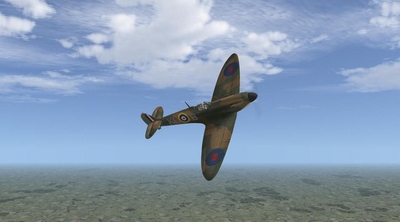
Al Deere's Spitfire I, 54 Sqdn, summer 1940, in Battle of Britain - Wings of Victory
33LIMA posted a gallery image in Member's Albums
From the album: Combat Sims
-
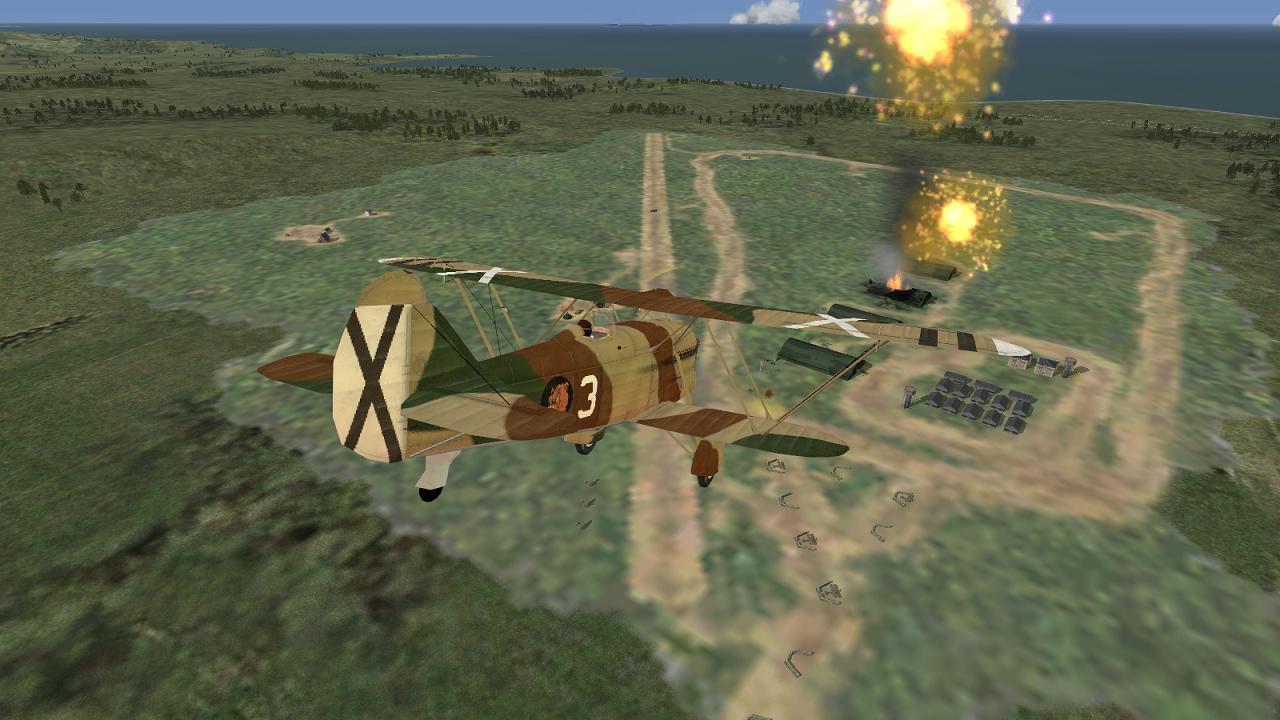
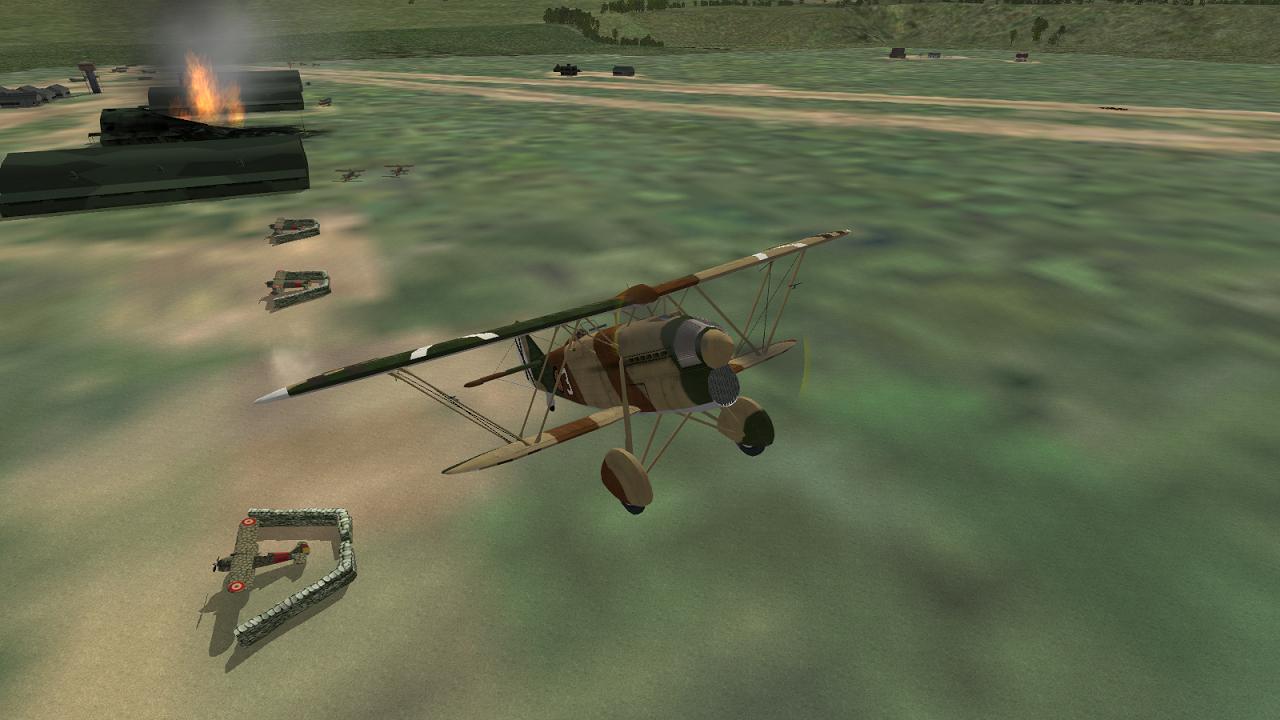
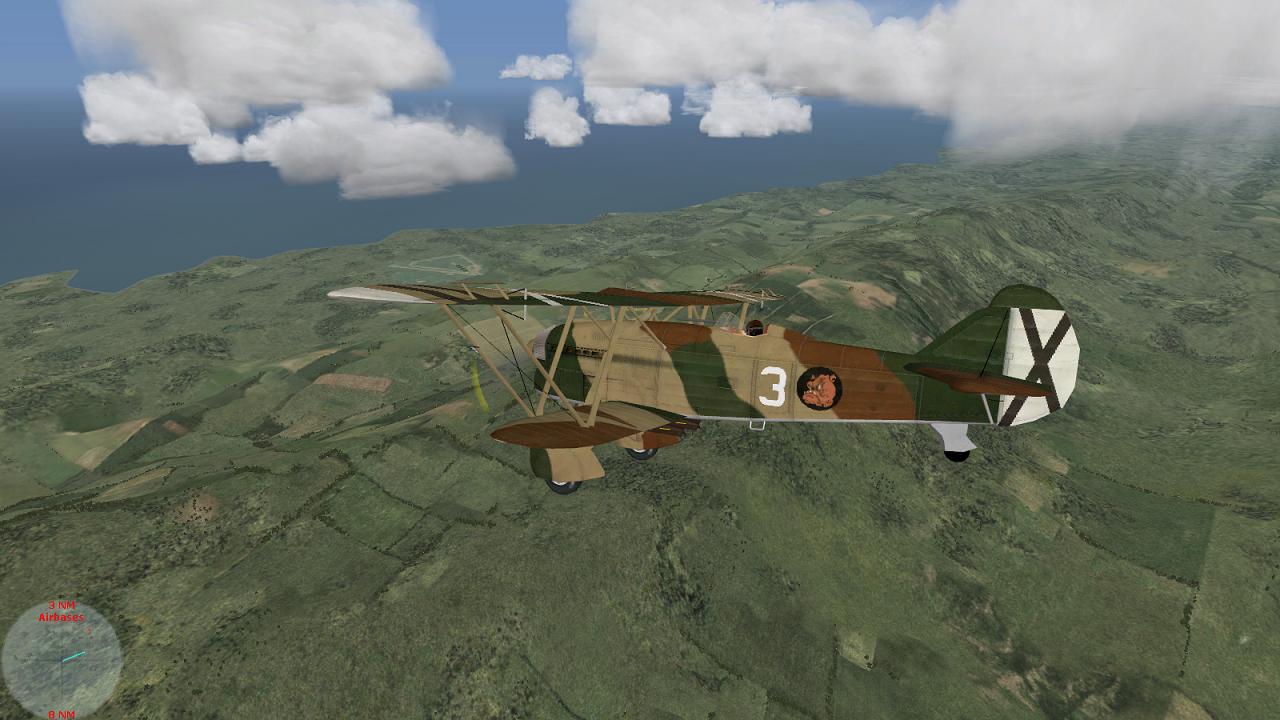
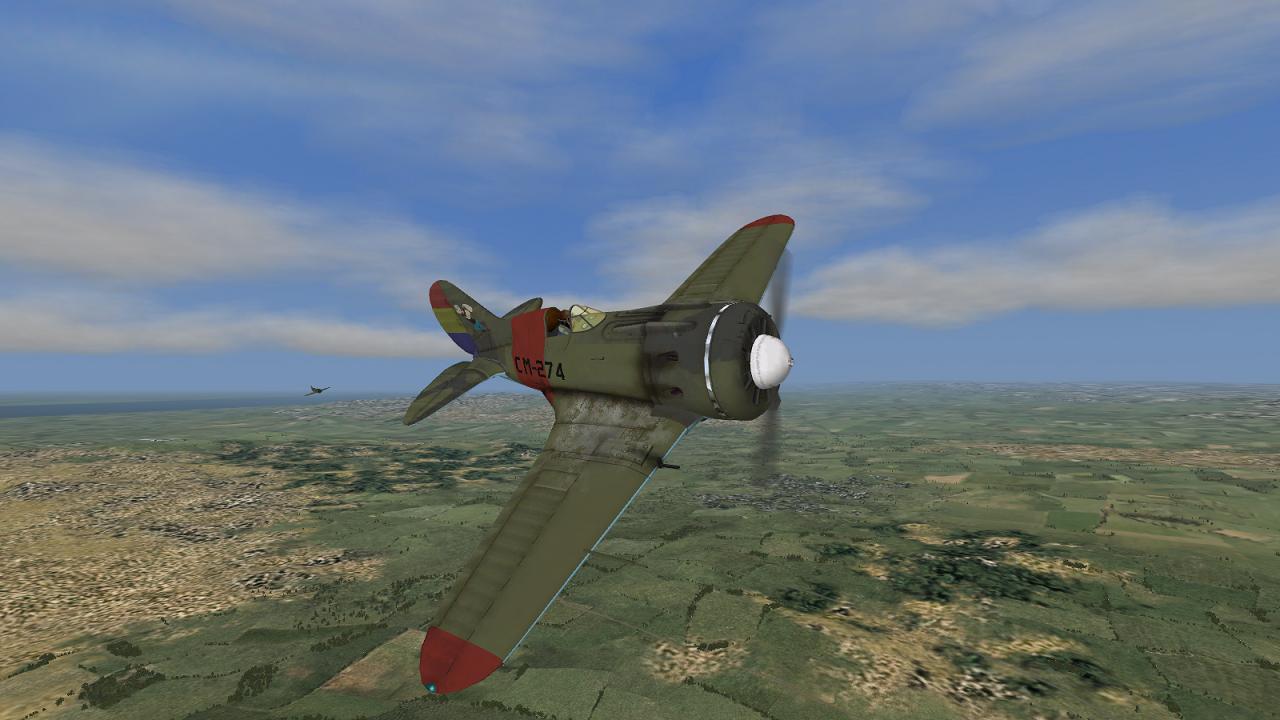
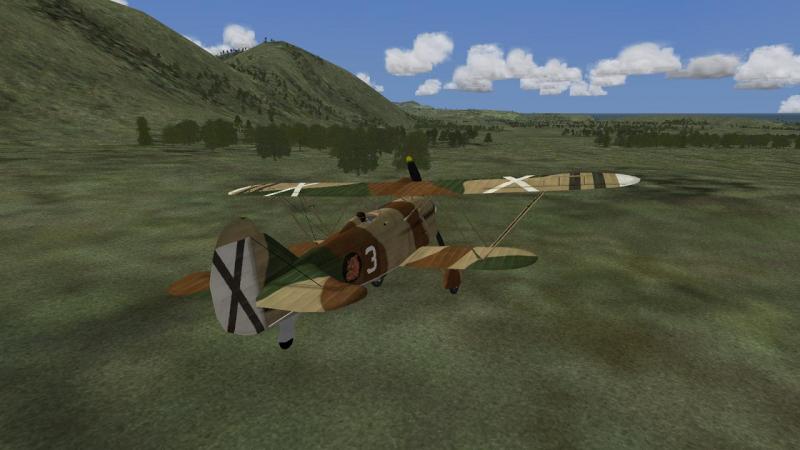
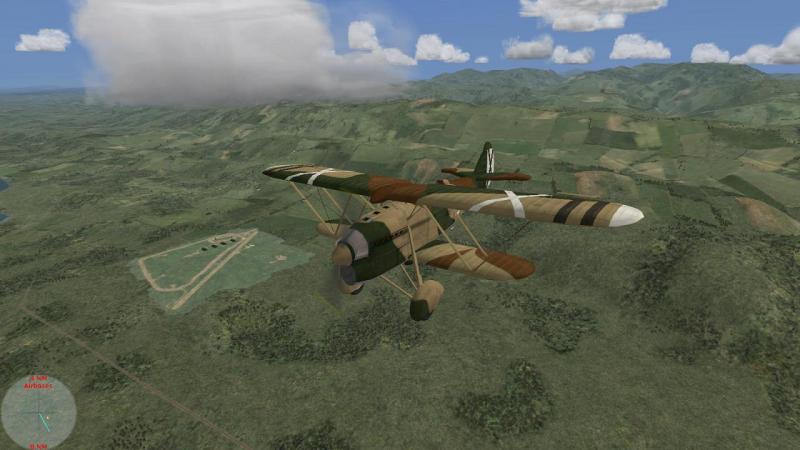
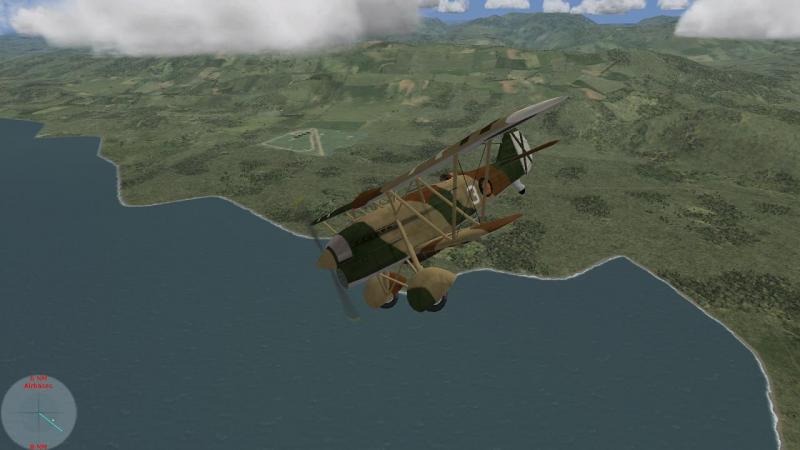
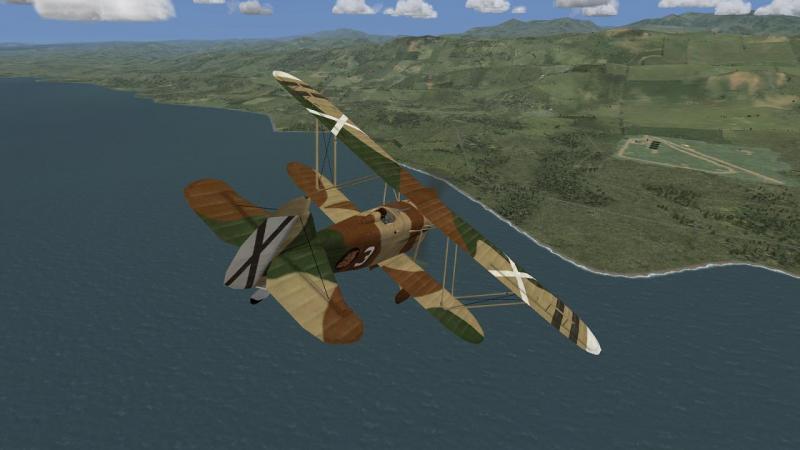
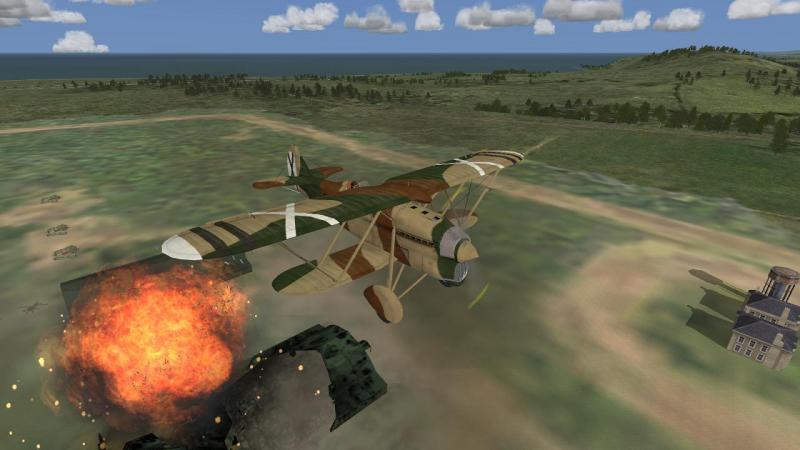
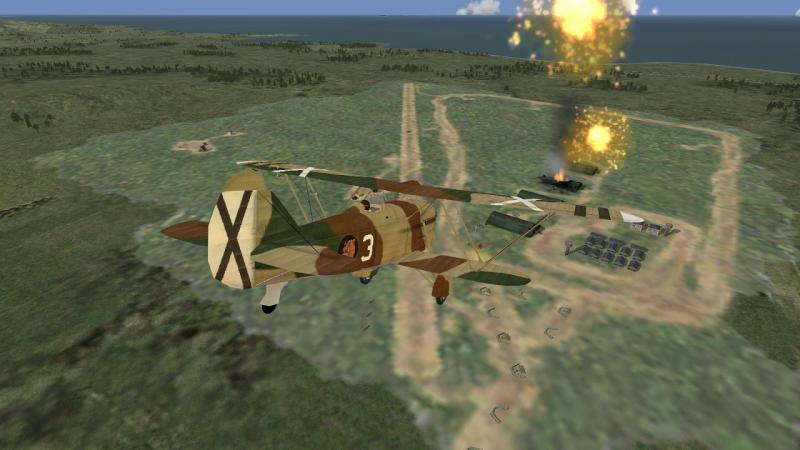
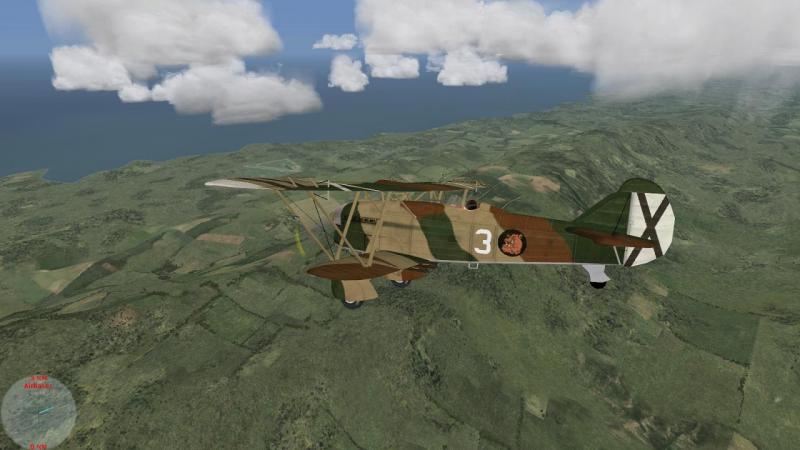
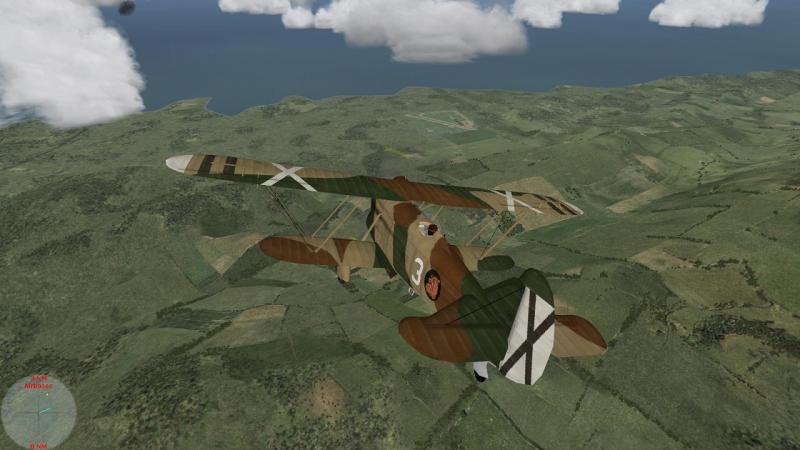
Mission goal? What mission goal? Having missed them on the first attempt, I was determined to nail one of those parked fighters on my next pass. I could see they had Republican markings, even though they were Fiat CR-32s like my own...some arms dealer somewhere was likely making muchas pesetas from selling the enemy the same planes we had. All the more reason to burn a few of them while we'd caught them on the ground. That'll teach 'em. This pass, I didn't do much better. Still no burning wrecks on the ground. Fleeting targets like these really needed a bit more firepower than a couple of heavy MGs, I thought to myself...couldn't possibly be anything wrong with my shooting. One more pass ought to do it. As I banked around to come in for one last, final, absolutely-and-positively-no-more-after-this pass, I had the satisfaction of seeing one of my flight make a firing pass of his own. I could see the muzzle flashes of his MGs as he dived in; it was nice to watch. I couldn't see what he was firing at. I hoped he was not still attacking just the airfield itself, 12.7mm bullet hits being only likely to give the runway repair hombres something to laugh at. Anyway his heart was in the right place, bless him. This time I decided to come in from the front of the hangars, to give myself a clearer shot at the planes parked outside their doors. As I did so I noticed several aircraft flitting about well above me. I watched them anxiously for a moment, but they seemed to have no plans to come down and interrupt us. Possibly this was part of the rest of our raid, arriving in the area at last. I continued with my own atack. This time I had more luck. One of the enemy Fiats blew up under my fire, its wings being flung up over the hangar roof in suitably emphatic fashion. That's more like it! I needed to pull up sharply to avoid making an unorthodox entry into the hangar itself. I had the feeling that this rather violent change of attitude should perhaps have pulled my wings off but my stoutly-braced Fiat stayed in one piece. The boys back in Turin know how to build 'em strong, evidently. Relieved more than elated, I levelled off somewhat and looked back. One hangar and contents thoroughly bombed, one aircraft burned on the ground. That would do nicely. In the second screenie below, you can see that there were warships off the coast. Something to mention during the debriefing back at base, for a possible future anti-shipping strike, I thought. At this point, I returned my gaze to the front and became aware of two things, neither of them good, and together, very bad indeed. Firstly, I was flying straight towards sharply rising ground. Secondly, my motor seemed to be struggling to maintain revs, having doubtless ingested some shell fragments from all that AA fire. I turned right, resisting the temptation to pull up hard as I did so, knowing that any attempt at a steeply climbing turn with a struggling engine could see me stalling in a situation where recovery was unlikely and disaster a near certainty. The immediate risks averted, I flew parallel with the line of the ridge for a while. The flak continued to throw rounds in my general direction but fortunately, my turn had been away from the airbase, where the guns were sited. I contemplated trying to make a break left, across the ridge at any point there was a gap in the crests. But my engine was steadily fading. She soon died and my propeller spun to a stop. Clearly, a forced landing was now inevitable. Looking ahead, I was glad to see a stretch of unobstructed open pasture between stands of trees. I steered for this and set down my wounded bird. She ground-looped at the end but stayed upright. Time to grab my escape kit and slip away quickly! They say that ground troops are always keen to meet the pilots who have just been strafing them, but I was not feeling particularly sociable. So concluded the mission. Unsuprisingly, the debrief didn't regard my performance as particularly successful. I was credited with an aircraft 'shot down' (!) and two bomb hits - but no buildings destroyed, despite one of these clearly being what the bombs had hit. In fact I was faced with a list of failed goals, none of which had been presented to me in the mission briefing - visit all waypoints (who cares if I missed one!) survive, and return to final destination and destroy an Hs123 formation. This is one thing that's badly wrong with CFS3. No real-life mission briefing would fail to be specific about the mission's objectives. And of course, no real life mission is likely to be planned in the certain knowledge that there's a formation of Henschels in the target area or therefore to insist the mission's a failure if it's not destroyed. Many sims dress up their briefings - 'orders' as the Army more accurately calls them - with a bit of padding about the situation or mood-setting musings or amusing observations; but yet fail to convey basics in a realistically military style. CFS3's briefings, with their hidden and often unrealistic 'mission goals', are at the wrong end of this particular scale. In the absence of a decent mission brief, I'd interpreted my task as a fighter sweep over a raid objective with the secondary mission of slipping down to ground level and attacking either the raid's target or other targets of opportunity in the absence of aerial opposition. I can live with getting clobbered doing this because I made too many passes over an alert and well-defended objective. But I'm not cool with the debrief. Nevertheless, this was an enjoyable mission in what for me is a novel theatre, an opportunity to relive some of the history that my happy holidays in sunny Spain have prompted me to study a little. Despite the CFS3 legacy limitations of the briefing and debriefing, the mission itself was well-constructed and gave me several tactical options - for example, how to interpret my task, whether or not to try to link up with the other flights in the raid, which targets to go for and when. Satisfying stuff. I also really like the ETO Expansion's CR-32, which looks great, has lots of little detail touches and has excellent engine and MG sounds. I'm looking forward to playing further ETO Expansion SCW missions for both sides and flying more of these pre-WW2 birds in combat. Definitely recommended.


-
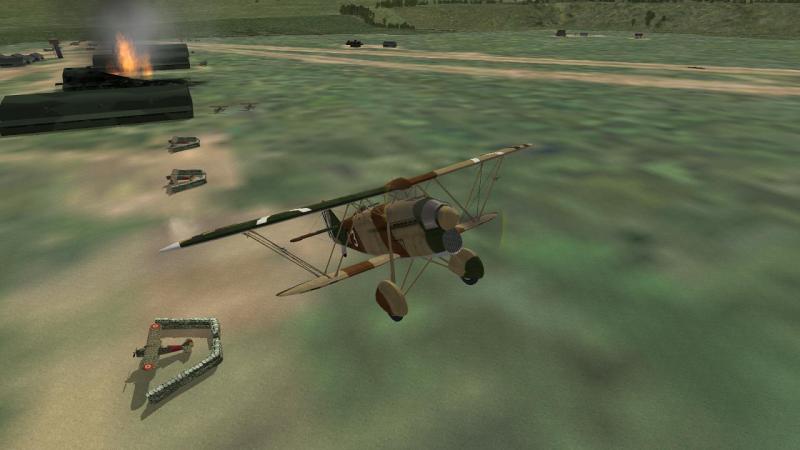
The ups and downs of the airfield attack business I'm a bit rusty with my CFS3 flight-leading drills, outside of Over Flanders Fields where I made minimal use of the TAC as it's even more out of place in WW1. But it all began to come back to me. Bits of it anyway. I had ordered in my first pair to attack the airfield, which I hoped was Llanes. I now carried on with my usual drill for a CFS3 ground attack, which is to fly past the target, ordering in a pair with a gap in between, so that the target is hit by a succession of pairs coming in from different directions; hopefully also not too far apart in time, as I'm gradually getting closer. Last of all, I turn in for my own attack with my wingman. I'm glad to say, this mostly went to plan, if not entirely well. As I swung out over the sea then around for my own attack, I heard my flight-mates give the usual canned CFS3 radio chatter, confirming 'Target spotted' and that they were generally on the job. And I had the satisfaction of seeing one of them plonk his bombs pretty well right in the middle of the runway. At this point, I realised what I'd done wrong. I'd picked the airfield itself as the target. What I should have done was selected its buildings or its parked aircraft (assuming the latter also showed up on the TAC) which are a separate CFS3 target type you have to cycle through to select. So I did this now and, hitting the 'A' key several times, ordered an attack on the hangars instead. I hoped this wasn't going to be a case of 'order - counter-order - disorder'. Then I turned off the b***dy TAC and concentrated on making my own attack. This didn't go too badly. I lined myself up on the row of hangars and armed (selected) my bombs, firing a few MG rounds as I came in, just for the hell of it. Finally, I let fly with the bombs at what seemed like about the right point in time and space. The results were about as satisfactory as I was entitled to expect, from a couple of small bombs. Not bad at all, really. I pulled around and dived in for another pass, this time with my MGs. I was aiming at the parked aircraft outside the front of the hangar I had attacked but with the smoke from the burning hangar and the bursting AA, I failed to get a decent sight picture and did no visible damage. Mierda! Nothing for it but one more pass! I should have known better... ...to be continued!


-
Target ahead! As we neared the coast, with the Tactical Dispay/TAC turned on, I noticed that the blue line on the display which showed the direction of the next waypoint - which will point up, towards the twelve o'clock position when you're on course - had swung around. So I altered course to follow it. Perhaps we were supposed to orbit and await the other flights in our raid on Llanes airfield? The in-flight map wasn't much help; not just because it was the usual horrible CFS3 low-resolution muddle, but all the waypoints and course legs drawn on it for all our flights produced an indecipherable cat's cradle. I did a '360' and rolled back out onto my course to the north, as I dod so switching the TAC to display airbases. Time to get a fix on the one which was our target! My course changes seemed to had the desired result, inasmuch as the blue course marker line now lined up with my course north. Finally, we crested the last row of hills before the sea. The course marker line flicked around to the two o'clock position. Roughly in that direction lay an airfield. As I turned tentatively towards it, flak started bursting around me. You'll do, I thought to myself. There was no sign of other aircraft, so I judged that the time had come to do something useful with our little bombs, while we had a target in sight and the opportunity to hand. I selected the airfield as a target, noting the little trianglular target icon in in the TAC turn from red to yellow. Then I hit the 'A' key, to initiate the attack. Looking back, as expected, I saw two of my flight of six peel off to the right. I also head them acknowledge the command on our non-existent radios...I don't think CR-32s usually carried RT sets. Anyway the point was, we were in business. ...to be continued!

-
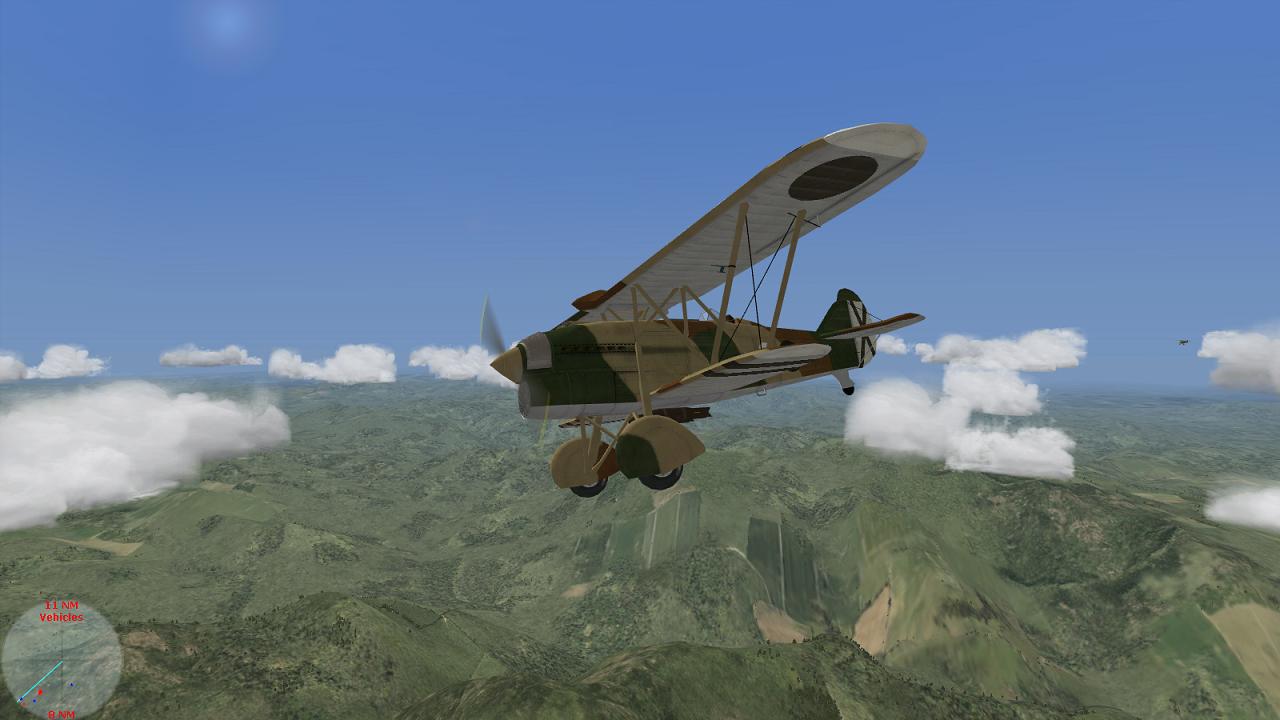
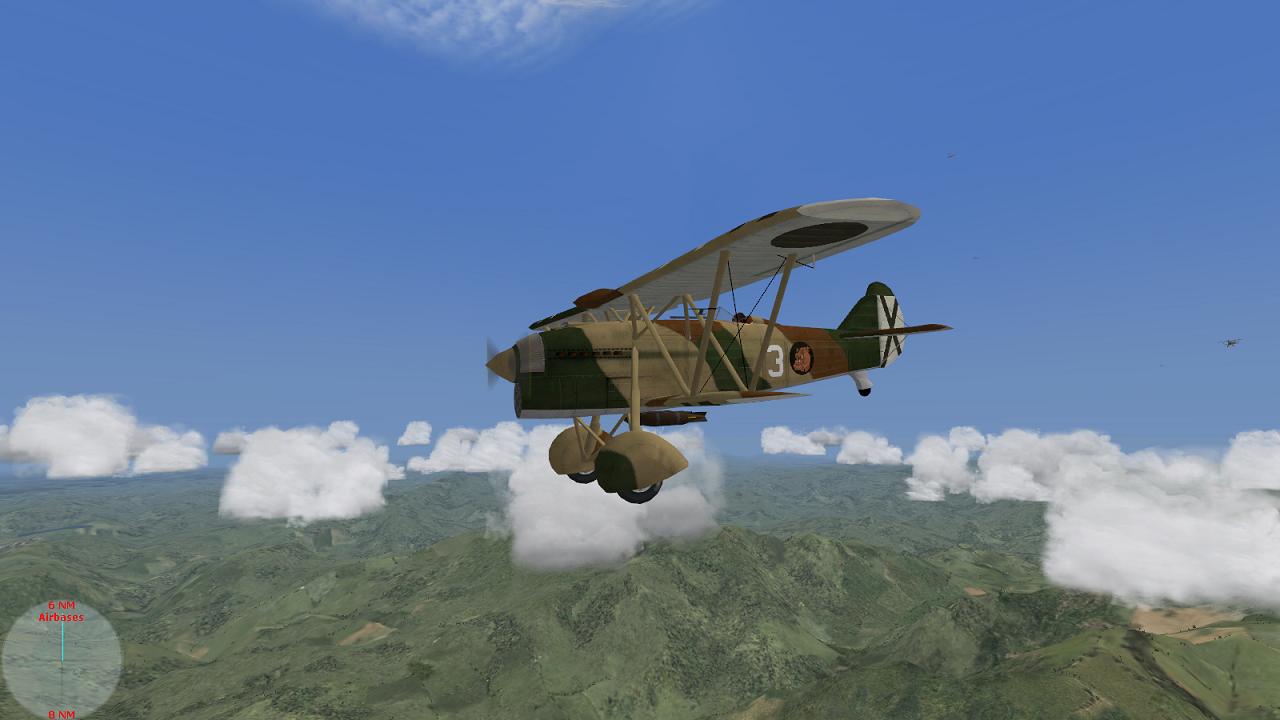
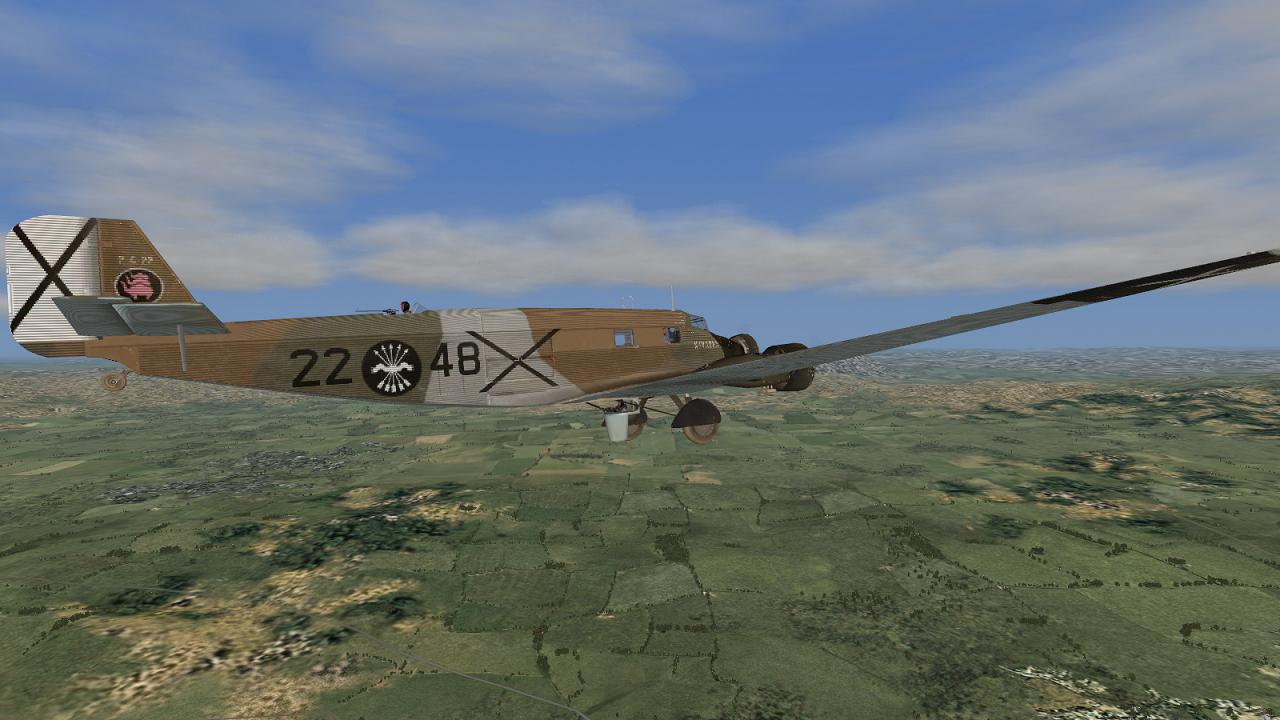
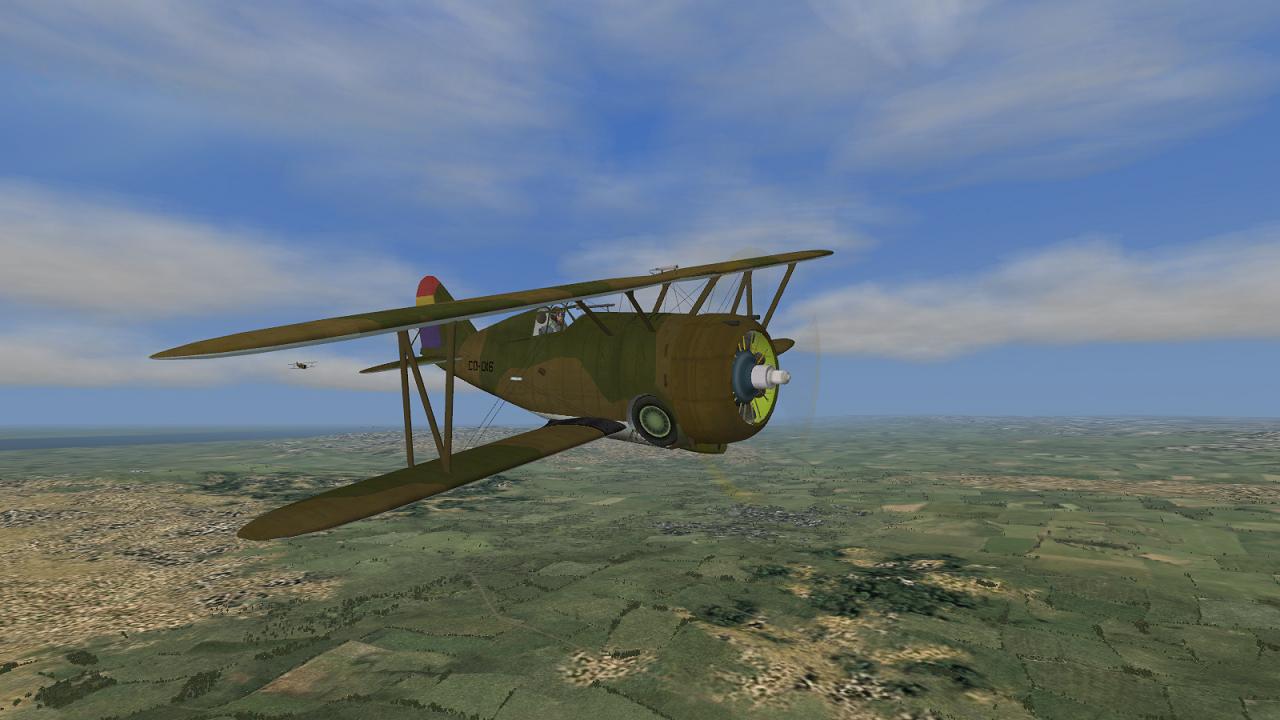
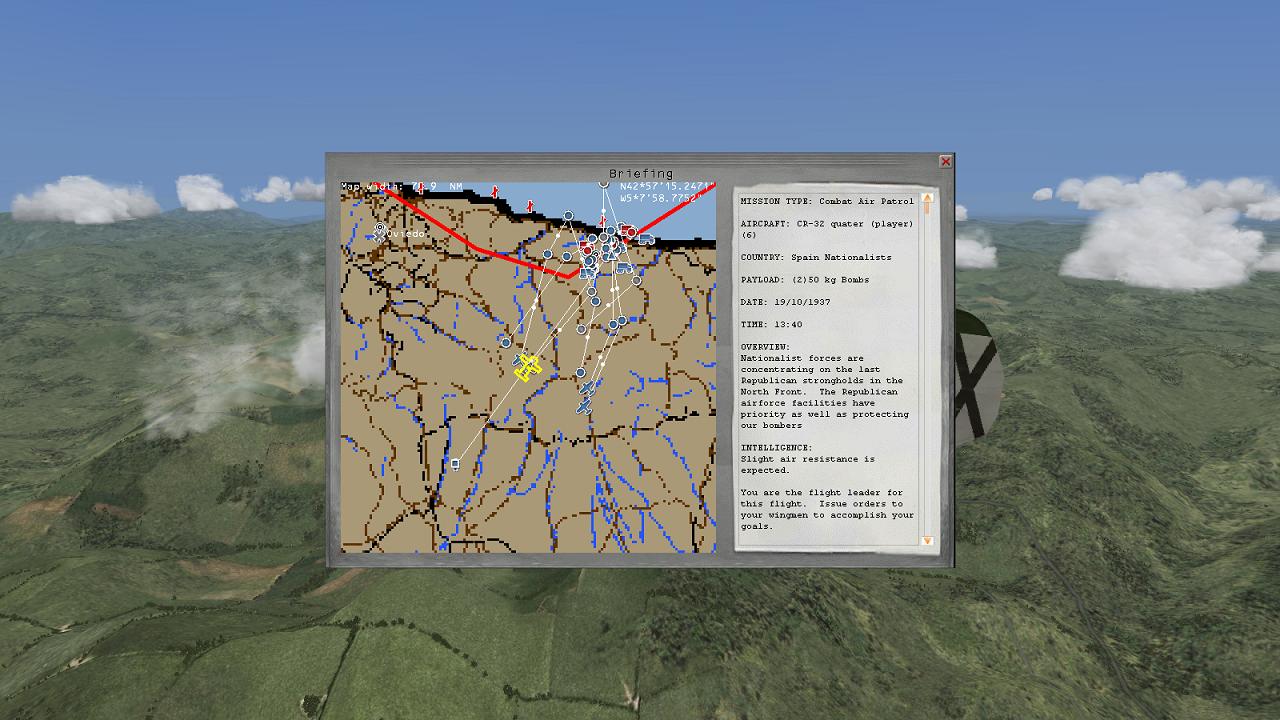
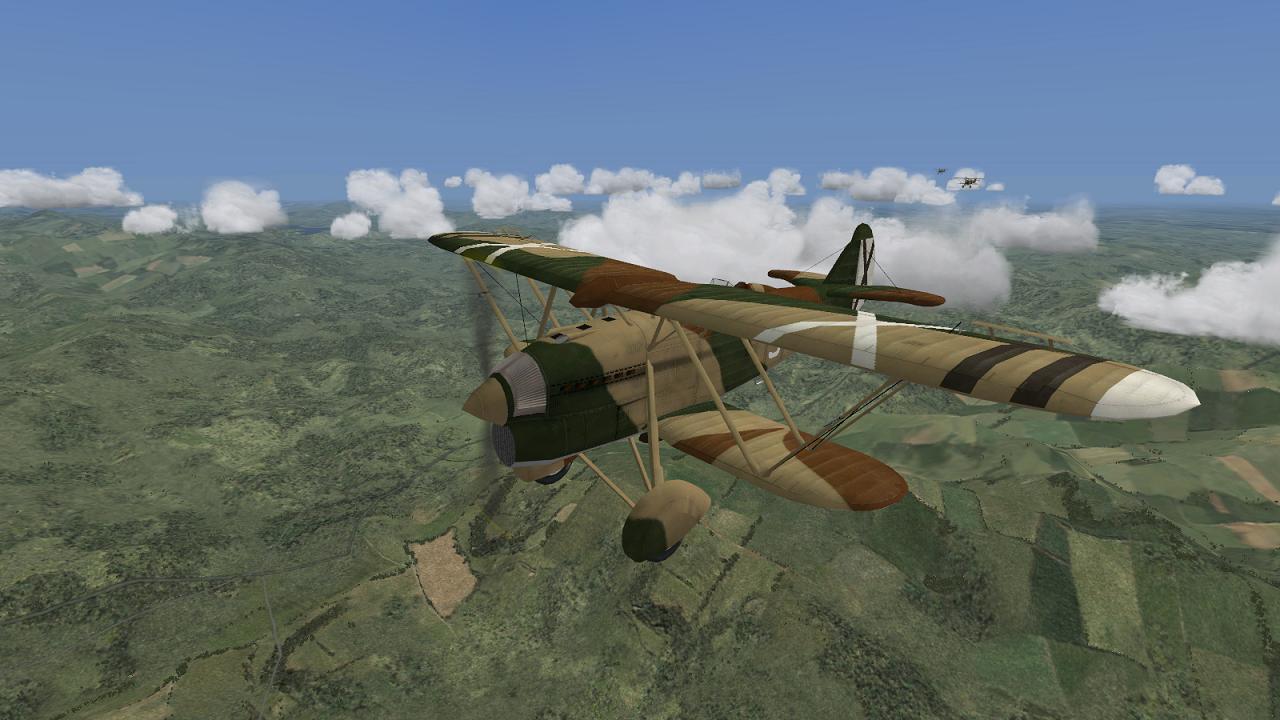
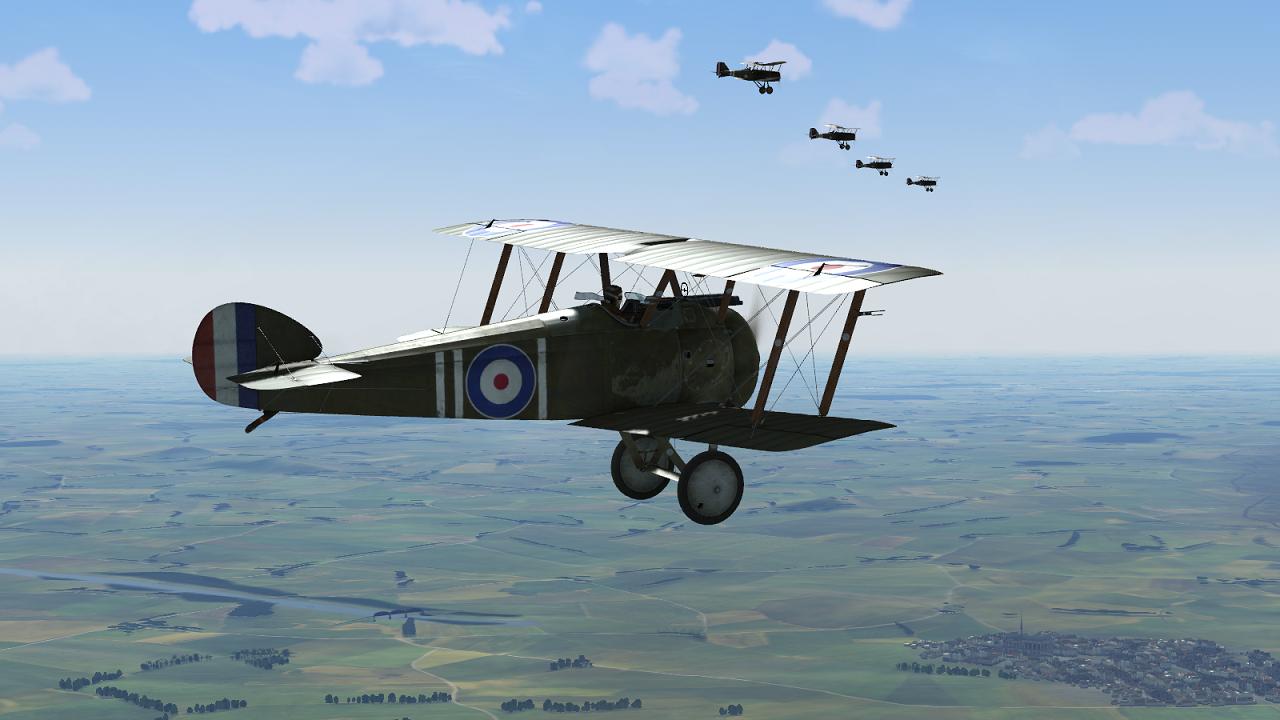
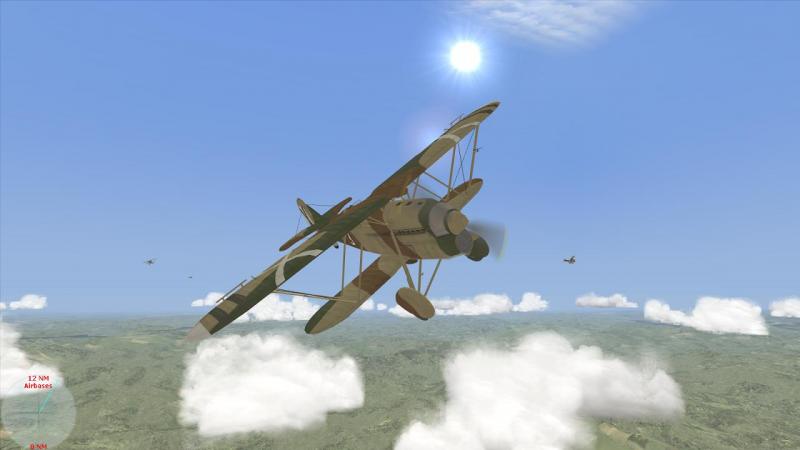
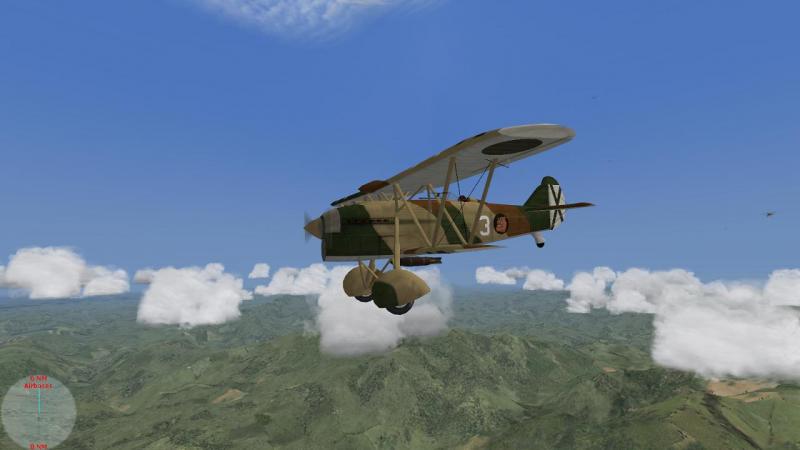
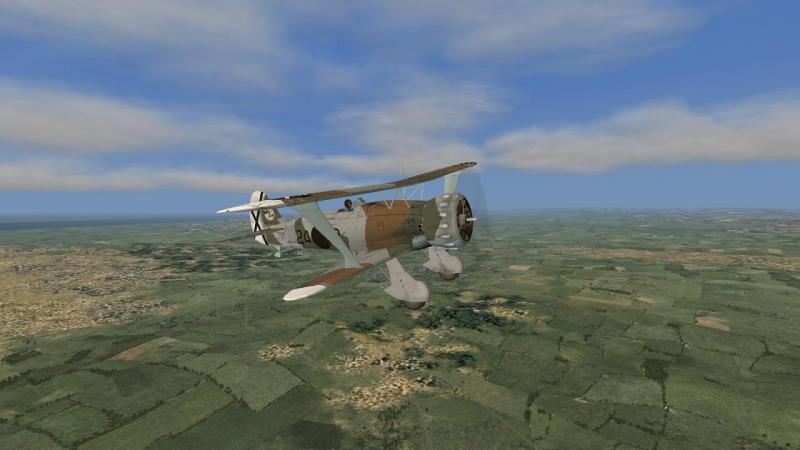
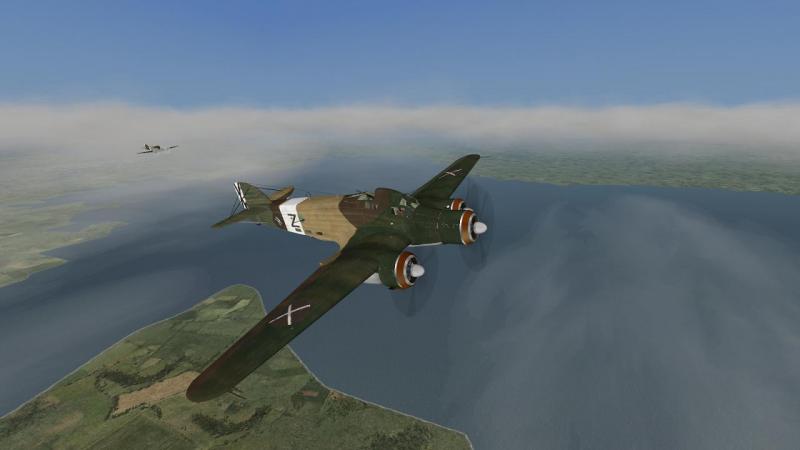
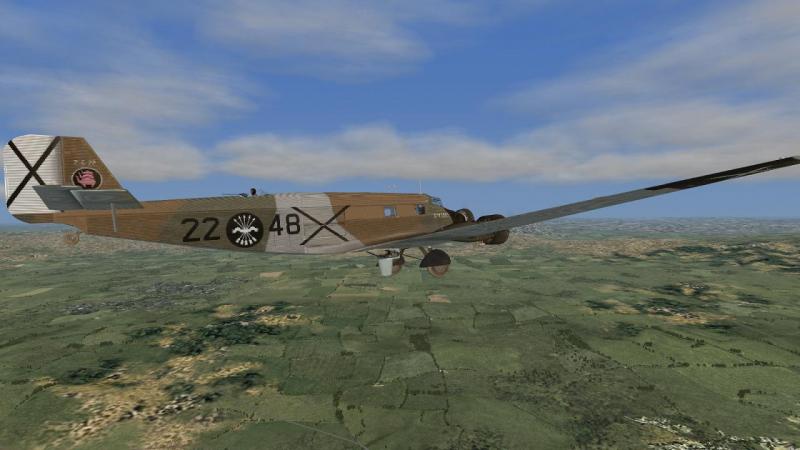
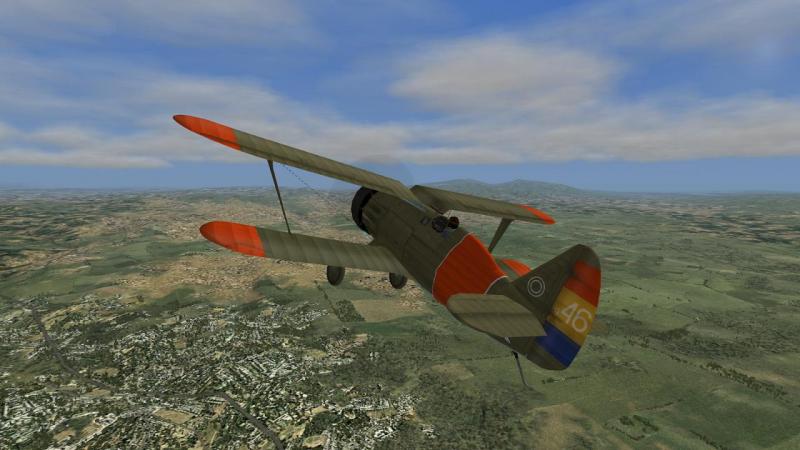
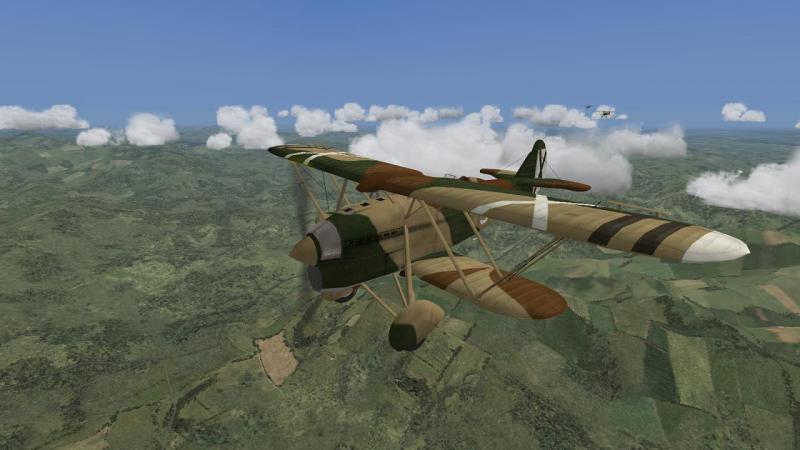
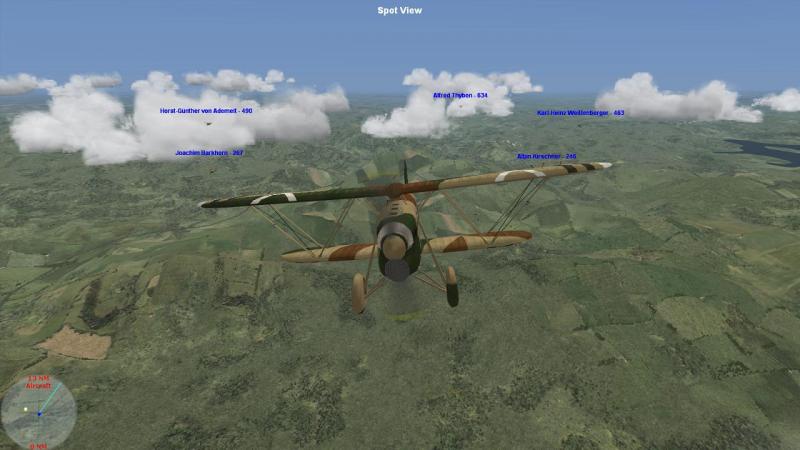
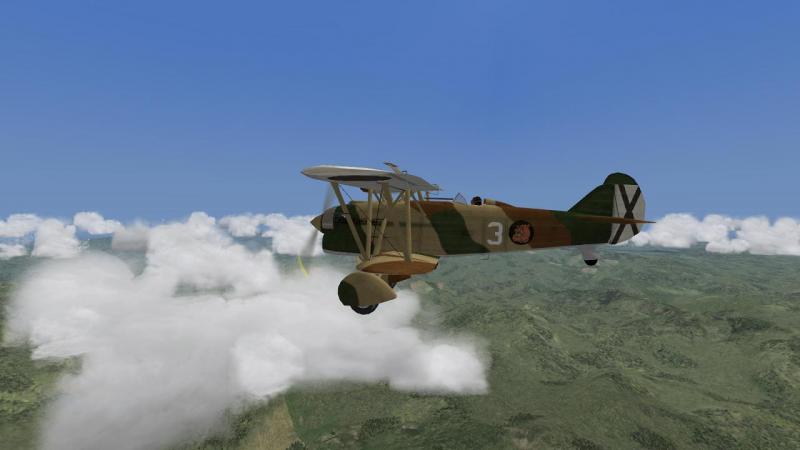
La Guerra Civil Espanola in the CFS3 ETO Expansion! The Spanish Civil War, fought between 1936 and 1939, foreshadowed the monumental clash that was to follow between fascism and communism, with the Italians and Germans backing the Spanish nationalists and the Soviets backing the republican side. For all that, this was a distinctly Spanish affair, the product of a deeply-divided society. Matters came to a head in 1936 when the Left, having secured a narrow electoral victory, nevertheless pressed on with a radical programme. Divisions deepened and political violence spiralled. The Right responded with an attempted coup, led by elements of the army, which failed in places like Madrid the capital, culminating there in siege and massacre at the Montana barracks. These events set the tone for the long, bloody and vicious civil war which ensued, won in the end by the nationalists under Franco. Air power played a key role from the start. Fanco's leadership was established after the revolt's original leader, General Sanjurjo, was killed when the DH Dragon Rapide carrying him back to Spain crashed, supposedly from overloading with all the personal luggage the 'Jefe' insisted on bringing. Later, Hitler commented that Franco should set up a victory monument to the Junkers 52 transport, the type having flown in from Spanish North Africa colonial troops who helped secure, then advance, the nationalist cause in mainland Spain. In the actual fighting, the German Condor Legion despatched to Franco's aid played an equally important part and tested out many tactics and weapons that would be used to good effect in WW2, including the Ju87 Stuka, the Bf109 fighter and the 88mm flak gun. The devastating Condor Legion air raid on the Basque town of Guernica became infamous, and was one of many air raids on urban areas in which civilians suffered badly. The Italian Regia Aeronautica also contributed 'volunteer' personnel and aircraft, while the Soviets supplied the republican side with some of their own latest military hardware, including I-15 and I-16 fighters and SB-2 fast bombers. Thus was the scene set for some of the fiercest air operations in Europe since the World War. If you want to 'fly' in the SCW, there are several options, including the venerable Luftwaffe Commander (which actually runs on my Vista 64 machine) and the Strike Fighters SCW add-on, available at the A Team Skunkworks, under 'All inclusive installs', which looks great and I'm looking forward to trying out: http://cplengineeringllc.com/SFP1/[link] This mission report features a different option - the CFS3 ETO Expansion. Amongst the Expansion's many and varied additional aircraft is a decent selection suitable for this conflict, all in appropriate markings. From a quick look, this comprises: Nationalist: Messerschmitt Bf109E Henschel Hs123: Fiat CR-32 'Chirri' Breda 25: Savoia Marchetti SM 79: Cant 501 floatplane Junkers 52 bomber: Fiat G50 Republican: llyushin IL-15 'Chaika': Ilyushin I-16 'Mosca': Grumman G23: ...plus some aircraft captured and repainted eg the CR-32 and the Il-16. the main gap seems to be a bomber for the Republican side; the Soviet Tupolev SB-2 fast bomber would have been ideal. Although the Expansion doesn't feature a CFS3-style dynamic campaign for the Spanish Civil War, there is a good set of single missions which enable you to fly in - and against - the appropriate aircraft in Spanish skies, for both sides. And stock CFS3 covers much of northern Spain, no messing about here with mere map segments. The mission Before firing up the ETO Expansion, I used the supplied 'spawn selector' to set 'stock spawn mode' and then the 'era selector' to start the ETO expansion in '1936 to spring 1940'. To be honest, I've not yet worked out exactly what difference this era selection makes, as planes from different eras seem to be available no matter which is selected; I suspect it's a way of getting around a CFS3 limit I've forgotten on the number of installed planes, which in CFS2 was 90, if I recall right. No matter; thus prepared, I opened the list of Historical Missions and selected the first one labelled 'SCW' - titled 'Air conflict over Llanos airfield'. This assigned me the role of a fighter pilot in the Nationalist Air Force, flying an Italian Fiat CR-32 biplane fighter and leading a formation of six. The mission was an air start, flying on the northern front. This was one of the country's few industrialised regions, where the Spanish coastline meets the Bay of Biscay. It was October 1937, over a year into the war. Our task was described as a Combat Air Patrol - a piece of (originally USN WW2?) jargon I dislike to see used out-of-context - what other sort of patrol are combat aircraft going to fly? Anyhow, the briefing helpfully described our patrol as part of a 'Nationalist Air force attack on Llanos airfield', which is on the coast between the towns of Oviedo and Santander. Looking at the mission 'Assignments' tab, I could see that we were not on our own. Our order of battle for this mission comprised: - six SM81 'Pipistrello' bombers (a type I missed when looking up the available planes, so not listed above - it's a 3-motor bomber like the SM79 but with fixed undercart); - six Breda Ba 25 biplane army co-operation planes (what their role was, I have no idea, but I'm relieved not to have been flying one on this trip!); - another flight of six CR-32 biplane fighters, like my own flight. The default loadout gave us a pair of small bombs. These, I kept: I reckoned that we could always ditch the bombs if we encountered aerial opposition. And if we didn't, we should hopefully do some useful damage with them, down below. Here's the briefing. As well as our flight (yellow aircraft icon), you can see other icons representing what I take to be other flights. Friendlies are blue; enemies red. I'm not sure why there appears to be an enemy airfield well out to sea (red crossed runways icon, there's one just off the top edge of the map in this screenie); maybe it's on a small island. Anyway at least I was now able to orient myself. And here's my mount. The CR-32 was apparently one of the best of the pre-WW2 biplane fighters, lightly-armed but highly manoeuvrable; a good match for most enemy machines iin spanish skies and seemingly superior to the mediocre Heinkel He-51s which formed the fighter component of the Condor Legion until the early Messerschmitt 109s were rushed into action to replace it. The Fiat is a neat bird, sleeker than the later tubby radial-engined CR-42 and she looks the part in her ETO Expansion incarnation, complete with Nationalist Spanish camouflage and markings. I'm not clear whether my unit or my machine's 'skin' represented one of the Italian 'volunteer' formations or an indigenous unit flying the sleek Italian fighter, but no matter, she looks like a typically racy Italian job. And here's the 'office'. In flight, you'll notice the benefits of the extra power if you've been used to the biplanes of Over Flanders Fields; one being that your wingmen keep formation better, recovering more quickly during course changes, instead of drifting well wide and being left behind. Even if they still look rather far away, thanks to the CFS3 'wide angle lens' look, which tends to distort things, especially in the external, 'spot' view. Below us were the hills of northern Spain. Having flown over this area often enough on holiday trips, the topography looks to be captured fairly well, although the textures are to my eye a little green and lush for the region and the field patterns and hedgerows look more northern European. Turning on aircraft labels. I was a little bemused to find we were all apparently Germans. Strange, as I don't think the Condor Legion flew Italian fighters in Spain, unhappy though they may have been with their Heinkels. Perhaps we were on an unofficial exchange programme...yes, that must have been it. I turned on the CFS3 Tactical Display and cycled through target types. It picked up a flight of aircraft some distance to our left. Part of our attacking force...at least I hoped so. I kept a better watch in that direction, just in case, even though such use of the 'TAC' was a bit naughty - lacking radios, we should not have been able to get any help from a ground controller in locating stuff we couldn't see for ourselves. I considered for a while orbiting to let the other friendly flights catch us up, but we seemed to have been awarded the dubious honour of going in first so I kept on my way. As for the actual flying, I had trimmed elevator to keep my kite's nose from dipping at a fast cruising speed but the torque kept pulling down my left wing, which I contented myself with correcting without resort to aileron trim. And what were we flying into? 'Light air opposition' the briefing said. Were the Republican pilots going to come out to play, or were they not, I wondered? So far, the six of us seemed to be on our own in this particular patch of sky, and at least until we'd dumped those bombs - preferably upon something deserving of them - I was quite content for it to remain so. ...to be continued!


- 5 replies
-
- 1
-

-
- cfs3
- eto expansion
- (and 1 more)
-
Hey, those are great warships! Love Ise, Hyuga, Kongo and the heavy cruisers - downloading the ships and missions now, thanks for the link! PS this is the Aerosim Val, it comes with skins for most of the carriers in the 'Hawaiian Operation':
-
My pleasure, and thank YOU guys for this great mod, still going strong!
-
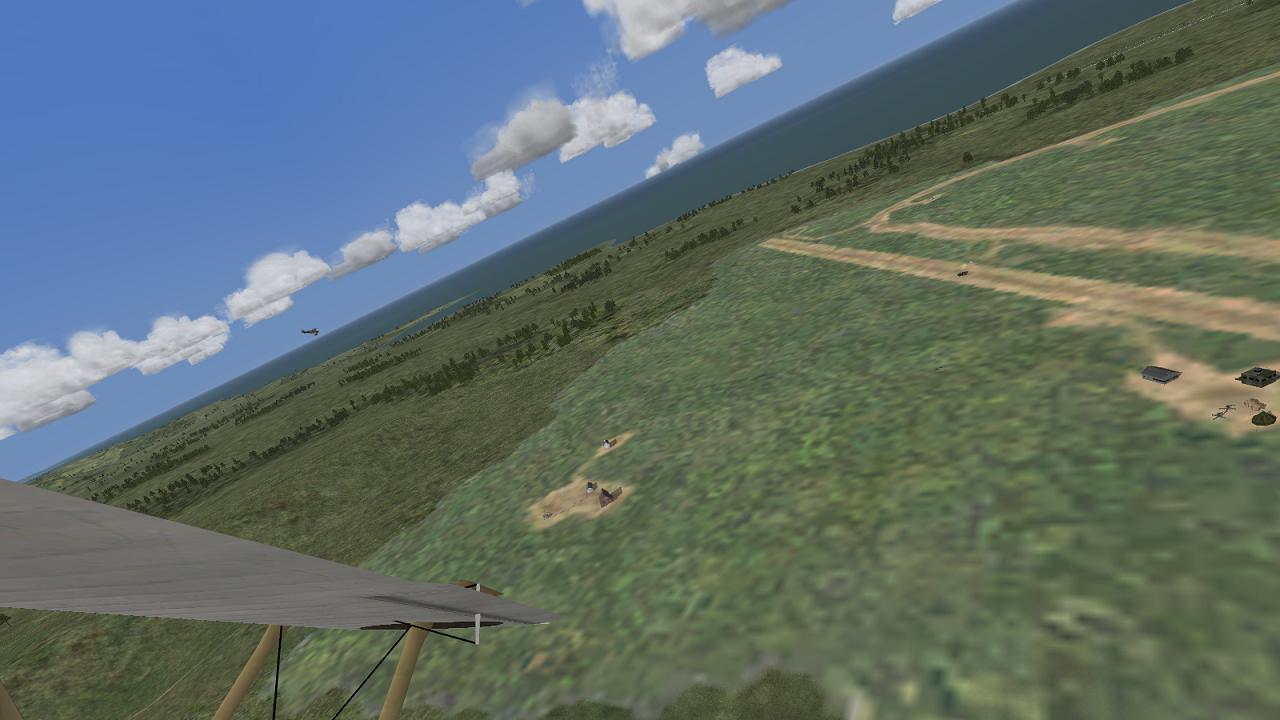
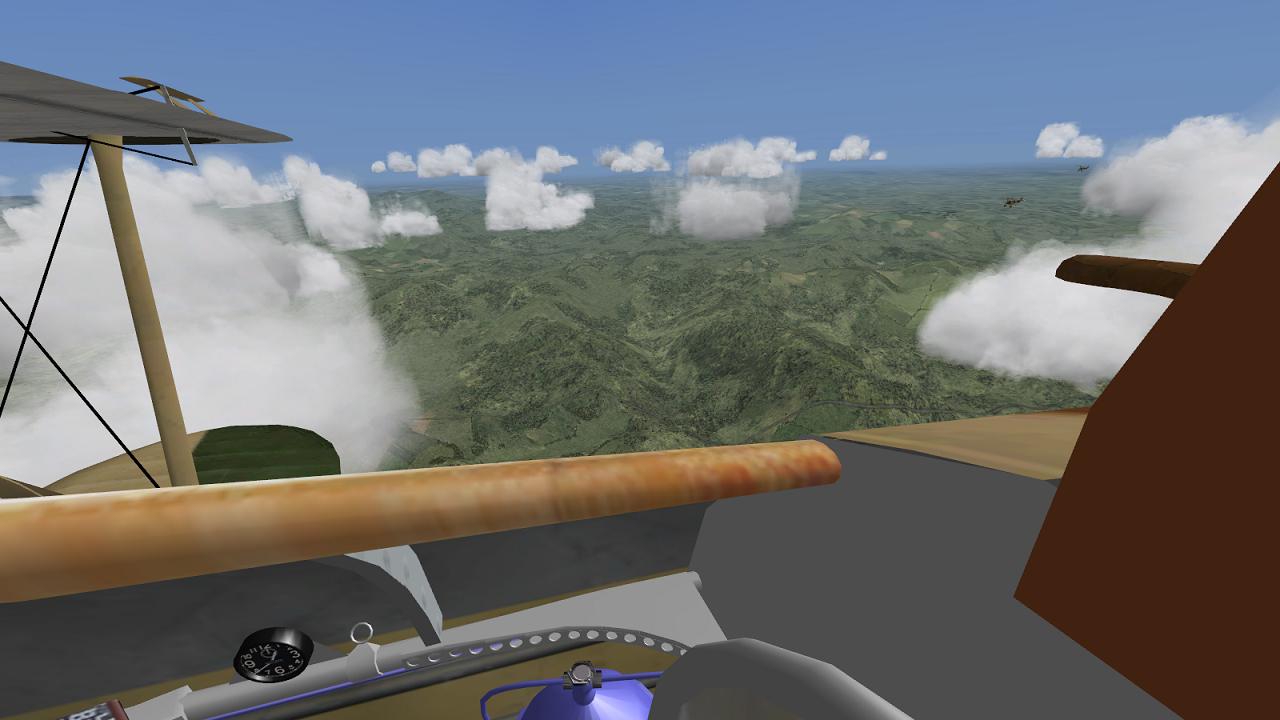
Whohooo! This is looking good, we even get Lawrence of Arabia by the look of it! Shipping, harbours, bridges and camps to bomb or photograph...the best just got better....or will soon! Looking forward to taking your BE for a flip over this lot and dropping some Cooper bombs onto suitable parts thereof.
-
Nice pics Comrad! Love the IJN carrier group and the D3A1! What mods are you using? I have the Aerosim Val campaign but that's not it.
-
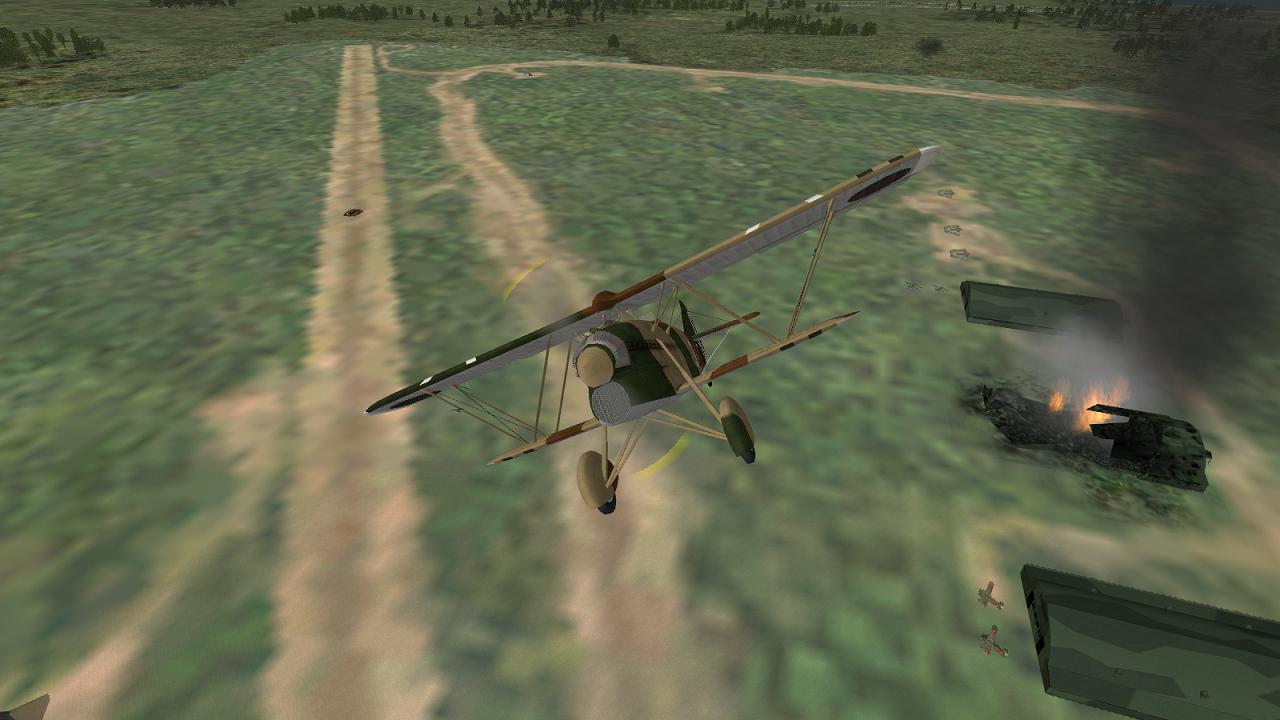
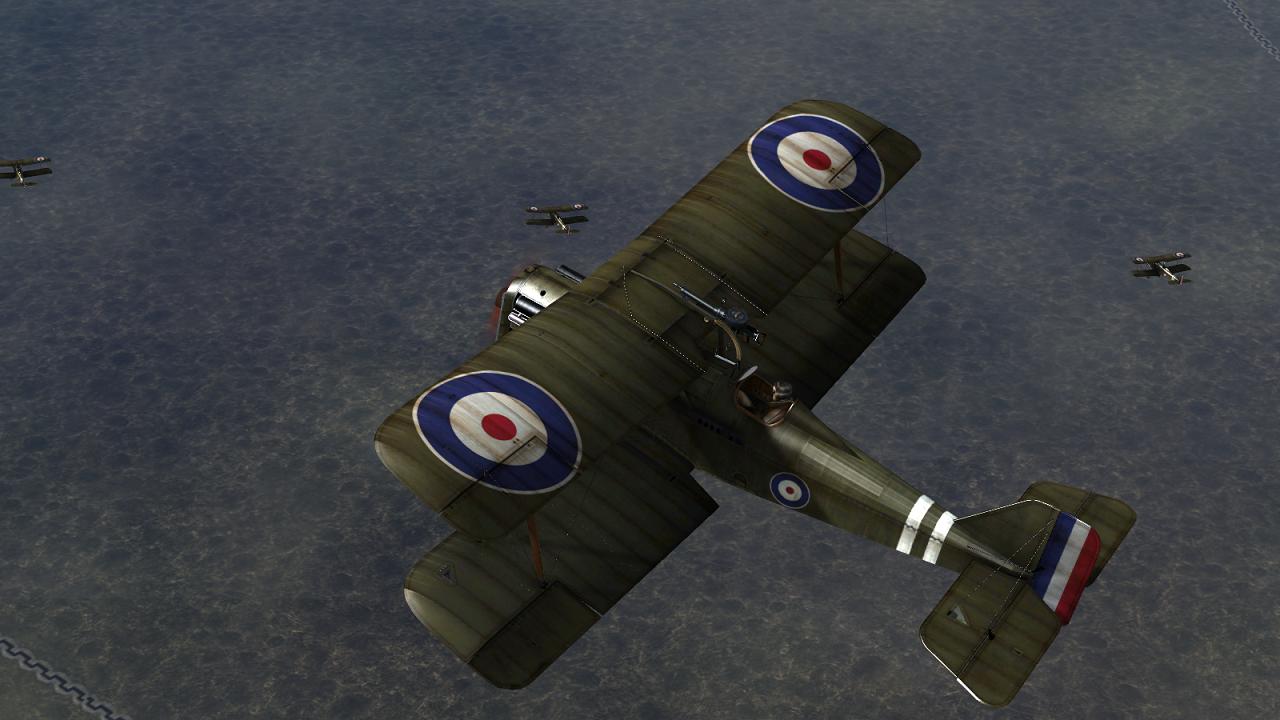
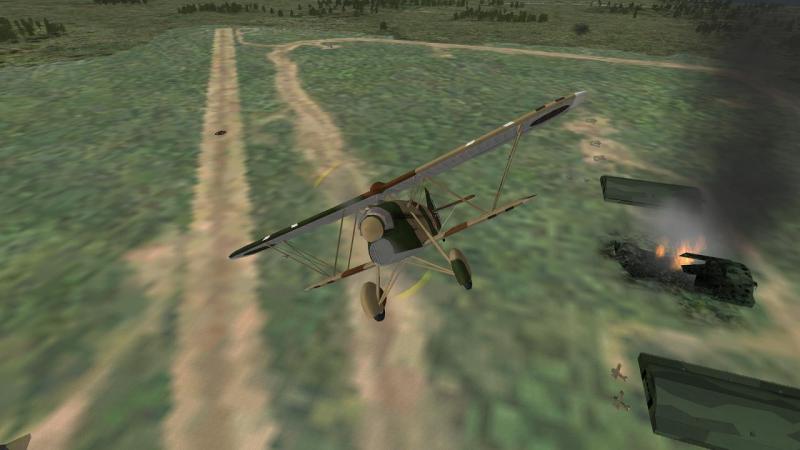
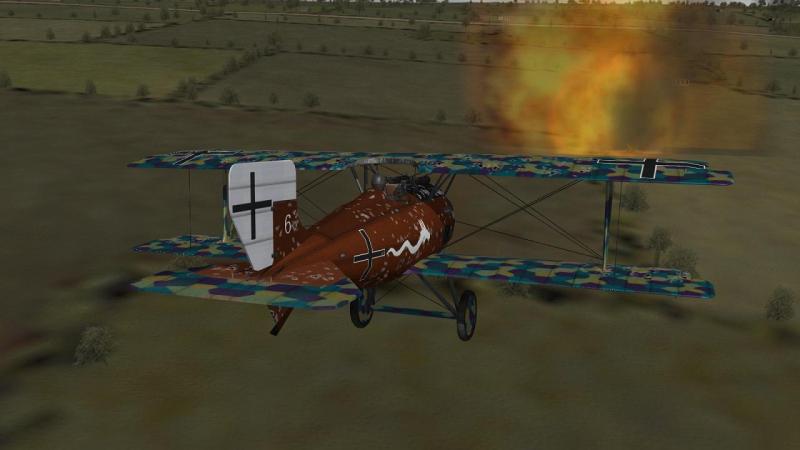
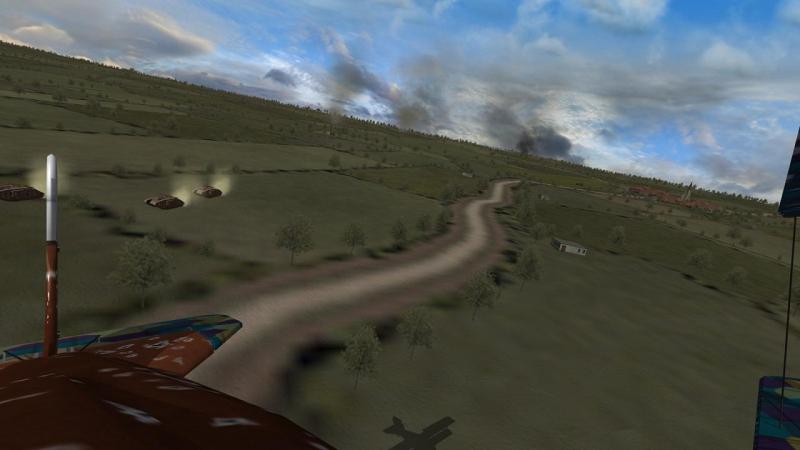
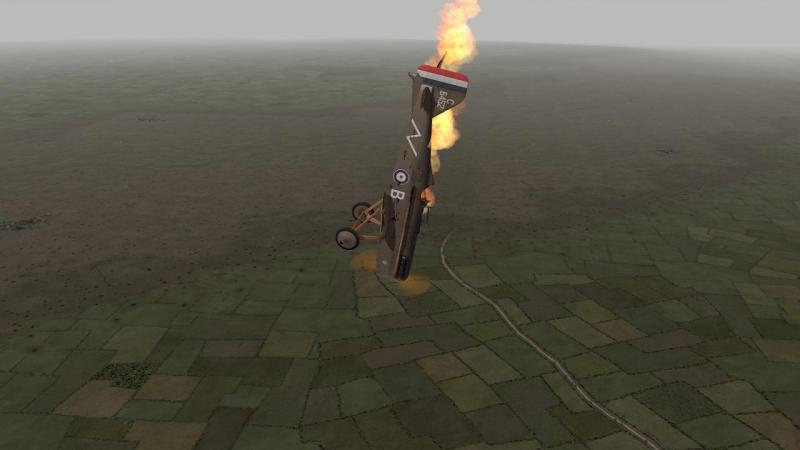
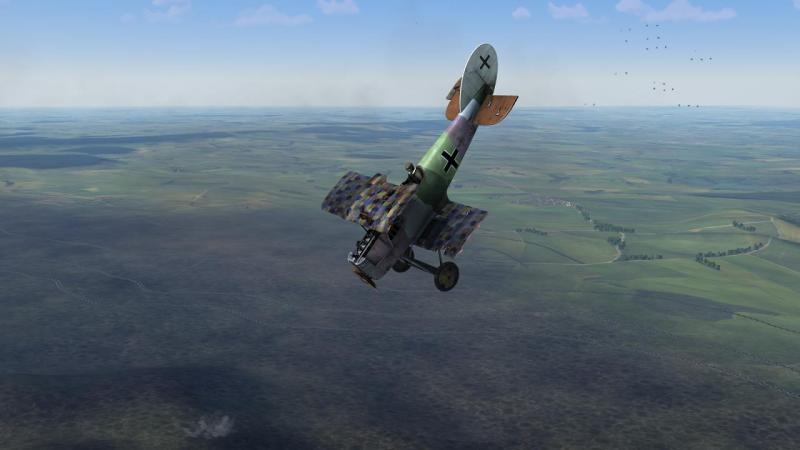
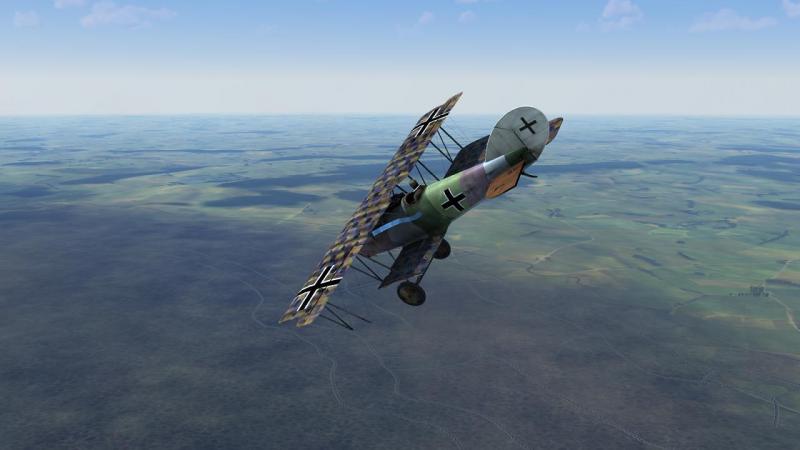
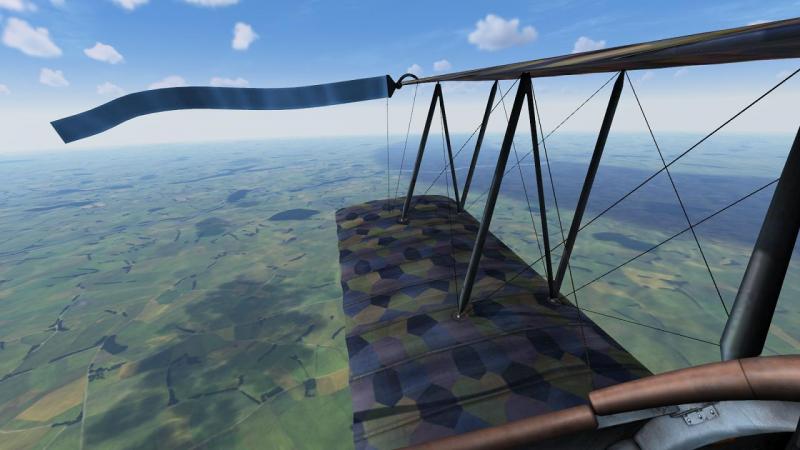
A different kind of target... Irritated, I realised that we were again under fire from enemy AA, over our side of the Lines. 'This should really not be happening', I thought. What was going on? Looking down, I could see some gunflashes from the ground, a pair of weapons maybe a hundred meters or so apart. Two enemy AA guns on our side of the Lines - evidently there had been a breakthrough here! I should have paid more attention to the planning map at the mission briefing! One of the neat features of FE is that this map - which for security reasons presumably, you can't take with you on the mission! - will show you a black line, bulging away from the Lines, portraying as a salient any side's penetrations into enemy territory. The map also displays ground unit symbols (in NATO format) and if you mouse over them you get a display of the unit's title (if known) and what it's doing eg '36th (Ulster) Division - Conducting offensive operations into Bonvais'. I made a mental note to be rather more attentive to what was happening on the ground, at future briefings! What caught my eye next lay off to one side of the AA guns. There was a little cluster of four dark objects in a field, evidently on the move from the small clouds of dust they were trailing. Enemy vehicles…possibly tanks! I turned and commenced a shallow dive towards them, intending to strafe whatever it was, unless identified as friendly as I ran in. At the same time I gave my flight the signal to commence ground attacks. As I swept in, I could see that my intended target was a troop of four British tanks. Their markings as well as their movements indicated they were not captured and in our hands [the Germans frequently re-using captured tanks, which were generally better than their own A7V model]. So I selected one in the middle of the group and opened fire as the range closed. I was not expecting to do much damage and I didn't. Apart from spurts of earth being thrown up around the tank, I saw no sign of damage. I only just managed to pull out in time, my second near-miss so far on this mission! Looking back, I realised that, having turned right as I climbed away, I was now in a good position to make a firing pass along the line of the two enemy guns I'd seen originally. These were not the stock FE truck-borne AA weapons, but a couple of wheeled guns. So they might have been field artillery in action, rather than the AA guns that had been firing at us. If so, better still, as we would therefore be helping directly our friends on the ground. One way or another, those guns were now for the chop. I took out one weapon on each of two passes. Both targets went up in a rather satisfying fireball, presumably caused by the explosion of their ready-use ammunition. Whatever it was, the enemy gunners were now well and truly out of business. Swinging around again, I resumed my firing passes at the nearby enemy tanks, which were pressing on regardless in the same ragged formation. I might not be doing them much damage or even putting them off their stroke, but perhaps I might have been providing some much-needed comfort to whoever was facing them, down there on terra firma. Looking right as I passed over them, I saw that the lead tank, which was a little way ahead of the other three, had stopped. Puffs of light smoke danced around the snout of the metal monster as his tracers whipped out at an unseen target in a hedgerow beyond the road just ahead of the tank. As I pulled away, my ammo almost certainly nearly gone, I saw the other three tanks slide into line beside their leader. Whoever was ahead of them, was going to be in for a very hard time. I could do no more. Regretfully, I carried on, away from the vicious little fight developing behind me down there, and called my flight back together. But the war wasn't quite finished with us, yet. As we flew towards what was evidently the northern limit of the salient the English had pushed into our lines, I saw some tracer fire, zipping out horizontally from an MG on the ground towards what must have been German positions in a village to the north. As this was on my route home , I thought I might as well try to help out, one last time. I nosed down and fired off my remaining rounds at the enemy machine gunner, pulling up just in time to clear the spire of the church in the little village where his targets lay. Phew! Another near miss! I didn't hit him. This became fairly clear as I pulled away; the enemy MG gunner quickly switched from shooting at his previous target and sent a burst of tracer up my backside, instead. You can see some of his tracers on the left of the pic below, curving up after me. I could have sent my flight-mates after this rather nasty little man but they were likely low on ammo too. I wasn't going to risk planes and pilots on this last target. So we carried on. This time the battle really was over and we arrived back at base without further incident. It had been an eventful mission, not ideally suited to the high-flying abilities of our fine aeroplanes, but with the enemy pressing forward relentlessly on the ground with plenty of air support, we could not complain. A review of the debrief confirmed that I was credited with a Camel and an SE5a, while Neumann got another Camel and Josten an SE. I was also credited with the two guns destroyed. Three of our SSWs were damaged but we all made it home. In recognition of our success, the debrief finished with a nice medal screen. A citation in the name of Friedrich August III, King of Saxony, awarded me the Ehrenkreuz mit Schwerten for my courage and leadership in the face of the enemy, with a nice illustration of the medal alongside. Great stuff! This was a typically eventful, satisfying and enjoyable First Eagles mission. For me, it reaffirmed why, of all the WW1 air combat sims I've played (FCG, RB3D, OFF, RoF, CFS2+Combat Aces, IL2+DBW 1916, FEG, FE2) I consider FEG/FE2 - thanks to a great combination of solid core features, all the better for the many great mods freely available from the skilled hands of so many talented people - to be 'simply the best'.


-
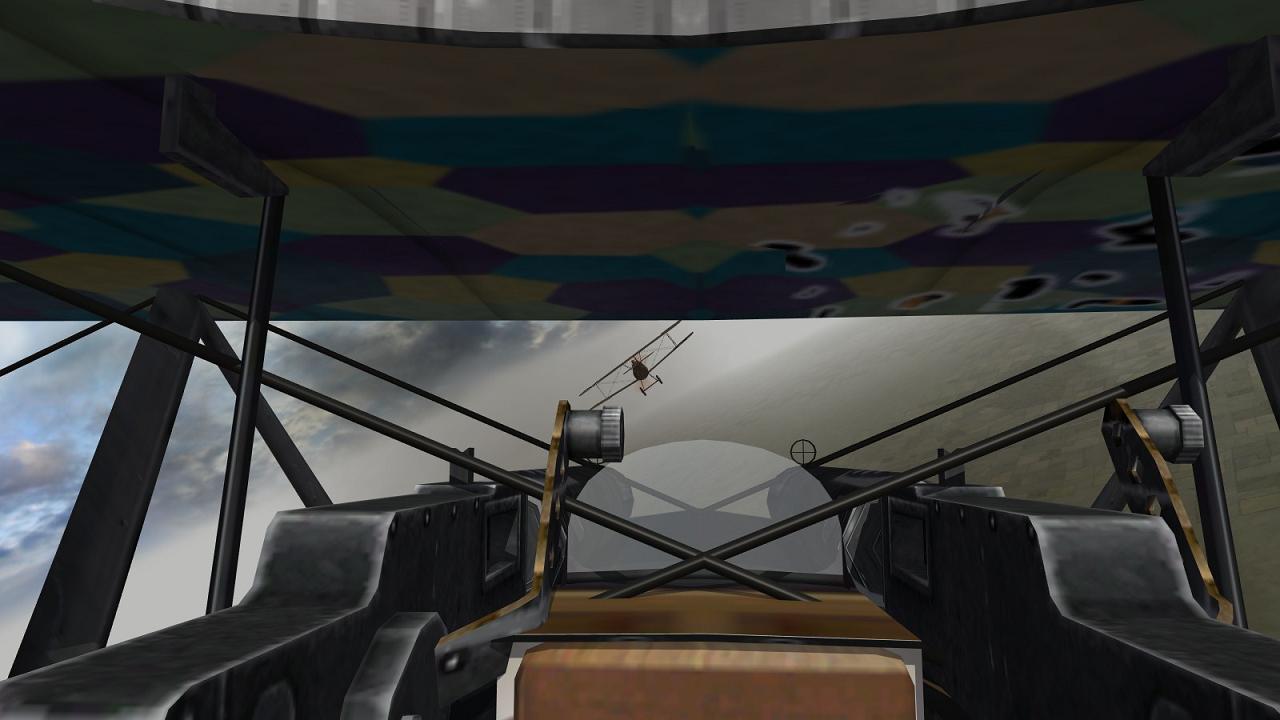
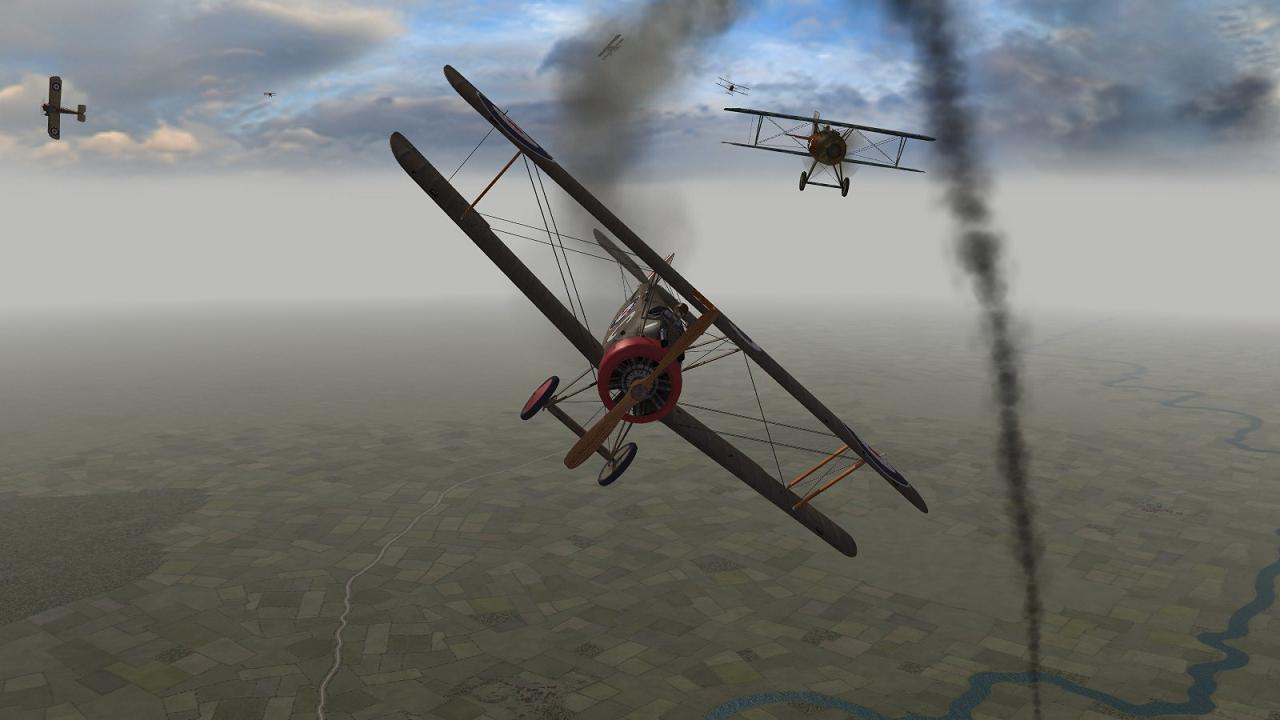
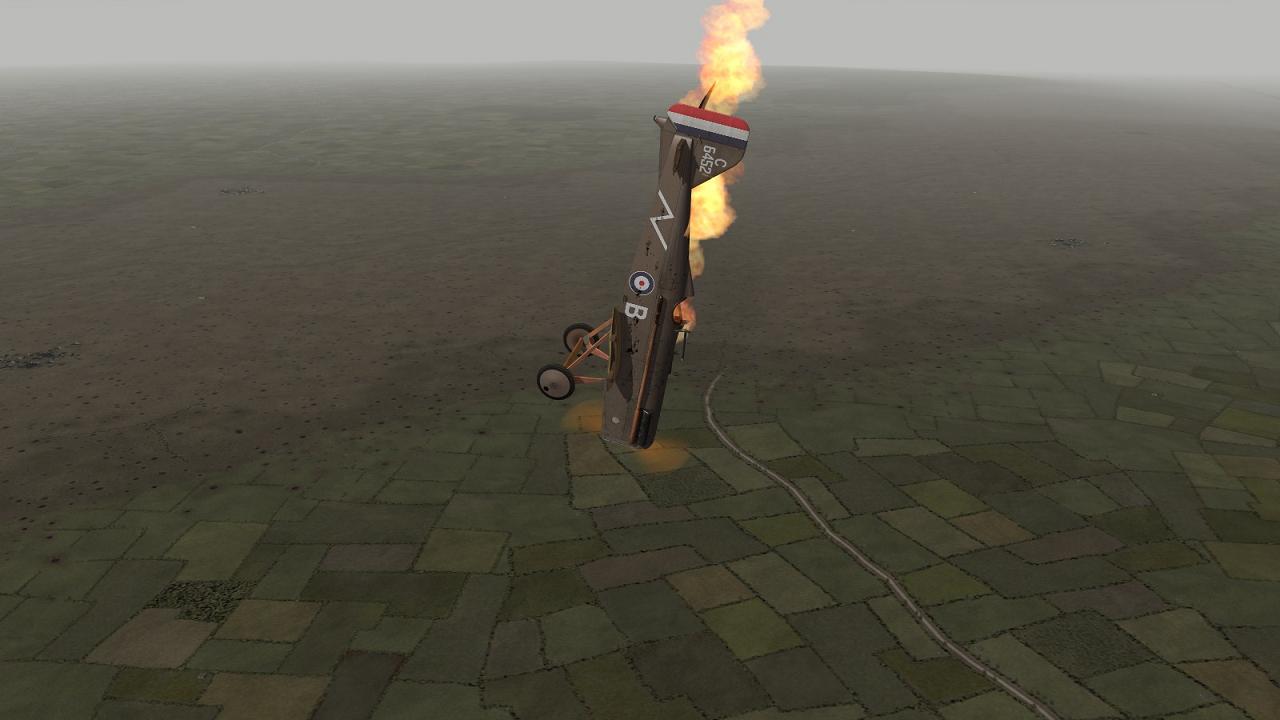
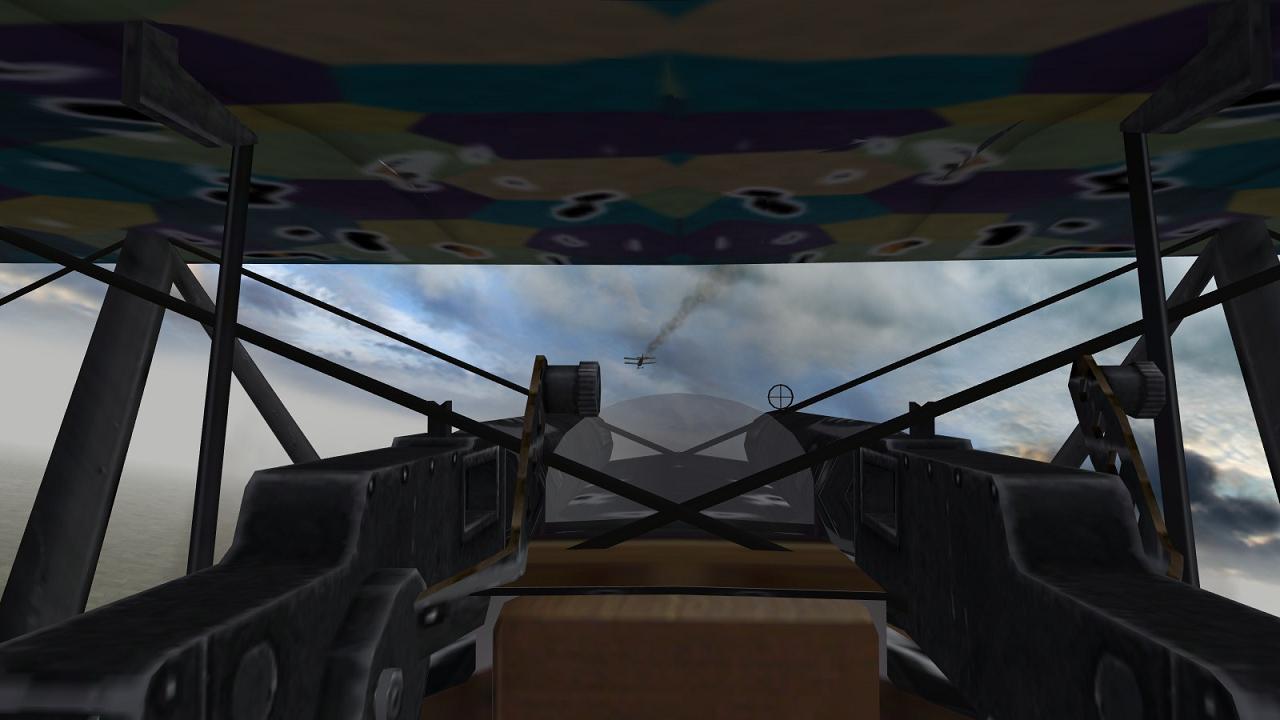
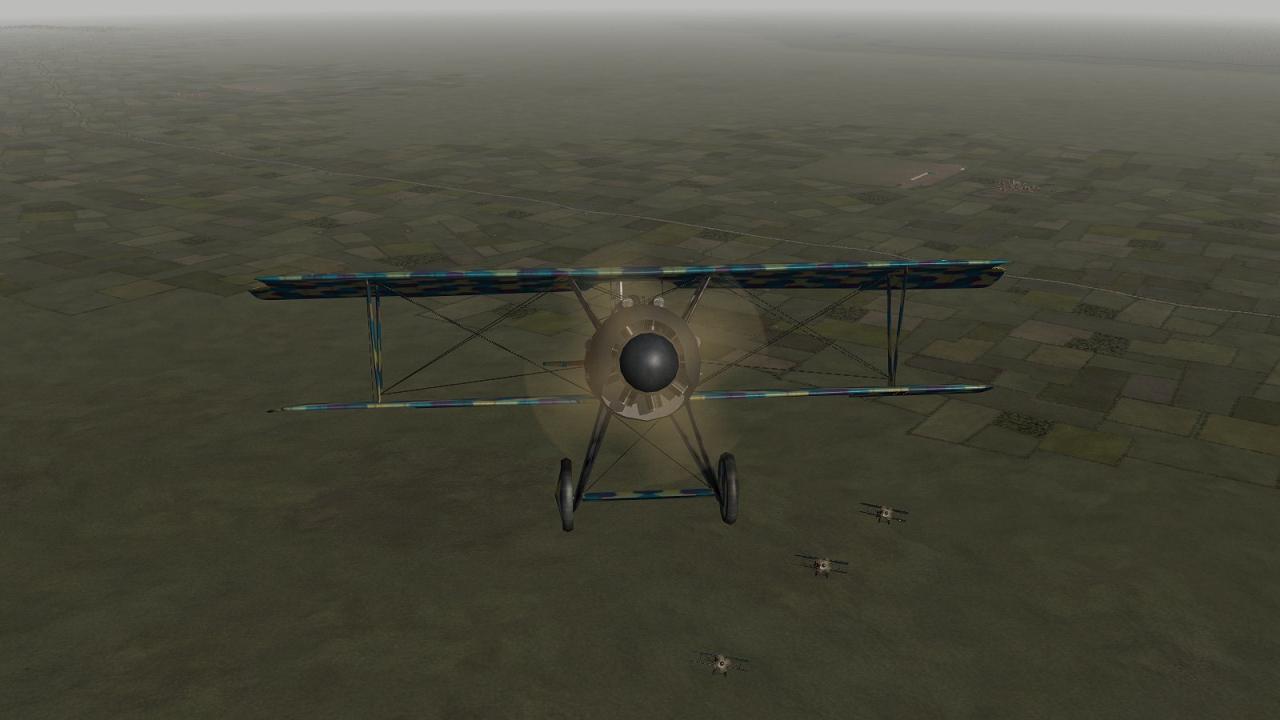
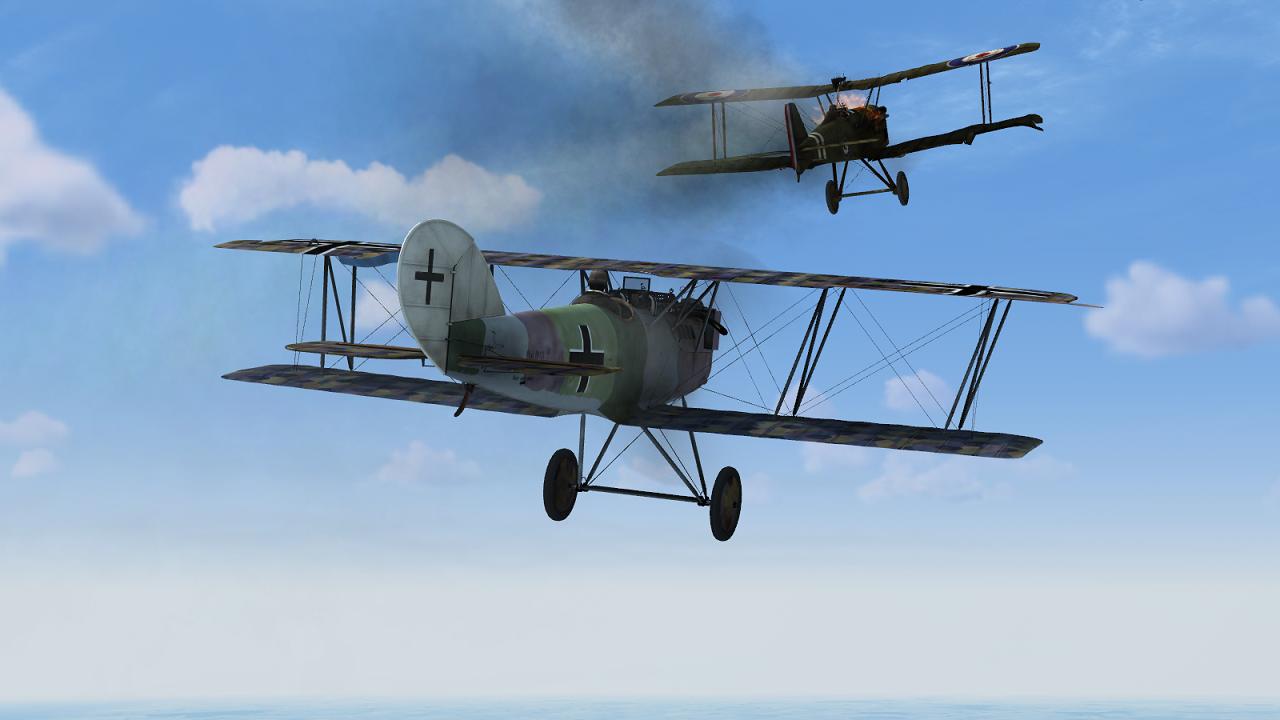
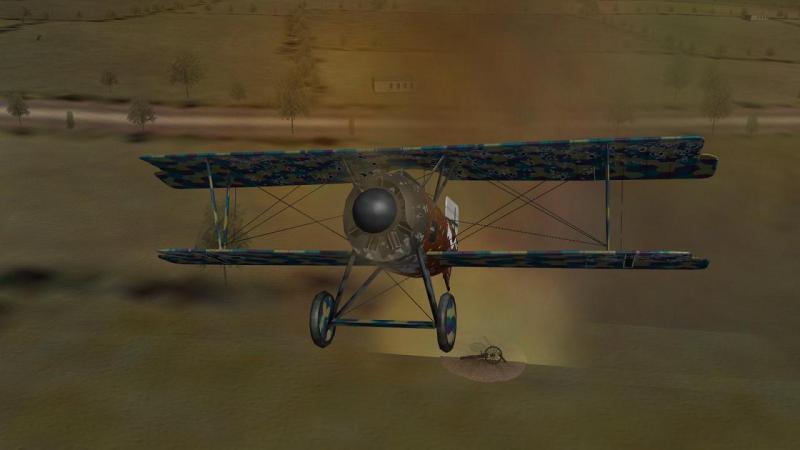
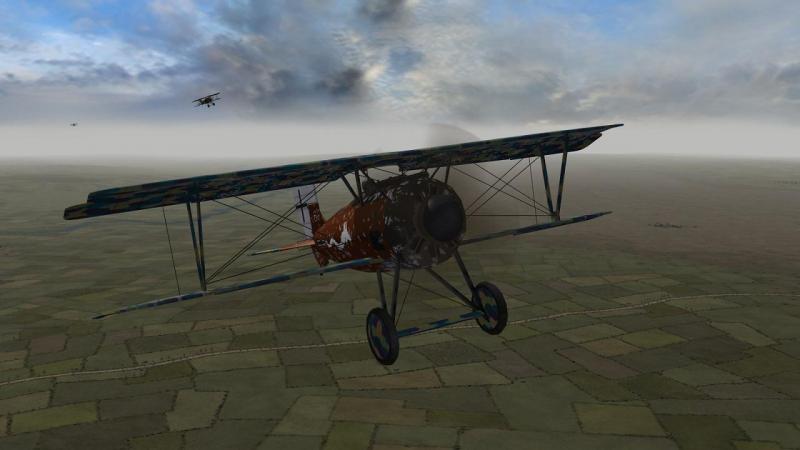
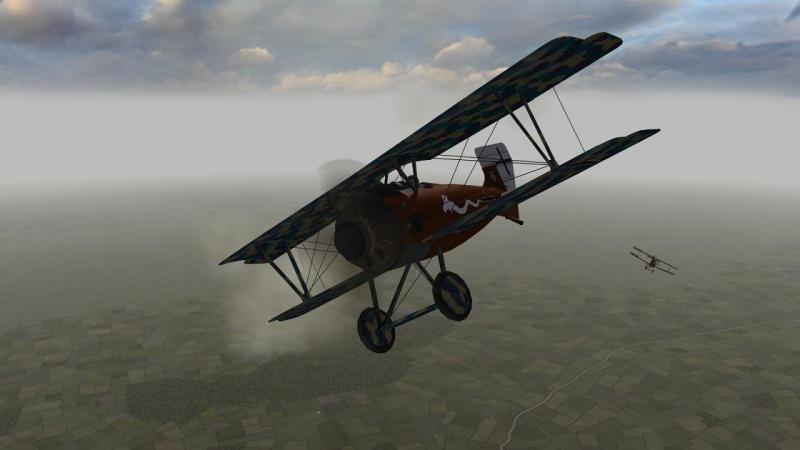
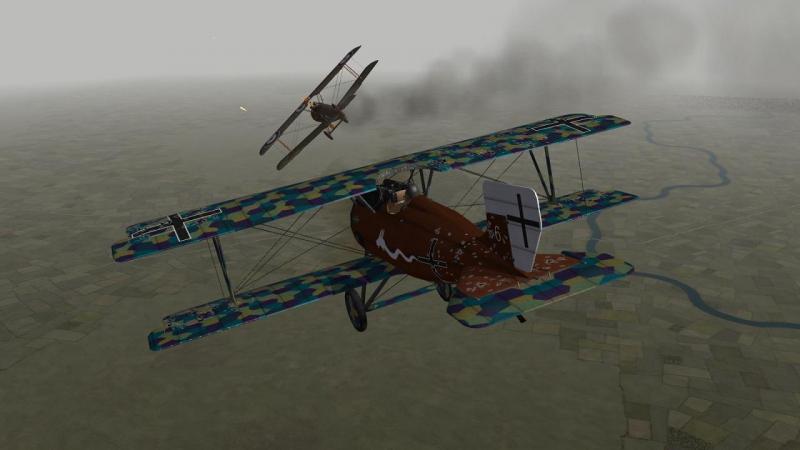
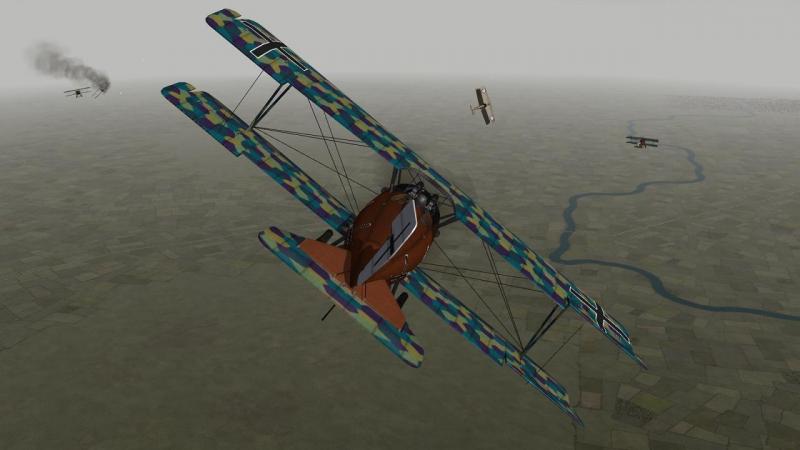
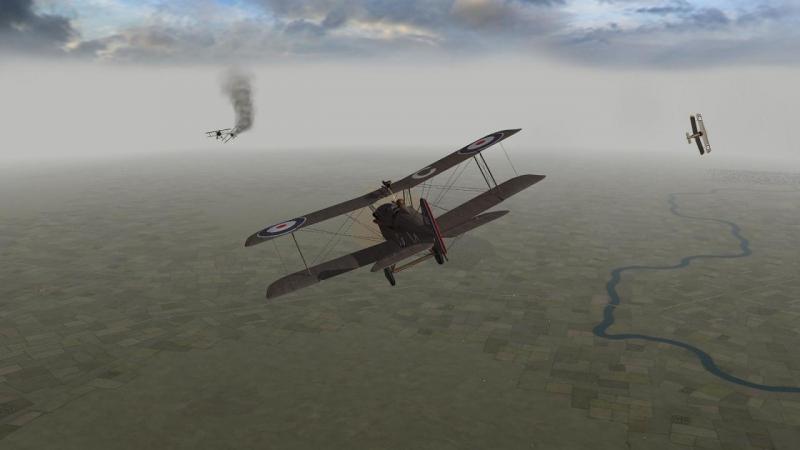
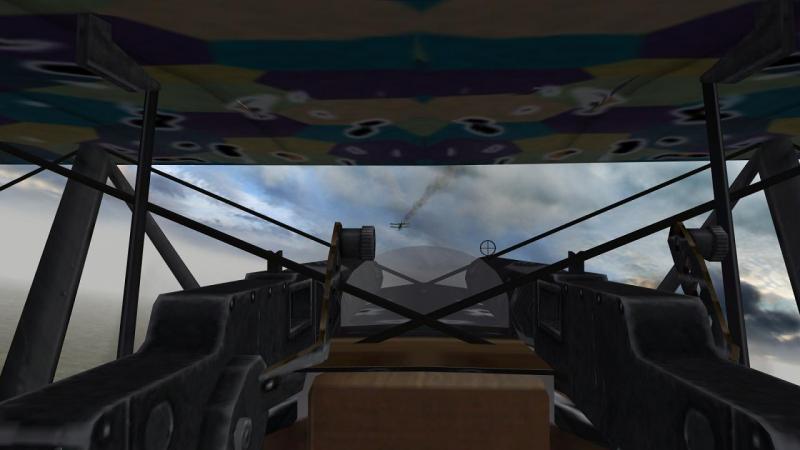
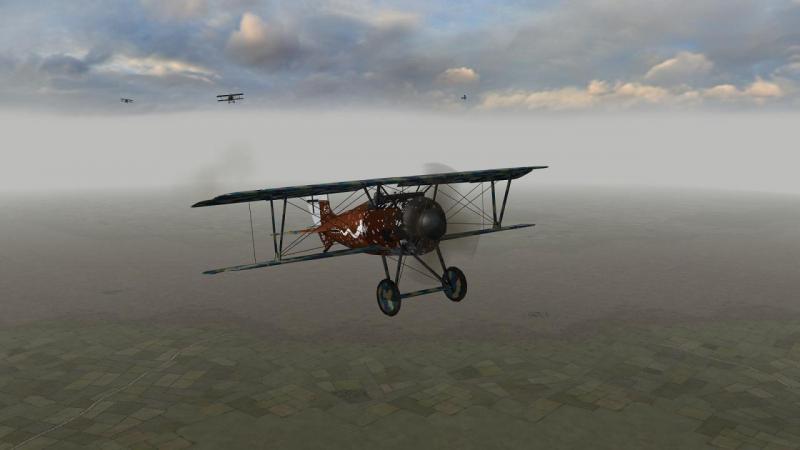
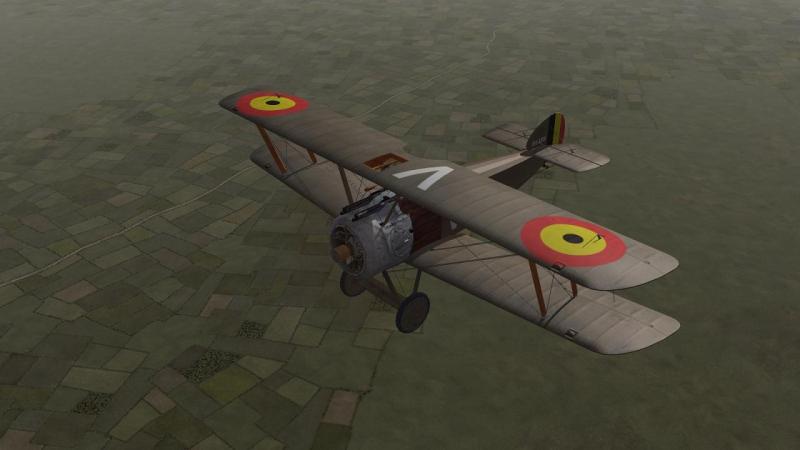
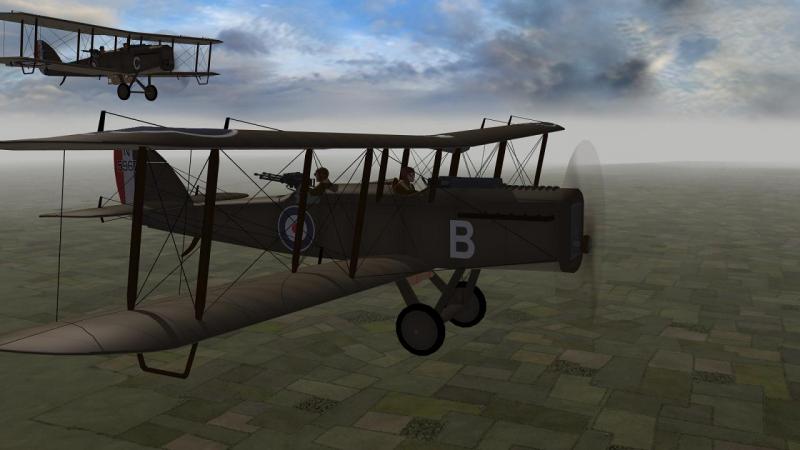
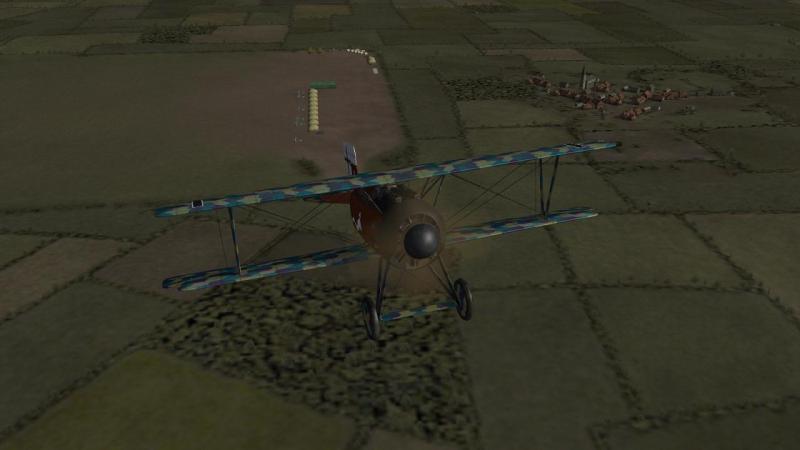
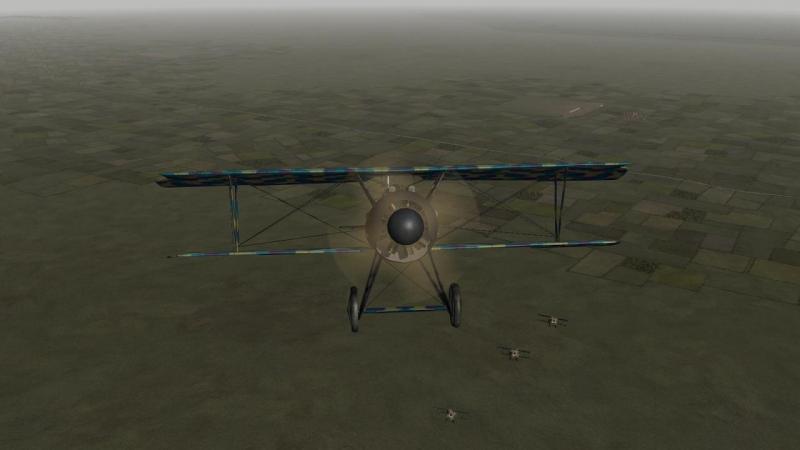
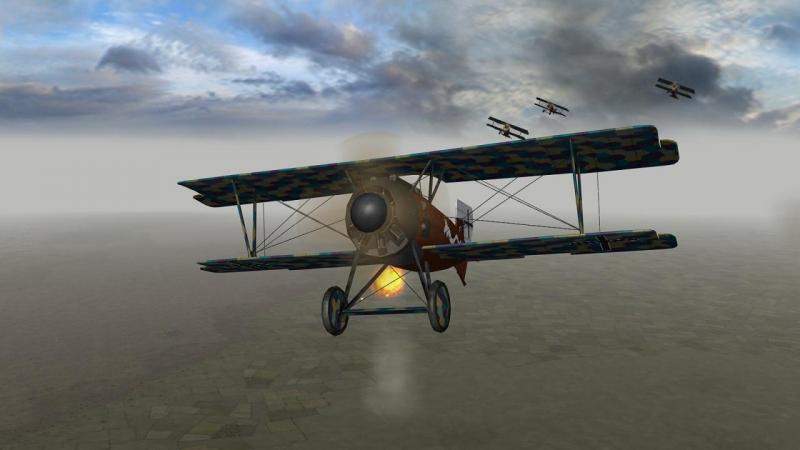
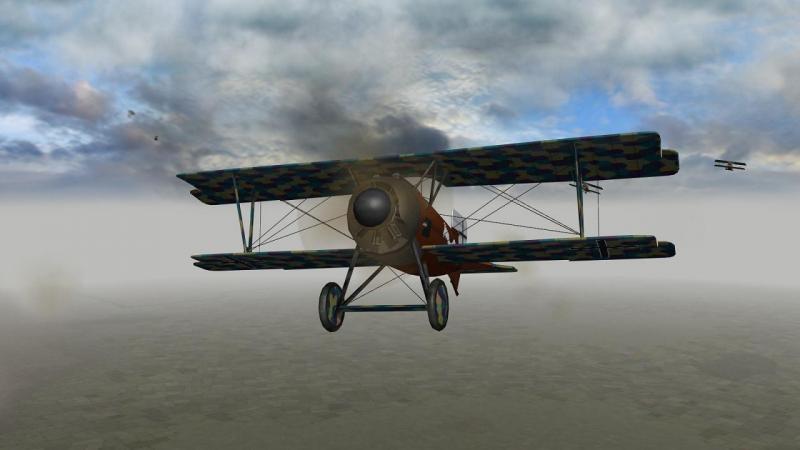
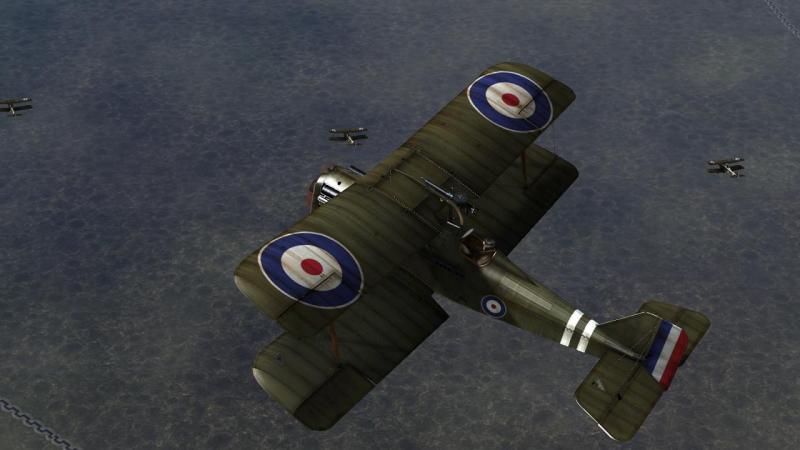
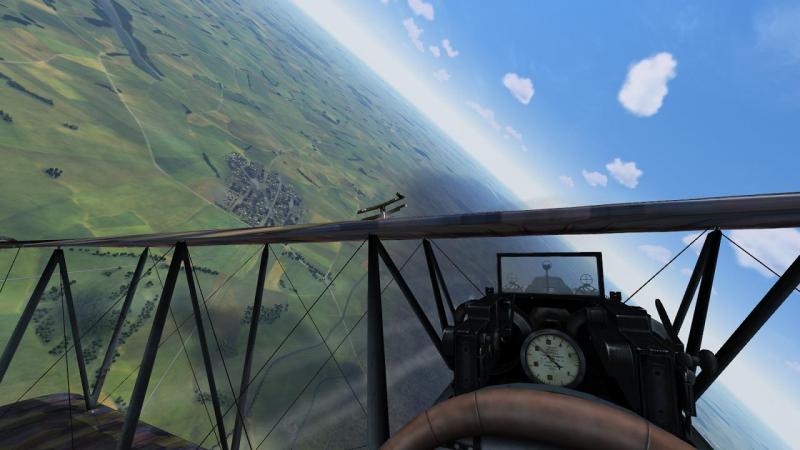
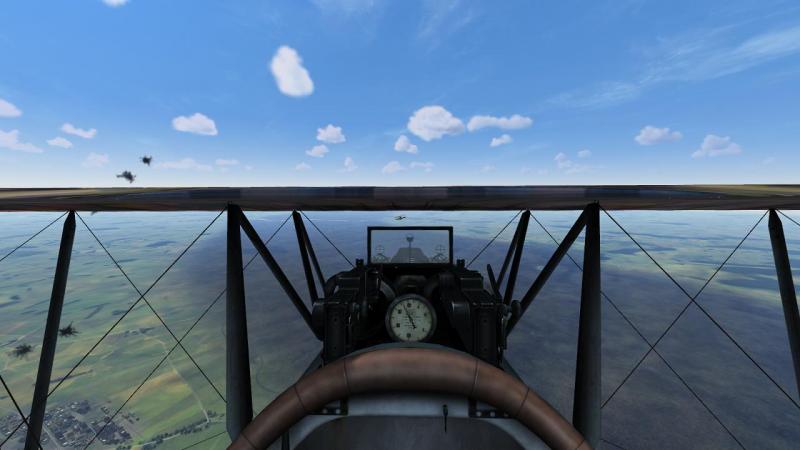
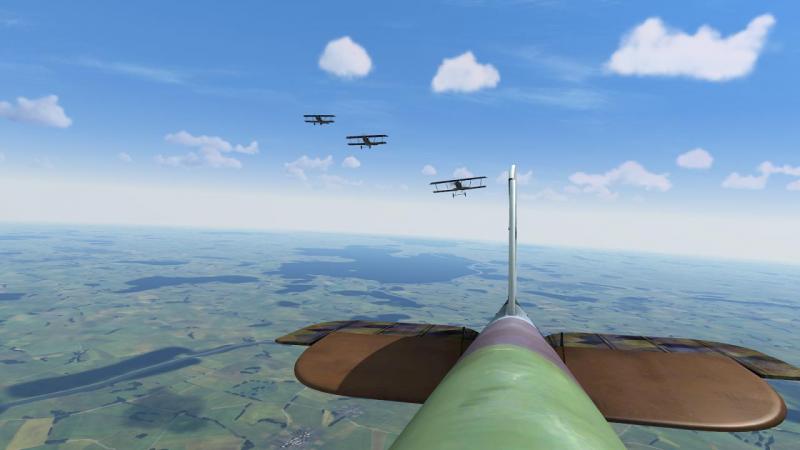
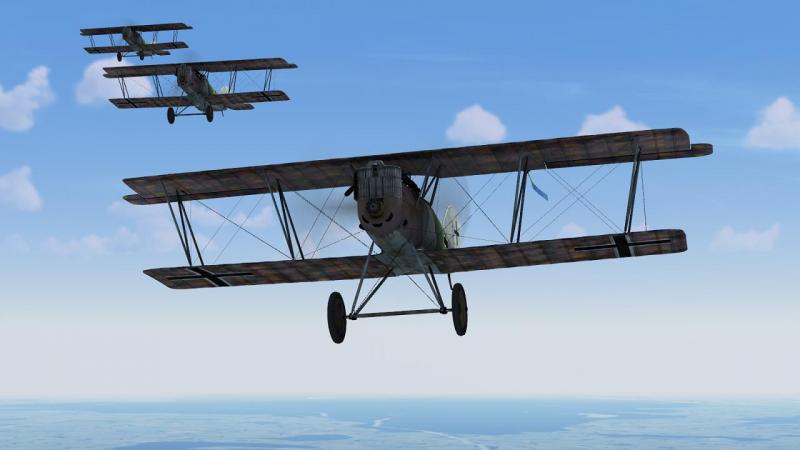
First blood! I peered at the flak bursts, looking for their target. At first they'd seemed to be drifting left to right, leading me to hope this was a flight passing by, behind which we could creep. But the reason it took me a while to see the planes was that they had swung around and were now coming at us head-on, in a slight dive. There were two at least, probably three or more; the type I could not tell. I pulled up my nose slightly and aimed myself at the right-hand enemy, as we rushed at each other head to head. It seemed we each opened fire at the same time, tracers briefly flashing back and forth across the rapidly-diminishing gap between us. He came straight at me, unflinching. I felt a suddden apprehension, realising I was now staring virtual death in the face. I made a slight but rapid movement of my controls, right at the last minute, praying he would not mirror - and cancel out - my move. Then whoa!!! ...and relief as he flashed past, missing me by inches, it seemed. Instantly, I pushed the nose just below the horizon and banked hard around after him. At the same time, I gave the signal for an attack, just in case any of my comrades hadn't already taken the hint. He was an Englishman in a red-nosed Camel. I was soon behind him and following his every move, snapping out short bursts as he turned and jinked. I gained ground on him, sensing victory. But we were not alone. At intervals, rounds slammed into my plane from somewhere behind me. I ignored them. I was determined to get my man and relied on my own manoeuvres in his pursuit to put off the aim of whoever was shooting at me. I continued to take hits and really ought to have paid the price for my conscious target fixation. I could clearly see the increasing number of holes and tears in the wings around me. But suddenly, the Camel under my guns sprouted a trail of grey smoke and I saw his prop spin to halt. Enough! Now it's time to spare myself the same fate! I broke hard left, determined to revenge myself on the chap who'd been trying to kill me. Meanwhile, my flight-mates had started their own merry dance. A second Camel was after one of my men, but he in turn had a Siemens-Schukert on his own tail. The two Camels were not alone. The enemy behind me was in an SE5, as it happened. My third flight-mate had quickly settled the hash of one of his friends, whose burning machine left a dark banner of greasy smoke staining the heavens, but it would be up to me to deal with the other SE This didn't take long. A tight turn brought me out behind and below him and a long-range burst sent him down, engine smoking. Having knocked down the SE, I turned into a climbing spiral at full power and looked around. My trusty machine was well-holed - FE visual damage modelling tends to over-do the 'well peppered' look though it certainly leaves you in no doubt you've been hit - but I seemed to be flying normally. And we had evidently swept the skies of opposition. All four SSWs were still there, thank goodness, but the only sign of our former opponents was a couple of pillars of smoke from crash sites down below. I signalled a recall. Apart from our flight, the skies now seemed clear. An 'unofficial' sweep with the excellent FE view system established that there were numerous other flights going about their business, including some US Air Service Camels and these fellows: friends in Fokker DVIIs and some more foes in the form of Belgian Camels and bombed-up RAF DH4s. But none were to be seen from our position. It looked and felt like were now masters of all we surveyed. And so we were...in the air, at any rate... ...to be continued!

-
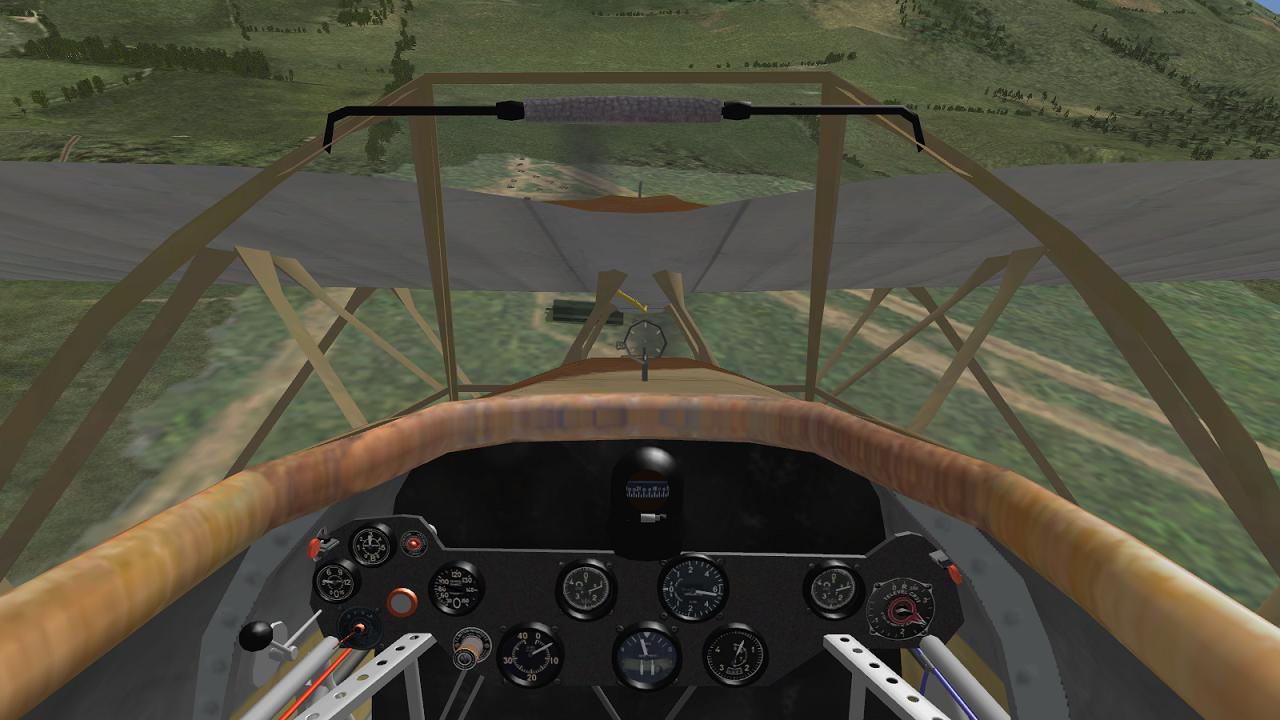
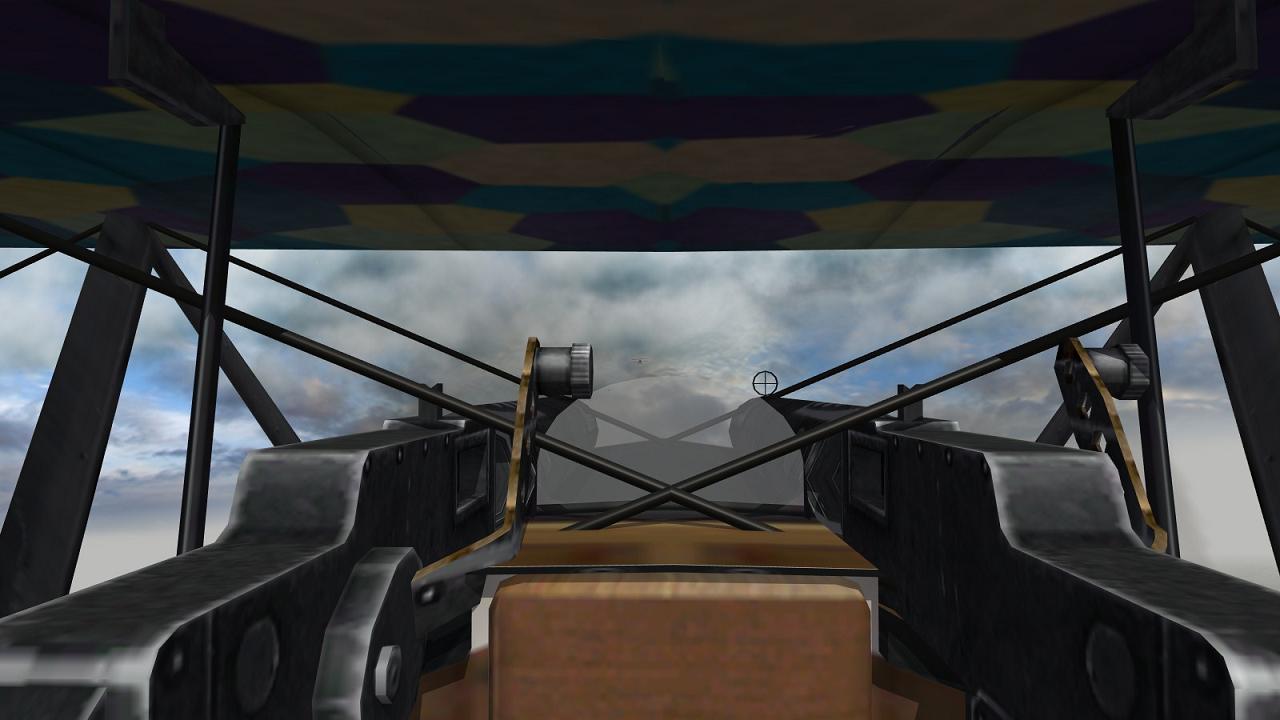
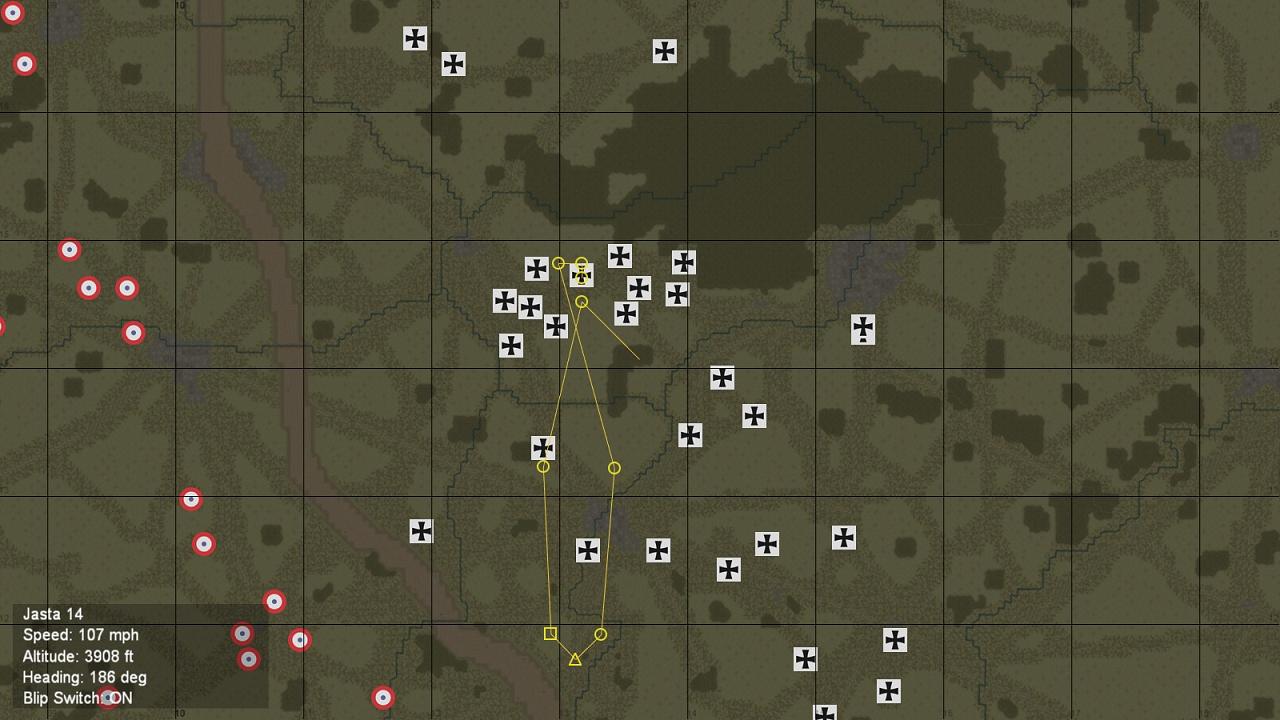
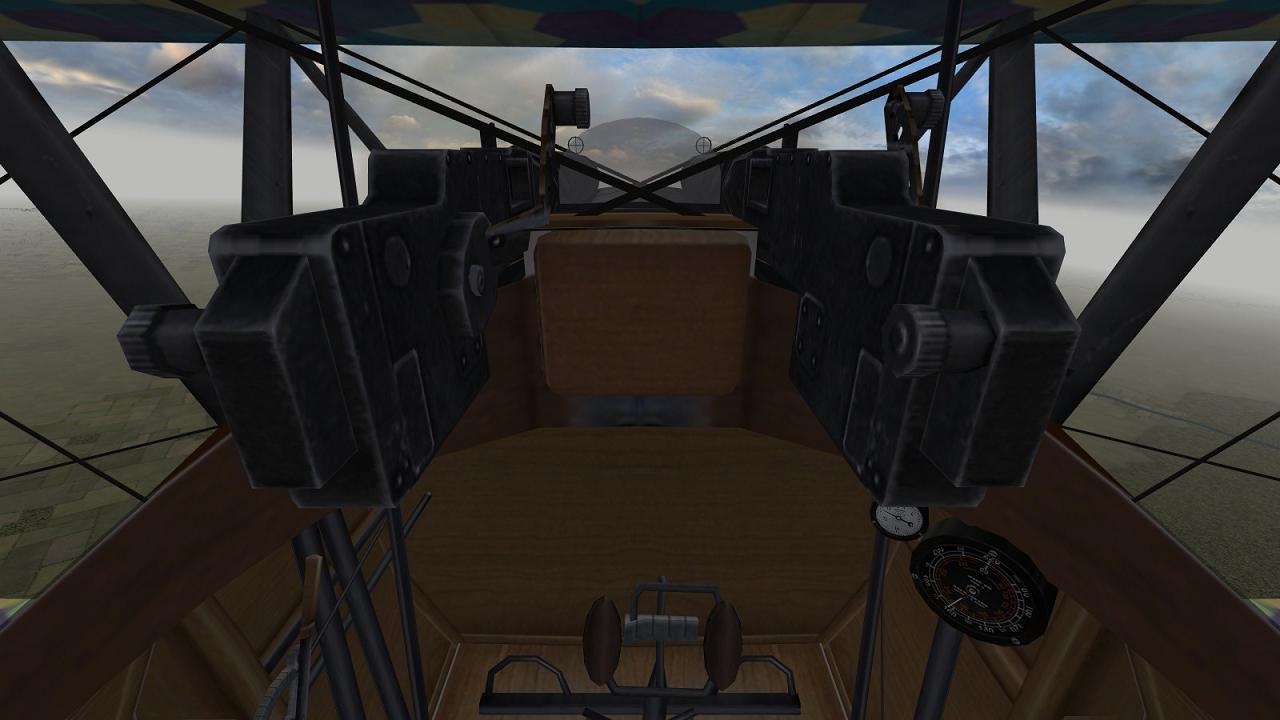
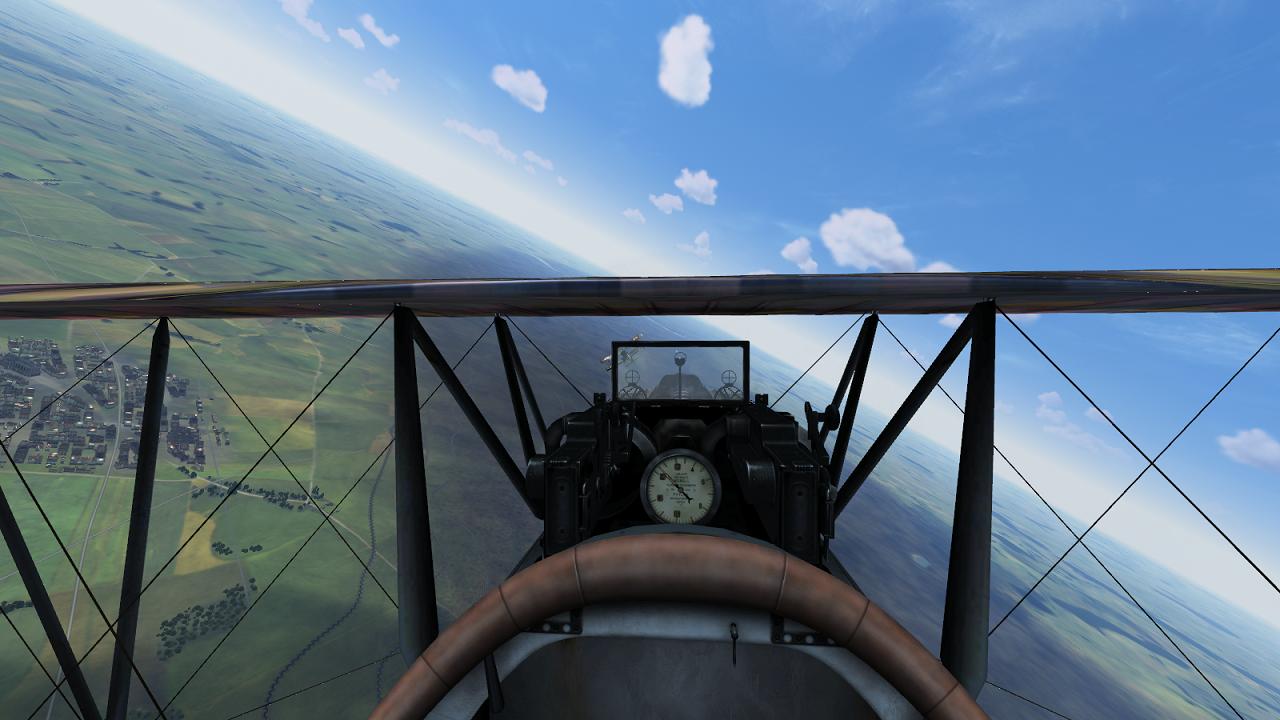
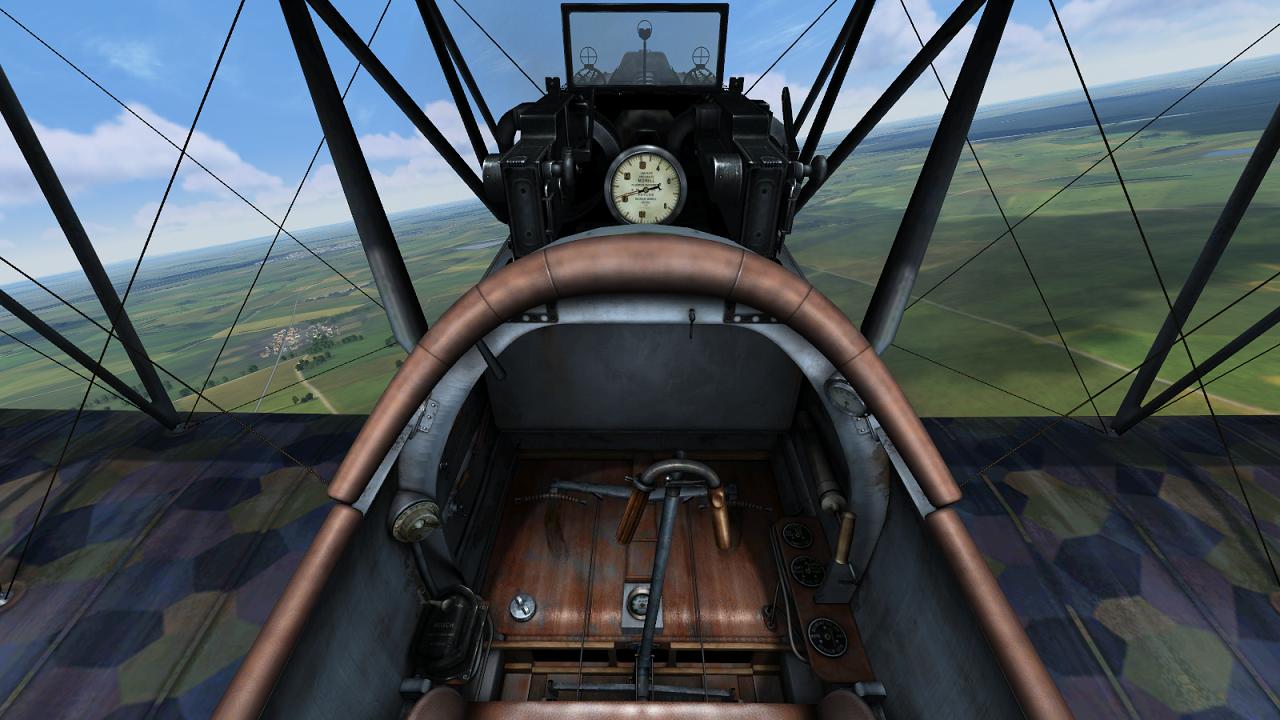
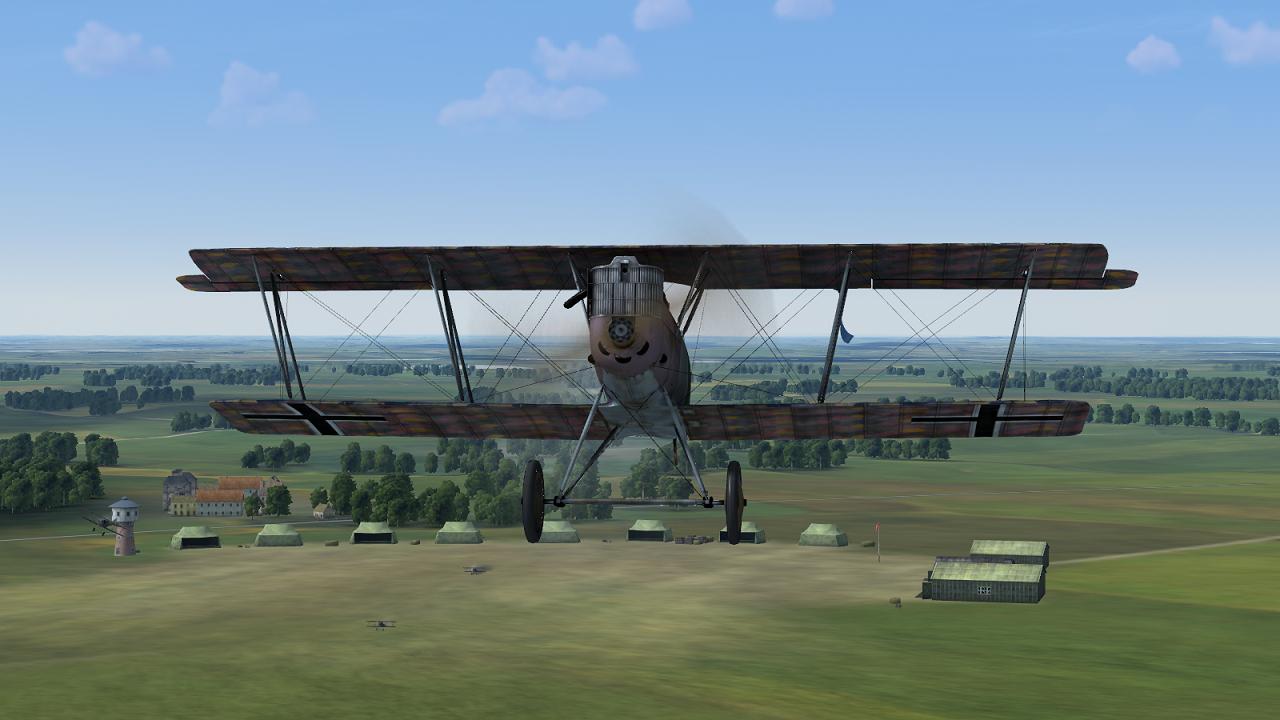
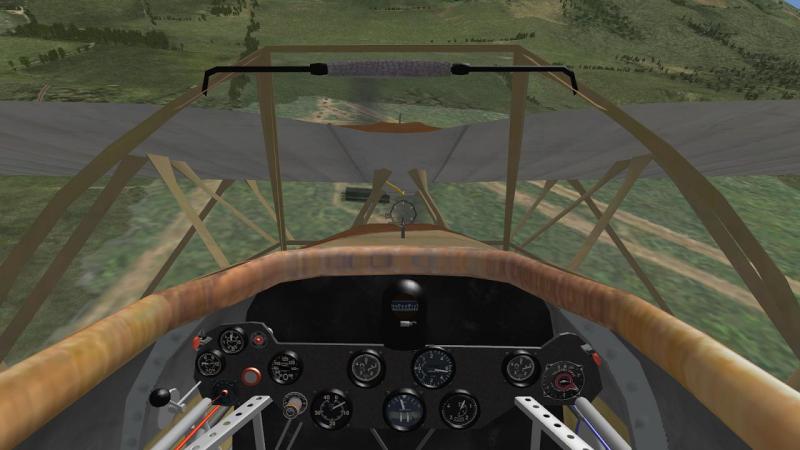
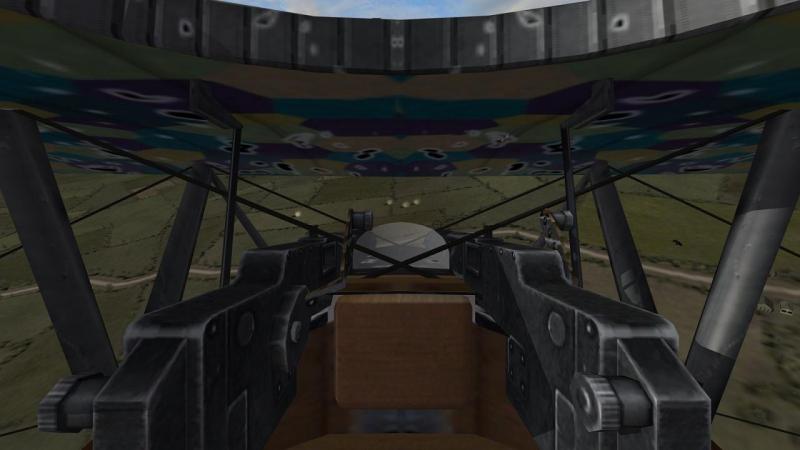
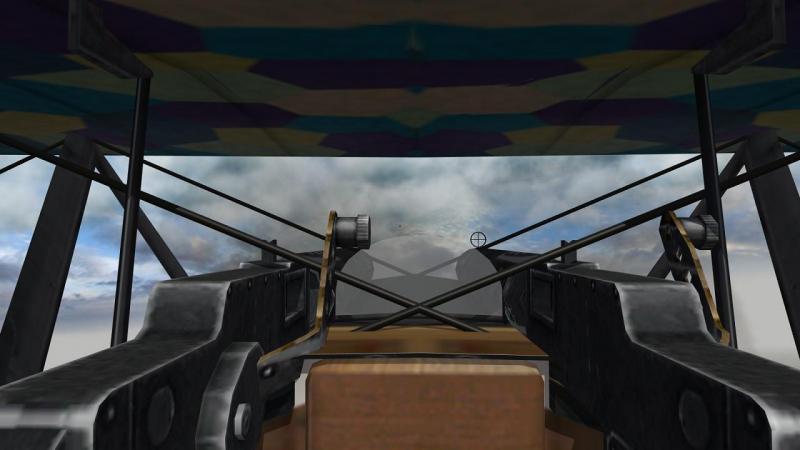
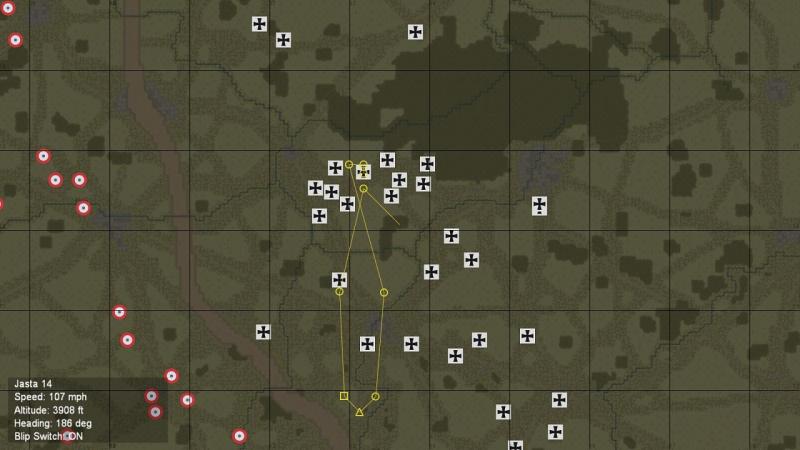
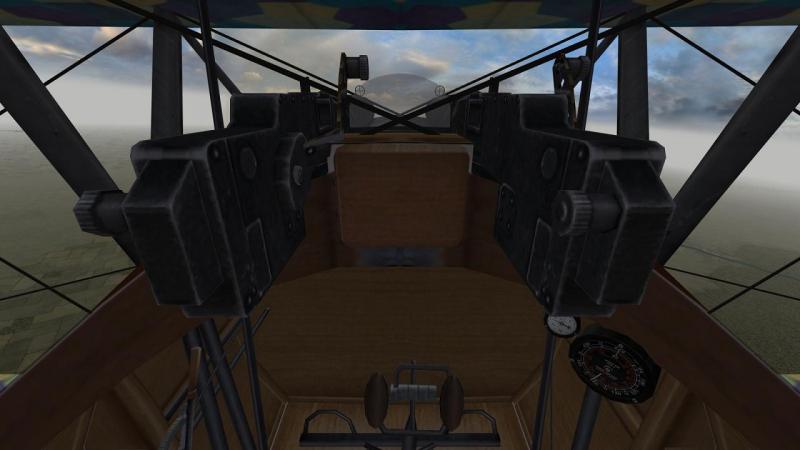
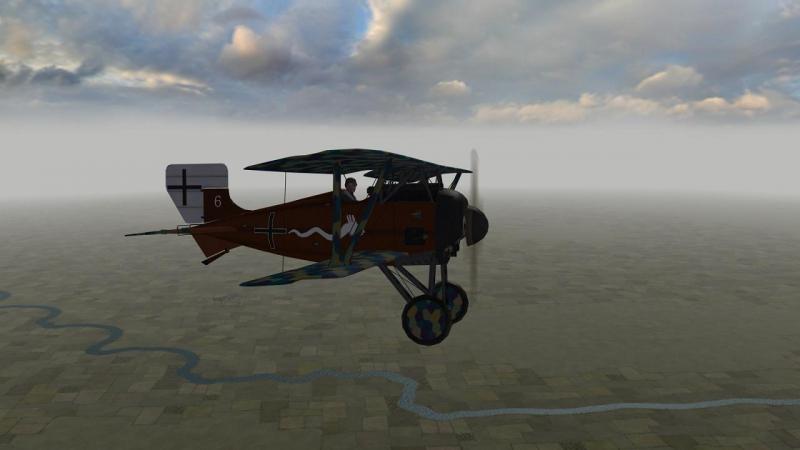
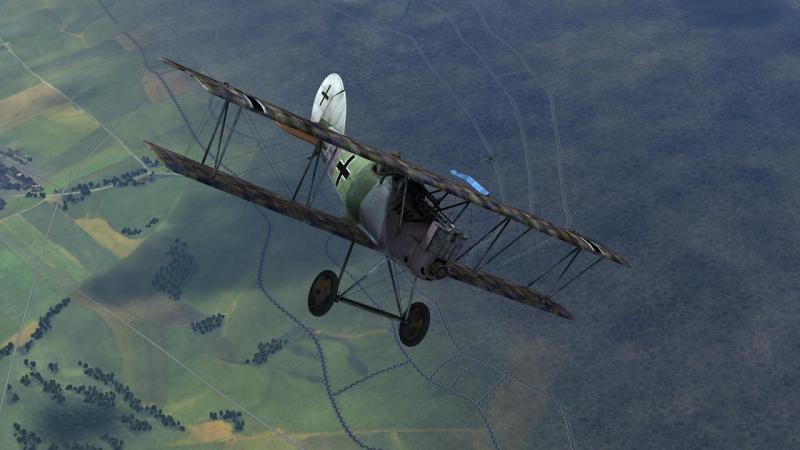
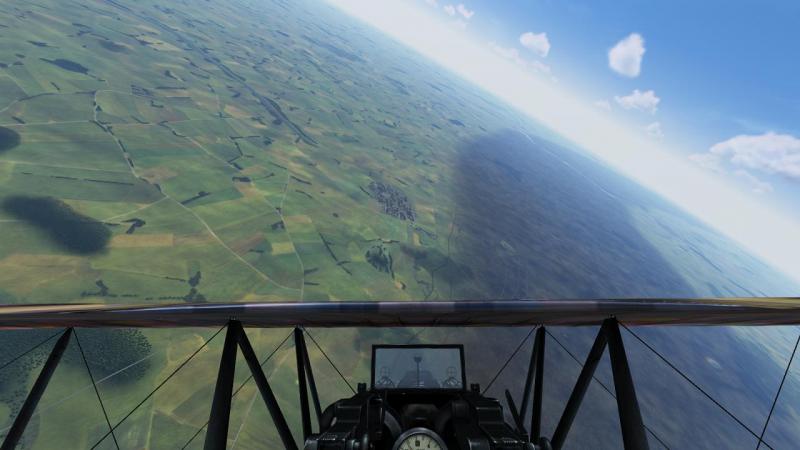
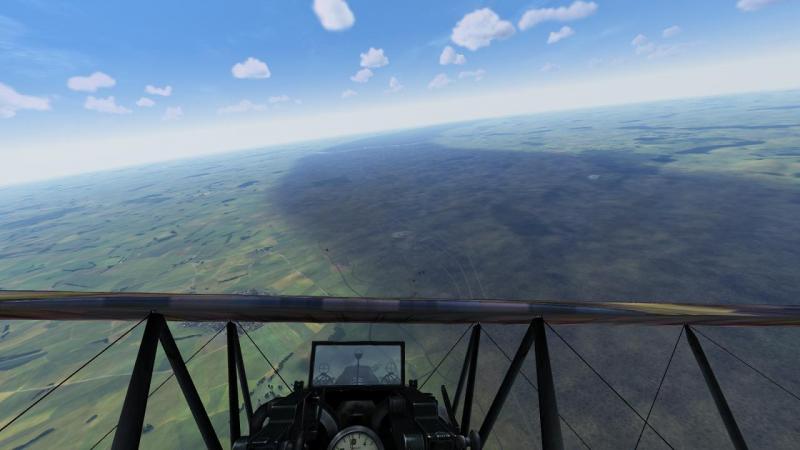
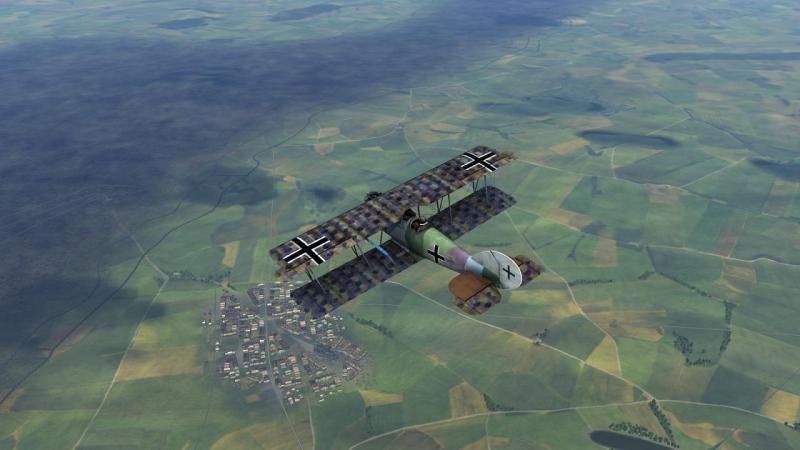
Onward and upward! I called up the in-flight map and oriented myself. Clearly, the wide brownish line weaving north to south marked the shelled area around the trenchlines. The big grey splodge east of our airfield was evidently the substantial town of Valenciennes. The smaller one to my west was Douai, with Cambrai down to the south, just over half-way to my objective, Bonvais. The latter was a village barely visible as a meeting point of several roads, south again of Cambrai. Still climbing, I switched back to the external view, corrected my course, and started blipping my engine to enable my flight, which was together but left and below me, to close up. The A Team's SSW runs either full power or throttle off, so blipping - either by using the 'B' key or just pulling the throttle back from full power - is the only power control you have. I'd have expected fuller throttle control on a late-war rotary engine; it may take only a simple Wordpad edit to the plane's data file to change this. But it's no big deal, and it certainly didn't stop me from climbing rapidly in the fashion I'd expect for a plane with the SSW DIII's reputation. FE2 doesn't include seasonal terrain by default but I have FEG as well and copied across the seasonal terrain textures; hence the dull terrain shades. If you can't do this, there are user-made seasonal terrain textures available here at CombatAce, in the FE downloads secrion. Here's the view from the DIII cockpit. The later SSW DIV's reduced-chord upper wing will have improved pilot visibility, whatver other benefits it conferred. From photographs I've seen, this cockpit is quite an accurate representation. FE/FE2 supports head tracking but I'm quite happy to make do with mouselook, panning and padlock, which are all supported and work well in this sim. Having quickly climbed up to about five thousand feet - rather above the briefed mission height - and very glad I'd defied Mother Nature and improved the weather and hence the visibility - I looked around. On the climb out, I'd noticed a pair of inoffensive and undoubtedly German two-seaters pottering about low down and close to another nearby airfield. But now the skies seemed clear - no planes, no flak bursts. So I decided to 'warp' (=Ctrl+N, 'next encounter'). As it usually does if there's no enemies en route, this brought us out at the 'initial point', at the briefed mission height of a couple of thousand feet, closer to the front and a mile or so short of our objective area, Bonvais. I began another climb, the better to tackle whatever might lie ahead. I hadn't got very far when there was an explosion nearby, then another, each accompanied by a flash which quickly faded to a large puff of grey smoke. Enemy AA fire, and quite accurate. We were still some way on our side of the Lines, a sign that all was not well below. But in FE, flak often fires a short way over into enemy territory, so I thought no more of it. Continuing my climb, I looked for any sign of enemies in the air, concentrating ahead, in the direction of our objective. That way, the skies looked clear…but not behind us. Finally looking around, I saw the black German flak bursts immediately, cursing myself for not having checked behind us sooner. They seemed fairly close, and they were definitely above us. I turned into them without further ado, followed by my flight-mates. ...to be continued!

-
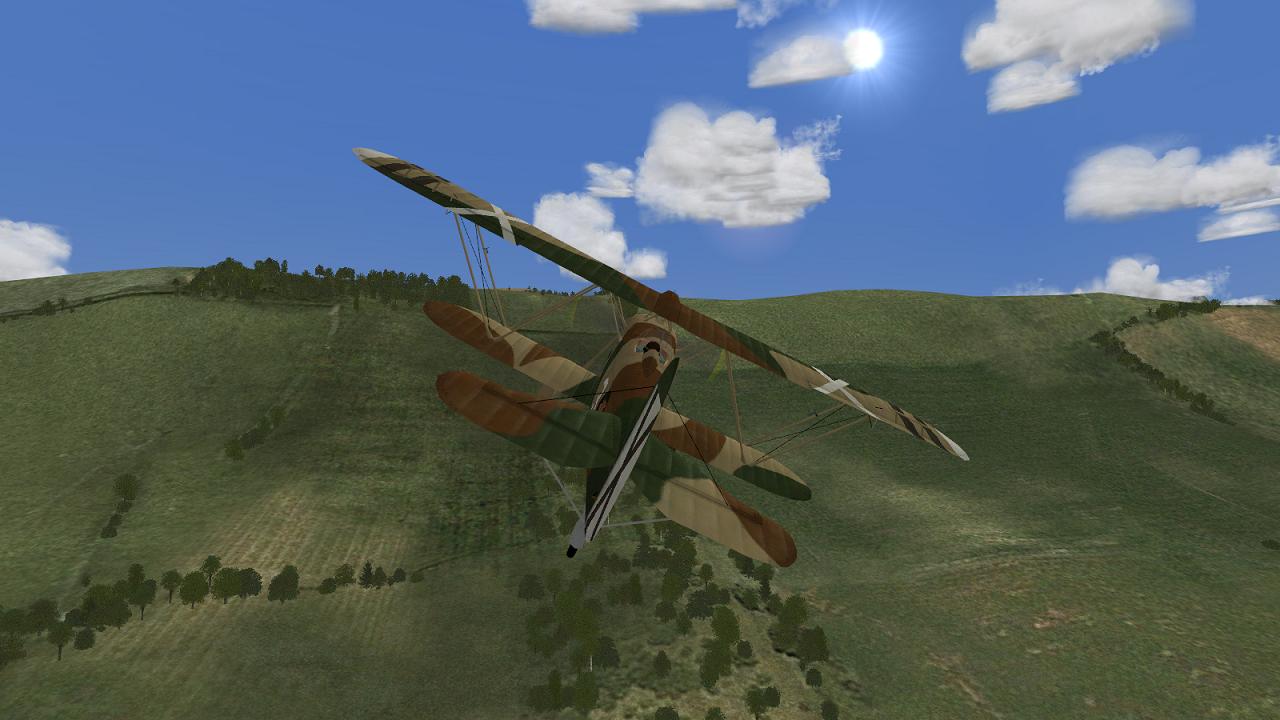
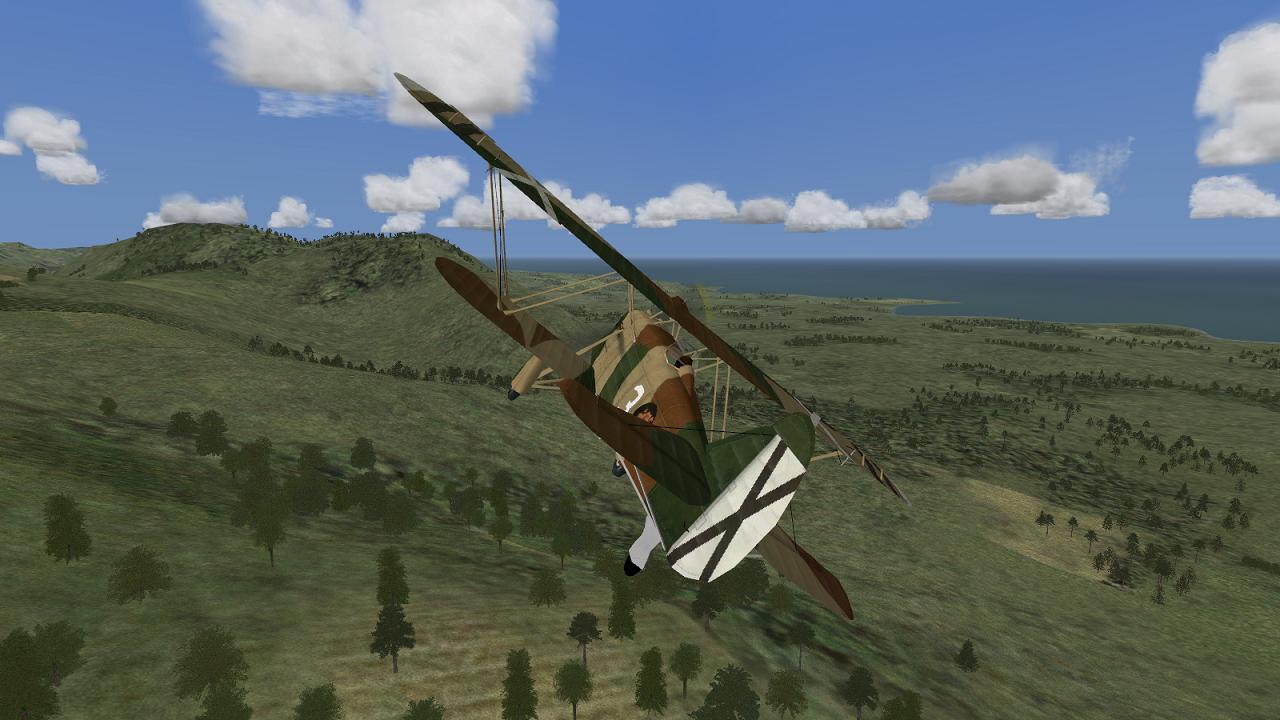
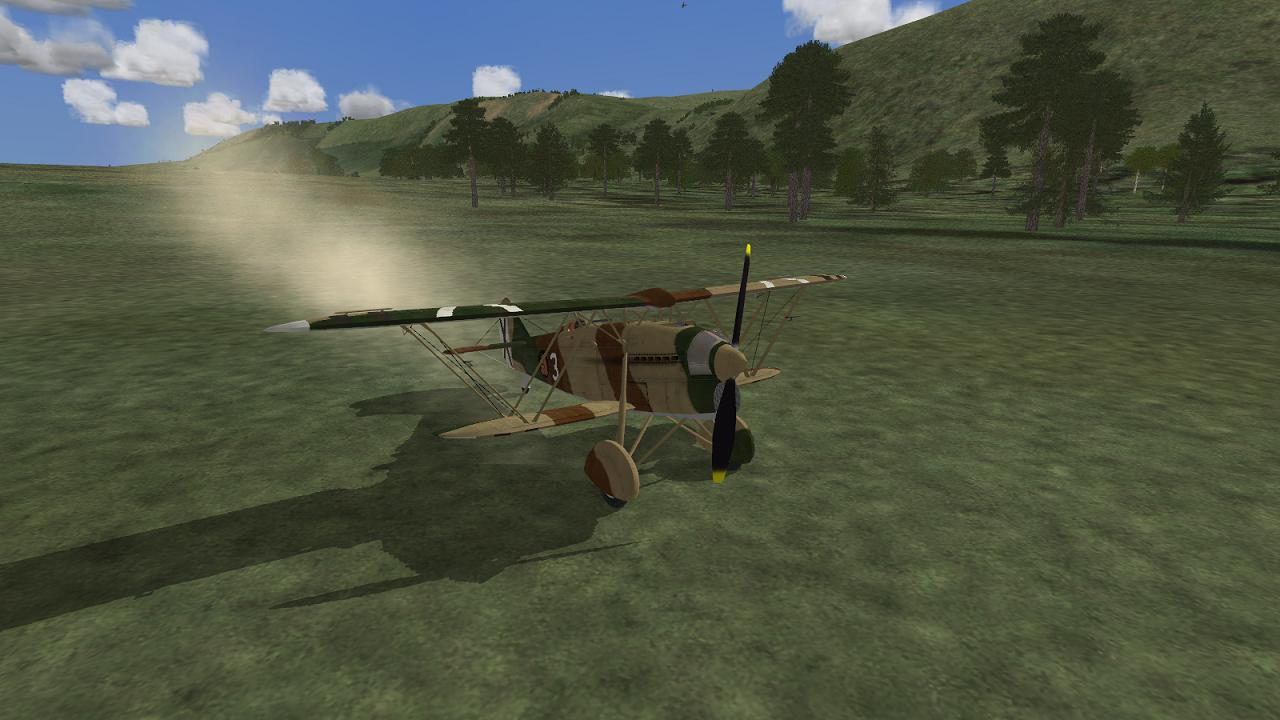
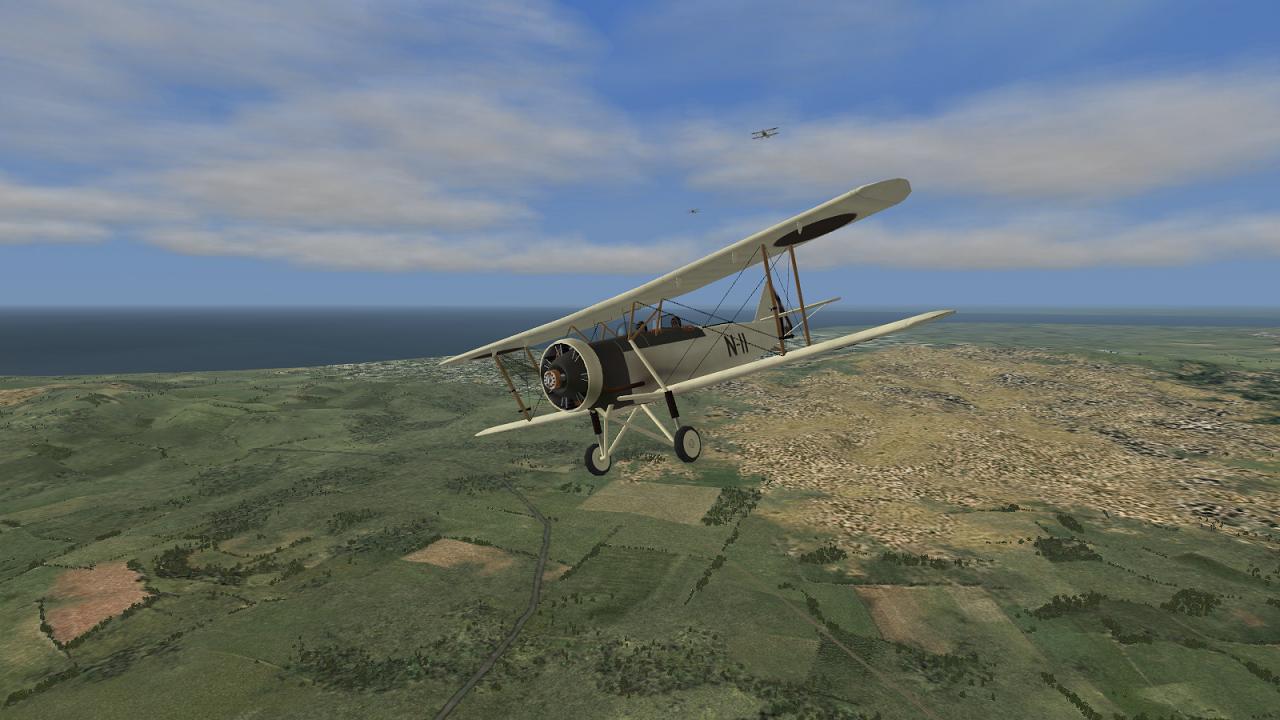
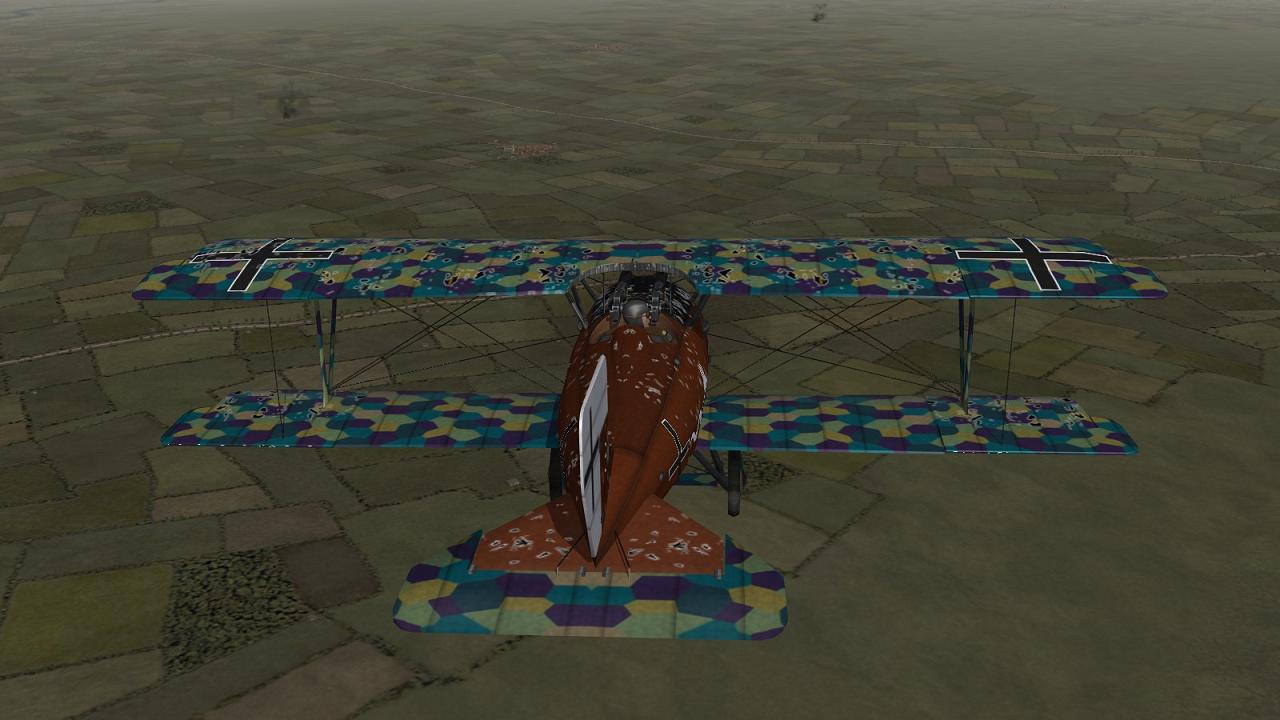
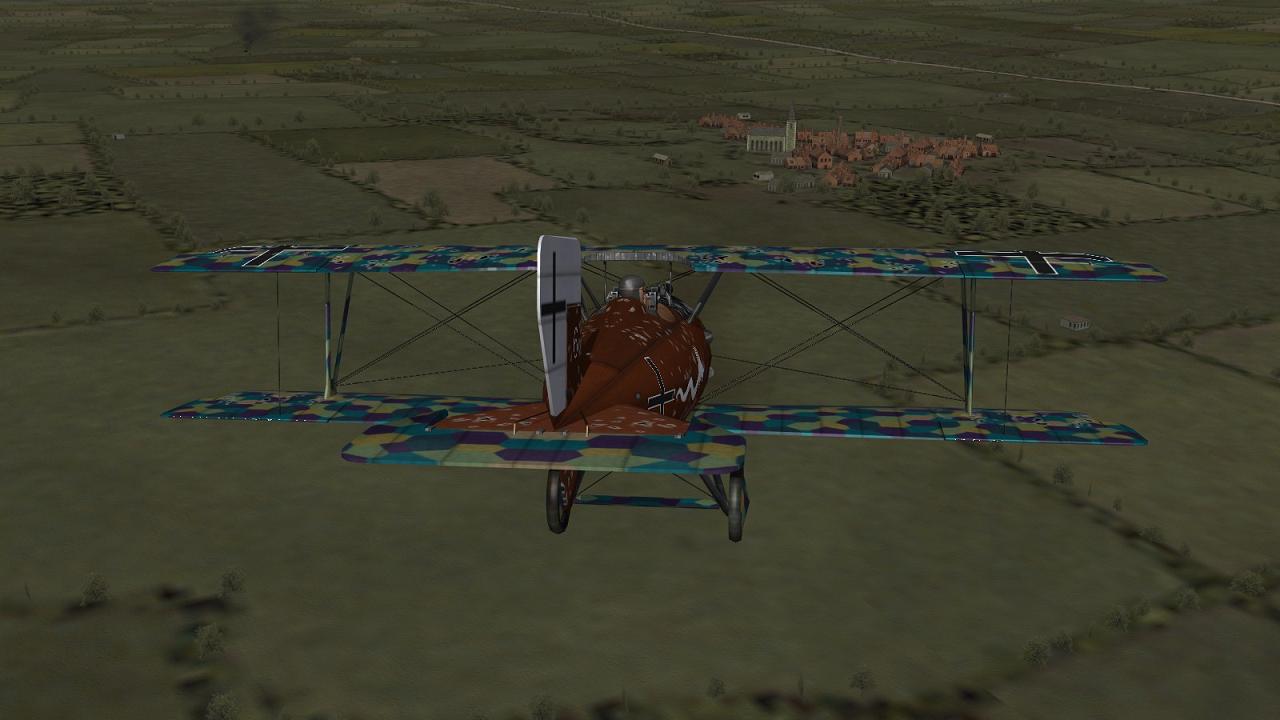
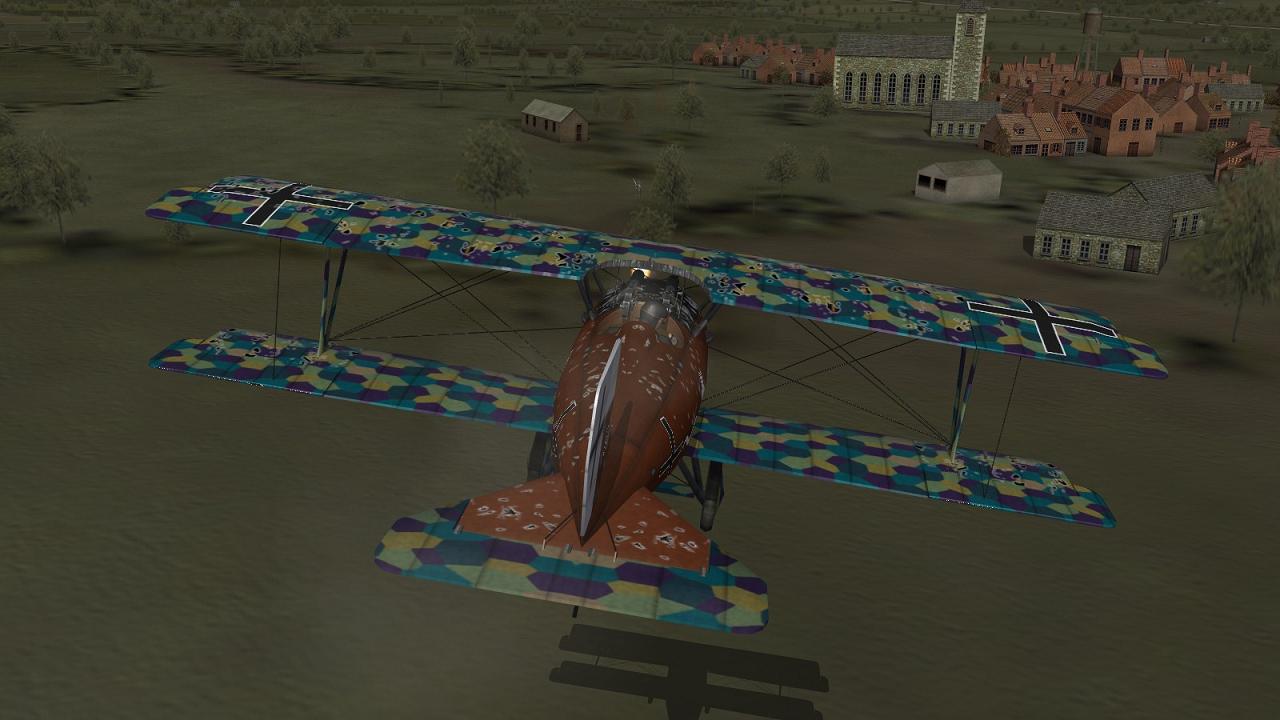
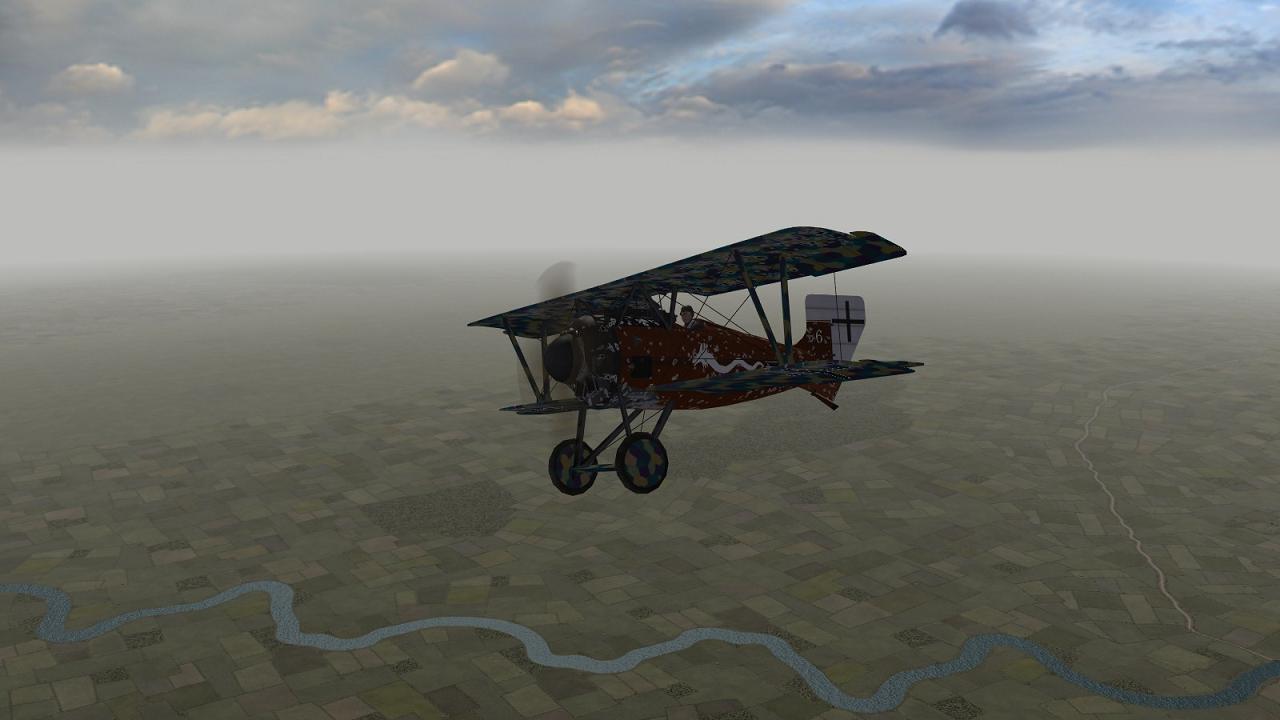
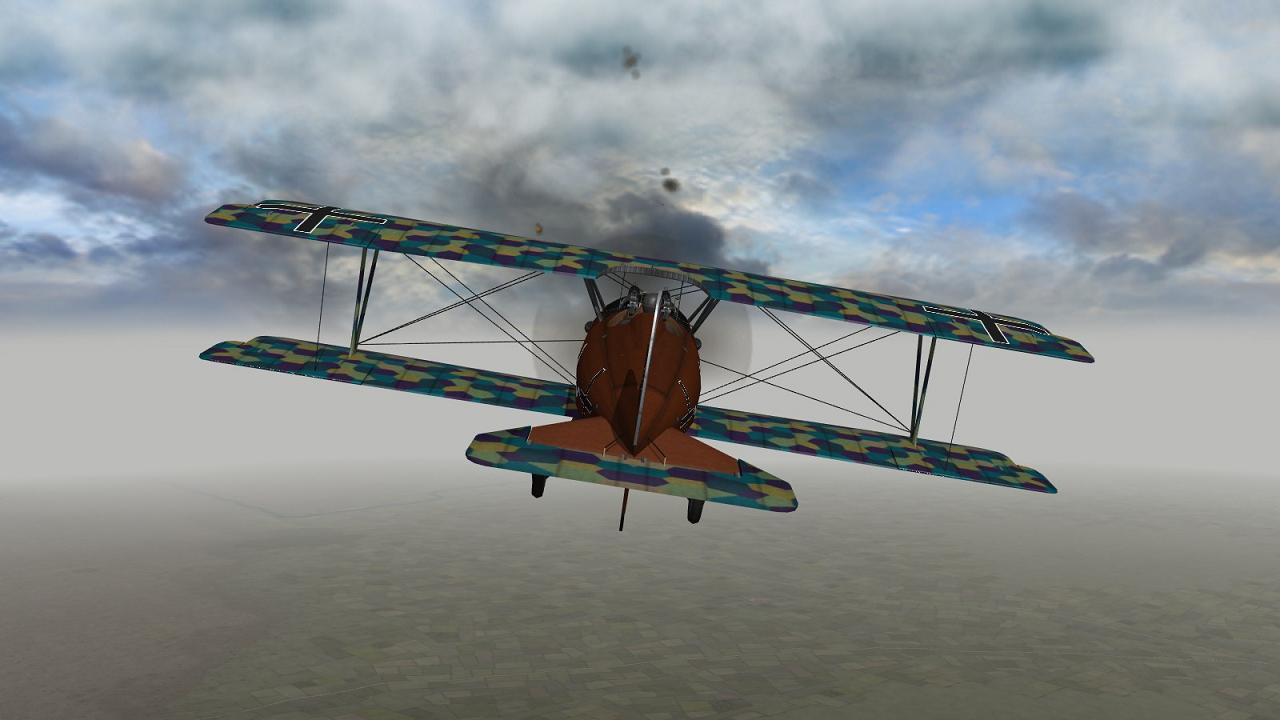
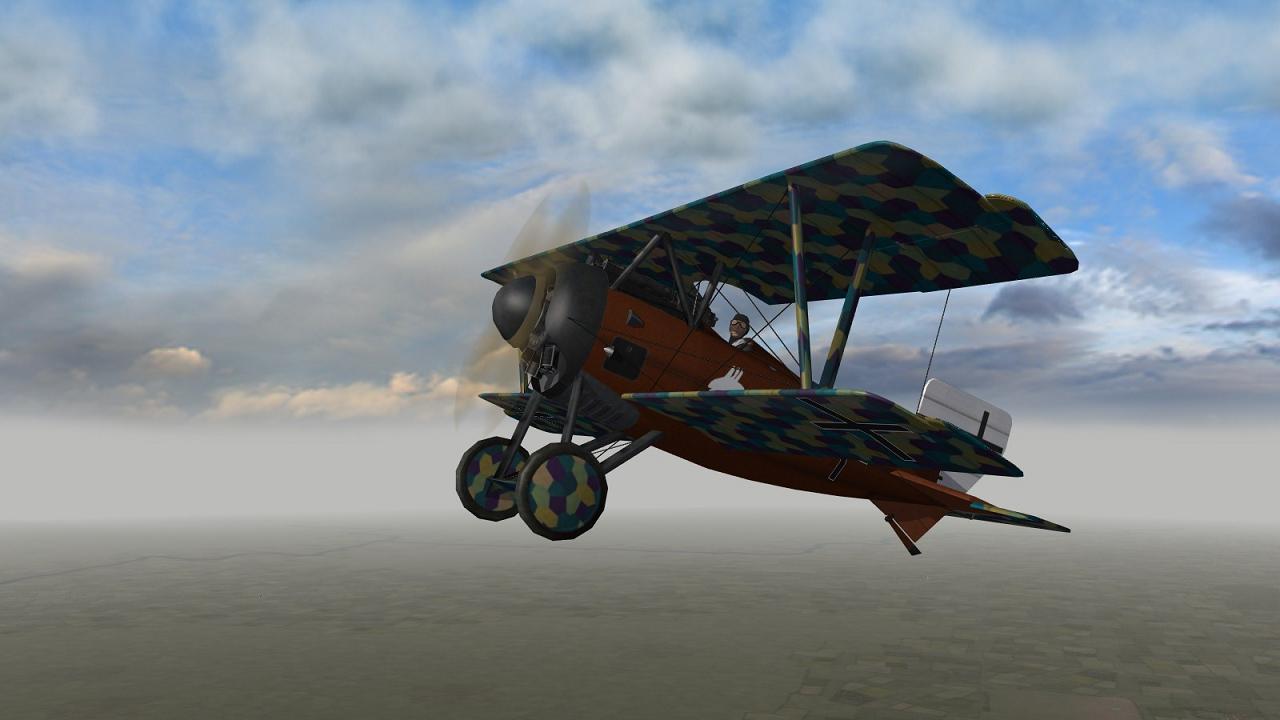
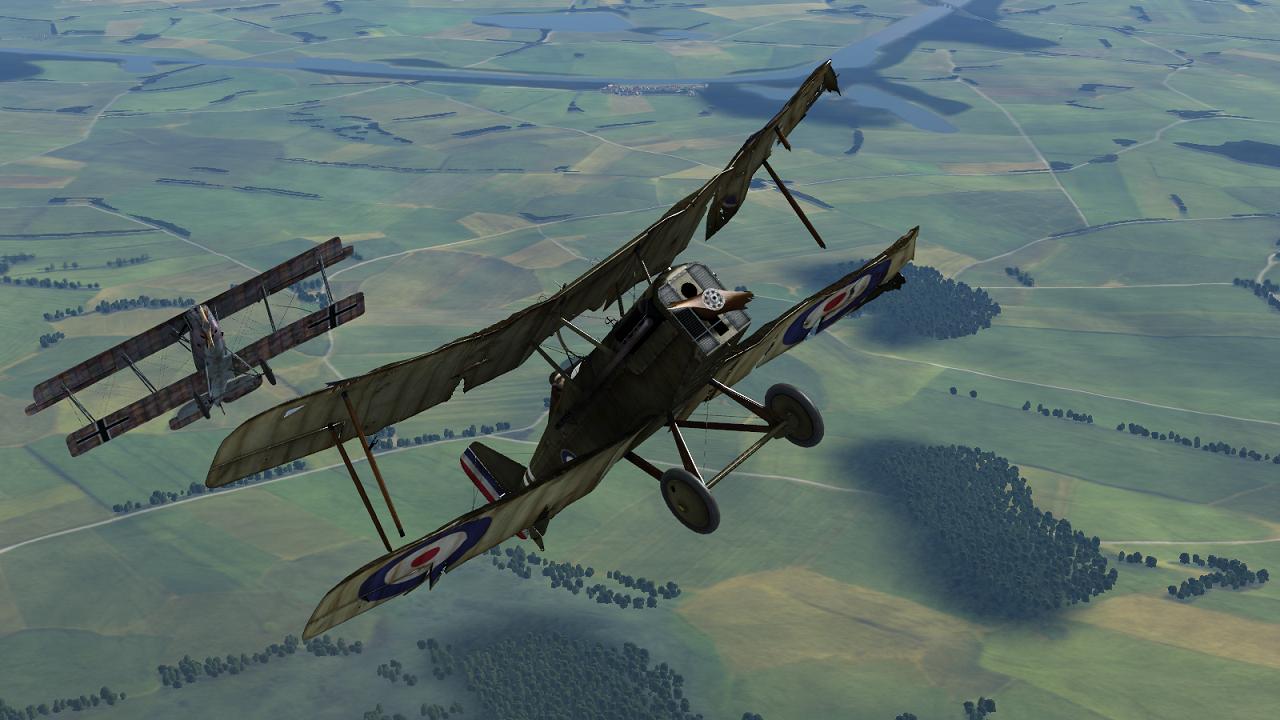
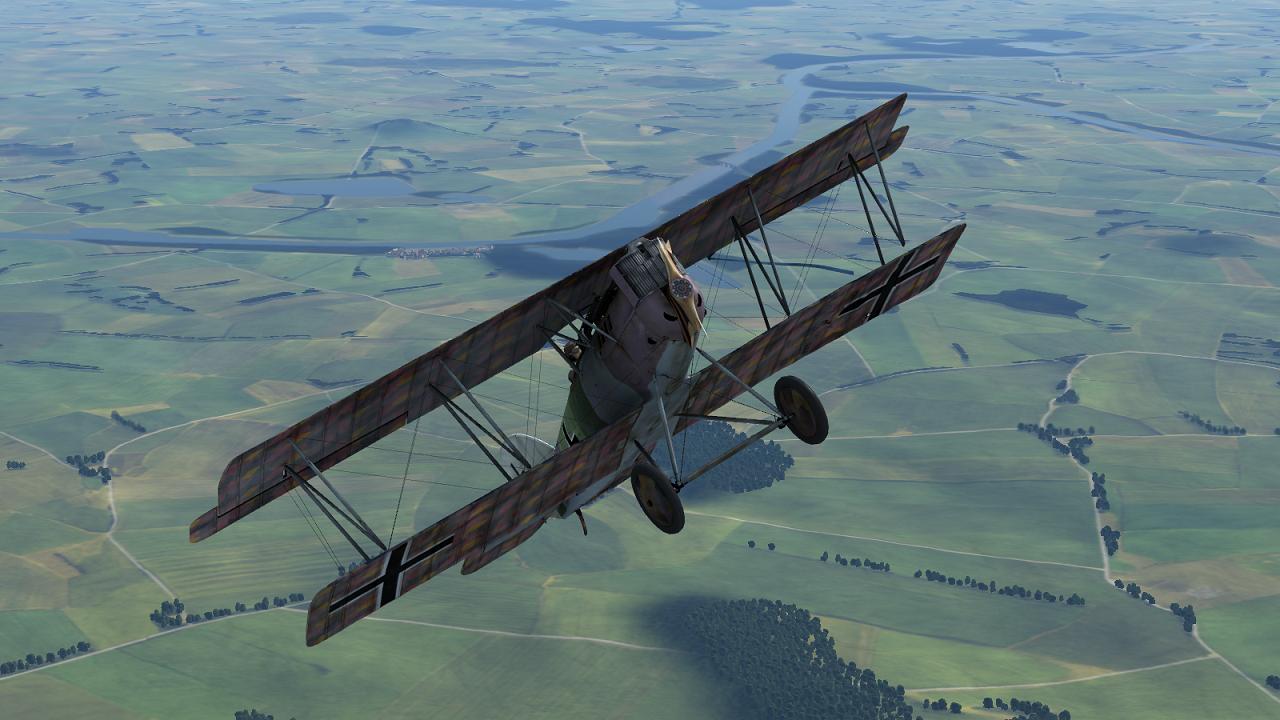
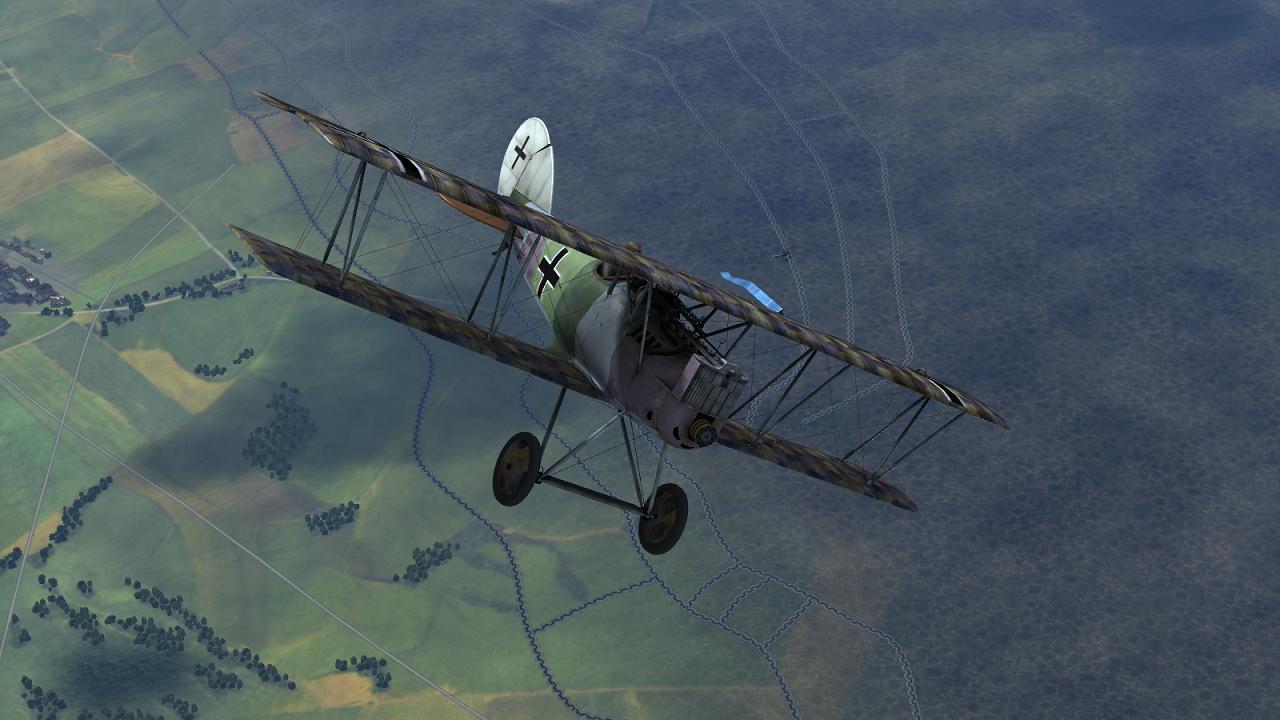
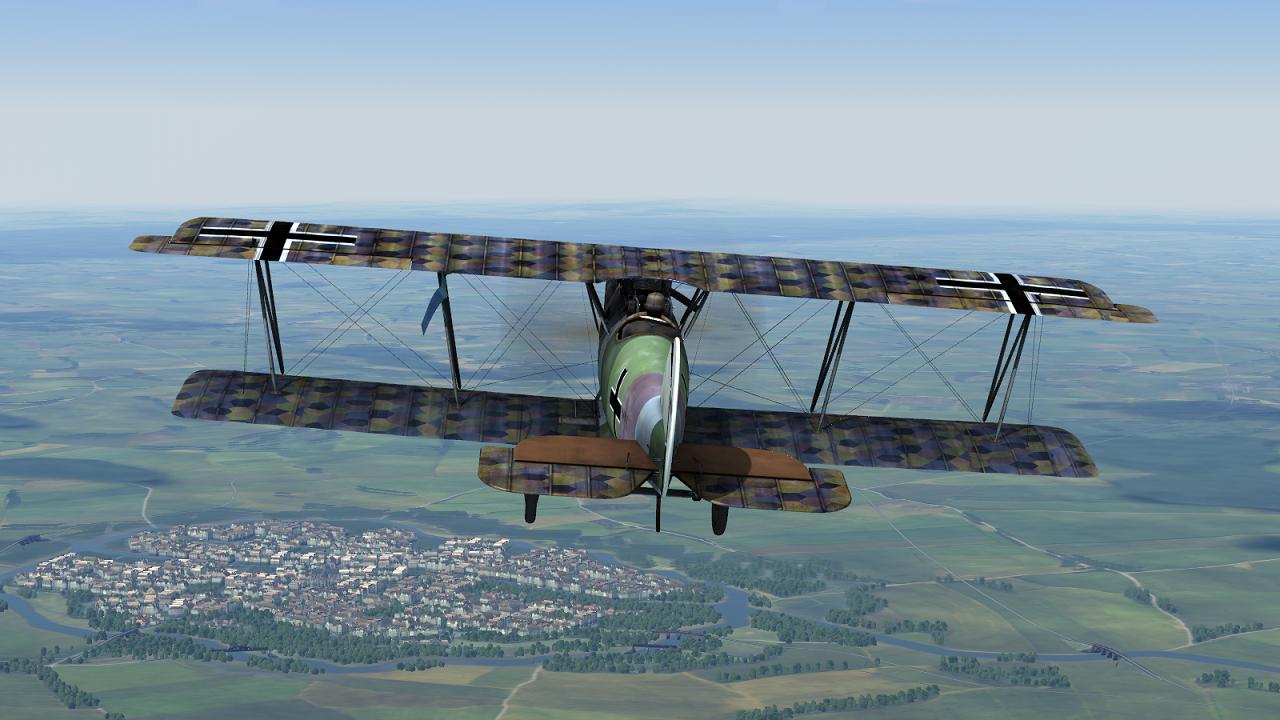
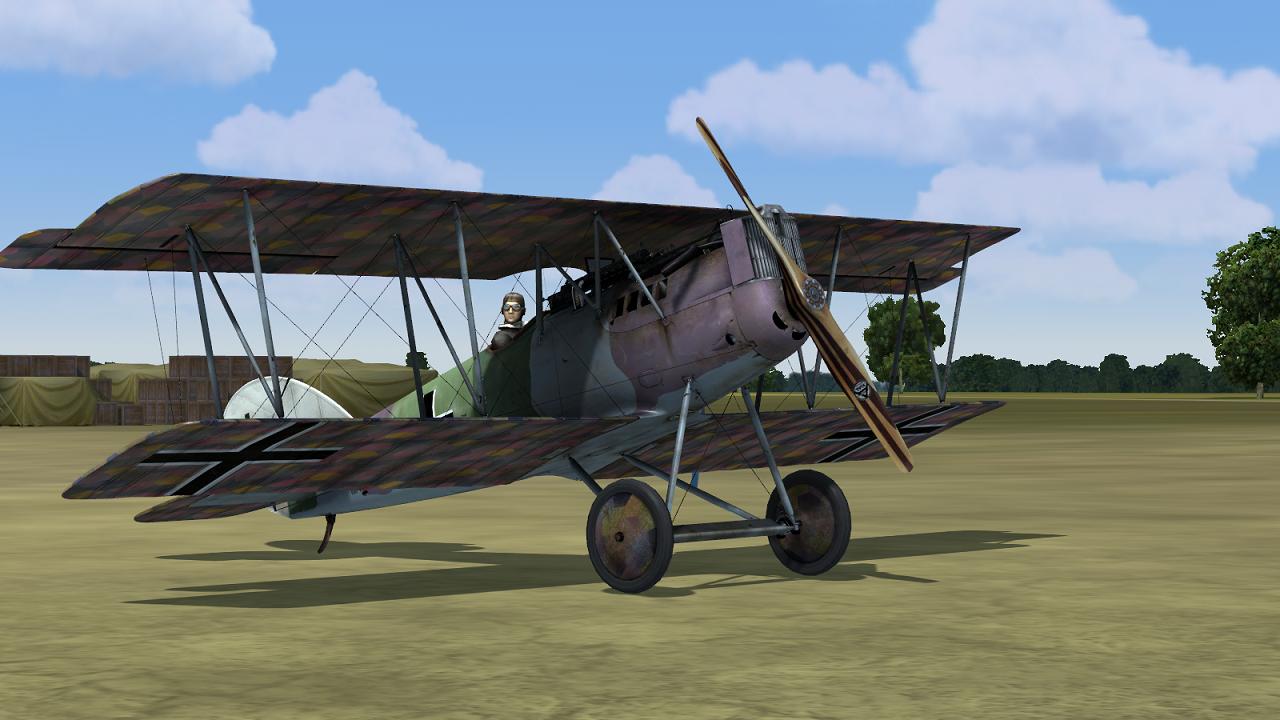
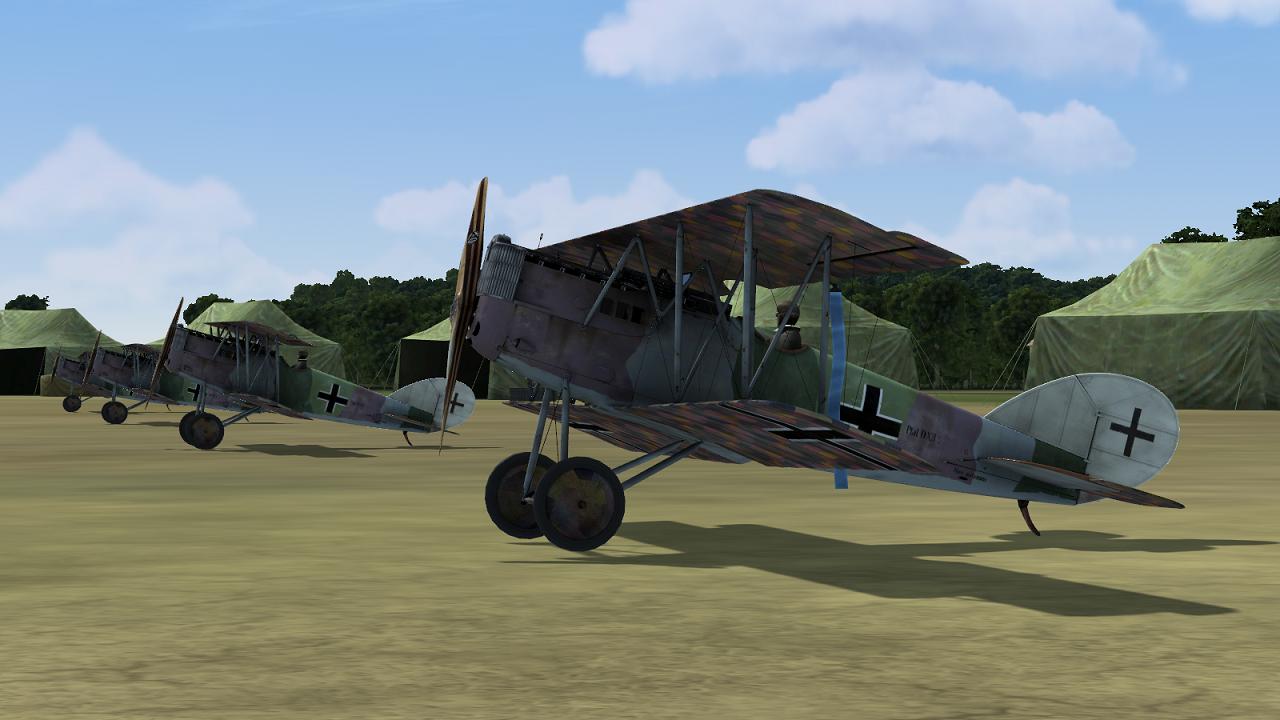
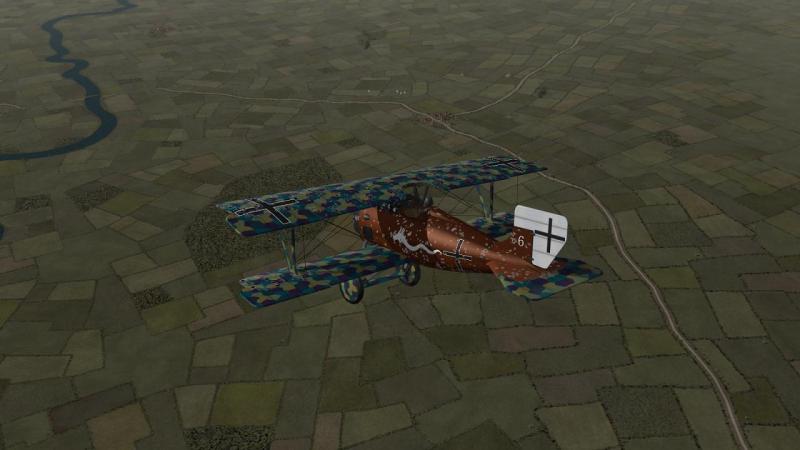
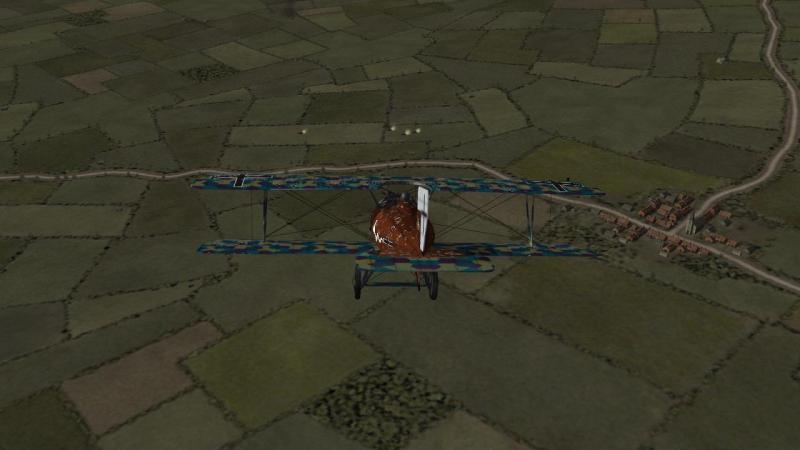
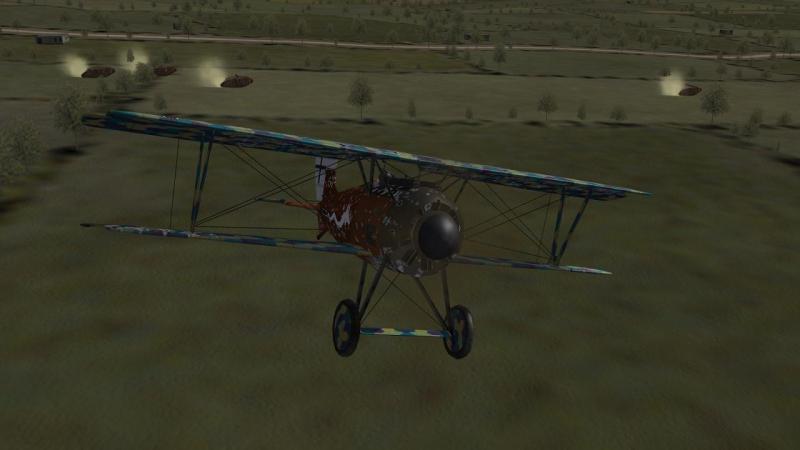
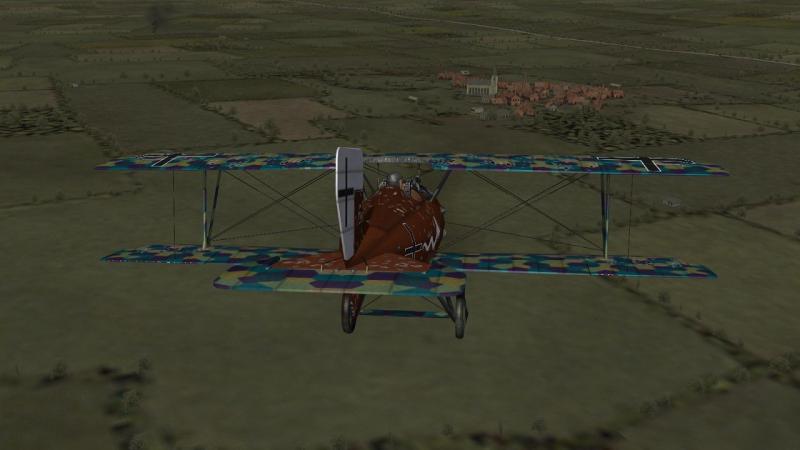
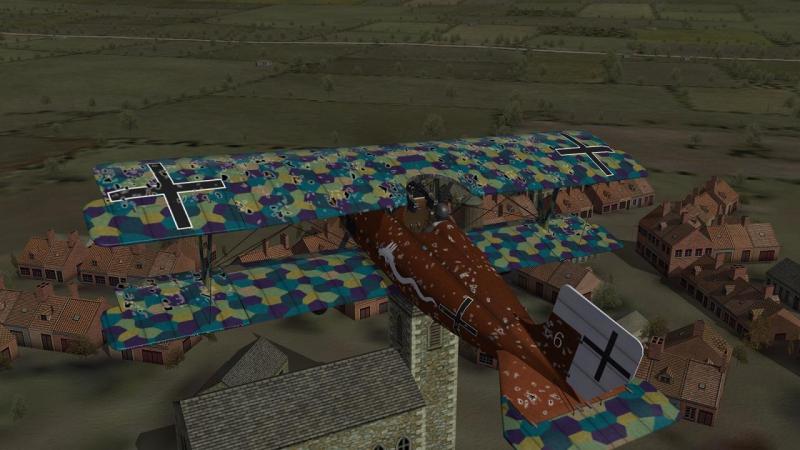
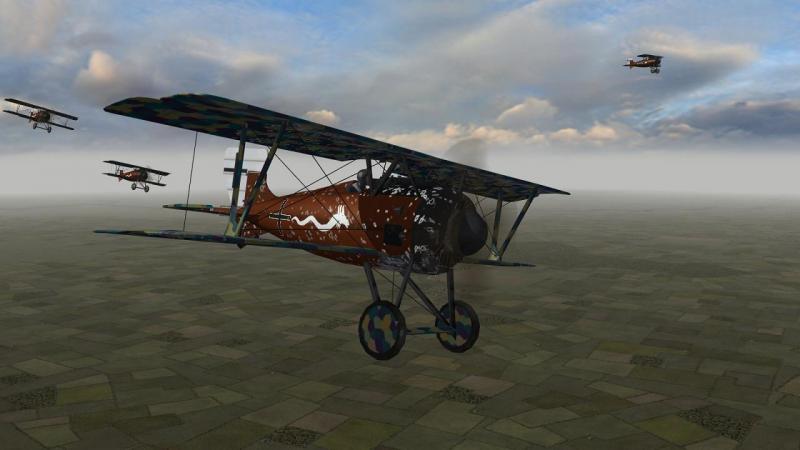
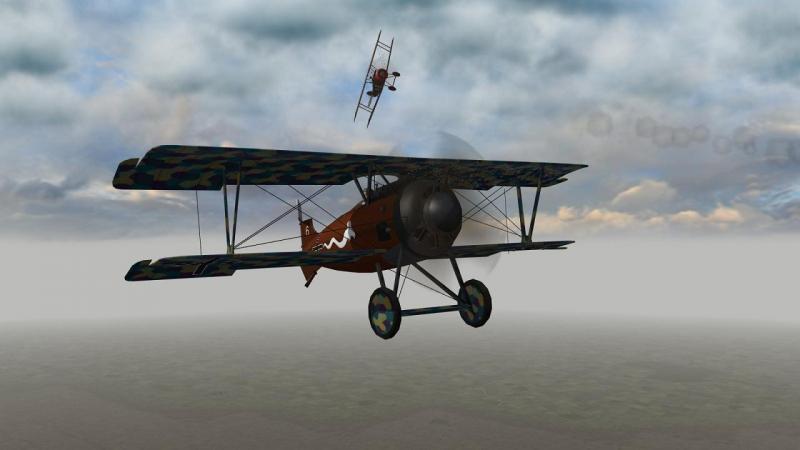
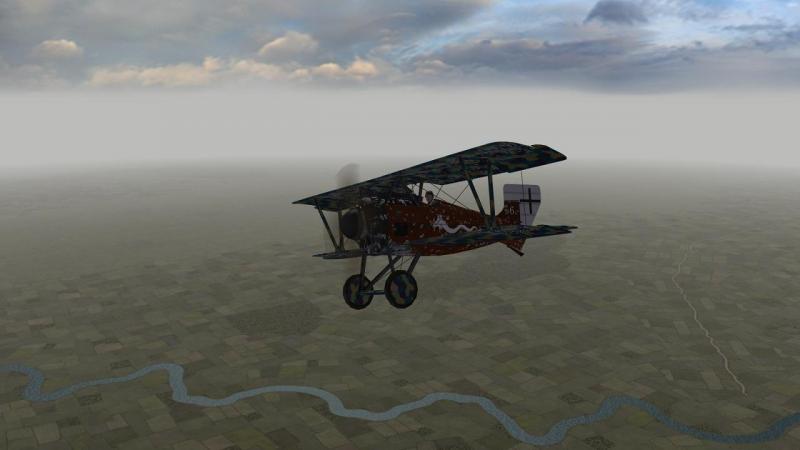
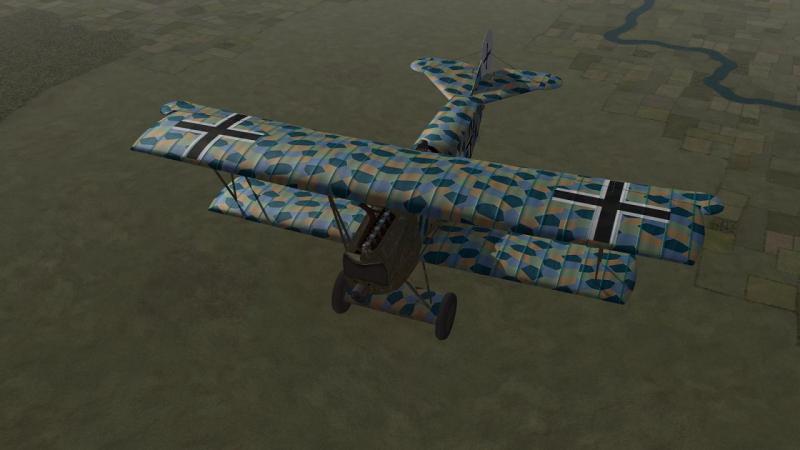
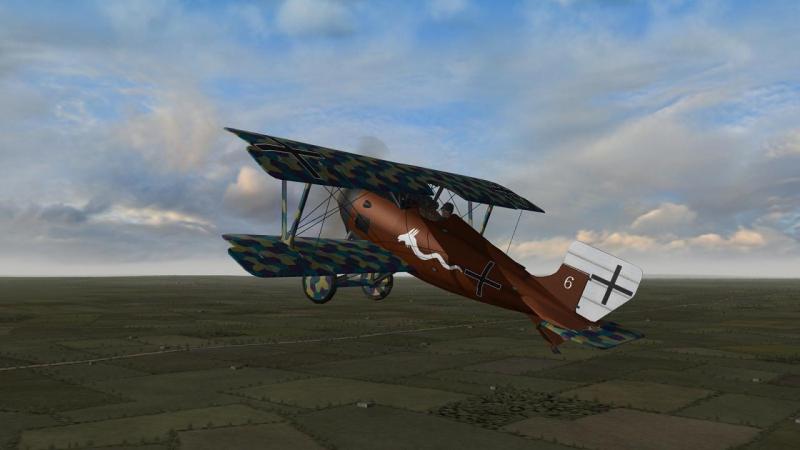
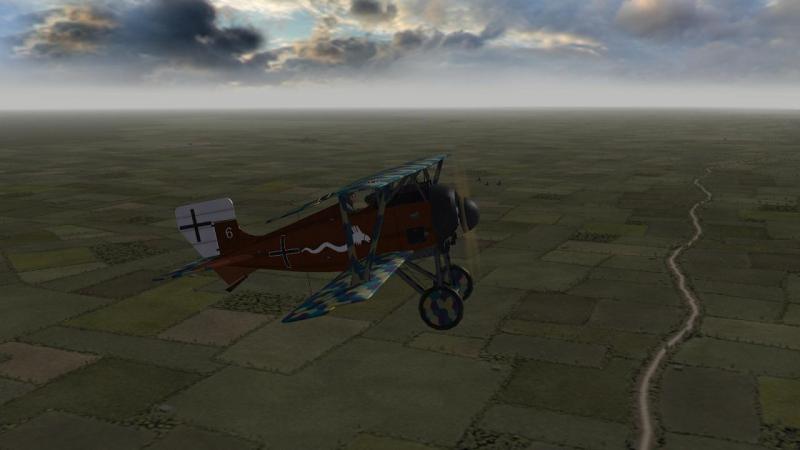
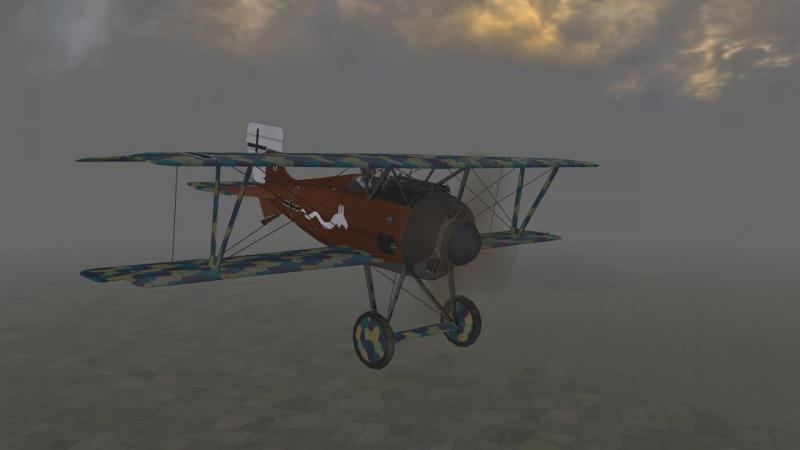
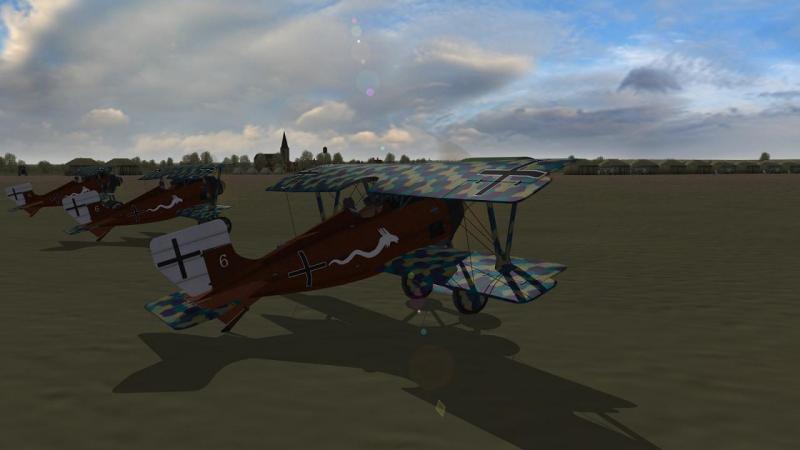
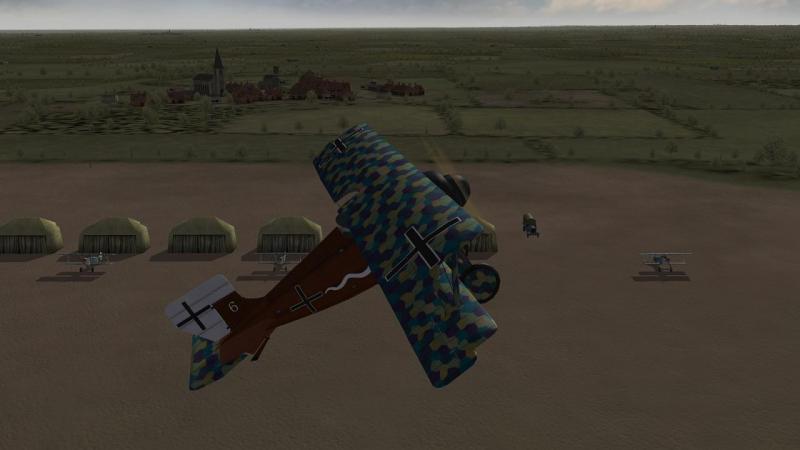
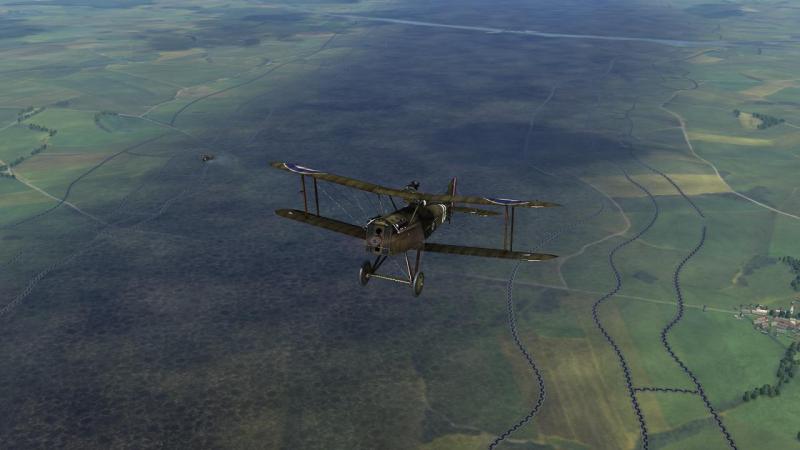
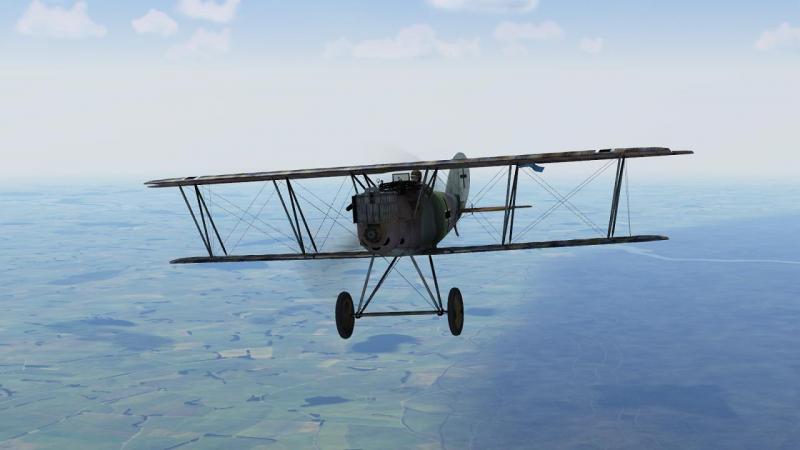
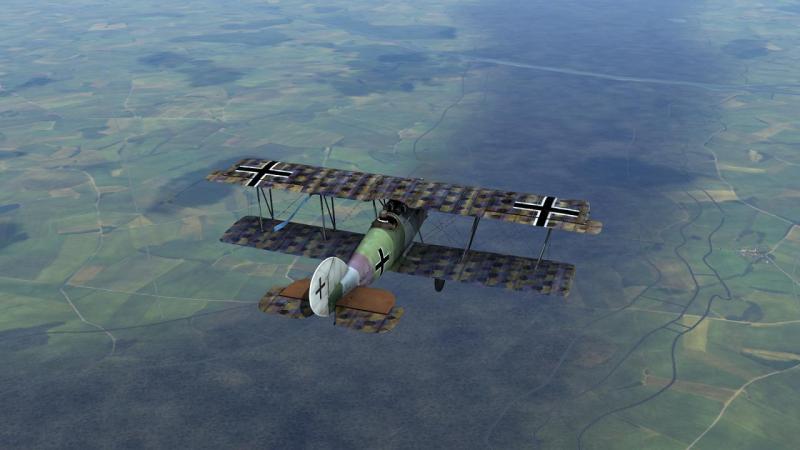
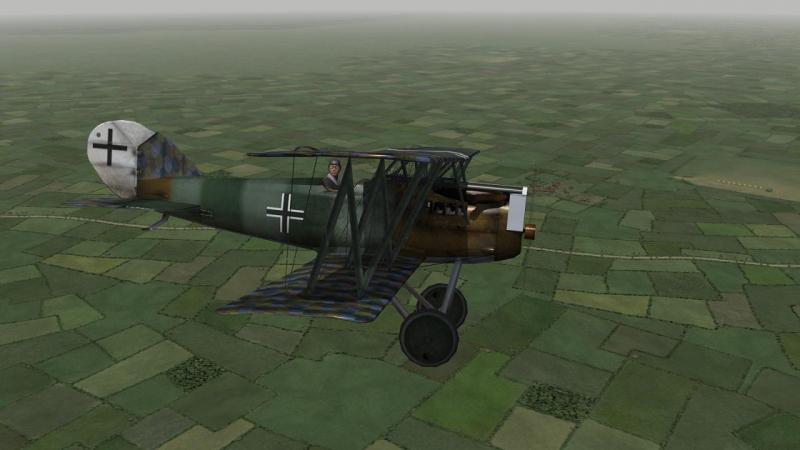
Flying the German Air Service's premier fighter in First Eagles 2 The Siemens-Schukert Werke's DIII and DIV are described with some justification in Gray & Thetford's 'German Aircraft of the First World War' as 'Without doubt...the best German fighters to reach operational status'. The first SSW D-type (biplane scout/fighter) was basically a copy of the French Nieuport 11 with a German engine and a conical spinner. But the DIII was a wholly-new machine, a barrel-shaped fighter built around the powerful Siemens-Halske ShIII rotary engine. Early operational deployment in Spring 1918 ended with the aircraft being returned for modifications to correct serious engine problems but - joined by the DIV version with a reduced-chord upper wing - the type was back on ops during the summer. The Siemens-Schukert was highly manoeuvrable and had an outstanding rate of climb with excellent high-altitude performance. They served with Jastas 14, 15 and 22, the Marine Jagdgeschwader and, in the home defence role, with Kests 4a, 4b, 5, 6 & 8. Their work in the latter capacity inspired a member of the Independent Force, formed to mount 'strategic' bombing missions into Germany, to pen the following appreciation: 'It's not the Pfalz or the Fokker Scout It's the Siemens Schuckert that we worry about They do fly high, with the beaucoup speed We can thank our stars that it's the pilots they need!' The plane and the mission First Eagles is one of the very few sims ever to have featured this outstanding warplane, courtesy of the A Team Skunkworks. Public assess to their functional download pages is by email application only and once granted, care must be taken to observe the site's download and usage rules, but it's very worthwhile as the A Team's collection includes some excellent and essential WW1 types like the Sopwith Pup and Triplane. http://cplengineeringllc.com/SFP1/ In fact, as the A Team acknowledge, their SSW DIII is based on that featured in Illusion Software/Silver Wish Games's Wings of War. You may remember that when released, this neat little WW1 air war game's great-looking planes and excellent landscapes and envirommentals had many simmers attempting mods to make it more sim-like. Sadly, these didn't get far beyond unlocking all the flyables and killing off the deadly rocket armaments, but it was still great fun and a highly professional and well-produced package, well worth a blast if you can track down a copy: Back in FE2, I wanted to play a campaign mission so opted for Ojcar's 'must have' Armchair Aces month-by-month campaign set. In the FE campaign creation screen, I cycled through those for Flanders in the last months of the air war till I found a staffel flying the SSW DIII - Jasta 14 (which really did fly the type) in October 1918, flying from Masny aerodrome, north of Cambrai and west of the larger town of Valenciennes. When I kicked off a mission, I found that the weather was awful - a few patches of blue sky visible but mostly cloud, rain and general murk. Not for me. I don't much mind bad weather in Over Flanders Fields, but only because - apart from the clouds themselves - it doesn't really hinder your visibility. In FE and in RoF, more realistically, bad weather really does clobber your visibility. It also makes for dull screenshots, because your plane is dull and unlit (unlike OFF, where the planes in bad weather look bright, like they've been spot-lit for a movie). Another problem with bad weather in FE2 is that you're stuck with it for the campaign, as it inexplicably lost the original FE's ability to vary weather, in-campaign. Anyway being stuck with murk is not my cup of tea, really. So I edited the campaign's data file in Wordpad, replacing the starting (and in FE2, unchanging) weather - 'INCLEMENT' - with 'BROKEN'. That did the trick. Things looked better, and there was no murk to blind me. The weather sorted, my first mission was a defensive patrol, behind our side of the Lines, down south to Bonvais, the far side of the town of Cambrai. Two aircraft were allocated to the mission but as I usually do, I opted to pick three to accompany me, selecting Vizefeldwebels Neumann, Heim and Josten from the bottom of the staffel roster screen. Here we are on the grass at Masny. The SSW is one of the relatively few FE planes not to feature individual aircraft markings, and although there is at least one different skin available, I elected to stick with the stock one, with a snake-marked brown fuselage and 'lozenge' pre-printed fabric wings. As usual with FE planes, there's plenty of animation - wheels, pilot, control surfaces, the rotary engine and even the cocking handles on the MGs. And provided you don't have shadows turned off in the plane's .ini file, you get dynamic self-shadowing (in the cockpit as well as outside if you have the sim's graphics/shadows option set to 'high' or better). As usual, FE kicked off the mission with my engine just having started and my prop picking up speed, which is arguably more realistic than the ground-crewless self-starting featured in other sims. In the external view, I paused to let the others take off and then opened the throttle. There was little swing and once my wheels were off the ground, I decided to go for broke and perform an immediate test of my machine's renowned climbing abilities. I yanked back on the stick and up she went, cocking a snook at the row of Fokkers parked outside the canvas hangars to my left. Off to a good start, at any rate! ...to be continued!

- 3 replies
-
- 1
-
-
- fe2
- first eagles
- (and 1 more)
-
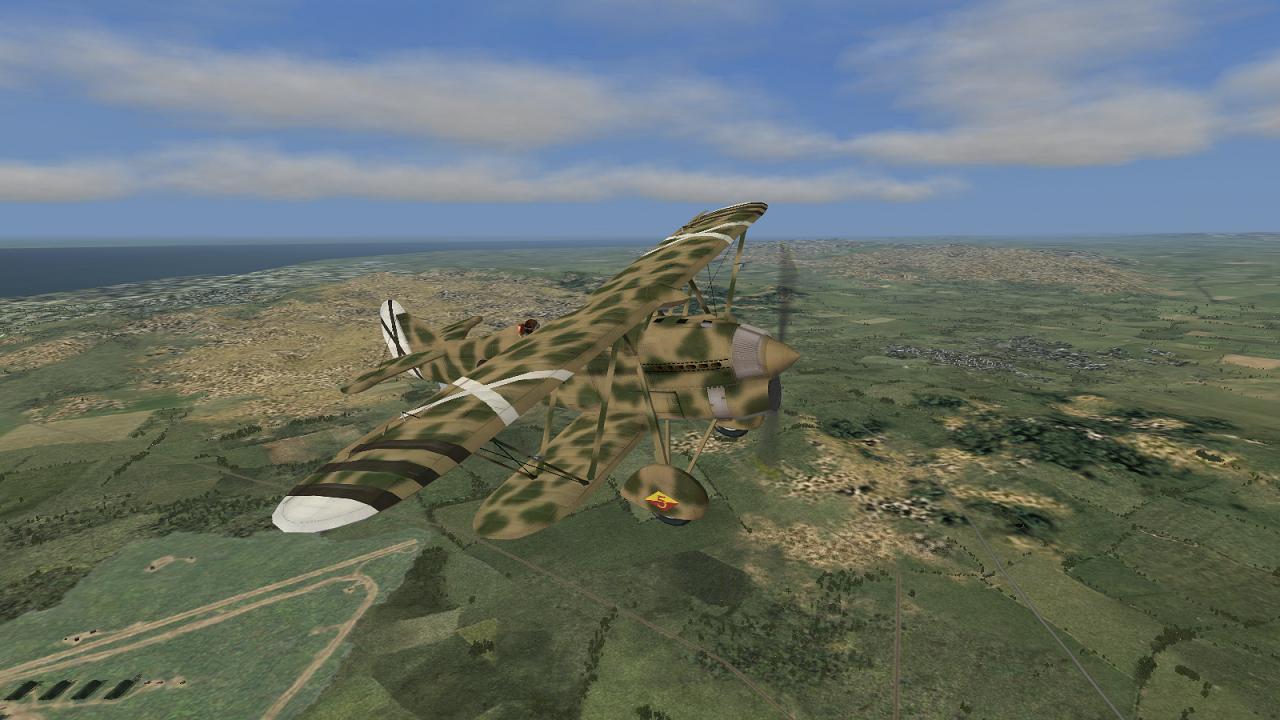
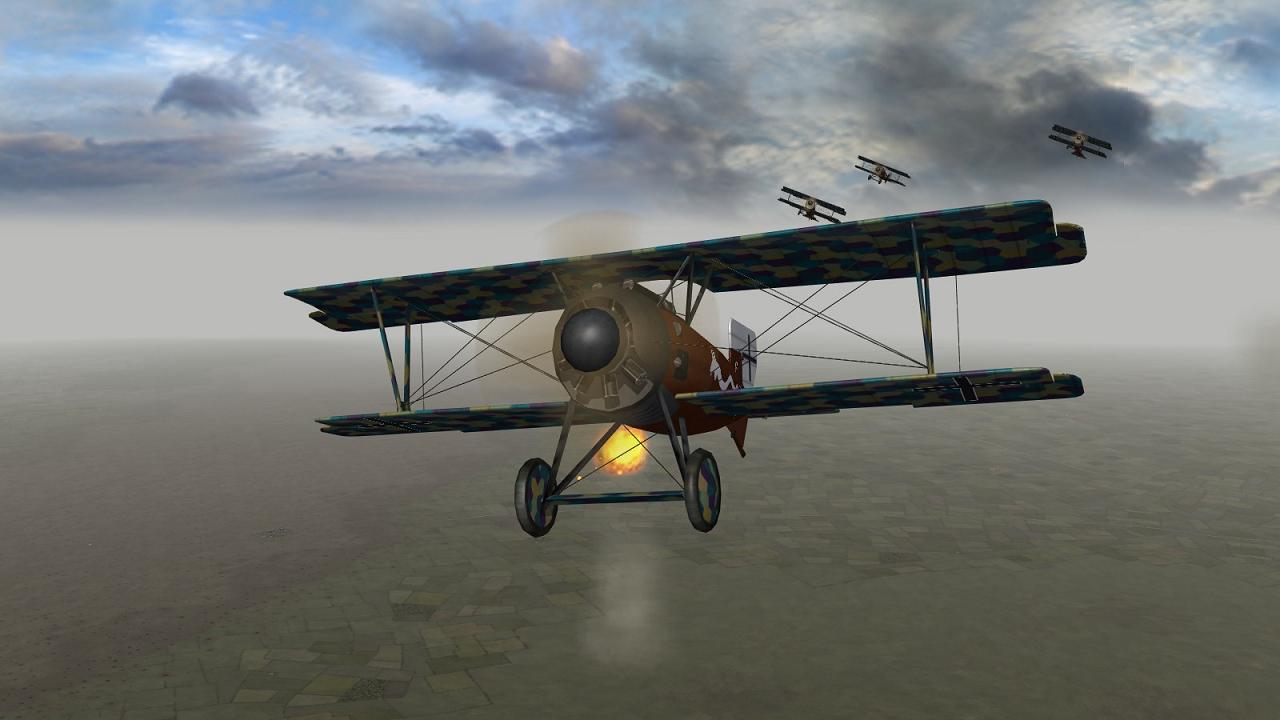
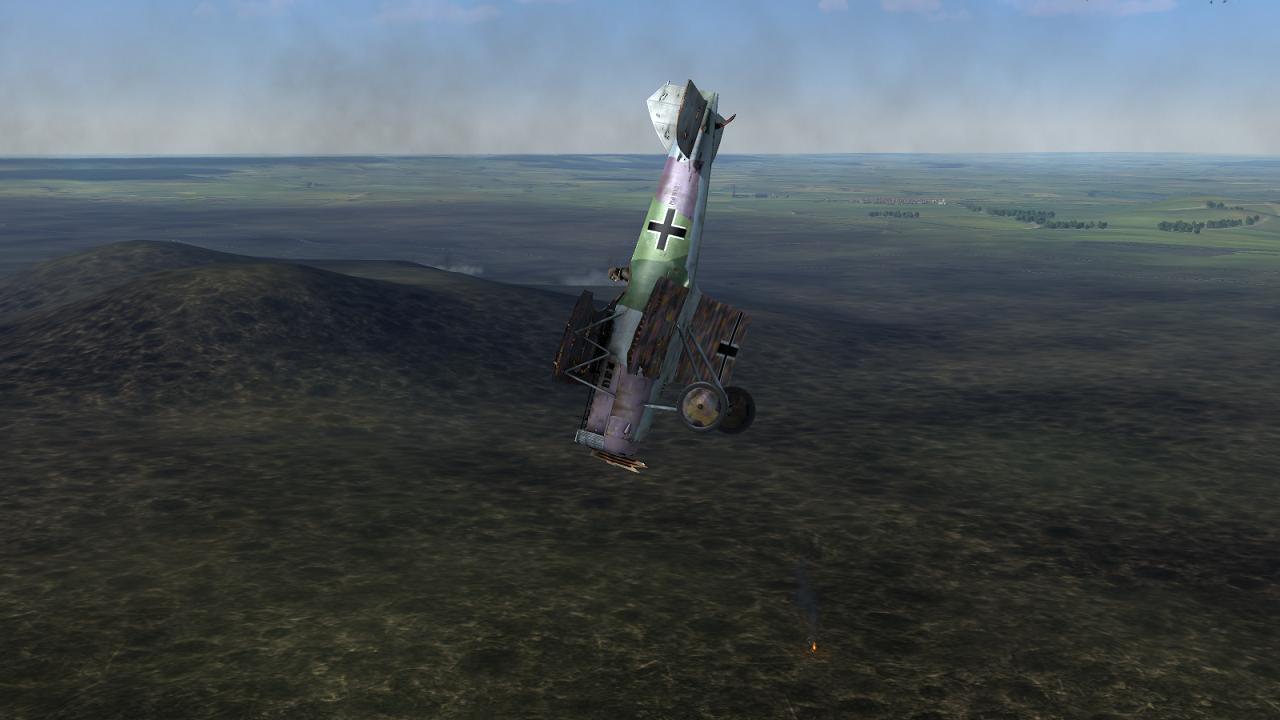
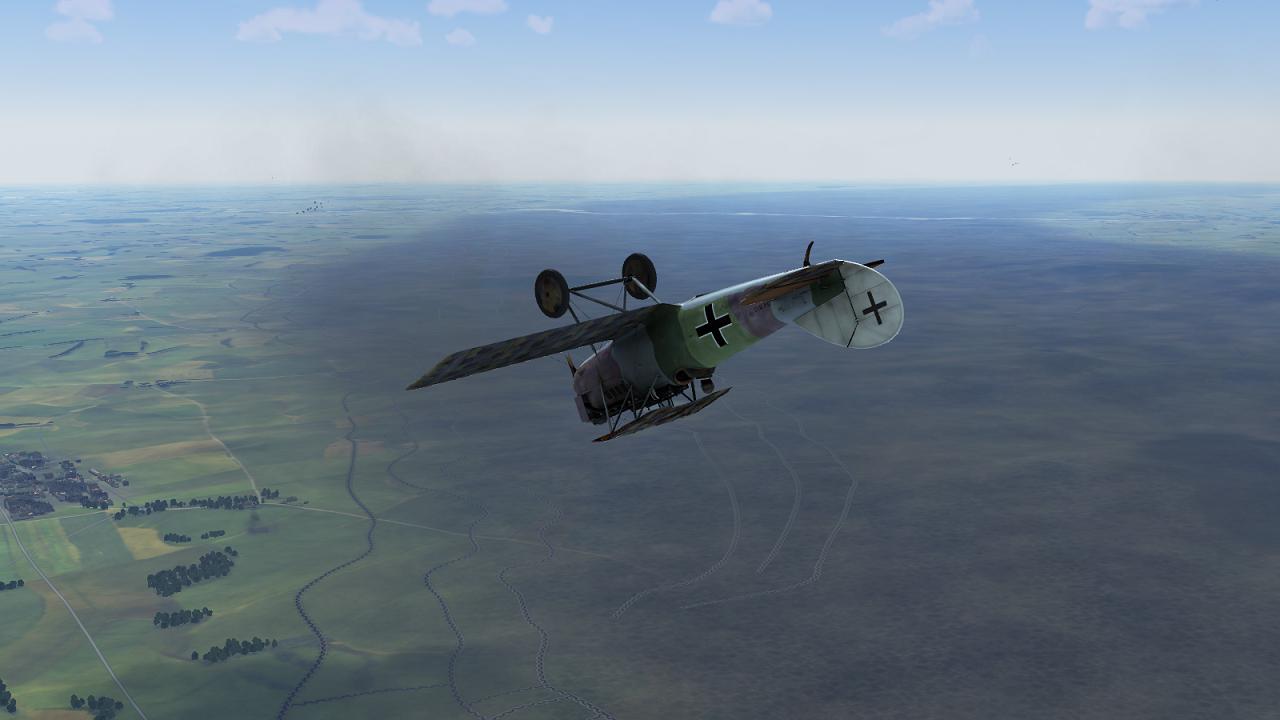
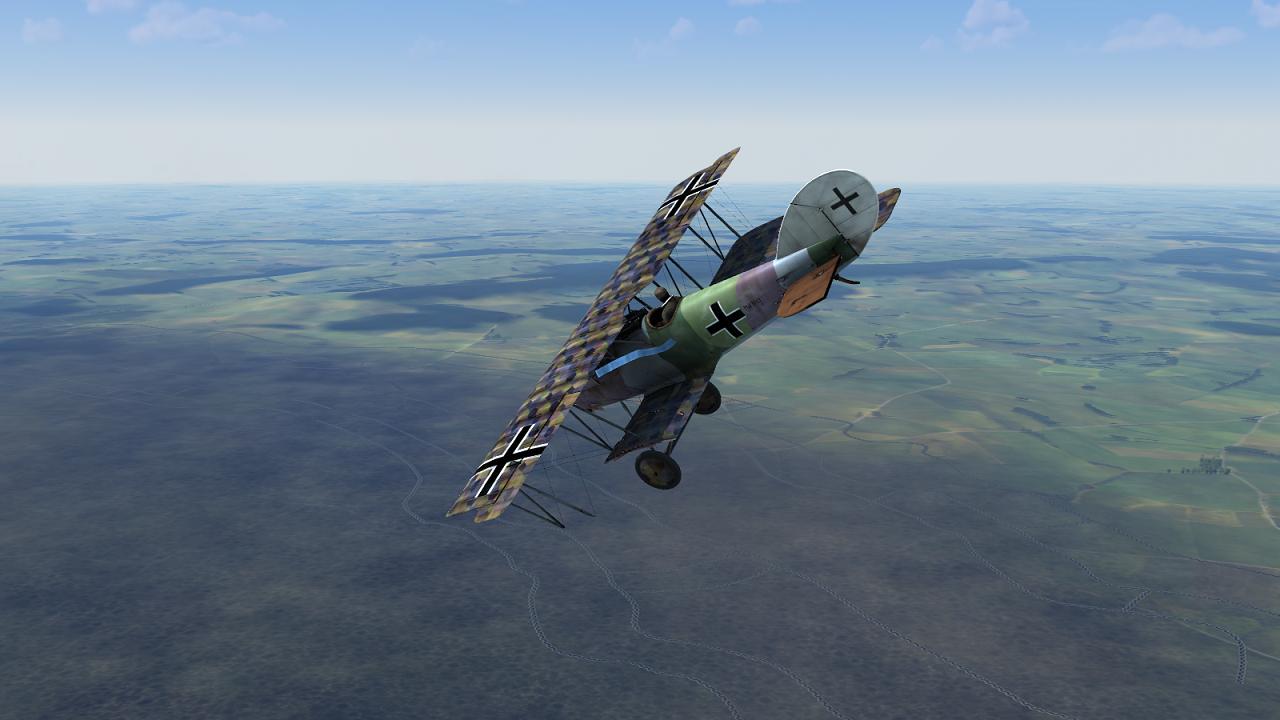
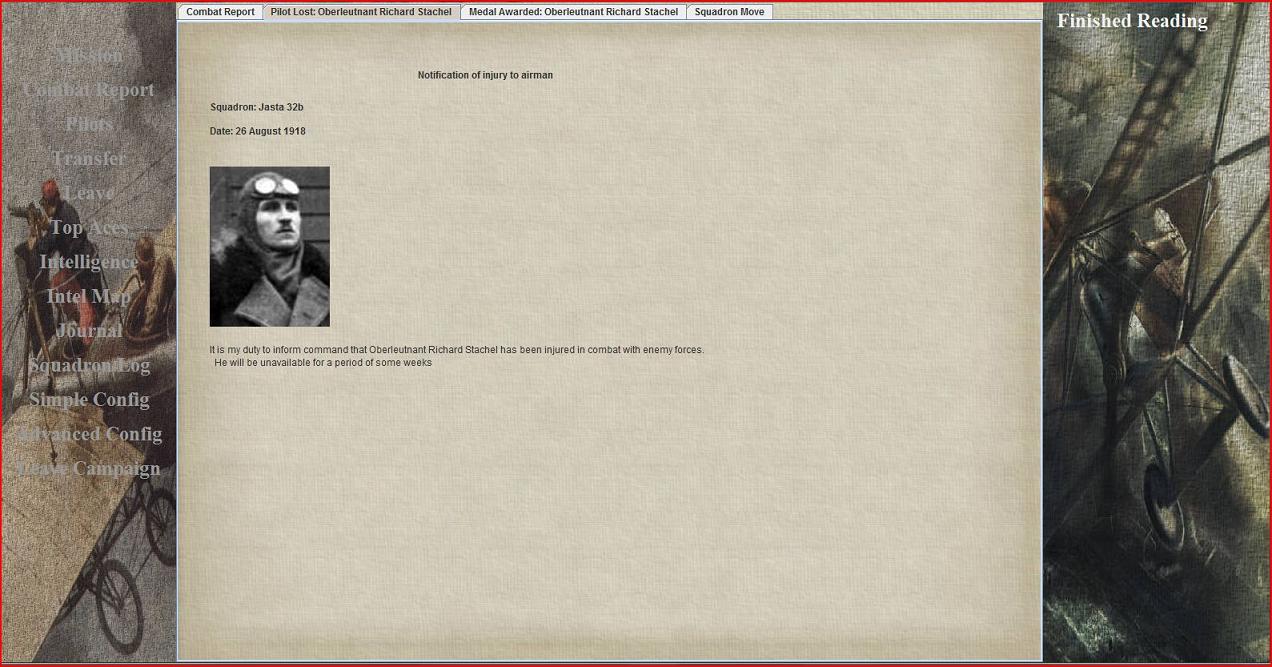
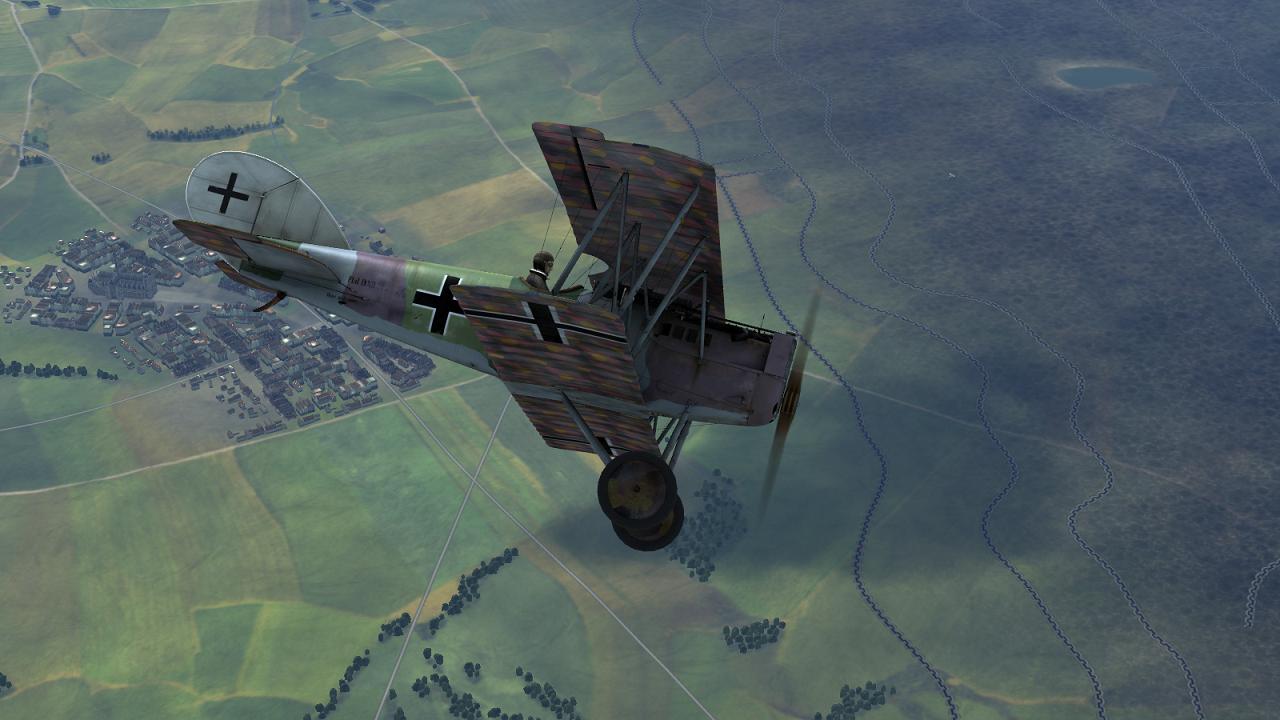
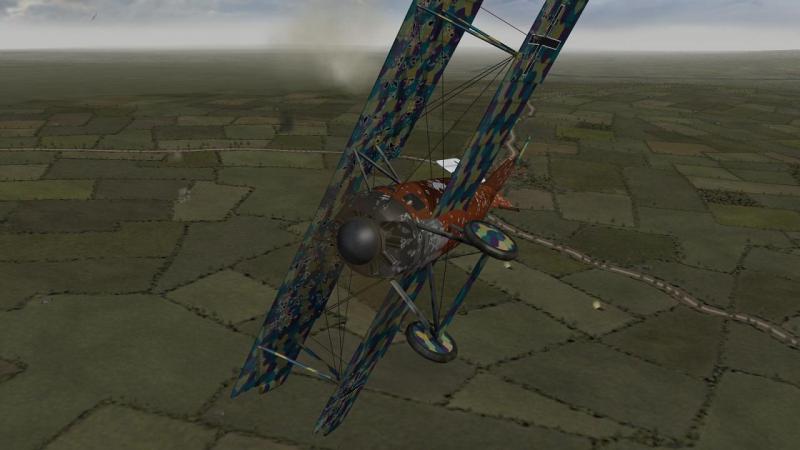
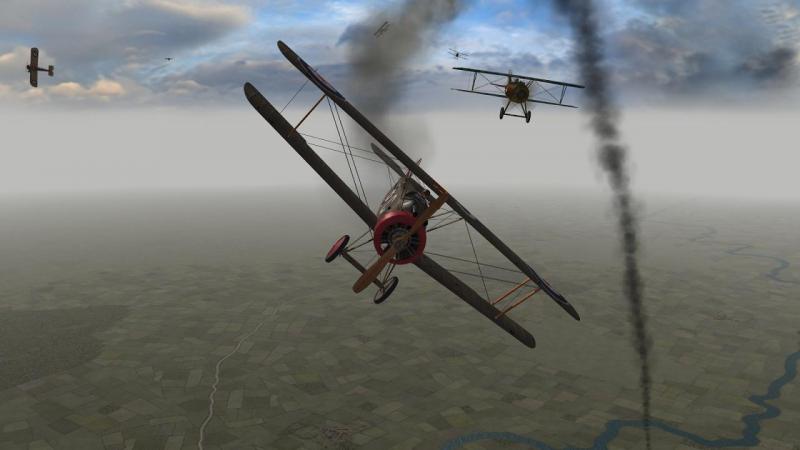
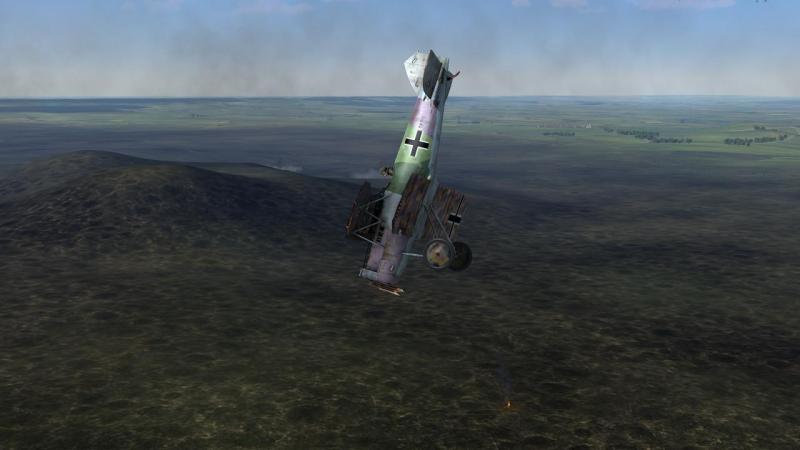
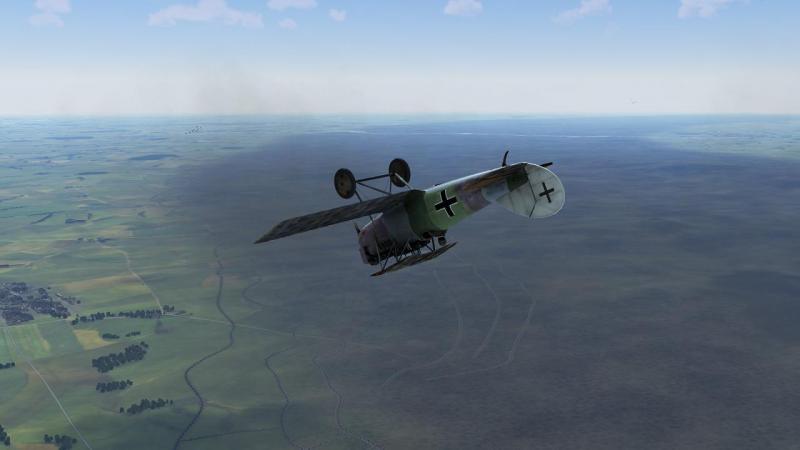
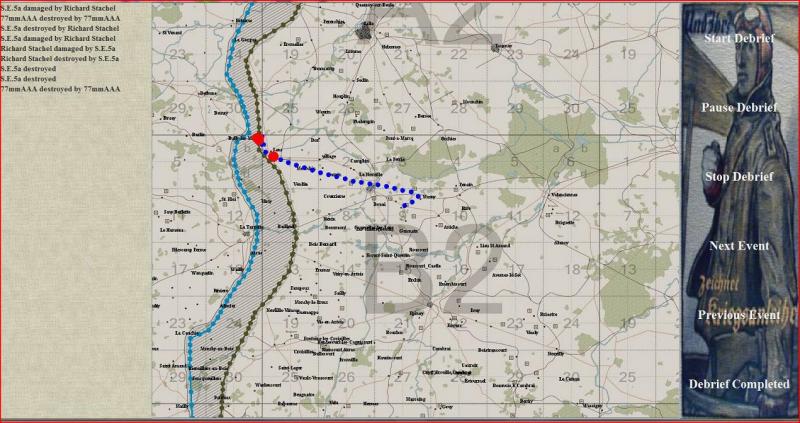
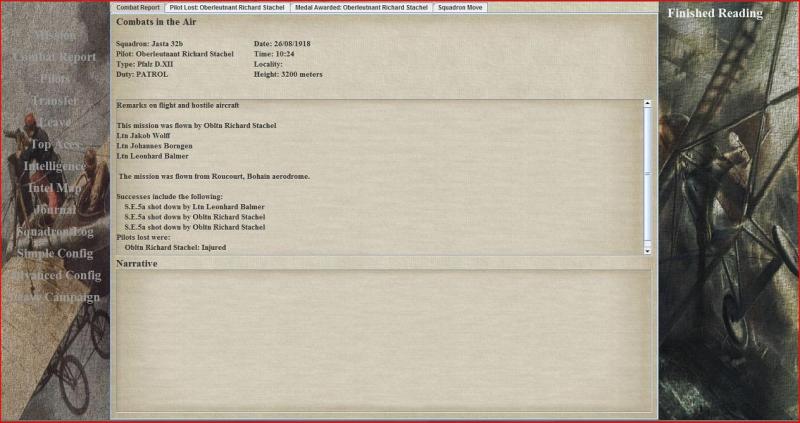
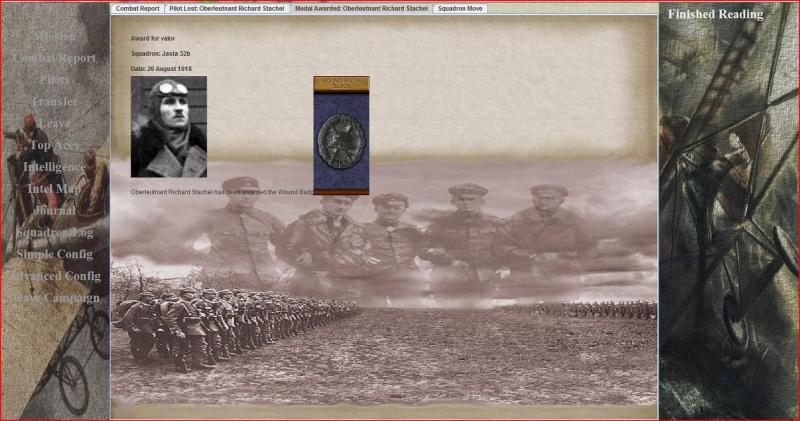
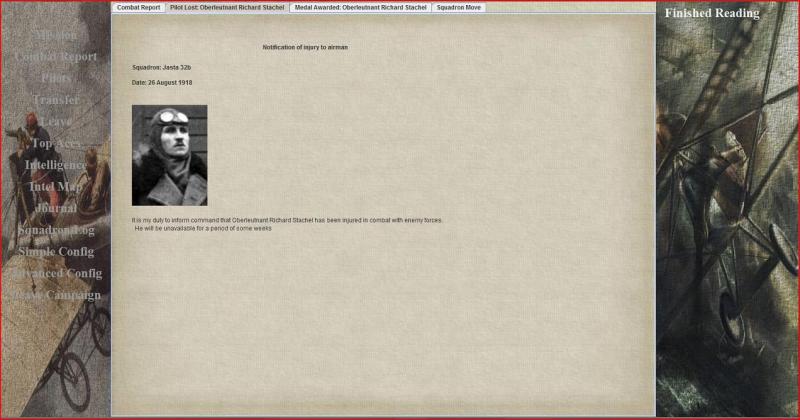
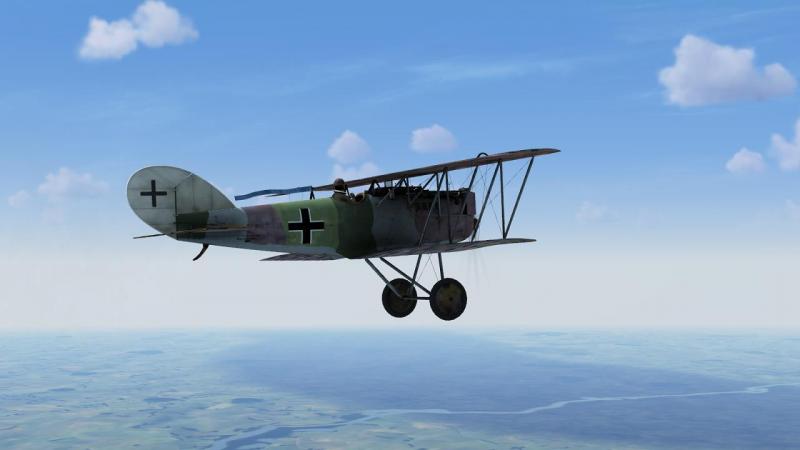
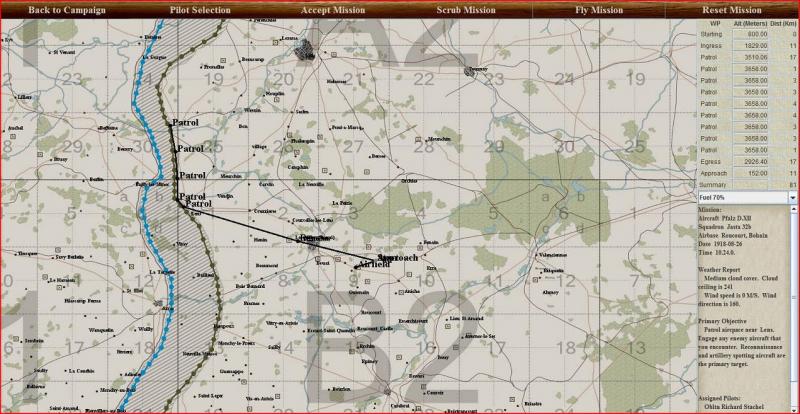
'Those who flew the Pfalzs did so because there were no other machines for them. But they always gazed enviously at the Fokkers and prayed for the quick chance of an exchange' Rudolph Stark, CO Jasta 35b, in Wings of War' My speed in the dive swept me past my intended victim and I carried on for a bit, to take myself out of range of retaliation, even though the SE looked to be in serious trouble. But not fatal; I next saw him heading past me in the opposite direction, slightly above and still going strong. This would not do! I lost a bit of ground from having to swing around after him but was soon closing impatiently. A quick glance behind revealed what looked like other Plalzs not far behind. I pressed on at full throttle and opened fire as I came into range, ignoring the 'friendly' flak bursts still trailing my foe. As I closed right in, firing steadily in short bursts, I saw a flicker of orange fire from the cowling behind his engine. Got him! The SE reared up and his speed fell off. I pushed the stick gently forward, just enough to avoid crashing into him. Behind this little drama, the sky was filling up rapidly. Two of my flight-mates were now close behind me...but beyond them was a line of other aircraft, all undoubtedly Englishmen and certainly headed our way. I hurriedly gave the signal for an attack and turned into the rapidly-approaching enemy phalanx. Evidently, this was the lower flight of SE5s and they had left the Sopwiths, the better to attend to us and avenge their comrade. Despite the tight turn, my trusty Plalz showed no sign of spinning out and I rolled into a head-on pass at the onrushing SE5s. I quickly lined up the one on the right-hand edge of the formation, then hesitated...there was another SE more or less directly below him and also coming at me. Turning away was out of the question...as Biggles himself wisely observed, 'It's just not done.' I kept my sights on my original target, the higher of the two SEs. The lower one quickly slipped out of sight somewhere under my nose. I was nervous about losing sight of him but the die was cast. Hopefully he could see me, and do whatever was needed to avoid a collision. I hosed my oncoming target with tracers as he rapidly grew in my sights. Bang! My machine lurched drunkenly. I knew instantly that the lower SE had crashed into me, the idiot! The engine noise was suddenly gone and my nose swung up and around as my forward momentum drained rapidly away. The main damage was evidently to my prop and motor. The Englishman looked to have come off a good deal worse, not that it was much consolation. For a moment, we both seemed to hang nearly motionless in the sky, close together, like a pair of insects frozen in a block of blue ice. Then, slowly but inexorably, my nose swung around and down I went. I wrestled desperately with the controls, to no avail. As the speed built up, pieces started to depart from my battered Pfalz. First, my left lower mainplane broke off, taking the left elevator with it. I hoped even so to be able to regain some control and ease her out of this deadly nose-dive. But then, all but the centre section of my upper wing wrenched off and my machine rolled over onto its back. She quickly steadied herself but there was now clearly no arresting my downward plunge. Ironically, now that I no longer needed it, the skies seemed fairly filled with flak bursts! Down I went, to join the remains of what was possibly the SE I'd shot down, which was burning in No Man's Land. All that remained was to fire up PWCG again and review the mission results. I filed claims for two SE5s, knowing that my collision victim must have crashed too. Its destruction seemed to have been recorded, but I was only credited with one kill. Here's the excellent PWCG mission replay screen: However, on viewing the various tabs in the debrief summary screens, I discovered that I had, after all, been credited with the second SE, and that one of my flight-mates had got credit for knocking one down, too. Though you can change settings so that 'dead is dead', by default and intention PWCG is fairly lenient with your virtual pilots' lives. Looking at the other debrief screen tabs, I fould out that not only had I been awarded the Wound Badge, but that I had been 'merely' injured and would be out of action for some weeks. Overall, and despite the collision, this was a pretty satisfactory mission. The Pfalz is a nice change from the usual Albatros or Fokkers, and seems to be a reasonable match for the likes of the SE5; well worth adding to your RoF hangar. PWCG adds a lot of good stuff to the single player campaign experience and is looking better than ever - and sounding better too, with the addition of some background music from Matt Milne of OFF/WOFF fame. The significant negative for me is that flak is still too infrequent and too hard to see when it is there - certainly compared to FE2 and OFF anyway, and to the impression I have of real life, from the accounts I've read. This may be down to several issues. Perhaps enemy flights 'spawn' at rather close range, leaving little time for flak to engage them and/or for you to notice. I gather that some practical RoF limitations on ground objects means that flak coverage is not as extensive as it could be. With the latest versions of PWCG, there IS certainly more flak than there used to be, both in terms of the frequency of barrages and their intensity, which is great. But if recent missions are anything to go by, flak is still not as frequent as it should be and/or as visible as it should be (for gameplay, if not also for realism). Granted, I was above these particular enemies and looking down - but even so, they got really close without any flak, which only started after they were right below us. Still, the flak is significantly better than it was and this was an enjoyable and engaging mission in another aircraft brought to life as only RoF can do it.


-
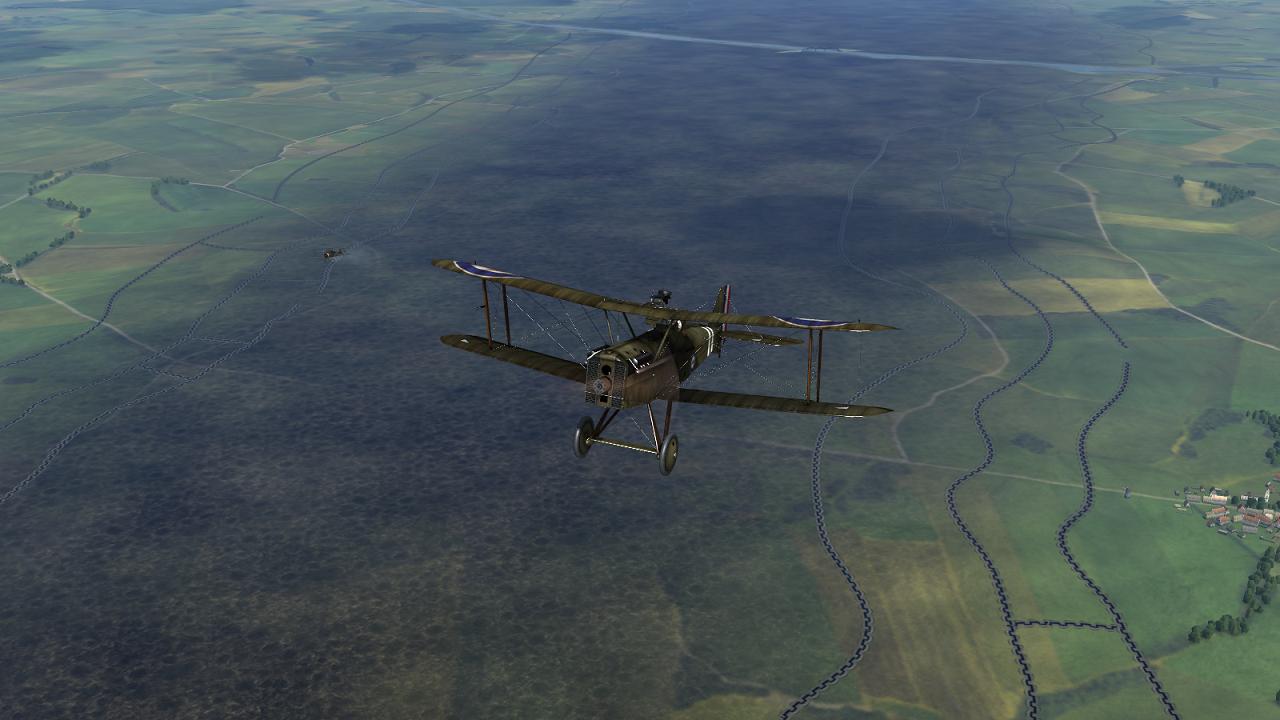
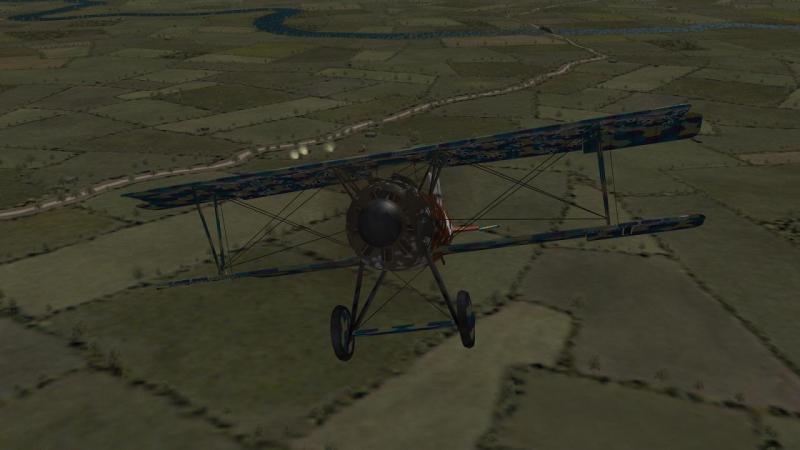
First blood! We flew north over our reserve trenches. Still the skies around us seemed obstinately empty of other aircraft. As we neared the northern limit of our patrol leg, I decided to use the RoF view system to check if - as often seemed to happen before - there were enemies about, but not easily seen. If this revealed any foe-men, I would do my best to ignore my discovery and fly on as if I was unaware they were there. I wanted only to confirm whether there was still a dearth of flak, leading to enemies escaping observation who might otherwise have been spotted. It didn't take me long to discover the answer. Unbothered by AA fire, there was an SE5 low down roughly over trenches. From the look of river behind him, he was just ahead and below us. And he wasn't alone. In fact, there seemed to be a flight of Camels, some bomb-laden, with a flight of SEs apparently in close escort and another lot who seemed to be nosing up towards us. They were flying south, on a more or less reciprocal course; and despite being roughly over the German reserve trenches, they were not being engaged by flak, nor had they been before I had 'unoficially' spotted them. Not good. This looked like getting awkward. I flew on as if I had not seen them - which I hadn't, officialy. I planned to fly up to the end of the leg, then turn 180 degrees and fly back south...unless I legitimately spotted the enemy. This seemed likely at some point, as the SE5 -top cover' - if that's what it was - seemed to be climbing up to meet us. One way or another, it looked like the crunch would come, sooner rather than later. I carried on scanning, seeing nothing in any direction. Not even behind me; where my flight had been, the sky was now empty. Where the Devil had they gone, and what were they up to? Banking around to get a better view, I caught a glimpse of one of my comrades, spiralling down, as if in attack. And that's exactly what they were doing; they were attacking the lower-flying RAF machines, which they must somehow have spotted. The screenie below shows the fellow I saw, and you can make out one of the lower-flying SE5s ahead of him, between the Pfalz and the little circular pond. This isn't the first time I've seen flight-mates in RoF, of their own volition, break off and go for a distant enemy who's not an immediate threat. In other sims, your AI flight-mates usually won't do this, but will only attack either in pretty immediate self-defence or on your order as flight leader. The latter is, I think, preferable and more realistic. Flight-mates have to spend more time keeping formation than their leader so are less likely to see a 'bogey' before he does. And if they DO see something first, they should never, ever just hare off after it - they should alert the leader, typically by pulling ahead, waggling wings (or making some other pre-arranged signal) and pointing. Anyway, from the (mis-)behaviour of my flight, I now knew that, despite the lack of flak, there were very likely enemies down there somewhere. I wheeled down and around in a tight spiral after my flight and sought them out. I picked out an aircraft, apparently alone, flying straight and level a short distance over our side of the Lines and heading roughly west, back home. I rolled out of my spiral into a shallow dive and onto an interception course, pushing the throttle fully open. You can just about see my target in the screenie below, as a light speck with the sun glinting off his wings, just below the little town I'd flown over on the way in. At this point, the German flak finally opened up, firing on my quarry! Better late than never; at least, this now confirmed that the other aircraft was indeed an enemy! With the speed I'd built up in my dive, the range rapidly wound down, to the point the lagging flak bursts seemed more a danger to me than to the Englishman at whom they were aimed. I ignored the danger, bored on in and started shooting. The SE, caught by surprise, lurched sideways in the air as one of his ailerons came off. ...to be continued!


-
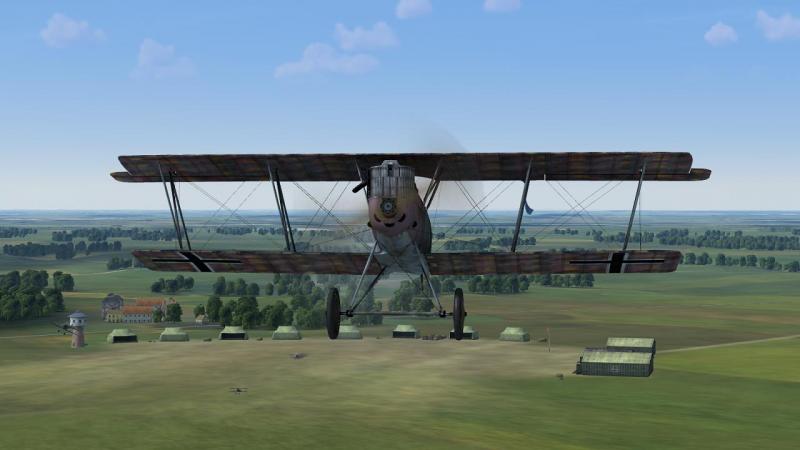
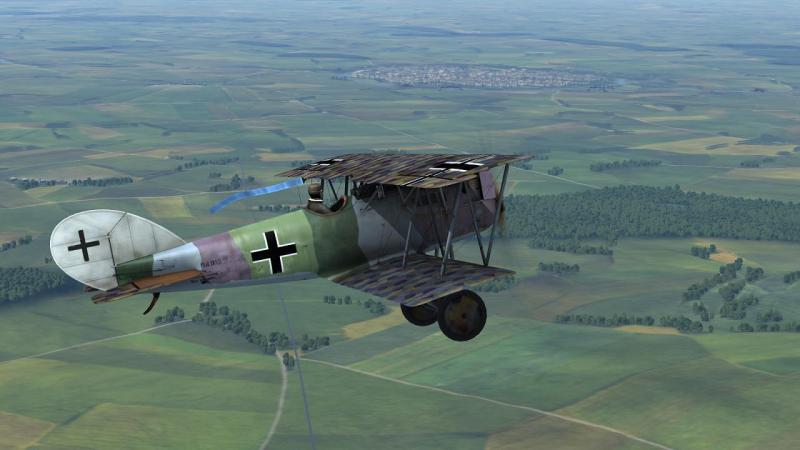
All quiet on the Western Front...? I throttled back briefly, to allow my flight to catch me up, then resumed my gradual climb west, to the front. Conditions seemed a little gusty as my machine bucked and swayed somewhat, but at least I no longer needed constant forward pressure on the stick to stop her trying to loop. I had discovered that you can use the RoF control profile facility to 'trim out' the usual tail-heaviness, and had done this for the Pfalz, in a previous test flight. Formation-keeping can be a little variable in RoF but today, everybody was behaving themselves nicely. As usual, RoF did a great job of creating the feel, sight and sounds of flying a WW1 plane, in a way that sets it above other sims. And the RoF DXII is beautifully rendered inside and out, including the 'lozenge' pre-printed fabric camouflage on the wings and the distinctive flat windscreen and central gun sight. RoF lets you order a decent variety of formations but as usual, I left the flight in the default echelon right, as we flew on past the town of Douai then onto the front over the German reserve trenches, where a smaller town marked the point where we were due to swing north and fly up the Lines. I had been keeping a careful lookout, watchful in particular for the flak bursts which - I hoped! - would soon reveal the presence of other aircraft. I switched between external and cockpit views, mouselooking all around while holding my machine steady. Our climb-out to the Lines had been uneventful and now, throttled bacl slightly and cruising north, there was still nothing to be seen, except some shellbursts amongst the trenches far below. 'Wo ist der Royal Air Force?' I asked myself, mimimicking that line in the Battle of Britian movie where the Heinkel bomber leader cheekily notes that the 7 September 1940 switch to attacking London appears to have wrong-footed the opposition. But in this case, I was actually hoping for some contact with the enemy, not least as recent enhancements to PWCG incorporated changes to increase this possibility. Was this going to be another uneventful mission, with enemies either absent or unseen? ...to be continued!


-
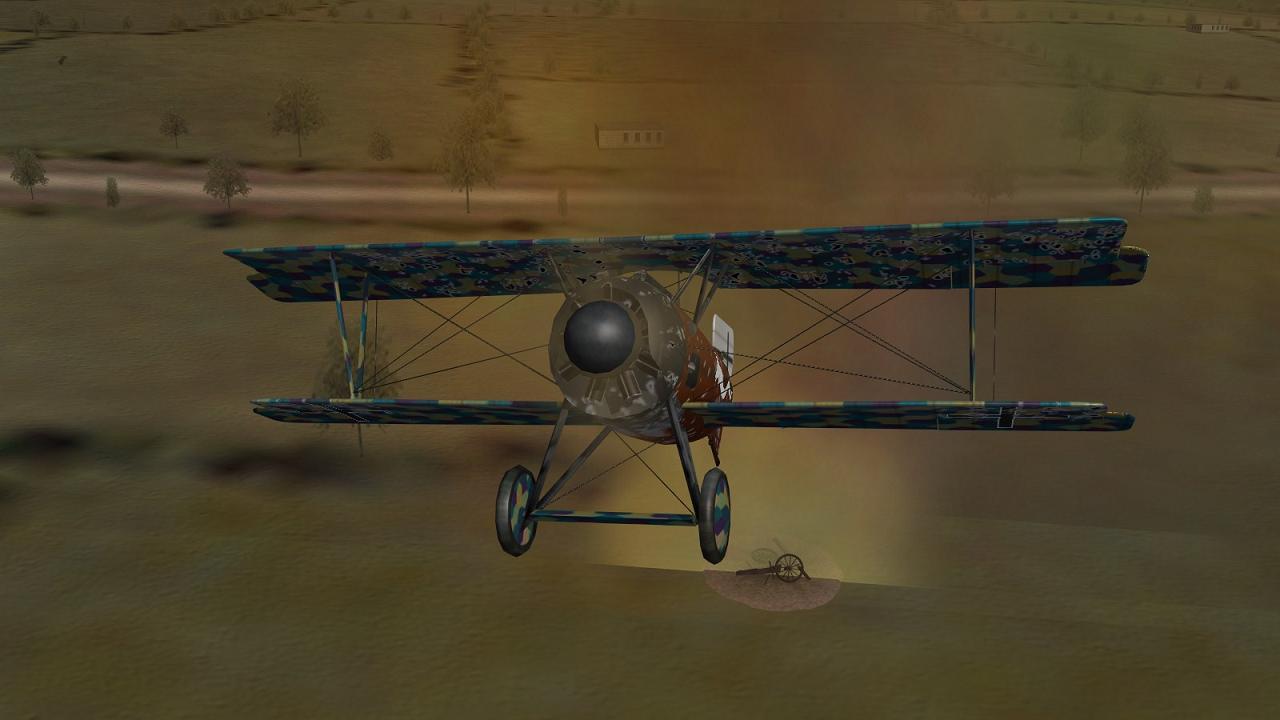
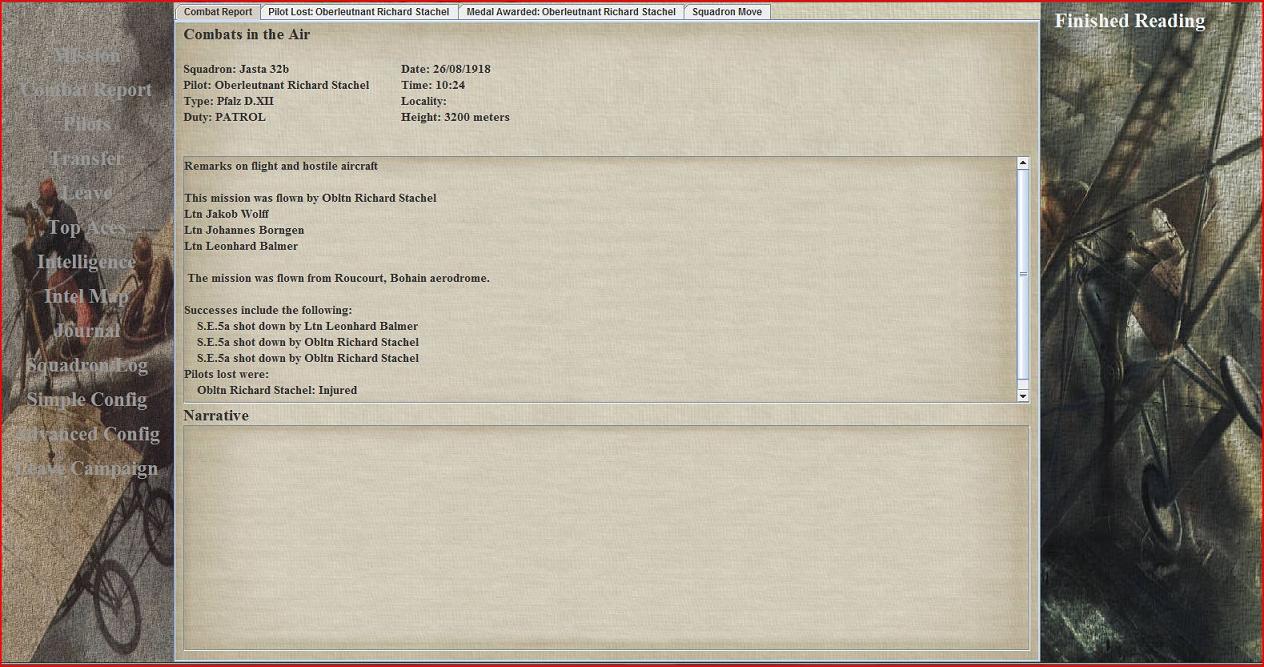
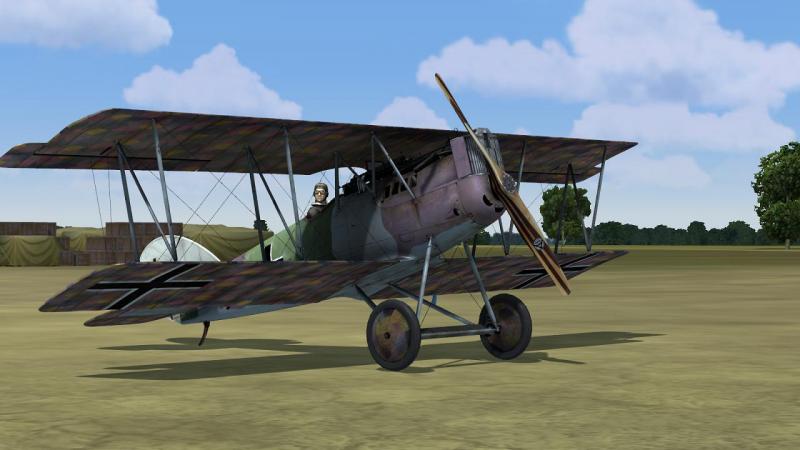
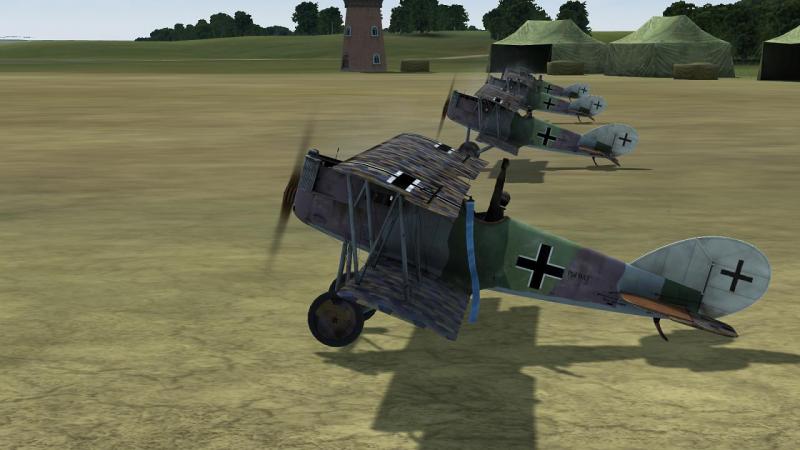
Taking on the RAF in the Fokker DVII's Bavarian competitor This campaign report is designed to do two things. Primarily, it's intended to showcase the Rise of Flight Pfalz DXII, flown in career mode using (almost) the latest version of Pat Wilson's Campaign Generator (PWCG). I found out after flying this mission that PWCG's now up to Version 15.6, but the changes since my version (15.3) seem mostly cosmetic. The second reason for this report is to celebrate the miraculous recovery of my trusty 8800GT graphics card, which had started displaying artifacts but was restored to health - I hope for some time - by literally 'baking' it in an oven to re-solder possible decayed connections. I'm not making this up - Google it and see for yourself! To digress a little, the recent PWCG improvement of greatest interest to me is the increased flak. In First Eagles/FE2, fairly often, you get warning of the presence of other flights when you see flak bursts tracking them. So I find it is quite often possible to spot other planes at a respectable range, without resorting to visual aids like 'radar screens', target boxes/pointers or labels. Combined with decent rendering of more distant planes, this has two big benefits. First, I often see aircraft I might otherwise have missed. Second, I see them far enough away to make a plan to deal with them, following Mick Mannock's advice that all aircraft should be assumed to be enemies until proven otherwise. In OFF, the flak is also a good indicator of other aircraft, althoigh the planes themselves are not visible as far away as they generally should be. In RoF, a big issue for me, flying 'aids off', has been how often enemies in the vicinity remained invisible unless our flight more-or-less blundered into them. If I didn't miss them altogether, I'd come upon them suddenly, with no opportunity to do any of that interesting patrol-leading stuff: stalking them, getting my flight into a good position, then timing and leading my attack. PWCG not only enables you to select a rank high enough to lead patrols regularly, turning the player from drone to tactical decision-maker; recent versions have increased levels of flak, so that it can now provide the patrol-leading player with the target indicator that flak so often was, in real life. At least, that was what I was hoping I'd find out, flying this mission! The plane As for the Pfalz itself, though a competent design, the DXII inevitably suffered from being compared to the contemporary Fokker DVII. The sturdy, agile and easily-flown Fokker was the plane the German fighter pilots wanted, to replace their outnumbered and increasingly-inferior Albatros DVs or Pfalz DIIIs. Anything less was regarded with suspicion. In 'Wings of War', Baviarian Rudolph Stark - by then in charge of Jasta 35 - told it like this: '1 September 1918. We are to have more new machines. Everyone is pleased...but their joy is soon damped down, for the machines...are not Fokkers, but Pfalz DXIIs. What is a Pfalz DXII? No one has ever heard of such a machine, no one knows anything about it. We decline to take these machines...we are told...there are no more Fokkers to be had. All right; we'll have the Pfalzs...the sight of them does not inspire confidence...with a multitude of bracing wires...the whole thing looks like a harp. We are spoilt for such machines. No one wanted to fly those Pfalzs except under compulsion. Later their pilots got on very well with them. They flew quite decently and could always keep pace with the Fokkers; in fact they dived even faster. But they were heavy for turns and fighting purposes, in which respect they were not to be compared with the Fokkers. The Fokker was a bloodstock animal that answered to the slightest movement of the hand...the Pfalz was a clumsy cart-horse that went heavy in the reins and obeyed nothing but the most brutal force.' My own references on the type are the old but valuable Profile Publication and - highly recommended - the more recent Osprey 'Pfalz Aces of WW1' which features other types like the DIII of 'Blue Max' movie fame. If I recall right, Pat Wilson's Western Front Patch for Red Baron 3d added a Pfalz DXII but if you want to fly one in a modern WW1 sim the choices are First Eagles or Rise of Flight. The FE Pfalz is from the A Team Skunkworks and it's a fine rendition, a great bird that looks the part (seen here with the fix that corrects the slightly offset wheel hubs and a great skin, by Quack I believe) Having read Rudolph Stark's book many years back, I was keen to add this plane to my Rise of Flight hangar and take her for a spin…literally, as it happened. While the Pfalz seemed a tractable enough mount, I found she was a bit more prone than , say, the albatros, to spin out of a tight turn...and to keep on spinning, all the way down, until stopped by something solid. I have to admit that spin recovery is a bit of a bugbear for me in RoF, generally. The classic advice for a WW1 pilot on spin recovery was to centralise all controls and pray. This doesn't work so well in RoF. For the DXII, even the classic modern technique - power off, opposite rudder, nose down - seemed not to work, quickly or at all, for the DXII. Happily, RoF pilot's notes are available on the sim's website and these include spin recovery. As described in the notes for the DXII, this is counter-intuitive - rudder (and aileron) INTO the direction of the spin. Practicing this in 'free flight' mode is recommended, before entrusting your virtual life to a campaign. Though PWCG by default renders your pilot less liable to be killed, best not to take chances, eh? Anyway here's that handbook: http://www.777studios.net/ROF_Guides/P12_Hanbook.pdf The man, the unit and the mission First challenge is actually getting to fly a DXII. Unlike FE/FE2, RoF models mixed squadron establishments and in Beta Career, starting as a lowly NCO pilot, I was liable to get allocated a Pfalz for a mission or two, then get moved onto a Fokker. In real life this would have been most welcome, of course...but not for this mission! Using PWCG, I decided to transfer my Jasta 11 Fokker triplane pilot, Richard Satchel, to Jasta 32b. Pfalz being a Bavarian firm, its products tended to go to Baviarian units such this. I opted to fly with it in August 1918, at which point Jasta 32b was based at Roucourt/Bohain airfield, between Cambrai to the south and Lille to the north. We seemed to be entirely equipped with the Pfalz so it was a simple matter to use PWCG to generate a mission. I was allocated a patrol up to the Lines, then north for a stretch. I was the leader and was allocated my preferred three flight-mates - Leutnants Wolf, Borngen and Balmer. So I accepted the mission and picked it up in RoF, in the usual PWCG fashion. There seem to be few skins available for the DXII so I just went with the default one and here were are, lined up and ready to go, with my machine bearing the blue leader's streamers. I don't bother with 'complex engine management' so it was a simple matter to check the controls and start up, at which point my virtual pilot gave a hand signal for the flight to do likewise. Once all props were turning I opened up the throttle and after an initial swing, my Pfalz bumped and rocked over the grass airfield and was soon airborne and climbing away. Our base was quite close to the front and for safety's sake, I climbed away from it initially, to gain some height. All seemed peaceful so I swung around and set course on the first leg of our patrol, which would take us west and into the thick of whatever might be waiting for us there. ...to be continued!

-
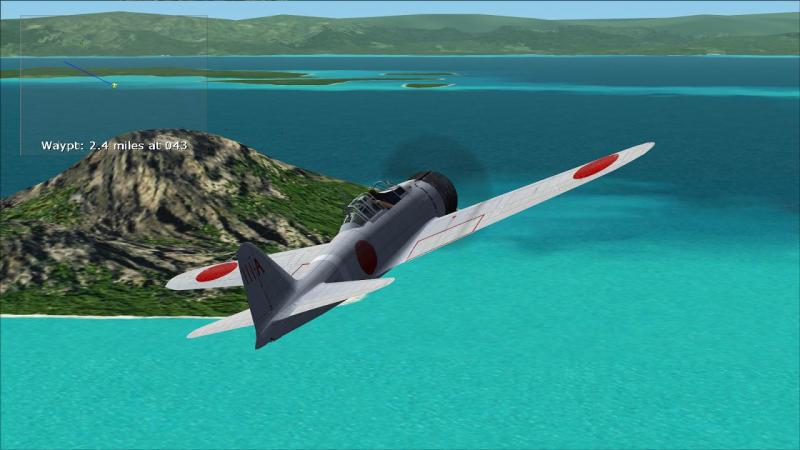
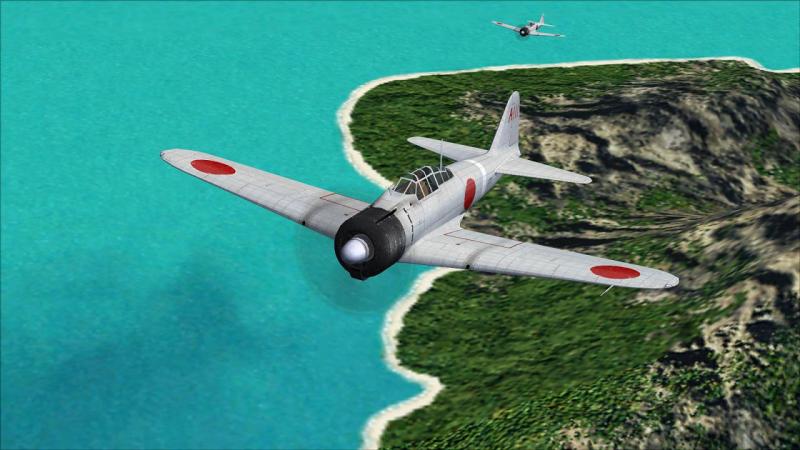
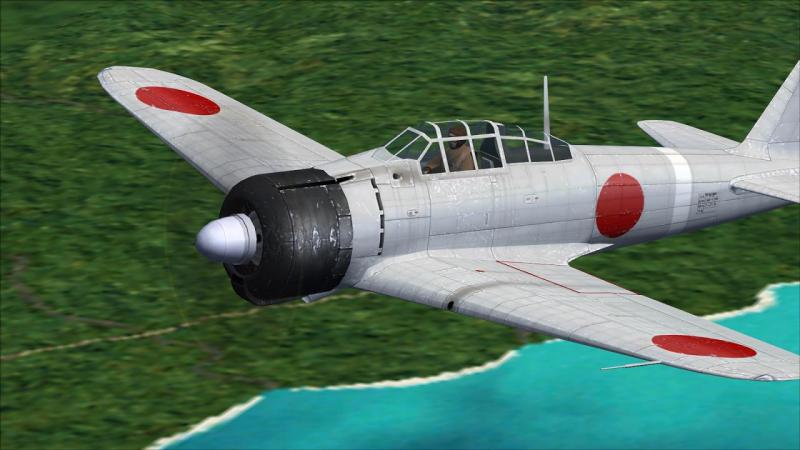
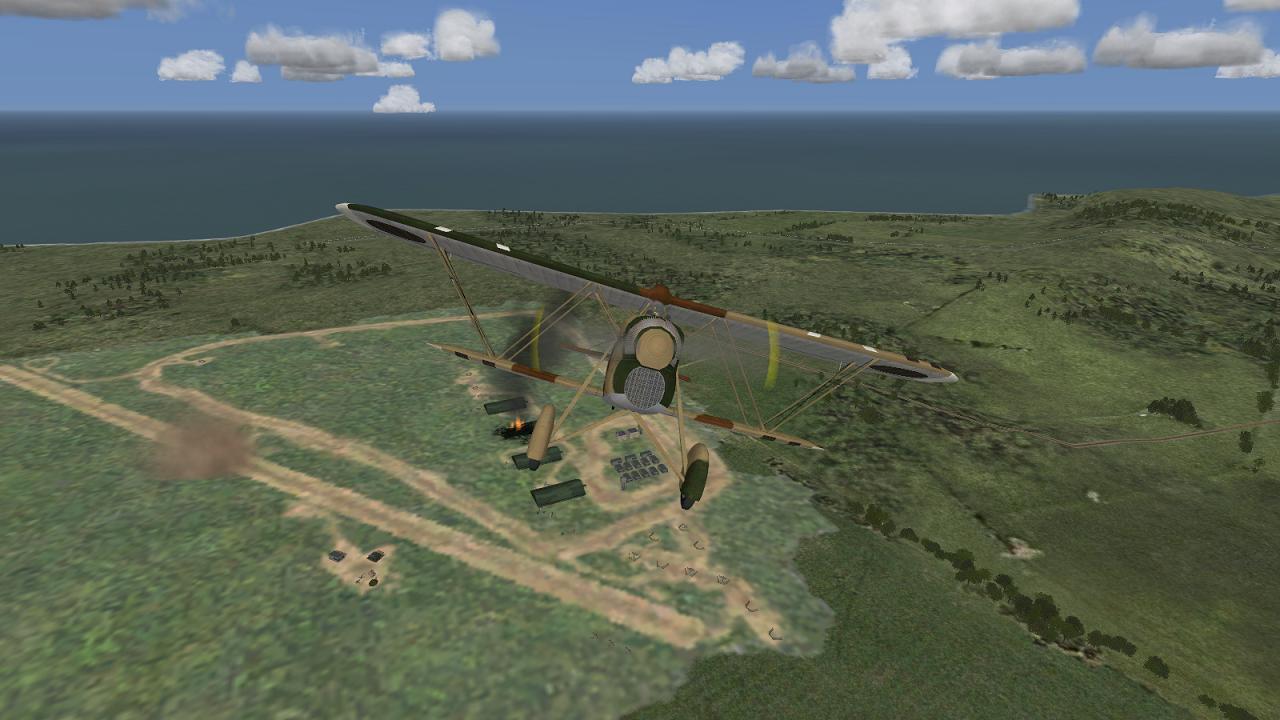
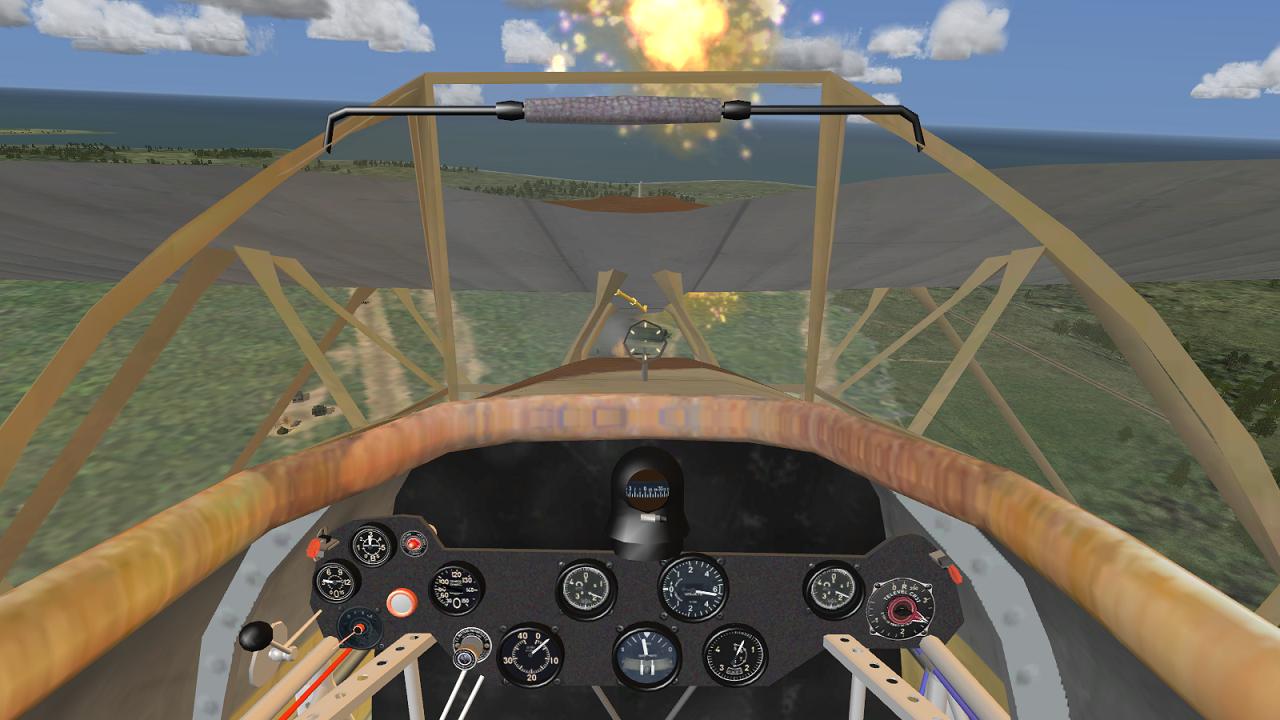
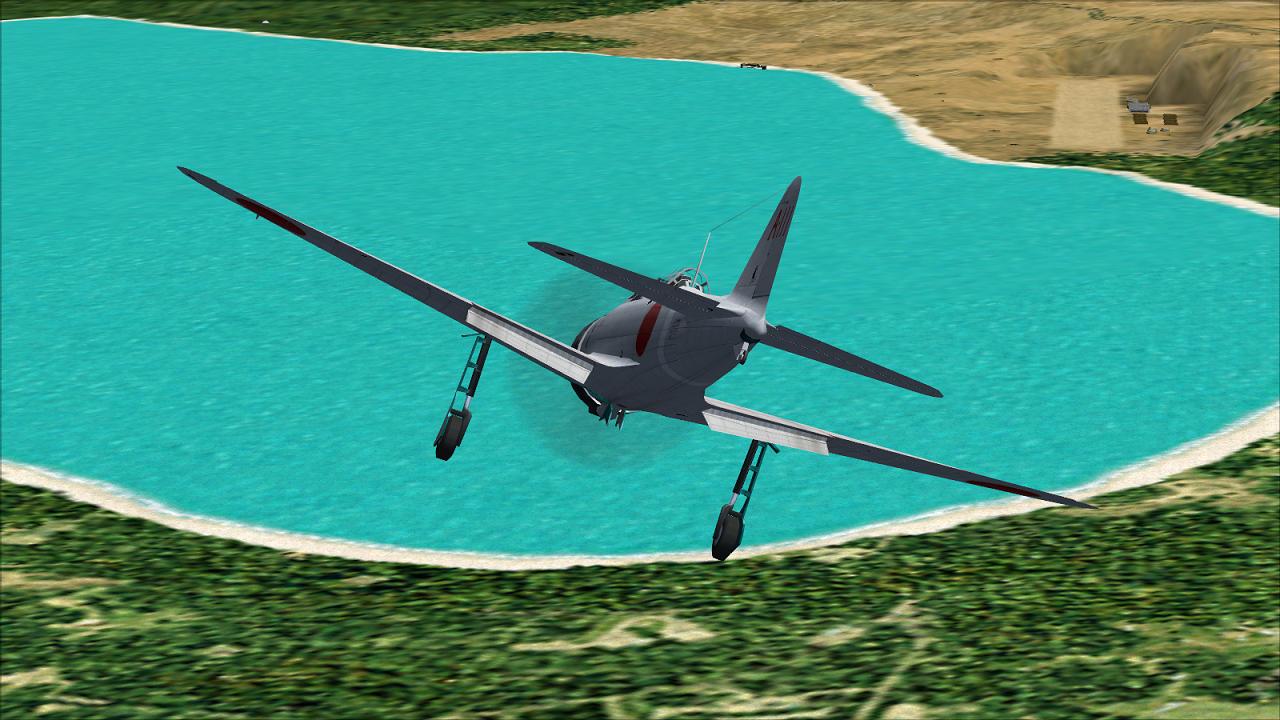
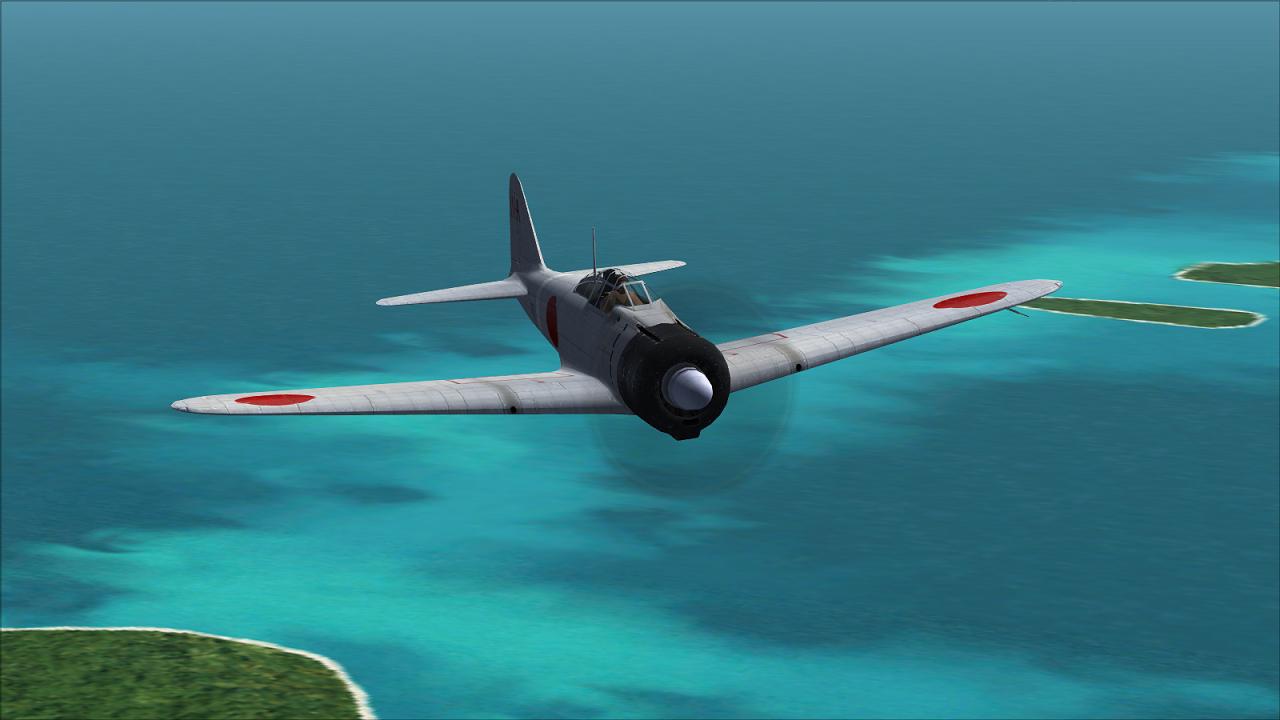
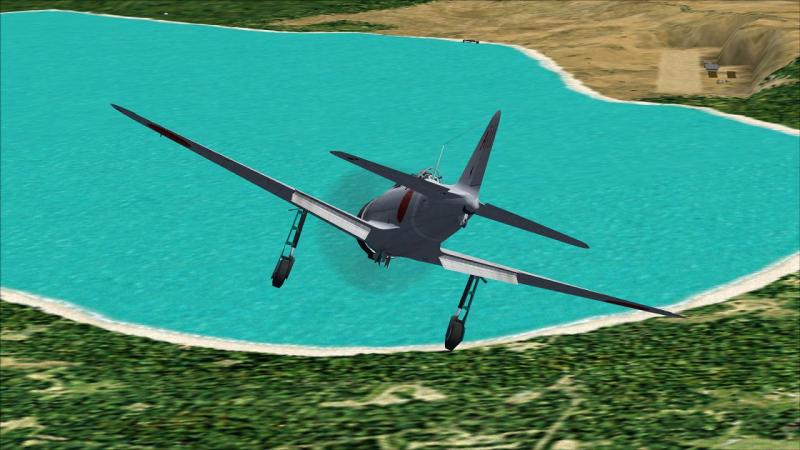
Into action! I 'warped' across the intervening distance to our objective, and came out at several thousand feet with our target, Buka airfield, directly ahead. At this point, I suddenly regretted not having made a plan, while I was able to study the recce photo at my leisure. There was no sign of enemy aircraft, but ahead and below, the first flak was bursting in the sky near our bombers. Clearly, there was no time to hang around trying to think of something clever. We were briefed to strafe Buka and it was high time to make a start. I switched the TAC to display ground targets and selecting one, tapped the 'A'/attack key once, then after a pause, again for good measure. I rolled over and dived in to make a pass of my own but could not pick out the source of the ground fire. Rather than waste my firing pass, I put some MG and cannon rounds into one of the two ships moored offshore. I must have hit something vital - or perhaps one of the bombers hit her just after - for she seemed to start settling in the water. I made a mental note to check afterwards if CFS2 weapons are innately overpowered against shipping and re-check that my game and campaign settings were not over-modelling anything. I banked around and dived in for another pass, this time attacking the second vessel from nearly head on. This time I left her smoking but still on the surface. As I pulled up and around for another pass, I could see that the skies were criss-crossed with tracers and that the 'Val' dive bombers were apparently exiting the target area, still intact and in good formation. This time I was determined to do something about that AA fire, so I began making runs at the little polygonal emplacements dotted around the runway. Most seemed empty, but one looked like it was occupied by some troops manning a pom-pom type weapon or a heavy MG. Other, more rectangular emplacements protected some aircraft, though I didn't notice at the time! I ended up making a pass at what turned out to be an empty emplacement. To make matters worse, after my second run, the luck I was pushing - in making repeated passes over an alert target - finally ran out. There was a bang as an AA round burst close by and I noticed that my Zero now had some holes in the wings, tail and fuselage which had definitely not been there previously. Enough was enough, I decided; the bombers had cleared off so it was time we, too, gave up providing those nasty people on the ground with live target practice. Time to go home. I turned away and ordered my flight to form up, which they acknowledged; at least I think that's what they did - I had subtitles turned off and my Japanese doesn't extend beyond what little I remember from watching 'Shogun' on TV many moons ago. Off we went, over the jungle and out to sea again. I vaguely remembered that 'warping' in a damaged state might or might not have a tendency to end badly, so I flew on for a bit, testing my controls and checking my instruments. Nothing nasty seemed to be happening...except that my roll rate had fallen sharply. I made a mental note to install Nibbio's 'rollfix', which I now recalled was designed to stop a tendency for CFS2 flak to clobber your rate of roll every time. Then I warped home. Coming out quite near our home base without mishap, my wingmen broke off to make their approaches without needing any bidding for me. I carried on with the airfield on my right and then turned right onto a base leg, before turning right again onto final approach. I should have joined a more conventional left-hand circuit because this one brought me uncomfortably close to a b***dy great hill which some clot had put rather close to the seaward end of our runway. It was a bit like that infamous approach to the old Kai Tak airport at Hong Kong, from what I can tell...interesting. I somehow managed to avoid ramming the scenery and settled down onto a fairly straightforward final approach. I was quite glad to get back on terra firma; landings - in one piece, anyway - are not really my strong point. Unfortunately, at the debriefing, I got the cartoon graphic which shows you being bawled out by a very unhappy CO. We were credited with doing some damage, but one of the results screens showed that although we had met the 'Survive' goal - usually a good starting point - we had not also met the second goal - concerned with giving the target 'a good shoeing' - through not scoring sufficient hits on our objective. 'Must try harder', basically. Overall, this was an enjoyable and visually attractive reprise of a stock CFS2 campaign. My Zero looked rather good outside and the virtual cockpit was also pretty decent, as were the terain visuals and effects. I'm now looking forward to re-installing some more of the Pacific Theatre add-ons and mods (which I fortuately still have on CD; though many are likely still available online) and getting down to some serious CFS2 action. She's still a great little sim.


-
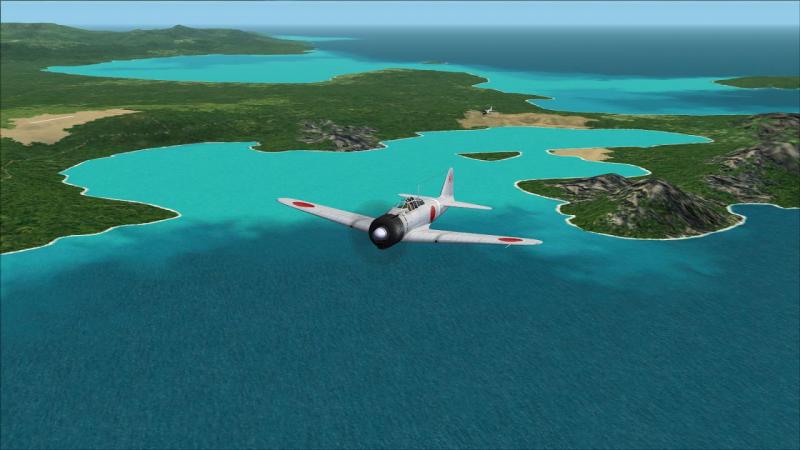
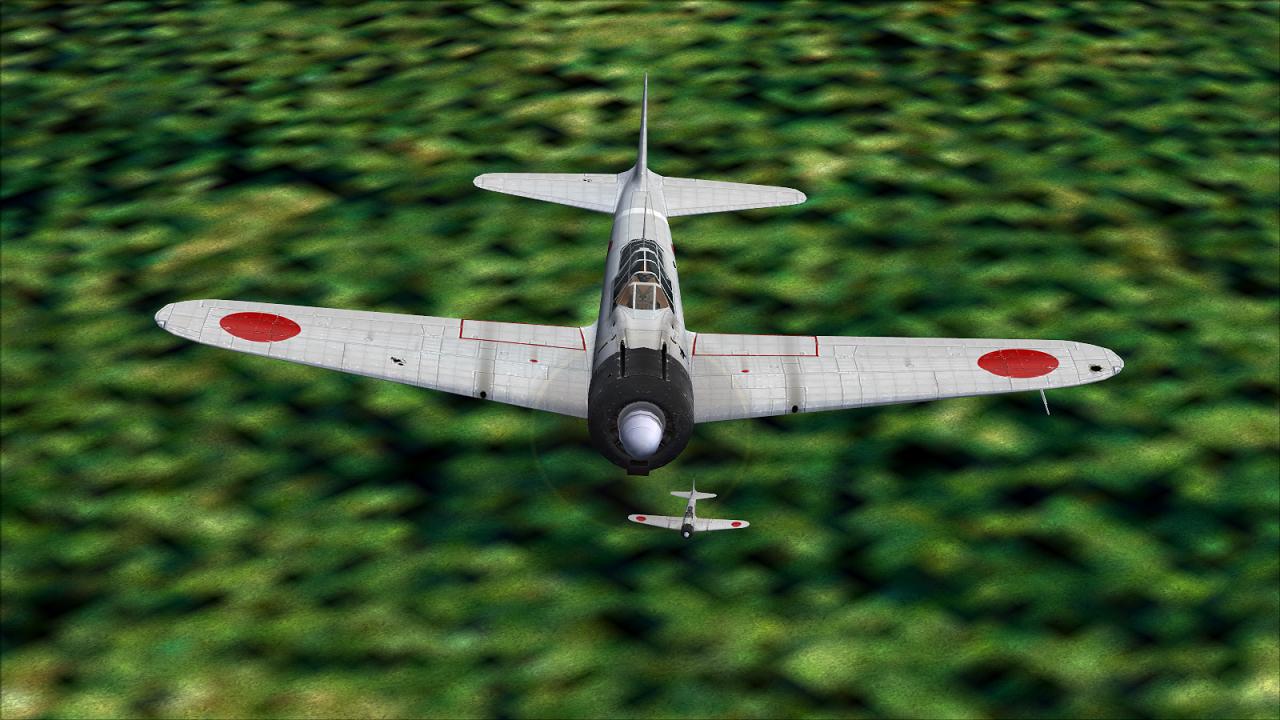
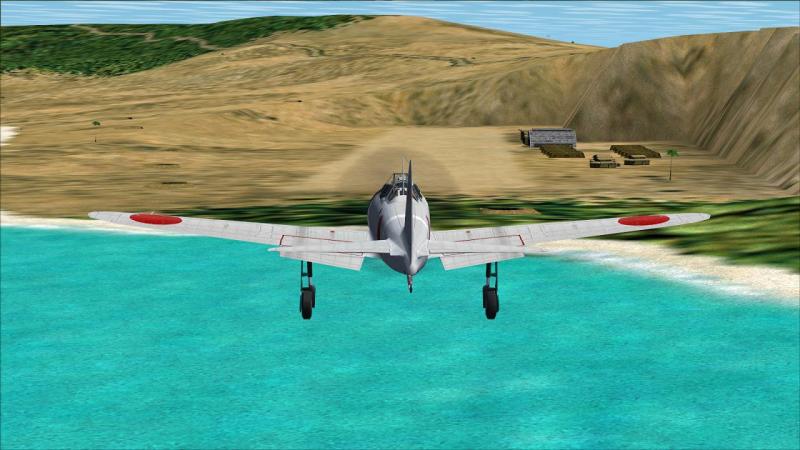
Outward bound At this point, I turned on the CFS2 'radar'/Tactical Display/TAC, to pick up my course to the next waypoint, which was our rendezvous with the bombers. In the screenie below, you can just about make out the latter, another little vic of three green arrowheads on the TAC display at roughly 11 o'clock to me (the yellow plane icon at the centre). The aircraft themselves are just right of the tip of the volcanic-looking peak, on the left. My wingmen weren't long in closing up and we sped after the bombers, which seemed to be in no mood to wait around for us and carried right on. I've never flown over (or been to) the Pacific Ocean but I have seen the CFS2 visuals described as being a good likeness. There are alternative textures available but I like the stock ones; to me, they convey very well the impression of lush green vegetation, barren hilltops and blue lagoons. Flying in the external view - as I generally do, pre- and post-combat - I was able to spend a little time admiring my nicely-textured mount. The subtly-weathered CFS2 textures were pretty well top of the heap when the sim was released and to my eye, they are still first class. I made another check of my TAC display. A further course correction turned my heading line green and showed I was on course for the next waypoint, slowly gaining ground on the nearest vic of bombers, now at about 1 o'clock. Gradually, the land slipped behind us and we settled onto the long leg across open ocean to the western Solomons, where lay the airfield we were to attack. ...to be continued!