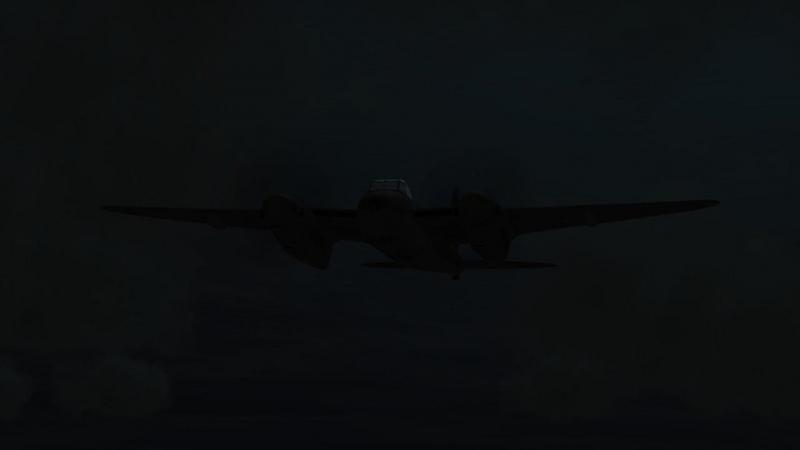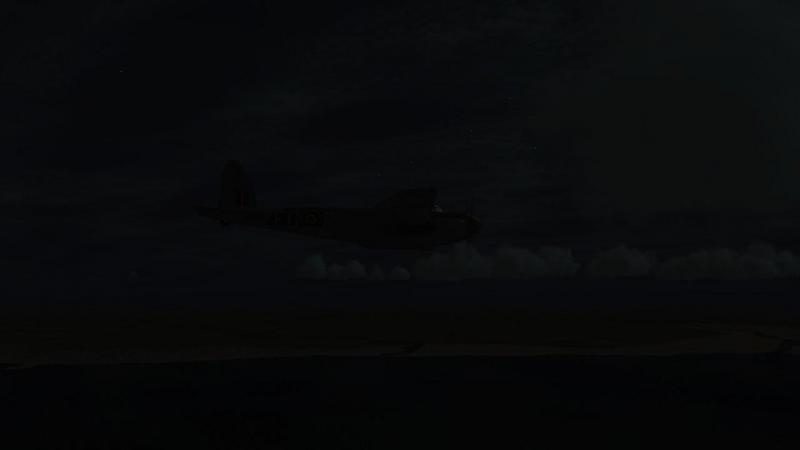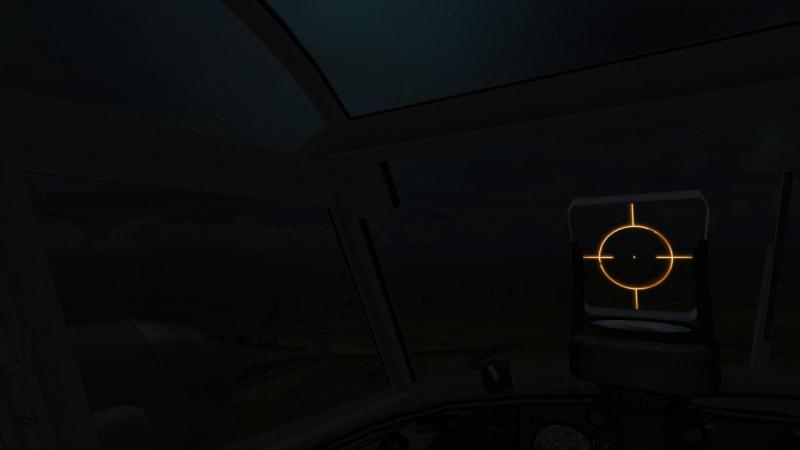


33LIMA
-
Posts
3,749 -
Joined
-
Last visited
-
Days Won
7
Content Type
Profiles
Forums
Gallery
Downloads
Store
Everything posted by 33LIMA
-
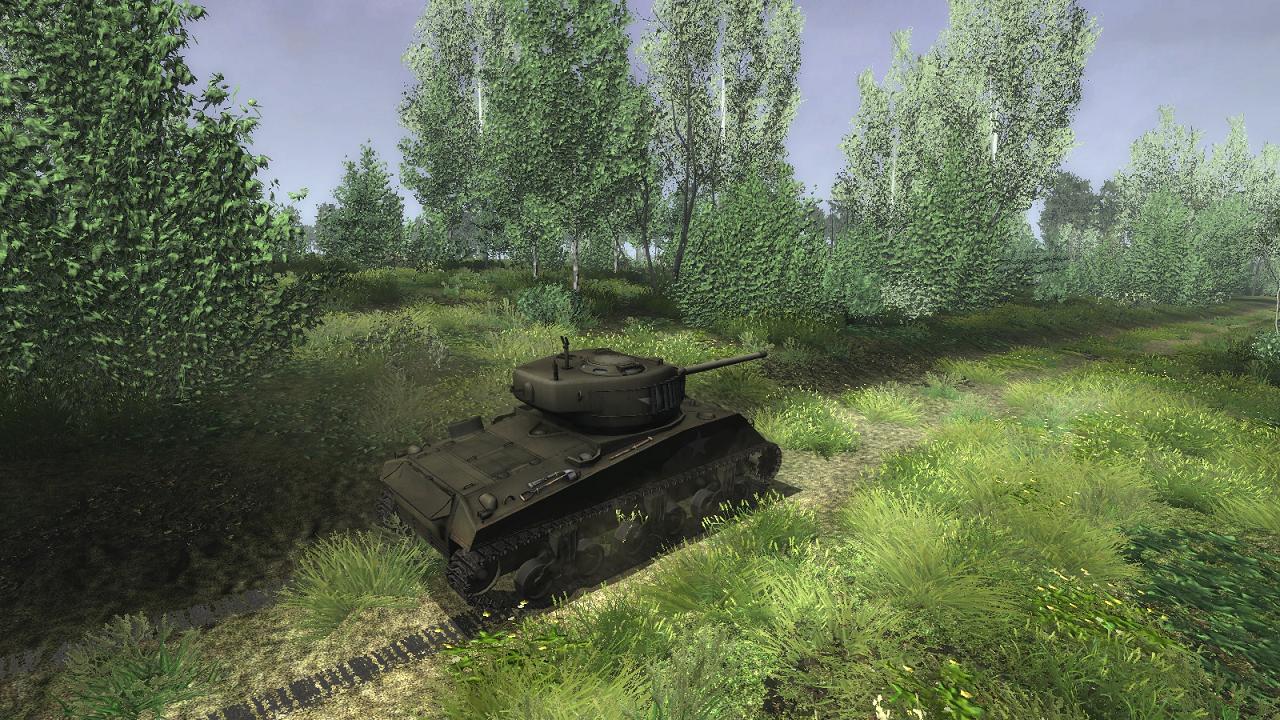
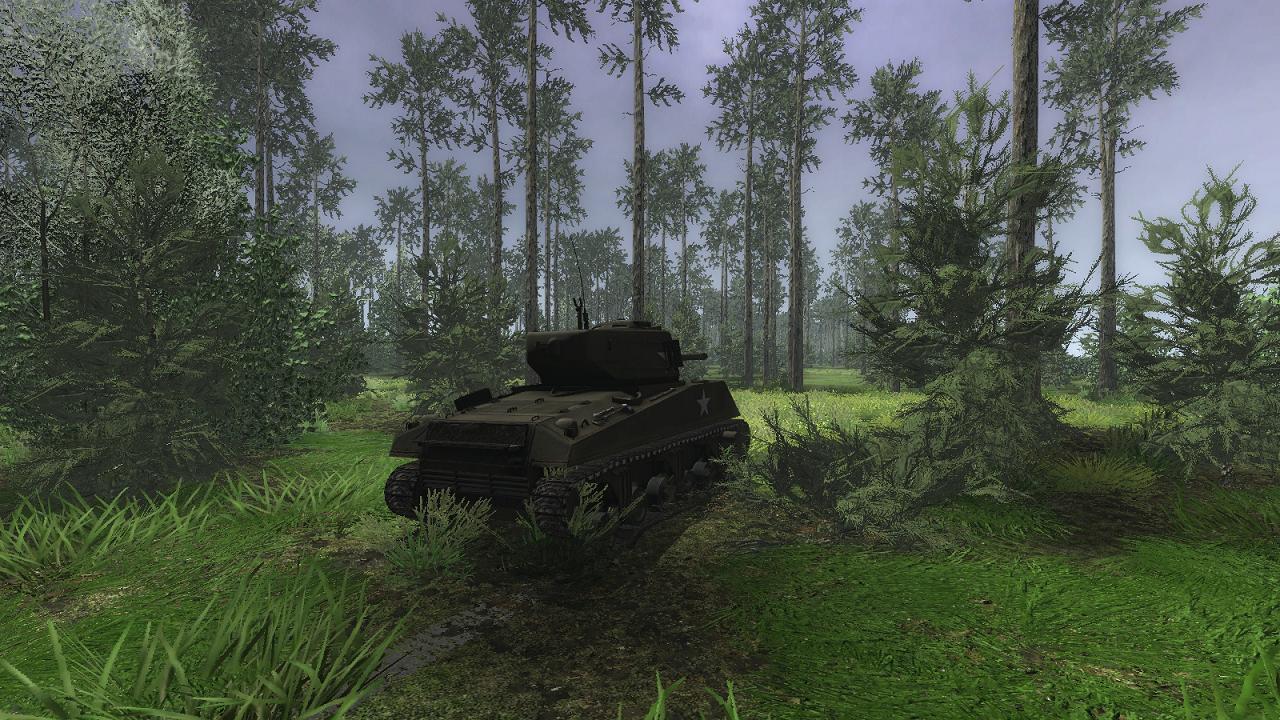
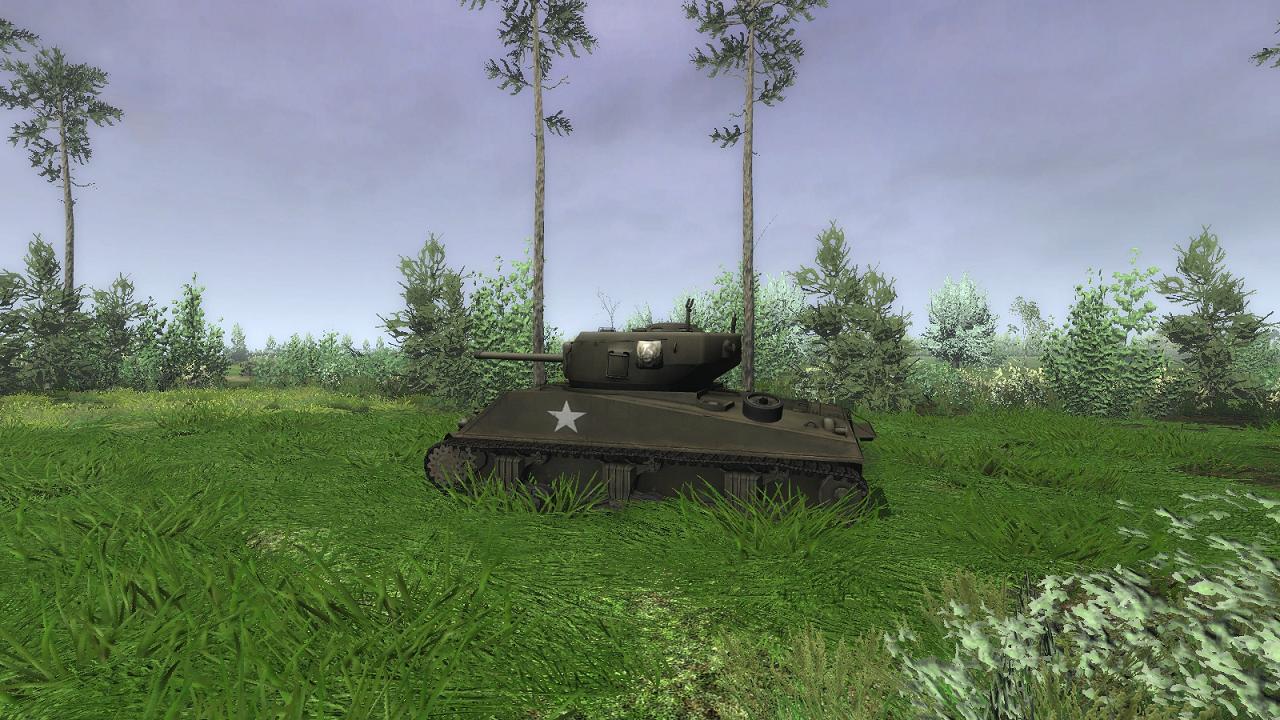
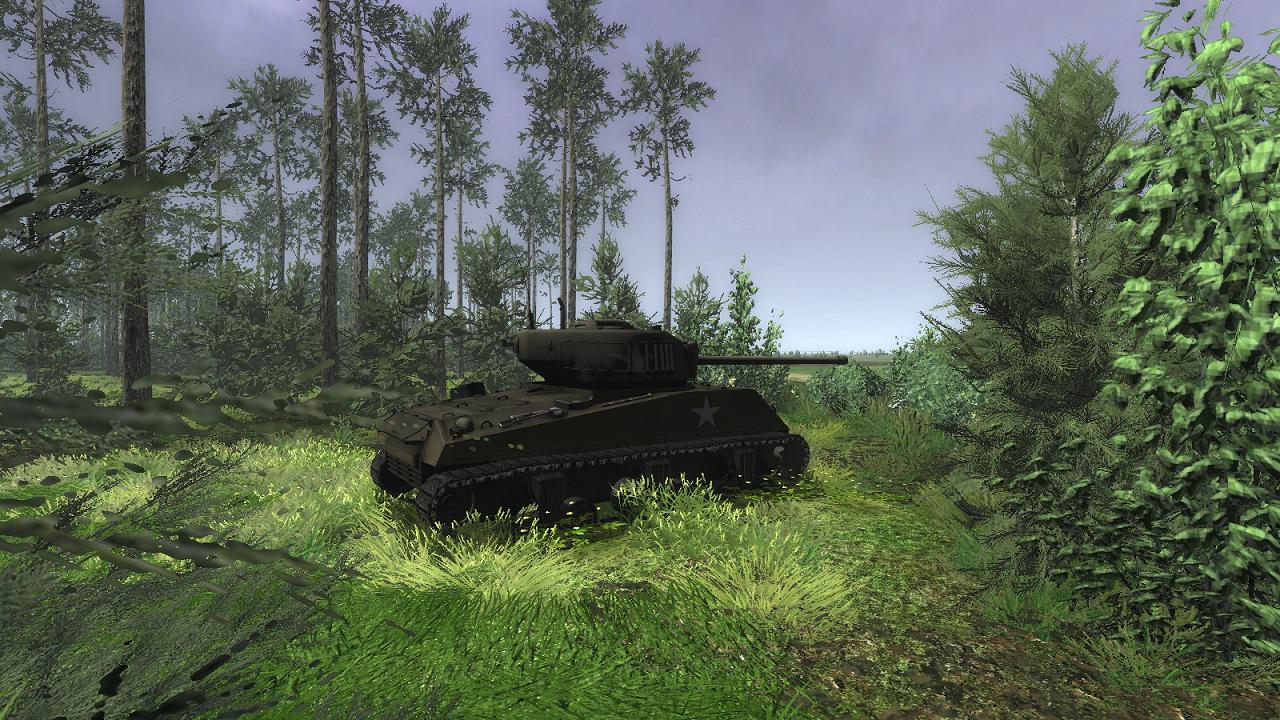
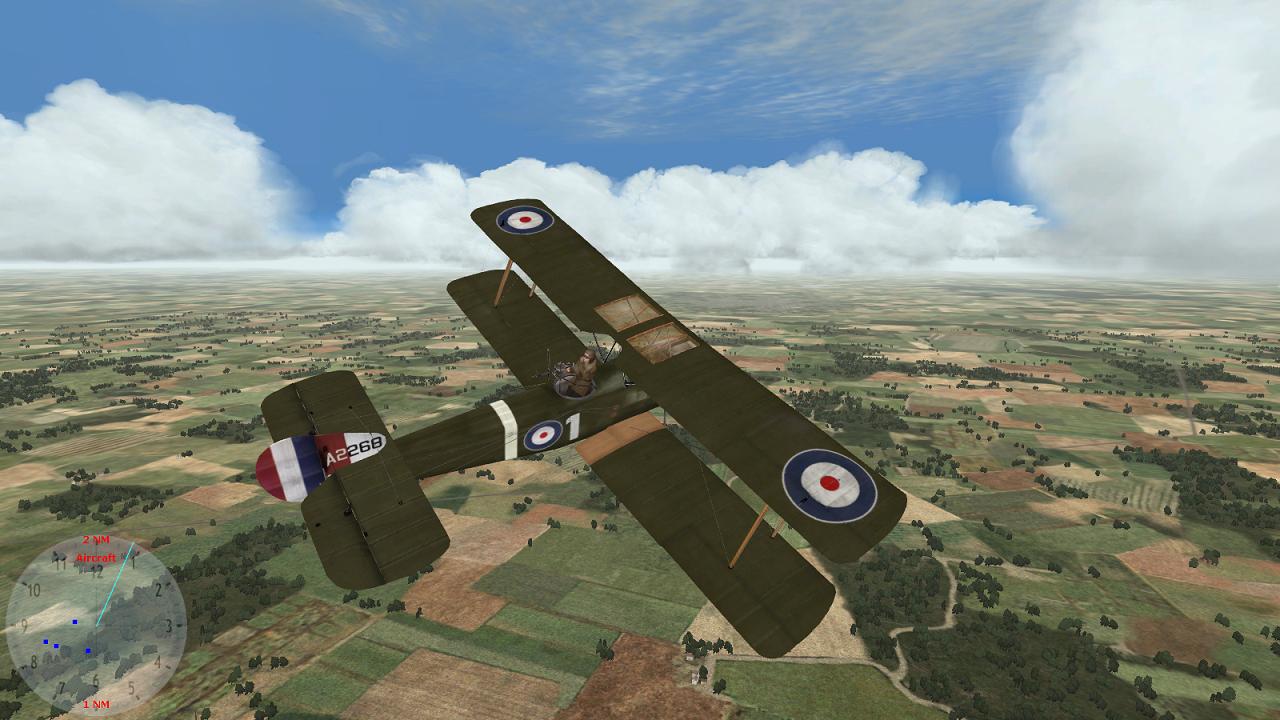
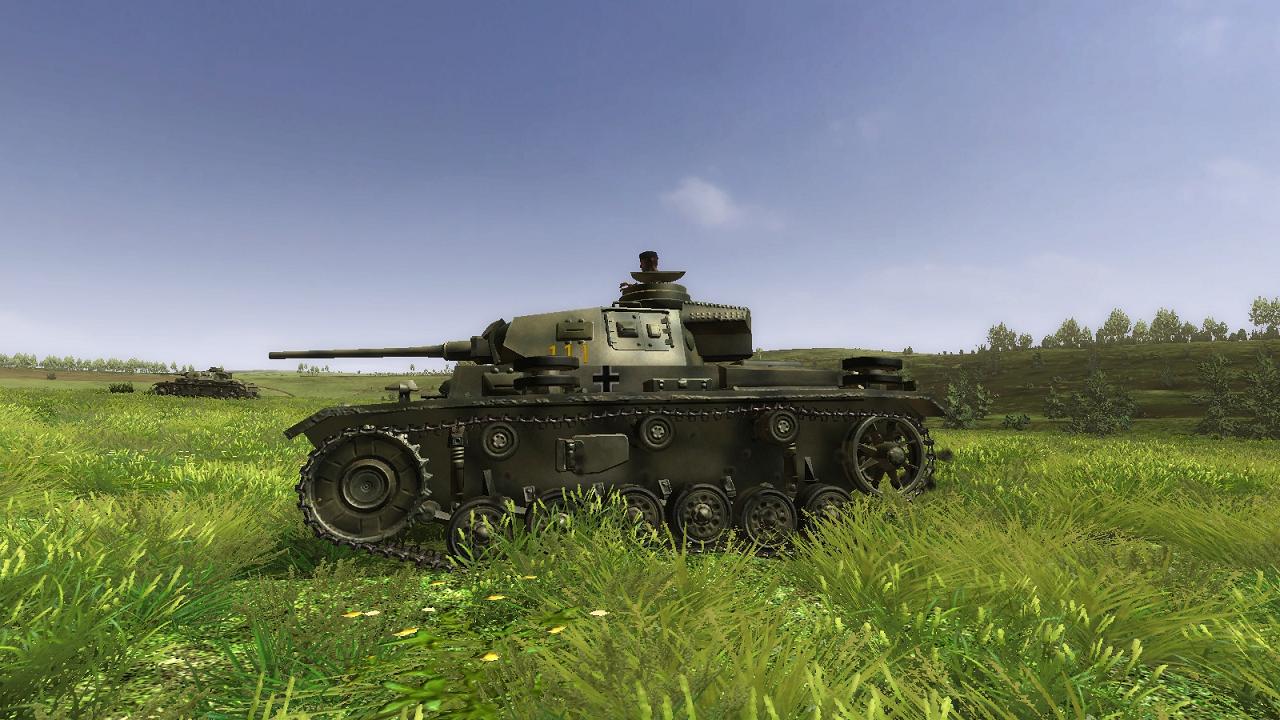
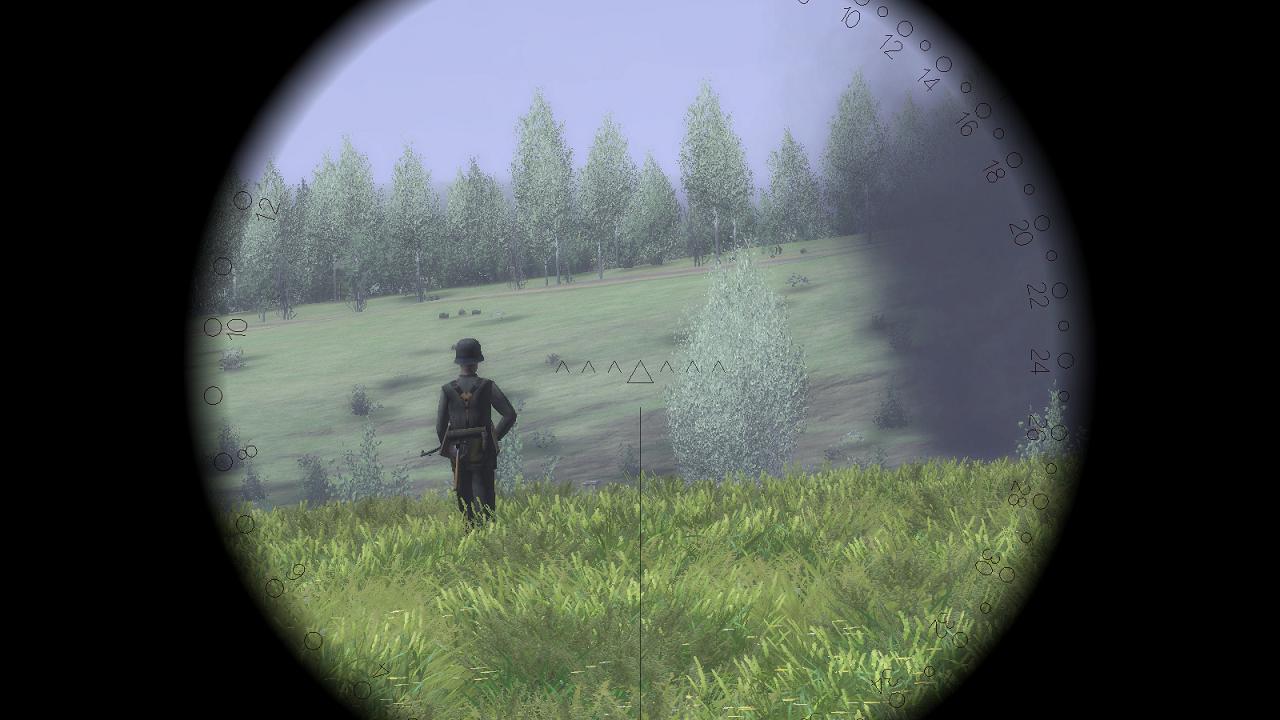
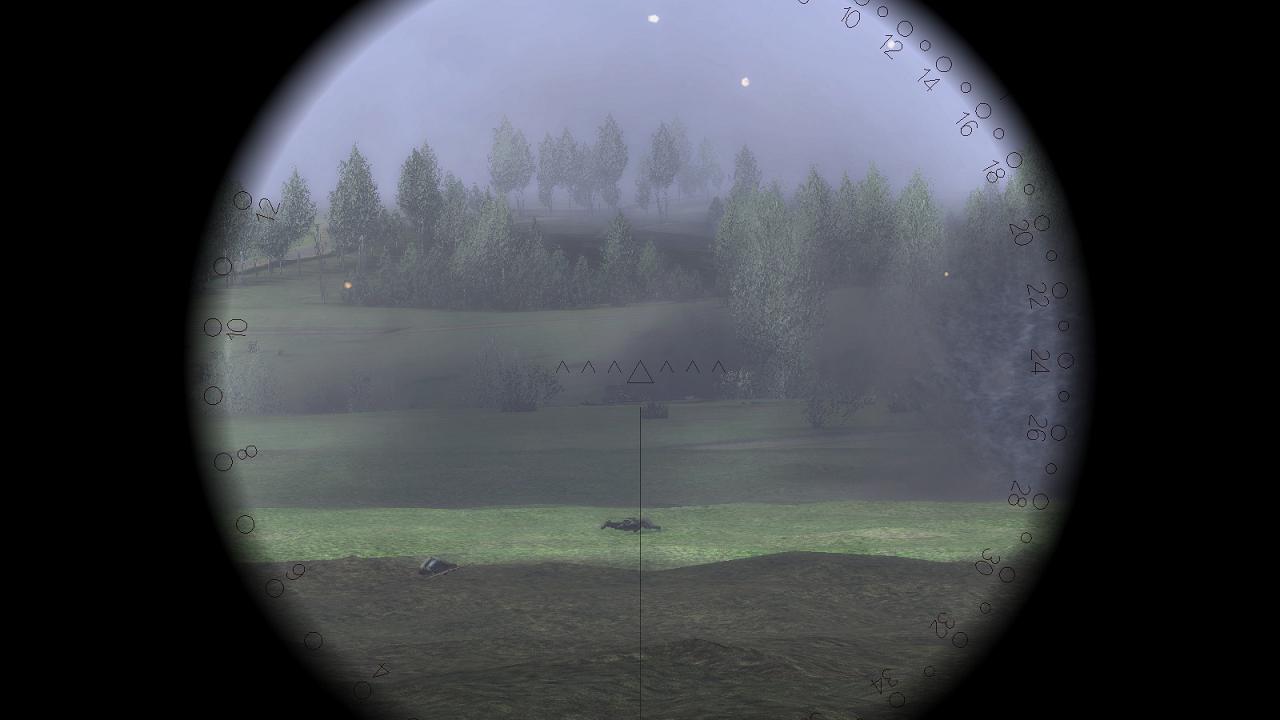
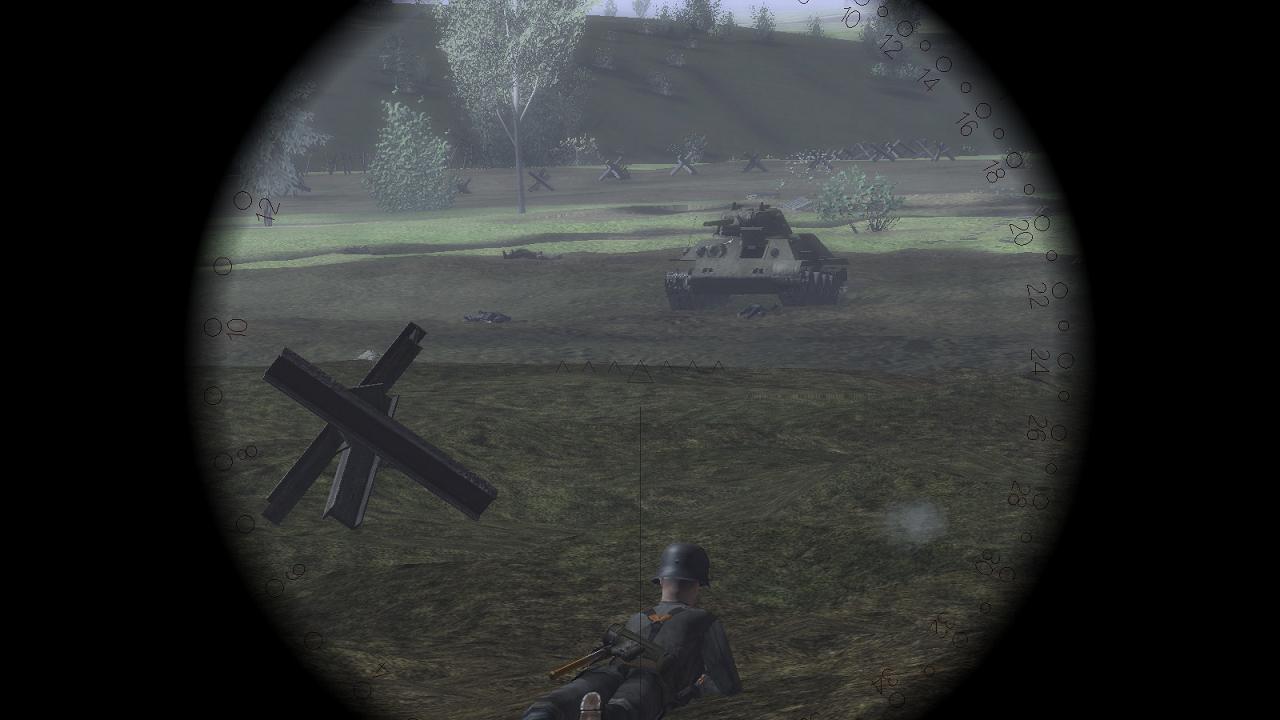
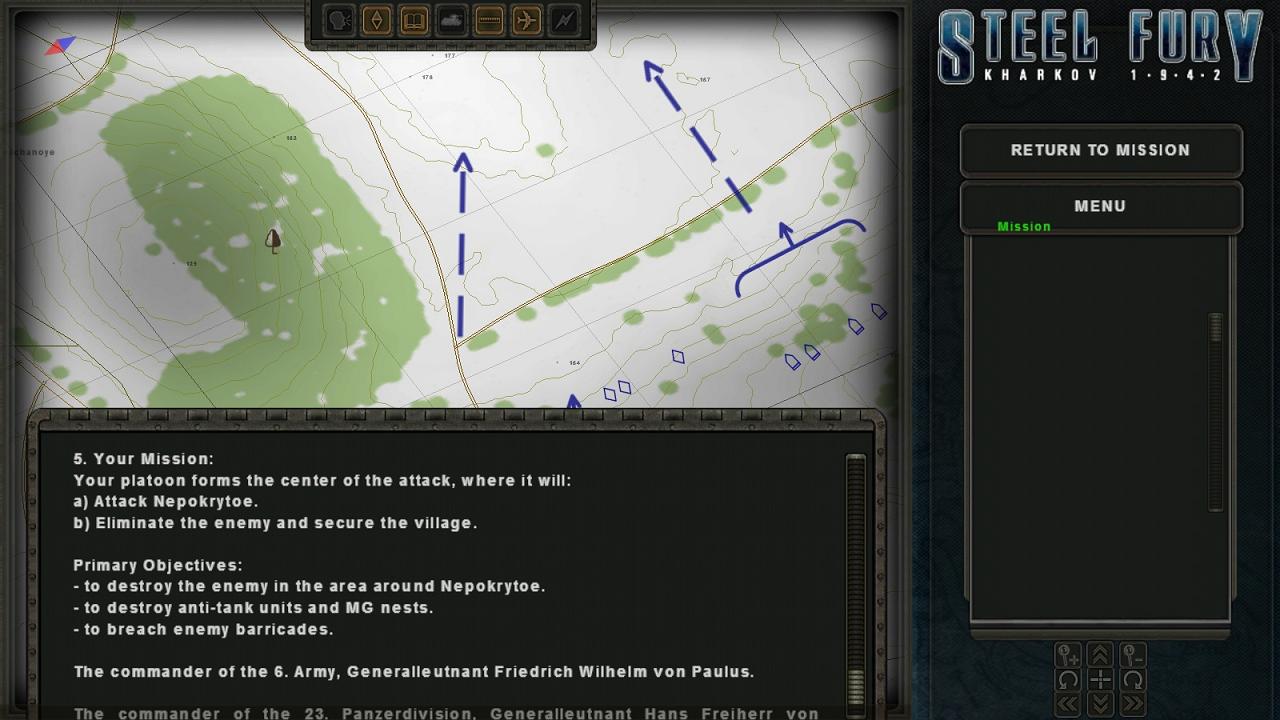
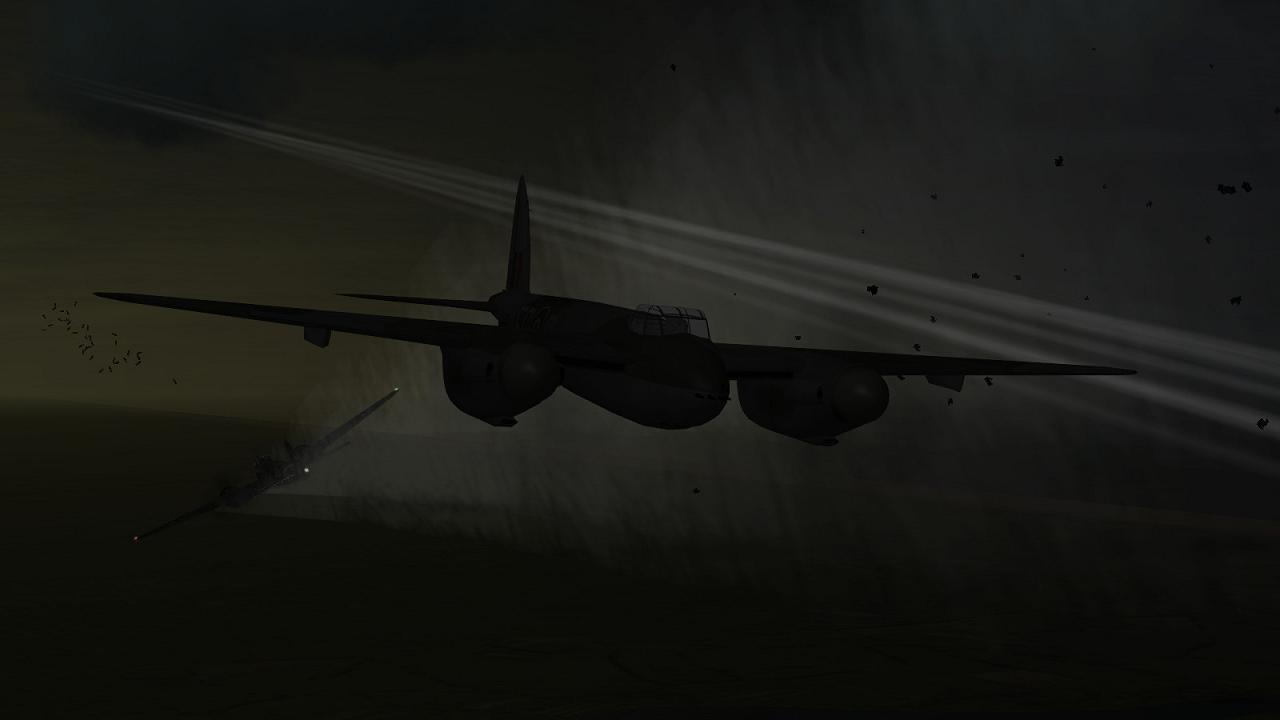
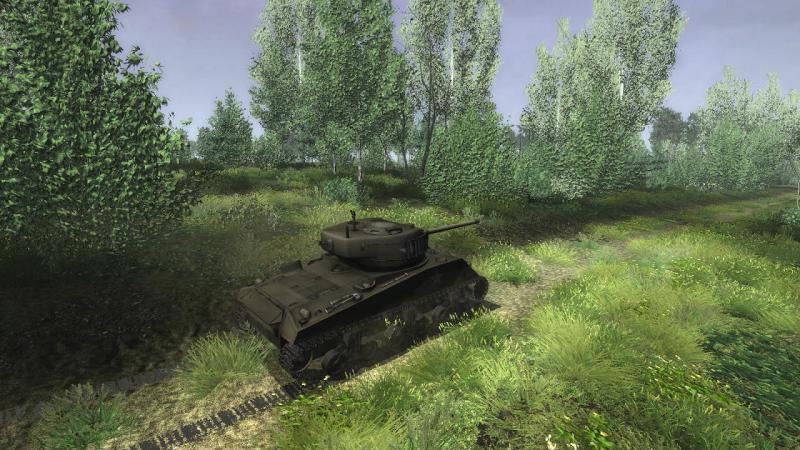
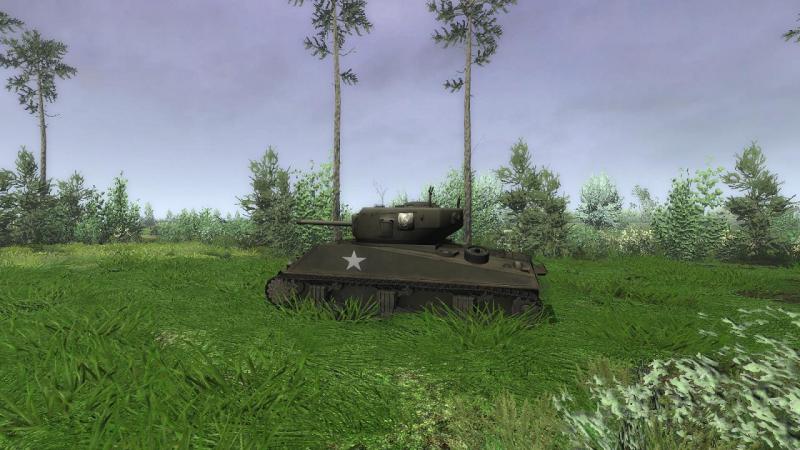
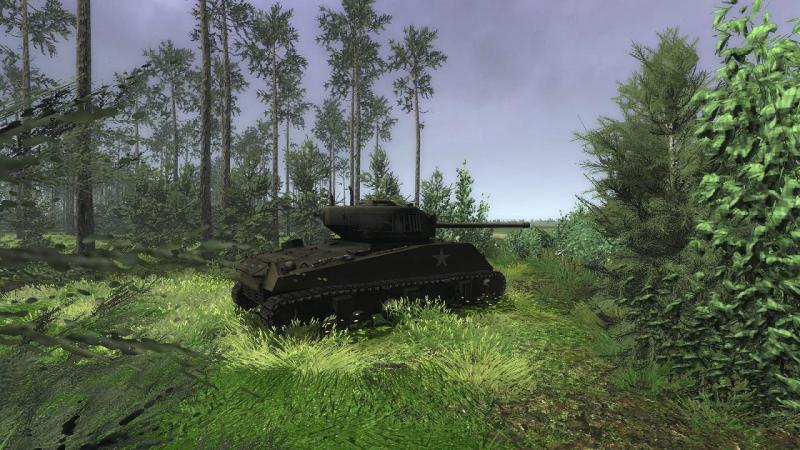
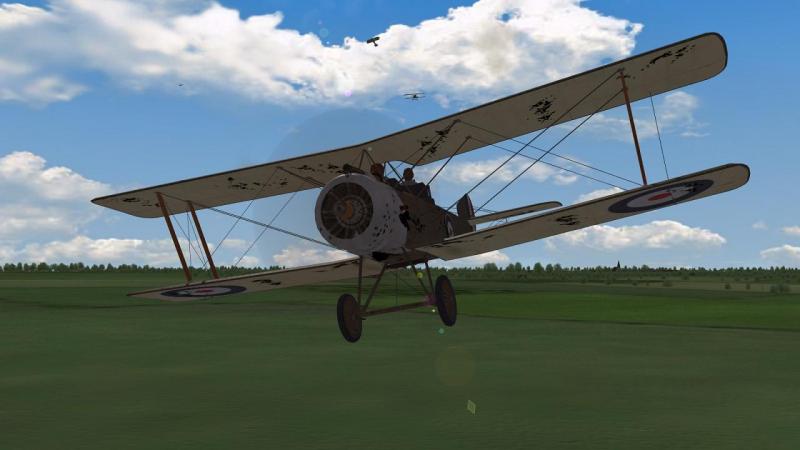
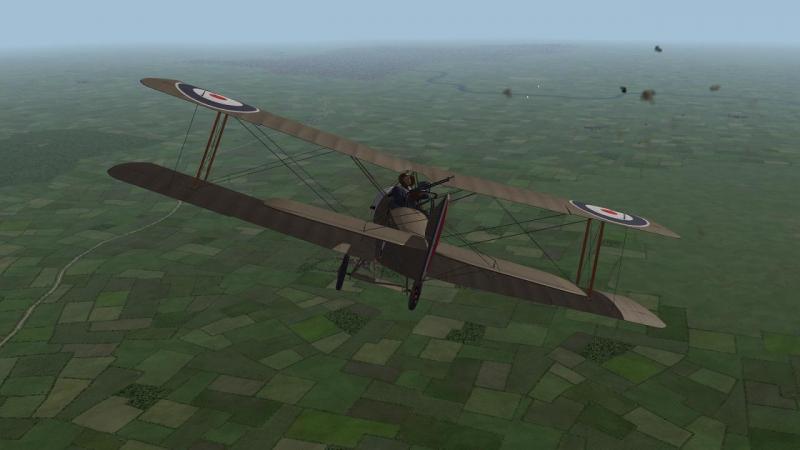
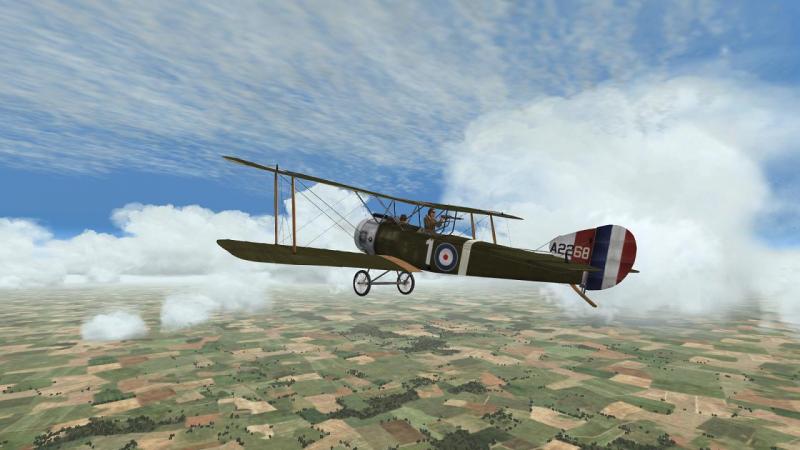
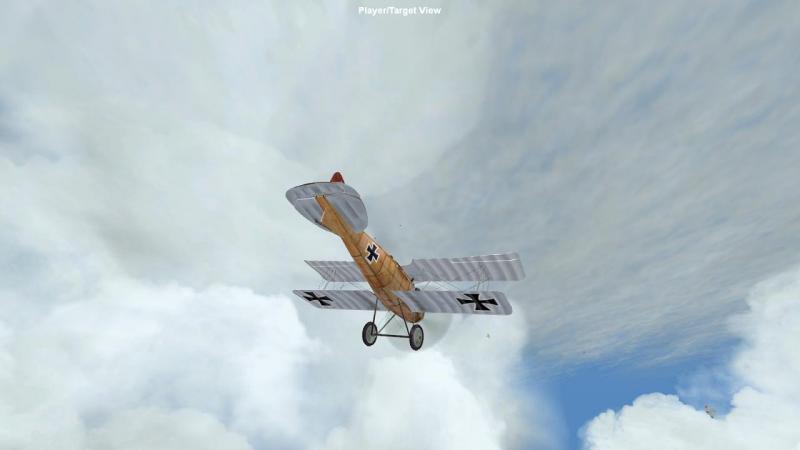
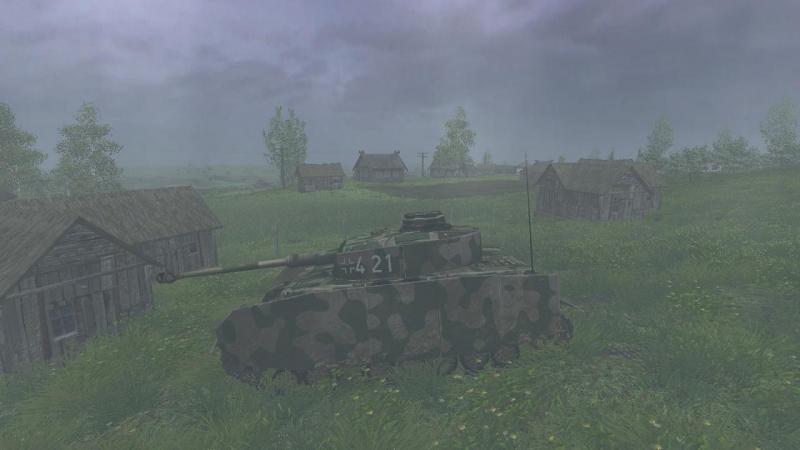
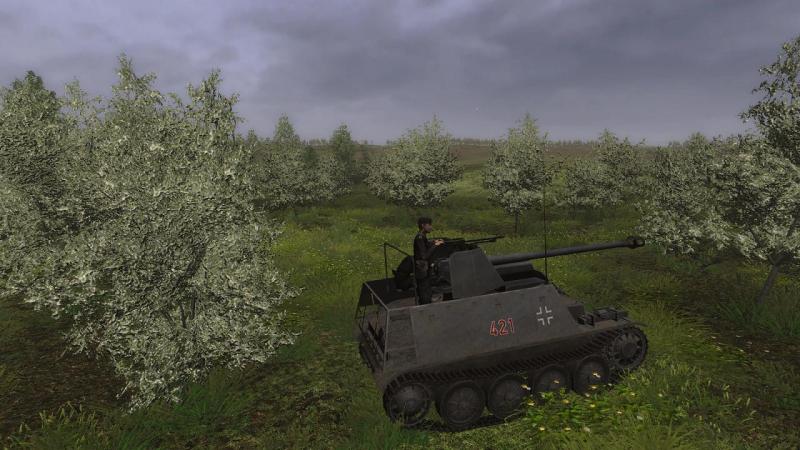
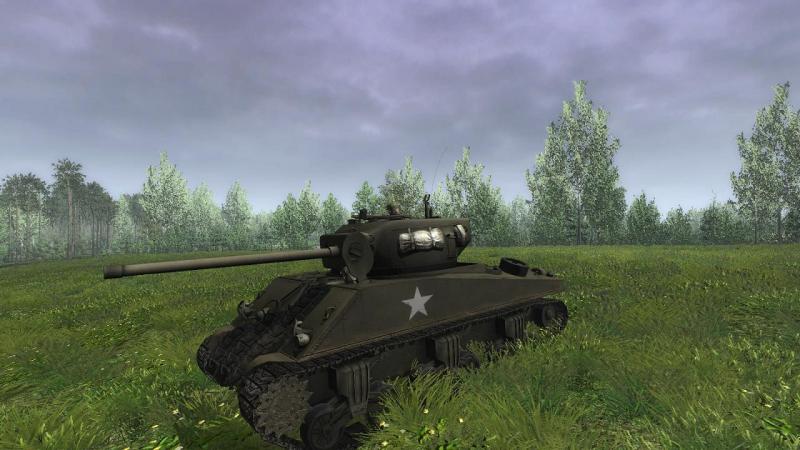
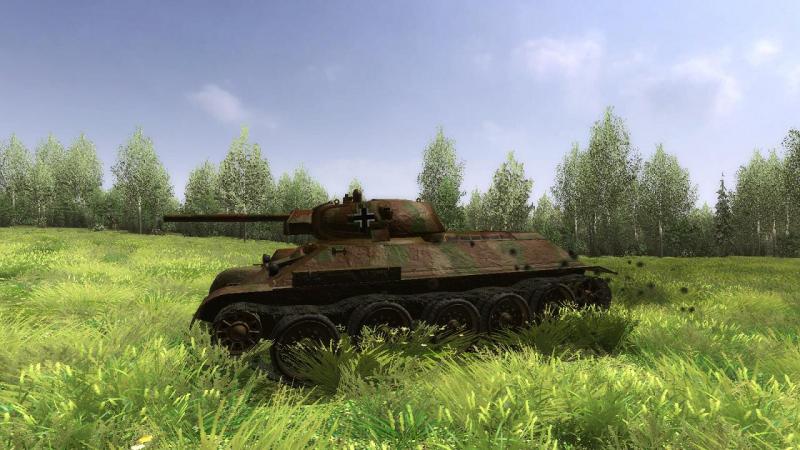
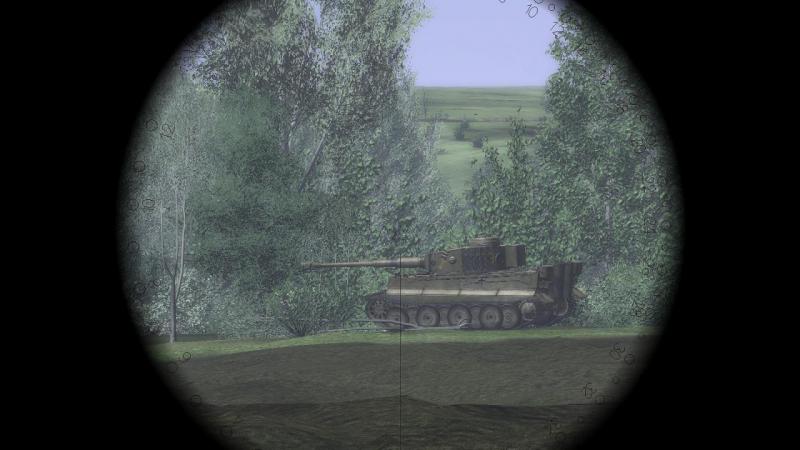
Fighting in the M4 Sherman in Steel Fury - Kharkov 1942! Until recently, I didn't realise that Graviteam's Eastern Front WW2 tanksim lets you sign up as a US Army tanker and fight in the famous M4 Sherman tank. It doesn't of course...at least, not out-of-the-box. But SF '42 is one of those sims which has been much enhanced by the work of that intrepid and talented group of people we call 'modders'. And the 'New Tank Add-on' (NTA) mod - current version, NTA 1.8 - includes a Sherman and missions for it. Keen to go to virtual war in an M4 - and to fight some battles in places whose names I could actually pronounce - this was one tank I had to try out. The mod Jonesoft Generic Mod Enabler is a must for SF '42 and I have it set up so I can play with either the Steel Panzer Mod (SPM) version 2.0 or NTA 1.8. Each has its own install order for the main mod and some recommended or essential extra components. It's not-at-all complicated to get set up; main thing is, use JSGME and enable or disable the mods, after installing them into JSGME's 'Mods' folder, in the right sequence. It's all here: http://graviteam.com/forum/index.php?topic=10944.0 (NTA) ...and here: http://graviteam.com/forum/index.php?topic=11026.0 (SPM). NTA 1.8 is apparently the most recent and complete mod and that's what I'm using for this mission, along with the associated sound mod, mission packs and update. Edit, August 2014 - the NTA mod has been discontinued but its successor, the STA Mod, is now available: http://stasf2008.eph...d-on-steel-fury The tank Like the Tiger featured in my last SF '42 mission report, the M4 General Sherman needs little introduction. Nicknamed rather derisively the 'Tommy Cooker' or the 'Ronson' (after the cigarette lighter's slogan, 'lights first time'), the M4 may have earned an unenviable reputation for burning when penetrated and it mighn't have been a match for some of the later German tanks in a straight fight. But when it appeared in action with the British Eighth Army in North Africa in 1942, it was one of the best tanks in the world. Even in 1944-45, it could do many of the things a tank had to do, as well or better than its opponents. Strong points included a decent dual-purpose gun, reliability and fast turret traverse The NTA Sherman is a late WW2 model M4A3, with the 47 degree, single piece upper hull front with larger driver and radio operator hatches; the T23-type turret with 'vision' cupola for the commander; 76mm gun; and internally, wet ammo stowage to reduce the fire risk. The 76 is of course a better AT weapon than the earlier 75mm, comparable to the German long-barrelled 7.5cm KwK 40 tank and Pak 40 anti-tank guns and able to fire APCR tungsten-cored rounds. The latter gave the Sherman 76 a better chance against the later German tanks at shorter ranges but was reportedly in short supply in tank units, being reserved mainly for the Tank Destroyer force, whose towed and self-propelled 76mm guns were supposed to be the main counter to enemy tanks, in US doctrine. The SF '42 M4A3(76) is a really nice rendition, with a just a hint of the 'gypsy caravan' look from external stowage and extra track sections on the hull front for extra protection. There are no interiors; these are of limited use anyway, as you can play just fine from the third person external view or (in the first-person view) from either the hatch-open view or the gunsight/periscope/vision port view. The mission From the list of available single missions, I chose 'Everything, but the Bridge!' by prolific Ukranian mission-maker Lockie. This is part of mission pack 2.1, which I think is designed for the NTA mod. Like Lockie's other missions, this comes with a neat loading screen, which includes a tantalising excerpt from a report of an engagement during the Battle of the Bulge, the historical setting for this mission. The German Ardennes Offensive in December 1944 is probably familiar to most of us, if only from the well-known Hollywood movie which featured grey-painted Spanish Army M47s acting as King Tigers, M24 Chaffees acting as Shermans, and that famous rendition of the Panzerlied with Robert Shaw. As that French General said on observing the charge of the Light Brigade, 'C'est magnifique, mais ce n'est pas la guerre!' I haven't played much SF '42 until dusting it off recently but in my experience, the typical mission is a deliberate but rather chaotic attack by a combined arms company-based combat team. This one was clearly going to be very different, as I could see from the briefing. Here it is; the mission map anyway. I have minimised the text briefing as it hides a lot of the map and in this case, it told me nothing much, except to defend the bridge: My little outfit is the trio of red diamonds, bottom centre-left. The bridge is in the middle. From the tactical symbols, the defenders - on the left bank apart from one AT gun - comprise some dismounted infantry, some soft-skimmed vehicles, a single tank, and a handful of anti-tank guns, likely the 57mm ones derived from the British 6-pounder, used by US Infantry Divisions. I believe the map is a re-labelled version of one of the Ukranian ones that come with the sim. The terrain itself is fairly level, not what you'd expect for the Ardennes. It might have been a good idea if I had enabled the winter weather mod to produce snowscapes appropriate for at least the later stages of the Battle of the Bulge but I don't know if it's compatible and I stuck with the original. Even though this mission is evidently an ad hoc operation, I'd have preferred a fuller, more immersive 'battle picture' and more scene-setting, in the mission briefing. Here’s how I ended up picturing the briefing, in my own mind: You're a lieutenant in the US Army commanding a platoon of three 76mm-armed M4 tanks from the 66th Tank Regiment, Second Armoured Division, the famous 'Hell on Wheels'. In the confusion following the Division's sudden redeployment to deal with the German Ardennes Offensive, your platoon has become separated from your unit. As you motor uncertainly along a track beside a river, an infantry major and his radio operator step out of the trees to your left and wave you down. The major looks tired but business-like, waving his '45 like he means to use it. 'I'm the Officer Commanding, Company B, First Battalion, 145th Infantry. I don't care who you are or where you're going, but starting right now, you're working for me. Look at this map. There's a bridge over the Roer River here. It's on your right, just a few hundred yards ahead of you. See it? There's also a whole bunch of Kraut tanks and infantry heading straight for it, coming from way over there, on your far left - see those blue arrows on the map? Company B - what's left of us - is in a defensive perimeter, on the near side of the bridge, with a few 57mm AT guns. The Krauts musn't get that bridge. We've to hold it, at all costs. No more bug-outs. Take your three M4s up there and keep the Krauts away from the bridge. Their tanks are your priority targets. Your choice, where you set up. But do it quick. Move out NOW!' They say 'Time spent in reconnaisance is never wasted'. For this mission, as usual in sims and often in real life, my recce would have to be a map one. First job before starting the mission was to take the map and my orders and make a quick Combat Appreciation. For this sort of thing, I used an abbreviated format we were taught by a captain in the RM Commandos - good enough for the booties, good enough for me. It's 'Aim - Enemy - Ground - Plan' and here goes my quick effort for this mission. Aim - the easy bit, to destroy any Germans making for the bridge. Enemy - tanks and infantry in unknown, but possibly company group, strength, shortly likely to cross my front from left to right, headed for the bridge. Ground - looking towards the enemy from the bridge: on the left, a treeline with good cover and some room to manoeuvre; in the centre, a large open space with little cover, which the enemy will likely have to cross, a good killing ground; to the right, a narrow treeline backed by a bend in the river which severely limits mobility that way. Contour lines are few and gentle so the terrain looks rather flat, apart from the rather shallow river banks and a very low hillock to my immediate left. Basically, I'm looking for covered, preferably hull-down firing positions on the enemy's lighter-armoured flanks. Plan - move to positions in the tree line to the left of Company B's defended locality. Fire into the flanks of the enemy as he crosses my front from left to right, heading for the bridge. My tanks to be in a line, set back from the treeline, sacrificing wider arcs of fire for better concealment. Change firing positions every few rounds, as one does. Cover from fire would be nice but accept cover from view if that's all I can get up there, as seems likely. Plan made, I loaded the mission and roared off down the track towards the bridge, trying hard not to veer off and fall into the river, conventional Sherman gun tanks not being noted for being amphibious, notwithstanding the abilities of DD versions. Looking behind me only to see my other two tanks immobile, I realised I'd forgotten to brief them. The F8 key brought up the map again and from its command and control icons, I ordered single file/column formation and 'do as I do'. As they caught up, I pressed on. About 50 meters before the trees on my left petered out, I turned 90 degrees left and rumbled through the woods, some distance inside and parallel to the treeline from which I intended to catch the enemy with flanking fire. As I motored on, the trees thinned out but I was still screened from the killing ground to my right by a decent line of smaller trees. From that direction, the cacophony of sound I could hear above my engine noise indicated that the battle was already in full swing. I'm using the recommended NTA sound mod, which I assume was responsible for the US tanker voices I could hear on the intercom. This mod changes many of the other sound effects too; hard to say from one usage whether or not I prefer it to stock, which is pretty good too. Anyway, I pressed on, more cautiously now. The woods thickened up around me and I swung 90 degrees right, to face the edge of the treeline. Beyond, the enemy seemed already to be advancing, heard but not yet seen through the screen of foliage in front of my tank. I began to edge slowly forward, to the point where I would acquire a narrow line of sight out into the killing ground. As I did so, I ordered my tanks into line abreast, anxiously looking around to see how well my AI Tank Commanders would cope with my series of manoeuvres. The answer, alas, was 'none too well!' ...to be continued!

-
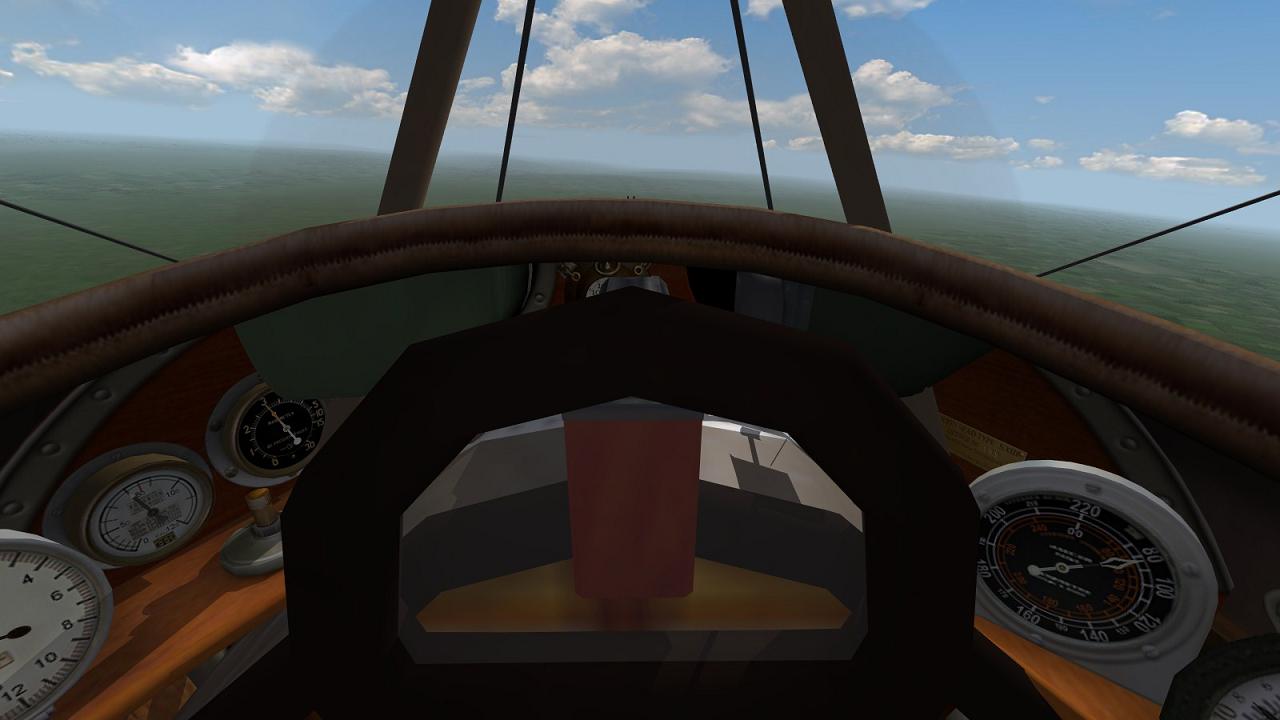
OK, thanks - just wanted to check if I was doing something wrong. If I'd had this cockpit view in the mission, I think I might have got that Hun!
-
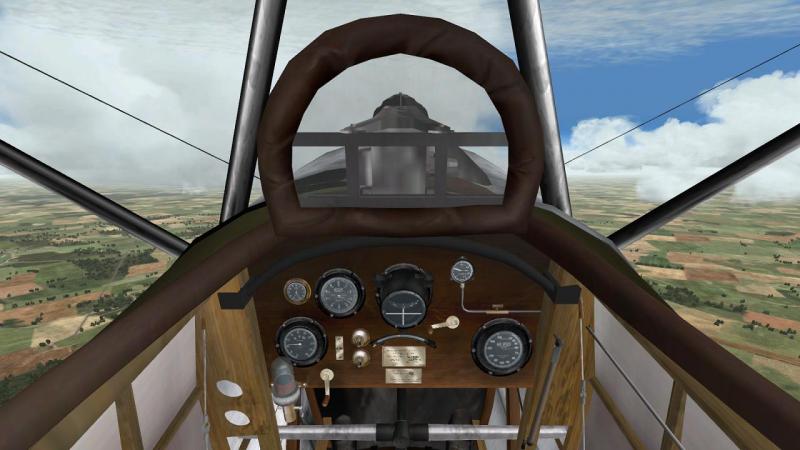
Thanks Ojcar, I checked and it looks like I forgot the last step in the readme (copy your files). Still not right tho: the cockpit coaming/edging is not sitting on top of the edge of the cockpit and is below the top of the nice new instrument panel. Any ideas?
-
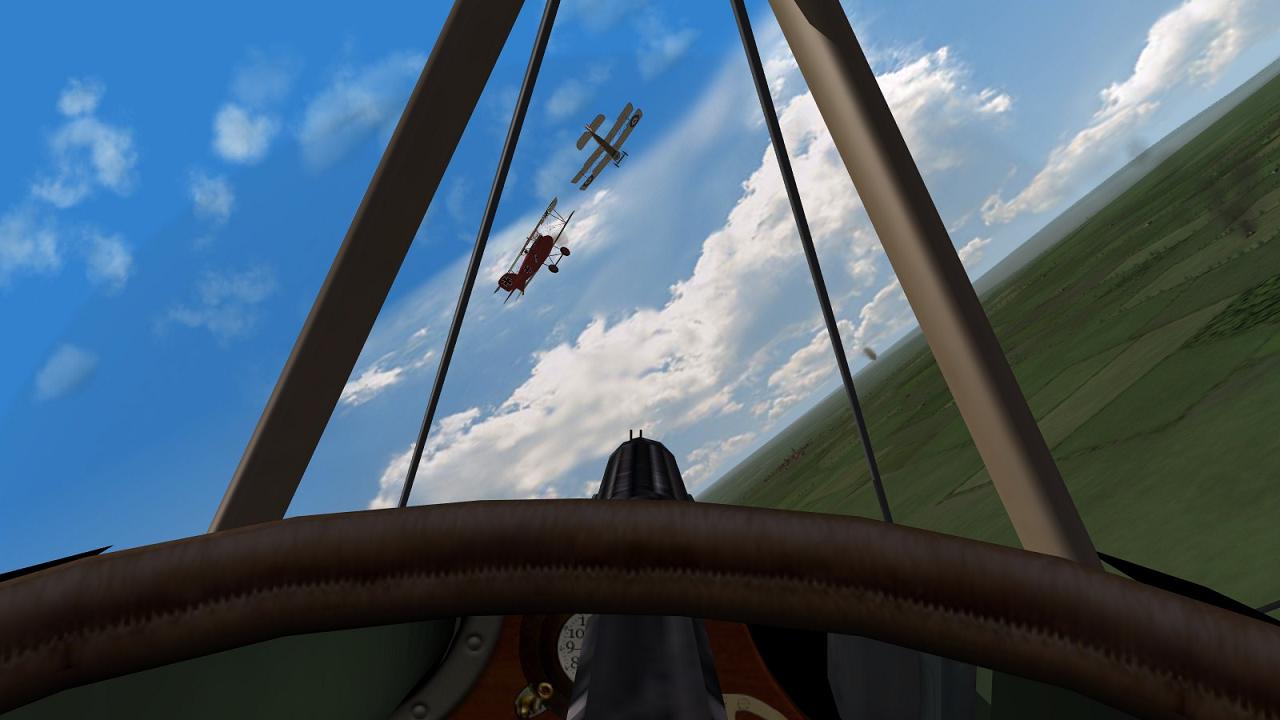
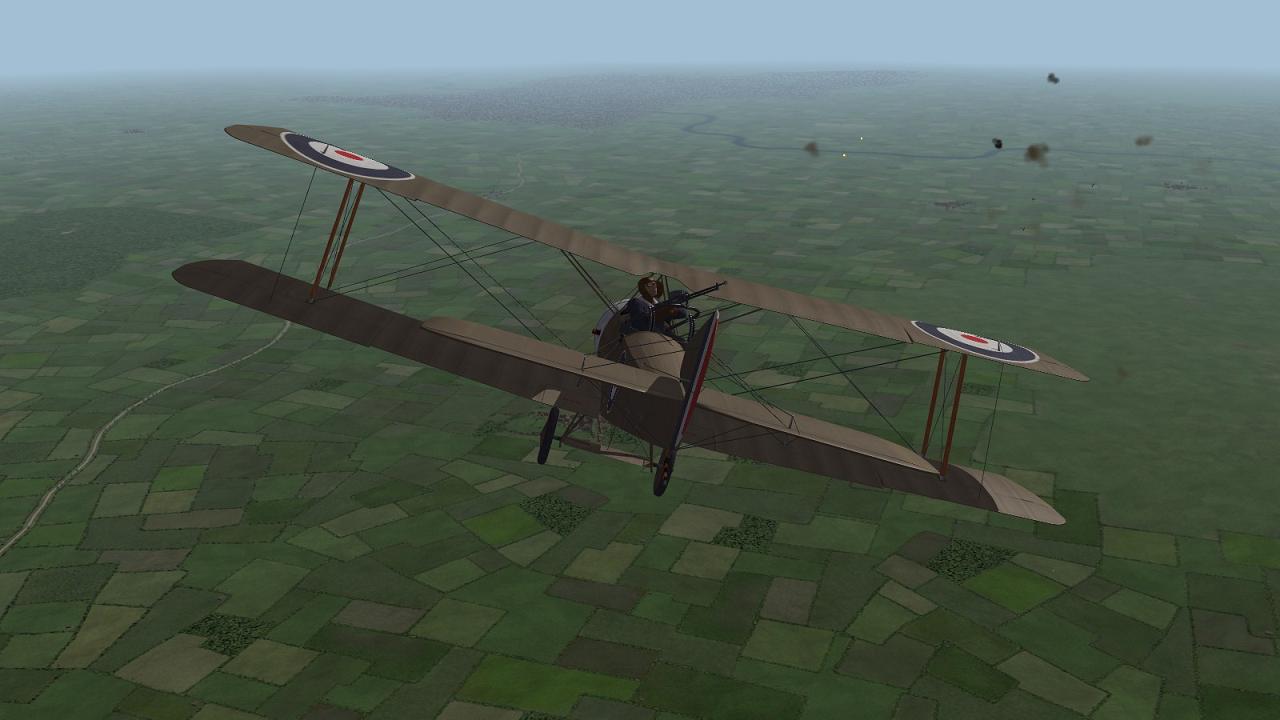
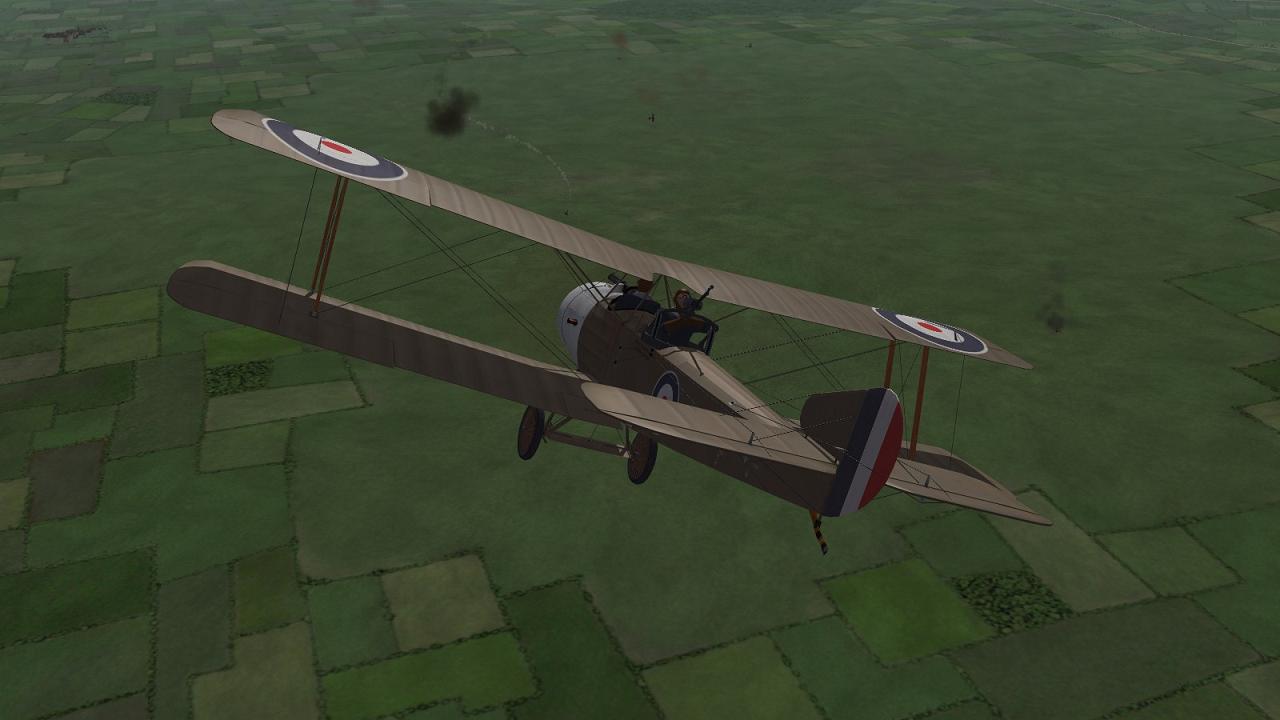
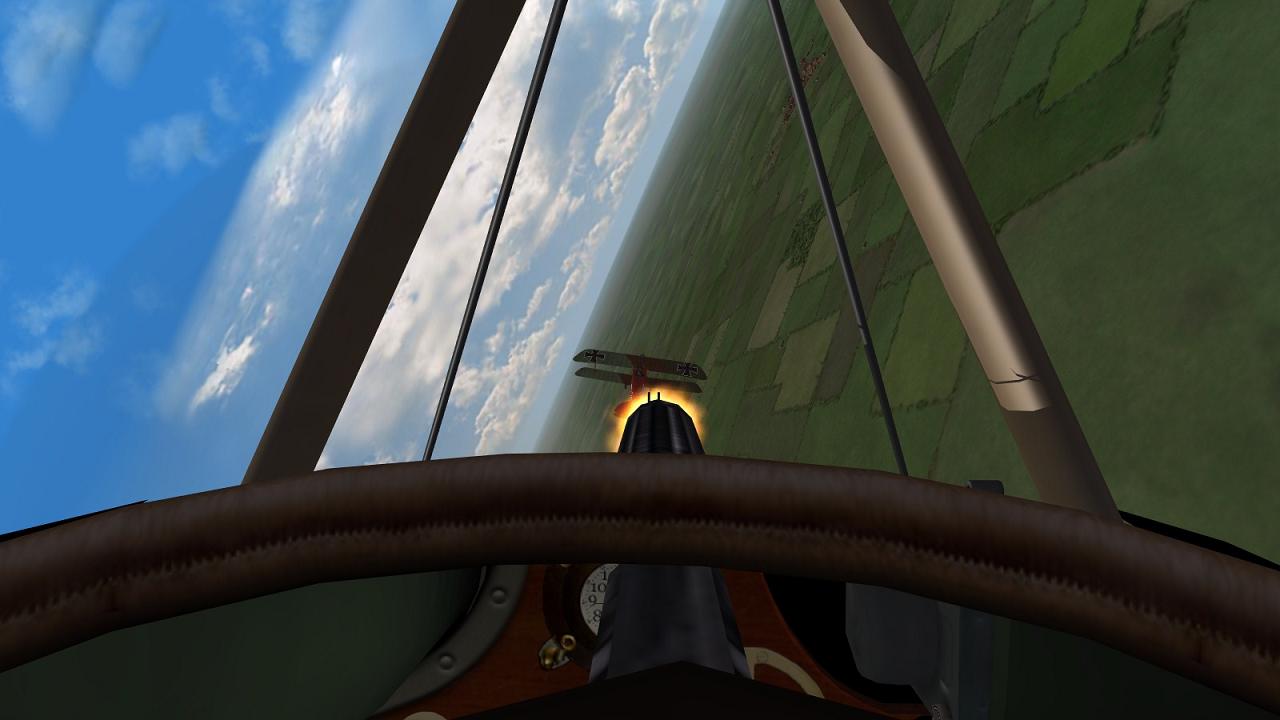
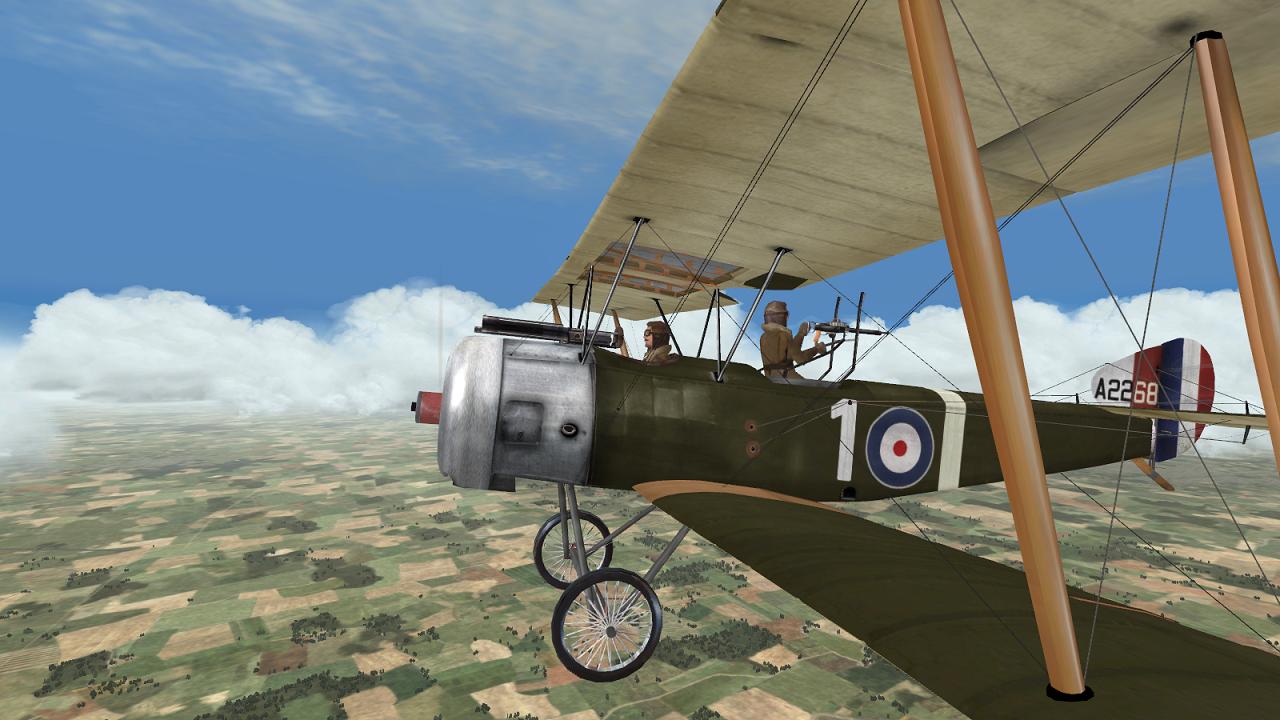
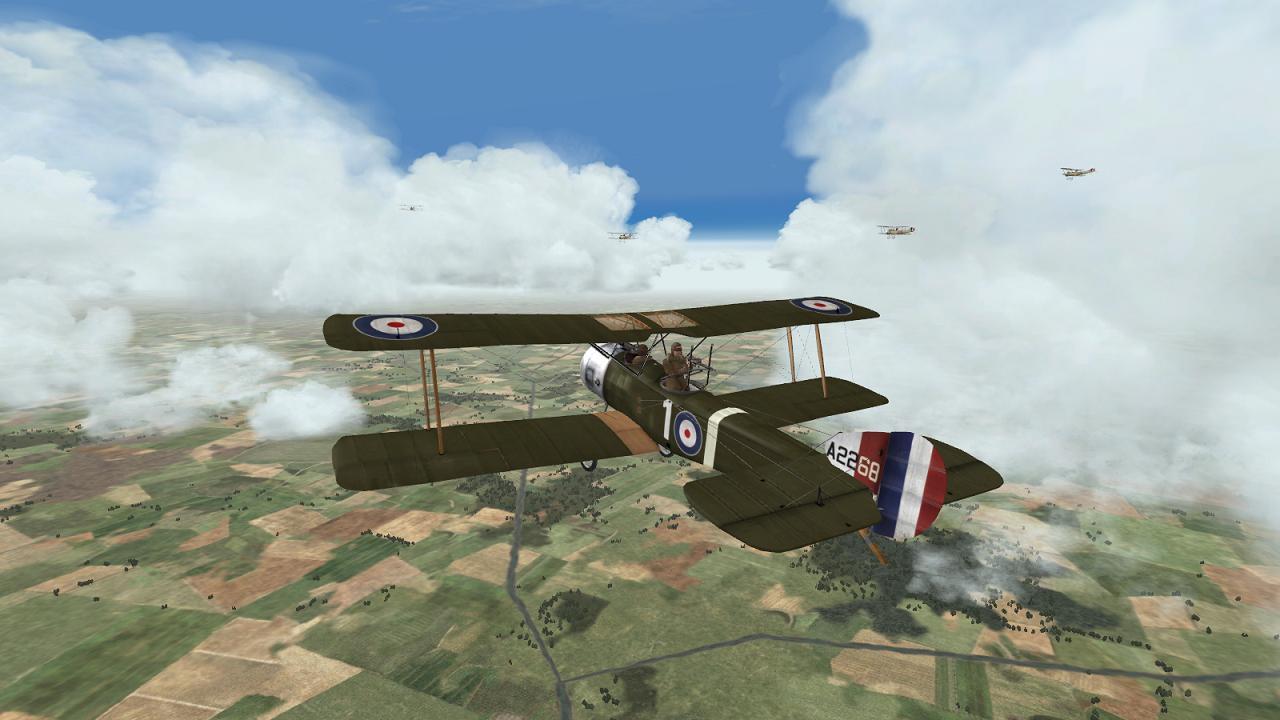
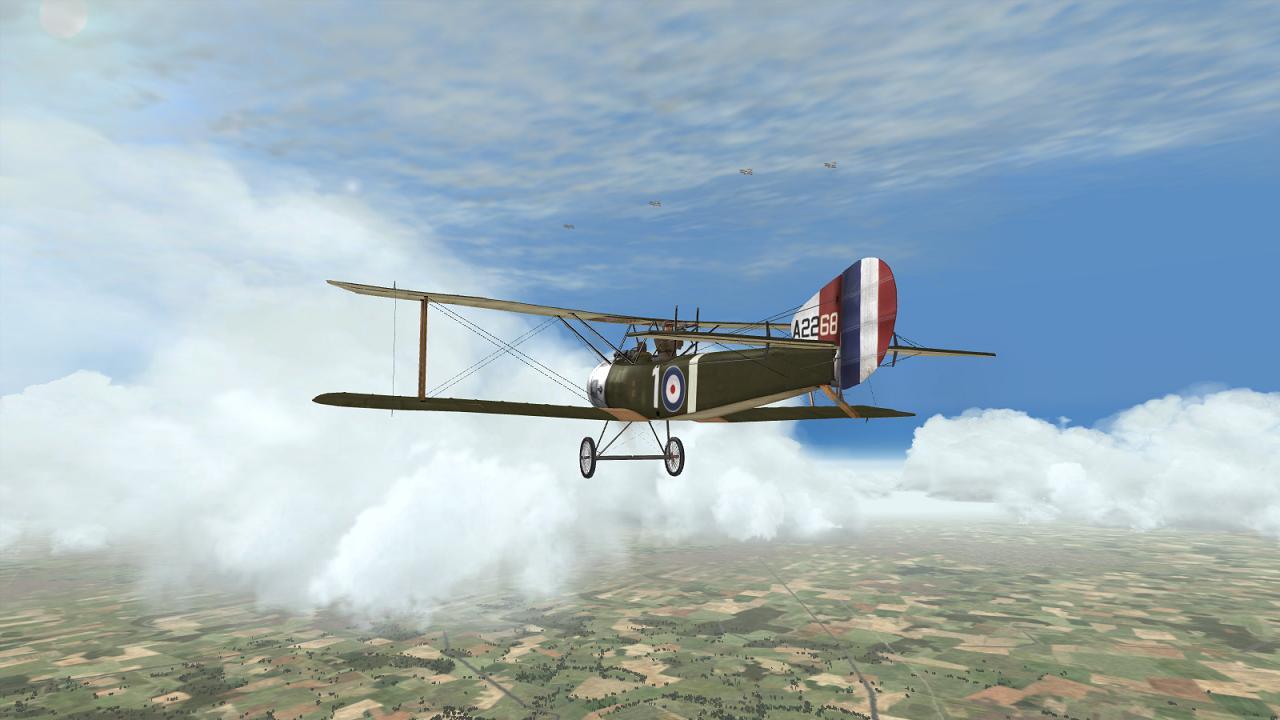
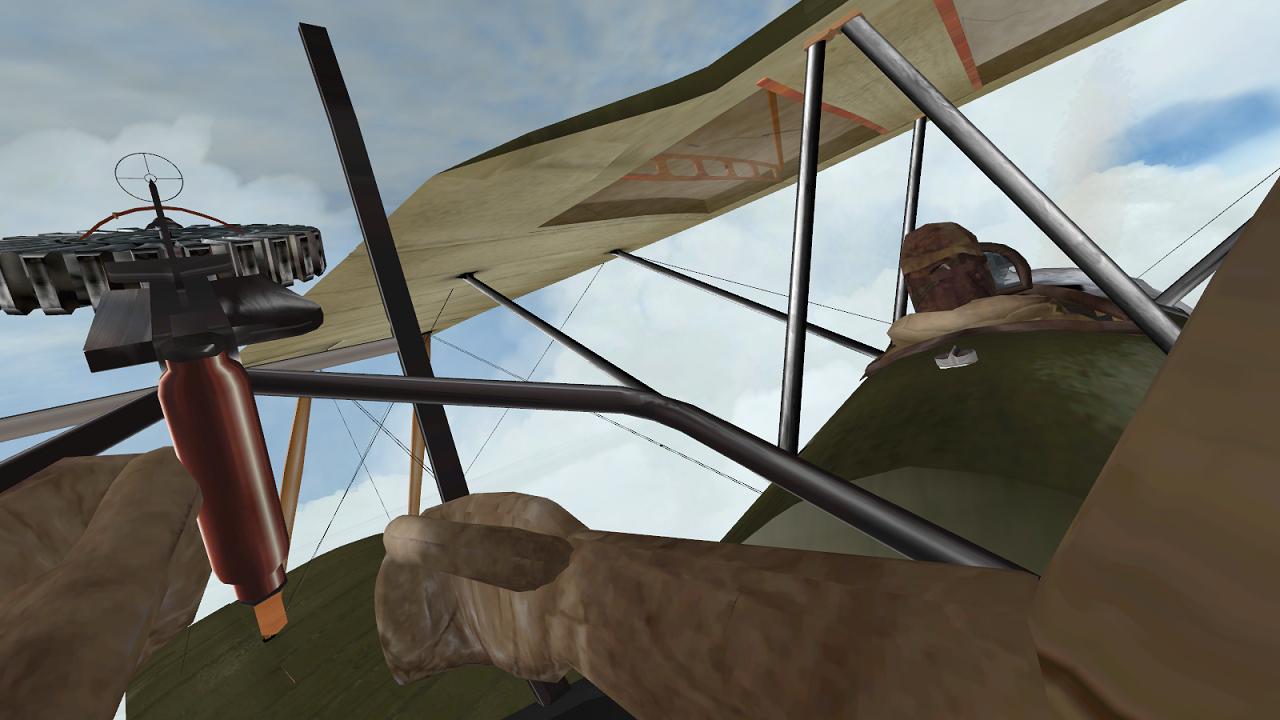
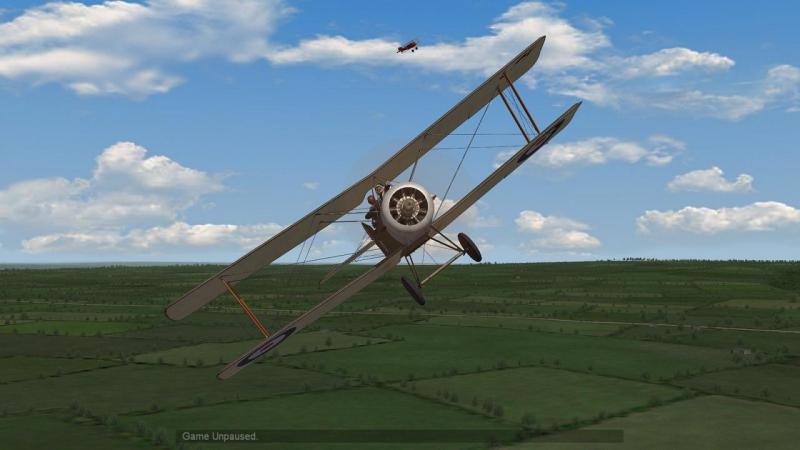
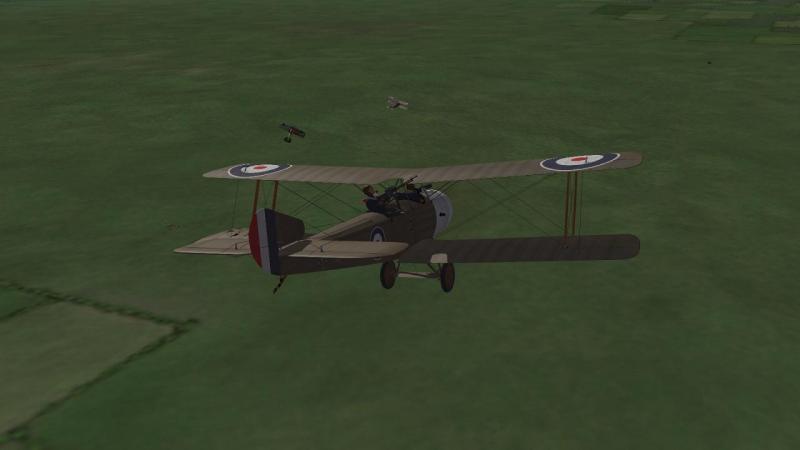
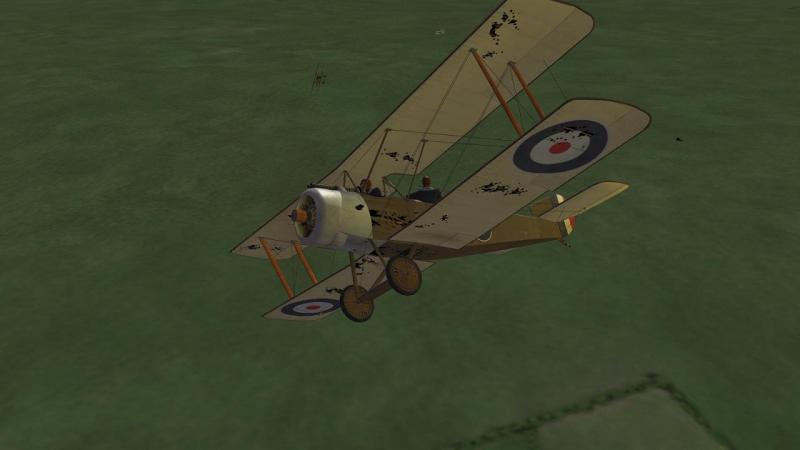
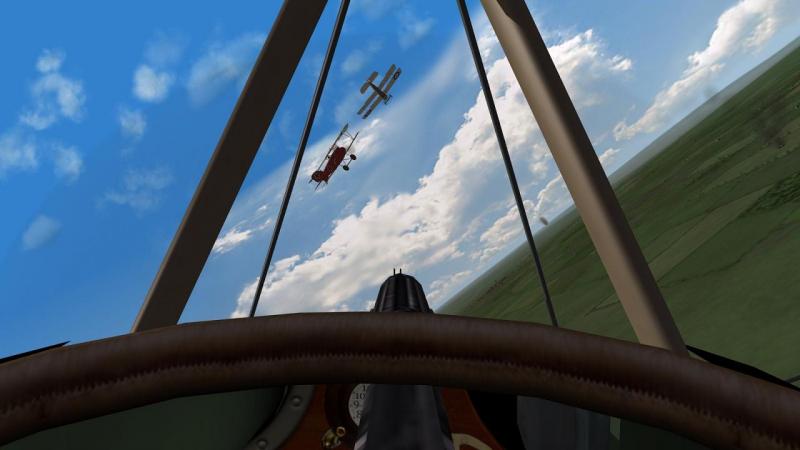
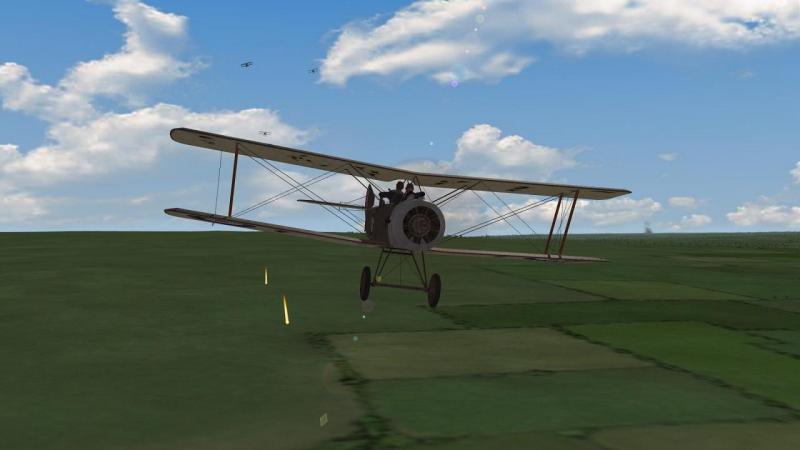
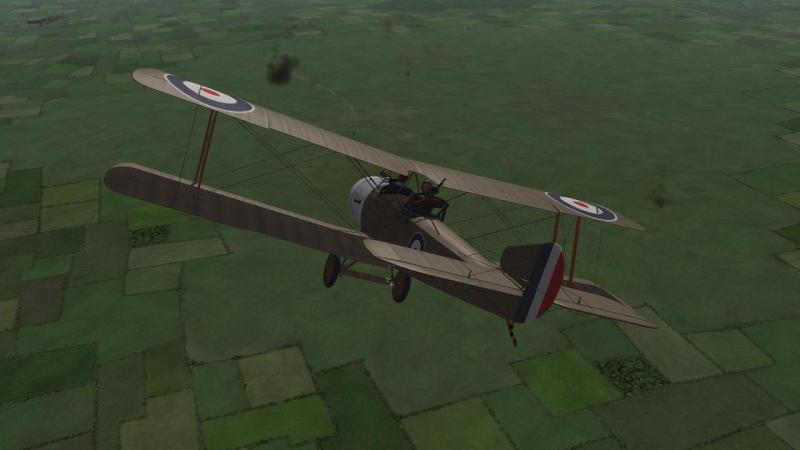
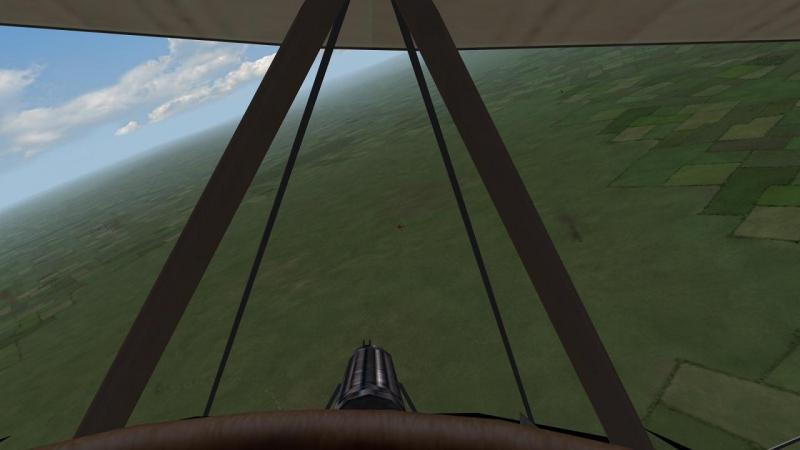
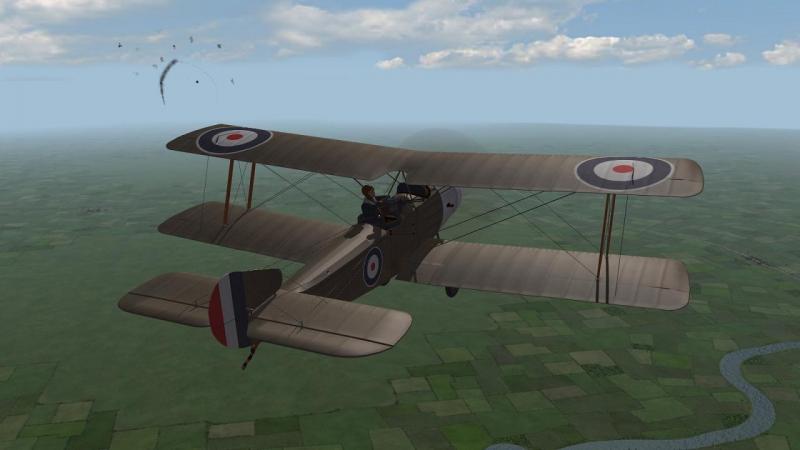
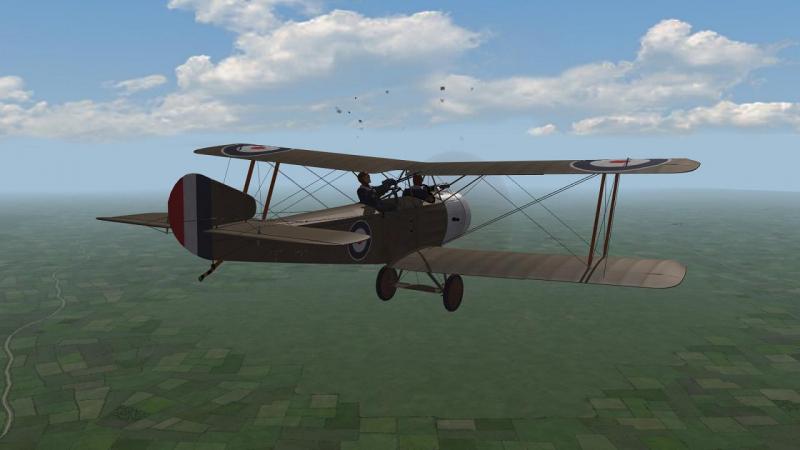
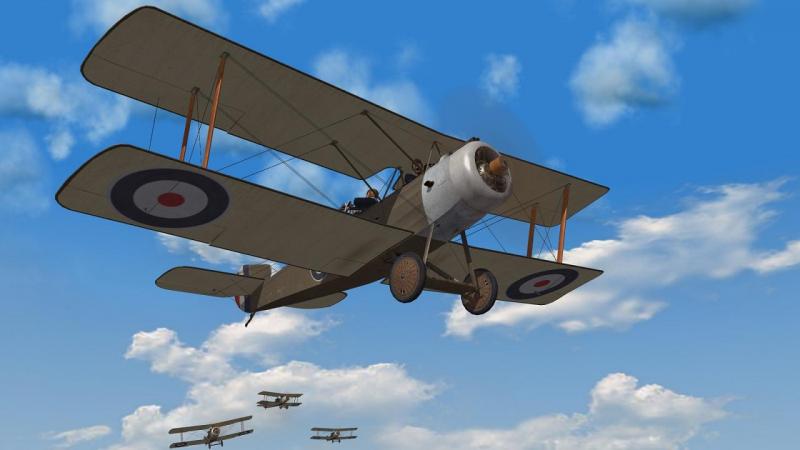
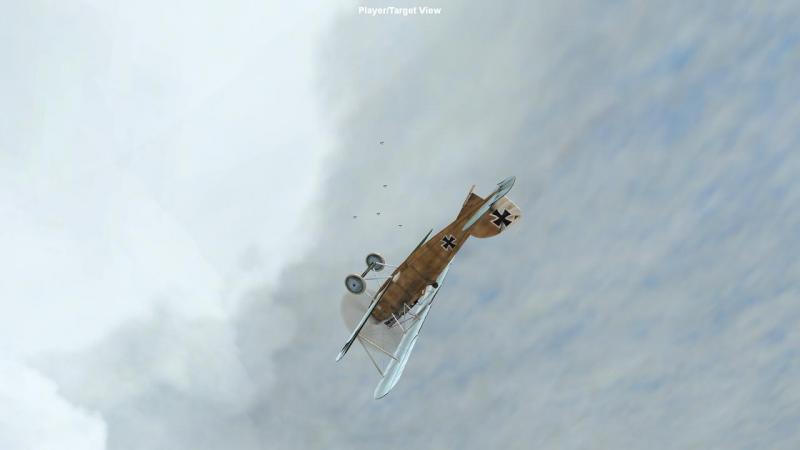
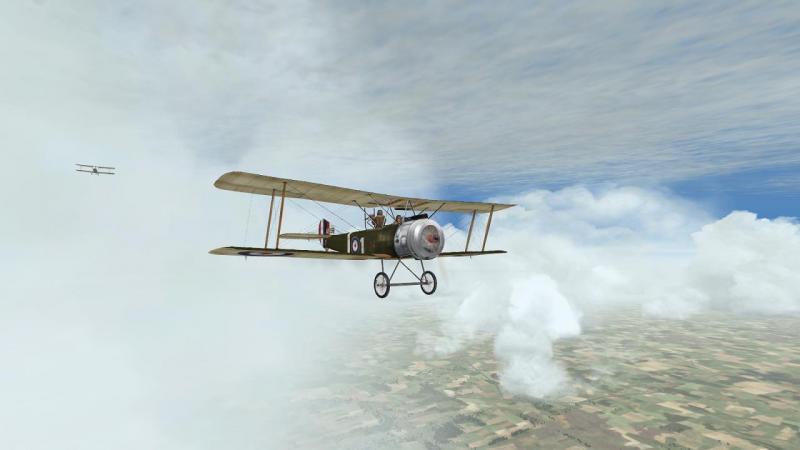
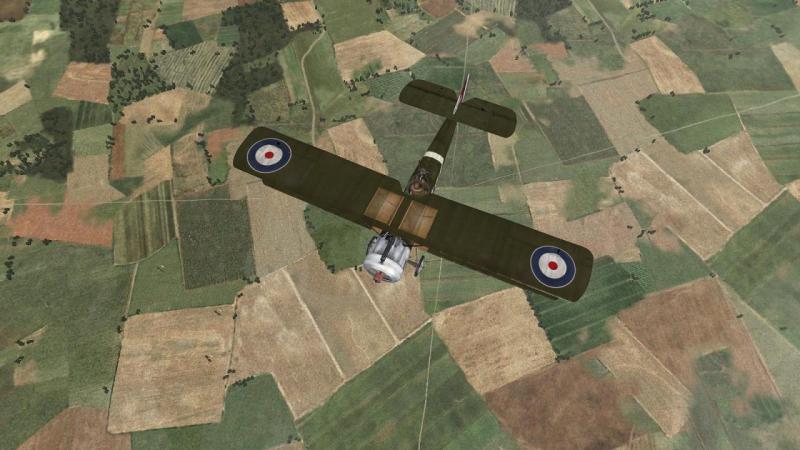
"Trenchard stopped and looked at this unusual trio of sights [an Aldis and two ring & bead sights on a 45 Squadron Camel]. 'This is what I like to see,' he boomed. 'Something original. Shows thought, which is good.' 'Tell me,' he said to John, 'how do you make use of this triple sight?' 'I don't, sir,' replied honest John, 'I just point my nose at them and hose away.' Norman Macmillan, 'Into the Blue' As I turned back into the main dogfight, the red Hun I'd spent all my Vickers rounds upon hovered menacingly above me, but seemed reluctant to try matters with my observer's Lewis, which tracked him purposefully. Soon, I was back in the thick of it. 'It' now seemed to consist mostly of a veritable hornet's nest of Huns from two different Jastas, including the red outfit - Jasta 11 most likely - and some green-tails, possibly Jasta 5. Several aircraft wrecks now burned on the ground. There was at least one other Strutter still on the go, but mostly, there were Huns. My cunning plan of a defensive 'beehive' had unravelled pretty fast. I tried to scare a red Hun off the tail of one of my friends but without much success, for suddenly there were tracers crashing into my machine from somewhere behind. As if that wasn't bad enough, my kite was lit up by a close burst from Archie, who wasn't waiting for anyone. My surviving flight-mate seemed to be managing an escape from this disaster, though badly knocked about and with a dead observer. Time to make my own escape, I thought to myself. I made a few tight turns at low level in an effort to throw off at least some of my assailants and came out facing the Lines and home. What followed was like one of those nightmares where you're trying to escape something dreadful but are stuck in slow motion. Reminded me of that bit in Coleridge's 'Rhyme of the Ancient Mariner'; 'Like one that on a lonesome road doth walk in fear and dread And having once looked round, walks on and no more turns his head Because he knows a frightful fiend doth close behind him tread' I just hunched down in my seat and snaked for home, dodging the rounds that rained down all around me at intervals but not looking back. No point, really. Either they got me, or they didn't. Not much I could do. I was, however, hoping that my observer might be able to do something about it. I recalled hearing his Lewis gun rattling behind me at least once during the earlier fight. But now, he seemed overwhelmed by the scale of the impending personal disaster. Or perhaps, by the sheer number of targets. He tracked the enemies but didn't fire. Thanks, mate. I'll remember that one. As we got closer to the Lines, somehow escaping destruction, I began to entertain a hope that we might just get away with this. The rounds still rained down, but there seemed to be 'only' three Huns from the five or more originally in my immediate vicinity. Still blindly jinking, I finally made it across the enemy wire into No-Man's Land, then across into friendly territory. Hopes that the Huns might not venture after me were soon dashed. One turned back, but two others came on. Likewise dashed were hopes that my pursuers would be driven off by our Archies or AA MGs on the ground. The pursuit continued. I contemplated landing, but after checking my map decided to make for the nearest airfield, not far away, close to the Lines. By this time the pursuit consisted of just a single Albatros. If I'd had any ammo left or if my observer had been any use, I'd have had a crack at him. But all I could do was continue to jink my way towards the airfield, flying so low as to make it difficult for the Hun to make a firing pass at me without risking a crash. AA defenses at the airbase were my last hope. On I went. The ground was pretty level but it was still hard to pick out the airfield, which had looked close by on the map but seemed to be miles away when hunted in this fashion. I was much relieved when I finally spotted the row of green hangars, looming behind the red roofs and church spire of a nearby village. For some reason, the airfield AA started firing then seemed to stop. I came in too fast and had to extend then come in again, all the while cursing the AA gunners and expecting to be knocked down by that final Hun. But I managed to plonk my well-holed kite down in the middle of the airfield, swerving to the last, and trundled to a stop close enough to one of the AA guns for the crew to her me tell them exactly what I thought of them. Meanwhile my Hun escort merrily buzzed the lot of us, cheated of his prey but in his way, also letting us all know what he thought of us. The debriefing confirmed the scale of our defeat. Sinclair, Edwards and Hallowes had each bagged an Albatros, but the first two were now dead and the last one, a prisoner. With the view system, I had been able earlier to confirm that there were other aircraft in the air, friendly and enemy, of which a sample is pictured below. But the only friendly scouts were some silver Nieuports and I saw neither head nor tail of them during my sortie. As Macmillan observes in 'Into the Blue', co-ordination between friendly flights was left largely to good fortune. The Huns had followed us for a bit over our Lines and one as far as that airfield a short way over. But they were not as target-fixated as one often sees in sims, even if it happened that some had turned back only when their ammo ran out. My ineffective gunner was a big disappointment, but he might have been wounded early on; you can't man the rear gun yourself in FE and I don't think there's any way of telling at the debrief if your observer was wounded, FE being built for single-seater flying. I will, though, check the plane's data file to make sure the gunner's rates of traverse, elevation and fire have not been 'nerfed' by a mod. Well, that was it; a typically exciting and eventful First Eagles mission which nicely captured the excitement of some of the desperate air fights described in 'Into the Blue'. I could have wished for a clear-vision panel in the upper wing and a better sighting arrangement for my Vickers, though. And perhaps for less Albatrosses in the air, or more friendly flights, or both. But I'm not complaining! If you have Wings over Flander's Fields or the Rise of Flight Strutter, why not post a mission report of your own right here; or at least some screenies and a line or two on what the mission was and how it turned out?


-
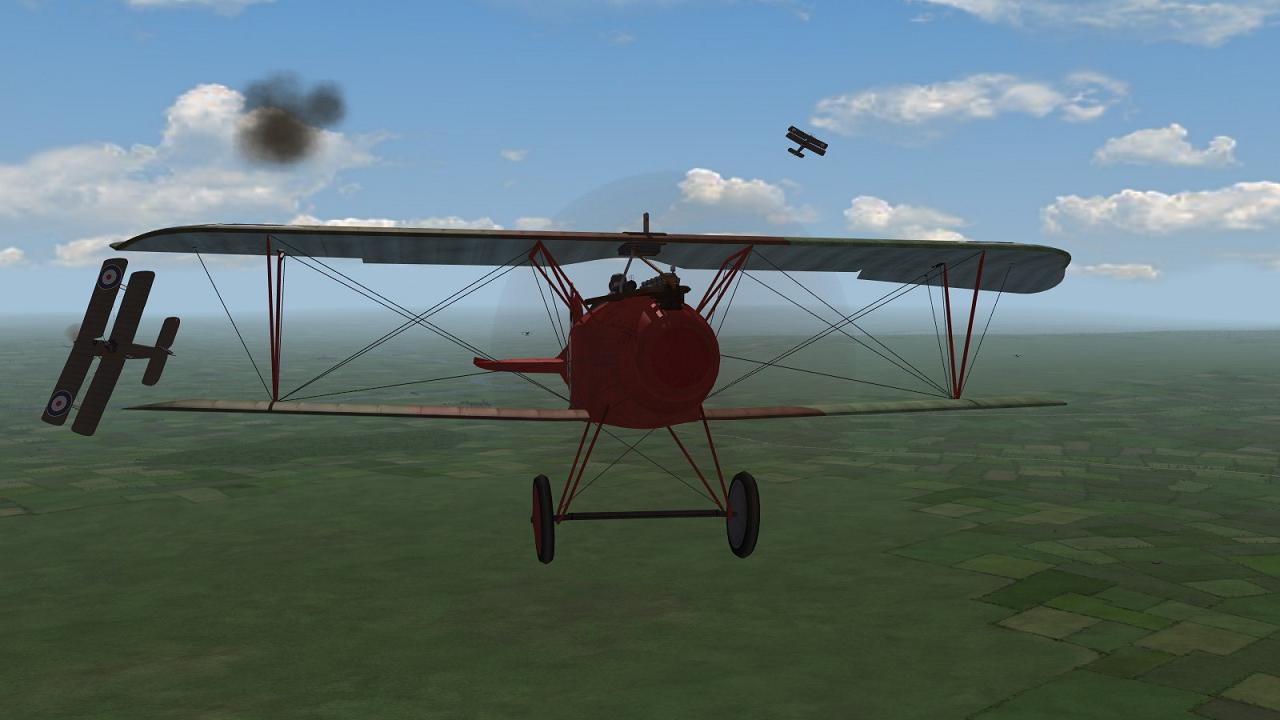
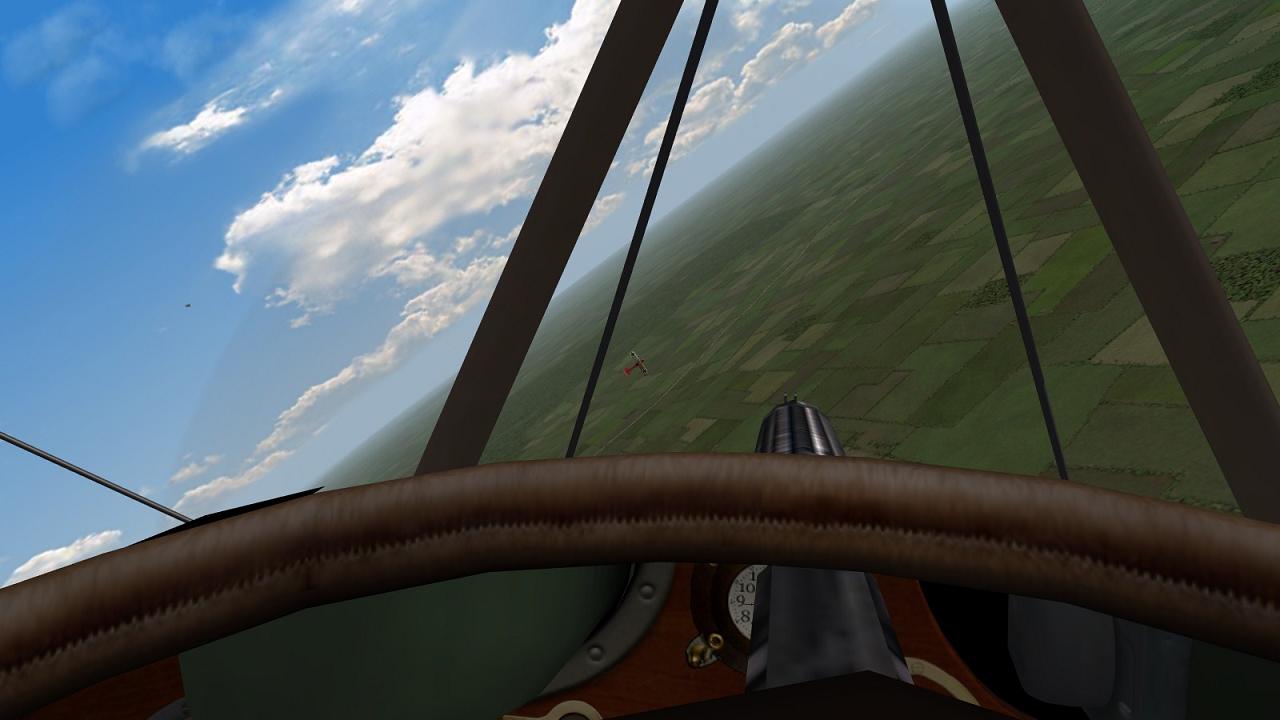
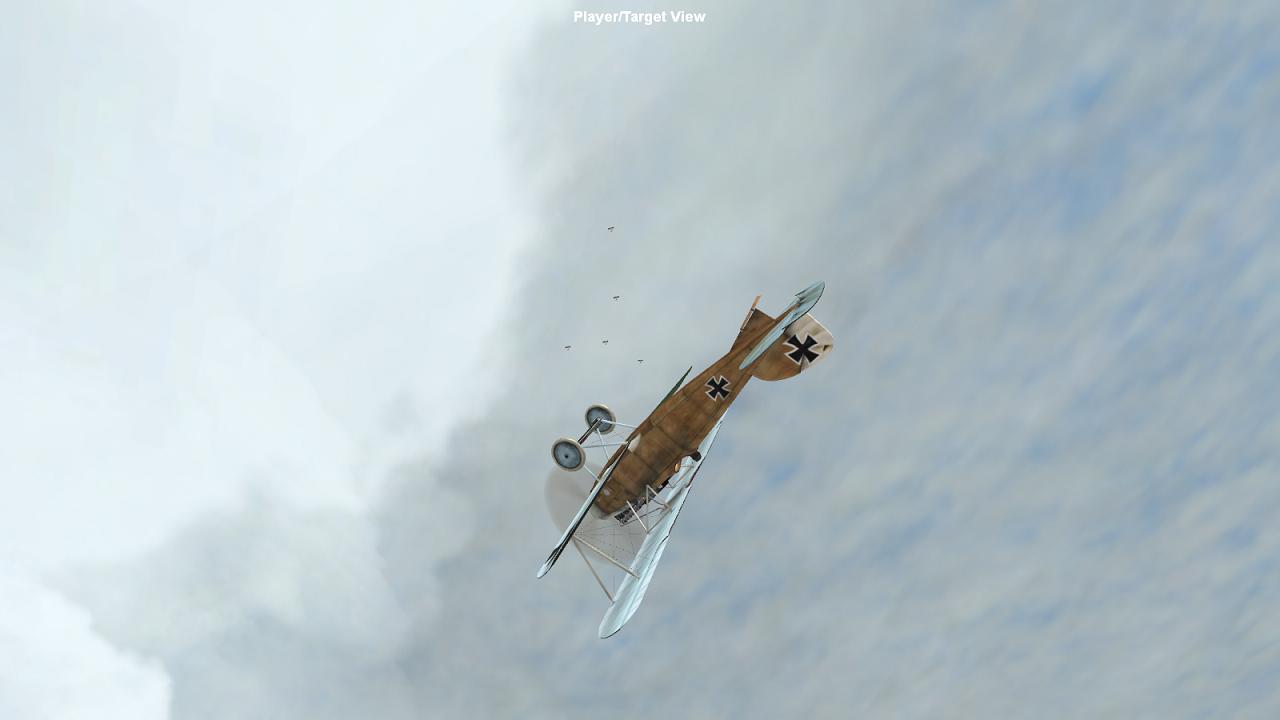
'When the four Huns closed on them the observers fired a burst at the nearest and the two pilots splitarsed round and opened fire at them with their front guns. These tactics did not appeal to this particular clutch of Huns' Norman Macmillan, 'Into the blue' We drew closer to the air fight ahead and below, which was now drifting slightly right. I hung on a little longer then gave the signal for an attack. For better or worse, we were now completely committed to entering the fray. At this point, two things happened. First, one of the original combatants went down streaming light grey smoke in dive which quickly became terminal, possibly a victim of the flak. Either way, I sensed he was one of ours. The second thing was that I noticed that the other aircraft in the flight appeared to have distinctive spade-like tails. Exactly like those on an Albatros scout. It was at about this time that I began to get the feeling that this might end badly for us. Sure enough, the last of the friendly planes had evidently gone down. Now, it was just the four of us, against a bunch of hot-shot Huns in V-strutters who had just tasted blood and were now after some more - ours. Confirmation came in the form of a red-bodied DIII which came up at me head on. Suddenly missing the presence of any kind of gunsight, I gave him an uncertain burst as he flashed past. I literally ducked as I missed piling into him by what really looked like inches. Then I pulled hard around after him, to have another go. In my haste to engage, I had committed various sins. For one thing, I hadn't counted the enemies. Possibly three, four at most, I estimated, which gave us a fighting chance. So relying on my flight-mates to shift for themselves, I went for the first Hun. Round and round we went. Despite the gaudy red fuselage, this Hun didn't seem to be all that hot. He seemed to lose sight of me from time to time, or perhaps he was distracted by the other aircraft. Each time I went for him he broke into a tight turn which he did not sustain long, enabling me to have another crack. But I always seemed to be missing him, with that difficult sight picture. I could see that I was getting some hits, but not nearly enough. By the time I realised that I had to get close or run out of ammunition, it was too late. I finally made it right on top of him and let him have it. My Vickers fired off its last few rounds and clicked to a halt. No time now for self-recrimination! By this point, I was rather low, having pushed my Strutter hard to keep up with the first Hun. I now broke away from him and headed back to the main scrap. My plan was to join the general scramble over there and rely on both the fire of my observer and on the cover of the guns of my flight-mates. The RFC's FE2 pusher 2-seaters are frequently described as flying in a defensive 'Lufberry' circle in such circumstances, but by another account the tactic was more like staying roughly together in an unpredictable swarm so that attackers would find it impossible to avoid facing some defender's gun and so be hampered from making a firing pass. This was what I now had in mind. Join the swarm and hope the sharks would not single me out. Would it work? I would soon find out! ...to be continued!


-
'The work of our 1 1/2 Strutters was nearly over. They had done good work despite deficiencies in performance; but at high cost in men and aircraft' Norman Macmillan, 'Into the Blue' To the question 'Where are the Huns?' the answer seemed to be 'elsewhere'. The skies looked clear all around us. They didn't stay that way for long. Looking half left, east into Hunland, I saw a series of black AA bursts begin to dot the skies, some way off but at about the same level. Black bursts meant German fire, directed at friendly machines. I flew along for a bit, keeping a lookout for any other aircraft but mostly watching the Archie. A dark trail appeared and lanced down to the left, with a fainter smoke trail forking down to the right. An aircraft going down, possibly two, after a collision. Staring hard, I could just about make out a small swarm of faint objects, looking like a small cloud of midges swirling around one another. An air fight in progress! As far as I could make out, it was about 2-3 miles away. Looking around again, there were no other aircraft to be seen, so I banked left and steered straight towards the scene of the action. As I drew slowly closer, I saw one aircraft detach itself from the melée and slide across to the right, flying level and seemingly intact, possibly a friendly aircraft escaping back towards the Lines. Meanwhile, the dogfight continued, gradually drifting lower. My first instinct had been to climb as I approached the fight, so as to give myself the opportunity to see from above what I was getting myself into. The dogfight's descent made this un-necessary. But, I reasoned, I had to consider the possibility that the friendly aircraft over there might need urgent assistance. I nosed into a dive, so as to arrive as quickly as I could, at the cost of my height advantage. This was soon to prove to be a very serious mistake, even if made quite deliberately and with the best of intentions! ...to be continued!


-
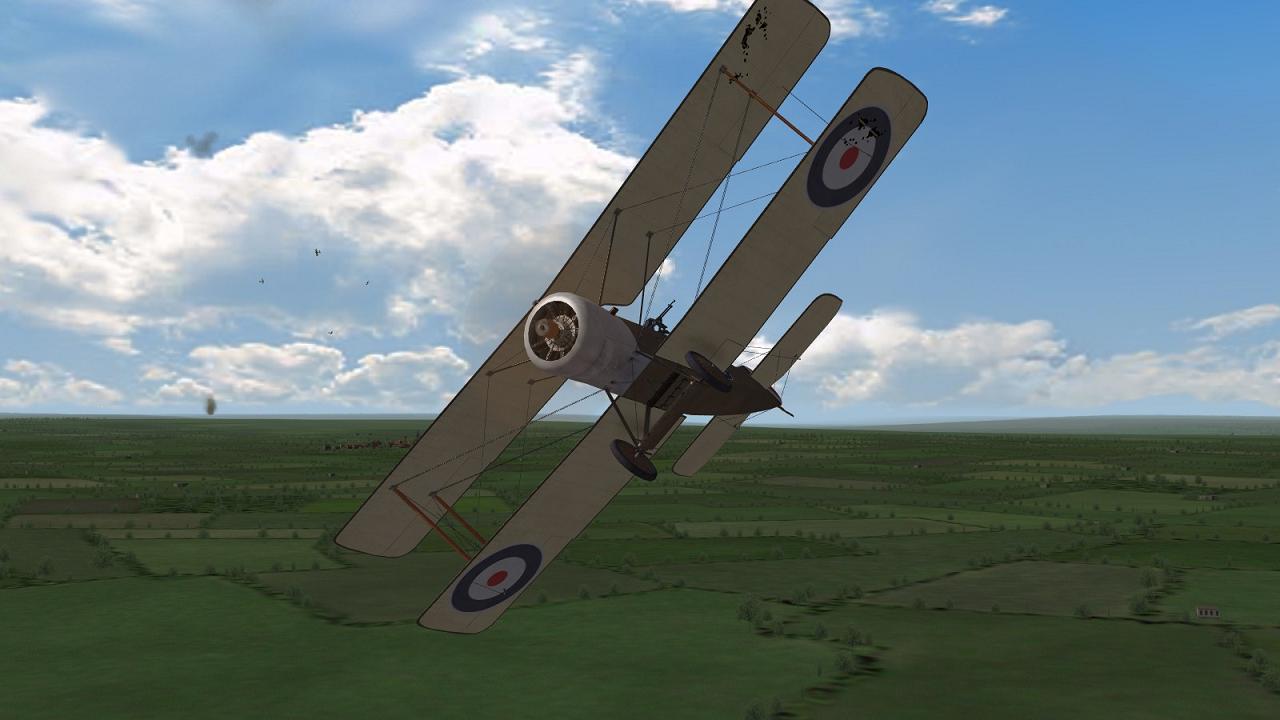
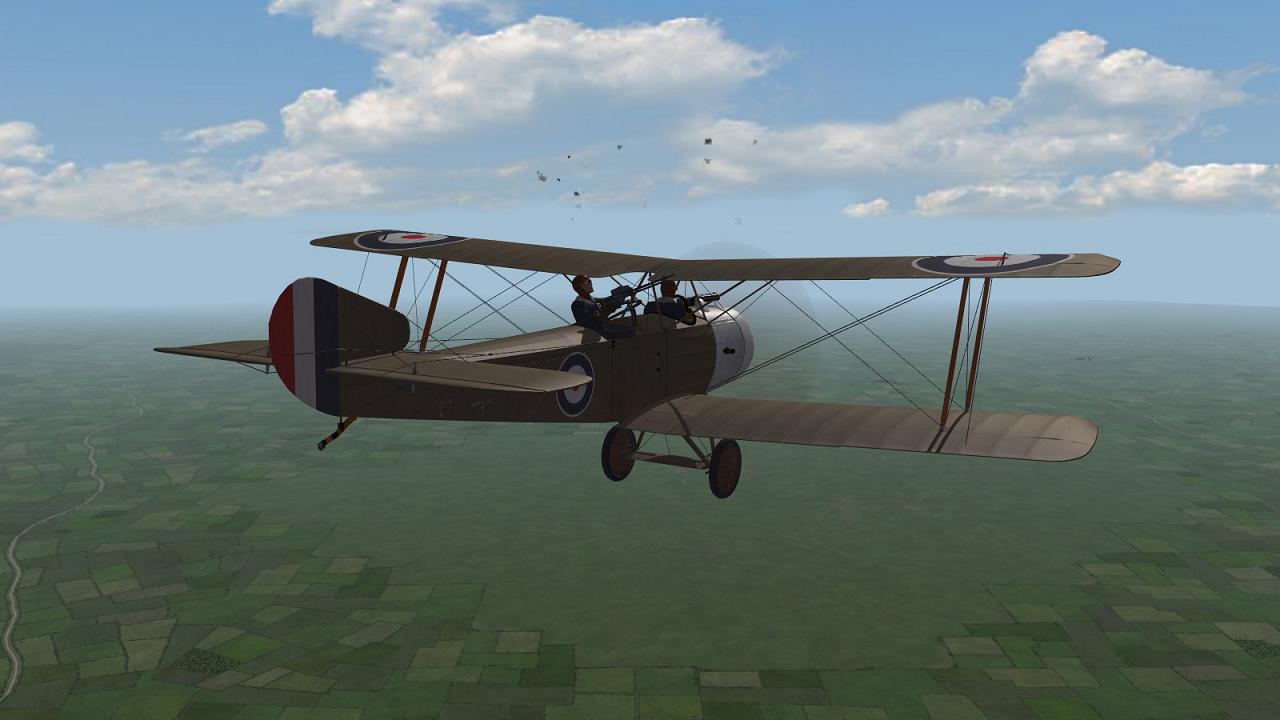
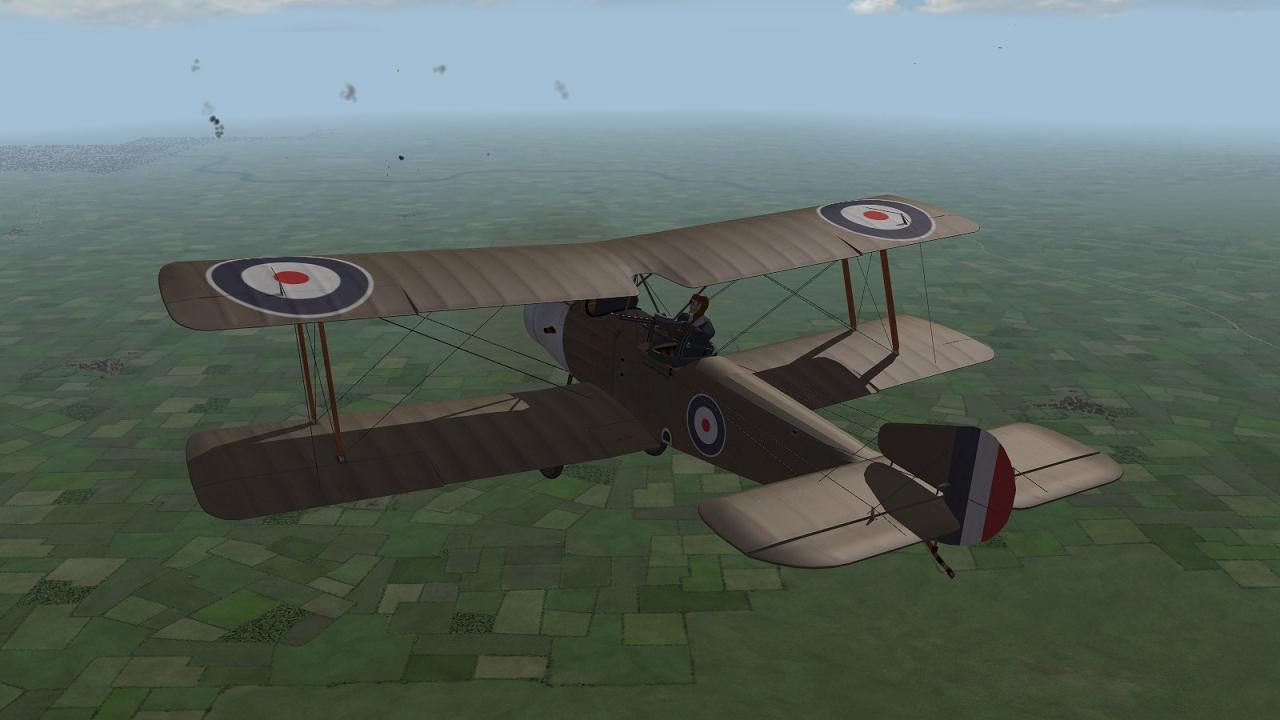
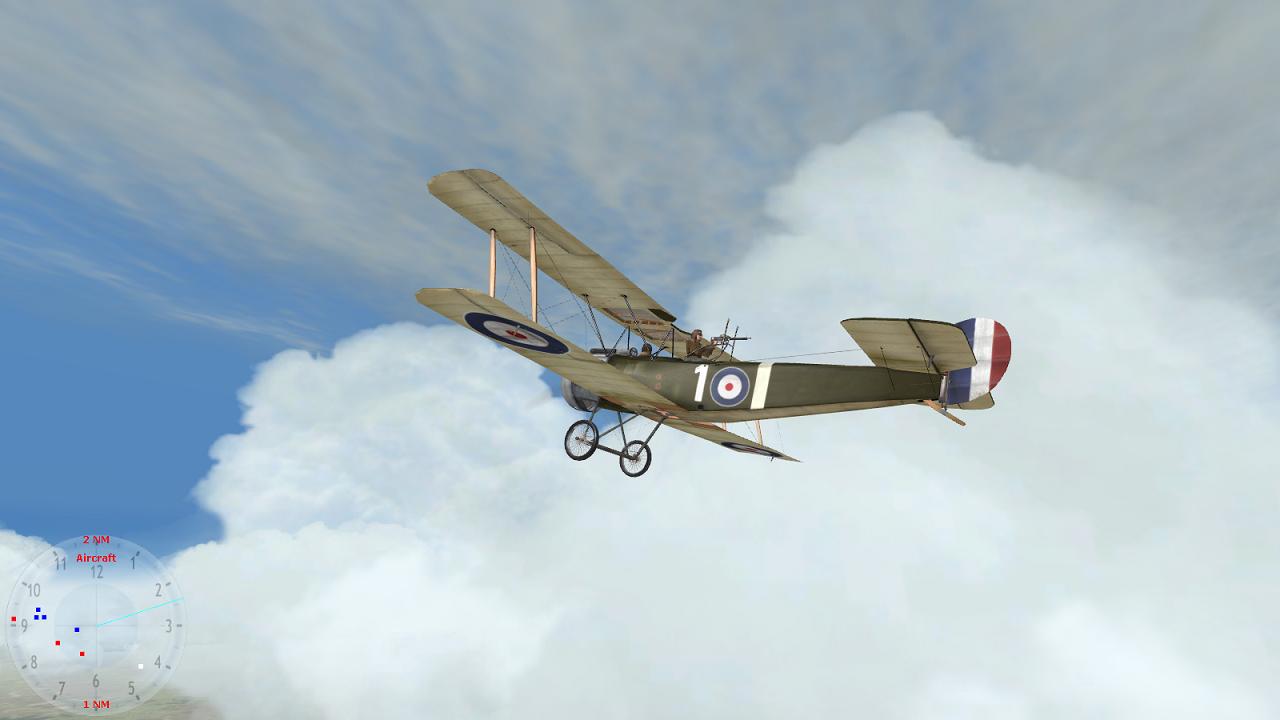
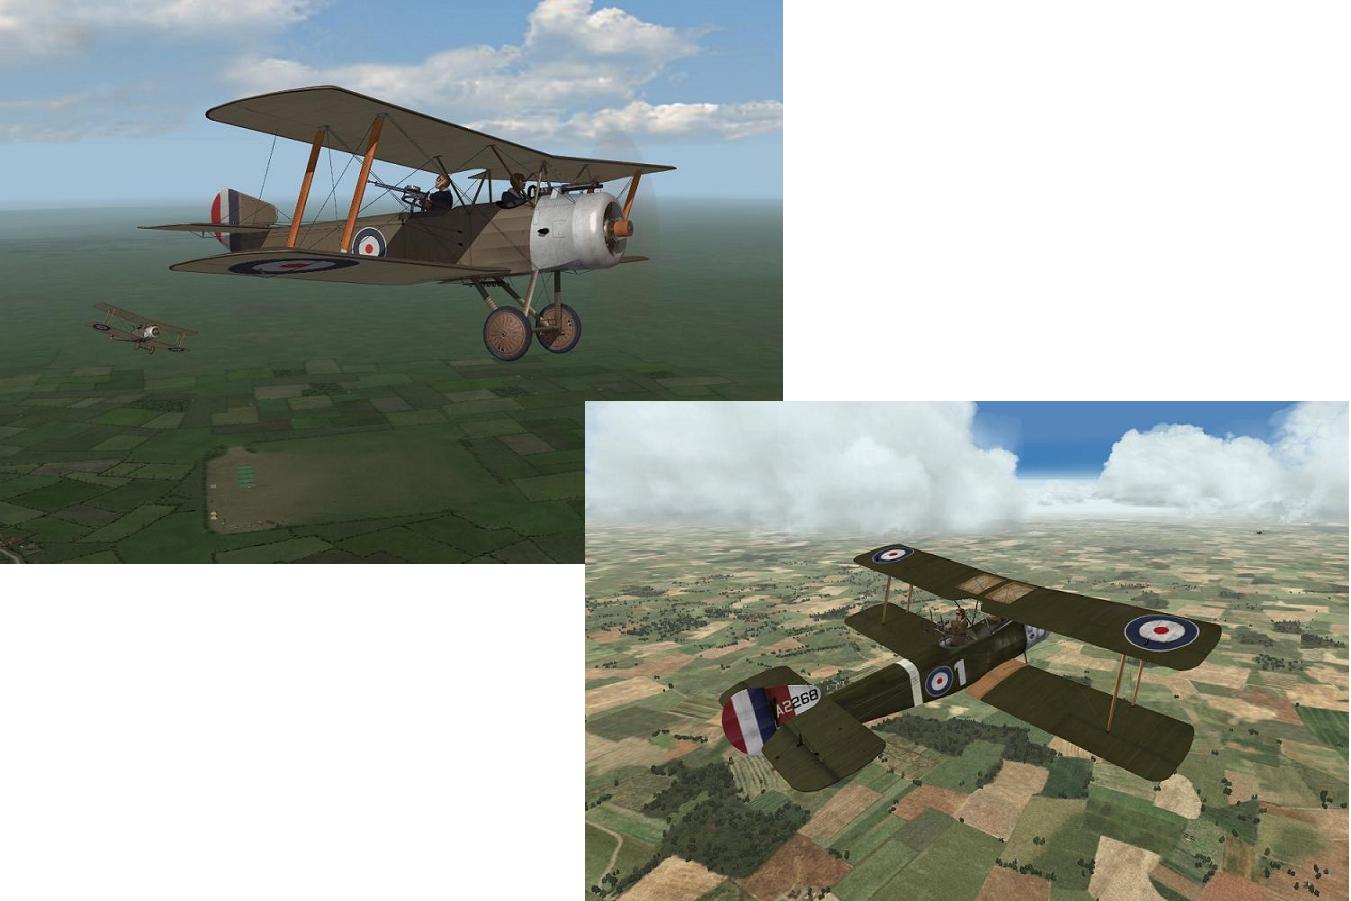
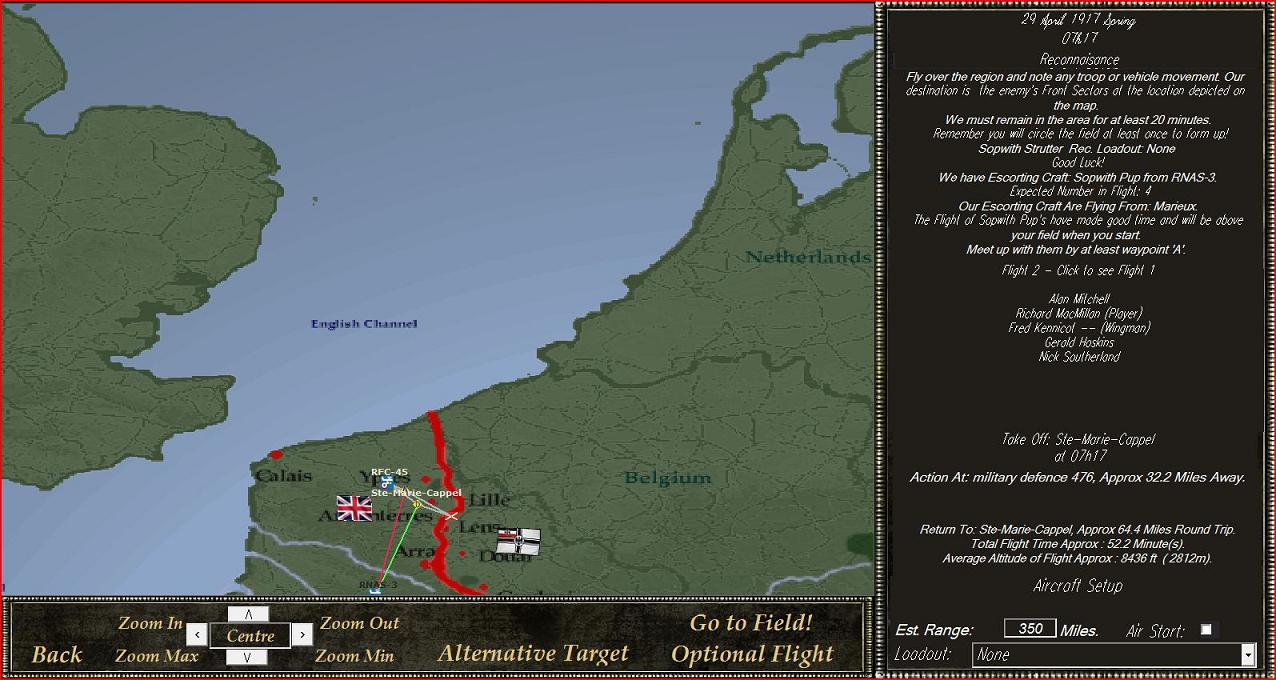
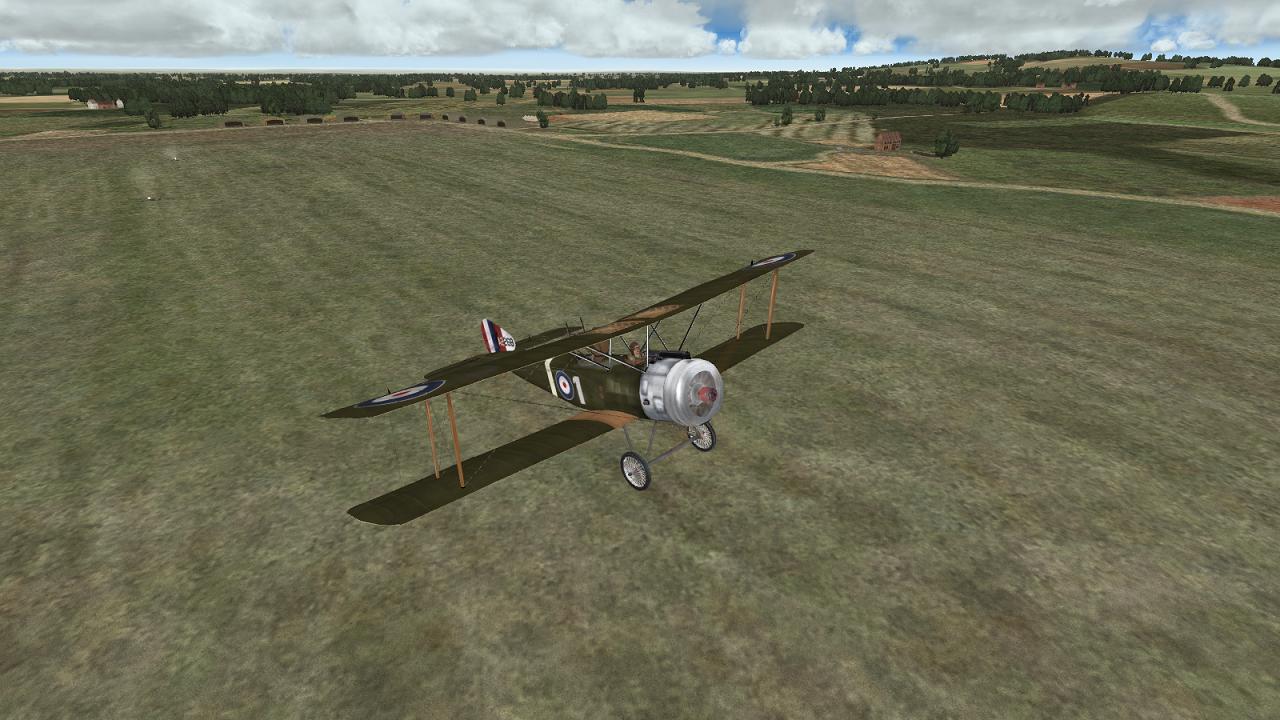
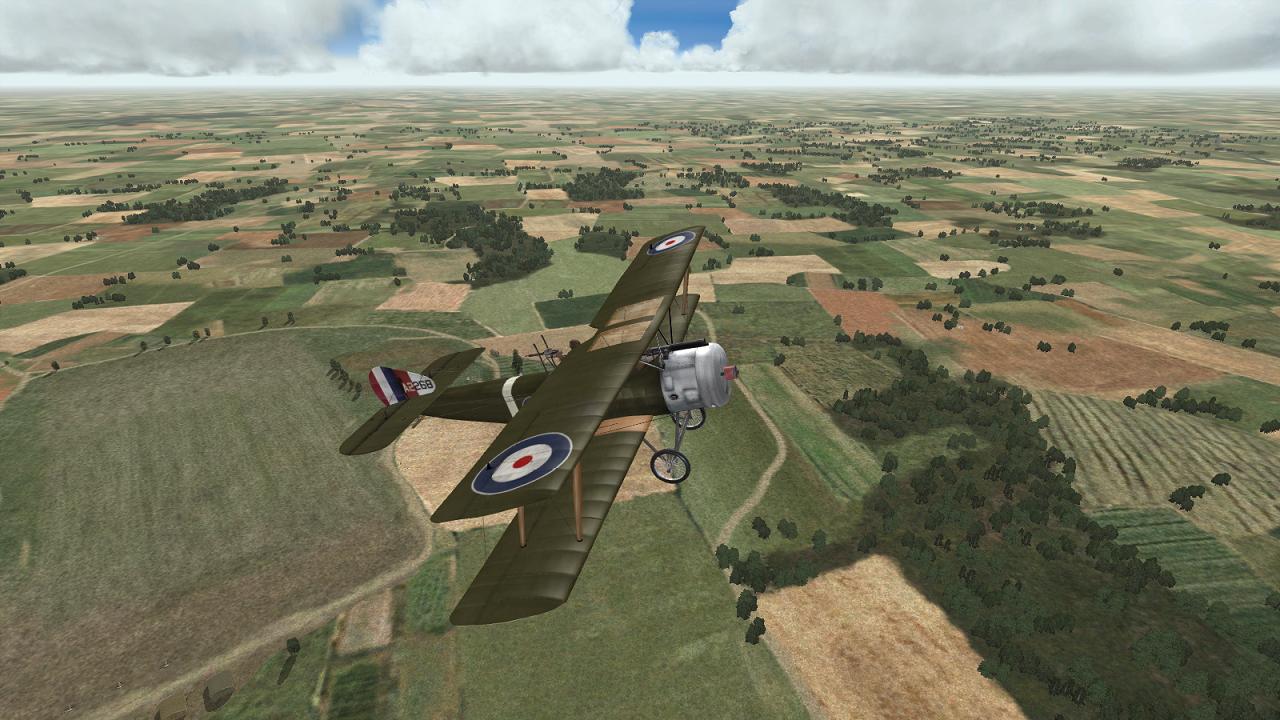
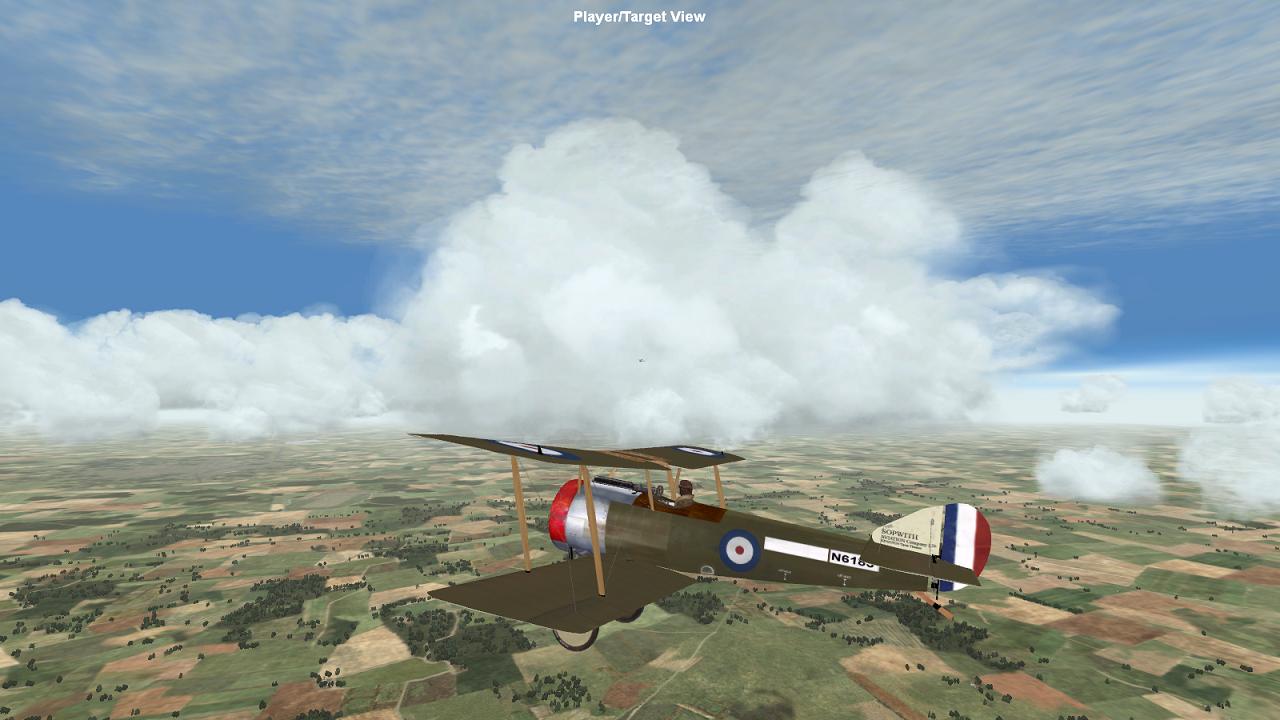
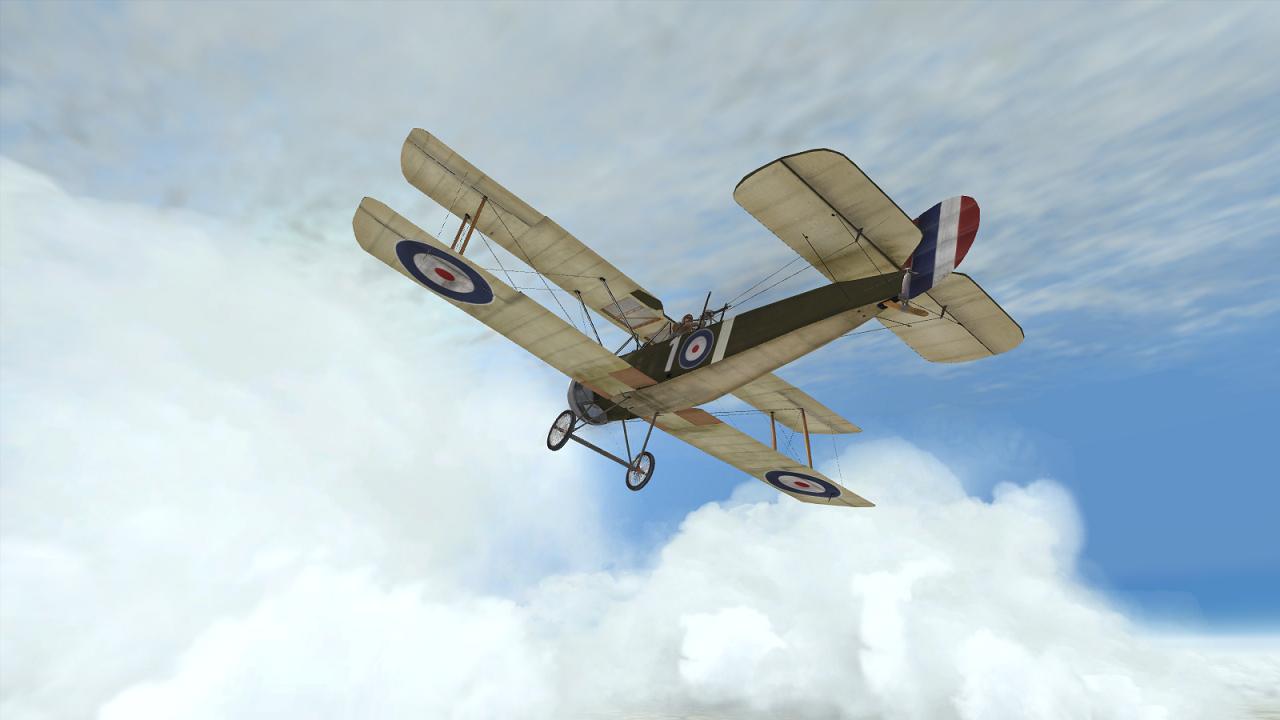
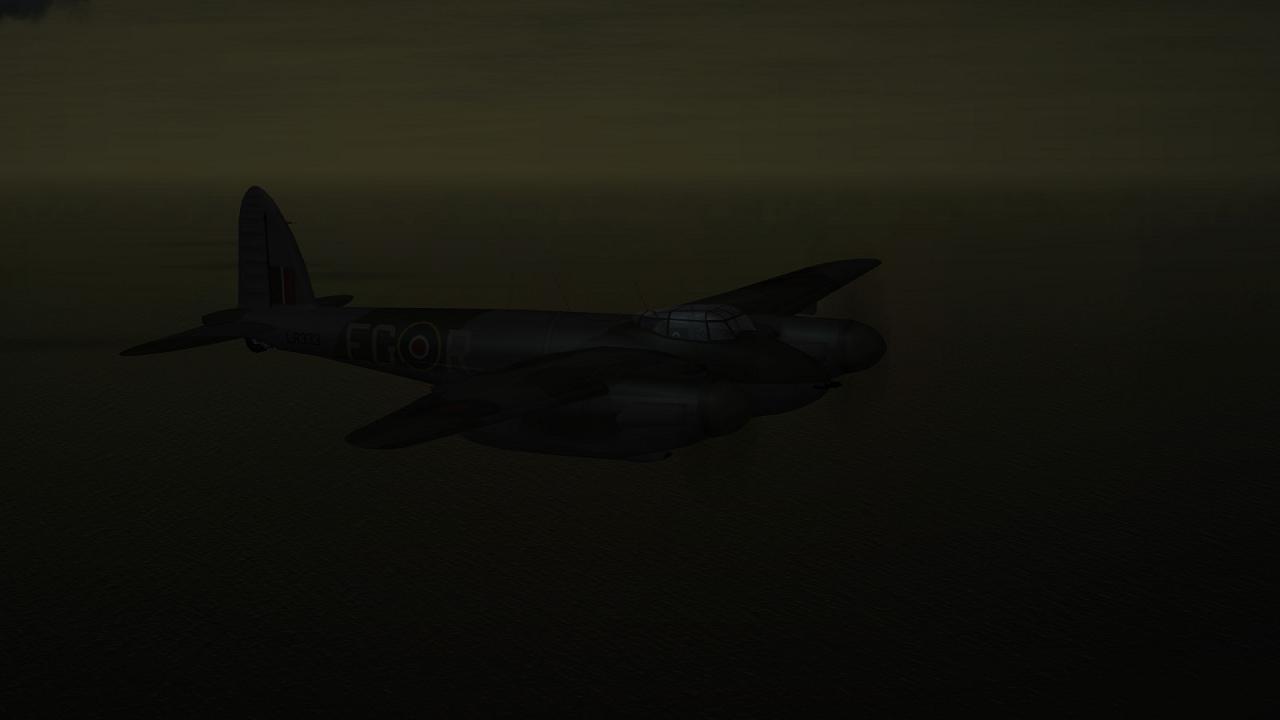
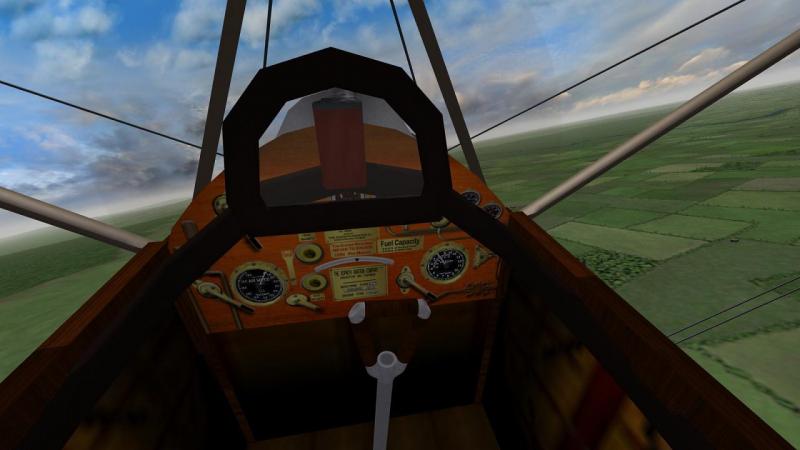
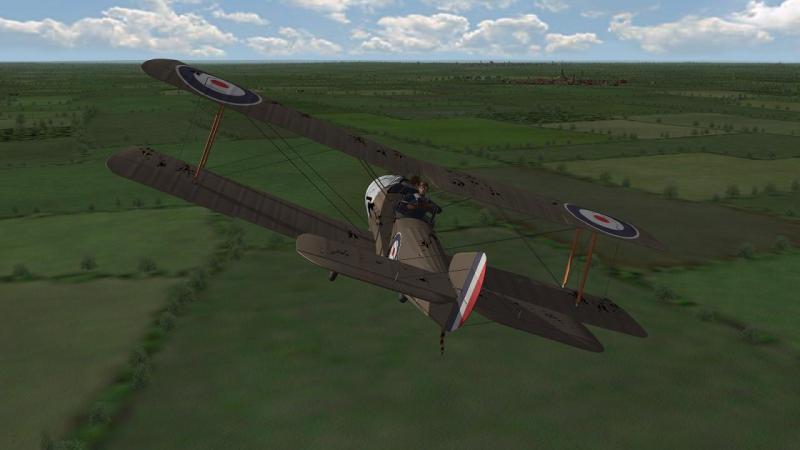
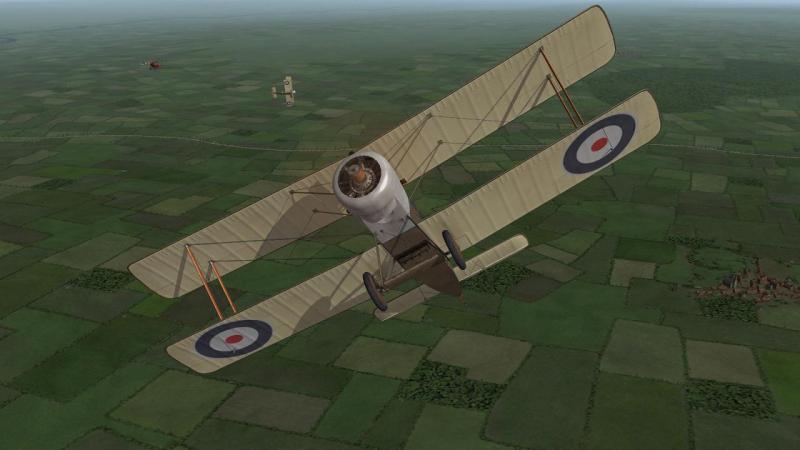
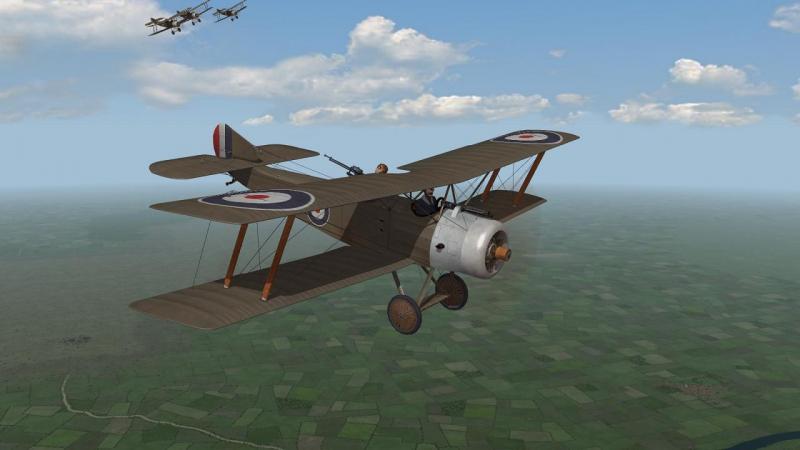
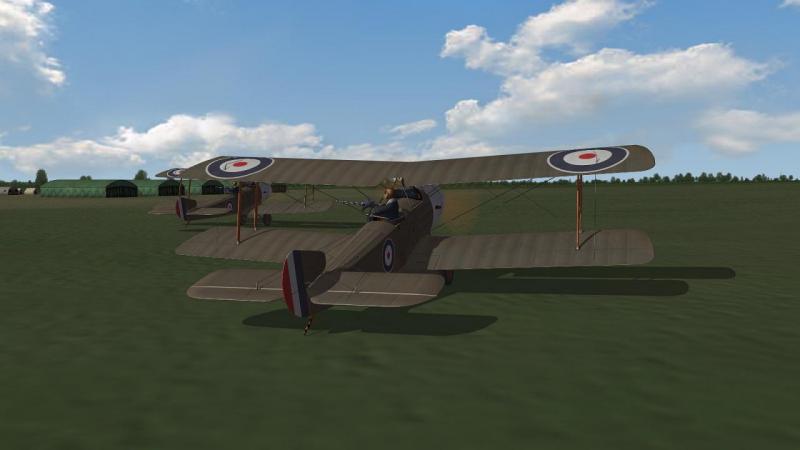
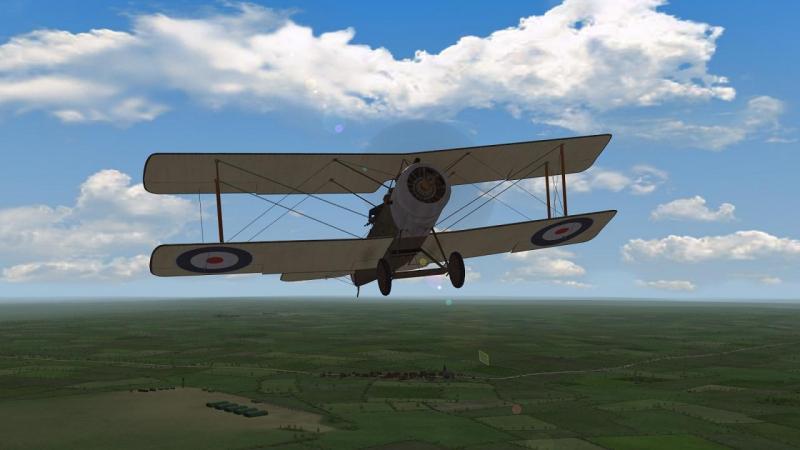
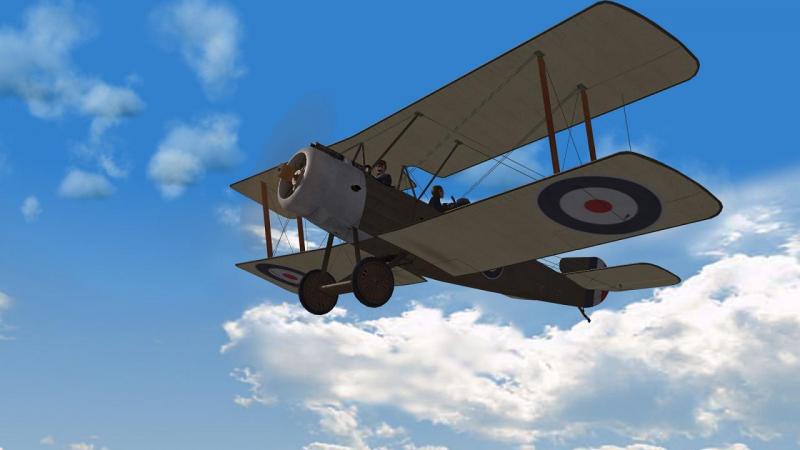
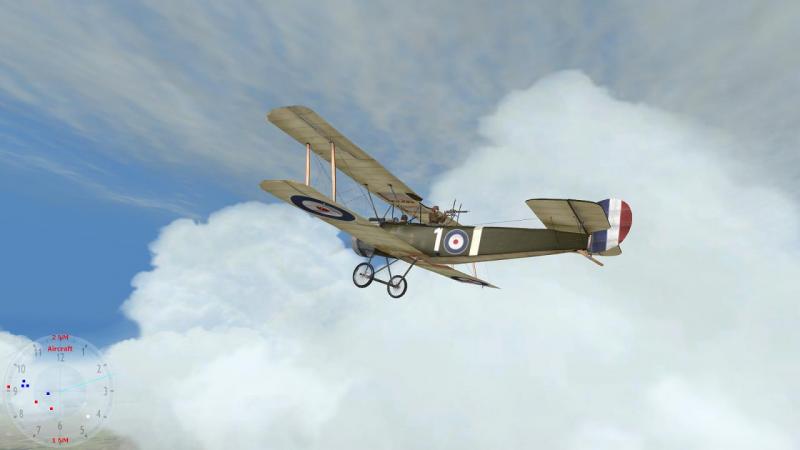
The Strutter mission in First Eagles 2 The Strutter mission in OFF had presented some niggles; some of my own making, but mainly those Germans uncharacteristically operating behind our lines. However, as a mission it had gone well, with our goal accomplished and without casualties. Apart from the issue - admittedly, a rather large one - of all those unhistorical, errant Hun flights, it was almost straight from the pages of the book. In particular, I'd benefited from OFF's fantastic depth of historical content, able to fly in Norman Macmillan's own 45 Squadron alongside some of the pilots whose names and exploits I'd read about in 'Into the Blue'. I'd even been able to fly in a Strutter with the markings of one of the squadron's real-life pilots. Great stuff. Now, how would a comparable mission go, in First Eagles? In FE2, I elected to fly the Strutter in Ojcar’s ‘Armchair Aces’ campaign. This being a set of month-by-month campaigns, I was able to start from 1 May 1917 (chosen to get close to the late April start of my OFF mission). FE campaigns provide players with a selection of squadrons flying the available planes. While (modded) FE2 has many more planes to choose from than OFF, unlike the latter FE won’t let you fly in every squadron operating any given flyable plane. May 1917 in Armchair Aces does not offer 45 Squadron. But having created a new pilot for the campaign, I was able to choose fellow Strutter unit 70 Squadron, instead. In fact the other RFC Western Front Strutter squadron, no.43, was also listed, along with at least one French Strutter outfit - 45 was the only one of the RFC's not available! I suspect adding 45 would be a fairly simple hand edit, if you knew what you were doing. FE2 based us at Fienvillers, a few miles north of Amiens and bit further to the west-south-west of Arras, the front-line town which gave its name to the land battle over which Bloody April was fought. I’m not sure if 70 Sqdn was genuinely based here at this period. The general location is well south of 45 Squadron's authentic OFF base of St Marie Cappell. So we were operating on a different stretch of the front, probably a busier one at this point in 1917. And though I didn’t know it yet, my FE2 Strutter mission was certainly going to be a whole lot busier than the OFF one I’d just flown! To get just the sort of missions featured in 'Into the Blue' I had previously checked the May 1917 campaign data.ini file in Wordpad. In the entry for the squadron, I reduced the possibility of a 'close air support' (Strike Fighters terminology's used here) mission from 50% to zero; ditto for an 'escort' mission. I left recce and patrol at 80% possibility. There was already zero possibility of other inappropriate missions, like an intercept. Our first mission was a patrol, this time just up to the trenchlines in the vicinity of the village of Villers-Ploich, where the planning map showed some of our units were attacking. Our assigned altitude was 3,400 feet, probably fine for many operations but unrealistically low for a patrol in good weather. While I believe campaign designers can control mission heights, I’m fine with FE generally keeping things low as this saves tedious climbing and possibly makes encounters more rather than less likely, without having to resort to using on-screen visual aids or fly uneventful missions. In ‘Into the Blue’, Norman Macmillan says that Line Patrols were often flown at this time with just one or two machines, often the less experienced pilots. Offensive Patrols (to about 4 miles into enemy territory) and Distant Offensive Patrols (10-12 miles over) were flown in flight strength, typically up to 6 aircraft. The mission allocated just two of us for our line Patrol but at the squadron roster, I chose three names from the bottom, to give my preferred strength of four aircraft. On this trip, my companions would be Lieutenants Sinclair, Hallowes and Edwards. You can’t alter waypoint heights in FE2 but unless you’re on an escort mission, you can alter their locations. As I generally do, I dragged the last waypoint before our triangular objective marker to a point some distance further north over the Lines. This meant that if I used the ‘Next encounter’ key, if nothing else intervened and I ‘came out of warp’ at this ‘initial point’, I would be far enough away from the target area to give myself time to see and prepare for my approach to that potentially dangerous zone. Here we are taking off from Fienvillers. Unusually for FE, our aircraft have neither serial numbers on the fin nor aircraft letters or numbers on wings or fuselages. Not sure why, though it’s worth noting that Macmillan says that at one time, 45 Squadron’s Strutters did not carry any individual markings except the serial numbers. I think the FE Strutter is a stock plane made flyable by adding a cockpit; in fact, it has the cockpit interior of the SPAD VII! This doesn’t bother me as I spend no time looking at cockpit interiors. The only problem I found here was the lack of a gunsight or failing that, any bracing wires I could use to judge my aim with the forward-firing Vickers gun. This - and my failure to practice my shooting in a Strutter, to get used to this set-up before flying on operations - was to have serious consequences, later! Externally, the FE Strutter is a superb replica, enhanced not only by dynamic self-shadowing and bump-mapped textures, aminated control surfaces and rotary engine, but also by the nicely-posed and well-animated crew figures. In FE you're always the flight leader so no formation-keeping chores or worries about 'iffy' flight leadership AI. As I oriented myself and turned for the front, my flight-mates caught up and, though they weaved about a bit, stuck close behind me. The skies seemed to be clear of friend or foe. After flying on for a bit and reassuring myself that this was so, I hit the 'Next encounter' key and, as often happens, found myself arriving at my previously-adjusted 'initial point', at about three and a half thousand feet above the Lines. In 'Into the Blue', Macmillan several times describes the front as a slimy brown snail-like trail across the landscape, so perhaps the 'river of brown' effect you get in both FE and RoF is actually as valid a representation as OFF's more 'patchwork' alternative, which latter I still tend to prefer. Heading south down the trenchlines with my three Strutters close behind, the first indication that we had arrived at the war was some sporadic German Archie bursts, which I pretty well ignored, much as service tradition dictated. At that point, my main concern was - where there any Huns around? ...to be continued!


-
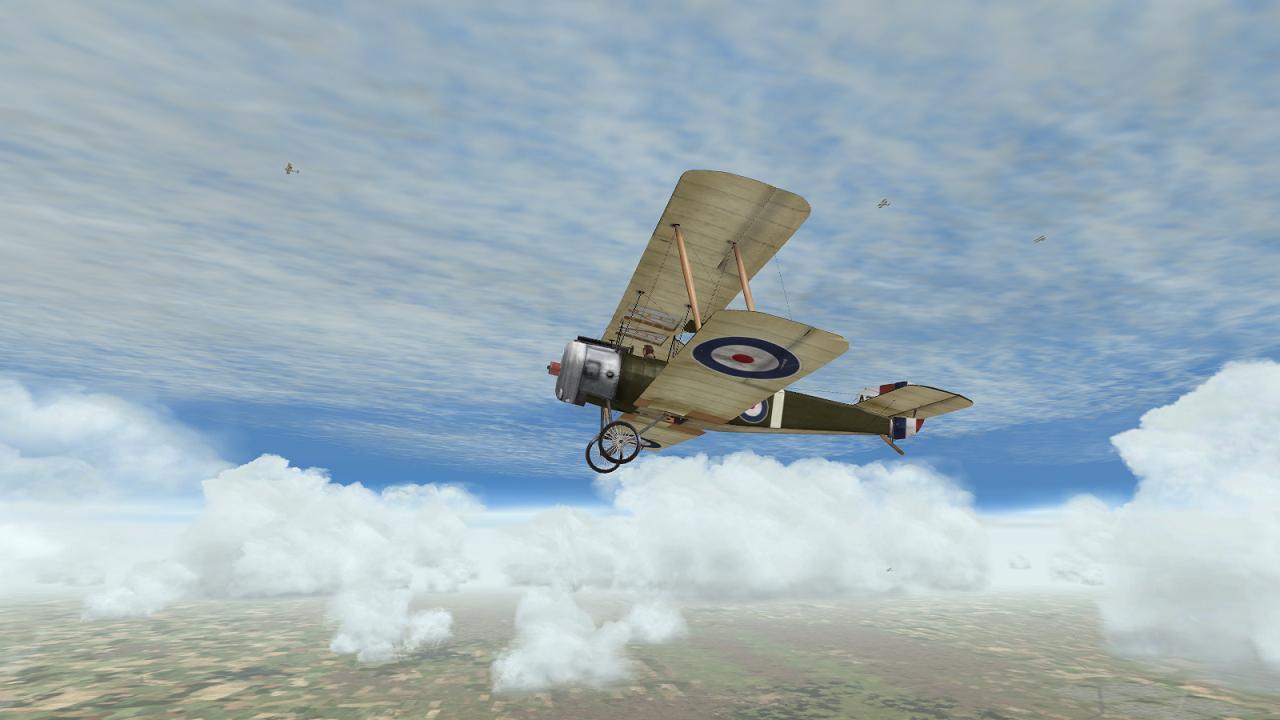
Trials, tribulations and Albatrosses Climbing for the front, I looked around to see how well - or how badly - my flight was catching up. They were nowhere to be seen. Knowing that in OFF your flight often falls well below you on a climb and that you need to level out before they seem to realise this and begin to make the effort to climb up to you, I looked down. Sure enough, there they were. But leveling off did not produce the expected climb up to join me. This was unusual. Also unusual was the escort of Pups. Usually an OFF escort will be above and ahead. But this one, while ahead, was on my level. Finally, the proverbial penny dropped. I realised that I was NOT the leader of this flight, and that it was ME who was out of formation. This ought not to have been a big problem, so far on my own side of the Lines. Just an embarrassment, really, liable to get me in for a spot of wigging from the boys, back in the mess, afterwards. But things were not as they should be. Before I could make a move to rejoin formation, flying in the external view as I generally do pre- and post-combat, I saw a very strange thing. My observer moved. If you play RoF and/or FE, this isn't strange at all, of course. Your observers and your pilots will both move, quite a lot. But not in OFF. Pilots don't move at all - a few have their heads rotate left or right with aileron movement, including the Strutter's, but so very little it's hard to notice it. Mostly, they just sit there. Like this: The observer will rotate and his MG will elevate or depress, but only if he is tracking a target. So...the second penny dropped. I had just seen my observer's gun swing around, then back to the rear. He must have been tracking a target, briefly. Oooooh dearie me! Seeing nothing, I cheated...well, sort of. I turned on the radar - sorry, the Tactical Display. And there they were, a series of little red squares somewhere just ahead. Huns! What I did manage to see without the benefit of the 'TAC' was our escort suddenly swinging down and away...into the attack, evidently. That was good. Not so good was that Hun scouts were operating well over the British side of the Lines. This seems to happen rather a lot in OFF and though, as here, it can make for some exciting moments, it is pretty wildly un-realistic for it to happen with any frequency. But Hun scouts was what they were. There seemed to be two separate flights, no less; V-strutted Albatros DIIIs and some red-ruddered Albatros DIIs. I would likely have felt obliged to lodge a serious official protest with the OFF campaign system, the UN Security Council or anyone else who might have listened, had not this threat been dealt with effectively by our escorting Pups. For we never saw those Huns again...at least, I didn't think so, at the time. Looking around, I was relieved to see my flight plodding along un-interupted, just ahead and below, evidently not in the least bothered by all of this. So I swung down and tucked myself into formation with them, now at last in something like my proper place in the scheme of things. This is where things started again to go awry. I held my place for a while but as we neared the Lines, my flight began to climb like they were on some sort of invisible escalator that I had missed. Up, up and away they went. I managed to catch up somewhat by cutting a corner as they turned south to fly down the Lines, on our photographic run presumably. But I was still rather far below them, and feeling quite vulnerable as German AA bursts started to dot the skies. If I was the plane carrying the camera on this trip, HQ might not get to see the nice pictures it was expecting our mission to obtain and come back with! Suddenly the chances of the staff officers being disappointed seemed to increase. I don't know why I did it; but at that point, I turned on the 'radar' again. As you can see from the red '1NM' at the bottom, I have its range turned down from the default 8 miles to just one and with an observer behind me, that's perhaps not too un-realistic, as compensation for the limits of 'MonitorVision'. But as you can also see, the red dots are back. At least this time the Huns are not assailing us in our own back yard and have had the decency to wait for us to arrive over the trenches! The Huns were more V-strutters. As they carried no Jasta markings, I could not tell if they were some of the same fellows who'd tried to mob us back on our side. Not that this mattered much. We were now in trouble, or so it seemed. At this point, still straggling rather too far below my flight and thus facing an early and violent virtual end, I had a brainwave. I decided to switch to the gunner view and see if my AI pilot was able to do what I couldn't. A similar kludge can work in Panzer Elite, I knew - if your own tank gets stuck, switch to a 'wingman's' tank and then back, after the AI has unstuck your own. I wasn't sure the same sort of thing would work in OFF but it seemed worth a try. If it didn't, I could at least shoot back at the Huns as they came in behind me, while maybe getting some protection from the guns of the flight above. And it worked. My now-AI pilot weaved a bit at first but before too long, we were back in formation! Now, bring on the Huns! Except, the Huns didn't want to be brought on. I watched one of them slide across in behind us, some distance off, but then we flew into some cloud and when we came out, the Huns were nowhere to be seen. How strange! We stooged about for a bit but soon turned west for home. Tiring of this, I started to 'warp' but that quickly exited, denoting enemies were within about the max 'radar' range of 8 miles. Seeing nothing, I increased the 'radar' range so that I could at least know what it was we would likely fly past, unknowing. The answer was more Huns on our side and/or where no Huns should usually be. There was a couple of DFW two-seaters, low down over our territory but heading east and home. And a single Albatros DIII, sitting disconsolately on the ground, likely a victim of our Pup escort. Serves him right for ignoring good tactics (and the history books) and operating on our side, I thought to myself. Higher up, there were a couple more like him, again possibly from the same shower who'd met our Pups on the way out. Nobody made a move in our direction and as I'd expected, we continued on as if neither side had seen the other. By now, we hadn't far to go to get home and I exited the mission as my AI flight broke as if to land. While the historical trappings had been rather good, the operational bit had been rather a disappointment. In the stock CFS3 campaigns, you are intentionally presented with a sort of parallel WW2 history where German shipping plies the English Channel in daylight and where, even after 1942, England could have been invaded. Having the skies well over the British side in 1917 fairly full of German fighters and low-level two-seaters isn't quite on that scale but for historical accuracy, it's not really much better. And while it was my fault that I got out of formation, it was frustrating that when I caught on, I couldn't keep up. Perhaps if I'd used an 'empty weight' mod which forces the AI to fly with at least some of the weight of fuel and ammo, things would have been better. At least we made it back with those virtual photographs and the brass hats will be happy, until next time. Next up, the Strutter in First Eagles 2!


-
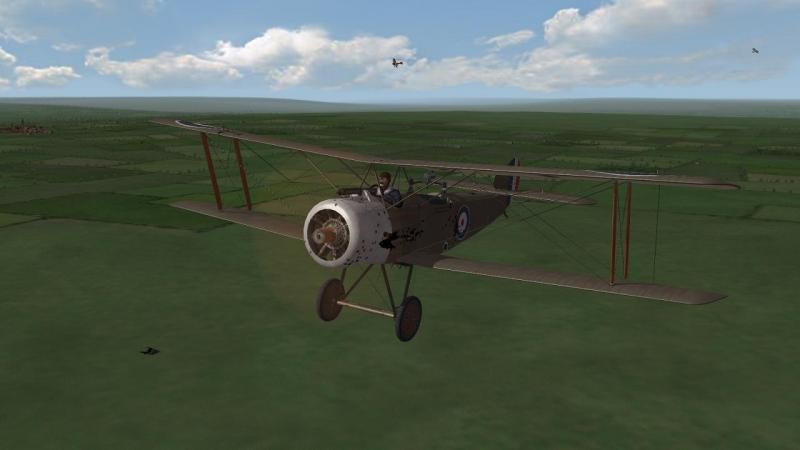
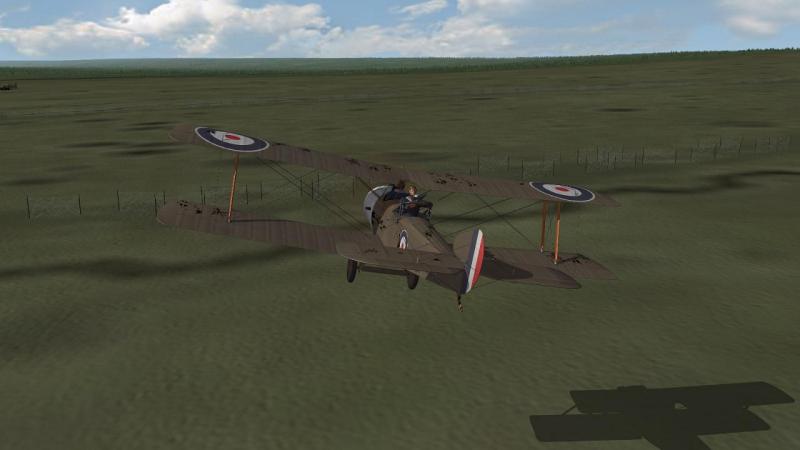
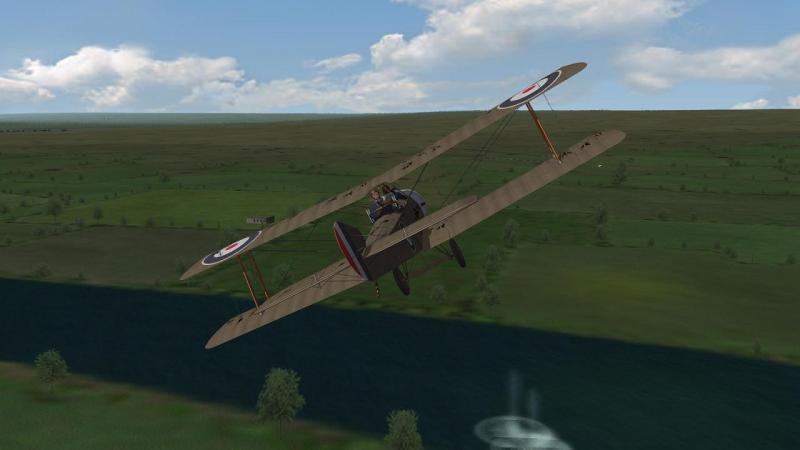
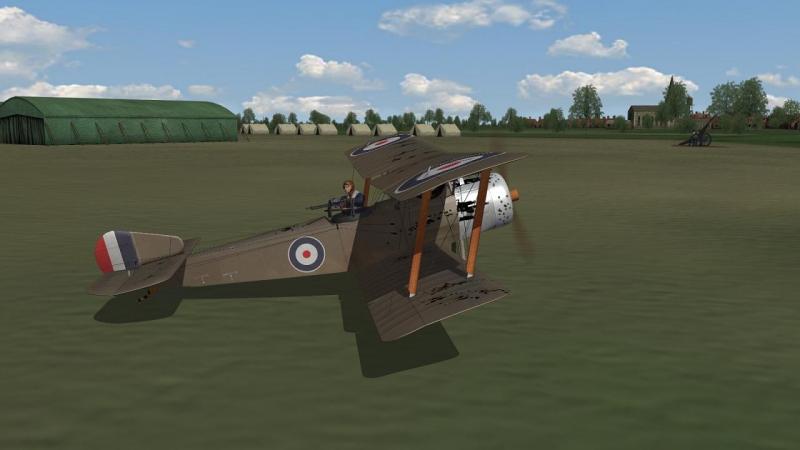
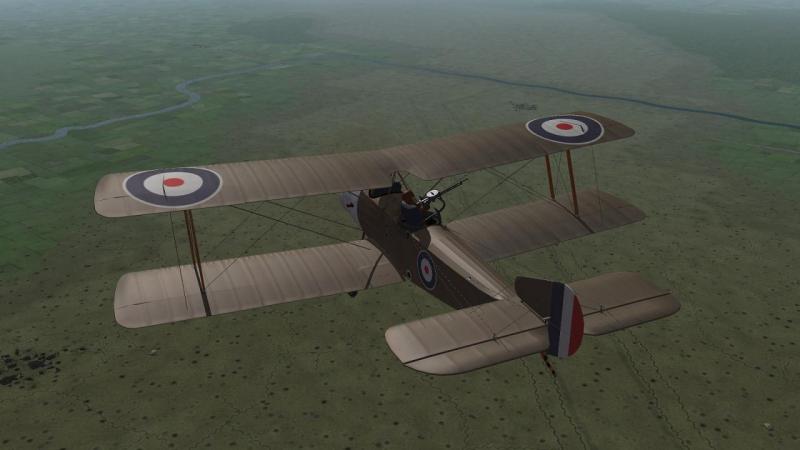
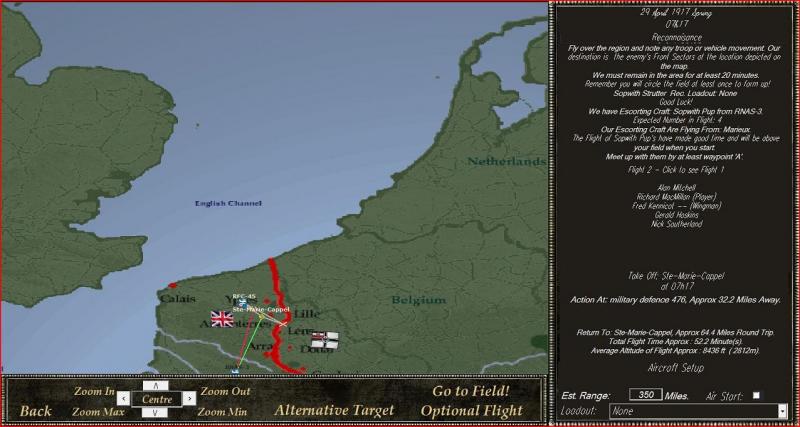
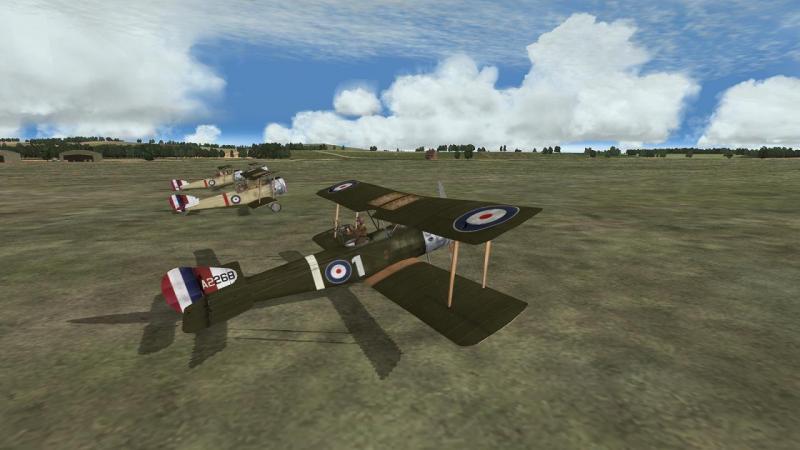
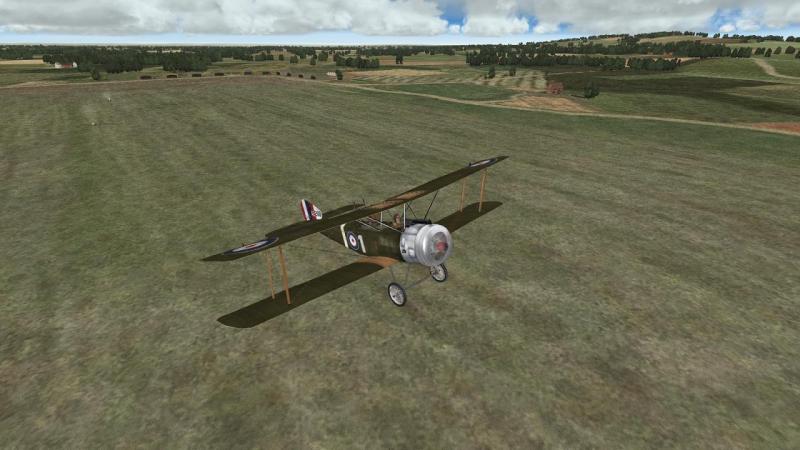
Recreating a classic WW1 pilot's tale flying Sopwiths in France! This mission report was inspired by my reading material on a recent short holiday. I had last read Norman Macmillan's 'Into the Blue' back in the early 1970s along with other classics then available from the local public library, such as my favourites, Arthur Gould Lee's 'No Parachute' and 'Open Cockpit'. While the latter two are back in print, I had to go to eBay to get a copy of 'Into the Blue', and I much enjoyed re-reading it, after all those years. The book comprises segments originally written for publication at or about the time, expanded to book format in 1929, then expanded again for the 1969 edition to include recent research by the author and with real names replacing some pseudonyms used in the earlier edition. This composite origin makes it hard sometimes to distinguish what is or isn't genuine contemporary observation or terminology; but the work is not just a good read, it's a mine of many useful snippets of information on RFC and RAF operations and training, as experienced by the author. The book The story starts with initial training at Netherhaven and Upavon in England, 1916-17, flying first Maurice Farman MF17 'shorthorns' - also known as 'the Rumpety' - then moving on to Avro 504As and Sopwith 1 1/2 Strutters, the latter as the type on which the author would expect to fly operationally on posting to France. The main impression is that even by early 1917, flying training was very rudimentary, lacking not just combat training but even basics like spin recovery. This part of the story is brought to life with many experiences and anecdotes. The one I like best is told of one of the COs at Central Flying School, Upavon, the dapper Major Gordon Bell, who had a bad strutter. One day, the story goes, after having been shot down while on operations, he crashed into a tree: "As he shinned down the tree to the ground, a resplendent staff officer rode up to him and said, 'Have you crashed? 'N-n-n-n-no,' replied G.B., 'I a-a-a-a-always l-l-l-l-land like that.' " From training, the author was posted to 45 Squadron RFC, at St Marie Cappel on the northern part of the British sector, not far south of the English Channel coast. He arrived at the end of March 1917 and flew Strutters right through 'Bloody April' and beyond, regretfully finding that the 2-seater Sopwiths, though fine flying machines, were long past their best as fighters. Despite that, they had to soldier on, flying the same types of patrol as the single seater 'scouts', with the added hazard of also flying longer-range reconnaisance missions. For the latter, being fighters, they were expected to escort their own photographic machines, and though they rarely failed to get their pictures, a particularly heavy price was often paid on these missions. For some reason the author records that fellow-Strutter outfit 70 Squadron did sometimes get escorts, but never 45, who had to rely on help from whatever friendly patrols might be operating along their route. In that regard the author is fairly scathing about the failure to make any serious attempt to co-ordinate with or even inform patrols, though he also accepts that such efforts would have been prone to all kinds of difficulties. Among the many interesting details is of course the experience of flying Strutters. They were apparently prone to 'float' on landing, making it too easy to overshoot landings on small operational airfields. The airbrakes fitted to Strutters may have been designed specifically to help with this. But the author records they were too close inboard to have much effect and instead, disrupted airflow over the tail so badly that pilots generally used them once and then never again! Macmillan also records the replacement of the original Ross synchronisation gear for the front-firing Vickers with the more reliable and faster-firing Sopwith Kauper system, though he also notes that the former system left the standard gun trigger in place and this was sometimes used to engage a fleeting target, regardless of the holed propellers which resulted. Macmillan also records the arrival of 130HP Clerget engines which offered little improvement over the previous 110hp versions. Despite this, the squadron performed solidly and even generated some aces, especially those who learned to fight their Strutters as crews later learned to fight the Bristol F2B Fighter, using the front gun as well as the observer's Lewis. The squadron re-equipped with Camels, in the field, only during August 1917. Late in the year, they transferred to the Italian Front after the disaster at Caporetto. However, Macmillan suffered burns in a non-flying accident and when fit again back in England, was posted as an instructor. Here, his accounts of the training regime make a fine contrast to his description of his own initiation, thanks to the improvements made by then Lt Col Smith-Barry whose approach to flying training is often credited with setting the foundation for the modern syllabus, as we know it today. Macmillan primarily trained Camel pilots, and he records that no pilot he was instructing was killed or injured in a Camel crash. Interestingly, he attributes this partly to his insistence that all heavy landings must be reported so that centre-section rigging could be checked and tightened. Apparently the Camel's centre-section struts were not firmly fixed to the upper wing, but set into sockets, where they were held by the tension of the centre-section rigging. The latter could become loose, especially after a heavy landing and the author reports that after the war, the famous Hawker designer Sir Sydney Camm, confided his own belief that this was a cause of many Camel crashes. The mission - Over Flanders Fields Keen to see how well I could re-create for myself the author's experiences of combat in Strutters, I decided to start with OFF (not yet having acquired its recent successor, WOFF). There were two reasons for this. First, in my experience of WW1 sims, OFF is perhaps the best at the 2-seater experience. Second, I was sure that, with OFF's particularly faithful recreation of WW1's air war orders of battle, I would be able to choose a career in 'Forty-Five'. I was not to be disappointed as regards the second point; though with the first, I would be less happy with the results. I started by creating a new pilot and his unit. I found 45 Squadron listed as a fighter squadron ('bomber' being the alternative, under which most two-seater units are listed in OFF, though it is not a very satisfactory term for WW1). I gave my character Macmillan's surname and wanted to start about the same time as he did, just before 'Bloody April'. As potential OFF careers seem to have start dates associated with a change of base or aircraft, this wasn't possible and I started instead on 28 April; near enough! In the briefing screen, I was pleased to see that although I was the only Macmillan on the squadron roster, this included, as historical aces, several of those named as such in the book. Good stuff and typical OFF attention to detail! Kicking off my first mission, came more typical OFF stuff, though not so good this time. Our first mission was a 'scramble', to intercept incoming enemy aircraft. In OFF there are far too many such missions and your own airfield is often the target of strafing fighters, including German ones which generally operated on their own side of the Lines and just did not undertake this kind of mission, not in early 1917 anyway and not much if at all, after that. Unable to change to a different type of mission, I had to start it up, then cancel the mission, after it had loaded. Then start another mission. This wasn't much better - a railyard attack. At this point in the war this would have been a common enough target for a bombing raid, but for BE2s or the like, not our squadron or other fighters. The RNAS operated Strutters in the bomber role but these were I think generally the single-seater version. Besides, 45 Squadron was listed in OFF as a fighter squadron and as Norman Macmillan's book makes clear, that's how they operated, along with southern neighbours and fellow Strutter unit 70 Squadron - as fighters who sometimes also flew longer-range recce missions. Third time lucky, my next effort generated a more realistic mission - a reconnaisance. This was only up to the trenchlines, and thus not really the sort of mission commonly flown by RFC Strutters by Macmillan's account, but it would do nicely. Unusually for the period, we had an escort - four RNAS Sopwith Pups. Here's the mission briefing screen: OFF sometimes assigns rather large numbers to a mission but the five squadron machines on this show was pretty representative of the period. Here we we are at St Marie Cappel - naturally, OFF has the squadron operating from the correct airfield, even though these are now generic layouts not the accurate airfields commonly featured in the previous release, Phase 2. Oddly I think for late April 1917, the default 'skin' for the squadron has PC10 brown wings but clear doped linen fuselages and red and white tailplanes - more accurate I'd think for the squadron's early days, in late 1916. Macmillan several times refers to their planes as being brown and both the operational Strutters pictured in 'Into the Blue' have dark fuselages as well as upper wings. For my own machine, I opted to use a different skin, that for the aircraft of the man who became better known as Air Chief Marshall Sir Arthur 'Bomber' Harris. He's noted as an efficient flight commander in Macmillan's book and it's a nice OFF touch that I can fly in a plane flown by someone featured in the book. The overall PC10 uppers, with the forward fin in a lighter colour, white fuselage band behind the roundel and white number ahead, nicely matches a 45 Sqdn Strutter pictured in flight in the book, numbered '2' and said to be flown by Garratt and Carey. I don't know how I did it but in fiddling about unsuccessfully to get Ankor's DX mod (which adds self-shadowing to WOFF planes, and has been got to work in OFF and CFS3 by MajorMagee over at Sim OutHouse, but caused my missions not to load) I seemed to have messed up many of my OFF settings. For one thing my 'Always lead' option was not working on this mission. I didn't notice this in the briefing nor did I twig when one of the flight - the real leader - took off ahead of me. Anyway, getting over my irritation at one of the chaps taking off (as I believed) in front of the boss, I checked controls, started up and roared off down the runway and into the air. I say 'roared' but the OFF engine sound is rather muted. Turning to orbit the aerodrome, I found that, although not tail-heavy and stable enough in level flight, she needed a great deal of bottom rudder to avoid her tail drooping badly in a turn. The OFF Strutter is a good-looking bird, with a nicely-appointed cockpit, complete with reproductions of brass manufacturer's plaques and a padded windshield. I suspect many pilots removed the latter for better visibility and hoped not to regret its inclusion in OFF, later! Wing ribs are enhanced by what appears to be bump-mapped textures. Another nice OFF touch is the rendition of the transparent material on the centre section. She has the French Etevée Lewis gun mount for the observer, which was probably something of an antique by Spring 1917, in the RFC anyway. It may better suit the French Strutters; but tho the Aviation Militaire ended up a bigger user of the Strutter than the British, they were late adopters and I suspect most French machines would have had the British Scarff ring mount. I don't know if the WOFF Strutter changes this but I'm sure its textures are much improved. I duly orbited the airfield in a climbing spiral, still not having realised that I was not leading the flight. This may be why I wasn't able to select 'Next waypoint' on the Tactical Display and get my blue route line to skip to the heading of the objective. Or it might be down to my lost settings, which included my joystick key assignments and my lower-visibility tactical display and labels (an Olham mod). So I ended up following all the many waypoints before the leg to the Lines. As I did so, I used the padlock and 'player-target view' to have a look at our escort, the RNAS Pups. OFF uses the limited CFS3 view system which is much less satisfactory for this sort of thing than, say, FE2 or RoF; but I gather WOFF has made some improvements in this direction. Finally, the current route line switched to the direction of the objective and I settled down into a steady climb towards the Lines, still thinking myself the leader and watching to see if I needed to throttle back to let 'my' flight catch me up. ...to be continued!


-
Wow! outstanding work, even down to the F-84 'gate guardian'!
-
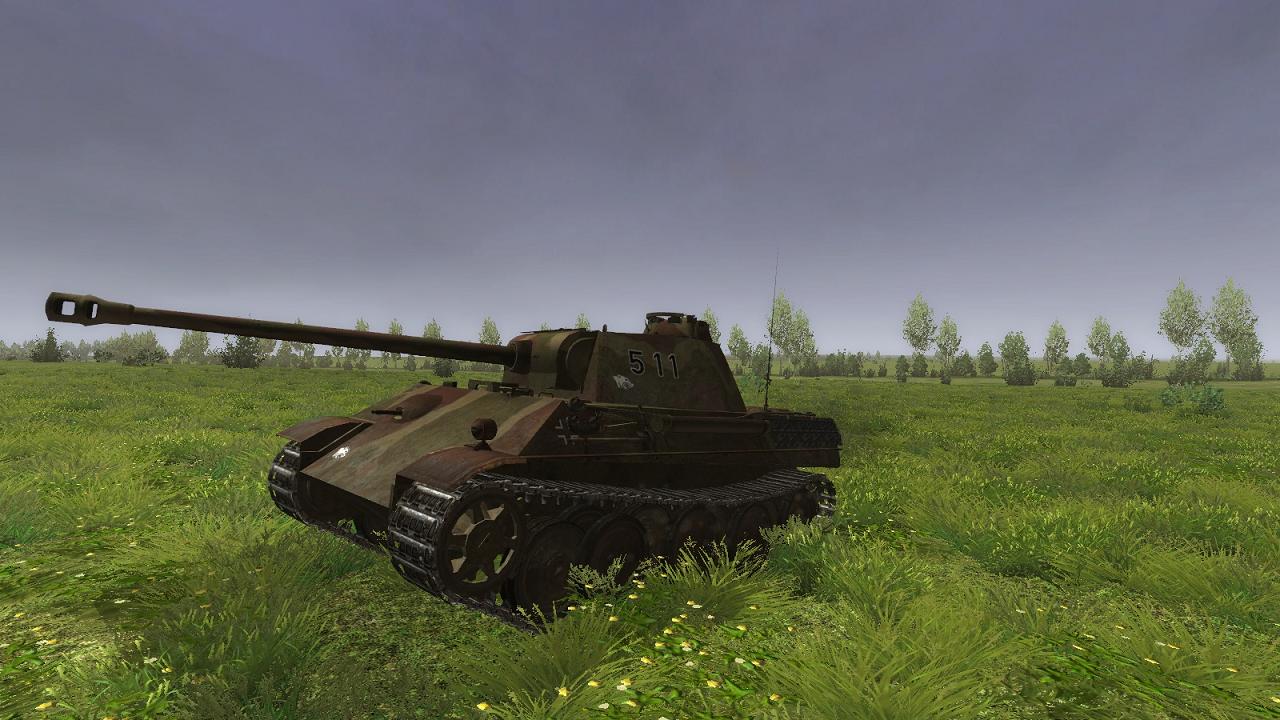
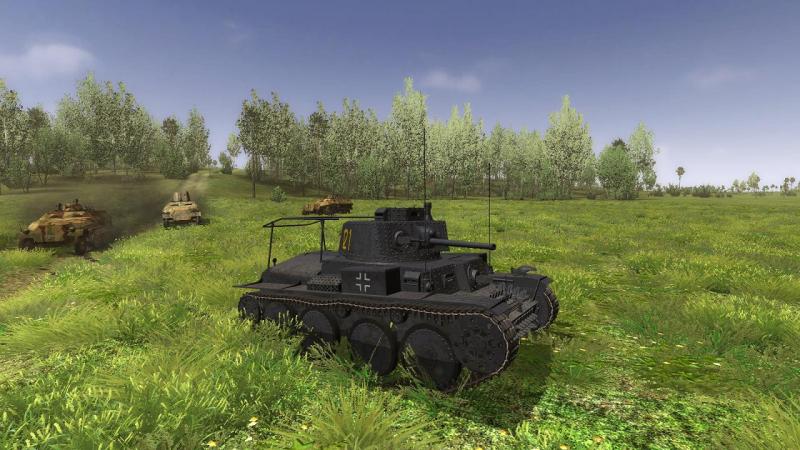
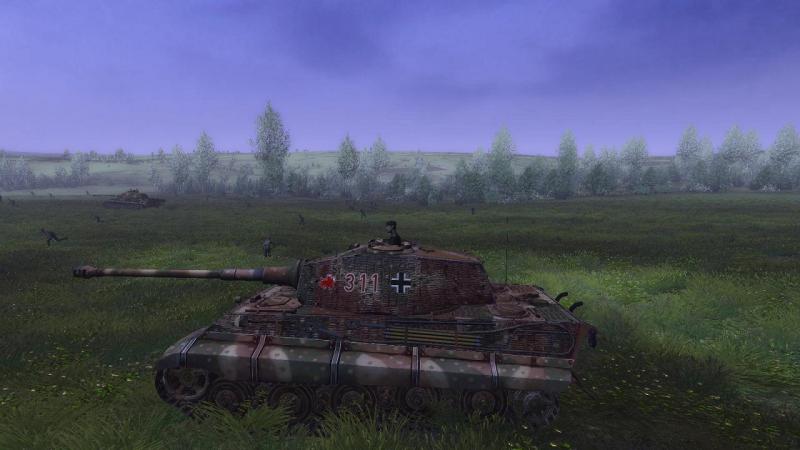
For completeness I should add a couple of things that I've found out, courtesy of Frinik, since writing the mission report. Firstly, the SF '42 discussion and modding scene is now covered most actively over at Graviteam's own forums, here: http://graviteam.com/forum/index.php Secondly, the most recent mod package is no longer the SPM one I used above, but the latest NTA mod ('New Tank Add-ons'), details being available here: http://graviteam.com/forum/index.php?topic=10944.0 Edit, 27 July '14 - the NTA add-on has been discontinued, but a successor, the Steel Tank Add-on (STA) is expected to be released soon: http://stasf2008.ephpbb.com/t6-steel-tank-add-on-steel-fury The NTA mod includes several vehicles (and supports some mission packs) that don't come (or work) with SPM, so that the range of tanks and AFVs is now wider than ever, including these beauties and the missions for them: Panzer IV Ausf.H in the murk, well clad with spaced armour: Soviet T-70 light tank (stock): Panzer 38(t), an efficient Czech type impressed by the Wehrmacht and famous for its role with Rommel's 7th 'Ghost' Panzer Division in May 1940: IS-2 heavy tank, a dangerous opponent even for a Tiger: Panther Ausf.G in very late-war camouflage and with the mantlet 'chin' introduced to reduce the shot-trap: Marder II self-propelled AT gun, a captured Soviet 76.2mm on an early Panzer II chassis: Sherman M4A3(76mm), one of a handful of US AFVs now available: Many user-made vehicles don't have interiors but you can still play them from external and gunsight/viewport views, which is what I mostly do anyway. Re-reading earlier today the original reviews of SF '42 over at SimHQ and Tanksim.com, they come across as rather cool. Partly this doubtless reflects the state of the sim on release, rather than the one it's matured into. And frankly, I think anyone who's too critical of the nature of typical SF '42 missions is probably missing the point that many deliberate attacks in real life, in training or on operations, tended from the platoon commander's standpoint to look more like the typical SF '42 mission than the sort of sweeping battles of manoeuvre that they imagine were how tanks always operated. As Basil Fawlty said to a guest who complained of the view from his little hotel, "What were you expecting? The Hanging Gardens of Babylon? Herds of wildebeest sweeping majestically across the plain? THIS IS TORQUAY!". The typical SF '42 attack mission might look like the work of a fairly unimaginative company commander and seem a tad chaotic in execution. Like Panzer Elite, AI limitations may hamper anything very much more sophisticated. But for the types of operations it portrays and for the WW2 period in particular, SF '42 does an exceptionally good job, in my book. Panzer, marsch!


-
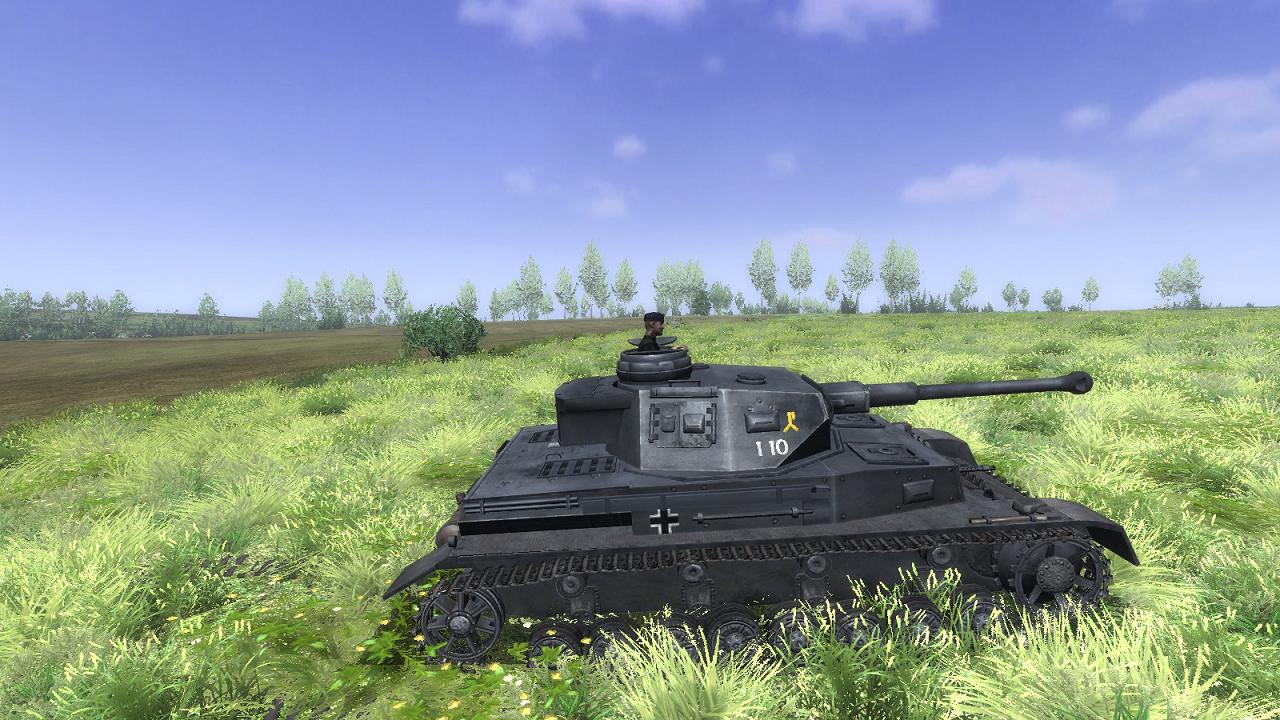
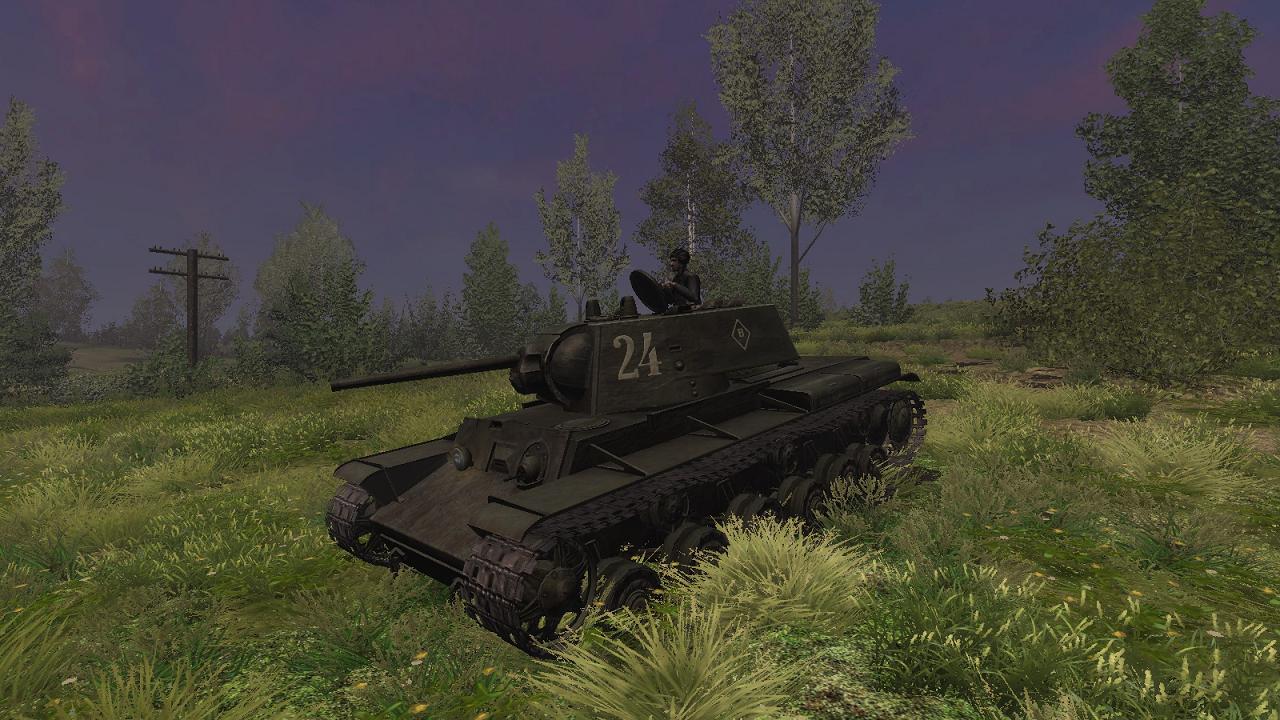
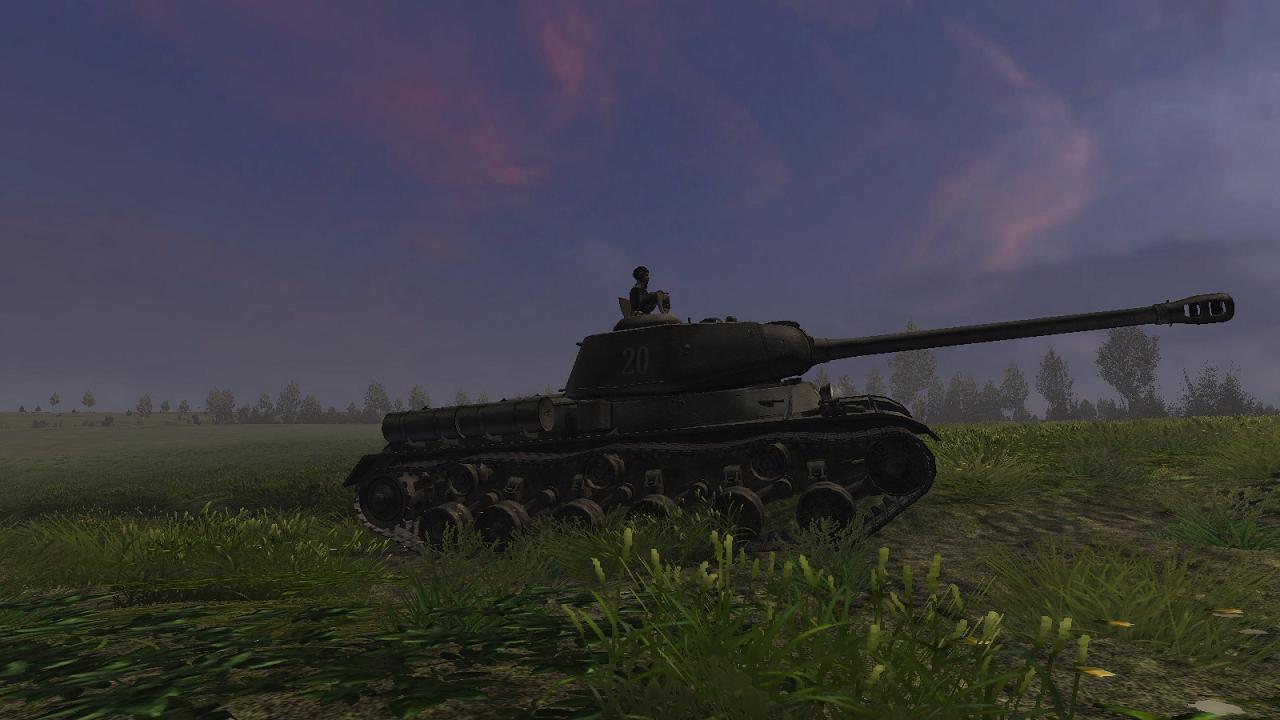
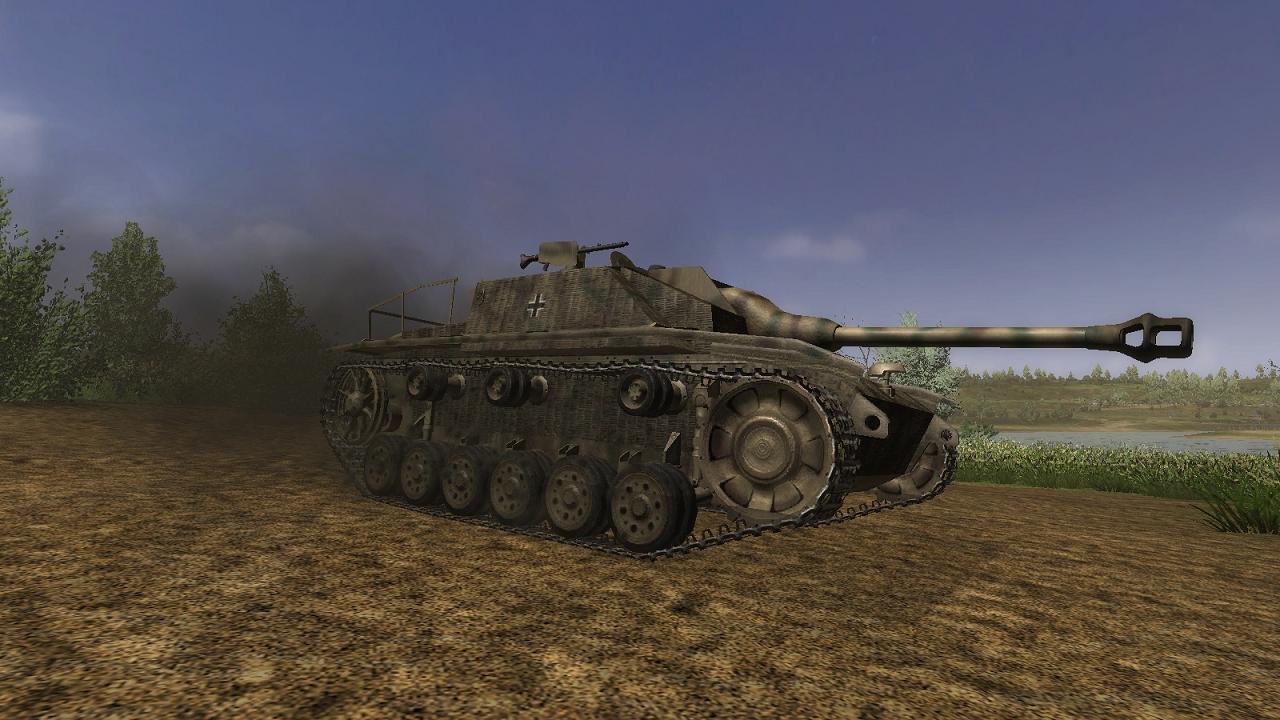
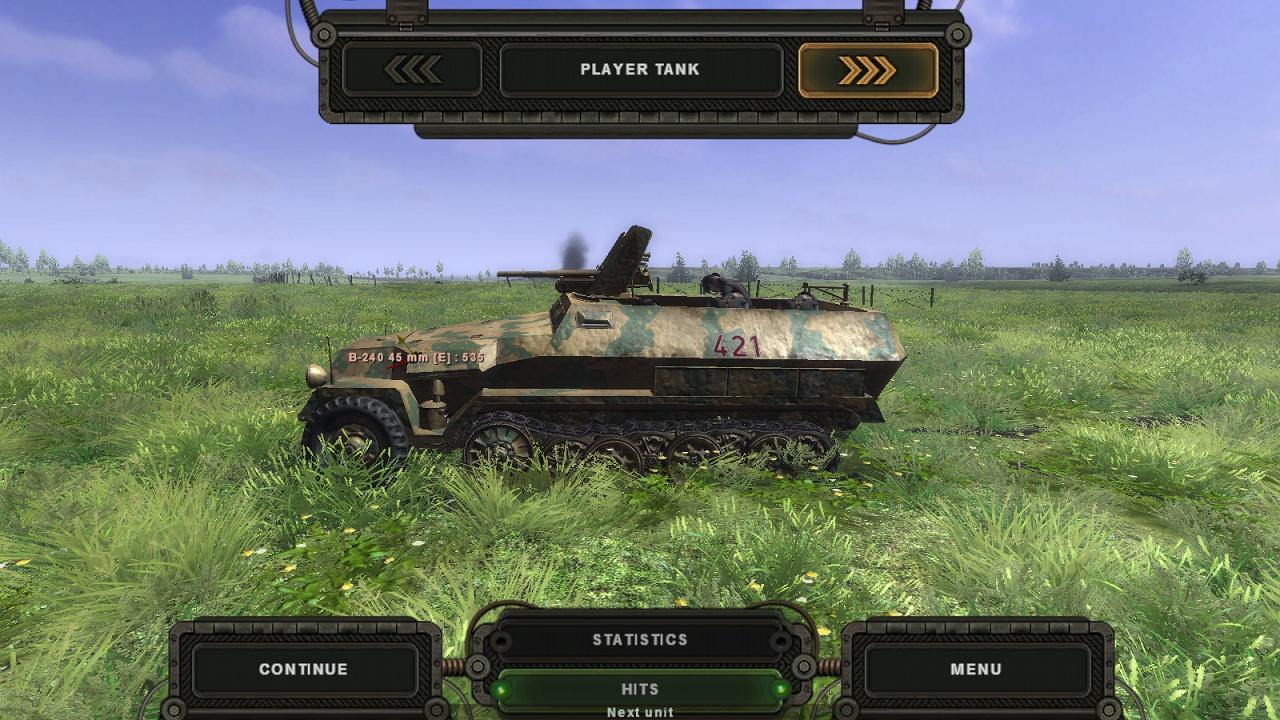
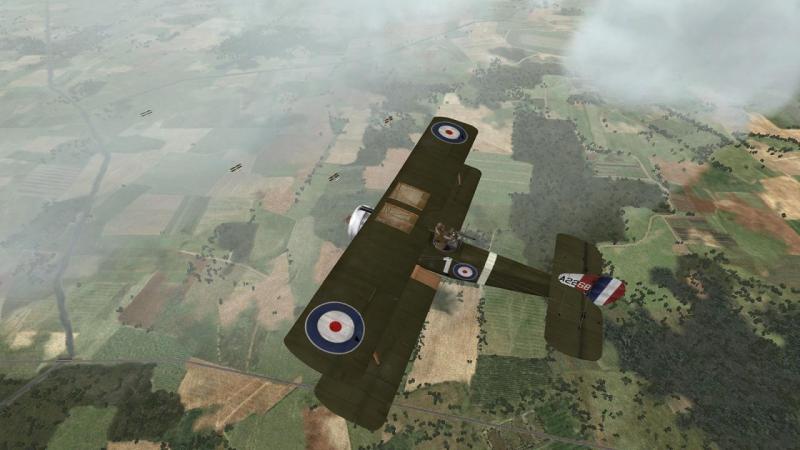
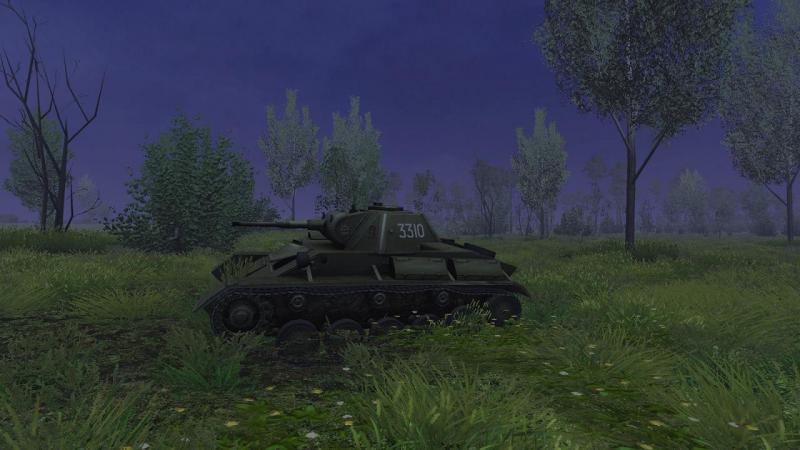
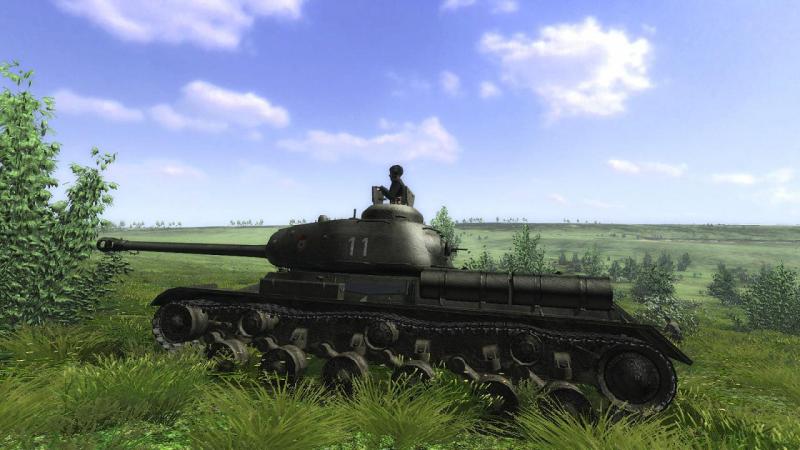
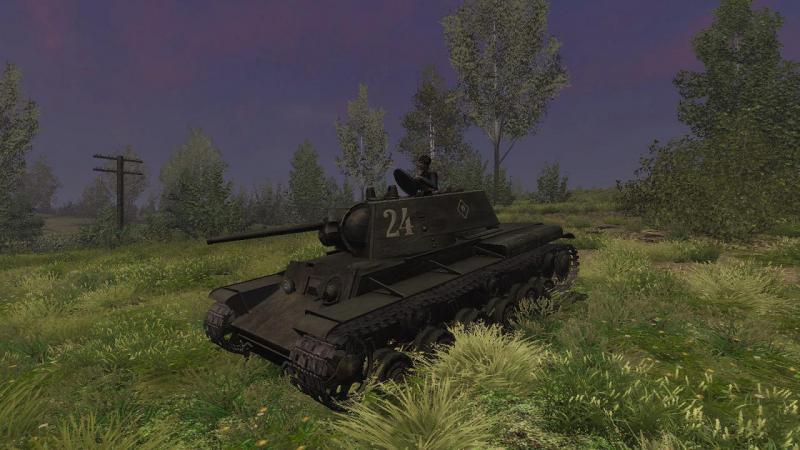
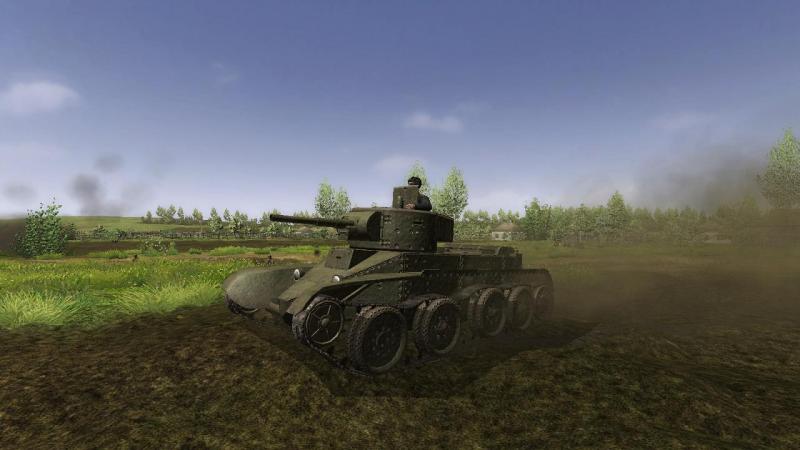
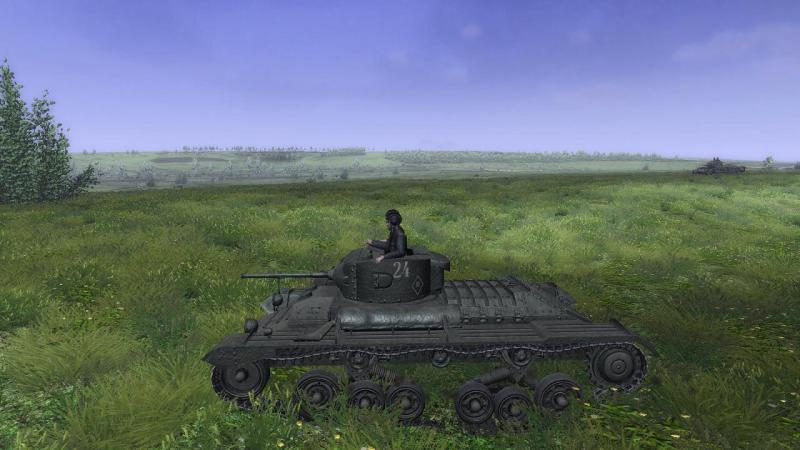
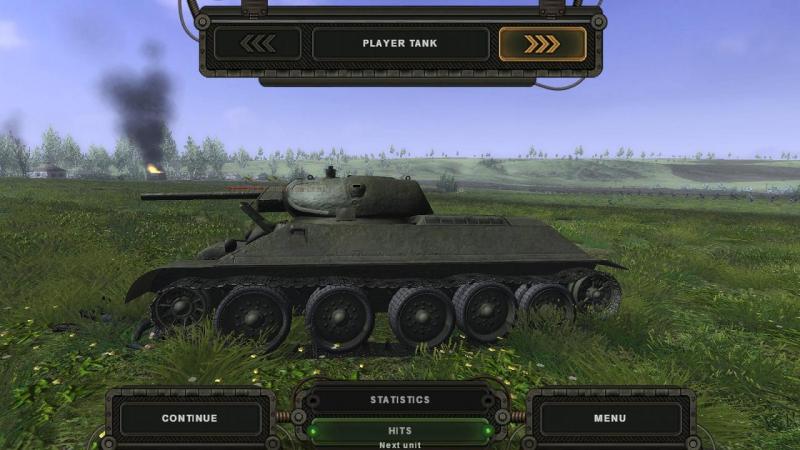
Glad you enjoyed it, Dave! I thought I'd finish off with some pics of a few of SF '42's other playable tanks. Here, I'm using the latest version of the Steel Panthers Mod (SPM 2.0, available here: http://graviteam.com/forum/index.php?topic=11026.0 and enabled after the basic English language patch, in JSGME). The Klimenti Voroshilov (KV) 1: Developed from the KV series, the even more formidable Iosef Stalin (IS) 2: One of the early 'fast tanks' using the US Christie suspension, the BT-5: British lend-lease in the form of an Infantry Tank MkIII, the Valentine: The Germans used a lot of captured kit and this is a 1942 model T-34 in German camouflage and markings: A late-model Sturmgeschutz III assault gun, with streamlined cast 'saukopf' gun mantlet, remotely-controlled MG-34 on fighting compartment roof, and rippled Zimmerit anti-magnetic paste: The tank on which the StuG III was based, the Panzer III, here in what the British called the 'Mark 3 Special' version, with the long-barrelled 50mm gun: Late-model Tiger 1, distinguishing features including low-profile commander's cupola with horizontally-pivoting hatch, Zimmerit finish, turret side triple smoke dischargers replaced with single British-style launcher fired from a port in the turret roof, no Fiefel air filtration system on rear hull, and resilient steel roadwheels with one less layer, in place of the original dished, rubber-tired ones: And the German apex predator, the mighty Tiger II or King Tiger, here with the angular Henschel turret which replaced the more streamlined Porsche version fitted to (IIRC) the first fifty; seen here in the so-called 'ambush' scheme with dots of contrasting camouflage paint supposedly applied to create the dappled effect of light falling through foliage to facilitate concealment in hides: It's worth mentioning the high level of animation you get with all of these, not just fully-moving suspension/running gear but also the crew who can be ordered to 'button up' but otherwise are quite happy of their own accord to open their hatches when it's quiet, duck down and use periscopes when it gets dangerous and close hatches completely when the muck really starts flying. The SPM mod comes with at least single missions for all the above and many more, linked in some cases to form mini-campaigns. I found out just recently that there is a desert war mod but while there are apparently also some US vehicles available, you are basically otherwise restricted to the original Kharkov area maps which are fine for 1942 and 1943 but not strictly historically accurate for 1944 or later, after the liberation of the Ukraine. Not that this matters much; while not large the maps are, to my mind, excellent 'sandboxes' for any company-sized battles fought in the former Soviet Union and perhaps other areas of eastern Europe in those days. If you want to see larger battles, you should instead really be playing a wargame like one of Gravitean's Achtung Panzer series - company and platoon level actions are exactly the right scale of battle for a tank simulator. With the exception of Steel Beasts, with most other tanksims, it's like you and your platoon are off for a drive in the countryside, conducting a little mission of your own, with other AI units, if there are any, likewise only loosely co-rdinating with you. This is not how it usually worked, then or since. Your tank is part of a troop (US platoon) which is part of a squadron (US company). As a tank commander who's also a troop/platoon leader, the orders you get will be given to you - and to your fellow troop/platoon leaders, plus those of attached troops like armoured infantry - by your squadron/company commander, all together at what the British Army calls an 'Orders Group'. And 'orders' are what you get - the common term 'briefing' is much too casual, a real misnomer. Your mission will be a closely-linked part of the squadron/company's mission, not your own little drive in the countryside. SF '42 has its limitations in this and in other respects; but it still simulates this important reality of combined arms warfare much better than any other WW2 tank sim I've played and is beaten in that respect only by Steel Beasts. To be fair, I suspect that you could probably achieve something similar to SF '42 in Panzer Elite. My attempts to do this in my own efforts at missions tended to break down when (as regularly happened) any AI subunit got stuck and mission triggers designed to co-ordinate things between different sub-units then didn't fire; a less ambitious or less complicated approach might have worked better. Anyway - within the inevitable limits of AI and mission design - compared to other tank sims, SF '42 does an exceptionally good job not just in simulating the operation of your own tank but also in the bit most other sims seem to do less well - nicely simulating the experience of participating in company-level combined arms operations, in this case on the Eastern Front in Word War 2.


-
Nice stuff there! I don't suppose the ballon winch will actually winch down balloons?
-
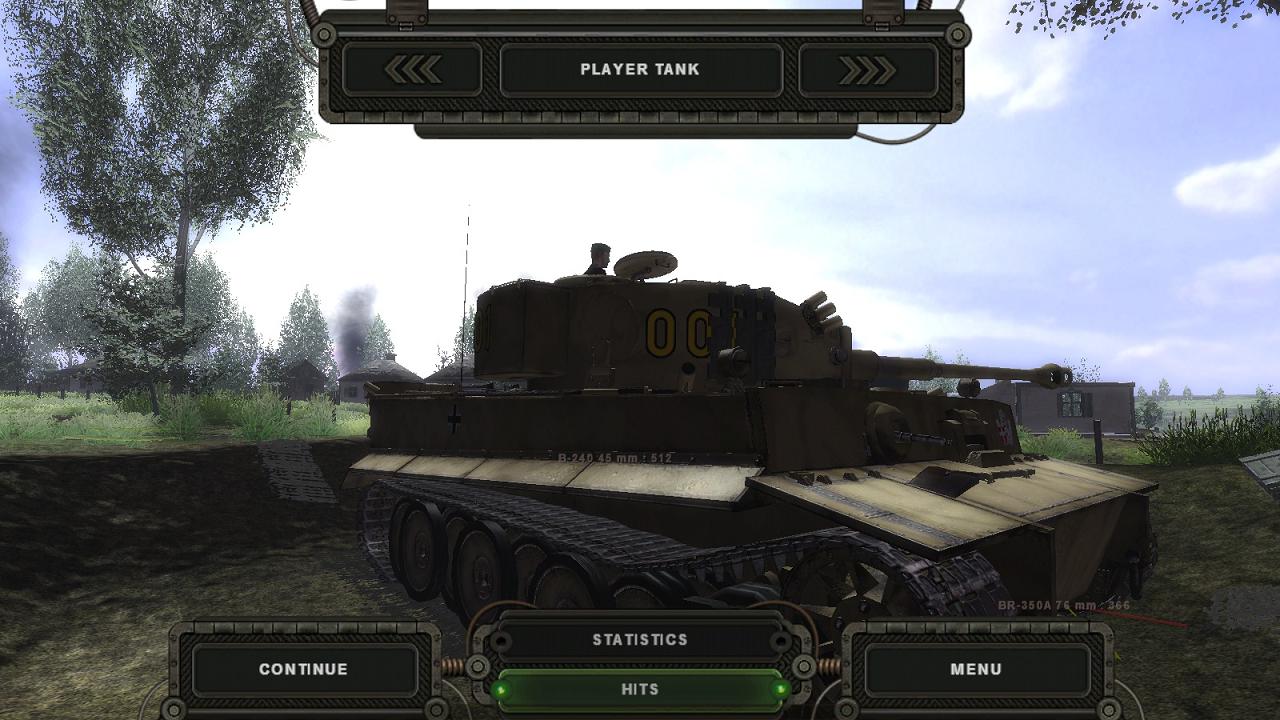
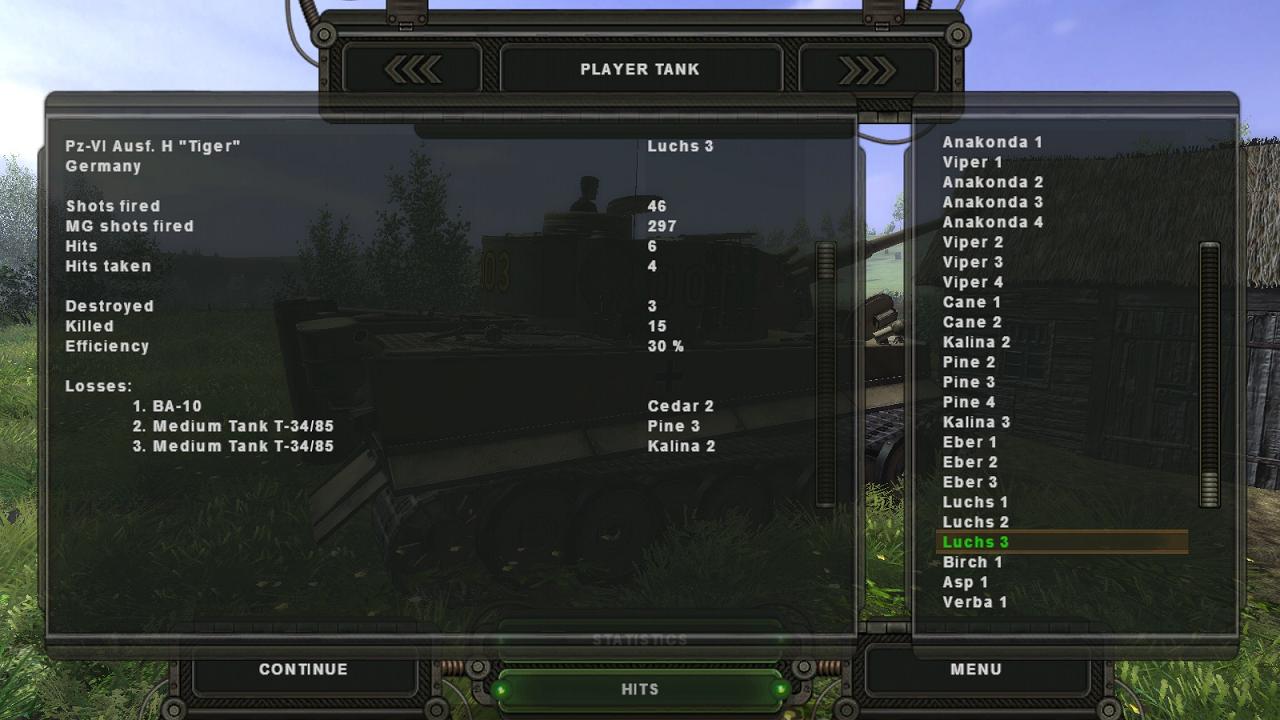
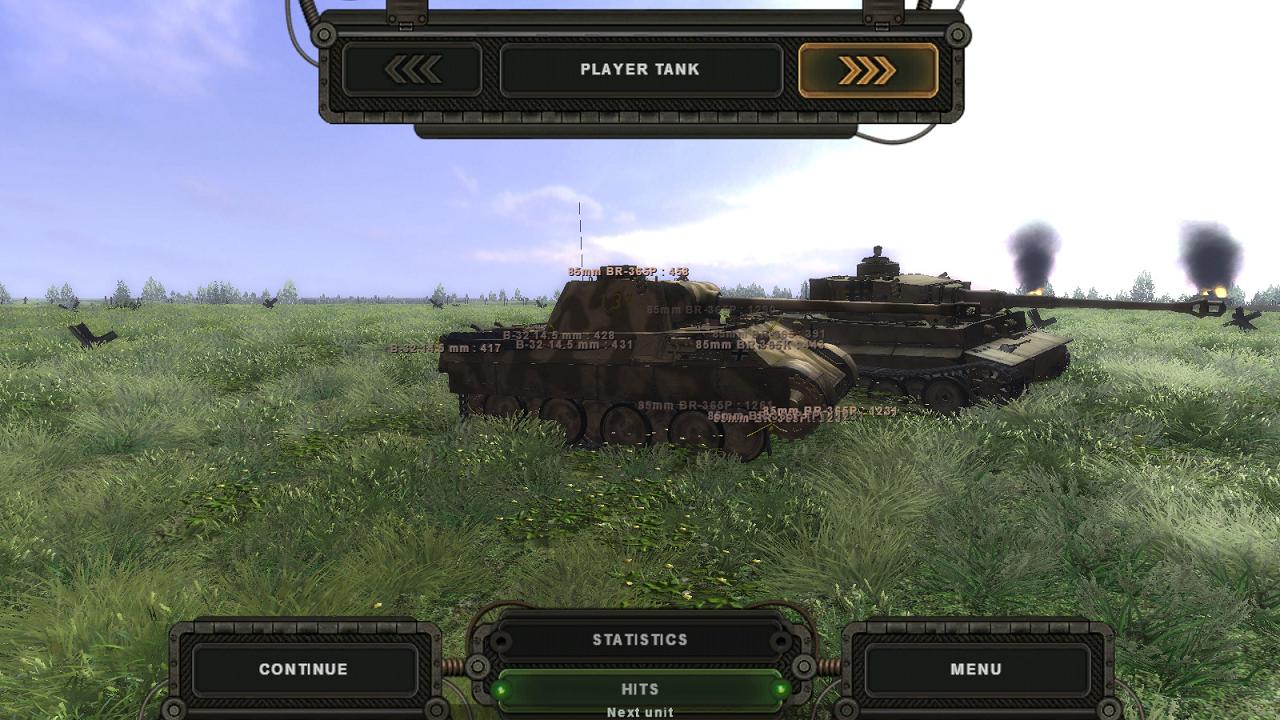
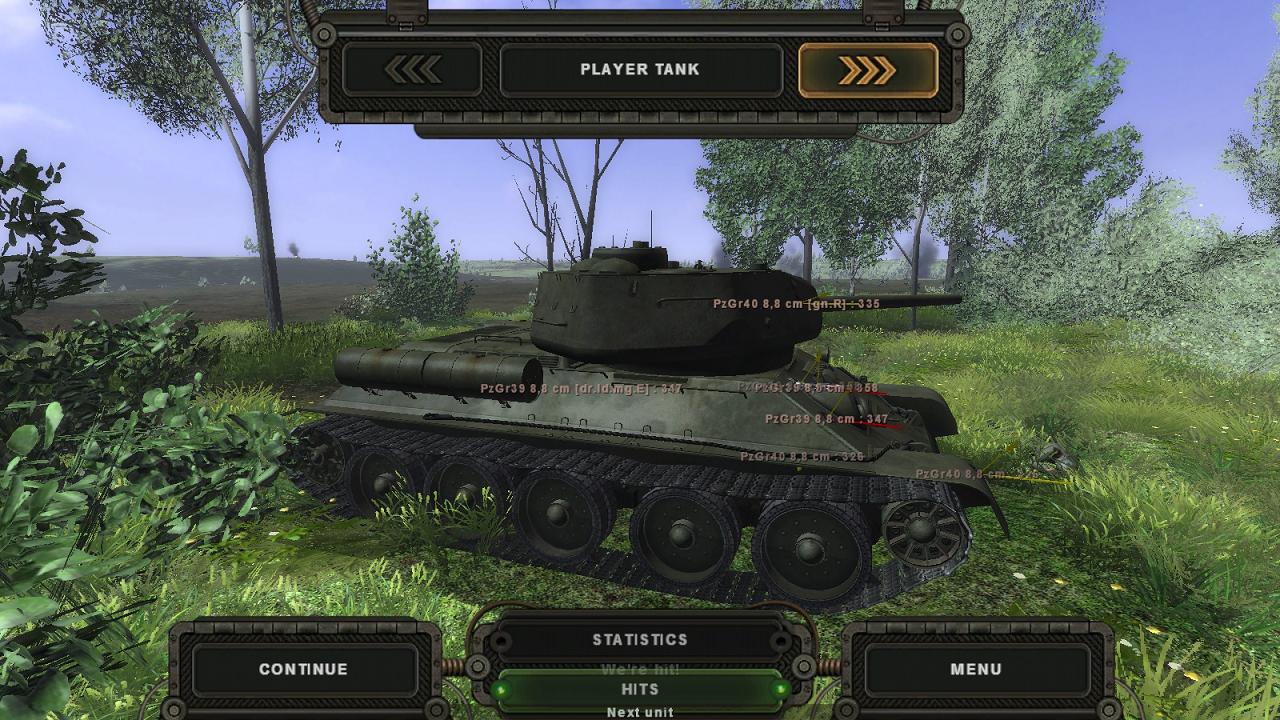
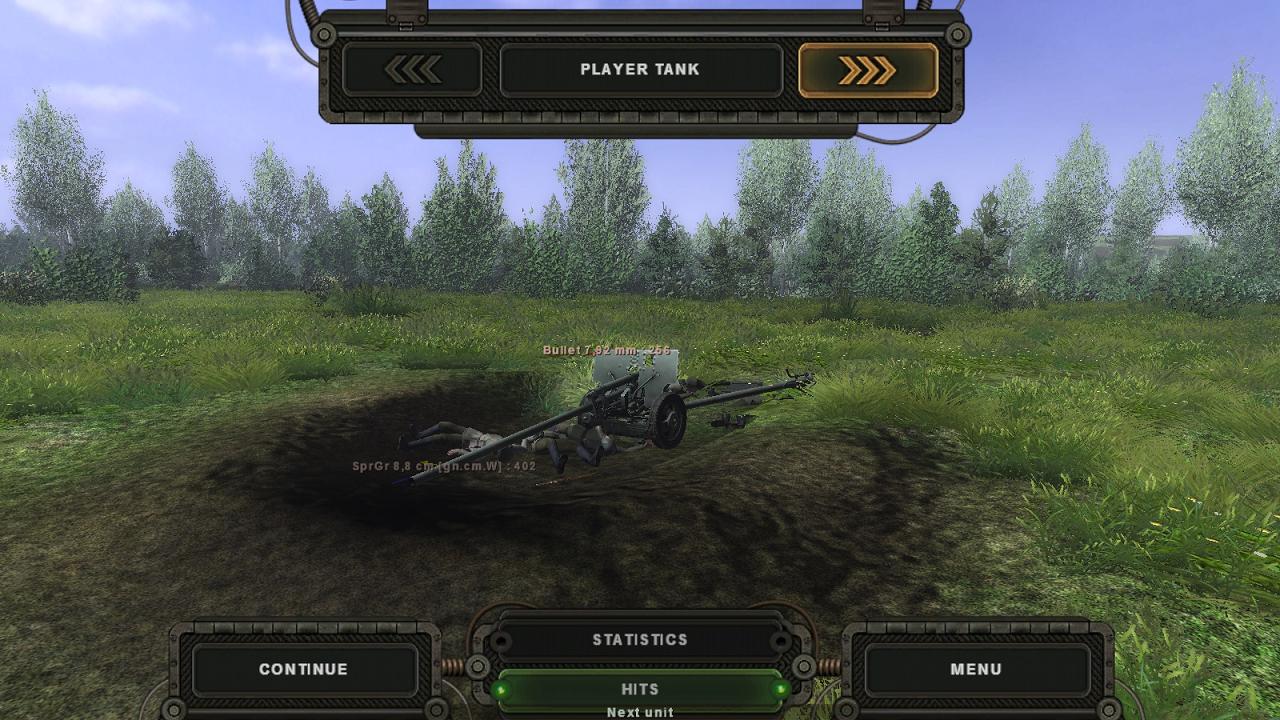
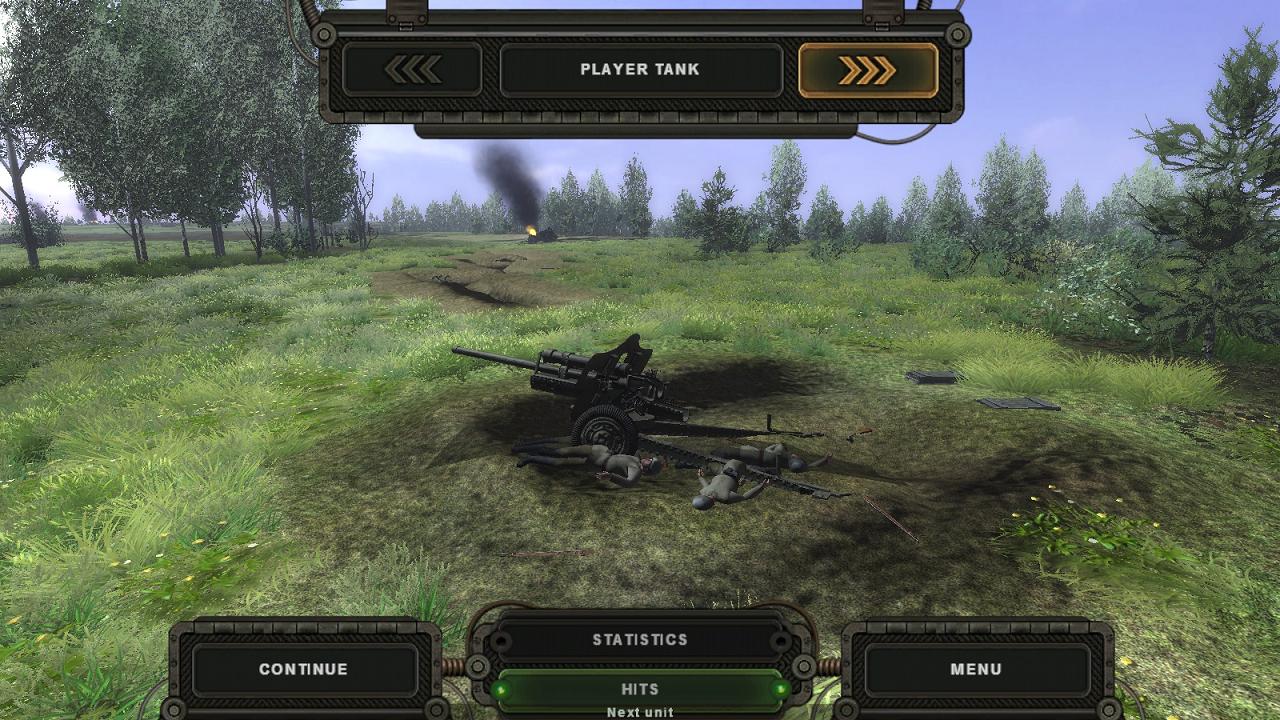
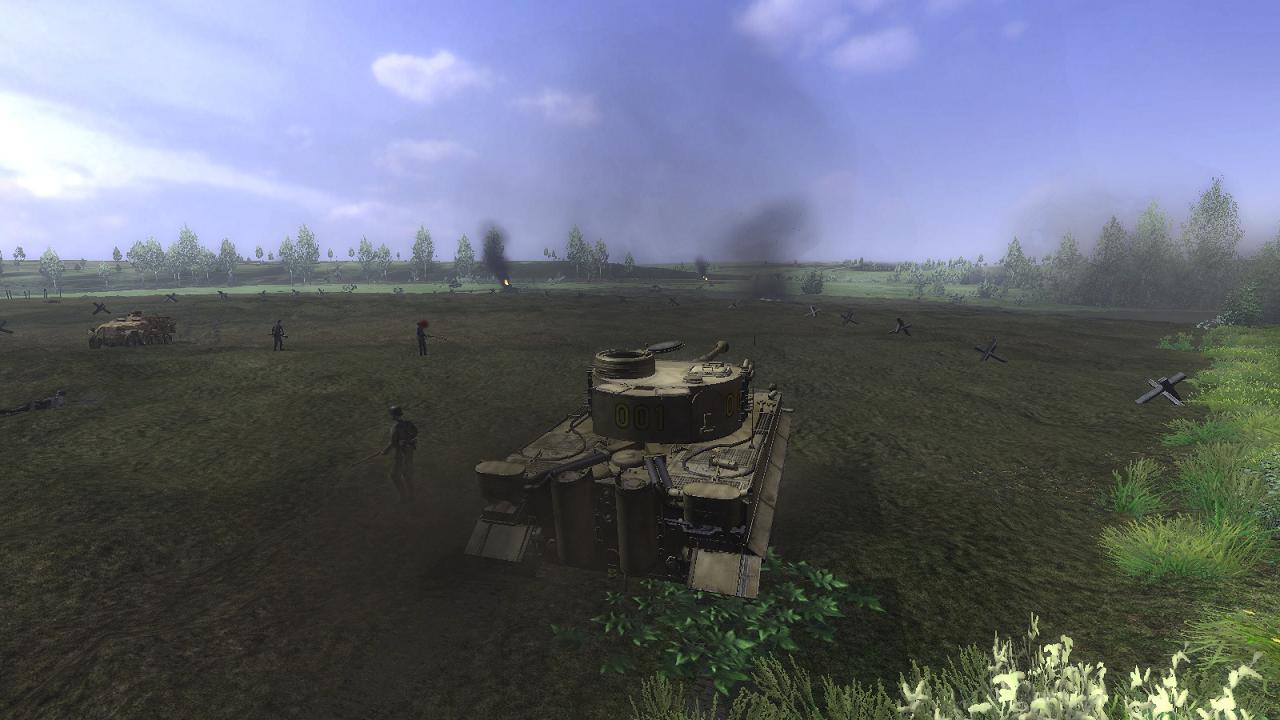
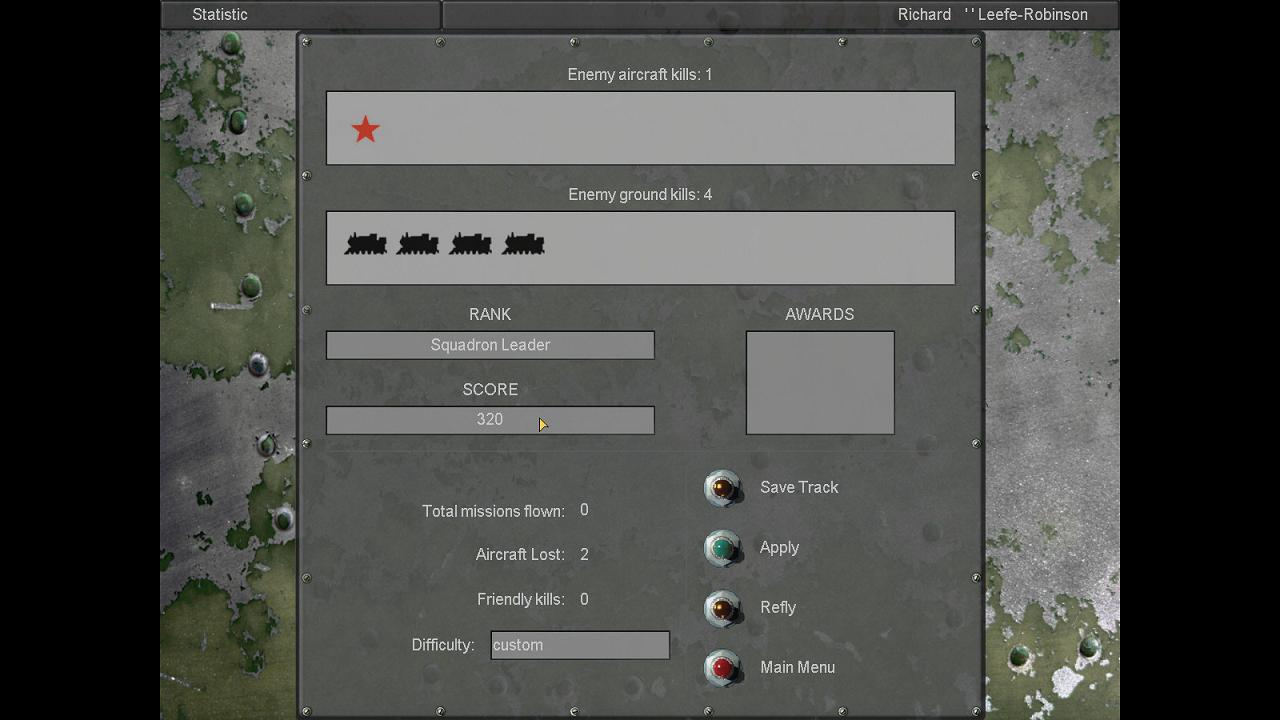
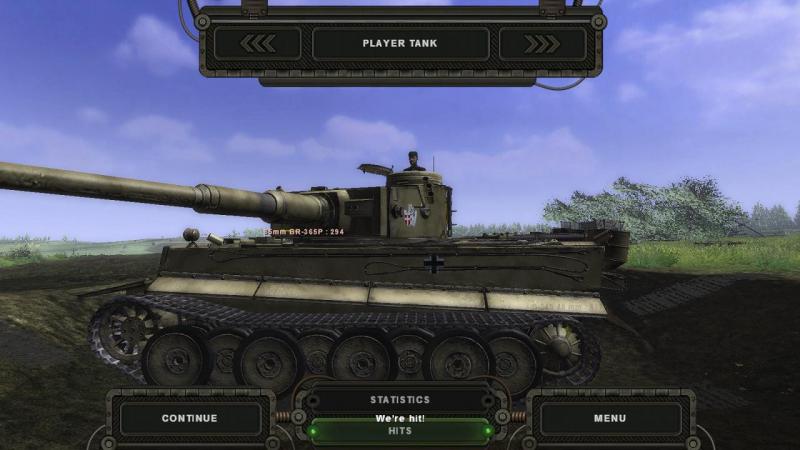
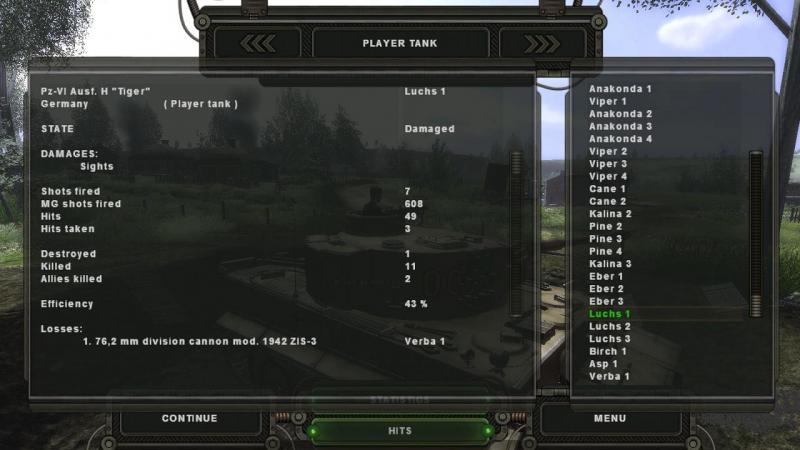
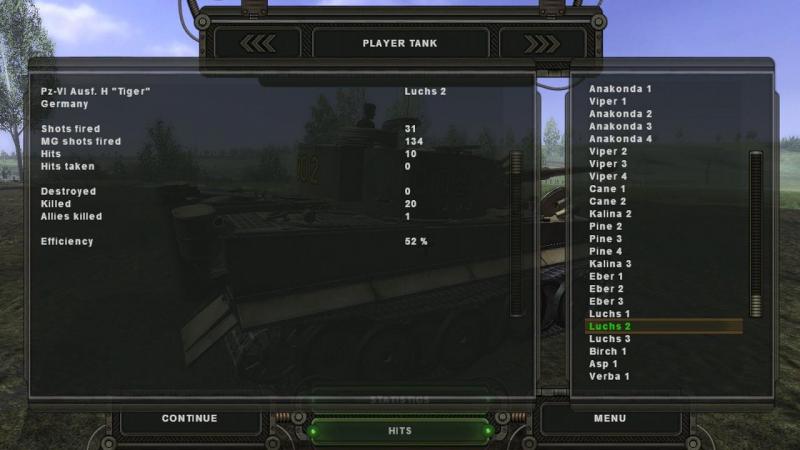
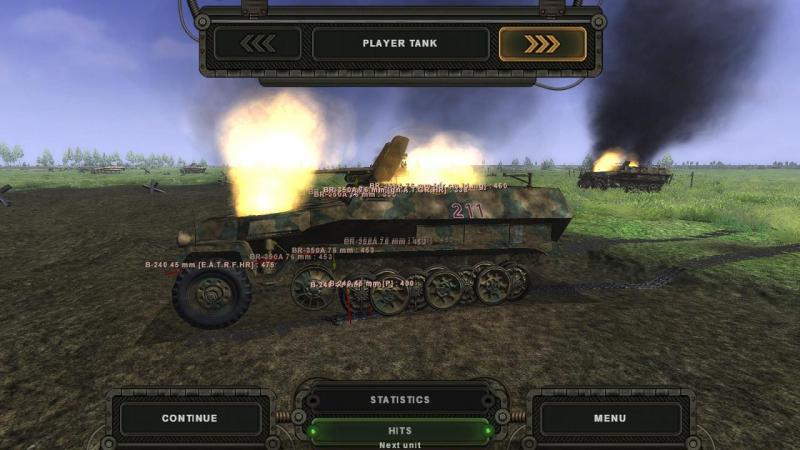
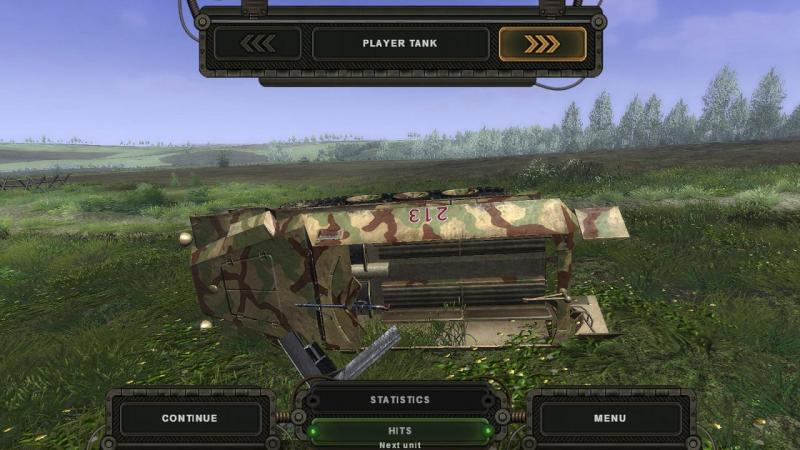
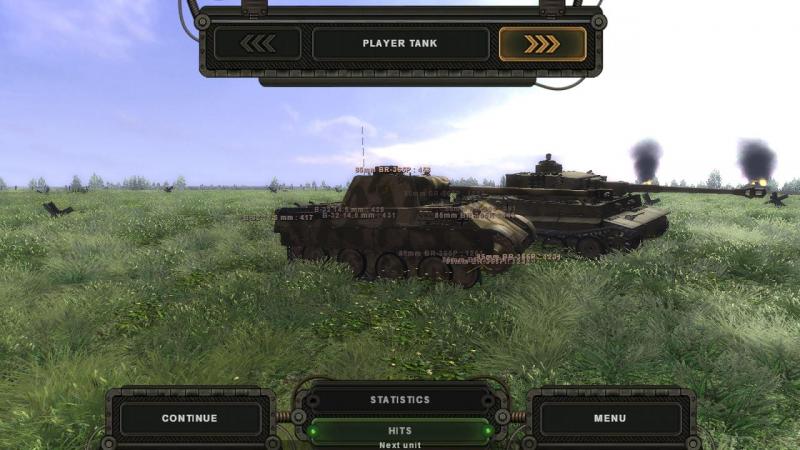
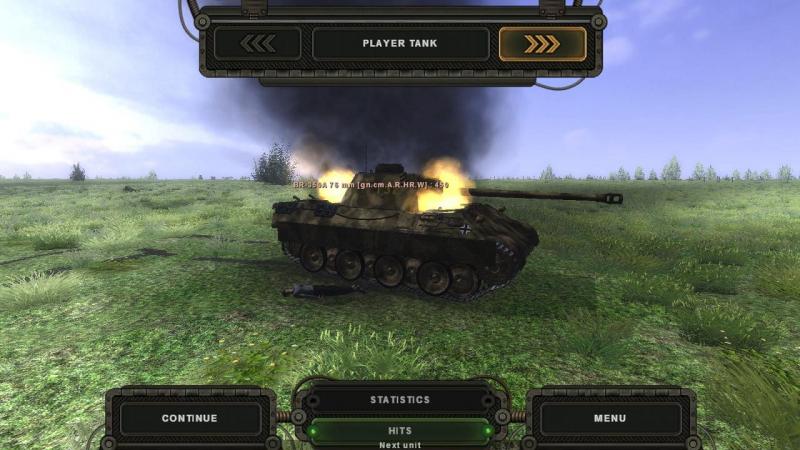
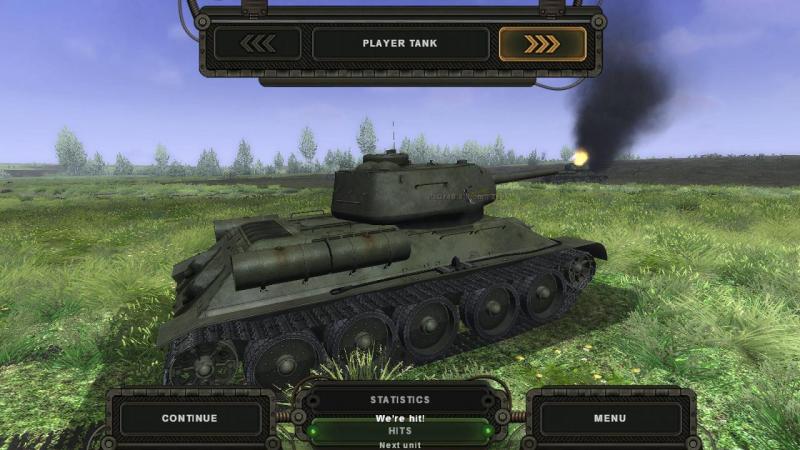
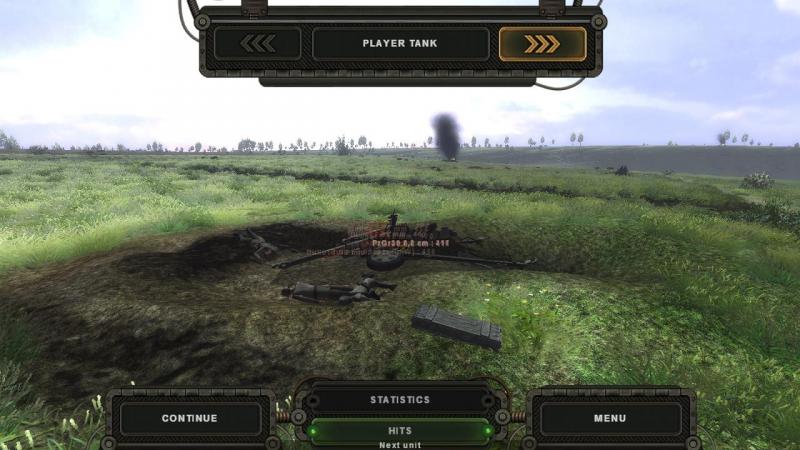
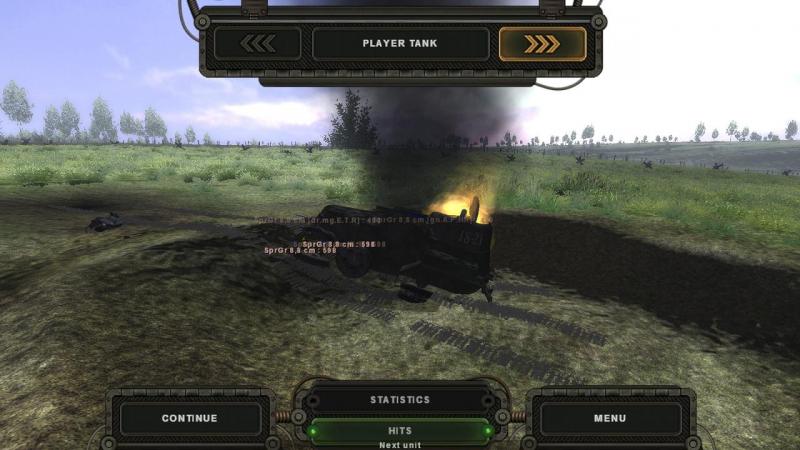
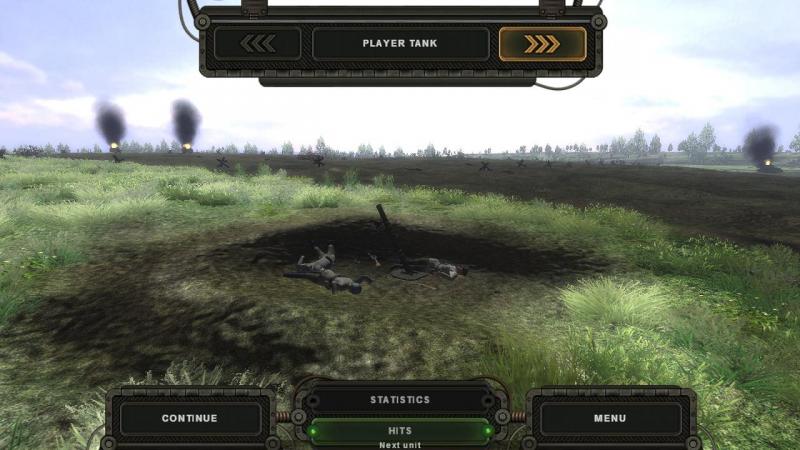
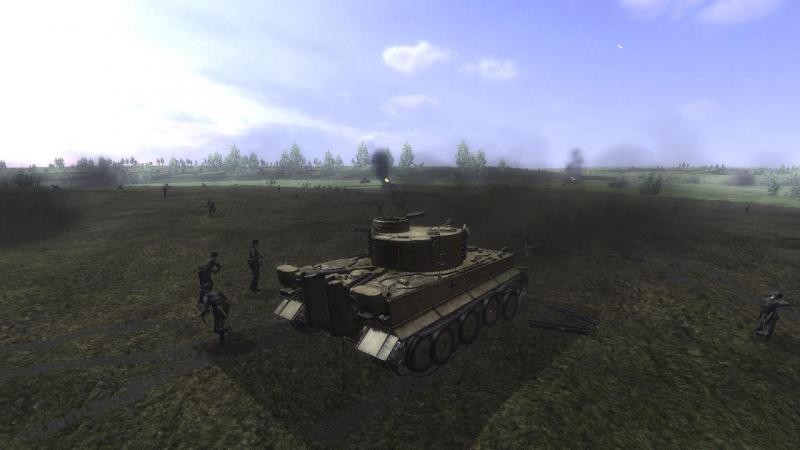
Aftermath At this point, battle over and mission complete, it was time to select the SF '42 option to 'View statistics'. This isn't the usual worthy but dull listing you often get in sim debreifings. Instead, you get to wander the battlefield, tabbing from vehicle to vehicle, weapon to weapon, able to see more arrows than after Custer's Last Stand, each denoting a hit; and to call up, for each, their own mission kills and damage sustained. Here's my own Tiger. I'm shown as having taken a hit from an 85mm round low in the gun mantlet, non-penetrating fortunately. The numbers are the type of round I think, and the range. From the other side, you can see that I've taken another couple of whacks, from a 76mm gun in the nose and from a 45mm AT gun in the side By switching from the 'Hits' tab (at bottom) to 'Statistics' I get an overlay with the mission units, friendly and enemy, listed on the right and in the centre, a larger overlay with my own 'vital stats'. Neat, isn't it? Seeing this now, I remember loosing off an AP round I had 'up the spout' and a shed-load of co-ax rounds at an emplaced gun, which event I didn't capture in a screenshot - possibly as the b***er was firing back at me! - but the confirmation I got him is here! Moving on, I can also see that my platoon's other two Tigers have had a rather more successful day. As the leader of my little team, it's encouraging to see that we've done reasonably well, even if my own personal score was rather low. Moving on, our lightly-armoured SPWs had taken a bit of a beating: This Tiger and Panther were where I last saw them, immobilised but with crews surviving and clearly candidates for early recovery and repair. Another Panther had not been so fortunate, though. And so to the defeated Soviets, whose knocked-out T-34/76s and T-34/85s littered the battlefield. Their infantry support weapons and field and anti-tank artillery had suffered similarly; as had some Soviet BA-10 armoured cars, whose presence I'd not even been aware of, even though my number 3 got one of them - along with two T34/85s. Worth an Iron Class First Class at the very least, methinks.. So that was it. This was a very enjoyable and thoroughly absorbing mission, battlefield simulation immersion at or near its very best. Some aspects could be better. Platoon control is limited and your platoon mates seem to be like Cold War Soviet tanks, able to receive the limited range of orders you can give but unable or forbidden to communicate in return, whether to indicate targets, acknowledge your orders or communicate difficulties. It's perhaps possible that some of the target indcations you hear over what you take to be your own tank's intercom are supposed to be on the platoon or company radio net from other tanks but it's hard to say. I haven't played much in the way of SF'42 campaign missions but my impression is that while they are nicely representative historical set pieces, I'm not sure they are any more than a set of single missions or whether - outside of some real combat footage set to music - there's anything resembling the sort of crew management or campaign extras that you get in M1TP2 or the like. Good old Panzer Elite not only has much more comprehensive tools for platoon management in battle and better (if somewhat robotic and less exciting) radio comms and chatter. And you can fight in Africa, Italy or NW Europe as well as in the East. But for great visuals, great sounds and great missions, Steel Fury Kharkov 1942 is very hard to beat and a 'must have' for any fan of WW2 tank simulation action. And the mod community have taken a good basic package to a new level. Very highly recommended!


-
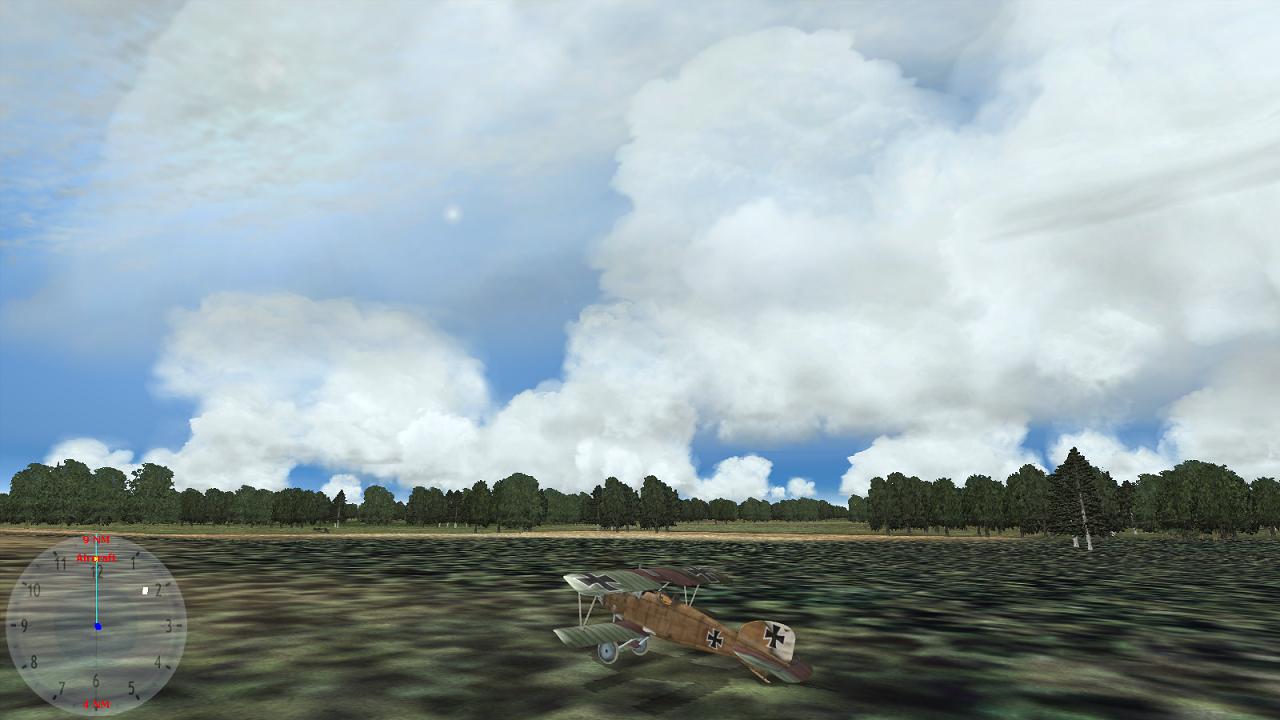
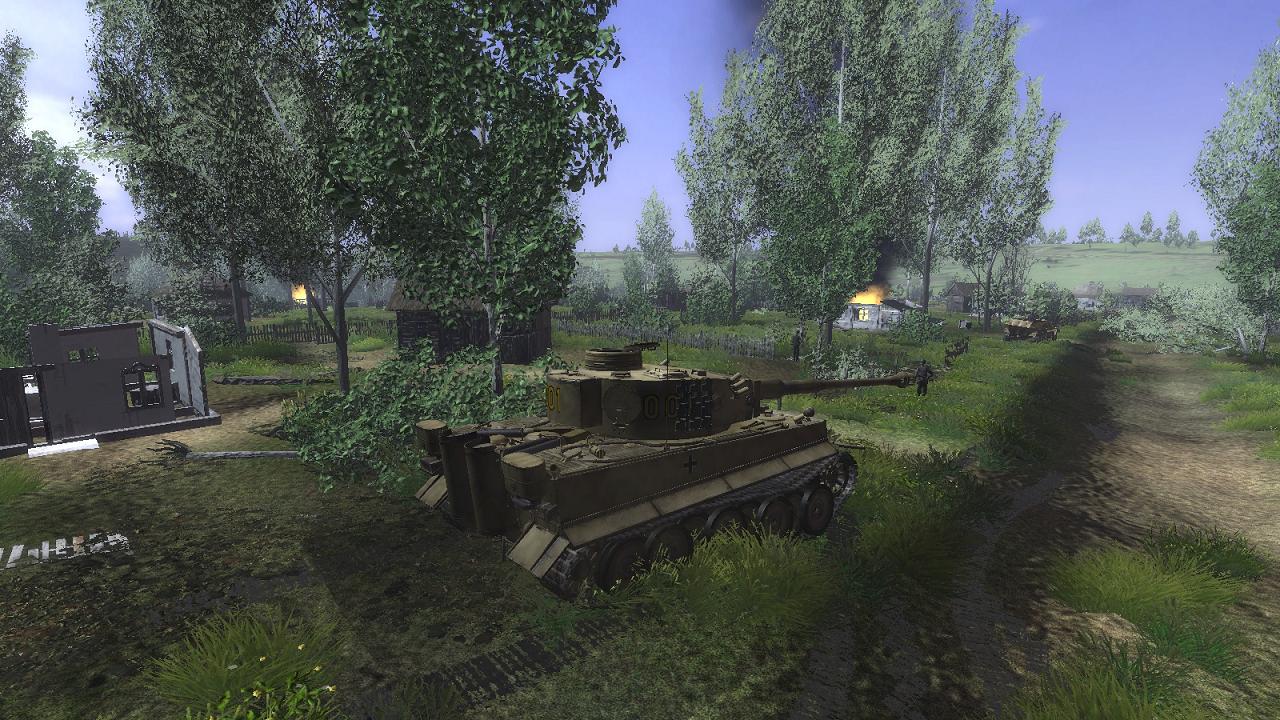
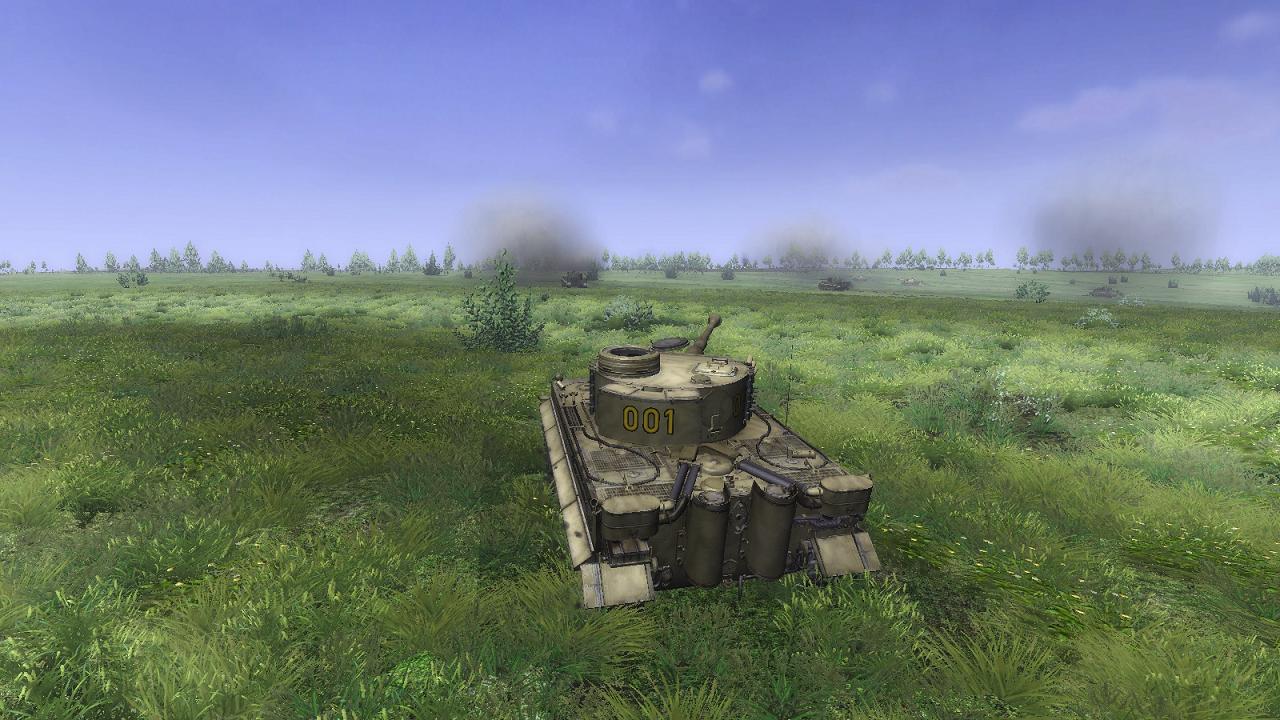
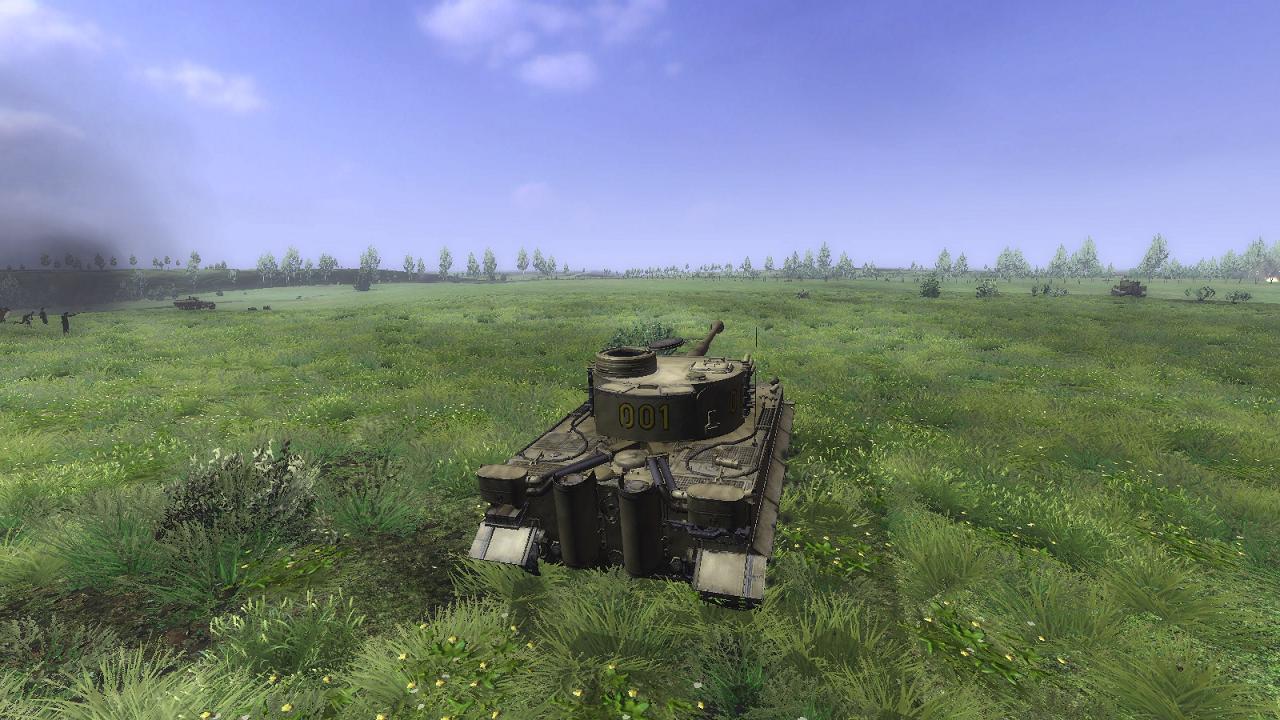
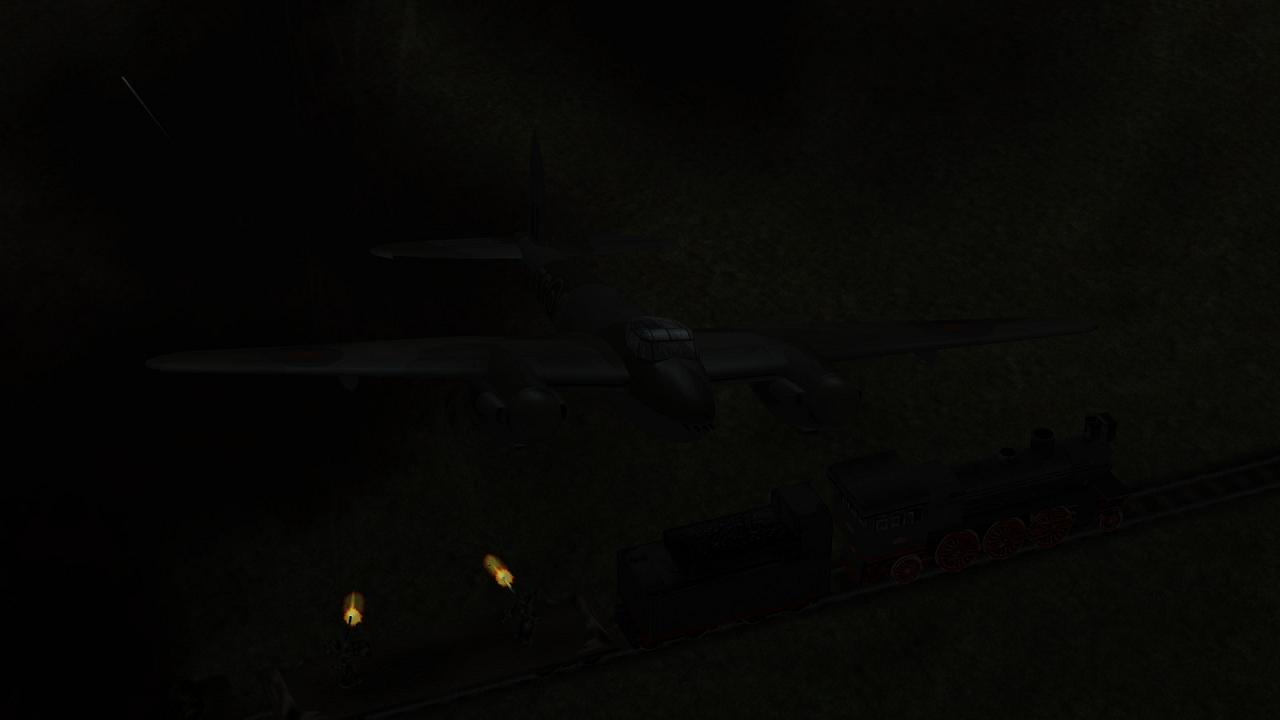
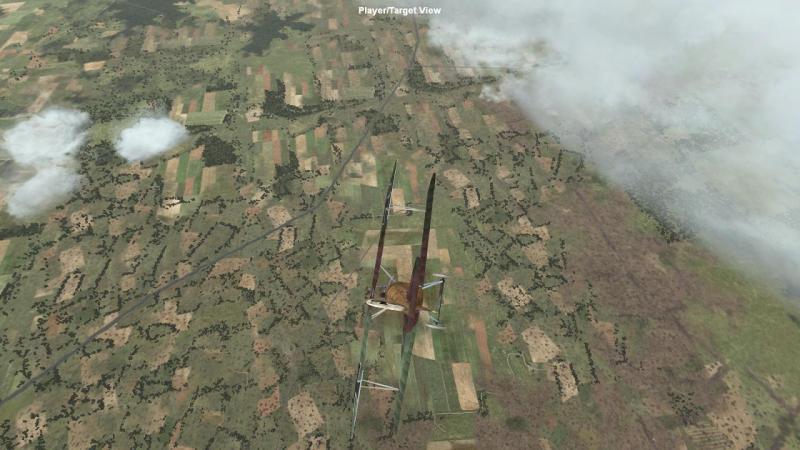
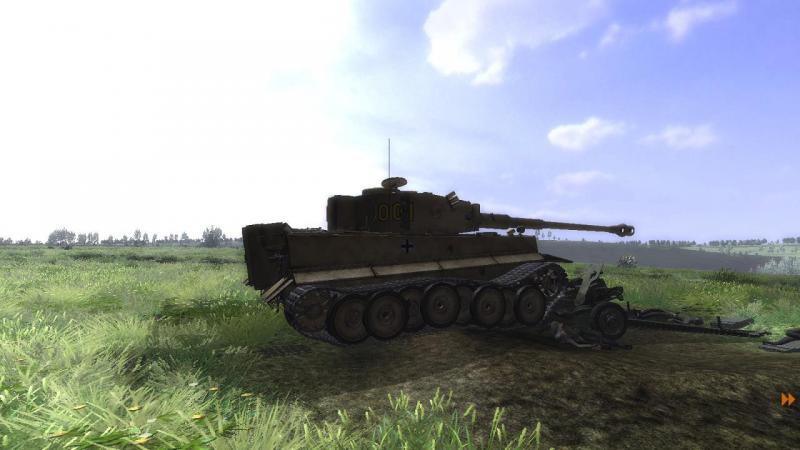
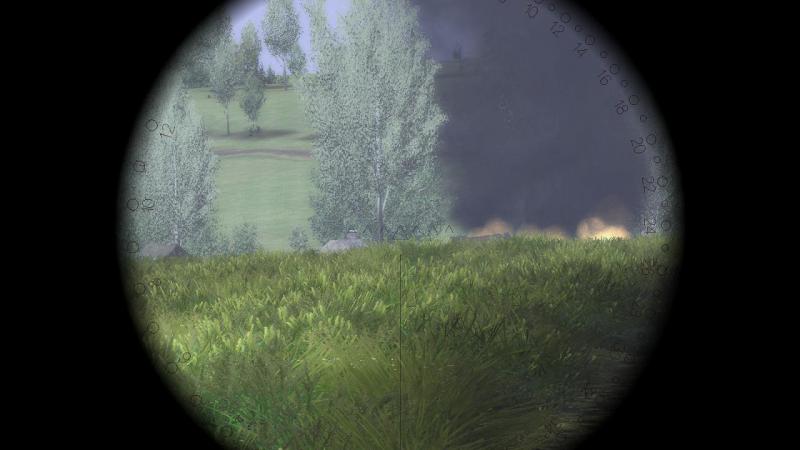
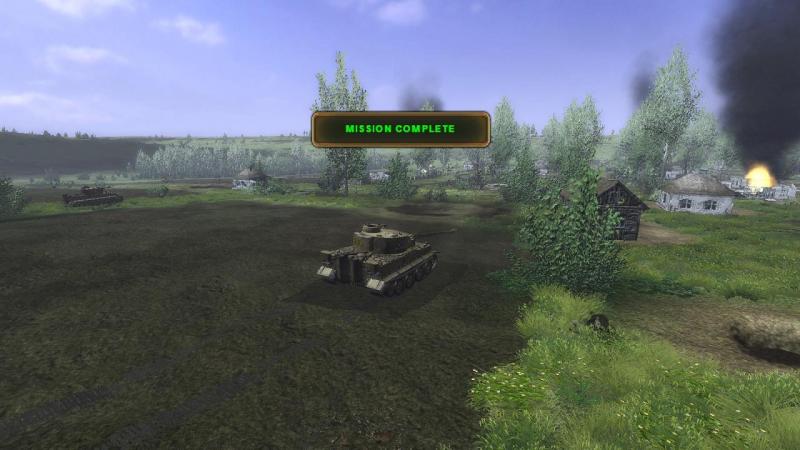
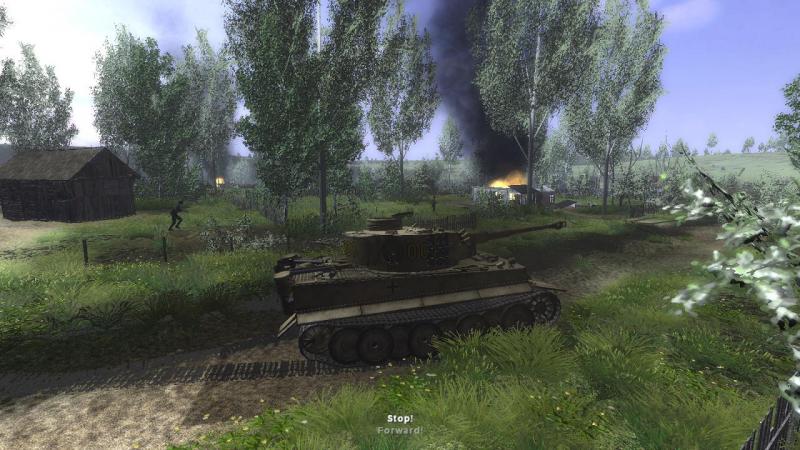
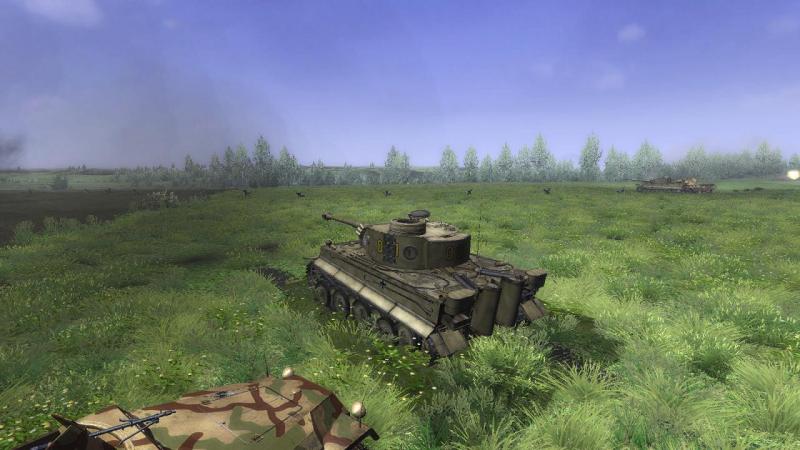
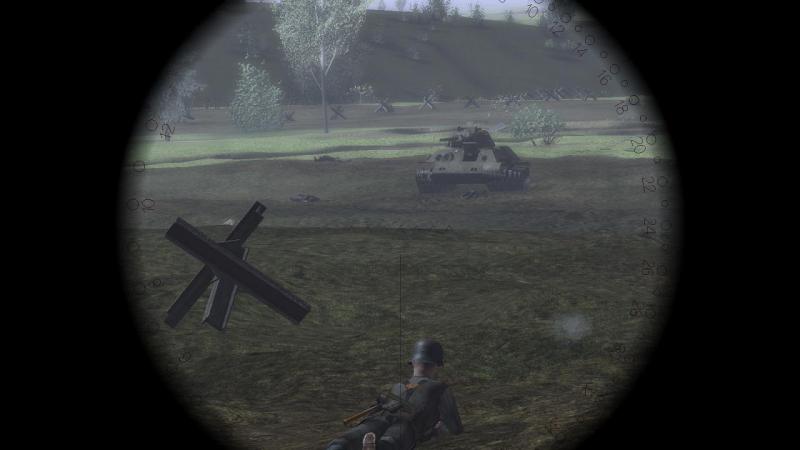
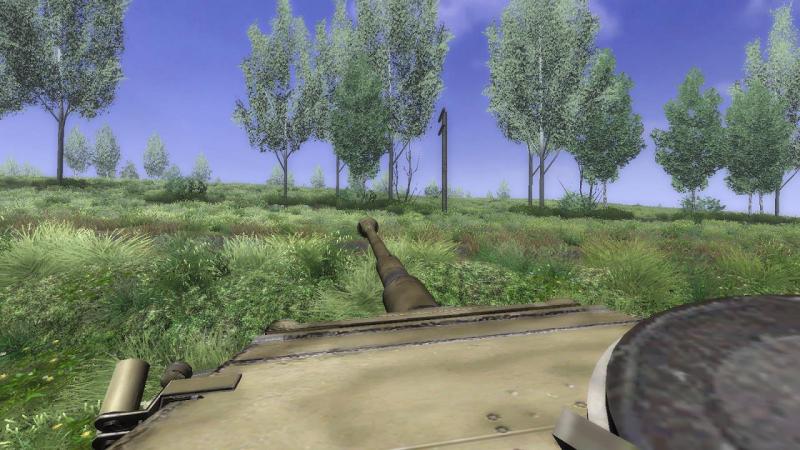
To Nepokrytoe and beyond By now I was moving from cover to cover, making brief halts for observation in tracks, dips in the ground, anywhere that offered a little bit of extra protection. Soon, climbing out of a rutted track I'd momentarily sheltered in, I could see the burning village just ahead. I turned to face it, halted in the open grasland and started scanning again. All I could see were burning rooftops, clouds of smoke and steadily advancing Grenadiers. I moved off again, towards the village. The firing seemed to have slackened right off, and as I neared the outskirts, scanning anxiously left and right for concealed anti-tank guns, the mission's success was suddenly proclaimed - Nepokrytoe was ours! At ths juncture - provided the mission hasn't concluded with your destruction! - SF'42 will let you quit to the deberifing, view statistics - of which option, more later - or continue with the mission. If I'd played a more active role in our success, I might have called this one quits, but in the circumstances I opted to play on. This was firstly, in the hope I might get a crack at some more Ivans; but secondly, because as anyone who's had any combat training knows, the final phase in any attack is the 're-organisation', during which you 'go firm' on the enemy side of your objective, mopping up, regaining control of your troops, sorting out supply and casualties, and perhaps most importantly, making yourself ready to deal with the quick counterattack you must always expect at this very point. Besides, I wanted to fight through the objective, even if the sim already considered it fallen. One must do one's battle drills in the right order, after all! So on I went, into the sad ruins of little Nepokrytoe, edging past wrecked buildings, careful to avoid crunching any of our troops and at the same time, looking out for any remaining Ivans. Nearing the other side of the village, I could see to my right another Tiger - one of mine, as it turned out - blazing away with his hull MG at some unseen target. Between us lay the wrecked remains of what looked like one of those typical Soviet 76.2mm field guns that were also rather dangerous AT weapons. Finally reaching the edge of Nepokrytoe, I edged into a conveniently-sited large bomb crater, which made quite a good hull-down firing position for my big tank. Once settled in, I swung my turret from right to left, scanning for targets and in the process, confirming that the Tiger to my right was from my own platoon, with the same distinctive unit insignia (can't tell which as all my 'Panzer Colours' volumes are in the loft at the moment and I've no time to go looking online). All clear. Evidently, our job here was now done. My own role had been rather modest, to say the least, but the day was ours. It remained to inspect the battlefield, and perhaps grab a few souvenirs. ...to be continued!


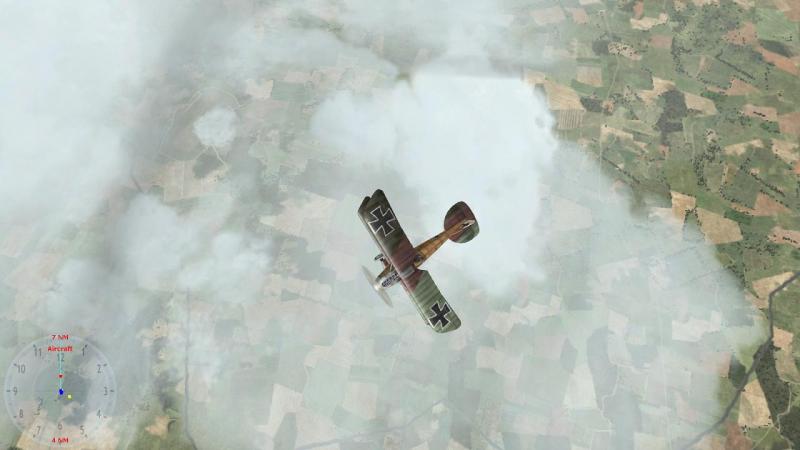
-
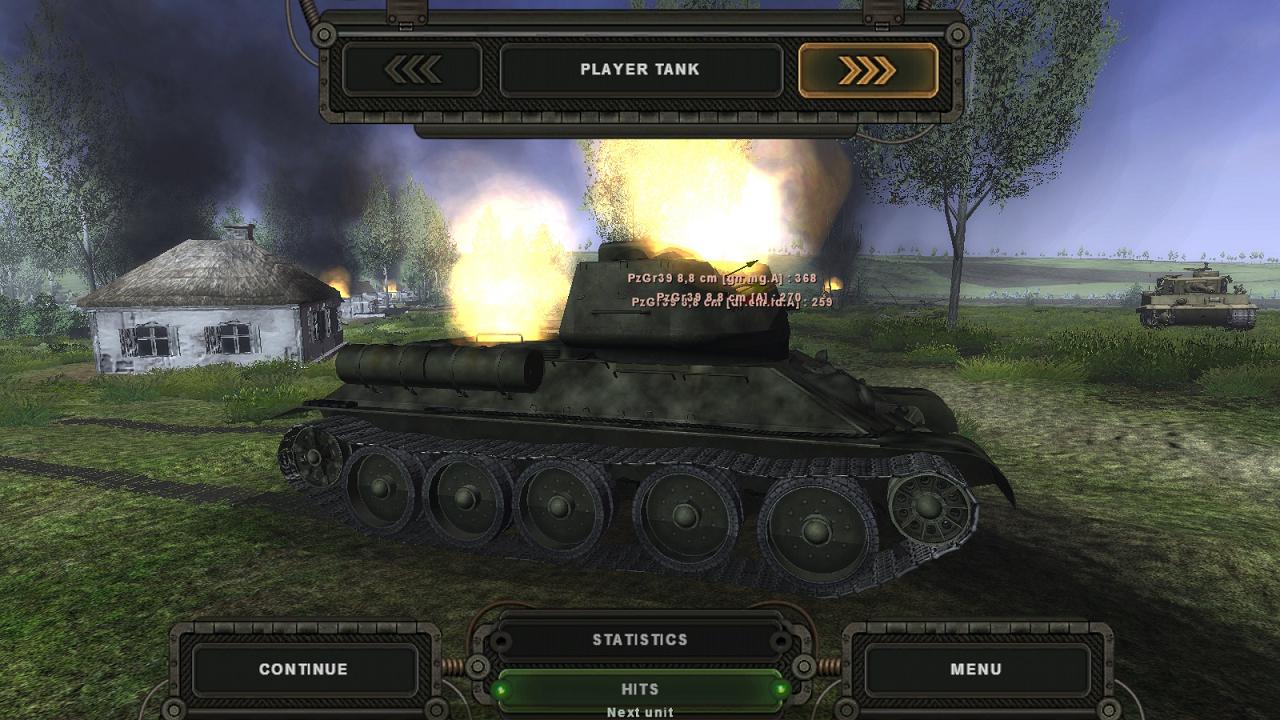
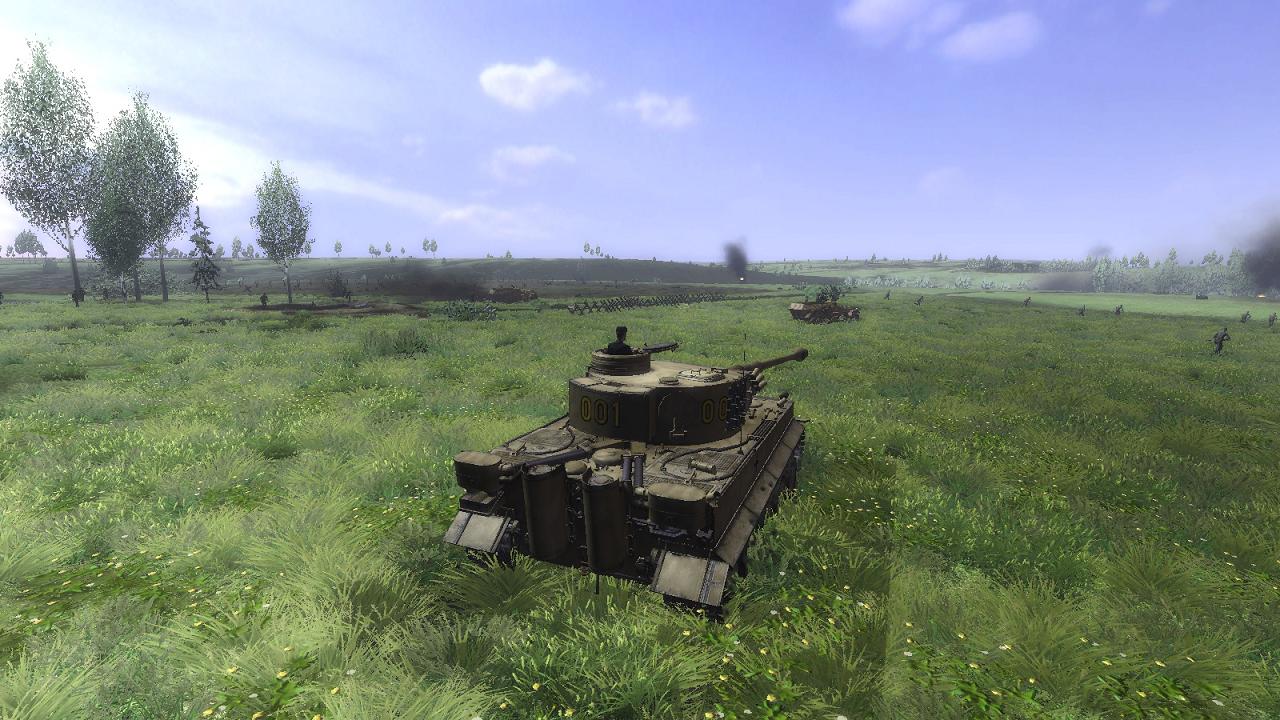
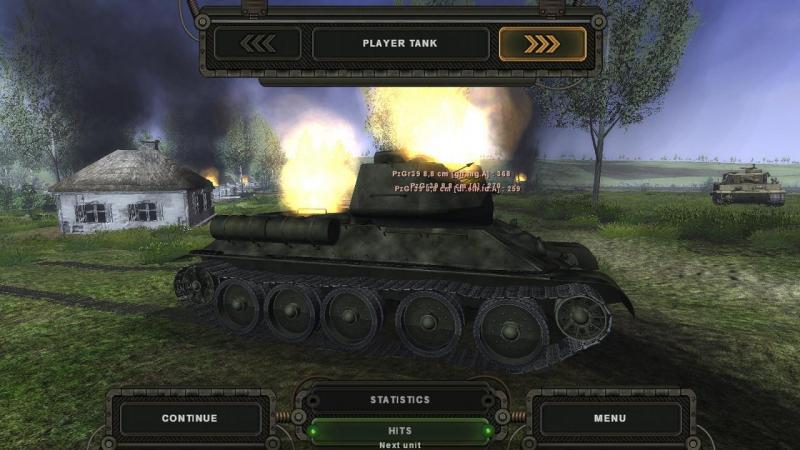
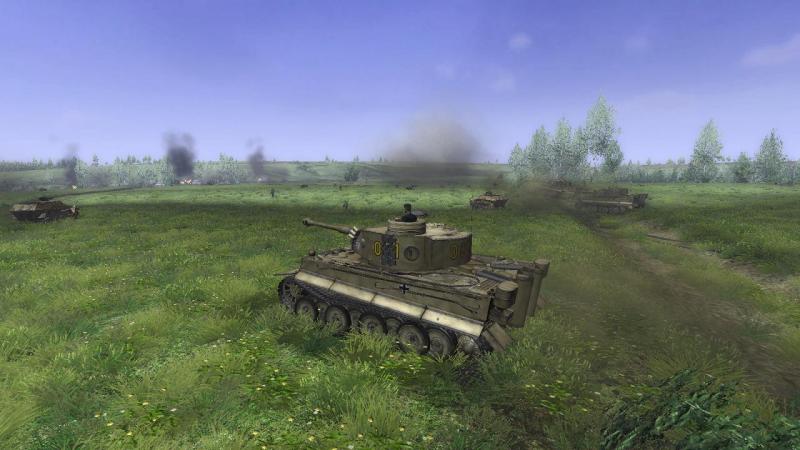
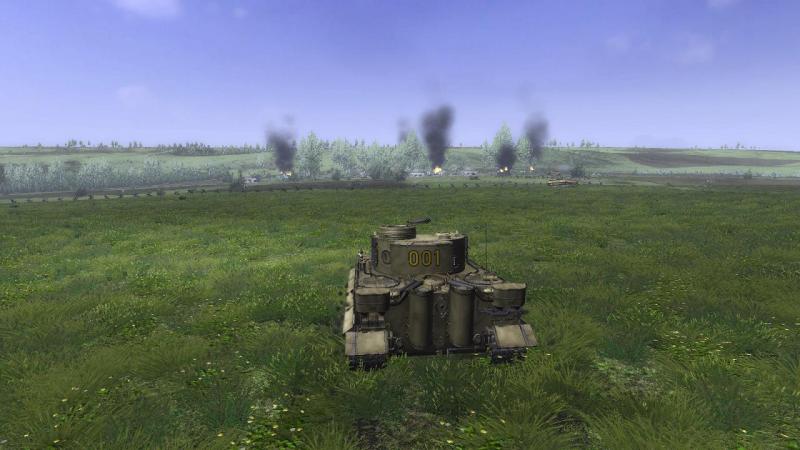
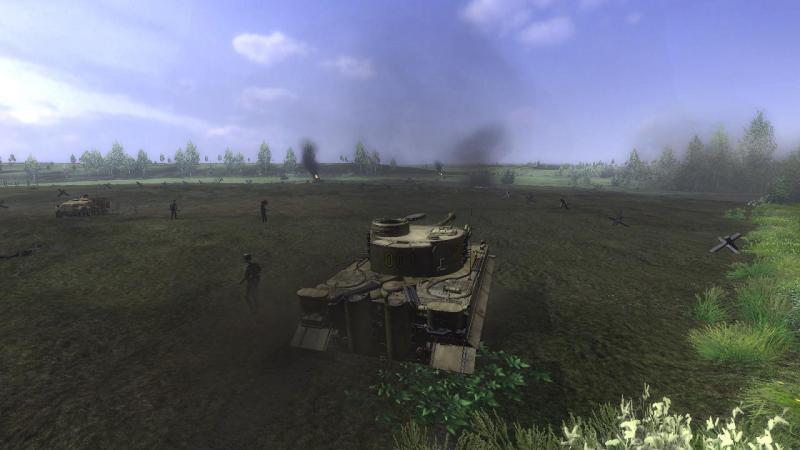
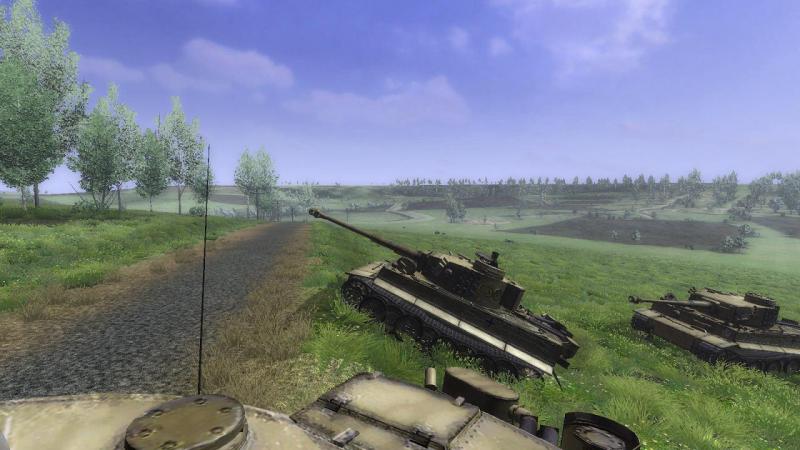
On to Phase 2 - the assault on Nepokrytoe The Ivans on the Phase 1 objective had been subjected to a torrent of fire from artillery, Stukas and tanks. And without much help from me, struggling from the outset to keep pace with the advance! I was particularly mortified when one of the SPWs advancing to my left, which had pushed ahead of me, went up in flames. I passed the first line of 'knife rests' and came up to a second row of these fairly ineffective obstacles just short of the enemy-held crest that was our Phase 1 objective. There, as our Grenadiers swept past on foot, I paused at last, looking for any threat to our advance in general and to our infantry in particular. To my right, the tanks - which I could now see included some early model Panthers - had also stopped and appeared to be shooting their own Grenadiers onto the objective at point-blank range. Looking half left, roughly in the direction of our Phase 2 objective, Nepokrytoe, I could see that the terrain dipped away, with some dead ground fairly close. Beyond that again was a long field of fire to some rising ground which had been screened in other directions by trees along the crest line. Feeling suddenly rather exposed, I swung my heavier frontal armour to face that direction and started scanning from the gunsight, zoomed in. The din and clamour of combat was still going on all around but I saw no targets. And soon after, the message came through that the enemy positions on the crest had fallen. Phase 1 complete! Little thanks to me, perhaps, but so far, so good. I motored on. As I came over the crest and gained a line of sight into the dip in the ground ahead, much to my surprise, I saw ahead three knocked-out enemy tanks. T-34s evidently, two of them on fire. At that stage I had no idea if they had been killed by my own tanks, by the others or by artillery or Stukas. The enemy was still around and dangerous, though; you can see that the luckless Grenadier half left of my tank has just caught a bloody packet in the head. Nosing forward more cautiously in an effort not to crush any of the German troops around my Tiger, I finally saw something that needed shooting - a hull-down T-34/76 just a few hundred metres away. We exchanged shots but my first round appeared to hit and that seemed to shut him up. In SF'42 it's realistically not always obvious that your target tank is dead. In real life you see many tanks hit and holed over and over again. 'Keep firing until it changes shape' is reportedly how US Army tankers see it. Conscious of this, I put several more rounds into him, then left it at that. I now resumed my advance, more cautiously though, as the ground opened out ahead and around us; more exposed than ever. Reasurringly, my other two Tigers were still with me; this is actually one from the other Tiger platoon, seen through my gunsight, over on my right. And this is one of the knocked-out T-34/76s, now up closer and looking intact but quite dead, with the driver's hatch open and the body of a crew member strewn in front. The Grenadier lying prone ahead of me has just fired a round from his rifle and is in the act of rising to resume his advance; you can see the fading puff of light grey smoke from his shot, just in front of him. By this point our dismounted infantrymen were all around my Tiger. Their Kar98K rifles are a bit on the long side and sometimes they stand about a bit aimlessly for long moments. But overall the SF'42 infantry look pretty good with perhaps slightly-oversized helmets but realistic field equipment and they're fairly well-animated. You can see that the ones to my rear seem to cary MP40 submachine guns; others carry MG34s. Anyway, having cleared Phase 1, our attack now re-oriented itself to the left and headed for the Phase 2 objective, the little village of Nepokrytoe. Across another ploughed field we went, then back onto grassland, a seemingly-ragged but purposeful tide of Tigers, Panzergrenadiers and half-tracked Schutzenpanzerwagens, all now headed for the village which lay in another dip in the ground, not far away. ...to be continued!


-
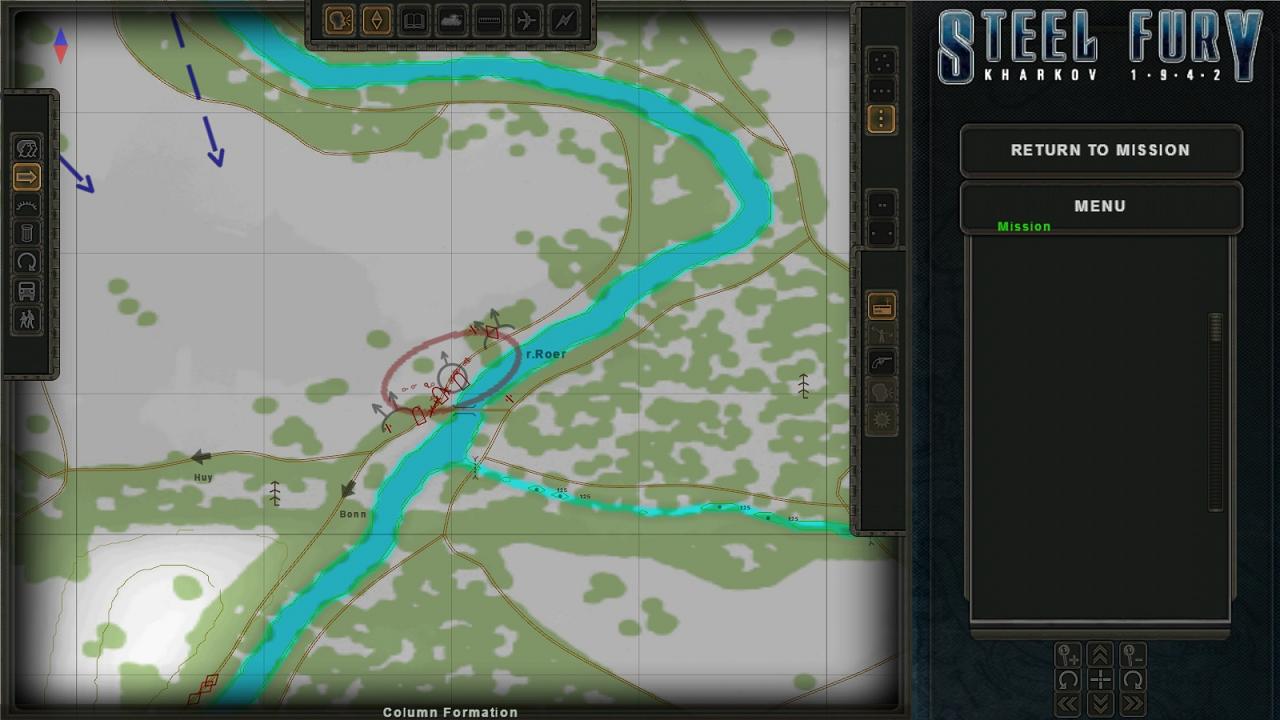
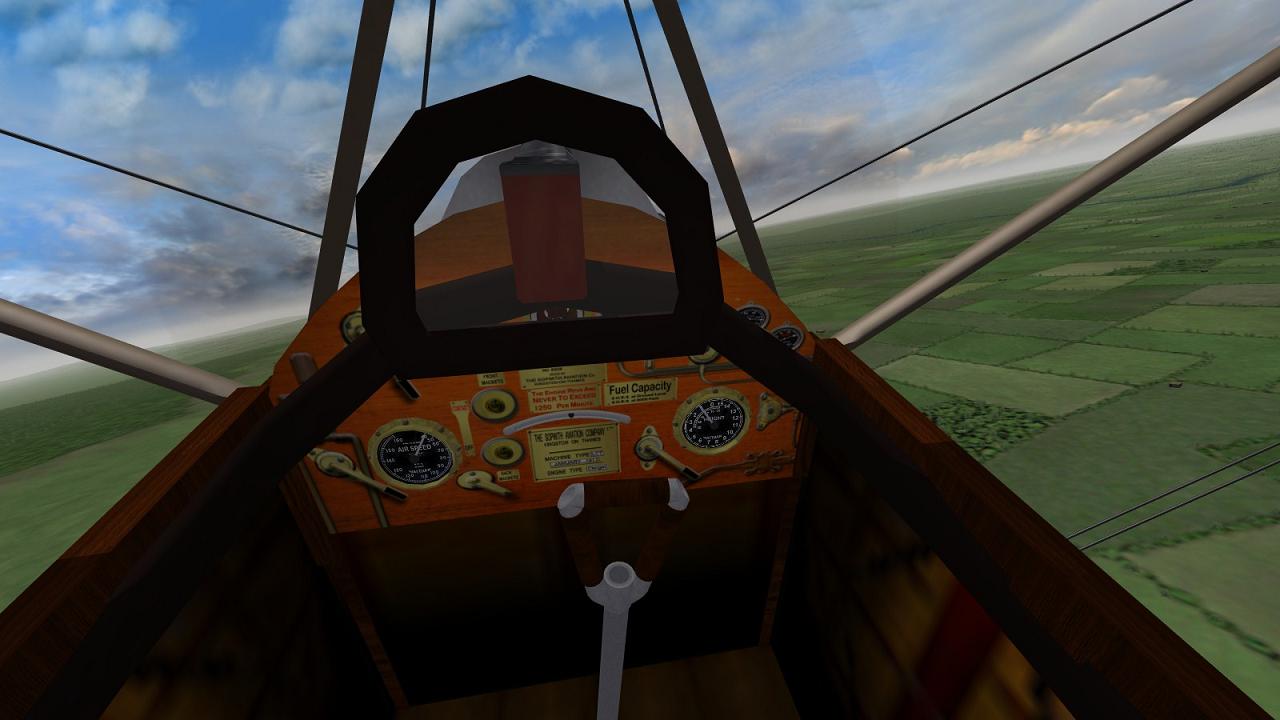
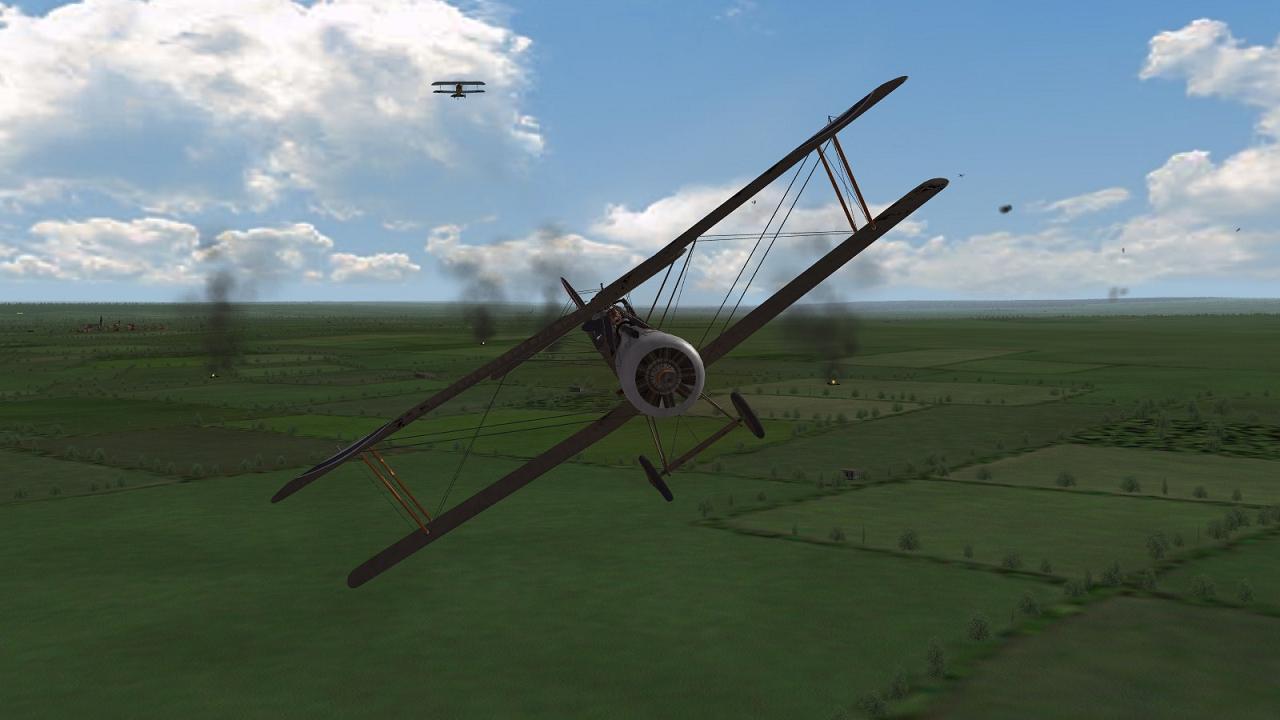
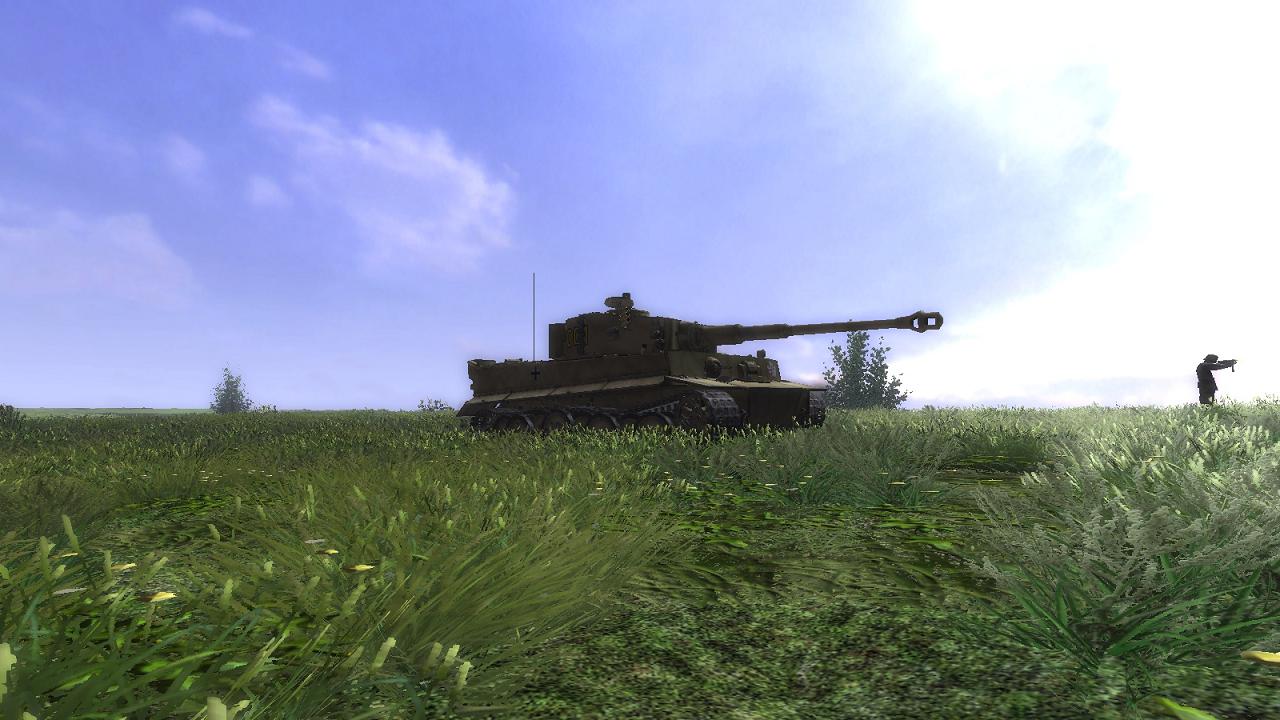
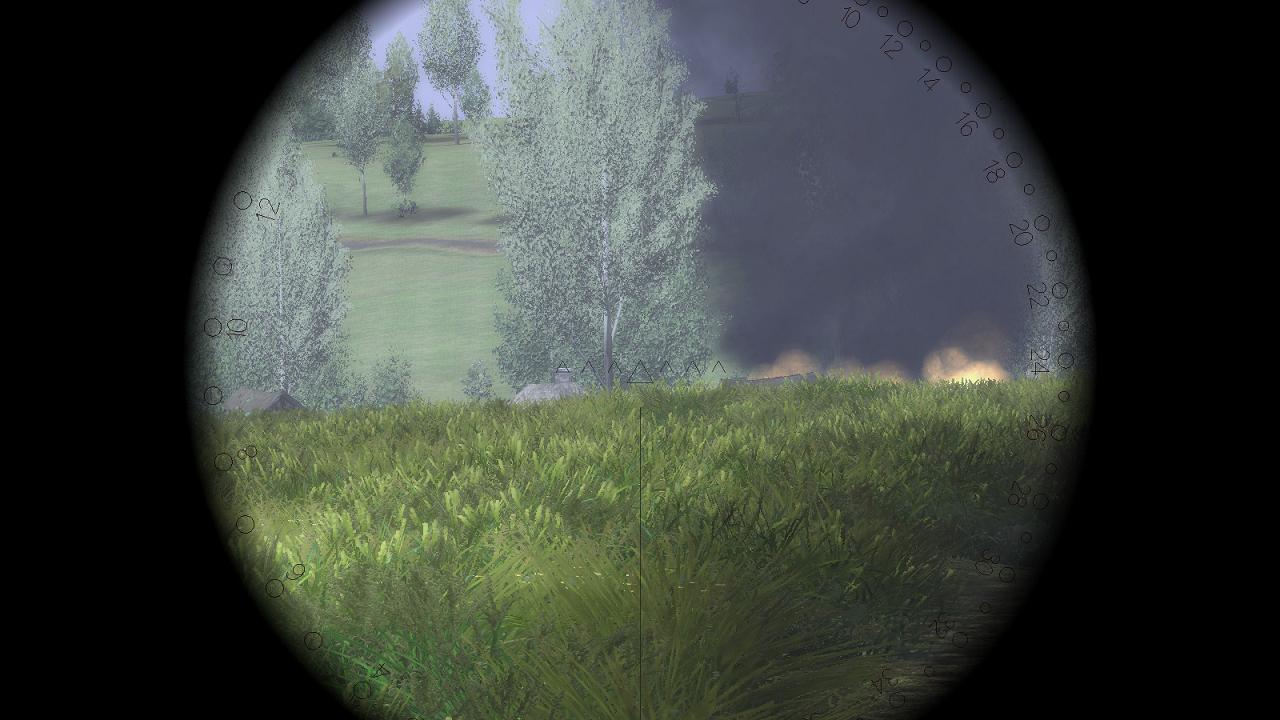
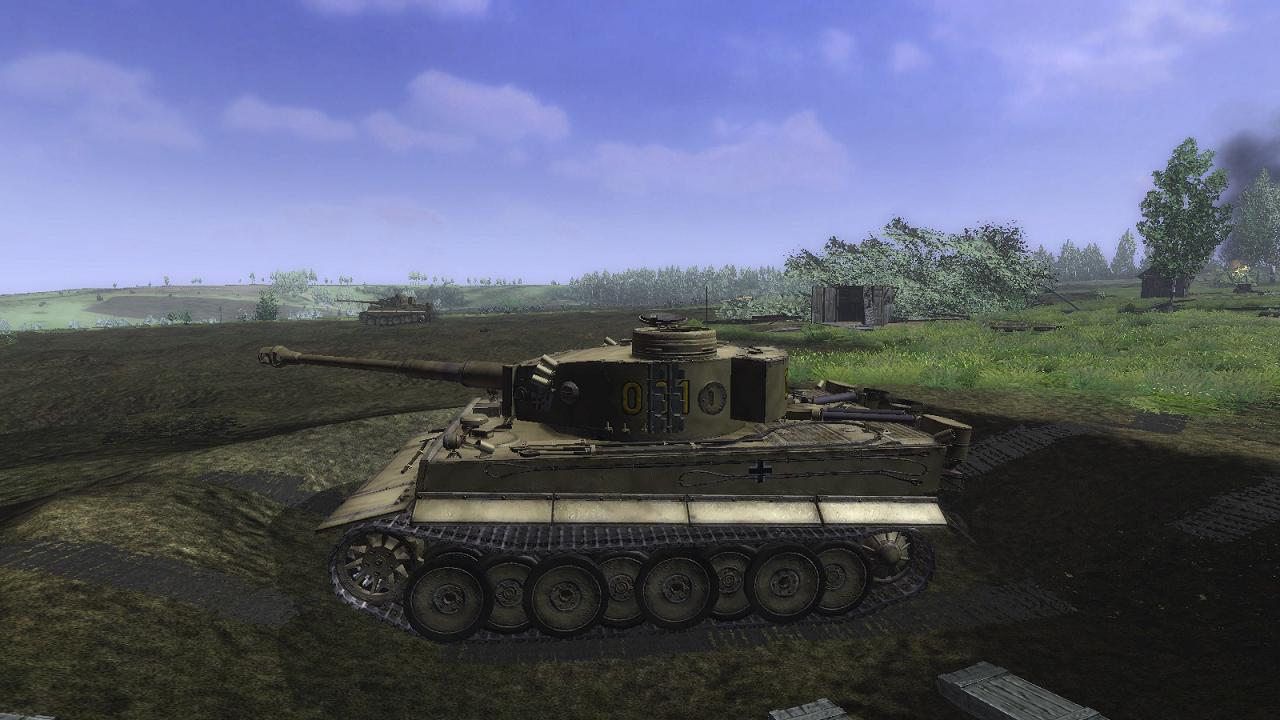
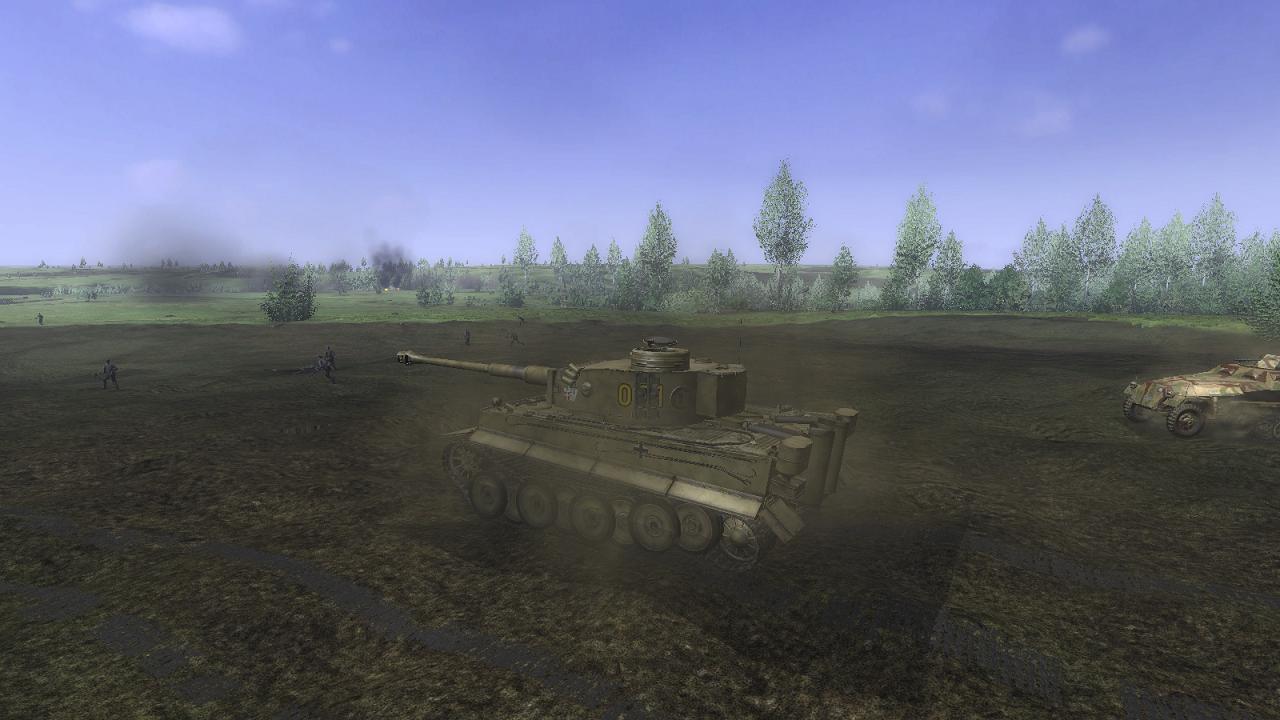
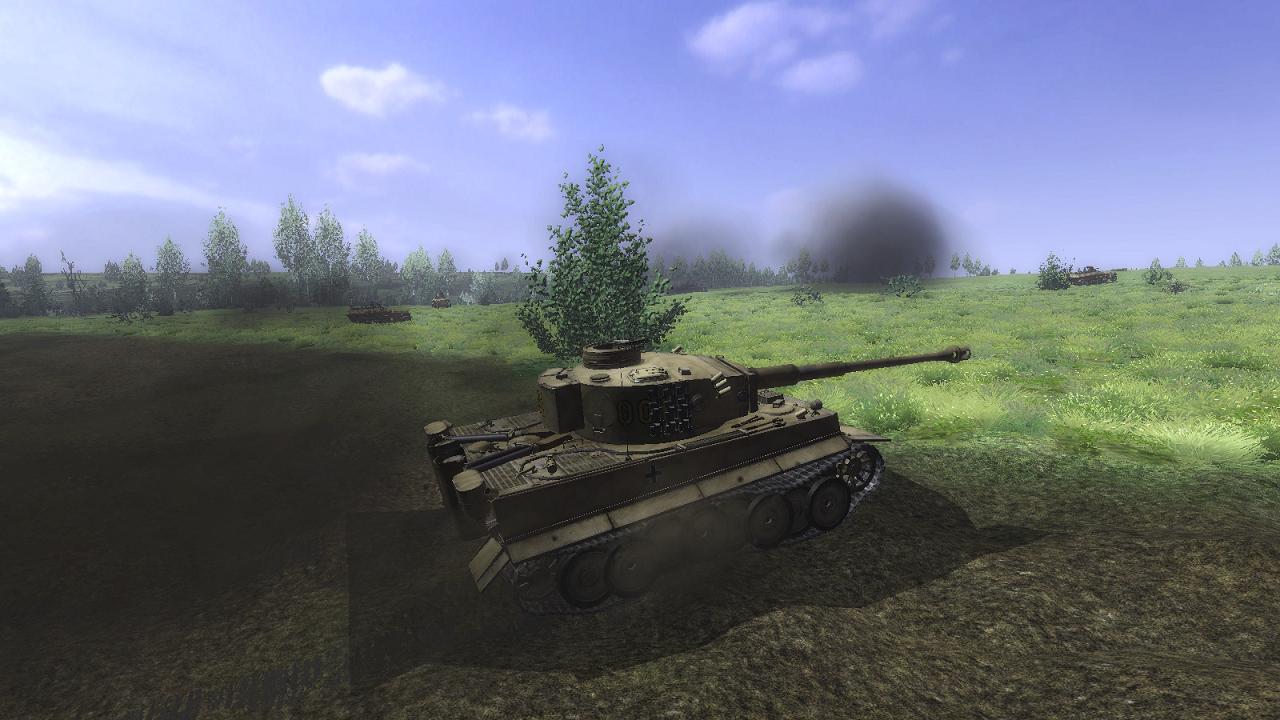
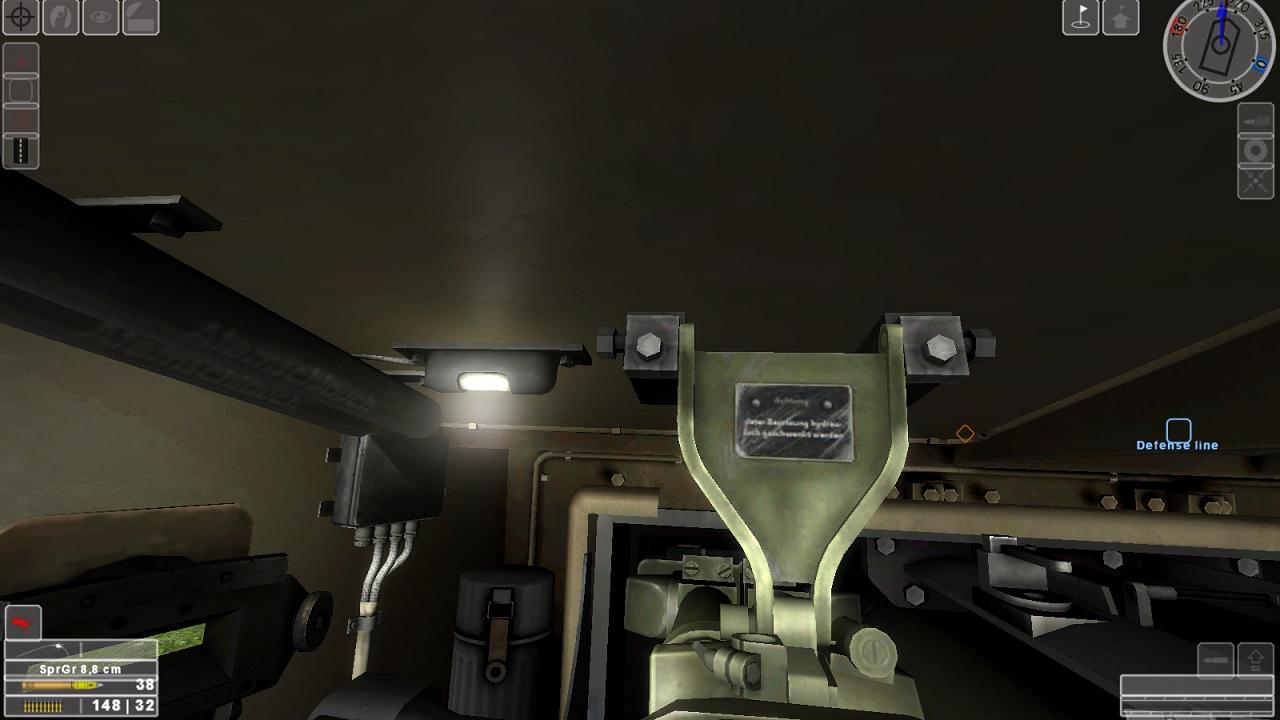
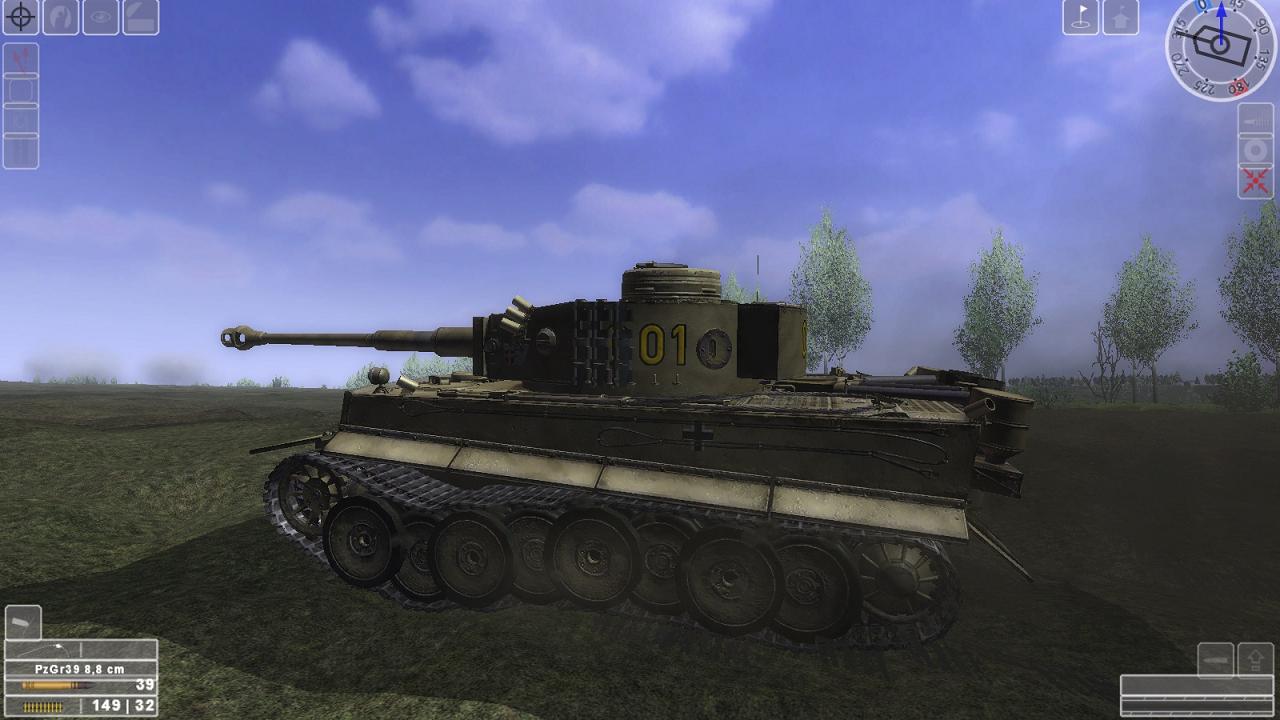
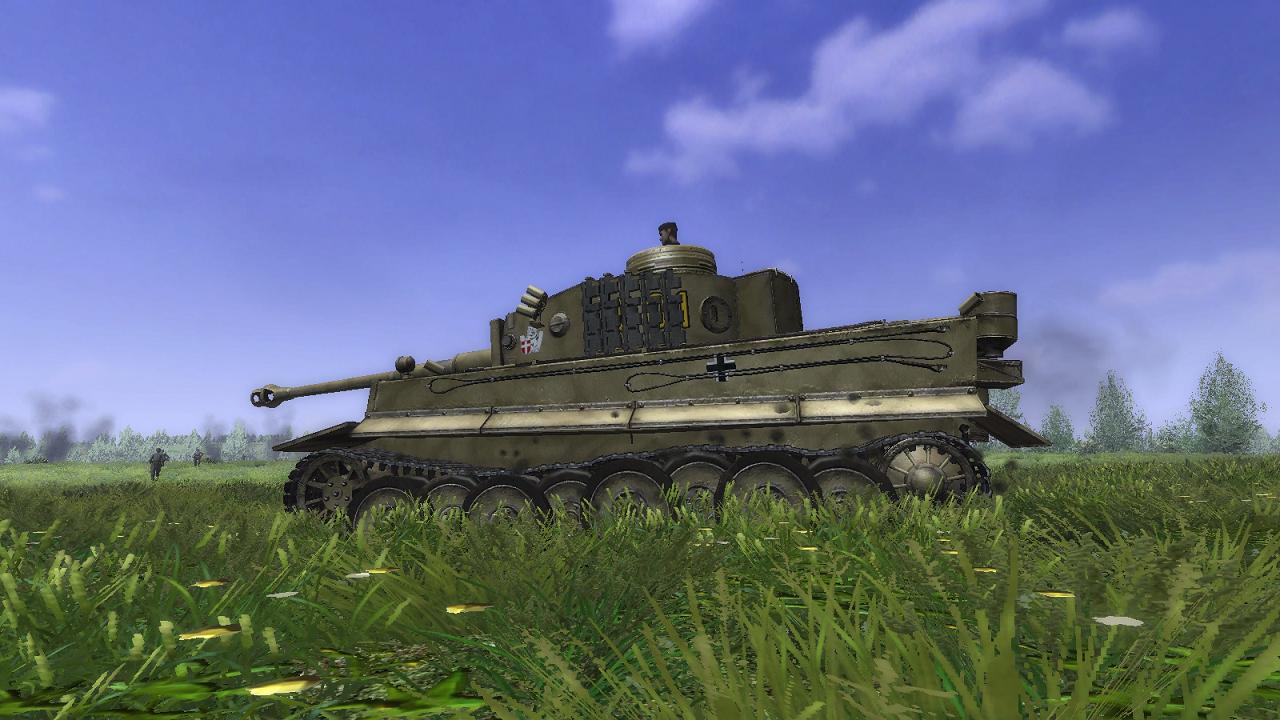
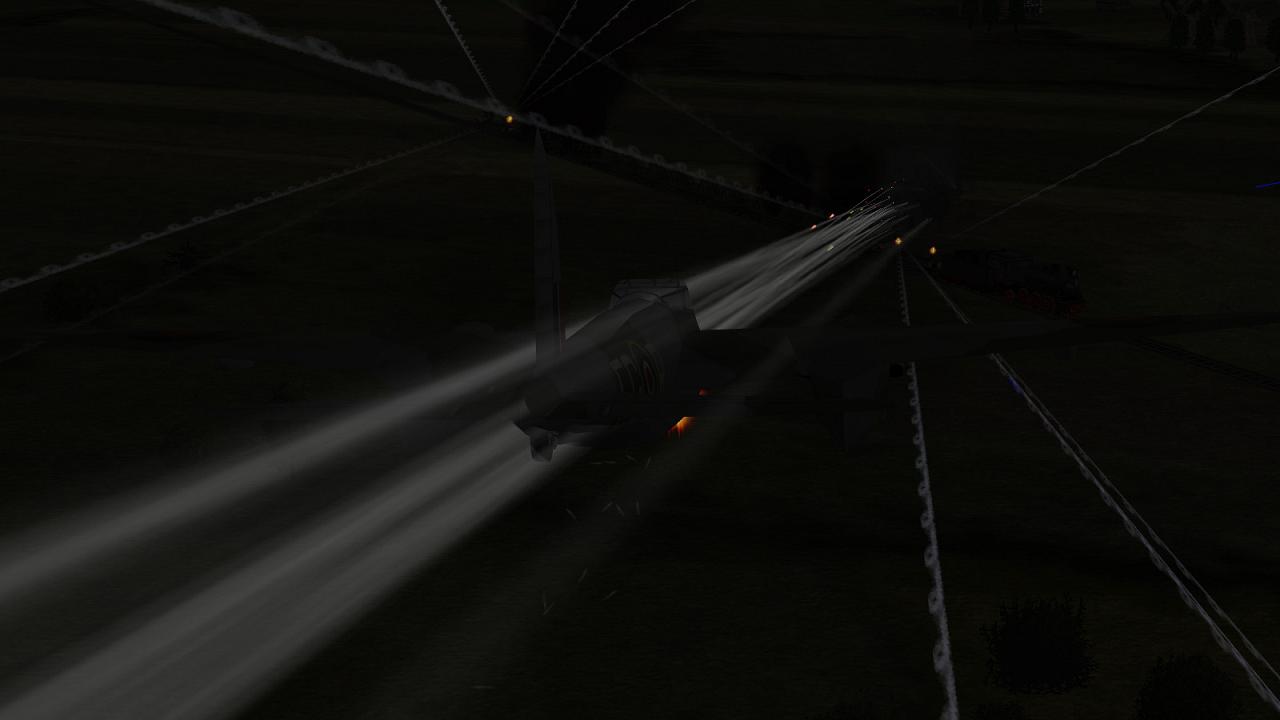
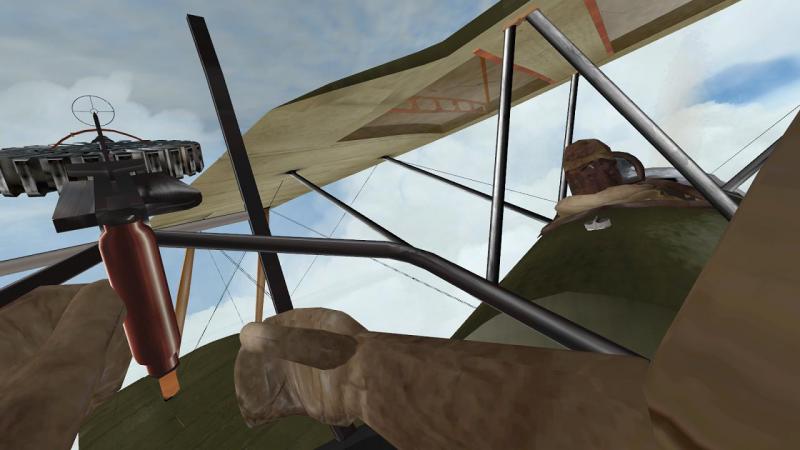
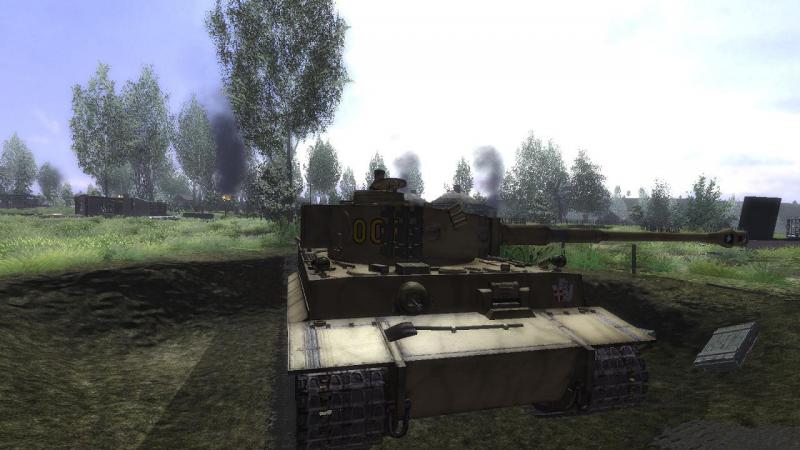
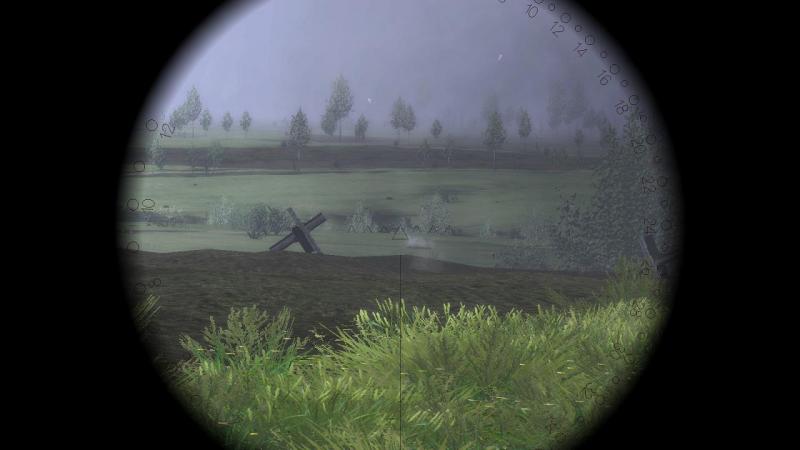
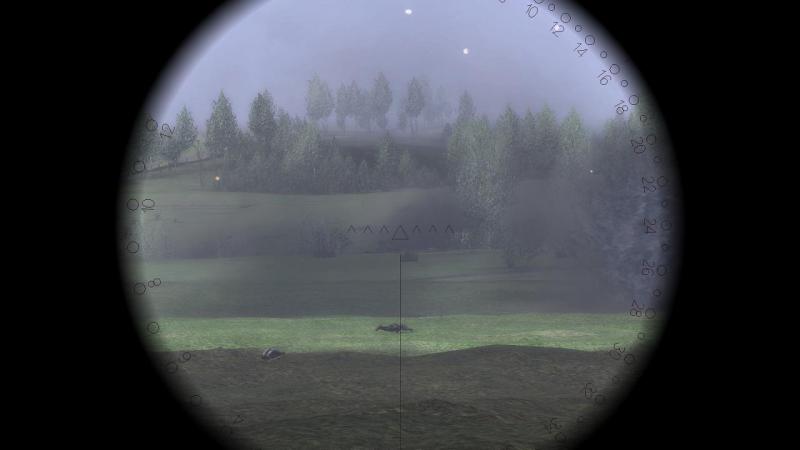
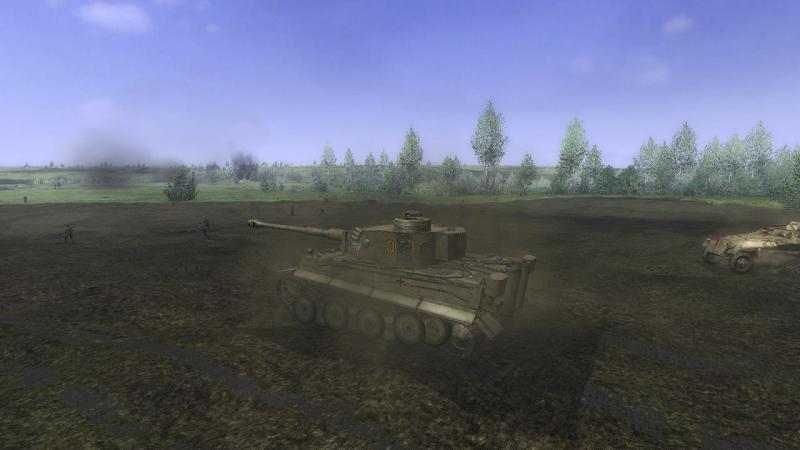
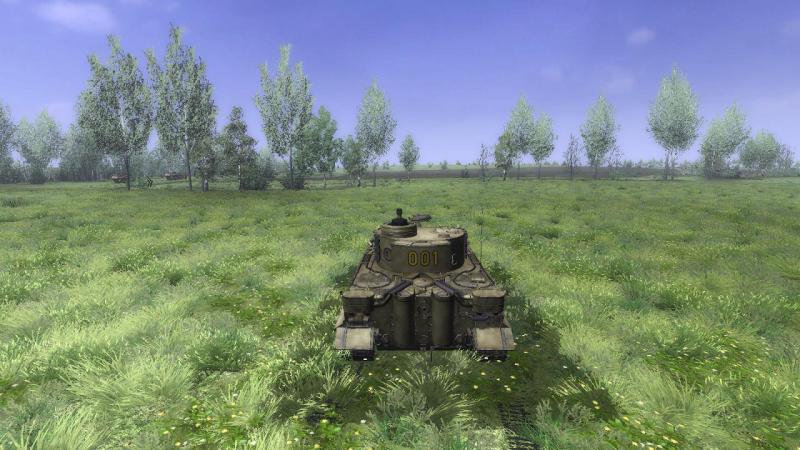
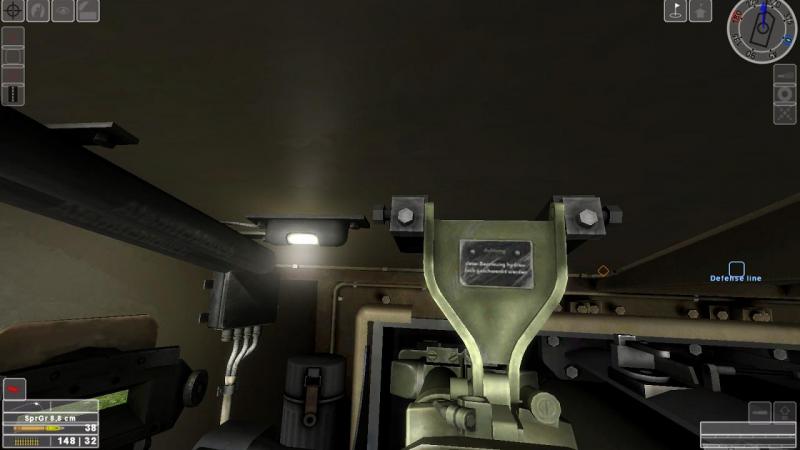
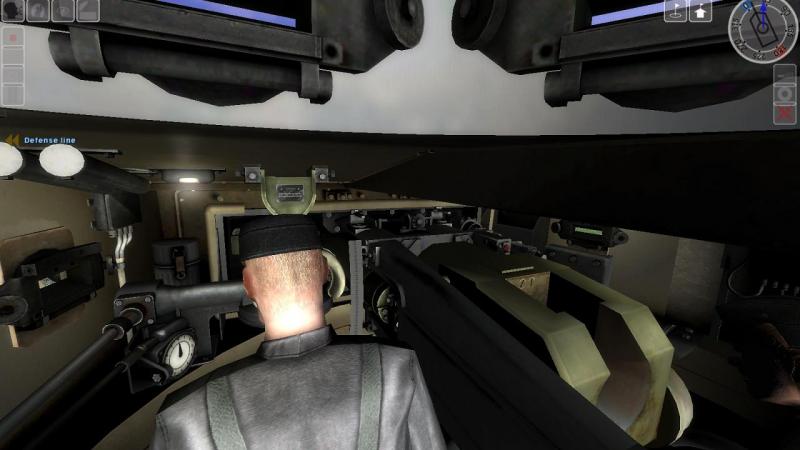
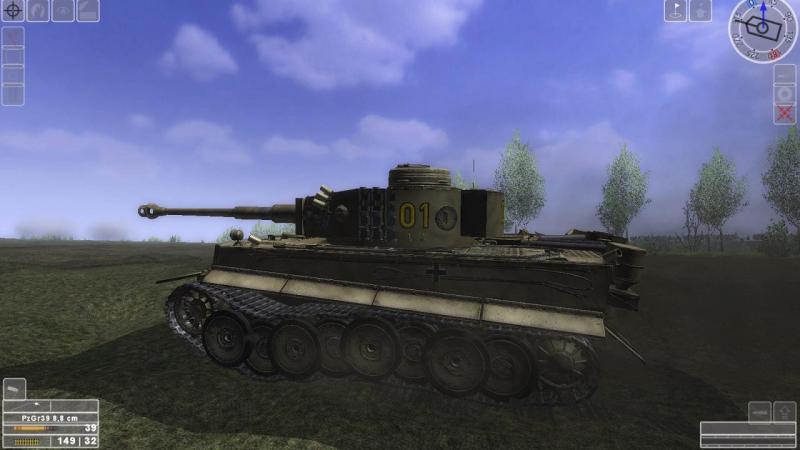
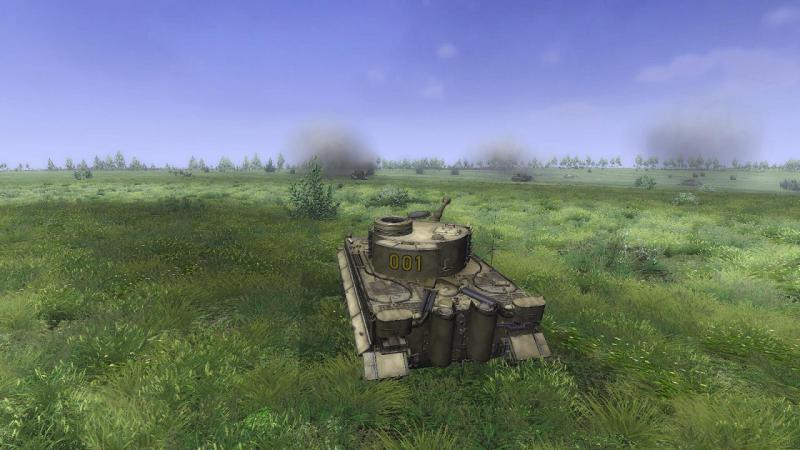
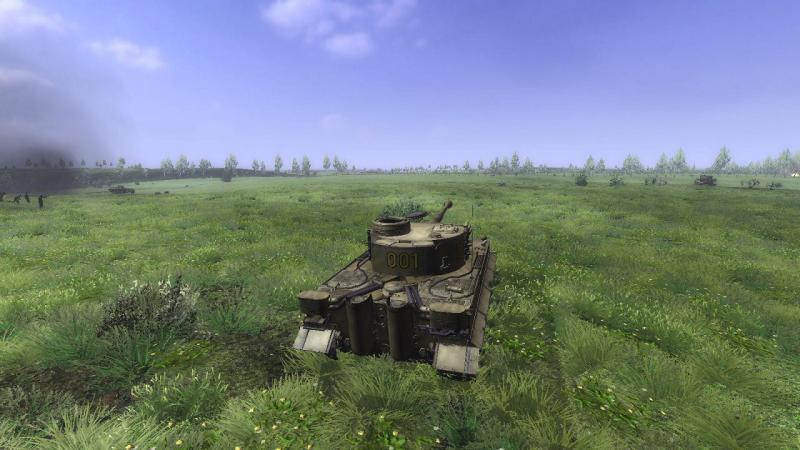
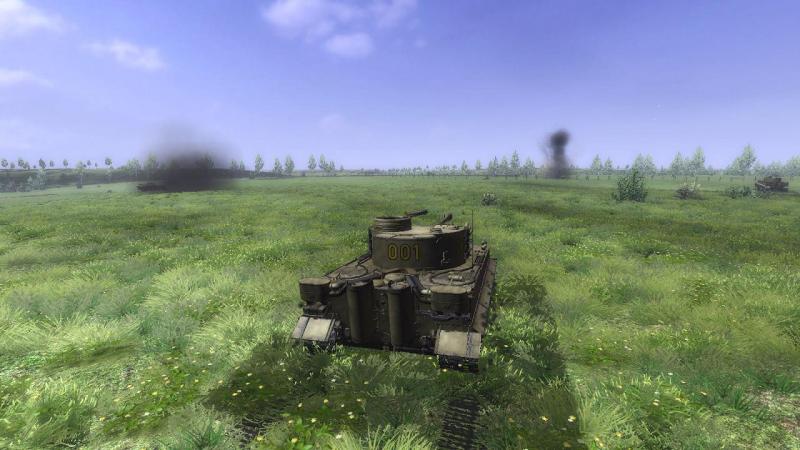
Phase 1 - clearing the enemy defensive positions on the ridgeline Before leaving the briefing map screen, I had ordered my platoon to 'Do as I do!' and into line abreast formation. I haven't played much SF'42 but one thing I do remember is that there's no hanging about. When you launch the mission, likely as not the other units in your combat team - to use the Cold War British Army term for a grouping based on an infantry company or a tank squadron (US company) - are already hare-ing off towards the enemy. No pauses, however brief, on the Start Line (US 'Line of Departure', IIRC) to pick up our dressing and orient ourselves on the axis of our advance. So I ordered the driver to proceed at speed, uphill for 'the off'. He skillfully negotiated the bank on the near side of the track that seemed to mark the Start Line, with my platoon's other two Tigers waiting their turn impatiently, close behind. You can see how our tanks are basically early production jobs, finished in uncamouflaged Dunkelgelb (dark yellow) which was standard on all German heavy equipment ('Grossgerat') from early 1943. Not only do we have the early 'dustbin' commander's cupola, Fiefel air cleaning system to hull rear, triple smoke grenade launchers either side of the turret mantlet and dished rubber-tyred interleaved roadwheels, we also have on each hull corner the cylindrical 'nahverteigungswaffe' launchers fitted to discharge an S-mine as a defence against nearby infantry, which was only carried on very early Tigers. Across the track and playing for now from the external view for better situational awareness, I saw the Panzergrenadiers' SPWs moving ahead on my left. I maintained my speed so as not to be left behind by them. The pace they were setting was such that there was no time here for anything fancy, like making the attack with my tanks on a separate axis and shooting the infantry onto the objective with fire from a flank. The Grenadiers were pelting full tilt towards the enemy to our front and I now needed to be right up there, with them. By about this time, you need to have made a decision as to how you are going to play this sim. You can play from most crew member roles including the driver, but the gunner or commander are the main choices from which to fight your tank, in SF'42. Playing as commander, the sim lets you give orders to your AI driver: a fairly decent set comprising speed, direction, halt, short halt for firing, follow road and go hull-down/into cover. And you can select weapon (main gun, co-axial MG) or ammo (AP or HE, typically) and designate targets for your AI gunner, as well as sending him simple shooting corrections (over or short). However, mainly because it was my preferred and familiar method in M1TP2 and Panzer Elite, I opted to fight from the gunner's position. This is actually a sort of merged role as you can also issue driver orders, as if you were also the commander. So as we advanced I switched to the gunner role, from which I was able to swing the turret left and right to scan for targets and cover likely threats quickly (a good idea, as the Tiger's turret traverse speed was not one of its strengths). SF'42 has nicely rendered tank interiors, including these, for the commander and ahead of him, the gunner: However, I spend no time in these, finding it better to play in the external view (or if playing as commander, in the 'unbuttoned' view, standing in the cupola with hatch open) and to switch to the binocular (commander) or gunsight (gunner) view to locate or engage targets. Another point worth mentioning is SF'42's 'Head-Up Display' which provides a pretty good set of icons around the edges of your screen, covering everything from ammo to crew status to turret/hull orientation. There are also target markers which provide a visual cue to any targets that are called out on the intercom. You can see the 'HUD' icons in the screen below. You can also turn off all of this, which, somewhat dangerously, I opted to do on this mission. The only other thing I could wish for is a turret ring indicator in a ticker-tape format when I was in the gunsight view, for use with the icons turned off, as not knowing which way the turret is facing can be a bit disorienting when in that view with no icons visible. Back to the battle! With my two other Tigers close behind, I rumbled over a ploughed field, throwing up a cloud of dirt. As I did so, rounds began to fall amongst the advancing SPWs to my left, throwing up spouts of dark earth. I hadn't noticed any tracer (the Soviet variety is conveniently green while German is red, in SF'42) so guessed this might be indirect fire, from either artillery or mortars. Half right, the second platoon of Panzer Grenadiers were forging well ahead, accompanied by some more Tigers which I hadn't noticed in the briefing. Just beyond them, the enemy defensive line on the low crest was dotted with dark clouds of smoke from a combination of supporting artillery fire and direct fire from the other Tigers, who had begin to engage targets I could not yet see with direct fire from main guns and MGs. From time to time, Stukas screamed in and added their bombs to the general mayhem. A platoon commander like me would generally not in WW2 have been able directly to request or control air support and in an attack like this, both air and artillery support would have been organised in advance anyway. So it's no reflection on SF '42's realism that I had no influence on all this fire support, which, combined with friendly tank fire, now fell on the enemy to our front. One of the best things about SF'42 is the great battlefield ambience, backing up the great visuals with equally good sound effects. Many of the MG sounds are poor, too 'mechanical', and you can hear voices which appear to originate outside your tank just a bit too easily. But overall the effect has to be heard to be believed. Violent bangs from the discharge of cannon or incoming rounds, a wild miscellany of screams and shouts, the pop and rattle of small arms fire, the clunk of fragments hitting your tank, the roar of engines...they're all there and together, they create a real sense of your being mixed up in a confusing and continuous inferno. Brilliant! Looking back left, I saw that the Grenadiers had de-bussed from their armoured half-tracks and were forging ahead. This left them with rather far to cover on foot, to get to the first objective. Perhaps their Artificial Intelligence is a bit 'iffy'. Or perhaps it is actually rather clever and judged that even with tank support, the risk in open country from AT weapons made it safer for them to leave their lightly-armoured 'battlefield taxis' and assault on foot for the last few hundred metres. The infantry carriers on my right had their own tank support; the ones to my left seemed now to have mainly me to rely upon. Anxious not to let them down, I forged ahead, without pausing to scan for targets of my own. Ahead of me was a row of 'knife-rest' obstacles and not far beyond that, the low crest were lay the enemy. As I roared on at full tilt - though heavy, the Tiger I is no slouch - more enemy rounds fell to our front. Red and green tracers from friendly and enemy MGs and tank or anti-tank weapons started to fly back and forth on both my flanks. Battle was well and truly joined, but so far I was still not engaged! I plunged on, taking a chance but keen to contribute my platoon's fire to the assault that was now developing on the enemy defensive line. ...to be continued!

-
Roaring into battle with the famous Tiger tank in 'Steel Fury - Kharkov 1942'! 'Tyger, tyger burning bright In the forest of the night What immortal hand or eye Dare frame thy fearful symmetry?' William Blake, 'The Tyger', 1794 And now, for something completely different. No, not a Monty Python sketch, but a change of pace and scenery: from the clear blue skies and snarling aero-engines of combat flightsims to the solid earth and thundering heavy weapons of perhaps the best available tanksim, from Ukrainian developers Graviteam - 'Steel Fury Kharkov 1942'. The sim My first tank sim was back in the early 1980s, believe it or not. It was played on my younger brother's Sinclair Spectrum and compared to 'Pong', 'Rommel's Revenge' was a revelation, albeit the wire-frame graphics were perhaps not quite what we're used to these days. Fun, though; I was pleased to see that it's been preserved for posterity on Youtube: Turn the clock forward about 15 years, and my first modern tanksim was Ultimation's 'Panzer Commander'. Graphics had come a long way and despite simplified (but very usable) targeting, odd bunker-based anti-tank guns and no infantry at all, this was a great product, with a dramatic musical theme and varied and engaging single-player campaigns covering US, British, Soviet and German tanks and AFVs. It was soon joined on my hard drive by another classic, Microprose's 'M1 Tank Platoon 2', showcasing the US Army's formidable M1A2 Abrams. This also had its vicissitudes, like near-instant deluges of lethal artillery fire which usually killed off any attached APCs early on and a tendency to over-rely for successful gameplay on the simulated IVIS real-time tactical display, where, as one reviewer put it, you could spend the whole battle watching little blue and red squares firing pixels at each other. Still, with high production values (including newsreel-style video intros from 'MPS News' to each of the campaigns) it was a great sim, a classic that, with a bit of fiddling, can be played on modern PCs and is still great fun: Tanksim fans were rather spoiled back in those days. There were other less capable but still fun modern tanksims like Novalogic's 'Armoured Fist 2' and 3 and Interactive Magic's 'Spearhead', soon joined by the original 'Steel Beasts' from eSim, which simulated the mechanics of tanking with unpredecented accuracy. For World War 2 fans, as well as 'Panzer Commander', there was Interactive Magic's 'iPanzer 1944', but the best of all came with Wings Simulation's 'Panzer Elite'. Modders soon appeared who tweaked the original rather cartoonish graphics and by the time the Special Edition arrived, this was clearly the premier WW2 tanksim, and I think still is, in many respects. This is not least due to the continued work of the mod community, notably Aldo and other members of the PE Development Group and BobR and the Ostpak team. PE is still playable on modern systems and well worth it, too, as seen in this 'playthrough' of the Beresov mission from Ostpak: And so to modern times. 'Steel Beasts' is now a grapically-improved professional military training tool with a spun-off version for simmers, and if you want something simpler and cheaper there's IDDK/Crazy House's 'T-72 Iron Warriors/Balkans on Fire'. Although you're often just a single tank driving around and clobbering stuff with little opportunity to co-operate with fellow AI, this looks good, has plenty of detail and plays well: http://store.steampowered.com/app/1670/ For World War 2, there was 'T-34 -vs- Tiger'. Like the same developer's 'T-72', this is a pretty good simulation of the operation of the featured vehicles. Again, you're essentially on your own in missions, with the other AI, friendly and enemy, acting out their scripted functions. Looks and sounds great though: https://www.youtube.com/watch?v=kmyM-WLyd8U Which brings us to Ukranian developer Graviteam's 'Steel Fury Kharkov 1942', which at last puts you in the role of the leader of a platoon/troop of tanks and pitches you right into company-sized combined arms operations on the Eastern Front. While the original release featured a decent set of German and Russian tanks (including the Lend-Lease British Matilda infantry tank, of all things!) it was limited, as the title suggests, to the mid-1942 era. While the sim's mostly still Eastern Front only, the modders have been at work, making AI AFVs playable and adding new missions and vehicles. And unlike other Graviteam titles like the 'Achtung Panzer/Graviteam Tactics' series which are essentially wargames, or 'Steel Armour - Blaze of War' which is an unusual sort of tanksim within a 'strategy' game, SF'42 is a proper tanksim, through and through SF'42 was hard to come by for a while but is now available at GamersGate: http://www.gamersgate.co.uk/DD-SFURY/steel-fury-kharkov-1942 The mods are now de rigeur for anyone wanting to get the best of this sim and the best place to start is I think over on Tanksim.com: http://www.subsim.com/radioroom/showthread.php?t=178218 Edit - since writing this I've discovered that the best place for SF mods is Gaviteam's on forum for the sim: http://graviteam.com/forum/index.php?board=1.0 Use of Jonesoft's Gerneric Mod Enabler is essential and many mods seem set up to use it. Install order is important and as with most sims there are some aspects of modding with which you need to have a bit of patience. But most or all of what you need to know is there on Tanksim.com. And most of the stuff you'll want seems to be on Mediafire, here, courtesy of Godzilla1985: http://www.mediafire.com/?q38nkzaginphq Edit, August 2014 - the SPM mod was used for this mission; the later NTA mod has been discontinued, but its successor, the STA Mod, is now available and I think it's fair to say STA is the latest and most comprehensive mod for Steel Fury: http://stasf2008.eph...d-on-steel-fury Fancying a slice of tank action for a change, I dusted off my old modded install of SF '42 and knowing that it is better to give than to receive - especially if the 'present' is a solid round of 'Armour-Piercing Capped, Ballistic Capped' travelling at over 2,000 feet per second - I decided to start with my favourite tank - the German Tiger. Which by all accounts, is pretty good at both giving and receiving. The tank The Panzerkampfwagen VI Tiger I needs little introduction. Its unsloped armour reflects the fact it was designed more for superiority over the likes of the British Matilda and French Somua than the T-34 or KV-1 which so shocked the Germans on meeting them in the summer of 1941. But the Tiger proved an excellent antidote to the superb Soviet tanks and indeed, to the Shermans, Cromwells and Churchills it would meet in the Mediterranean and North-West European Theatres. 'Nuff said, except that I count myself privileged to have met the mighty Tiger 131, now restored to running order and authentic appearance by the Royal Armoured Corps Tank Museum at Bovington Camp, Dorset, having been captured, abandoned, from Schwere Panzer Abteilung 504 at Medjez el Bab, Tunisia in April 1943 after being damaged by Churchills of 48 RTR: The mission Here's the mission briefing; the tail end of it, anyway. It's preceded with other sections which help set the scene, telling me that my platoon of three Tigers is part of a Kampfgruppe of Panzer Regiment 201, 23rd Panzer Division, tasked with following up a successful counterattack. Our Kampfgruppe appears to be a combined arms force of reinforced company size, with artillery and air support. Our mission is in two phases - first to destroy enemy defensive positions along a low crest then to swing left and clear the village of Nepokrytoe. While the briefing has the semblance of military orders it could still be rather better presented. The current NATO format for 'orders' like these - Ground (technically a preliminary to the orders), Situation, Mission, Execution, Service/Support and Command and Signal - would be better. Not unrealistic either, as it is essentially the same as the British WW2 format (with detail differences, eg 'Situation' was 'Information') adopted also by the Americans. Convergent evolution being what it is, the German WW2 format wasn't much different. The SF'42 format doesn't give me as much info as I'd like on the operation, eg the composition of the other subunits my platoon's operating with. And the attack itself could have been better described, more clearly broken down into its two constituent and distinct phases, with the detailed tasks given for each subunit for each phase stated, including my own. As it was, while the narrative didn't provide a clear picture of the composition of our force this was apparent from the map, which showed unit type symbols - diamonds are tanks, the 'pointy rectangles' are infantry in APCs. In our case the APCs are SPWs (Schutzenpanzerwagen) as the Germans called their Hanomag half-tracked armoured personnel carriers. The map itself isn't bad but despite the presence of contours and the occasional spot height, it doesn't make the lie of the land very clear (a vital consideration in ground ops) and it doesn't zoom out enough, so you have to pan around to try to orient yourself properly. The map screen is also were you can issue orders to your platoon, which you can do 'in game' only by calling up and clicking on this map - there are no hotkeys to order (eg) a formation change. The scope for giving orders is pretty low, perhaps better suiting Soviet tanks where radios were limited and hand or flag signals were the norm. The most useful orders are 'do as I do! and basic formation commands, options being line (abreast), column/single file, a sort of 'blob' (as near as you'll get to the common arrowhead or wedge formation) and the ability to order 'spread out!' or 'close in!' I probably need to spend a bit more time on this map/briefing screen to better appreciate its facilities. One other issue is that the map is from the original sim which is for operations in the Kharkov area in mid-1942. While this wasn't the only period when there was fighting around this town, even my mission's date is in May 1942, some months before the Tiger first appeared in action, in the Leningrad sector in September 1942. But this is a modder-made tank in a modder-made single mission which makes the best use of what's available, and I for one am most grateful for the opportunity to fight in a Tiger in a modern sim. From the map, I could see that my platoon was sited to the centre rear of the mission's Start Line, which was a track running across our front. You can see this more clearly below, with the briefing panel minimised. We are the three blue diamonds, roughly bottom centre. To our right are some Panzergrenadiers in their SPWs. To our left are some more SPWs with more tanks, all still in column formation until they reach the Start Line clear of the woods. The latter will evidently be our Kampfgruppe's left-hand boundary. So I will be in the centre, as ordered, with a Panzer Grenadier platoon each side, with some other tanks for a bit of extra firepower. Enough of the preliminaries! Time to get the show on the road. I started the mission, the loading screen helpfully giving me a snippet from a German tanker's manual, this one a warning that stopping after spotting an AT gun close by was suicidal and that only a fast-moving attack with all weapons would do. I'd try to remember that! Soon, I found my virtual self standing tall, hatch open, in the commander's cupola of my Tiger, looking up at the Start Line, which I could make out in the form of a line of trees interspersed with telegraph poles, maybe a hundred meters ahead. Here we go! ...to be continued!
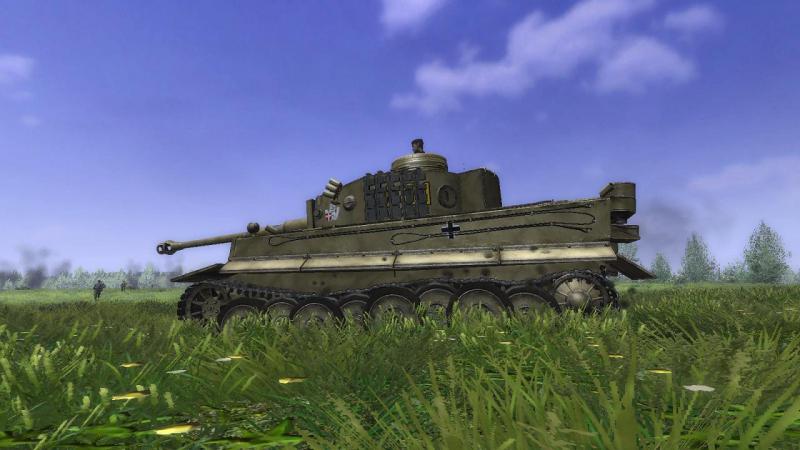


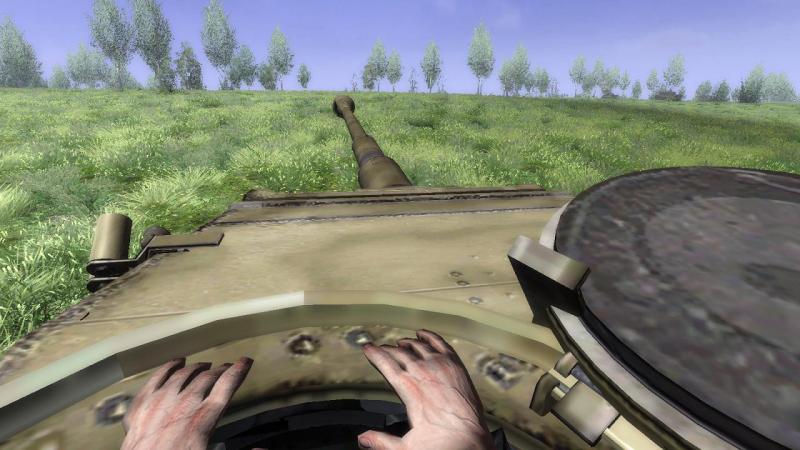
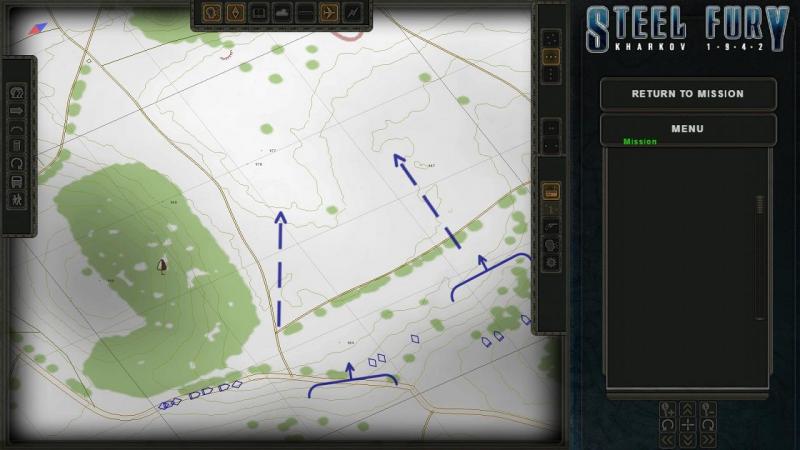
-
Wow! MS Trainsim meets FE and goes to war! Can't wait to see this new Verdun terrain from my cockpit, looking forward to flying some Hat in the Ring missions, Navarre Nieuports and all the rest, plus now taking out a Gotha or an AEG to clobber those beautiful railway facilities!
-
Good to hear Geezer Those fuselage texture are really superb, can't wait to see this one in flight!
-

ROF, FE2, or WOFF? (and a question or 2 about FE2)
33LIMA replied to MrGoTime's topic in Thirdwire - First Eagles 1&2
Hi Shoresroad My issue with OFF formations is that the are legacy CFS3 - very wide, WW2 fighter style, much too spread out for WW1 (from when they really started formation flying, anyway). And that likewise, formations are very easily lost. I always fly as leader and anything but the gentlest course change sends the flight slipping well wide and taking ages to catch up. CFS3 was the same ,but at least with WW2 reserves of power, the fighters caught up again relatively quickly. In a climb, my OFF wingmen also tend to fall far below, and need me to level off for a bit, at which point the AI seems to recognise the vertical separation and they climb back up. I'd be very interested to know what improvements WOFF has made here, as these formation-keeping issues were a real negative for me, in OFF. As for RoF, my own experience is that when they're good, they're very, very good (best of all) but when they're bad, they're awful. You look back and one or more of your wingmen has disappeared, and can usually be seen instead weaving about, somewhere behind and well below, possibly after a near miss. In my DFW mission report at SimHQ, here: http://simhq.com/forum/ubbthreads.php/topics/3817656/Re_Best_Current_WWI_Sim#Post3817656 ...I mentioned how I looked back to see both wingmen just spinning in, without any visible damage. On an earlier DFW mission, they just disappeared! In FE the wingmen weave much of the time but they seem to stay with me a lot better! I find they may stop weaving after a while but are fairly easily set off again. If I 'warp' they are settled when I come out. AI-led formations don't have this problem, which helps a lot; the screenie with the nice echelon will either be AI, or mine at a point they were settled. Be interested to see the results of that edit! -
Thank you and my pleasure!
-
Planes, trains and automobiles... Heading south after knocking down the Ju88 near Valognes, I was soon back in the dark, metaphorically and literally. I tried to pick up roads or railway lines heading down towards Carentan, which lines of communication I was now to interdict. I managed to pick out the occasional bridge which evidently marked out the presence of one or the other of these features, but between them, I could see nothing but open fields and the occasional small town. Wandering over one of these got me fired at from the ground, so I promptly wandered off again, still without having seen anything that looked worth having a crack at. I ended up rather to the east and swung back, getting fired at again in the process, this time by an automatic weapon in open country. What I failed to notice at the time was that this came from a group of dark objects sitting in a field, possibly parked motor transport or armoured vehicles. You can just about see these in the screenie below, two little rows of dark objects to the left and lower left of the muzzle flashes. I had not yet made the connection that something defended by flak might well signify the presence of something worth attacking, perhaps even the transport I was specifically briefed to clobber. I wandered on for a bit, trying harder to stay close to the line Valognes-Carentan. Soon I was fired on again, this time more vigorously and from nearly directly below. I turned away and came in for another look. The flak seemed to be coming from two separate points not too far apart, and sitting on a long, dark line. This looked like it! My first thought was that it was a line of MT on a road, with mobile AA weapons towards the front and rear of the column; I wasn't expecting a train to have such protection, at this stage in the war. But that's excactly what it turned out to be - a train. Either way, this was just the ticket. Back in the cockpit view I set myself up for a firing pass in a shallow dive. In the dark, even with the intermittent muzzle flashes, it was hard to align my aircraft for a run along the length of the target so I settled for an attack from an oblique angle, coming under steady fire as I did so but escaping damage in the process. As soon as my sights were on, I cut loose. Sweeping over the target with the flak blazing away at me, I could just about make out that this was indeed a train, and that it seemed to consist of a row of flat cars carrying tanks, Mark 4's possibly. Clouds of black smoke sprang from the cars I'd attacked. I wasn't carrying any bombs on this run - they weren't an option in mission setup, though my FBVI Mossie had a small bomb-bay behind the cannon in her belly and pylons under the outer wings - but my MGs and cannon were evidently doing some damage. I banked around and came in again. And again. Making a second pass on an alert and defended target is of course a bad idea but I was emboldened by my continued survival. Having realised that the train carried armoured vehicles and unsure how much harm I'd be able to cause this cargo, I tried to target the locomotive which I expected to be outside one of the two flak wagons. But it was impossible in the dark; or at least, I found it so. On the last of about four firing passes my cannon ammo gave out and I decided to call it a day rather than risk my aircraft and my virtual neck trying to cause further harm with my remaining .303 ammunition. I banked away and was soon over the coast and back out to sea. Finding my way back onto terra firma was the night's last little adventure. Using the mini-map I picked up my track and was careful to hit the last waypoint on my return route, thinking this might be the trigger that brought my airfield's lights back on. Things stayed dark for a bit and I was beginning to get worried but then the lights came on and without bothering with a circuit, I landed straight away. Flying in the external view and lacking a shadow, I found it hard to judge my flare accurately and bounced a couple of times, but was soon down, all in one piece. Perhaps I was cut out to be a night intruder, after all! The debriefing seemed to suggest so, at any rate. One enemy aircraft confirmed destroyed, plus four railway vehicles. Not a bad night's work! I've always had a mind to try a night intruder mission in a sim; ever since having read an account of one, long ago. It was in the aviation volume of a trilogy called 'Freedom's Battle', a highly-recommended compilation of short personal accounts from those who served in British & Commonweath forces, laced with airmen's, seaman's or soldier's songs (like the one I quoted earlier) and humorous material from the RAF's 'house magazine', called Tee Emm. The night intruder story was from a gunner in a Mitchell whose gung-ho pilot was trying to impress a war reporter onboard for the trip, in so doing hugely un-impressing his more war-weary crew, who were more interested in surviving the mission. Back in the 1970s, I never thought for a moment that one day, I would myself be 'flying' similar missions, courtesy of the wonderful world that's been brought to we simmers by such great products as IL-2 '46. And by the work of modders like Prangster, who produced the clever, hugely immersive and well-presented mission reported here. It comes with other 'goodies' including a movie intro and recce photos and fully lives up to its exceptionally-accurately-presented briefing. Highly recommended.

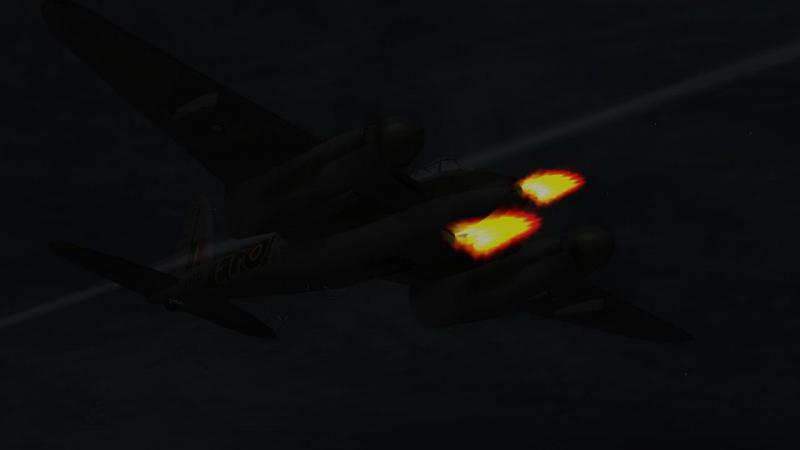
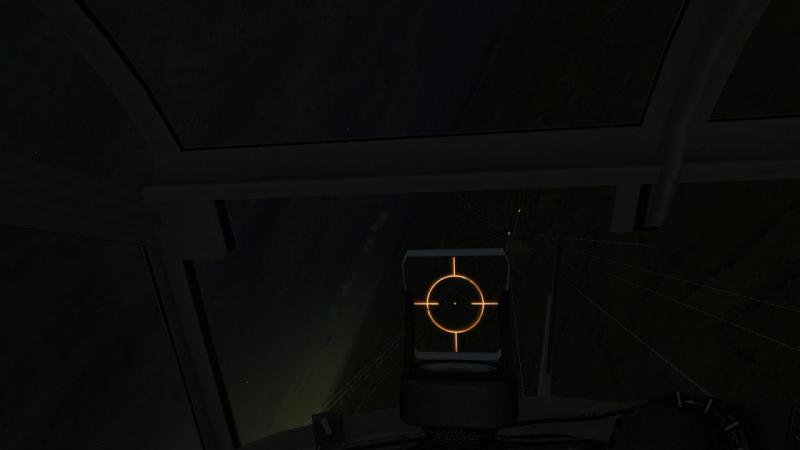

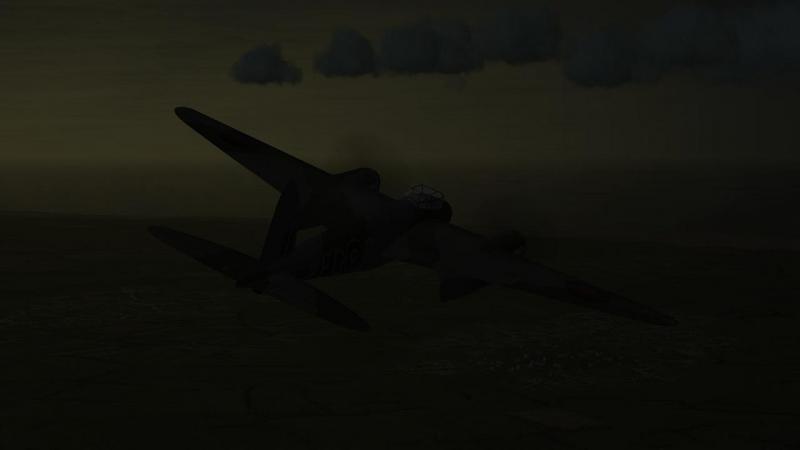
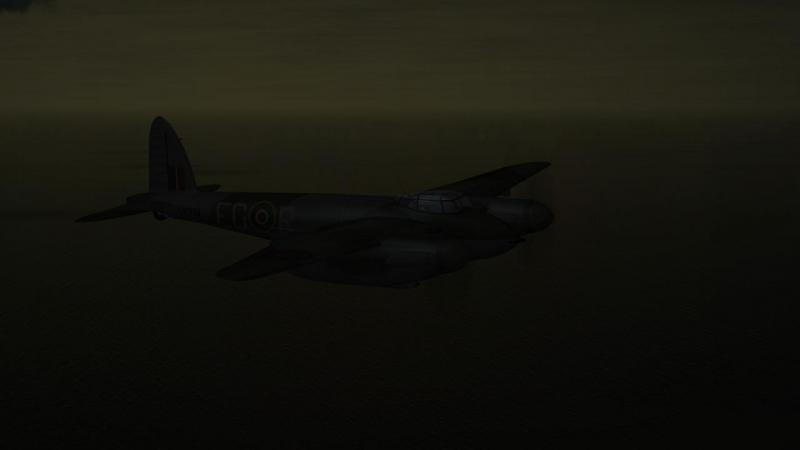
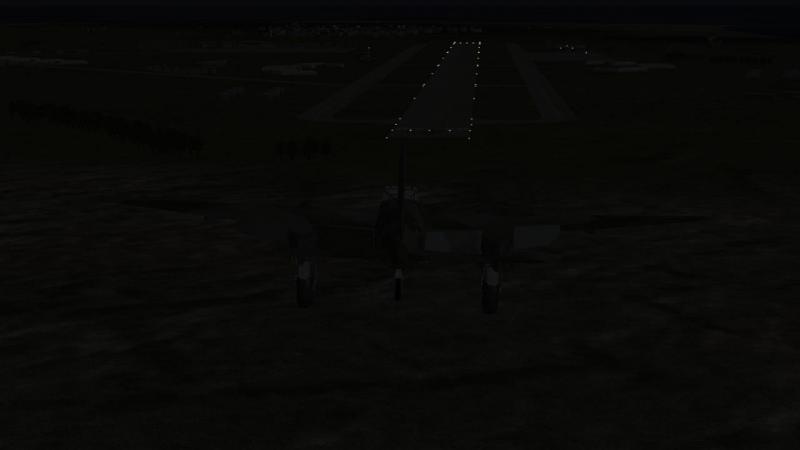
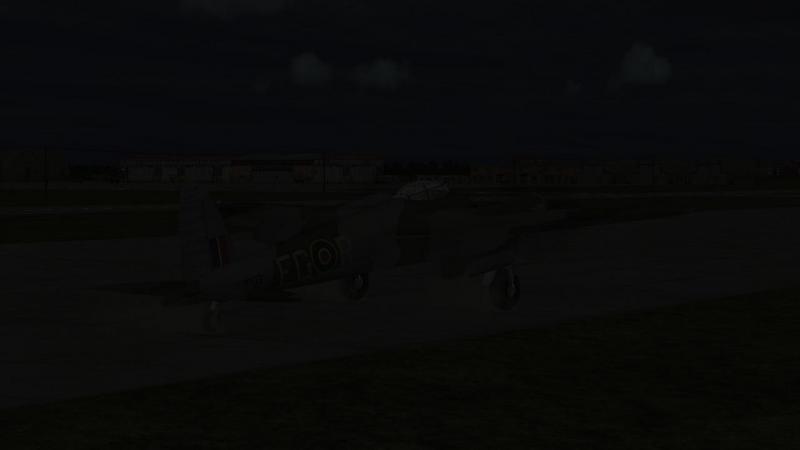

-
Ill met by moonlight... Though disheartened with so far finding only a star to chase, I contined to stooge around in the darkness over the illuminated enemy airfield. Should I fly lower, to silhouette an enemy against the sky? Would I be more likely to catch an aircraft in the circuit if I was north or south, east or west? As I pondered, I kept an eye on the airfield itself. The runway lights could signify a take-off as well as a landing! But I'd seen neither and suspected that the length of time the lights had stayed on most likely signified an incoming aircraft. But the minutes ticked by and still, I had seen nothing in the air or on the ground. Oh, for a radar set! But I was a fighter-bomber on a night intruder mission, not a night fighter, proper. Perhaps the Germans, hearing me, had thought me to be their visitor and were puzzled at me neither landing nor making radio contact! Continuing my solitary vigil, I turned south, to where the skies were the darkest. While this looked to be the hardest sector in which to spot another aircraft, it was, I felt, also the most likely direction from which a German aircraft would come. As I watched, with mounting excitement I spotted a faint but distinctive pattern of lights, low in the sky. This was not a single, bright point of light, like the many stars higher in the cloud-speckled sky. Rather, it seemed to be a short, horizontal cluster of faint lights, whitish in the middle, duller and tinged with colour at the outside. I immediately switched to the cockpit view and continued to observe this phenomenon, while lining it up in my sights. Things now happened with dizzying rapidity. In a split second I realised that I was indeed seeing the navigation lights of another aircraft. And that it was headed right for me, just slightly lower! In the little time I had to react, I pushed down the nose to bring my point of aim ahead of the light cluster as it rushed in below me, and quickly pressed the tit. Four Browning 303s and the same number of Hispano 20mm cannon roared into life. It was the briefest of snap shots, a split-second burst. But with all that firepower, it had taken effect. The Ju-88 - for that's what it was - swept past inches below me and staggered off into the darkness, trailing fuel or glycol and leaving a cloud of aluminium fragments in his wake. I banked around hard after him, not so hard so as to bring on a stall or lose the horizon and risk a 'controlled flight into terrain'. I was not sure how hard I'd hit the enemy aircraft and having found him at last, was determined there would be no escape. I need not have worried. The big Junkers went straight in, his end marked by a plume of orange flame which seemed narrowly to have missed some local Frenchman's property. I had not positively identified the aircraft I had just shot down. A moment's doubt crept into the back of my mind...but replaying the circumstances, I remained clear that it was as near a certainty as made no difference that this had been an enemy. Leaving the fragments which burned on the ground, I resumed my vigil around the airfield. The lights remained on, and I hung around for a while in the hope of repeating my success. Perhaps I would have done so, had I waited longer. But the second half of my mission - patrolling the roads and railway line to the south - also required my attention. So I pulled away and left the Lufwaffe base behind. ...to be continued!
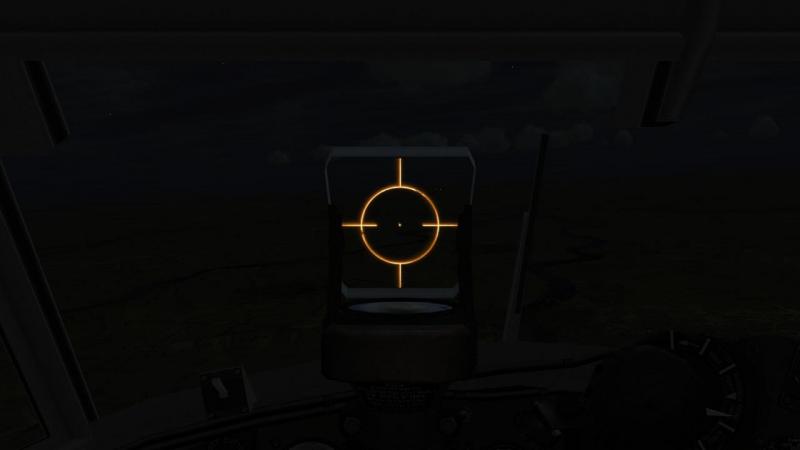

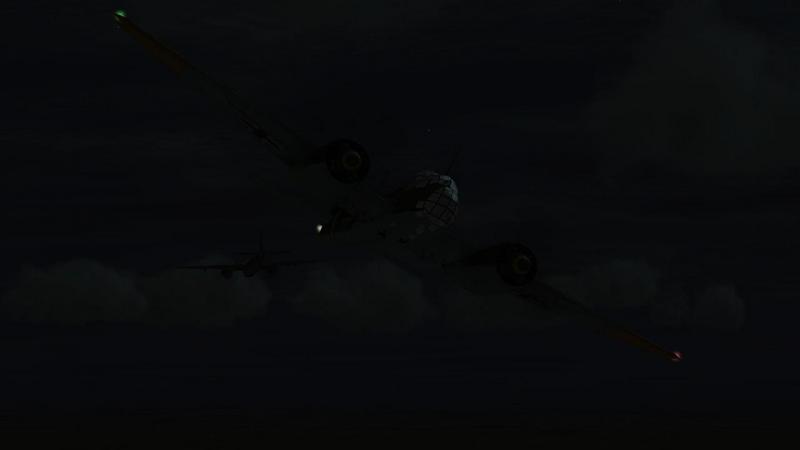
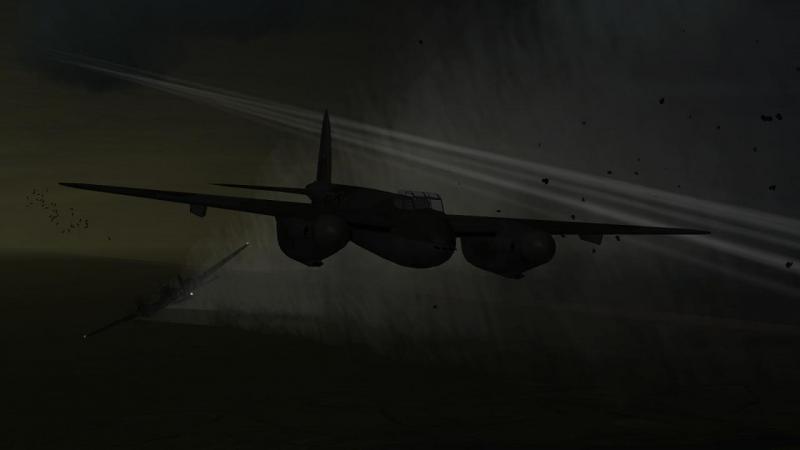
-
'Ki te Mutunga!' 'Through to the end!' - the Maori motto of no. 487 Squadron, Royal New Zealand Air Force The flight to the first target area - the German airfield at Maupertus, north of Valognes - was uneventful...and dark. I flew much of the way in the external view at a fast cruise, about three-quarters throttle, calling up the mini-map or the red 'speedbar' on-screen text display at intervals, to maintain course. Taking no chances, I stayed up at about 2,500 feet. No dangerous messing about at a mere thousand feet for me, thank you very much! I could see the French coast, off to my left, a continuous stretch of sandy beach with the dark countryside receeding to a barely-visible horizon, beyond. I lost a bit of height as I crossed inland near the base of the Cotentin Peninsula, where the coast runs more or less north-south. Back in the cockpit and switching to the gunsight view, I was a bit put off by the brightness of the reflector sight's illuminated reticle. If there was a keystroke to dim this, I hadn't set it. So on I went, watching out anxiously for anything that looked remotely hostile, but most especially for the ground, which flashed past beneath me with a vague, dark menace. About half-way to Valognes I flew over something which took exception to my passage. Blue tracers fanned out from an automatic weapon below. The rounds seemed to pass quite close but the firing seemed fairly wild and I took no evasive action, relying on my speed to carry me past in the dark and out of their field of fire. Emboldened by my surviving this first hostile action, I soon arrived south of the enemy airfield and began to circle, careful as ordered not to overfly it and thereby hopefully avoid being shot down by its defences. The airfield's grey runway, apron and taxiways were visible, but it was in darkeness. Then the runway lighting came on. A few to start with. Then the whole runway was lit up. Evidently, they were expecting a visitor, other than myself. Someone whose visit it was now my job to interupt. Violently. I banked around, looking for any sign of another aircraft. In the campaign 'difficulty' setup, I had retained on the mini-map the display of my own plane and my route, but had turned off other aircraft icons. So I kept fairly low, looking around and hoping to see something silhouetted against the sky, which at night is still generally lighter than the ground. Nothing. Round and round I went. At one point I found myself chasing a light in the sky which seemed to be moving, but it was just a star. But the Germans down there on the ground were not just teasing me, I was sure. Somewhere out there, an enemy aircraft must be approaching, if not already in my immediate vicinity. The excitement was palpable. Where was he? ...to be continued!