


33LIMA
-
Content count
3,749 -
Joined
-
Last visited
-
Days Won
7
Everything posted by 33LIMA
-
Ill met by starshell! My first chance to slug it out with my two battleships came in the form of a night action against two light cruisers, Konigsberg & Karlsruhe, and one heavy cruiser, Hipper. Individual enemy ships lost in one battle may re-appear the next in the static campaign, otherwise many would end before 50 missions, since the real Kriegsmarine had a rather limited supply of surface vessels! The enemy had the initiative/first move this time so I had to put up with watching as they cut loose, without the ability to do anything about it. Hipper opened festivities with a full broadside directed, as usual, at the nearest dangerous target, King George V. Happily, this went over. Then it was the turn of her lighter consorts. One of them opted to illuminate us with starshell. I tend to use these rarely, becasue unless visibility is exceptionally poor, they help only the default firing solution, and I normally revert to the more accurate shot or spalsh history tools to correct my fire, after the first salvo. For the AI enemy, though, illumination, I believe, improves their shooting. So for them, it's very worthwhile, not just eye candy. Knowing that certainly helps concentrate the mind, when you've been illuminated. You don't have any control over ship placement at the start of a battle. And opposing sides nearly are always within gun range from the outset. My very first move was for KGV to turn to starboard and let fly with a broadside of her own. There was a significant crosswind and while this was all right for range (I usually find that about half a degree less than the recommended elevation is better for the first salvo), my rounds landed just astern of Hipper. Not a bad start, by my standards! Revenge was next. I turned her less to port than KGV, and did not increase the revs, intending that she should open up a bit of distance from my leading battleship. Never mind the risk of collision, there's no point in presenting the enemy with a dense target zone, where shells directed at one ship might actually hit another. Revenge's first salvo was from 'A' and 'B' turrets only, since 'X' and 'Y' were not yet able to bear on her target. This was one of the light cruisers, my superiority in firepower rendering it un-necessary for me to concentrate on one or maybe two targets at a time. Berwick turned the other way, to set up my usual naval pincers movement. Soon, everybody was banging away at everyone else, in a classic surface engagement of the sort that Atlantic Fleet does so well. The difference, of course, was that I was banging away with mainly 14-inch and 15-inch guns, against enemies with just 6- and 8-inch weapons (although AF does 'weight' these broadsides, to allow for the lighter weapons' higher rates of fire). Konigsberg was the first ship to suffer serious damage, probably hit by Revenge. If so, the cruiser was lucky to stay afloat long enough to make smoke and turn away, after suffering a secondary explosion By this time, Hipper had been hit hard enough to persuade her, too, to try to disengage under cover of a smokescreen. King George V gave her no respite. The fight was not entirely one-sided, however, with Hipper for a time coming out from her smokescreen to land an 8-inch hit or two on KG V. Meanwhile, Berwick was hammering away at Karlsruhe, but with no observable success. Gamely, the light cruiser zig-zagged towards us, firing as she came, and gradually closing the range. Karlsruhe's luck was bound to run out sooner to later. Which it duly did, in firey style. She didn't go down, but meanwhile, Hipper went under instead, hit by more 14-inch rounds from King George V. The damaged Karlsruhe was now facing impossible odds, but on she came. Perhaps her steering had jammed; this is not uncommon in Atlantic Fleet and can take a variable amount of time to be repaired. She was, by this time, abeam of Berwick. Next move, all three of my warships were able to engage Karlsruhe .A first salvo is always something of a ranging effort but with Berwick hammering away and the two battleships joining in, it wasn't long before the plucky cruiser met her inevitable end. That's as far as my current Royal Navy static campaign has got, so far. I have found it most thoroughly enjoyable, more so than the dynamic equivalent for the RN, which suffers from too-frequent U-Boat 'area ambushes' of surface ships, as well as alert convoy escorts being significantly too vulnerable to the same foe. As a dilletante wargamer of old well accustomed to alternate move gameplay, I have long ago become entirely comfortable with Atlantic Fleet's non-continuous gameplay. The many beautifully-rendered ships, and the visual and environmental effects, I find as much of a delight as I did when I first clapped eyes on them; likewise the sounds and music are a most effective accompaniment. Two campaign systems for each side, a custom battle generator and a pack of 50 historical battles provide exceptional scope for all this content. Great artwork and clean and effective interface design complete a PC package which entirely belies its mobile device ancestry. I would dearly love to see some measures to make subs slightly less deadly; and a few other realism improvements here and there, within reasonable limits, would be nice to have. But the simplified representation of the deployment and tactics of subs (and planes) is a small price to pay for their presence at all, and readily rationalised as a feature of many wargame rules. In about sixteen years of playing PC combat sims and games ranging from European Air War to Operation Flashpoint, I have found many I enjoyed greatly, and of those, some which stand out above the others, in their ability to recreate and immerse me in the essence of the conflicts they bring alive so vividly on my PC screens. I have no hesitation in placing Atlantic Fleet right at the very top of the latter category. Nearly three months of playing little else has done nothing to diminish my enjoyment of the game and my respect for the team at Killerfish who have designed, developed and delivered such a magnificent package. Truly exceptional and rather brilliant! Love it!
-
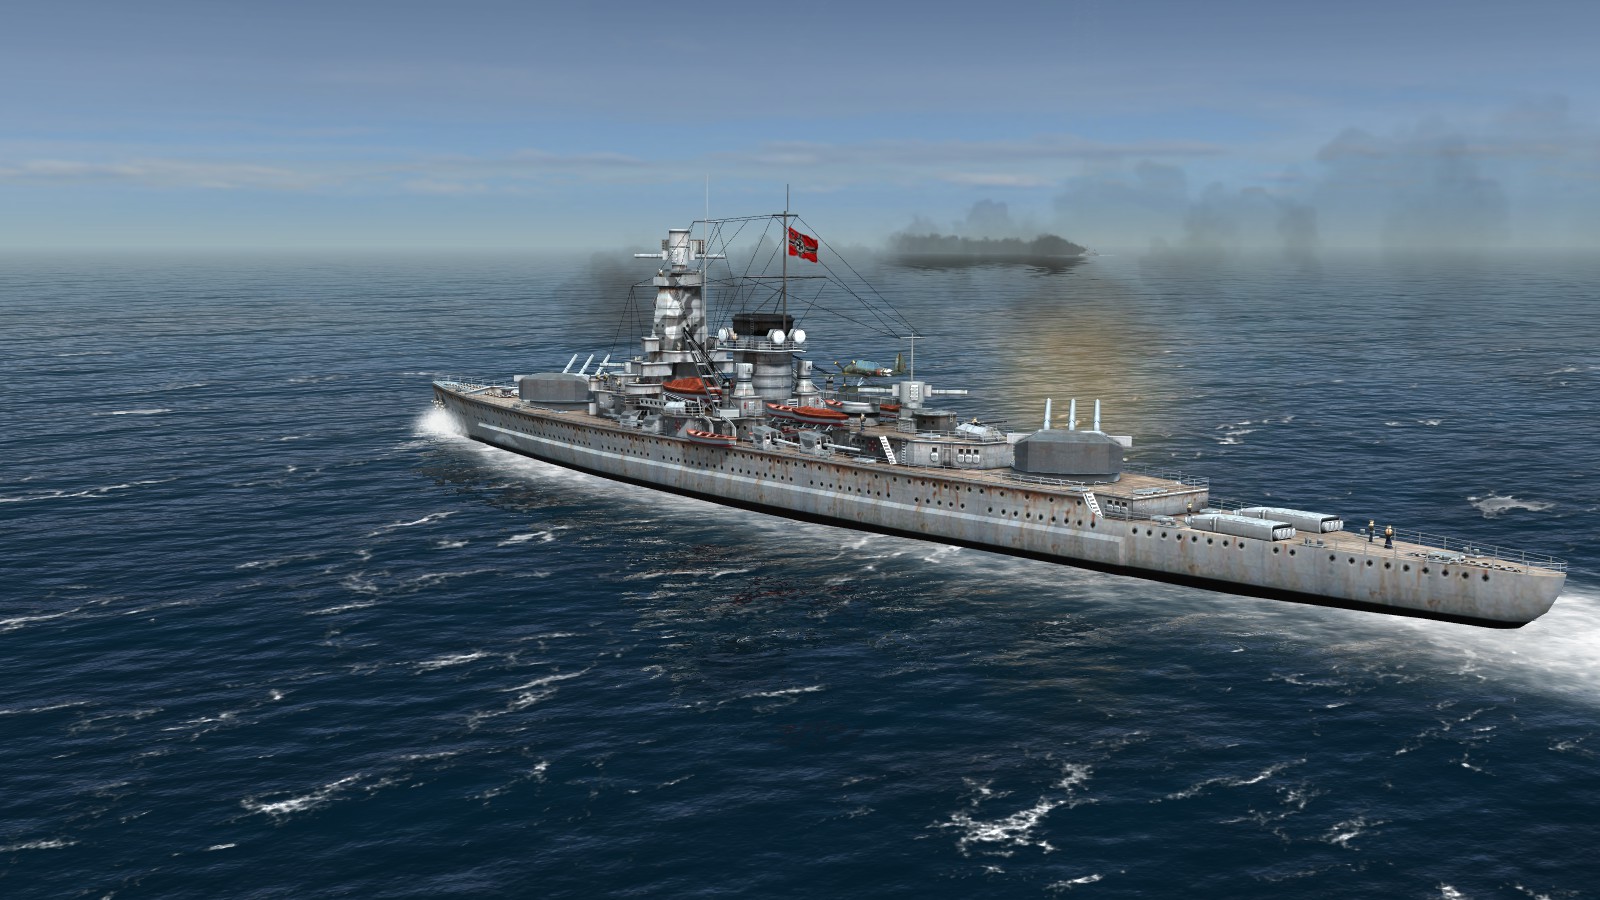
Yet more heavy metal... My next encounter also pitted us against an inferior force, but with one of the two enemy cruisers now a heavy Hipper Class unit. Again, I deployed battleship Revenge, County Class cruiser Berwick and 'H' Class destroyer Hardy. The winds were light and this doubtless helped me find the range. The enemy AI seems untroubled by the effect of wind on sheel trajectories but I still like to play with this enabled. There is an 'elite' enemy gunnery option but I find their shooting is good enough without this! Below, 8" rounds from Berwick fall close abeam of Leipzig or Nurnberg. Atlantic Fleet uses the same fine 3-d model to represent these very similar ships, distinguishable from the earlyer pre-war German light criusers by having their two funnels trunked into a broad single one, but sharing the same unusual main gun layout, with two out of three triple turrets astern. I have often seen near misses like these cause damage in Atlantic Fleet battles, which is entirely realistic from either splinters or 'diving' shells hitting below the waterline. In this mission, I had a couple of Sunderland flying boats on call and duly called these in. I've got a little rusty judging the right aiming point and while one of my runs produced only more near misses, another was more successful. The best tactic is set up the attack direction so that it goes diagonally across the target, so that one bomb in a stick is likely to get a hit; attacks along the line of the target seem harder to get lined up right. While Revenge turned away to fire longer-range broadsides, Berwick turned the other way in a race to cross the enemy's 'T'. You can see top centre in the pic below that one of the German cruisers, almost certainly Hipper, is taking hits from Revenge and is making smoke in an effort to escape. At this point, Revenge shifted fire to the enemy destroyer, which was in danger of getting into torpedo range. I got lucky and obtained an early hit, which was enough to wreck Z-31. Both enemy cruisers soon followed her to the bottom. A night action followed, but with no more powerful opposition, and no aircraft or U-boats to level the playing field, the result was never really in doubt. Next time out, the Kriegsmarine had a 'pocket battleship', but though she landed some 11-inch hits on Revenge, she was soon rolling over and going down, soon to be followed by an escorting destroyer. The net result of all of this was that I earned enough renown points to obtain a second battleship, this time a more modern or powerful one. I chose the name ship of the King George the Fifth class, generally known as 'K G fives'. With a modern armour scheme, a decent dual purpose secondary armament, a respectable top speed and ten 14-inch guns, she would be a useful complement to Revenge and should keep me ahead in the Atlantic Fleet arms race, which was showing signs of heating up. ...to be continued!
-
Enter the Very Heavy Metal... One of the engaging features of the Atlantic Fleet 50-mission campaign is that you are quite conscious that you're in an arms race of a sort. The opposition you face gradually increases. If you don't earn enough renown (one point per enemy warship ton sunk) to keep up with this escalation, you can fall behind and end up in a sort of death spiral, from which it can be hard to recover. Tactics to avoid this include deploying subs rather than surface ships if you cannot readily overmatch the enemy, or if you are operating inside enemy air cover. And not committing heavy units you can ill afford to replace, if faced by enemy subs. In this play-through, I was having no such worries. In fact, I was winning the arms race comfortably, to the extent I was able to afford a battleship, at a point in the game where the enemy was just starting to deploy cruisers. Admittedly, the battleship I could afford was a Royal Sovereign/Revenge Class. These were built in World War 1 as a sort of slower, poor man's version of the Queen Elizabeth Class, super dreadnoughts which were superb combinations of armour, speed and firepower in their day. By WW2, the QEs had just about managed to stay competitive, helped by inter-war rebuilds, but the 'R' Class were showing their age. Nevertheless, their 15-inch guns and decent armour make them useful enough in Atlantic Fleet, even if a maximum 20-degree elevation limits the range of their main batteries. The next mission pitted us against two German light cruisers, at a point where I had one heavy cruiser (Berwick), a destroyer (Hardy) and my first batleship, HMS Revenge. We were not inside the range of enemy land-based aircraft and there were no U-boats about. So I had little hestiation in committing all three ships. This time, I had the initiative/first move and I wasn't too long in finding the range, partly thanks to light winds (the windvane arrow, top left in the screenshot below, is a darker blue, the stronger the wind). I turned Revenge hard to port, and my other two ships hard to starboard, to open their 'A'arcs as soon as possible and confront the enemy with fire coming from different directions. The German cruisers were soon returning fire... ...and their shooting was not too bad, either, although their 5.9 inch shells were not a major worry, even for an old battleship... Soon, Berwick was making to cross their 'T' and had also started shooting... Caught in a crossfire, the German cruisers started to turn away, but it was too late... I think it was Berwick who sank Konigsberg. Before the former could train her guns onto sister ship Karlsruhe, massive shell spashes and a fireball marked the spot where 15-inch salvoes from Revenge had already finished the fight. So far, soo good. Provided the next few missions didn't throw up encounters with subs or aircraft, I now had the nucleus of a force strong enough to smash in similar fashion the likely opposition. And I was acquiring renown points at a sufficient rate to keep ahead in the arms race. What would the next encounter bring? Whatever that was to be, I was now feeling increasingly confident. ...to be continued!
-
Heavy Metal versus...not-so-Heavy Metal... The enemy light cruiser, Leipizig, started to turn away as Berwick took her under fire. My sub, Triton, was too far off to do much initially but I steered her on a course calculated to cut across Liipzig's mean track. Deither von Roeder was coming at us while my oew destroyer, Hardy, moved to cut her off. Before too long, I had got the range and was beginning to find the correct degree of aim-off for the crosswind. However, before I could do Leipzig serious harm, she landed a devastating broadside on poor Hardy. Edit - that pic, now that I look again it, is of von Roeder catching a packet, not Hardy! By this time, von Roeder had started hitting Berwick and before she could get into torpedo range, my heavy cruiser switched fire to the big German destroyer. Soon, von Roeder was burning and making smoke as she tried to get away. It makes sense to switch targets once an enemy is disengaging behnd a smoke screen, as they are no longer the most immediate threat. But they often resume firing at some point, so it also makes sense to let them have a last salvo while you still have the range. Which I did in this case, and that settled von Roeder's hash. So our attention could now be turned to the withdrawing Leipzig. Below the surface, Triton was closing in, although she had to dodge around von Roeder as she sank ahead of her. At this point, from no-where that I could see, another Dornier appeared, not wave-hopping this time, but at meduim altitude. Horrified, I watched as she bunted over in to a dive-bombing attack...on Triton! The stick of bombs straddled the sub and even at periscope depth, the effect was deadly. I had lost my trusty Triton! Happily, that was definitely the last of the Dorniers. Also happily, Hardy's damage from the 6" hit or hits from Leipzig hadn't affected her fighting abilities. Hardy to port and Berwick to starboard, we ran down Leipzig and showered her with shellfire. No pictures survive of Leipzig's final moments, so this one, taken of the two-funnelled but similar half-sister Konigsberg in similar dire straits, will have to serve... So we'd won the battle, but I was upset to lose my submarine, even though I already earned more than enough renown points to replace her. In fact, I had earned enough to acquire my first battleship, which was soon to see action. But another lesson had been re-learned. Though much simplified in method of deployment and attack, the aircraft in Atlantic Fleet are a force to be reckoned with. As well as good to look at. I am well pleased that Killerfish took the trouble to add them to this gem of a naval wargame. ...to be continued
-
Heavy Metal versus Death from Above By the time I had got to Mission 11 (out of 50), I had a heavy cruiser, Berwick, a destroyer, Hardy and my trusty submarine, Triton. I deployed all three for the battle, which pitted us against the light cruiser Leipzig and the destroyer Deither von Roeder. I wasn't expecting too much trouble, but I had recokned without the participation of the Luftwaffe! Before deciding which ships to commit to any battle, it is always a good idea in AF to check if the scene of the action is likely to be within range of enemy land-based aircraft. This battle was to be fought in the North Sea near Norway and AF seems to treat as in German hands from the satrt all the ports in the lands occupied in 1940...including the Norweigan ones. Thus it was that - the Germans having the initiative/first move - the fight begam with Berwick attacked by a torpedo bomber, a Dornier 217 coming in from off the starboard bow. The AA let fly at him - this is AI-controlled - but on he came, finally releasing his torpedo from a range that I knew was going to be too close to dodge, in such a big warship. As if that wasn't bad enough, the Hun wasn't alone. A second Dornier came in from port, and once again the AA boys failed to knock him down. I knew that unless I was very unlucky, the damage to my heavy cruiser from a single torpedo hit was unlikely to be fatal. But now, I was faced with the probability of two such strikes. I judged that I would be certainly struck somewhere between midships and bow on either side and decided that it was pointless, and possibly more risky, to turn into either torpedo track. Instead, I decided to do two novel things. Firstly, I ordered full astern, to reduce the possibility of a hit near the boilers or in the forward magazines. Secondly, I decided to try to cut the damage I was going to take in the bows by half. I trained my eight 8" guns to starboard, any purely by gueswork, depressed them to point at the sea just ahead of the torpedo track coming in from that side. Then I let fly, and crossed my fingers for luck. My luck was out. Both torpedoes hit in the bows, more or less directly opposite one another. If I had turned as well as putting my engines astern, I might just have avoided both, for they hit well forward, as you can see. Worse still, the next turn saw yet another Dornier making a torpedo attack. This time, though, the AA gunners earned their keep. Maybe my luck hadn't deserted me after all, because a quick check for damage showed that all was in order. We weren't even listing or noticeably down by the bows. Fortunately, that was the last of those pesky Dorniers...or so it seemed. Now, it was going to be a straightforward gunnery duel, with weight of broadside in my favour and a friendly submarine available to snap up any targets of opportunity. Time for some payback! ...to be continued!
-
The chase is on! By this time, Kormoran had turned off her closing course and was evidently intent on getting well clear of this dangerous vicinity. She was still at rather long range. And from here on, it would only get longer. As soon as my first torpedo tube was reloaded, I let fly with it, having turned towards her, then another. These missed, having only the effect of inducing Kormoran to make smoke. This action deprived me of my firing solutions, so that any further shots would have to be fired blind. Which I started doing as my torpedo tubes were reloaded, with Kormoran turning away across my bows. A further fan of two or three tin fish followed as the enemy raider settled onto her new course. But the range was extending rapidly and she managed to outrun them. My top speed submerged was only a fraction of what the enemy could make. A brief hesitation, then I surfaced to engage with the deck gun, where I’d be able to keep up with Kormoran using my diesels. I knew that if the raider decided to fight rather than run – or even if she stopped making smoke, and fought while she ran – I would be taking a big risk, with only the much smaller target size of my sub in my favour. To heck with it! If things got too hairy, I could always dive again. I would gamble against Kormoran landing a lucky hit before I could get below. Triton found the range fairly quickly, but because of the strong crosswind, the correct line was harder to obtain. My first rounds fell well to starboard of their target. But they gradually crept closer onto line. I was slowly closing all the while, compelling me to drop the range at intervals. But eventually, I started landing hits every so often, though without visible effect at first. Kormoran stopped making smoke for a time, and my heart was in my mouth as I waited for her first shells to splash nearby. But for some reason, none came. I decided to ride my luck a bit harder and stayed on the surface, firing as I came. I suspected few of Kormoran's guns could bear dead astern – most were on the broadside, I knew that much – so perhaps I had knocked out her stern gun, or damaged it, or was just out of her arcs of fire. Emboldened, I kept on after her. After a little while and several more hits, I began to see that the range had started to fall off more noticeably. Evidently, the damage was beginning to tell. Kormoran could have turned at bay to fight, and with her much heavier broadside – not to mention torpedo tubes – she would have been more than a match for Triton. But she was evidently persuaded to run, and then keep on running, by the threat of our own tin fish. And in escaping these, her tactics had been successful. Turning to fight, forcing me to dive then running away again would likely just have postponed the inevitable. Another round smacked into Kormoran and this time the results were more satisfactory. A large secondary explosion smashed her superstructure and sent an orange fireball rolling skyward. Finally, perhaps because, in creeping out from under the lee of her stern, I had come into a new arc of fire, Kormoran started shooting. Just when I thought it was all over, as a certain football commentator at a certain World Cup final famously put it. My gunnery now needed the shooting skills of Geoff Hurst to settle this particular England -vs- Germany fixture! I could - and doubtless should- have dived and used torpedoes. But I sensed - or gambled! - that Kormoran was in her death throes. So I stayed on the surface, but turned hard a-starboard to come in directly behind her, once more. Kormoran got off one more round, just as she was wracked by another internal explosion. The round missed and I kept on turning, to get back astern of her. I needn't have worried. Kormoran lost the remaining way she had left on her and began to settle by the stern. Having got outside torpedo range, Kormoran had banked on also getting outside effective deck gun range before hits slowed her down. We had both gambled; Kormoran had lost. Thus was ‘destroyer disaster’ followed by ‘submarine success’, with my single ‘T’ Class boat having sunk a fellow sub and a disguised surface raider. All in a good day’s work for the Silent Service! I now had sufficient spare renown points to add a destroyer to join Triton and the heavy cruiser Berwick. Despite previous losses to whatever cause, I felt I now had a fighting chance of meeting on at least even terms whatever the Kriegsmarine might throw at us next. And I had certainly seen again for myself how useful submarines can be in Atlantic Fleet. Splice the mainbrace! ...to be continued!
-

Atlantic Fleet - Graf Spee, Battle of the River Plate
33LIMA posted a gallery image in Member's Albums
From the album Combat Sims
-
From the album Combat Sims
-
Atlantic Fleet - a destroyer's torpedoes near their target
33LIMA posted a gallery image in Member's Albums
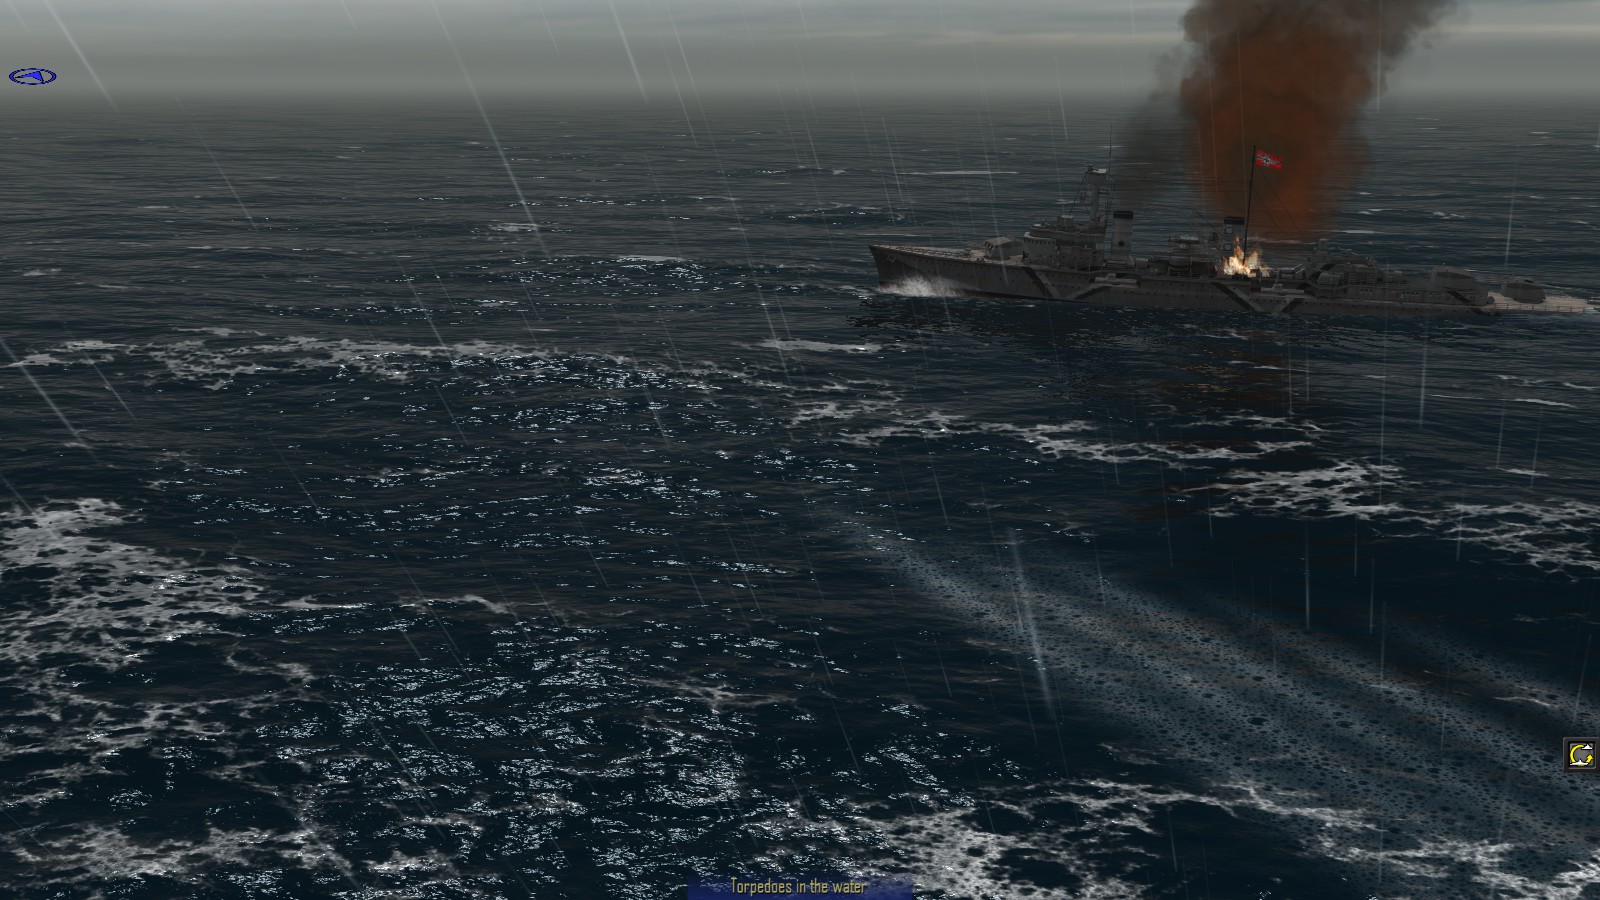
From the album Combat Sims
-
The 'destroyer disaster', when it came, was as sudden as it was unexplained. I kicked off the next mission...and found that my two destroyers were no longer listed! I have a vague recollection of selecting both ships but clicking the button to remove them, instead of the one to add another ship, which I wanted to buy with my renown points. AF warns you that you're doing this but, doubtless distracted by some real world events, I evidently clicked the wrong option and accepted their deletion. At least, that's the only thing I can think of. The net result was that when the distraction went away and I tried to resume where I had left off, Echo and Encounter had gone. I went back a few missions, which AF will let you do, but as I discovered, you re-start with what you have now, not what you had then. Doh! All was not lost! It was now time to spend the renown points I had been building up. I found that could afford an 8-inch cruiser so I went for one of these - the 'County' Class HMS Berwick. I knew that I was at the stage in the campaign that I could expect to be facing more than a destroyer or two, by way of surface opposition, so a heavy cruiser was, I felt, the best choice open to me. I used much of what little I had left to buy a submarine, as these can be great force equalisers if you find that you are really badly overmatched on the surface. The enemy must have been thinking along similar lines, for my opposition on the next outing was a U-boat and a cruiser. Fortunately, the cruiser was only an auxiliary one - a gun-armed merchantman, in this case a disguised surface raider. In fact, she was no less than Kormoran, famous for surprising and then sinking the light cruiser HMAS Sydney in the Pacific, in late 1941. Forewarned by the 'briefing map' what I was up against, this was not an outcome that especially worried me, even if - as was not the case this time - the Germans had the initiative/first move. However, I was was still facing something of a dilemma. My heavy cruiser was a good choice for making short work of Kormoran in a surface action. But I would be at grave risk of losing her, to the accompanying U-37. I did not ponder for long. This, I decided, would be a solo mission for Triton, my 'T' Class submarine. My opening position was off Kormoran's starboard bow. She was still at or just outside extreme range, where the slightest turn or zig-zag would be enough to evade my torpedoes, if launched now. As she was heading my way, I could, however, bide my time. For now, that left the U-boat. My 'sonar' - for a sub, this should really be 'hydrophones', although perhaps is just that in the static campaign, late-war kit like sonar in allied subs is available from the start - had picked her up to starboard, not too far off. I turned into her and let fly at once with a full savlo of torpedoes - the 'T' Class has no less than eight forward tubes, plus two external (the latter effectively non reloadable). Viewed from behind and below my boat, the visual effect was quite impressive, as the fish veered right and headed off towards their quarry. This was my first demonstration that fans of torpedoes from a submerged submarine can be just as effective as those from a surface ship, against a sub at periscope depth. U-37 took no eavsive action that I noticed, and paid a fatal price for her own hydrophone operator's lack of vigilance. While I don't think a surface ship ever succeeded in torpedoing a submerged submarine, a British submarine, HMS Venturer, managed to sink the submerged U-864 in early 1945 in such a fashion, in a remarkable (and for WW2 possibly unique) underwater battle. So far, so good. Now, it was Kormoran's turn. The hapless U-37 hadn't even faded from my hydrophones by the time I had swung my periscope onto my new target. ...to be continued!
-
Destroyer disaster, submarine success... My next mission was one of those I like least - surface ships on my side, pitted against submarines. The only good thing about these missions is that - less realistically than in Atlantic Fleet's surface actions - the 'briefing' map, as seen above, tells you what you're up against, and you have a chance to pick your forces accordingly, beforehand. In this case, I had earned enough renown points to buy more than the two destroyers I had left from last time. But I decided I wasn't going to risk losing ships on this one, so just committed one destroyer, Echo, whose game plan would be simple - vacate the premises, so to speak. The problem is that in AF, subs - whose suurfaced maximum speed is generally about the same as a warships cruising speed - nevertheless and much too often start a battle in good firing positions - frequently, within the 'magic range' when a torpedo will travel far enough to hit you in one turn. If the subs have the initiative (=first move), this means they will put a tin fish into your ship before you can so much as move, let alone shoot back. And so it came to pass. The U-boats had the first turn! U-25 was almost directly astern of Echo and let fly with a fan of torpedoes from her four bow tubes. As it happened, U-25 was fractionally outside the 'magic range' - about 2,500 yards - and I would have a chance to evade...a slim chance, by the look of it... But that wasn't all. The second sub, U-28, was off Echo's starboard bow and she, too, let loose upon the hapless destroyer. Fortunately, U-28 was also just outside guaranteed hit range. Now, at last, it was my turn. I went to full speed and put on twenty degrees of so of port rudder, to turn parallel to the torpedo tracks coming in from my starboard quarter. This did the trick... ...but it took me directly into the path of one of the incoming tin fish from the second U-Boat. This hit Echo just abaft the second funnel. Realistically enough, torpedo strikes in AF seem to do varying degrees of damage. One will often sink a destroyer...but not always. On this occasion, Echo shook off the strike and stayed afloat. Now, I had a fighting chance! As AF often gives subs an unrealistic initial advantage, I will not refrain in using the even less realistic counter-move AF gives destroyers, as if in return. This is that a sub at periscope depth is something of a sitting target for a fan of torpedoes from a surface ship. Once or twice I have seen them dive away, but usually, the sub is an easy target. With two U-Boats hunting me, I could not afford to make many mistakes. To be certain of a kill, I usually attack a sub with a fan of at least six torpedoes. As warships can't reload torpedoes during a battle and my 'E' Class ship only had two banks of four, this meant I'd have only one good shot at my tormentors. While the enemy torpedo hit would undoubtedly slow me down, I might still be able to out-run the submerged sub astern. So I set up my torpedo attack on the beggar to starboard... ...who, as the asdic operator had reported, was obligingly still stooging about at periscope depth... That did the trick. Down went U-28! But U-25 was still in the fight, as another torpedo track not too far to starboard now reminded me. Sub reload time is quite short in AF, though they seem to manage only one tube reloaded, per turn. So I was still in grave danger. I did the only thing I could, which was to blaze away at his periscope with my after 4.7 inch mountings. Fortunately, this was one of those occasions when my shooting was not too bad. Again, that did the trick. The U-boat dived away, lighty damaged, and disengaged! I had been lucky. If even one of the subs had been within the 'magic range', I would probably have caught a couple of tin fish, which would certainly have been fatal. As it was, I had been lucky that the one I didn't avoid hadn't sunk me and that my counterattack had been so effective. The icing on the cake was that as damage is cumulative in AF's dynamic ('Battle of the Atlantic') campaign but not in this static one, I knew that good old Echo would be fully operational for the next mission. So, where was the 'destroyer disaster' of the title? Well, not too far away, is the answer to that! ...to be continued!
-
A great boxer, and more importantly, a great man.
-
Destroyer versus destroyer! Mission # 5 saw me inteccepting two German destroyers, Leberecht Maas and Georg Thiele, who were escorting a large freighter, off the north-eastern coast of Brazil. This definitely called for the deployment of all three destroyers of my own. I had the initiative and used this to turn two destoyers to starboard, the other to port, and started shooting at once. The enemy were steaming straight towards us and there was a moderate crosswind. I decided ,for as long as I dared, to concentrate all my fire on the leading enemy warship, hoping thus to gain a decisive advantage early on. I didn't need to sink him; just damage him enough to cause him to disengage, before the fire of his more distant comrade posed a serious threat. This is fairly classic 'divide and conquer' stuff, owing something, I think to 'Lanchester's Law', whereby I would try to divide the battle into two fights of 3 -vs- 1, not one fight of 3 -vs- 2. Somewhat as Nelson did at Trafalgar; not that I'm comparig my grasp of naval tactics with such a Grand Master's! My first salvoes were well over, falling harmlessly into the sea between the two oncoming enemy destroyers. The enemy frighter unwisely held his course, standing on towards us. The enemy warships sensibly turned left and right and Thiele, the nearest one, started shooting back. Mass would not be long, in doing likewise, I knew. At this point, we began landing hits on Thiele, with results that were spectacular, but by no means immediately fatal. . Another salvo had the desired effect. Thiele turned away and started making smoke. He was out of the fight, for the time being at least, and was sunk soon afterward. I immediately turned my attention to the hitherto-unengaged Maas, about the time he passed behind the enemy frieghter, moving left to right across our arcs of fire. I allowed this to distract me, to the extent my nearest destroyer cracked off a broadside at the merchantman. Things now took a decided turn for the worse. Before I could do Maas any damage, she landed a devastating broadside on Foresight. Up to then, I had got away lightly, but my second 3 -vs- 1 battle had started rather badly. Foresight was still in the fight but badly damaged. To make matters worse, the fiercely-battling Maas, though soon herself hit again, also launched a fan of torpedoes. This forced me to take violent evasive action. It was fortunate indeed that Foresight, though burning, was still answering the helm. By this time, the German frieghter captain had woken up and was turning hard to get away. At this point, Foresight's luck ran out, all at once and emphatically. There was a violent explosion, presumably a propellant fire reaching a magazine, and down she went. By now, Maas was also burning, and the tin fish were her last hostile act. She too sank, soon after this picture was taken. All that remained now was to run down the fleeing freighter. This presented no particular problem, for my two surviving destroyers. Losing Foresight was a sad blow, but over 13,000 renown points from the battle was some compensation. Which came in handy, for my next battle was to be a very different kettle of fish. ...to be continued!
-
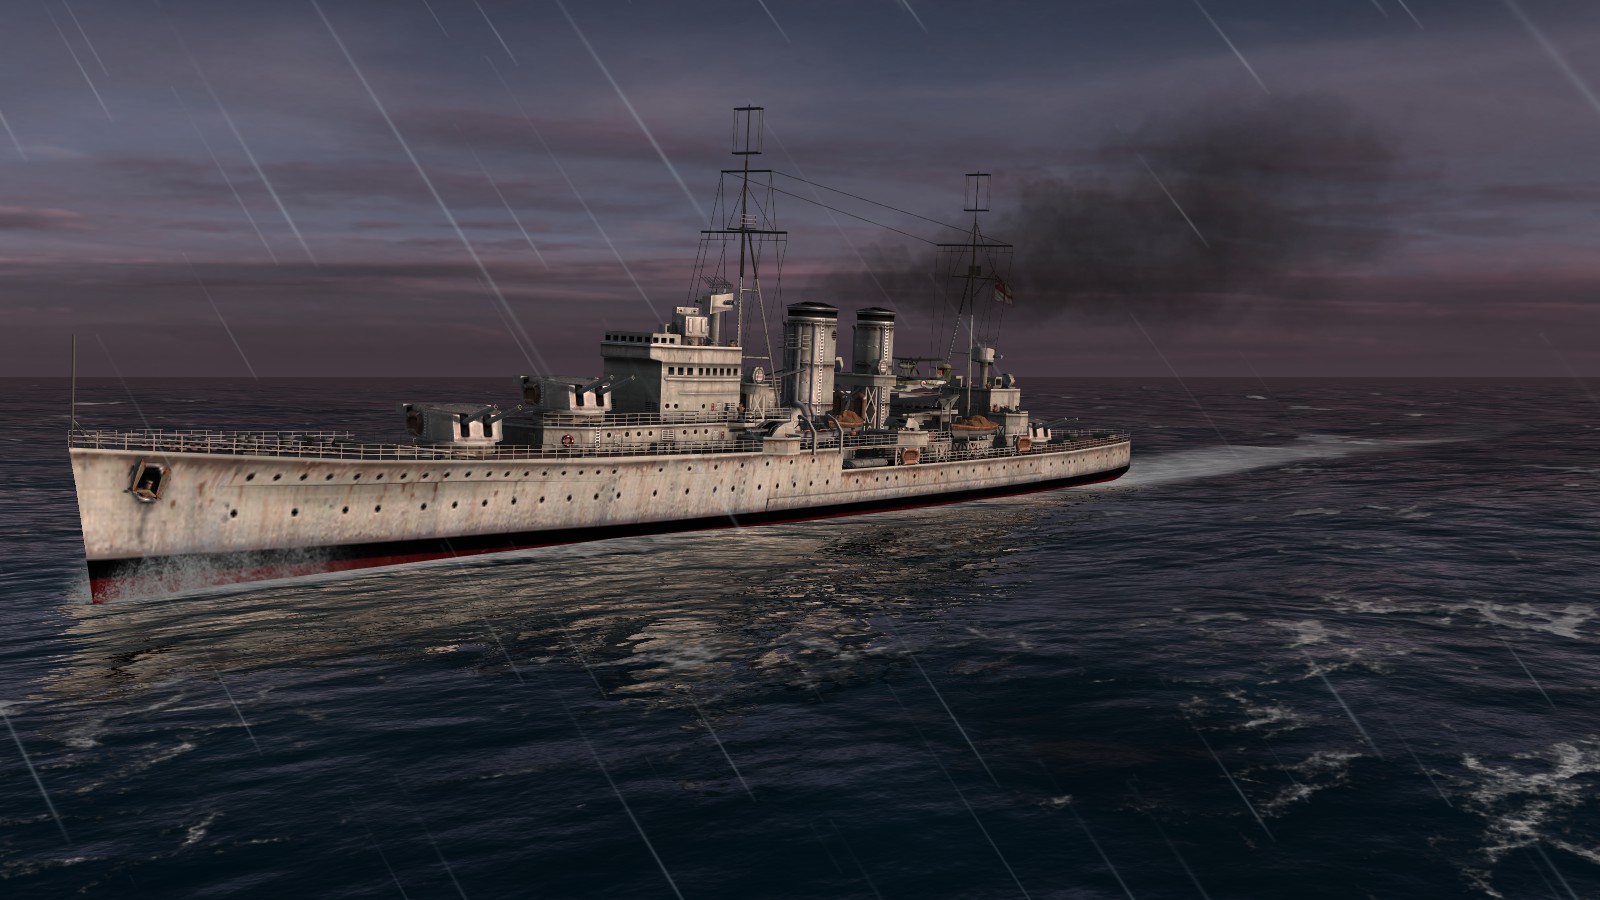
Torpedo boats...and torpedo boat destroyers Before describing the next missions in my Royal Navy static campaign, I should say that this is my second play-through, and that I have the impression that while the enemy generally starts out as helpless merchant shipping, there is some replay variability, as missions progress. You can certainly get some variety by acquiring different ships as you earn the necessary renown. Or by deploying different ships for each battle (the maximum is three, out of the ten you can have in your mini-fleet, though the enemy may have slightly more). Suffice to say that my second time around is proving just as much fun as the first. It helps that you have the sense of being in an arms race, needing to acquire enough or better warships at least to keep abreast of the stepping up of the opposition, in each successive battle. Lose ships or otherwise fall behind, and you might find yourself in a downward spiral. It's useful that you can replay any given fight, before moving on to the next one. My next battle brought me up against a sleek German torpedo boat, T-22. The Kriegsmarine was one of the navies which persisted in building these vessels, essentially small destroyers with a light gun armament, but a heavy torpedo battery. The Kriegsmarine's torpedo boats saw much service and had their successes, but were not as versatile or powerful as the destroyers (originally developed and known as torpedo boat destroyers) favoured by the USN and RN, or as effective as escorts as more specialised craft (Atlantic Fleet is essentially open water warfare so there are no motor torpedo boats or other coastal warfare craft). With enemy air power unlikely to intervene - the location was mid-Atlantic - I had no qualms about deploying all three destroyers for this fight. You get no choice of placement in AF, and in most cases the battle starts with both parties inside gun range...which is fine in most cases, except that – especially relevant, if you’re playing any sort of German surface raider - a longer start range option (which is ‘in the works’, apparently) would give you the chance of running when you met a more powerful opponent. Not a problem in this case! I was awarded first move and one ship at a time, I went to full speed and turned to approach the enemy at an angle. One advantage of my early destroyers in this sort of battle is that their rear guns have a wide arc of fire forward, more than most warships. My shooting was terrible. There are generally four reasons this happens. First, while relishing gunnery in AF, I secretly long for the option to role-play the skipper and just order targets that are then engaged by an AI gunnery officer, as per Fighting Steel; I think this subliminally affects my shooting accuracy! Second, if you have the relevant option selected, getting the correct ‘aim off’ for a crosswind can be tricky, something the enemy doesn’t have to worry about, even if like me you don’t enable ‘elite enemy gunnery’. Third, if I have multiple ships against a weaker enemy, I tend to take less care, thinking, ‘Well, with sufficient volume of fire, one of us will get him before long’. Finally, and related to that, I’m impatient. If in a dangerous position, I will take my time and use mainly the map-based shot history (the best but slowest option, and the only one if the target is obscured by smoke). But if not in a tight corner, I will rush things, probably just using the splash history, which enables me to stay in the 3d world (there is no ‘mini-map') where things look better. Including the impressive if dissapointing spectacle of your shell splashes falling repeatedly off target. Just as I was now seeing. Close, often, but although in AF near misses can realistically cause damage, not close enough. Three destroyers of torpedo boats against one of their classic quarry should have been over pretty quickly. But a combination of poor shooting by me and evasive action by the enemy, meant that I seemed to be in as much danger as my opponent. He turned around and while broadside on, let us have a full salvo. Fortunately, his shooting was no better than ours. Soon he was making a run for it with Echo, Foresight and Encounter snapping at his heels. This reduced his weight of fire to the aft-mounted guns. I kept my 'A' arcs open from two of my ships to give him full broadsides, while the other headed straight for him. Finally I got some hits, starting a fire. He began making smoke, forcing me to rely on the map-based shot history to adjust my fire, but also forcing him to stop shooting. This seemed like more than a fair exchange. By now, we were hitting him fairly regularly and he began to lose way. I sensed victory, but was still wary of a late fight-back. We kept on pounding, as the range wound down. Finally we drew level. Still, there was no return fire, and the action ended up more like an execution by firing squad. So perished T-22, flying her colours to the last. Greater numbers and weight of fire had made up for lack-lustre shooting on my part. Would I be so lucky, in the next action? ...to be continued!
-
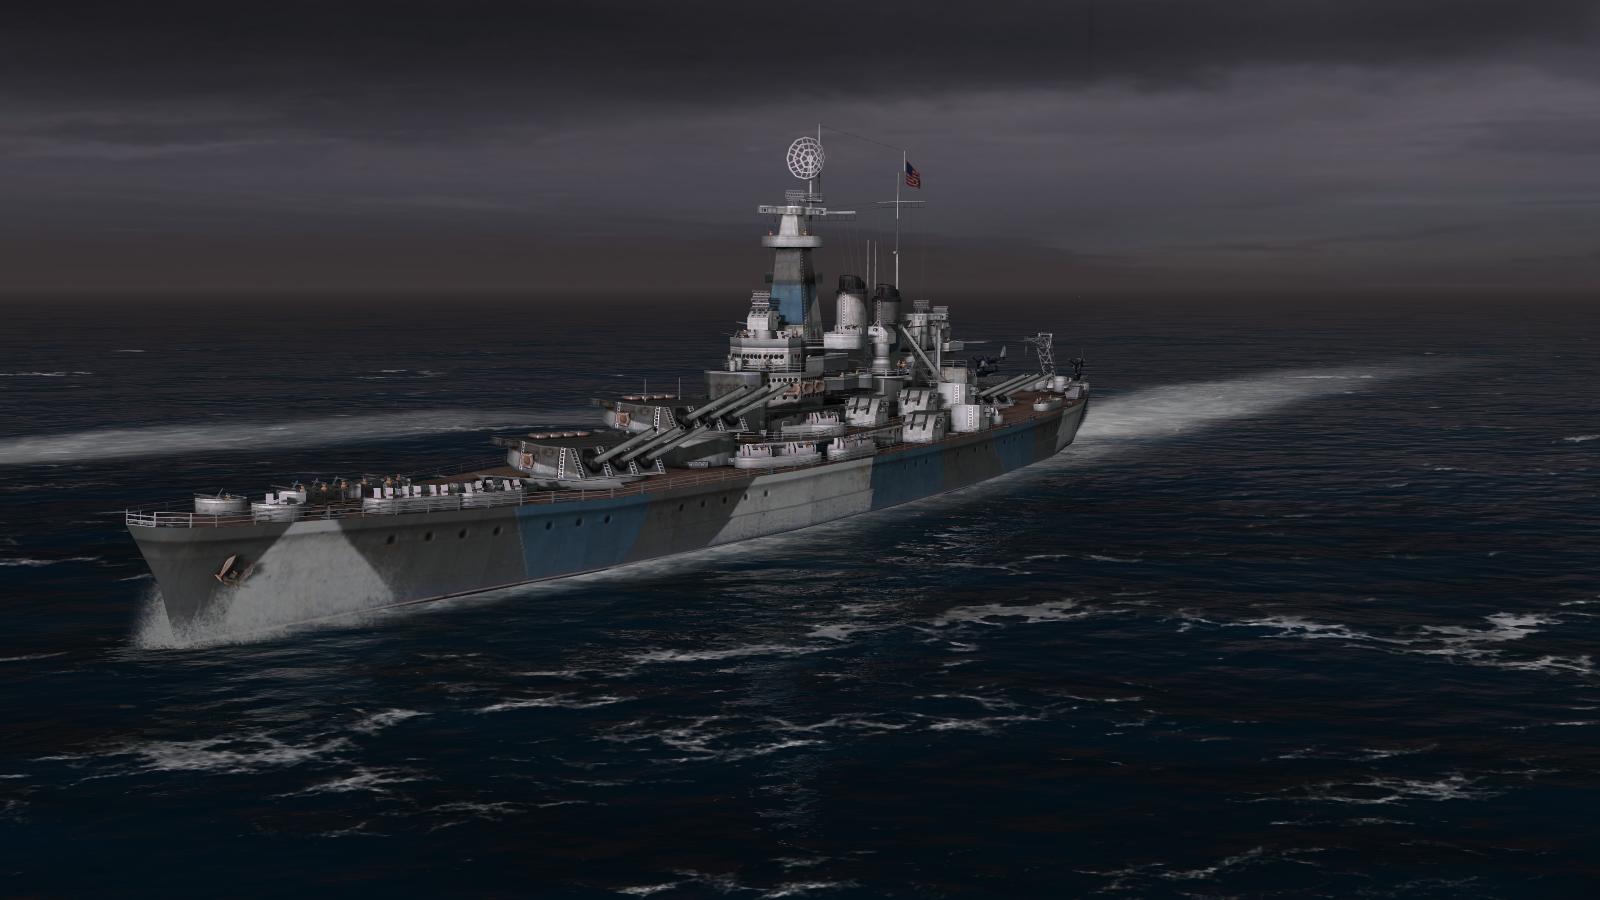
My sentiments exactly, guys! Playing the German static campaign, I quickly added a Type XXI U-boat to my mini-fleet, then a couple more. With its high submerged speed, it is a great force leveller against the heaviest of enemy units. In the later battles, where the RN typically deploys a surface force you just can't match, I shamelessly countered the Nelsons and USN North Carolinas with a trio of Type XXIs. They were definitely campaign-winners. However, as long as I dared, I used the Bismarck and Scharnhorst class, unless totally outmatched, because while the simplified subs enjoy the unrealistic deployment advantage and are highly effective, slugging it out with those big battlewagons is just so satisfying a challenge... I enjoy my tanksims and a range of combat flightsims so while I have grown up knowing my 'County' Class from my Southamptons and Leanders and am not impressed by arcade 'warship shooters', I'm by no means a total freak for WW2 naval warfare games. But now that I've been playing Atlantic Fleet solidly over several weeks, having quickly got used to the turn-based gameplay, I think I can now confidently state that I have never, ever got more fun from any PC game or sim I have played since I started (with European Air War, about 16 years ago), For all the simplification (eg representation of aircraft), limitations (eg inability to use main and secondary batteries concurrently) and weaknesses (eg sub ambushes of warships, and dangerous starting placement of carriers and their lack of a CAP) in the present release, this is still an amazingly immersive and more than adequately convincing simulation of WW2 naval warfare with great gameplay, sounds and visuals and a fantastic breadth and depth of content at a knock-down price. I just cannot recommend Atlantic Fleet too highly. I freely confess, I'm hooked and loving it. Gotta go...have another appointment to keep with the Kriegsmarine, specifically a prowling torpedo boat that needs some taming...
-
The enemy starts shooting back! In the next mission, I found employment for both of my destroyers. The battle was in the same general area, off the western coast of Norway, but this time, the enemy was the disguised merchant raider HK (Hilfskreuzer, Auxiliary Cruiser) Pinguin. The real Pinguin had a very successful career but was blown up in a duel with HMS Cornwall, with heavy loss of life, including many merchant seamen prisoners. Now, it would be up to Foresght and Echo to end the virtual Pinguin's depredations. Realistically but scarily, Pinguin had suceeded in getting quite close by the start of the engagement. The most famous example of a Germain raider maintaining her disguise until she was close enough to hit an enemy warship hard is of course Kormoran, which managed thus to sink HMAS Sydney. Now, here was Pinguin close abeam of Echo, too close for comfort. Perhaps indicating that we had seen Pinguin unmask her guns and torpedo tubes in good enough time (you can perhaps see the dropped screens in her sides, fore and aft), we had the first move. With this, I needed to blow Pinguin out of the water, before she torpedoed us or hit us hard with her 5.9" guns. I should probably have kept my nerve and launched torpedoes. But because AF won't let you do that and fire guns in the same turn, I was wary of being shot in return, while my tin fish were in the water. So, out of funk, I began a defensive turn to bring Echo's stern towards Pinguin, and from that position, let fly with 'X' and 'Y' 4.7" mounts. And missed. Even at close range, with just the initial 'firing solution' estimate available, your first salvo in AF is always likely to be a bit hit or miss...more than a bit miss, in this case. Both rounds went over. Now, it was down to Foresight. She was astern of Echo, with Pinguin on her starboard bow, and for no particular reason except my poor show with Echo, I decided that she should do something different. What that 'something different' turned out to be was a sharp turn to starboard, by which, as intended, I managed to open my 'A' arcs so as to give the enemy the benefit of a full broadside. This worked tolerably well and we soon had Pinguin burning. She got off two inaccurate rounds from her forward 5.9 inchers but took further hits from both destroyers. Pinguin then began making smoke and turned away. I swung Echo back onto a parallel course and thus set up a torpedo attack. In AF, I have quite often seen an enemy who is making smoke switch back to shooting, which can be a tad disconcerting and is always a risk. This time, I took that risk. It paid off. Pinguin didn't seem to take any evasive action and the four torpedoes I launched were more than enough to finish the fight, in dramatic style reminiscent of the real raider's end, when a four-gun salvo from Cornwall set off her mine store. AF's super sounds and visuals did the scene full justice. I love the look and sound of this great game! Despite a shakey start, we had turned up trumps and I had earned enough renown to buy another destroyer, the aptly-named HMS Encounter. I was quite glad to have all three ships in my next battle. ...to be continued!
-
The first missions The first couple of missions in the fifty-battle static campaign are basically target practice...which, having been offline for a week, I rather badly needed. For my RN campaign, here's where things kicked off - an encounter with a single enemy freighter, in the arctic seas north of Scandinavia. Not that AF does land, outside of the campaign maps, but weather, sea state and visibility do seem to reflect geography, as well as time of day if not also season. Merchantmen in AF are all unarmed, so this won't be too difficult, even for rusty ol' me. And though the enemy is displayed as having the initiative (= first move), it 'ain't gonna do him much good. The reason that there is no ship for my side visible on the LH side of the screen above is because I have not yet chosen one. Doing this is your first action. Not that you have much to choose from, to begin with. 'Renown' is what gives you ships in AF and at this stage, you have just your initial allowance - 6,000 points. The good news is that because the static campaign has no historical timeline, late war kit is available from the outset. The bad news is that 6,000 renown points doesn't buy you much of any sort of kit. To put this in context, if you fancy yourself at the helm of a 'Queen Elizabeth' Class battleship - state-of-the-art at the Battle of Jutland, whose 100th anniversary is at time of writing nearly upon us, with rennovations to HMS Caroline nearly complete, but even modernised, not the toughest RN battleship available in AF - you are 56,000 points short, at this early stage. Well OK, at least there is no danger of exceeding my ten ship active fleet allowance, or even my three-ships-per-battle limit. So, if I have to sink enemies to earn renown and have to start with just 6,000 points, how about a cruiser, then? No dice. Even a lightly-armed 'Leander' Class is well out of reach. All that I can afford is destroyers, escorts and subs. Even a modern destroyer is going to be a stretch, at over 5,000 points for a 'Tribal' or the 'L' or 'M' Class seen below; the later but slightly less exotic 'wartime emergency' builds are not much cheaper: Looking around, I decide to go for an inter-war destroyer. Starting with the 'A' Class and running up to the 'I' Class over the 1920s and early 1930s, these differed in detail but looked and performed much the same. I picked HMS Echo, four 4.7'' guns in single mounts and two banks of four 21" torpedoes. It's also worth noting that in the static campaign, RN destroyers also get a forward-firing Hedgehog anti-submarine weapon from the get-go, as well as depth charges, the former not at the cost of a forward gun. Anyway, I reckoned that at 4,800 points, these neat little ships were better value than the later destroyers available. I'd start by building up a small flotilla of these early destroyers, then start saving for a cruiser. The sooner I could meet the escalating enemy forces with like for like or better, the happier I would be. So I picked Echo and, Hobson's Choice, selected her for the fight. And there we were, seas light, visibility good, and this unarmed enemy ship about 18,000 yards off our starboard beam, on an opposite course. I went to full ahead and turned onto an intercepting course. My first rounds were soon on the way from the fowward guns, short at this extreme range but sending the enemy heeling into a turn to port. Despite the lack of a crosswind, it took rather a lot of rounds before I began to get hits. The merchantman completed her turn and then just ran for it. With my top speed of over thirty knots I was soon overhauling her, and after that it didn't last long. In this campaign mode, merchant and warship tonnage you sink earns your renown, on a points for tons basis. The extra 7,800 points from this easy prey would soon come in handy. I was still rather a long way short of a cruiser, but as planned, I added another pre-war destroyer to my budding flotilla; HMS Foresight, this time. She didn't have long to wait, for her first action. This was in the form of another enemy freighter, this time off Noway's North Sea coast. I committed her on her own - there is no possibility of an un-mentioned enemy ship appearing, but you can be hit unexpectedly by enemy aircraft. And I didn't want to risk both my warships, in an action that one would be able to handle. Which Foresight duly did. The enemy vessel was a rather more modern steamer this time. Seemed a shame to smash her up, but virtual war is virtual war. So far, so good. I didn't know it yet, but the next opponent was to mark the point from which things began to get dangerous. For me, there would be no more target practice. ...to be continued!
-
Did the Battle of Jutland Really Matter...?
33LIMA replied to Hauksbee's topic in WOFF UE/PE - General Discussion
As John Keegan records in 'The Price of Admiralty', 'At 9.45 that evening [1 June, after the Grand Fleet was back at Scapa and Rosyth] Jellicoe reported to the admiralty that his warships were ready to steam at four hours' notice. That signal writes the strategic verdict on Jutland. Britain's navy remained fit for renewed action, however soon it should come. Germany's did not...Warspite, Barham and Malaya had suffered damage requiring dockyard attention but the battleship fleet itself was almost unscathed; and despite losses, the Battlecruiser fleet on 1 June still outnumbered the German 1st Scouting Group which, moreover, was crippled by damage. The German dreadnought battleships had also suffered grievously. Koenig, Markgraf and Grosser Kurfurst all needed major refits...and the German battle line could not have met the British at four weeks' notice, let alone four hours, except at risk of outright defeat.' With Scheer's basic plan of a U-boat ambush having completely fallen flat, Jutland doesn't much read like even a tactical victory for the High Seas Fleet, more an inconclusive battle, where better German tactical control and battlecruiser equipment denied the Grand Fleet the victory their intelligence and numbers advantages should have enabled. This is the best book I've read on Jutland - 'The Rules of the Game' by Andrew Gordon: https://www.amazon.co.uk/Rules-Game-Jutland-British-Command/dp/014198032X Like Peter Townsend's 'Duel of Eagles' on the Battle of Britain, the neat thing is the author's fascinating recounting of the history which led to the battle and which in turn, explains why the Grand Fleet fought as it did, and not as Nelson had done in a different era. Notably, there had developed an obsession with the latest version of the same signal book (Popham's) that had helped, but not so circumscribed, Nelson. This was thought to be so good that it enabled Admirals to excercise complete and effective control of fleets in action, so fostering that culture. Gordon recounts how, with supreme irony, the one man who might have led the Navy down a different path in time for Jutland, Admiral Sir George Tryon, had developed an approach to more imaginative, independent action that would have led to Jutland being fought very differently, but died in the famous collision between Camperdown & Victoria, caused by his own misjudgment in orders for a fleet manoeuvre, compounded by the reluctance of his captains to question him. From Wikipedia, as per Gordon's account: 'Tryon's TA system — and with it his attempt to restore Nelsonian initiative into the Victorian-era Royal Navy — died with him. Whether or not Tryon had intended the system to be in effect at the time of the accident, traditionalist enemies of the new system used the collision as an excuse to discredit and bury it...Heavy reliance upon detailed signalling — and the ethos of reliance upon precise orders — continued within the navy right through to the First World War. Several incidents occurred where reliance upon specific orders or signal failures allowed lucky escapes by the enemy in that war, so that had the sinking not occurred and Tryon survived to continue his campaign, there might have been a significant improvement in British performance.' -
IIRC, to get rid of the 'AWACS effect' of the map view displaying icons for friendly and enemy aircraft, which I think is the single most important map mod because it is not merely cosmetic, I commented out the lines in the [Map] section of the file [user-name]/Saved Games/ThirdWire/FirstEagles2/Flight/MISSIONCONTROL.INI, shown in bold below, by adding two forward slashes to the start of each line after opening the file in Wordpad: [Map] UseRelativeAlignment=FALSE RotateRunwayHeading=FALSE MapIconSize=32 //FriendlyIcon=MapFriendlyIcon.tga //EnemyIcon=MapEnemyIcon.tga FriendlyRunwayIcon=MapFriendlyRunwayIcon.tga EnemyRunwayIcon=MapEnemyRunwayIcon.tga RadarIcon=MapRadarIcon.tga WaypointIconSize=16 WaypointIcon=MapWaypointIcon.tga IPIcon=MapIPIcon.tga TargetIcon=MapTargetIcon.tga WaypointLineColor=0.914,0.777,0.230 GridLineColor=0.0,0.0,0.0 GridTextColor=0.0,0.0,0.0 MinorGridLineColor=0.0,0.0,0.0,0.8 MinorGridTextColor=0.0,0.0,0.0,0.4 TextFontName=Arial TextSize=12 I don't know about the text labels, but I THINK they may not appear in my FE2 maps because instead of using Ctrl+D (or whatever it is, that turns off labels and target info in the 3d world) I edited another .ini file somewhere, in a similar fashion, so that they and the target cone/marker box are permanently disabled - these are leftovers from the jet-age base game that I also consider should be completely absent in a WW1 sim. I'll post again here when I work out what that was.
-
Could be a complete co-incidence, but last night, flying home from Spain to UK in an A320, they announced at the start of the flight that the forward toilet was out of service, due to a 'mechanical' fault. I wonder if it was just this aircraft, or if some operators are disconnecting something up there, as a precaution pending more info.
-
Yeah, looks quite interesting! But they really need to get rid of German sailors acknowledging orders with 'Copy!', which instantly flushes the immersion down the U-Boat toilet, for me anyway. What's wrong with 'Jahol'! or 'Verstanden!', or whatever it would have been in real life?
-
Battle of Britian Simulators for 75th anniversary
33LIMA replied to sixstrings's topic in IL-2 Series / Pacific Fighters / Cliffs of Dover: General Discussion
Hopefully you have also found this, essential to get the best from BoB2/WoV: http://www.a2asimulations.com/forum/viewtopic.php?f=10&t=51298 Despite also being something of a nut for 'The Battle' I have not so far really warmed to BoB, now BoB2. Despite now having the ability to fly something resembling a conventional virtual pilot, historical squadron-based career, the 'sim within a wargame' aspect never really caught my imagination. And the graphics, though better now, still look a bit primitive and/or washed out, compared even to Il 2 '46 with its still rather beautiful lighting effects. And the rather un-natural formation-keeping still jars a bit. Still, BoB2 looks good enough and the air-to-air AI feels incredibly human. And the breadth and depth of its coverage of the Battle beats everything else into a pretty distant second place. -
There's some discussion of RAF Fighter Command squadron strengths 1941-42 here: http://www.rafcommands.com/forum/showthread.php?9472-RAF-Fighter-Squadron-structure ...and here: http://www.classicwarbirds.co.uk/articles/typical-royal-air-force-squadron-and-tactics-during-the-battle-of-britain.php I once had a photocopy, now lost, of an RAF manual describing the 'Fighter Area Attacks' - 'Johnny' Johnston also covers them in 'Full Circle' - and they are exactly as described in the second link - three-plane 'vics' lining up astern of 3-plane vics of bombers and shooting until ammo was gone, targets or attackers shot down then the next vic going in, rinse and repeat. There was also stuff based on 'Lanchester's Law', concentrating attackers against defenders. Twelve aircraft was probably the ideal flying strength but more stringent post-war conditions notwithstanding, I doubt an RAF WW2 fighter squadron would have had just 12 aircraft on its books, if at full strength - the figure given above of 16 seems about right. No way could they routinely have put 12 planes in the air in wartime, with no reserve. Anyway, I understand the German operational unit was the gruppe not the staffel, and that German staffel size tended to be below an RAF squadron (certainly a USAAF one, I recall from Richard E Turner's 'Mustang Pilot' that the USAAF squadrons of 1944 had what I recall read like a huge number of pilots and aircraft, rotating the former for any given mission). Comparing 'squadron for squadron' is probably one of the less useful ways of looking at the BoB. The common practice of Park's 11 Group of sending squadrons into action singly, compared to Leigh Mallory's advocacy (supported by Bader) of 'big wing' tactics, was more of an issue. The famous (ironic) jagdflieger September 1940 comment 'Here come the last fifty Spitfires!' when running into serious oposition on one of the big London daylight raids stems not from comparative squadron strengths but from several factors, mainly (i) that the British aircraft industry was in 1940 seriously out-producing the Germans, as far as single seat fighters was concerned (ii) serious Luftwaffe underestimation of that and overestimation of Fighter Command losses (blame Beppo Schmidt?) and (iii) as 'the narrow margin' wasn't really that narrow, Fighter Command had plenty of fighter squadrons based further north which were able not only to relieve hard-pressed 11 Group units, but to pitch in to defend London, just about the time the 109 pilots were waiting for their red fuel warning lights to come on. Back to reaching for the sky, I was interested to read a few years back in an issue of 'After the Battle' that it's now suspected that Bader wasn't brought down by a colliding 109 as in the movie, nor indeed shot down by one, but from astern without warning by a fellow Spitfire pilot, in error obviously. It's said Bader worked out as much while in Colditz, but kept quiet as he saw no point in raising hackles or blushes.
-
Re-living another classic WW1 air war memoir, in Wings over Flanders Fields! This is a rather late addition to my earlier series of WOFF mission reports inspired by real-life WW1 aircrew memoirs. The inspiration in this case is ‘Flying Minnows’ which was, in turn, a late addition to my library, picked up the other week from a local second-hand bookstore. The book was first published in 1935 under the author's pseudonym ‘Roger Vee’, my 1979 reprint appearing under the author’s real name of Vivian Voss. Though sharing the surname of the famous German ace, this Voss was a South African, with family ties to my own home town of Belfast, in Northern Ireland. The man and the book ‘Flying Minnows’ – which I haven’t finished reading yet – begins with Voss’s flying training in 1917, in Canada, having crossed from the USA where he was studying at John Hopkins University, Baltimore, to join up. From his account, the standard of basic training seems only slightly evolved from the beginning of the war. At Camp Mohawk near Deseronto, Voss learns to fly in the ‘Buffalo Curtiss’ type JN-4A, which is what we today would commonly call a Curtiss ’Jenny’. Slightly more advanced training then follows, after a move to Camp Borden, flying both the 'Buffalo Curtiss’ and another ‘Jenny’ they called the 'Canadian Curtiss', with reduced dihedral and a normal joystick instead of the Buffalo's one with a wheel for aileron control. Amongst other things, Voss receives instruction in artillery spotting, providing a usefully detailed description of the basic procedure, including examples of the actual Morse Code signals used. He receives his commission in Toronto then leaves via steamer from Halifax for Liverpool. In England, flying first at Shawbury in Shropshire, Voss records briefly his impressions of other types he flies during ‘continuation training’ there and later. He says of the Avro 504 trainer ‘It took me some time to get used to these rotary engines, and to the extermely sensitive "balanced" rudder. But they were remarkably stable machines and easy to land.' Of the Sopwith 1 1/2 Strutter, he says 'They were easy machines to fly', capable of being trimmed so they could be flown 'hands off' - literally: he tells the story of a Strutter which landed in a field 70 miles behind the Lines, and how the officer who walked over to offer assistance found that '...the petrol tank was empty, but the airmen needed no help. Both the pilot and the observer were dead.' Voss moves to Netherhavon on Salisbury Plain and fears he is doomed to artillery spotting rather than a fighter pilot career, when he hears they have RE8s there. However, he soon finds out he's destined to be flying Bristol Fighters and that these are not the obsolete Bristol Scouts he had known off, but modern 2-seaters, said by some of his fellows there to be '...considered to be the finest fighting machines ever built.' Taking up a BE2e at Netherhavon for the first time, his instruction consists of being told 'Don't spin or loop it, as it won't stand it.' He finds the BE is '...an easy machine to fly, and did several half rolls (Immelmann turns) and vertical banks with it. It was very light and felt like a toy after the the heavier 1 1/2 Strutters I had been flying.' The DH6 trainer also on station is ‘...a very slow machine...hideously ugly...commonly known as a 'Clutching Hand' or a 'Crab'. I have seen Crabs flying against the wind with such low air-speeds that they were actually drifting backwards relative to the ground.' Of the RE8 he says 'It was the heaviest machine I had yet flown...fortunately all the serviceable RE8s were crashed just about this time, so I was put straight on to Bristol Fighters.' Of his first solo in the latter machine, Voss says 'I felt at home at once...the engine, a 250 hp Rolls- Royce, was infinitely more powerful than anything I had come acrross so far. It gave a full-throated roar and shot away across the aerodrome and then up, soaring into the air like a great eagle. She was a massive machine but so beautifully designed that she did not feel heavy on the controls. She responded surperbly to the least touch of the stick or rudder-bar.' Such are the impressions that we WW1 air war afficionados love to savour! Voss's most memorable experience from this time is when he’s sent on an ‘altitude test’ to confirm he can tolerate the conditions. This he manages, but his base is clouded in below him. Having without visible reference points drifted well south in his wide spiralling ascent, he ends up coming back down through the overcast to find himself well out over a blustery sea, land no-where in sight. Luckily, he runs out of petrol close to a solitary fishing boat, which quickly rescues him. Completing his training, Voss is posted to France and is on operations from February 1918 to the end of the war, flying first with No. 48 Squadron, then with 88. With the reticence that was typical of the times, the squadrons are not identified by number and individuals are identified by more pseudonyms; but all is revealed in detailed appendices by renowned WW1 author Norman Franks, which include lists of casualties and claims for both squadrons during the author’s period of service. I haven’t done more than skip through the rest of the story but from what I’ve seen, it’s a fascinating one, different from but well up there with the likes of Norman MacMillan’s ‘Into The Blue’ or Duncan Grinnell-Milne’s ‘Wind in the Wires’. Based largely on an incident during training, one online review unfairly slates Voss for being a ‘chinless wonder’ type of officer, looking down his nose at the ‘other ranks’ - but leaving aside the fact the review mis-reports or mis-represents the incident, Voss is a man of his times not ours. And a brave man at that. To me, he displays a real charm and a self-effacing sense of humour. He does not disguise his fears, while maintaining the usual (for that era and that author base) stoical stance when recounting some of the crashes and other nastiness he encounters. I’ll not spoil the book for anyone else by saying more...besides, I haven’t finished it myself, yet! But it has already prompted me to start another Bristol Fighter campaign – I think my last serious one of these was in Over Flanders Fields, WOFF’s predecessor, so this outing in the Bristol is long overdue. The campaign Though Voss’s war started in early 1918, my favoured period for WW1 in the air is 1917, taking in ‘Bloody April', the RFC’s subsequent resurgence, and the appearance of many classic types like the Albatros D.III and D.V, the Pfalz D.III and Fokker Dr.1, and on the Entente side, the SE5 and the Camel...and of course, the Bristol Fighter. I decided to start in March 1917, with the type’s debut at the front with 48 Squadron. A side-benefit of this is that my low-spec PC isn’t going to be over-taxed by the higher volumes of air activity generated by WOFF for later-war periods, or need me to dial back my graphics settings. At this point, we have the early F2A version (tho WOFF visually represents this with a typical, later F2B). And our ranks include as a flight leader no less a man that William Leefe Robinson VC, feted back home as the slayer of a ‘zepp’ raiding England, in fact not a Zeppelin but the Schutte-Lanz airship S L11. Sure enough, WOFF’s order or battle lets me not only fly with the same squadron Voss was to join, but from its inauguration at the front and with Leefe Robinson on its duty roster. And of course WOFF puts us where we should be, at the airfield of la Bellevue. Naturally, I’m hoping that's as far as the recreation of history goes - because I want to avoid the fate of the squadron in what was reported to be its first foray over the Lines into enemy airspace (termed an 'Offensive Patrol', which Voss reminds us was known at the time as a 'O Pip'), when it met Manfred von Richthofen’s Jasta 11 and lost four out of six, including Leefe Robinson’s Bristol. The first mission As befits our first excursion since arriving at the front, our opening mission is a trip up to, but not over, the Lines. Having no particular interest in formation flying and preferring the extra tactical challenge of the flight leader, I have selected ‘Always lead’ so I’m at the head of the four Bristols for this trip. Bad weather – WOFF’s option to replicate the effects of historical weather, is another feature of this truly great sim – 'washed out' the previous day’s flying, so I’m keen to get away and at the Hun. I check the controls and start her up, the others doing likewise, including ‘A’ Flight, which will have three machines operating in loose support in the same area. I open her up and off we go! The ground is soon falling away behind us and I’m relishing the powerful, low snarl of my big Rolls Royce engine, such sounds being another of WOFF’s outstanding features. Up ahead, there’s still a lot of cloud, and if we go for our briefed altitude of 7,500 feet, I’m not yet sure whether we’ll be below, above or amongst all the white stuff. I’ll worry about that when I get up there, I decide. At a couple of thousand feet, I throttle back and level off while the others catch up. We make a series of gentle climbing turns, opening up and climbing harder as the formation comes nicely together. ‘A’ Flight slides across behind and below us and is last seen as a group of three dark specs, to our left and somewhat lower down. As we gain height, I settle onto a course that will take us to our assigned turning point above, but not across, the famous Lines. Grey and white clouds gather all around, but we plough on. The cloud stays fairly well broken and visibility is acceptable at our patrol height, which we reach after a long climb. With no ‘warp to next waypoint’ feature in WOFF, I much prefer to fly in real time. Even with autopilot, I dislike flying in accelerated time, but the short flights make this bearable. This, and the fact that if there’s a sim besides WOFF which captures with such uncanny depth the feeling you get from so many accounts of flying over the front in the First World War, I have yet to find it. Even over my own side of the Lines, with contact with the enemy not especially likely and with enemy fighters less so, I was kept busy enough scanning the skies above, around and below, in between admiring the view. And there is much to admire. For one thing, the Bristol, always one of the best-rendered kites in OFF, looks better than ever, in WOFF. As does the landscape, in this case including the battered town of Arras, near the Lines below us and soon to give its name to the battle that will spawn 'Bloody April'. The cloudscapes are equally good (especially with Arisfuser's cloud mod). They're not volumetric and sometimes it shows; but to my eye, they are as good or better than anything else in the business and their presence and appearance adds massively to the feeling that 'you are up there', over the front and at the mercy of everything from the elements, to the Archie (AA fire) and of course, the wily Huns, in the sun and elsewhere. But on we go, the eight of us, pilots and gunners, in our big new Bristol Fighters, ready for anything...we hope... ...to be continued!
-
From the album Combat Sims
