


33LIMA
-
Content count
3,749 -
Joined
-
Last visited
-
Days Won
7
Everything posted by 33LIMA
-
From the album Combat Sims
-
From the album Combat Sims
-
From the album Combat Sims
-
From the album Combat Sims
-
It's late October 1941 and we've won - Britain has sued for peace! Might have been sooner, but for the first few months, I didn't bother building up my fleet and fought on with what I had at the start. On one of the last missions, my North Sea patrol ran into an 'R' class battleship with a destroyer escort and I thought we were done for! However, by putting about immediately and making smoke, we out-ran the old battleship, called in the Stukas and then turned on and sank the destroyer, which had unwisely kept in contact, after the bomb-damaged battleship fell further behind. The final stats were reasonably satisfactory and the balance sheet well in the Kriegsmarine's favour. All hands, slice the mainbrace! Unsurprisingly, some elements of the campaign are not entirely historicaly, from smaller and rather badly-escorted convoys which don't scatter when they should and have un-manned stern guns on merchantmen, to Do 217s and Liberators in service a bit too early. And it's basically a wargame not a warship simulator, with a lot of things dealt with in the abstract. But the Atlantic Fleet dynamic campaign certainly captures the look and feel of the real thing and as something of a minor student of the period and its ships and battles, I have very thoroughly enjoyed playing it. Now, to try it from the opposite side, and see if Britannia can indeed rule the waves!
-
Mission reports, further illustrating single battle, dynamic & static campaign gameplay, are here: Battles of Sept Iles and the North Cape Battle of the Atlantic RN static campaign
-
Victory can't be far away now...the progress bar has been entirely in the red for the last couple of turns, indicating we have reached and sustained our target rate for the destruction of enemy shipping. Emboldened, while a submerged U-Boat attacks the far side of a convoy, I attempt a Kretschmer-style night surface attack in another boat, from the far side... ...but am forced to dive when an escort on the oposite side spots me and starts shooting. I have evidently forgotten my Silent Hunter/Das Boot...I should have waited till the moon had gone behind a cloud! We still manage to wreak considerable havoc upon the convoy, in concentric submerged attacks... Over the waves, my strike rate is improving with torpedo bombers, even against destroyers, which I usually manage to hit only with Stukas. I even manage to set up an attack with one Do 217 dropping a second fish from starboard while another one is in the water, coming in from port. The confused destroyer doesn't seem to know whether to dodge left or right and in the end he does neither; both torps hit home. On the surface, Bismarck and Gneisenau have been repaired and are back in the Atlantic, each one now operating with the other's sister ship (Tirpitz and Scharnhorst). We patrol the seas fearlessly, as so many of the Royal Navy's battleships and battlecruisers are now under the waves, snapping up several convoys. Truly, these are red letter days for the Kriegsmarine. soon I think, we will be dictating our terms to Mister Churchill!
-
This may be worth a try. With Wordpad or similar, open the file (Vista path follows, adapt for Win 7 if/as needed) [your user name]/Saved Games/ThirdWire/FirstEagles2/Options.ini. In the section [GraphicsOptions], check this line: UseAdvancedShaders=1, as shown below. If it reads 'UseAdvancedShaders=0', overtype the 0 with a 1, save and close. [GraphicsOptions] DisplayDeviceID=0 DisplayWidth=1600 DisplayHeight=900 DisplayDepth=32 AspectRatio=1.777778 AntiAliasing=0 UseAdvancedShaders=1 ForceDX9=FALSE ForceVSyncOff=FALSE LensFlare=0 DetailLevel=4 ObjectDetail=2 ObjectTexture=3 CockpitTexture=2 CockpitMirrors=1 CockpitReflection=1 EffectsDetail=2 TerrainDetail=2 TerrainTexture=2 HorizonDistance=1 GroundObjectDensity=2 WaterDetail=2 CloudsDetail=2 Shadow=2 Setting a shorter horizon distance may help - IIRC, setting for setting, FE2's settings are more, well, distant. IIRC there is an unresolved issue that if you have the shadows set to high (the one that gives dynamic shading in the cockpit view), the FPS takes a nose dive in that view if you are close to the ground and your own aircraft's shadow is in view/being rendered. The above settings are for a GTS 250 and give about 20-30 FPS with stock terrain
-
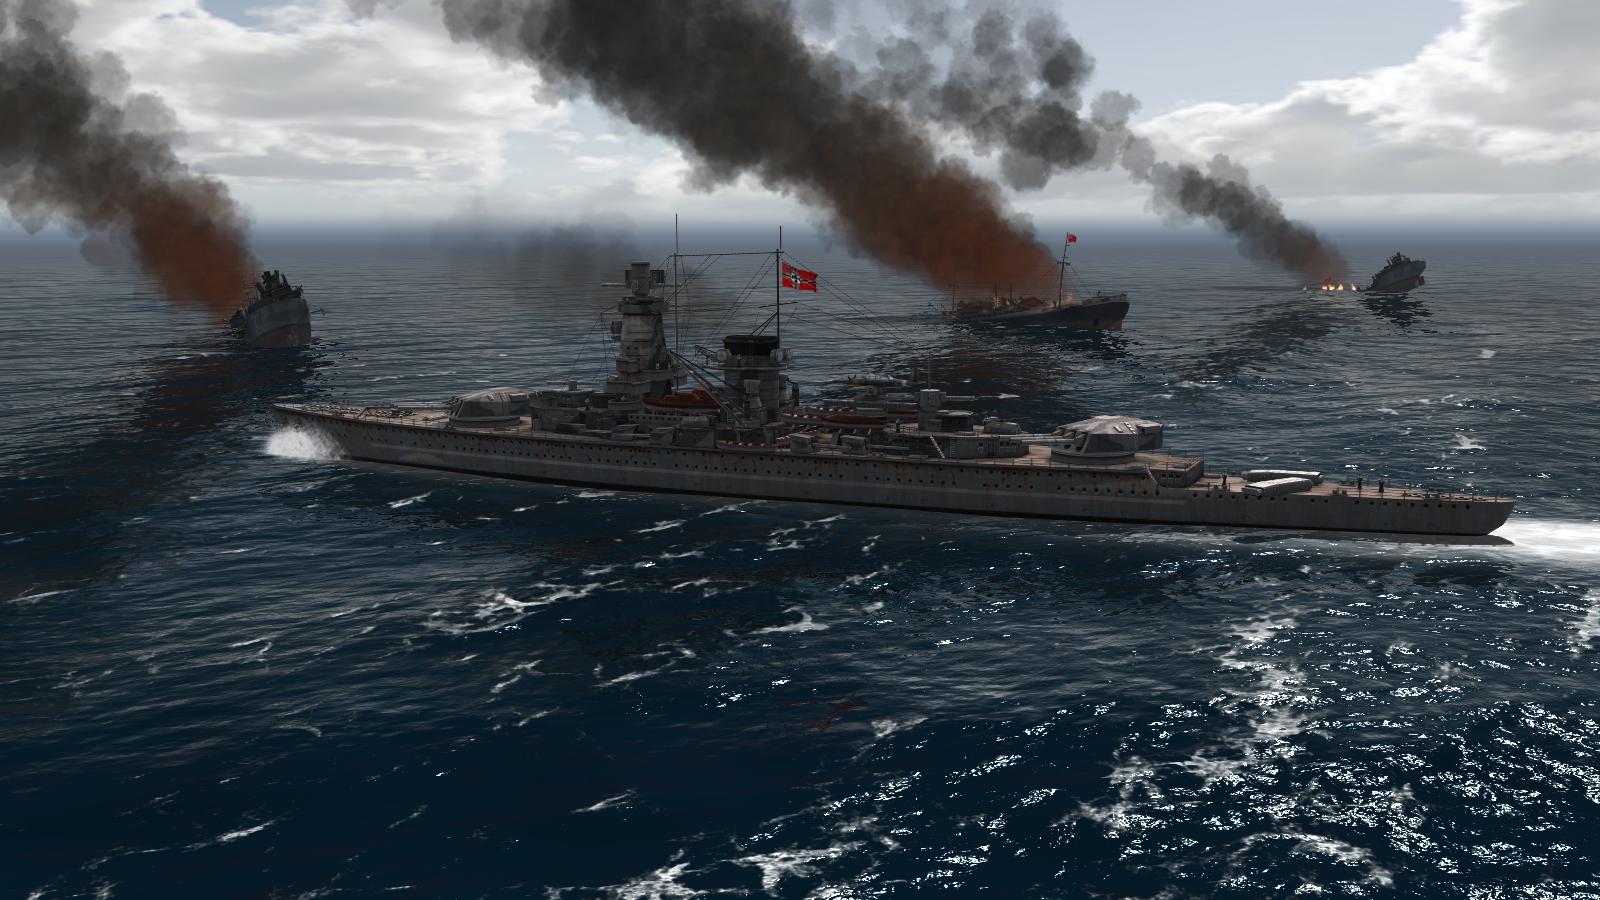
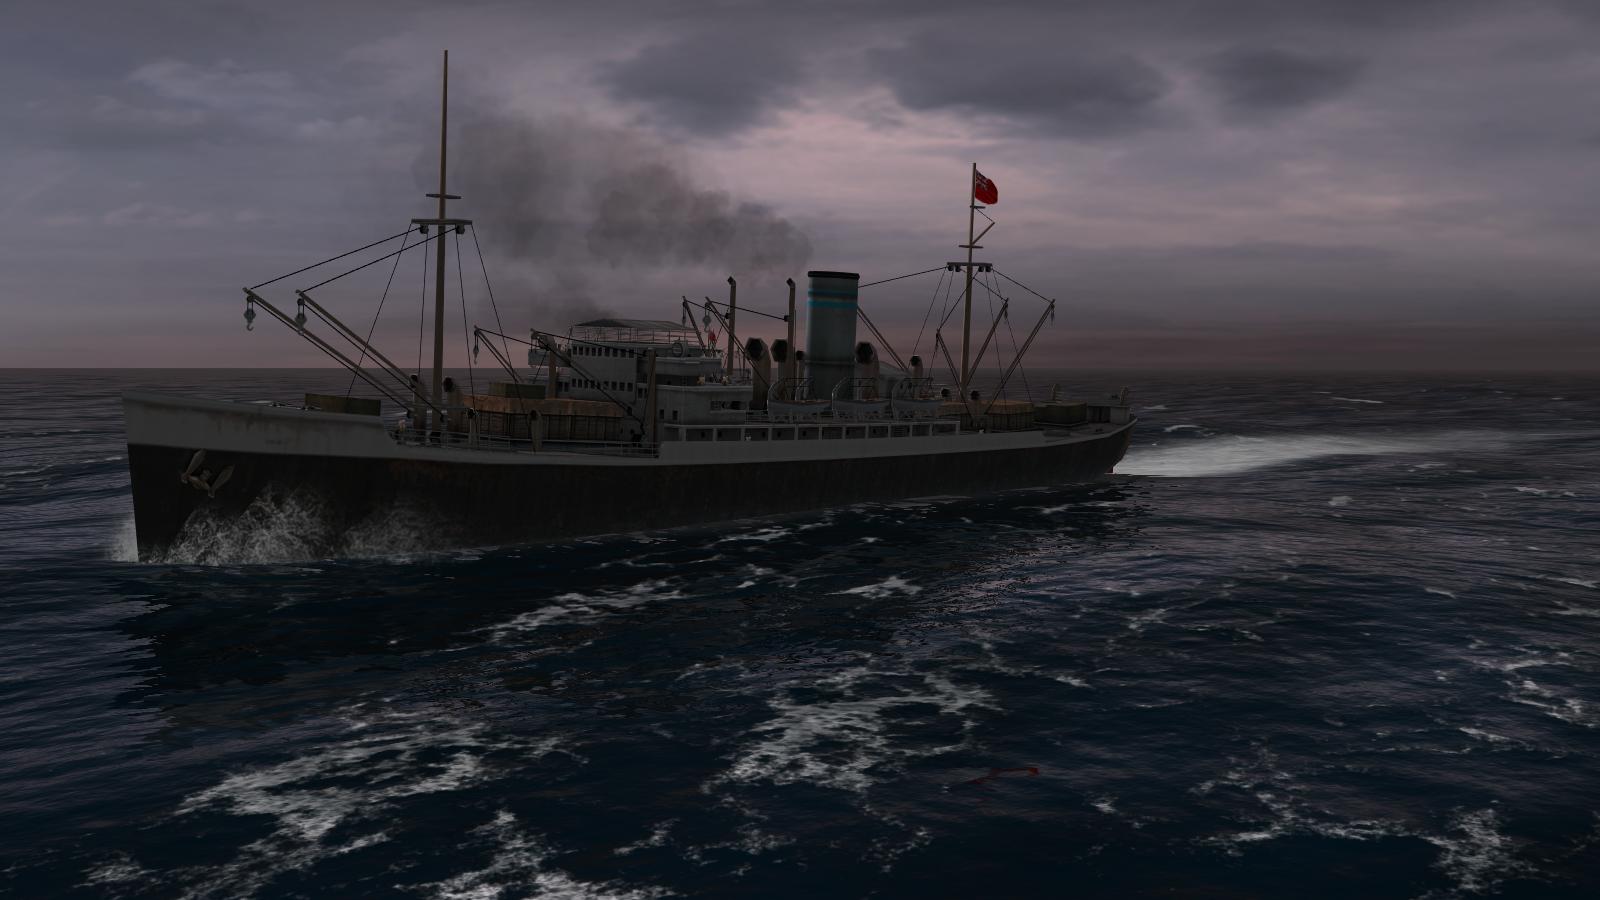
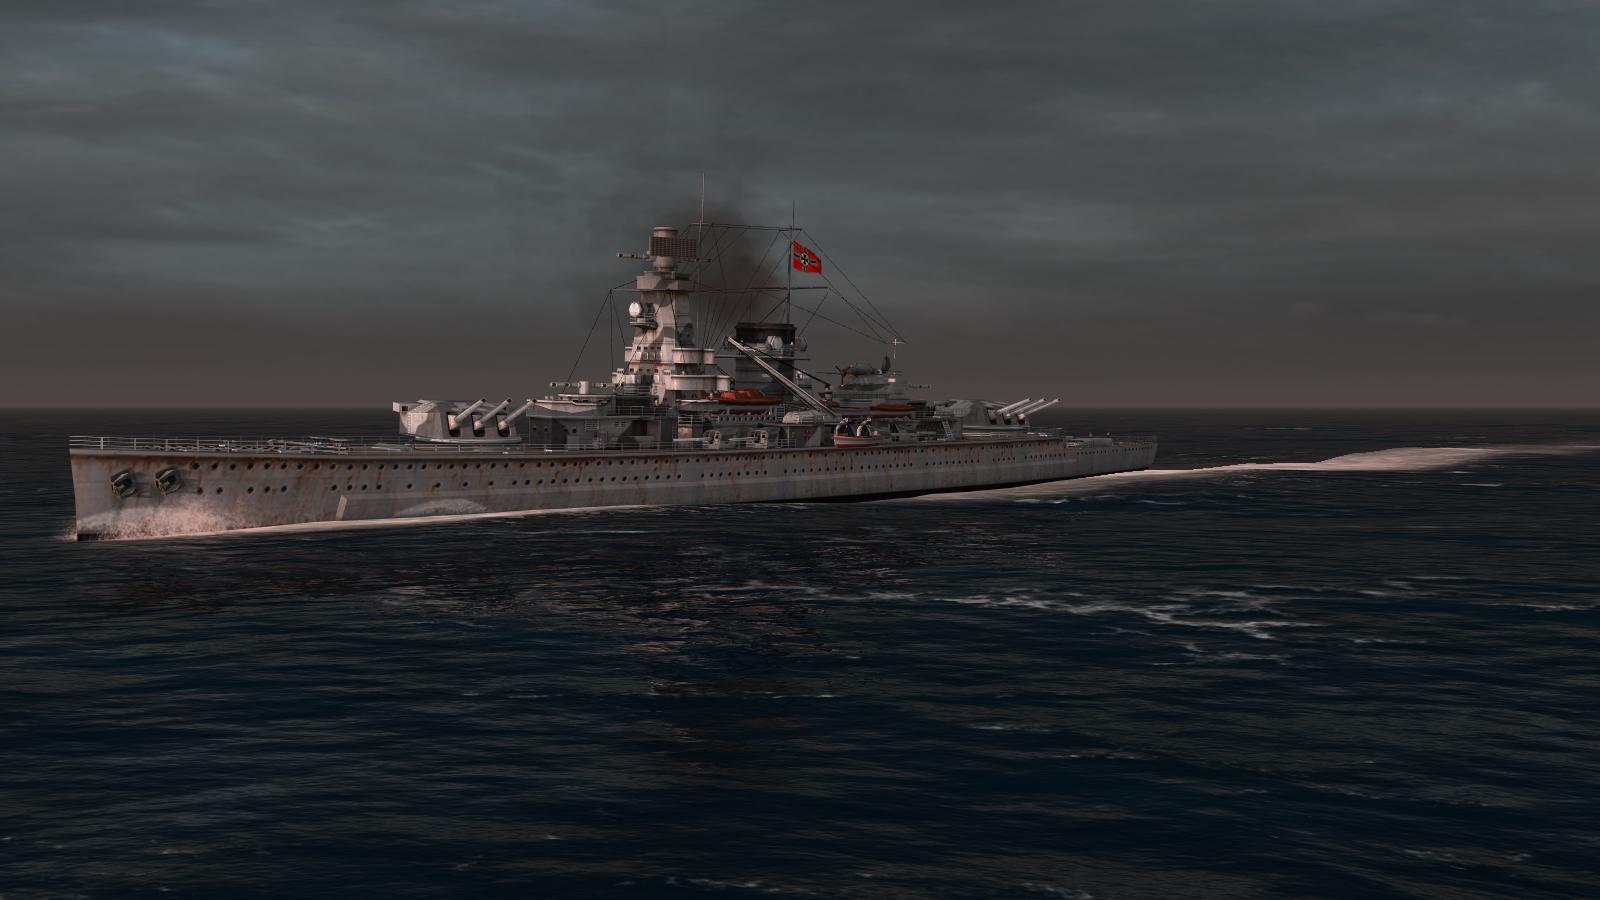
Condors to the rescue! So, my German Bight patrol, well used to beating up enemy destroyer patrols, is now in a spot of bother, facing an 8-inch cruiser. I'm rather too close to risk running for it, but luckily, close enough for Nurnberg's 5.9-inch guns to return fire, while destroyers Theile and Schulze manoeuvre independently to get into range of their 5-inchers, and later if they're lucky, their torpedoes. And I'll need all the help I can get, as Cornwall's shooting is rather accurate, from the first salvoes... Fortunately, we are all within range of friendly air cover and a couple of FW 200 Condors is in fact providing cover just for us. We call them in, for a strike on Cornwall. The first bombing run misses, allowing Cornwall to get in some more accurate shooting at Nurnberg, fortunately without doing any damage... I take a bit more care judging the bomb release point next time, and the second Condor's bombing run is bang on... Cornwall has been hard hit and her fire drops off. She sheers away, still burning. Now's my chance, to press home this unexpected advantage. My destroyers close for the kill as Nurnberg showers Cornwall with full 5.9-inch salvoes... Cornwall gets the fires out but is still in trouble. We already have her range, so her belated smoke screen doesn't help her much. I sense victory! The only question now seems to be, will Cornwall survive the barrage of gunfire long enough for the destroyers to get into torpedo range? It looks unlikely. With no return fire, Nurnberg closes the range cautiously, salvo after salvo straddling the now-listing Cornwall. As the range winds down, the destroyers start shooting, too, adding to Cornwall's misery. There's a moment of alarm as Cornwall's two rear turrets resume firing. But her shooting is now erratic and soon she is simply fleeing, under cover of another smokescreen. Suddenly, there's a massive explosion admidships, as another salvo from Nurnberg finds its mark. Just as my two destroyers are coming abeam for their torpedo attack, Cornwall slows to a halt, rolls over to starboard, and begins to slip beneath the waves. Thank goodness that co-operation between the Luftwaffe and the Kriegsmarine in Atlantic Fleet seems to be better than it sometimes was, in real life! At any rate, I'm finding the Battle of the Atlantic compaign utterly addictive, like no game I can remember, in fact. There are certainly elements which depart somewhat from historical events, but it's more than sufficiently close to capture the look and feel of its real-life setting. Brilliant! Some more recent scenes from my Kriegsmarine dynamic campaign... ...a wolf pack completes the destruction of a small convoy on the surface, after sinking its escort (which is a bit too easy to do, and those merchantmen with stern guns just have them for show)... Here's one less brand-new King George V class battleship for the kinder in the big ships to worry about... I gave into temptation when Spring 1941 arrived, commissioned both Bismarck and Tirpitz, and sent them out into the North Atlantic together, with a couple of destroyers for company... The little battlefleet's destroyers come in handy, running down merchantmen whose escorts the big battlewagons have smashed... We fall in with a fleet carrier, and screened by smoke from escorting cruiser and destroyers, she manages to scramble some Swordfish before going under... The 'stringbags' who get off have no-where to land, but that doesn't stop them from attacking... Another new day, another battle, somewhere up ahead... One time, it's a convoy with a KG V class battleship for company, HMS Prince of Wales. Disengaging well within her range is risky, so even though it's against standing orders to risk a fight with a battleship, we take her on... ...and win! In the previous battle, against escort destroyers, my shooting was all over the place. But this time, admittedly against a bigger target, I can hardly miss. All but the first salvo gets at least one hit, with only a single 14-inch shell reaching Bismarck, in return. I make full use of air cover, where I have it, including Stukas near friendly territory... Our Dornier 217s can come with bombs (released in a shallow dive) or torpedoes, but though they are longer-legged, they're not as accurate as the Stukas... Longest-ranged of all the friendly aircraft we may have available are the FW 200 Condors... As for the enemy, in addition to Sunderland flying boats, we have already started to see some Liberators, even though the USA is still months away from entering the war! Serves them right, if our flak puts paid to them... It's May 1941 and while we have lost Scheer, Hipper, Lutzow and several U-Boats, we have sunk two battlecruisers, several carriers, about half-a-dozen battleships, a bevy of cruisers and many destroyers and escorts. And most importantly, the tonnage war seems to be going well for us. Whatever the morrow will bring, both U-Boats and the high seas fleet are ready to meet it.
-
If you want an alternative view of the Battle of Britian, I would recommend 'Who Won the Battle of Britain?' by Wing Commander HR 'Dizzy' Allen. He was a fighter pilot flying Spits during the Battle, and an airman who knew his trade, in terms of the strategic side. He is not impressed with Dowding's tactics, for various reasons. Allen concludes that whoever won the Battle, the Luftwaffe did not lose it, and if any force was defeated, it was No. 11 Group. He also concludes that the Luftwaffe did in fact achieve air superiority over South-East England in late August and early September 1940, and that the reason that Sealion was nevertheless not launched was because, as the German Navy at least realised, it was not a feasible operation of war, since air superiority over the Channel would not have prevented the Royal Navy from winning the day. More recent students of the Battle like Stephen Bungay in 'The Most Dangerous Enemy' seem generally to agree, taking the view that the British would have to have done something extraordinarily daft, to lose. And that contrary to the usual stereotypes, it was the British who had prepared methodically for the 'Air Defence of Great Britain' and the Germans who tried to 'muddle through'. Which is just to add a bit of historical perspective, and in no way lessens the remarkable fight put up by RAF Fighter Command. In these more egalitarian days, we like our heroes to be 'men of the people' but they could just as easly have some rather unpleasant traits, Monty and Patton come to mind.
-
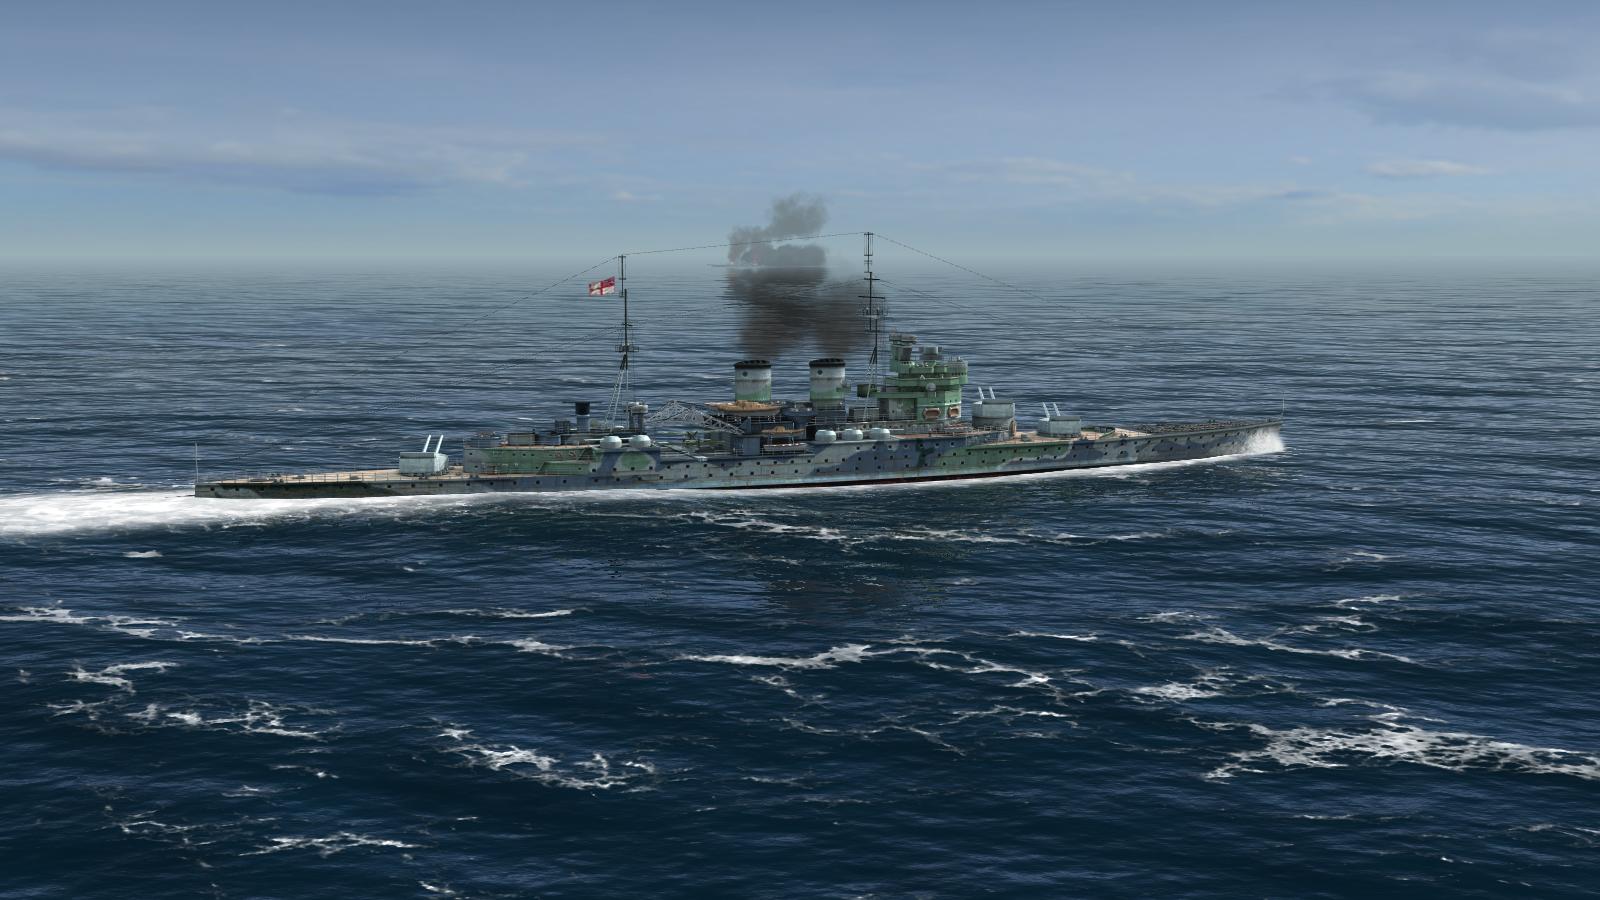
Cruiser -vs- cruiser! Cruisers have always been one of the classes of WW2 warship that I have found most interesting, not least because of their variety. And in Atlantic Fleet, we have a decent selection of these racehorses of the sea, from the stately County class three-funnelled heavy cruisers of the Royal Navy, to the supremely elegant Hipper class equivalents, of the Kreigsmarine, a visual contrast in designs if ever there was one. Unfortunately, in my current campaign, I have already lost Hipper to a battlecruiser - Repulse or Renown - which she could neither out-shoot nor (even if the starting range had been as long as it should have been) out-run. But Blucher is still at large in the Atlantic and I have yet to commission Prinz Eugen. What else I do have by way of active-service Kriegsmarine cruisers is the three that I was allocated from the beginning of the campaign - both light cruisers, two of the twin-funnelled Konigsberg class, and one of the class's later single-funnelled successors, Nurnberg (represented in Atlantic Fleet by a 3-d model of the Leipzig, as seen in 'Baltic scheme' in the first screenshot in this post). Apparently, in real life these light cruisers turned out to have weak hulls and with their armament of just 5.9-inch guns, I was just as reluctant as the Germans evidently were, to cut them loose anywhere as dangerous as the North Atlantic. So I, too, kept them on a short leash. In fact I sent two back into port while I made up my mind what use they might be. Nurnberg and some destroyers I kept on patrol at the eastern, German Bight end of the North Sea, under friendly air cover and where I hoped no British capital ship would consider it safe to venture (nothwithstanding crazy schemes by First Sea Lords or Prime Ministers, of which more than one has involved doing just such a thing). Mines and minefields I think we don't have to worry about in Atlantic Fleet, so the worst I feared was air or submarine attack. As it happens, my German Bight patrol has had a reasonably eventful war so far. A couple of British destroyer patrols have come snooping around, and the combined firepower of my big, powerful destroyers and Nurnberg has smashed them up or seen them off - mostly, the former. The AI in Atlantic Fleet is agressive but will make a run for it if damaged, though generally leaves this too late, unless the would-be escapee is fast enough. We met a British submarine once, but it was submerged and in daylight. The battle intro screen gave him away before my hydrophones picked him up and we just turned away and left him behind, until he gave up. The next mission after the convoy attack described above involved this same cruiser/destroyer patrol, but it was a different kettle of fish. This time, the Royal Navy had sent along something more dangerous: an 8-inch cruiser, no less. On her own, was HMS Cornwall, but quite capable of dealing with my little force. I really doubt that the British would have risked warhips in daylight in this area. But there she was, and there was I, so I suppose I had to do something about it. Checking the map and ranging on Cornwall, I saw that she was about far enough away (in cruiser terms, anyway) to give me at least a fighting chance of running for it. She was in fact just beyond maximum range for the 5-inch guns of my two destroyers, Theile and Schulze, but within range of the 5.9-inchers on Nurnberg. I went to maximum revolutions and began to turn away, glad, for a change, of the unusual arrangement of Nurnberg's main battery, with two of the three-gun turrets sited aft. Then it was Cornwall's turn - literally, Atlantic Fleet being turn-based. What would she do? I could guess, but I thought, hmmm, maybe she'll think better of it, and get out before the bombers come. I was wrong. ...to be continued!
-
A parting shot... Even as Imogen is slipping away ahead of U-269 - and realistic or not, Atlantic Fleet's underwater views add to the cinematic feel of this most excellent game - I am planning how to save her from the wrath of the two surviving escort destroyers, who are shelling my periscope. The answer is not difficult to arrive at. I dive away at full speed, going deeper each turn, before throwing in a turn. My crew evidently has full confidence in their captain, and show it by having the first tube reloaded even as we are slipping into the depths. After a few minutes, we get full a salvo of depth charges for our troubles... ...but we escape, with no serious damage. U-109 is further away, too far for a decent shot, even at the escorts. But far enough to be safe...and to get a good look at the rapidly-receeding convoy, with burning fuel oil marking the passing of the luckless Imogen. Short of a dramatic course reversal, which I know is most unlikely, my last chance for a crack at this convoy is now going to rest with U-252. From this boat, I line up a shot on the nearest merchantman. It's only at this point that I realise that my submarine is down to her last torpedo! I should have checked these things earlier, but I generally send my boats home when they are down to their last fish or two, fromthe campaign map screen; this one had evidently slipped through that net. Such are the hazards of managing multiple resources, rather than a single ship, with no AI First Watch Officer to help the player keep tabs on important details. The fish is soon clear of the tube and running straight and true. I know a single hit is unlikely to be enough. If I get one - the range is long and I have to anticipate that my target could make a routine or evasive turn, at any time. I've aimed towards the stern of the merchantman, and that's where I get a hit. The frieghter's stern dips, but she's not going to go under, anytime soon. With her last torpedo gone, U-252 dives and turns away. The other boats turn away, too. The battle is over...for today. Not much to show for it, but the convoy's course change put us badly out of position...except for one boat, with just a single tin fish left. At least we all got away, to fight another day... ...and in the meantime, our boats continue to 'earn their stars', which I believe will help improve performance in furture attacks. If there is a way of saving campaigns immediately after a mission and before the campaign has moved on to the next 3.5 day turn, I haven't found it. So I sometimes get another encounter immediately on the heels of the last one, with no obvious way to say, 'Not today, Cato!', to do anything other than kick off the mission. So it was this time. But this battle was a surface engagement, nearer to home, and that's what we'll look at next. ...to be continued!
-
The best-laid schemes 'o mice, men an' U-boats gang aft agley! So far, our three-boat attack on the little convoy was shaping up reasonably well. To starboard and abeam, U-269 and U-109 were putting on speed and thought still at long range, were quite well placed to get into decent firing positions, Astern and to port, U-252 was struggling to keep up, but well enough placed to come into action, if the convoy, when attacked by the other boats, turned her way. Who would get off the first torpedo? This is the view from U-269's position, as she runs in. The nearest destroyer, apparently oblivious to our presence, is just over 3,000 yards away. Soon, the U-Boat will have the option of attacking her, but I am clear that she will wait for a shot on one of the freighters, even though that will mean a longer approach, at risk of being detected by the escort bringing up the rear. The convoy starts its next zig-zag turn. Had I been lucky, they would have turned towards the two U-Boats to starboard. But no, they turn the other way, to port. Fair enough. Patience is a required virtue, for any virtual submarine captain. I might have to settle for a frieghter at the rear of the convoy, but their next turn should bring them back towards us. But It is not to be so simple. I watch and wait, adjusting course as necessary, waiting for the enemy to turn back towards my two subsm stalking up from starboard. Instead, the range just keeps on getting greater, as the convoy steams ever further away. Ach, scheise! Throug the periscope, even at medium zoom, the nearest destroyer looks temptingly close, but she is still turning and I decidedto let her go, rather than using up precious tin fish on a chancy shot on a non-priority target. The supposed zig-zag is now looking like a major course change, taking the convoy directly away from the bigger part of my little wolf pack. However, there is a consolation prize. U-252, having started astern and to port, is now suddenly being presented with the possibility of a shot at the convoy's port side. At the same time, one of the other two boats, U-269 is offered a possible shot, at one of the escorts. At 2,600 yards, HMS Imogen is just outside the upper limit of the 'sweet spot' range, close enough to have a crack - especially as it seemed likely to be the only chance she'd get, before the convoy drew out of range for the foreseeable future. I lined up the shot, aiming two tubes at and just ahead of the indicated firing solution. Hopefully, even if Imogen continued turning, I'd get at least one hit. In fact, I got two hits and Imogen was soon on her way to a watery grave. The bad news for U-269 was that the other two escorts were nearby, not best pleased, and soon shooting at my periscope. First blood to my U-boats, but I was going to have to act fast and have a bit of luck into the bargain, if I wasn't to allow the Royal Navy to even the score! ...to be continued!
-
From the album Combat Sims
-
From the album Combat Sims
-
From the album Combat Sims
-

From the album Combat Sims
-
Re-fighting two real-life battles in Atlantic Fleet! One of my favourite features in Killerfish Games's PC port of its excellent WW2 naval wargame is the inclusion of thirty historical sea battles. This short mission report features two of these - one a victory for the Kreigsmarine (said to be its last), the other a defeat. The victory is the Battle of Les Sept Iles ('the seven isles'). This was a night action, fought between light forces off the northern coast of Brittany, France, on 23 October 1943. The defeat is the better-known Battle of the North Cape on 26 December 1943, which resulted in the loss of the battlecruiser Scharnhorst. Les Sept Iles My interest in this battle was picqued after reading an account of it in the excellent wartime memoir Destroyer Captain by Roger Hill. The book is an account of Hill's wartime service in that role. He commanded first HMS Ledbury, participating in the debacle of Arctic convoy PQ17, then, in the Mediterranean, playing a significant part in getting the damaged tanker Ohio into Malta, during the equally famous Pedestal convoy action. Hill certainly had an eventful war, finishing off Normandy on HMS Jervis. In between those commands, he was captain of HMS Grenville, and, in the Bay of Biscay, was on the receiving end of one of the first attacks by Hs 293 glider bombs; the book includes a dramatic picture of one of these heading for Grenville, and another of the bow of sloop Egret, sinking after a devastating hit. By autumn 1942, Grenville was based in Plymouth and was a regular participant in Operation Tunnel. This was laid on as requred in an effort to intercept German blockade runners trying to sneak along close to the French coast during the hours of darkness. Hill hated the operation because it was usually undertaken with a mis-matched force which hadn't trained together and along the same lines every time, subject to regular radar tracking by the Germans. The naval staff refused any idea for a better-trained, more imaginative, less dangerously predictable approach...with sadly predictable consequences. One such operation was laid on, on 22 October 1943, when intelligence reported a German blockade runner (the Munsterland) had slipped out of Brest to make a run up-channel. This time, the hastily-formed British sweep had a cruiser in the lead, HMS Charbydis, but she was an AA cruiser, with more but less powerful guns than on the two participating fleet destroyers, Grenville and Rocket. The rest of the force comprised four 'Hunt' class escort destroyers, slower than the others and thus unable to keep up in a fast action. After the war, a friend of Hill's met a German destroyer captain in South Africa, who told him the blockade runner was used as bait for a trap. The radar contacts Charybdis picked up early on the 23rd weren't the blocakde runner and escort, but a division of big German 'Elbing' class torpedo boats (small destroyers, with lighter gun armament but six torpedo tubes apiece). These launched their fish while still head-on, without turning broadside. Charybdis, in the lead, was stopped by one torpedo hit, then sunk by another, with heavy loss of life. Coming up behind her, Limbourne, one of the Hunts, had her bows blown off. Grenville likely only escaped because Hill, just astern of the cruiser and anticipating mines or torpedoes, had pre-planned a full-power turn to starboard in the event of a contact, which only just took him out of trouble. The Germans turned away and were gone before the British could make any effective counter-move, leaving them to pick up the few survivors and sink the wreck of Limbourne. The Atlantic Fleet version of Sept Iles Here's the map for the battle. I decided to play for the Germans, though I was fairly sure that the element of surprise might not do me much good. In Atlantic Fleet, battles start well within gun range, which is a big disadvanatge if (for example) you are playing a German surface raider and find that you have come up against a convoy with a battleship escort, as I have found to my cost! And here is the opening tactical situation. I was surprised to find that there are only two enemy ships, which turned out to be the AA cruiser Charybdis and the fleet destroyer Rocket. At this stage, they are just radar contacts. Also, the blockade runner was in the middle of my formation. Just to cap it all, my torpedo boats were in two lines, with the leading line rather in the way of the second one. At this point, I found that I was unable to immitate the real German tactics. They could and this night, did, fire their torpedoes imediately they were within range, without turning broadside on, with the fish then turning onto the gyro course set. In Atlantic Fleet, you have less of an arc of fire for torpedoes, with none straight ahead or straight astern. So I was probably going to lose rather quickly most or all or of my advantage of surprise. To hell with it! I turned one boat and the blockade runner to starboard, towards the French coast, the others beginning full-speed turns to port, prior to cutting loose with torpedoes. Knowing I could be detected at any moment - if I hand't been, already - I started firing starshell, to illuminate the enemy. The opposition were evidently caught unaware, steaming straight ahead, guns trained fore and aft. But the battle was now on! ...to be continued!
-
Thanks, Silberpfeil! If anything and to my surprise, I'm actually enjoying the dynamic campaign a lot too, maybe even more than the single missions. The ten-ship-per-side limit means convoys are rather small and the AA-only armed merchantmen make life a bit too easy but I'm having a ball. After a period re-arming and refitting back at Wilhelmshaven, Scharnhorst and Gneisenau teamed up with Blucher and Scheer, for a breakout into the North Atlantic. There, they will re-join and re-inforce the valiant efforts of my U-Boats, who have been keeping the war going in the meantime...with a little help from their friends, including this airstrike called in against HMS Valiant, with most satisfactory results... The plan was for the two battlecruisers to get into the mid-Atlantic, while Scheer and Blucher carried on, headed for the southern trade routes. However, the full force had an unexpected early encounter while still together, with a lightly-escorted convoy. Unfortunately, the escort included a Sunderland flying boat, which damaged Blucher, forcing me to send her back to a friendly port. However, ships are not entirely safe anywhere, and while the captured ports in Norway (now joined by those in occupied France) are useful, none of them is immume from the attentions of the RAF, which can cause more damage or set back repairs... Despite the damage to Blucher, the renewed submarine-surface attacks are exacting a heavy toll from the convoys, so things are going pretty well to plan, for the Kriegsmarine. I could probably hasten things along by launching more U-Boats and putting them to sea, but I'm not sure I'm in any hurry to end this, even with a victory - the Atlantic Fleet dynamic campaign just is far too much fun. Terrific stuff!
-
First heard that story mentioned in the intro to WE John's 'Biggles of 266' in the 1960s. The Albatros D.V in the Australian War Memorial (D5390/17) was the one forced down, with a wounded pilot, in the fight with this RE8. I still have this Kookaburra book on the Albatros scouts; its cover illustrates the fight:
-
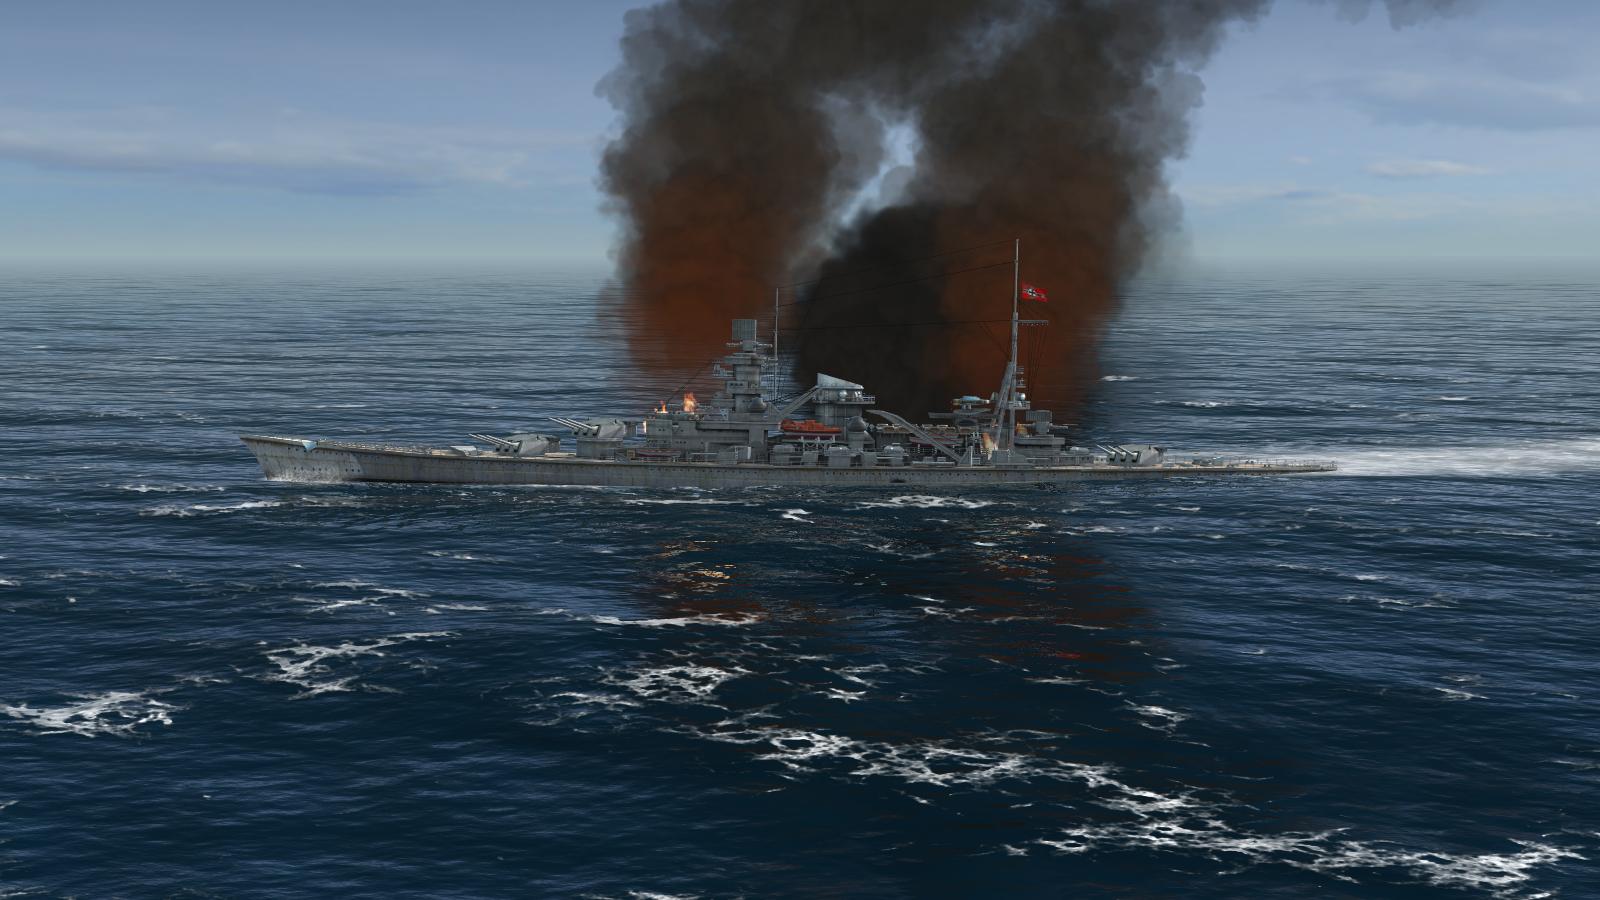
"We will fight on until the last shell is fired" (Admiral Erich Bey's last signal from Scharnhorst) With the help of a starshell fired from my secondary battery, I soon identified the contact astern as Duke of York and turned hard-a-port at full speed. This put much the more dangerous opponent dead astern, although I now had a force of cruisers closing fast from port. I kept a close check on my speed and soon saw that I was making thirty knots, which I knew was fast enough to out-run the British battleship. However, it would take a while to get out of range, all the time under fire from her six for'ard 14-inch guns, and unable to reply to the cruisers shooting me from my left - it's at times like this, that you really miss the ability for Atlantic Fleet to allow secondary and main guns to engage different targets at the same time. Having staked survival on making a run for it, I engaged Duke of York with turret Caesar, making an evasive turn only as a last resort, so as to keep opening out the range. The cruiser fire was mostly 6-inch stuff at longer range, apart from the occasional more dangerous salvo from Norfolk's 8-inch guns. I got some hits on the battleship, astern initially but then amidships too. But I started taking the occasional 14-inch hit in return. It all felt rather like the real battle. Whatever other damage these hits did, so long as they didn't affect my speed, I had a fighting chance of living to fight another day. But if they took even a few knots off my top speed, my goose was well and truly cooked. My hits seemed to encourage Duke of York to jink, which helped me open the range. But she kep on shooting, kept on getting the odd hit. Scharnhorst's speed fell slightly, still fast enough to get away, but only just. This couldn't go on much longer. Just when I needed it most, I seemed to get my eye in with the gunnery, using both the map and on-screen plotting tools to judge the fall of shot and allowing carefully for the crosswind. Duke of York came on, and she kept shooting, but her accuracy seemed to fall off, after several hits about the forepart of the big battleship. A fire burning amidships was extinguished, but another sprang up between her bridge and 'B' Turret. But now the cruisers, led by Norfolk, were getting dangerously close on my port beam. Hoping against hope that Duke of York was struggling and could be left alone for a bit, I swung to port and gave Norfolk a series of devastating broadsides. After that it was the turn of Sheffield, and then Belfast. I jinked to avoid Duke of York's now-erratic salvoes and to keep all three 11-inch turrets bearing on each cruiser in turn. Down they went, one after the other. There aren't ooo many screenshots from this phase of the battle, because I was fighting hard to keep hold of what suddenly seemed like just a chance of survival, of victory even. The fourth cruiser, Duke of York's consort Jamaica and the destroyer Gurkha had got ahead of the battleship and they were my next two targets, and my next two victims. By this time, Duke of York had cut the corner and was begining to bear down on my. Scharnhorst started taking big gun hits again, and began to list to starboard. Now, it was time to stop running from her, and take her on in earnest. I managed to 'cross her T' and salvo after salvo ripped into her. Soon she was ablaze amidships again - and slowly sinking by the stern! I'd done it! It had been the proverbial close run thing, but some fortunate early hits on Duke of York had bought me just enough time and opportunity to deal with the cruisers before turning at bay and managing to finish off the battleship, before she finished off me. It could just as easily have gone the other way, a few more hits on Scharnhorst and a few less on Duke of York and the ending would almost certainly have been very different. Scharnhorst was hard hit and listing badly but still afloat and in action. I had made a bit of a mess of Sept Iles, but had somehow managed to win the Battle of the North Cape! 'Lucky Scharnhorst lives to fight another day!
-
Will the Atlantic Fleet Battle of the North Cape be Scharnhorst's last? 'I didn't know the Navy had such a lovely boat!', said an RAF pilot in a post-war interview, recording his memories of the Channel Dash. They didn't. The 'lovely boat' was Scharnhorst, Gneisenau or possibly Prinz Eugen, the three major waships the Germans ran up the English Channel in daylight during February 1942, to get them away from the French ports before they were sunk or wrecked there by bombing. And surely, the Scharnhorst-class battlecruisers must, to most eyes, be one of the most visually-pleasing warship designs ever built. And Atlantic Fleet's Scharnhorst certainly does the class full justice (though Gneisenau should have her main mast stepped against the rear of her funnel). This daring move left the Kriegsmarine's surviving major surface units in northern waters for the rest of the war, a major threat in particular to the Arctic convoys which supplied the Soviet Union much vital war matériel. Their first major sortie against the convoys in December 1942 was a shambles; at the Battle of the Barents Sea, in bad visibility, Hipper, Lutzow and destroyers failed to hurt convoy JW51B, sinking a destroyer and a minesweeper but losing a destroyer of their own, when two of them mistook British cruisers for their own, in bad weather. Hitler ranted and called for the scrapping of the surface fleet. That didn't happen, and they made a valiant contribution to the defences and evacuations from the Batlic seaboard late in the war. But by that time, the last major surface action, a year after the Barents Sea fiasco, had seen Scharnhorst go down fighting after being caught by superior forces in another failed convoy attack. Having sent her accompanying destroyers off to locate convoy JW55B, Scharnhorst was alone when intercepted by a covering force of British cruisers. She abandoned the hunt after a second encounter and turned south for home, but by then it was too late. The powerful 'KG Five' class battleship Duke of York and more light units had been vectored in to intercept by the shadowing criusers. Scharnhorst might stil have escaped but a long-range hit disabled a boiler, her speed fell off and she was shelled and torpedoed to destruction, with very few suvivors. This oil painting by Charles Pears, in the National Maritime Museum, Greenwich, hauntingly captures the drama of Scharnhorst's last fight. The Atlantic Fleet battle Here's the launch screen for Atlantic Fleet's version of the Battle of the North Cape. There's no option to hide what you are up against, which of course the Germans didn't know in the real fight...not that this would be much use, to anyone with prior knowledge of the historical battle. We don't get the two preliminary skirmishes with the British cruiser force, so we are straight into the final fight, where the shadowers have called in the big guns of Duke of York. As in real life, this action begins with the British in two groups, and holding the initiative. Here's the tactical situation. The enemy units are unidentified radar contacts, but I will soon find out that the force astern of me is the trio of shawowing cruisers - Norfolk, Sheffield and Belfast - while the contacts off my port beam are battlestip Duke of York cruiser Jamaica, and the destroyer Gurkha (just one of the several which took part). All are headed right for me. So, the party kicks off with me having to watch as all the British ships move...and then fire, most of 'em, with me unable to do anything but watch. A click of the mouse lets you see things only from your ship's point of view, wvich is more realistic of course, but I have got into the habit of letting the auto-cam track each ship as it does its thing. Anyway, 'watch', from any angle, is all I can do at first, as the starshells arrive first, then the main armament salvoes arc in towards my solitary ship, a lovely one, but for how much longer? Now, it's my turn. I do the only thing I can do. I go to full revolutions, turn to show them my stern, and run for it, as shells spash close astern. ...to be continued!
-
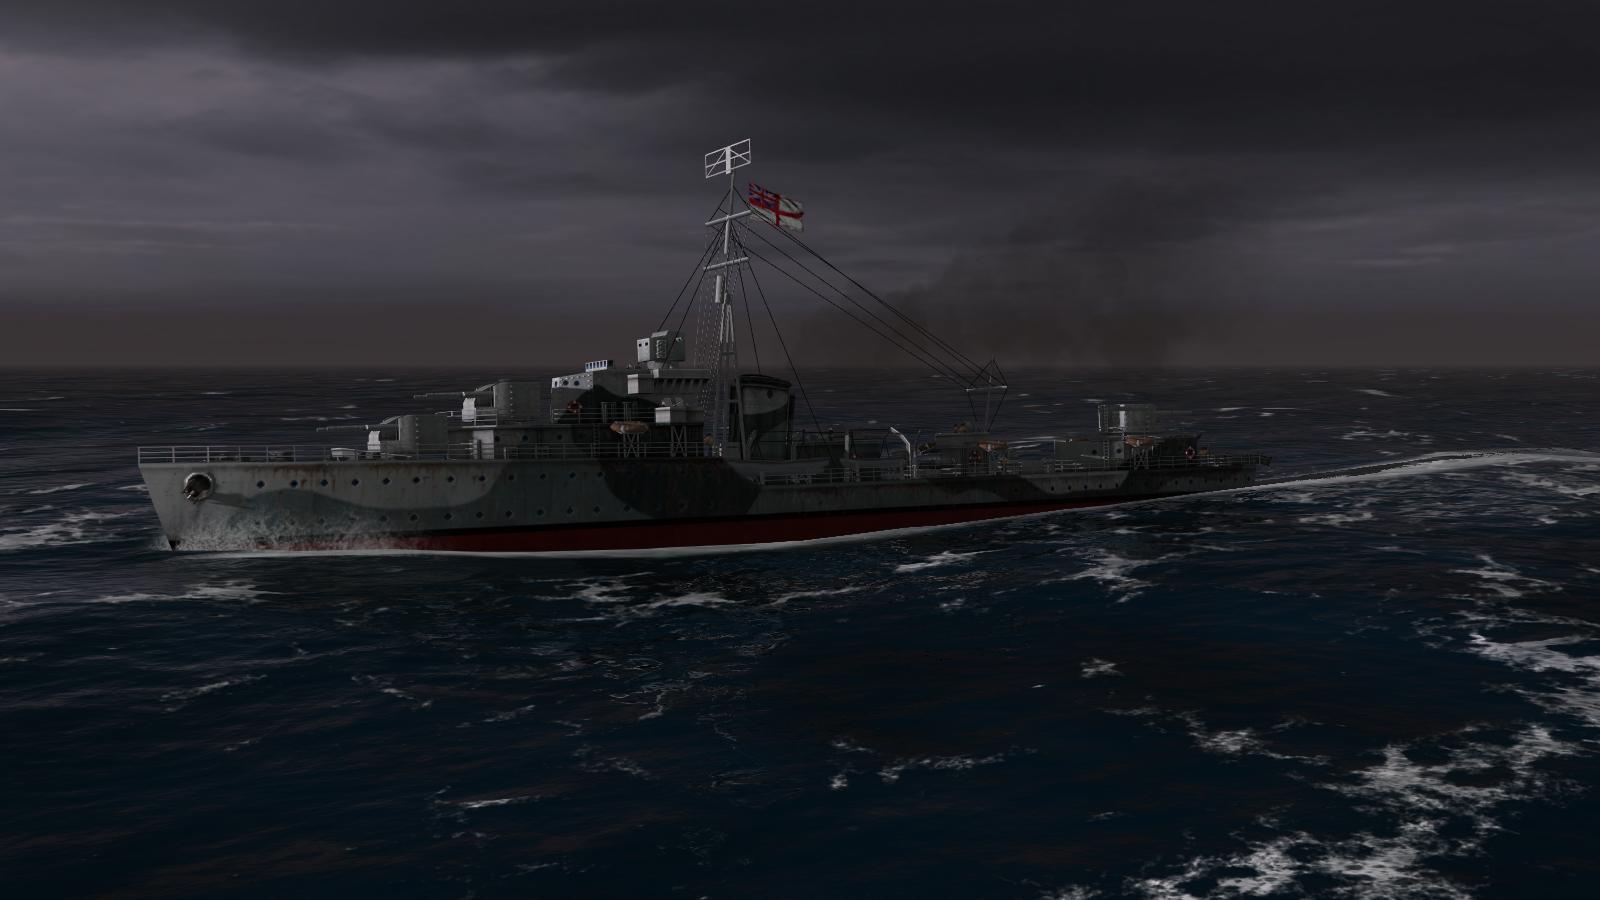
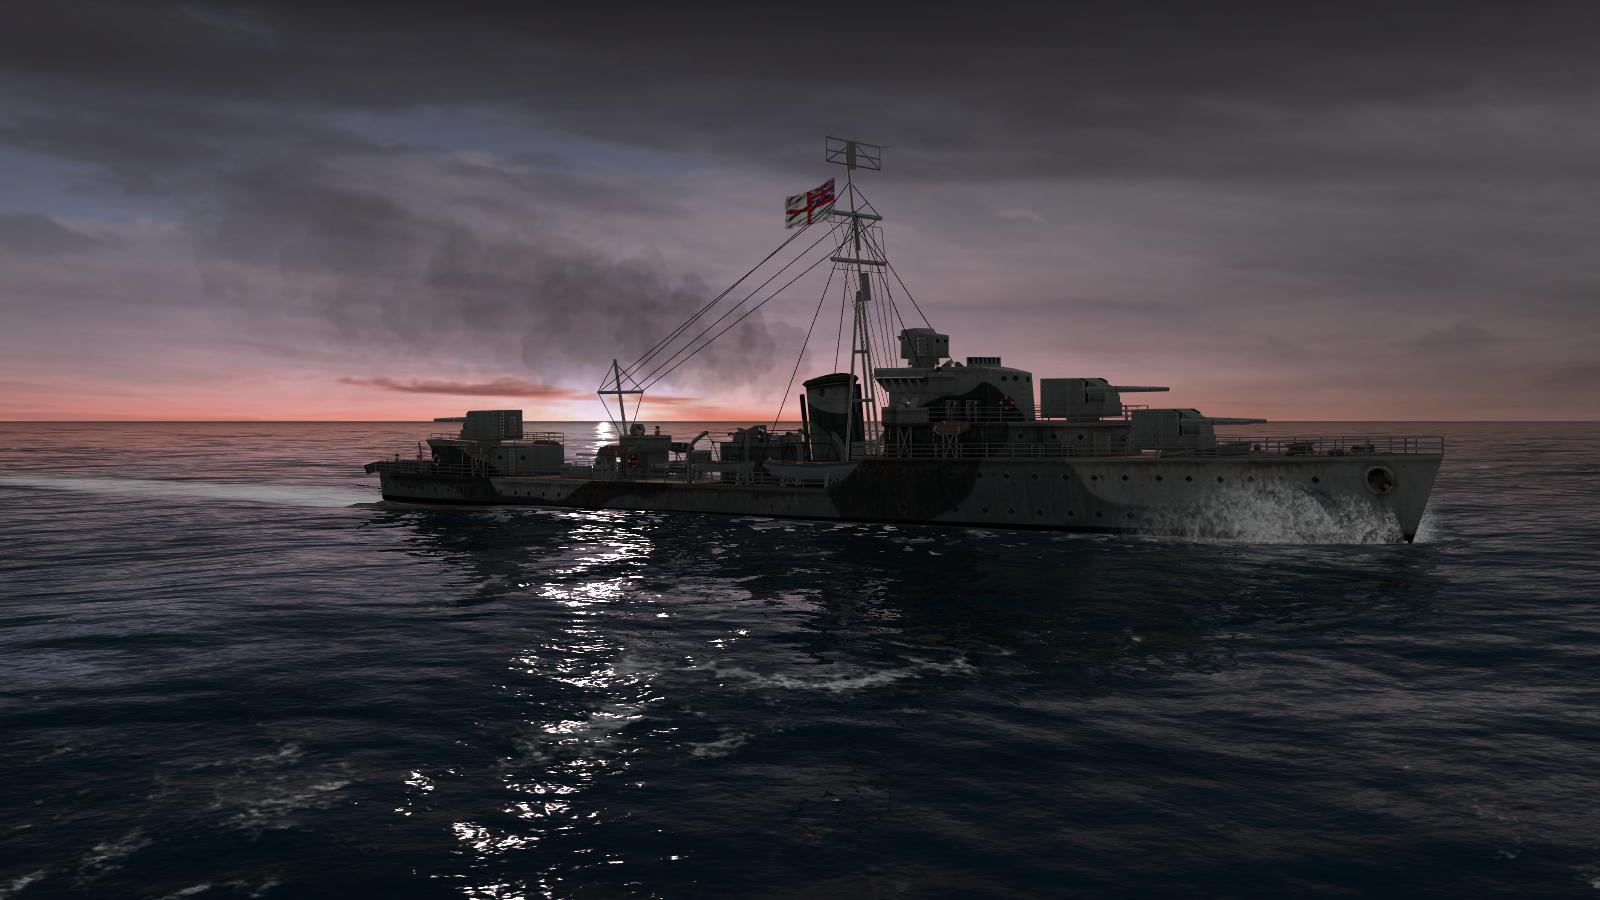
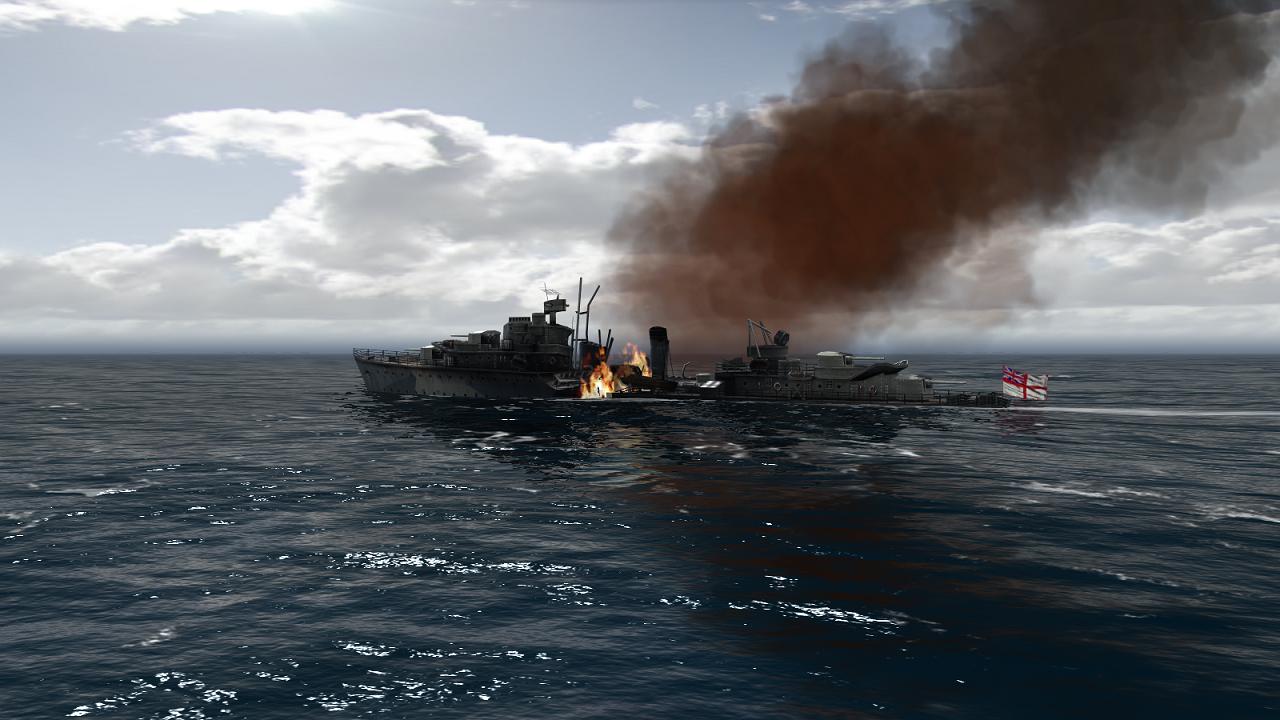
Torpedos, los! Charybdis, seen above in the foreground, was a later ship in the 'Dido' class of anti-aircraft cruiser, one of those who didn't ship the third twin turret (though she has it, in Atlantic Fleet, which uses the same 3-d model to represent all ships in a class; I'm not sure if differences in weight of broadshide are, neverthess, implemented). And she was one of those armed with 4.5-inch guns, due to shortages with the intended 5.25-inch armament. Still, she has a lot of them; not a ship to mess with, given my 'Elbings' have only four 4.1-inch, all but one mounted astern. She and Rocket were soon training their guns onto us. It took me a while to find the range and my first starshells weren't much help. Nevertheless, better late than never, I stuck to Plan A and started cutting loose with full salvoes of torpedoes. Even if they did no more than cause the enemy to turn away, they would give me time to escape. And that was my intention. I like to play my games like real lives and real ships are at stake, and I've generally no time for Keyboard Heroics. It wasn't long before the enemy, too, was firing starshells, and his seemed to be better placed, lighting up my blockade runner as she turned away. We were soon under quite accurate fire from both British ships, and to make matters worse, turning all but one of my torpedo boats to port at the same time more or less guaranteed that only the leading boats could launch torpedoes. I should have steamed the rear line ahead for a turn, before going to port. It would have taken longer, but they would have all ended up roughly in a single line astern, with clear arcs of fire. This seemed to be one of those battles where I just couldn't find the range. There's no auto-gunnery option, so with each ship you move to, you have to re-assess the firing solution, all over again. This can make multi-ship fights a bit of a headache, unless you are prepared to be patient and not rush. Me, I'm a rusher. The enemy's starshells and salvoes seemed to be on target, while mine mostly weren't. Charybdis seemed intent on getting my blockade runner, which was soon hit and burning, to sink soon afterwards. The enemy had turned into us rather than away, which not only caused those torpedoes I had been able to get away to miss, but soon brought the range right down. Now, it was the turn of my torpedo boats to get a hammering. The single boat I had turned in the opposite direction to the others was able to come in behind Charybdis but her torpedoes missed, too. I wasn't going to escape, clearly, so there was no longer any point in running. Attack had become the most effective form of defence, and so my other boats now turned to close the rapidly-advancing enemy in a series of zig-zags. As the range wound down, one of my own boats was first to go, smashed to a burning hulk and then sunk. Revenge followed, though, with Rocket soon going the same way. Now, we were trading rounds with Charybdis at close range. By this time, the cruiser had been hit several times, and seemed to have settled onto a steady course. Taking a chance, I turned one of my boats broadside on, and let fly with another salvo of tin fish. The boat was hit next turn by a broadside from the cuiuser and left sinking, but her torpedoes hit home, and at last, it was all over! Three torpedo boats and the blockade runner lost, was a high price to pay for a cruiser and a destroyer, though with less erratic shooting and better division-handling on my part, things might have been different. Just as well maybe, that Atlantic Fleet left out the rest of the British force! Next up, we will see if I managed any better in a real fight against odds, with Scharnhorst. ...to be continued!
-

From the album Combat Sims
-
From the album Combat Sims

