33LIMA
-
Content count
3,749 -
Joined
-
Last visited
-
Days Won
7
Everything posted by 33LIMA
-

Atlantic Fleet - convoy flees illumination by starshell
33LIMA posted a gallery image in Member's Albums
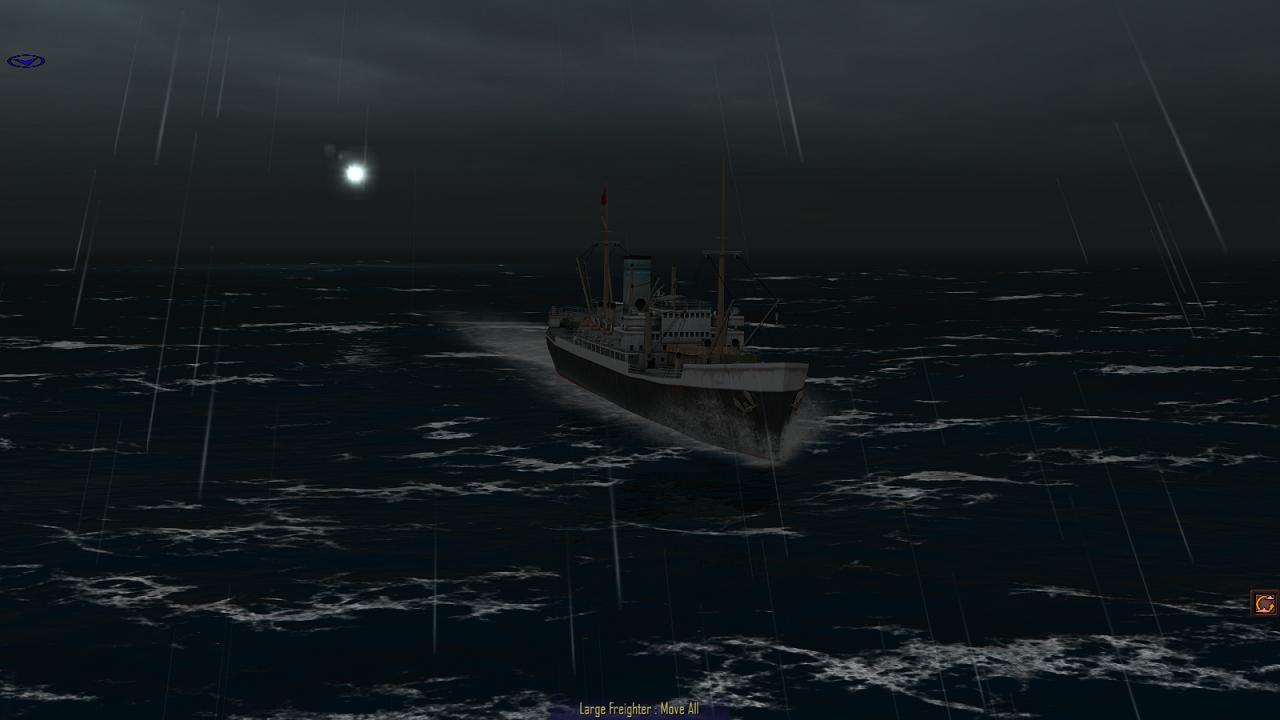
From the album Combat Sims
-

From the album Combat Sims
-
From the album Combat Sims
-
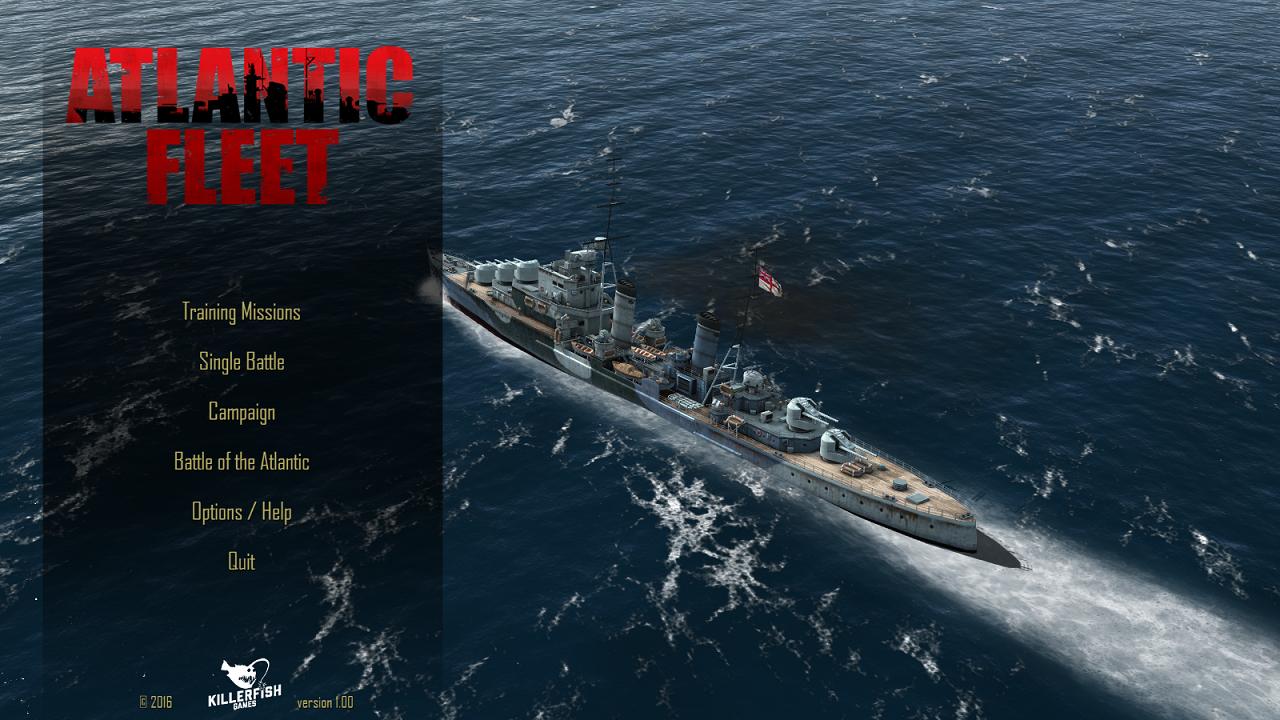
Atlantic Fleet PC/Mac Edition Available
33LIMA replied to dsawan's topic in Naval Combat Information Center
Understood - the Atlantic Fleet glass (or should that be, tot of rum) is at least half full here, not half empty, as far as I'm concerned, from the ww2 naval warfare simulation standpoint. I hope at some point there'll be another sequel to top up the rum ration with pausable but continuous gameplay and the ability to designate targets and let the AI do the shooting. As with Fighting Steel, I may or may not ever actually play the Atlantic Fleet campaign, as re-fighting historical sea battles (and the ability to create your own) is what I want from any variant on the WW2 naval combat genre. Anything that lets you re-fight the Battle of the Denmark Straits with this sort of sense of visual authenticity is a big winner, in my book: Nice that Bismarck's salvoes are fired with fore and aft turrets firing in sequence not all at once, just like in the famous clip of cine film taken from Prinz Eugen: Analysis of the sequence here on the HMS Hood Association website: http://www.hmshood.com/history/denmarkstrait/film.htm Nice! Nice attention to detail is visible in the above screenshot of Bismarck. You can see the painted-out but still slightly visible 'Baltic markings' on her hull with the darker bow and stern also painted out but the false bow and stern waves still there. And turret Anton authentically has the rangefinder removed and the apertures plated over. Neat! No silly crew figures runing around, or ladders rigged out on the sides of the hull. -
Atlantic Fleet PC/Mac Edition Available
33LIMA replied to dsawan's topic in Naval Combat Information Center
Whatever the design philosophy, I'm disappointed Killerfish didn't aim a little higher, as it were. Atlantic Fleet appears much more of a WW2 naval combat simulation (sic) than for example Pacific Storm, where the screen is full of tags and aiming marks hanging in the air, and ships fight at ranges that would have better suited the Napoleonic era. I think Killerfish have done a lot better than giving some old console shooting game concept a naval front end and nice visuals. Apart from anything else, Atlantic Fleet demonstrates a depth of knowledge of, and interest in, its historical subject matter which is worthy of any sim. -
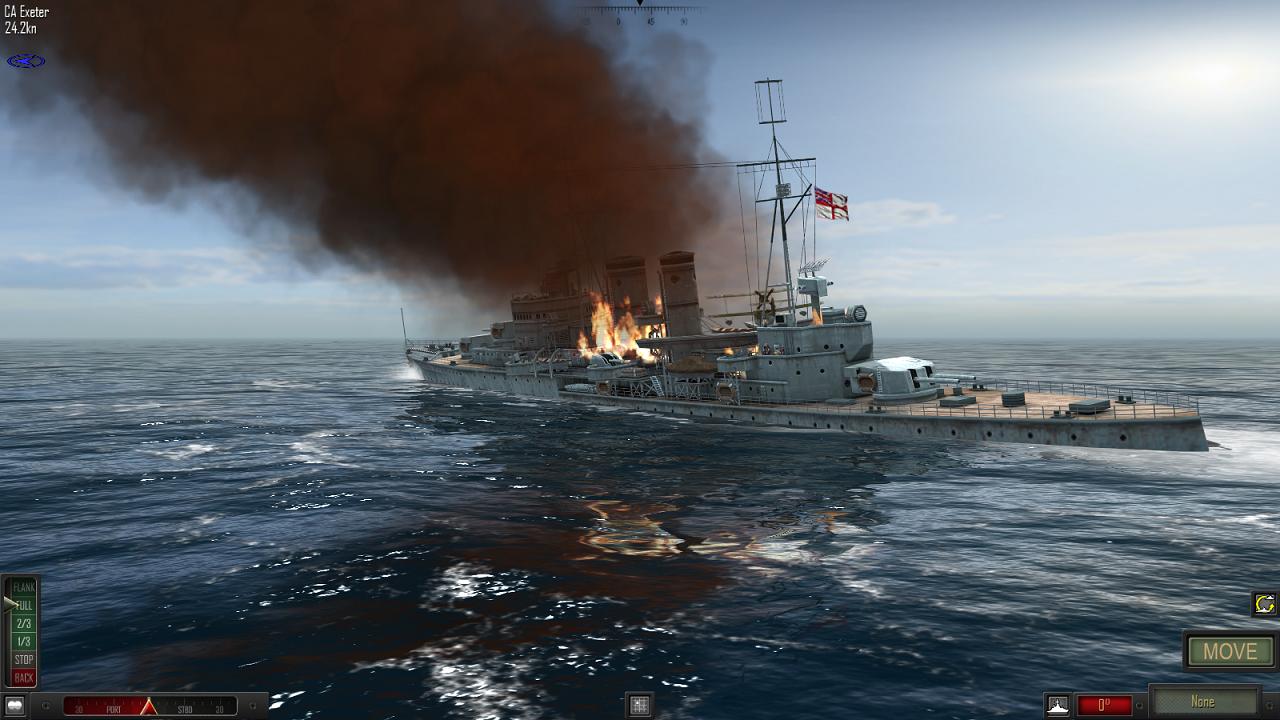
Atlantic Fleet - HMS Exeter, Battle of the River Plate, December 1939
33LIMA posted a gallery image in Member's Albums
From the album Combat Sims
-
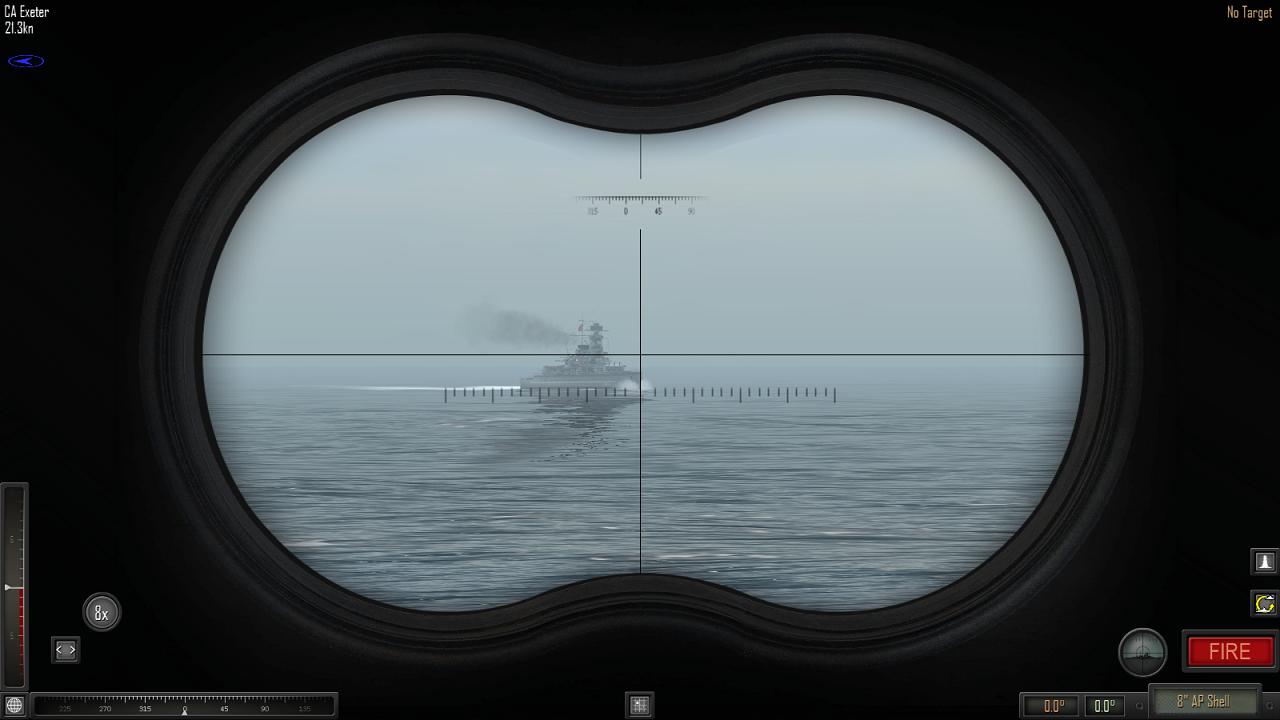
Atlantic Fleet - admiral Graf Spee, Battle of the River Plate, December 1939
33LIMA posted a gallery image in Member's Albums
From the album Combat Sims
-
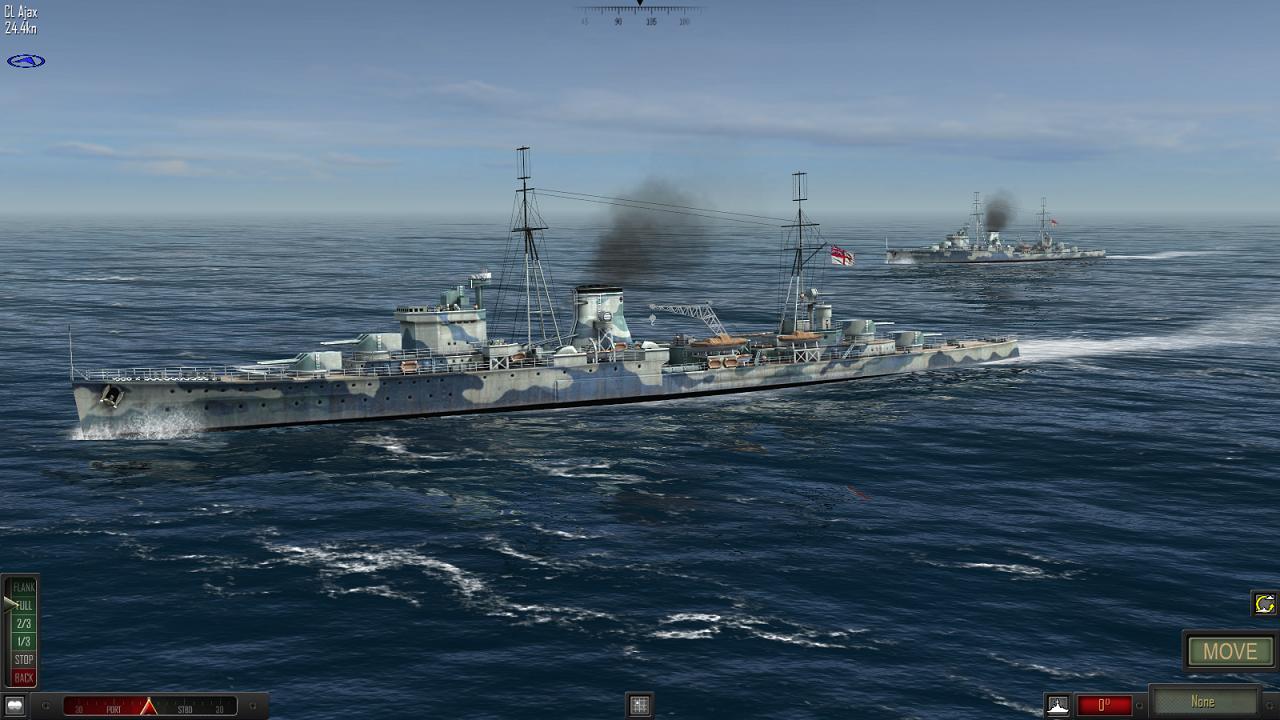
Atlantic Fleet - HMS Ajax, Battle of the River Plate, December 1939
33LIMA posted a gallery image in Member's Albums

From the album Combat Sims
-
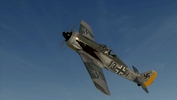
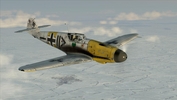
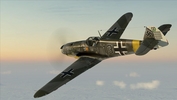
From the album IL-2 Battle of Stalingrad
-
-
-
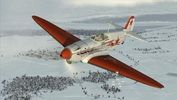
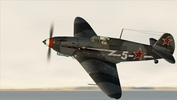
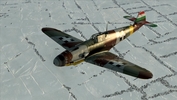
From the album IL-2 Battle of Stalingrad
-

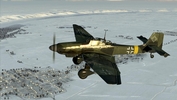
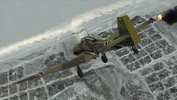
From the album IL-2 Battle of Stalingrad
-
Atlantic Fleet PC/Mac Edition Available
33LIMA replied to dsawan's topic in Naval Combat Information Center
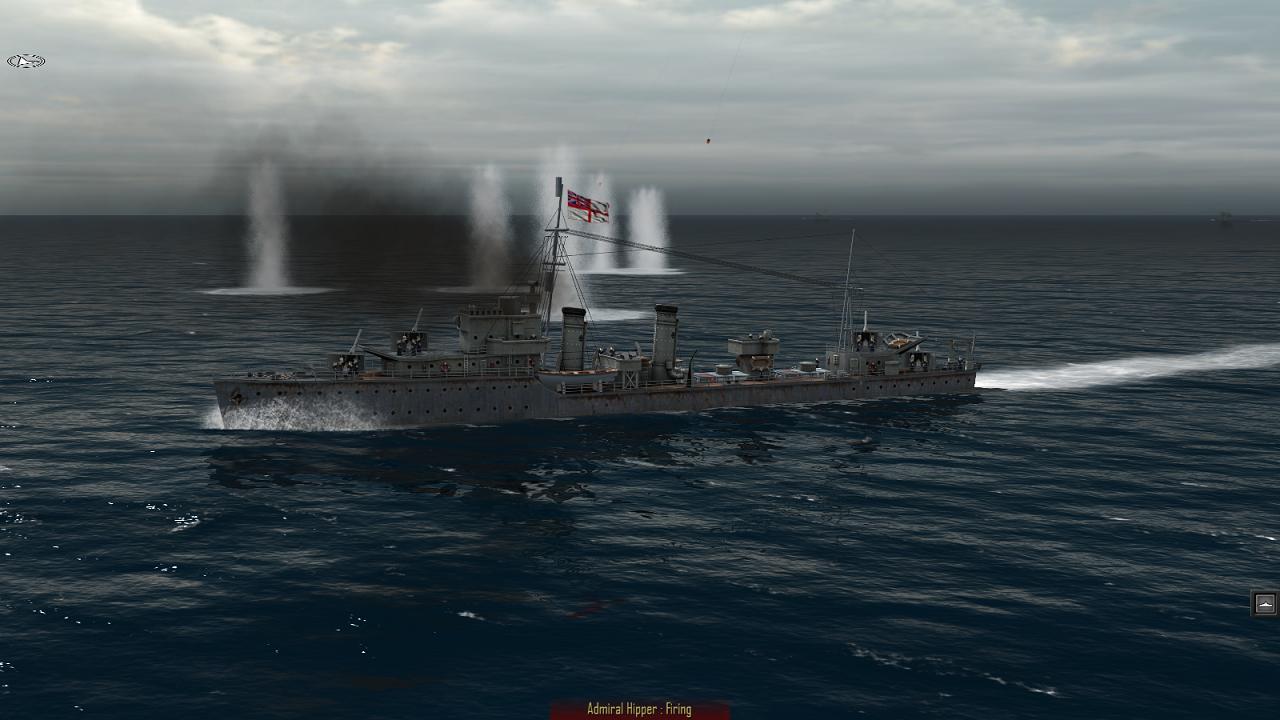
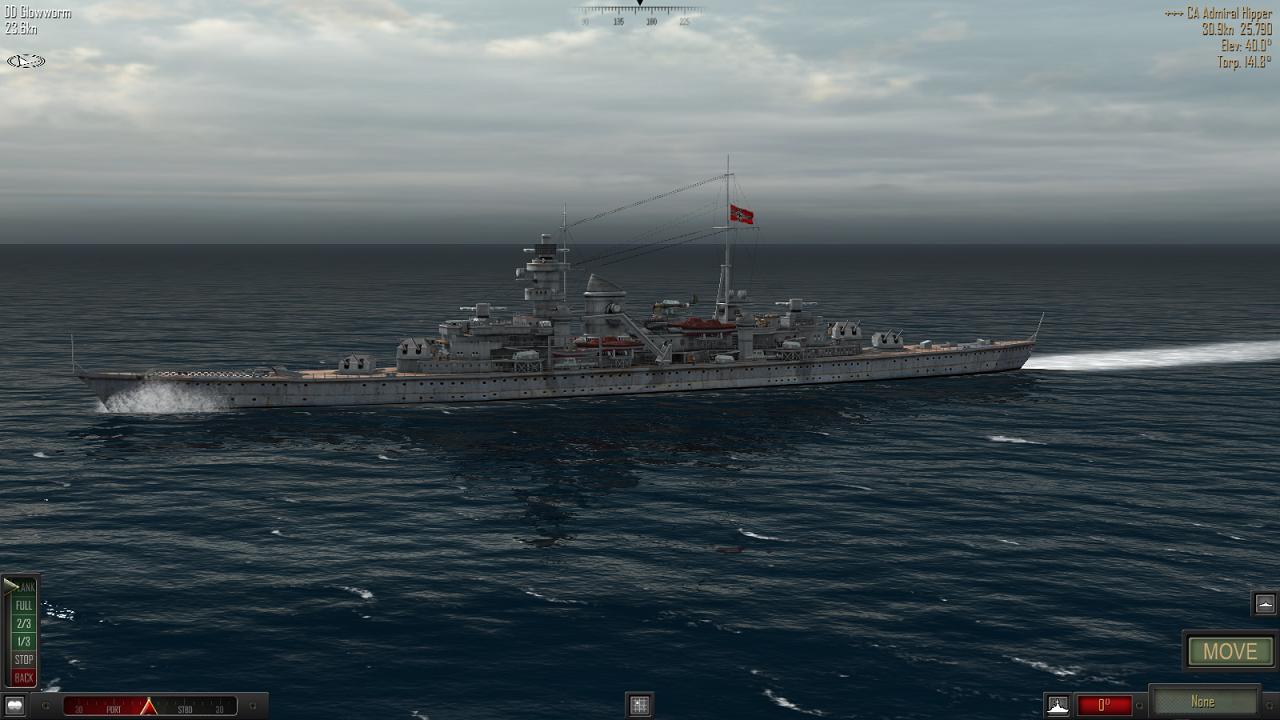
Thanks for the heads up! Just grabbed it. As I expected, I REALLY don't like the stacatto 'You move-You shoot-They move-They shoot' sequence, complete with 'freeze frames' in between, which smacks of a throwback to paper wargame rules and really jars [EDIT - after a couple of days playing AF, this has ceased to bother me]; likewise having to range manually, instead of having the option to designate targets and letting your AI gunnery people do the rest is a gap in the simulation [EDIT - again, after playing for a while, it would be good to be able to designate targets for an AI 'Gunnery Officer', but the ability to do it yourself is actually fun rather than a chore, and the tools provided are actually quite sophisticated]. But it's cheap as chips, has a shedload of historical ready-made battles, and the ships and visuals look wonderful. HMS Glowworm, April 1940, about to run into Kriegsmarine units supporting the German invasion of Norway: Hipper and Z-28 about to engage... ...and the results, a straddle as I turn away at full speed, before starting to zig-zag: Looking forward to getting to grips with this! -
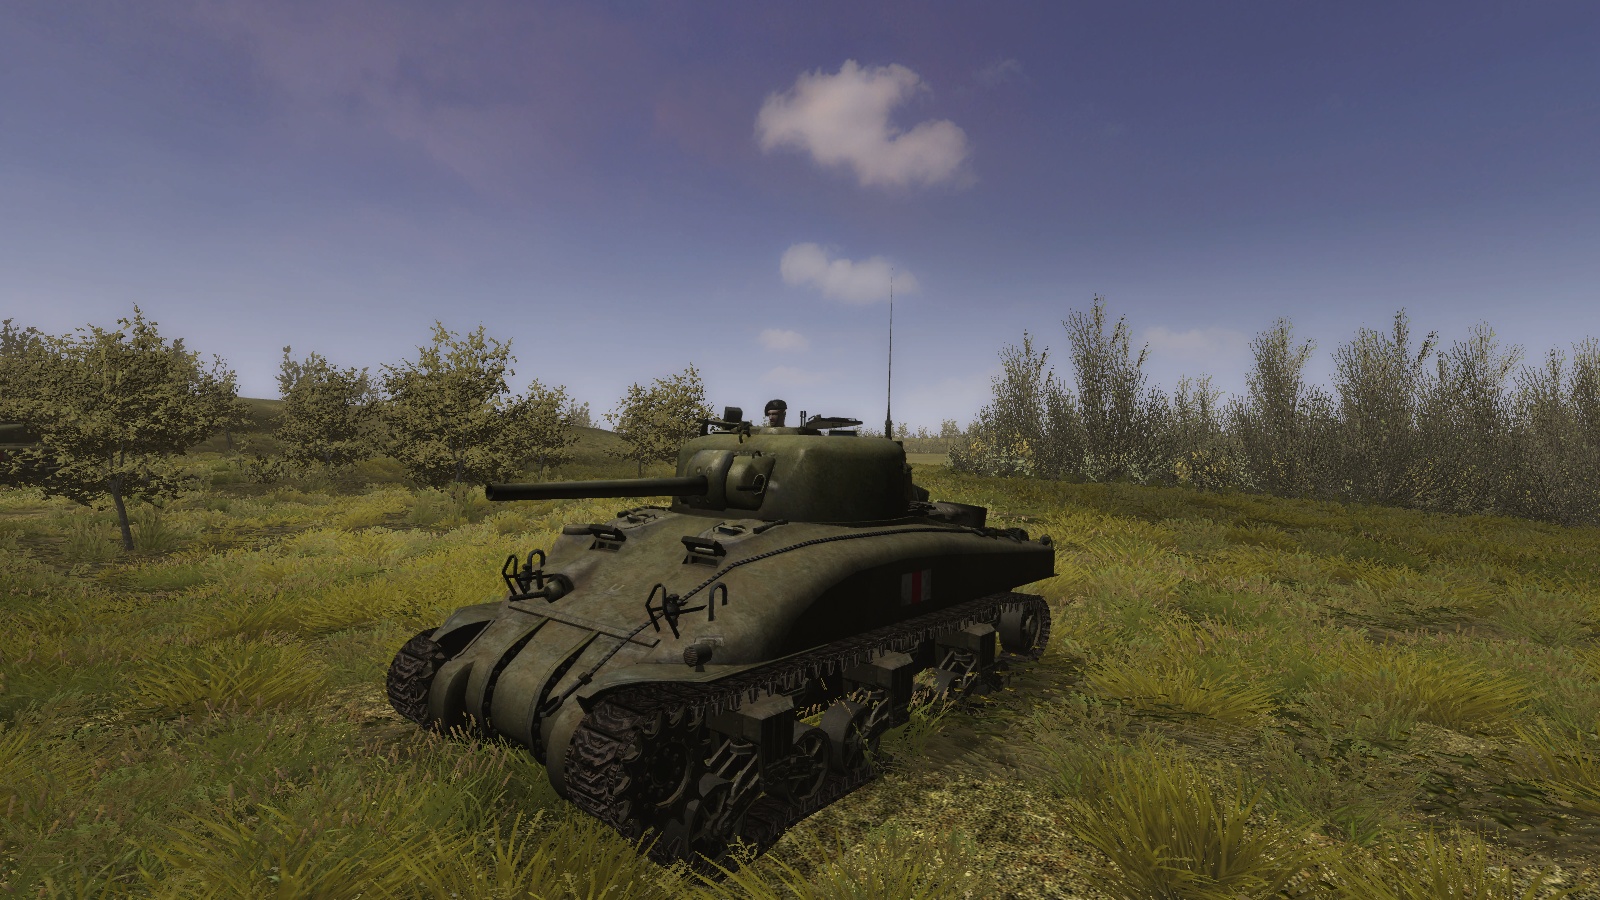
Missions from the movie, in the tanksim! Melodramatic tank movies are certainly better than no tank movies at all, especially if they make a decent effort at authenticity, amidst the melodrama. So let it be said of 'Fury'. I found it a tad contrived in places, from the awful, gratuitous prisoner shooting scene to the 'falling plate' Germans, whose erratic anti-tank gunners, plentiful but equally erratic panzerfaust operators and even a Tiger tank, fall to the guns of a few Shermans, crewed by our cynical, war-weary but nearly-all-conquering protagonists. However, 'Fury' wasn't nearly as bad as I had feared, quite a decent war movie in its own right. And as far as tank movies go, 'Fury's now my joint favourite, up there with 'White Tiger', which substitutes a rather compelling weirdness for the melodrama and T-34/85s for the Shermans. Its protagonist had rather less luck with the Tiger in that movie, at one point resorting to an automatic pistol, after his crew failed to notice they'd plugged their main gun's muzzle with mud. Just when it seemed victory against the super-Tiger was within their grasp, too. Dasvidanya, tovaritch. Anyway, thanks to prolific modder Lockie, Steel Fury now has a developing set of missions based on scenes from the movie - 'Fury', that is, not 'White Tiger'. There are two 'Fury' missions now available, both for the upcoming version 2.0 of the STA mod, which is in test, but available on application over on the STA forum. This mission report covers both of these missions; at time of writing (February 2016) a third one is in preparation. By way of a spoiler alert, if you haven't yet watched the movie but plan on doing so soon, you might want to do that, before reading how the missions play out! 'Fury' mission #1 - 'Ambush!' The mission puts you in the role of Brad Pitt's character, Staff Sergeant Don 'Wardaddy' Collier, who tells us early on 'I started this war killing Germans in Africa. Then France. Then Belgium. Now I'm killing Germans in Germany.' He must have missed out on the Battle of Kasserine, then. Things aren't that much better in Germany, it seems, because although the war's being won, your tank is the sole suvivor of your company. Your task now is simple enough - drive up the road to a camp, RV with a platoon of M4s, and then move with them to join forces with another tank platoon, before assaulting an enemy-held location. The mission has one of Lockie's snazzy splash screens and when it loads, there's a video clip from the movie, showing 'Wardaddy's' Sherman arriving in the camp. This mission's production values are not to be sneezed at! As in the movie, your tank is an M4A3 (76mm) HVSS, often known as the M4A3E8 or 'Easy Eight'. This was a common variant by 1945 and is distinguished from earlier Shermans by the one-piece 47 degree sloped hull front (no frontal protusions for the driver and co-driver hatches); T23 type turret with longer-barrelled 76mm gun, in place of the original 75mm; and different, horizontally-sprung suspension units with wider track. The SF-STA version is nicely-rendered; there's no 3d interior but the externals look great with lots of animations and external stowage, including the unditching beams carried on the left-hand hull side, just like the movie tank. Limitations in the sim mean the 'Fury' tank name is on the right-hand side of the hull, as per the first screenshot in this thread, rather than on the gun tube as in the movie; but the former is a more realistic place for WW2 tank names. The white tactical numbers on the turret RH side are a bit un-American, though, if not distinctly Soviet. Approaching the camp for the rendez-vous with the other Shermans, you soon see that Lockie's scenery-building has spared neither effort nor livestock. On the right as you pass into the camp is a firing range... ...and on the left, a PoW cage, some of whose occupants are nervously standing with their hands still in the air. Evidently, these follows still believe all that Dr Goebbels has told them about the proclivities of the dreadful Amis...or perhaps they have just watched that scene in the the movie, too. The PoWs' apparent anxiety is not surpising, perhaps, as the camp is full of GIs, all armed to the teeth, many of them prowling around purposefully, with their weapons in both hands. Moving on, and being careful not to run over any of these heavily-armed people, you can soon see the M4s you came here to join, parked up ahead. As you reach the Shermans, you're reminded of your next move - changing on-screen messages and optional waypoint indicators keep you well informed, without reverting to your map. Now, it's time to tag along and link up next with Lt Parker's boys, before we put in the next attack. Having seen the movie, something tells me that it's not going to be quite so simple! ...to be continued!
-
Lockie looks after hosting; I asked him, and he's no plans to change from 4Shared, which I find fussy but works for me provided I click the correct d/l option, as described here under 'HOW TO DOWNLOAD FROM 4SHA1rED': http://stasf2008.ephpbb.com/t6-steel-tank-add-on-steel-fury There's no ETA yet for STA 2.0, in which these missions are built. ATM there's a test version, available on application for the password, which is currently sufficiently stable that it's the only version of SF that I play now. The Fury missions need STA 2.0 plus the latest available updates. . http://stasf2008.ephpbb.com/t610-sta2-0-testing 'Fury' mission 3, based on the fight in the town, is now available and the next one, Lockie is already working on: http://stasf2008.ephpbb.com/t288p120-campaign-fury-m4a3-76-e8-wip
-
Good bye, Lucy Sue...? The next few minutes were all a bit hectic, confused even. I was at the gunner’s sight and stayed there. Having hit contact, what I should perhaps have done was play the platoon commander part, first – re-assess the situation, make a plan for the whole platoon and give the necessary orders. I suppose I had sort of done that, by dismounting the troops and advancing in line towards the enemy – initiating an advance to contact. The AI in SF are pretty aggressive and you can’t and don’t generally need to order ‘hold fire’ or fire at will’. So if you’re attacking, and you line ‘em up and lead ‘em off, you can let your troops take it from there, intervening only if necessary. Which is what I had done. It’s just that once you’re shooting at or scanning for targets in a two-way firing range, it’s kind of hard to keep track of much else...like when it might be necessary to intervene, to ‘regain control’ of your platoon. Which in practice, usually means reining in a buddy who doesn’t share the opinion of the French general who observed after the Charge of the Light Brigade, ‘’C’est magnifique, mais ce n’est pas la guerre.’ I got a strong hint to that effect when, scanning again, I saw another Sherman - tank name, Lucy Sue - had broken formation and was closing upon the enemy, in typically aggressive SF AI fashion. Unfortunately, SF platoon-mates are a bit too ready to leave formation and attack, in this fashion. This would not be so bad, but for the fact that SF doesn’t have hotkeys for even the relatively few platoon orders you can issue – you have to quit the 3-d view and go to the map screen. And even if you do that, for as long as they see something they consider worth charging, SF’s aggressive AI seem inclined to ignore you. So I left Lucy Sue to it, for now. Ok, we can still work together on this thing. If he (or rather, she) was moving, then I should be shooting – ‘No fire without movement, no movement without fire’. About this time, one of my other tanks - one of the 75mm versions, 'Murder Inc', 'came on the air' to report he was under fire (SF doesn’t do platoon radio traffic, so these were scripted messages Lockie had designed in – must fire up the Mission Editor and check out how he did that!). My tank commander called in an A/T gun and from the halt, I picked up on what looked like the shield of the gun, nestling against the base of a tree. A mixture of rapid-fire HE rounds, interspersed with bursts from the co-ax, seemed to do the needful. Then more dug in infantry, concentrating on the MGs for the benefit of our accompanying GIs. Then another A/T gun – I think, it wasn’t easy to be sure. If it was a bush, it had quickly become a dead bush. And you know what they say: the only good bush, is a dead one. Certainly so, when it might be hiding a gun easily capable of punching 75mm holes in your armour-plated ride. One or two of my platoon - I'm not sure which - radioed in that they were hit hard and out of the fight. To paraphrase the comment of a German 88mm battery commander in Italy, I wondered, were we going to run out of tanks, before the enemy ran out of anti-tank guns? I was suddenly acutely conscious that I had incautiously driven my platoon directly into a killing ground, on the rather blithe assumption that the concentrated frontal fires of four M4s and accompanying infantry would be enough to clobber whatever we encountered. The first, thick hedgerow had prevented us from getting ‘eyes on’ that ‘whatever’, until we were pretty much in the killing ground. That - and rather blindly following my assigned route - had ruled out the flanking attack I should have mounted, instead. No time for such niceties now. We were caught in what was in effect an area ambush and the only option now was – ‘Charge!’ Go for the beggars! So that’s what I did. ‘Driver, advance!’ then ‘Driver, speed up!’ To our right, a solitary German jumped out of a trench and ran off, to be cut down by my co-ax. At about the same time, the targets seemed to dry up. I moved on again and found myself bouncing awkwardly onto the parapet of an enemy trench. This seemed empty, apart from some dead enemy troops, scattered in awkward poses. I halted and looked around. Scanning ahead, I saw another infantryman, disappearing into the treeline. I was about to shoot him, when I realised he was a GI. The field was ours! The cost had been heavy enough. Few GIs could be seen; I could only hope the majority were clearing the woods out of sight ahead, rather than casualties in the open field behind me. Just one of my four tanks, a 76mm-armed M4A1, 'Old Phyliss', was still up there with me. Looking back, I could see that we had indeed lost two tanks – ‘Murder Inc’ and ‘Lucy Sue’. Both looked repairable, though sadly, there had been crew casualties. On the other side of the balance sheet, I was credited with twenty-plus enemy troops, and two Pak 40s destroyed... The AI gunners of those anti-tank guns had been rather better at their jobs than their rather erratic movie counterparts, who got off the first rounds from cover but still managed to score ‘nul points’. The sight of ‘Wardaddy’s’ four movie Shermans, grinding slowly to but inexorably straight towards them from the hedge, must have put them off, more so than the rather wilder, less disciplined show from our platoon, had succeeded in scaring the AI enemy. I think when I am playing this one again, I will tell the Director to get lost, ignore the script and roll up the enemy from a flank! Kill zones are things you are supposed to drive out of, not into! As 'Wardaddy' tells his new Assistant Driver at the start of 'Fury', 'It ain't like the newsreels, up front!' It’s great to see some more SF missions appearing set in NW Europe, to take full advantage of the excellent British and American kit that’s now becoming available. And even if you sort of know what’s coming, it’s fun to replay movie battles in a tanksim, with the excellent Shermans complemented by some really nice landscape and object modelling, some of the best seen so far in this sim. The use of some scripted platoon radio traffic helps fill a major gap in SF’s portrayal of Western armies. The next mission in this series is inspired by the town assault sequence from ‘Fury’ and I’m looking forward to playing that too, when Lockie’s done with it! Altogther now, 'Best job I ever had!'
-
"All tanks, start squirting that tree line! Let's light 'em up! Let's Go! Let's clear it up!" I nosed through the thickly-laid hedgerow. 'Driver, halt!' Ahead, just this side of the next, more straggly hedge, lay the survivors I had come to rescue. 'Lay', literally: I could see the GIs, sadly few, prone and helpless. Just beyond, was a stationary half-track, knocked-out or abandoned. No fire came our way, so I pushed on, with our dismounted troops and the other three Shemans close behind me and starting to fan out, on either side. Finally, we were beginning to shake out into a formation suited to dealing with whatever it was, out there somewhere in front, waiting for us. I rolled on, up to the next hedgerow, which provided scant cover, reaching the first of the survivors. They seemed too shaken to do very much. I had other things to worry about. Whatever was going to happen next, it was going to happen very soon. Before I had even reached the hedge itself, the party finally kicked off. MG fire erupted and my tank commander started calling in infantry targets. Tracers zipped into and amongst us. I had an HE round loaded and let fly at the first target I could pick up, which looked like an MG position. While the next round was being loaded, I started hosing the enemy with the co-ax. From what I could make out, the bad guys seemed to be dug in, a little way in front of the treeline itself. What lurked in the latter, I could guess, but could not yet see. ...to be continued!
-
"Do your job!" The second mission in Lockie's 'Fury' movie campaign takes its name from the experienced tank commander 'Wardaddy's' exhortation to the newly-arrived co-driver/bow gunner, after the latter proves to be something of a reluctant warrior in their first action. This mission is based on that action - the scene in the movie where Brad Pitt's Sherman platoon is tasked to rescue some infantrymen, who have been pinned down by the enemy. As the map below shows (representing the mission with the player's platoon - the four red diamonds - well on the way to the objective) you are assigned a dog-leg route along roads - tracks, really - to take you to the spot - the oval marked 'Center' - from which you are to assault the enemy. The other distinctive feature of this mission - apart from the fact that its briefing (and some in-game messages) are bilingual, English/Ukrainian - is that your platoon is assigned squads of supporting infantrymen, who will ride on your tanks, dismount when you tell them to, and then fight with you, on foot. 'Desants', to use the Soviet term, 'tank riders' as we in the west generally call the famous Red Army version. I ordered my tanks into column formation and led off, with the sounds of gunfire dying away out of sight, where our troops had been pinned down. SF's formation commands are limited - line or column, close or open order, nothing fancy like wedge. Not only that, but they can only issued from the map screen - there's no hotkeys. And to cap it all, formation commands are ignored, unless and until you hit the right sequence of icon clicks, as they are not executed until you issue a new movement order. Distracted with getting my boys where I wanted them - that's my excuse, anyway - I made the mistake of sticking closely to my route, so that when I stopped behind the hedge on the other side of which lay the enemy, my tanks stopped with me - and would not then obey my command to change from column to line, assault formation. There was I, watching my AI alter ego's simulated radio message to the platoon, telling them to make a start, but with said platoon not in the appropriate formation. Not a great beginning. Of course, what I should have done - and I've done it a million times on other missions in other tanksims - is to swing around, so give myself time and space to get into line formation as we move perpendicularly up to our Start Line, the hedge - the 'Line of Departure', in US Army terms. That way, I would have been in the right formation in good time to cross the Start Line, already in it. Oh well, I'll remember that, next time. To heck with it. Our buddies out the other side of that hedge needed out help, sooner the better. I ordered our passegers to dismount and was gratified to see them all do so. I now made a further mistake. I should have gone to the tank commander's unbuttoned position (or the F8 map), marked a 'move to' spot on the enemy side of the hedge, and got the others moving on ahead a little way, while I nudged forward into the aforementioned shrubbery, to provide covering fire from the halt. We'd have presented the enemy with multiple targets, most of them moving (though not crossing/moving laterally) and have multiple cannons and MGs oriented at the bad guys. Instead, I drove up to the hedge and began to push through it alone; pulling the others after me, as it were, when pushing them out ahead would have been the better option. Something else I'll remember next time...if I survive the next thirty seconds... ...to be continued!
-
Contact! From the sound of the shooting up ahead, it was apparent that our platoon leader, geting ahead of the pack, had run into a spot of bother, just out of sight over the hill. It's at times like this, that you may regret one of Steel Fury's biggest limitations - the lack of any simulation of radio traffic, beyond what scripted messages the mission builder may be able to incorporate. Here, we had a contact just ahead, but nobody was saying a dickey bird, on the radio net. In many SF missions, this doesn't matter greatly, as you're part of a compact force on a relatively open battlefield that is mostly within your view. But in close country, up against an enemy whose approximate positions are not pre-plotted on your map, the lack of contact reports or sitreps is rather inconvenient. What we do have, depending on what your map's settings have been configured to show, is the ability to see - on the aforementioned map - both the positions of frendly units, and those of any enemies they have spotted. It's reminiscent of consulting the IVIS screen at the commander's station of an M1A2 Abrams in M1 Tank Platoon 2. But it's the only way you've got, of getting - albeit rather too quickly and reliably - the sort of info that you might otherwise be able to pick up on the radio net. In this case, here's what I could see: As indicated by the hullabaloo, the point tank has run into what's evidently a linear infantry ambush, mounted from the trees to the right of our road. Scattered enemy infantry have also been spotted further up the road, around a bend. While I'm deciding what do do with this information, driving up to the crest to get 'eyes on' whatever it is, one of the tanks ahead of me mounts a reasonably credible anti-ambush drill - a Sherman breaks right and goes crashing off into the woods. Not bad, since an immediate counterattck by troops not caught in the killing ground is a pretty classic Immediate Action in the event of an ambush. The other two tanks act a bit less adventurously, speeding up and driving down to where I can now see the boss's tank, halted and facing right, into the woods. I decide to stick with the friendlies I can see, rather than go charging off into the trees - concentration of force, and all that! Reaching the lead tank, I see that he seems to have lost his left track. At that moment, my own tank commander spots the enemy! Scanning from the gunner's sight, I can see nothing, except lots of trees, and the tail end of a Sherman, busily knocking some down. I push on up the road, cautiously, losing sight of the others as somebody has inconsiderately felled a tree across the road. Passing the fallen tree, I meet two of the others, one either side of the road. They are firing in different directions and, watching the tracers, I finally spot some German troops, equiped with Panzerschreck bazooka-type AT weapons, but running away. With the co-ax, I manage to bowl over a few of them. This is no place for chivalry. The others Shermans move on, one of them knocking down another tree onto the road. So that was you, last time, was it? Thanks again, mate! Coming around the next bend in the road, we reach the edge of the woods. One of the Shermans is firing ahead and right, but at what, I can't see. I could call up the 'magic map', but I like to use this sparingly. Instead, I roll forward to the right of the road, swinging my turret to face the as-yet-unseen enemy. By this time, though, the battle seems to be petering out. There is still the occasional burst of tank MG fire, but the only enemies I can see are beyond posing us any further threat. The other Shermans resume their route march, so I follow. We are accompanied by some people on foot - un-horsed tank crews. In SF, these fellows seem intent on sticking with their platoon, instead of getting off the battlefield by the most direct route and having a nice cup of tea and a lie-down somewhere quiet to steady the nerves. Another M4 is behind me as I exit the woods and swing right, towards the area where team Baker awaits us. At this point, something strange happens. To my left, on the treeline, two Shermans race along, heading back towards the scene of the original battle. I believe - later confirmed - that it's two of the platoon I've been operating with. They must have spotted some enemies, perhaps suvivors whose chosen direction of retreat has proved unwise. My comrades' fighting spirit is commendable, perhaps, but they seem never to have learned, or have perhaps forgotten, that the master principle amongst the Principles of War is 'Selection and Maintenance of the Aim'. And our aim is to re-inforce Baker for an attack, not mop up inconsequential enemy suvivors from an ambush site. As if to punish them for their singular lack of mission focus, the second Sherman side-swipes a tree, and rolls over onto its side. A job for the heavy recovery boys, that one. Final score, Trees 1, Shermans 2. So I got to Baker's location and was awarded with a 'Mission Complete' message, but I daresay the Baker boys were wondering what happened to the rest of their re-inforcements. In fact, the M4A1 76 who had led the belated counterattack rolled up soon after, so that made two of us, present and correct. Plus, most of the crews of the rolled-over Shermans. At some point, I'll use the SF Object Editor to make the turret crew in this type of tank keep their heads down, when unbuttoned. As for the other three Shermans, the platoon leader's crew had survived, and were sitting it out in their tank, where it was immobilized. Both the other two M4s seem to have fallen victims to stout trees. So I suppose that leaves the real final score as a two-all draw, even after the penalty shoot-out. It seems that on Holy German Soil, even the darn trees are against us. Maybe North Africa wasn't so bad, after all. Coming next, Lockie's "Fury " campaign, mission 2
-
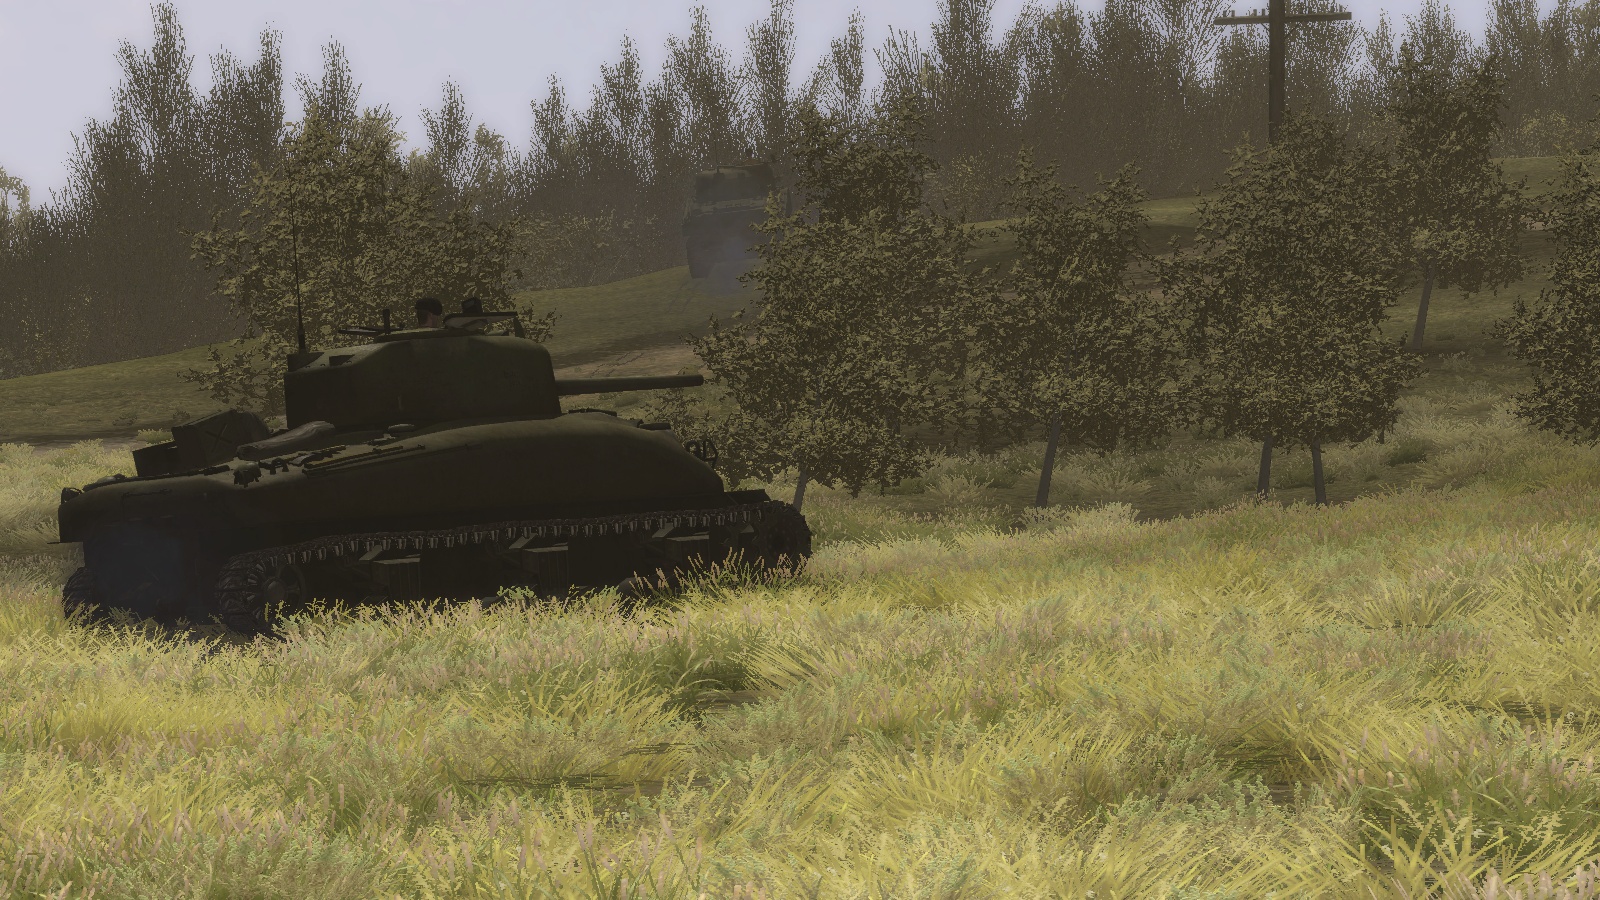
'Ambush, right!' It wasn't long before the four Shermans in front moved off. They shook out into column formation and exited the camp, headed for the RV with the second tank platoon. I tagged along behind, ordering my driver to follow the road. Incidentally, the 'weather' mod in use here is 'Winter- no snow', and a good job it does of enhancing the mission's cold, wintry, muddy setting. If you've seen 'Fury', you'll know that there's a lot of mud in the movie. Passing out of the camp, our five Shermans rumbled up the muddy road, past some more deceased livestock - does that make it 'deadstock'? The tanks up ahead maintained formation fairly well, apart from a certain amount of jiggling about. This in turn forced me to do a certain amount of speeding up and slowing down, to maintain spacing. During this trek, I had a certain amount of time to admire my mount. I always thought that the Sherman 76s were amongst the more elegant of the breed, although the 75mm versions were thought to be better for High Explosive work (the flatter trajectory of the higher-velocity 76mm gun producing a more elongated 'beaten zone' around a given target on the ground). So for early 1945, the mix of weapons in our platoon was fair enough, as in the movie. Nice, that my tank commander figure isn't standing tall in the turret, but instead, looks like he's ready for action, despite being unbuttoned. The main consideration in Sherman units, US and Allied, was not to mix variants with different engines, though on this mission we have a Wright Cyclone-engined M4A1 amongst the other types. Anyhow, with all the jiggling about, I managed to keep up just fine, but the platoon leader, out in front, didn't seem inclined to hang around for the rest of us. Soon, as the hedgerows either side faded out and the road curved off into some woodland, he began to draw ahead. Not a great idea, sir, I thought to myself. At this point, I began to expect the worst. I started swinging my turret left and right, mostly right where lay higher ground, amidst the trees. Scanning through the gunner's sight, I could see little but trees, leaves, trees and more leaves. But it made me feel better. If there's one thing I like to avoid in a tanksim, it's driving into potential trouble with my main gun at twelve o'clock. Keep the turret swinging, is my motto, laying the gun onto the areas of greatest threat. Scan! Even if you don't see anything, it may put off the enemy. And if you guess right, your first round will be downrange that much quicker. If you guess wrong, you're probably kaput, anyway. The road through the woods began to ascend. The tanks ahead rolled up to the crest. By now, the platoon leader was completely out of sight. At that juncture, with the point tank in dead ground and the rest of us unable to see beyond the crest, the party started. I couldn't see a thing, but I could certainly hear it: MG fire, and somewhere just up ahead. Now what?! ...to be continued!
-
Thank you Rob, and my pleasure!
-
A new feature for the Steel Tank Add-on mod - British tank missions for North West Europe, 1944-45! Not a mission report, strictly speaking, this is more a quick look at the mission that will feature in the first instalment of STA-Britpack. Which is what, exactly? Well it's inspired by Aldo's 'Brit44' mod for Panzer Elite, still a top tanksim, 17 years after release. Brit44 swapped for PE's stock US vehicles a good range of British AFVs, including Sherman, Cromwell and Churchill tanks. The missions were still the stock ones on the stock maps for the US Army's St Lo sector. But at last, we could try our hands against the 'Mark IVs', Panthers and Tigers with the thick-skinned Churchills, the speedy Cromwells or if in a Sherman, one with a big 17 Pounder gun, of the sort that seems to have brought panzer ace Michael Wittmann's career to a firey end. Steel Fury of course started life as a strictly Eastern Front tanksim, and limited to the battle whose name it bore - Kharkov 1942. But the modders soon added vehicles, theatres and missions, to the extent that you can now fight in Africa and NW Europe too. Below is a British Churchill in Tunisia; and below that, some of Will 73's US Shermans in a mission by Lockie based on the forest ambush scene from the movie 'Fury'. [EDIT, Feb 2016 - a CombatAce mission report on this is now online, here] Naturally, you will already know all of this, if you keep a weather eye upon the STA forums. But if you don't, well, now you know! With the fairly recent addition of a Sherman Firefly - the British 17 Pdr variant - we now have a good selection of British Army AFVs suitable for missions set in and beyond the Normandy campaign - although the only Churchill is still the earlier MkIII. And did I mention already there's a Firefly... ...plus, for the 75mm gun variants, we now have an M4A1, distinguished by its rounded, cast hull... ...and an M4A2, a diesel-engined type, with the more common angular, welded hull, here with the tank commander rather rashly 'standing tall'... ...and there's a Cromwell, a 'cruiser' tank whose Steel Fury incarnation has an interesting and authentic camo net camouflage option... Also, we have British versions of the US M3 half-track and M5 'Honey' or Stuart light tank, and some genuine Made-in-Britain kit like a '3-tonner' truck, 6 and 17 Pounder towed anti-tank guns, a 25 Pdr gun-howitzer, and the distinctive Universal Carrier aka Bren Carrier, a little multi-purpose AFV which was used throughout the war... Sadly, there are few missions to take advantage of all this nice kit, and what there is, mainly involves reducing it to shell-shot hulks, burning or otherwise... So, having finally cut my teeth with the Steel Fury Mission Editor, making some contributions to the upcoming 'Schuzle's Diary' SP gun campaign, I thought I might try to do something about that. Phase 1 of STA-Britpak is the first result - a single British Army Normandy mission, and a set of supporting file modifications which do useful things like add to the existing 3-tank platoons, a 4-tank option for British medium tanks, with either three Cromwells or Shermans, and a Firefly; and lower the height of the tank commander and loader figures, so that they are just heads out of the hatch when opened up, instead of standing tall like they are on a parade. Also, there will be a voice pack, which will, as the term suggests, add British-accented voices. The single mission is a follow-on of sorts to the two Jagdpanther missions I made for the aforementioned German campaign; like them, it's using the existing Normandy map based on Villers Bocage (made by Deviator, with input from Lockie), but re-labelled to represent the area around Hill 226 and Saint-Martin-des-Besaces, where some tough fighting took place during the Operation Bluecoat offensive. For this mission, set on 31 July 1944, the player is a Troop (platoon) Leader in the 23rd Hussars, a cavalry regiment which, being formed during World War 2, never went to war on horses! It's the day after the Jagdpanthers of Schwere Panzerjager Abteilung 654 famously mauled the Churchills of the Scots Guards on Hill 226. Now, the Germans are pulling back to more defensible positions nearer Vire, and your unit, 'A' Squadron, has been tasked with clearing a German rearguard out of St Martin. Though not an actual historical mission, it's based on the sort of battles that the Hussars fought about this time, during Bluecoat. A feature of this mission - and the others that will hopefully join it, in subsequent phases - is that instead of the common Steel Fury style of 'briefing' delivered to the player alone, the mission will begin with orders, given as if at an 'O' Group by the player's unit commander, to the player and all the other participating sub-unit commanders. These orders, though simplified, will be in the authentic British WW2 format, which was functionally the same as the NATO format I learned in the 1970s. Units will be deployed in recognisable formations and will have HQ units, present on the battlefield and making themselves 'heard' on the radio net (seen, actually, as scripted radio messages appear as subtitles). The mission scripting will also endeavour to have the units operate to the plan described in the orders, using something approximating to realistic company-level tactics. The 23rd Hussars attack on St Martin begins with 'A' Squadron formed up in a field, facing the objective, which is on the other side of several hedgerows running roughly left to right across their front. They are deployed in the attack formation described in the orders - 'two up', meaning that two of the sqaudron's three tank troops are ahead, with the third - the player's - behind ('in depth'). Just ahead of the player, are the half-tracks of the attached motor rifle platoon from 3 Monmouths, the player's task being to assault with them, while the other two troops provide fire support from either flank. The two tanks of Squadron HQ are in the middle of the formation. As the leading troops move off, the hedgerows ahead are struck by the supressive fire of the supporting artillery. A second barrage will fall on the more distant hedgerows immediately in front of St Martin, as the attackers close the range. In line formation, 3 Troop's Shermans speed their way across an open field, trying to keep up with the rapidly-moving half-tracks. Traversing right as we reach the village, I can see in the gunsight a burning house, and that somebody over on the right has helpfully managed to clobber one of the defending SP guns. We have a scary minute or two, as we are engaged head on by another SP which has seemingly been waiting for us to come into sight around the corner of the main street. It gets scarier when a second SP appears, but having called my Troop into close order column formation, we manage to win the fire fight. Reaching our phase 1 objective - the town square - a Sherman ahead and right fires across the street at an unseen target. My own tank's commander spots some motor transport tying to 'leg it', on the far side of town. Spreading out again, we reach the Hotel de Ville, where the Nazi flag is still flying...but not for much longer! This is the only mission that will be available with Phase 1 of STA-Britpak, but as more maps become available, more will be added - ideally and time permitting, in the form of mini-campaigns based on notable tankie memoirs, like John Foley's 'Mailed Fist' and Robert Boscawen's 'Armoured Guardsmen'. The current release of Phase 1 is in test - at time of writing, it lacks the voice pack (using instead the existing US voices). And it's built in the upcoming STA 2.0 mod with the December update, this so far only being available to testers, so it may be released with STA 2.0, whose release date hasn't yet been announced. If Britpak works with the current 1.0 release of STA, we may release the former sooner. In the meantime, watch your arcs!
-
Thanks guys! Apart from 'Only the bridge!', which is in one of the 'GMP' mission packs, there are also now two Fury-the-movie-based missions, in Shermans, both I think for STA2.0, the most recent mission in a January '16 update. As yet, 2.0 is still in testing but the password-protected files (yes, they're on 4Shared, that's not my decision!) are available on application by pm to Lockie, via the STA site. I'm now using 2.0 permanently, it seems just fine and since the December update, it has the 'Schulze's Diary' StuG/jagdpanzer campaign. And now the first part of Britpak, as well. I tried Britpak on STA1.0+September update, but am sorry to report that stuff is missing; and I need to get on with the voice pack, rather than make a backward-compatible version for the interim before STA goes on full release. Maps suitable for NW Europe will be the big limiting factor but if we can get some of those made - and I will try, myself - then Britpak can be developed further, and would also be a suitable basis for Canadian and Polish Army missions in that theatre. At some point it would also be good to revive Yankeepak, a project I started with real US tanker Stugumby back in Panzer Elite days, but never got beyond a test mission or two. Early days, but I'm getting there, notwithstanding the occasional setback...
-
From the album Combat Sims
-
From the album Combat Sims