


33LIMA
-
Content count
3,749 -
Joined
-
Last visited
-
Days Won
7
Everything posted by 33LIMA
-
I dropped back to the gunner's sight in the command tank of my First Platoon. To the left of the burning Chieftain, the last wisps were fading of a smoke screen. I couldn't see any other enemies, so concluded that this was likely laid earlier, by the knocked-out Iranian tank, whose turret, with its bank or electrically-fired smoke dischargers, had originally been facing that way. Further left another tank burned. Though partly hidden by the lie of the land and some intervening vegetation, he looked like another Chieftain. So far, this seemed to be going our way, although just sitting in a tank with a narrow field of fire, waiting for a mostly unseen enemy to make an appearance while relying on your initial dispositions turning out to be reasonably sound, was proving to be rather a nerve-wracking business. The urge to back out of our tank scrapes and seek out the enemy was considerable. But I held my ground. I'd made it my plan to fight from our fixed positions - a tactic used with some success by the Iraqi Army during the real-life version of the virtual battle I was now fighting - and I would stick to that. Every now and again, ammo in one or other of the burning Chieftains would cook off, producing a bright flash and a bang I couldn't hear from inside my own tank. There but for the Grace of God, as they say... Then, it happened. The moment I had been dreading. Fortunately, my AI tank commander, with the benefit of a sight with greater magnification and sited higher up, had been keeping a good lookout and had spotted the enemy tank which was now stalking us, throught the woods on our right flank. Frantically, I swung the turret round to the indicated bearing. The rain had stopped and visibility was better, but still I saw...nothing. Just trees and shrubbery. The ground dipped away in that direction. It seemed that with his higher sight position, my tank commander could see something that I could not. Then, there he was! Just becoming visible over the low crest amongst the vegetation, a third Chieftain! I had a HEAT round up the spout and as soon as I could get a clear shot at him, I let fly. At that range it would have been hard to miss...and I didn't. This time, he burned at once. The boss indicated some troops in his vicinity and though I was pretty sure this was the bailed out enemy crew, I cut loose with some bursts from the co-ax in their general direction, just as an ammunition explosion flared in the enemy tank. Although we had caught the other two Chieftains from the flank while they were attacking our other troops, that third one had definitely reacted to our presence by attempting to stalk us. However, I had deliberately placed the command tank of my two 3-tank platoons back from the other two, to provide a bit of depth and all-round defence. Despite our primary arcs of fire being to the front, my AI tank commander had been on the ball and had watched our flanks, especially that wood to our right. Top marks there to SABOW, for both friendly and enemy AI! The battle seemed to have gone quiet in my platoon's sector so I now switched to my two-tank Second Platoon, in the woods just behind our position 'Assyria 1'. There was what sounded like a heavy MG firing somehere close by but from the command tank, I could see no targets, just a knocked-out M-113 APC in the killing ground to our front. I cut loose in his general direction with the co-ax. Tracer fire in SABOW is really well done, the rounds looking a most realistic pink colour and often bouncing or ricochetting on impact, just as I have seen them do in real life. At that point, as if in reply, there was a sort of whoosh which sounded like an incoming RPG and something went bang in the woods about 50 metres to my left; you can just about see the dark smoke from this impact in the screenshot below. Deciding that there must still be some really nasty people out there, I resumed hosing the ground to our front with the co-ax. That seemed to have the desired effect, as peace returned to the battlefield. I switched back to my original platoon, up north. All I could see was wrecked enemy armour, the ones from their most recent attack still burning. Every now and again I saw a distant figure running to the rear, likely unhorsed enemy crew. The T-62 ahead of us fired at these intermittent targets but considering this a waste of ammo, I ordered firing to cease. Meanwhile the burning tanks would flare up every so often as propellant fires took hold. We weren't done yet, though! The radio net came alive with a report of enemy movement, spotted in the direction of the crossroads, a prominent landmark to our west and a known enemy strongpoint. The Second Platoon I had just left seemed best placed to deal with this, or at least get 'eyes on', so I switched back there. What was this? Another attack? There was now nothing to be seen, in the direction of the last sighting. To my left, something was burning, hidden by the trees. To my right, the under-strength platoon's second tank sat in its own defensive position, its turret turning at intervals as its gunner scanned his arcs. A look at the map showed the battlefield littered with killed enemy arrmour. Most interesting of all, the latest report of movement near the crossroads indicated that the enemy there were in fact withdrawing northwards! We'd won!!! A few seconds later, the results screen confirmed what had suddenly become clear. No ordinary win, this, it was a Total Victory'! I didn't have time to tour the virtual battlefield and take the obligatory snaps of the destruction we had wrought but I'd seen it for myself through the gunsight. A good days work, ending with the Iranians withdrawIng from the tactically-important ground from which they had been attacking us for the last few engagements. The fight had been quite small in scale, emphasised by the realistically-limited view of the battlefield from the concealed positions I'd chosen to fight from, and with the map set to display only spotted targets. But it had been a tense, exciting, realistic and thoroughly immersive tanksimming experience. No doubt about it now, in my mind. Steel Armor - Blaze of War is a top-notch tanksim, probably the best I have ever played and certainly second to none. If you take your tanksimming at all seriously, this is one you really must have.
-
I had started time compression to reduce the time spent waiting around for the real fun to begin, but only a few minutes had passed, before it all kicked off. My first indication that trouble had arrived was a 'Spotrep' from A3/3, the number three tank in my Third Platoon, in the centre of my ragged platoon line (radio messages are displayed as text, the voices all being Russian). As I called up the map to locate the sighting, he also sent a Contact Report, being engaged with APCs to his front. Whether from the murky conditions or clever use of terrain, the enemy had somehow arrived pretty well right in front of our positions, just 700 metres away. This wasn't quite turning out as I'd planned; I'd hoped to hit them further out. Anyway they had arrived in our killing ground and it was now time to do some killing. As well as the text from the Spotrep and the contact report, you can see the entry in the message log, top right of the map screen in the screenshot above. Mousing over each message will display details of the sender, who is also highlighted via a 'transmitting radio mast' graphic, superimposed on their vehicle marker. Neat! So, battle had commenced and while the enemy so far consisted of APCs, I was anxious that my centre platoon was engaged on its own. time to see if we could lend them some support and hopefully, catch the enemy advance from their flank. I dropped down to the gunner's sight and scanned left and right. Nothing! Where were the beggars? Moving out of our tank scrapes and into the open, to go hunting an unseen but very present enemy, was not how I'd planned this one would go. Suddenly, my tank commander burst onto the intercom with a fire order - a tank! I used to have a bit of bother interpreting his directions but now I'm well used to it and I quickly laid my gun in the direction he'd indicated, referring to the little turret direction indicator icon, bottom centre of the screen. And there he was - unmistakeably a mighty Chieftain, lumbering out of the murk and heading our way. Furtunately his own gun was laid to our left, towards our Third Platoon. I had a sabot round 'up the spout' and let him have it, only to see the tracer flash skywards from a ricochet. I fumed with impatience as my 115mm gun elevated for the reloading cycle, taking my sight with it. The big Iranian tank swung to our right, exposing more of his side to my platoon, possibly still fixated with the enemies to the east. This part of my plan was working out, but that Chieftain was refusing to die, despite the fact that the T-62 to my front had also started shooting. Our slow rate of fire didn't help and at one point the Chieftain drifted behind my right-hand tank, masking him from my own fire. As he came back into sight, I let him have a HEAT round, firing practically over the fenders of the T-62 just ahead of me. You can see the muck thrown up by my muzzle blast in the pic below, taken as the gun elevates to reload, with one of the crew celebrating our hit over the intercom. Finally, after what seemed like ages but was probably just a few short seconds, the Chieftain started to burn and the tension began to unwind a notch or two. I returned to the tank commander's sight and had a brief look at him, just to be sure. But the battle wasn't over yet! To the left of the burning enemy tank, wisps of smoke showed where another AFV was putting down some smoke for concealment and it wasn't long before I heard another Contact Report on the radio. While closed down in your own tank in SABOW you can't hear too much of what's going on outside but although I couldn't get 'eyes on' any more enemies, I could see tracers from cannon fire going back in forth to my front. A look at the map showed me that the battle was in full swing. From a quick glance it seemed that there were two killed enemy tanks to our front and a live APC in dead ground somewhere further out. And enemy infantry, likely debussed from that and possibly other APCs, were assaulting the woods in between my Second and Third Platoons. From dead quiet to utter chaos in seconds! In other words, absolutely fantastic! Just what the tanksim doctor ordered! SABOW had delivered me a great little battle. Now all I had to do was win it! ...to be continued!
-
I unpaused the action and found myself in the tank commander's station of the command tank of my first platoon, up at 'Ummayad 2'. It was raining heavily, thoroughly murky conditions with visibility poor. I quickly gave the platoon the order to close up and stay concealed, checking that they were also ordered to fire at will. I could see that the enemy might be at quite close quarters when they appeared - hopefully, under our guns, as they crossed ahead of us, from right to left. On our right, hopefully hiding us from the Iranians until they appeared in front of us, we had some cover from a slight rise in the ground, topped with a long strip of woodland. Next to my left-hand tank, which was dug in like all our T-62s, was a Chieftain knocked out in the previous battle. Scanning my arcs through the commander's sight, I could see that my chosen killing ground was littered with some other wrecks from the enemy's last attack, in the form of a couple of knocked-out M113 APCs. I hoped that this sight would not deter them from coming much the same way, although I was hoping the next attack would come from slightly further south. I next switched to my second platoon, set back inside the edge of the wood at 'Assyria 1'. They were deep enough into the woods to be reasonably well concealed without completely sacrificing their fields of fire. I was still quite worried about them, though, for they seemed likely to be at the sharp end of the enemy's attack. They would be the anvil against which my first platoon would smash the enemy. My dispositions were in any event designed to ensure that no single platoon would meet the enemy unaided, mutual support being an important principle of defensive operations. Finally I 'visited' my third platoon, in the centre. I would have prefered to have them out of sight as a mobile reserve but I didn't have the elbow room so here they were, set back slightly from my planned killing ground but with arcs of fire which overlapped with the other platoons, on either side of them. In the pic below, taken from the commander's cupola of the platoon leader's tank, you can see the other two T-62s, just ahead and to either side, all well dug in. Again, I gave orders to close up and stay concealed. From the commander's sight I scanned left and right. Once more I could see casualties from the last fight, in this case a T-62, one of my own losses no doubt, and beyond that, an enemy M-113. Having had a look at the battlefield from the viewpoint of each platoon in turn, I switched back to the first platoon and settled down to wait. Here's the tactical map, pictured at about this point in time. My first platoon is top right, with the command tank the green diamond. The third platoon is the group of three red diamonds in the centre, with the two further south, near 'Assyria 1', representing the second platoon, on my left flank. The blue segments represent my allocated arcs of fire (I've suggested to Graviteam that they lighten these markings as for one or more platoons, then tend to obliterate the map markings beneath!) Nervously, I went to the commander's sight and scanned left to right and back again, with the occasional wider sweep in case the Iranians somehow managed to elude other friendly forces to come in behind us. But all there was to be seen was my number three tank, dug in to my left rear... ...and to my right front, my number two, next to the dead Chieftain, with the equally-dead carcasses of the enemy APCs looming through the murk just ahead. I had the feeling that I should have set up this platoon further north, away from the open ground ahead, in case the enemy came in more to the north than I was hoping they would. But I was committed. I wasn't going to forsake our current dug-in positions, for the sake of a few hundred metres more separation. I was about as ready as I was ever going to be. The next move would be the enemy's. ...to be continued!
-
Emboldened by my success in that single mission, I decided to return to my current campaign, playing for the Iraqi side in the war with Iran. Last campaign mission, we had moved out from our defensive positions and met an Iranian advance more or less head on. Though we'd stopped the enemy in his tracks, we had paid a high price, in terms of tanks knocked out, at any rate. It's now the early afternoon of 7th January and fighting has broken out on both shoulders of the enemy salient, marked in blue below. The enemy is renewing his attacks towards my unit, the 10th Detached Armoured Brigade, in the bottom right hand corner of the map. I haven't been given any specific orders from on high but it's fairly obvious that the task will be to stop the enemy attack. In SABOW's campaigns, much as in real life, victory is decided according to the ground you manage to occupy...or in this case, prevent the other side from occupying. I'm still learning the ropes as far as SABOW's campaigns go - for example, so far I've not so far encountered air or artillery support options, the bad weather in this campaign being enough to explain the lack of the former. But I do know that having opted to join the developing battle, my next step is to set out my forces in the 'Deployment' screen, seen below. Bottom centre, you can see the icons that show that I am still commanding three T-62 platoons. Though we have had some re-inforcements, one of the platoons is down to two tanks, the others having the full three. I decided I didn't like the offered deployment, with all of us bunched up around the key point we were evidently to defend, marked 'Assyria 1'. Unfortunately I didn't take a screenshot of my deployment - you'll see this later - but after a look at the map, I decided to move my 1st platoon well to the north, up to the position marked 'Ummayad 2'. There I sited them in defensive positions with arcs of fire to the south-west. I kept the under-strength 2nd platoon near 'Assyria 1' but backed them into the wood, facing north and west. My third platoon I placed more or less in between these two, just inside the north-west corner of the large wood behind 'Assyria 1', facing west. I would have liked to place this platoon further back, in depth and in reserve, out of sight behind a low crest further east. But that was not allowed. SABOW can be quite strict about platoons sticking to their assigned areas (in terms of map squares), it seems. for each platoon in turn, I adjusted the positions of tanks individually, till I was satisfied. I then went to the 'Initial Orders' screen and set arcs of fire so that they all overlapped nicely, covering from north-west to south-east. The markings on the map told me my tanks were all dug in and my plan was to let the enemy come to is and destroy him by concentric fire from our fixed positions. The ground over which he was most likely to advance would form an excellent killing ground, into which at least two platoons should be able to fire simultaneously. Or so I hoped! ...to be continued!
-
Updates for SABOW are still coming thick and fast from developers Graviteam. As well as the abillity of tanks to lay smoke screens, there are new tank control options. One of the cleverest and most useful - and until now, seen only in Steel Beasts - is a command to order your tank or tanks to start moving into and out of hull down positions, in between shots - called 'active defence' in SABOW. In fact there is now a new training mission to enable you to understand and practice this. And another one, to practice the use of smoke generators. In fact, a new main menu option, 'Missions', has been added... ...to give more convenient access to the mounting number of additional single missions, which I expect will provide an equally-convenient way to access user-made missions, too... The 'active defence' mission is for the M-60 and starts with a text prompt to advance to a crest line ahead, to engage advancing enemies. You have a couple of tanks on this mission. As you advance, a HEAT round is loaded and your wingman slides over to your right. As you come up to the crest, the on-screen text messages continue to prompt you, like an instructor on a real training exercise. Having sighted the enemy through the gunner's sight - the one shown below with the simpler reticle is used with the analogue ballistic fire control computer and stereo rangefinder - you are prompted to ctrl+click on a target, to get a range from the tank commander, who dials this into the computer... You are then told to hit the hotkey which will start your tanks 'jockeying' (to use the British Army term) into and out of fire positions, relative to your selected target... This is where it gets really cool! You can take a shot, then your AI driver will back up into cover, while your loader chambers the next round... Your tank will then move forward again into a hull down position, halting long enough for you to take your shot, then back into cover while reloading, then move up again. Unless you have ordered otherwise, your wingman will do the same. This is a joy to behold! You can intervene at any time, as the text messages below suggests, for example, to change firing position or to order a short stop ahead of time. In the pic below, my own tank is reversing into cover after firing, while my wingman has started to move forward again for his next shot. Tanks appear to move back up to the same fire position each time. While it would be safer to 'pop up' even slightly to one side each time, you can adjust this manually at any point. The convincing detail in which SABOW replicates so many aspects of the functioning and handling of its featured tanks I am finding incredibly impressive and immersive. Largely thanks to the wargame layer, SABOW has what I believe may be the best single-player campaign system of any tanksim, ever. The sounds and visuals are just great. The most recent update added some improved damage modelling and associated effects: the sudden, vicious flare-ups of the ammo cooking off in a knocked-out tank look at once fearsome, authentic and spectacular, without being overdone. The first time I saw this, I just went, 'Oh WOW!' and could not suppress a grin. New video clip showing some of the new features here: A few weeks ago, when I finally decided to make the effort to get acquainted with this one, I was wondering if SABOW would be much good as a tanksim. Now, I'm beginning to wonder if there is a better one.
- 17 replies
-
- 1
-

-
- steel armour blaze of war
- sabow
- (and 1 more)
-
Good hunting!
-

Low flying in the Welsh valleys - the Mach Loop
33LIMA posted a topic in Military and General Aviation
Worth watching: -
From the album Combat Sims
-
From the album Combat Sims
-
From the album Combat Sims
-
From the album Combat Sims
-
From the album Combat Sims
-

From the album Combat Sims
-
From the album Combat Sims
-

From the album Combat Sims
-
From the album Combat Sims
-
Hmm, sounds like I got lucky! Or perhaps the more cautious approach paid off. In the previous mission, a campaign one, getting impatient, I just rattled off hunting for the advancing enemy, instead of planning my tank platoon's moves one tactical bound at a time, from fire position to fire position. Result - enemy advance stopped and tanks destroyed but with heavy losses on my side. One thing I have found about both SABOW and SF is that it can be wise not to rush in, just for the sake of either trying to keep up with the onrushing AI in the advance or get directly to grips with the enemy, in defence. Sometimes I will just plough on but I would always recommend making a Combat Appreciation and coming up with a plan, all from from the map, before kicking off the mission. 'Aim-Enemy-Ground-Plan' is a simplified form I adopted in preference to the longer version, since I was taught it back about 1980 and it works equally well in sims. From the SABOW map, or now the 3d delopyment option, breaking the ground down into left, centre and right is helpful, just as the infantry section commander does from 10:50 in this clip from an early 1970s training film: Yes there's a lot of depth and potential to this sim. Even now, choosing to concentrate on tactical handling of a tank platoon and finding I can do that, I have not yet experienced air or artillery support or explored the facilities for re-inforcements or repair - for example trying to recover damaged tanks from the battlefield, rather than just writing them off. Or tried out organising some tank-infantry co-operation, ideally with results like these: ...oh for a playable Chieftain, some FV432s and a central European map...maybe one from GT:OS! Hopefully there will be some add-ons, developer or user-made. I'll start getting into some of SABOWs other features soon but for now and even with just two tanks playable, there is plenty to do and savour, just fighting my own tank and running my own platoon.
- 17 replies
-
- 1
-
-
- steel armour blaze of war
- sabow
- (and 1 more)
-
In the words of the RAF motto, Per ardua ad astra!
-
The tedious bit is the many downloads - the ones for the maps, then the ones for the WW2 module (WAW) with WW1 and jets being optional. Even if you use the torrent option, you also need to grab one of the waw files (#8 IIRC) separately as it has a fix which I THINK isn't incorporated in the torrent. Once you've got them, it's just a matter of unzipping them...in the correct order, which is where it can go wrong. I got it right first time...but I still got a lock-up, loading the sim, at 70%. As recommended I enabled the (included) QMB Pro option via the (included) JoneSoft Generic Mod Enabler which quickly sorted that (plus it gave me many more options in the IL-2 QM builder so it was a must-have mod anyway). A few people report installation probs but they all seem to get sorted; some may be due to enabling sub-mods (like DBW, CUP includes a lot of these, emabled via JSGME) or other mods which conflict. It's no more hassle than installing Dark Blue World. I had a lot more trouble setting up Iron Front Liberation '44 the other day, assumed the Gamersgate version was current but no, had to download and install 3 patches (out of 5 available, eeeny meeny miny moe...) in sequence then the D-Day DLC. Worked fine till the last step, then CTD, re-install and start over...finally turned out that I was using the wrong key, of which there are three for different purposes...not THAT was a merry dance! I see one of my favourite campaigns has now been updated to CUP standard so I'm going to give that a try-out next! http://www.sas1946.com/main/index.php/topic,45262.msg511950.html#msg511950
-
Let battle begin! So...I had got my platoon safely into my chosen battle position, from which I could either shoot up or move to envelop the expected enemy attack from the north. At this stage, I could - and probably should - have fine-tuned the positions of my other two tanks. SABOW offers you different ways of getting your tanks into cover. This includes a command to adopt defensive positions, but I have little experience of using that and was concerned it might have unpredictable and possibly bad results. Besides, I wanted to keep us tight, in the patch of close country where we’d set up. I could have jumped into each tank in turn and tested and adjusted their lines of sight and cover from within the tank itself, much as an infantryman should do when individually siting his slit trenches. But I am well used in tanksims to driving the whole platoon into my chosen battle position – I get us into line, well closed in, and then orient my final approach to my chosen cover so we all end up in a decent final position. Sometimes this works well, sometimes not so well. But this time, I was happy enough with the results. We had a lot of dead ground to our right but that’s how I wanted it. The other platoon of T-62s had ‘eyes on’ that area and I planned to stay in cover until either I had a contact, or they did. I was quite hoping they would hit contact first so that I could flank a preoccupied enemy. At the same time, I didn’t want to conceal my platoon so well that the enemy might be upon us before we saw them, if they moved up on the left flank, where we sat... ...which of course is what happened. I was scanning from the commander’s sight, as this is higher up and has a greater magnification than the gunner’s equivalent, lower down. The first sign of trouble was an AFV which crossed a distant skyline, pausing then disappearing again. No way was I going to give away our position by chancing a long-range shot. So I let that one pass. ‘Whites of their eyes’ and all that...well if not that close, at least within good first round hit probability range. I don’t know how they did it, but the enemy managed to get rather dangerously close before we spotted them again. A radio message reported an enemy tank – I can’t recall whether from my own platoon or the other one. IIRC, SABOW identifies these messages, when displayed as text on-screen, with the name of the platoon or tank commander, rather than using their callsigns for some reason, which they also have. Scanning in the direction indicated, I saw nothing. I decided to call up the tactical map, which is no ‘God’s eye view’ but still displays all kinds of useful information, like a message log and spotted enemies. Before I could do this, the party kicked off, good and proper. Tank cannon fire erupted on my right and tracers flashed past. One of the shooters was a platoon-mate over there but I couldn’t see any bad guys. The tracers I saw seemed to be outgoing fire but there was likely some incoming, too. In a cautious effort to get ‘eyes on’ I slowly rolled forward, but halted abruptly when I got a rather sudden shock. An Iranian tank, a Chieftain no less, came into view just a few hundred meters away, in a patch of open ground to my half-right. He was rolling left to right across my line of sight, just about visible to me from the TC’s position and not yet visible to my gunner, lower down. Fortunately the Chieftain seemed to be engaged with our friends to his front. I edged forward but only succeeded in worsening my view of him, so uneven was the ground. Much to my relief, by the time I finally got my gun onto him, someone else’s rounds had slammed into him and he started to burn. I knew fine well he wouldn’t be on his own and rolled slowly forward again. Sure enough, this brought a second Chieftain into view and I put two rounds into his exposed sides. His hatches popped open and the crew bailed out. There was still some firing going on over to the right but I could see nothing more and looking back, I could see that my other two T-62s also seemed to have run out of targets. I considered edging further forward from the position we were now in, but conventional tank wisdom favours reversing out before moving forward again – so that you don’t re-appear from a position the enemy may now be concentrating on. In Steel Fury’s fast and furious little actions, this will often mean the battle moves away without you. But this being SABOW and a defensive operation, I decided I would play it by the book and disengage, before popping up somewhere else. So I gave the command to back up. In SABOW, your orders are treated as platoon orders unless you consciously first limit them to your own vehicle. Knowing that AI-driven tanks in other tanksims will often turn around rather than reversing when following a platoon leader’s move – exposing thinner armour to the enemy – I was pleased to see that the other T-62s reversed with me. Ahead of me in the pic below, you can see the empty cases from the two main gun rounds I had fired, lying where they fell after being ejected out of that little flap in the top rear of my T-62's turret. Had such a system been adopted in the cost-conscious British Army, I expect we would have been sent out after the battle, to 'pick up our brass' for refilling or recycling :) Backing over the broken ground, my tank rolled and pitched like a ship at sea but I kept going until I was confident that we had ‘broken trail’ and were now well out of sight. Still moving back, I turned right until I faced west then stopped and moved off, ahead this time, in that direction. I called the others into column formation. My plan now was to take a wide left hook and come up on the enemy’s flank again, not only from a different position but putting a bit more space between us. My platoon was soon in a neat column and we swung west and around the hillock which had been our first battle position. We were in more open country now but with the hillock to our right front, hiding us from the enemy in that direction. As we came around towards where I expected the enemy might start appearing, I got us back into line and circled on around the hillock, hugging its cover on our right but gradually bringing into sight more and more of the battlefield. Things seemed to have settled down so I used the opportunity to call up the tactical map. Mousing over the reports in the message log – mainly of contacts - I could check who had made which reports. This confirmed that the stay-behind T-62 platoon had indeed been in action. My own platoon had narrowly escaped the enemy coming upon us at close range in our first battle position but despite that, things had panned out reasonably well. The enemy advance seemed to have been halted, with no losses on our side. The terrain to the north seemed clear of the enemy and with my left flank seemingly safe enough, I continued my circling movement, intending to mop up the battlefield and destroy any enemy forces remaining in that area, perhaps gone to ground or pinned there by the other T-62 platoon. As we advanced, first one then the other of the two knocked out Chieftains came back into clear view. A little further on, I suddenly spotted an M60, stationary and hull down some distance away, facing south, away from us. Taking no chances, I put a couple of rounds into the side of his turret. Getting no reaction, I left it at that. ‘Keep shooting till it changes shape or catches fire’ is fine and dandy as motto for tank-vs-tank combat, but T-62s carry rather less ammo than Western tanks and this particular Western tank was quite possibly dead before I shot him. Finally, the battlefield lay exposed before us. Nothing left, but burning or abandoned tank hulks. The Iranian attack had been well and truly blunted, with no losses on our side. Not a bad day’s work! All in all, for a small-scale, no-frills, ‘instant action’ mission, this one had been a pleasant surprise. No mad enemy rush, let alone one concentrating on the player, just a steady advance. A tactical problem was presented, with time, space and opportunity for the player to consider, decide on and execute a tactical solution. The action when it came was intense enough; but in between, there was time to practice and savour other important aspects of handling a virtual tank platoon in a combat environment. Things like planning platoon-level operations; obstacle crossing; managing formations; moving into and out of battle positions; not to mention a spot of commanding, gunning from and driving my own tank. Friendly and enemy AI had been believable and efficient. All this, in convincing terrain, with well-animated tanks whose appearance and functions are modelled with an attention to detail which seems to be second to none. And with an interface which – once you’ve got past the initial unfamiliarity of it all – puts so much at your fingertips. I’ve said it before on CombatAce and I’ll say it again – I’m finding that SABOW is a rather excellent tanksim and quite a package! PS as of 25 April, SABOW is on sale at Gamersgate; definitely recommended, if you're serious about your tanksimming and have any interest in Cold War era armour: http://www.gamersgate.com/DD-SABW/steel-armor-blaze-of-war
- 17 replies
-
- 2
-
-
- steel armour blaze of war
- sabow
- (and 1 more)
-
It was after all Goering who is reported to have said, complaining about the Mosquito '...There is nothing the British do not have. They have the geniuses and we have the nincompoops. After the war is over I'm going to buy a British radio set - then at least I'll own something that has always worked.' So it's not to be wondered at, that the WOFF clock is MoD (then War Department?) property, marked with the ever-present crowsfoot. Either the WOFF Huns - sorry, Germans - purchased it, in line with Der Dicke's later sentiments...or perhaps it was 'liberated' as war booty.
-
I think I prefer the SABOW weather in Angola, nothing like getting paid to do a spot of sunbathing for doing your 'International duty', while you wait for UNITA and their South African allies to turn up... In SABOW's Iran, in sad contrast, it seems to rain a lot. Still, you can often rely on somebody starting a nice fire to help warm you up... Of course, one kind turn deserves another... The latest patch has definitely added exhaust smoke emitters to T-62 and M-60, plus there is now another training mission, accessible from a fourth icon on the main menu. The previous addition was a firing range for the M-60; now, we also have a free driving lesson, in the T-62. To adapt what the Romans reportedly said about Egypt, 'From Graviteam, always something new.' It's good to see SABOW getting all this attention from the devs and in return I hope it gets the attention it deserves from the market. Now that I've got the hang if it, I'm finding SABOW rather excellent, a tanksimmer's tanksim and a wargamer's wargame...if that makes any sense at all. Doing this to SABOW's great Chieftains, though, it doesn't come easy...
-
-
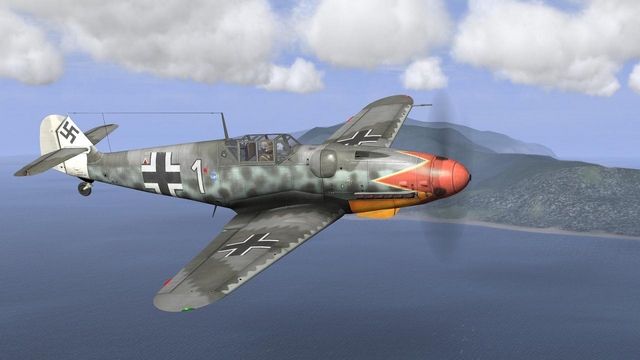
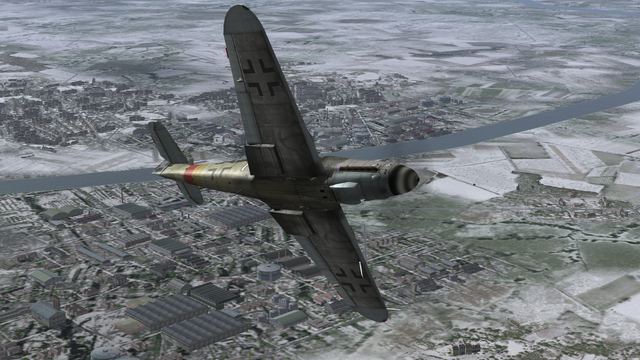
Bf 109K, Il-2 1946 + CUP, CUP Western Front Winter terrain
33LIMA posted a gallery image in Member's Albums
From the album Combat Sims
-
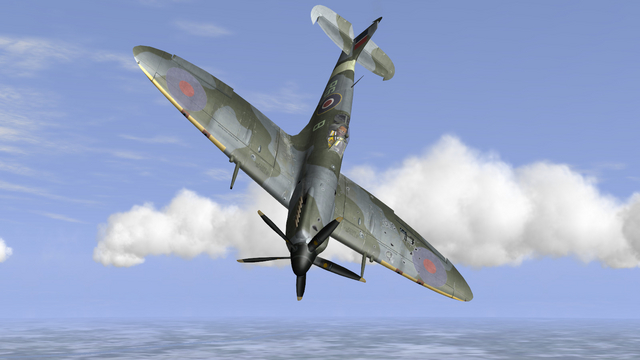
Spitfire XIV, Il-2 1946 + CUP, CUP Western Front Winter terrain
33LIMA posted a gallery image in Member's Albums
From the album Combat Sims