33LIMA
-
Posts
3,749 -
Joined
-
Last visited
-
Days Won
7
Content Type
Profiles
Forums
Gallery
Downloads
Store
Everything posted by 33LIMA
-
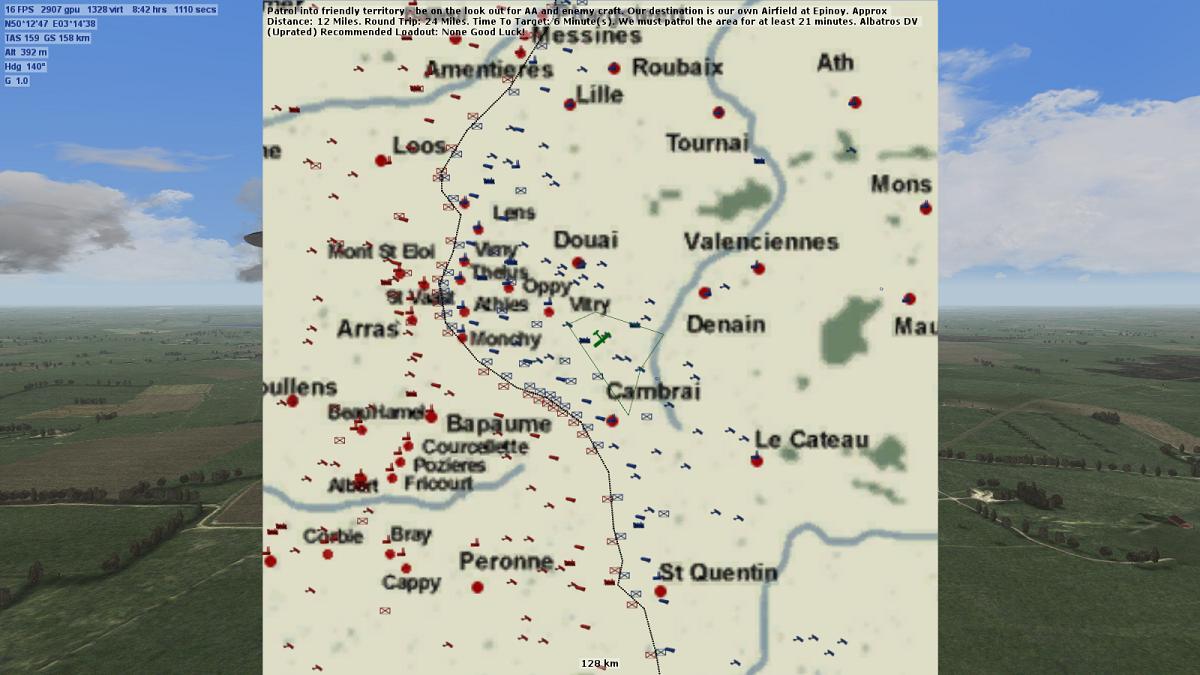
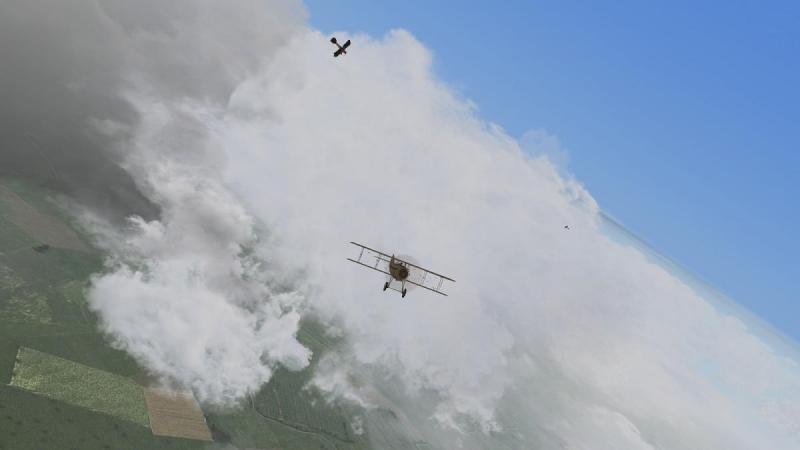
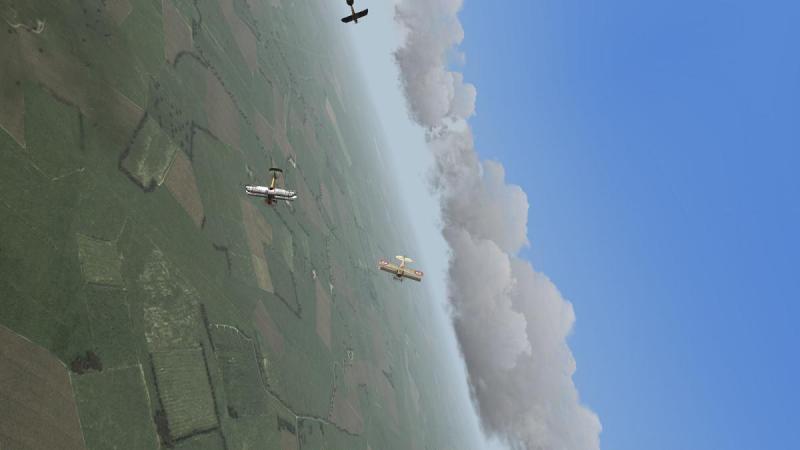
Finis! I rolled over and dived after the SPAD, being careful not to over-stress my aircraft, for fear of losing my lower wings. But I wasn't fast enough. Another Albatross was after him - it was my companion Sikorski, in fact. As he had likely been one of those who has chased the Frenchman off my tail and saved my neck, I was content to hang back while Sikorski attacked, ready to nip in for a shot should the opportunity arise. It didn't. Sikorski sat on the Frenchman's tail and fired. The enemy took no evasive action, having obviously suffered at least some damage from my own hits. This time it was the end. The SPAD seemed to pull up briefly, then his nose dropped and he dived for the ground, trailing dark smoke. This time, he did not pull out. I checked my map and the time, just in case I was offered the opportunity to claim the victory; it was 8.42 am and I was a little south-east of Vitry. Looking around, the only other machine I could see now was Sikorski's. Of the rest of our formation, there was no sign. No friendly anti-aircraft bursts dotted the sky. All very mysterious! I contemplated flying on and picking up the patrol route but I had lost a lot of altitude, taken some hits in the Frenchman's first pass, and had only about half my ammunition left. So home I went, accompanied by Sikorski. Back at Boistrancourt, I wasn't surprised not to be considered for the victory claim, nor that my Albatros needed a bit of fixing. A small price to pay, that was, for the fact that we had knocked down a Frenchman who must surely have been an ace, so bravely and skilfully had he handled his machine. I was disappointed that I hadn't finished the SPAD while I had him under my guns but the damage I inflicted certainly set him up for Sikorski. For a first mission, I hadn't done too badly. I wondered what the next flight would bring.

-
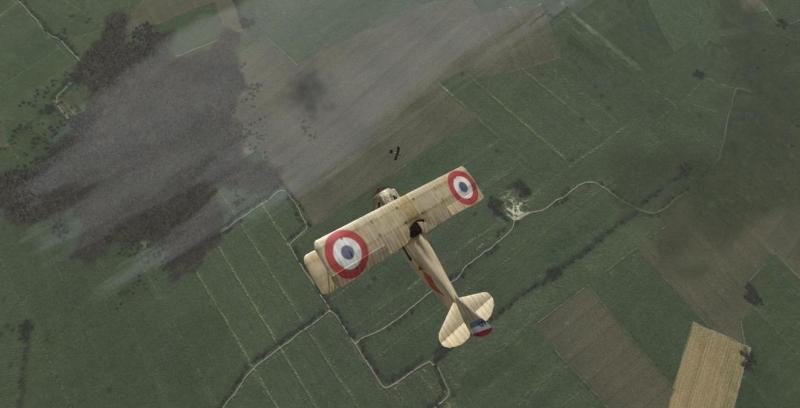
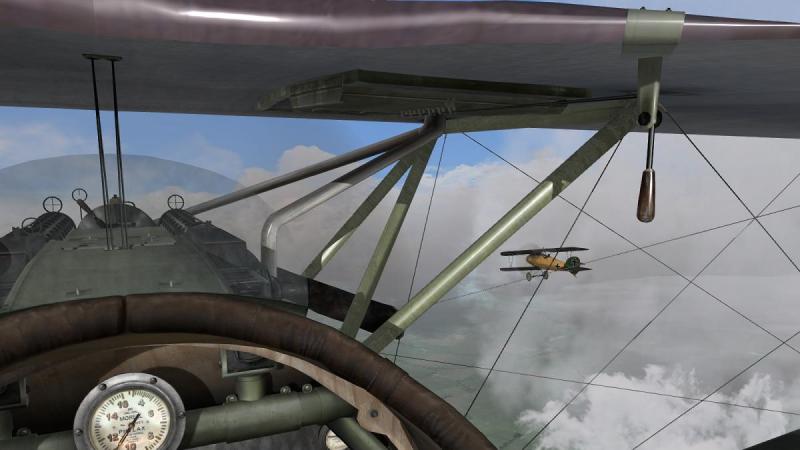
A tough nut to crack As it turned out, our foe was a Frenchman in a SPAD, and he was alone. Above us, he could most likely have avoided us, but that seemed to be the last thing on his mind. As we spiraled up towards him, he banked around dropped upon us like a hawk. Our friend in the SPAD seemed to have an unerring nose for who was the rookie, for he decided I was the one. In no time he was behind me. I leveled off from my climb and steepened my turn, but this SPAD seemed to be flown by an expert for he seemed to be entirely unimpressed by the common consensus that my machine was - at least on paper - more manoeuvrable than his. It was fortunate indeed that I was not on my own! Soon my flight mates counterattacked, and drove off the intrepid Frenchman who turned away with two Albatrosses hot on his heels. Anxious not to miss out on the opportunity to show the enemy flier that even a rookie pilot of Jasta 5 does not take kindly to having his tail chased, I swung around and headed after the others. By great good fortune, the Frenchman's efforts to escape took him right across my path and I duly latched onto him. After several bursts, he flipped over and went down! My excitement at a victory on my first mission was short-lived. Not far above the ground, I saw the SPAD pull out and fly off. Whether his dive had been a ruse or genuine, the fight was clearly still not over! ...to be continued!

-
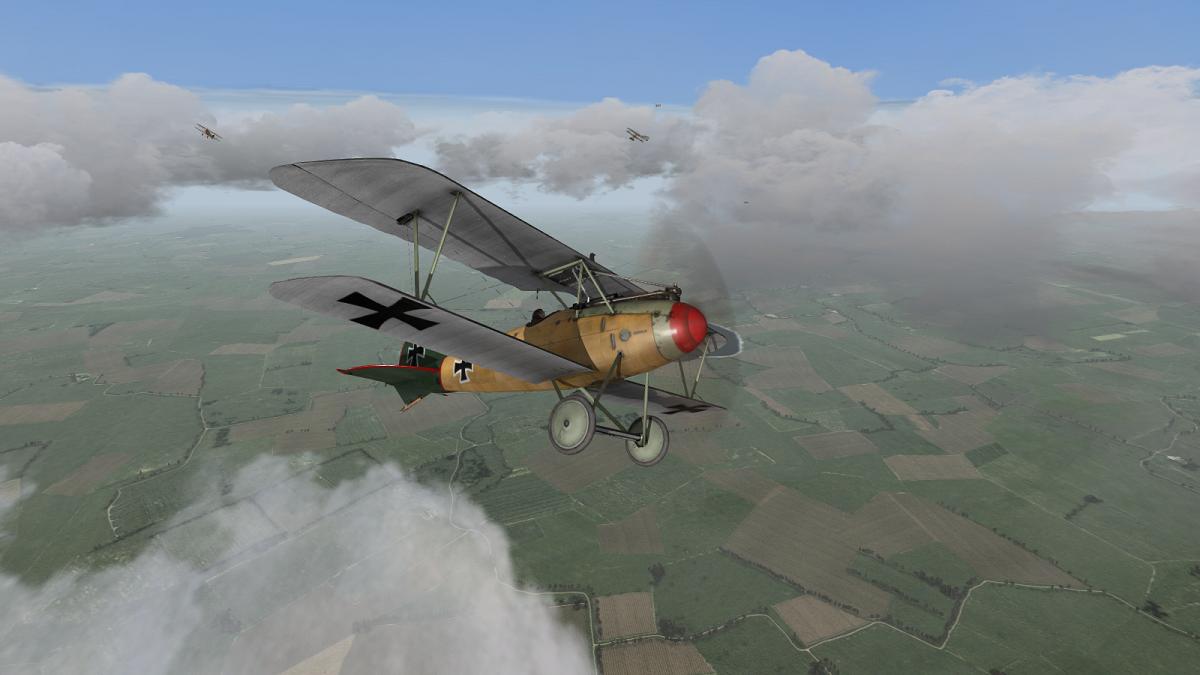
A surprise encounter! We took off together and headed first to the west. Our straggling group of aircraft slowly formed up on our leader, who stayed low until we were all with him. Checking my map which was marked with our patrol's intended course, I saw that we were still heading west, towards the front, which was not too far off, at this point. Finally our leader began a series of gentle, climbing turns which I expected would bring us onto our assigned track. With much adjusting of throttle, I managed to keep my position, more or less. Watching out for enemies while I was thus occupied was more or less out of the question. Without any warning, our formation broke up. At first, I thought it was just another course correction, but the turn tightened up and the other Albatrosses began ascending in a tight upward spiral. I knew this could only mean one thing - someone had seen the enemy! ...to be continued!

-
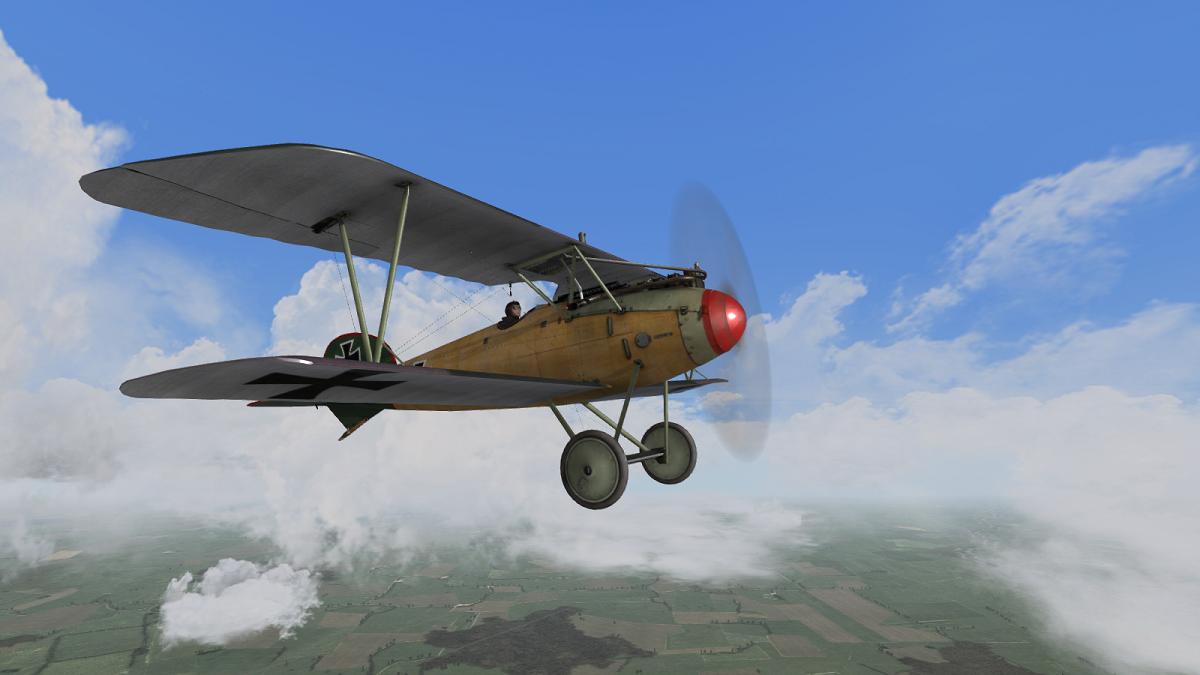
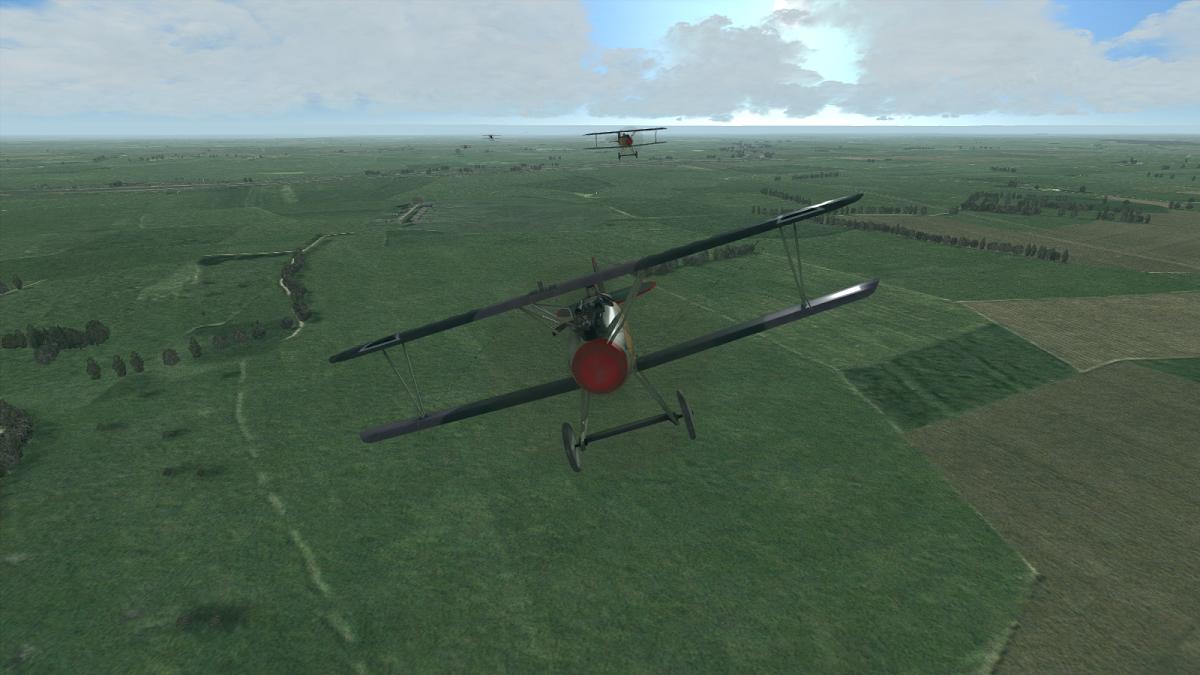
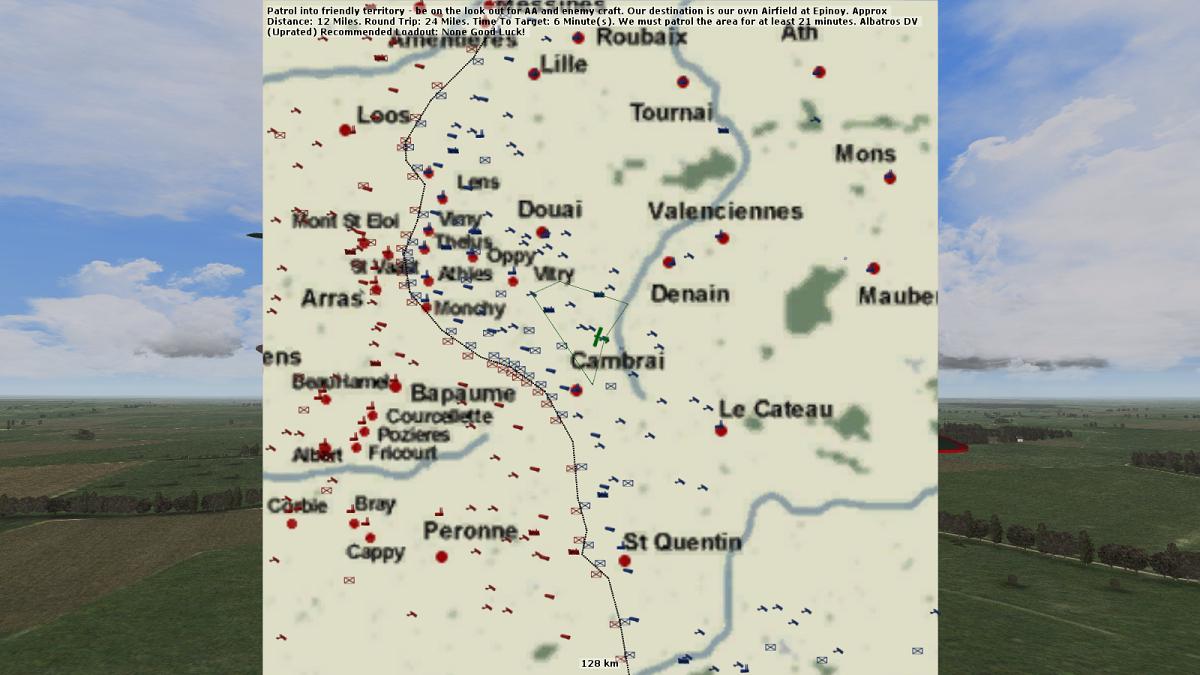
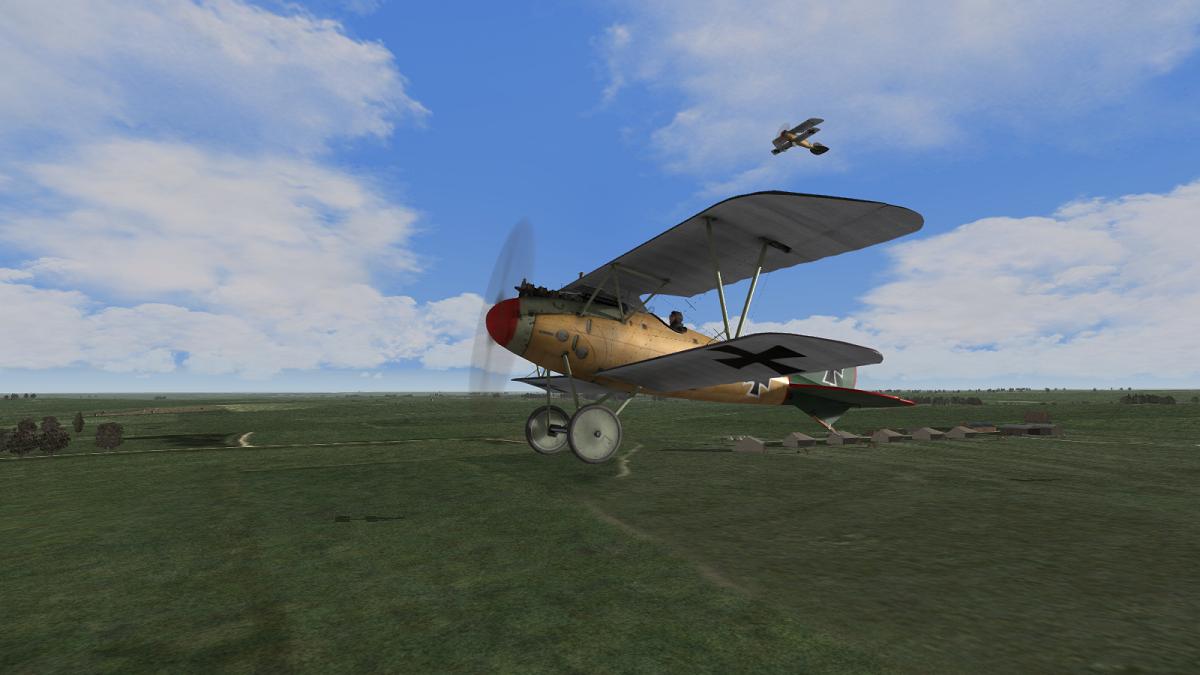
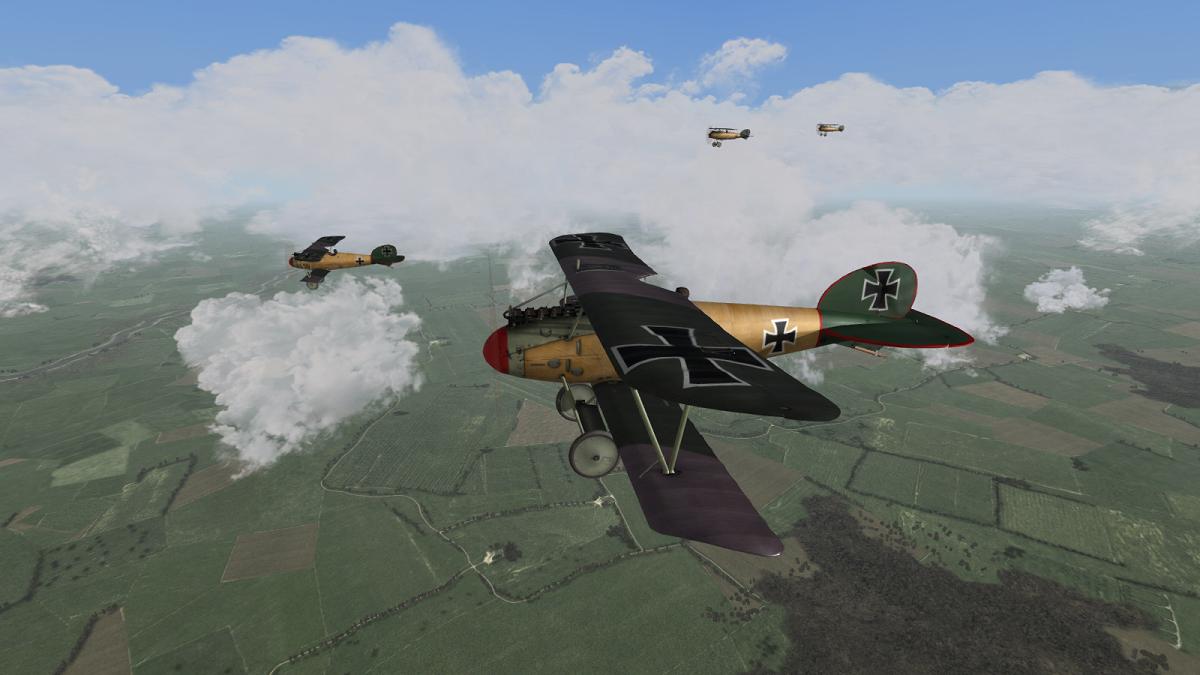
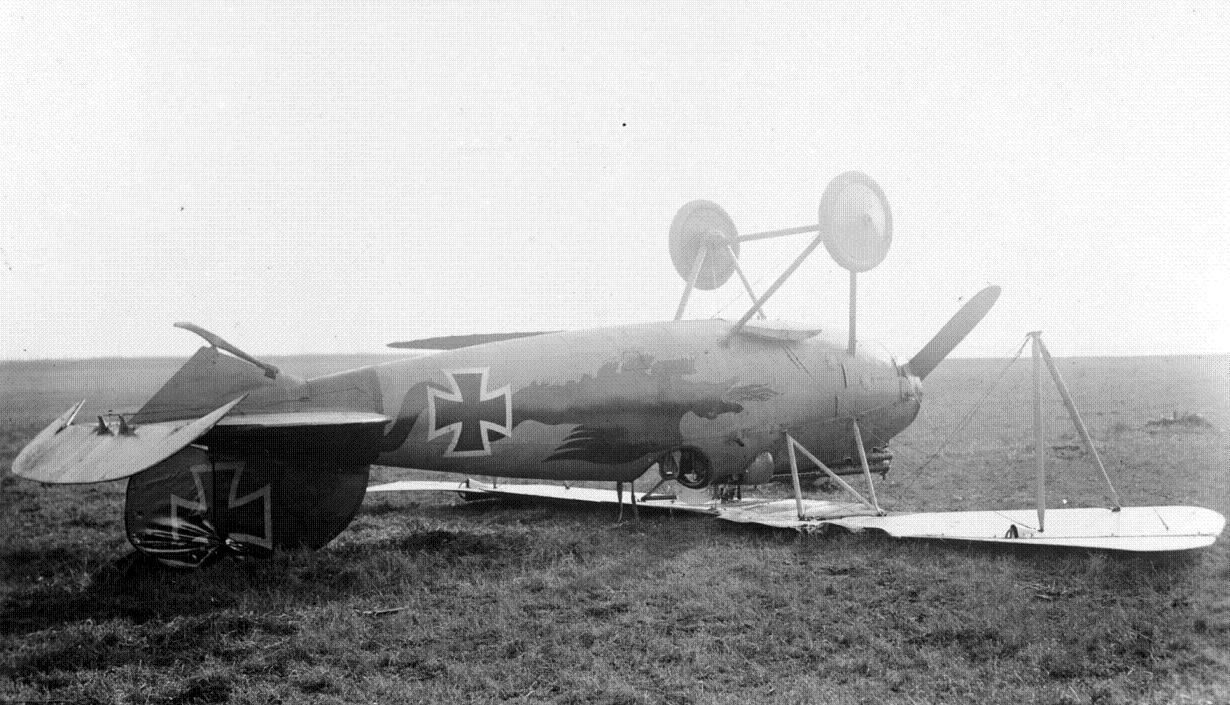
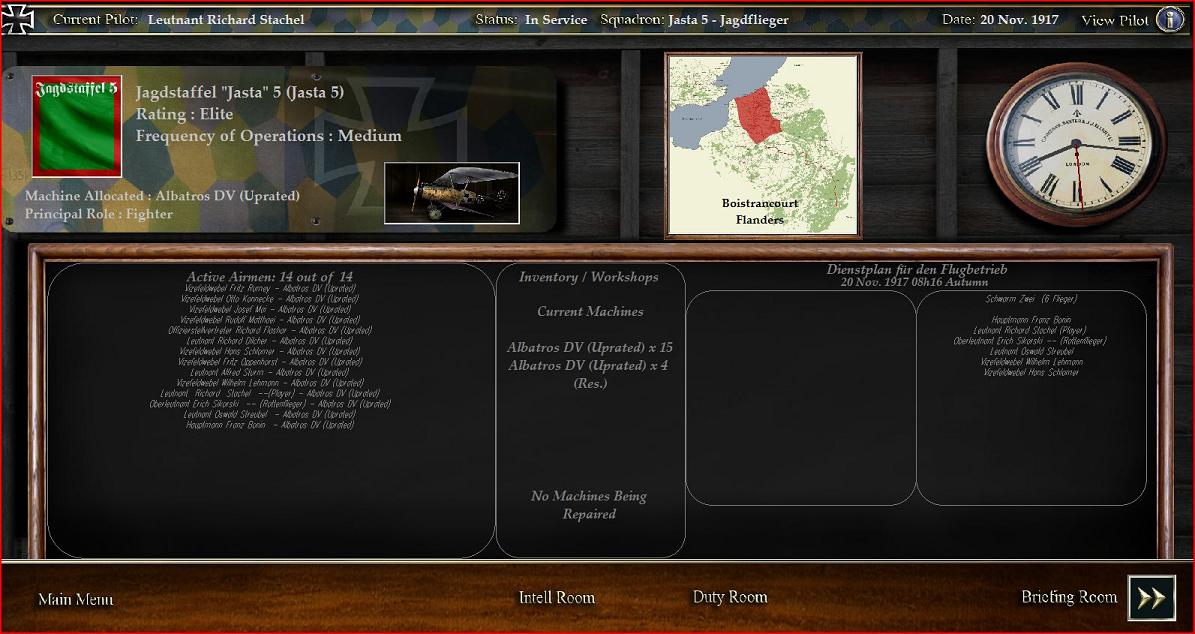
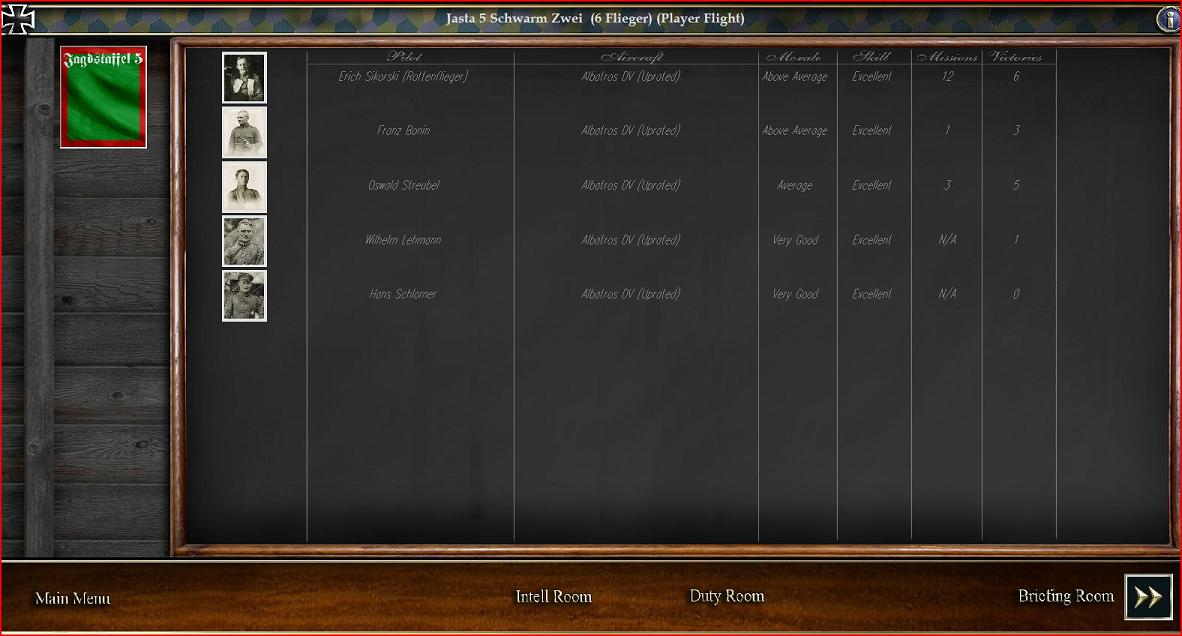
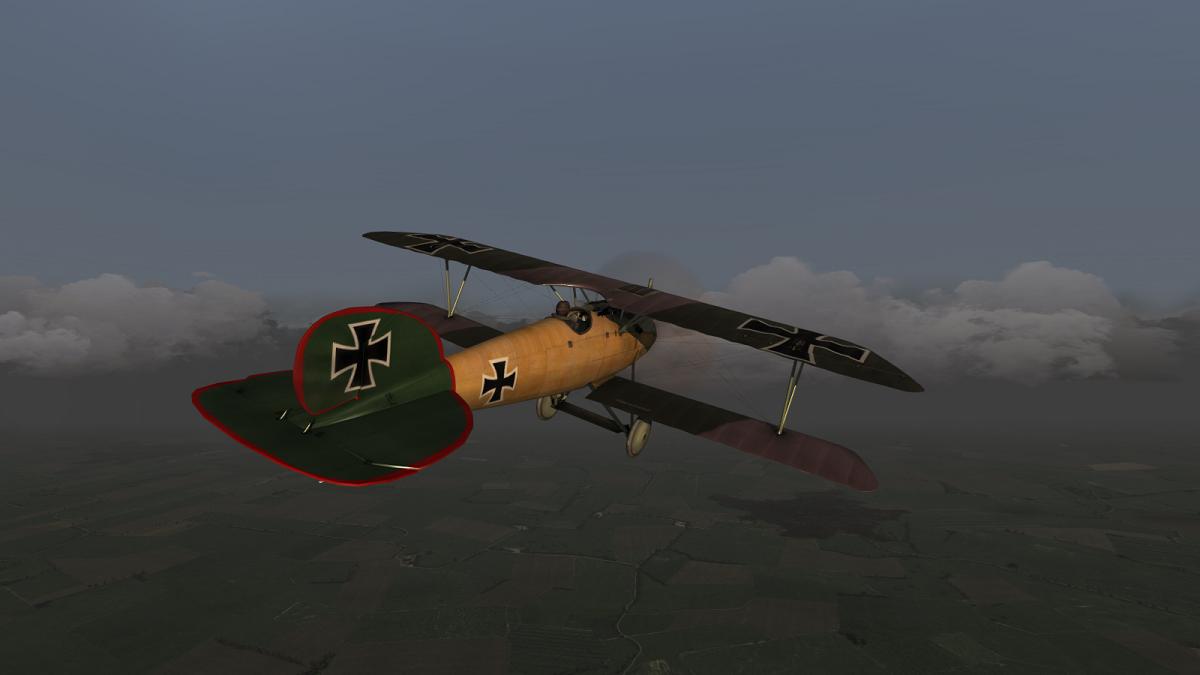
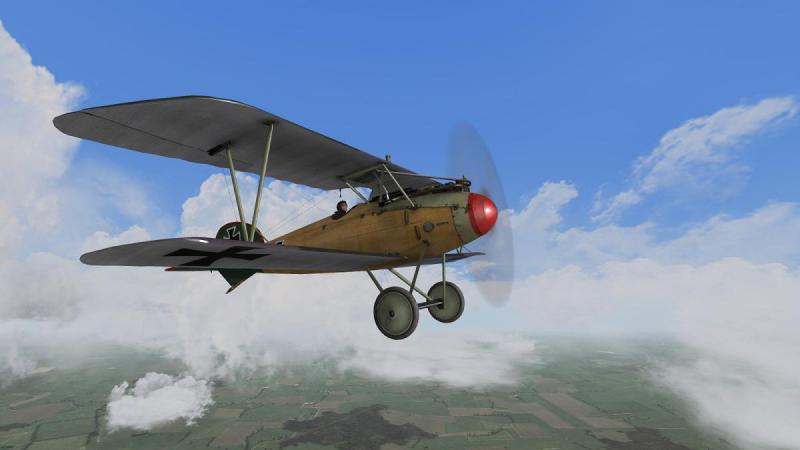
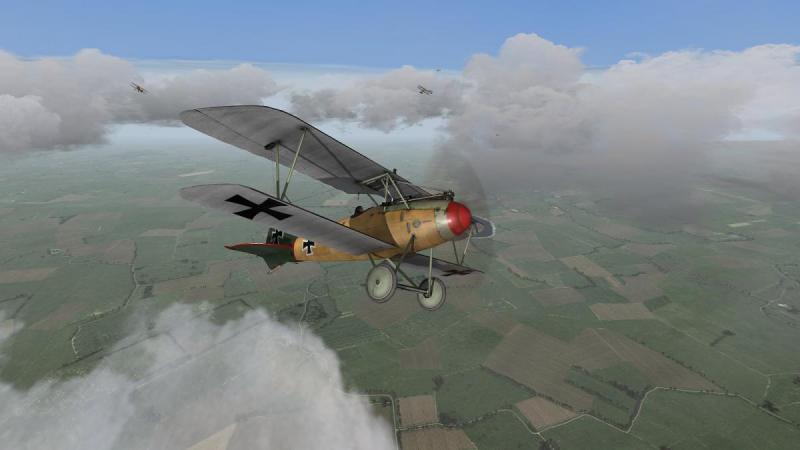
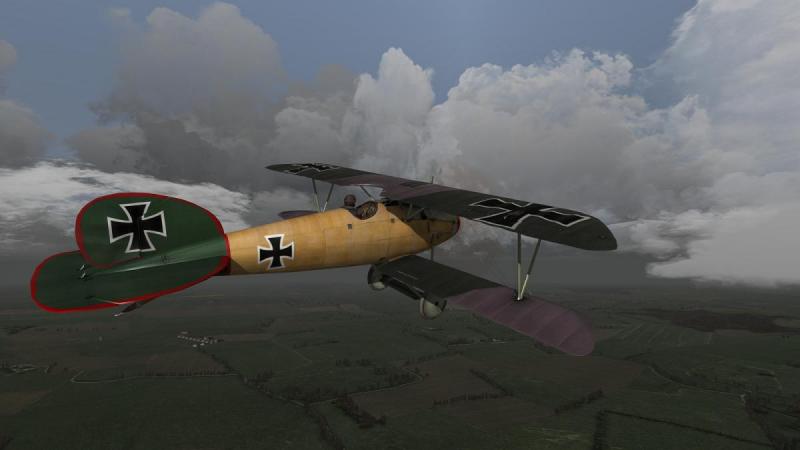
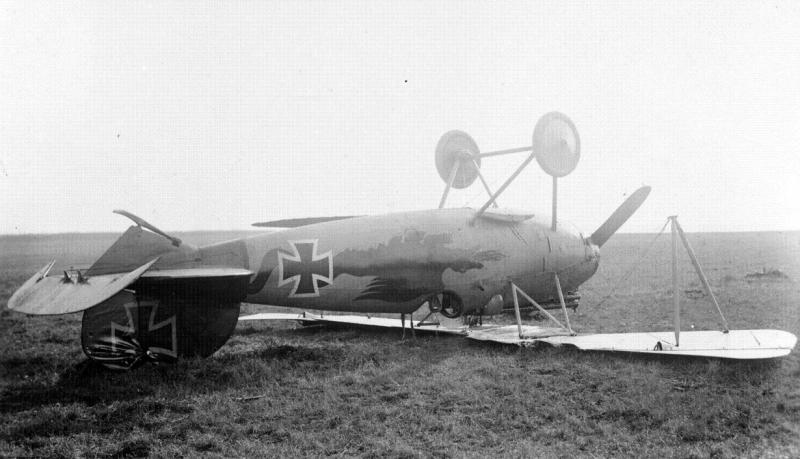
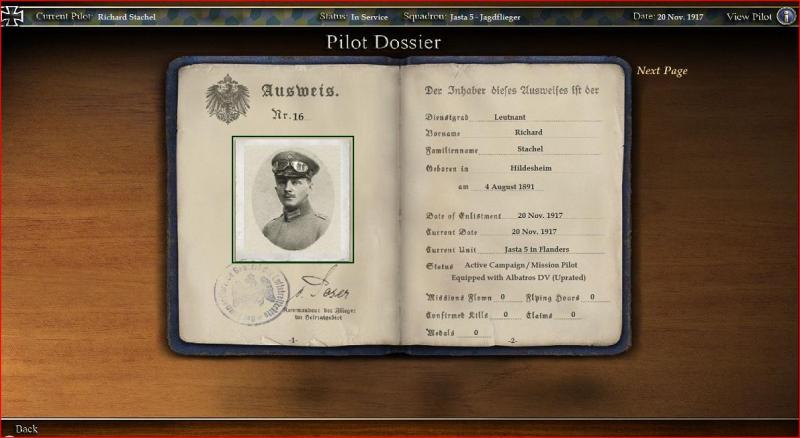
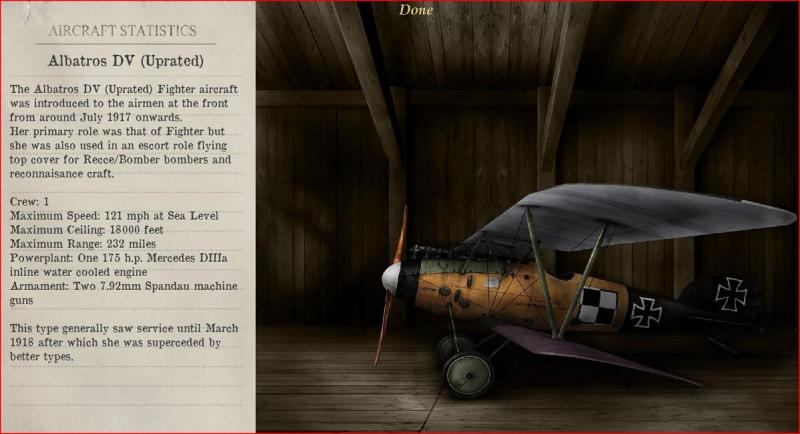
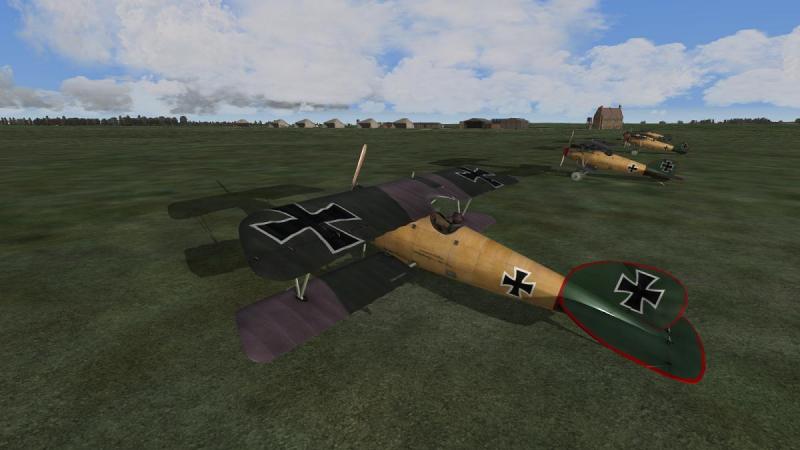
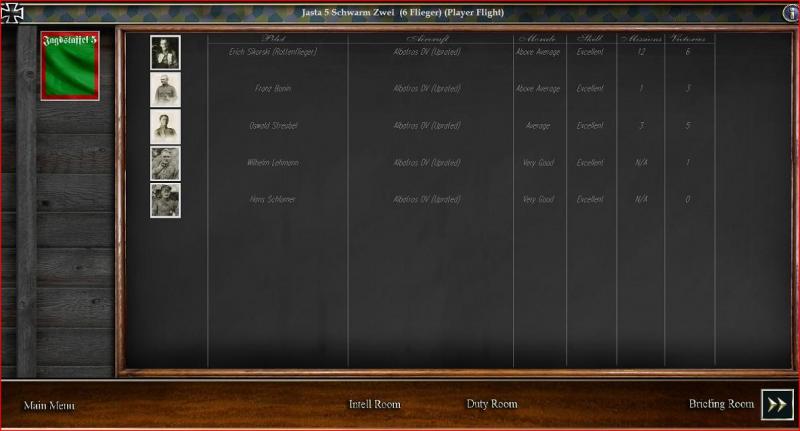
Jasta 5 at Cambrai - a 'Wings Over Flanders Fields' Campaign The first mission - 20 November 1917 A little while back, CA member Captain McMuffin suggested I report on the progress of a campaign or two. Seems like a good idea to me, so here's the first installment of the first campaign. If there's interest, I expect I'll feature different sims; but first up, it's back to the new kid on the WW1 block, Wings Over Flanders Fields. My chosen unit for this campaign is Jagdstaffel 5, famous both for its Albatrosses' green-painted tails and as the unit of the 'Golden Triumvirate', the three famous NCO aces Rumey, Mai and Koennecke. It's also the unit of Leutnant Hans von Hippel, whose green-tailed Albatros DV with its prominent dragon marking (apparently borrowed from another pilot) was famously photographed after a lower wing broke off at altitude and the pilot was lucky to get down in one piece. It's late November 1917, the first day of a big British offensive, spearheaded by a large force of tanks. It looks like fate has picked an interesting time for me to arrive at the front! A rookie Leutnant on my first assignment to a combat unit, I'm glad to have been posted to a staffel with a decent reputation and some outstanding pilots - Jasta 5. We're based at Boistrancourt, near the town of Cambrai itself, right in the path of the new British offensive, although we pilots don't know this yet. Our aircraft is the Albatros D V, the latest version of this sleek fighting machine, but by now, we all know its abilities are falling behind those of the latest enemy aircraft. And the lower wing troubles which first appeared with the D III model in early 1917 appear to have resurfaced. But in the hands of a good pilot it can hold its own and until better aircraft arrive from German factories, we must make do with what we have, At least the flight I'll be with on my first mission is a good crowd, experienced pilots with a fine tally of victories between them. In fact the top scorer, Sikorski, has been detailed to fly on my wing, no doubt to keep a close eye on me and make sure I don't do anything silly...and also that I get home in one piece, I hope. The day of my first combat flight has arrived! It's early morning and six of us have been detailed to patrol near Cambrai at about two thousand metres. I'll be flying in the leading 'vic', on the left of our leader, Hauptmann Bonin. Fortunately, the weather is good. In my excitement I have neglected to check the intelligence reports but I know that we can expect to face the enemy's best and that both French and British aircraft could be operating in our sector. As they fly offensively, I know that we can expect to meet them from the moment we are airborne. On the grass at Boistrancourt in front of our canvas hangars, our lined-up aircraft make a fine sight, with their varnished plywood fuselages gleaming softly and our red-edged green tails proudly proclaiming our Jasta's identity. What will my first mission bring? It's time to find out! ...to be continued!

- 4 replies
-
- 1
-

-
- jasta 5
- wings over flanders fields
- (and 1 more)
-
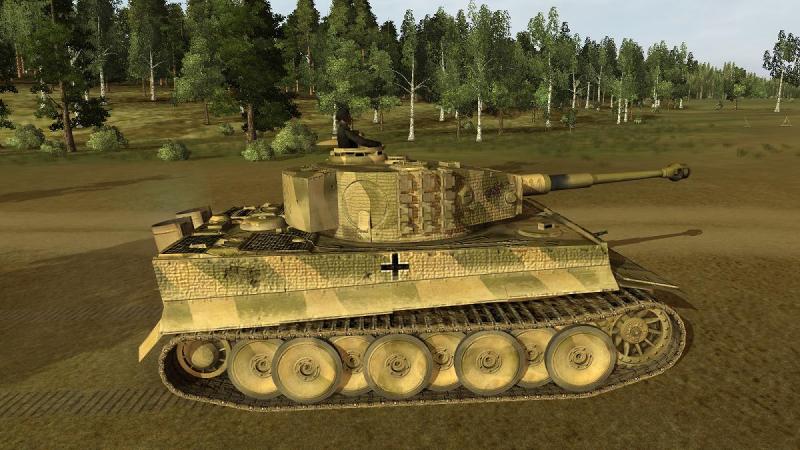
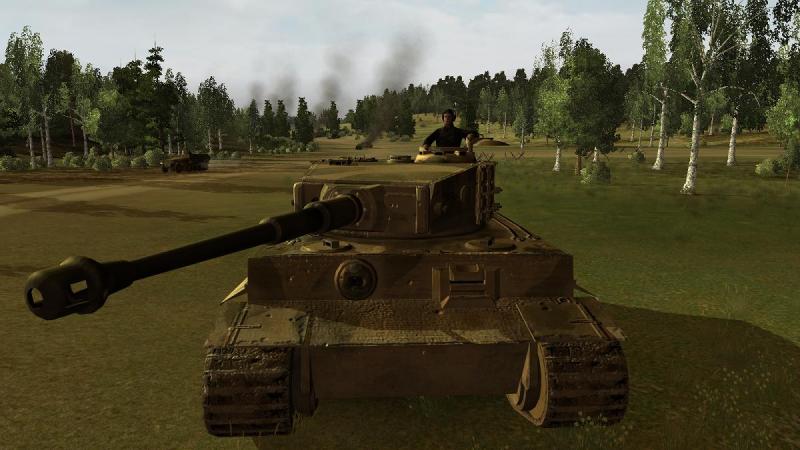
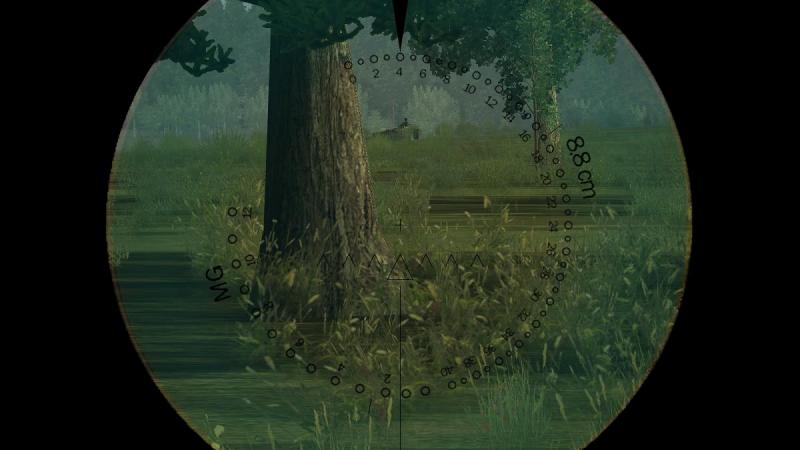
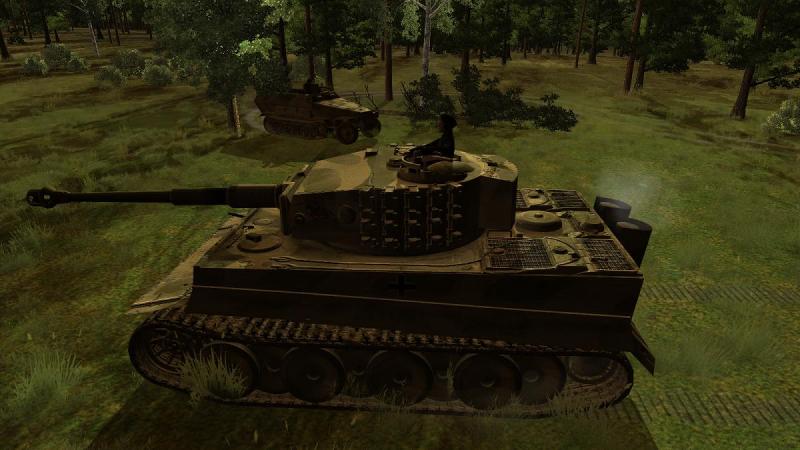
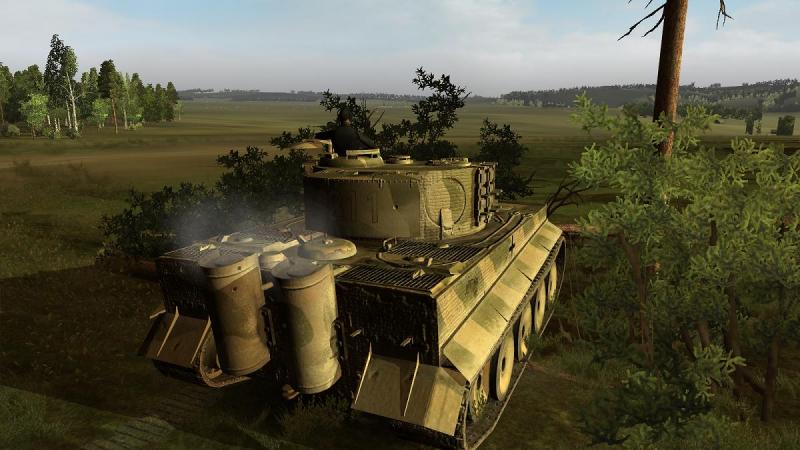
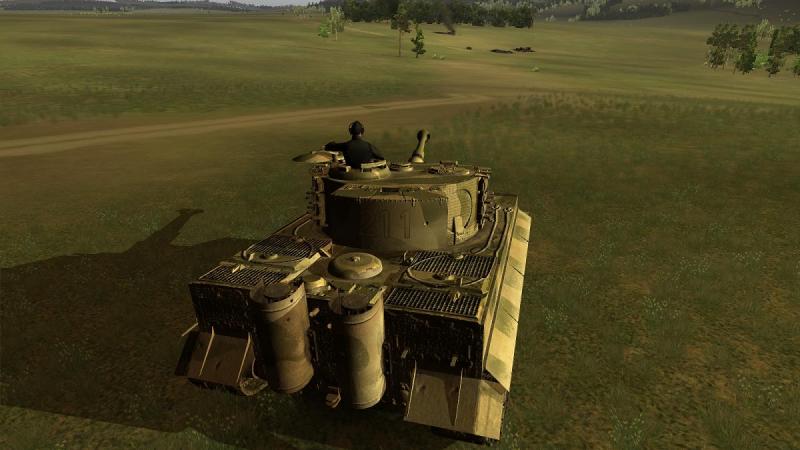
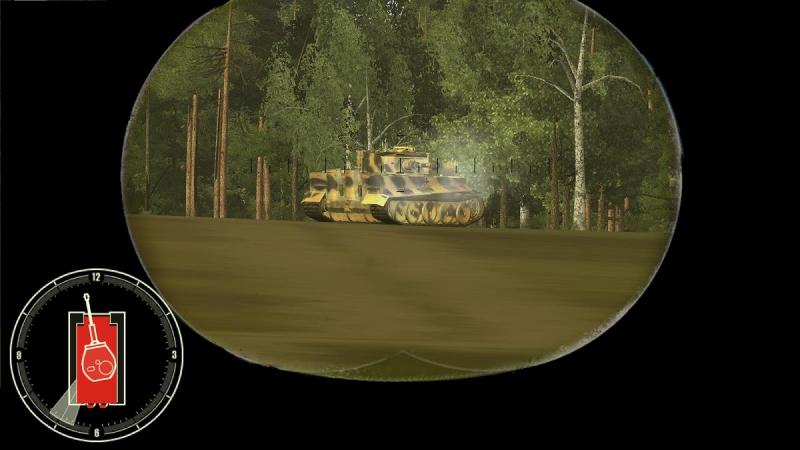
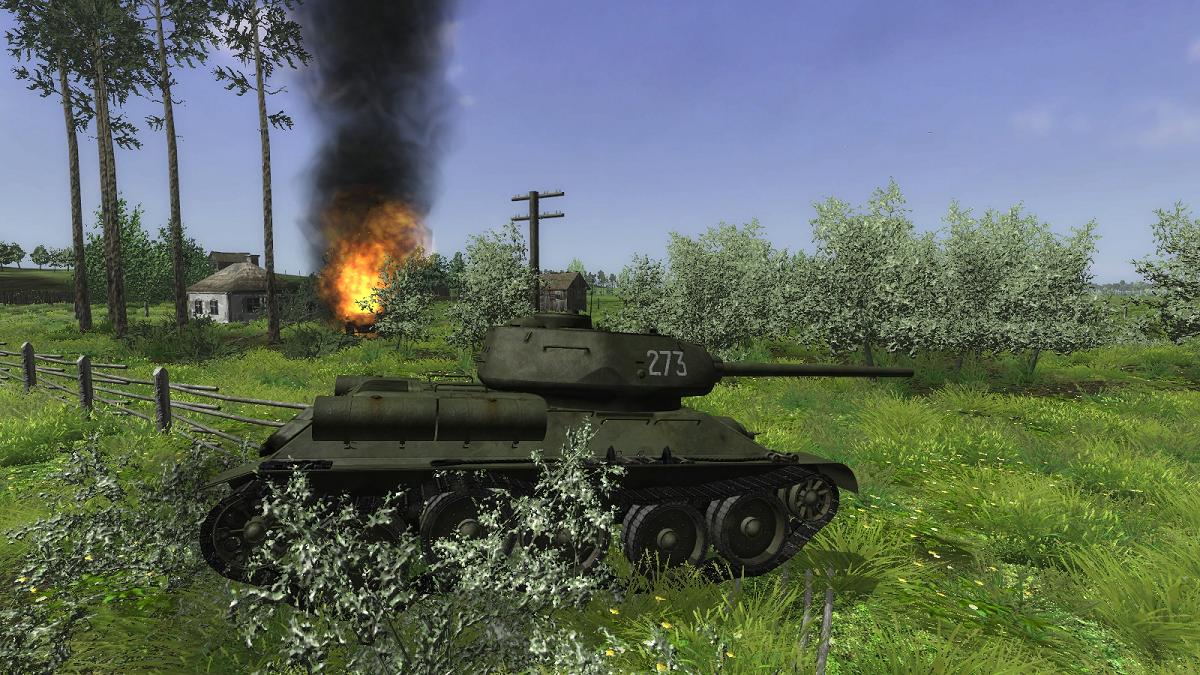
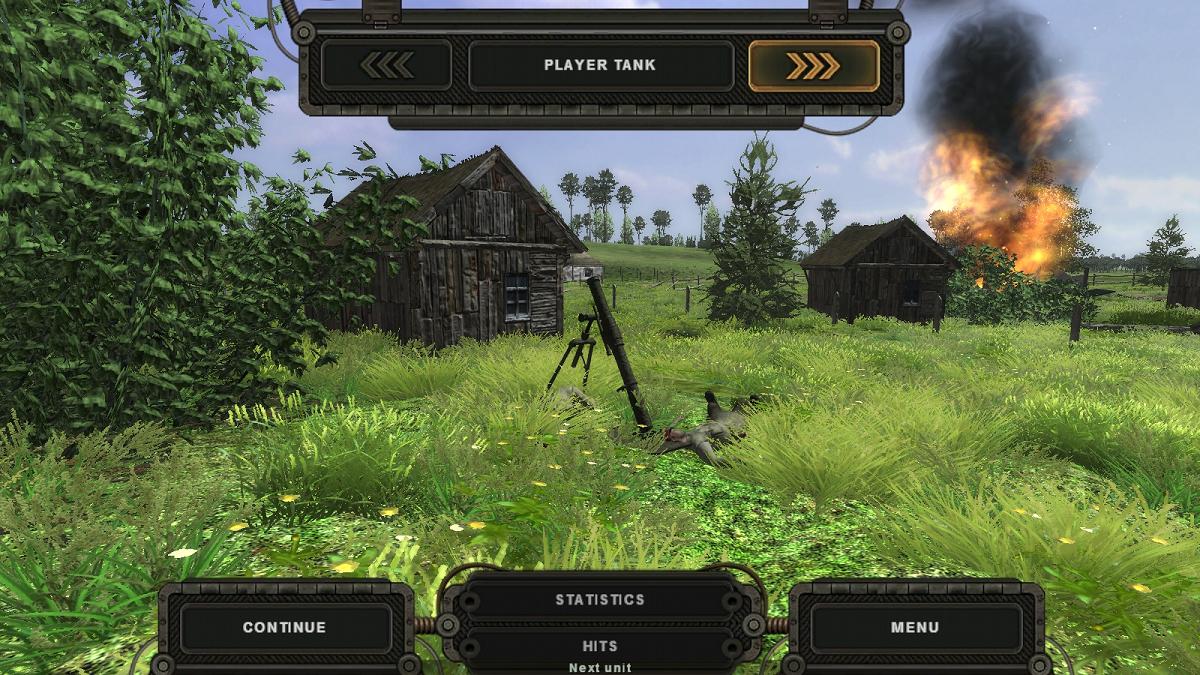
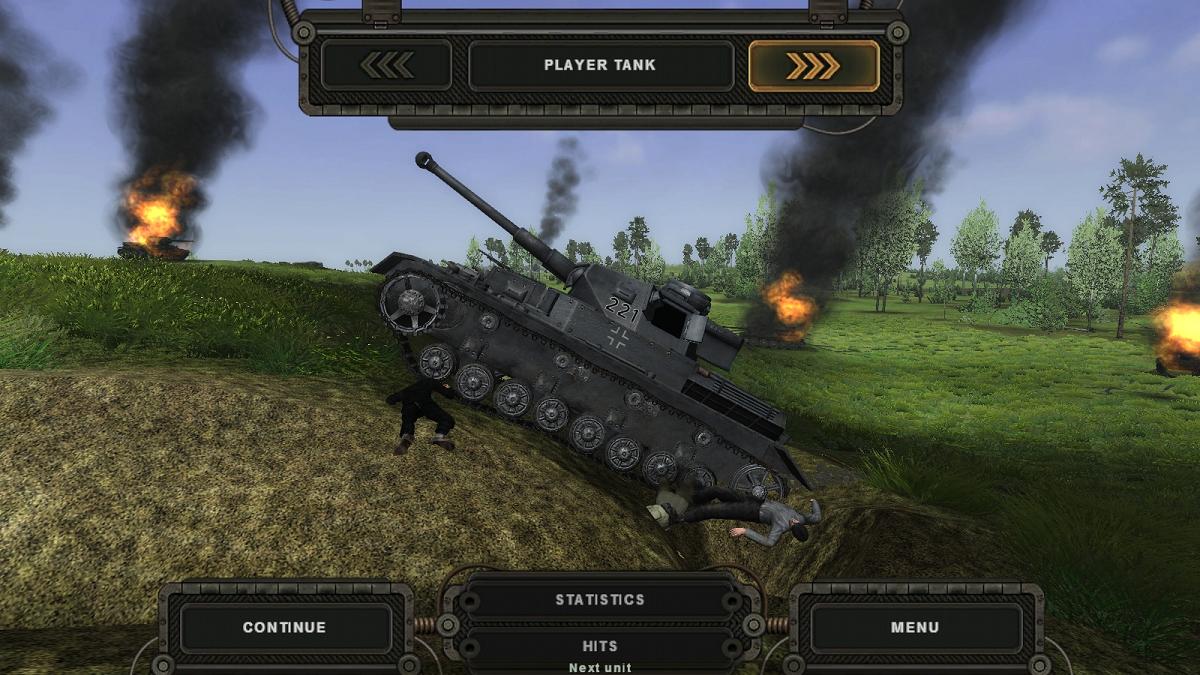
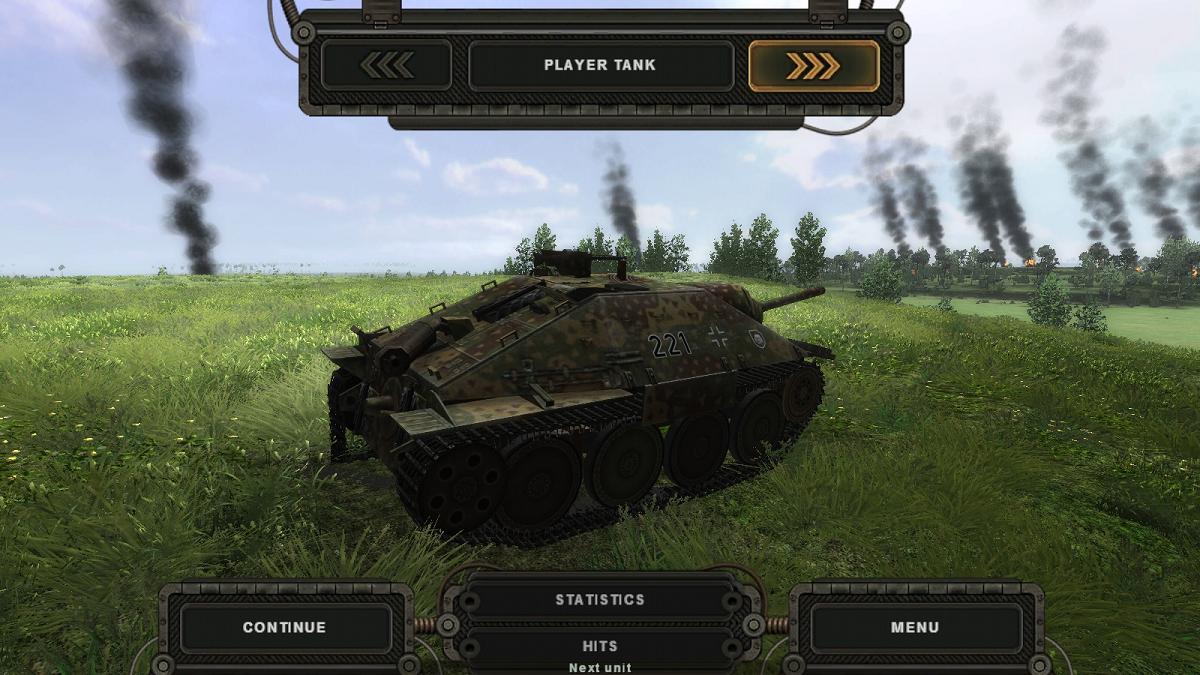
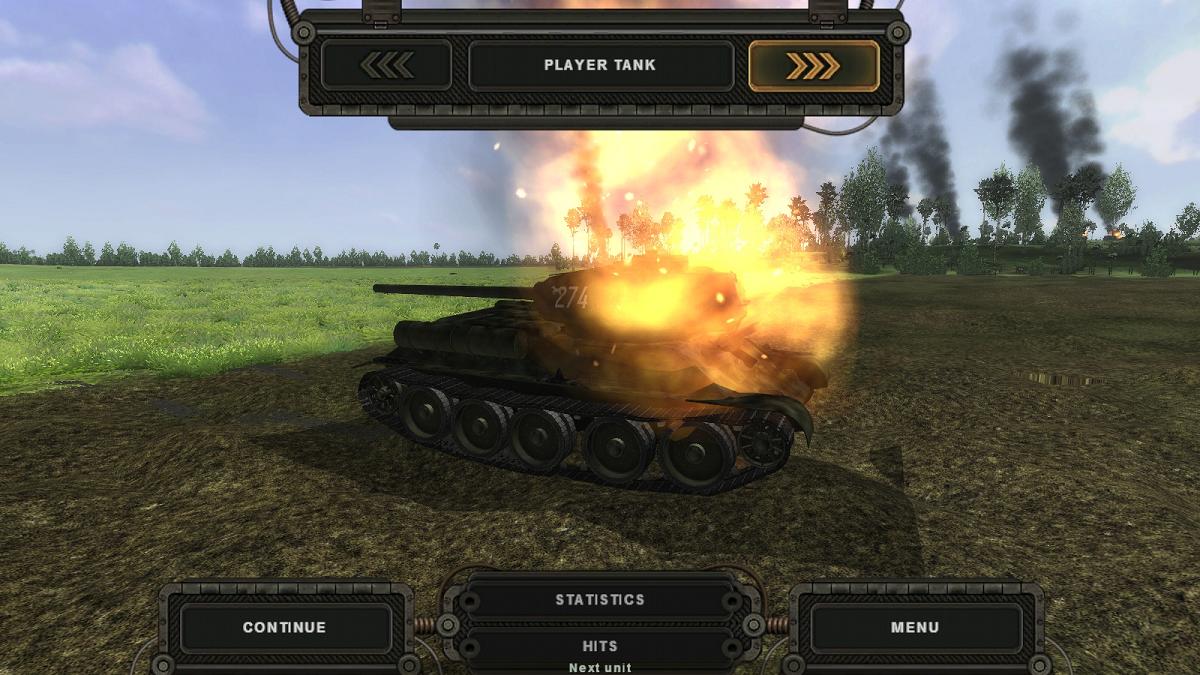
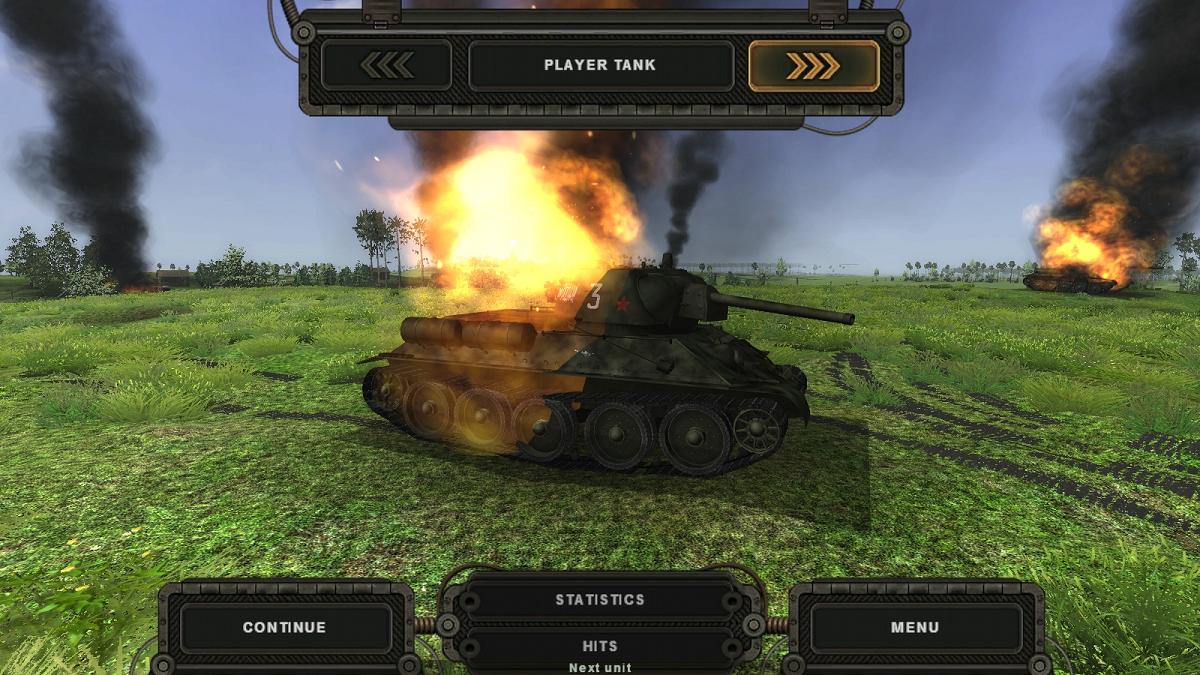
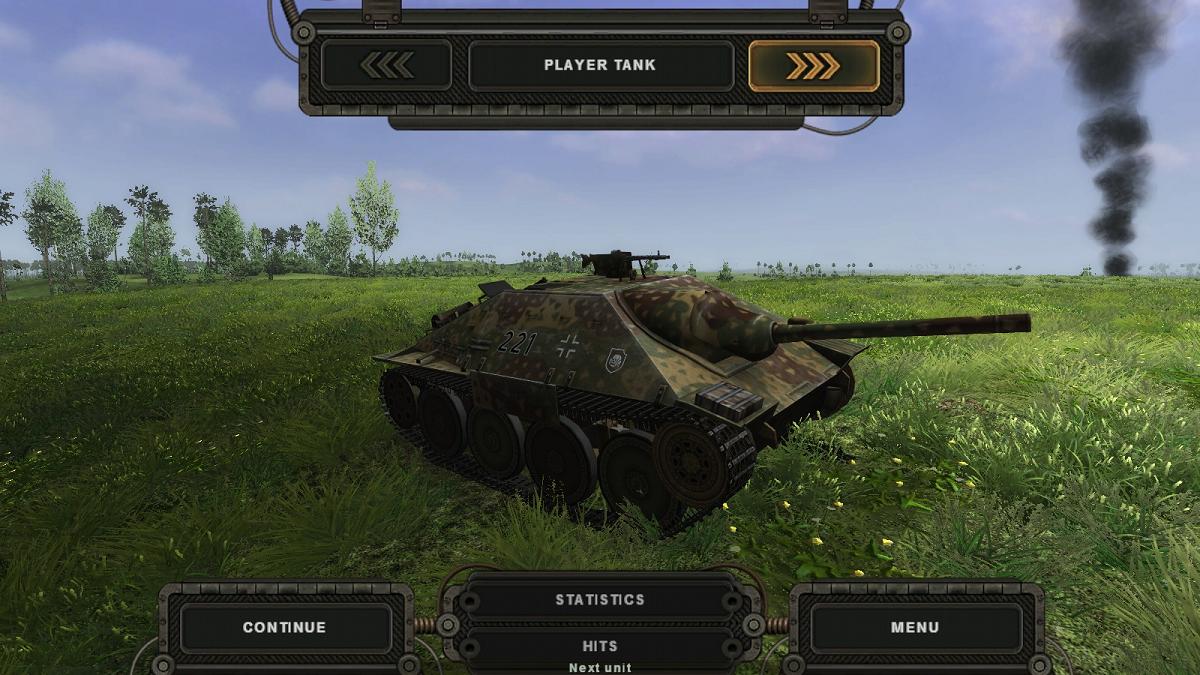
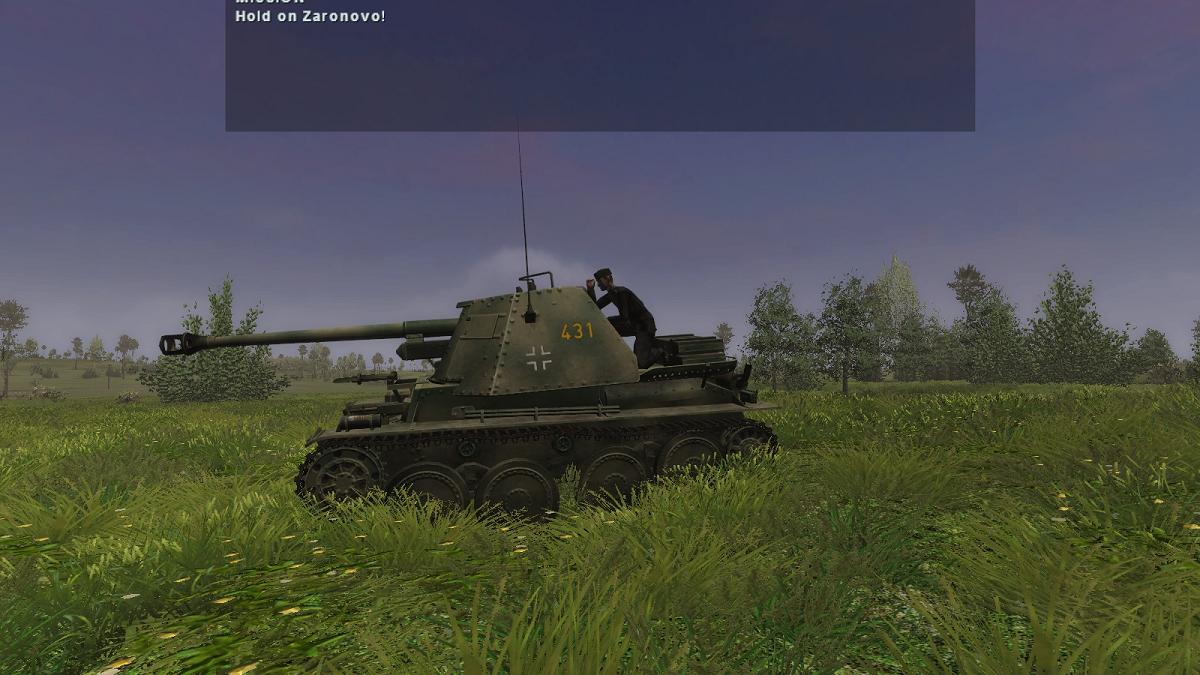
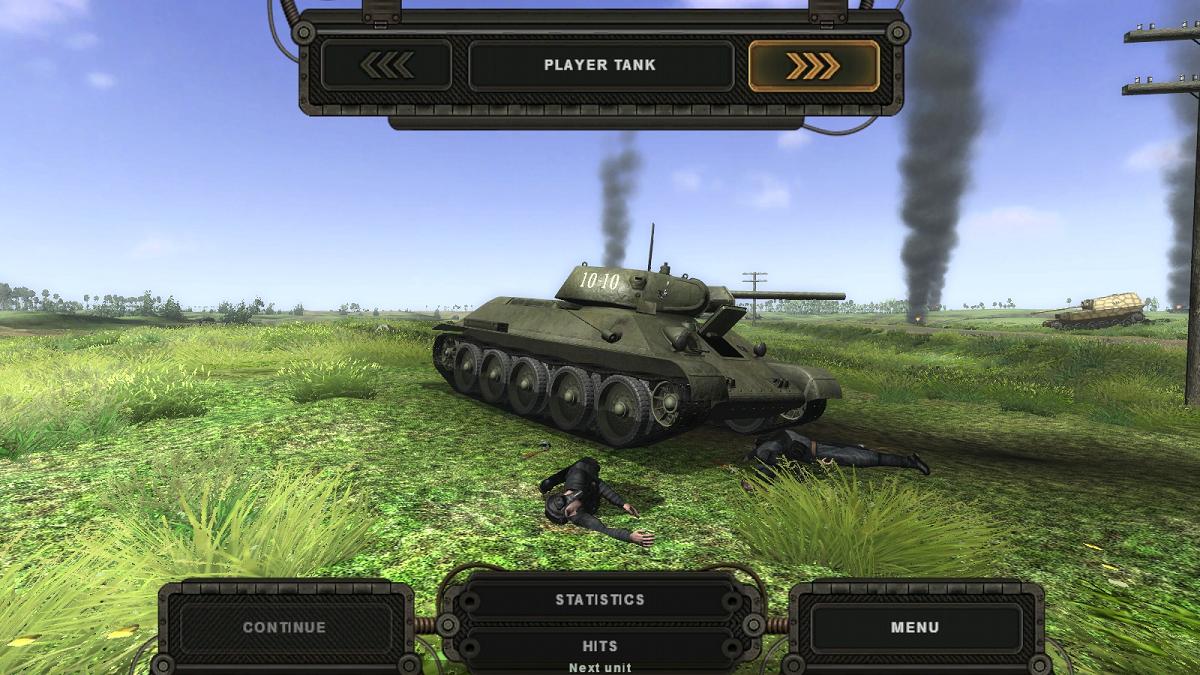
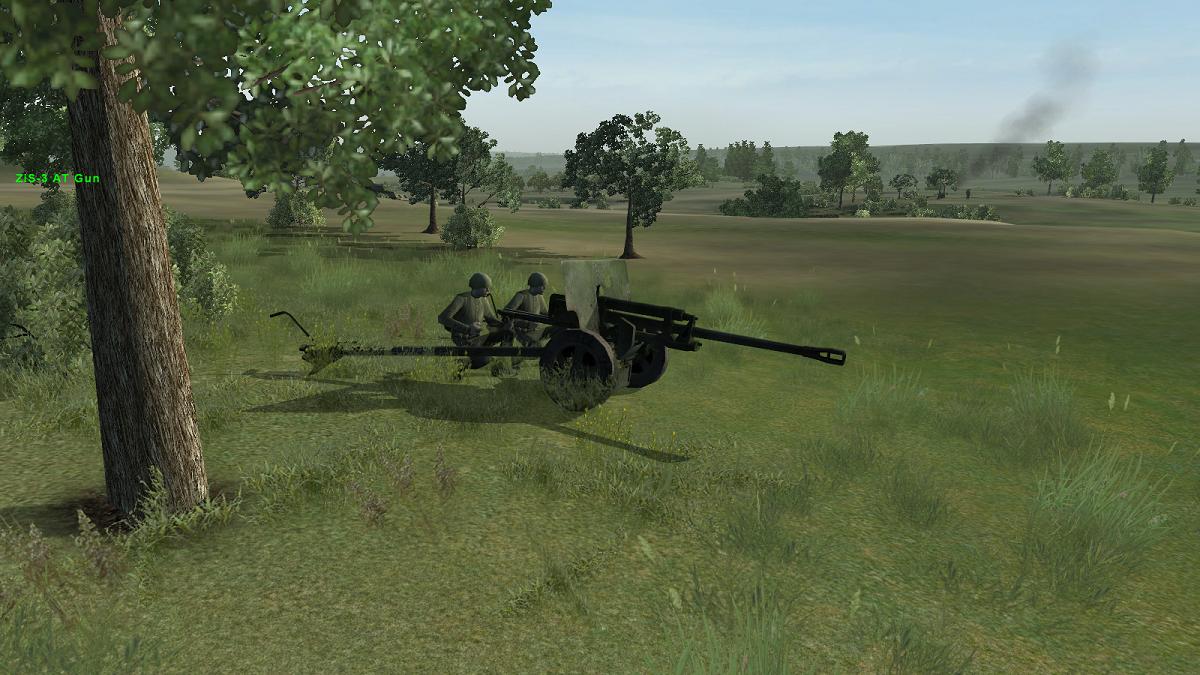
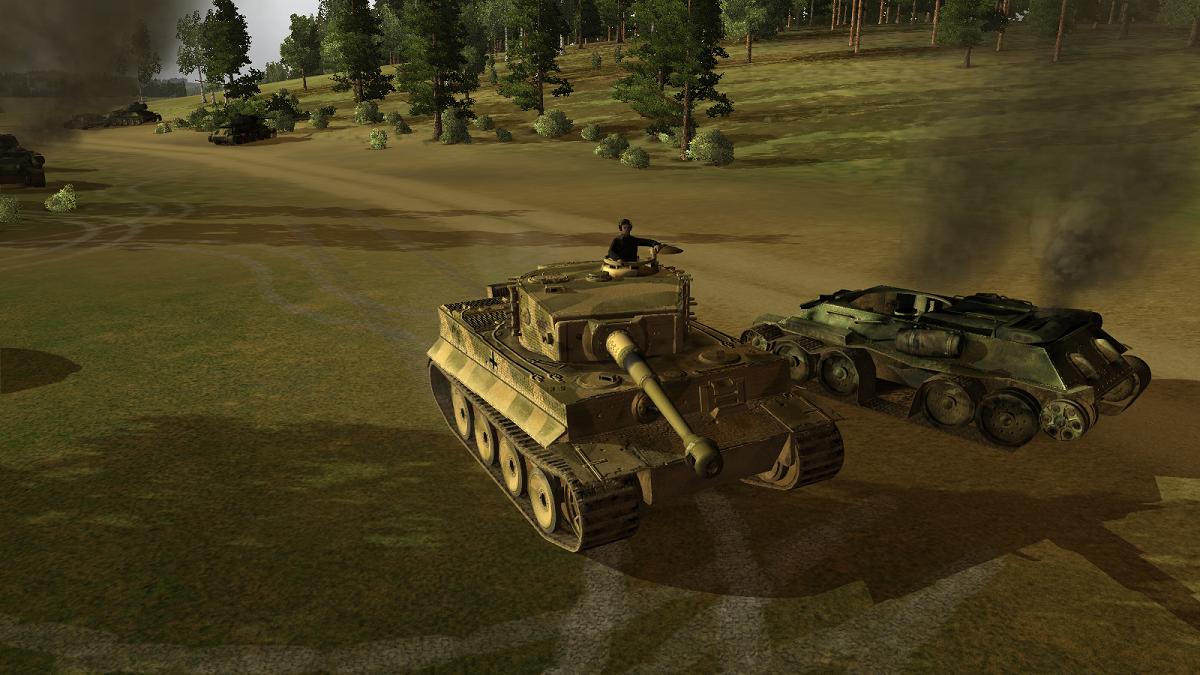
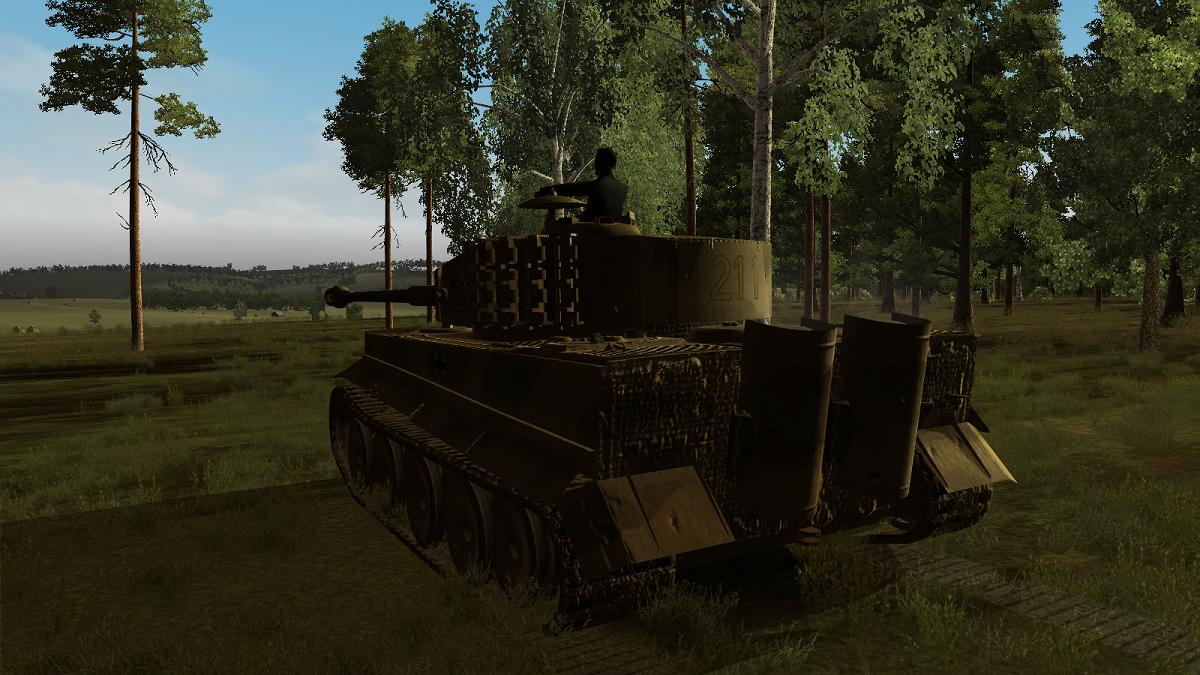
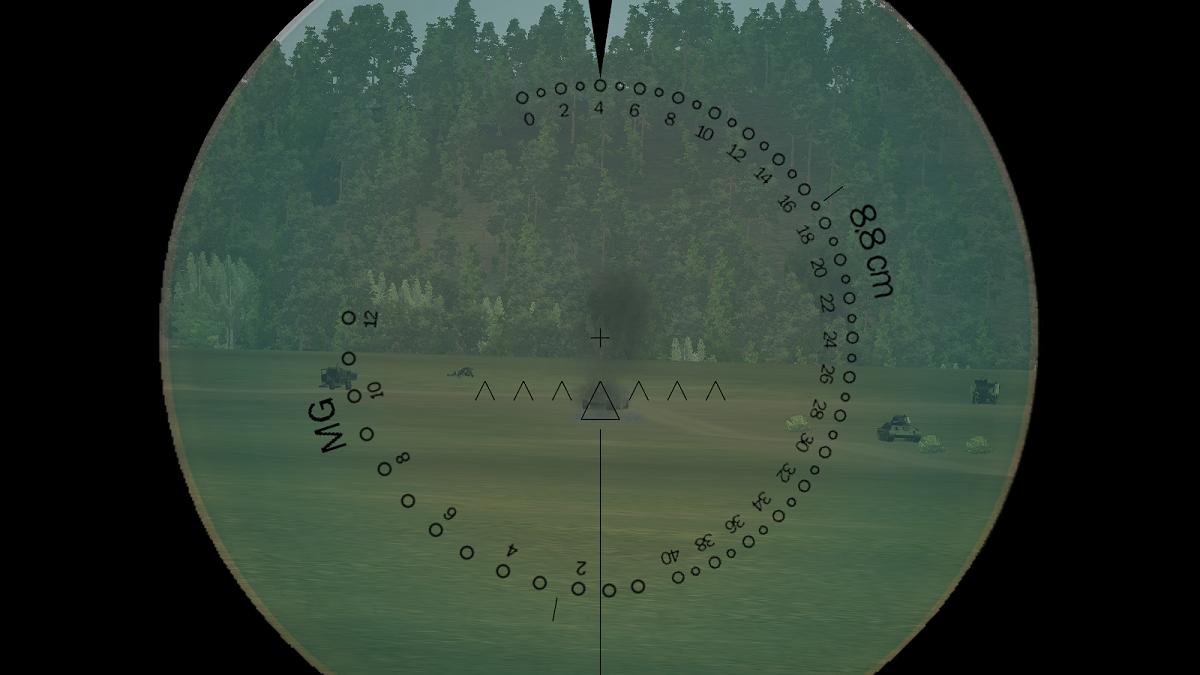
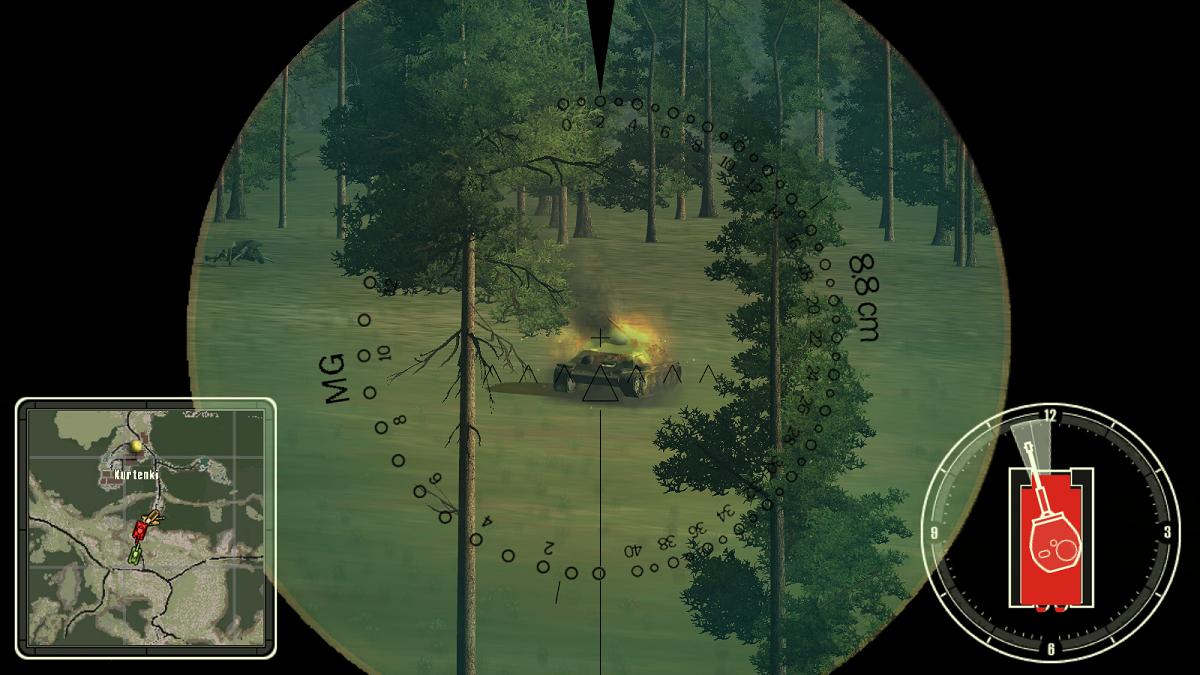
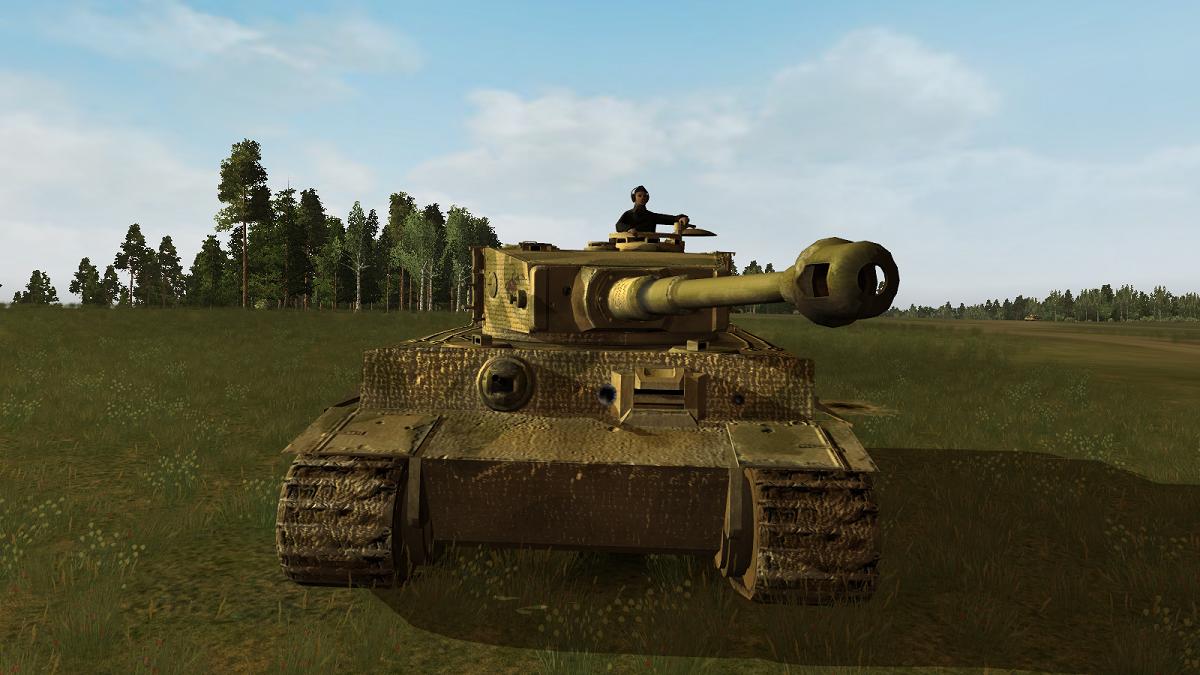
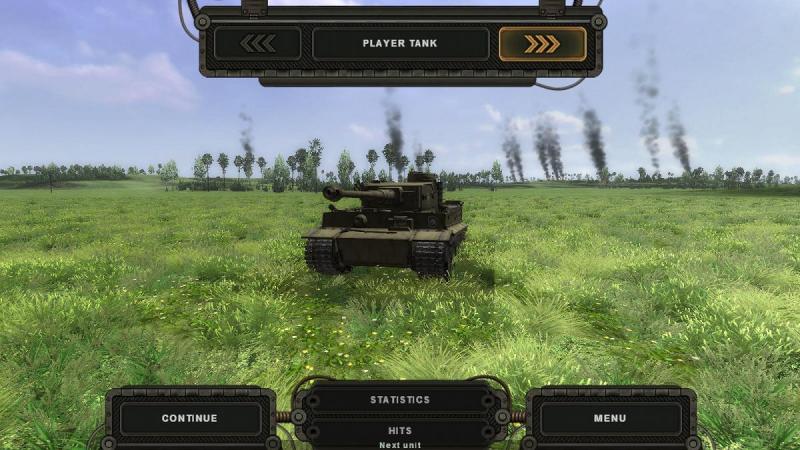
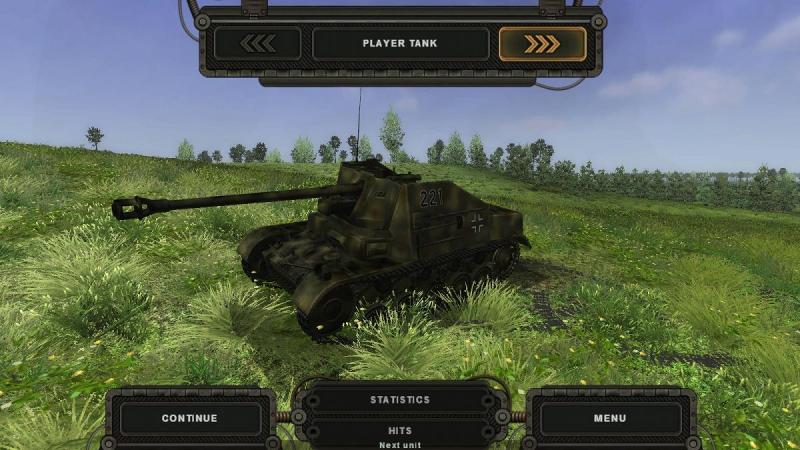
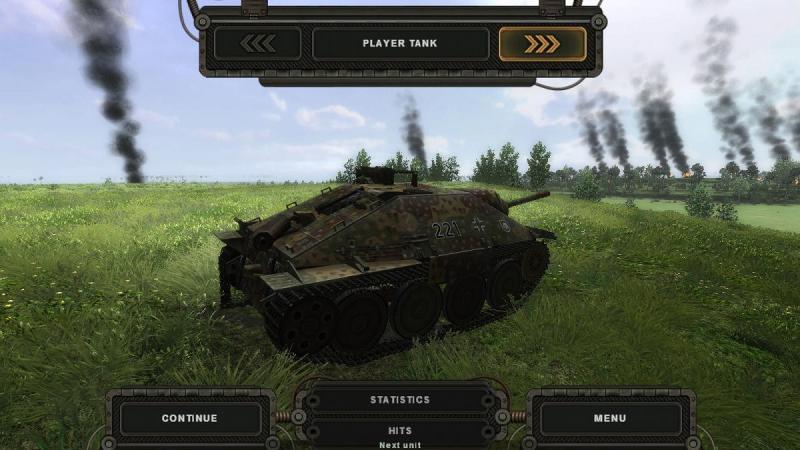
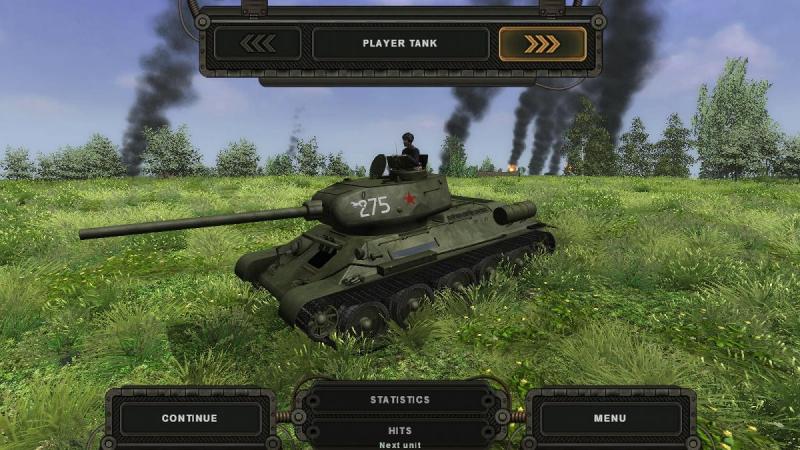
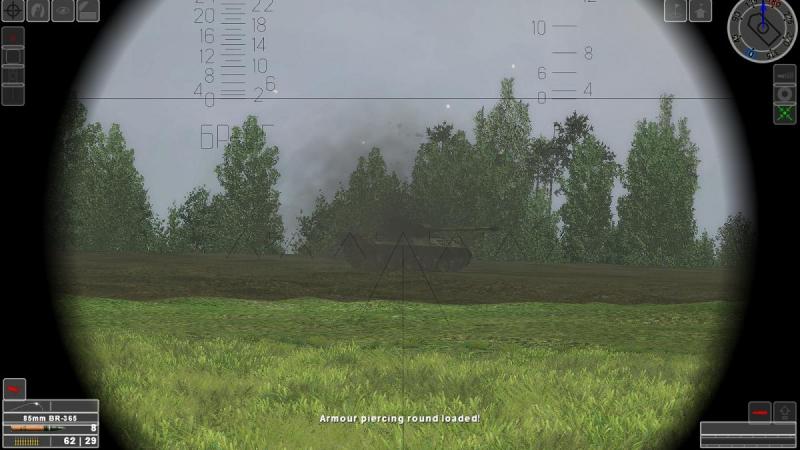
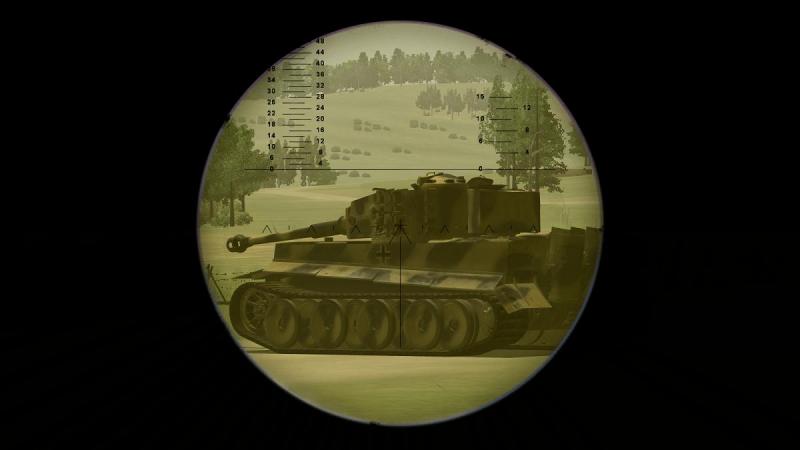
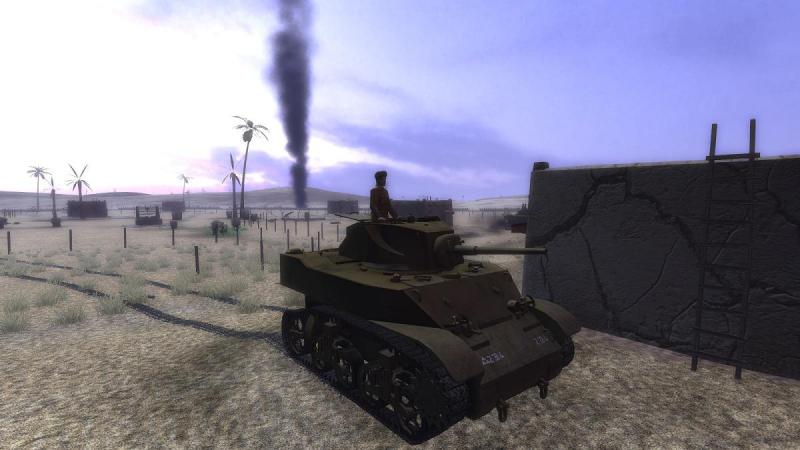
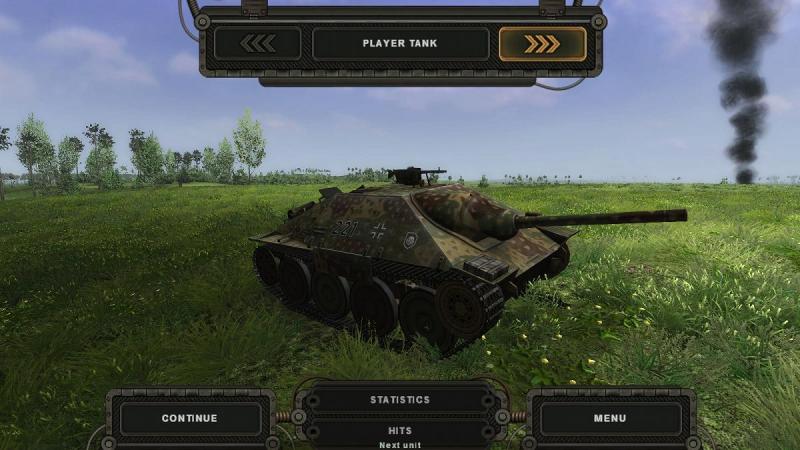
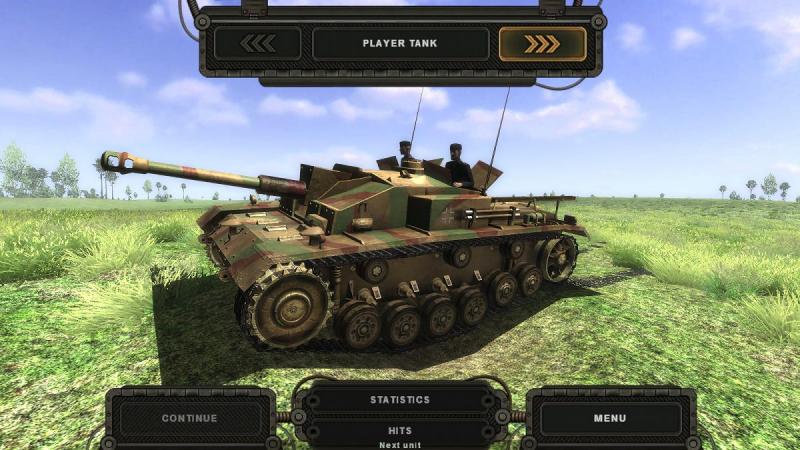
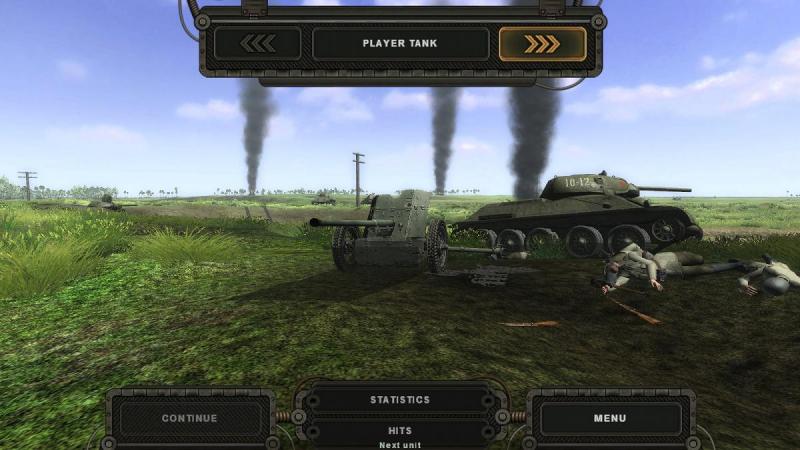
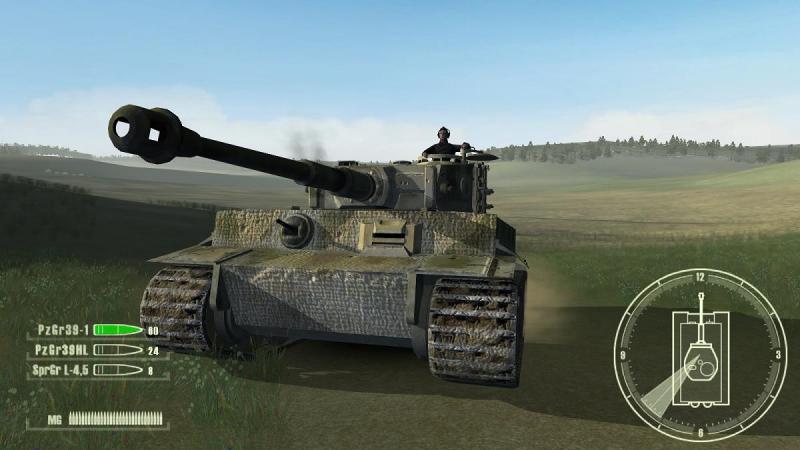
Dasvidanya, Tovarich Commissar! I guessed that since MG fire was all I could now hear, then there was likely no heavy armour about. This sounded like it was now an infantry versus infantry affair! So, I would just mosey on up there, see who was shooting whom, and join in with my big, bad tank, quickly settling matters in favour of the Red Army of Peasants and Workers. I turned right and diagonally climbed the hill. I hoped that I'd be able to see what the score was, before rolling up onto the top of the hill and possibly skylining myself. But it was an unusual shape, with low but fairly steep sides which quite sharply levelled off, onto a sort of plateau. Nothing else for it, but to go 'over the top'. Which is what I did. There wasn't much to see. But I did locate the source of the firing. It was a single machine gun, a Soviet one, it must have been. He was firing out across the open country beyond the little ring of hills around Chernogostie. A quick look around showed that there were no intact enemies lurking nearby. So all I had to do now was locate the gun's target and knock it out for him. Then off to see the CO and the Commissar; perhaps this time I'd get that nomination for the Order of Lenin, or better still, a ration of some decent vodka for me and the boys to celebrate our success. At least, that was the plan. Alas, as the great Scots poet Robbie Burns put it - or would have put it, had he been a tankie - the best laid plans of mice, men and tank commanders gang aft awry. My own plan's rapid demise was signaled by a noisy hit on the front of my tank, followed by a second one, at which my poor T-34 brewed up. All I had noticed was that the rounds that hit me seemed to have come from some distance away, across the low ground, possibly from whence I came, as if a crafty fascist had been stalking us, while we staked his comrades. Consoling myself with the thought that we had won the battle, I used the SF '42 battlefield review facility to find out who had laid us low, and generally 'have a nosey' around the battlefield. This was the culprit. A Tiger, no less. The Soviet MG had been rattling off some long-range bursts at him, it seemed, but he had disdained to fire back until he had something better to shoot at...me. Tabbing around, our defending forces had taken casualties, but many were still in place. Evidently, the enemy onslaught had been stoutly resisted. The Germans had definitely come off worst, though. The terrain around Chernogostie was littered with knocked out armour. It was quite a mixture; Panthers, two types of Jagdpanzer (Marder II and Hetzer) and at least one Sturmgeschutz. There was also a small convoy of Opel Blitz trucks, who had paid the ultimate price for trying to break out in the middle of a serious armour/infantry firefight. As for my own platoon, T-34 275 had survived, evidently in dead ground to the Tiger, who seemed to be the only surviving German vehicle and either unable or unwilling to close with the surviving defenders. Tank 274 - the one that had fallen behind, before we had turned in towards Chernogostie - had been burned. The position of his turret suggested that he had been caught from behind. Had he perhaps been stalked by the Tiger, and died defending our rear? It seemed possible. There were some other T-34s on the battlefield, 76mm-gunned versions. They, too, had not fared well. So it had been a rather bloody affair, all round. As a mission, I had found it quite realistic, tense and fun, with lots of activity, even if I didn't see much of some of it. SF '42 missions often get off to a fast start but having presented me with the scope to make a nice little tactical appreciation at the outset, I would have preferred if this one had delayed the German attacks a little, to give me more time to play out the battle tactically. Make a more active contribution without having to cast caution to the winds. As in that other old Scots saying, no man hastens to a market where there is nothing to be bought but blows. Great stuff, though, even if I escaped my reckoning with the Commissar the hard way!


-
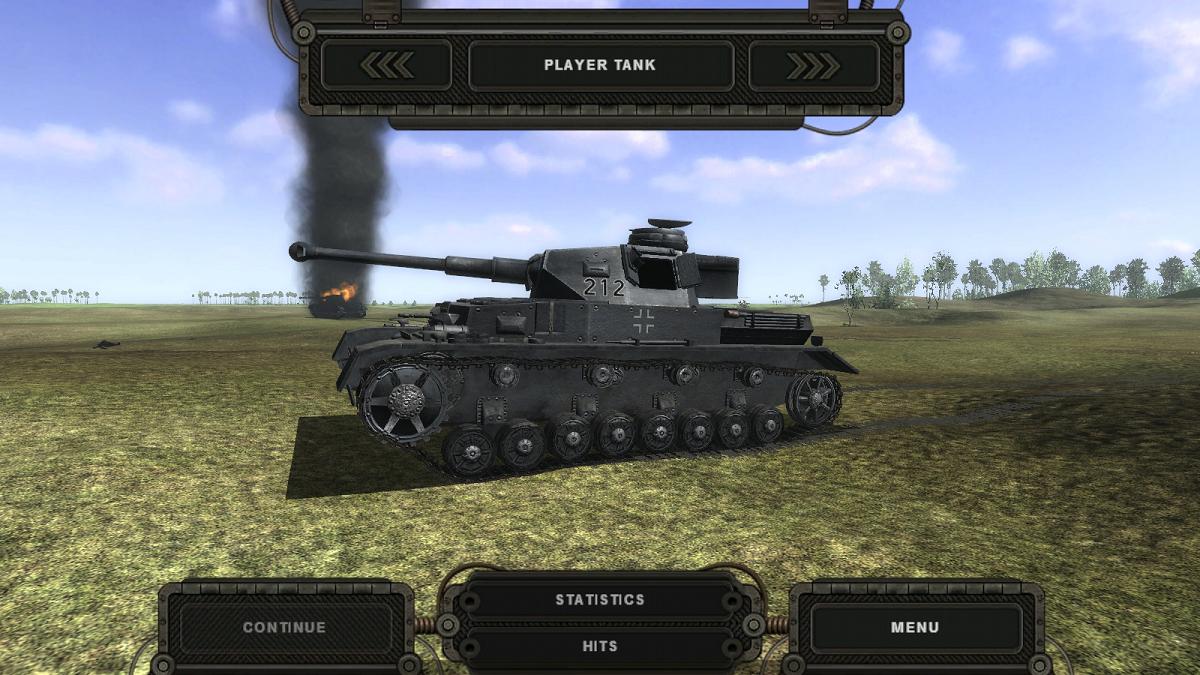
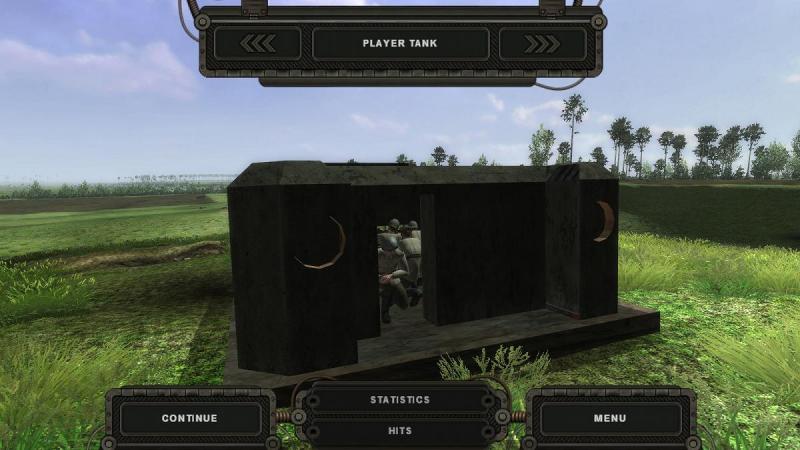
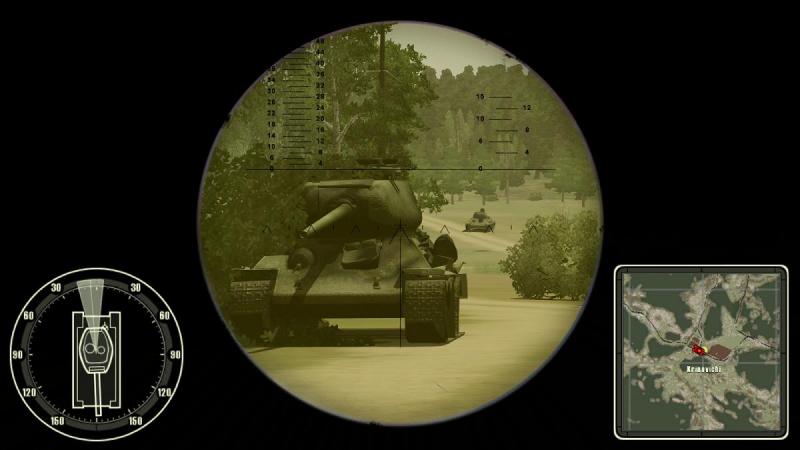
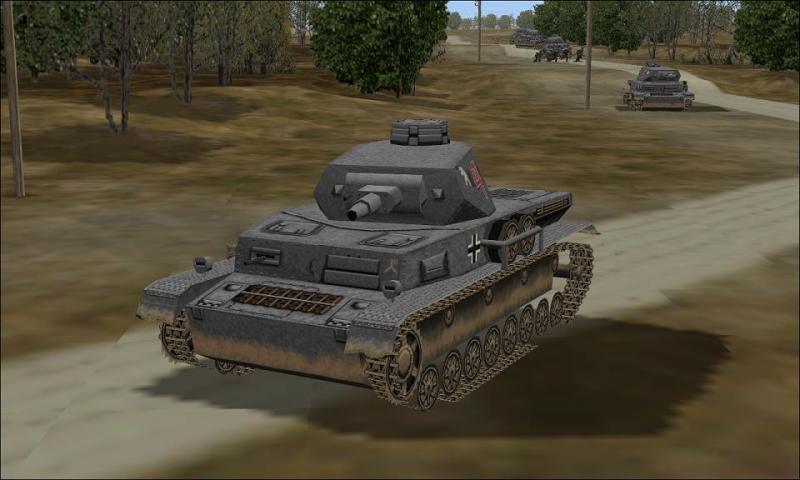
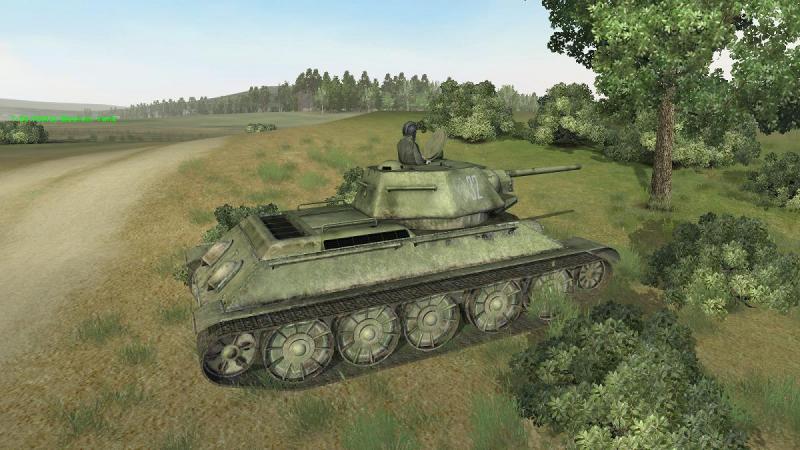
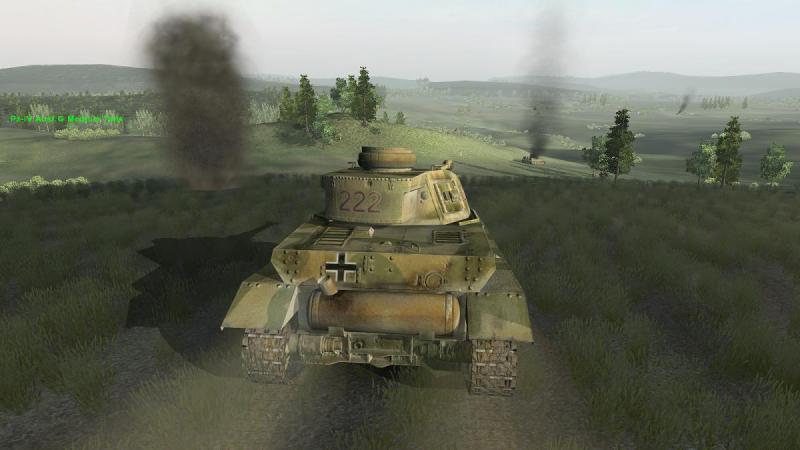
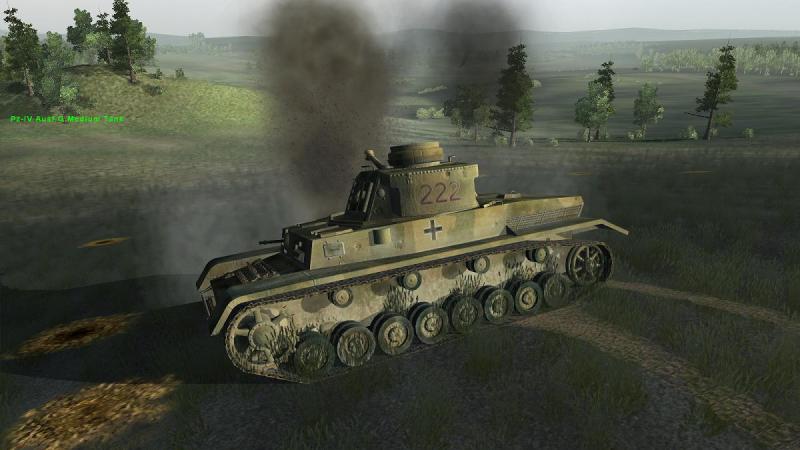
Into Chernogostie! No sooner had we put a few rounds into the Panther, than I noticed through the gunsight the grey shape of a Panzer IV, driving into a hull-down position to the left. I quickly laid my gun onto him and started shooting. After a couple of rounds, there was no reaction. At that range, I was confident of the ability of my 85mm AP rounds to have inflicted the damage the Panzer's inaction suggested that he'd suffered. I ceased fire, scanned left and right, then moved on. T-34 275 had edged slightly ahead of me, looking most businesslike when he loomed in my gunsight as I scanned. Soviet tankers generally seem to have fought buttoned up so like me, his tank commander had left his hatches firmly shut. I pressed on with my circuit to the right, hoping now to catch the attacking Germans in the rear. Nearing the Panther, I put another round into him, just to be sure. This time, the results left no room for doubt. There was still some shooting going on and also above the noise of my tank, I now heard the drone of aero engines. I was relieved to see that the source was a pair of aircraft which I quickly identified as friendly, IL-2 Sturmoviks no less. As I watched, they made firing passes in shallow dives, aiming at targets somewhere over to my right. It was beginning to look like the German attacks had all gone in very quickly, taking them right up to Chernogostie while I was busy carrying out my planned wheeling movement, around the low ground on its outskirts. I had evidently caught some of the stragglers. If I didn't get cracking, the flyboys would catch the rest of them, it seemed. Pressing on, I next came upon a hull-down enemy half-track, the other side of the same big ploughed field as the Panther. I lobbed an AP round onto him but he was almost certainly already dead. By this time the Panther was blazing merrily. More dead fascist troops littered the fields. Together with the knocked-out vehicles and the lack of any other targets, this tended to confirm that my arrival had been a tad late. Apart from a few hangars-on, the party seemed to be over. Moving on, I edged nearer to Chernogostie, where several fires were burning brightly. Were they friendlies? Or enemies who had penetrated the defences? Hard to say. If our positions had been over-run while I'd been moving into position...not good! At last, as per my original plan, I finally came upon the rear of one of the German attacking formations…or rather, what was left of it. The Panzer IV sitting perched just short of the crest, next to a battered pillbox, seemed to be immobilised but looked undamaged, so I put a round into him, aiming at the top of his turret. At this range I reckoned one such well-placed shot would be enough; if he wasn't already dead, he would be, after that. Incidentally, while German vehicles and suchlike kit switched from 'panzer grey' to dark yellow in early 1942, and the NTA mod replaces many grey schemes with 'transitional' ones so they suit both mid- and late-war periods, this tank is still grey. I think that's because I have forgotten to turn off a further mod ('Return of Panzergrau' does what it says on the tin). As for the tank itself, by this stage in the war Panzer IVs should have 'schurtzen' skirt armour, at least around their turrets. Likely, this one doesn't because the mission was made before SF '42 acquired a late-war Panzer IV, like this one: You can't be too careful with these Fritzes, though. Whatever the Commissar says about their nefarious ways, we all know that they didn't get to be masters of large swathes of Europe and Mother Russia by being bad soldiers. On we rolled. Carefully. Apart from the dead infantry, the open ground in front of Chernogostie was clear. So I tightened up my wheeling movement and headed up a little gully which ran between two of the low hills which ringed Chernogostie. 'Drive as the water flows' is an old tanker's motto, apparently. Stay low; keep off the high ground, and in particular, avoid skylining yourself. Makes sense, no? By this time I had lost track of the T-34 on my right, number 274. One moment he was there; a little while later, no sign. The remaining tank, trusty old 275, was still on my left. I should perhaps have ordered him into line astern before heading up the gully. But he was just below the crest so I left it at that. We were roughly in echelon left and that would give us a decent arc of fire to the front, better than if he'd been right behind me and I was masking his frontal arc. On we went, with the rattle of MG fire and the occasional tank or anti-tank round being the only remaining signs of battle. The Sturmoviks were still droning around but no longer attacking and the Germans seemed to have come and gone, too. This seemed confirmed, when I got the 'Mission completed!' message. We'd won! I opted to play on, feeling that our ever-watchful Commissar might have something to say about my socialist credentials, if not also my military ardour, in view of the rather limited part I had played in this, our glorious victory. To my complete surprise an SdKfz 250 light armoured half-track suddenly rattled right past me, coming from somewhere behind us. By the time I had picked him up in the gunsight, he had turned sharp right up the bank, as if to escape over the crest, only to be clobbered by my other T-34. Recovering my composure, I rattled on. Slowing down, I rolled into the village of Chernogostie, halted, and scanned cautiously left and right. Some German armour was burning on either side but the place seemed deserted. I moved on a little further, then stopped and scanned again. There were still some ragged, intermittent bursts of MG fire from somewhere up on the high ground to my right, but that was it. I knew from the map that most of our defensive positions were up there, on top of the little hillock to my right, from where the firing came, with some more on two other similar hillocks. Now what? ...to be continued!
-
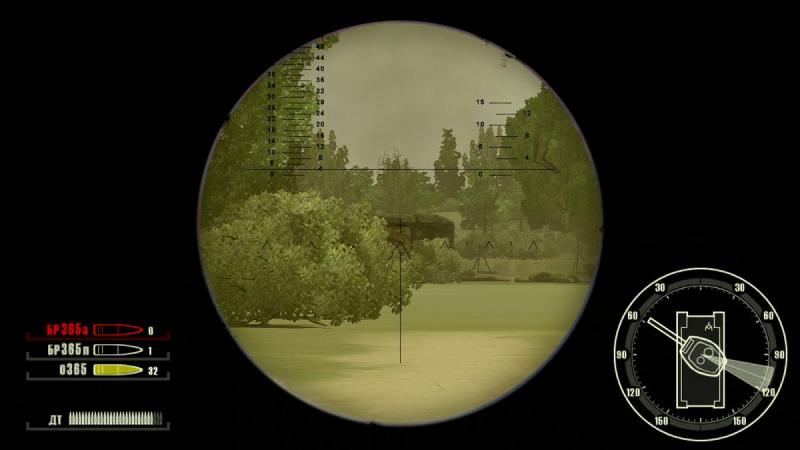
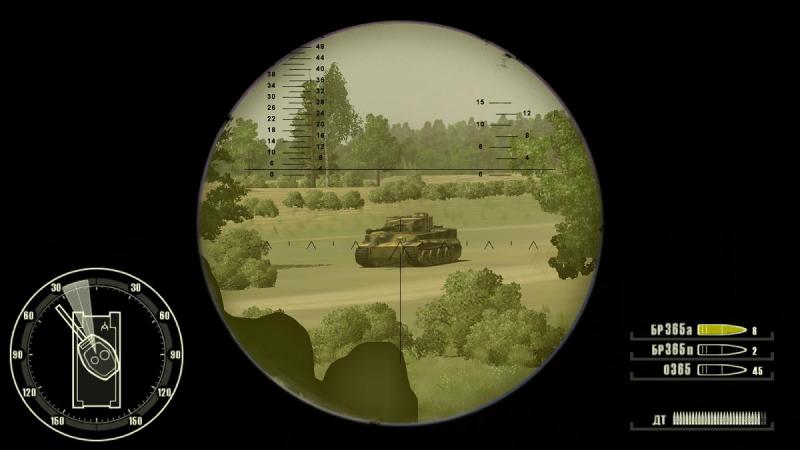
Into action! Edging forward and scanning ahead through my gunsight, all I could see at first were some dead Germans - sorry, I mean, dead fascists. The unit's Commissar doesn't like it unless we refer to the hated aggressors in terms more appropriate for any true son of our glorious proletarian revolution. More slowly now, I trundled forward, watching out for whatever might come into view as I circled around Chernogistie Hill. Shooting was still going on and I was getting increasingly anxious that I could still see nothing of the battle. But I didn't have to wait much longer! Into view came a Panther, no less, out in the open, at close range and side-on to us. This was exactly what I had in mind, when I'd made my little plan! Of course, I let him have it, right in his thin side armour, with the AP round I had 'up the spout'. I even took the trouble to aim at the side of his turret, intending to kill the turret crew and score a quick victory. A cloud of muck rose and a shower of sparks flew, as my round whacked into him. In fact I put a couple of rounds into him, joined by one of my other tanks. The Panther took no action so I judged that we had got him; realistically, in SF '42, there are no Hollywood fireballs to let you know a tank is dead. So far, so good! ...to be continued!

-
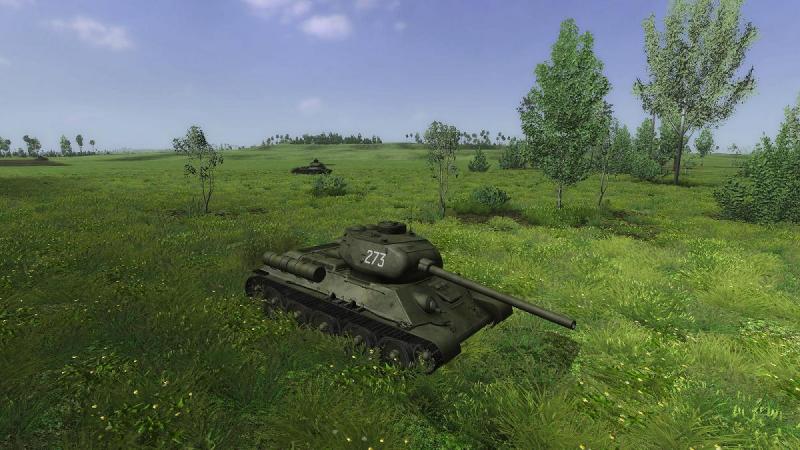
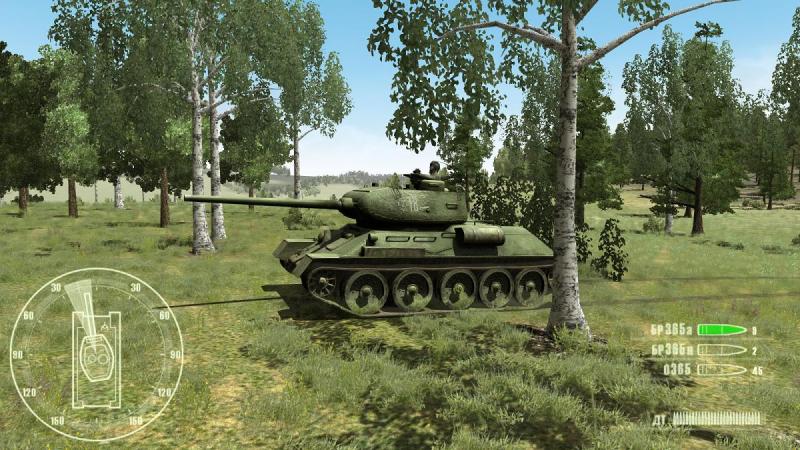
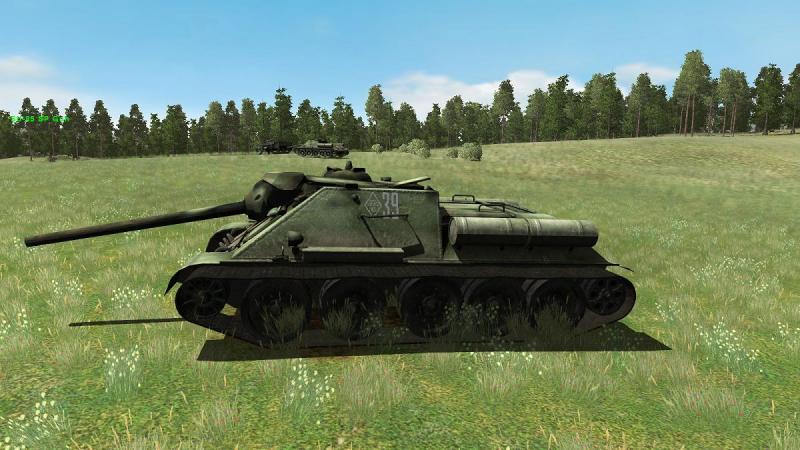
Za rodinu! Za Stalina! ('For the Motherland! For Stalin' - Red Army battle-cry, seen painted on tanks) Accompanied by two other T-34s, one either side, I rolled towards the copse of trees I'd seen on the map. I had planned to make that copse the limit of my first bound. In 'real life' the group of trees looked a bit sparse and the ground beyond seemed still clear of the enemy, so I kept on going, with Chernogostie hidden from me, apart from a few rooftops, by the low hill to our right. Listen in, now. I'm going to give you a reference point, to assist orientation as we move out on the next bound. 'Reference point - three hundred - right - low, sparsely-wooded hill - will be known as Chernogostie Hill - seen?' Beyond the copse, I halted the platoon. Behind me, an SU-85 self-propelled gun trundled across our path, on a little mission of his own. I was covered to my right by Chernogostie Hill itself and half-right, by the spur of ground that sat out from this hill, where I'd planned to take up our second fire position. At this point, battle was joined, but not by us. Firing broke out on my right, with friendly forces in the area of the village exchanging direct fire with enemies who were still out of sight, around the other side of the rising ground to our right front. Skirting the trees on the edge of Chernogostie Hill, I moved off again, nervously. My plan was still to circle clockwise around the open ground surrounding Chernogostie, catching attacking enemy forces in the flank. With said enemy forces apaprently engaged with the village's defenders, this seemed to be a good time to catch them out. ...to be continued!
-
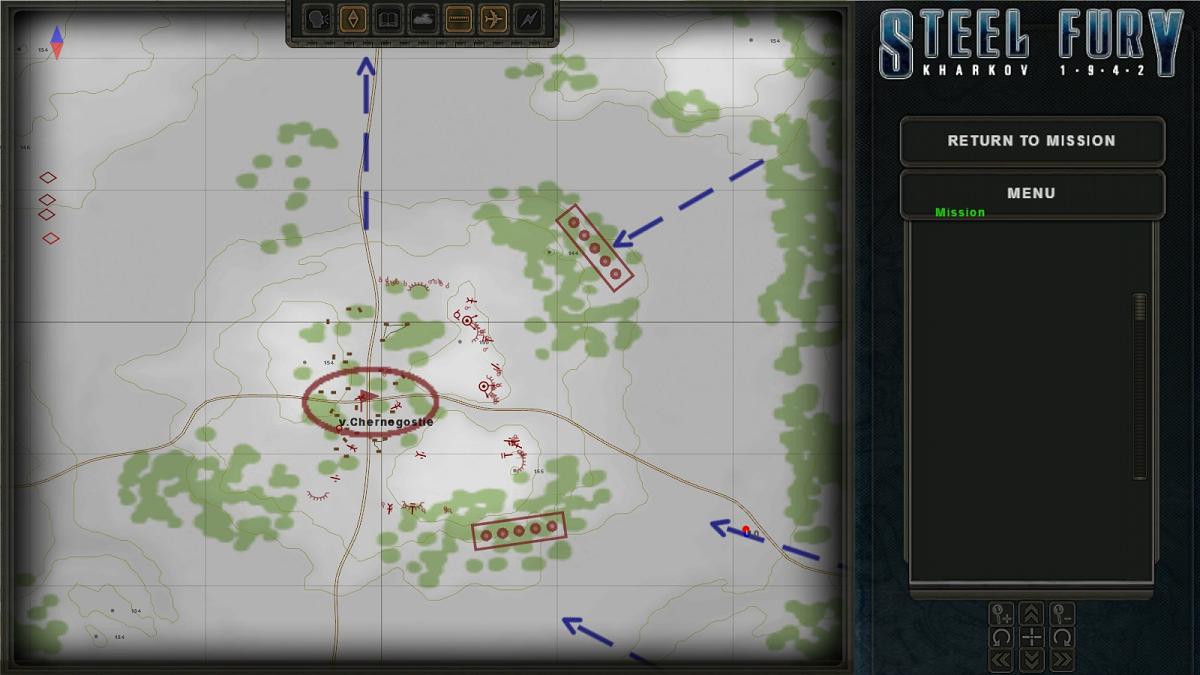
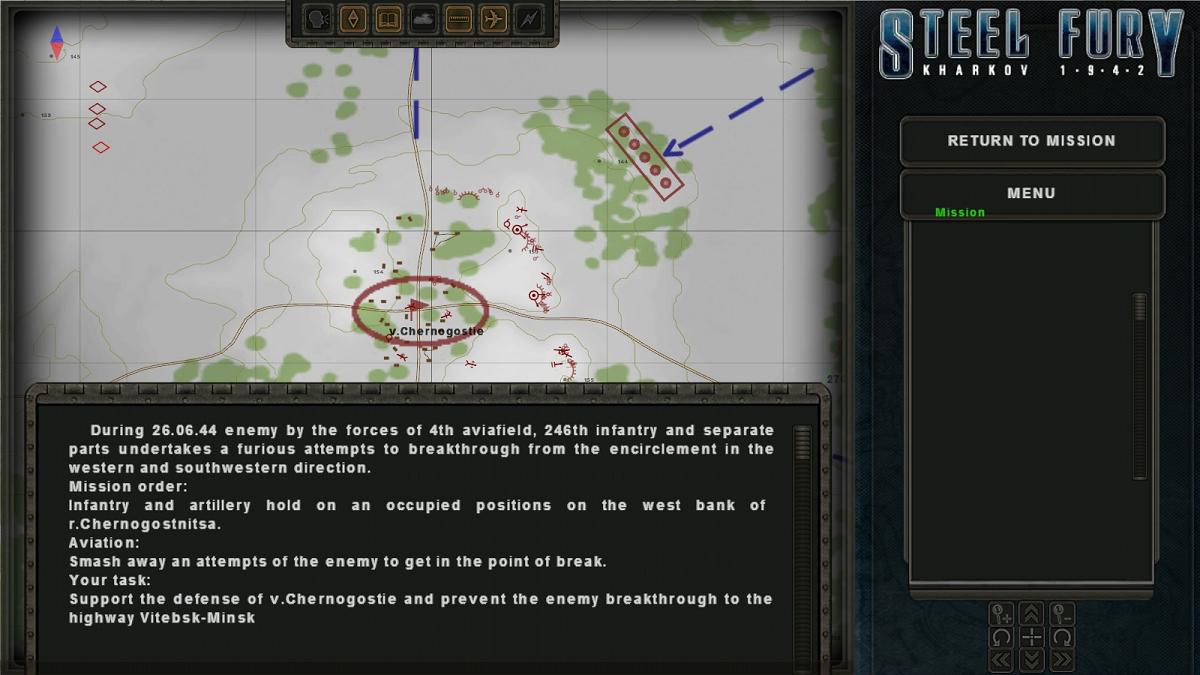
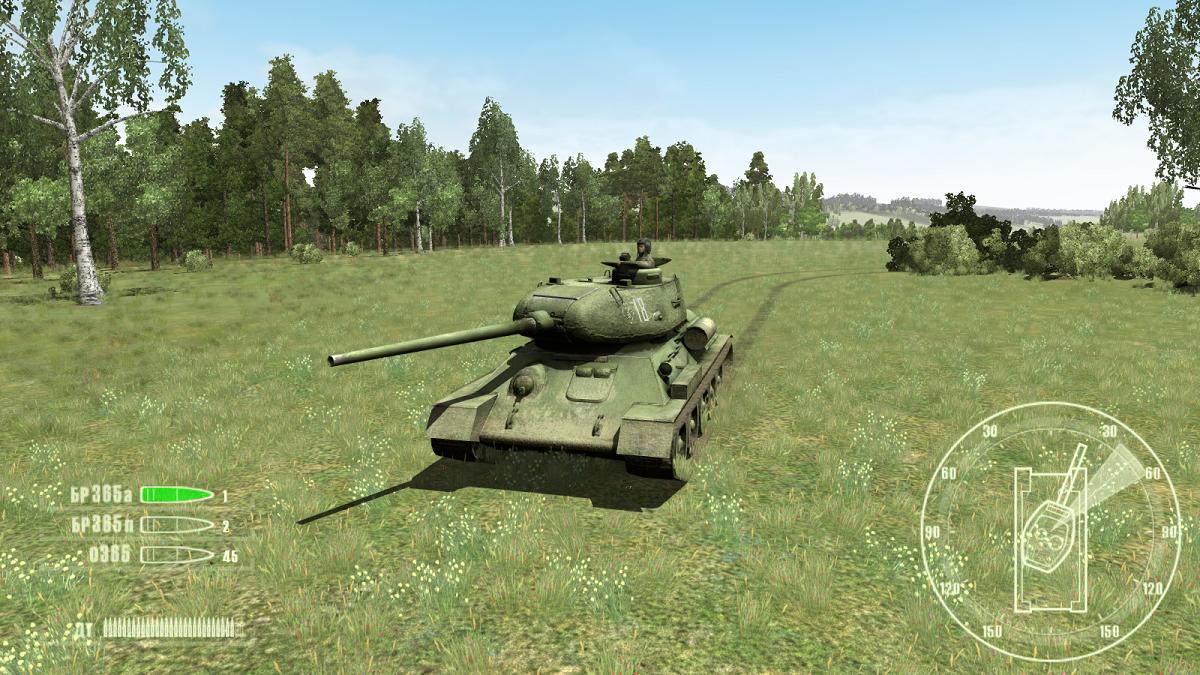
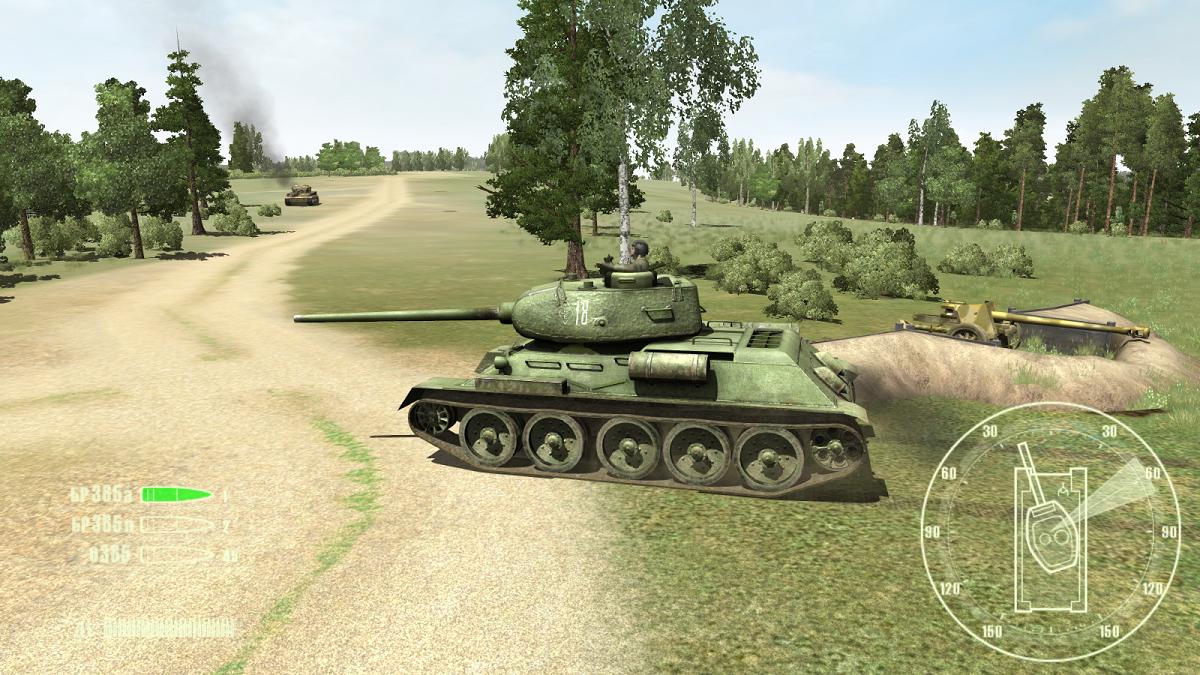
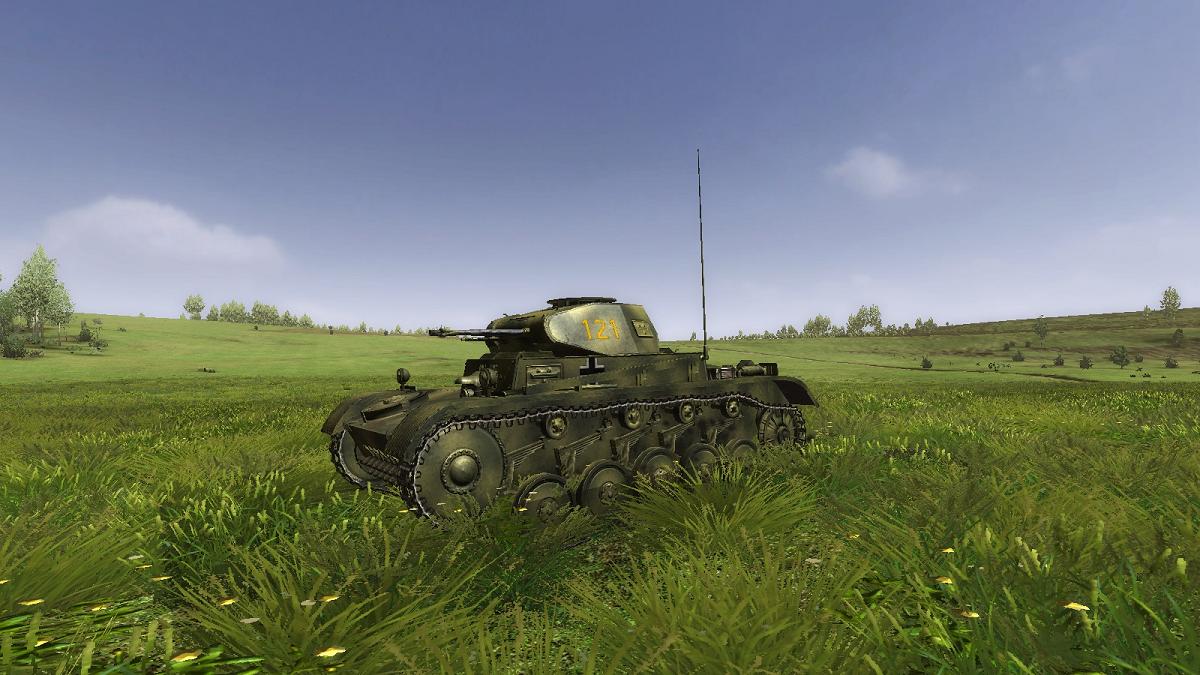
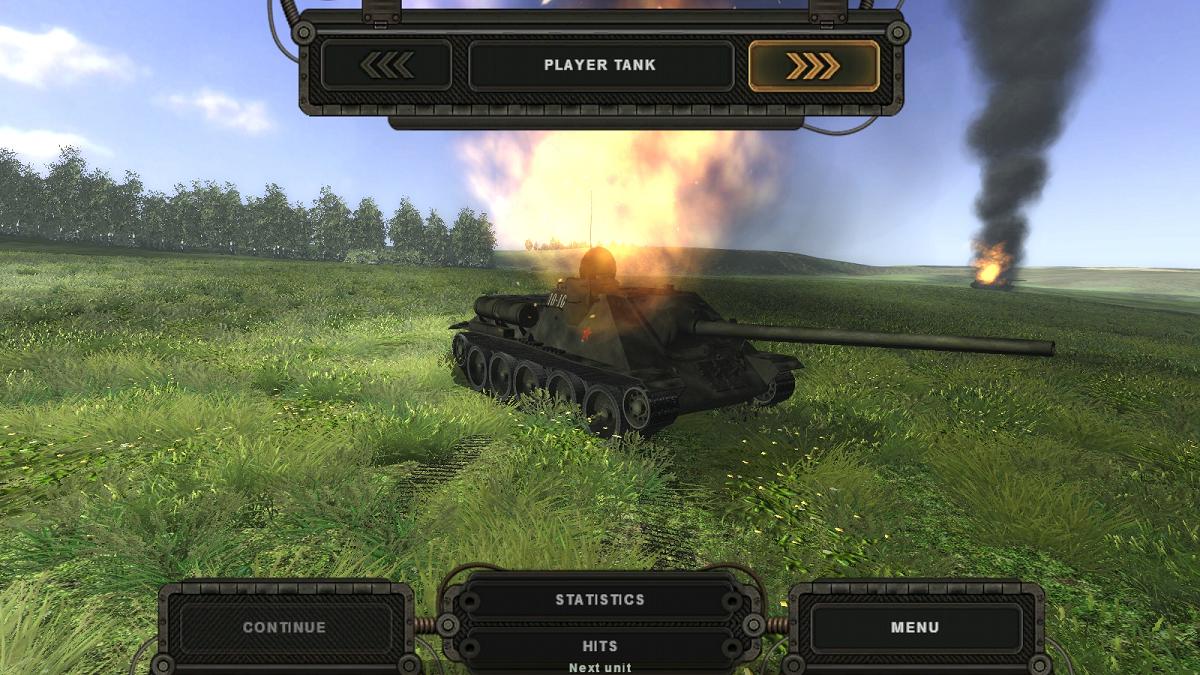
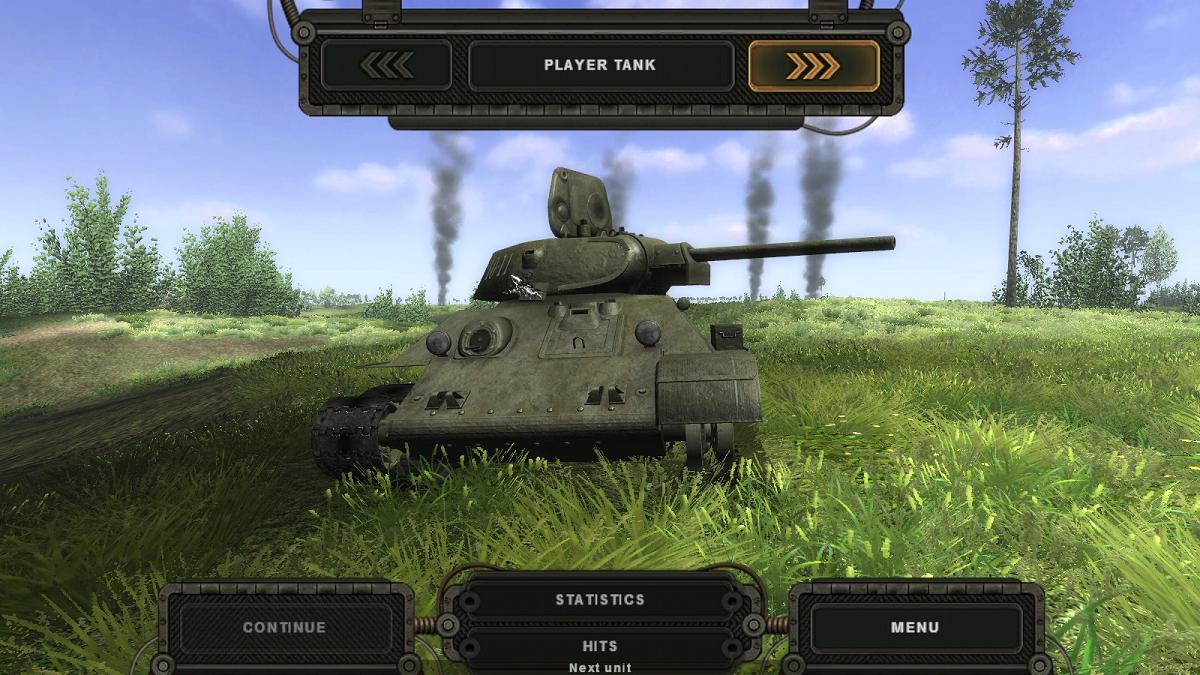
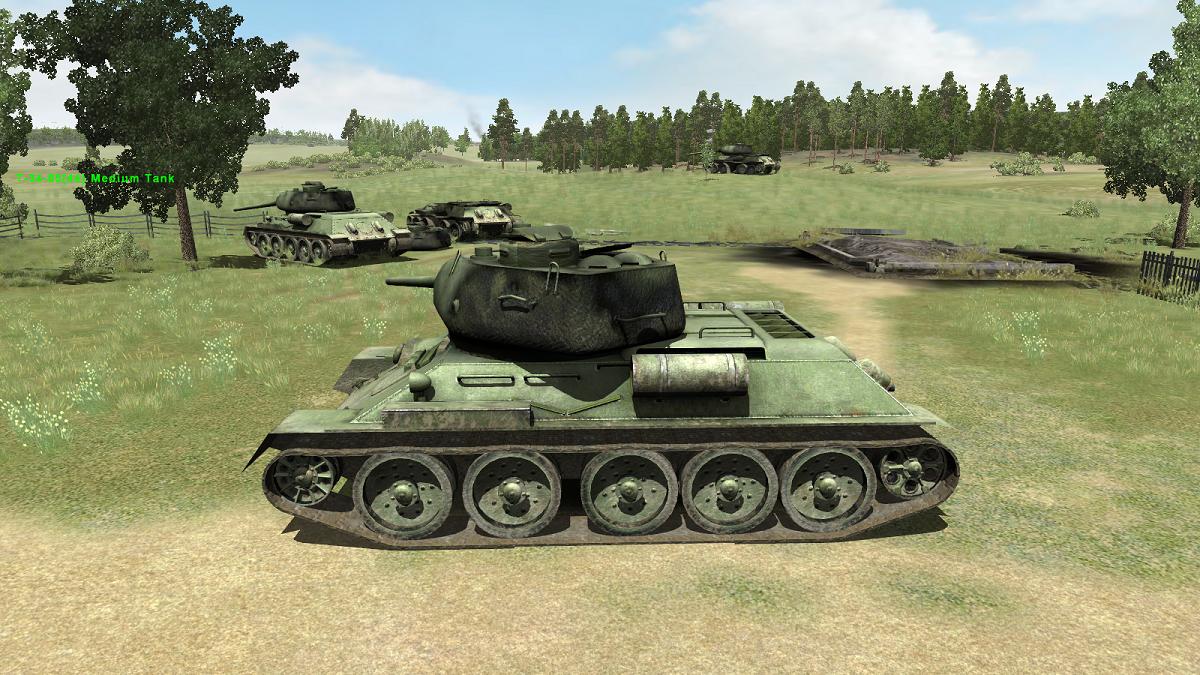
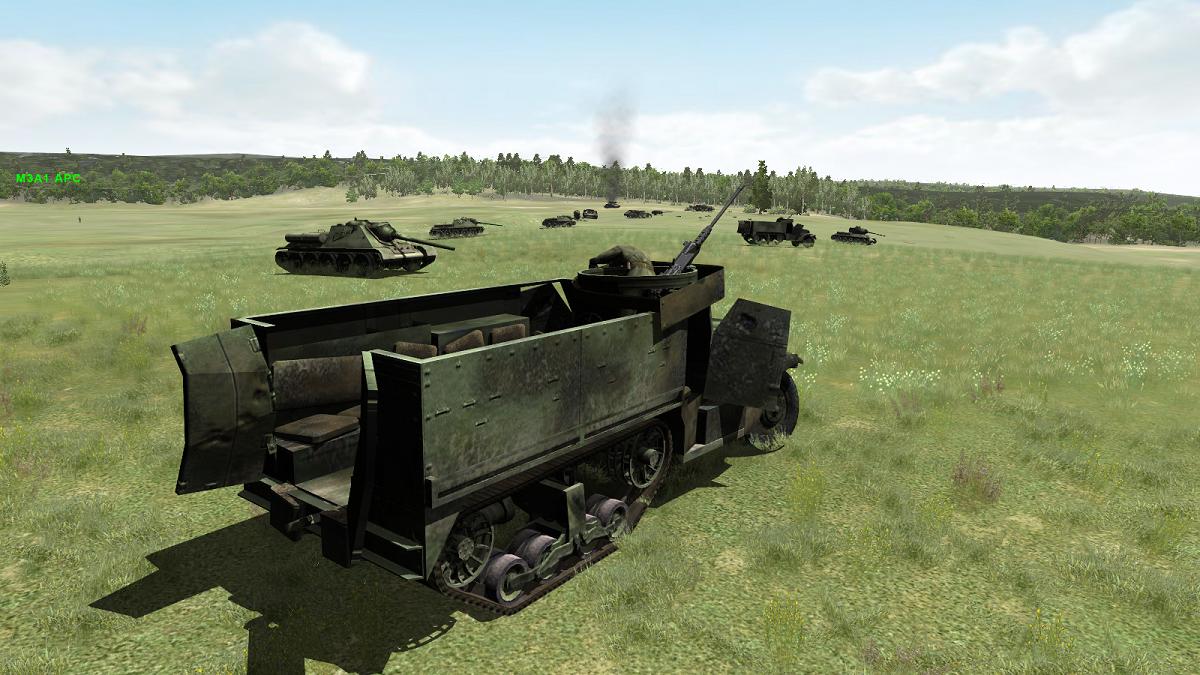
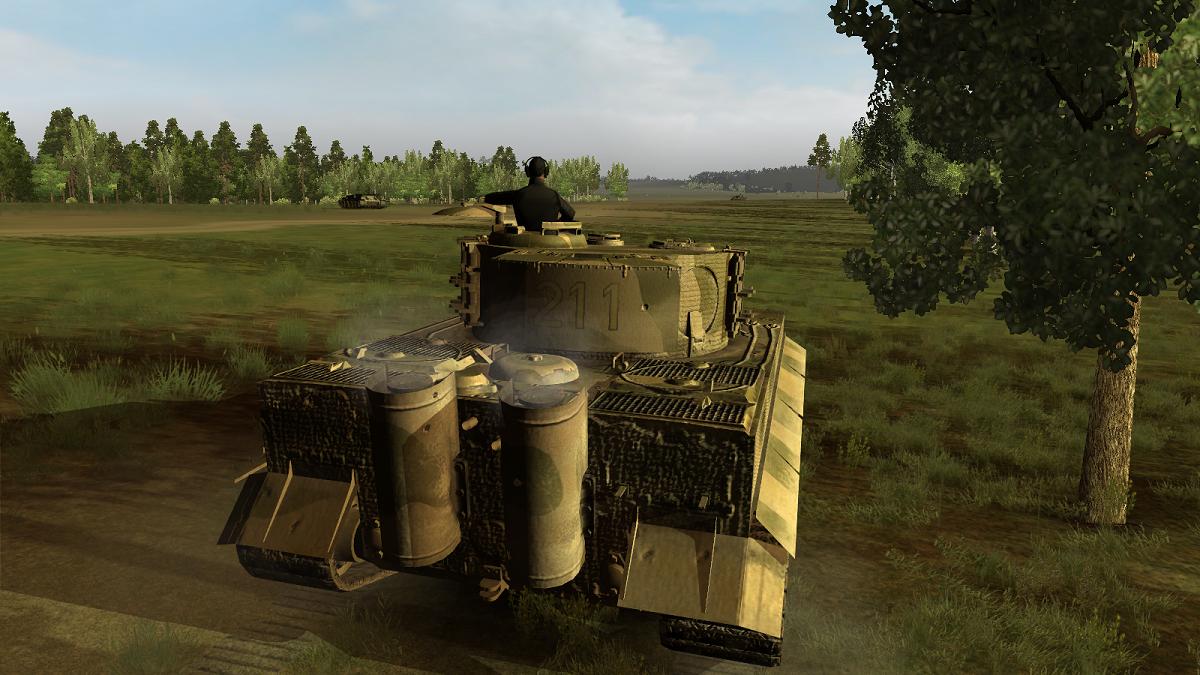
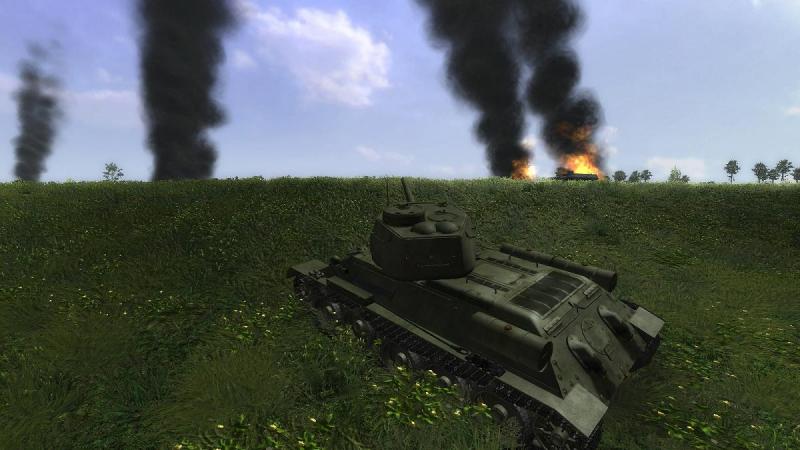
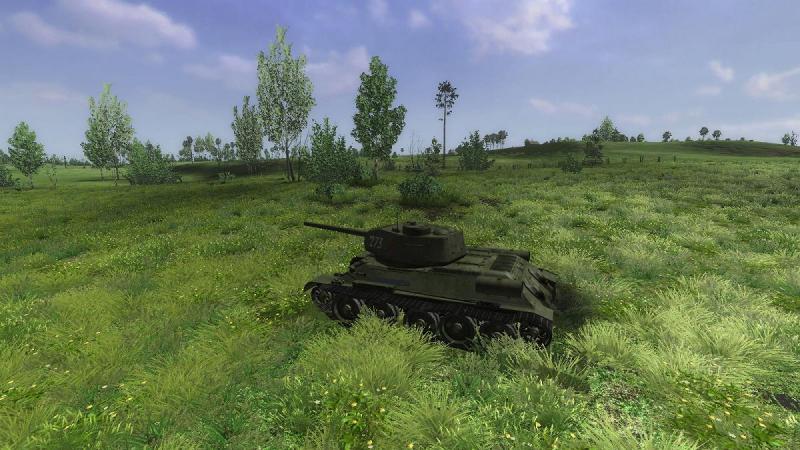
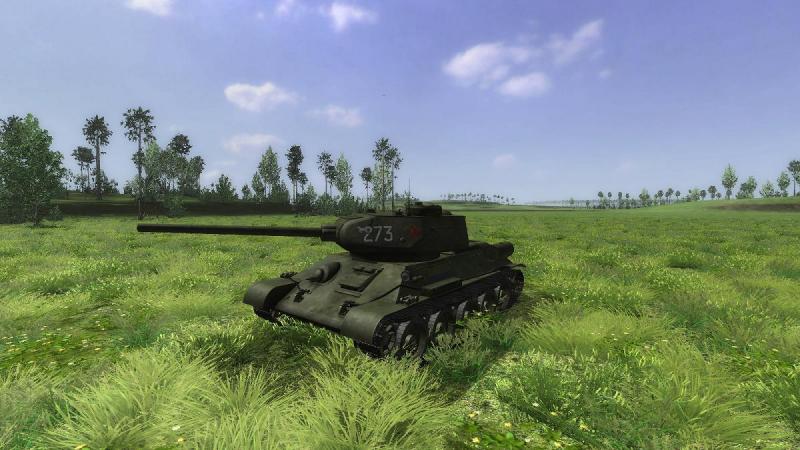
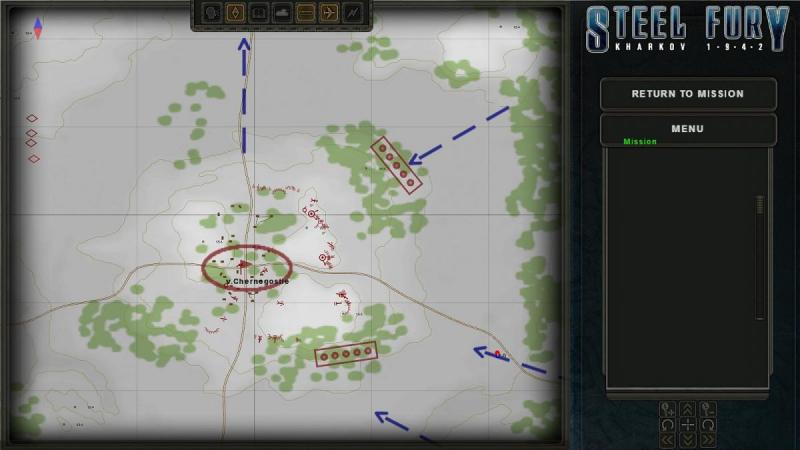
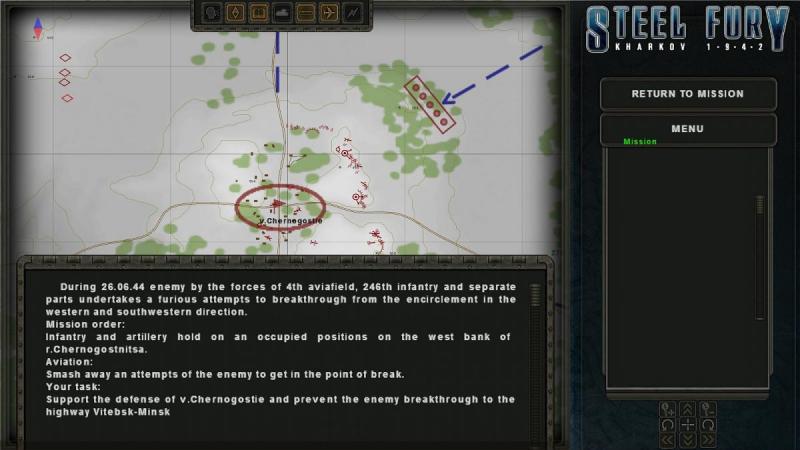
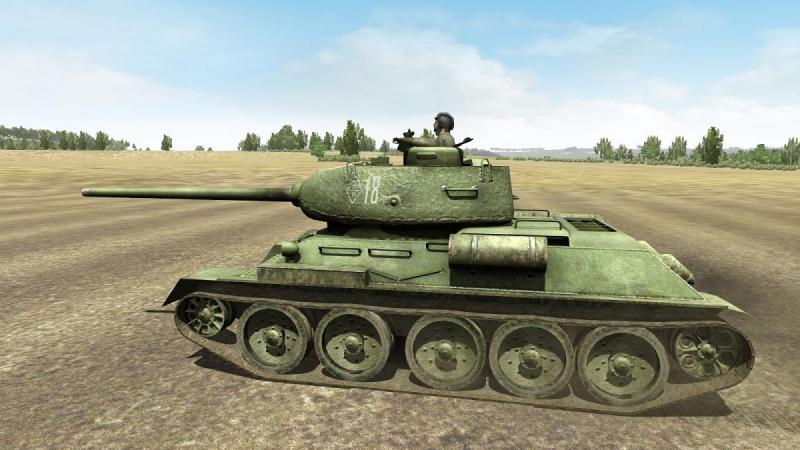
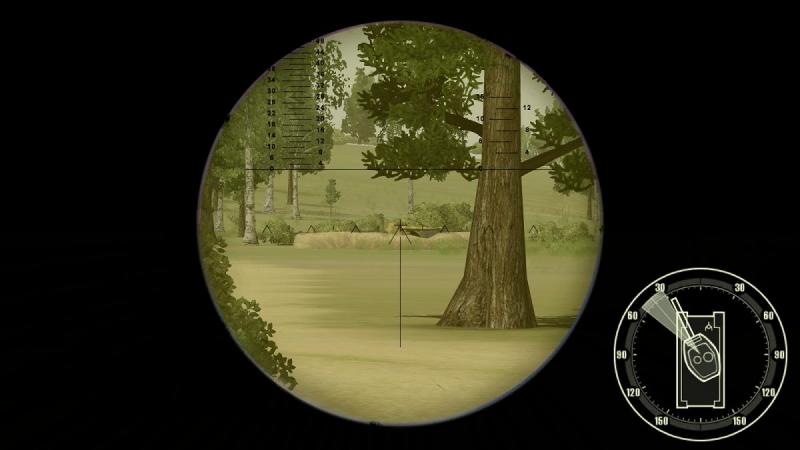
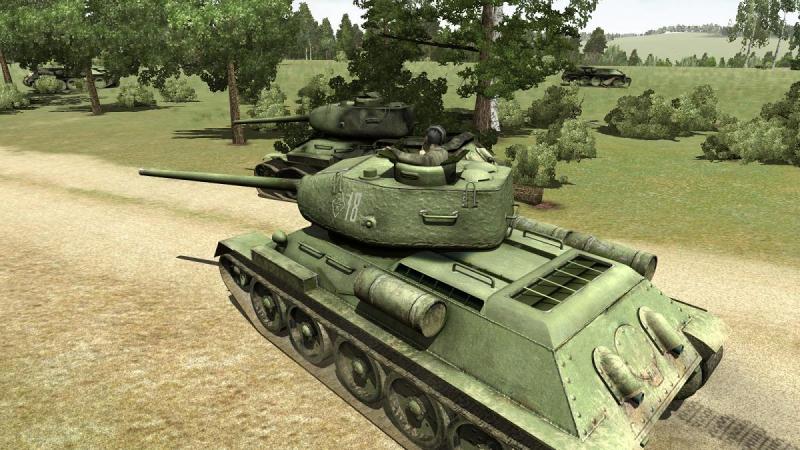
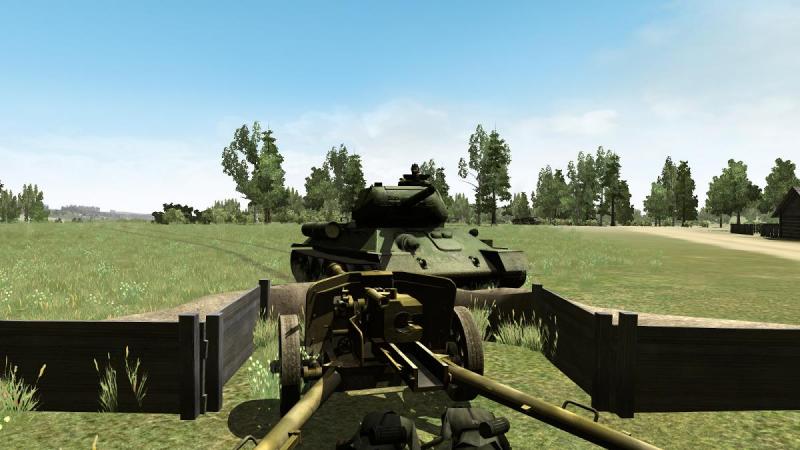
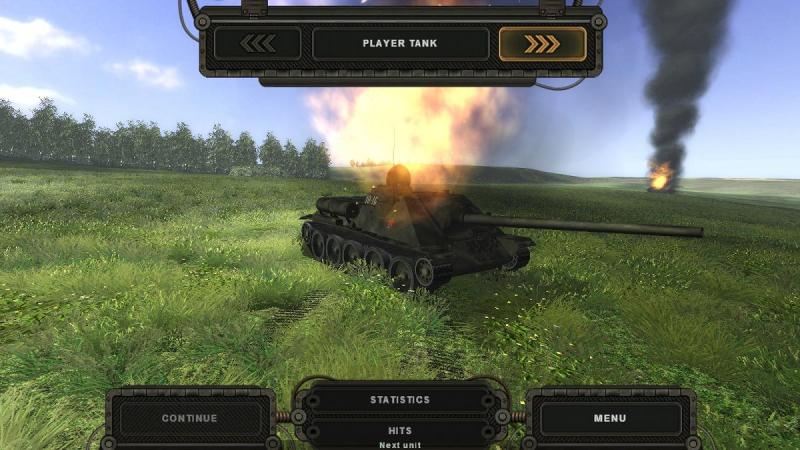
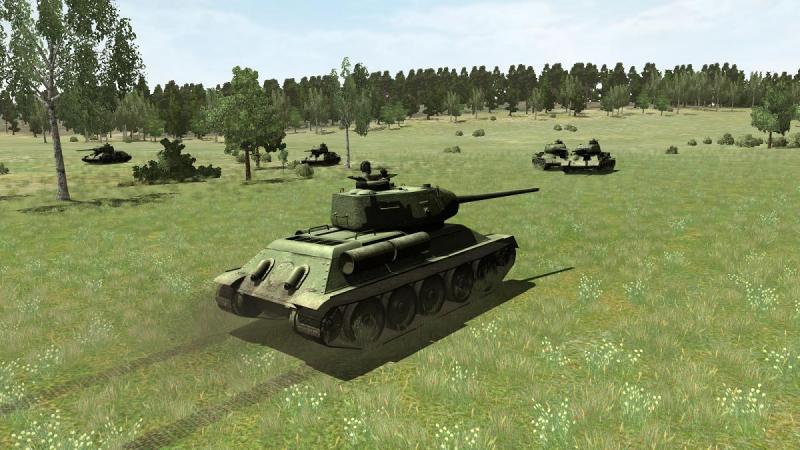
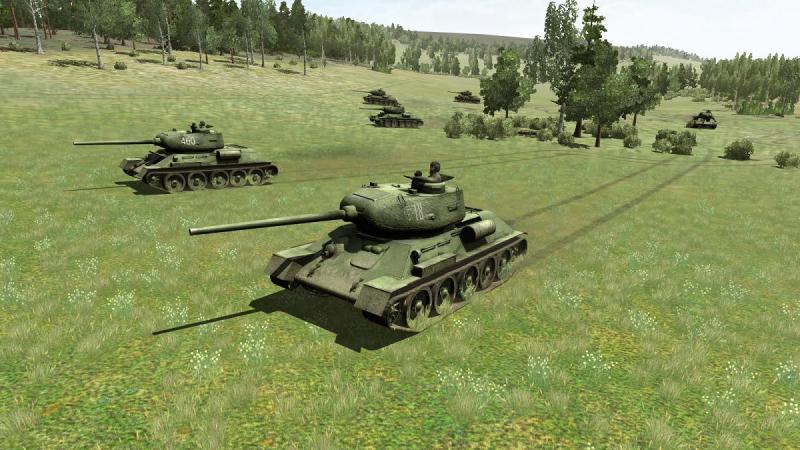
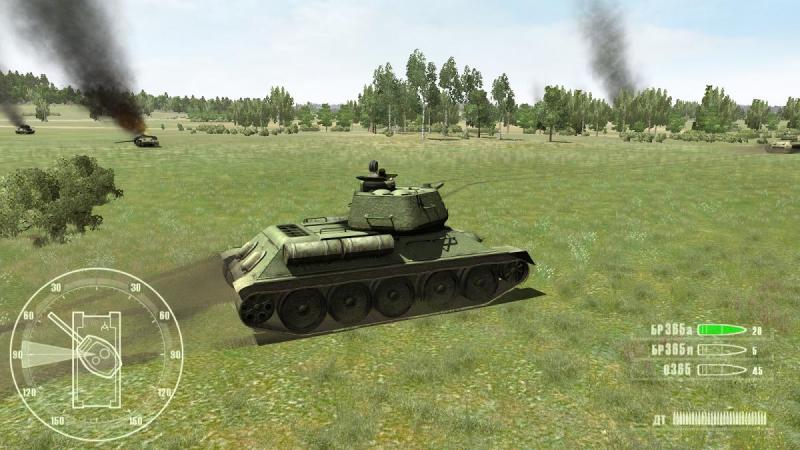
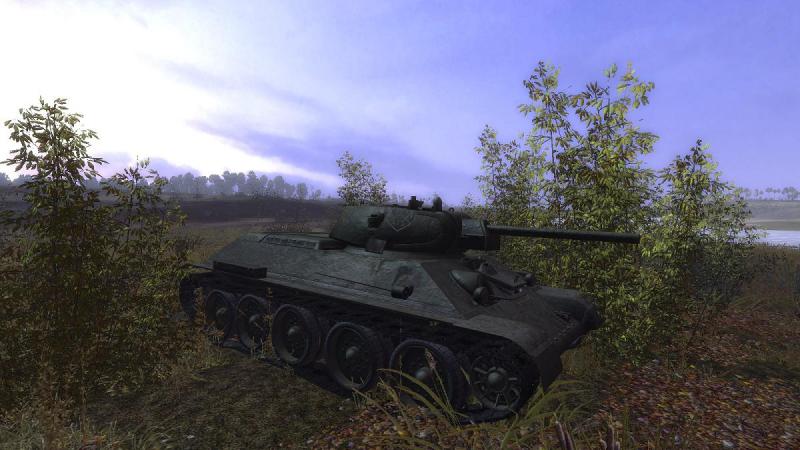
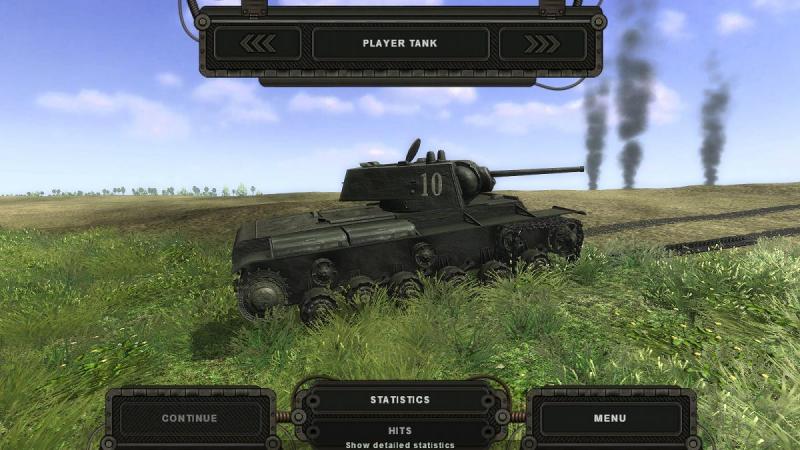
The T-34-85 goes to war in 'Steel Fury - Kharkov 1942'! Ok, so we've put the late-war version of this iconic Soviet tank through its paces in 'T-34 -vs- Tiger'. Now, it's the turn of 'Steel Fury'. The T-34-85 is one of many vehicles which SF '42's small but talented, active and dedicated modding community has given us, extending the sim beyond its focal year into 1944 and beyond. The tank itself doesn't have 3D interiors but no matter, it can be played just as well from the external, open hatch and gunsight/binoculars views. And here's the mission. It's one of many single missions that come with the packs available for use in the NTA mod, download links and installation instructions being available over at the Graviteam forum, here. Edit, August 2014 - the NTA add-on has been discontinued, but a successor, the Steel Tank Add-on (STA) is now available: http://stasf2008.ephpbb.com/t6-steel-tank-add-on-steel-fury For this mission I'm also using a simple game file edit that increases fire effects, suggested by long-time tanksimmer Frinik. The mission is part of Mission Pack 1.1 and its full name is 'v.Chrenogostie, 26th June 1944y. 13:30 (T-34-85)' My orders are rather short and doubtless lose something in the translation. But it's not hard to understand that it's June 1944 and my task is to prevent a breakout by encircled German forces. Specifically, I am to provide tank support for the defenders of a blocking position, around the village of Chernogostie. With the briefing panel removed, you can see more clearly the lie of the land and the disposition of the defenders (red). Our Red Army forces appear fairly well sited for all-round defence, though concentrating on arcs facing east, from two low hills on the eastern side of the village. Chernogostie itself seems to lie in a dip at a crossroads, surrounded by these low hills. The enemy is evidently expected to launch concentric attacks on our positions (blue arrows to the right; not sure what the arrow pointing north indicates - perhaps the German's next move?). There appear to be four tanks in my platoon (red diamonds), though when the mission started, only three seemed to accompany me; perhaps the fourth was just in the area by accident, or he fell away early on for some reason I didn't see. Anyway as usual while in the map screen, I selected the order to conform with my movements ('Do as I do') and chose line (abreast) formation. Still looking at the map, I made a quick Combat Appreciation, using an abbreviated format I was taught long ago. Aim - to destroy enemy forces attacking Chernogostie. Enemy - likely armour and infantry, headed from Chernogostie from points east, if our 'int' was to be believed. Ground - wooded and slightly undulating, with slightly higher ground in the centre-left at Chernogostie, and lower ground on the near left and the far right. Plan - right flank is rather too far away and likely facing stronger enemy attacks, so stay left and use cover - of the trees to my front, that little finger of higher ground I can see, and any folds in the ground - to move the platoon, by bounds, to fire positions on the left (north) of Chernogostie. From there, destroy enemy forces crossing the open ground to attack Chernogostie, starting with their right flank and working my way around in a clockwise direction. Take the German 'arrows' in the flank, one at a time, or even come in behind them. Would my plan work? I'd soon find out. I launched the mission, loaded AP and settled down in the gunner's station, while surveying my surroundings in the external view, relating them to what I could see on the map. Here we go! ...to be continued!
-
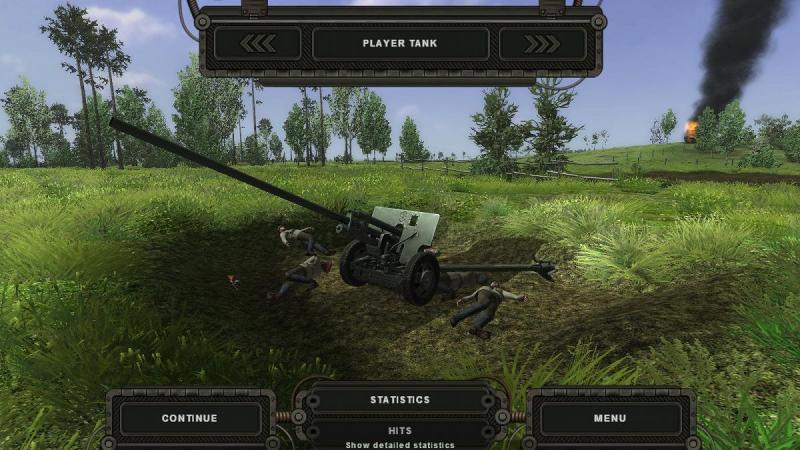
Come out, come out, wherever you are! Skirting the woods around Krinovichi and making the occasional faster dash across open stretches, I sought out any Germans lurking in the vicinity. All I came across was a second Pak 40 anti-tank gun, which seemed as deserted as the first one. This time I decided to make sure of him with a round of 85mm HE. Moving on, I rolled past some knocked-out T-34s and coming around a corner in the woods, found myself behind a second and equally knocked-out Tiger. Eventually, I had made a complete circuit of the objective without encountering any opposition...likewise, without encountering any friendly forces, either. Live ones, that is. There were plenty of dead ones. Still I hadn't seen the 'Mission accomplished!' message...or the 'Mission failed!' one, for that matter. Last time this happened in a T-v-T mission, I had broken the stalemate by putting another round into an enemy AFV which looked like it had been knocked out but might have had some life in it. Perhaps, in this mission, one of the dead Tigers wasn't quite dead. Perhaps there were some live enemies lurking silent in one of the pillboxes. But I'd already made one tour of the battlefield and didn't feel inclined to make another, just for the sake of killing (apparently) dead things. So I called it quits. Fortunately, I had applied the mod (a registry edit IIRC) which unlocks all the T-v-T single player missions so I didn't have to complete this mission to play others in the little 6-mission Soviet SP campaign. Personally, I Ioathe this sort of restriction. Anyhow, as tanksim missions go, this one had its moments, mainly soaking up the sights and sounds of tank gunnery, conveying the impression of which I'd say is TvT's strength. However the mission also highlighted one of T-v-T's weaknesses - its missions. Not only are there too few of them, and not only is your tank on its own amongst a bunch of AI stuff doing its own thing with no platoon command and control for the player, but mission goals are too artificial. Often, you must kill everything on a target list. Miss one and it's no go. In this mission, three goals were listed, as you can see in the mission briefing in the first post: 1. Advance to Krinovichi; 2. Supress the MG nests [pillboxes?]; 3. Occupy the village. Which had I missed and how? I had no idea. Setting decent mission objectives and tying this into how the mission ends seems to present tanksims a challenge that not all mission designs meet very well. Sometimes, they impose silly and artificial time limits - yes I know timing is important in military operations but not like that; we want our tanksims to simulate war not a bl***y video game. Other times, they impose specific things you must destroy. And however they resolve objectives, while some will be sensible and tell you the result but still let you play on, others will tell you you've failed and then end the mission for you with no option to play on, again, video game style. Likely, part of the problem is that unlike a combat flight sim, you don't have the nice 'RTB and land' end point of the typical flying mission. Military operations are typically centred on taking or holding ground so that's the obvious type of victory condition we should have in a tanksim. But I daresay that can be hard to boil down to a victory condition. In real life it wasn't necessarily clear-cut, either. I recall that concerning Normandy 1944, one British tank unit's War Diary was quoted as criticising another unit's claim to have occupied a certain enemy position, when it was said that all they had really done was to 'superimpose themselves on a heavily-defended locality'. I quite liked how M1Tank Platoon II handled things - if I recall right it, you were told whether you had won or lost when the moment came but had the option of playing on. Your results were in some fashion then factored into the next campaign mission you faced. Panzer Elite is a bit like that, except the visible mission goals tended to include the destruction of units whose names you could not possibly have known and of whose presence on the battlefield you might have been otherwise completely unaware, in real life. This T-v-T mission's ending was at the more unsatisfactory end of the scale, but at least it didn't time me out. Anyway, in the second part of 'Red Storm - T-34 twosome' we'll see how I got on with the same tank in a different sim - Steel Fury - Kharkov 1942.

-
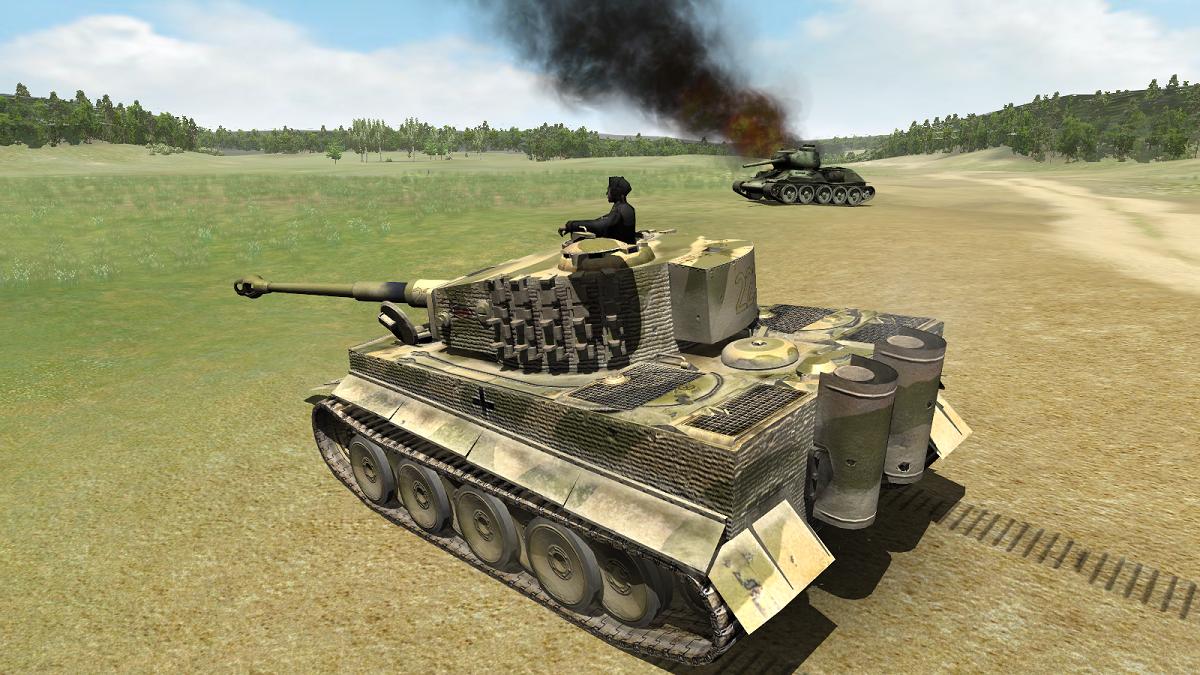
Tiger hunt! Having used the woods to creep up on a Tiger while my less cautious comrades were being savaged by fascist gunfire, I now needed to destroy my close-range foe before he woke up and destroyed me. 'Keep firing till it changes shape' I've heard that US tankers say, recognising that it's only in the movies that knocked-out tanks announce their demise with a petrol-laden fireball, every time. I was conscious that the Tiger was sitting at an angle to my line of fire, thereby increasing the thickness of armour my 85mm gun had to penetrate. I concentrated on his front, thicker than the side armour but at less of an angle. At that range I could hardly miss but I still had to pump several of my remaining AP rounds into him before his shape changed - finally, his gun drooped and his hatches popped slightly open. Phew! At this point I should repeat the point made in an earlier mision report - T-v-T gunnery is top-notch, in my book. The visuals are good, the gun firing and loading sounds are excellent, and likewise the crew voices. In this mission, failing to familiarise myself with the Soviet ammo types had led me in the heat of action to neglect proper round selection but that wasn't T-v-T's fault. For the rest of this mission, I just hoped that my zealous Red Army comrades had dealt with any other Tigers. Elated but nervously, I edged forward from the trees, scanning left and right for any sign of further enemies. But all I could see was my victim, now gently smoking in the open. As I came out of cover, I got a shock when I suddenly spotted a Pak 40 AT gun in a defensive position, roughly between me and the Tiger. The gun itself looked undamaged but its crew was nowhere in sight. Had it been active, I'd probably have been dead by now. So I pushed on, speeding up and making straight for the gun emplacement. I intended to make that my next fire position; if the Germans sprang to life suddenly...well, I would just roll right over them, gun and crew. I managed to cover the short stretch of open ground to the AT gun position without mishap. Halting in front of it, I could see that although the gun itself appeared undamaged, the unfortunate gun crew did not. Still no sign of the enemy! Where were they? I decided my next bound would be into the village itself, where I would use the cover of the buildings to do a bit more creeping up on the Nemetski. I backed up a little, swung left, then dashed across the short stretch of open ground, slowing again as I got amongst the buildings. They were hardly much protection from AP rounds but they say that cover from view is better than cover from fire...even though both is likely best. The only hostile indications I could see were some menacing but silent pillboxes, likely to house those MGs we had been briefed to knock out. There was no sign of our infantry but in case they showed up later, I did my duty and duly blasted the pillboxes. The HE rounds I had left seemed to crumble rather than obliterate them but after reducing a couple of these things to a fairly knocked-about condition, I decided it was time to move on. Looking around, there seemed to be plenty of T-34s about...dead ones. The view below is through the tank commander's binoculars, which give a somewhat better view than the gunsight. Looking at the turret position indicator, you can see that this shows me I'm looking left, while my gunner is looking slightly left. You can activate an AI gunner while in the commander's station and he is quite decent at picking up and engaging targets on his own. The battle seemed to have died off, too, and I got the impression that I was the only one still in the Land of the Living...apart from any devious fascists who might, even now, be lying in wait, ready to put a violent and sudden end to my heroic endeavours on behalf of the Motherland and Comrade Stalin. Plotting my position on the map - which I had previously set not to display other vehicles besides my own, so as to avoid the AWACS, eye-in-the-sky effect, however convenient it is - I decided that I would have to make a little circuit around the village, rushing from fire position to fire position, pausing to have a good look from each, before moving on. This promised to be a tense affair...and so it proved. ...to be continued!


-
Hi Rusty If your boy's already got Panzer Elite and likes it then he'll have no difficulties with SF '42 (or T-v-T)...except he may miss not being able to do some stuff he could do in PE, like play campaigns all the way through from North Africa to Normandy. If he hasn't already done so he could try the PE-x mod or PE3, which extend features and scope still further: http://pedg.yuku.com/topic/2141/PEX-Realsed-Version#.U4TT6ygo0vE http://panzerelite.yuku.com/topic/482/Panzer-Elite-three-mod-LINK-contains-Ostpak-MvR-BritPa?page=1#.U4TTMSgo0vE
-
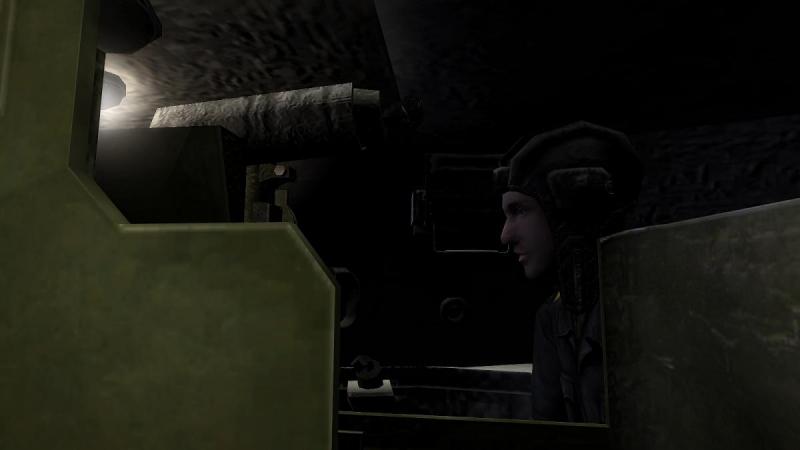
Hi Rusty 1. I don't think there is much to choose, in terms of being easy to play. T-v-T I find slightly easier because (i) its manual is better translated than SF '42's and (ii) T-v-T has less functionality and therefore fewer keystrokes - a bit of a back-handed compliment! 2. You can play in the external view in both but AFAIK there is no crosshair, you have to switch to the gunsight view to shoot OR play as a tank commander and point out targets for your AI gunner to shoot. I would hate a crosshair in the external view so i don't miss that. I play in the external view and go to the gunsight either when a target is spotted or when I want to scan for targets from the gunsight. It's not complicated to play like this. If you're playing as gunner, both sims have an artificial intelligence tank commander who spots and indicates targets for you, just as in real life. In both sims you can hear the commander's fire order (German or Russian) and see it displayed as text; each sim also has different on-screen aids to help, like the turret position indicator in the screenies above. In both sims I believe that you can just drive the tank and your AI gunner will do the shooting. 3. I think SF '42 is less demanding on a system. On my system anyway, T-v-T can chug a bit with lots of vehicles in view, while SF '42 does not. Maybe not an issue with newer PCs/GPUs. 4. I would not say that either sim is particlarly easy to get into - it takes practice and some patience. SF '42's manual's translation can be difficult to understand. All tank simulations (as opposed to tank arcade games) can take a while to pick up, and it can be very frustrating when your first few missions result in sudden death from an enemy you never even saw (still happens to me). You need to select the right ammo for the right target, and if playing as gunner, to know how to set your gun sight for the target's range. Rushing ahead will often get you killed; you learn to move from cover to cover, pausing to watch for enemies. Learning and managing these things is part of what you get from a tank sim, as opposed to a tank game. The only tanksim that I really found easy to get into was Panzer Commander (which had a simplified targeting mode and generally simple controls). At the other extreme is Panzer Elite, dated graphically but, with the latest mods, still the best WW2 tanksim in many departments - it had a very complex (but very capable) control setup with more keyboard controls than a thing with a lot of keyboard controls, including many multi-key combinations. SF '42 does have some options to make gameplay simpler but I've not tried these. SF '42 also has training missions, which T-v-T doesn't. 5. In T-v-T you can drive only the Tiger or the T-34-85 (although there is a payware mod by ZeeWolf which adds some additional playable vehicles). In SF '42, if you download the NTA mod, you can also drive dozens of tanks and other AFVs. I think the mission packs even include one for a BMW motorcycle & sidecar! My mission reports here feature just a very small selection of the drivable vehicles. Others include these: 6. SF '42 has been extensively modded - the NTA mod is the latest and you can get up to speed with all the extra missions and vehicles by following the installation guide on the Graviteam forum, here: http://graviteam.com/forum/index.php?topic=10944.0 As to which is best, each is better in some respects but overall, I agree with most people that SF '42 is significantly better, overall, especially with the mods installed. SF '42 has dozens of playable vehicles and many missions and campaigns; T-v-T (unless you go for the payware mod) has two vehicles and two campaigns with just six missions each. If you just want a simple tank game that is suitable for some single-player fun, others will be able to give better advice but something like Panzer Elite Action (not to be confused with the original Panzer Elite which was a real tank sim) might do the trick, if you can still get it: But if your lad has the interest and the patience to learn the aspects of tanking that a proper tanksim will teach him, they don't come much better than SF '42 with the NTA mod. With dozens of AFVs and many missions, it has the replay value I don't expect you'll get from an arcade game. ,

-
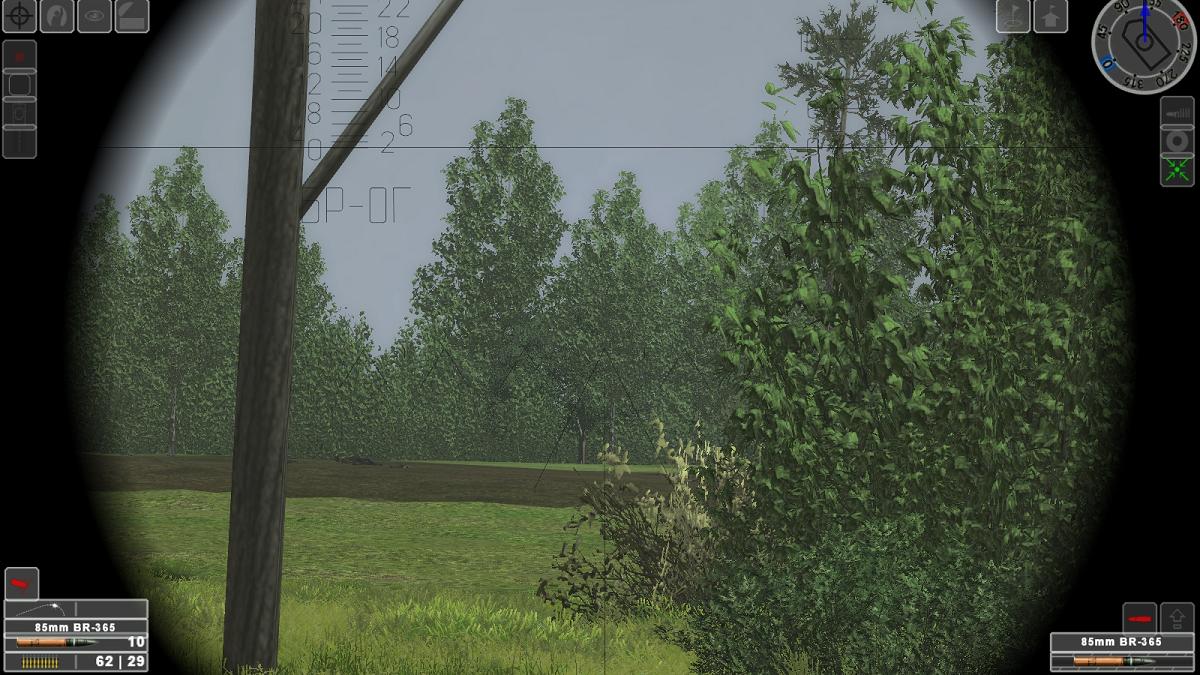
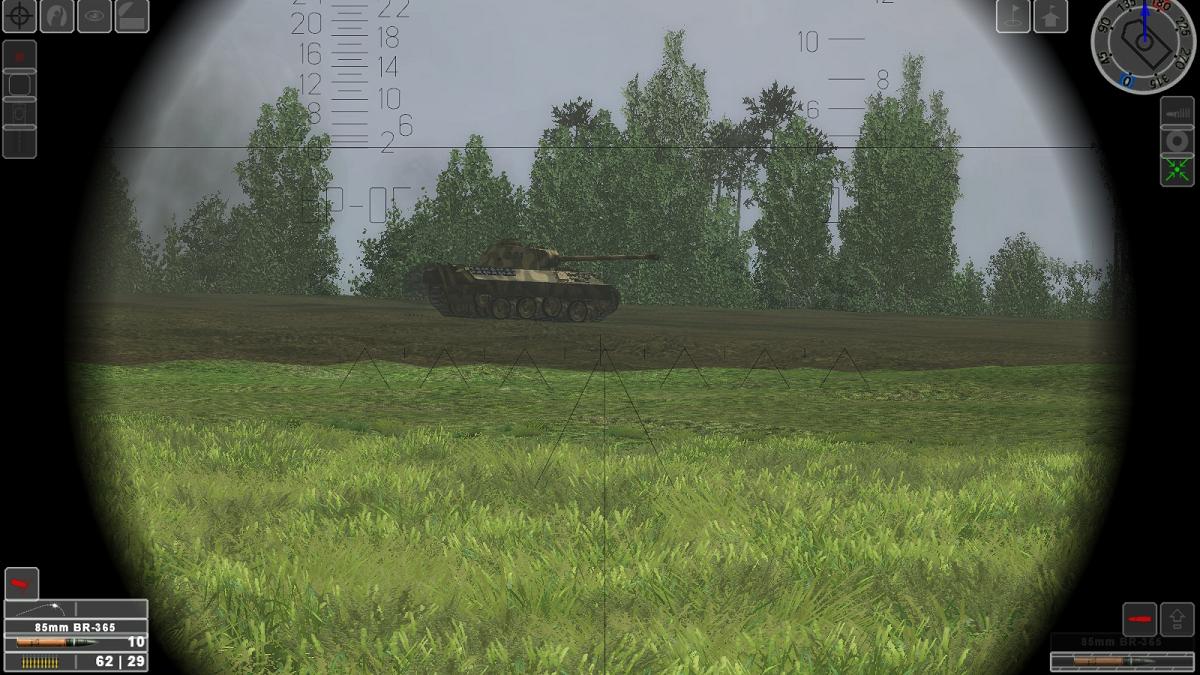
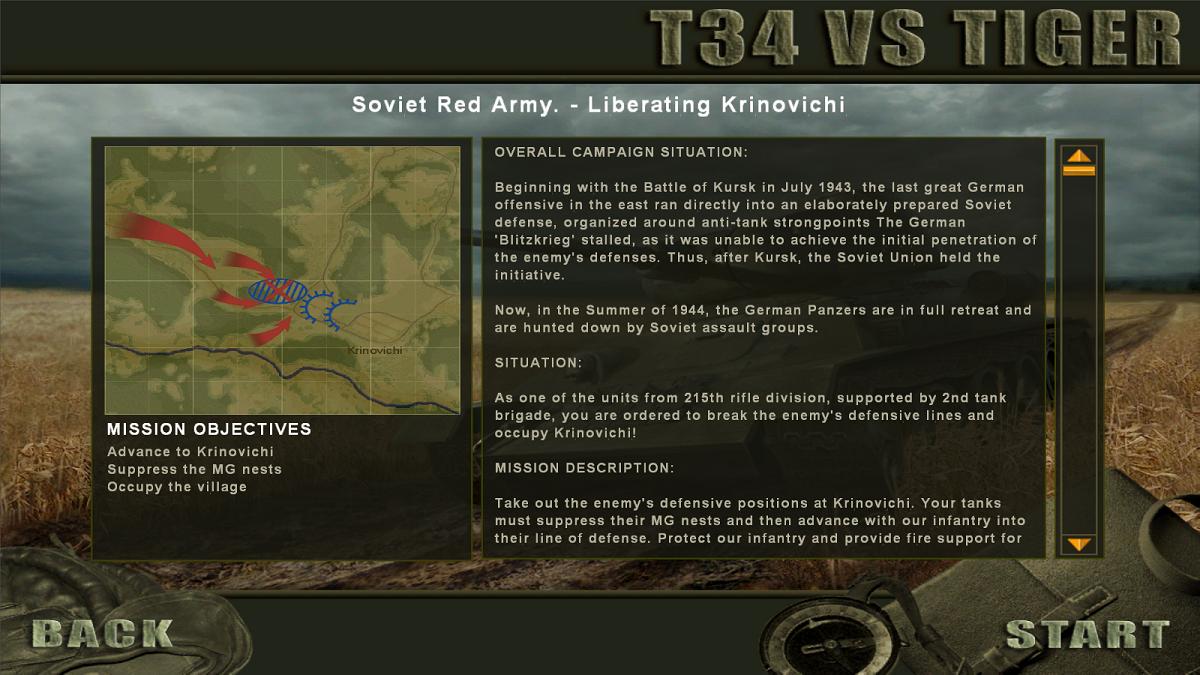
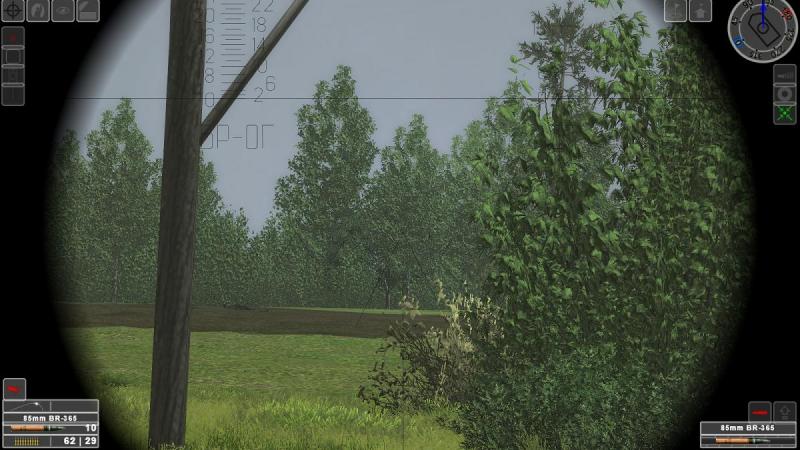
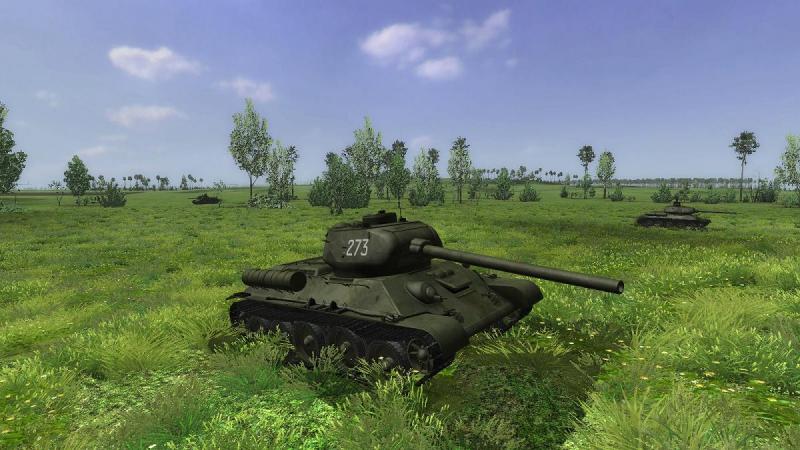
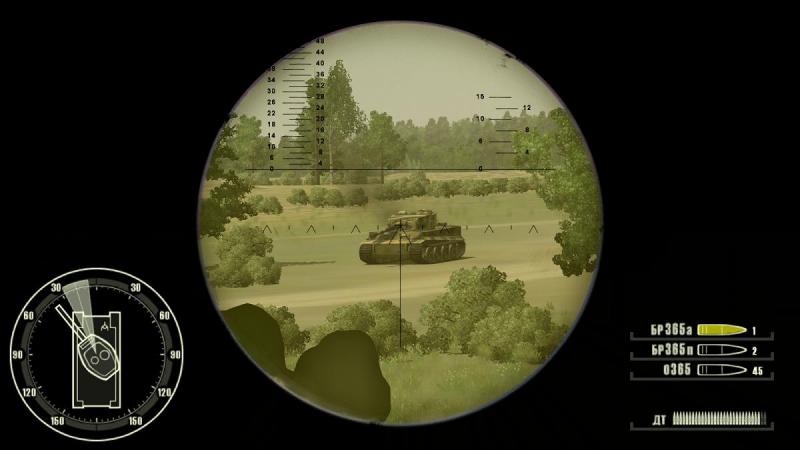
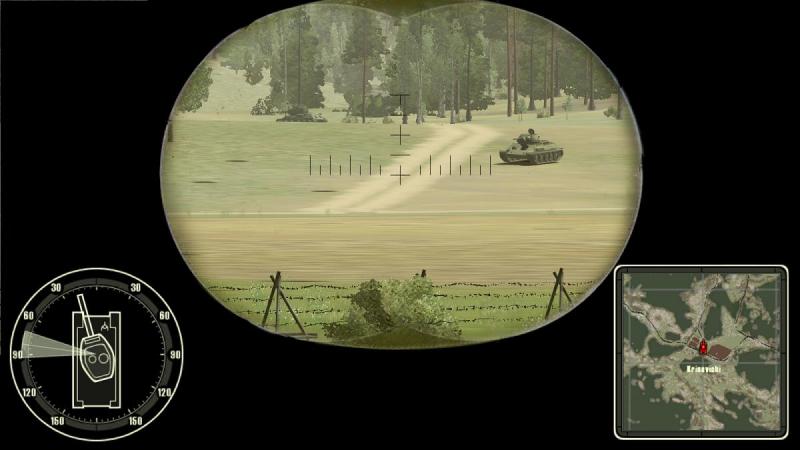
'Liberating Krinovichi' Here's my orders for the T34-vs-Tiger mission. This is the first Soviet mission, there being a not-very-grand total of six for each side, in the stock sim. The 'briefing' itself is not terribly helpful. As you can see, about half of it is given over to a short history lesson, concluding with a rather strange description of the plight of the panzers at this stage in the war. The actual mission description is slightly truncated in the screenie below but it tells me very little. What is the composition of our attacking force? Do we have any artillery support? What do we know of the enemy, apart from roughly where they are? The briefing implies nothing more than MG nests! What sub-unit am I with, and which of the three axes of advance (red arrows) is my sub-unit supposed to take? You don't get to make up your own mind about such things in real life. But this is T-v-T and I decided to go left-flanking. Not that it seemed likely to make much difference, as all three axes looked to channel us into a likely killing ground more or less in front of the enemy position. I suppose I could have crunched off through the extensive woodland and gone wide, but commanding officers tend not to approve of that sort of thing, never mind Red Army Commisars. Besides, if I went swanning off on my own into the Wide Blue Yonder, I'd lose whatever support I'd get from the others in my force. Whoever they were. There was one way to find out. I started the mission. Having 'moved' to the gunner's station, I activated the AI driver and commander, checked that I had an AP round chambered, then turned on the turret position indicator and map displays. Checking the latter, I ordered the driver to turn hard left and we crunched through a short stretch of woodland. Once on the other side, I turned right into the clearing that would lead us towards the objective. As you have no way of interacting with the AI (other than your movements sometimes triggering their activity) it seems not to matter who you link up with. When I turned left to enter the woods, I had left behind a group of 76mm- and 85mm-gunned T-34s who had promptly rushed off without me. Instead, I found myself approaching a group of five T-34-85s, with whom I could join up, instead. That was the good news. The bad news was, they were all facing the wrong way. Either that, or I had missed the order to withdraw. But no, I was going the right way; the war hadn't been cancelled. As I neared the T-34s, they sprang into life and turned with me as I passed. Soon, I was at the head of quite an impressive phalanx of Soviet steel. I say 'at the head off' rather than 'leading', because - while my arrival may have triggered the AI into action - in no sense were the other T-34s under my control. Evidently keen to be at the fascists and impress the Commisar with their ardour, they roared off towards the objective. In no time, they were in the large clearing in front of Krinovichi, where they rapidly began to take casualties, firing back at an enemy I could not yet see. Of the infantry we were supposed to be supporting, I could see no sign. But the opposition evidently consisted of something a good deal more formidable than a few machine guns. I could see nothing definite but cracked off several rounds at what I took to be bunkered enemy positions, without much result that I could see. To make matters worse I forgot to switch to HE after the first shot so I used up AP rounds needlessly - doh! Time for a change of plan! I suddenly felt disinclined to continue ahead, into an open space which was evidently well covered by enemy fire. Instead, I swung right, across the rear of the group of tanks which I had originally left behind. I felt more than a little exposed, but I was relying on presenting the Germans with a crossing target, harder to hit - and, shamelessly, on the leading T-34s drawing the enemy fire. Across the open ground I went, urging more speed on the driver, aiming for a stretch of woodland which extended out towards the objective, on the right. It was a tense few seconds but finally I made it into the woods. Once inside I slowed right down, picking my way between the trees. I edged cautiously towards the furthest extremity of the woods, scanning left and right between the leaves. Suddenly, my commander called out a tank target. Using the turret position indicator, I swung my gun around onto his line of sight...and there it was! Just visible between a gap in the foliage, sitting in the open - unmistakably, a Tiger! My relief that he wasn't aiming in my direction was tempered by the knowledge that if I didn't get him quickly, he soon would be! I lined him up and cracked off my first round. ...to be continued!

- 7 replies
-
- 1
-
-
- steel fury
- t-34
- (and 1 more)
-
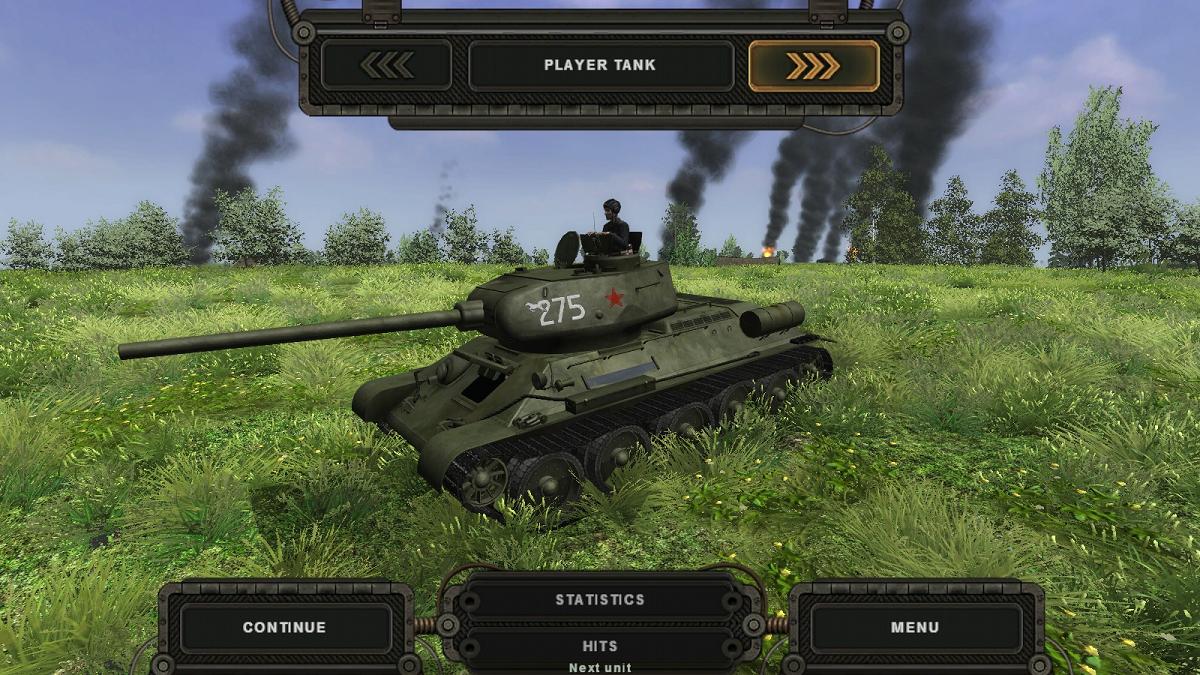
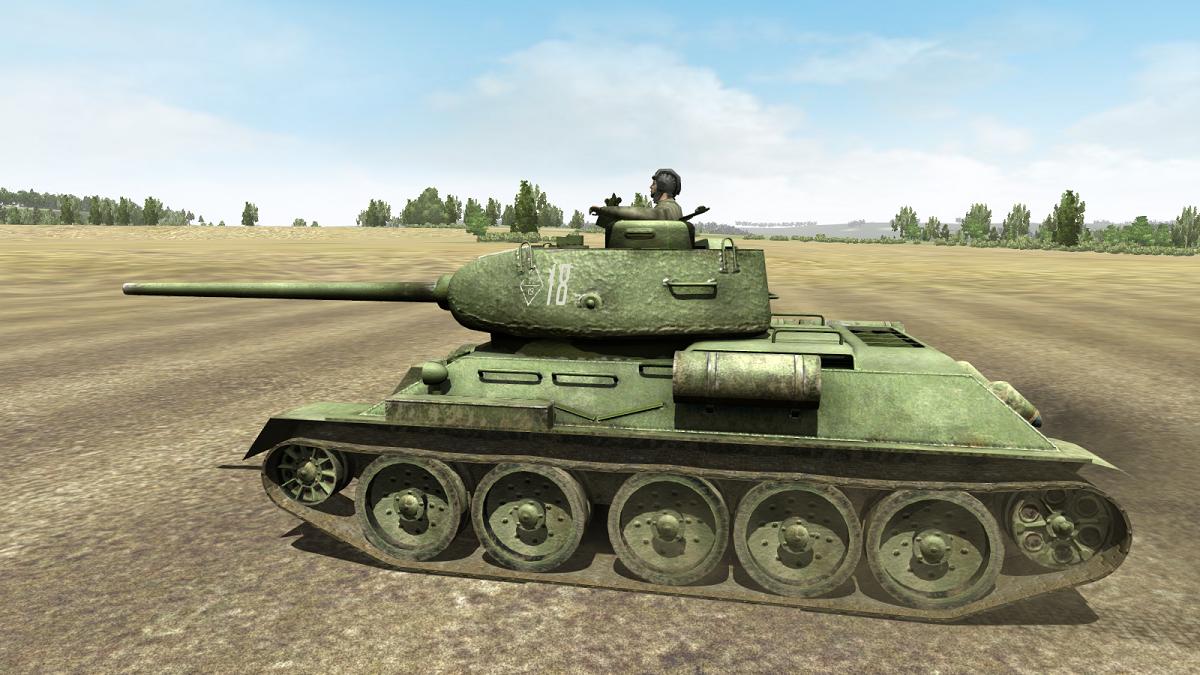
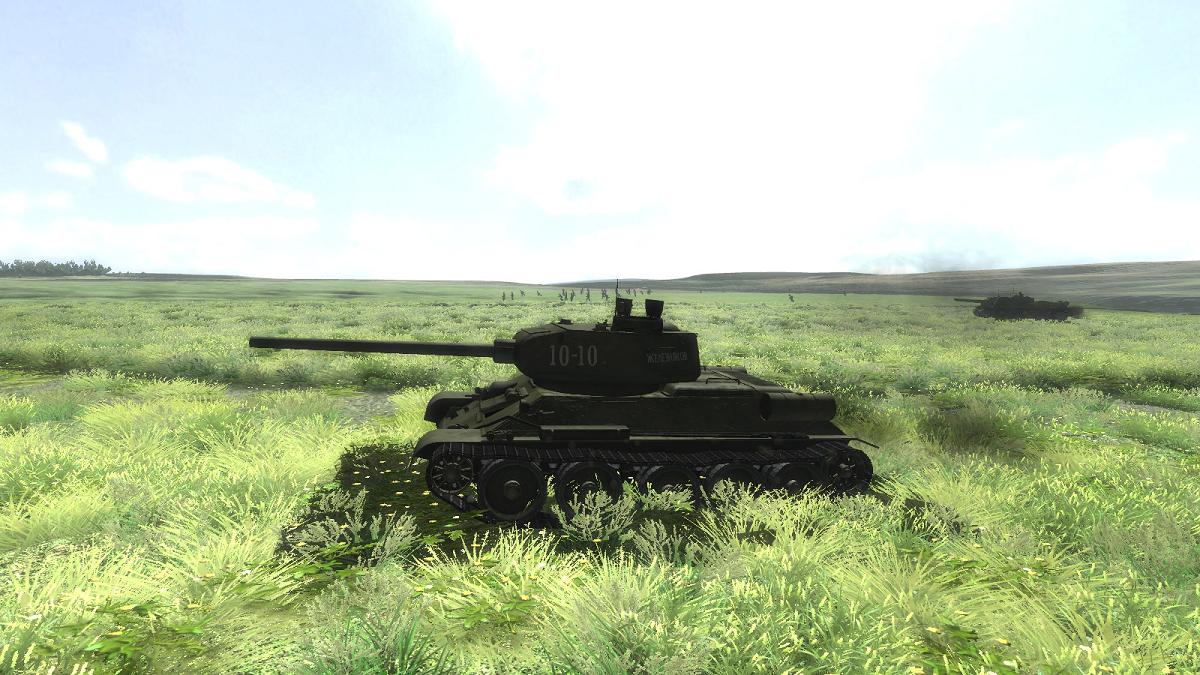
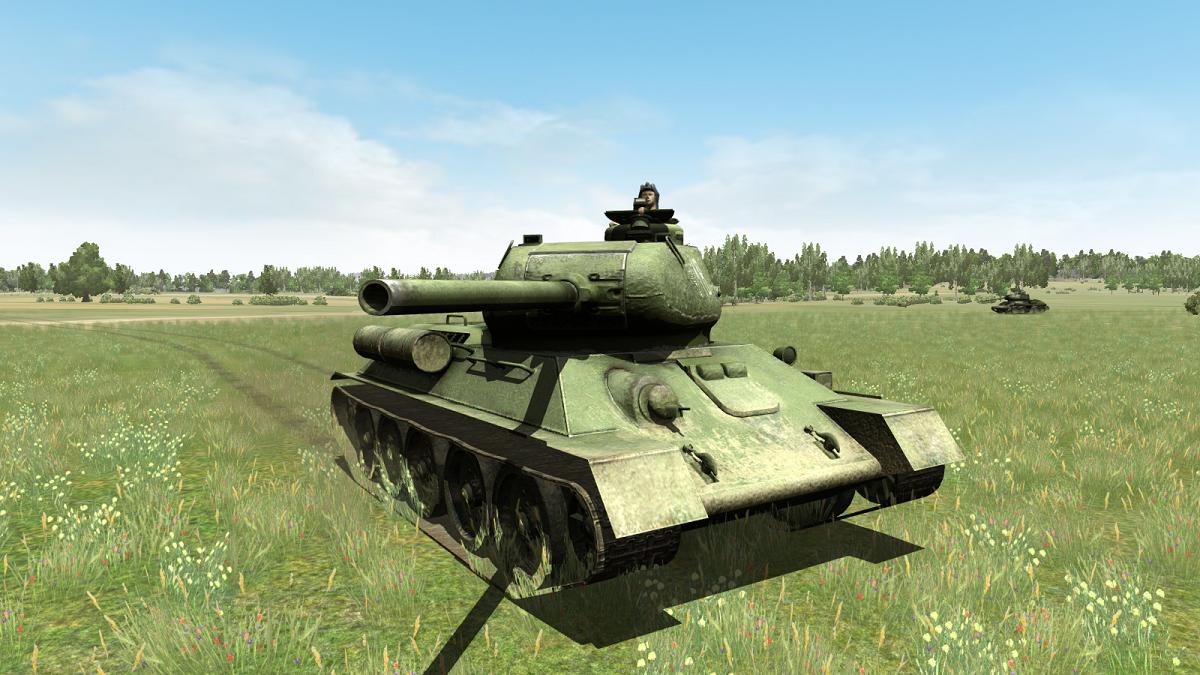
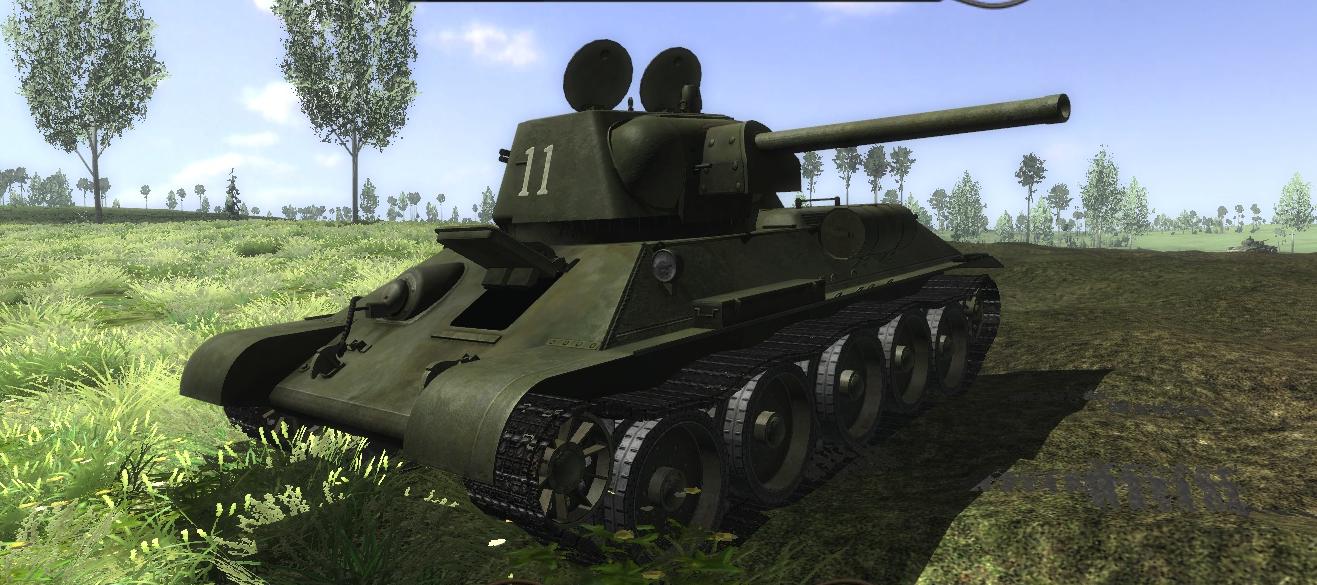
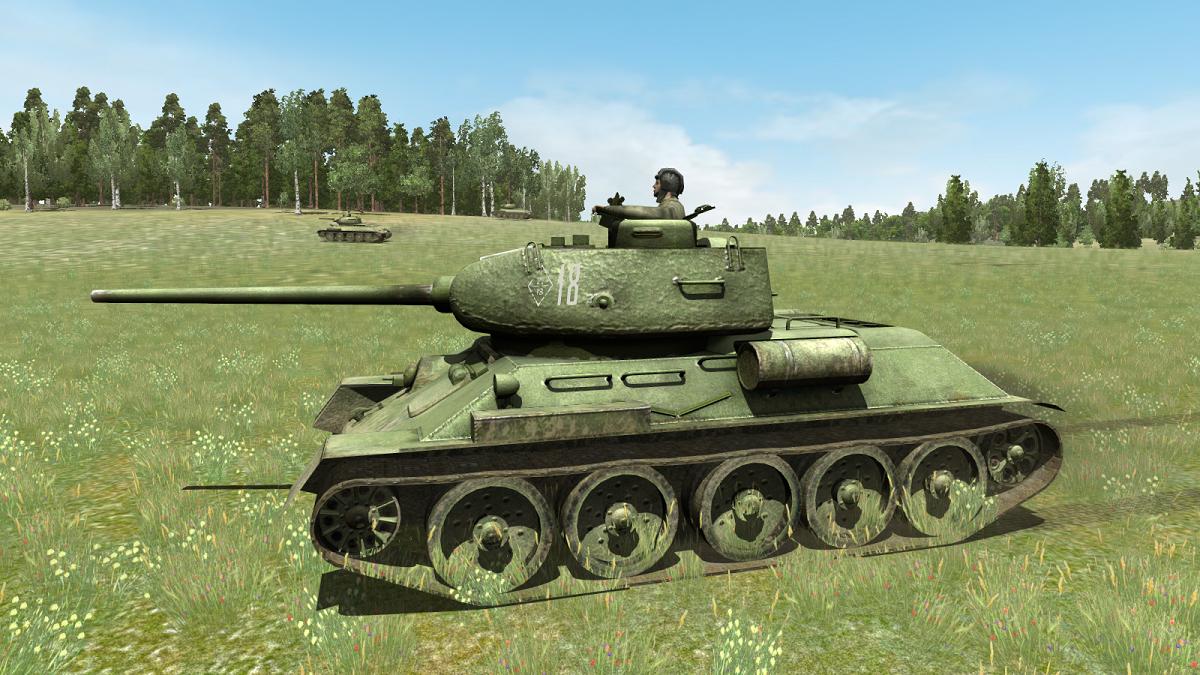
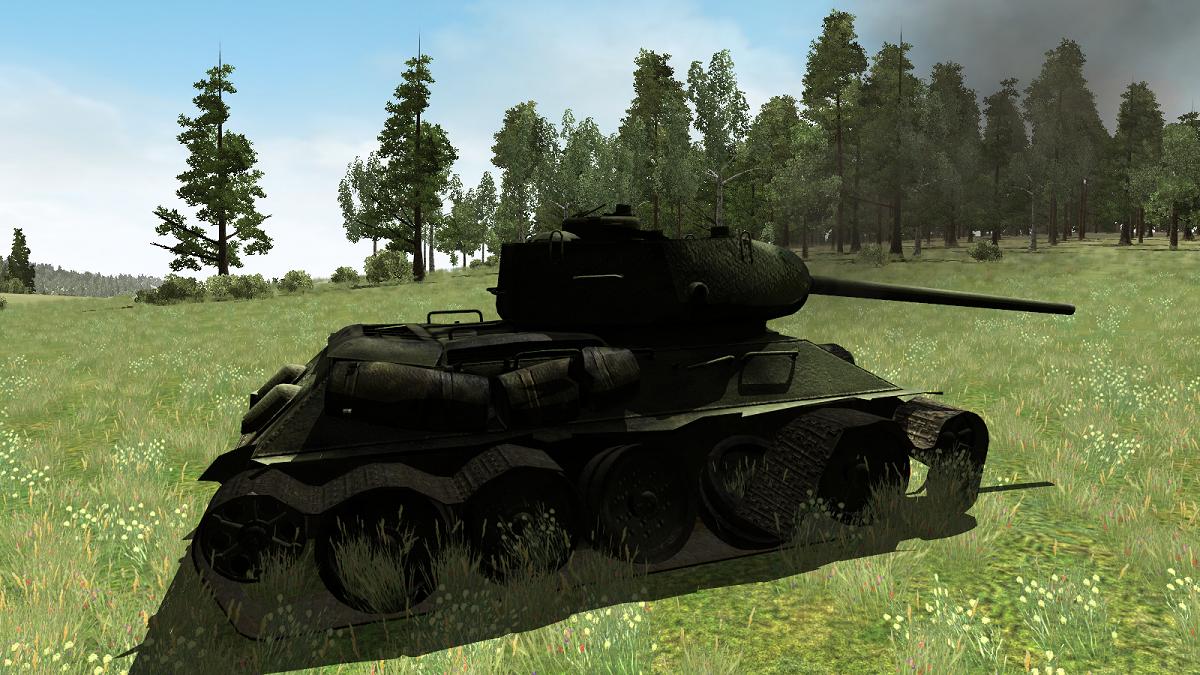
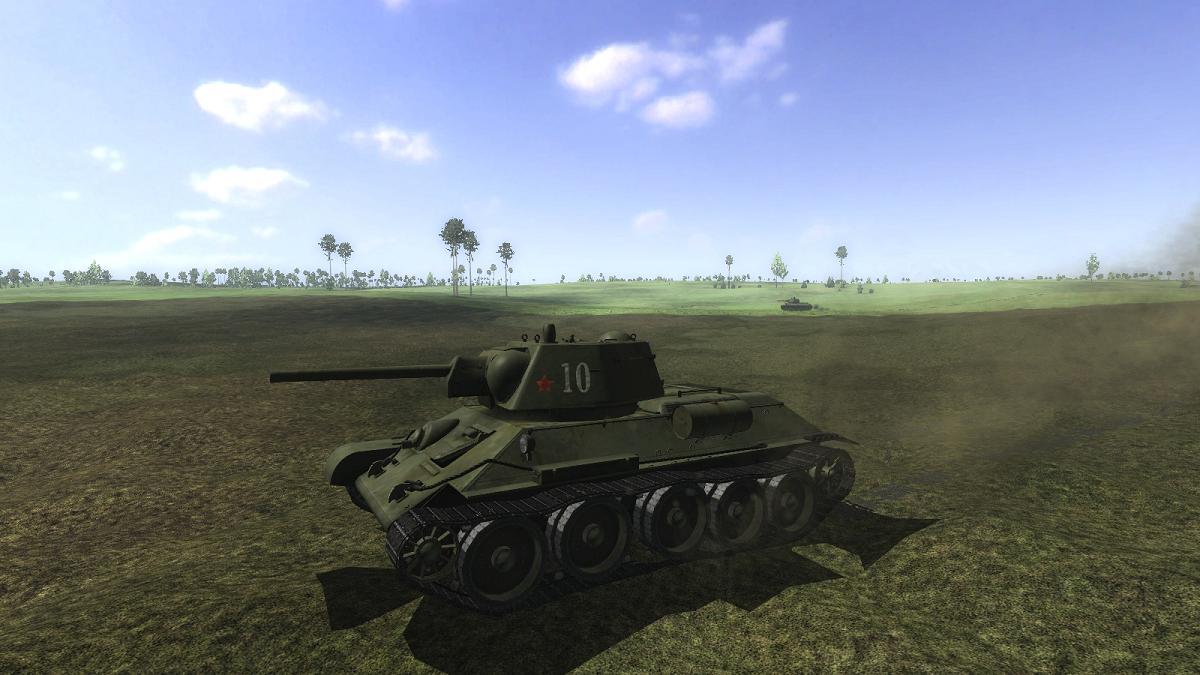
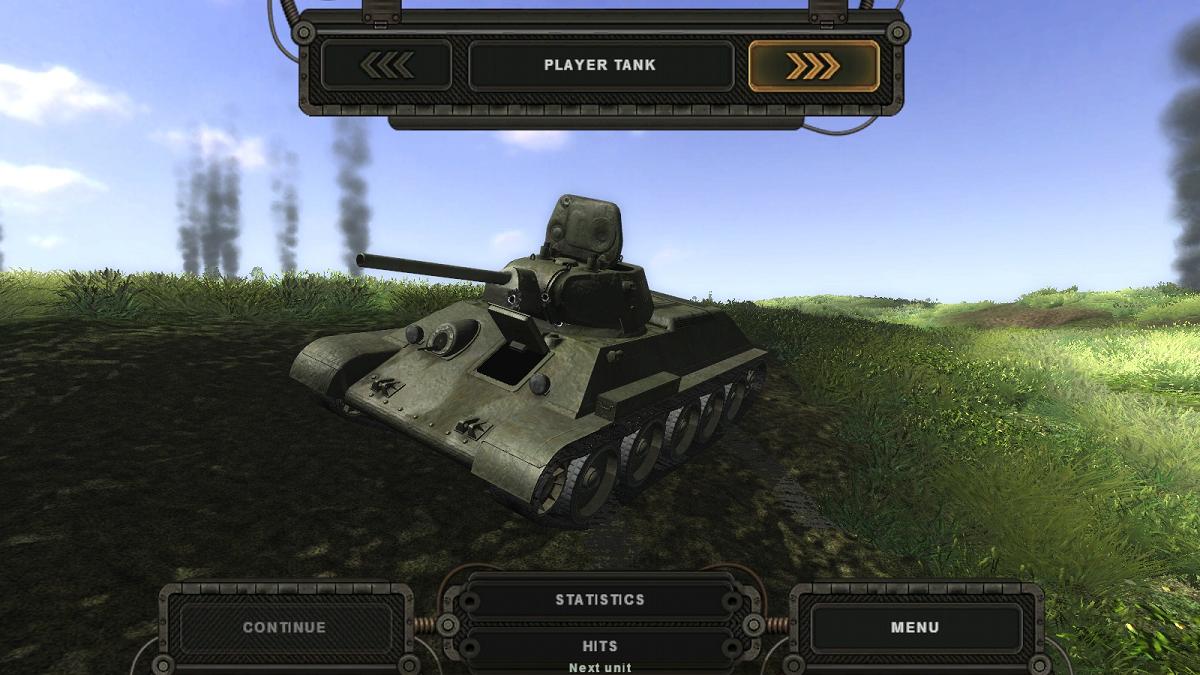
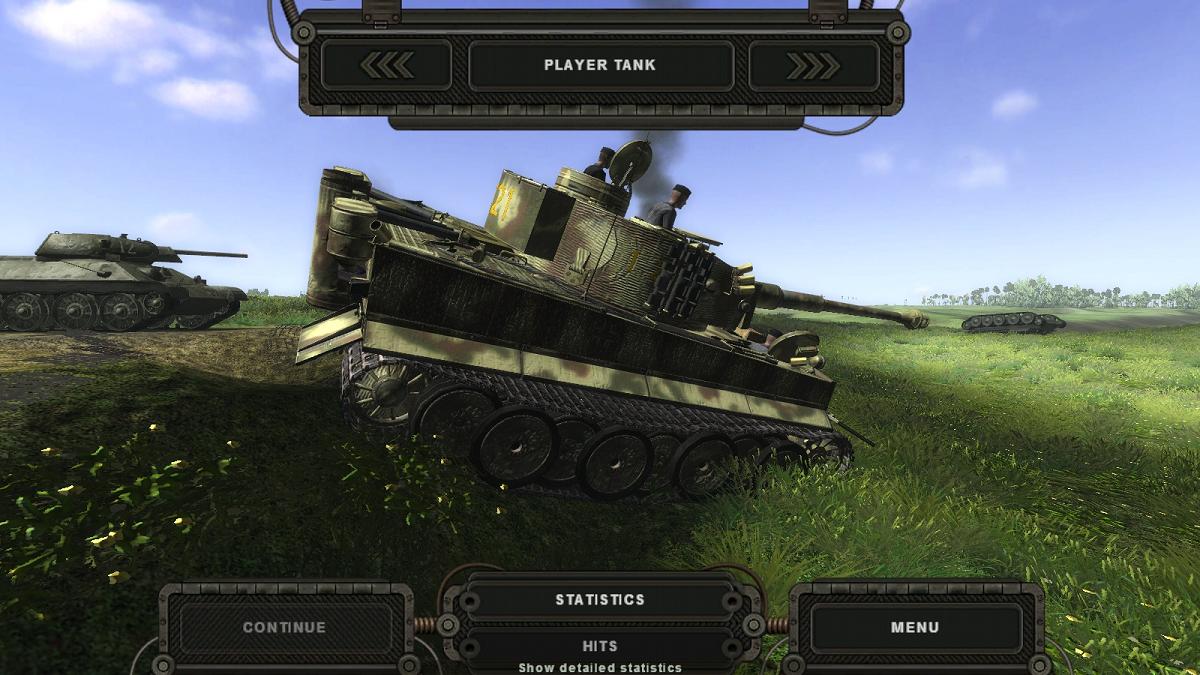
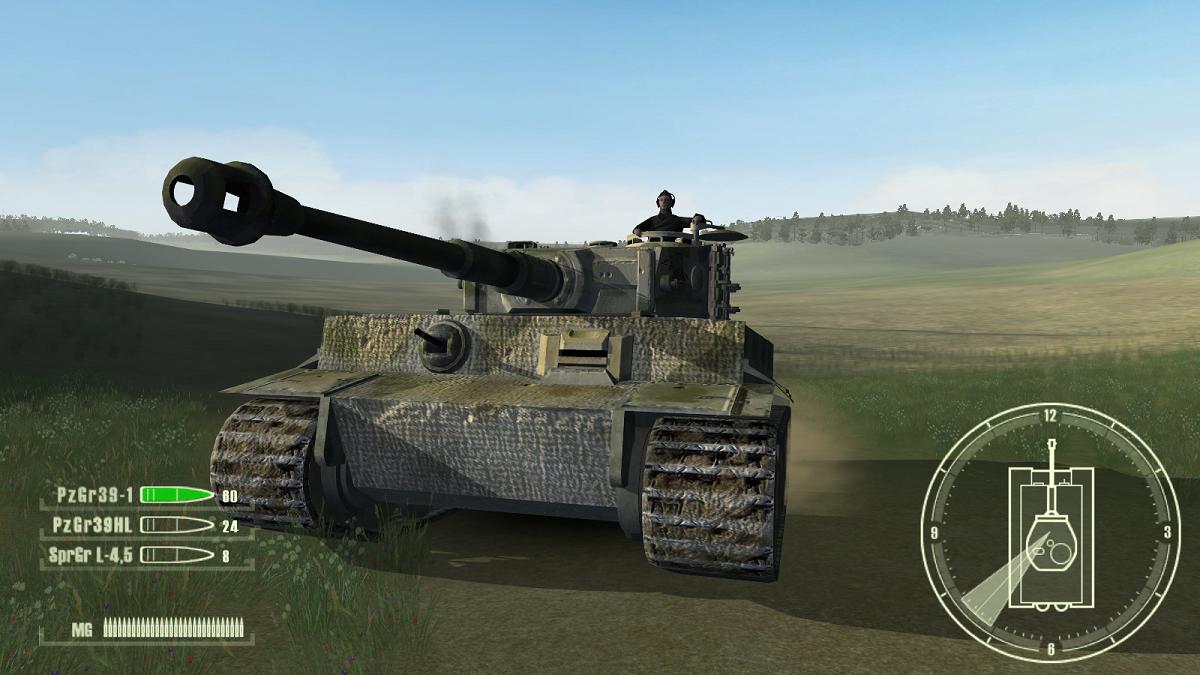
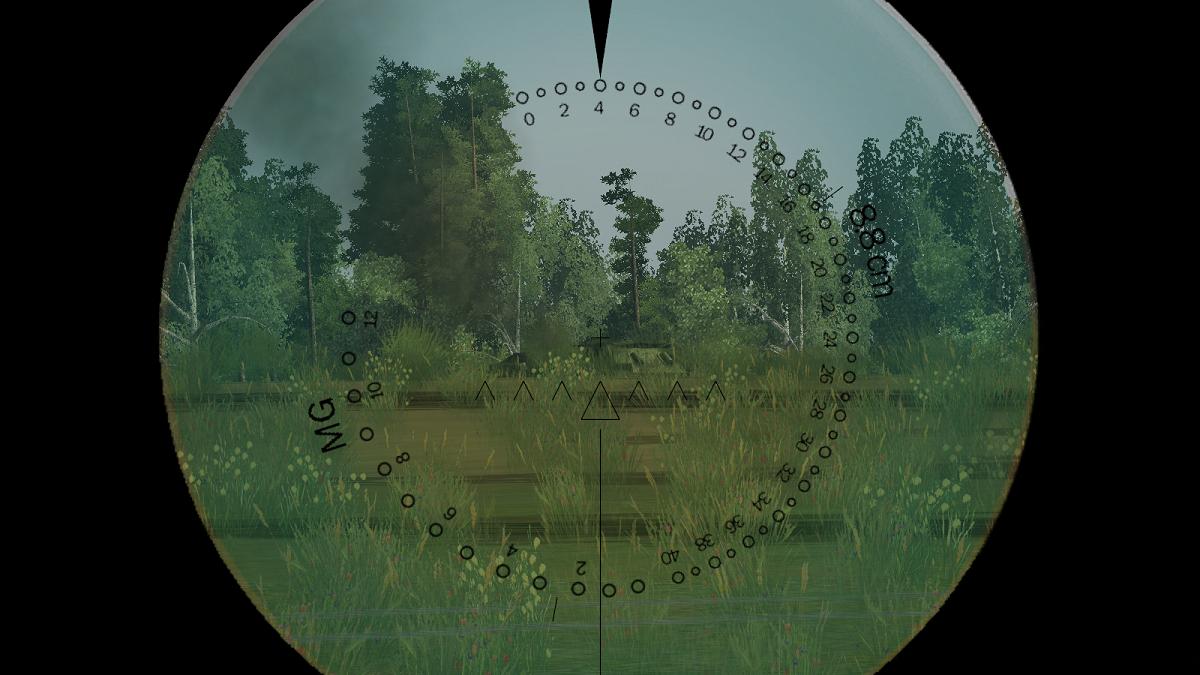
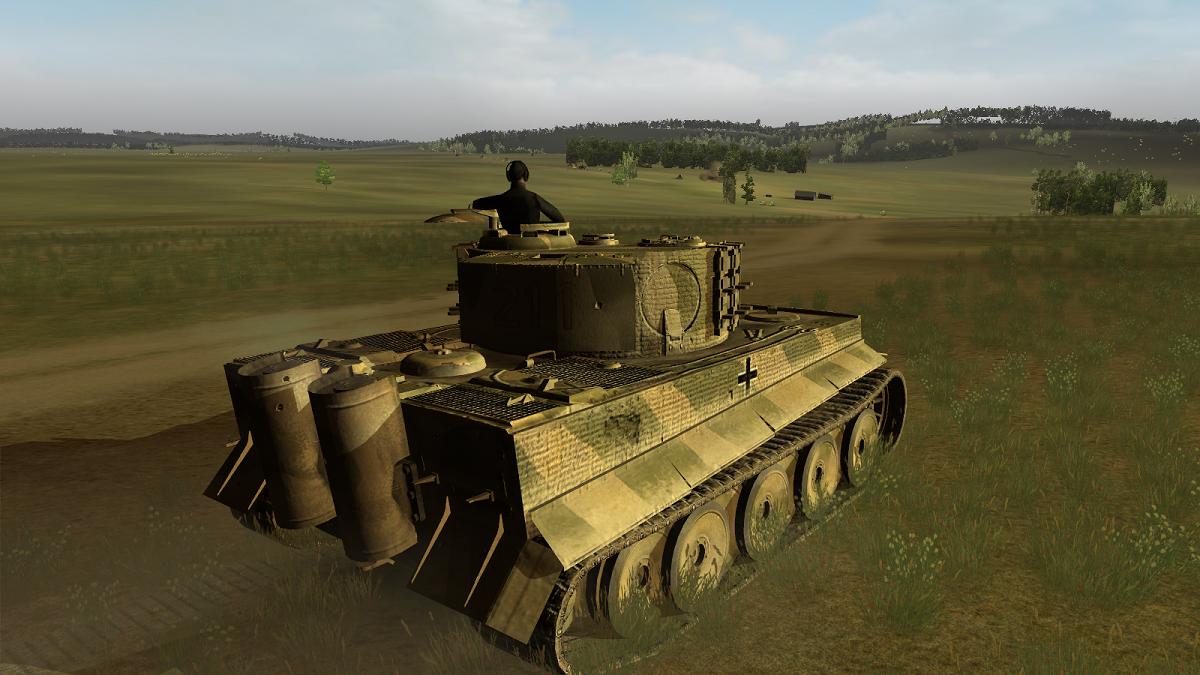
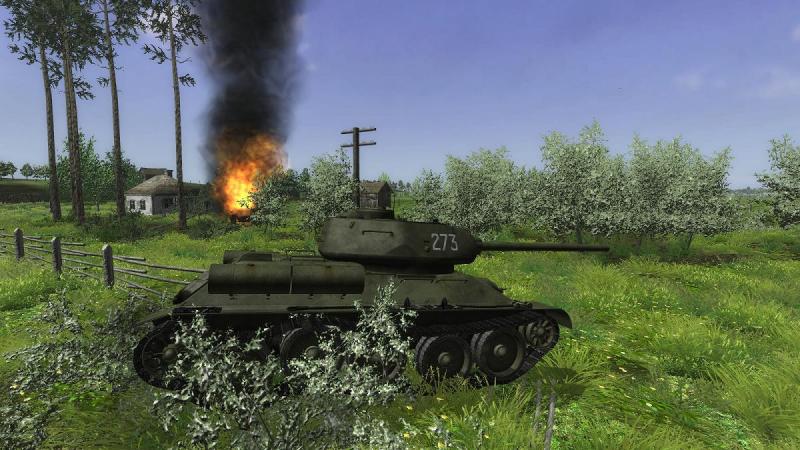
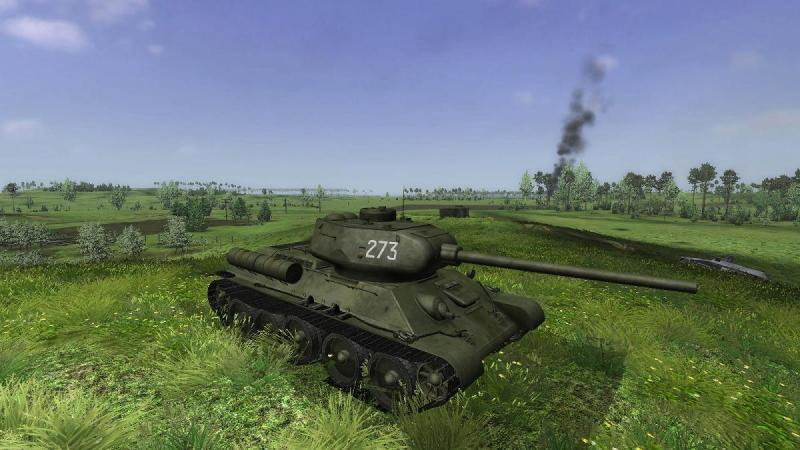
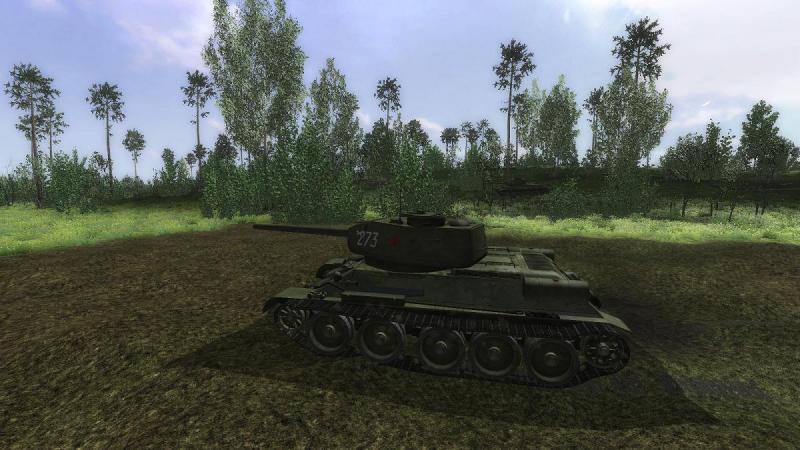
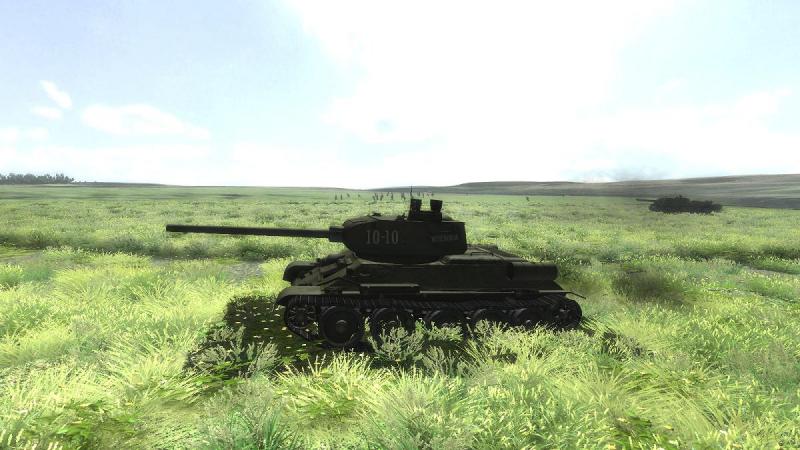
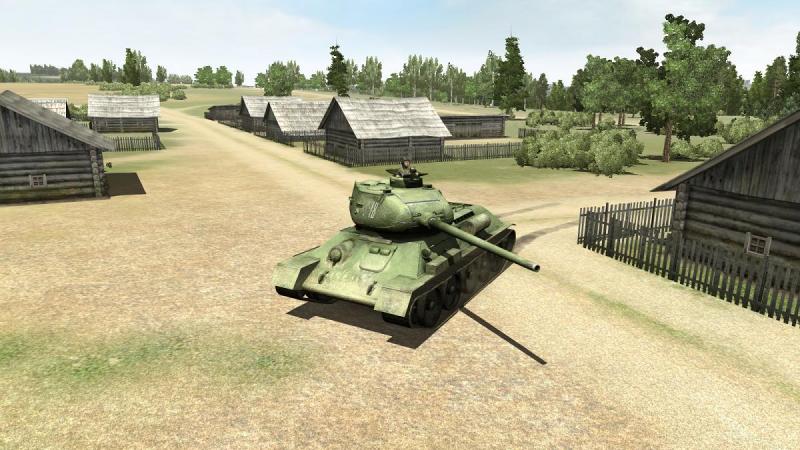
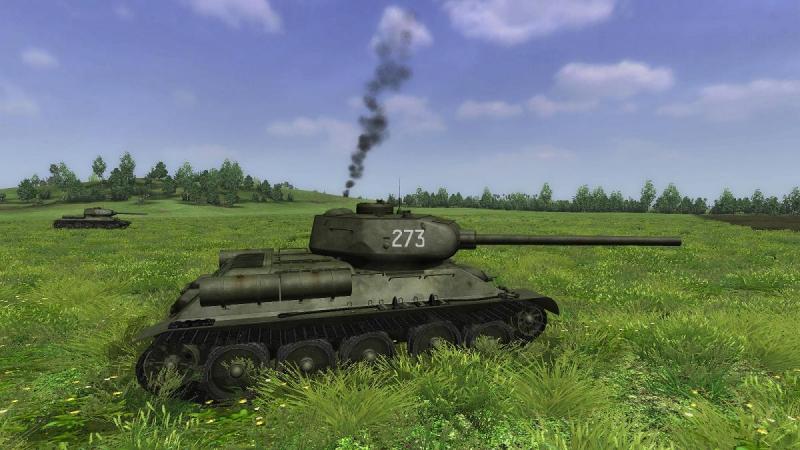
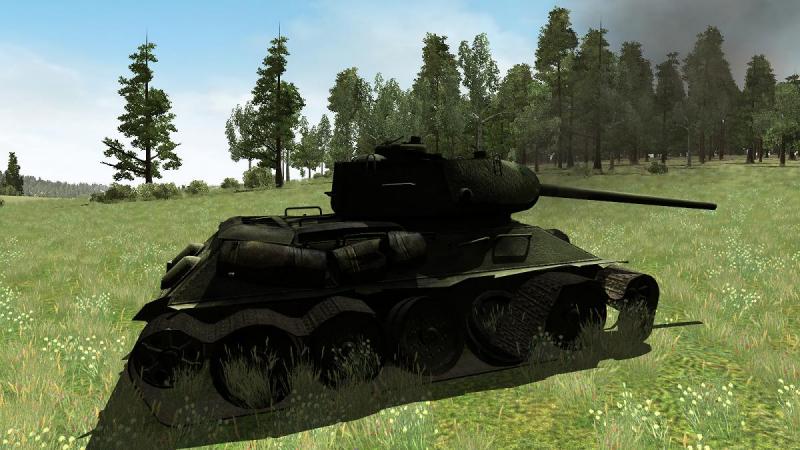
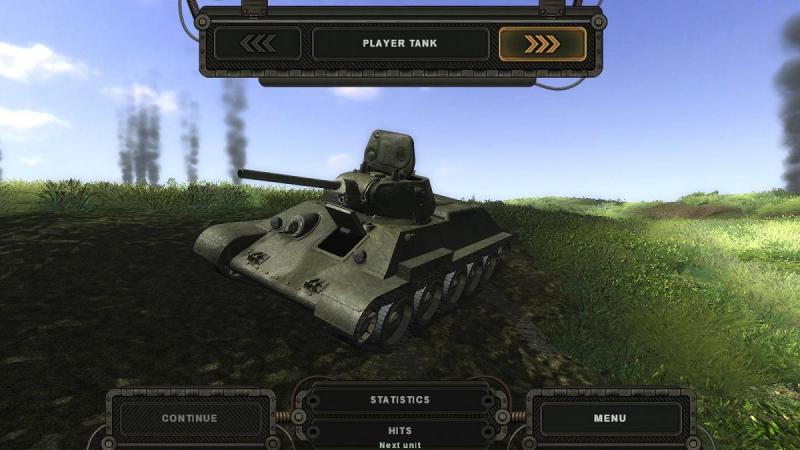
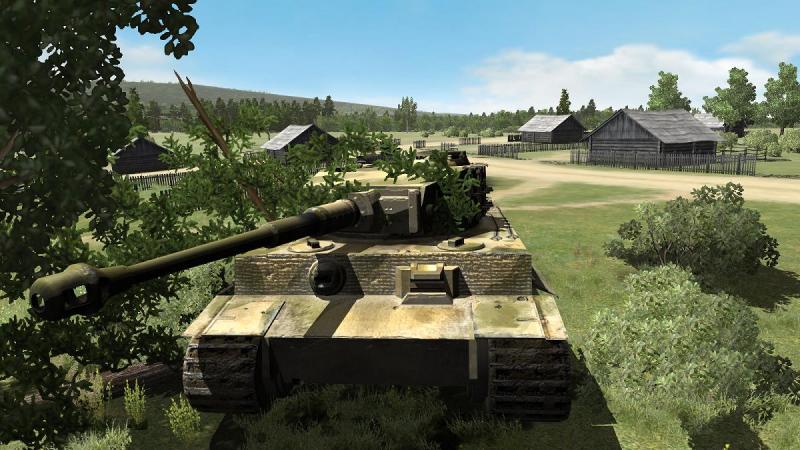
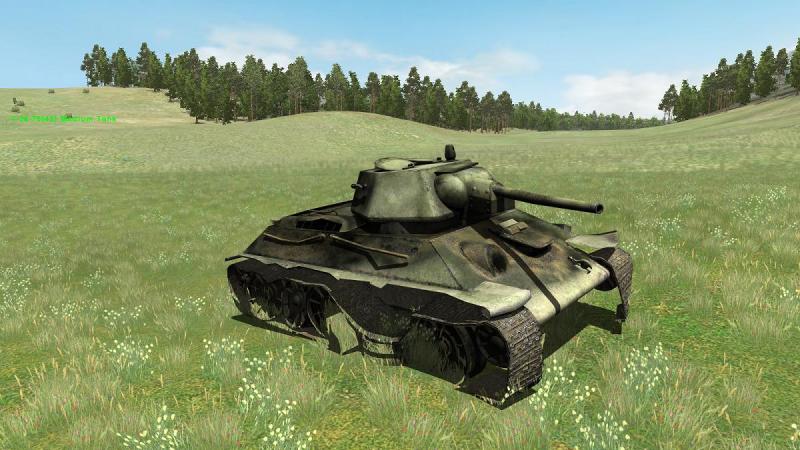
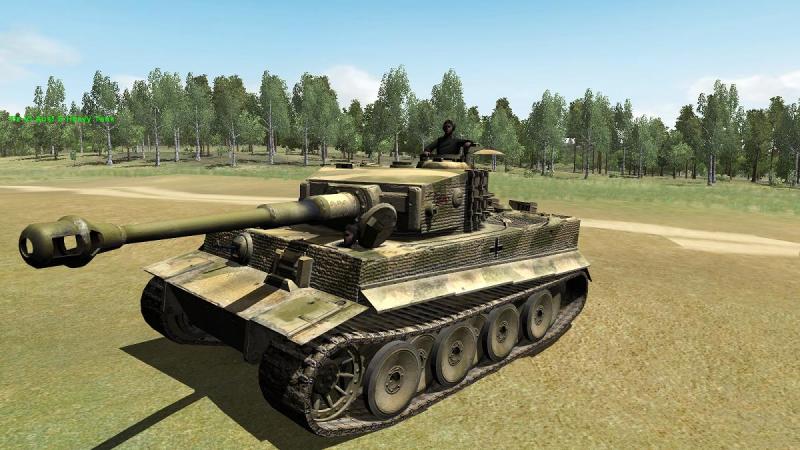
The T-34 in Steel Fury and T-34-vs-Tiger Having gone up against T-34s in recently-reported missions in both SF '42 and T-v-T, I thought it was time to see how things looked through the other end of the telescope....through the gunsight of the famous Soviet tank, to be precise. This report is the result, featuring the same tank in both sims, for comparison. T-34-vs-Tiger is set during the period of the Soviet 1944 summer offensive, and the T-34-85 is the playable version. It's a fine replica, evidently an earlier production model with the prominent inverted 'U' turret lifting lugs and the two-piece commander's hatch. This sim also has the previous production version, commonly called both the Model 1943 and the Model 1942; but this isn't playable.This 76mm-gunned model's presence both adds variety and ensures that when playing the Tiger, you aren't always up against the top Soviet medium tank. SF '42 comes with an earlier T-34. To this, the modders have added two later versions: the Model 1942/43 and the T-34-85. All three versions are pictured below. I believe only the stock version (top) has 3-D interiors (second pic). These are certainly nice to have, but non-essential. All the Steel Fury T34s have superior animation to the T-v-T models, with working suspension and crew who open or close hatches as the tactical situation may dictate. The T-34-85 went into action in early 1944, replacing the original 76mm gun with a more potent 85mm weapon in a larger turret, which at last had a 3-man crew, so the commander no longer had to act as gunner, as well. My appetite for the T-34 was recently well whetted after watching 'White Tiger', a modern Russian film to which CA member Snailman had recently posted this link. It's a rather strange and spooky film and the Tiger in question is apparently an IS-2 conversion (seems they built a realistic Tiger replica but ended up using the Stalin tank conversion, which if nothing else certainly emphasises the point that this was no ordinary Tiger). Despite the strange plot and some overly fuel-filled special effects, the visuals are great, the performances strong and the tank action is not to be missed. Anyway, back in sim-land, the missions I chose to play are 'Liberating Krinovichi' from T-v-T's stock single-player 6-mission Soviet campaign and Steel Fury's 'Chernogostie', which is in one of the mission packs which go with the NTA mod. The T-v-T mission, as its name suggests, is offensive in nature; the SF '42 one is defensive. First up, it's T-v-T. Knowing that this sim's main antagonist is no less than the Tiger tank itself, I was expecting trouble, but glad that I'd be meeting it in the latest T-34. I reckoned that woud give me a fighting chance of avoiding ending up like this: ...to be continued!


-
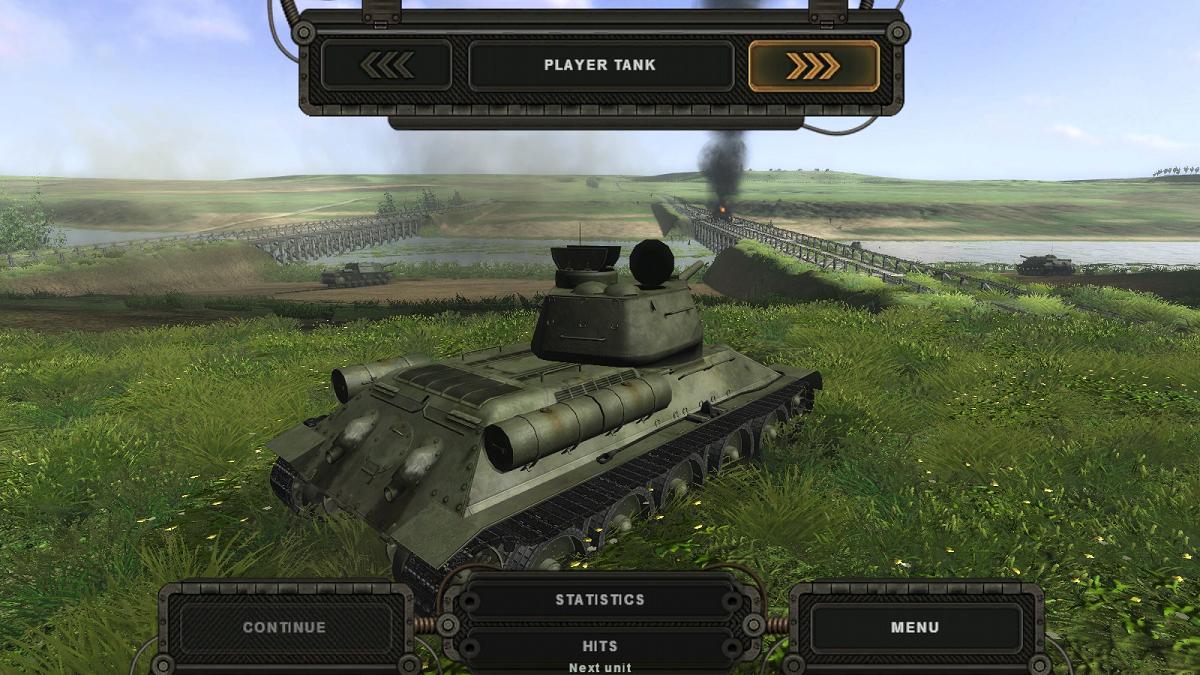
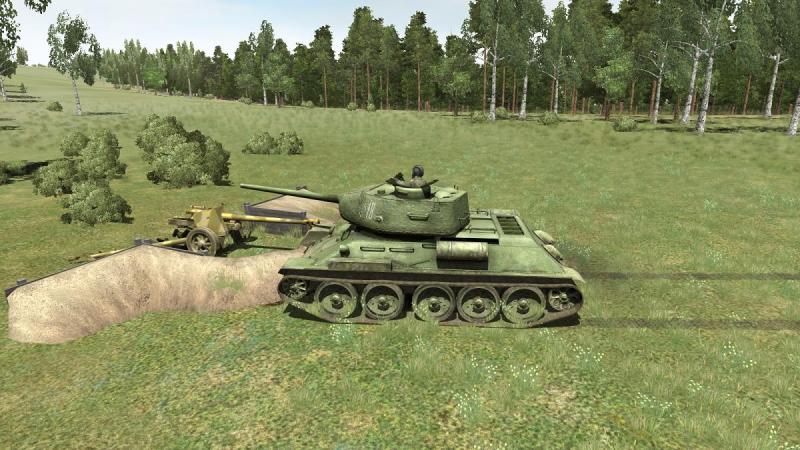
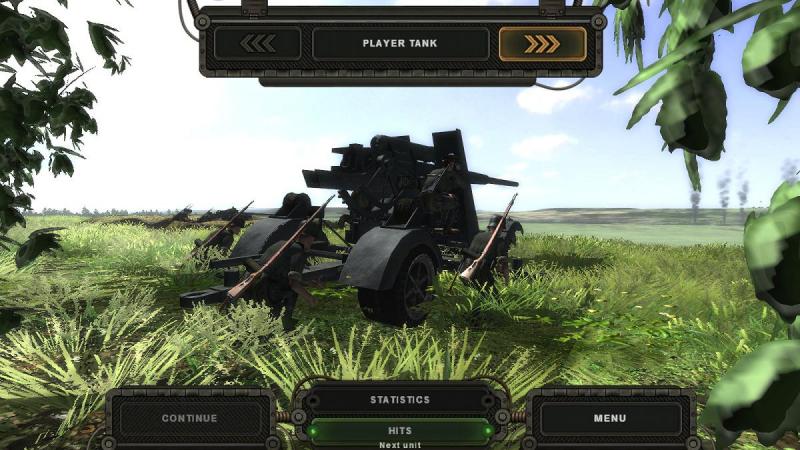
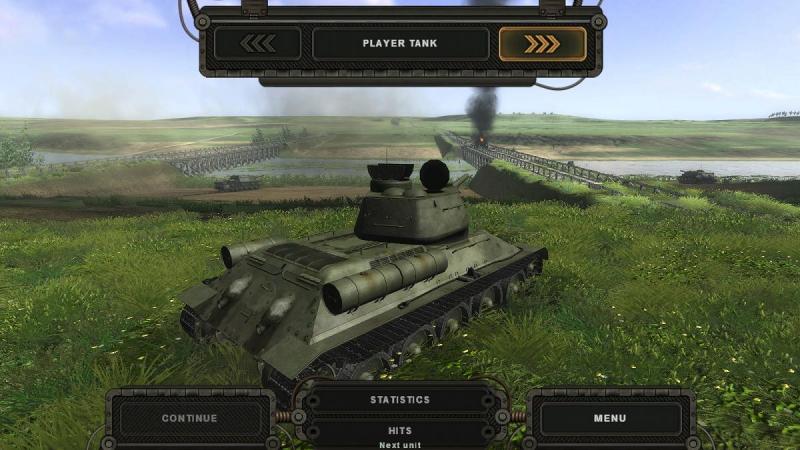
Thanks Rends and thank you for the map and the mission. Now that there is a 'Mickey Mouse ear' T-34 available, it would be good to see this in the mission. I might try editing the mission to make that change, and replace the Panzer IVs and Tigers with Panthers, for a bit of variety. Lockie has been showing me a little of the editor but he makes it look easy! The thing I liked most about your map is that the ground is not a 'billiard table', but has lots of dips, folds and gullies so that you can move tactically, in bounds, from fire position to fire position. However, I am glad I did not encounter that anti-tank ditch, nasty!!! I'm going to have a crack with a T-34 next, but even that has its hazards, like 88s firing across the valley while you're trying to get across the bridges:

-
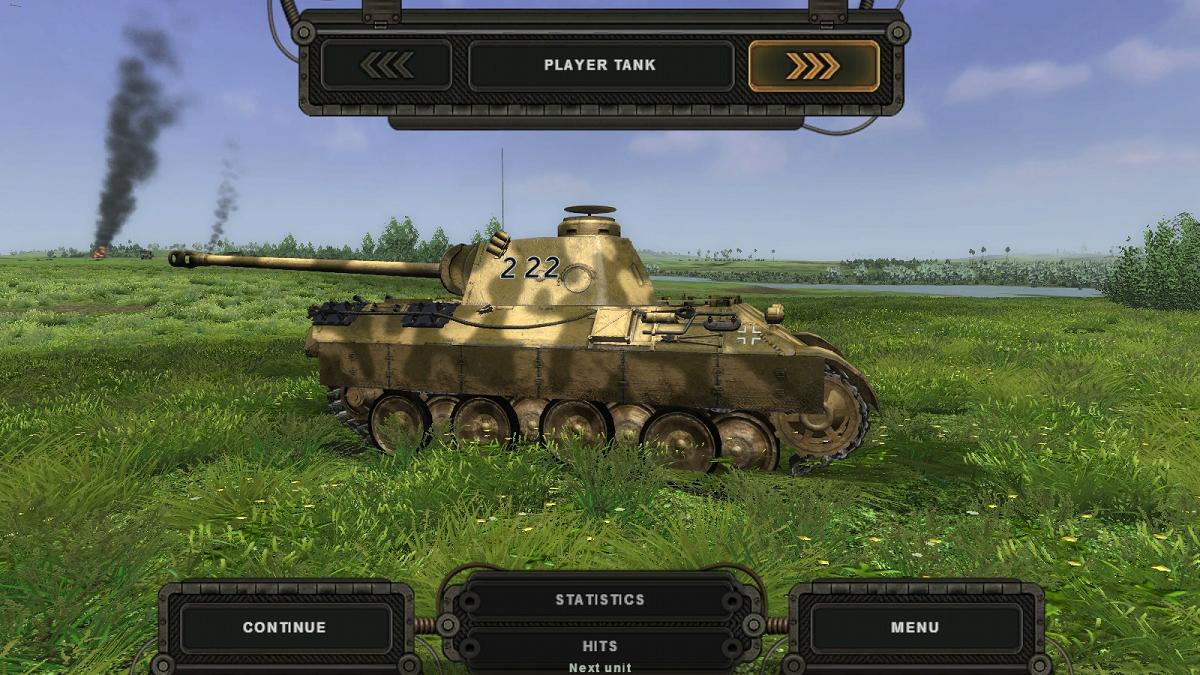
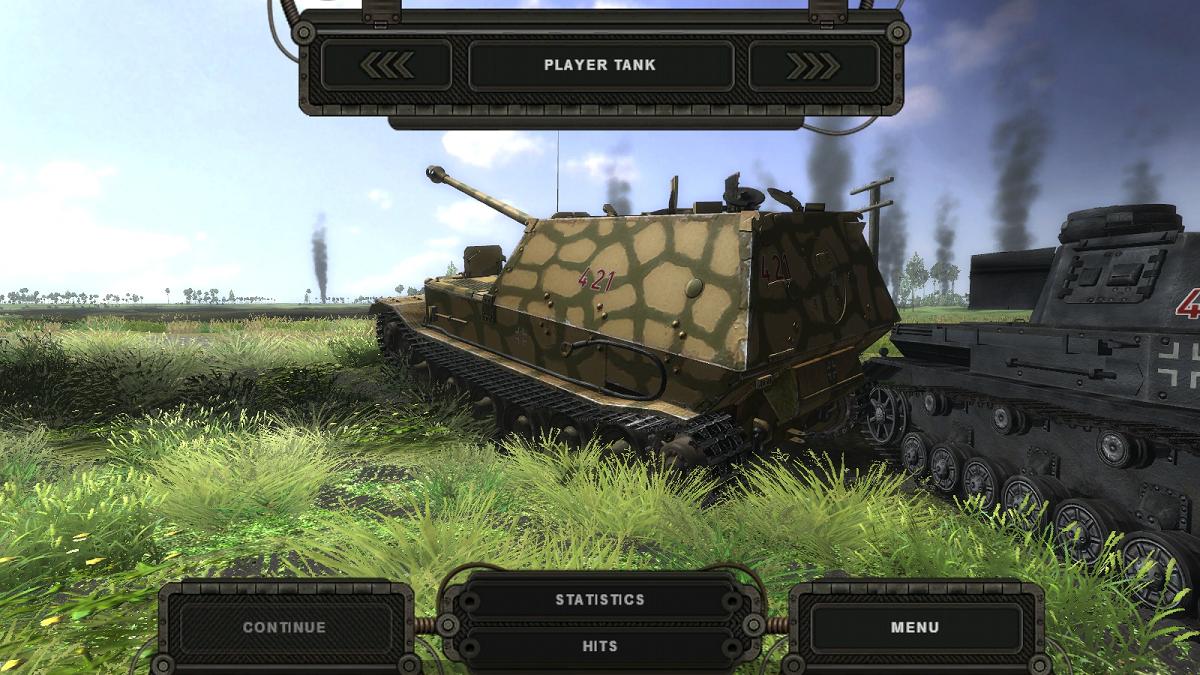
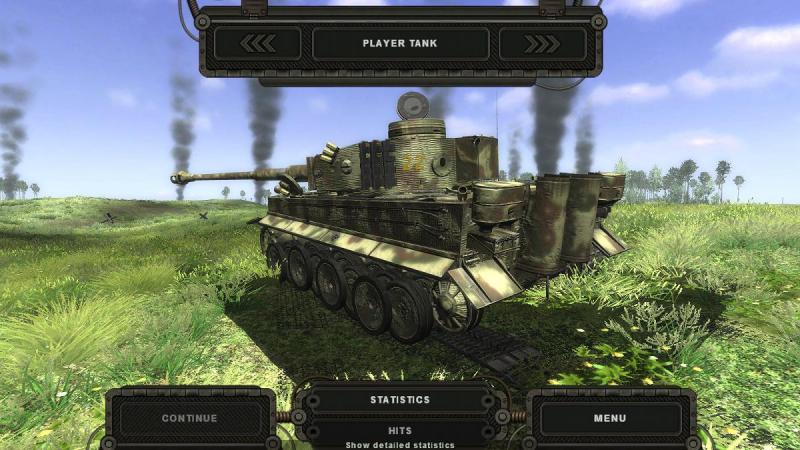
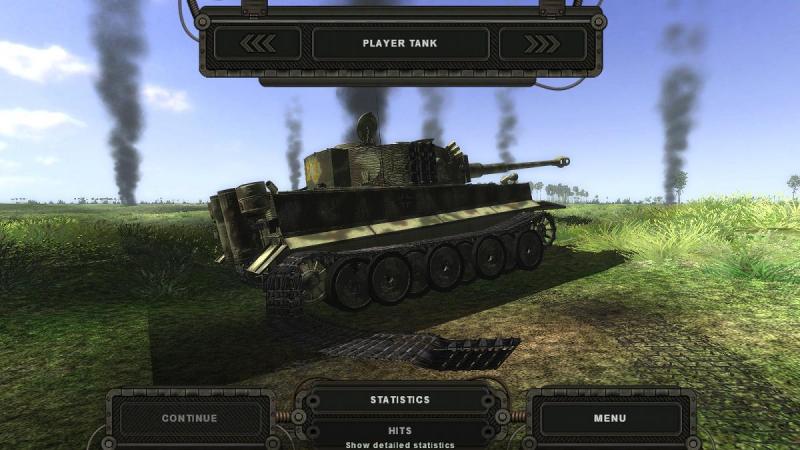
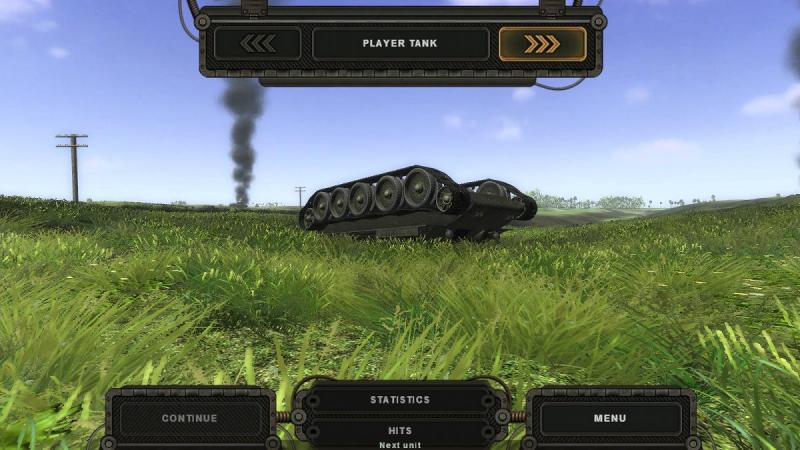
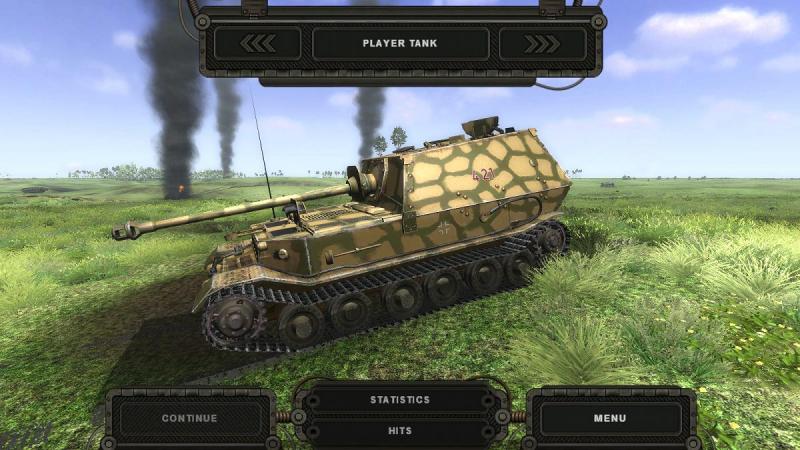
The butcher's bill I'd got away with it, this mission, but many hadn't been so fortunate. On the Soviet side, the casualties were mostly T-34s, as was to be expected, including these fellows. Another T-34 lay next to a gun pit with a 45mm anti-tank gun, which had been no match for the panzers. There were several of these about but I didn't see any of the 76.2mm field guns which had a much better A/T capability. Another T-34 had somehow flipped upside down. Serves him right for showing off, like as not. Other Red Army casualties included KV-1 heavy tanks and SU-122 assault guns, like these. On the German side, there had also been losses. My own platoon had been fortunate - the Panther which had lagged behind had lost a track but was otherwise intact. I hadn't noticed it but there had been at least one SPW on the battlefield, and it had come to grief, as they usually do, along with many of the Panzer IVs. My early-war German vehicles in this mission were all in 'panzer grey' because I had applied the mod which replaces the NTA mod's 'compromise' colour schemes with the early-war colour: by Kursk, many German AFVs would probably have been in the Dark Yellow inrtoduced early in 1943, or in an interim scheme. The Tigers had borne the brunt of the fighting and two of them were out of action, both immobilised. Nearby a third Tiger was awkwardly parked but intact. Rather less well parked was this Panther, which had evidently fallen foul of a deep anti-tank ditch and left its crew standing about waiting for the recovery crew to arrive and decide whether to pull her out or fill her in.. Finally there were the Ferdinands, as the Elephant tank destroyers were also known. At that stage lacking a bow MG to defend themselves against Soviet infantry, these were said by Panzer General Heinz Guderian to have had to go 'quail shooting with cannon' at Kursk. One of ours had been somehow knocked out; another had ended up intact but entangled with a knocked-out Panzer IV. All in all, this was a very enjoyable mission. I would have seen more action if I'd charged ahead with the others but I prefer to play a bit more tactically and ideally, to bring my platoon through the fight in one piece, rather than just regarding them as expendable AI 'bots'. Like many add-on AFVs, the Panther D lacks interiors (or 'cockpits') but I very rarely use these so I never miss them. While the mission was but a tiny fragment of the real Prokhorovka, it did a great job of recreating the basic scenario. Only quibble would be that as with many SF '42 missions, I would have preferred to be operating as part of a tank company (or a single tank platoon working with an infantry company) instead of a force where each tank platoon has a different tank - the sight of a dozen or so Panthers thundering forward, perhaps with some Ferdinands for fire support, would have been quite a spectacle - not that the mission wasn't, as usual the SF '42 battlefield ambience is first class. Highly recommended


-
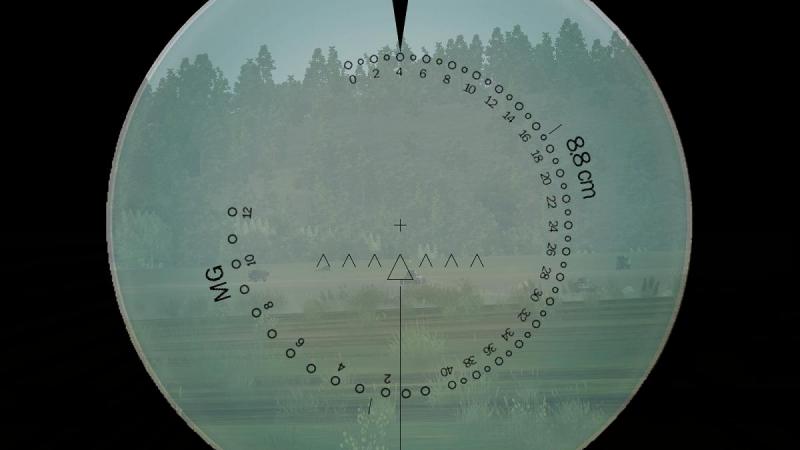
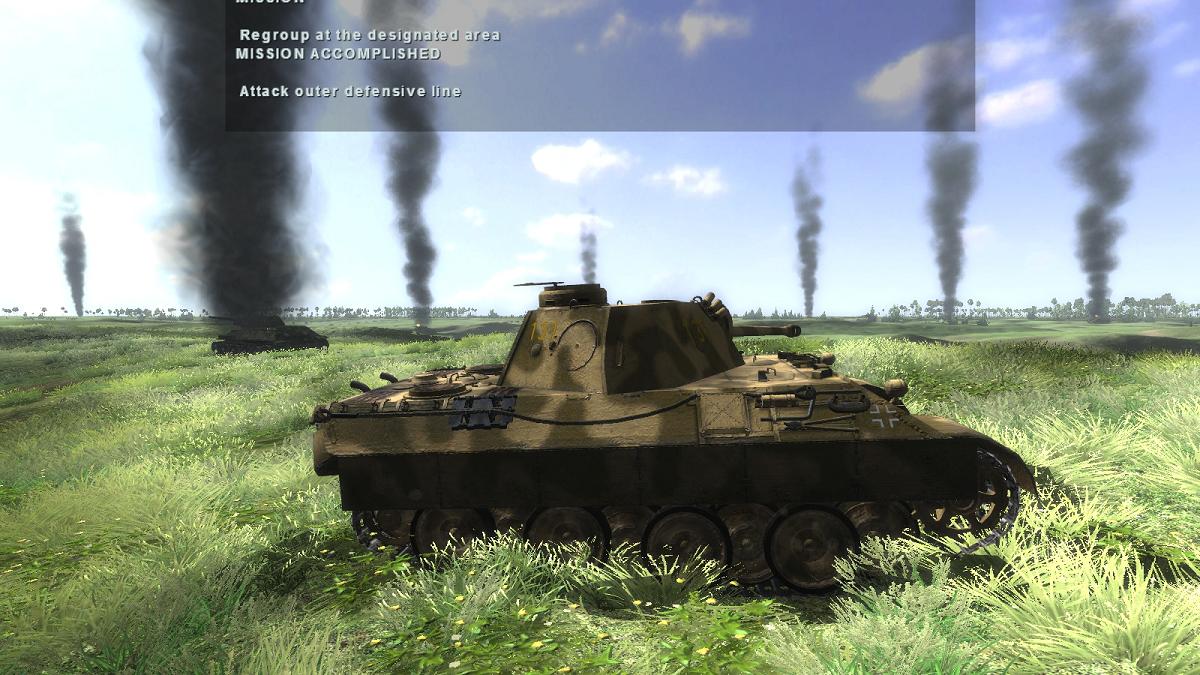
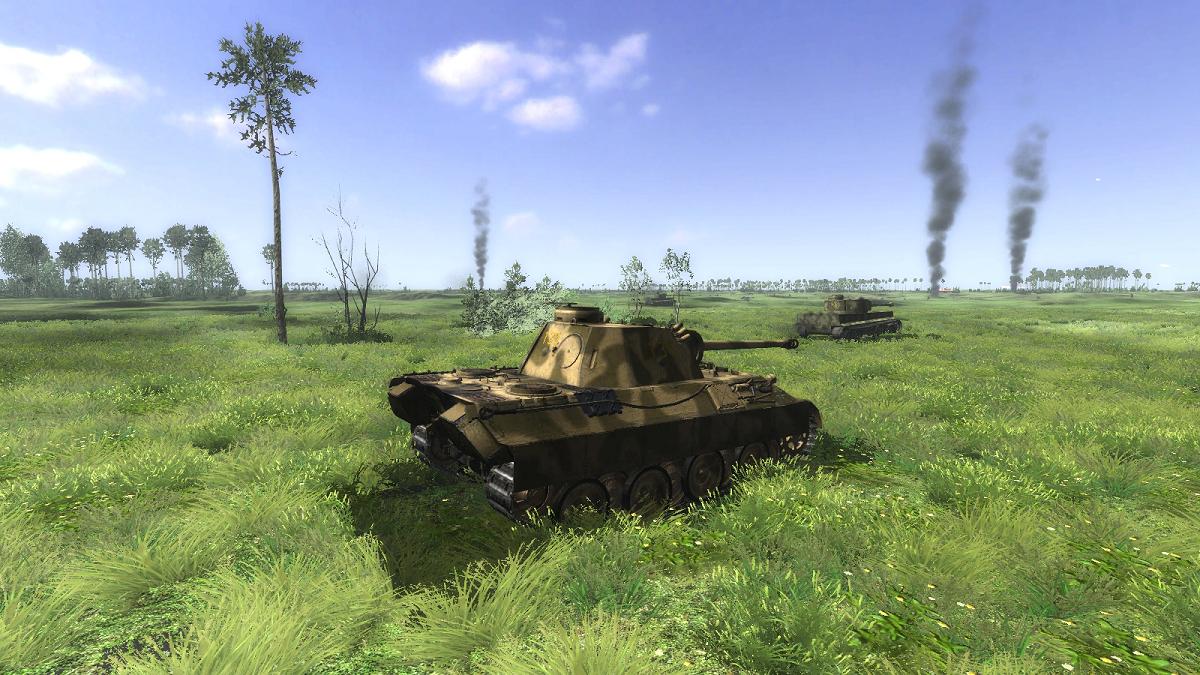
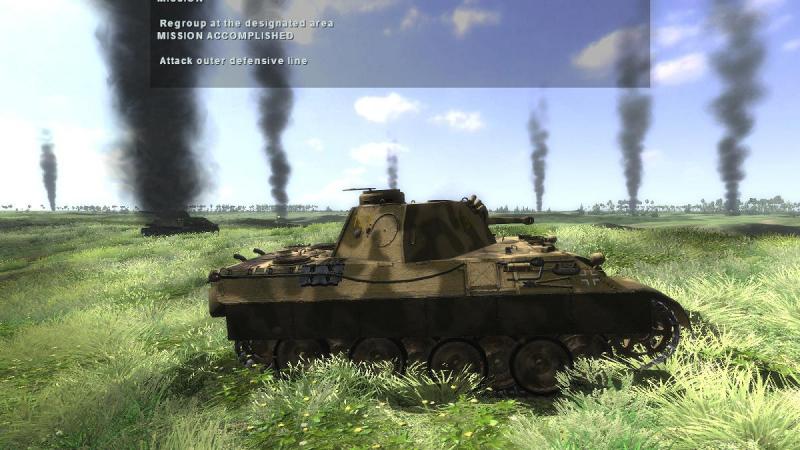
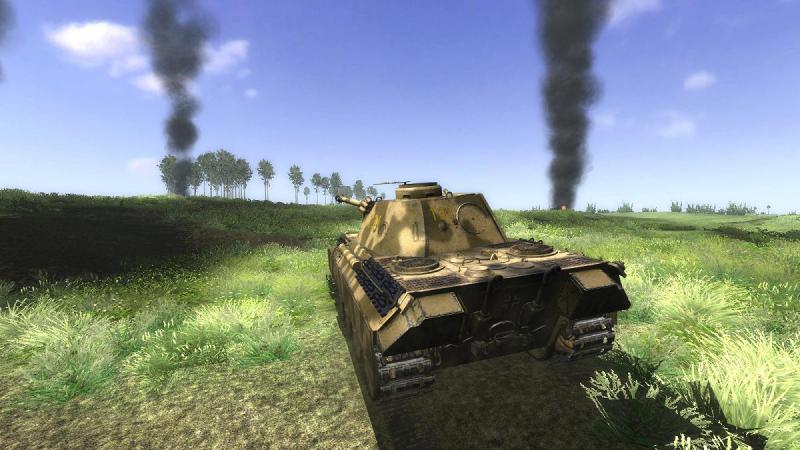
Battle over! Advancing again, I noticed that my AI tank commander now had his head out of the hatch, which is generally a sign that there's no immediate danger. I could see no particular indications of Soviet defensive positions but for the first time I could see some of our grenadiers, pressing forward on foot. I stopped again in another fold in the ground to cover their advance. Scanning left and right again, I put a round or two into some stationary T-34s as insurance. The Tigers seemed less worried and carried on regardless. There was still lead flying, mostly MG fire, and my tank commander wisely decided to keep his head down once more. We rolled forward again to the next dip in the ground. The terrain here was well suited to a bit of fire and manoeuvre, with plenty of little undulations where I could halt the tank in a near hull down position. Checking my map I headed for one of the re-grouping zones marked on it, in the form of blue ovals, just on the far side of the enemy positions through which we had now come. At this point, I got confirmation that we had won the battle! Rather than end the mission I played on for a little while, keen to make the most of the chance to do some virtual tanking in my fine big Panther. There was still a little shooting going on and if any Ivans needed persuading that for them, the war was over, well, I was up for it. Followed by my surviving Panther, I rolled on a little while, slipping down into a gully and edging to a halt just short of the far lip, with my main gun just above grass level, in a nice hull down position Seeing no threats and moving forward again, I decided to test my crew's ability to find cover for themselves, using the 'take up defensive position'! comamnd (available from the map view and as a hotkey, '7'). This worked fairly well and I settled down to scan for a possible counterattack. The infantry settled down too although one of the Tigers - who seemed to have borne the brunt of the fighting - decided it was time to head back, to refuel and re-arm, perhaps. There had been something about re-arming at pillboxes in the briefing but I hadn't seen these. There was nothing doing, so I contented myself with putting a couple of rounds into a stationary T-34. You can't be too careful - last mission, playing for once in a thin-skinned Panzer III, I got killed by just such a stationary Soviet tank, who waited until I had driven up right next to him. Live and let die, like they say in that song. The expected counter-attack didn't come - likely, we had in fact run into it, at the outset - a meeting engagement, as they call it. In that respect, this mission had played out quite like a mini Battle of Prokhorovka. Neat! All that remained was to have a quick look around the battlefield, see what there was to be seen, and maybe grab some loot... ...to be continued!


-
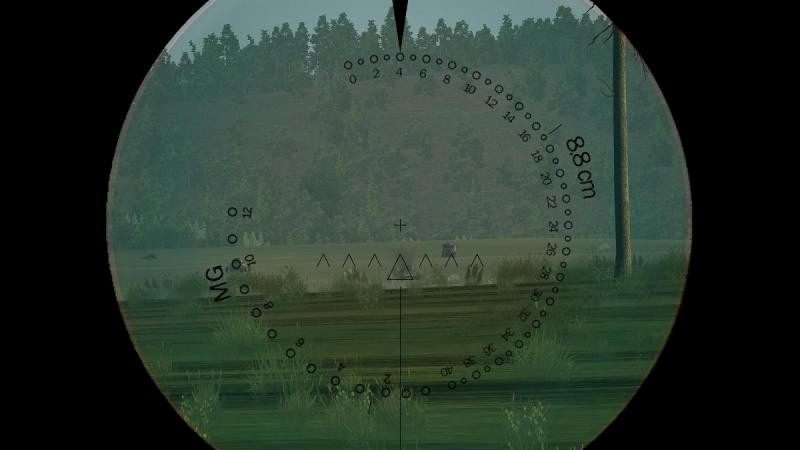
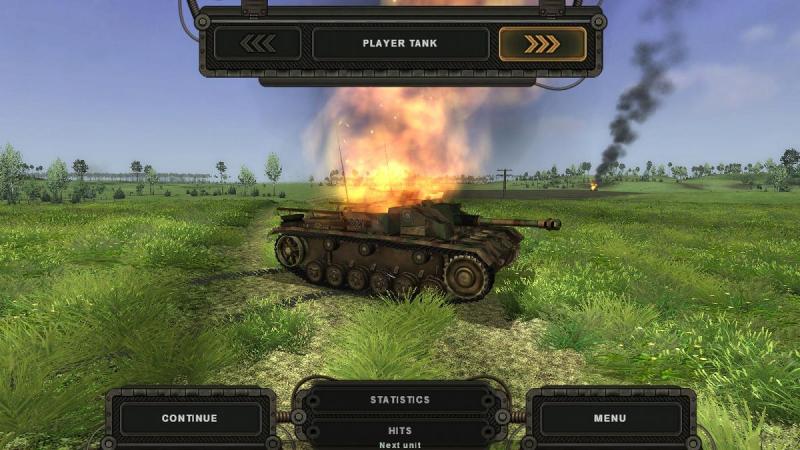
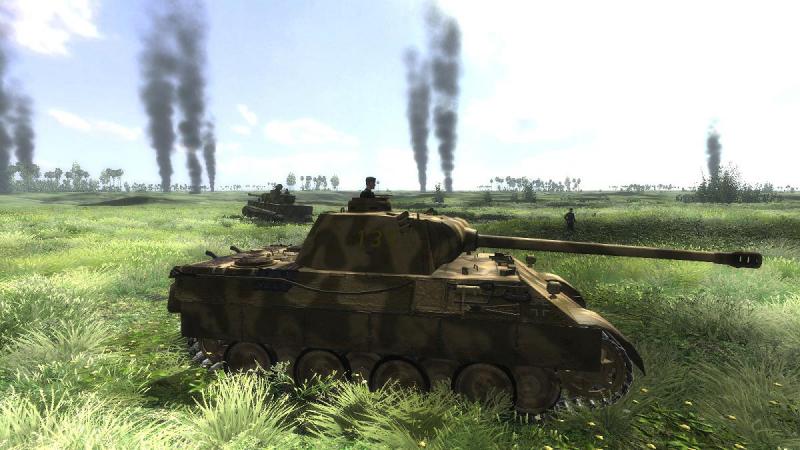
Into action ! Scanning left with the gun sight (the object to the right is my 7.5cm tank gun's muzzle brake) I could see one of the Tigers rolling forward, but no sign of the enemy, beyond some knife-rest obstacles. A screen of trees blocked any view into the distance. But nearer the axis of our advance, things were hotting up rapidly. Beyond another Tiger, I suddenly saw a T-34 slip over the distant skyline, followed by another, then another. I swung my turret around and started shooting the Ivans. I should have set my sights to, say, 500 metres while still zoomed out, because in the zoomed-in view you can't see the ticks against which you read off the range against the scale for the appropriate ammunition. So my first round was a bit of a ranging effort. By the time I had got a hit, my first target has slipped into a fold in the ground. Soon I could see little of him and the other T-34s, except the occasional turret top, flitting left or right. Time to move, and no time to lose! Rather than backing out of cover and advancing again from a different side I just rolled forward, halted in the next fold and started scanning again. At this point, things quickly got scary. The fold in the ground ahead must have ended quite close to us for suddenly, zig-zagging T-34s started popping up in front of us, at dangerously close range, and seemingly right in front of the Tigers. Firing as fast as our loader could chamber rounds, I tracked and shot the T-34s. Just as at Prokhorovka, they seemed to have been briefed to close with us fast, as the best antidote to the new German tanks. For a while it was touch and go, seeming likely that we would be over-run. For a Panther, with its comparatively thin and brittle side armour, having Ivans in a T-34 as your next-door neighbour is not to be sneezed at. But we managed to halt the onrush, and things settled down again. Scanning left and right, I could see that our lighter Panzer IVs had taken a bit of a beating. Time to gain some more ground! I backed out of my fold in the ground, swung around, and began to press forward again. Behind me, only one of my other two Panthers was still moving. Together we pressed on, past the first of the Soviet casualties, an SU-122 assault gun. ...to be continued!
-
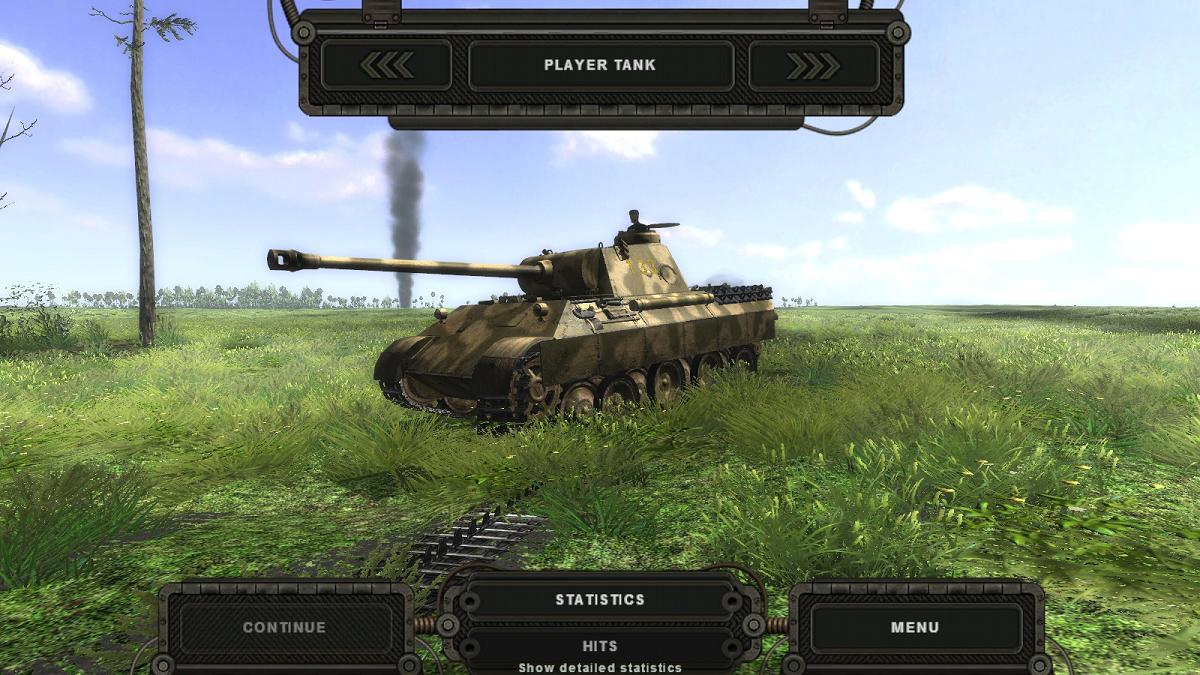
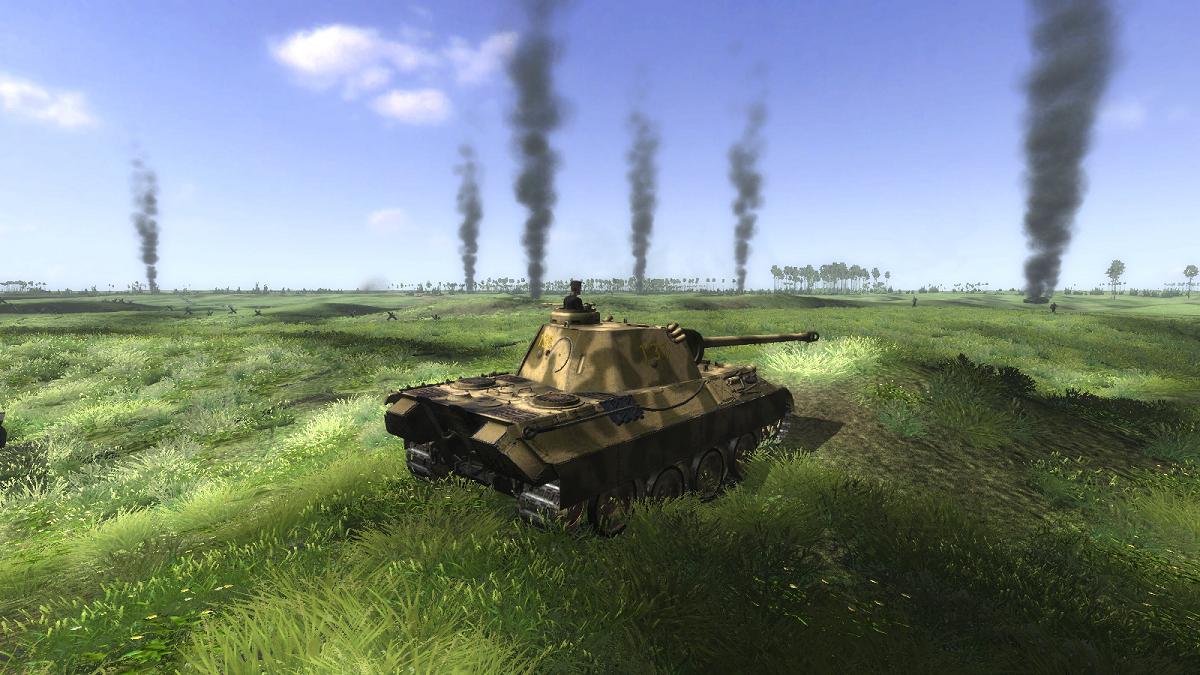
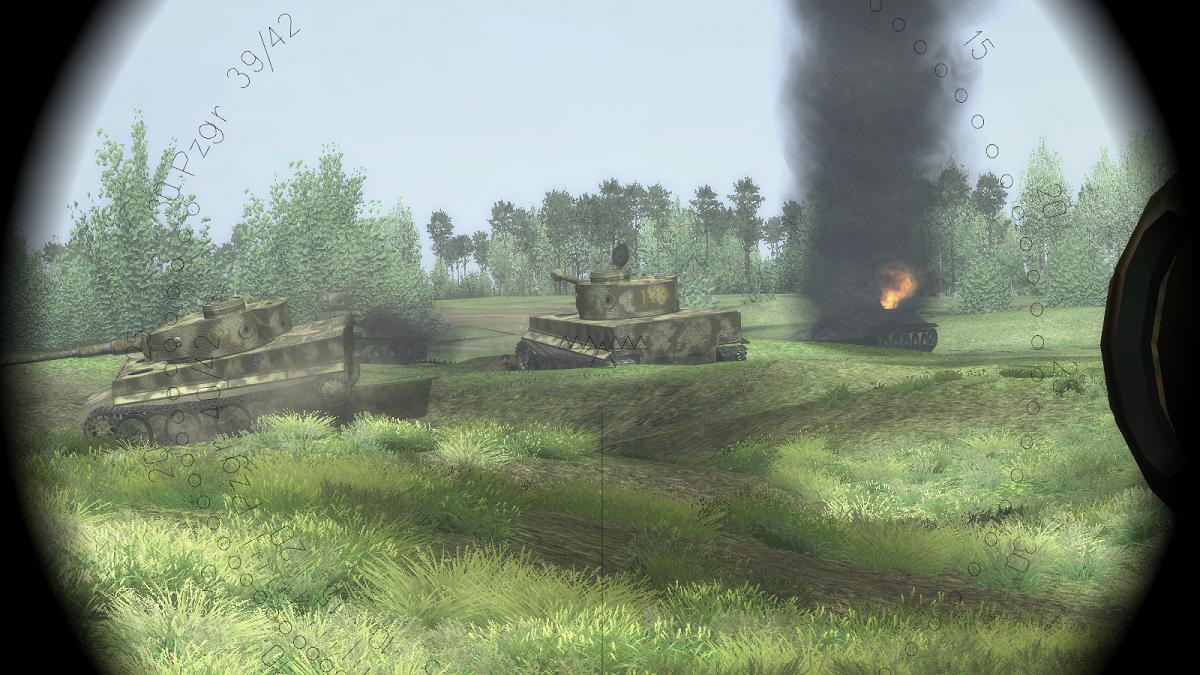
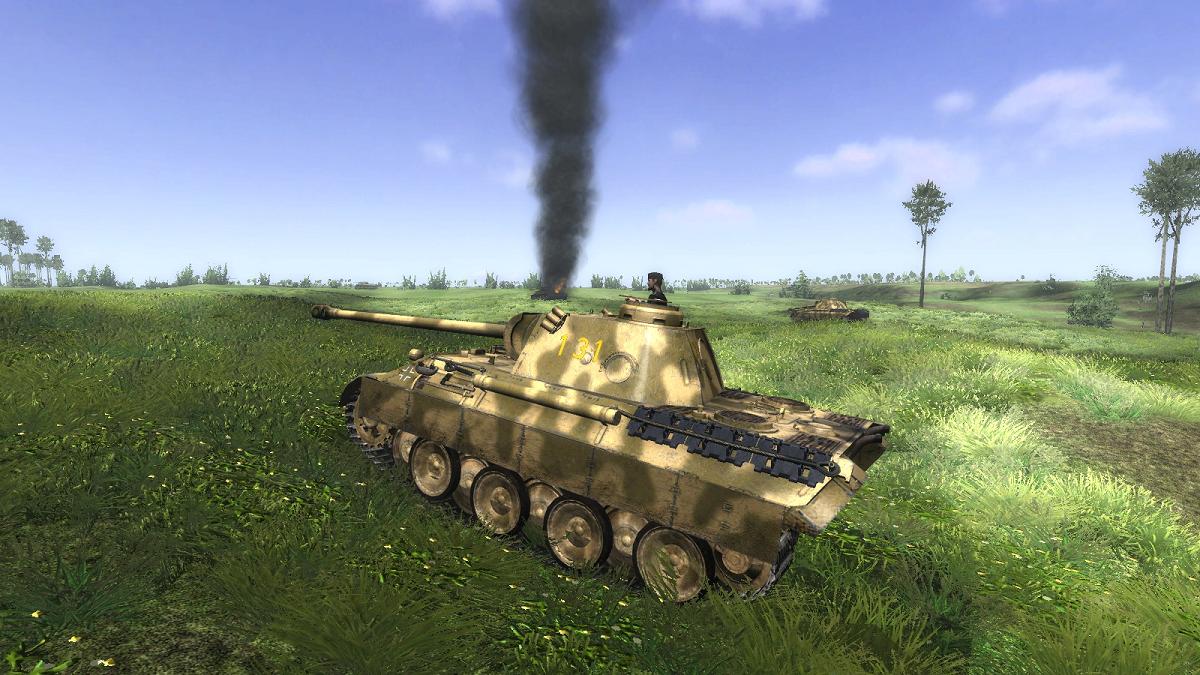
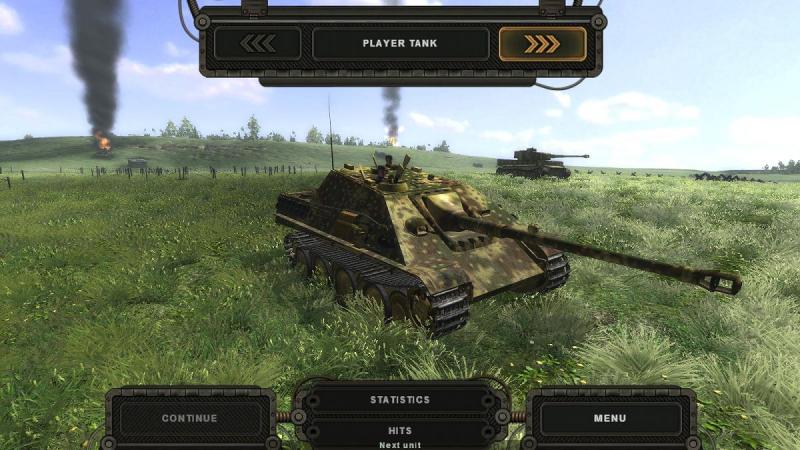
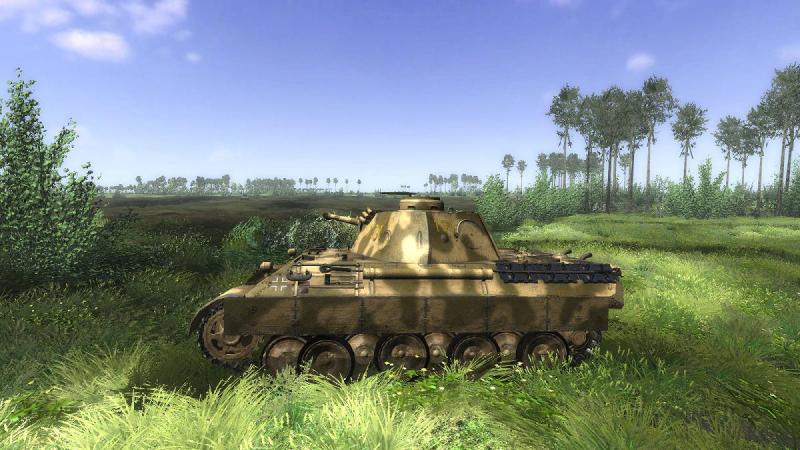
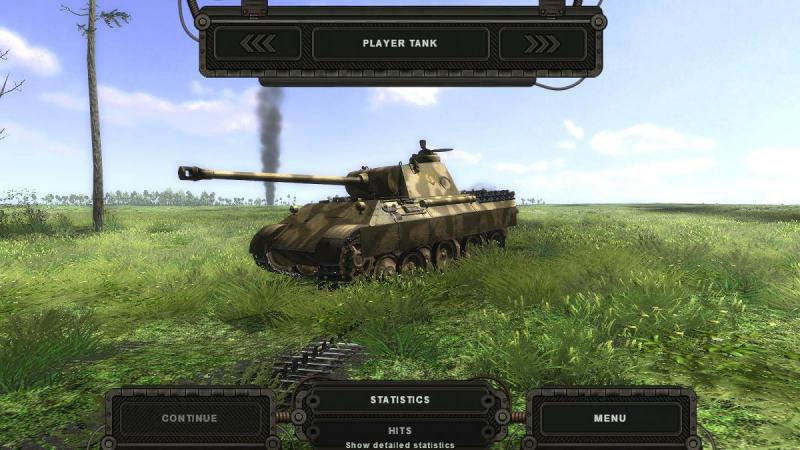
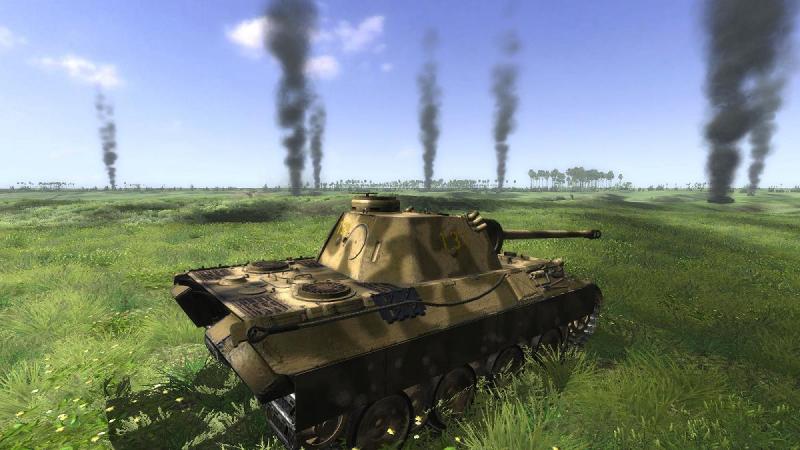
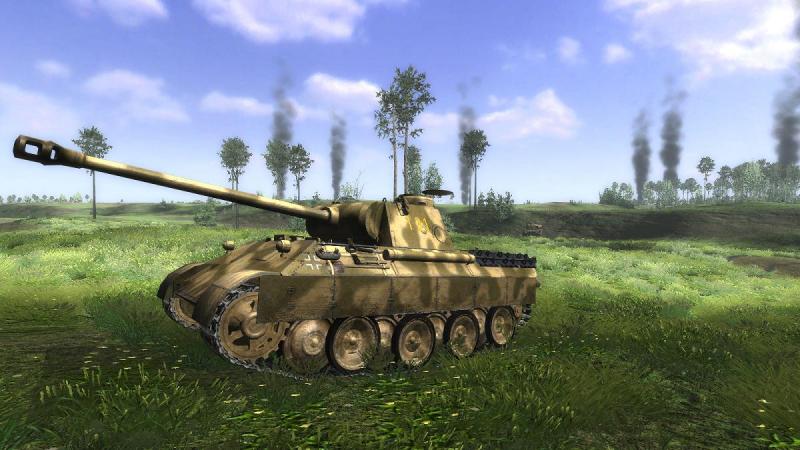
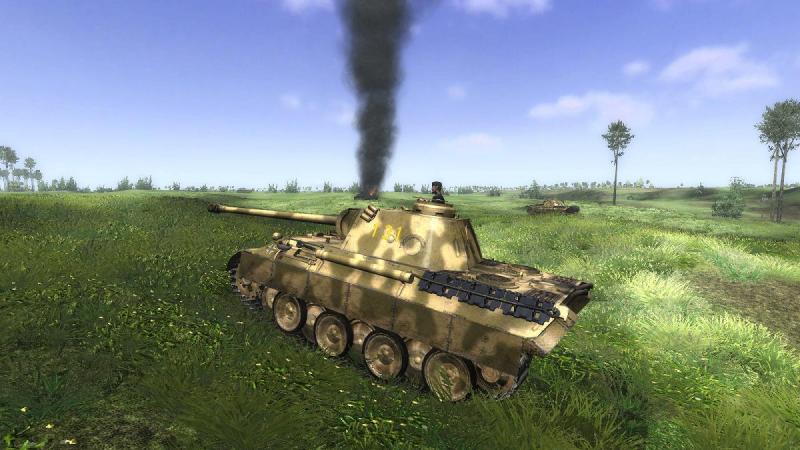
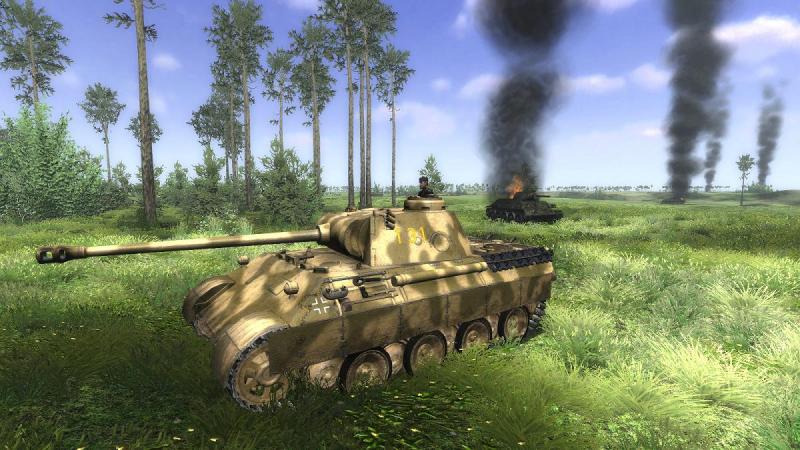
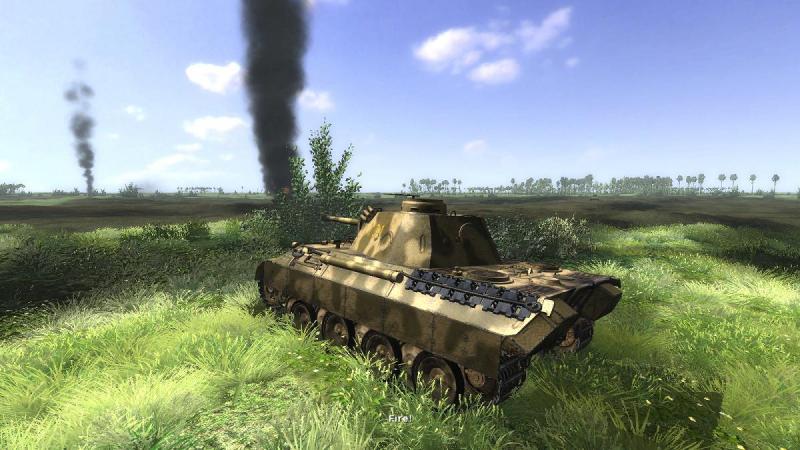
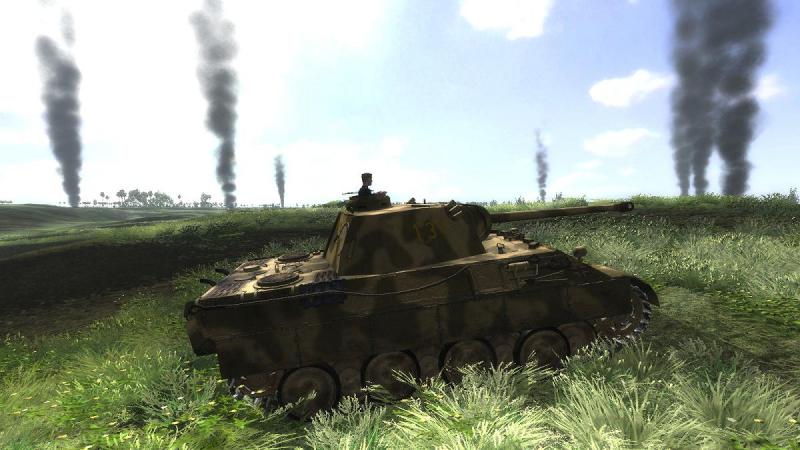
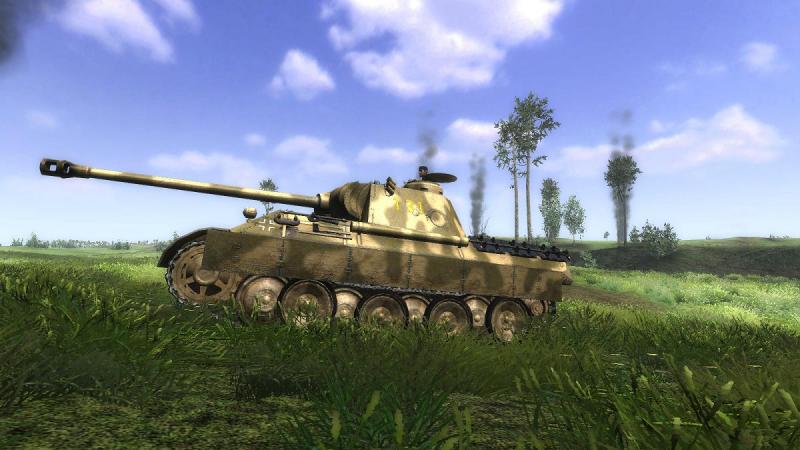
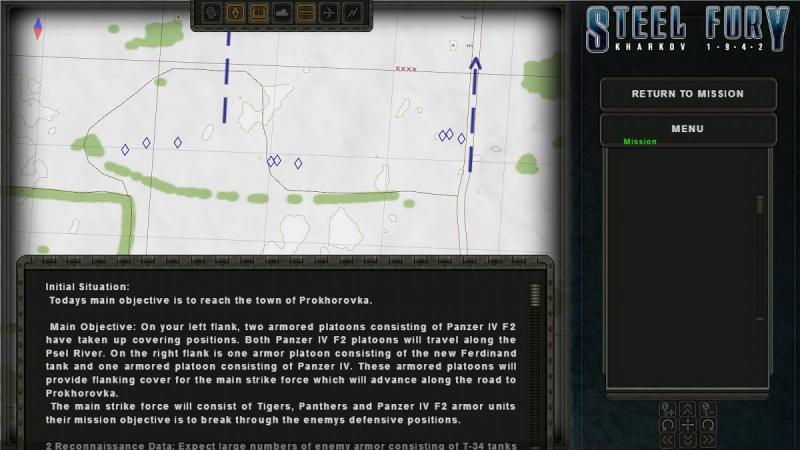
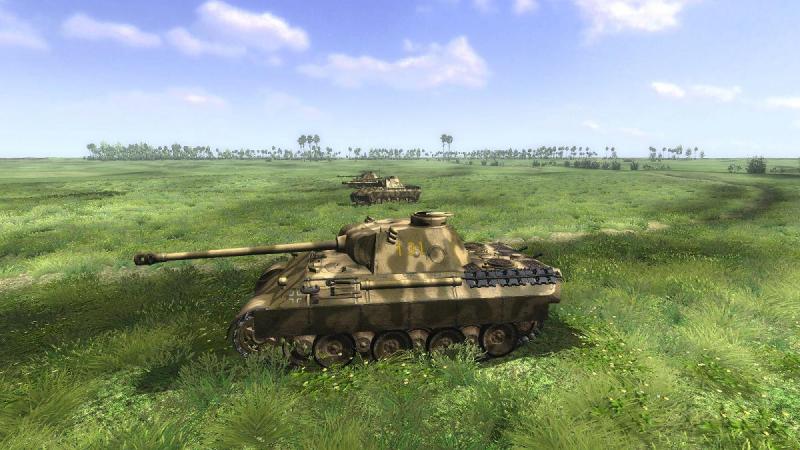
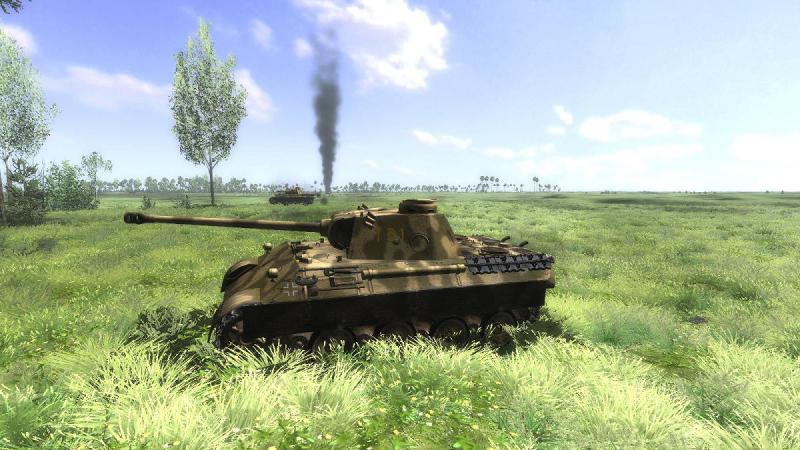
From Kharkov to Kursk - a change of scenery for Steel Fury! The battle The fighting at Prokhorovka has gone down in history as one of the biggest and most desperate tank battles ever seen. It was a battle within a battle, fought on the southern front of Operation Citadel, the German offensive against the Kursk salient in July 1943. This was an ill-starred effort to regain some of the initiative lost after the Stalingrad disaster. At Kursk, the Soviets knew the Germans were coming and the offensive soon bogged down amidst well-sited defences, storms of artillery fire and fierce armoured counterattacks. The fiercest was at Prokhorovka on 12 July, when hundreds of T-34s from the 5th Guards Tank Army swept forward in massed waves and ran headlong into II SS Panzerkorps. As its full name indicates, Ukrainian tanksim Steel Fury is centred on the 1942 battles around Kharkov. However, thanks to the modders and mission makers, its scope has been extended well beyond those battlefields and that year. Sure enough, if you install the NTA mod and the associated mission packs you will find that you now have a short series of missions based on the Battle of Kursk - specifically, inspired by the fighting at Prokhorovka. From these, I chose a mission featuring the Panther tank, which the Germans had rushed into service for Kursk, only to find that mechanical teething troubles and limited crew training added up to a very disappointing debut. Would I do any better? There was one way to find out! Edit, August 2014 - the NTA mod has been discontinued but its successor, the STA Mod, is now available: http://stasf2008.ephpbb.com/t6-steel-tank-add-on-steel-fury The mission and the tank Here's the mission briefing. I think it's fair to say that its intention is to recreate the general pattern of the German operations at Kursk on a smaller scale and - as I found out - give the player a taste of the kind of fighting at Prokhorovka, where the Germans were on the offensive but were faced with having to fight off waves of oncoming Soviet tanks. With the briefing panel minimised, you can get a better look at the map, including the disposition of the units, the lie of the land, and the route to your objective. I've got a platoon of three Panthers - the blue diamonds, bottom centre in the map below - and we are in the middle of the attack, with other tank platoons either side of us. Rather than keep us with our parent tank company - which would have been fully equipped with Panthers (those that had not broken down, anyway!) for the sake of variety we have a mix, including the stalwart Panzer IV but also some Tiger tanks and Elephant tank destroyers/assault guns. There's no mention of infantry or fire support in the briefing but as it turned out we had dismounted Grenadiers with us. It's probably no bad thing that they were on foot; there wasn't much hostile artillery or mortar fire and when the German SPWs (half-tracked APCs) do feature in an SF '42 mission, they seem always to suffer especially heavily! Basically, the operation is in two phases. First, we attack and destroy the enemy defensive positions. Then, we pass through and re-group on the other side, presumably in anticipation of a counterattack. Before leaving the map screen, I selected line abreast formation and 'Do as I do! for platoon orders. I didn't fiddle with the default game settings, which would have allowed me to change relative skills for each side and increase or reduce the balance (=the size of the enemy force, relative to mine). I kicked off the mission then as I usually do, in the external view, went to the commander's station and popped open the hatch (F3, P key) then moved to the gunner's station (F2) and loaded an AP round. From this station you can control turret traverse/elevation and do most of what the tank commander can, too, giving orders to driver and loader; so this is how I usually play. And here are our three Panthers, lined up and good to go. Nice to see that they are the correct model for Kursk - the Ausf. D, with the original 'dustbin' commander's cupola and vertical flap on the right of the glacis plate for the hull machine gun, instead of the later ball mounting. Another early feature is the set of three smoke dischargers either side of the turret (non-functional, as I believe SF doesn't simulate tanks popping smoke) Edit - Steel Fury mission-maker and modder Lockie tells me 'SF has smoke grenades. To use them u need sit down on loader place and press "space" on keyboard to fire' . The other units either side of us didn't hang about, but soon shook out into formation and roared off towards the enemy defensive lines, which were more or less in plain sight and not too far off, either. It didn't stay quiet for long, as the air was soon filled with the din of combat. Already, tall columns of smoke arose from the battle's first victims, friend or foe. Everyone else might have been in a hurry but not me. I drove forward a little way into a small fold in the ground, where I halted and started scanning the ground ahead for signs of the enemy. ...to be continued!


-
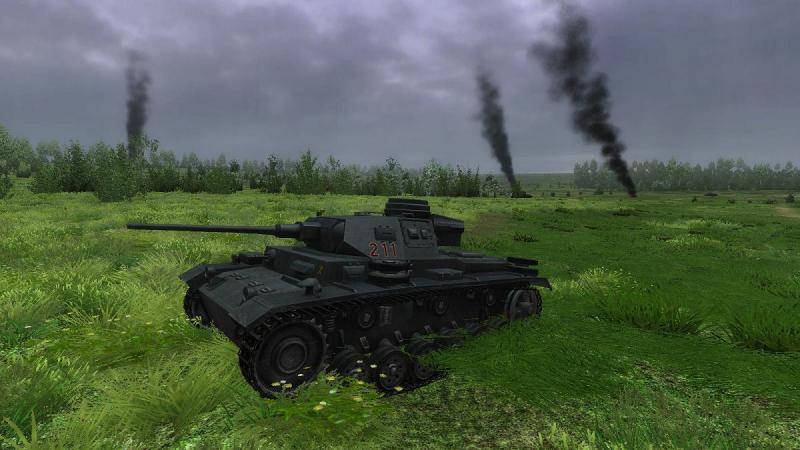
Yes I see what you mean Dave; I got those two on the next attempt, including this lot: Letting the first effort at the mission play on after my Tiger's demise, I noticed that the agressively-handled Panzer IVs did quite a good job flanking the Ivans, even though their tactics were a bit erratic eg driving right up over skylines. Staying on the move seemed to keep them alive, though, and they certainly gave better than they got, although at lest one got stuck in the woods. So this time I stayed closer to the Panzer IVs and slowed down my move to let them get into action too. Worked a treat. It helped that I mostly kept the turret position indicator turned on, to h*ll with the screenshots. The third German mission was a bit of a pain - the one where you're defending the village and it's the Soviet's turn to come over the skyline. Main problem is that you start in the open and by the time you've taken over the gunner station and turned on the auto driver (who seems inclined to forget he's working and take a nap, usually at critical moments) and the auto-commander and started to move into cover, they're coming at you. Plus another bunch then sneak into the village behind you. By the time one of the others had got this one, it was too late for me. Managed it on the third attempt, by driving immediately into the village and shooting from defilade, dividing my fire between the skyline merchants and the sneaky-beakies. The other defenders got most of the former, and some of the latter too. The mission didn't end though and guessing that one of the Ivans was either lurking unseen or needed finishing off, I had to make a fairly scary solo drive up the hill to the skyline, hugging the treeline. After establishing that there was nobody lurking in the dead ground over the crest I put a round into a couple of the less battered-looking Soviets and that seemed to do the trick - mission completed. The gunnery and general sense of tanking is very good. Despite the frustrations with the AI, lack of platoon control and some aspects of mission and map design, I must admit I'm enjoying T-34 -v- Tiger...while the missions last...


-

Council tells WW2 Re-enactment society.. NO NAZIS
33LIMA replied to UK_Widowmaker's topic in The Pub
Where do they draw the line, I wonder. Even Wehrmacht uniforms have swastikas, albeit small ones as part of the eagle badge. Are they banning accurate German Army uniforms? Or because of the prominent SS runes or who they were, just Waffen SS? The latter, I assume. Granted that the Wehrmacht played no mean part in helping the Nazis bring all the horrors of war (not to mention what came in its Nazi wake) to millions and thereby to Germany 'reaping the whirlwind', their leaders having 'sown the wind'. Of course the Waffen SS were primarilly (and as re-enacted are) soldiers, albeit they were particularly tough and brutal ones by many accounts. Nevertheless, it seems to me that a re-enactor who chooses to portray publicly, at this sort of event, troops who are so closely and visibly identifiable with a truly hateful regime (when they could instead portray Wehrmacht or Falschirmjaeger units) is just going to have to accept that they are liable to stir up this sort of reaction; and 'muck it up for others' as CrazyHorse said. I'm as opposed to 'political correctness' as anyone, but I actually think this decision is no bad thing. It actually shows that WW2, in the UK anyway, has not become simply just another visitor attraction, with the lines between good and evil now blurred by the passage of time. Some people still remember; some people still care. The day when the very public display of overtly Nazi symbols - in any context - does not engender unease or opposition will be a sad one. I'm not entirely blameless. An airsoft event a few years back was desiged around the battle for Pegasus Bridge in Normandy. I wanted to play for the Paras but ended up being detailed to command the Germans. The only suitable kit I had was a modern German flecktarn smock. As this was unlike Wehrmacht patterns but a good ringer for a Waffen SS pattern, for the sake of greater authenticity I stuck on some SS runes and rank badges to the shirt lapel and SS eagles to the smock, even tho the Waffen SS were not at that battle. But I was conscious that I was doing something questionable and contrary to my own beliefs, which I would not have contemplated at a public event, rather than a private one were my mates got a laugh and knew I'm no wanabe Nazi. -
WOFF Flanders Map Nearing Completion
33LIMA replied to RAF_Louvert's topic in WOFF UE/PE - General Discussion
Not towns but how about labelling the forests named in many pilot accounts? The one that comes to mind is Polygon Wood. Even if that is not what the Germans called it and even if it is not polygonal in WOFF, it would be good to see it marked on the map, if there is a sim wood in the area. As for towns, the main ones would be those (probably villages really) mentioned in the major battles, like Vimy or Adinfer (the latter also having a wood named after it IIRC). -
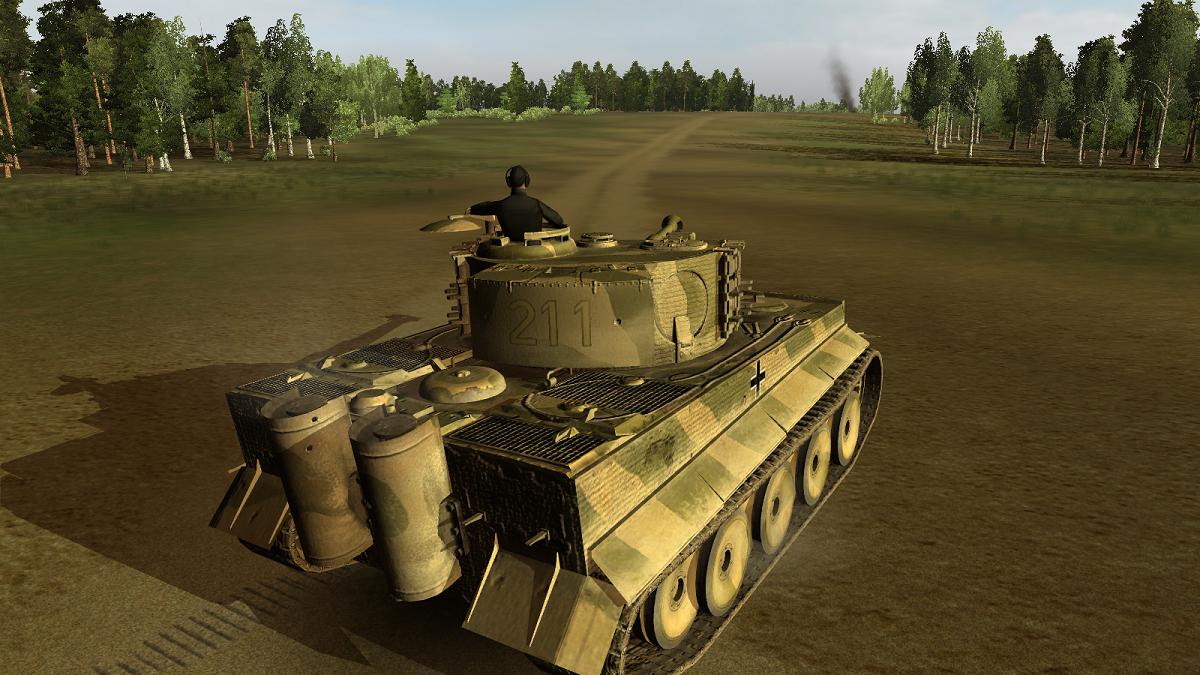
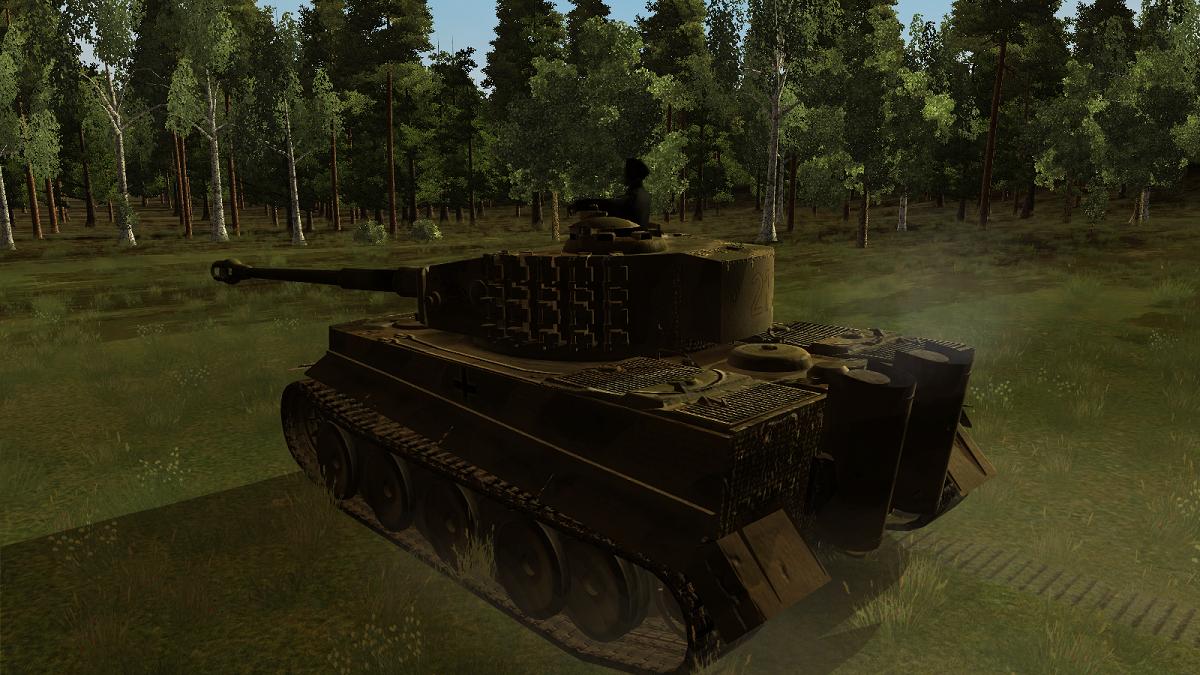
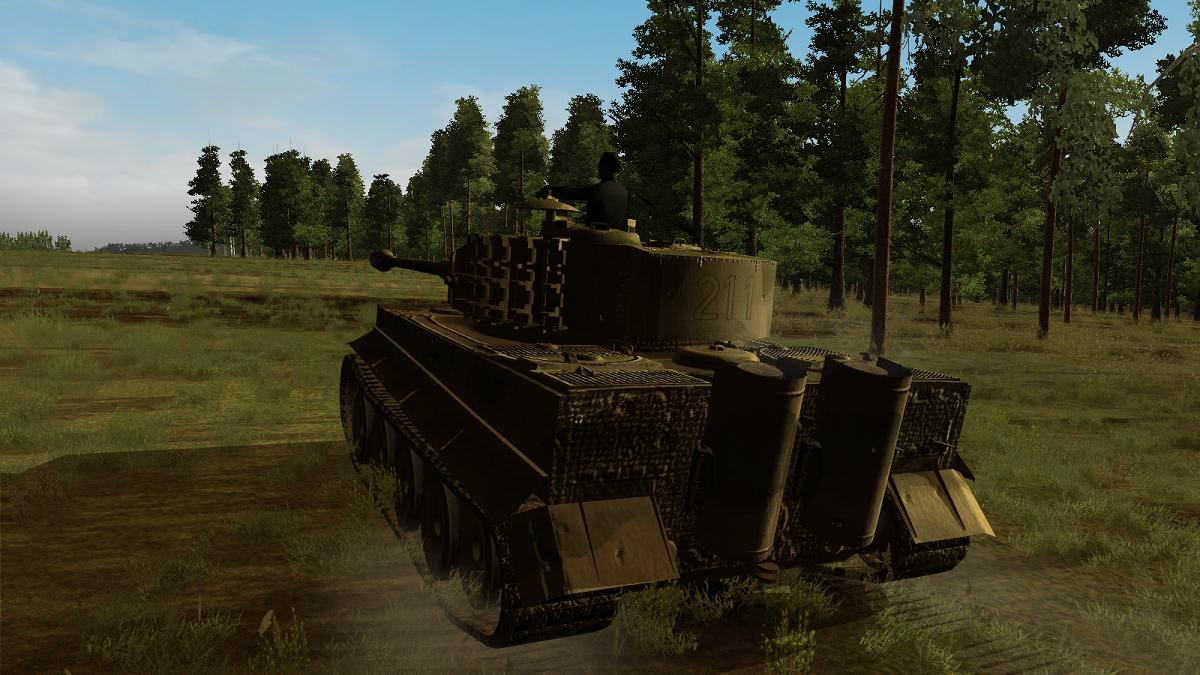
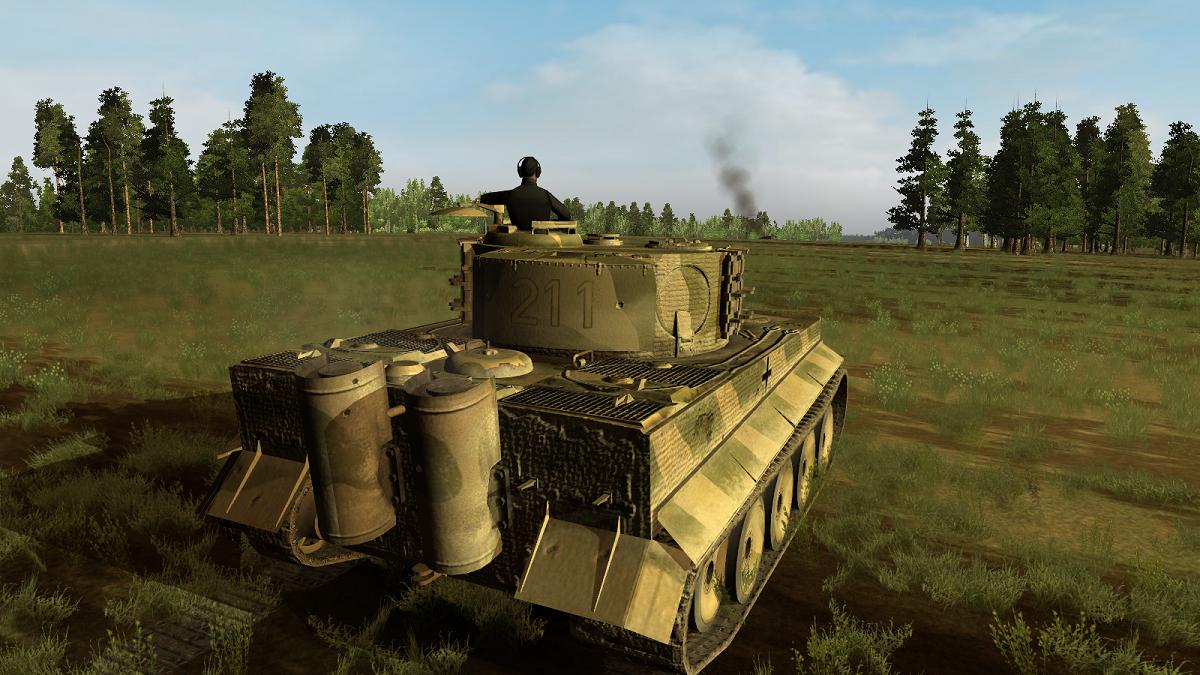
WOFF: Screenshots and Videos
33LIMA replied to RAF_Louvert's topic in WOFF UE/PE - General Discussion
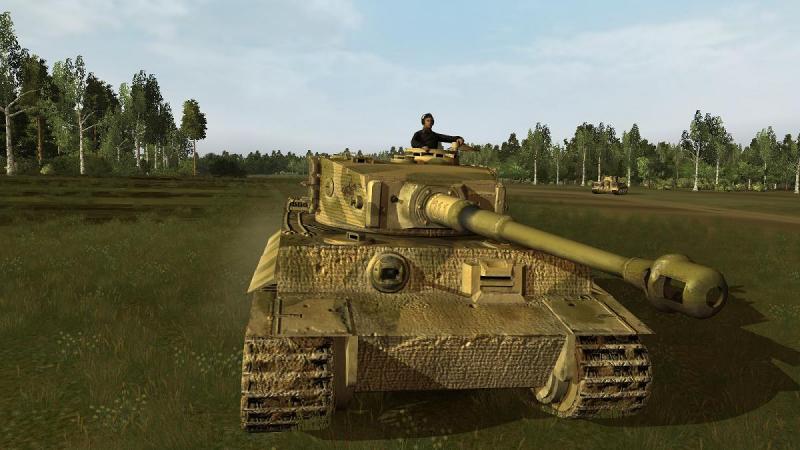
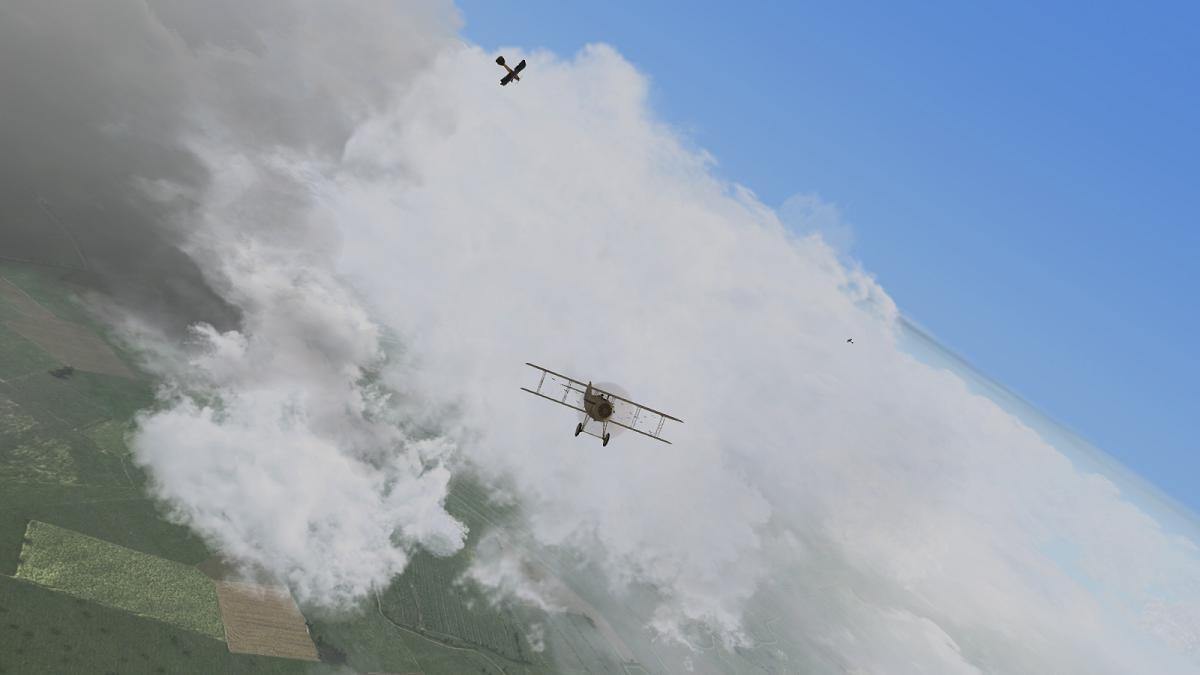
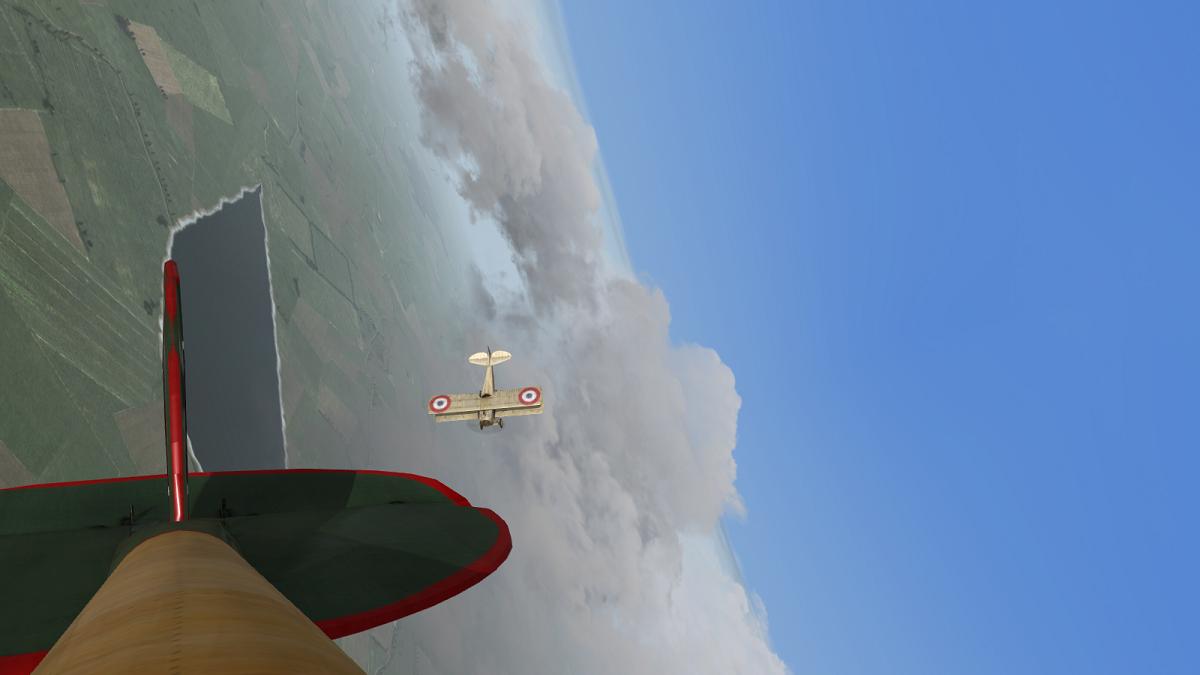
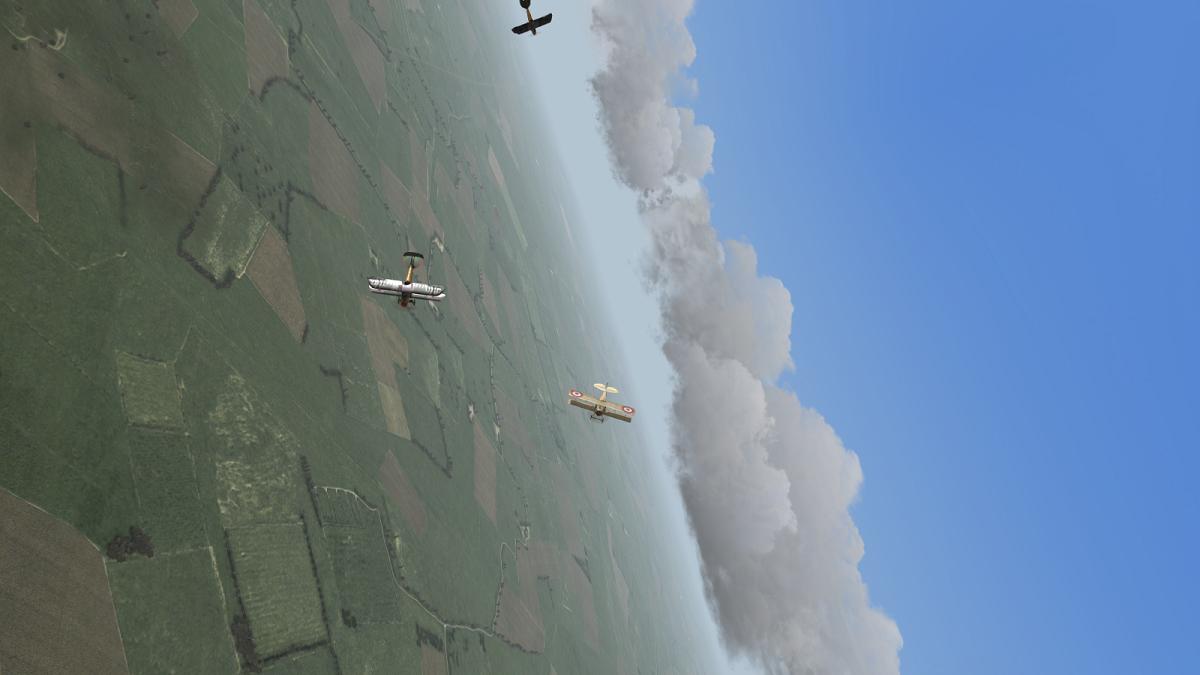
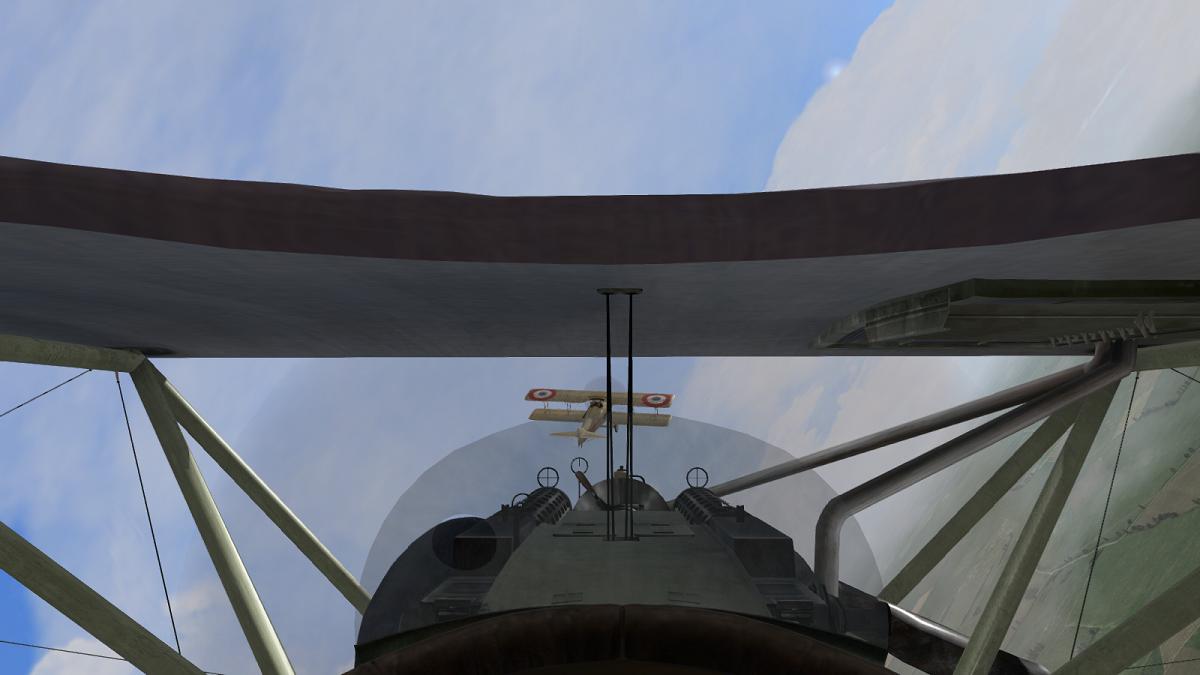
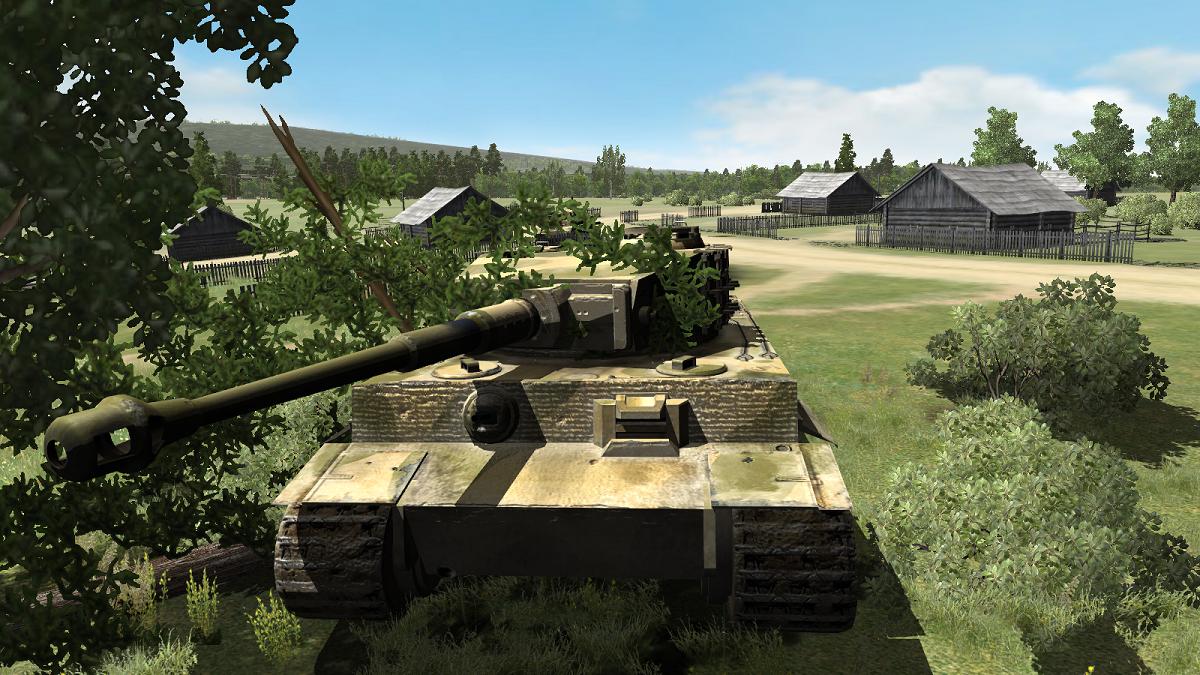
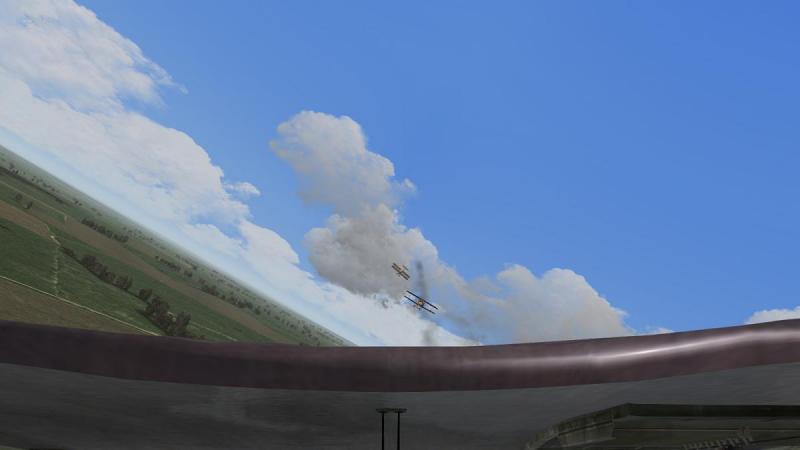
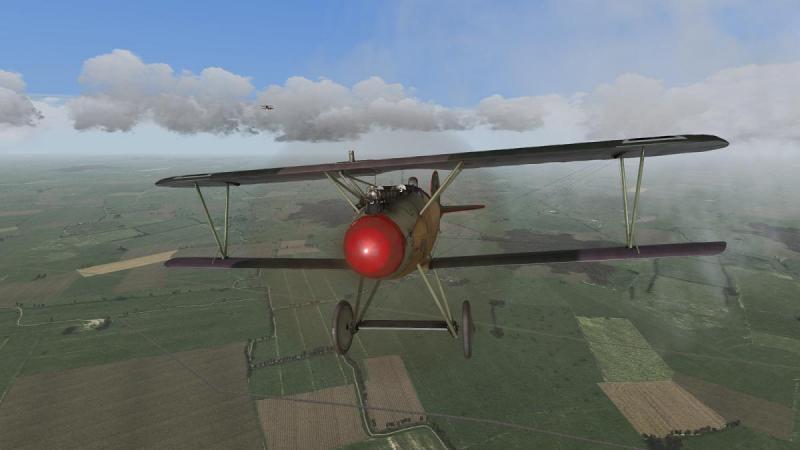
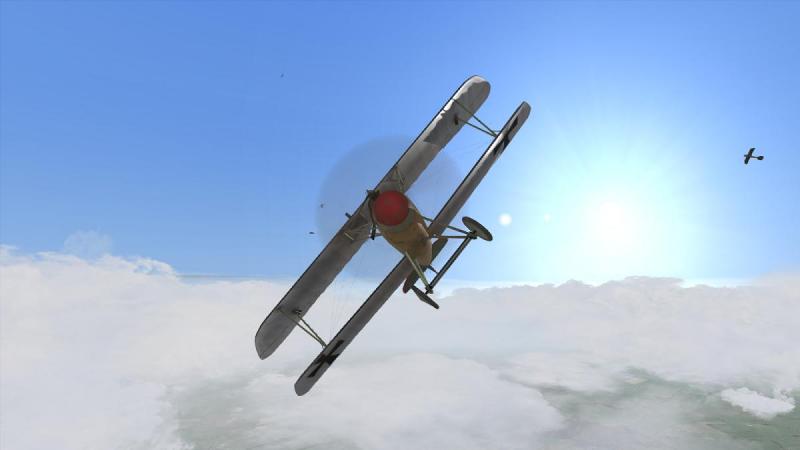
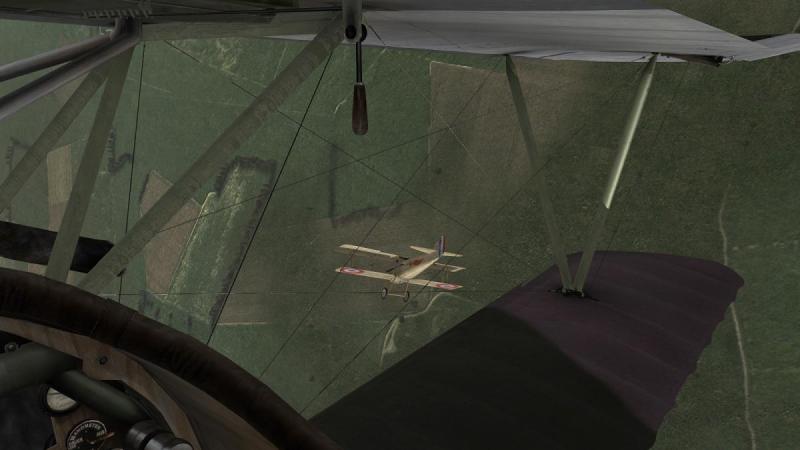
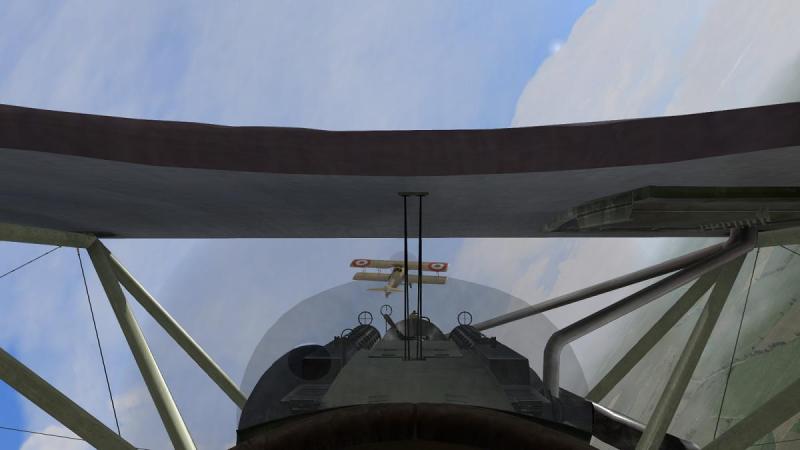
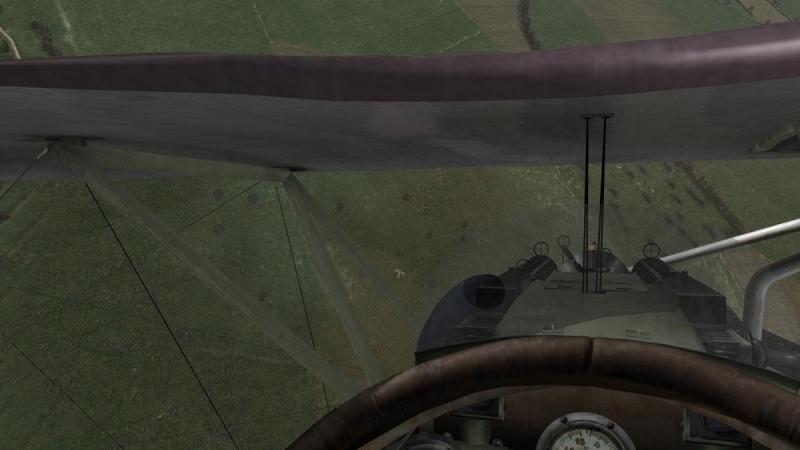
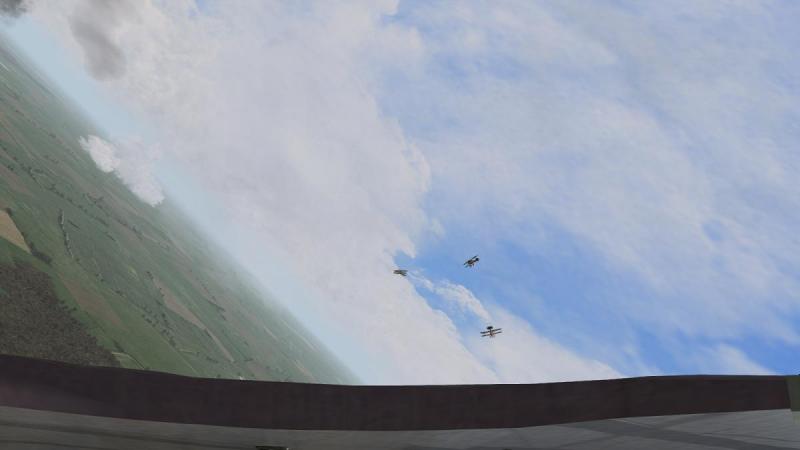
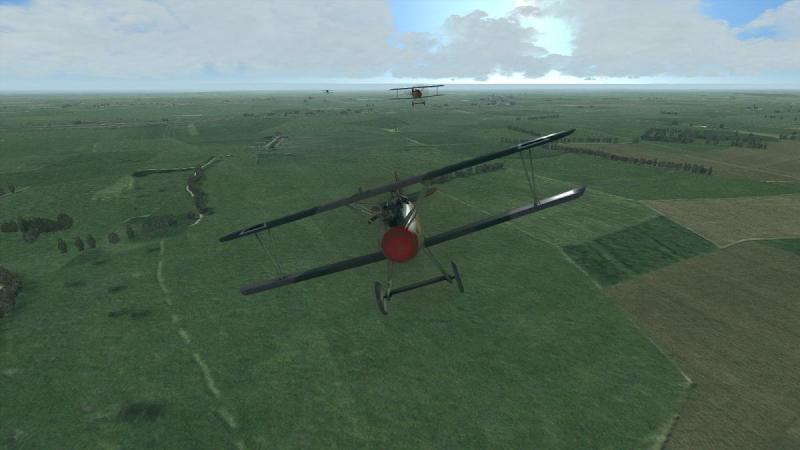
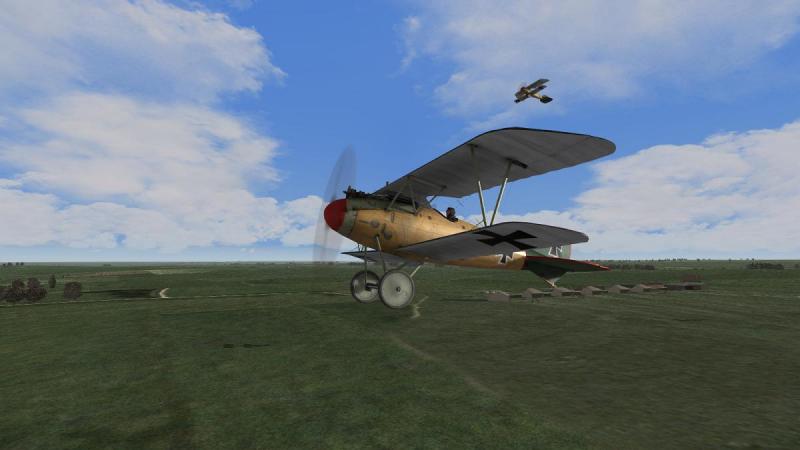
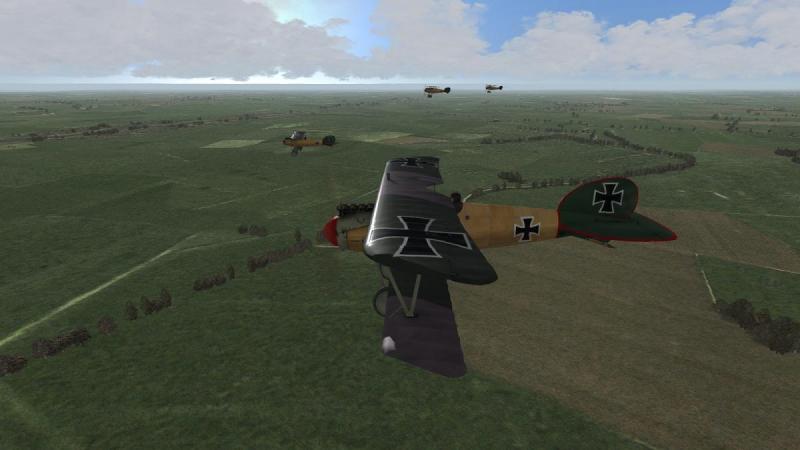
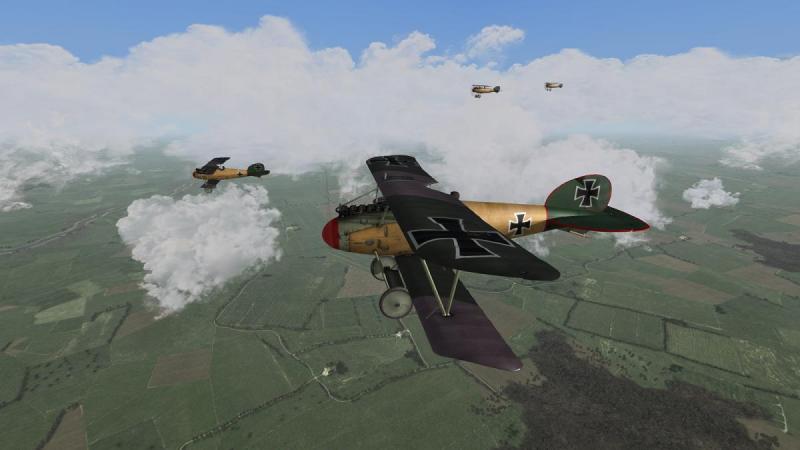
Evening patrol with Jasta 5, Cambrai sector, November 1917: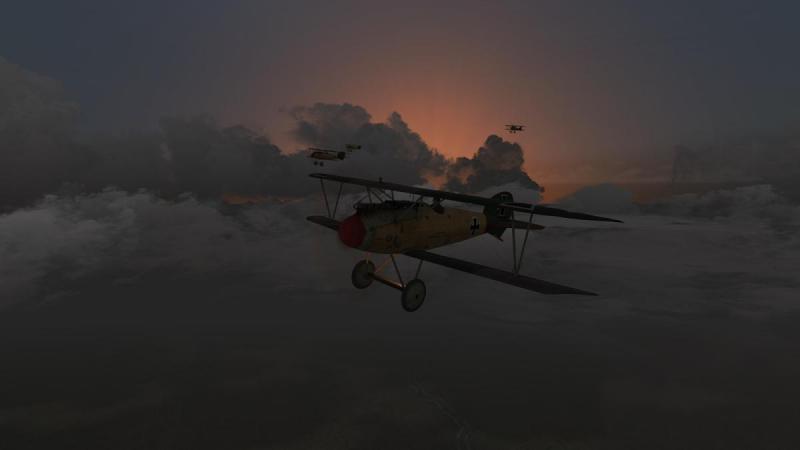

-
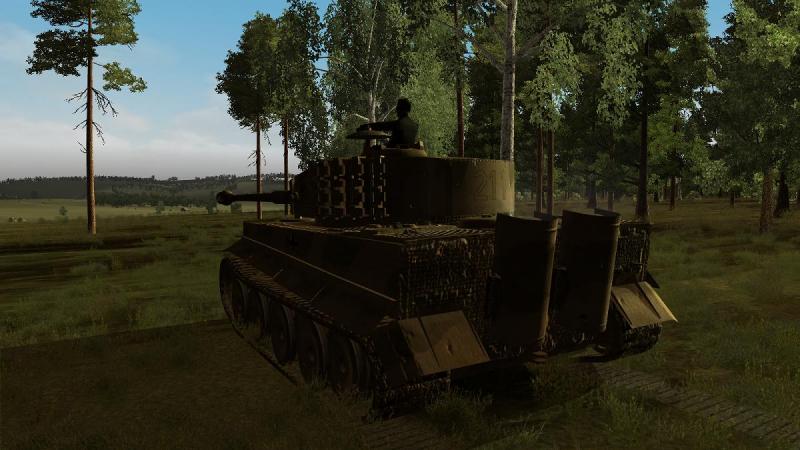
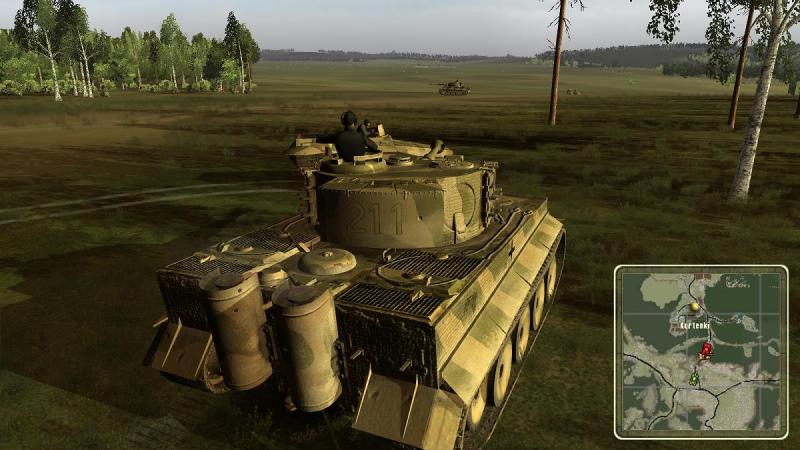
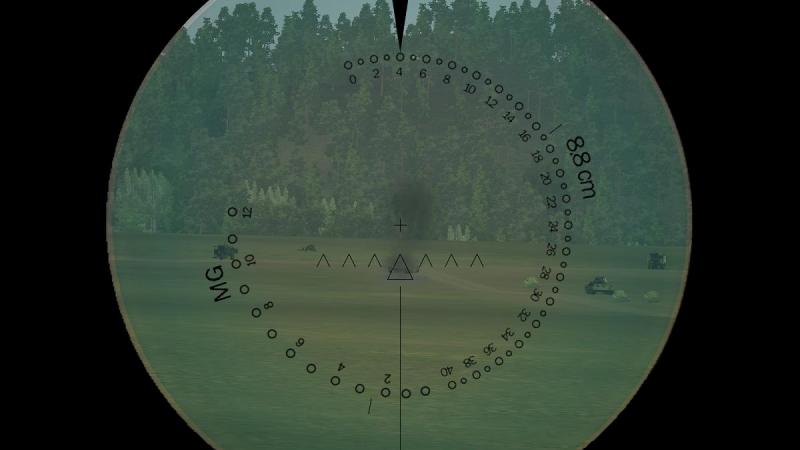
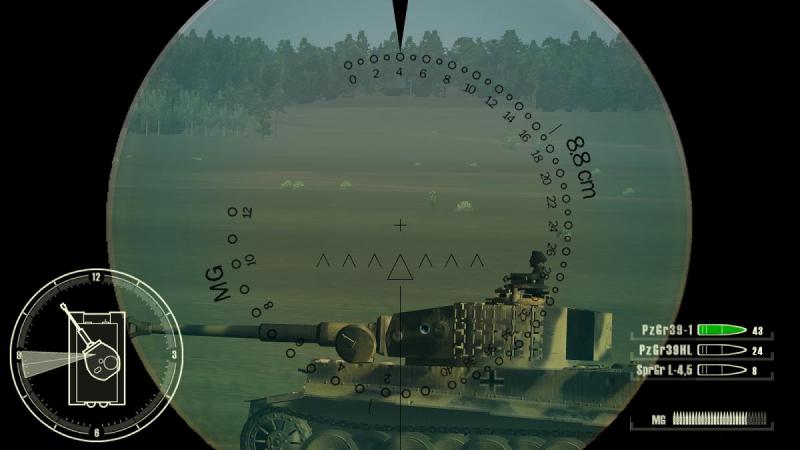
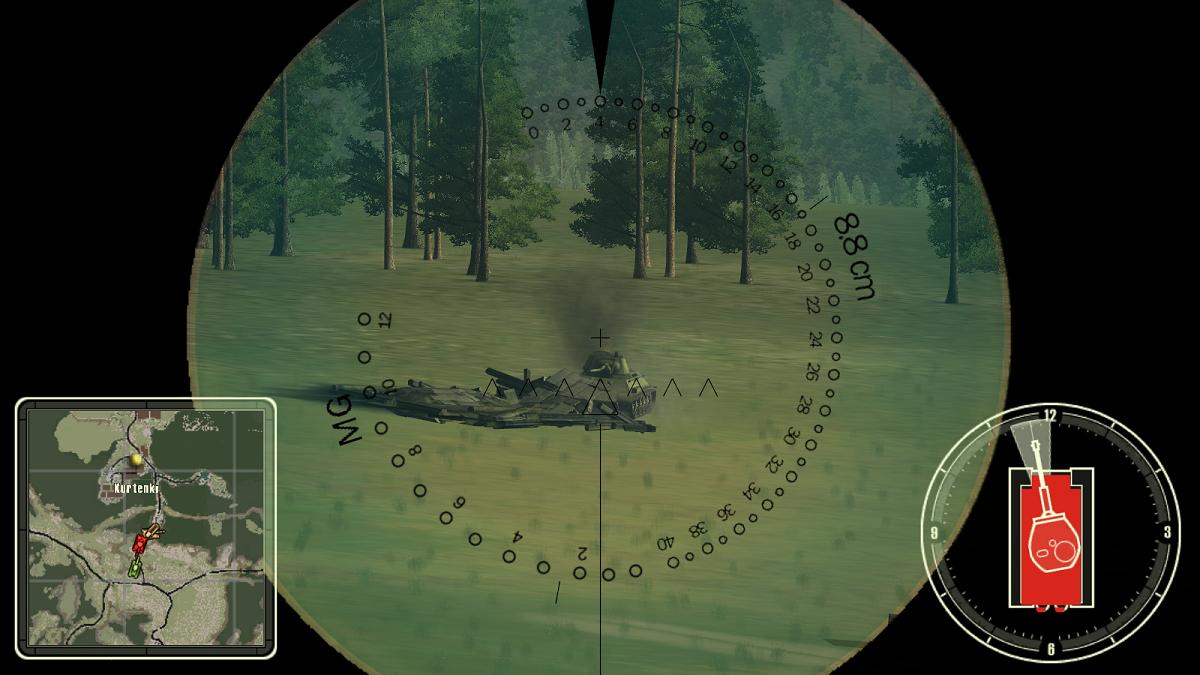
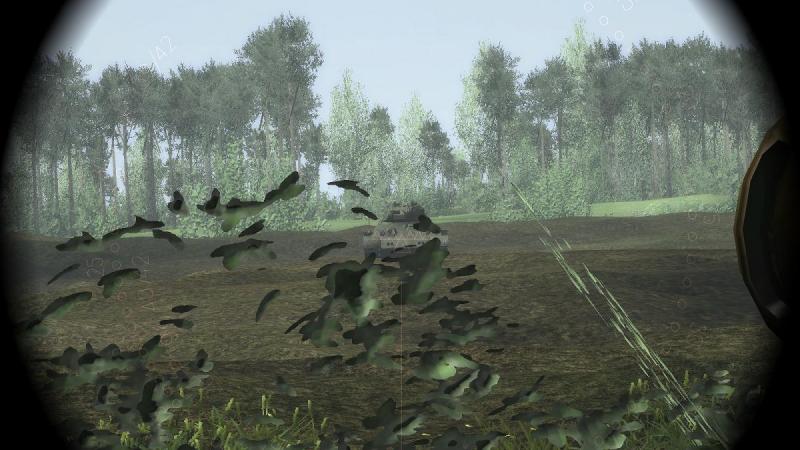
The ZeeWolf mission, part 3 Either side of me, the gap between the woods widened out as I pressed on, scanning anxiously ahead and on either side. The ground dipped away towards the far end of the ride and what lay there, I could not see. Elsewhere it was pretty level, with little or no visible folds or hummocks to offer me any cover. As I rolled on, trying not to be distracted by the SPW's antics, I noticed a smoke column in the centre of the long clearing. Its source was in dead ground, so I could not tell if it was my remaining companion. They say that the Hoplites in an Ancient Greek battle-line tended to edge instinctively to the right as each man sought to gain some protection by tightening up against the shield of the man on that side. In a similar way, I crept up close to the right-hand edge of the woods, rather than stay exposed in the centre of the ride. If it really kicked off again I would at least be able to crunch into the trees quickly...and hope that reports that TvT's AI gunners could see through such cover were inaccurate or exaggerated. As I nudged forward, I came to a point where - having shifted to the commander's higher viewpoint to get a better view into the dead ground ahead and using the binoculars - I could see that the source of the smoke plume to my front was a turret-less T-34, likely another victim of the remaining Tiger, wherever he was I rolled on, with the dodgem driver in the SPW sometimes behind, sometimes looping out in front. Then, a little further on, scanning between a group of trees at the right-hand edge of the ride, I saw the Tiger, sitting stationary and possibly immobilised but otherwise intact, not far beyond the killed T-34. Had the turret-less T-34 hit him? Were there more enemies ahead? Or was the Tiger fine and just waiting for me to catch up? I pressed on even more cautiously, pausing at intervals to scan the ground ahead of me. Finally, I came to the point were I could see more of the dead ground to my front. This suddenly opened out into a wide expanse of clear ground. I switched back to the gunner's station and started scanning through my gunsight, working left to right, and back again, near to far. Sure enough, just in front of what looked like a couple of wrecked trucks, stood two T-34-76s, sitting stationary and right out in the open. Where they in action or knocked out? Taking no chances, I quickly engaged them. In the second pic, you can see one of my tracers just above my tartget, arcing down and about to hit, even though I have somewhat under-set the range and compensated by aiming high. As the sight is mounted to the left of the Tiger's main gun, you need to place your aiming mark slightly left of your intended point of impact. Note also that TvT does quite a good job of simulating 'obscuration', the smoke and dust produced on firing, which you can see somewhat dimming the view in the second screenshot below. Fairly sure that both the inactive T-34s were now thoroughly knocked out, I rolled forward slightly further, so as to ensure there was no danger lurking in the remaining dead ground nearby. Meanwhile the SPW, which was still with me, continued to give a rather out-of-place but nevertheless impressive display of dodgem driving. At this point, halted and scanning, I turned on the mini-map, and confusion began to set in. I had forgotten to turn off the AWACS-style display and the map showed a live enemy tank (green) to my front. Where was he? I could see nothing, except the two dead T-34s. I put another round into each of these, just in case. As continued to scan, I could see that though its commander still stood unconcernedly in his cupola, the Tiger ahead of me had taken what might have been a penetrating hit in the near side of his turret. At this point the dodgem SPW did another loop in front of me, this time taking on one of the trees, which he succeeded in knocking down in front of me. Perhaps it was a clever attempt to give me some cover but it rather hampered the view throught my optics, so I drove over it and halted again. At this point things started happening fast. I began to take fire, anti-tank or tank rounds whipping past or into my tank from an enemy to my front whom I just could not see. I put a round into a suspect shack slightly left, which collapsed to reveal another T-34, which I promptly clobbered. But by this time my own tank had taken bad hull damage, indicated by the red in the 'HUD' graphic. I tried to back up but wasn't going anywhere. In TvT, you can't pop smoke, so I was now committed to simply slugging it out with an enemy who was even now putting rounds into me but whom I still could not see. My commander called in a T-34 target straight ahead at close range but though I lined up my gun and scanned slightly left and right of twelve o'clock, I saw nothing but the T-34s I had already engaged. In something approaching desperation, I put another round into one of these and he brewed up. But I still continued to be fired at. To my rear, another Tiger had showed up - one I had not seen until then! - and started firing past me. I tried to pick up his target by watching for his tracers, which seemed to be aimed in the direction of another target beyond the now-burning T-34 behind the shack. To no avail. Another AP round slammed into my tank and knocked us out. Game over! I neglected to tab around the battlefield afterwards so I never found out who our killer was (though you can see what might be another T-34 just left of the burning one, partly hidden by the branches of an intervening tree). I think I need a bit more practice in using the TvT view and gunnery systems and help features. Turning off some of these features for better external-view screenshots (or even taking them in the middle of a firefight) is not conducive to either success or survival in TvT! However, playing 'live' missions is the only way to practice. Once you get the hang of the important keystrokes and how to make the best use of its capabilities and features, TvT comes across to me as a rather good simulator of operating a tank. However, it is badly let down by a tiny number of heavily-scripted missions, in which I often feel like I'm playing a first person shooter 'on rails', being channelled down fixed paths and then having equally fixed 'bots' presented to or thrown at me. The AI seems notably poor. The failure to provide for platoon control is another big negative. Had this been implemented the game would have been more realistic and more tactical. And player control could have partly compensated for the the poor AI, at least for your own platoon. It may be that through better mission design, and by providing more open maps with less 'chanelling', ZeeWolf's add-ons deliver some improvements here, as well as more vehicles and some more missions. The ZeeWolf mission I played for this report was a big improvement on the stock mission although it, too, had erratic AI, including platoon-mates. I don't know if it is possible to improve or mask this by somehow chaining platoon-mates to the player, so that they at least give the illusion of being under your control, instead of rattling off on their own scripted paths. Overall, my own assessment is that while the vanilla game falls short in some key respects, in others it is a decent tanksim - well worth a crack, if money is no major object or if you can obtain a bargain copy. PS a video of 'Tigers shake Kurtenki' with the full ZeeWolf mod installed has recently been posted on Youtube by Kempet, here.