


33LIMA
-
Content count
3,749 -
Joined
-
Last visited
-
Days Won
7
Everything posted by 33LIMA
-
Destroyer versus destroyer Z 25 was now in trouble, and I turned her away, covering the withdrawal with her aftermost guns. You can see how the range has closed - Fury is visible in the picture above, headed left to right, just above turret Anton. The tactical situation around this time is shown in the map view below. To the north, Z 26 is racing to get back abeam of Trinidad, which has turned well away and is making smoke. Z 25, like Z 24 and Z 26, is still targeting Trinidad. Clearly, it was time to start hitting back at the enemy destroyers. Fury was now steaming north towards Trinidad, almost on a reciprocal course, as if she was trying to cover the cruiser's escape. I decided she must now be the priority target, and would be engaged by both the damaged Z 25 and by Z 24, while Z 26, coming down after Trinidad, kept up the pressure on the retreating cruiser. Still burning, Z 25 came about onto a roughly recriprocal course to Fury and brought a full broadside to bear on the enemy destroyer. Successive broadsides from both Z 24 and Z 25 churned the sea around Fury as she came level with Trinidad, heading in the opposite direction on her unengaged side.. Hit and down by the stern, Fury somehow survived my first salvoes and I knew I would now have to face her return fire, possibly a torpedo attack. Further north, Oribi was undamaged and steamed as if to cut off Z 26 in her pursuit of Trinidad. Now, it was Z 26's turn. As she was about to send another salvo after the smoke-shrouded Trinidad, there was an explosion to the left of her target. The victim was Fury, whose damage must have caused a magazine explosion or set off torpedo warheads. My next victim was Oribi, whose bridge was enveloped in a fresh fireball as Z 26 redirected her fire from Trinidad. Oribi's decks were soon awash; not long after this photo was taken, she went down. The situation at this time is shown on the map view below. Oribi has just been sunk by Z 26. Sister ships Z 24 and Z25 have sunk Fury. Trinidad is now steering further to the west, still making smoke. The convoy has turned over 360 degrees and is headed away to the west-north-west. The only enemy warship still in action is the destroyer Eclipse. The battle at last seemed to be well in hand, but it was in fact far from over. ...to be continued!
-
A turn of the tide? At this point in the fight, Trinidad, though hit more than once, was looking pretty well undamaged and was still engaging Z 25, to her front. The latter had been hit once, a 6-inch shell from a salvo falling over, which seemed to clip her funnel and did no serious damage. But now, astern and to starboard of Trinidad, Oribi came into action. At first she fired starshell, but I knew that worse would quickly follow, and that the illumination would likely improve the accuracy of Trinidad's shooting. That shooting was still concentrated on Z 24 or Z 25. One of them was well lit up by Oribi's starshell... ...and was soon taking hits from the destroyer Fury, across on the other side of the escaping convoy. Those Royal Navy captains were co-operating well! Despite this, I continued with my plan, concentrating my fire against Trinidad. She is seen below with a single shell-spash from one of our salvoes indicating that other armour-piercing rounds have found their mark, somewhere in the ship. Finally, Trinidad began to make smoke and turn away, a sure sign that she had been hit hard! At last, just when it seemed we would be swamped by the combined fire of the British ships, the tide of battle seemed to be turning my way, instead! Behind Fury, Eclipse, dangerously cutting across the bows of the retreating merchantmen, began shooting at us... ...but I was determined to press my advantage against Trinidad. I knew that repairs could see her back in action at any time, and that, especially with the range closing, her apparently-intact battery of twelve 6-inch guns could blow any of my destroyers out of the water. I had to keep after her. Z 26 had turned around and was soon catching up, pumping 5.9 inch rounds into the smoking cruiser. At last, I saw more visible signs that Trinidad was taking serious punishment. A violent explosion sent a fireball rising from amidships, leaving mangled wreckage where her second funnel had been. That's more like it! By now, Z 26 was well abeam of Trinidad, outside effective torpedo range but now a good target for full broadsides from my five 5.9 inch guns. There was another big explosion aboard Trinidad, this time between the bridge and 'B' turret. She' was still under way but I began to feel more confident that I had, and could maintain, the upper hand, by keeping her under fire from at least one destroyer. But the battle was far from over! Unengaged, the three British destroyers had been steadily closing in and now, a salvo from one of them smashed into Z 25, starting a nasty fire amidships. Could the tide of battle be about to turn again? ...to be continued!
-
Snow and starshells My first few salvoes having failed to draw blood, I was beginning to get worried. Sooner or later, somebody was going to get some hits, and I needed it to be me. Z 24 and Z 25 zig-zagged as they fired, to throw off the aim of the oncoming Trinidad. Astern of the cruiser, Oribi made smoke to cover the convoy's turn away to starboard. The 'manoeuvre' part of my plan seemed to be going rather better than the 'fire' bit. As Z 24 and Z 25 raced across Trinidad's bows, Z 26, firing as she came, steadily drew abeam of the enemy cruiser. I maintained a nearly reciprocal course so as to keep all my guns bearing, rather than closing fast to get into torpedo range. Finally, I got some hits! Three of Z 26's rounds splashed into the sea to port of Trinidad, but two more hit metal not water. At this point, the enemy destroyers pitched in. Fury, ahead of the escaping convoy as it turned to satrboard behind her, illuminated Z 25 by starshell. I continued meanwhile to engage Trinidad, but I seemed to have lost the range again, with my salvoes going close, but not close enough. To add to my troubles, Fury now joined Trinidad in engaging the illuminated Z 25. Bound to happen, sooner or later, and now it had. Here's the situation at this stage of the battle. The convoy continues to turn away to starboard, while Trinidad and Fury (and behind them, Oribi and Eclipse) are about to turn to bring their full broadsides to bear on Z 24 and Z 25. Z 26, seeing Trinidad turning away, has come about to port, to stop the range opening out. I've had my chance to do some serious damage to Trinidad before a general battle gets under way. And I've failed! Now, I can feel the fight slipping away from me, as the advantage passes to the British. ...to be continued!
-
Will history be re-written? This was not going to be easy. Our three destroyers, with five 5.9-inch guns apiece but protection against nothing but shell splinters and not much of that, were up against a cruiser with twelve 6-inch guns, accompanied by three destroyers whose four 4.7 inch guns each would be enough of a threat, as it was. I quickly made a plan, then started to put it into action. The plan had two elements - fire and manoeuvre. For the former, I decided we could concentrate all of our fire, for as long as possible, upon the closer and more dangerous target - Trinidad. By way of manoeuvre, we would split into two. Z 26 would go right to come in along the port side of the oncoming cruiser, with the possibility of making a torpedo attack. Z 24 and Z 25 would go left, to 'cross her T'. I sent two destroyers that way because they would also be closing with the convoy.. and likely, other destroyers. Z 24, in the centre of my line, went to full ahead and turned hard to port. Having completed the 'move' phase of my turn for my first ship, I now had the opportunity to get off the first rounds of the battle. I ordered Trinidad as our target... ...then from the gunnery position, fine-tuned our aim-off to the right, to allow for the significant crosswind. At this stage, only the initial firing solution was available - we had neither fall-of-shot (map) nor spash (3D world) history as yet. I backed off the recommended 16.3 degrees elevation to a round 16, as the initial solution usually turns out on the long side. Then we opened fire. My first salvo of AP rounds was left and slightly over. I'd need to allow a bit more for that darn crosswind! It was now the turn of my other two ships, to move then fire. Again, the crosswind undid my best efforts to secure some potentially decisive early hits. Trinidad, when her turn came, wasted no time in replying. For her target, she choose the two destroyers who were racing across her bows, ignoring, for now, Z 26, which was moving fast as if to pass her to port. Having failed to land early hits, I now needed a certain amount of luck, for the enemy to do no better. A lucky hit or more from an early salvo could scupper my plans at the outset. After a few tense seconds, the six rounds from the opening salvo from Trinidad's 'A' and 'B' turrets plunged down and crashed into the sea within about a hundred metres of Z 25. A miss! But it wasn't far off, for a first effort. It transpired that destroyer Oribi was astern of Trinidard, on the convoy's port side, with Fury, followed by Eclipse, to starboard. At first, these three took no action, save to stand towards the enemy, while the merchantment turned to starboard to get away. I would have to watch these fellows, but for now, I had my hands full with Trinidad. The enemy destroyers I woud continue to leave unengaged. ...to be continued!
-

WOFF Screenshot of the Month, July - 'Meet the Fokkers!'
33LIMA replied to 33LIMA's topic in WOFF UE/PE - General Discussion
Just right, Olham! After all, what have the Fokkers ever done for us, eh? Apart from shoot down Camels. And SE5s. And Bristols... -
The moment of truth arrives... I levelled off and settled onto my torpedo run. CFS3 is a bit more forgiving than it shoud be, in terms of how high and how fast you can be for a successful torpedo launch, but I still made some effort not to over-stretch this - I aimed for about 100 feet and under 200 knots. As for the others, whom I'd already ordered in to make their own attacks, I still hadn't heard the stock 'Beginning my attack!' radio messages, so it looked like I was definitely going in first. As if that wasn't bad enough, I was conscious even before the flak opened up that my B-26 was responding somewhat sluggishly to the controls, evidently from damage sustained in the earlier fighter attack. I fly with the 'simulation messages and warnings' text display turned off, so apart from seeing a hole in my fin, I had no reall idea how bad it was. I was seriously tempted to turn away and make another run once the others had started their attacks, but I was so close now that it seemed just as risky to turn away, as go on. So I bored on in - if I was about to get wiped out, as seemed more than likely, I might at least try to be sure of getting a hit with my single torpedo. After what seemed like ages but was only seconds, I hit the release. Nothing happened. I hit the key again. Same result. Realised I must be hitting the wrong key. Tried another. Away went the torpedo, splashing into the water much too close to the target. I pulled the stick hard left to roll my wingtip away from Scharnhorst's main mast, cursing the sluggish response. I waited for the double crash as wingtip met mast then plane met sea. Instead, we scraped past with what looked like inches to spare. I reversed my roll and tried to get away, pushing the throttles fully forward. Everything seemed to be moving painfully slowly, like one of those nightmares when you want to move but can't. Behind me, there was an explosion as my torpedo hit the German battlecruiser, well aft on her starboard quarter. I tried to shove the nose down, to get away at wave-top height. Instead, the extra power seemed to be forcing her up, increasing the angle of attack. Contrails streaming back from my wingtips indicated a power stall was near. Behind me, fires were burning on Scharnhorst... ...but all the while, flak from the battlecruiser and her escorts filled the air around me. If the stall didn't get me, it seemed the German gunners would. It didn't seem like it could get any worse, but now it did. Ahead and just left, I saw that an air fight was going on, obviously the one between the Focke Wulfs and our Mustang escort. I banked right to steer away from this, even as a trio flak bursts went off just to port, under my wing and beside my tail. Somehow, my empennage didn't fall off, and at last, the flak began to die away. They were still firing at me but now, the shells were consistently bursting astern. Looking back, I could see that the sky behind me was stained with its dark bursts. How I had got through all that, goodness only knew. Not only had I somehow survived, but my single torpedo hit seemed to have done Scharnhorst quite a bit of harm. Ships in CFS3 don't seem to take any evasive action but just plough on regardless, which doubtless helped, as did the liklihood that the sim doesn't seem to model realistically the distance a torpedo would have to travel in the water to arm. Mine had run for a hundred feet at most. Still, I wasn't complaining. The complaining started instead when I realised one of the Focke Wulfs - probably the beggar who had shot down my number two - was now coming in behind me. I made some sluggish changes of course to try to throw off his passes. This seemed to work, to the extent that instead of firing, he banked and rolled around behind me, as if to avoid an overshoot. I checked the map and made sure I was headed home. I could perhaps have tried to reach the dogfight and tried to wipe him off on that, but reckoned that could just as easily backfire and provide me with double trouble instead. I held the trottles wide open and nosed down towards the sea. Perhaps his aerobatics would cause him to fly into it. And I had four .50 Cal. machine guns to cover behind and above, ready to give him a hot reception. My tail and mid-upper gunners were already snapping out short bursts, which seemed to be deterring the 190 from making a sustained attack. Just as I was beginning to feel once again that I might get away with this, the best laid plans of mice, men and Marauders went t*ts up. The roar of my engines faded. Speed dropped off, and in a second or two, my engines fell silent, their props spinning to a complete halt. This, I now remembered, happens a lot in CFS3. If I recall right, it's fuel system damage that somehow causes two engines to fail simultaneously, in the sim's twin-engined aircraft. I suspect the chance of this happening in real life is as close to nil as makes little difference, but there it is. I had no chance to find out how well the CFS3 B-26 flew on one engine. Maybe just as well... Down we went. Not that there was much 'down' left, maybe a couple of hundred feet. At this point, the Focke Wulf overshot. My gunners seemed to be too surprised - or perhaps it was, too depressed - to do anything about it. You can't feather props in CFS3, though this had happened automatically. I don't know if their remaining drag - they weren't windmilling - made any difference. But my stubby-winged Marauder seemed to make a very poor glider. She just seemed to want to head belly-first for the water; my instinctive but misguided efforts to raise her nose probably just made it worse. I should have pushed the stick forward to reduce the angle of attack, built up speed, then flattened out at the last moment, to ditch. Instead, we belly-flopped, hard, into the water. There was a big spash, and that was it. That was indeed it. Mission over. Campaign over. Pilot (and crew) killed on their first operation. Scharnhorst didn't sink, unsurprisingly, and if there were any attacks made by the rest of the squadron, I saw no successes recorded for them. Serves me right for attacking on my own, instead of remembering to make my own attack only after having set up concentric attacks by the rest of the squadron, and then waiting for these to begin. I suppose I was distracted by that unexpected fighter attack at the start. In the end, I'm miffed that I fell victim to the dreaded CFS3 twin-engine double whammy, but realise that I was lucky to get that far! If I recall right, ship attacks are one type of mission you cannot set up, to get some practice, in the usual CFS3 single mission generator. Whis is a pity, because they can be (a) fun (b) challenging and © are a common assignment at the start of the dynamic campaign. There are some user-made single missions which feature such targets, though perhaps not in the Marauder. Which is a pity. But with Ankor's DX9 mod making such a big difference to the appearance of the sim, on top of those delivered by the ETO Expansion, I'm definitely going to be flying some more CFS3 soon!
- 9 replies
-
- 2
-

-
- b-26
- eto expansion
- (and 2 more)
-
WOFF Screenshot of the Month, July - 'Meet the Fokkers!'
33LIMA replied to 33LIMA's topic in WOFF UE/PE - General Discussion
Meanwhile, back at the Fokkers... Karjus, Jasta 75... ...and Stark, Jasta 34b (author of 'Wings of War'): Note the Albatros company logo on the rudders of both - not a mistake, but signifying that these machines were made by the Ostdeutsche Albatros Werke. Enough to get Olham flying one of these birds, maybe? :) -
Back on target... I turned on the Tactical Display, a.k.a. TAC, to orient myself, and immediately became disoriented. The blue line to the twelve o'clock position indicated that my next waypoint - which should have been the target itself - lay almost directly ahead, with the range read-out indicating seven miles. But where was the little purple triangle which I remembered should highlight the direction of my mission target? Instead, I could see a group of ships to my right rear - enemies, as they showed as redon the TAC. It seemed most unlikely there would be two groups of enemy ships in this vicinity. Hmmm...ok then, a shipping target in the hand is worth two shipping targets in the bush, I quickly decided. I would attack the one I could see, even though I wasn't sure it was the one we had been sent out here to clobber. I pulled up and turned right. Now then, how was it that one goes about organising a squadron attack in CFS3? Let me see, now... Ah yes, I remember. I selected a ship target. Then issued the 'Attack!' order. This sent one - or was it a pair? - of the others in against the target. A radio acknowledgement confirmed the command was being complied with. Select another target, then rinse and repeat, until all the aircraft had been allocated a target. It was all coming back to me. But this is where things started to unravel. The first indication of trouble came suddenly. There was the crash of an explosion and the B-26 to my left rear disintegrated into a shower of falling aircraft parts. At the same time, he reported on the radio that he was taking heavy damage, which was something of an understatement. Our assailant was one of the FW 190s, of course. Well, nothing else for it - we were committed to the attack. I carried on, swinging down and around in a wide sweep to the right, calculated to being me onto the starboard bows of the oncoming enemy ships. As the range wound down, I could see that one of the enemies was a lot bigger than the others - he looked to me like a Hipper class heavy cruiser. OK, you'll do, I told myself. I continued my approach. As I got closer still, the flak started. Lines of red tracers snaked up towards me and shells started bursting nearby, on the sea and in the air - the ETO Expansion flak effects are positively scary, compared to stock CFS3! I could see by now that my target was not merely a heavy cruiser, but the battlecruiser Scharnhorst. Sudddenly but much too late, I remembered that in previous CFS3 gameplay, I had learned to be a bit more clever about my atttacks - not issuing attack orders in quick succession as I had just done, but doing so at intervals, as my formation circled the target. Finally, having allowed enough time for the others to start making their attacks from different points of the compass - and they could be quite slow to do this - then I would make my own run-in. Instead, here I was, attacking a bloody great battlecruiser with destroyer escort, all on my own. All of a sudden, I felt a lot less clever. ...to be continued!
- 9 replies
-
- 1
-
-
- b-26
- eto expansion
- (and 2 more)
-
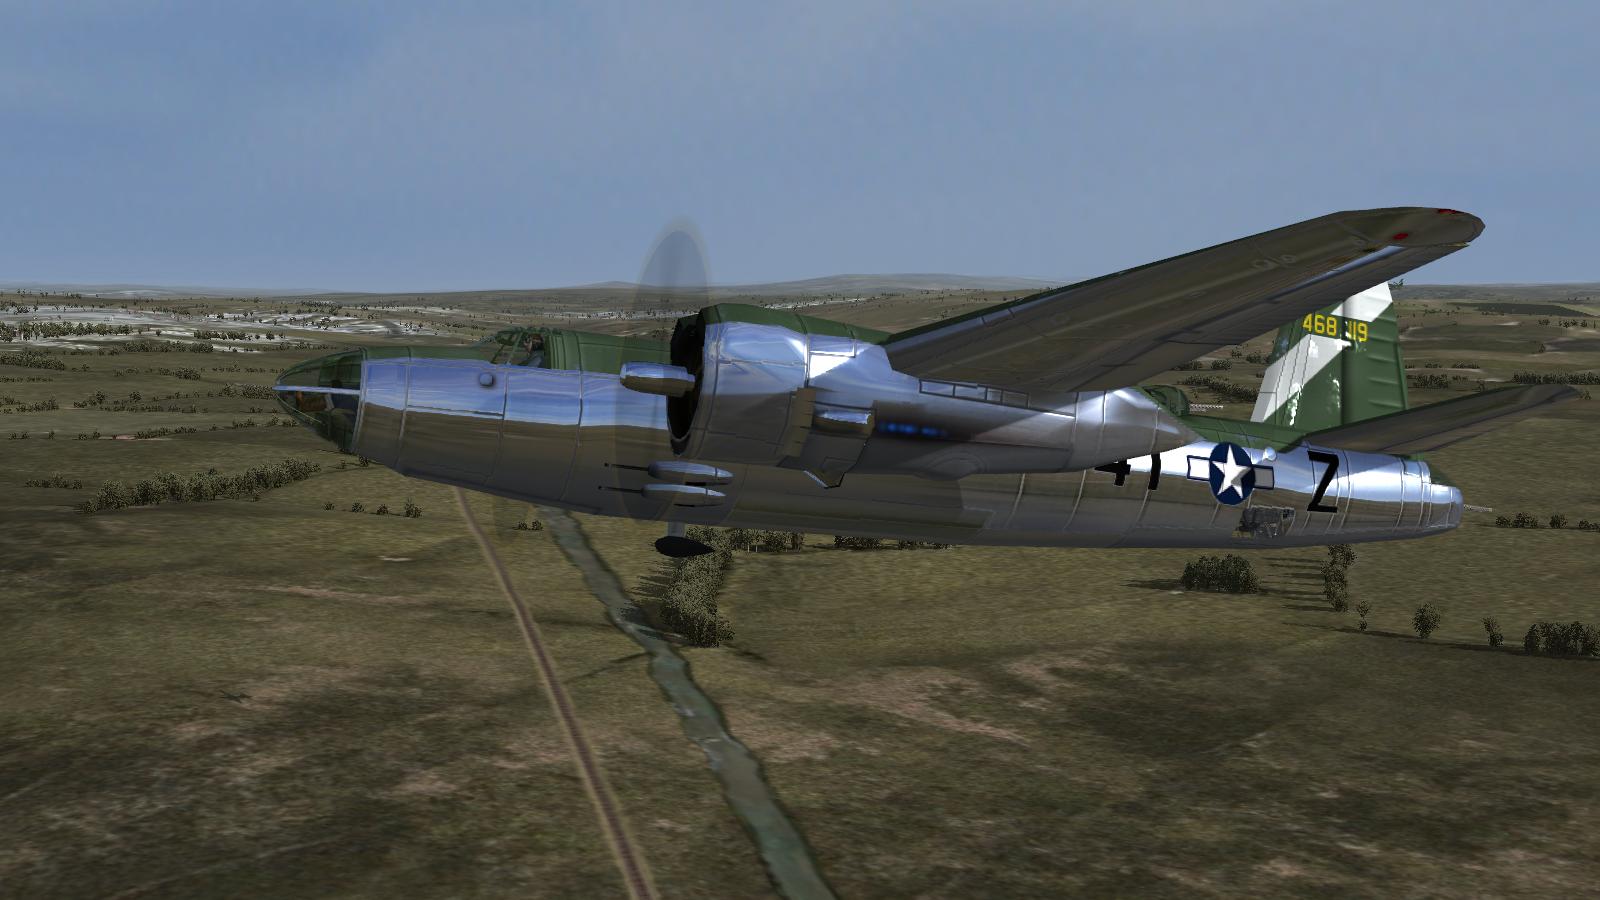
A rude interruption! As we neared the target area, I checked my position on the in-flight 'mini-map', as you can see below. This map has to be one of the worst in any flight sim ever, low resolution and particularly indecipherable if zoomed in, with airfields and your target being the only things marked on it with any clarity. You can also see the mission briefing, on the right. These being generated, not scripted, campaign missions, this briefing is pretty canned. It also hasn't caught up with the fact we have changed planes, as it still shows us as allocated B25H Mitchells. The land visible at the top of the map is Land's End in Cornwall; to the right edge of the map is the tip of Brittany. You can see why the principal occupation of squadrons based at the real RAF St Eval was patrolling to catch U-boats, as they transitted to and fom their bases around St Nazaire and Brest. Nearing the target area, it was time to get down from the 14,000 feet default transit altitude. Now then, how does it go, for a descent? Power, attitude, trim. I chopped the throttle and let the speed decay, then pushed the nose down. Formation-keeping in CFS3 is not brilliant and it invariably takes a while before the boys recognise your move and follow; I tend to tap the 'R' key to order 'rejoin!' but am not sure if it actually makes a difference. I didn't bother with the trim, I must confess. CFS3's virtual cockpits were notably poor for the period, well behind those in IL-2. The Marauder being a stock CFS3 model is typical, but though not visible below, at least it now benefits from the dynamic shadows that come with Ankor's DX9 mod, which as Stary has observed, really transforms the visuals of CFS3 (stock or modded) and is now built-in to Wings over Flanders Fields (working fine with predecessor Over Flanders Fields, too). The squadron had by now begun to descend with me and was closing formation again - 'closing' being a relative term, CFS3's bomber formations being too wide - IIRC they are liable to break up more often, if a modder tries to tighten them up. By now, the sun was just clearing the watery horizon to the east. Suddenly and without any warning, this pretty picture was rudely interrupted. Tracer fire whizzed down past my bomber, some of it hitting me somewhere astern. At about the same time, my mid-upper and tail gunners started shooting back. I didn't really need to look behind, to confirm that we were under air attack - from FW 190s, by the look of them. 'Where's our escort?', flashed through my head as I jinked to throw off the enemy's aim. 'On the job' was the answer. A Focke-Wulf overshot my B-26 and turned hard left, pursued by a silver P-51. 'Go get 'em!' I thought, exultantly. Much relieved, I settled back into my dive towards the target area, but opened out the throttles, easing off the angle of descent a little. The P-51s and FWs seemed now to be mixing it up behind us, so it was time to get clear, find those ships and hit them hard. It wasn't going to be quite so simple, however. To be continued!
- 9 replies
-
- 1
-
-
- b-26
- eto expansion
- (and 2 more)
-

From the album Combat Sims
-
From the album Combat Sims
-
From the album Combat Sims
-
From the album Combat Sims
-
From the album Combat Sims
-
From the album Combat Sims
-

From the album Combat Sims
-
From the album Combat Sims
-
From the album Combat Sims
-
From the album Combat Sims
-

From the album Combat Sims
-
From the album Combat Sims
-
From the album Combat Sims
-
From the album Combat Sims
-
From the album Combat Sims
-

From the album Combat Sims