

33LIMA
-
Posts
3,749 -
Joined
-
Last visited
-
Days Won
7
Content Type
Profiles
Forums
Gallery
Downloads
Store
Everything posted by 33LIMA
-
From the album: Combat Sims
-

From the album: Combat Sims
-
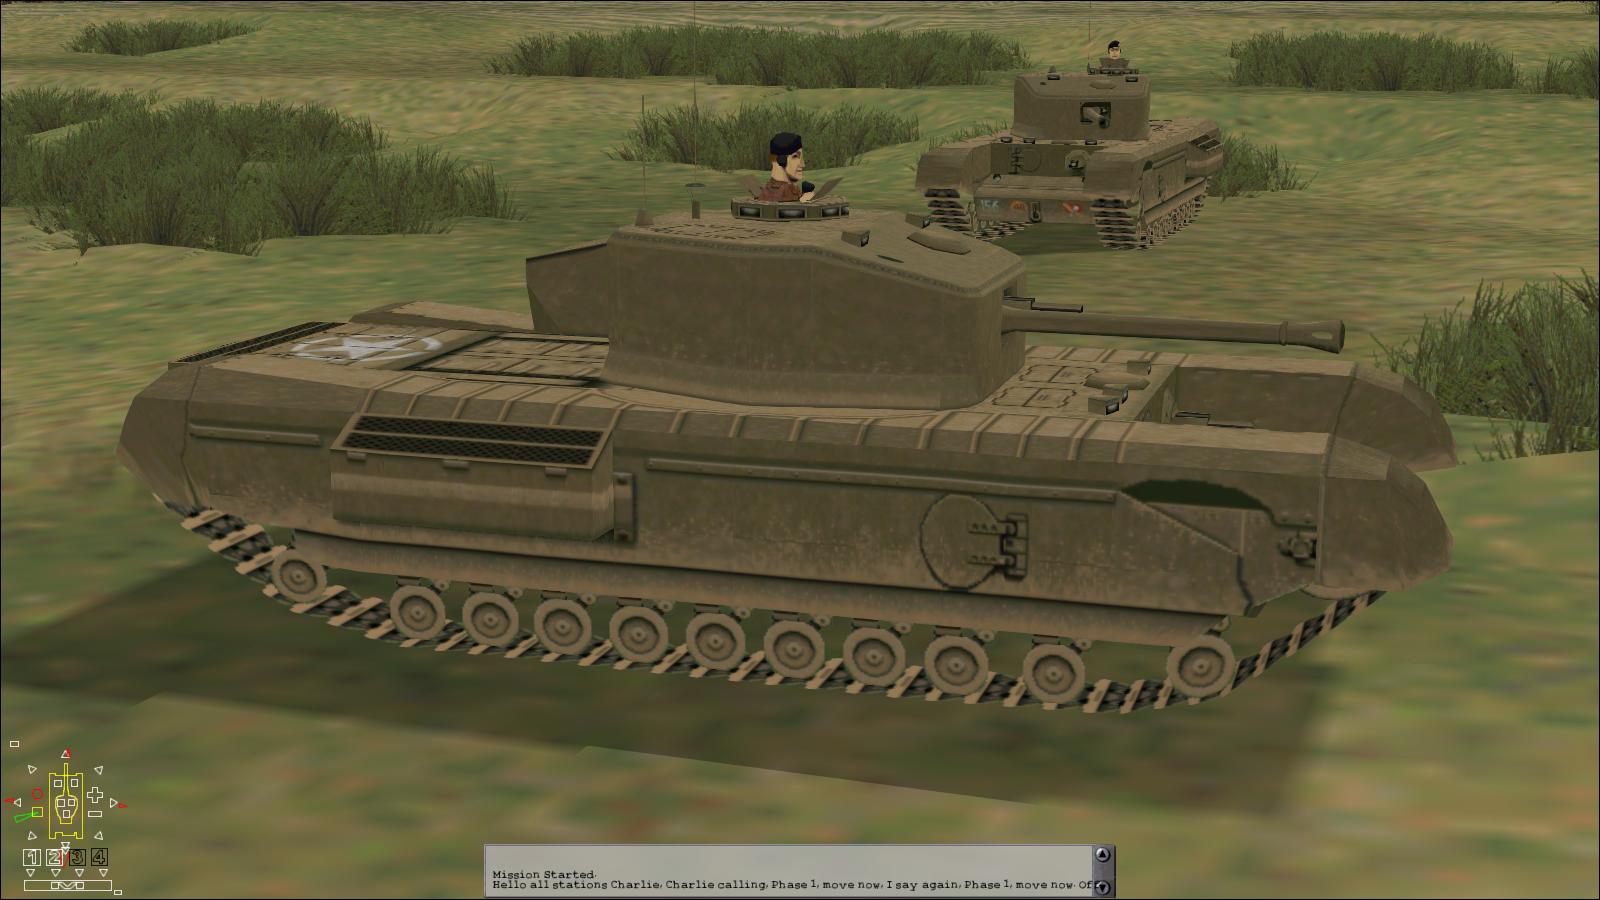
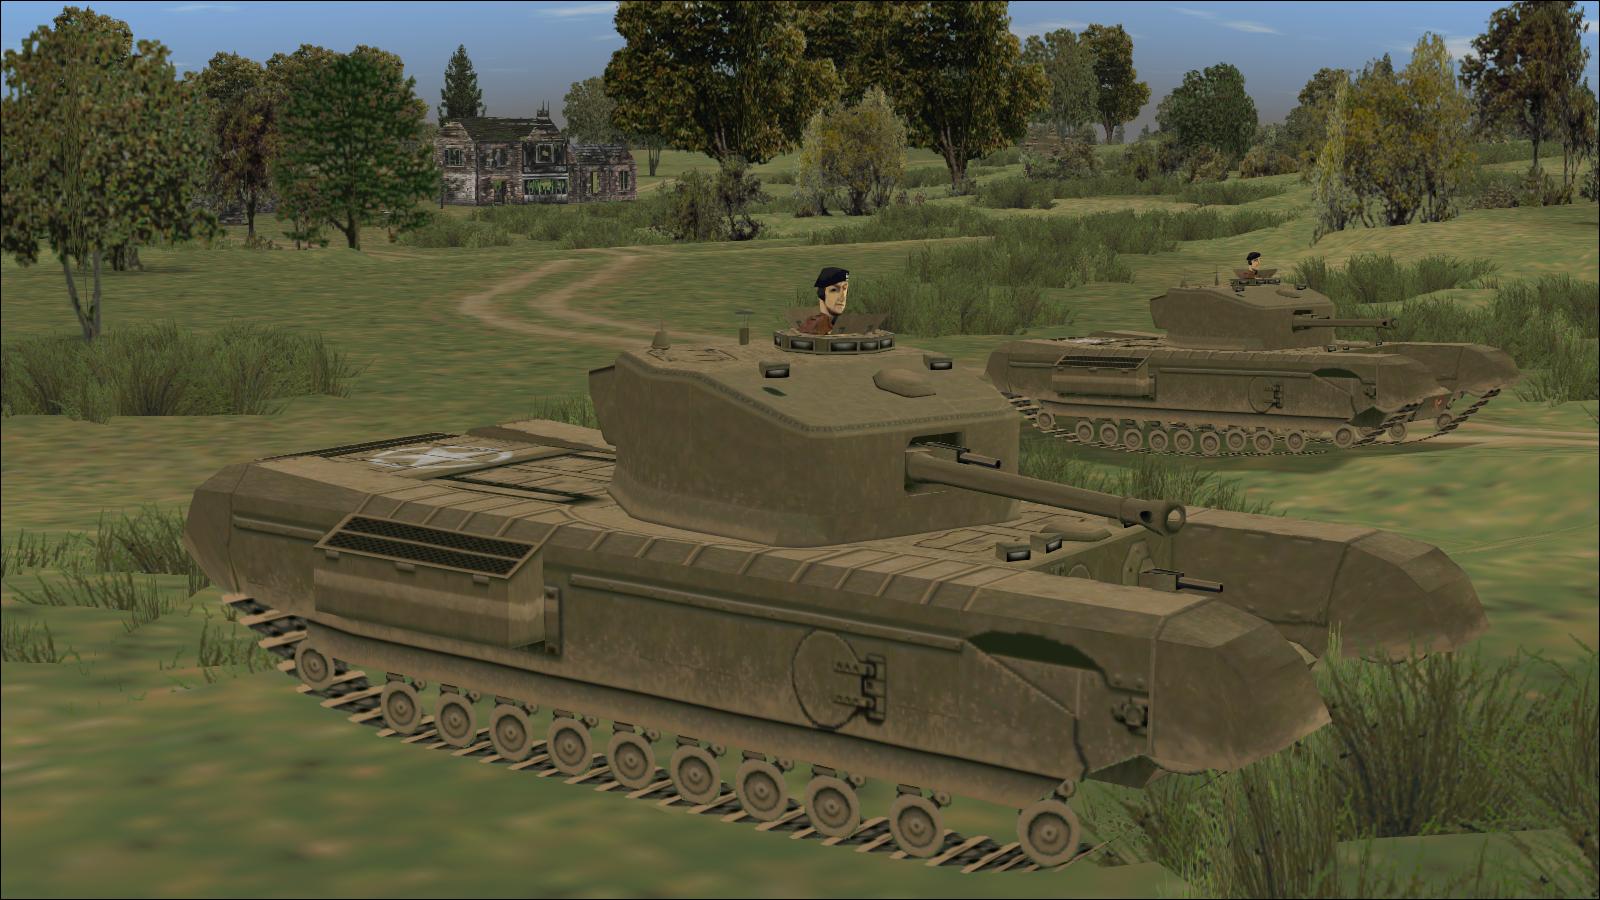
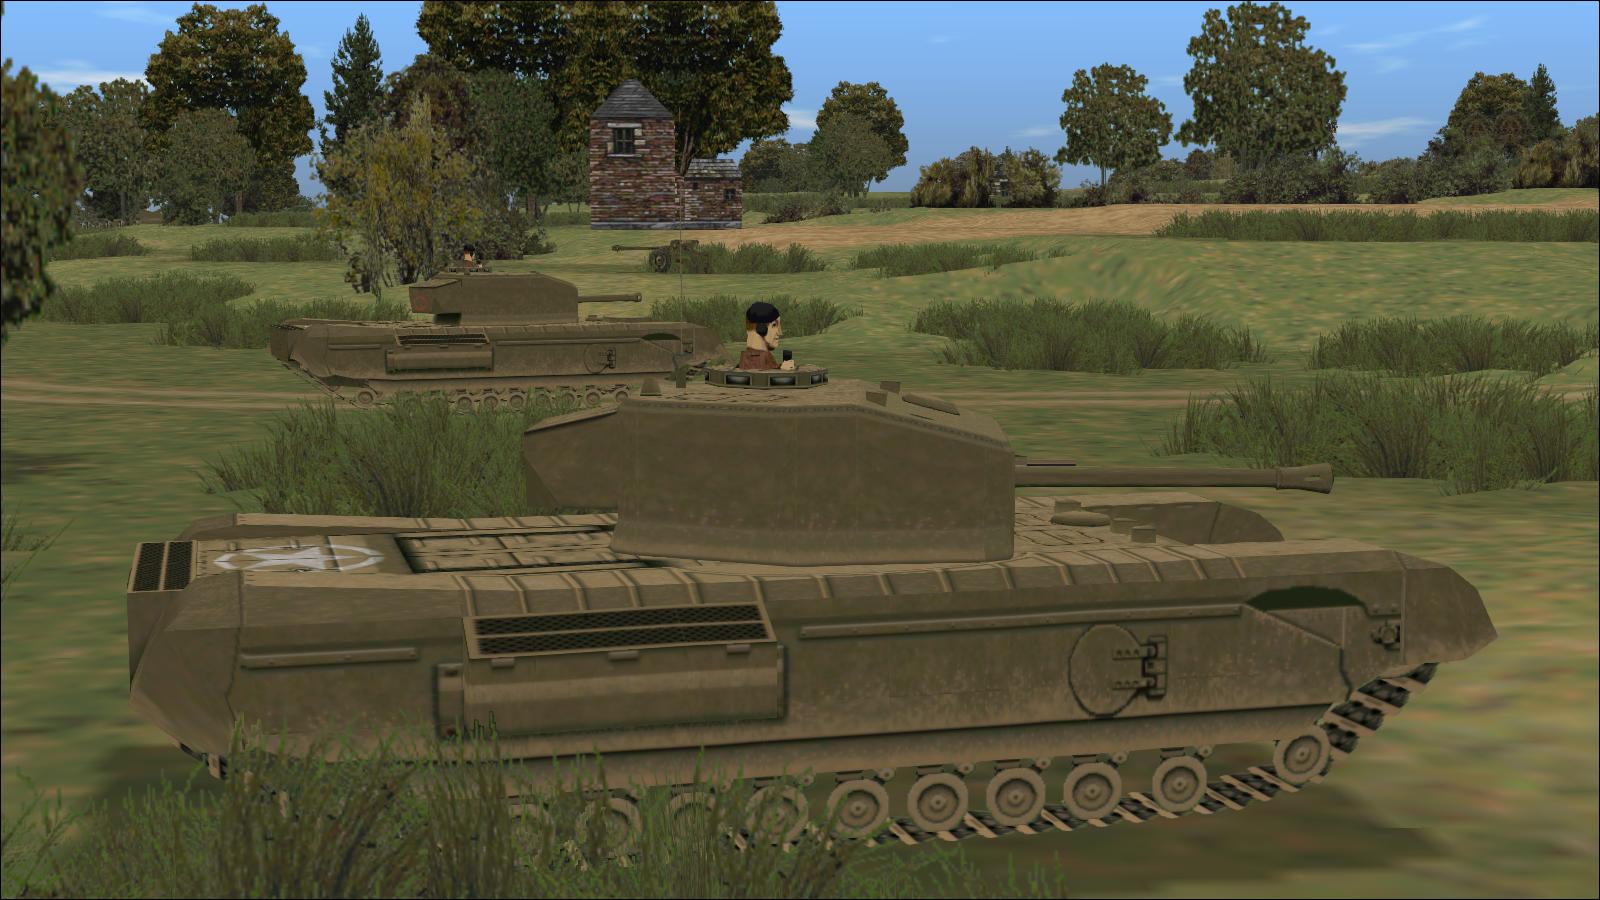
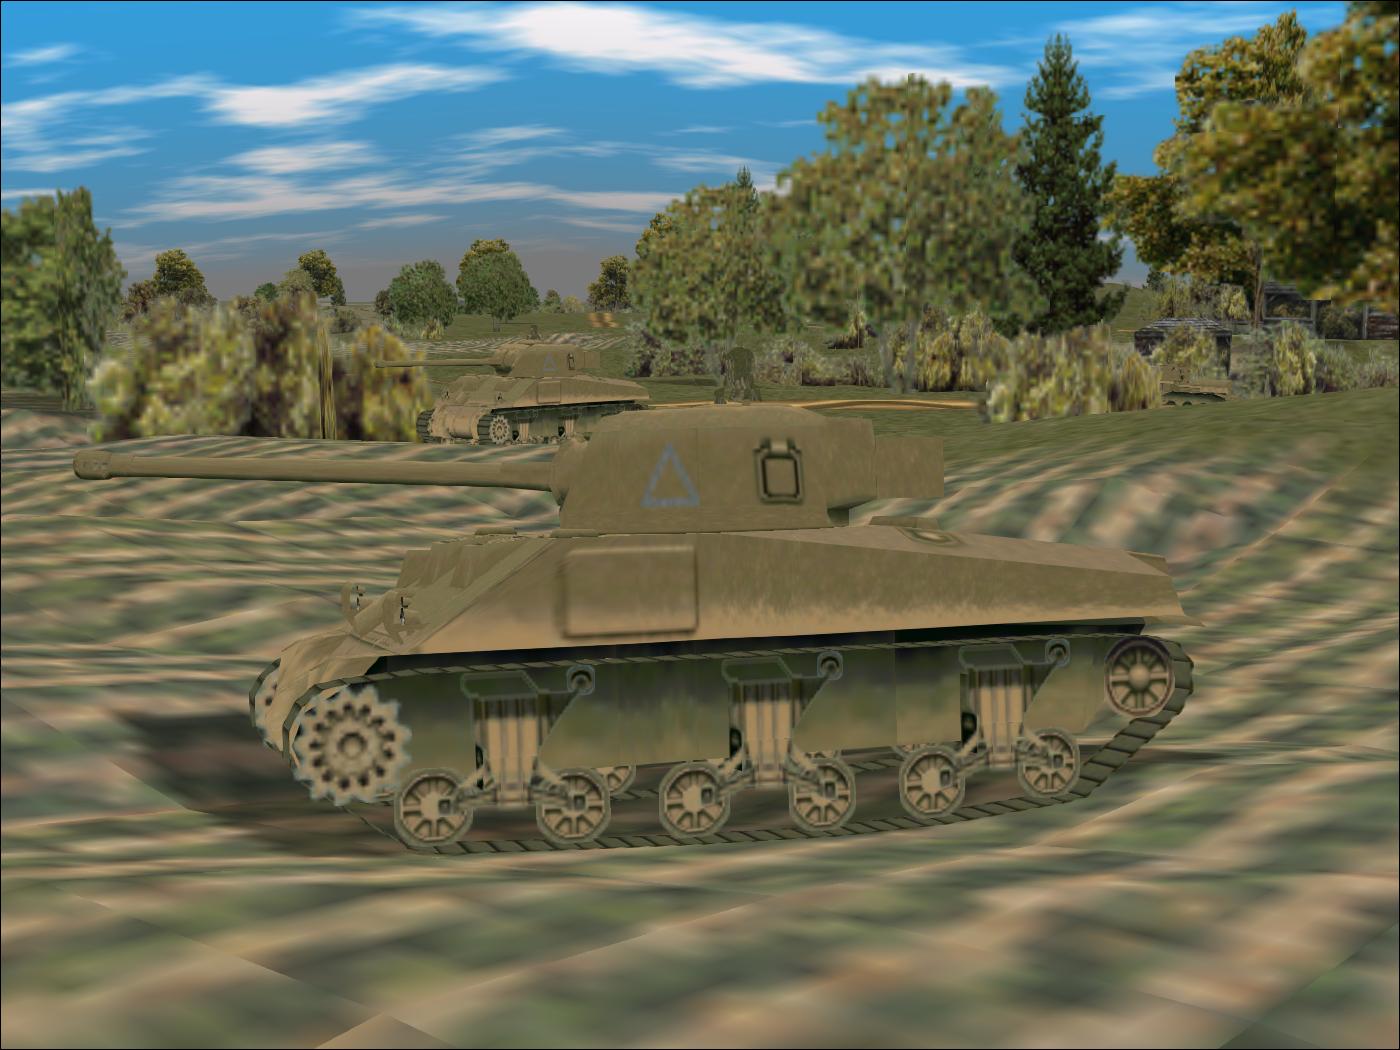
Panzer Elite - Brit44-x beta - South of Hill 112 - Churchill VII, 3 Troop leader's tank
33LIMA posted a gallery image in Member's Albums

From the album: Combat Sims
-
From the album: Combat Sims
-
From the album: Combat Sims
-
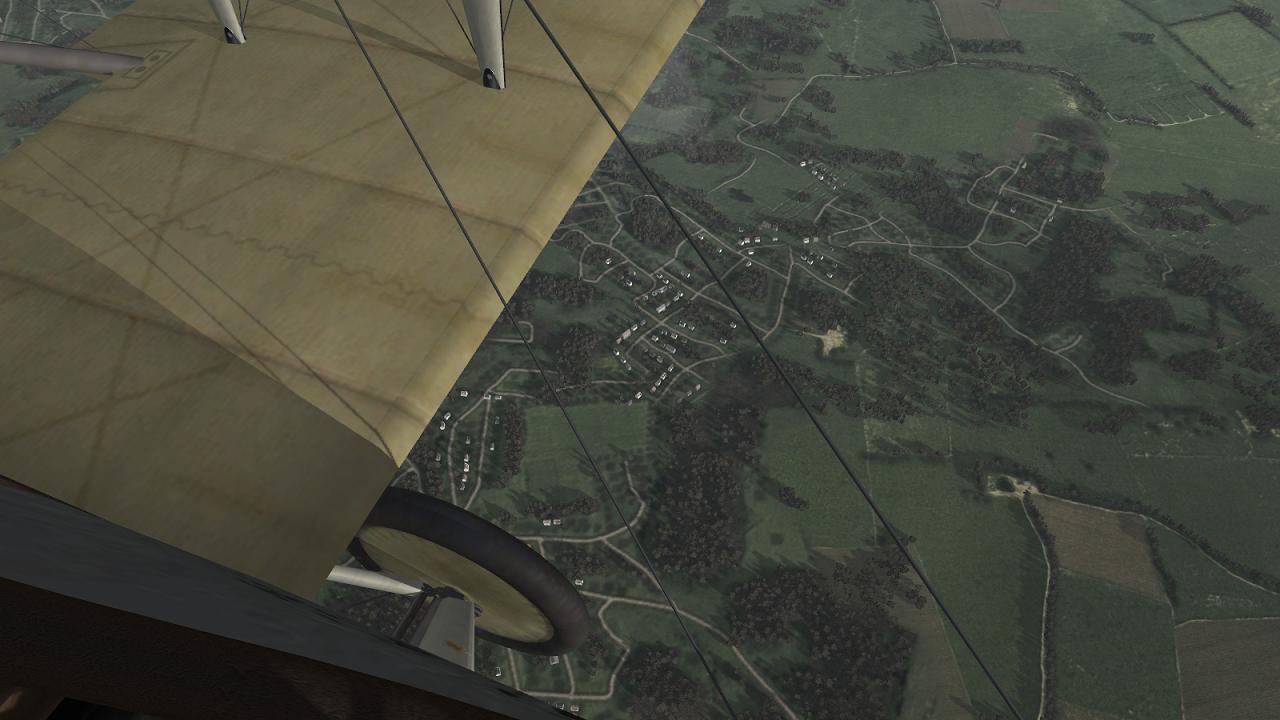
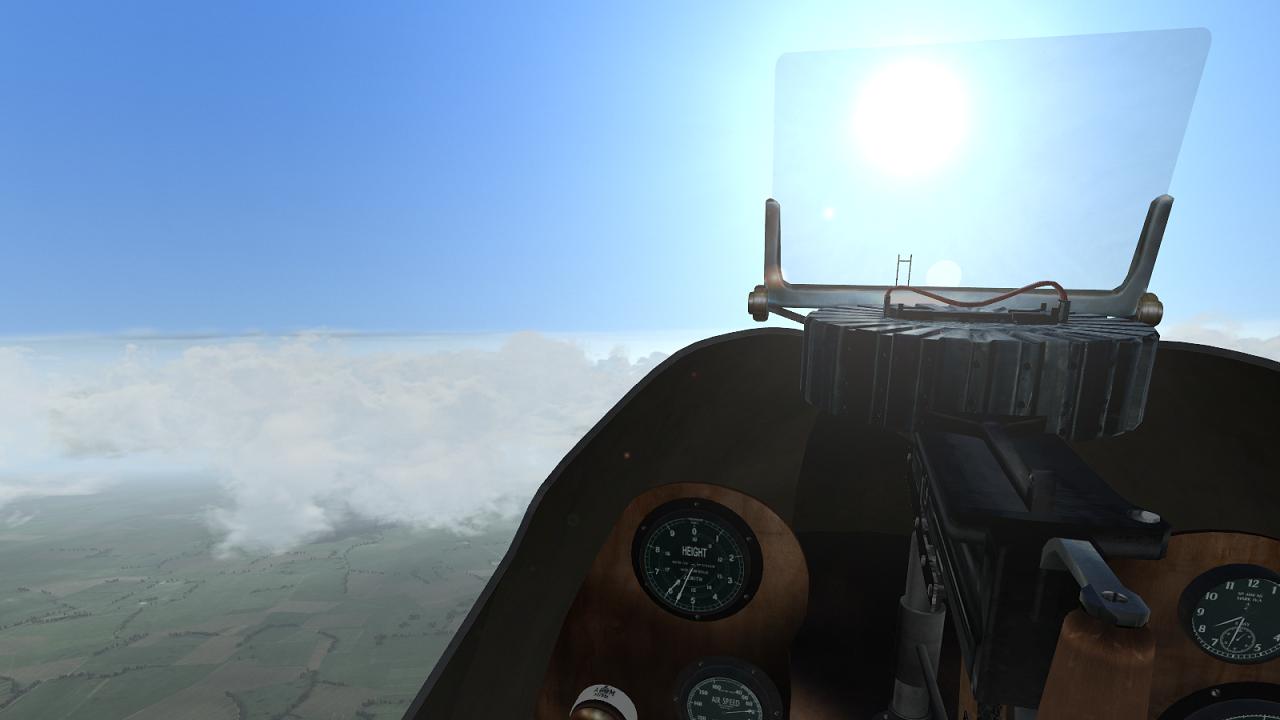
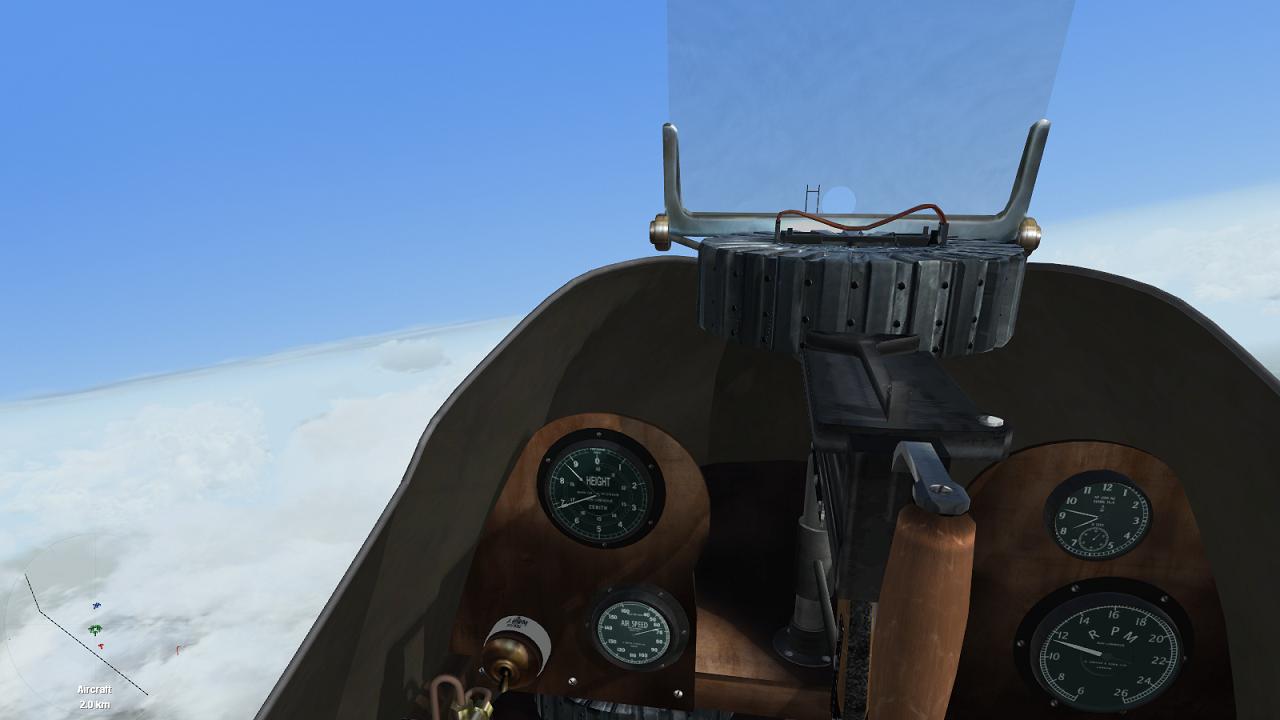
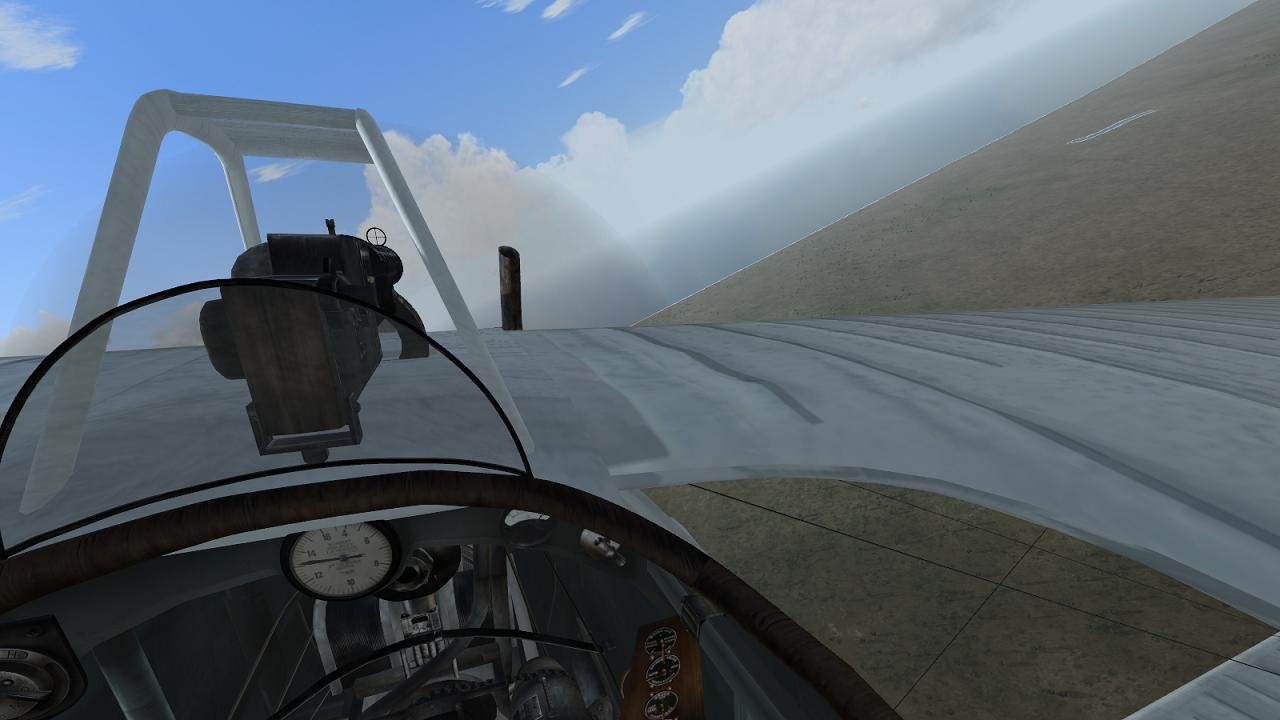
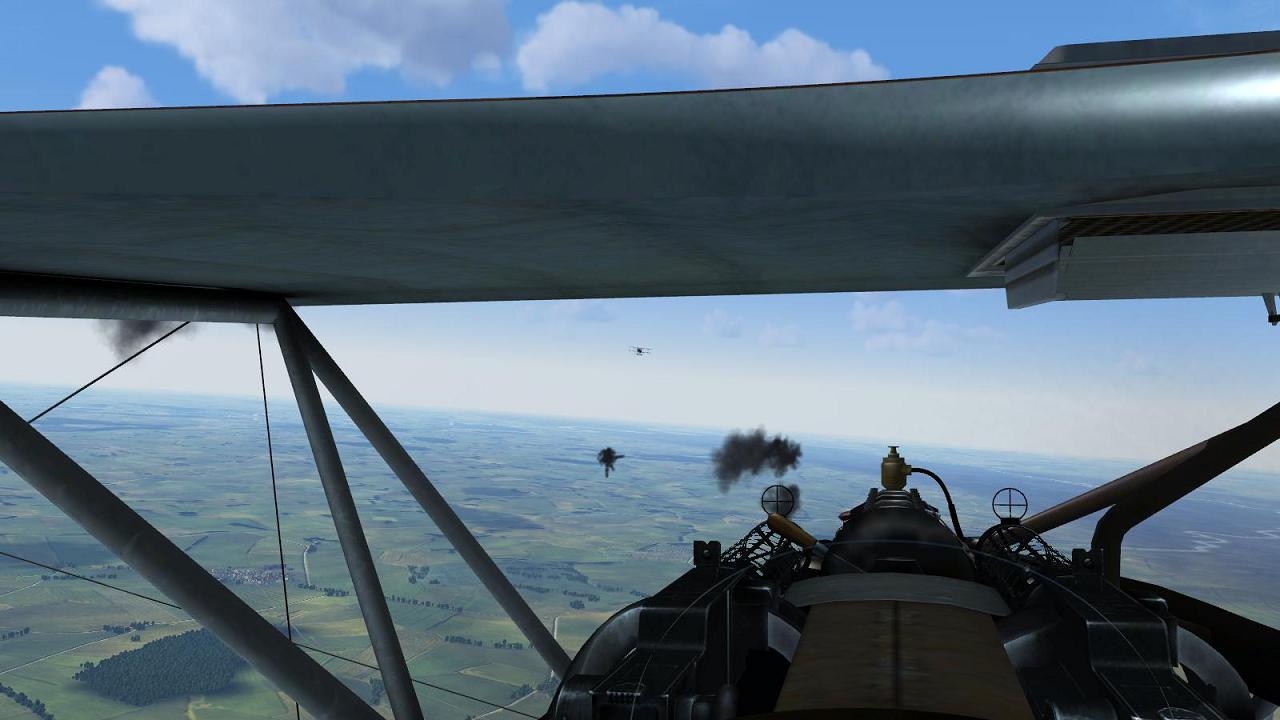
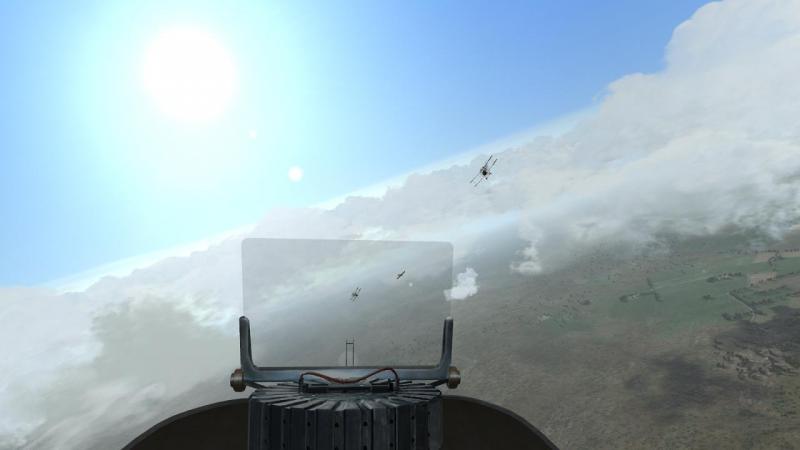
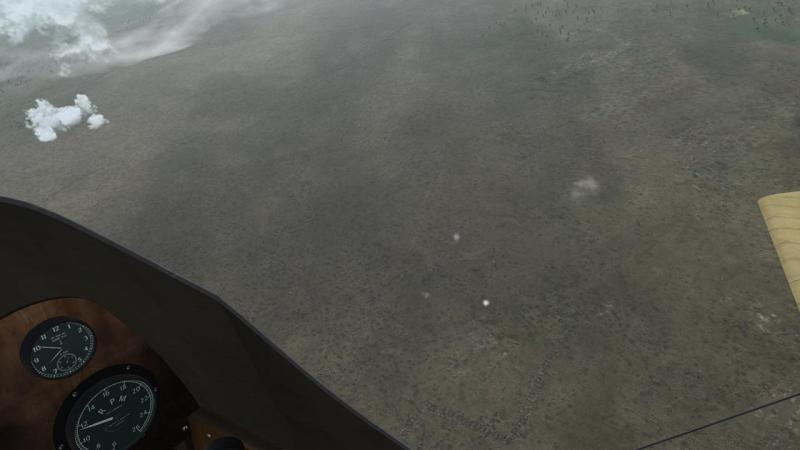
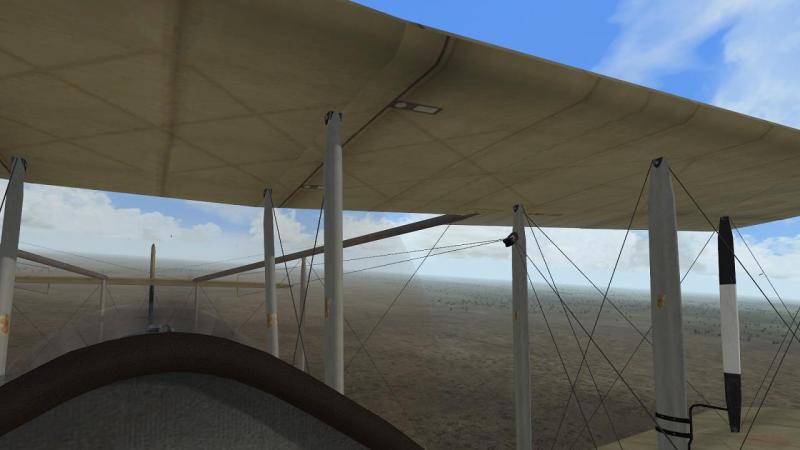
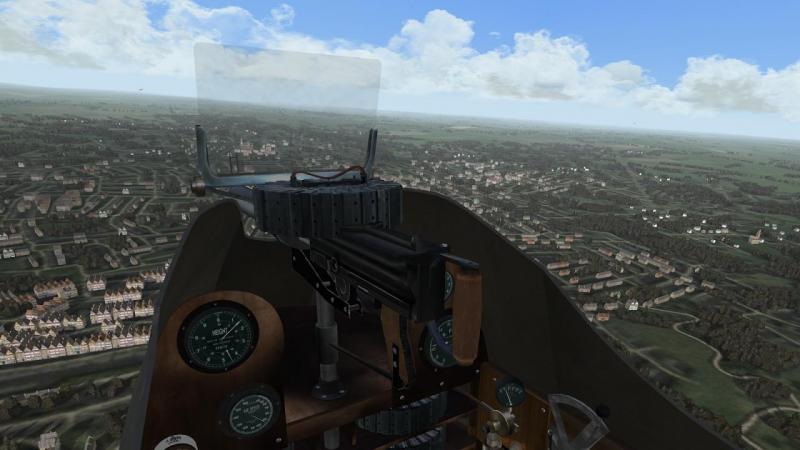
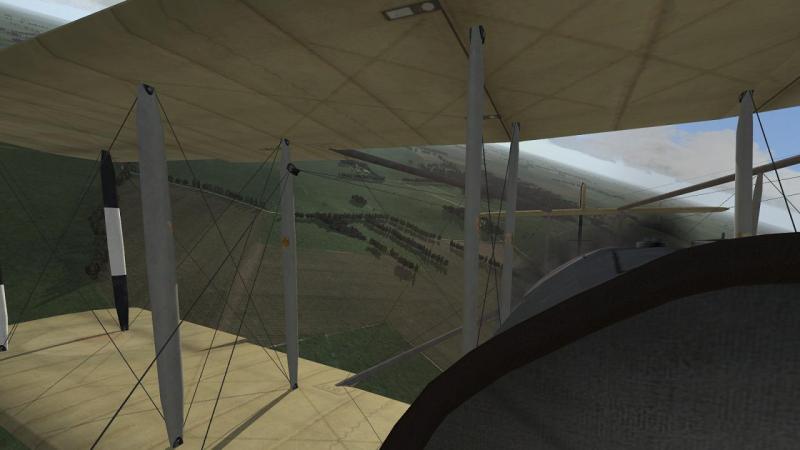
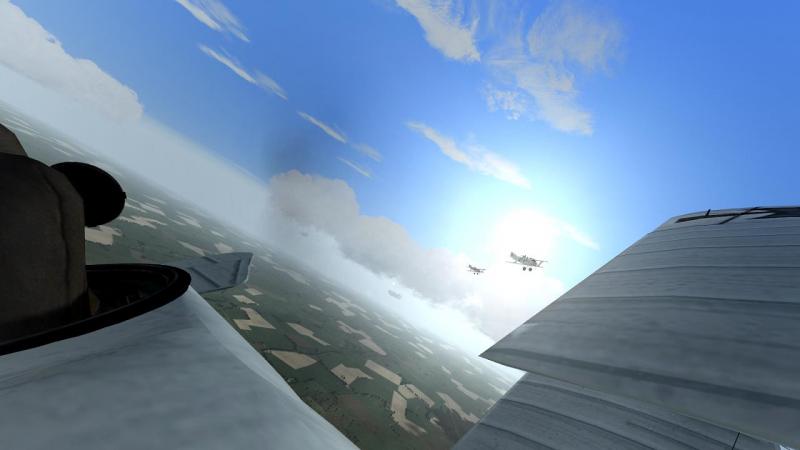
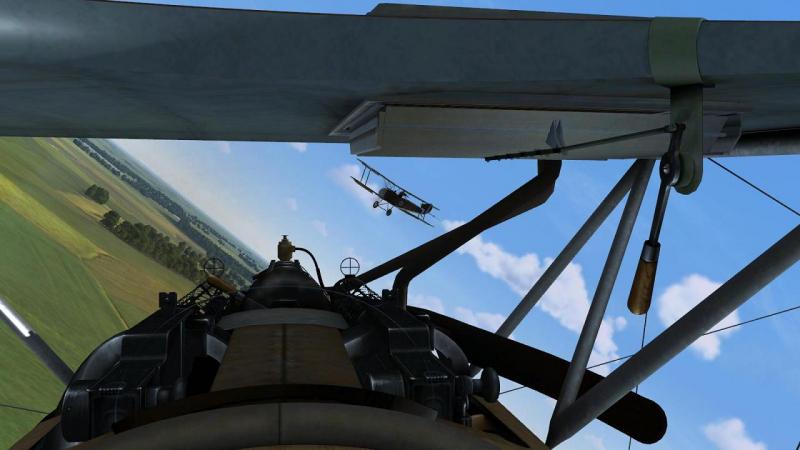
Hey, that's good news! As mentioned above, I'm now using the new version with G-forces 'head bobbing' and mouselook and it's a really big improvement, for the 'in cockpit' experience. For example, without head tracking or manually moving your viewpoint with keyboard commands, I don't think I could have got this 'down, over the side of the cockpit' view, now readily available just with mouselook: Thing is I think you install that new file in the root folder as before not the 'WoFFScenery/shaders' folder, except for WoFF Ultimate Edition, as the latter seems to have changed this.

-
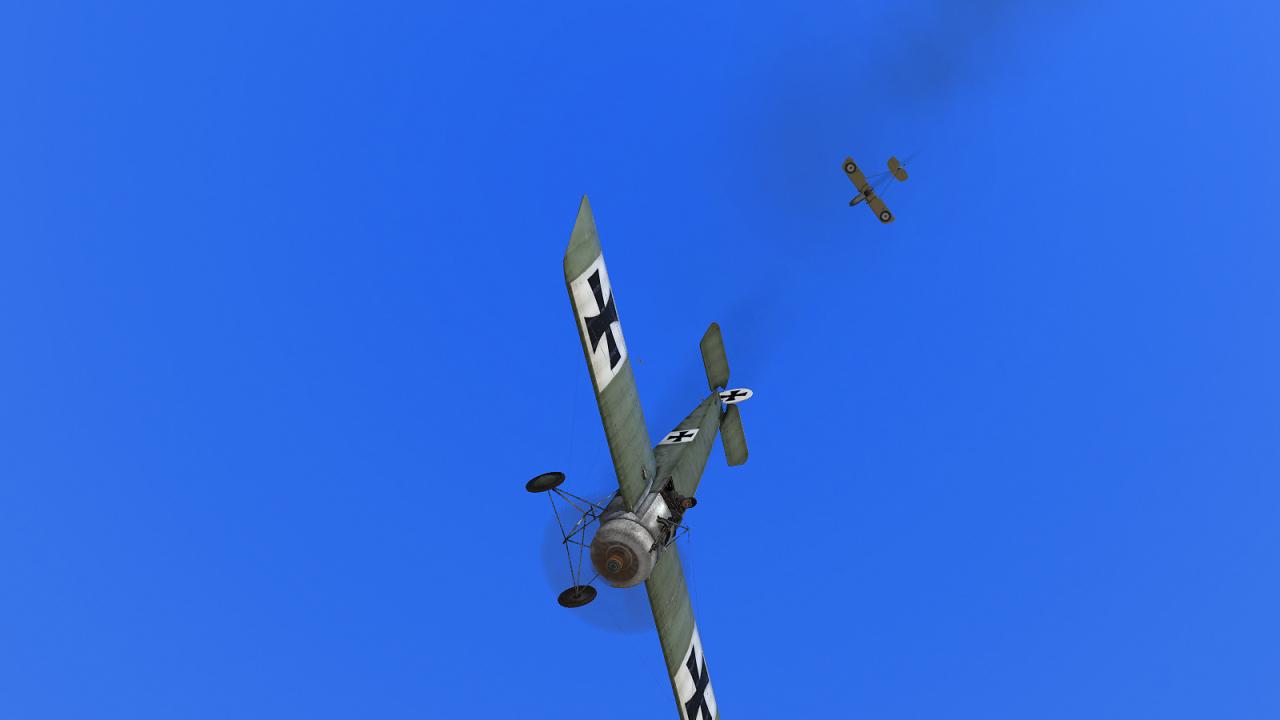
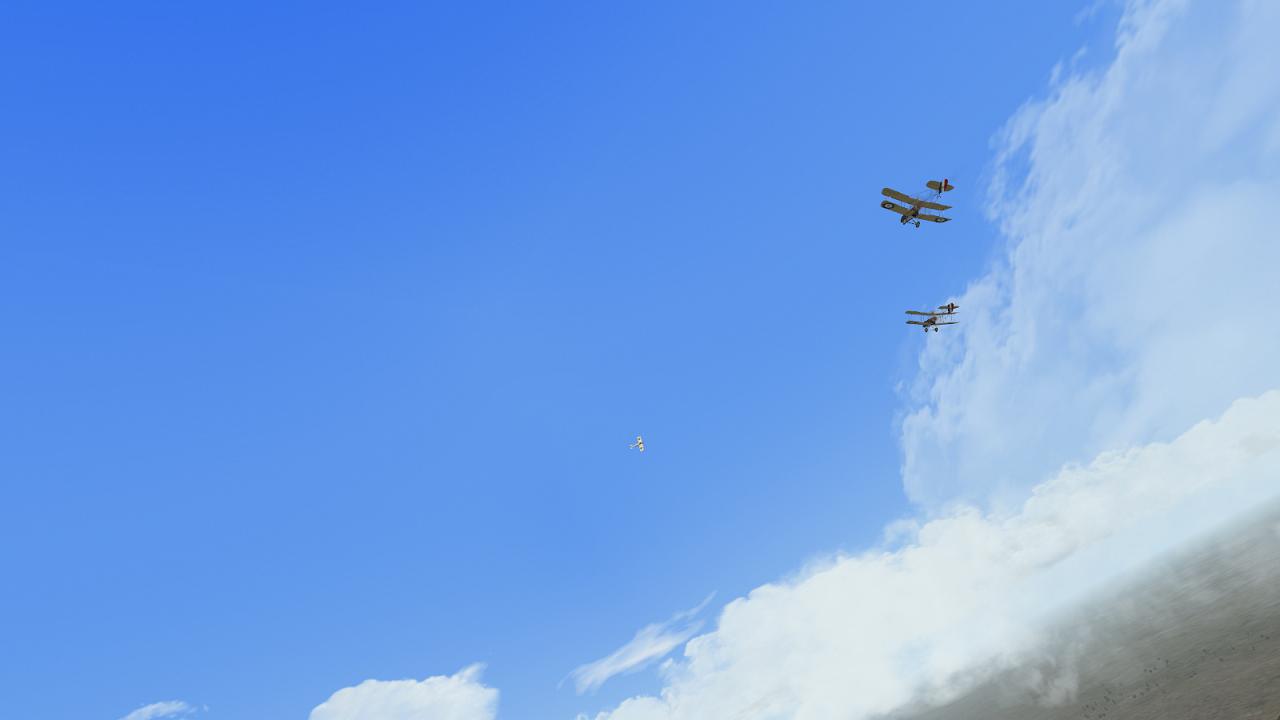
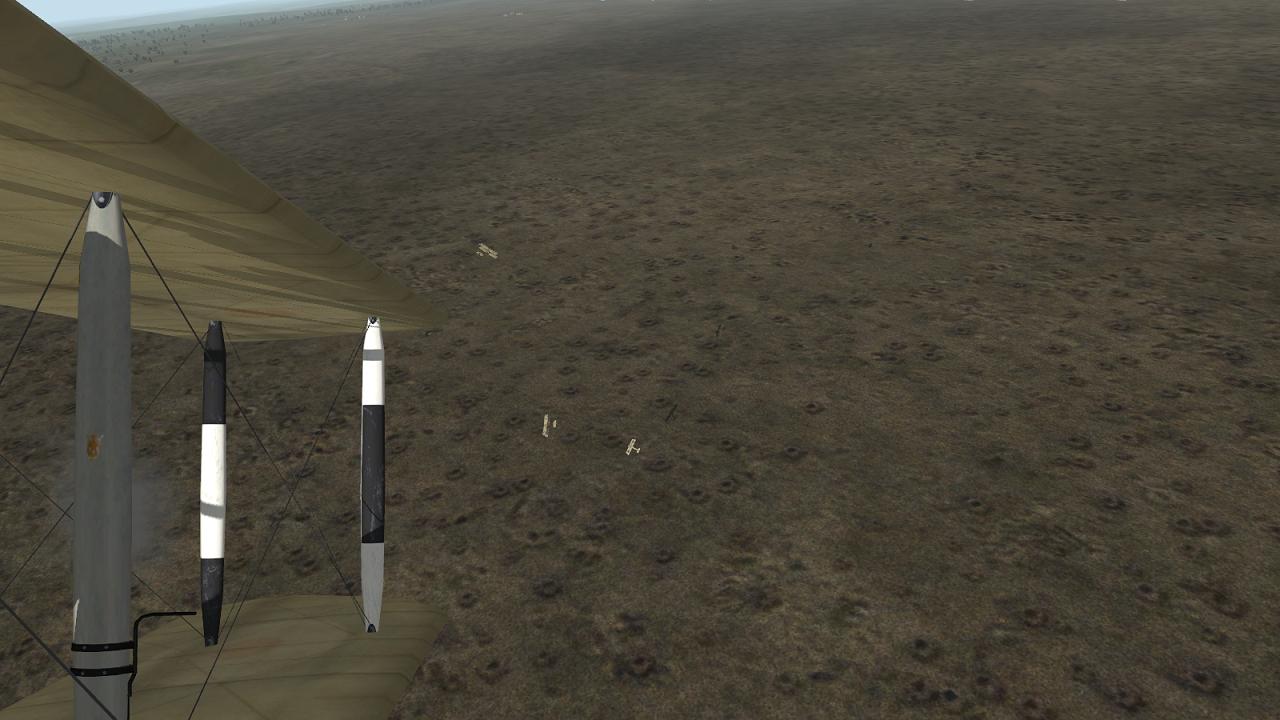
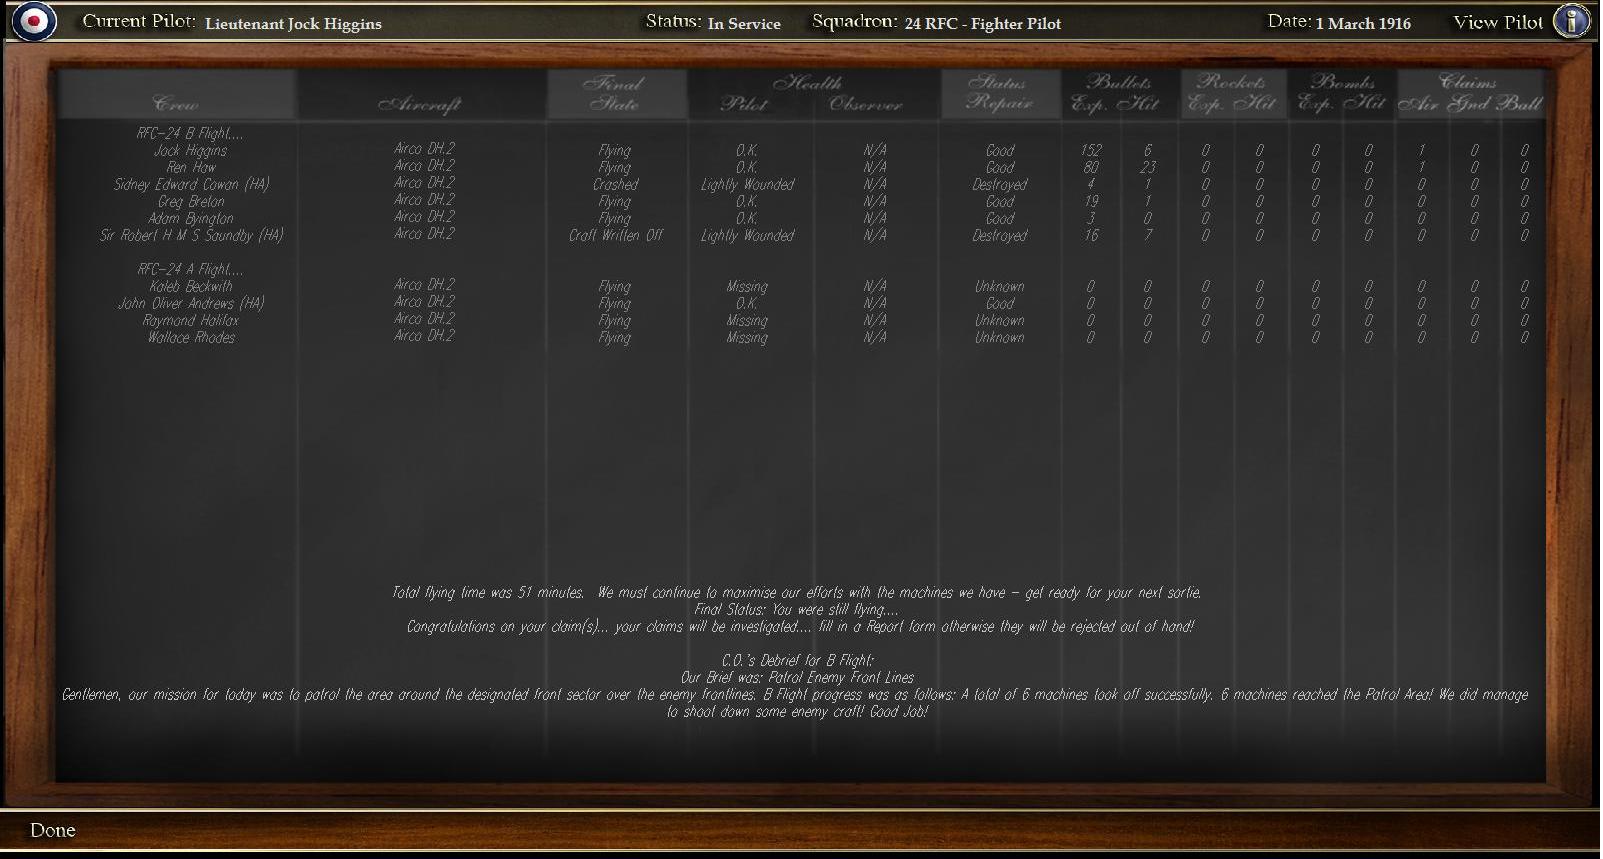
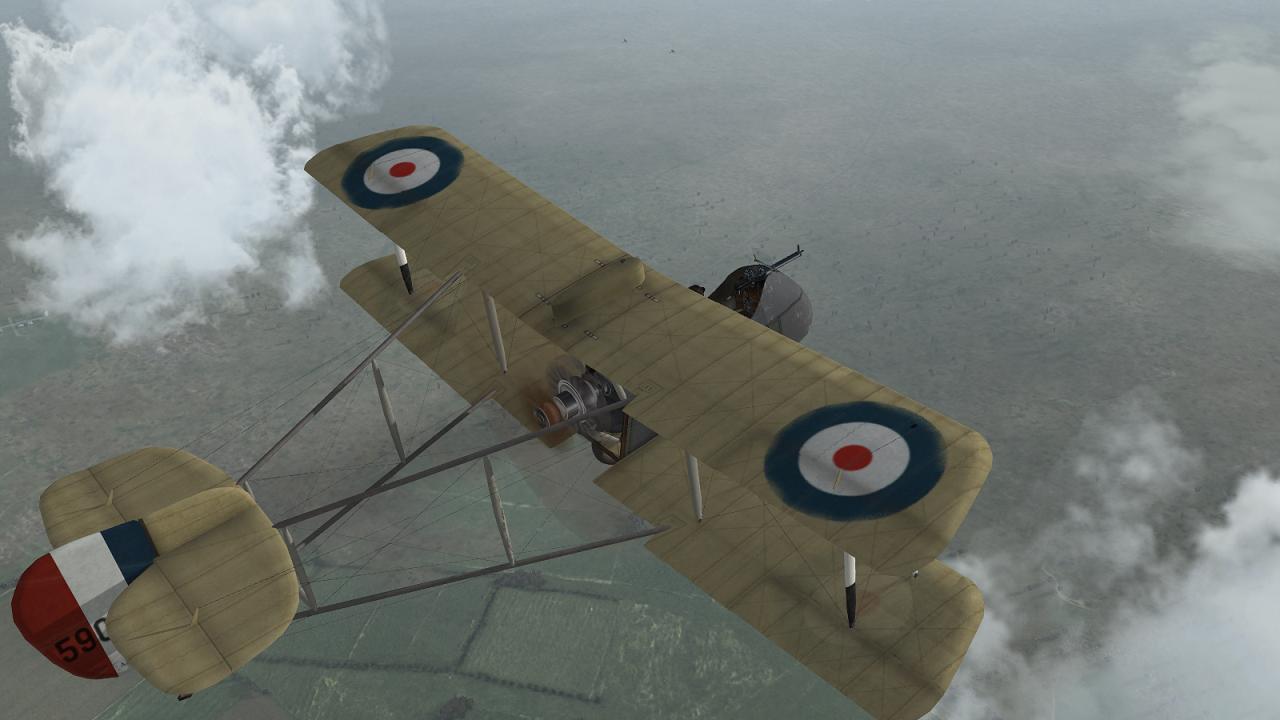
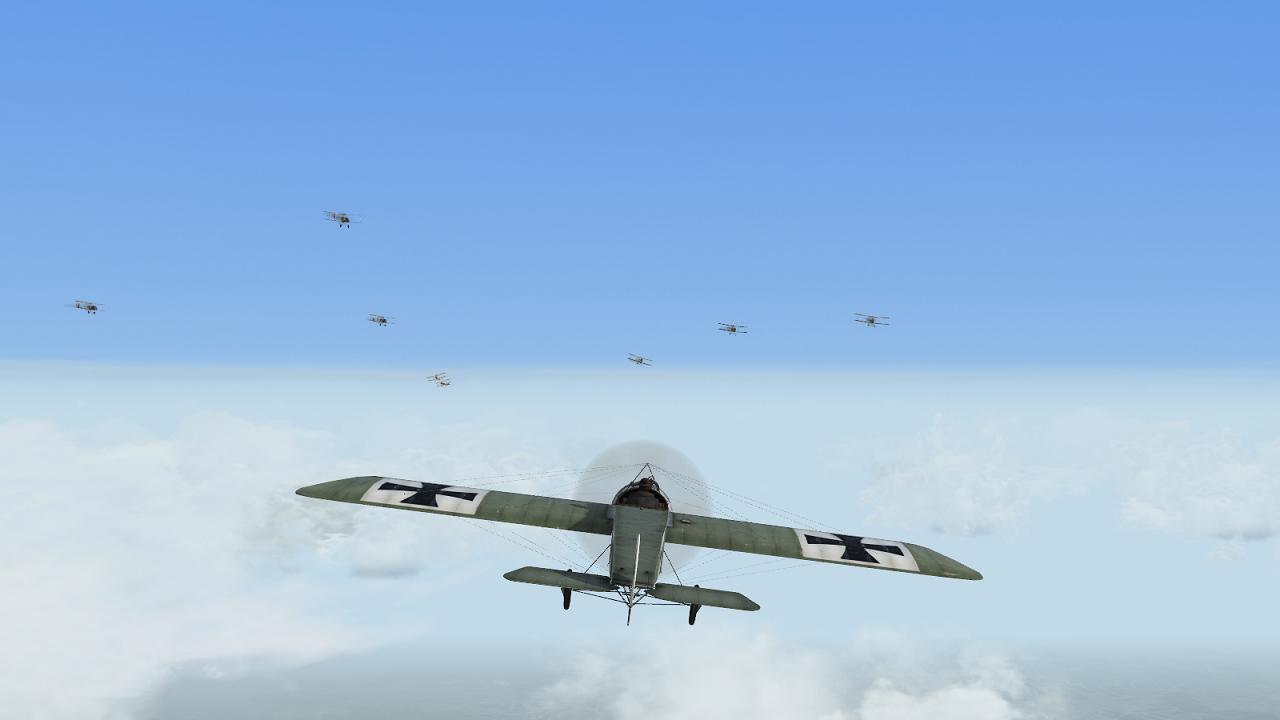
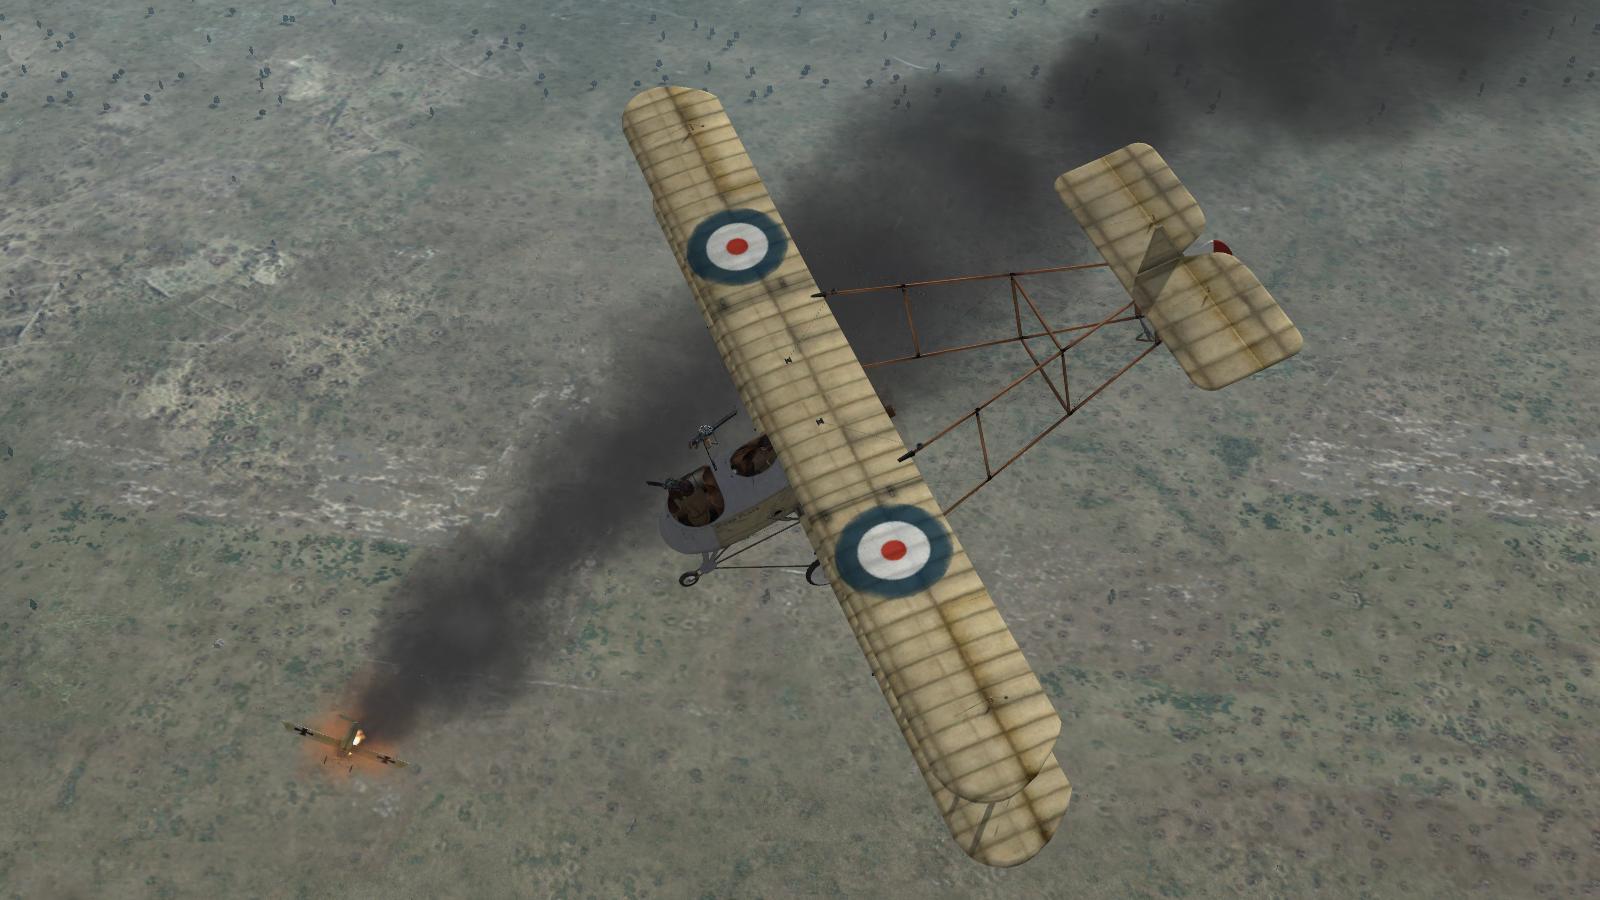
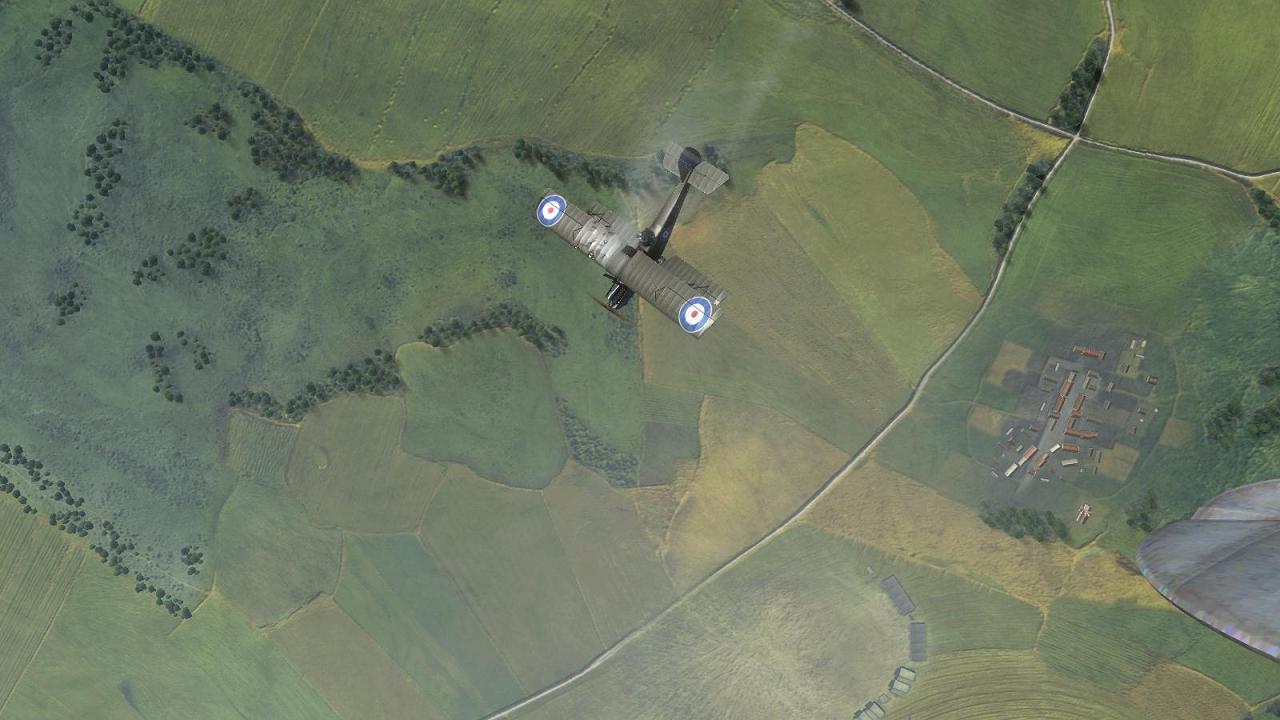
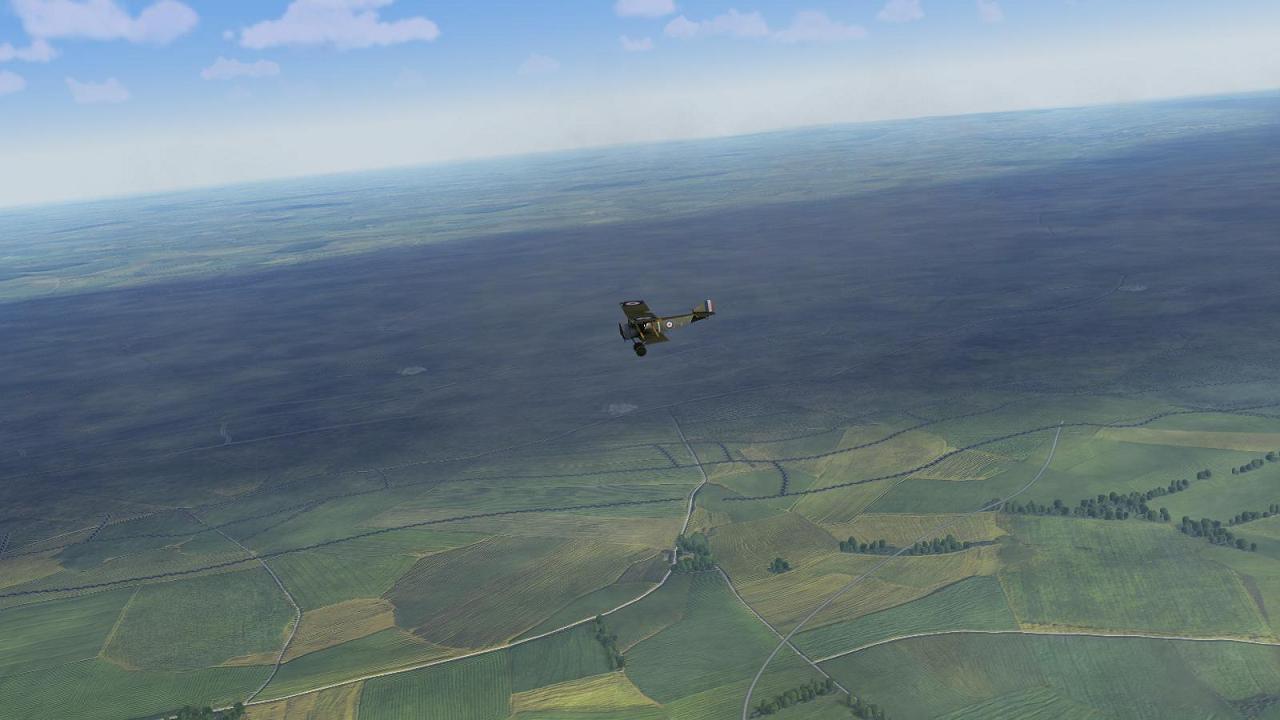
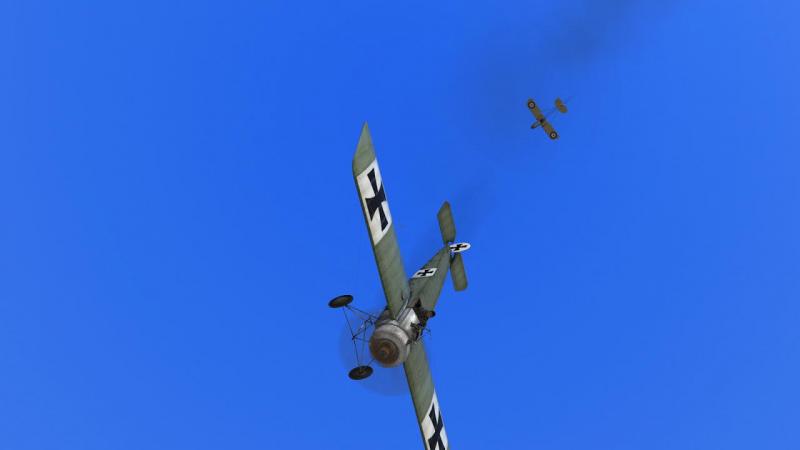
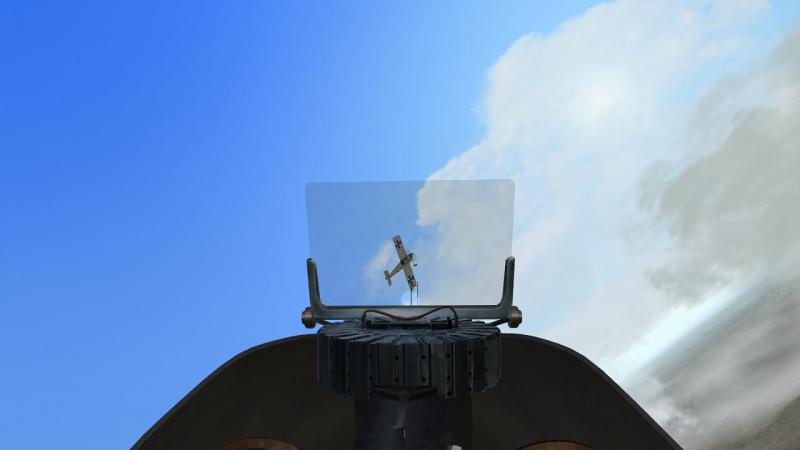
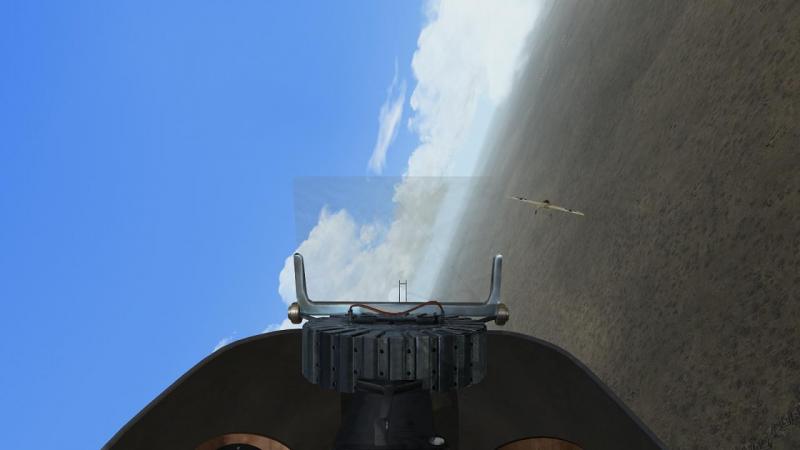
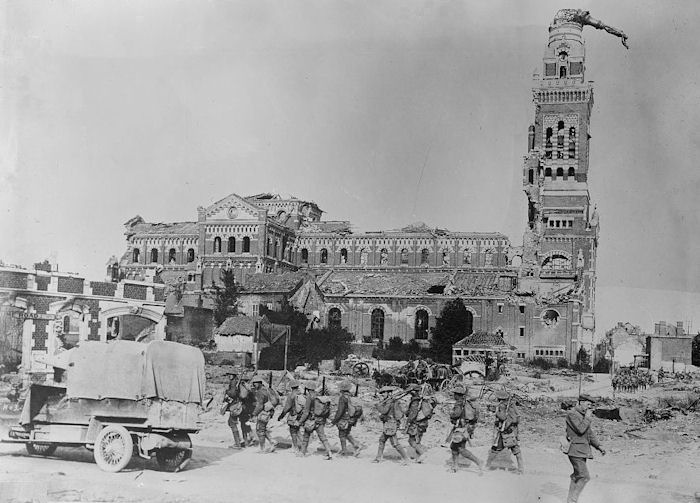
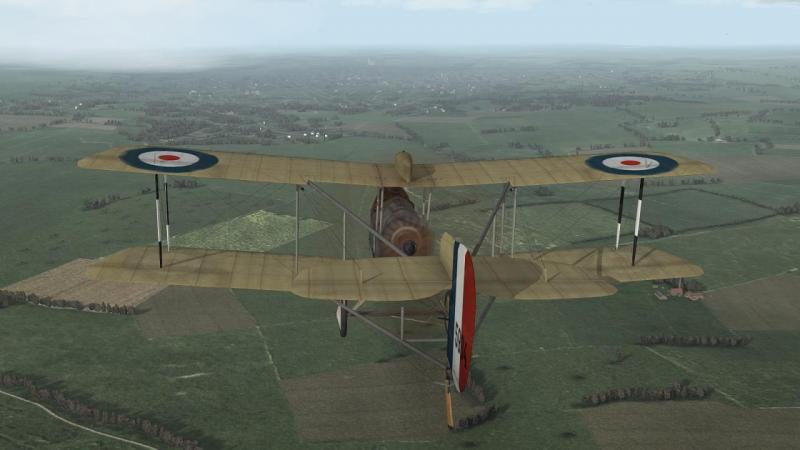
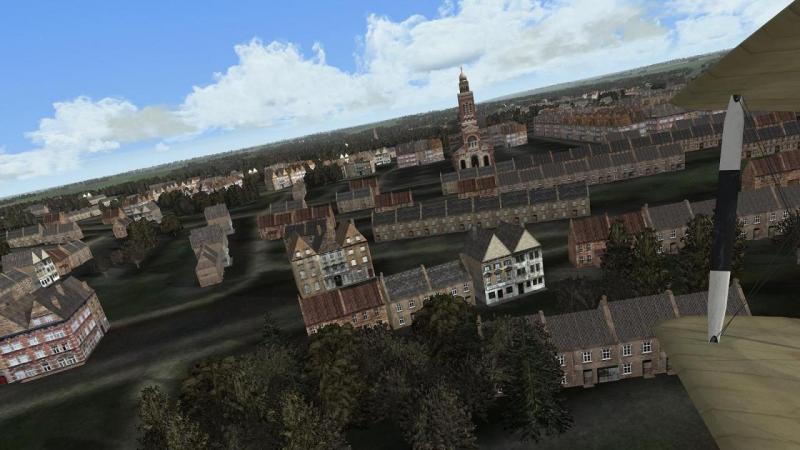
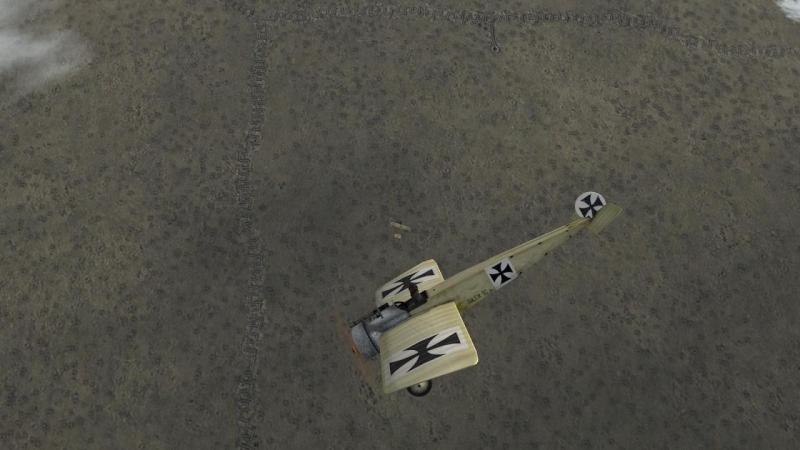
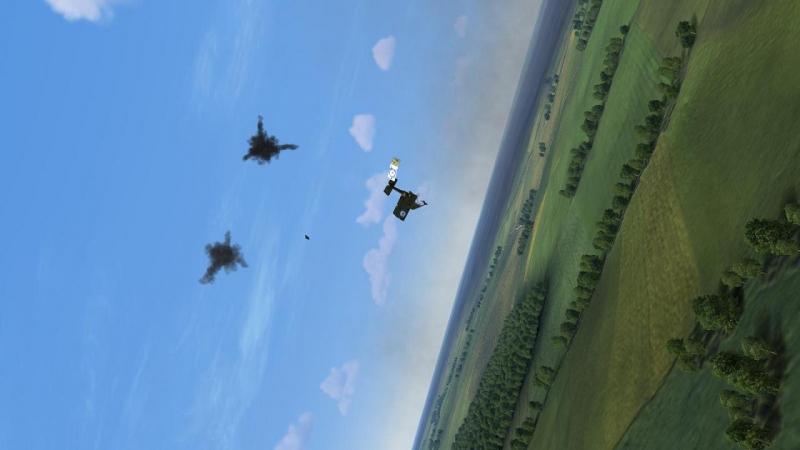
"Twenty-four" takes on the Huns! I bank hard around to get at the silly Fokker who's been trying to sneak up on us - and nearly succeeded! As I go, I order an attack, then look back to observe results. These are quite satisfactory. Two of my De Havillands have gone for the Hun, forcing him to break away. The other three D.H.2s, instead of getting in the way, sensibly break in the other direction and keep their height. AI-wise, this sort of thing is a welcome change from the common flightsim behaviour, where the AI pilots all charge the same target. The Fokker makes a run for it, with my two bravados hounding him all the way, making slashing passes as the Hun jinks. He still seems to be alone so I hang around, keen not to get in the way but ready to make a pass of my own, should the circumstances seem to favour it. The relentless D.H.2s force the Hun lower and lower, and I decide to leave them to it, rather than losing any more height myself. Finally, they get him. The Hun plunges vertically earthwards... ...and a cloud of brown dust, on the ground far below, marks where he hits the ground. By this time, our own AA gunners are shooting at him, too, evidenced by the white airbursts. But I have no doubt that this victory has been scored by one or both of my flight-mates. Transferring my full attention to the skies at my own level, I look around for the rest of 'B' Flight. But the first machine I see is another Fokker. He's above me, and I hastily turn in underneath him. Too hastily...for now, it's my turn to find out that the D.H.2 is quite happy to enter a spin. My next discovery is that recovery, as Major Hawker demonstrated to his pilots just the other day, is not difficult. However, it costs me more height, and at that point, down comes the Hun. But up to meet him come my two comrades-in-arms, fresh from their victory over the green Fokker and just as keen to add this light tan-coloured fellow to their tally. The Hun breaks in my direction, and I get a good burst into him as he flashes past my nose. I come around after the eindekker, but he's no slouch, as regards either speed or agility - more so than I'd expected from a machine with crude wing-warping for roll control. Still, I manage to get behind him, though fearful of another spin at this lower level. Down goes the Fokker! My flight-mates return and are fussing around him as he goes, but the last rounds into him are mine, so this is one that I'll be claiming, in my combat report. A glance at the 'magic map' confirms my location - on the enemy side of the lines near Pozieres, between Bapaume on the German side and Albert on the British. This, and the time of day, will help my claim be confirmed. The skies now seem clear, apart from our three D.H.2s. I swing west towards our side of the lines, throttling back to help the others catch up, which they will by default unless they are otherwise occupied. To my right front, German artillery fire is bursting on our positions... ...while a glance behind shows my tail is clear, apart from a rejoining D.H.2 and a distant observation balloon on the German side of the lines. I linger for a while in the hope that the rest of 'B' Flight might re-appear - I haven't seen the other three D.H.2s since the start of the fight with the first Fokker. It's very common for flights to become split up, but as flight leader, all the boys are my responsibility and I'm hoping they've not come to any harm. I decide not to go looking for them, though, and continue to the west, as the other two close up. If there has been some kind of disaster, there's no point adding to it now, by taking the three of us back into harm's way. Soon, we're passing over our rear-most trenches and back into the unspoilt countryside of unoccupied Flanders. I set course back up to Bertangles, and realise that our route is going to take us close to the town of Albert. This brings an idea into my mind. The town, I know, is the location of a famous church tower statue of the Virgin Mary, that was knocked askew by shellfire. Hanging from the tower at an impossible angle, the statue's fall, it was said, would signal the end of the war. It didn't, but I think to myself, I'll check out this landmark in Wings over Flanders Fields. I'm not really expecting much, but as we draw nearer, I can make out that WoFF's Albert does in fact feature a prominent church-like building, visible from a fair distance. Sure enough, the famous church is there, about where it should be. And as I make my fly-by, I can see that it's a passable rendition of the real thing, complete with statue, albeit not yet knocked-about by shellfire. Now, that's what I call attention to historical detail! Touches like this earned a certain WW2 combat flightsim - Rowan's Battle of Britain and it's successor BOB II (with the help of its mod community) - the reputation of a time machine, with its players. For the Great War for Civilisation, as it was called, truly Wings over Flanders Fields is no less. Back at base, the debriefing brings tolerably good news. Everyone has fired their guns. Cowan's and Saundby's machines have been written off, with both men lightly wounded. However, Haw and myself are both claiming a Fokker, which seems about right. Not a bad showing, for our first fight with precisely the enemy we've come here to sort out. Let the Huns beware of 'Twenty-four'! We've surely good cause for a jolly sing-song around the old piano in the mess, tonight! We went to Cambrai, all in vain, The F.E.'s said, "We must explain; Our camera's broke - we must do it again." Oh, we haven't got a hope in the morning!


- 2 replies
-
- 2
-

-
- woff
- wings over flanders fields
- (and 2 more)
-
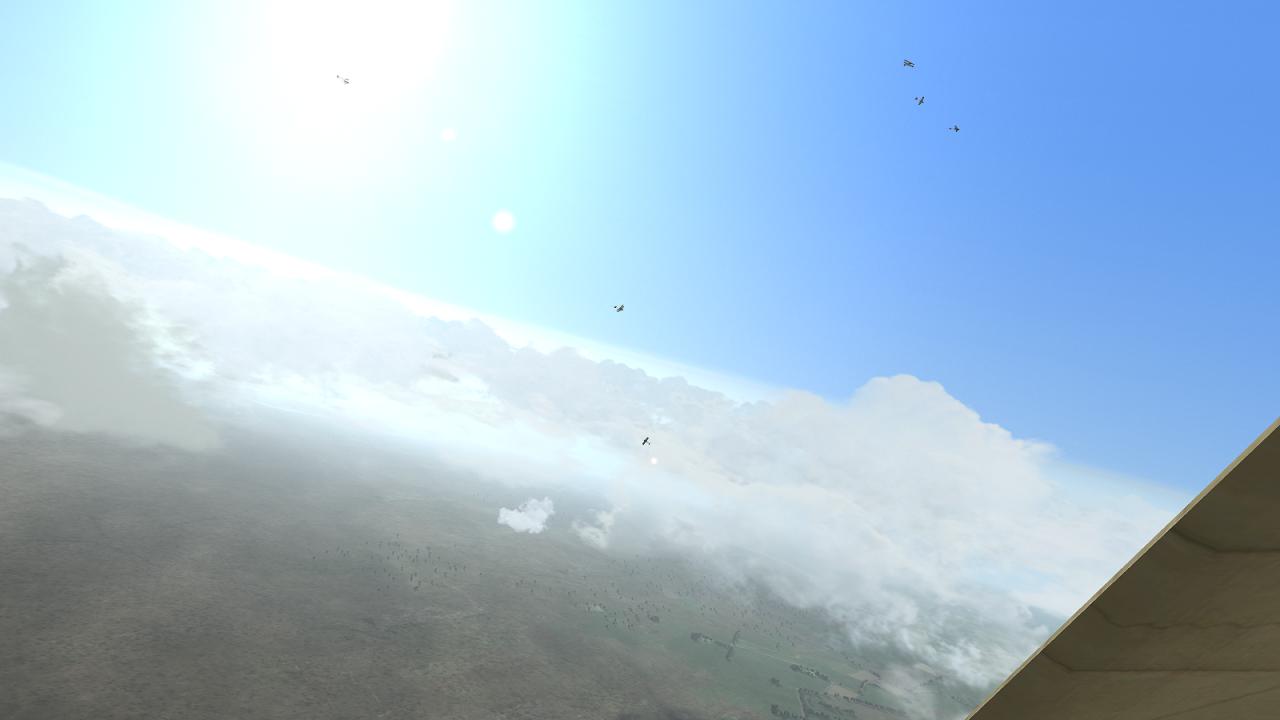
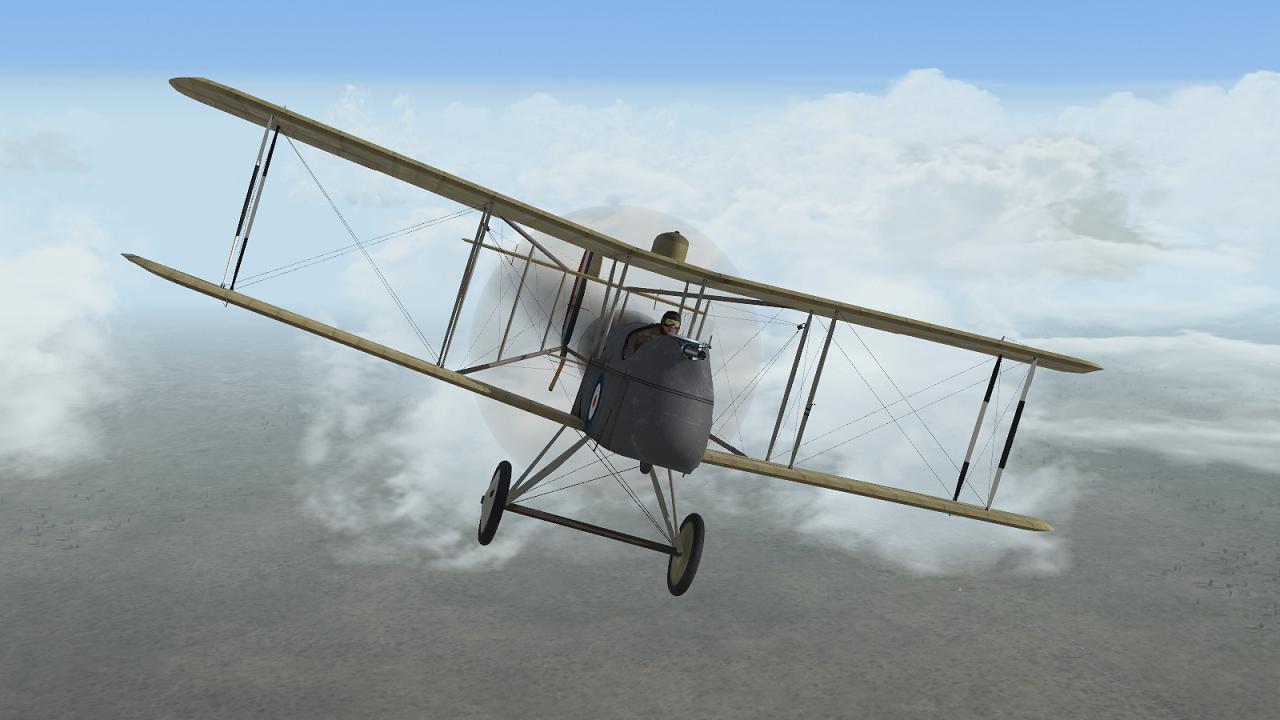
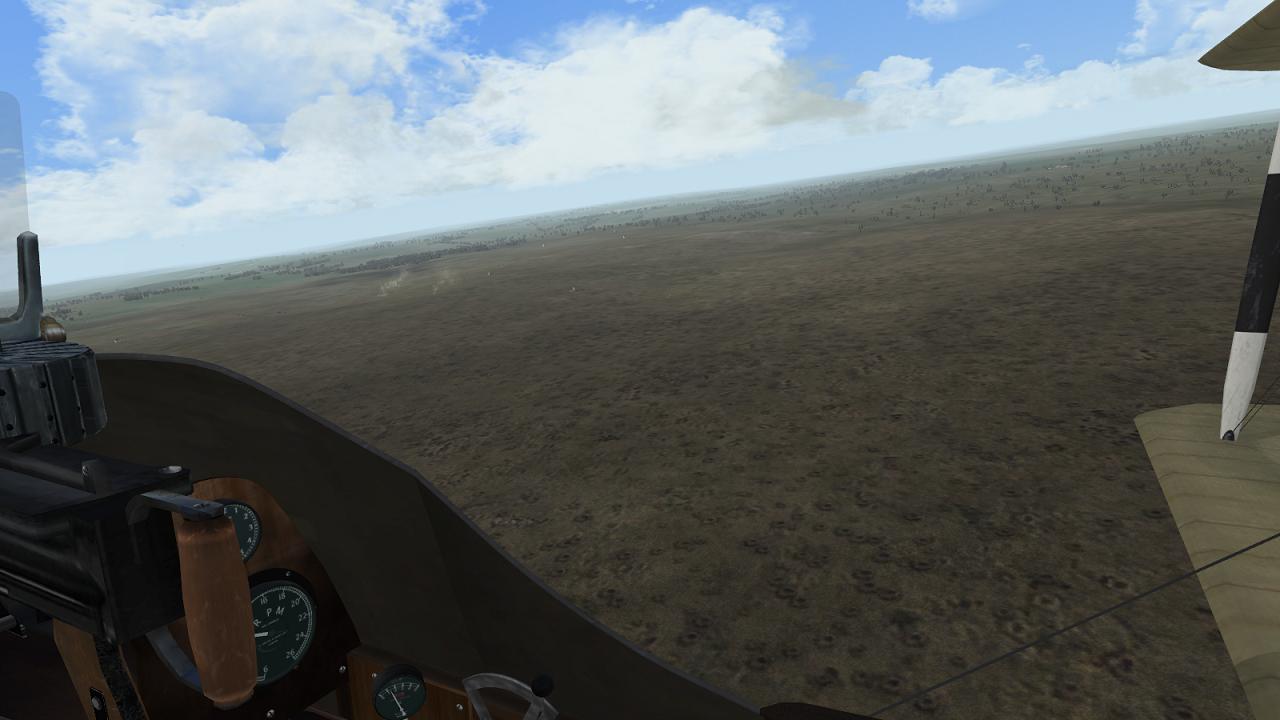
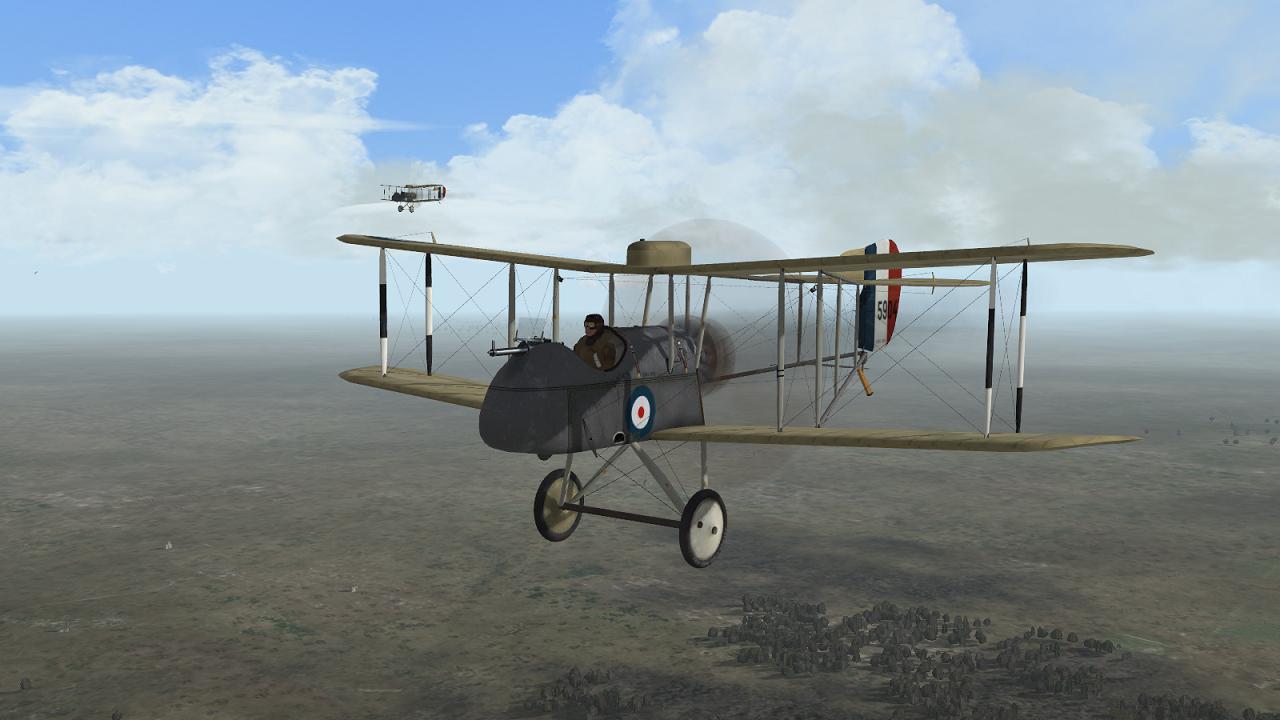
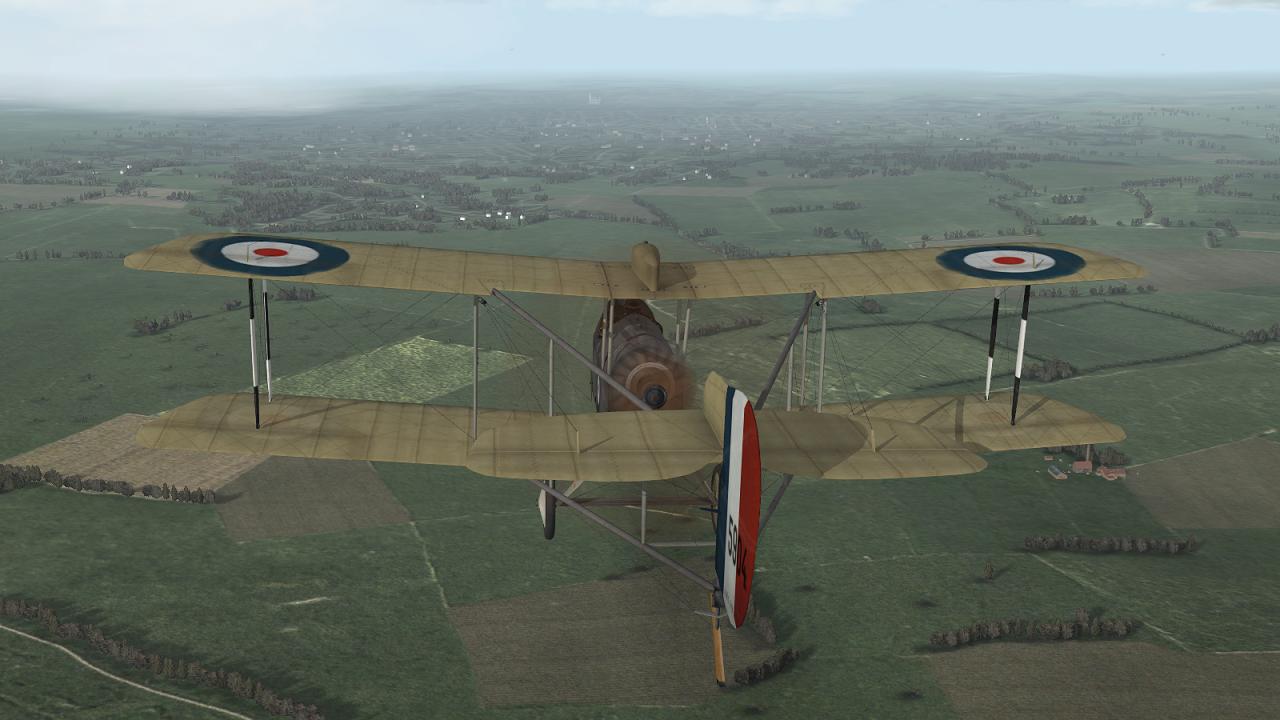
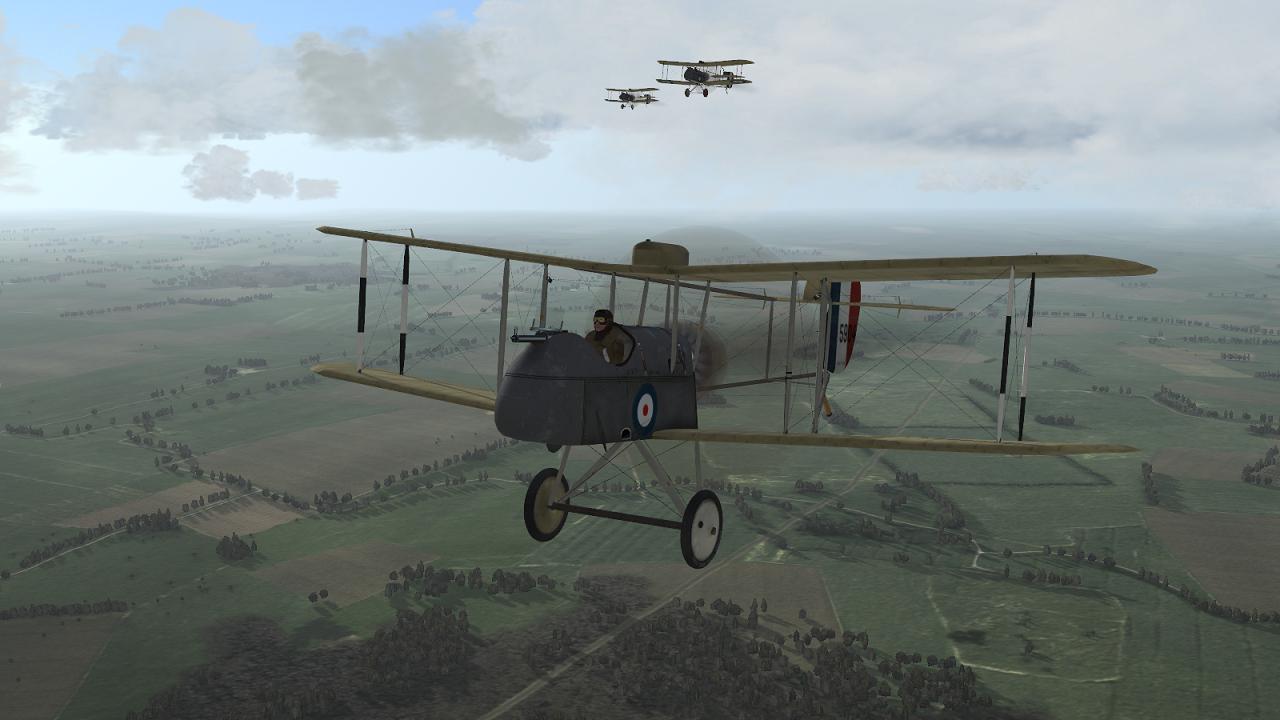
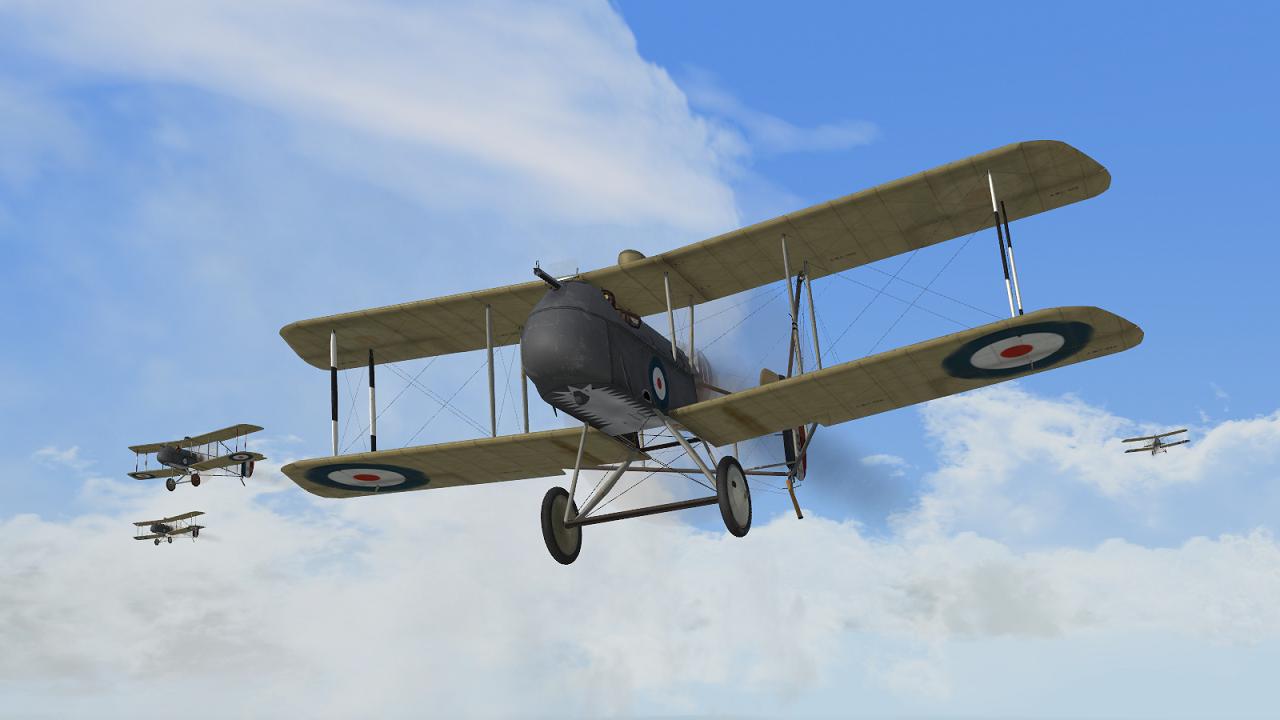
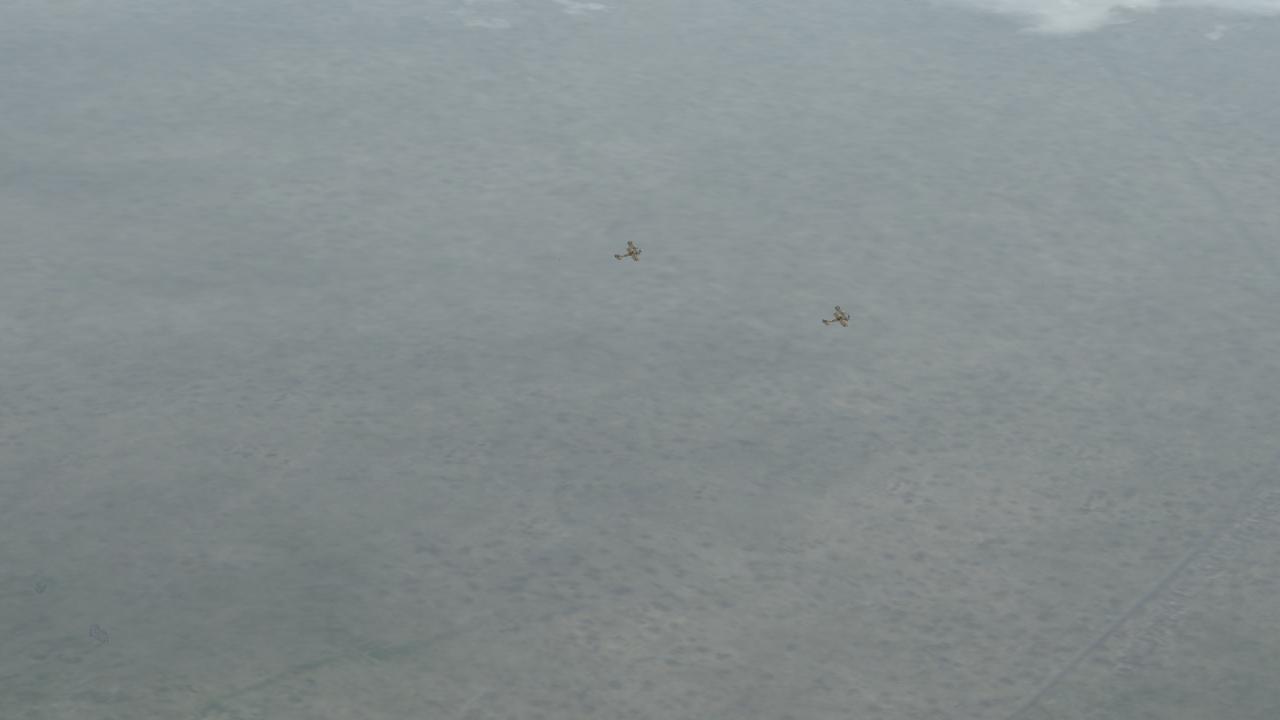
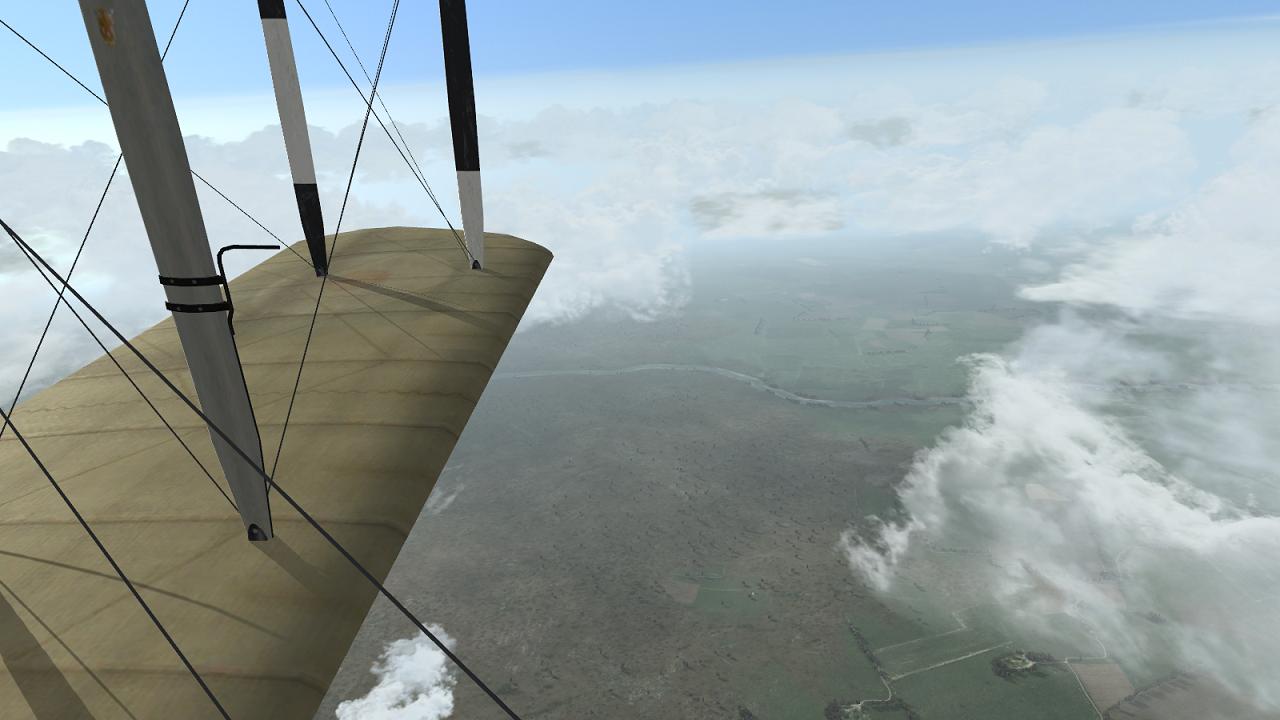
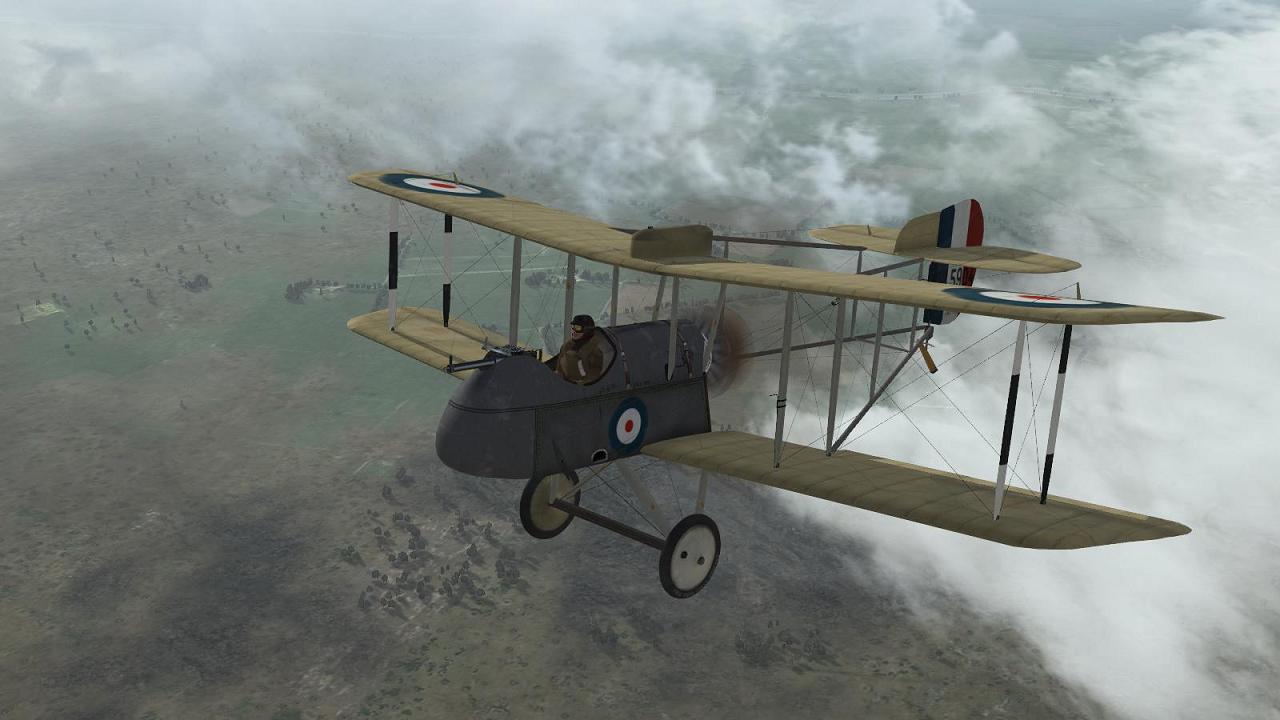
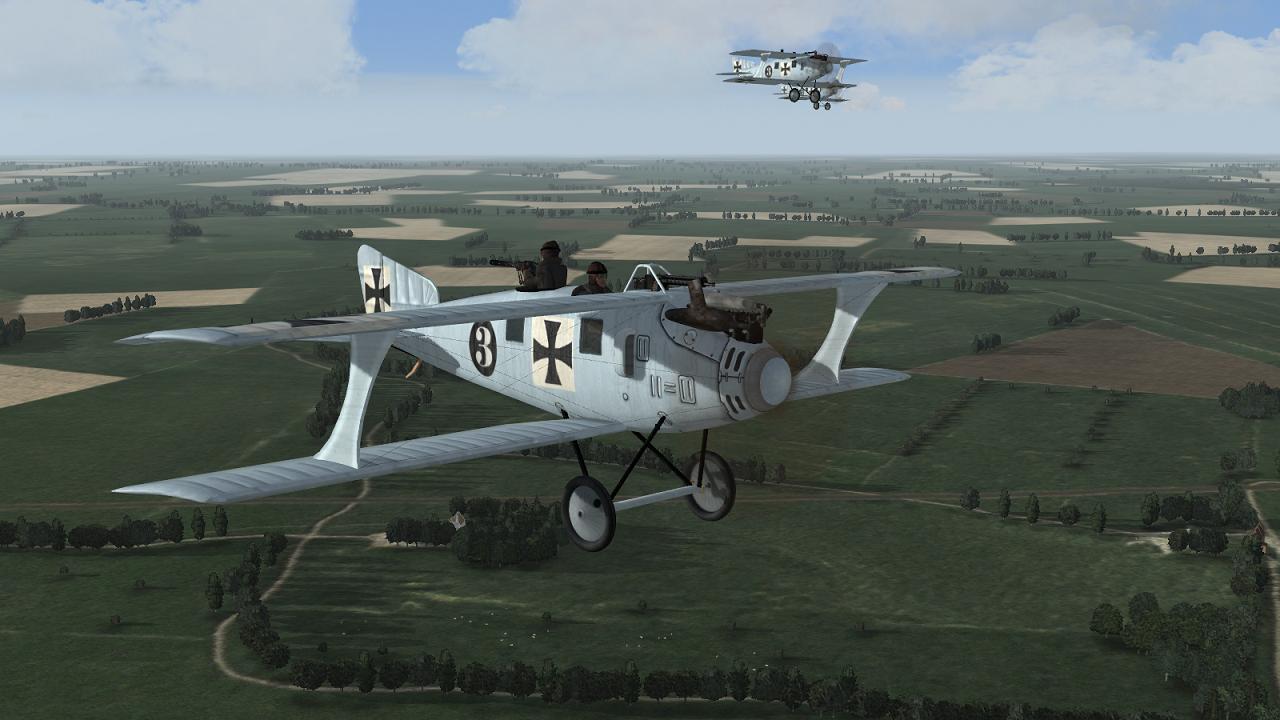
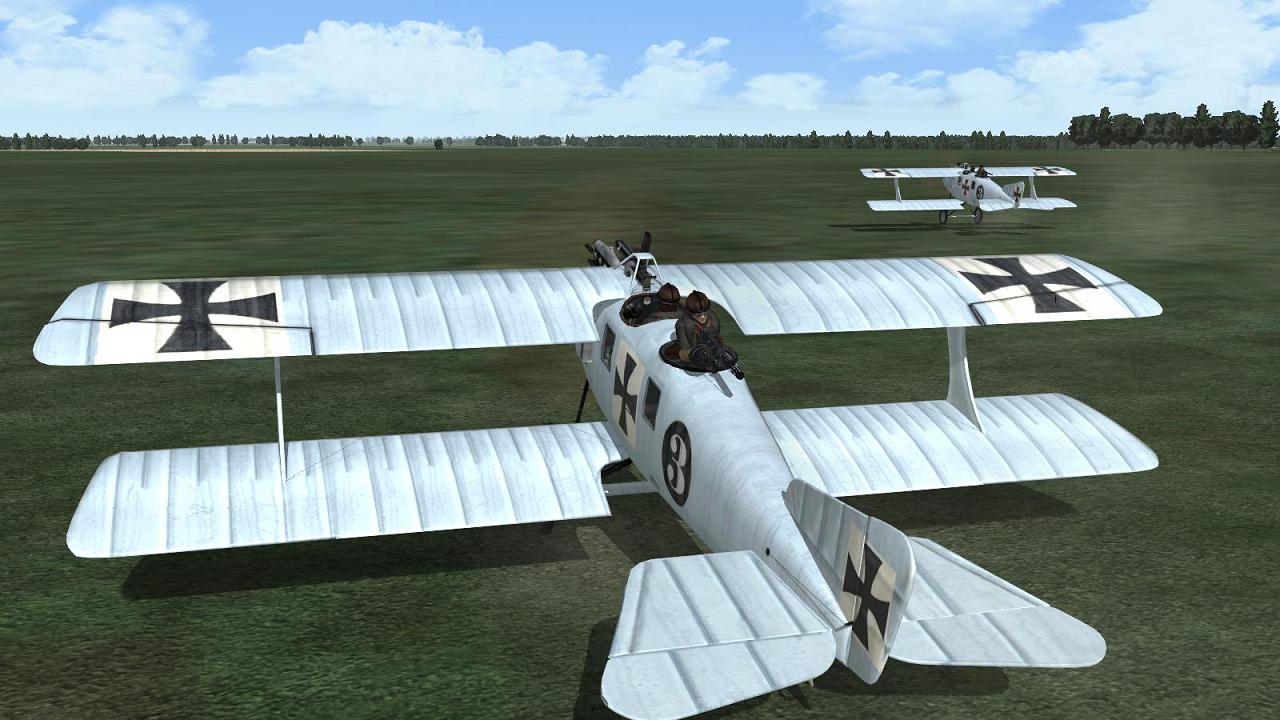
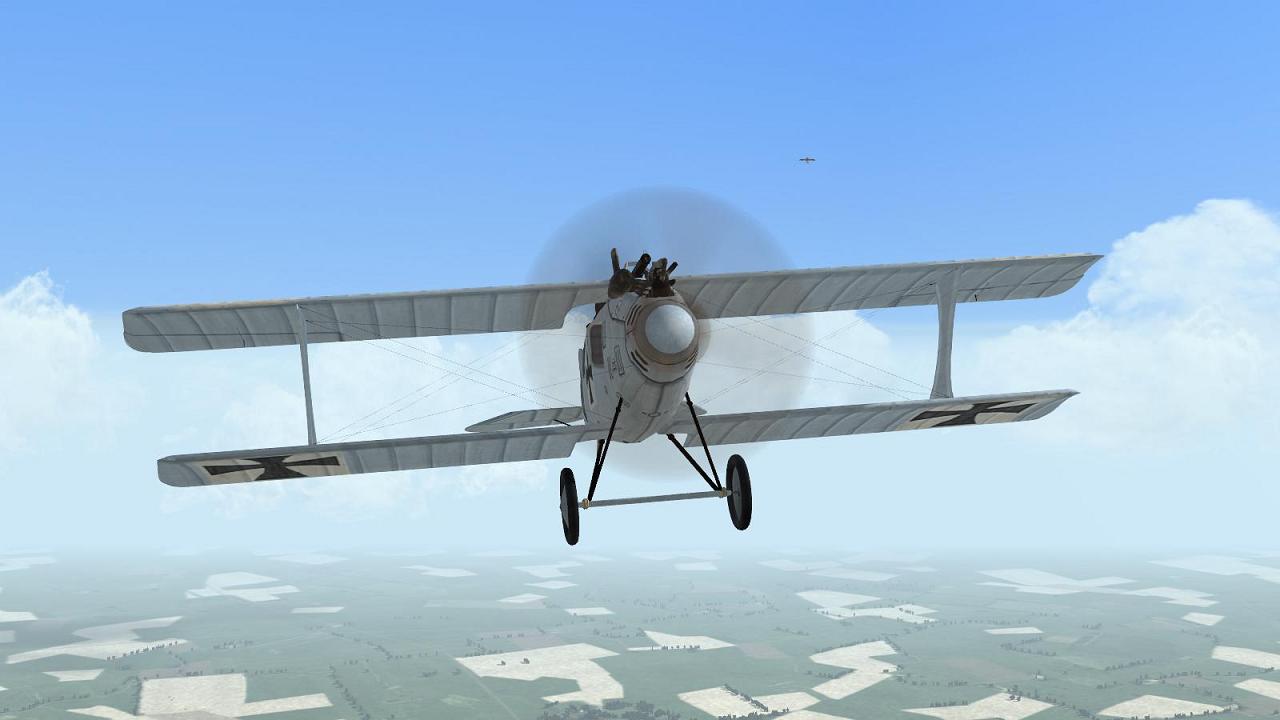
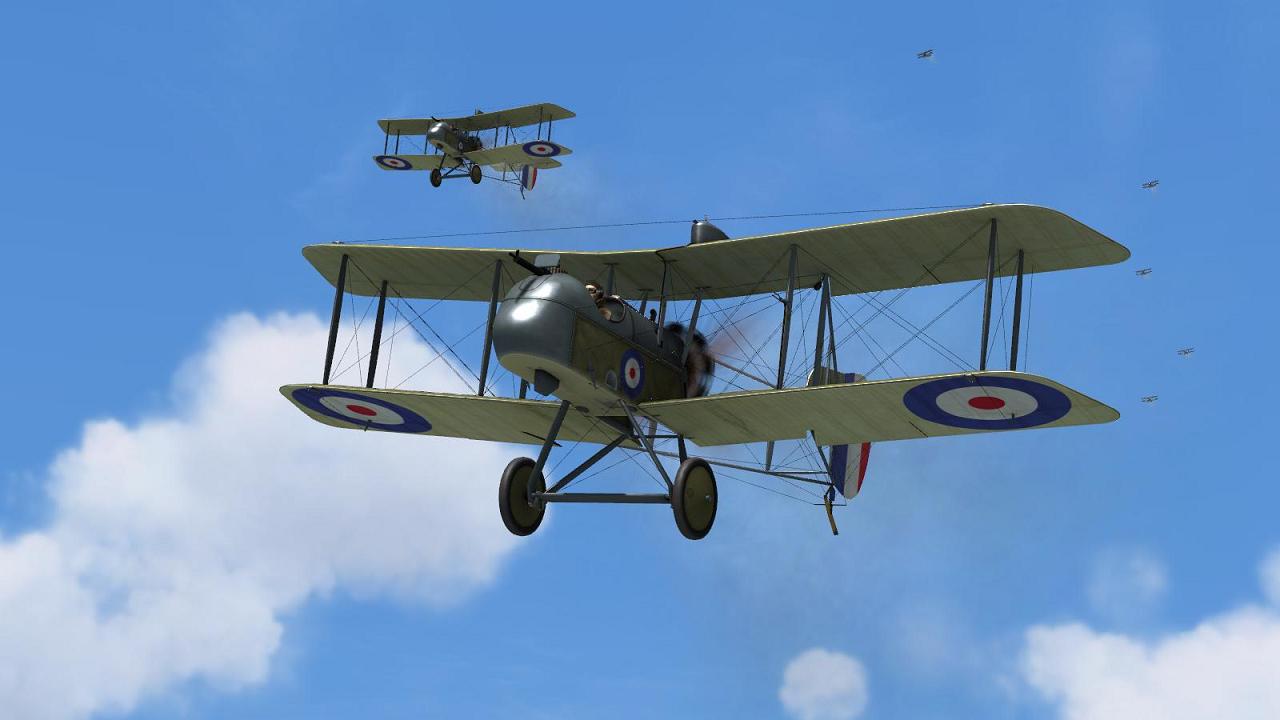
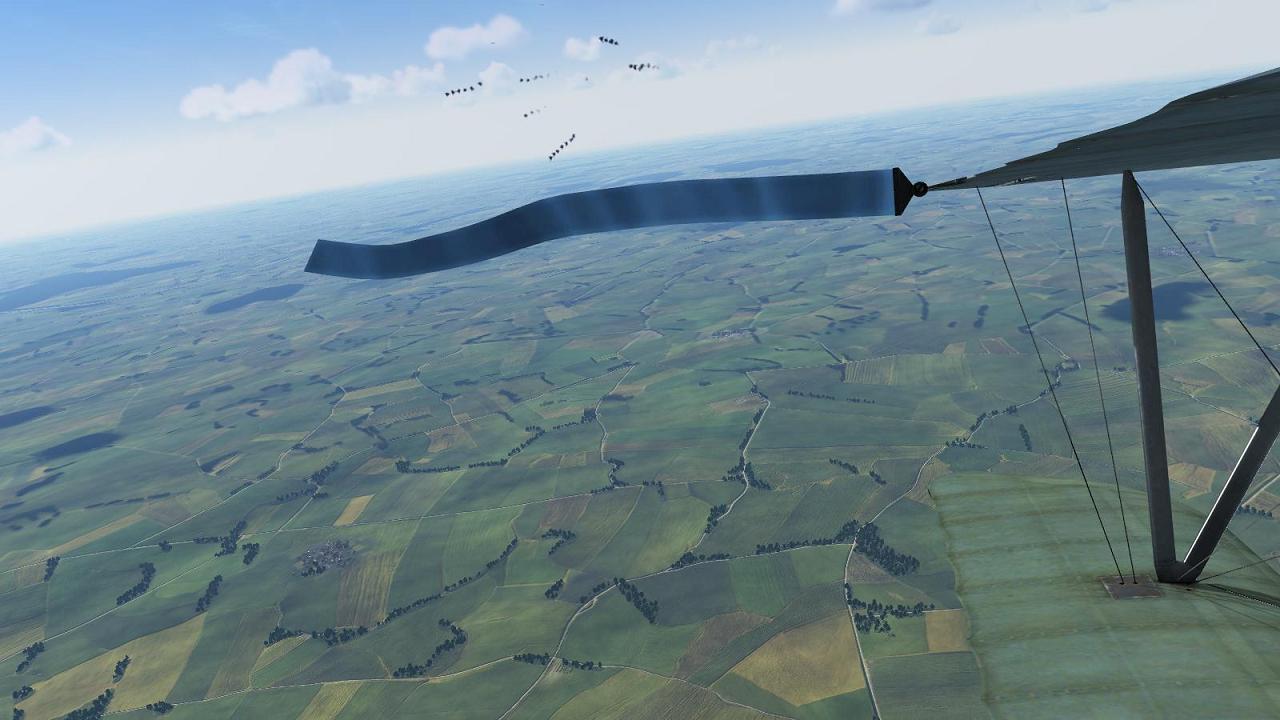
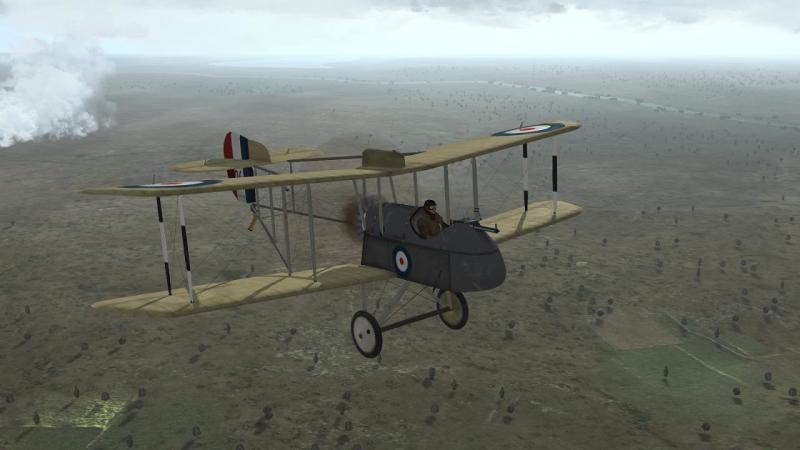
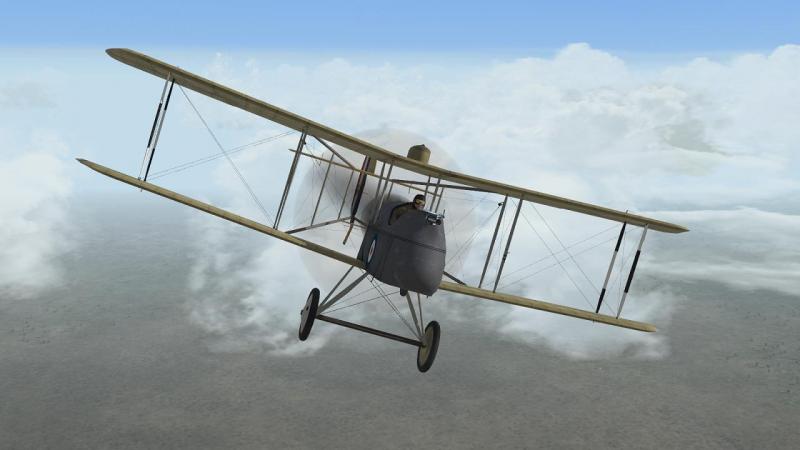
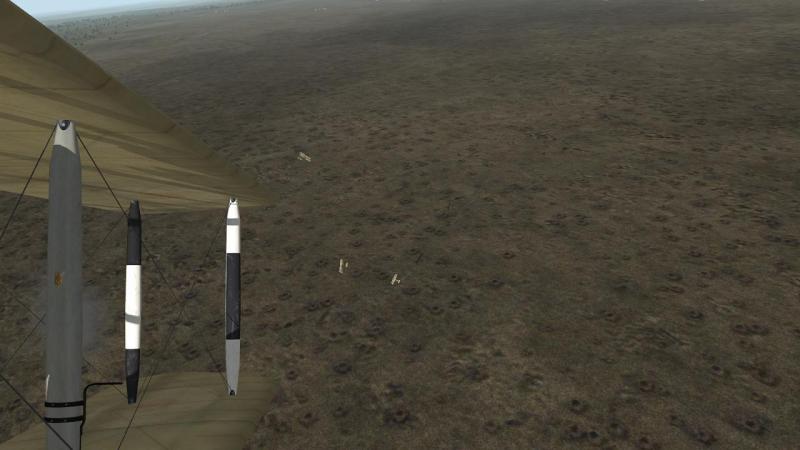
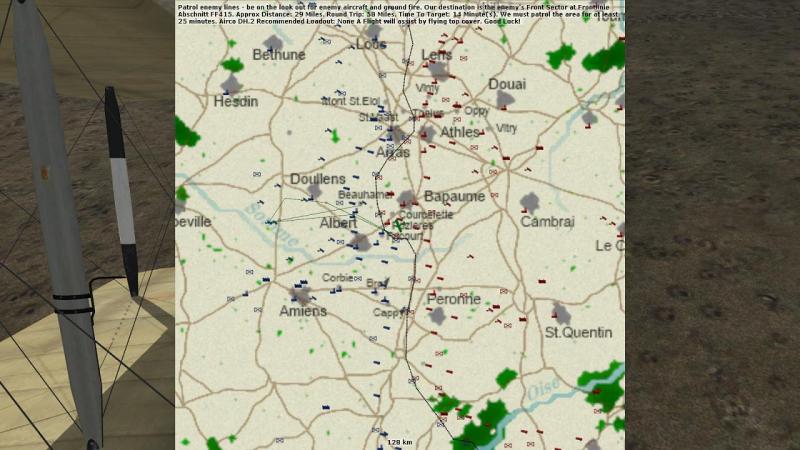
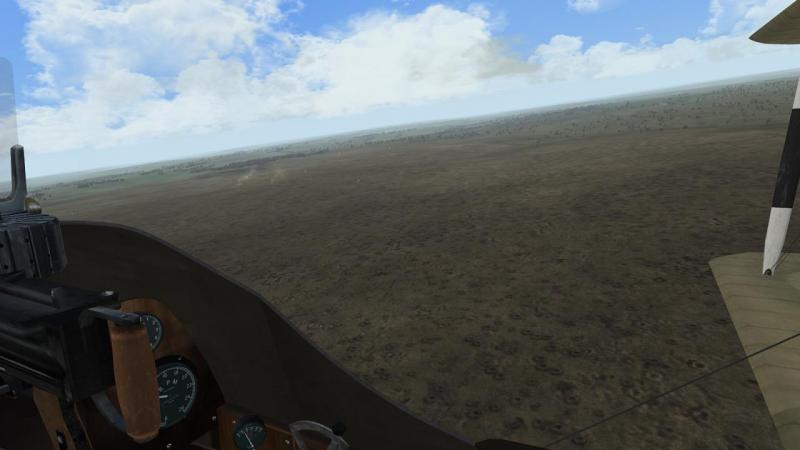
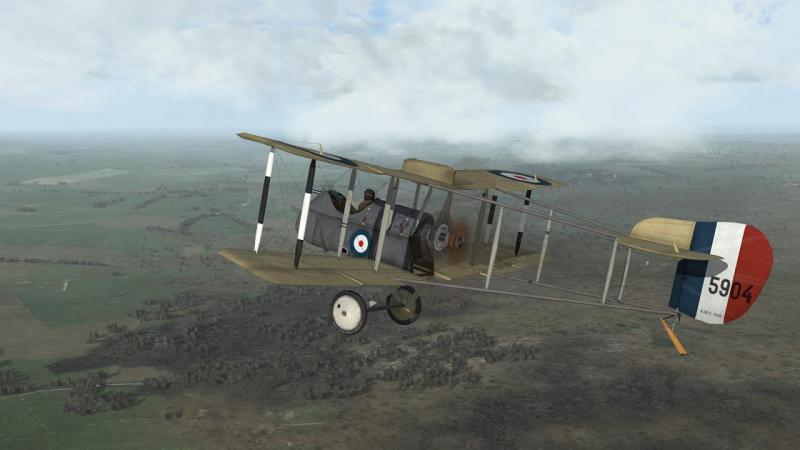
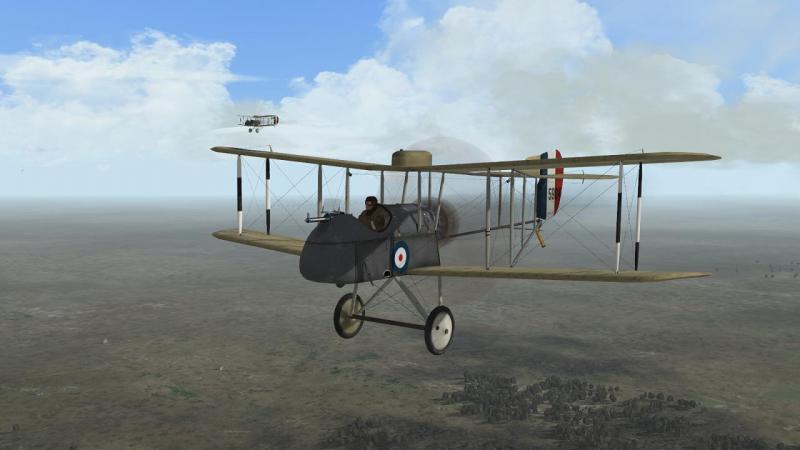
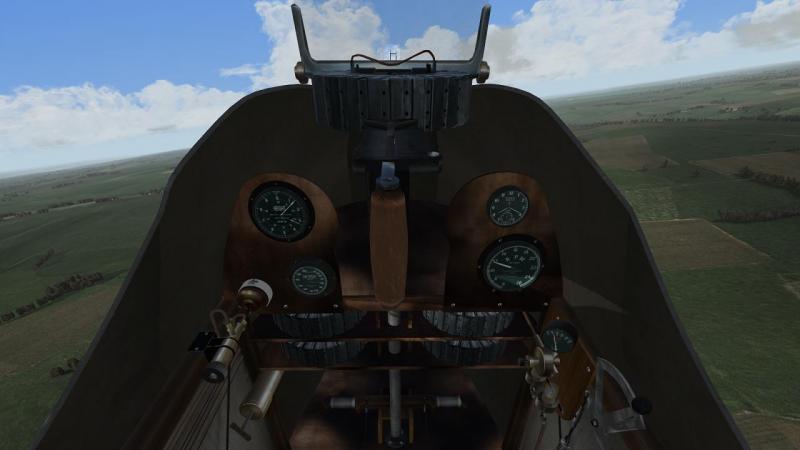
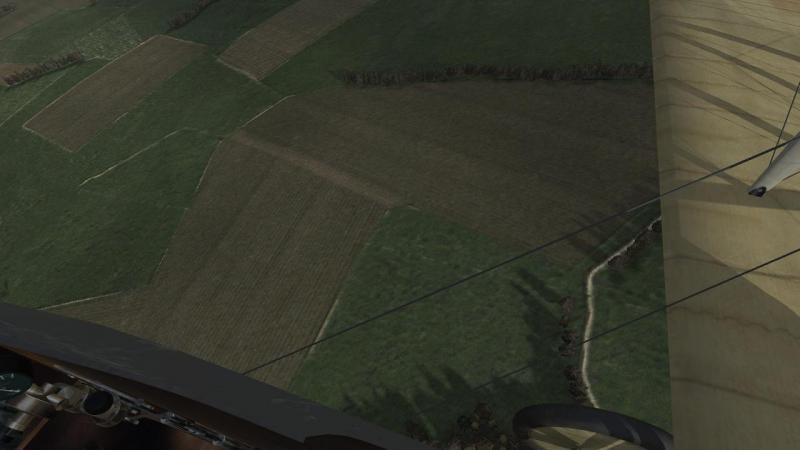
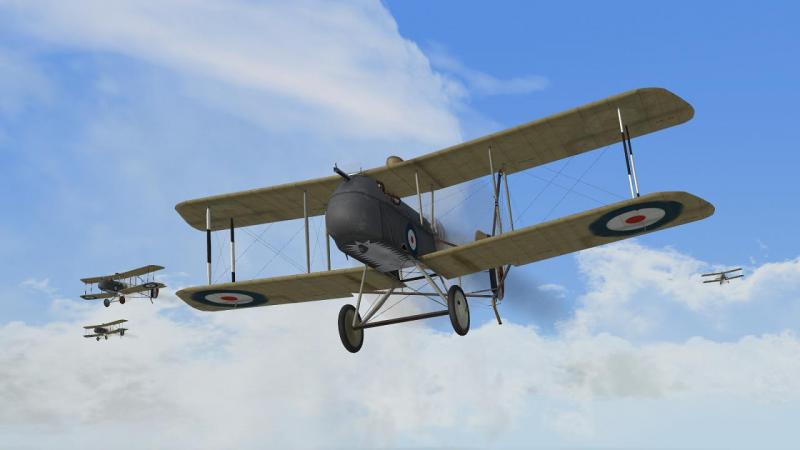
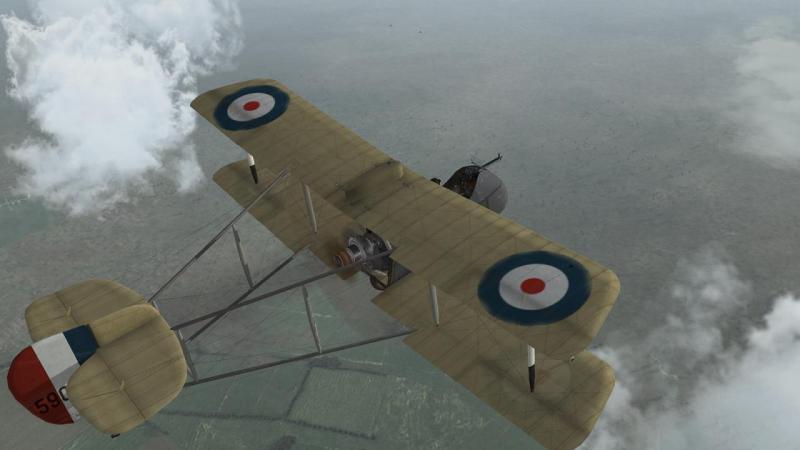
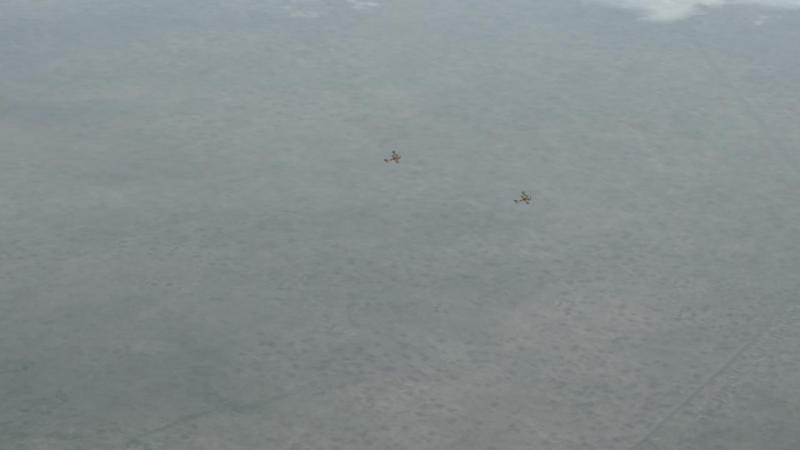
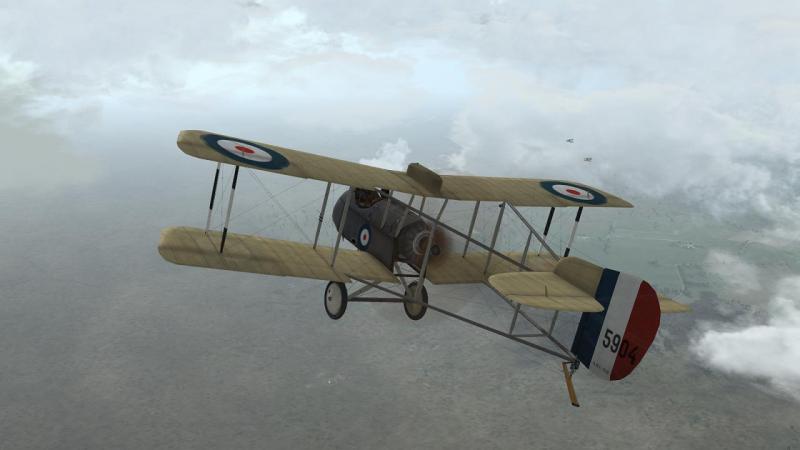
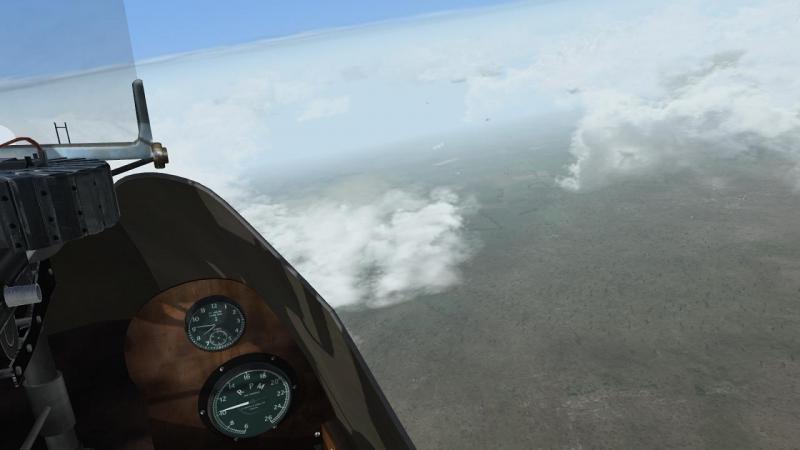
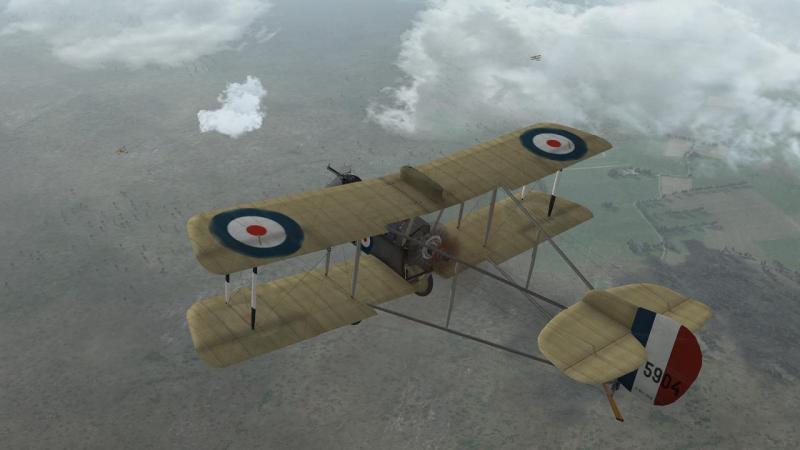
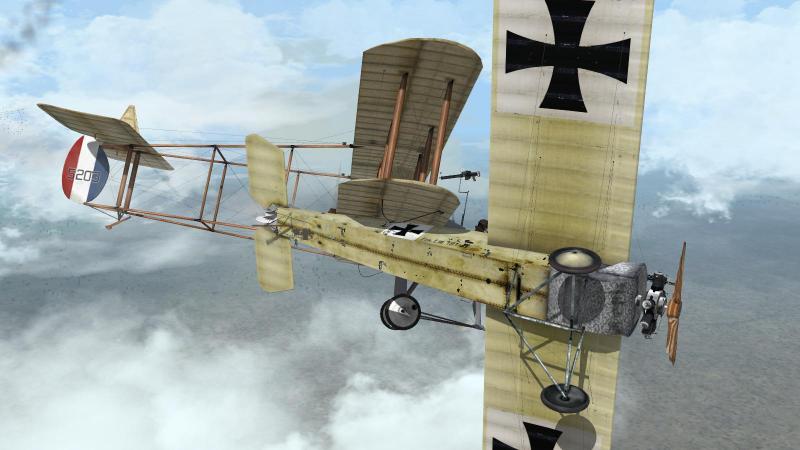
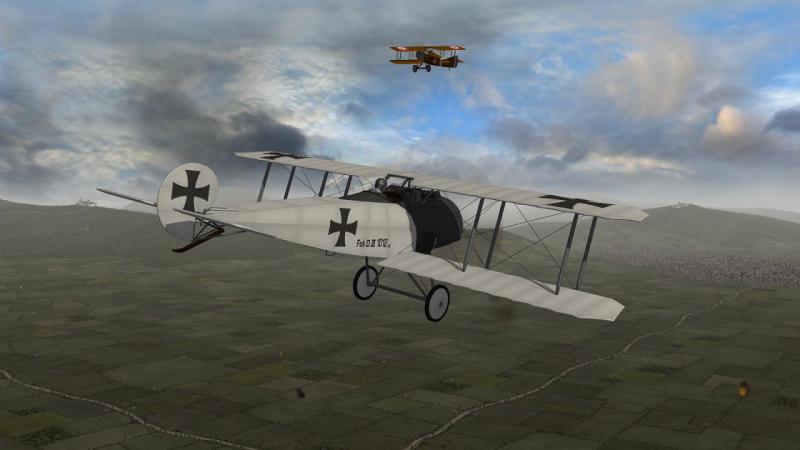
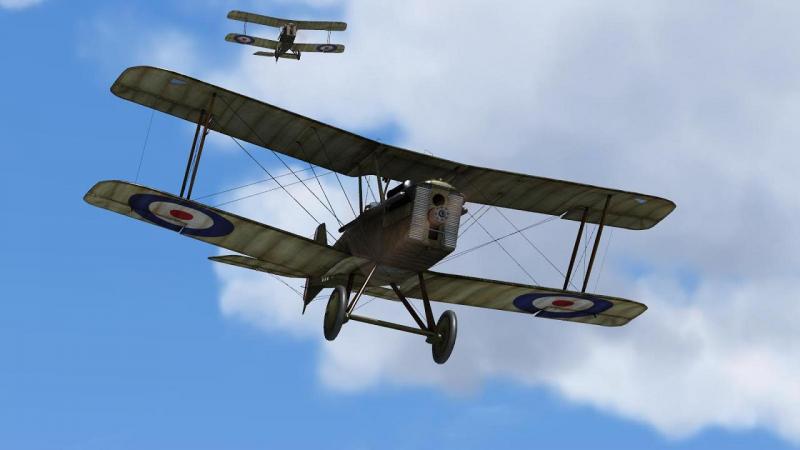
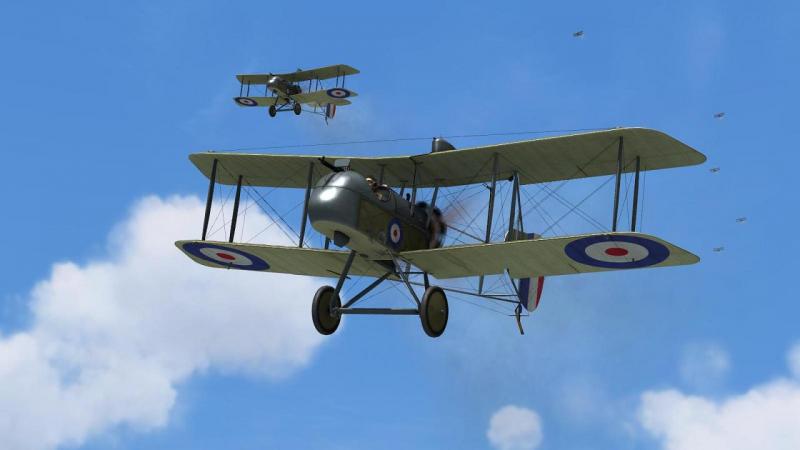
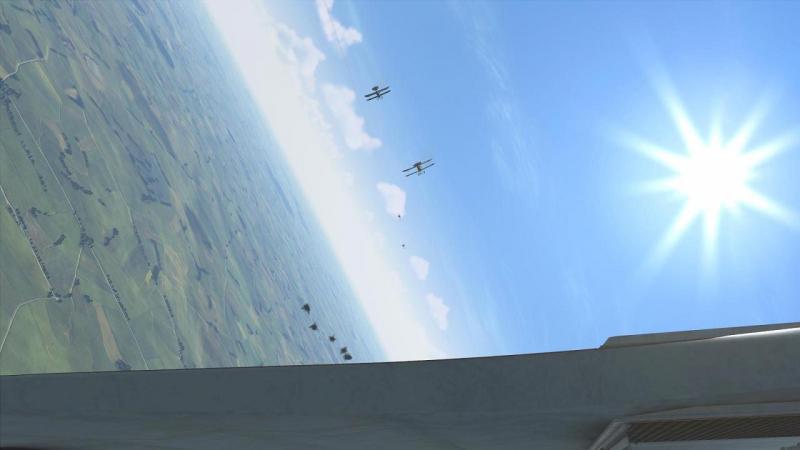
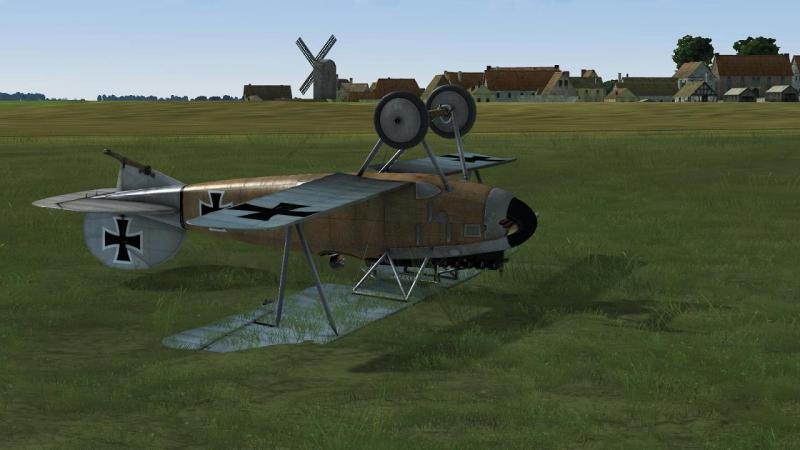
Meet the Fokkers... The WoFF D.H.2 is a nice replica. This being early 1916, our machines are still in clear doped linen finish - it was only during the course of the year that the RFC started finishing machines in camouflage uppersurfaces, using the famous P.C.10 brown (some sources give it a greenish hue; I'm in the 'more brown than green' camp). Our nacelles are in the 'battleship grey' colour commonly used for plywood or metal surfaces, here extending to the fabric covering the sides; hence the sawtooth pattern underneath, commomly seen on D.H.2s during this period. And our kites have the distinctive checkered outboard interplane struts used as flight markings on 24 Squadron's De Havillands. You can rely on Wings over Flanders Fields to incorporate this sort of detail and get it right. Our six D.H.2s are soon in formation and headed for the front lines which we are to patrol... ...so I take a bit of time to get the feel of my new mount. She’s no speedbird, but as you’d expect with a ‘pusher’, the view ahead is rather good. And unlike the big F.E.2b I crashed out with on my last WoFF campaign, the view behind is not too bad. It helps, that I’m using the latest version of Ankor’s DX9 mod, which to aircraft & cloud shadows and a natural external view perspective, has now added subtle head bobbing and mouselook. One result is that if you look down to the left or right, it’s like you’re leaning in the cockpit, so you have a better downward view, as you can see. Helpfully, the view pans back to straight ahead if there’s no mouse movement within about 5 seconds. This combination of features (head bobbing and moueslook) is a great addition to WoFF and for me, significantly enhances the flying and fighting experience. It can also make gunnery more challenging, as changes in G forces can push your head slightly out of alignment with the sights at times. Overall, the look and feel of flying, scanning and fighting is, I already have found, much more convincing. Ahead of me for a time, I see the four D.H.2s of ‘A’ flight. As there are six of us in ‘B’ Flight, I feel strong enough to make my own way to the front, rather than staying with them. A glance down and left shows the south-eastern outskirts of the town of Doullens slipping underneath the leading edge of my port lower main plane. I know from the map this town is just north of our track up to the front, so this is a good reference point. There are printable maps, made by 'WoFFer' RAF_Louvert, for those who disdain the annotated inflight map. So for folk who like or have the time for such things, it is perfectly possible to navigate visually in Wings over Flanders Fields. Me, I just like admiring the view, en route, and Ankor's latest DX9 mod has just made that look and feel a whole lot more natural. The early morning March sun's in our faces as we rumble east... ...and as we near our assigned patrol height, the clouds begin to obscure much of our view of the ground all around us... But the cloud cover is sufficiently broken for us to see enough of the ground below to realise we have arrived at the front. Here, the farmer's fields give way to the muddy earth-brown of the wide area churned up by regular shellfire. It is at this point, looking down and left, that I see two aircraft, dark specks which stand out against the ground haze. They're roughly on the same course as ourselves, towards Hun-land. A closer look confirms they're our machines - two-seater B.E.2s, probably on a reconnaisance or artillery observation job. 'It's your lucky day, chaps!' I tell them mentally. RFC 'working aeroplanes' like these rarely received a direct escort, except sometimes from machines of their own type from their own squadron, preferring reliance on patrols timed to be in the general area and so provide indirect support. The policy seems to have worked out pretty nicely for these fellows. I decide we''ll shadow them from above, ready to deal with any Huns who try to interrupt their vital work for the boys in the trenches. The B.E.'s plod on, out across No-Man's Land, as we slowly criss-cross the skies above them. At one point, I get a bit of a fright as my formation appears to break up behind me. This is often a sign that someone has spotted an enemy and decided to do something about it. But not this time. The skies remain clear, and I'm none the wiser at what apparently spooked my people, who are soon catching me up again, rather sheepishly I suspect. I throttle back a little and continue to watch out for the B.E.s, who may or may not be directing the artillery fire that you can see whacking into the ground, roughly below my undercart in the picture below. At one point, the two-seaters seem to decide to split up, for they begin drifting apart. If they carry on like this, they aren't going to make my role as their self-appointed protector any easier. There's a bit of zigging and zagging, and it looks like they may have worked this out for themselves... ...for they come together again, before setting course to the east, on towards Hun-land. Looking down, I can see that we are already passing beyond the trenchlines into enemy territory, just to the south of the River Somme. This presents me with a bit of a poser. Do I stick to my assigned patrol area, or carry on after these people, at least for a while longer? At about this point, things go from merely interesting to potentially dangerous. For some reason I've since forgotten, I decide at this precise moment to turn on a visual aid which I leave off 95% of the time, the Tactical Display or 'TAC'. And the red aircraft icon this paints to our rear reveals that at least one Hun is stalking us. Now just to be clear on this point, I prefer to play all my games with as little reliance on on-screen aids as I can manage. The exception in WoFF is that I’m happy to use the default in-game map with 'own plane' icon and flight plan, for navigational purposes. And because I use padlock, I also need to turn on the Tactical Display when combat begins – I think you can only start padlocking after turning on the TAC and picking your first target on it (though I can cycle targets after turning it off again). I also occasionally turn on the TAC for a quick ‘nav check’ since it displays the route to the next waypoint, without needing to look at the default in-flight map (which dominates the screen). To prevent it acting like a radar screen, I have set the TAC’s range to about a mile. I could also set it to display ships rather than planes, but leaving it on planes (with this very short range) and turning it on only briefly at long intervals is, I think, a reasonable representation of the possibility that one of my other people will spot an enemy aircraft I haven’t seen, allowing for all the usual limits of ‘MonitorVision’. I still feel slightly like I’ve cheated, when the TAC does show up a plane I haven’t spotted with the Mark I Eyeball, though, and so it is on this occasion. The Hun so revealed is apparently alone and tailing us within the short range I've set. 'He’s keen as mustard', I think to myself, 'trying to sneak up on six of us.' Perhaps he doesn’t realise we’re flying the latest English fighters, thinking instead that we are the old, slow Vickers ‘gun-bus’ two seaters he may be more used to bullying about. Regardless of what he thinks, it’s time we spoiled his fun! ...to be continued!


- 2 replies
-
- 2
-
-
- woff
- wings over flanders fields
- (and 2 more)
-
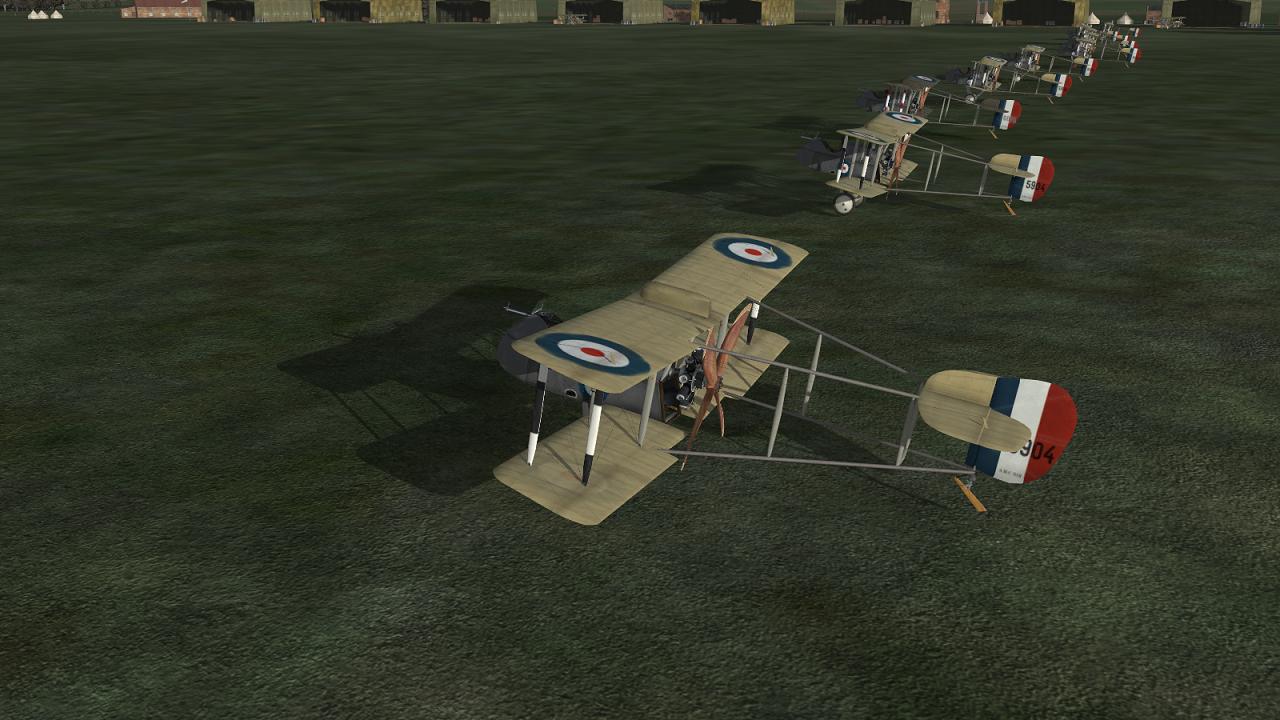
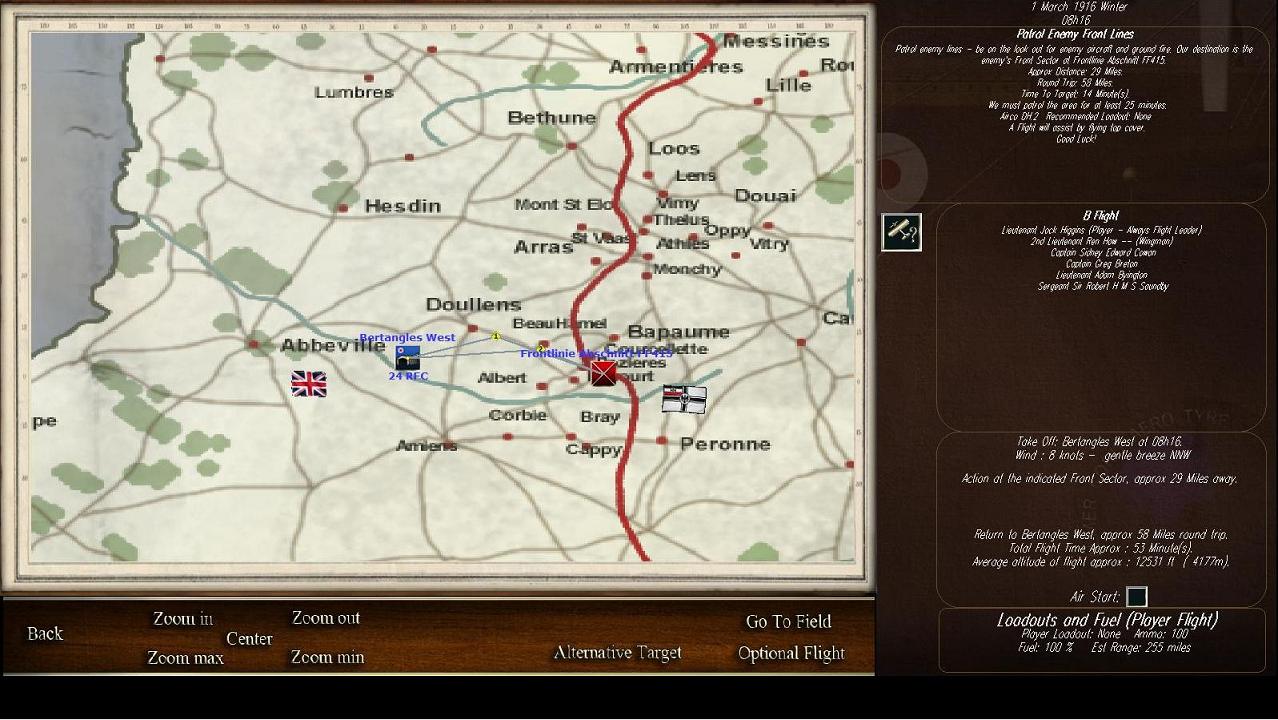
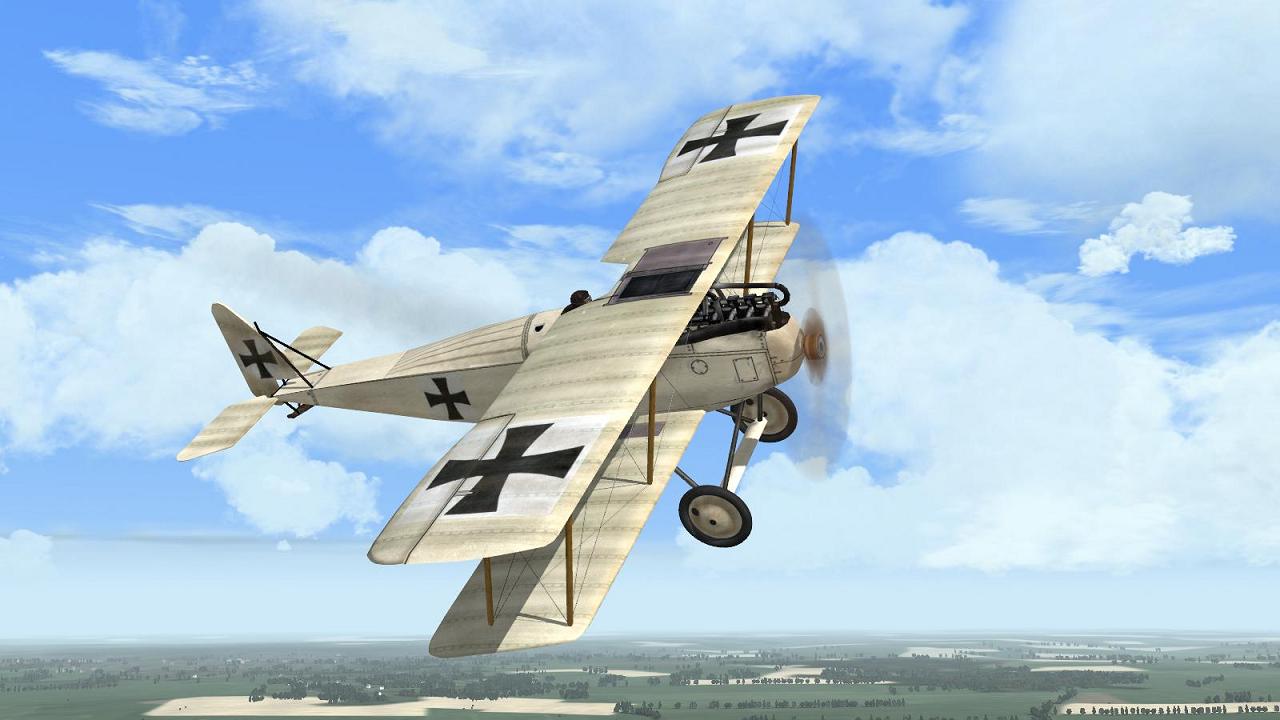
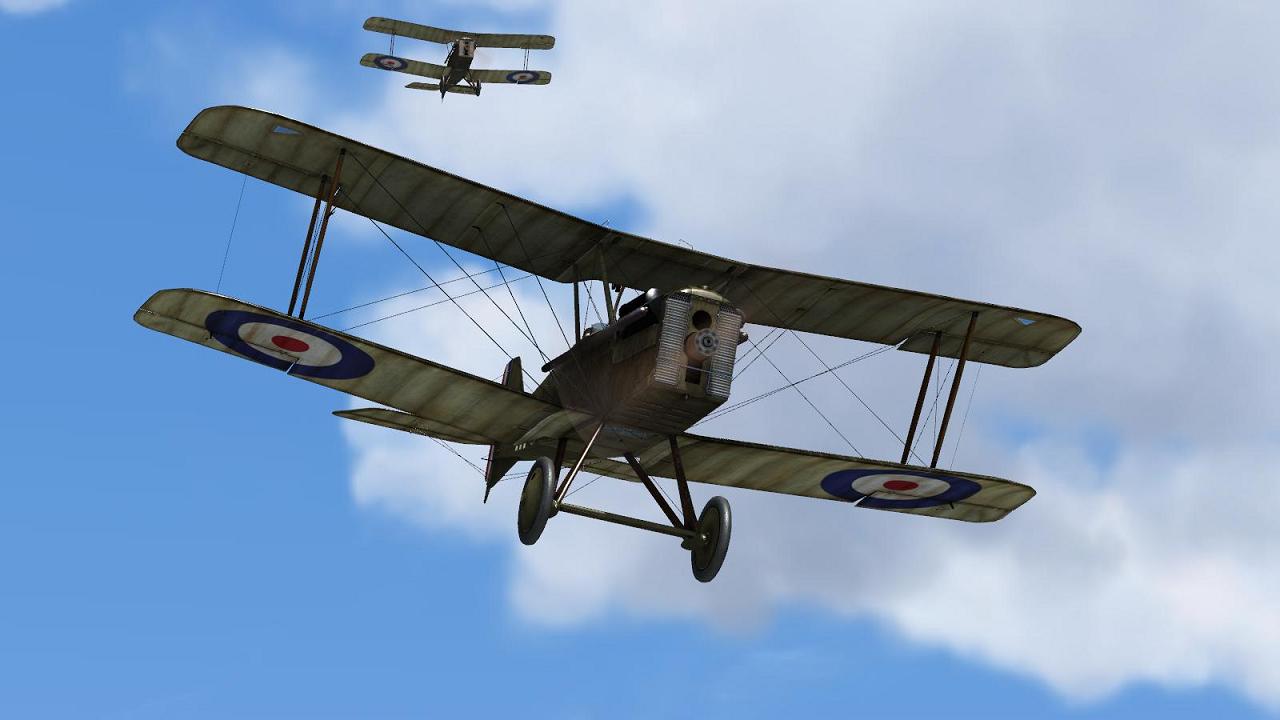
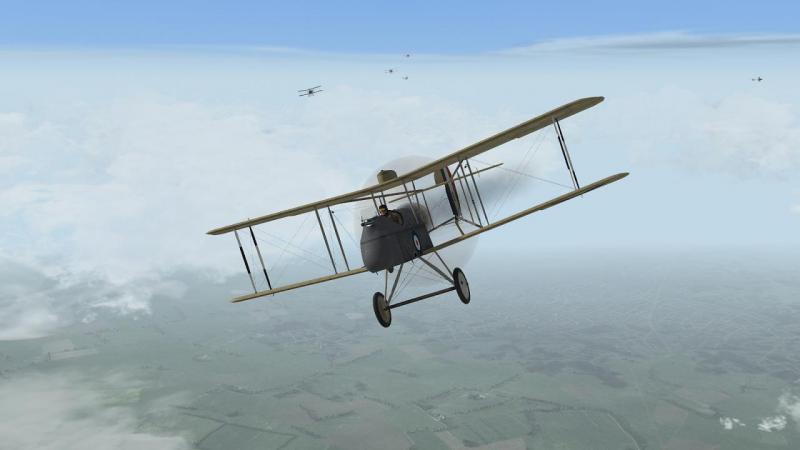
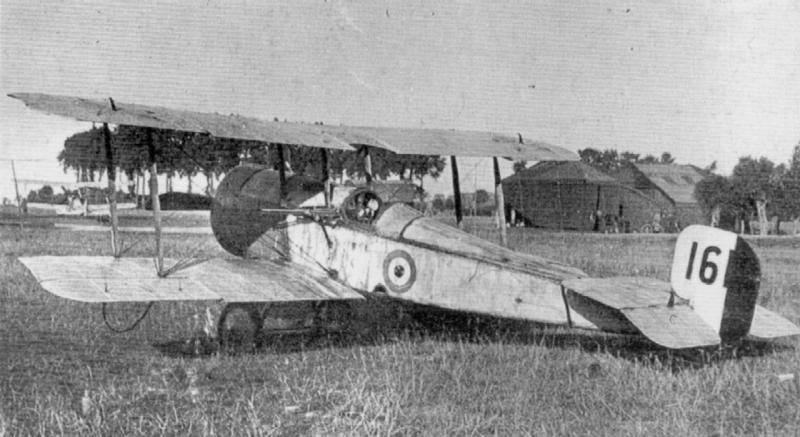
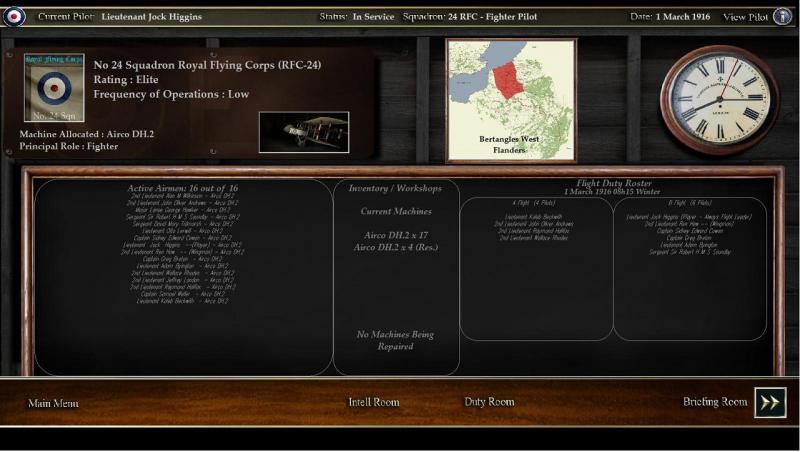
Flying the 'spinning incinerator' in Wings over Flanders Fields! "Led by Lanoe Hawker, No.24 Squadron (DH2s), Britain's first single-seater scout squadron, arrived in France on 8 February 1916 in great excitement but was immediately absorbed in a crisis of its own. The day after their arrival, one of the flight commanders, on the first flight of a DH2 from a French airfield, got into a spin and failed to recover. Five days later, another pilot spun in, and this time the machine caught fire. It had happened before, earning the DH2 the grisly sobriquet of the 'spinning incinerator'...Hawker responded by taking up a DH2 and, according to his biographer, spinning it from every conceivable angle, engine on and engine off, and demonstrating how, with correct remedial action, and provided there was sufficient height, it always recovered." Ralph Barker, 'A Brief History of the Royal Flying Corps', Constable & Robinson, 2002 Major Lanoe George Hawker, VC, DSO, deserves to be remembered not so much as a famous early victim of Manfred von Richthofen in November 1916, but rather, as the aggressive pioneer air fighter who won a VC for victories over three Germain aircraft - all I think machine-gun armed 2-seaters - on a single day in July 1915, flying a Bristol Scout with a Lewis Gun which had to be fixed to fire at an angle ahead to clear the prop disc - a real feat of arms. This is the actual machine he flew: As a Flight Commander in those days, Hawker's motto, pinned to the notice board, was 'Attack EVERYTHING!' and it was certainly a dictum he lived up to. Later, he was a natural choice to lead the Royal Flying Corps' first real single-seat fighter squadron. Just as No.24 Squadron was a natural choice of unit, when I decided to fly an early-war British fighter campaign in Wings over Flanders Fields. I had only just ended a 1916 campaign in another 'pusher', the two-seat F.E.2 - after one mission! We crashed after a dramatic collision with a Fokker... ...which didn't survive the encounter... We lasted a bit longer, surviving further damage in another Fokker attack as we drifted down with a dead motor and elevator control gone, but didn't live through the ensuing crash landing... So, you might say that I had a score to settle, when I chose to try my hand with another lattice-tailed aircraft, the De Havilland D.H.2, which was credited with a large part in ending the 'Fokker Scourge'. My new career starts in early March 1916, with 24 Squadron's first operations following its deployment to Bertangles in Flanders. You can see from the roster that the redoubtable Major Hawker is very much on the squadron roster - COs were forbidden to fly on ops due to the need to preserve experienced leaders, but Hawker still flew, letting one of the other flight commanders lead. One of whom is me, for my pilot, Lieutenant 'Jock' Higgins - no relation to famous pioneer RFC flier 'all bum and eyeglass' J.F.A. 'Josh' Higgins - is the leader of 'B' Flight. Our first mission is a patrol up to the lines, more or less directly to the east. I'm leading no less that six machines, and 'A' flight are putting up another four, so we should be able to give any Huns we meet a run for their money. The C.O isn't flying with me today, but I see one or two other famous names in my flight, including the later Air Marshall Sir Robert Saundy, who wasn't a 'Sir' (knighted) in 1916, butI think should be an officer by that point, rather than the Sergeant he's recorded as...maybe the Recording Officer has made a bit of a mix-up in the squadron roster somewhere. We make a fine sight on the grass before the sheds at Bertangles in the fine early morning March weather... ...and it's not long before we're off the ground and climbing away. Those Huns had better watch out - 'Twenty-four' has opened shop and means to do some business this day! ...to be continued!


- 2 replies
-
- 2
-
-
- woff
- wings over flanders fields
- (and 2 more)
-
Panzer Elite Brit44-x - South of Hill 112 - Churchill VIIs
33LIMA posted a gallery image in Member's Albums

From the album: Combat Sims
-
WOFF: Screenshots and Videos
33LIMA replied to RAF_Louvert's topic in WOFF UE/PE - General Discussion
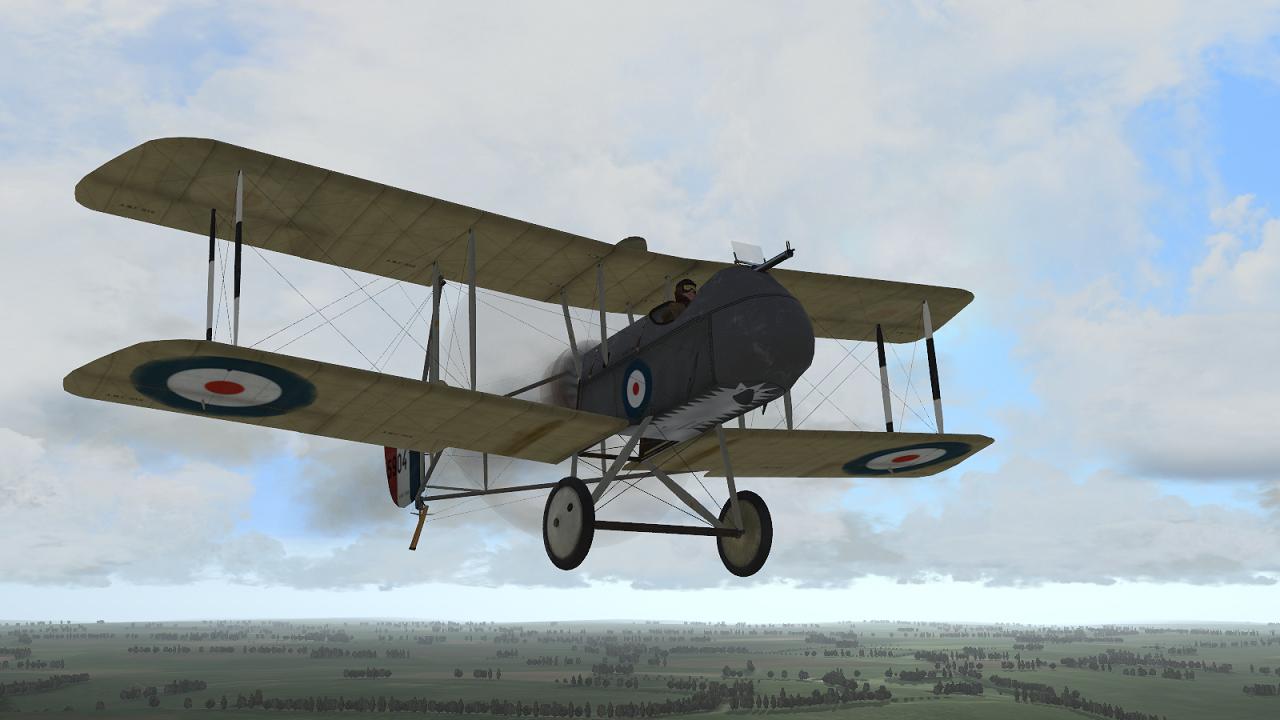
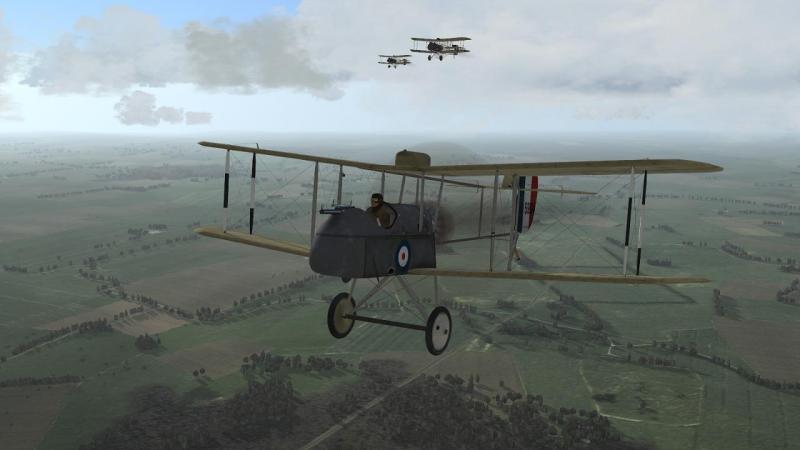
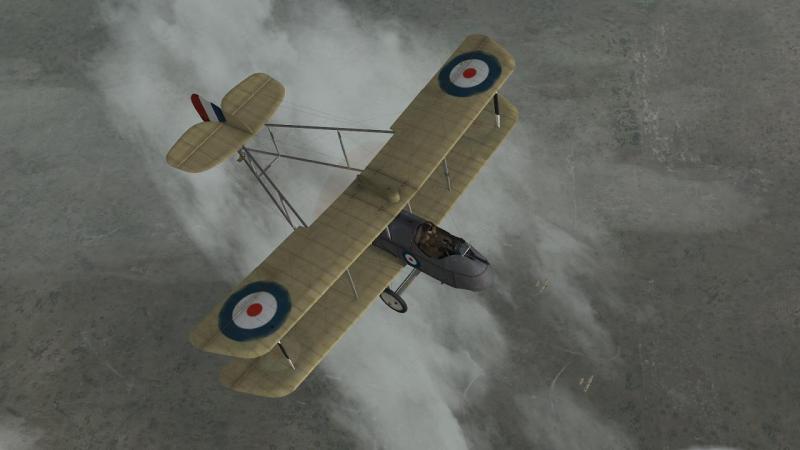
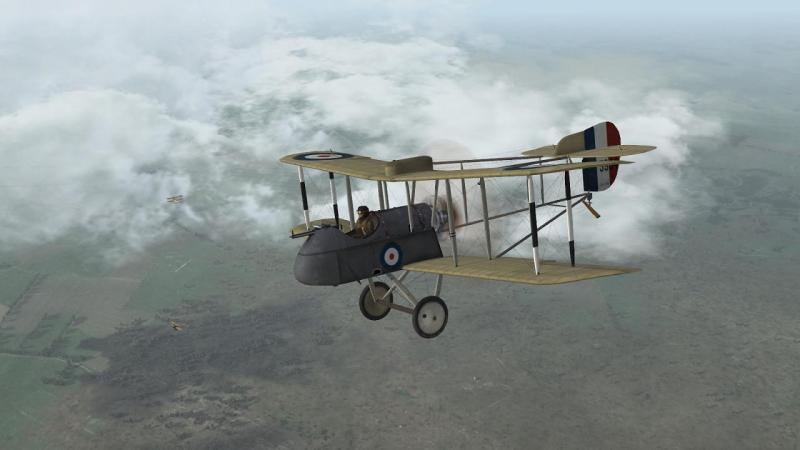
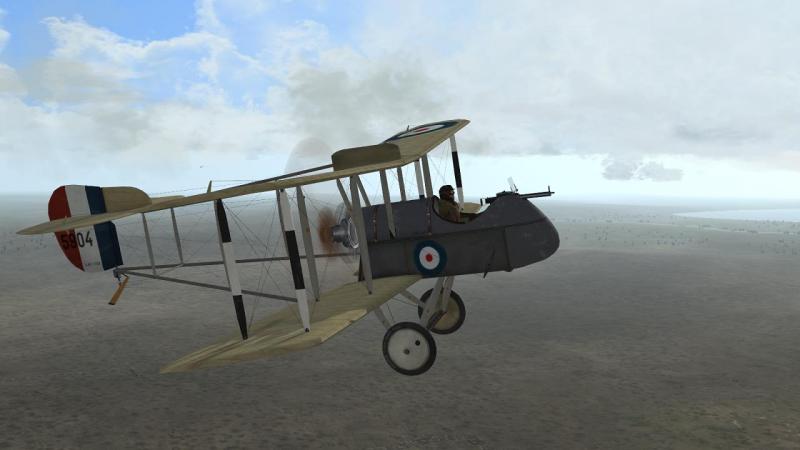
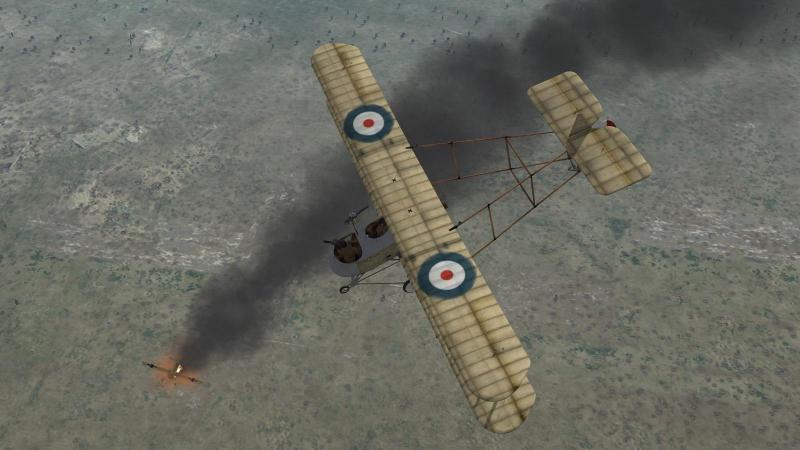
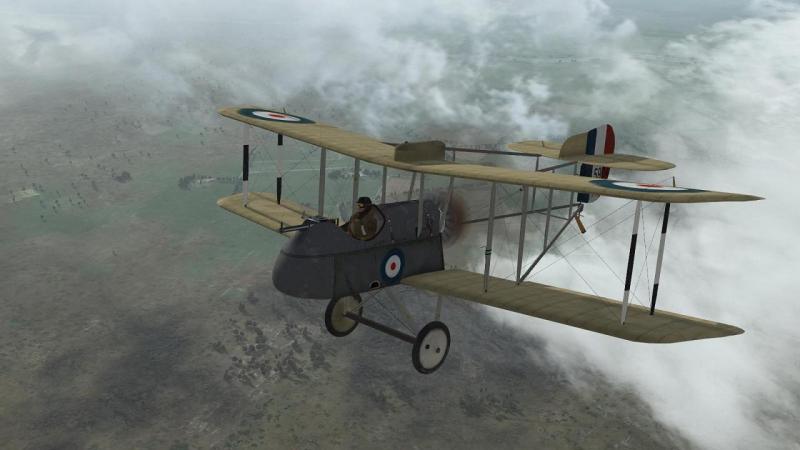
Some pics from recent careers in 1916: Roland C.IIs of Feldflieger Abteilung 3 return at low level from a scrap over the lines: A D.H.2 of 24 Squadron heads back to Bertangles after knocking down a Fokker: An F.E.2b of 22 Squadron going down over the lines with a dud engine, after a collision with a Hun:

-
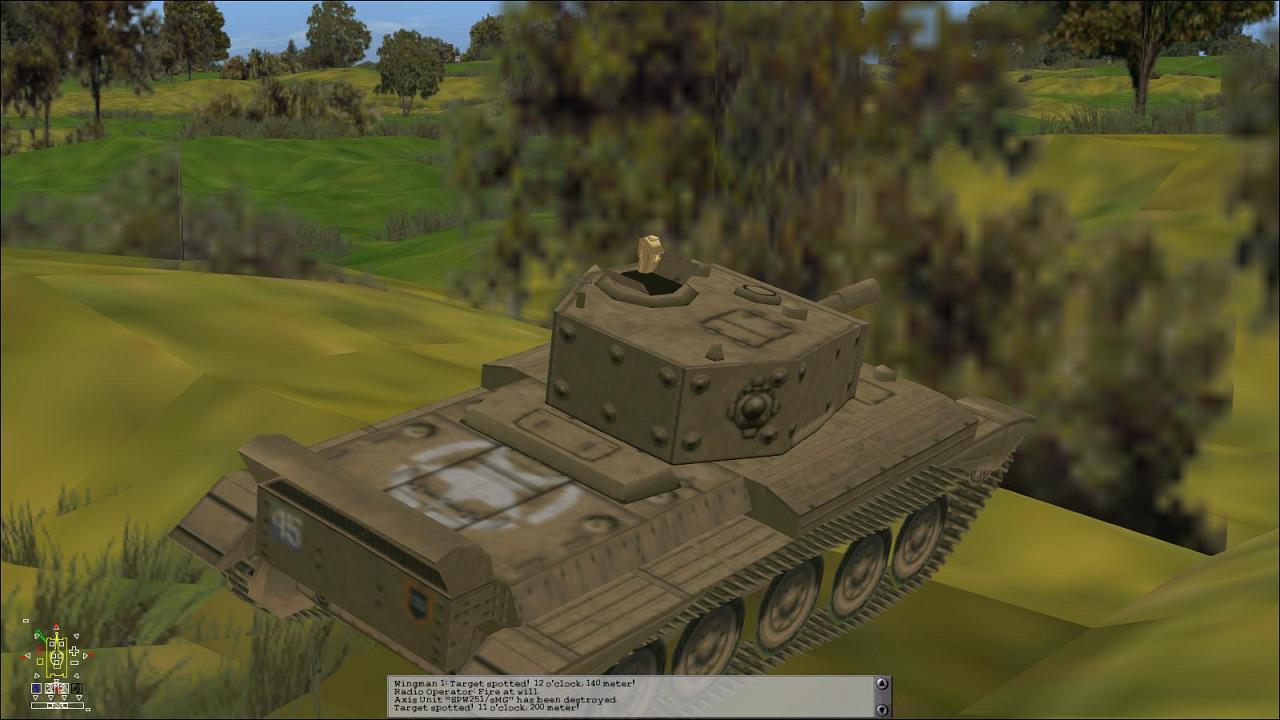
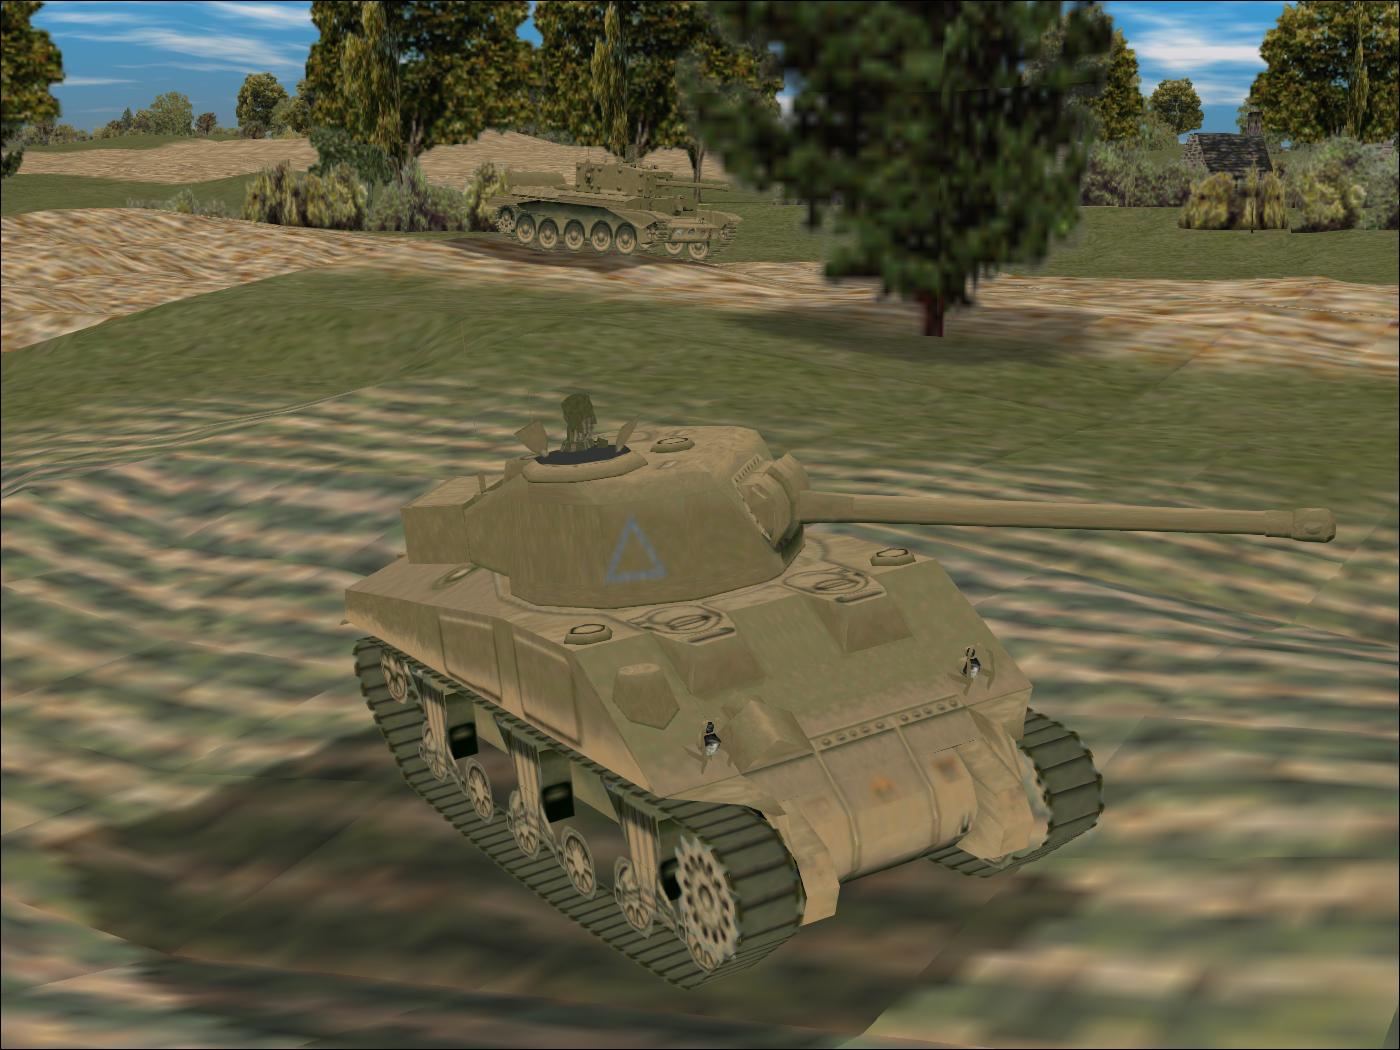
Panzer Elite Brit44-x beta - Sherman Fireflies, Normandy
33LIMA posted a gallery image in Member's Albums
From the album: Combat Sims
-
Panzer Elite Brit44-x beta - Sherman Firefly & Cromwell, Normandy
33LIMA posted a gallery image in Member's Albums
From the album: Combat Sims
-
Thanks and glad you liked it! It's good to be back in the clean skies after battling in the mud and snow of Graviteam's Eastern Front! And Ankor's latest DX9 mod, which adds both mouselook and subtle head bobbing to both CFS3 and WoFF, makes all the difference!

-

From the album: Combat Sims
-
From the album: Combat Sims
-
Farman HF.20
33LIMA replied to Stephen1918's topic in Thirdwire - First Eagles 1&2 File Announcements
Excellent work Stephen! Bravo! -
FE2 terrain objects drawing distance
33LIMA replied to Dornil's topic in Thirdwire - First Eagles 1&2
I thought the 'terrain objects not fading like they used to' issue was introduced by an SF2 patch later that the final FE2 one - in other words, wasn't an issue for FE2. -
FE2 terrain objects drawing distance
33LIMA replied to Dornil's topic in Thirdwire - First Eagles 1&2
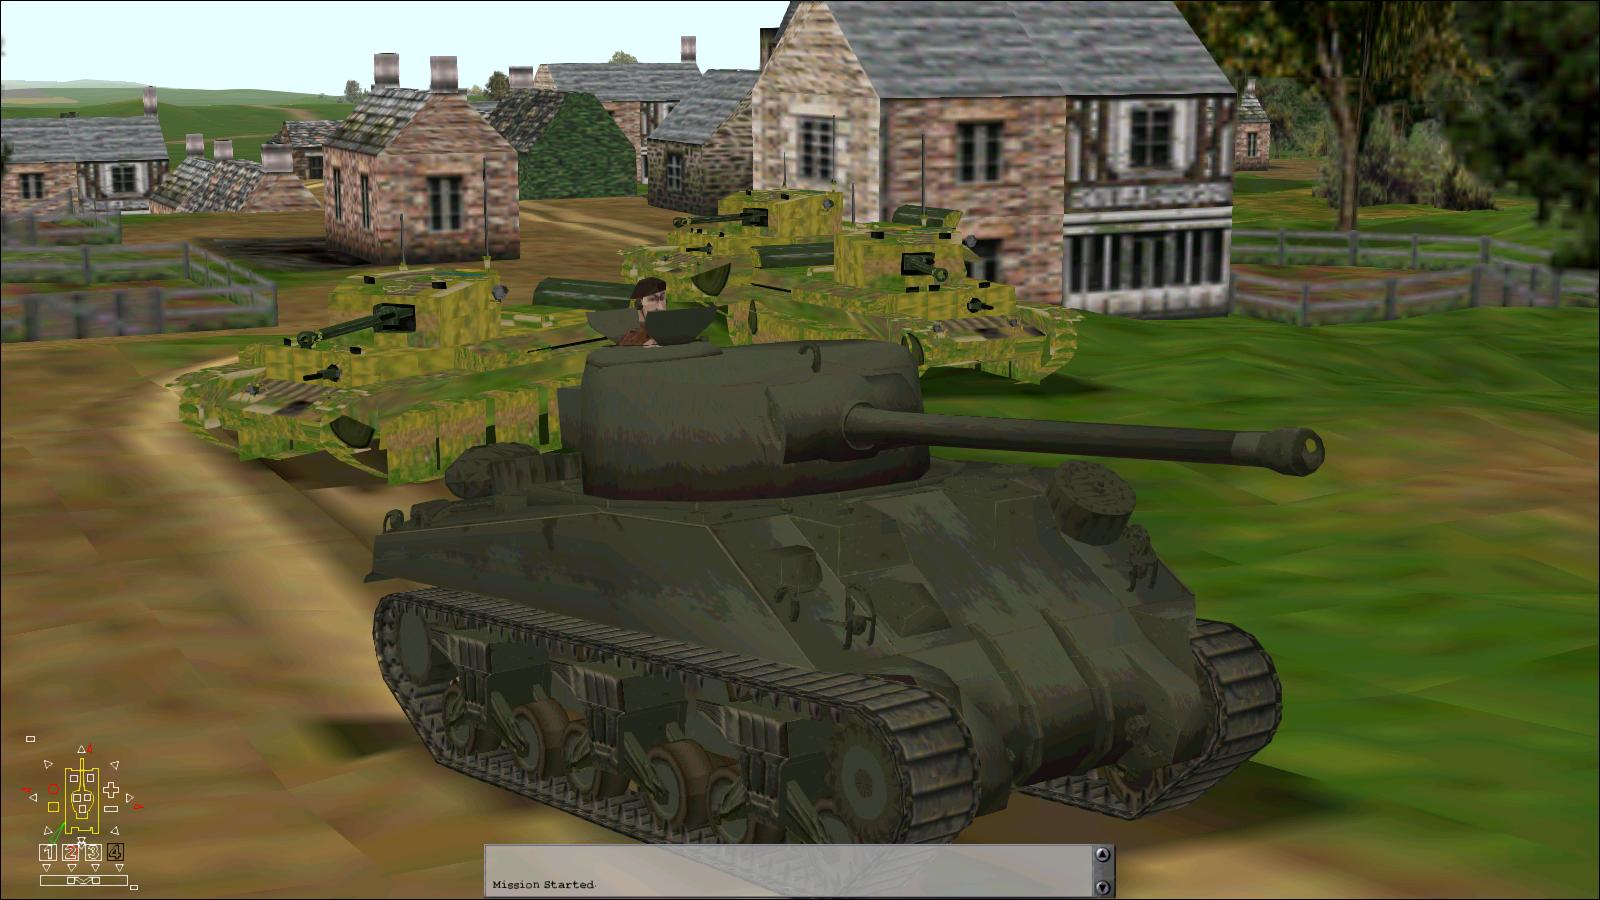
Not sure if it will work for Jan Tuma's terrain but it did for stock FE2 terrain - I hated the way towns in particular had this hard edge where the drawing range could be seen, much too close, even at highest graphics settings. Take a backup copy, then edit in Wordpad or similar the file (in your mods folder ) FLIGHTENGINE.INI, as follows Look for the series of blocks for each graphics setting that start 'XXXDetailOption' (where XXX is Low, Med, High or Unlimited, corresponding to the graphics option settings). Change the value of DetailMeshSize for the setting you use, to a bigger number - I have 18 set for all my options. Shown at bottom is the block for medium setting. I had used 22 but 18 seems to be enough, so that I no longer notice the draw in of ground objects. Save and test. I don't recall if the pic below was taken with 22 or 18, but stock, before the file edit, I would have been able to see a zig-zag far edge to the towns that are visible; instead, with the edit, buildings in towns are drawn out as far as the horizon blur, making the draw-in pretty well invisible. Hope this helps! [MedDetailOption] HorizonDistance=12000.0 DetailMeshSize=18 DetailLevel=1 WaterEffect=1 NoiseTexture=0 MaxTextureRes=256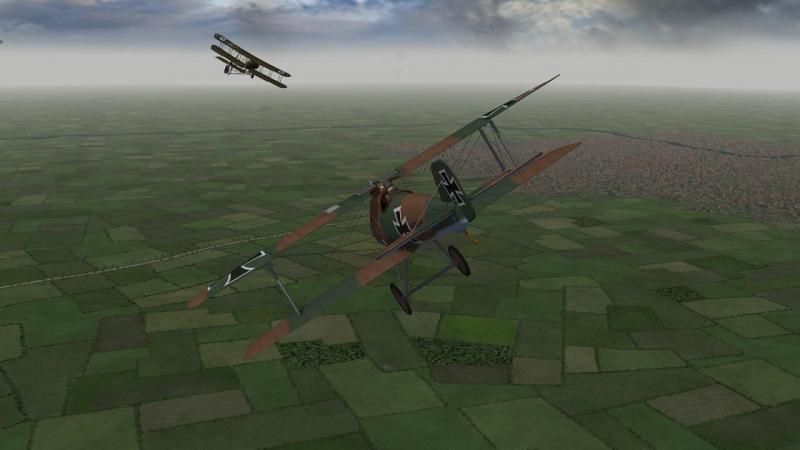
-
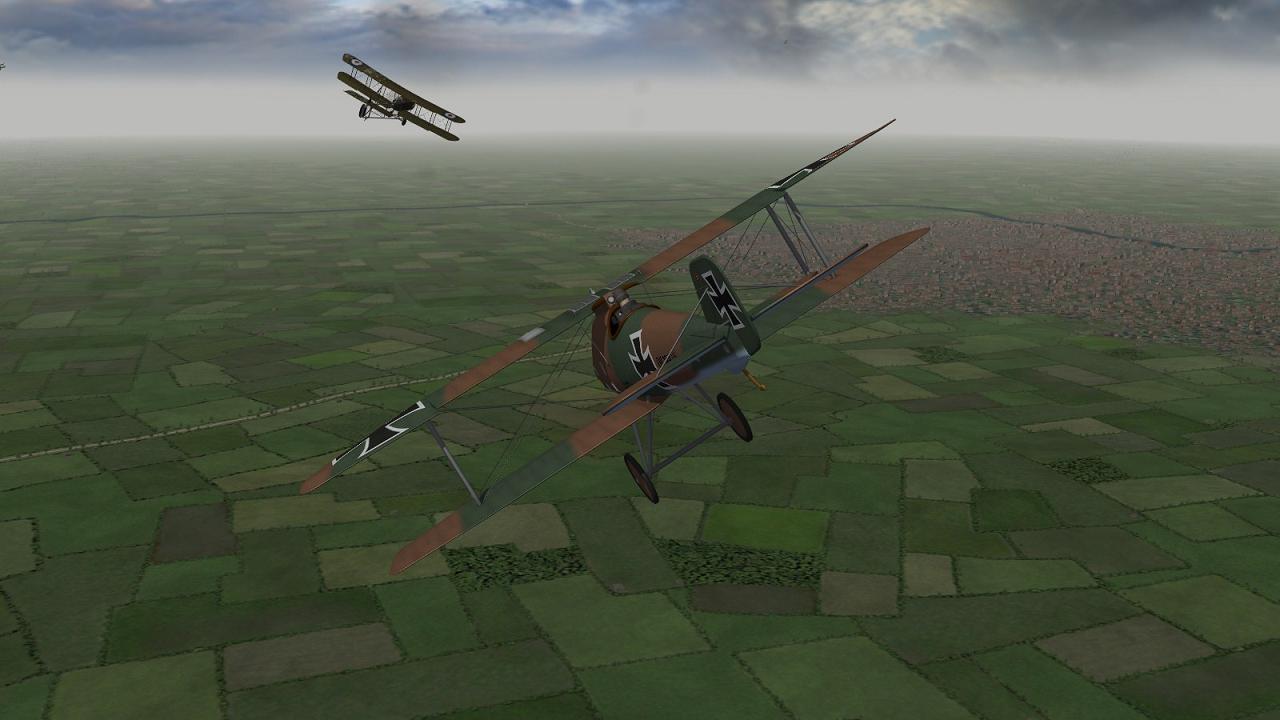
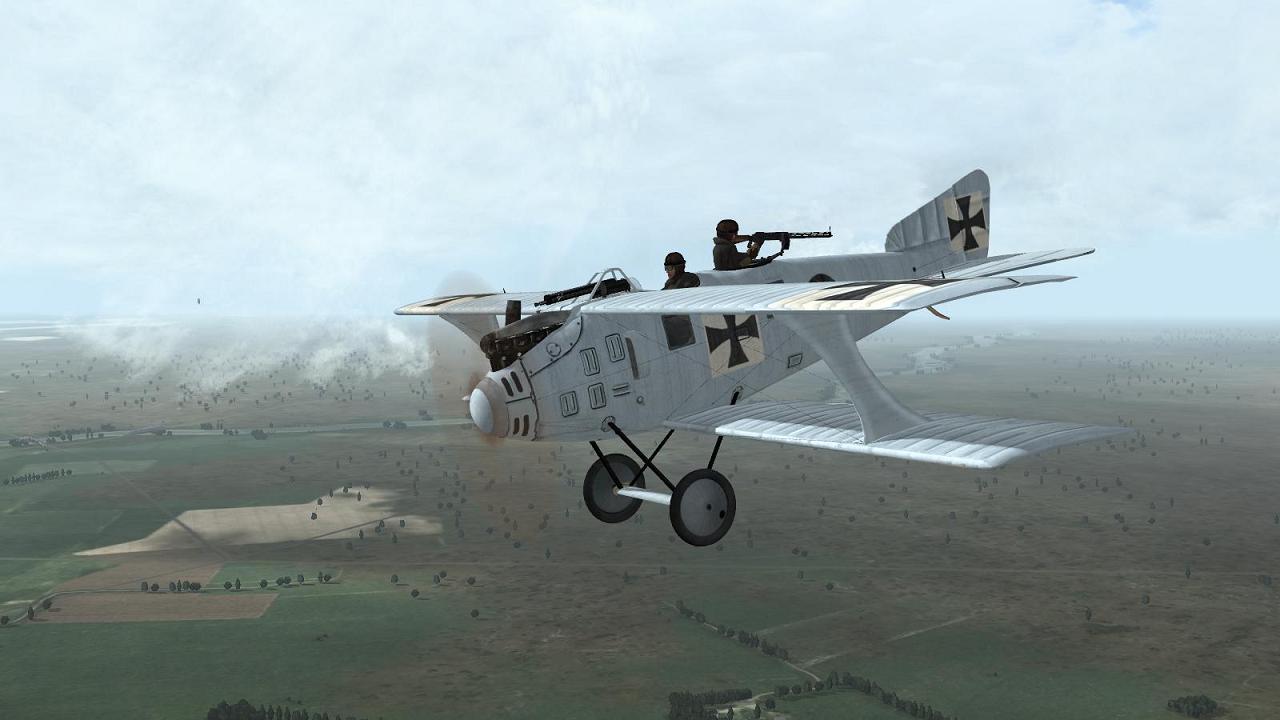
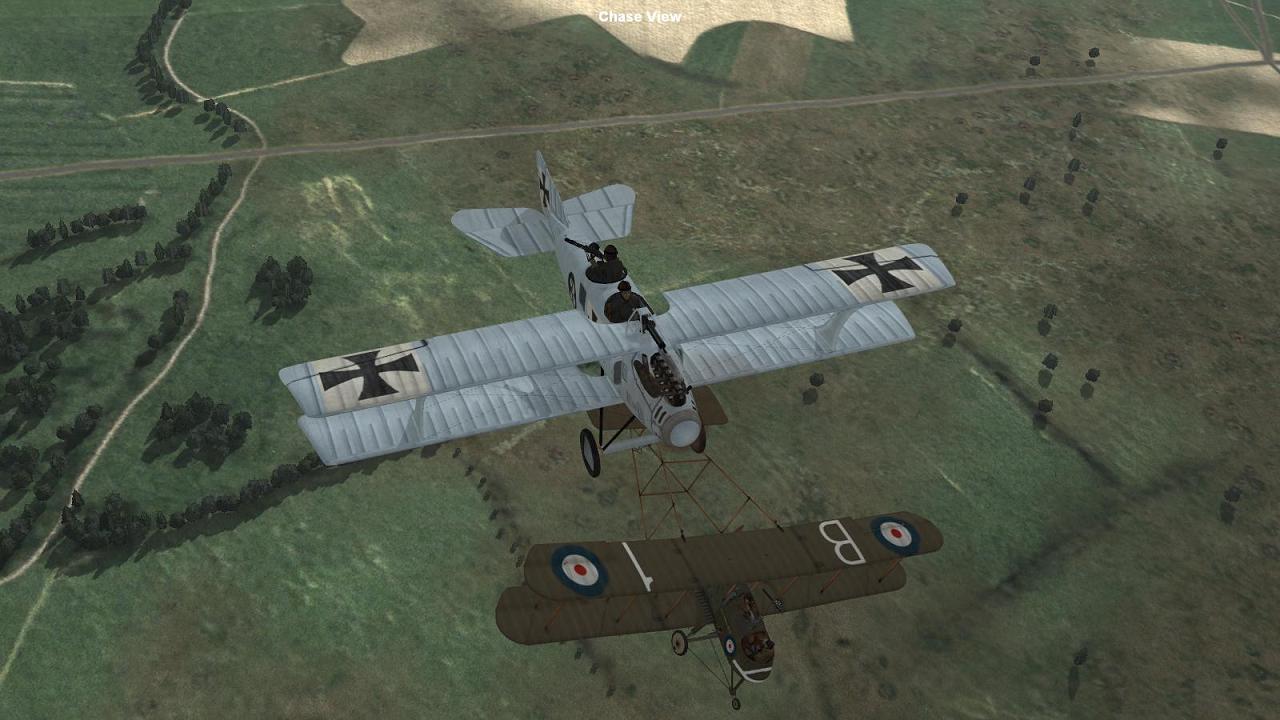
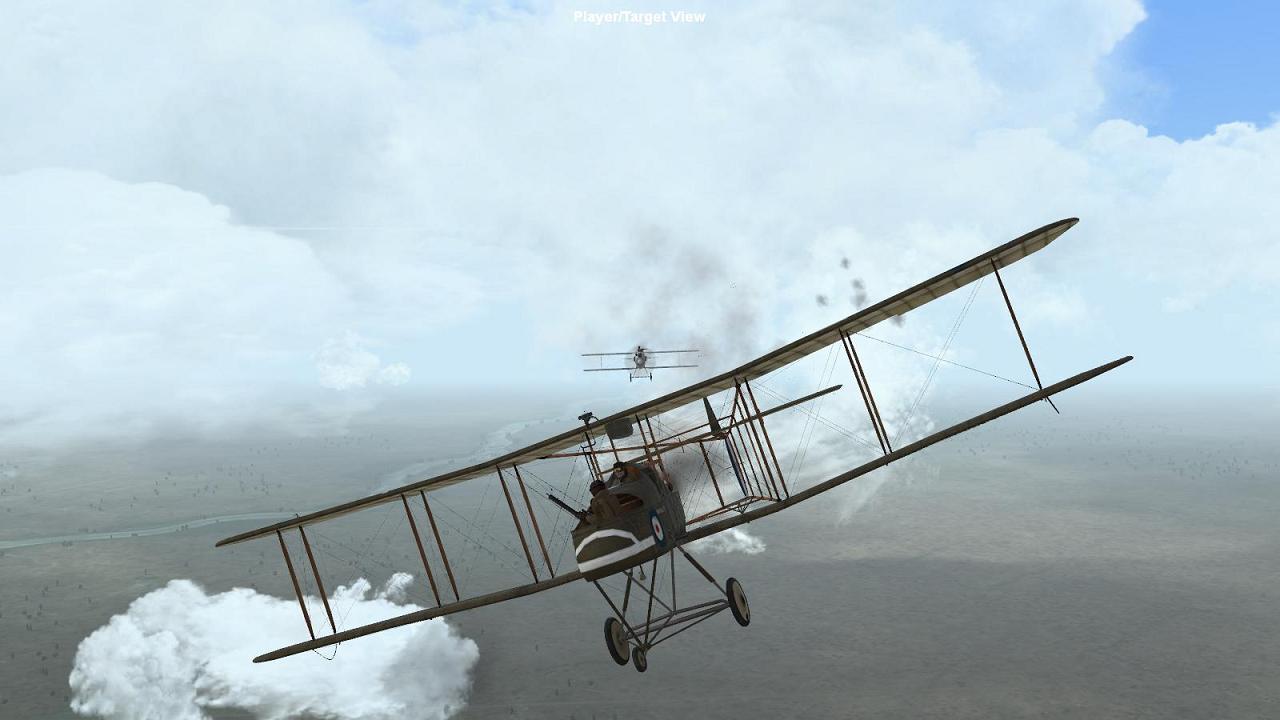
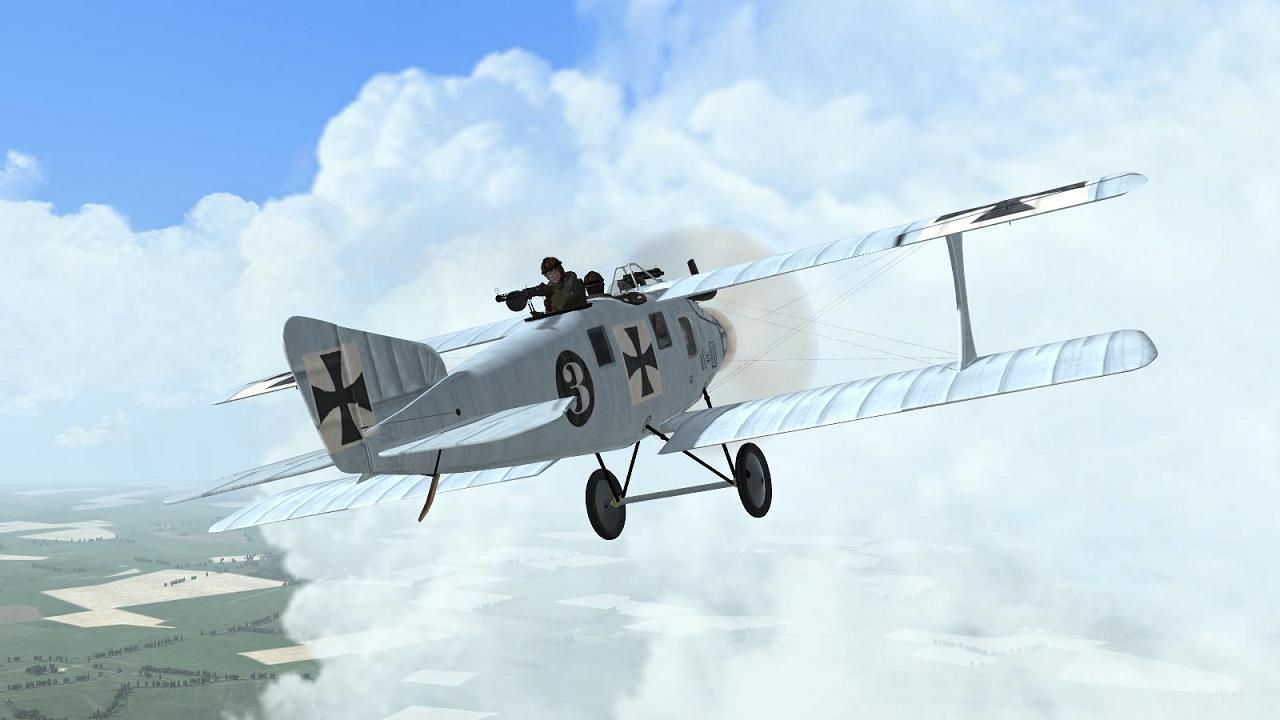
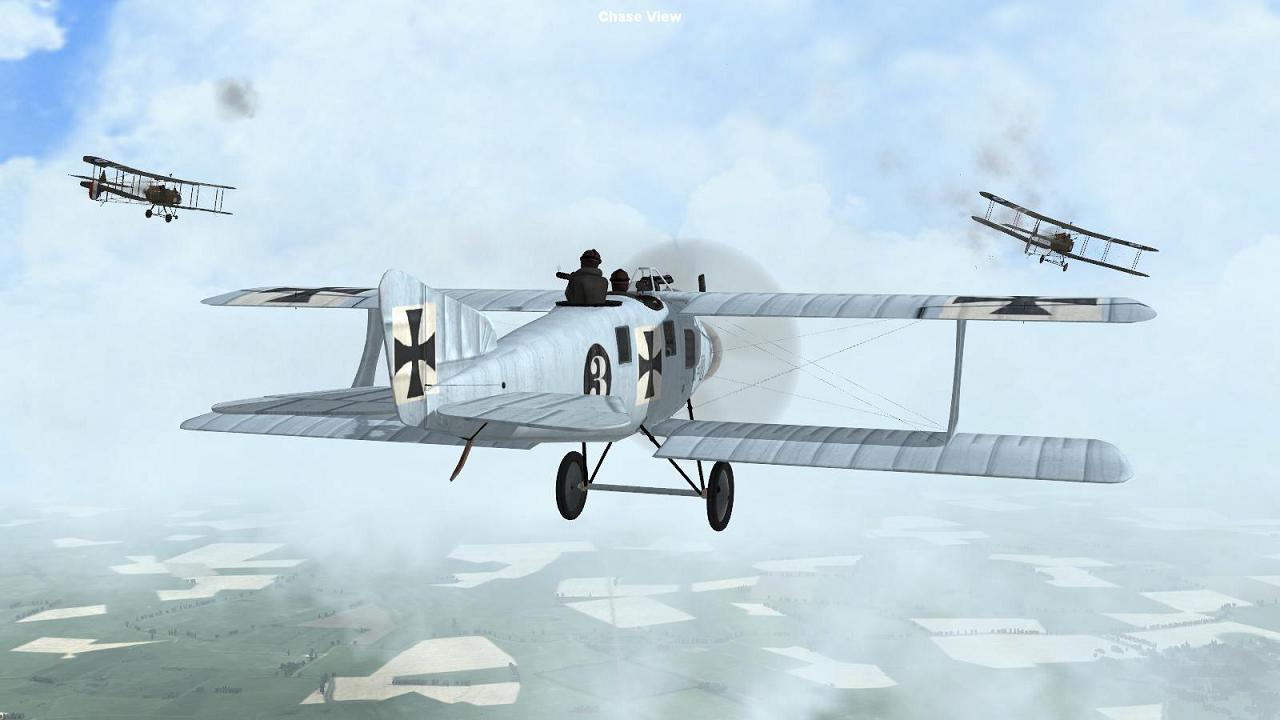
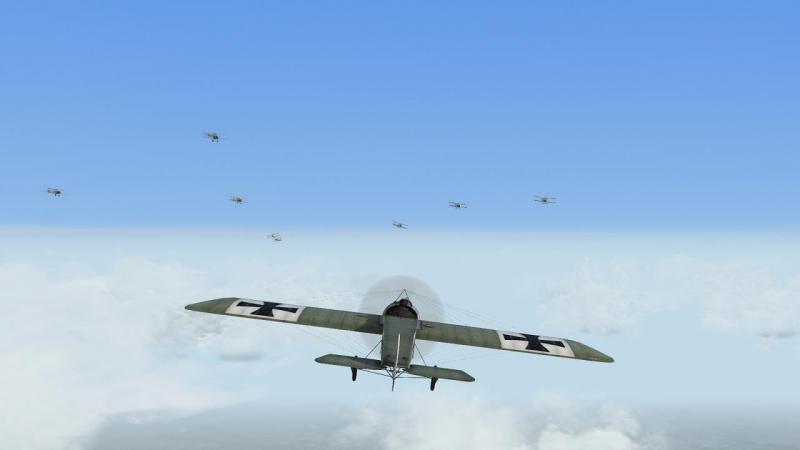
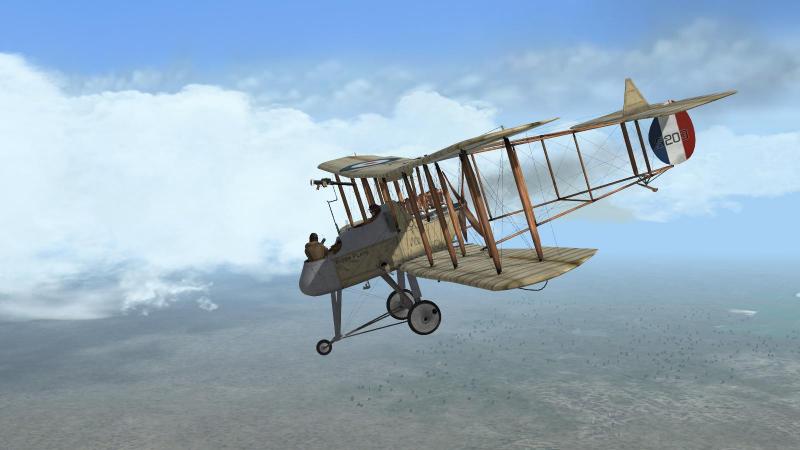
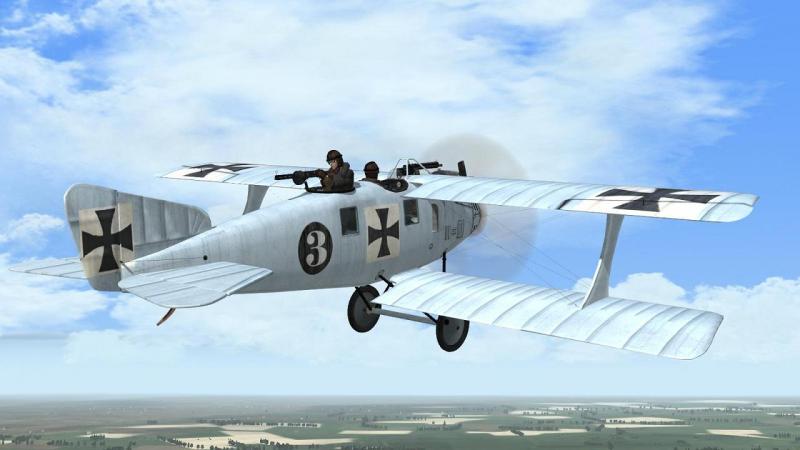
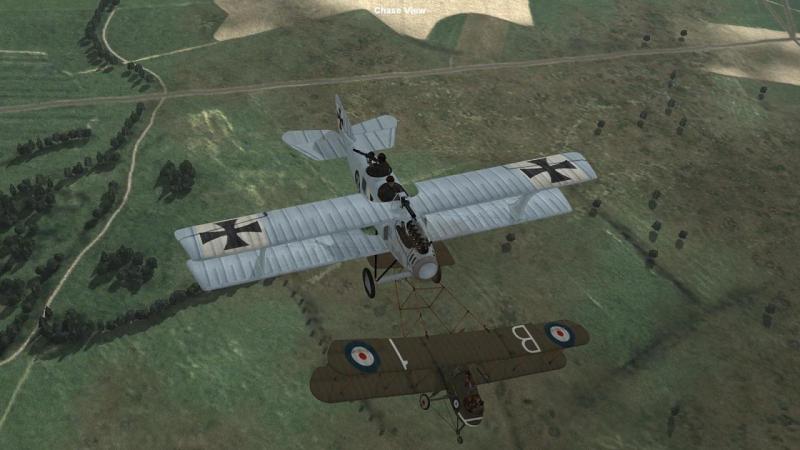
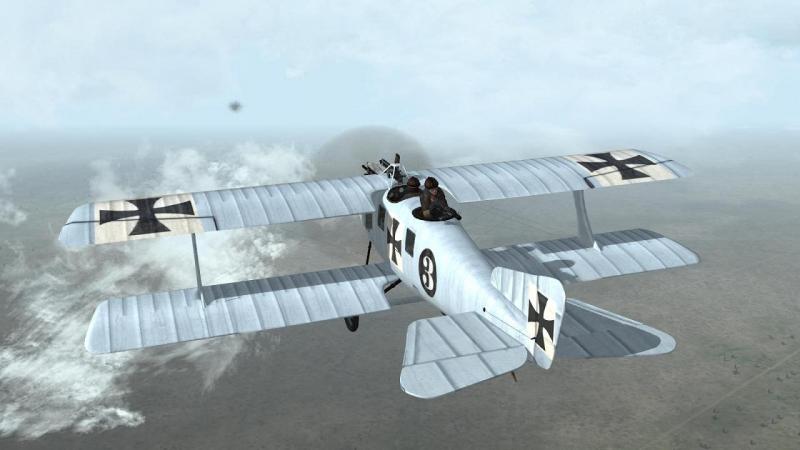
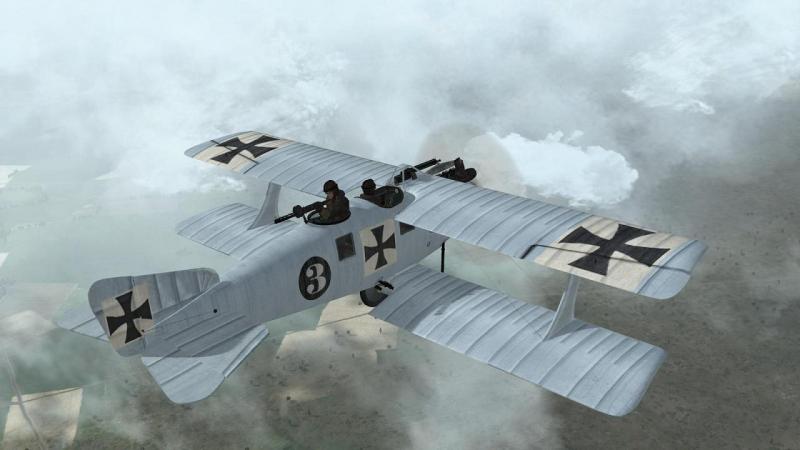
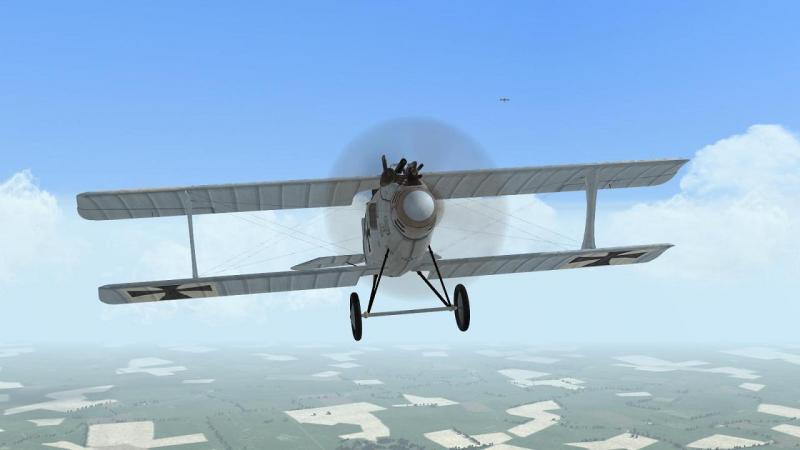
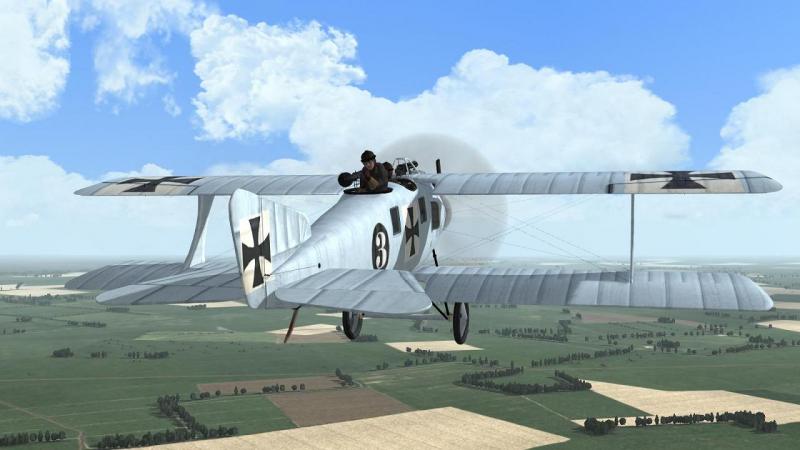
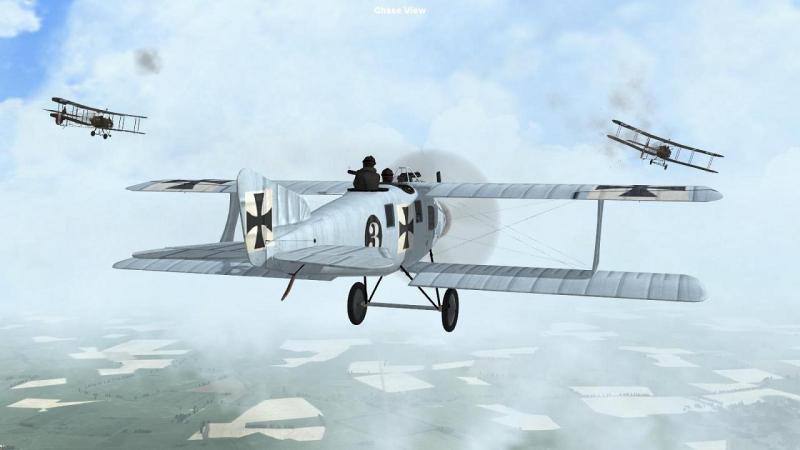
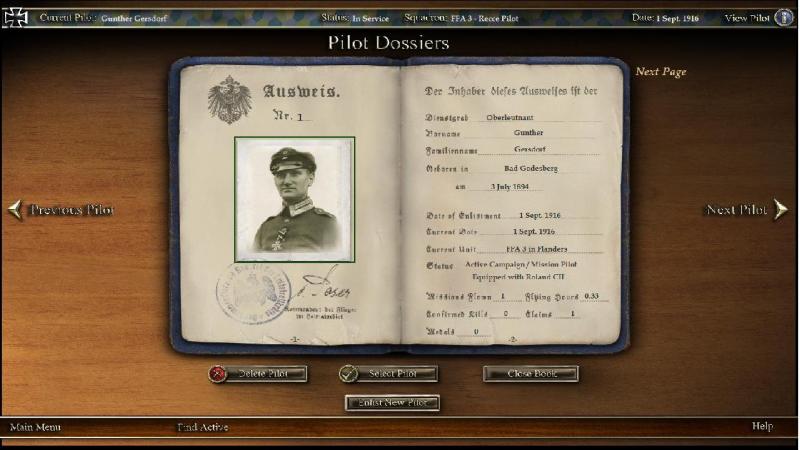
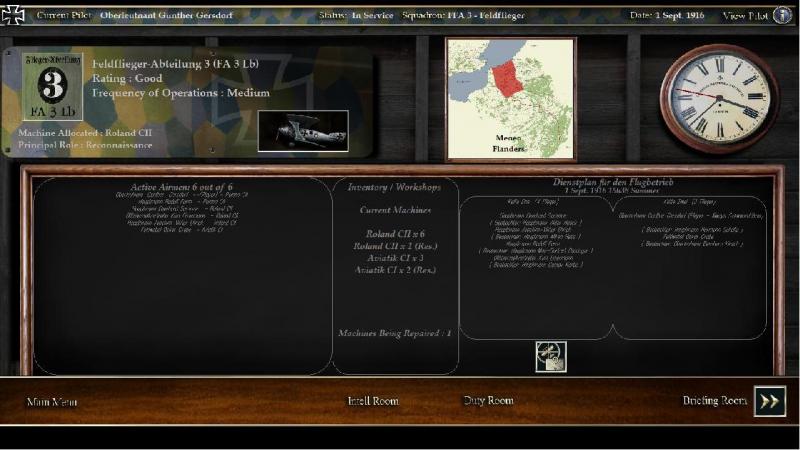
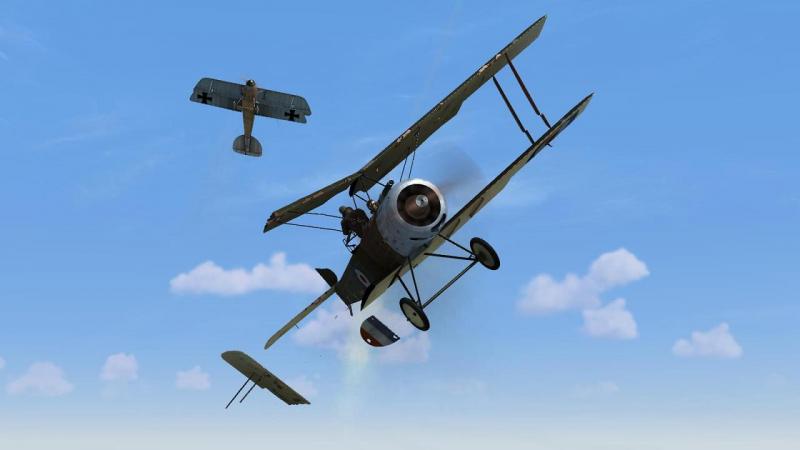
First mission in a new two-seater career in Wings over Flanders Fields 'Truly, this machine is a whale' ('walfisch' in German), one of the acceptance commission officials is reported to have said of LFG Roland's C.II two-seater, when it first flew about October 1915. Not the kindest of epithets, but it stuck - indeed, one famous flier of the type, Eduard von Schleich, made his Roland look even more whale-like by painting a mouth and eyes onto the nose of his machine, as people familiar with the old Airfix 1/72 kit will recall. Portly though it looked, the Roland was in its time an advanced machine, fast and well-armed, with superb view and fields of fire upwards, for a biplane. Less happily, the thin wings were reported to warp under front-line conditions, reducing climb rates, and the poor downward view and high approach speed made for rather a lot of landing crack-ups. Nevertheless, about the middle of 1916, RFC ace Albert Ball described the Roland as 'the best German machine now' and they type soldiered on over the Western Front till about mid-1917. This isn't my first WoFF mission report in this type - that can be found here. However, it's been a while since I have flown the Roland. I decided it was time to break out of my traditional 1917 campaigns with one the year before, flying and fighting against an earlier generation of combat aircraft. For the German side of that experience, I was initially tempted to fly the neat Halberstadt D.II.. But instead for additional novelty, I thought I'd go for a two-seater, with the Roland being an obvious choice - like the RFC's Sopwith Strutter, it was no mere target, but more of an all-round combat aircraft, with a decent air-to-air capability. To digress slightly, I'm still flying the original version of WoFF - my PC, though able to produce acceptable FPS (most of the time) with high graphics settings, has been left behind as the minimum specs have crept up. However, though I think it has introduced some stutter on my old rig at low level in graphically 'busy' situations, I am using the latest version of Ankor's DX9 mod, which to aircraft and ground shadows, has now added two really outstanding new features to Wings over Flanders Fields - subtle 'head bobbing' during manoeuvres, and mouse look. Marvellous stuff! For my Roland campaign, I wanted a unit equipped with this type in the summer of 1916, based in the British sector - until the arrival of WoFF Ultimate Edition, the sim has somewhat limited coverage of French orders of battle, now pretty well remedied with the addition of the Caudron G.IV and Breguet 14. So I ended up with Feldflieger Abteilung 3, based at Menen in Flanders, starting in August 1916. Here's the squadron roster, which shows me at the head of the second flight as usual in WoFF, in this case Kette Zwei; also as usual, I've enabled the 'Always lead' option to ensure that I fly at the head of my flight, every time, with no need for tedious formation flying. The unit still has some old Aviatik C.IIs. It was quite common for German two-seater units to operate a mix of aircraft types, helped no doubt by the fact that many had similar makes of engines, which probably shared many parts. Our first mission was artillery observation, directing the fire of a battery. I believe Rise of Flight is the only WW1 sim which provides a game mechanism to simulate this activity; in the others as in WoFF, it's a case of flying to the objective, where you can orbit back and forth between the likely positions of target and battery, simulating your task (which was commonly flown in a back-and-forth figure of eight pattern). 'Art obs' planes generally operated alone, on the British side having escort only in the form of timed patrols; but the Germans often seem to have provided direct escorts. In fact, the 'CL' or light C-type two seater, though much employed later for ground attack, was intended to have just such an escort role. And the Roland C.II is arguably the immediate progenitor of the CL types that followed, like the Hannover CL.II and III and Halberstadt CL.III and IV. For this job, four of us are detailed: three Rolands and an old Aviatik. I have accepted the unit's stock colour scheme for my kite, though with the now-free historical skin pack, I could have chosen something different, but all I did was reduce the flight's fuel load to 80%, more than enough for this operation. Here I am hareing across the grass at Menen. The weather is good, Kette Eins is said to be flying in support, plus we have two Fokker eindekkers coming down from the north as additional cover. All in all, it's quite a big effort for an art obs mission, so perhaps the target is especially important. Early on, I realise the Aviatik is going to struggle to keep up with our fast Rolands. I should perhaps play it as if he is the one with the morse transmitter plotting the fall of shot, and maintain formation with him so as to act as a close escort. But I decide instead to press on and sweep the skies clear, ahead of him. Although WoFF doesn't have a functional 'warp to next event/waypoint' feature and has limited time acceleration, I generally prefer flying in real time. Even if the flight to the front is longer than this trip, the visuals are sufficiently impressive to make it a valued part of the experience, for me. The excellent cloudscapes are a major part of this, especially with Arisfuser's cloud mod.Love it! For much of the trip down to the south-west towards the lines, I see neither Kette Eins nor the eindekker escort. But finally, nearing the front, I look up and behind, and there, hanging in the skies above, is a Fokker monoplane. The second one is lower down, but also catching us up...or trying to, not very successfully. Soon, seen through the broken cloud, the green and yellow fields below us are giving way to the muddy earth brown of the shelled area. It won't be long now, till we are in the target zone. At this point, we see the black smudges of German AA fire below and ahead. As I watch, I can see that the bursts are tracking towards us. Looking for their targets, I can just about make out two small specks close together, below and ahead of the flak bursts. They're on a roughly reciprocal course, but are not climbing as if to intercept us. I watch the two enemy aircraft warily as they pass below and slightly right. I can see as they pass that they are 'pusher' types, probably F.E.2s, 'Vickers two seaters' as they Germans commonly knew them. If they'd been DH 2 fighters, they would likely be attacking us. I could ignore them, and possibly should. I hesitate, remembering that we have artillery fire to direct. But I decide that can wait, and pull around and down, after the two Englishmen, before they get too far away. Leaving the rest of my own flight lagging, I'm soon attacking their leader from his blind spot. Obligingly, my trusty observer starts shooting at the second F.E. to our left, even as I'm knocking bits off the first one. My target turns right out of formation. I close the range, firing as I come and getting more hits. At this point, the F.E.'s speed drops off, and a wisp of dark smoke begins to unravel in his wake. I weave but end up overshooting, giving his observer the chance to put some rounds into my machine, in return. I try a rolling scissors but he's going so slowly I just can't keep behind him, working hard as I have to, to control my Walfisch's tail-heavy tendency to push the angle of attack well up. The F.E's bobbing up and down now, like he's strugling to stay under control, but I know only too well that he's still dangerous. So I do what I should have done earlier and make a clean break, swerving away and then coming around in a wide arc to make a fresh attack. This at last has the desired effect. After some more short bursts from my forward-firing MG, the F.E. goes down with a stopped propeller. I look around for the others, but see nothing of them. I recall noticing two of them flying close together straight and level, so perhaps they had decided to leave me to it, and go on with the mission (the WoFF AI will reportedly do this, if they conclude their leader is giving up or no longer able to fly the mission). My plans for my next move are interrupted, however, when the noise and revs of my motor drop back. The power dies too and I'm left to turn east and search for somewhere to force land. Evidently, the hits the F.E. did managed to land on my Roland are responsible for this unfortunate turn of events. Happily, I'm well on our side of No Man's Land and almost clear of the ground torn up by shellfire. And there's an airfield nearby, but while I edge around in its direction, I haven't enough height to make it there. Instead, I manage a creditable forced landing in a big field that's fortunately bereft of the lethal fences which can bring many such a move to grief, in WoFF. Well, my diversion meant that I failed to get to my artillery spotting location, which is not good; but my flight may have been able to carry on. In return, I've knocked down an Englishman, at the cost of a damaged motor. Not too bad a day's work, for my first day at the front! Below, is my pilot logbook after this sortie, opened to show that I have made my victory claim, as yet unconfirmed... A couple of pages further on, I can re-read the combat report which I typed up afterwards, against the entry for the claim. So far, so reasonably good. Very early days yet, but I'm rather hoping that this will be the start of a long and successful career!


- 5 replies
-
- 2
-
-
- woff
- wings over flanders fields
- (and 1 more)
-
Some mostly off-the-beaten track stuff, from my own favourites, by subject category... Armoured and land warfare White Tiger - despite the sureal apects, much the best tank film yet made, in my book English - subtitled version can be viewed here, as I write this - The Beast - interesting tank fim based on soviets in Afghanistan and using an Israeli 105mm-gunned T-55 as a T-62 - preview available here - Mailed Fist by John Foley - much the best tankie memoir I've read, by a Churchill troop leader in NW Europe, 1944-45 - https://www.amazon.com/Mailed-Fist-John-Foley/dp/0583124917/ref=sr_1_1?ie=UTF8&qid=1483792013&sr=8-1&keywords=mailed+fist Caen - Anvil of Victory by Alexander McKee - great grunt-level account from both sides, by one of my favourite authors With the Jocks by Peter White - down to earth and detailed account of what it was really like to be an infantry platoon commander in NW Europe, 1944-45 The Irish War by Tony Gerriaghty - all you really need to know about 'the Troubles' in one book - https://www.amazon.co.uk/Irish-War-Tony-Geraghty/dp/0002556170/ref=sr_1_sc_1?s=books&ie=UTF8&qid=1483794658&sr=1-1-spell&keywords=the+irtish+war Contact! by AFN Clarke - the BBC short film, rather than the book - classic and largely ultra-realistic squaddie-eye view of 'the Troubles' was on youtube at one point, now available on Amazon - http://www.imdb.com/title/tt0088949/ and https://www.amazon.co.uk/dp/B01N52QKDL?tag=_&camp=1406&creative=6394&linkCode=as1&creativeASIN=B01N52QKDL&adid=14DGBEEEQRNKY1WPXPWQ& Air Warfare Richthofen - a true history of the Red Baron by William E Burrows - won't tell you the serial # of each plane he flew but much the best-written and most personal account of MvR - https://www.amazon.com/Richthofen-True-History-Red-Baron/dp/0151771723/ref=sr_1_5?ie=UTF8&qid=1483792504&sr=8-5&keywords=richthofen Flying Fury by James McCudden - one of the most-quoted WW1 pilot memiors, and much the best of those written at the time - https://www.amazon.com/FLYING-FURY-Years-Flying-Illustrated-ebook/dp/B00DJ75KS8/ref=sr_1_1?ie=UTF8&qid=1483792863&sr=8-1&keywords=flying+fury No Parachute by Arthur Gould Lee - probably the best of the post-war WW1 pilot memoirs - https://www.amazon.com/gp/product/1909166049/ref=s9_psimh_gw_g14_i6_r?ie=UTF8&fpl=fresh&pf_rd_m=ATVPDKIKX0DER&pf_rd_s=&pf_rd_r=X5J4AYNWX3KA6BWVQ3XT&pf_rd_t=36701&pf_rd_p=a6aaf593-1ba4-4f4e-bdcc-0febe090b8ed&pf_rd_i=desktop The Big Show by Pierre Closterman - if a better, more vivid WW2 fighter pilot memoir exists, I have yet to read or hear of it - if you read only one of this genre, it has to be this one - https://www.amazon.com/Big-Show-Greatest-Military-Paperbacks/dp/0304366242/ref=sr_1_1?ie=UTF8&qid=1483793051&sr=8-1&keywords=the+big+show+clostermann The Schweinfurt Regensburg Mission by Martin Middlebrook - told with the author's customary ability to weave tactical aspects and first person accounts into a compelling story and a comprehensive history - https://www.amazon.co.uk/Schweinfurt-Regensburg-Mission-Middlebrook-Martin/dp/0684179830/ref=pd_sim_14_5?_encoding=UTF8&psc=1&refRID=MKC44RGAKAWFT46JY4Q2 The Friendless Sky by Alexander McKee - participant's eye view of WW1 in the air, told with humanity and insight - https://www.amazon.com/friendless-sky-Alexander-McKee/dp/0586058230/ref=sr_1_2?ie=UTF8&qid=1483793166&sr=8-2&keywords=the+friendless+skies On a Wing and a Prayer by Joshua Levine (also published under the melodramatic and inaccurate title Fighter Heroes of WW1) - excellent account of the experiences of participants over the Western Front in WW1 - https://www.amazon.co.uk/Joshua-Levine-Prayer-Pioneering-Aviation/dp/B00I60LAWI/ref=sr_1_7?s=books&ie=UTF8&qid=1483794228&sr=1-7&keywords=joshua+levine A Brief History of the Royal Flying Corps by Ralph Barker - a superb account and often moving, weaving together the personal stories of many airmen, famous and otherwise. Biggles of 266 by WE Johns - despite the 'boy's own' audience, conveys a pilot's eye view of WW1 in the air as well or better than many more serious accounts, often written with a modern perspective - https://www.amazon.com/Biggles-266-Rewards-W-Johns/dp/0603034071/ref=sr_1_1?ie=UTF8&qid=1483793322&sr=8-1&keywords=biggles+of+266 The Blue Max - despite a few liberties with markings and trigger mechanisms, still much the best WW1 air war film - one air combat sequence here is - The Battle of Britain - still much the best WW2 air war film, in my book - the opening sequence alone is worth the price of admission - Naval warfare Pursuit by Ludovic Kennedy - the familiar tale of Bismarck told with humanity by someone who was there - https://www.amazon.com/PURSUIT-Chase-Sinking-Battleship-Bismarck/dp/B000QGMRG8/ref=sr_1_2?ie=UTF8&qid=1483793375&sr=8-2&keywords=pursuit+the+sinking+of+the+bismarck Few Survived by Edwin Grey - a darker take on submarines - https://www.amazon.co.uk/d/cka/Few-Survived-History-Submarine-Disasters-Edwyn-Gray/0708833942/ref=sr_1_1?s=books&ie=UTF8&qid=1483793722&sr=1-1&keywords=few+survived Iron Coffins by Herbert A Werner - my favoutite U-boat commander memior - https://www.amazon.co.uk/Iron-Coffins-U-boat-Commanders-1939-45/dp/0304353302/ref=sr_1_1?s=books&ie=UTF8&qid=1483793842&sr=1-1&keywords=iron+coffins Science fiction Hyperion by Dan Simmons - by a long chalk, the best sci-fi book I've ever read, the sequel 'Fall of Hyperion' is also highly recommended - https://www.amazon.com/Hyperion-Cantos-Dan-Simmons/dp/0553283685/ref=sr_1_1?s=books&ie=UTF8&qid=1483796092&sr=1-1&keywords=hyperion+cantos Other movies The Mission is not to be missed - moving and epic tale of good, evil and those caught in the middle, beautifully acted, filmed and scored, a movie great - https://www.amazon.com/Mission-Robert-Niro/dp/B004G7UTXG/ref=sr_1_1?ie=UTF8&qid=1483796322&sr=8-1&keywords=the+mission
-
Scenes from my Jasta 2 campaign... Stachel attacks a Sopwith two-seater at low level.. ...and knocks it down - in emphatic fashion... But the skies above are filled with English fighting aeroplanes... ...and they are not all prehistoric packing-cases, so it's time to go home... Unescorted R.E.8s make easy victims on a later mission... Later still, and an escort job is interupted when Stachel spots friendly flak breaking out nearby... ...and his three Albatros D.IIIs turn to give battle, with what turns out to be two RFC SPADs... They knock down one SPAD, but the fight is joined first by some Nieuports, then by two Sopwith single-seaters. One of the latter breaks up in mid-air during a tight turning fight, possibly from a weakened structure due to flak or MG damage... The second Sopwith has been attacking Stachel's surviving comrade but breaks off under heavy flak fire, and makes a run for it, with Stachel in hot pursuit... The Sopwith goes down to a forced landing after Stachel's fire knocks out his engine... ...but Stachel's machine has been trailing steam and his own motor grinds to a halt soon after, with the Albatros over-turning in the forced landing which follows... No doubt about it - with recent versions of Pat Wilson's Campaign Generator, the seemingly empty skies that used to put me off Rise of Flight are now but a distant memory, and the excellent PWCG combat report facility means that Stachel's logbook aka journal is rapidly filling up with reports of many fierce and usually successful combats. And yes, he's now got the Pour le Mérite!


-
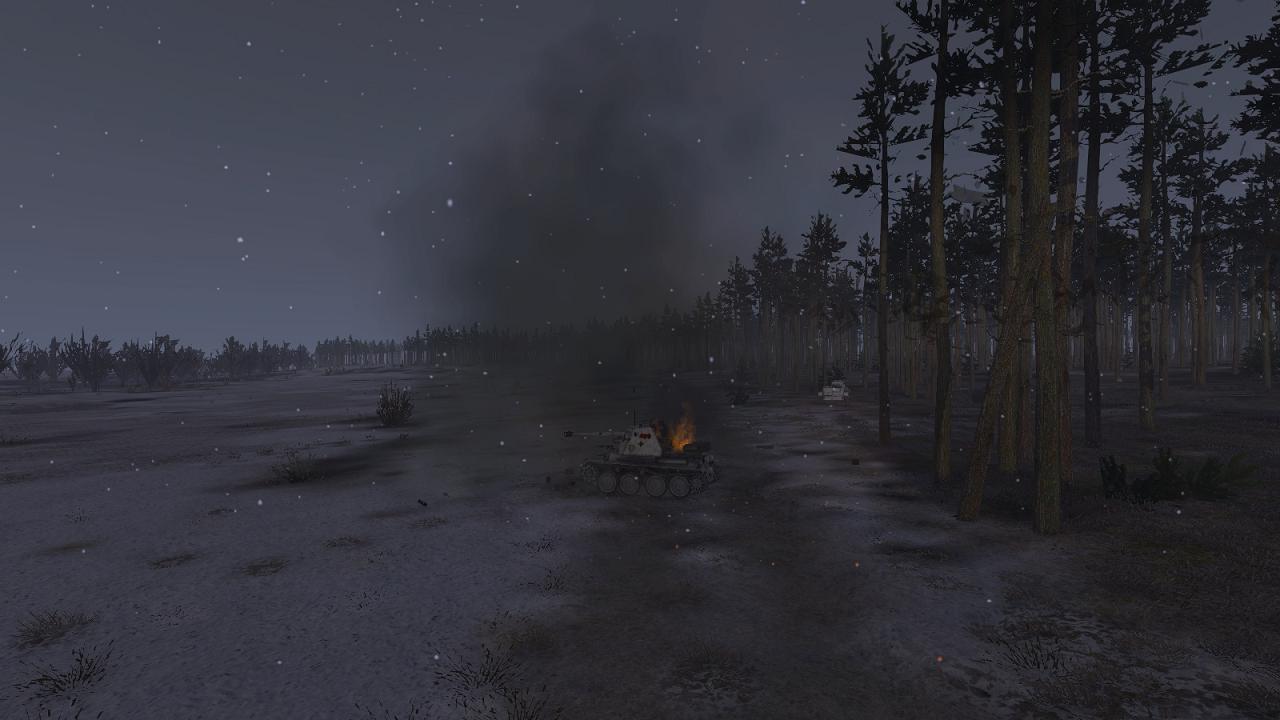
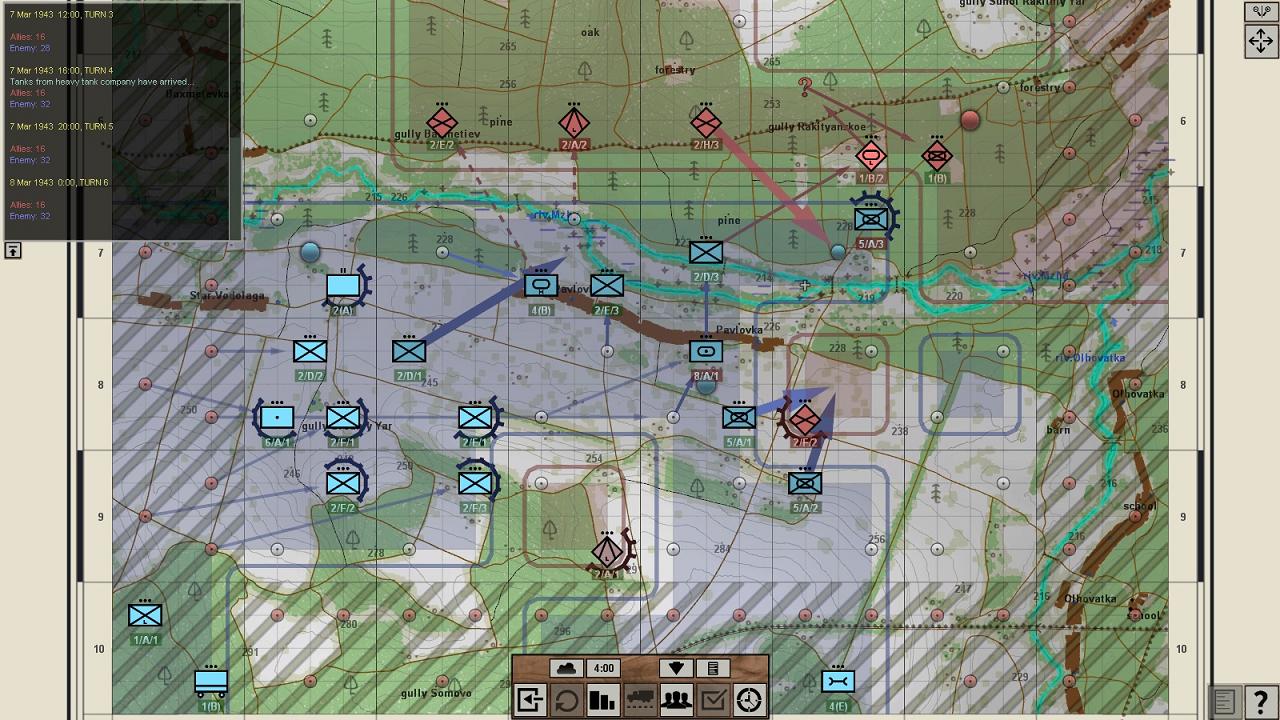
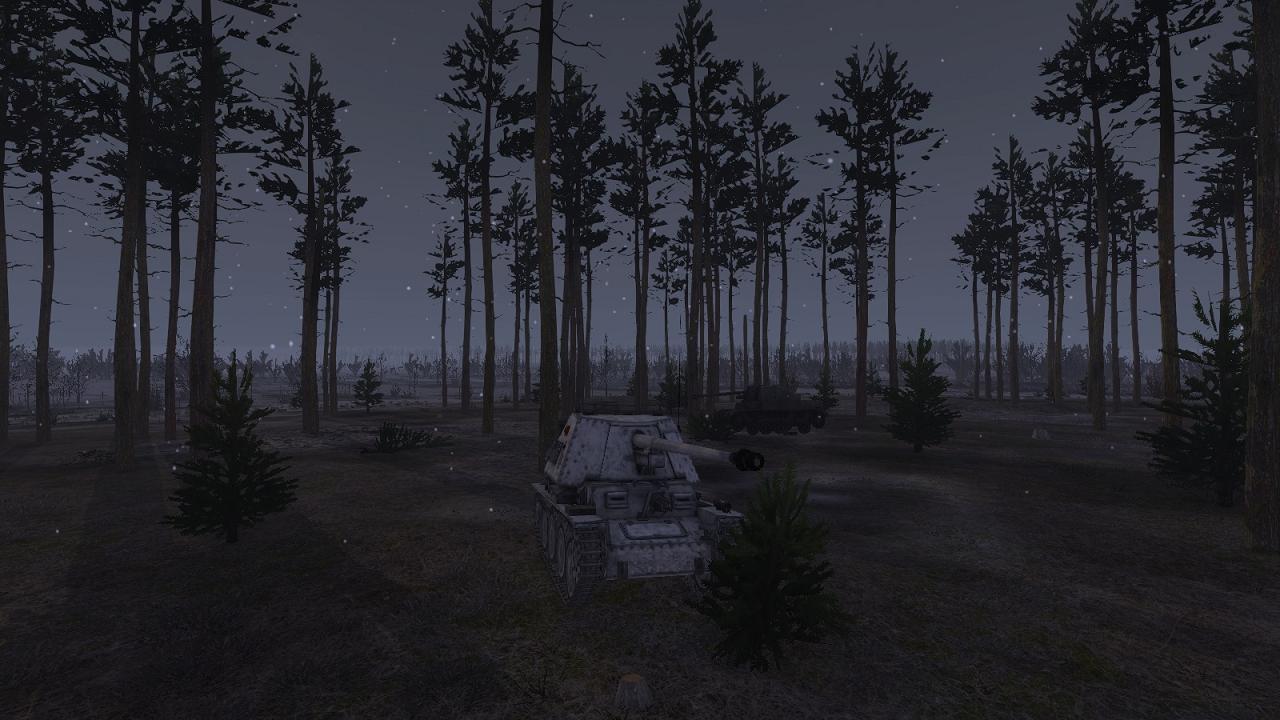
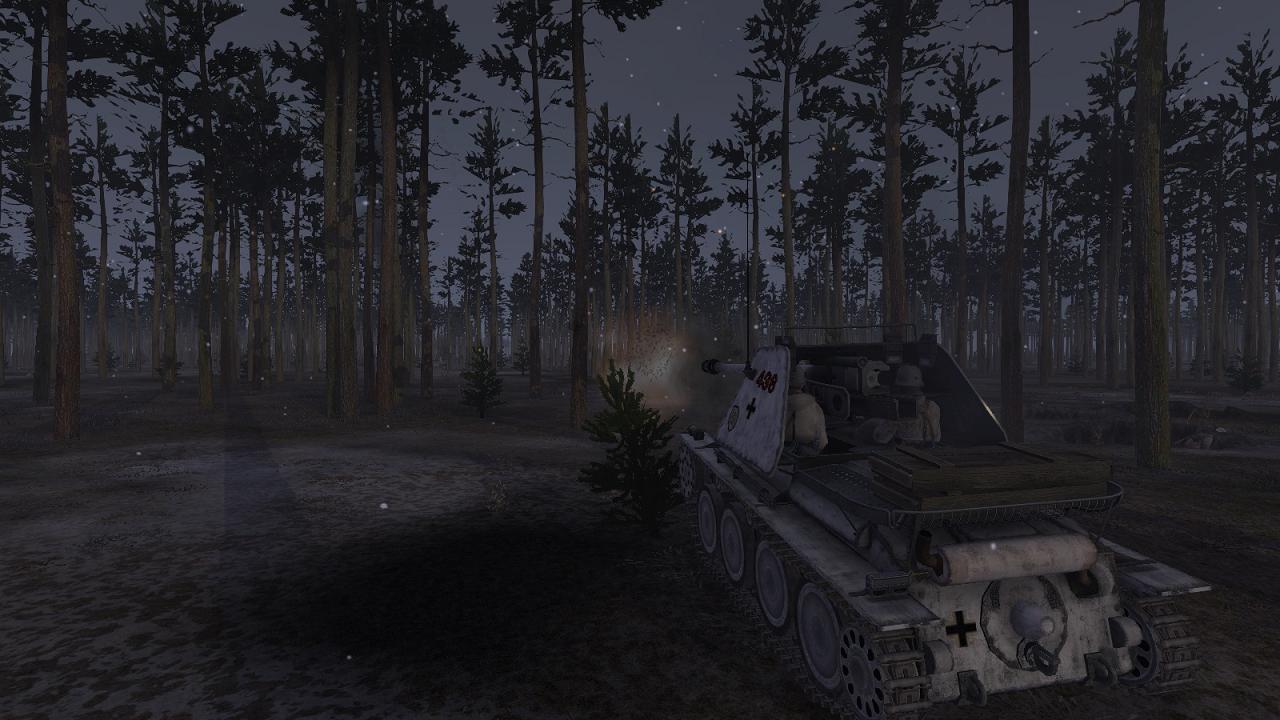
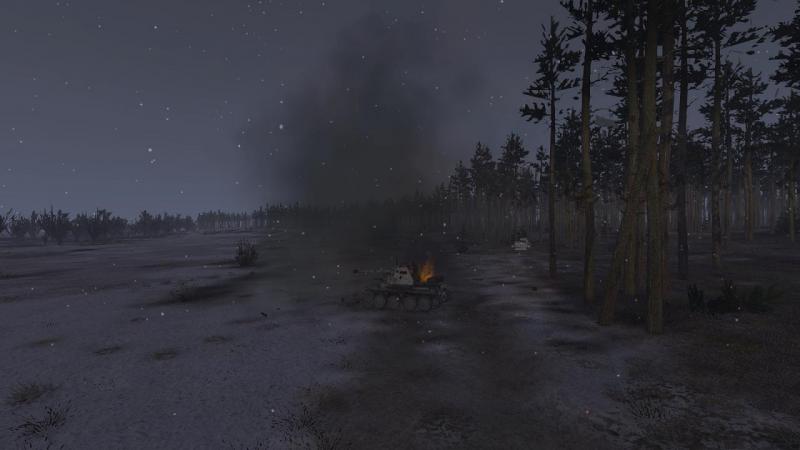
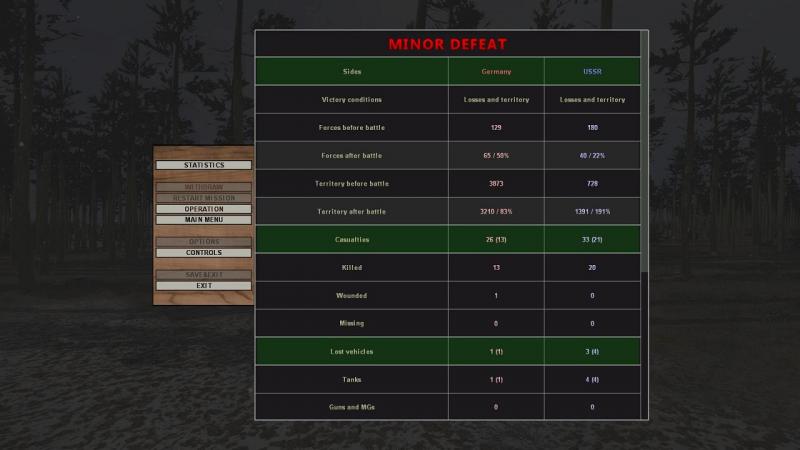
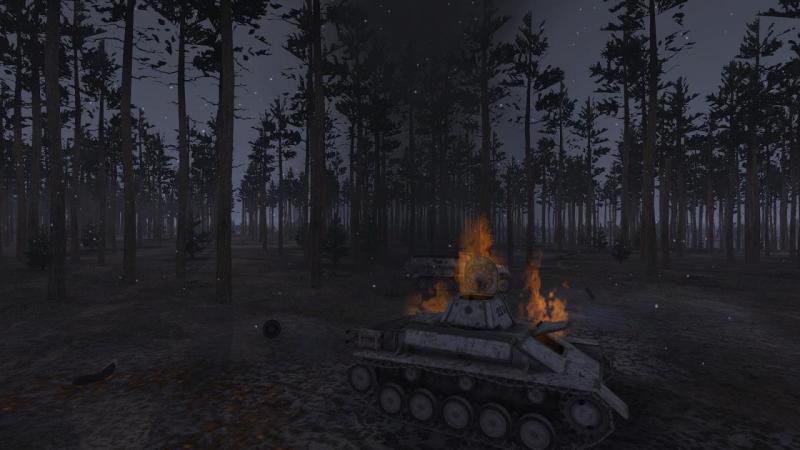
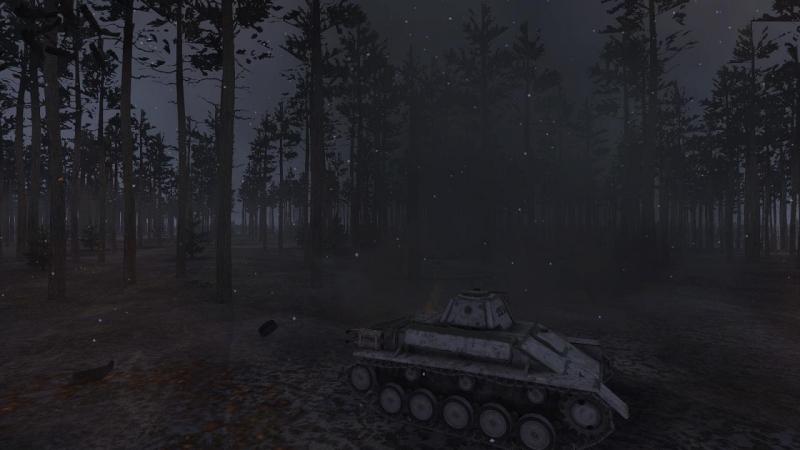
Final fling! The second enemy attack comes in on my left. Any hopes that it's just infantry are soon dashed. It's more armour; probably more light tanks, but that's more than a match for my weak infantry platoon over there, bereft as it is of significant A/T weaponry. I order my Marder to switch flanks, and soon, he's trundling through the left-flank platoon's hasty defensive positions. However, he's too late to stop the platoon from being outflanked on their extreme left. Destroying the platoon HQ, the enemy armour pushed south, reaching the track which runs west to east along the rear of our positions. I hastily divert the Marder to the left, and he runs out onto the track. At this point, I mess things up. Some of the Red armour seems intent on reaching the river to the south, but other tanks are reported heading east down this track. I know the Marder is going to meet them head on. The Marder wisely halts, but, eager to save the infantry the Red tanks are shooting up, I push him further forward. This generates the desired combat, but it goes against me, and the Marder goes up in flames! I have just lost my only decent A/T weapon! I should have got him into an ambush position in the woods and let the enemy come to him, but it's too late now for second thoughts. Part of my problem is that these enemy tanks are T-70s, not T-60s, armed with a much better 45mm gun, instead of a 20mm cannon. The T-70s spread out and enter the woods, over-running my left-flank platoon... ...and catching their SPW, which I pulled back deeper into the woods, too late to save him. By this point, I have rather run out of options; attractive ones, at any rate. My infantry here are pretty well pinned down by the T-70s. Fortunately, they seem to be without supporting infantry of their own. My troops take advantage of this - there's a flash and a gout of smoke from the rear of the nearest T-70; it looks like he's been hit by an A/T grenade! The tank goes up in flames. The hatches flip open, but nobody gets out. At about that point, I finally run out of time, as well as realistic options. The battle is rated as a 'minor defeat', which is probably about right - we won emphatically on the right flank, but the Reds had the last laugh. Returning from the tactical to the operational level, I find the campaign is now complete. The debriefing tells me that - as I can see for myself from the map - Das Reich has succeeded in clearing Pavlovka and securing crossings over the Mzha. Overall, though, counting up victory points, the campaign is rated as a defeat. Perhaps I should have mopped up those enemy hold-outs to our right and rear. But while I'm lucky we caced nothing wose than light tanks, they were enough to match the light armour which was all I was able to deploy for nearly all of the campaign. And I still haven't got the hang of calling in artillery, assuming I had any avaibable. Still, it's been a great introduction to Graviteam's magnum opus, and I'm looking forward to pitching in to my next campaign!


-
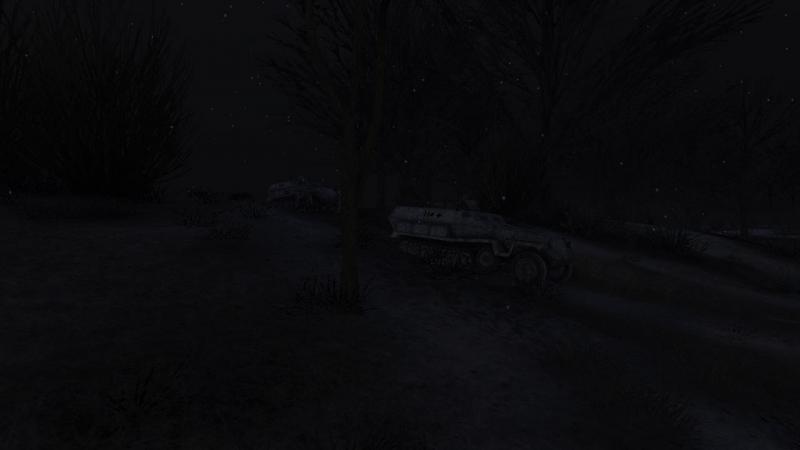
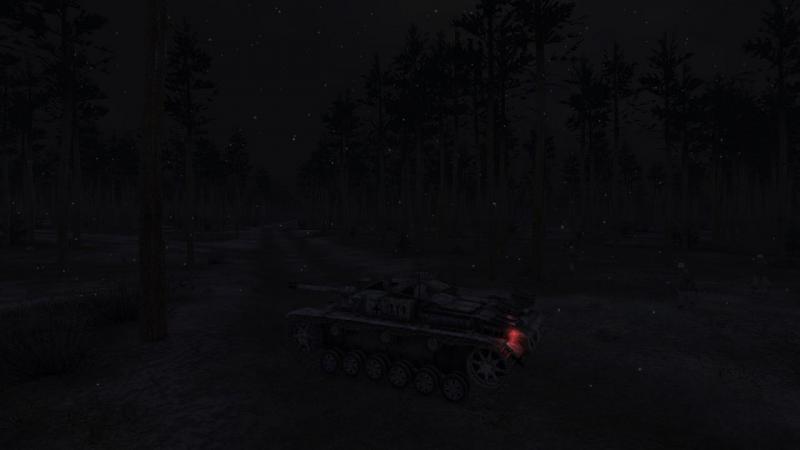
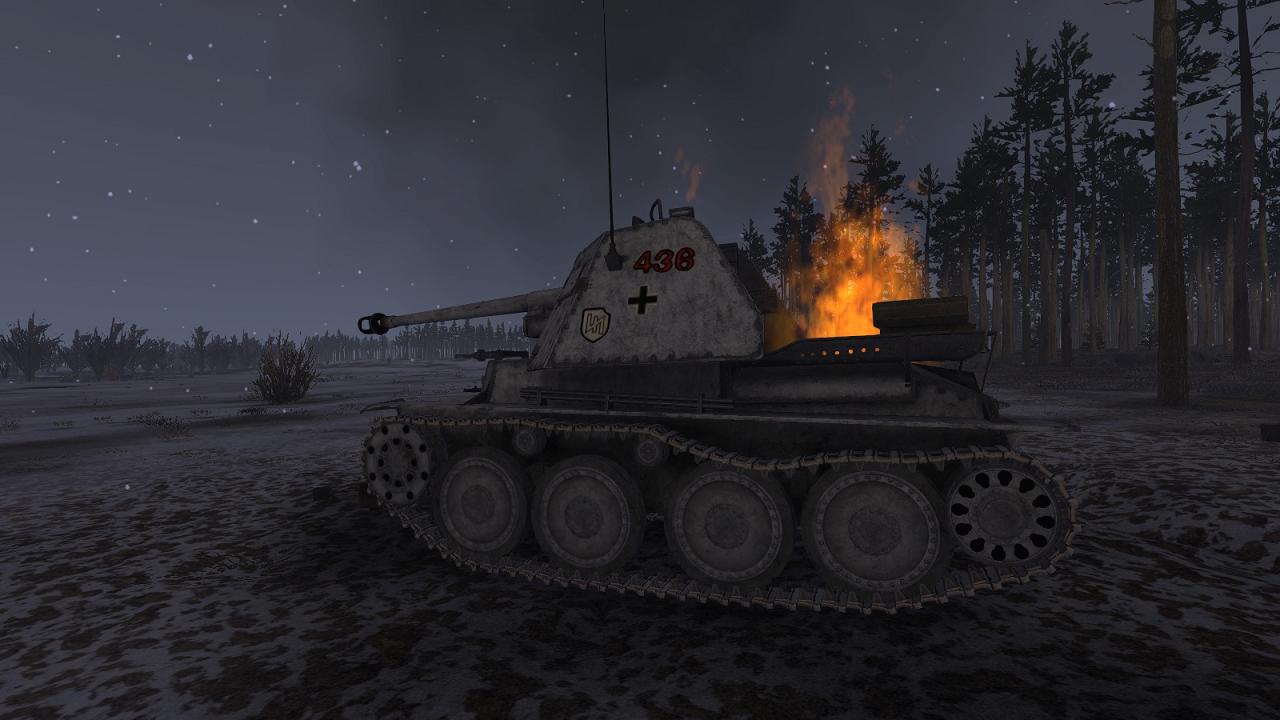
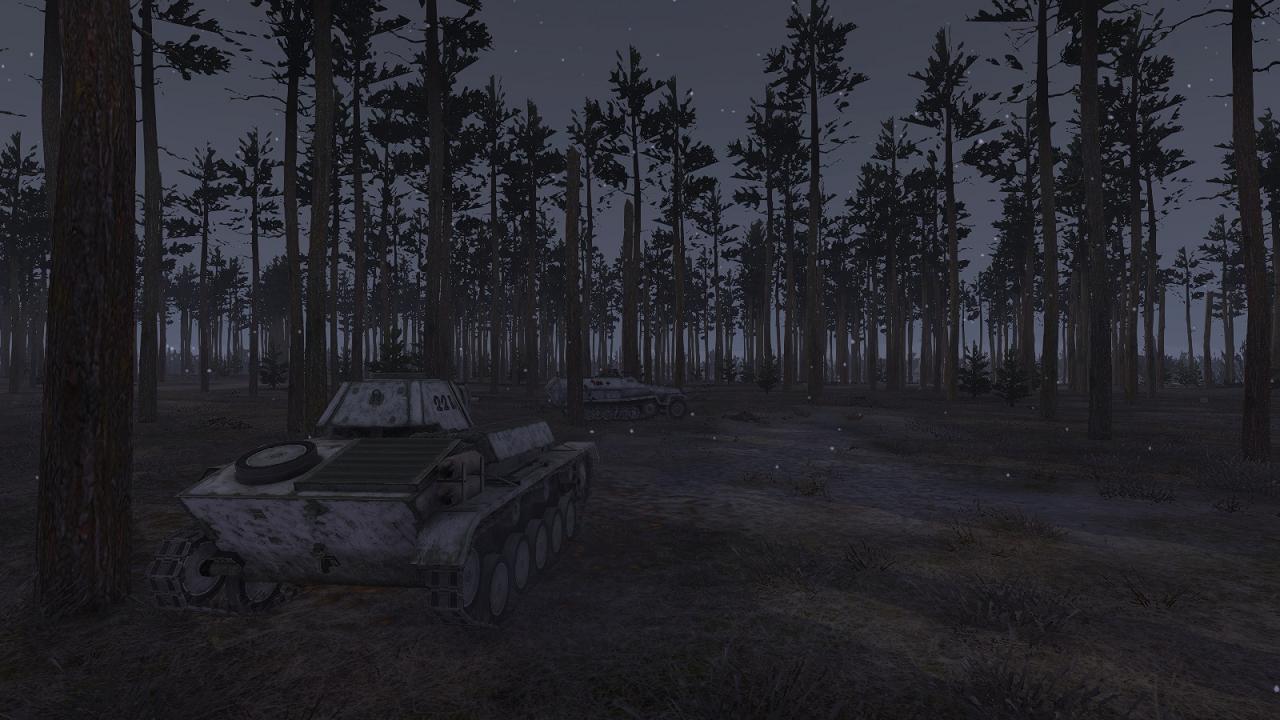
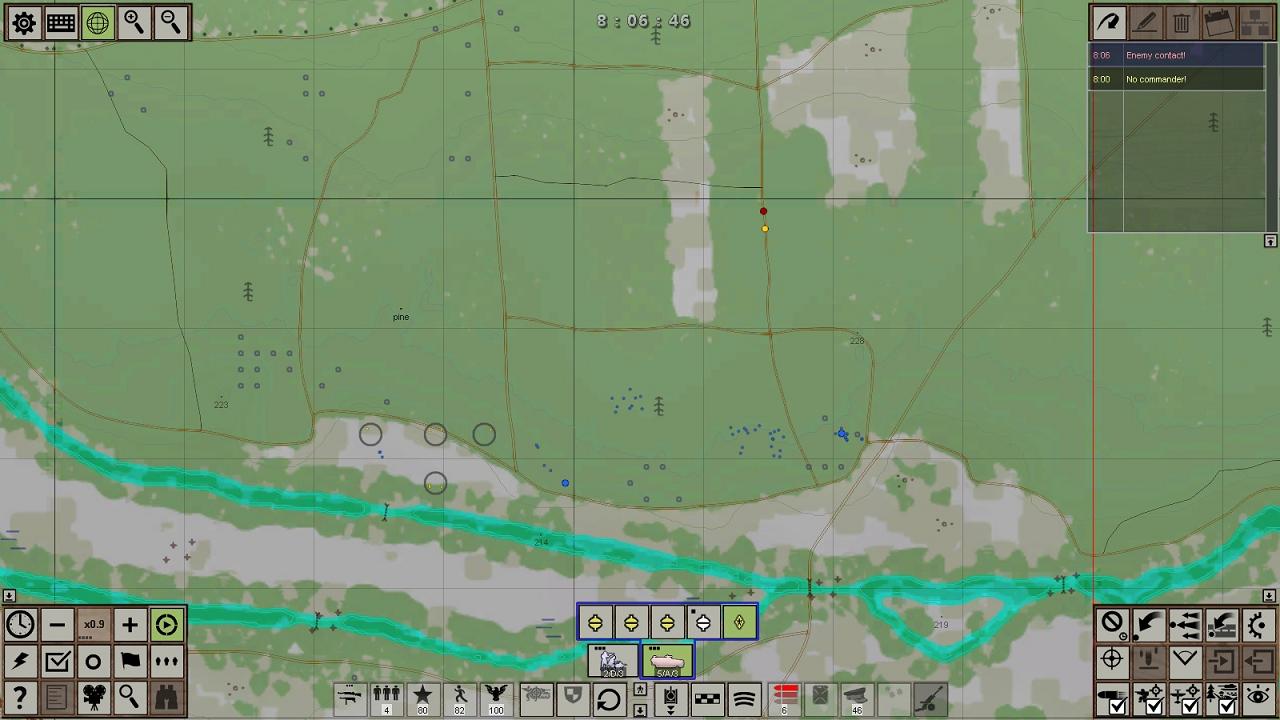
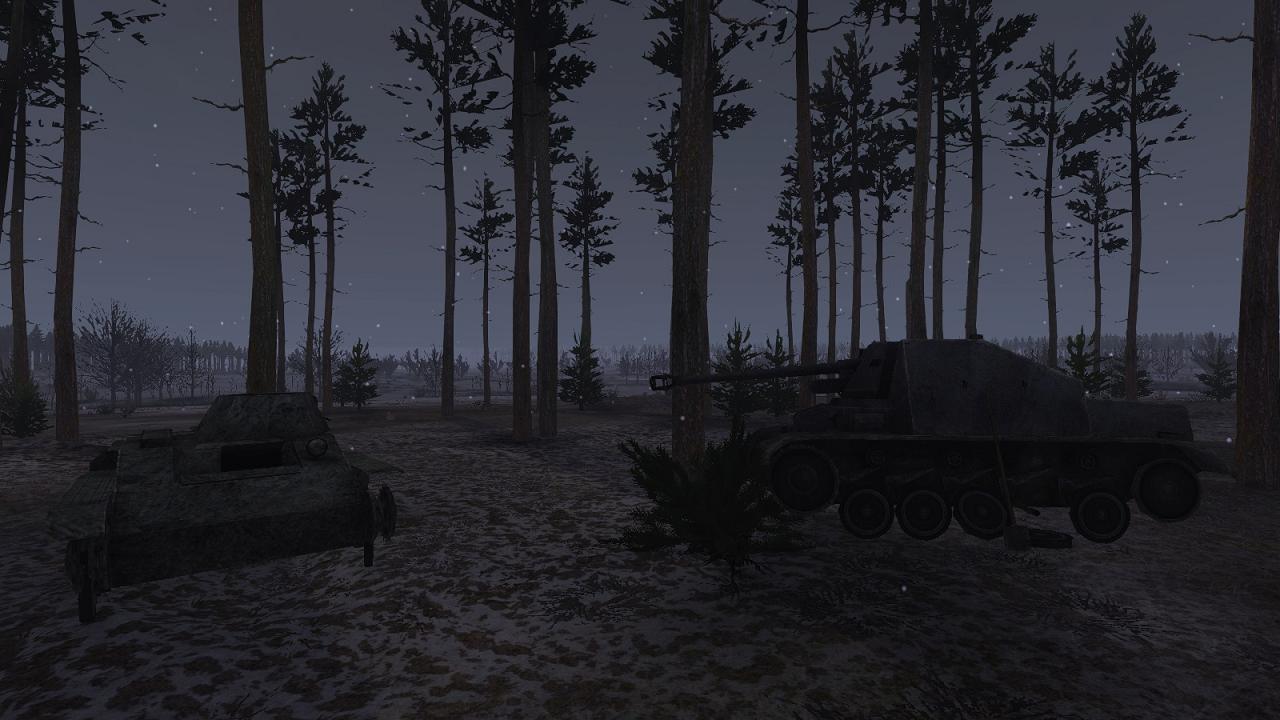
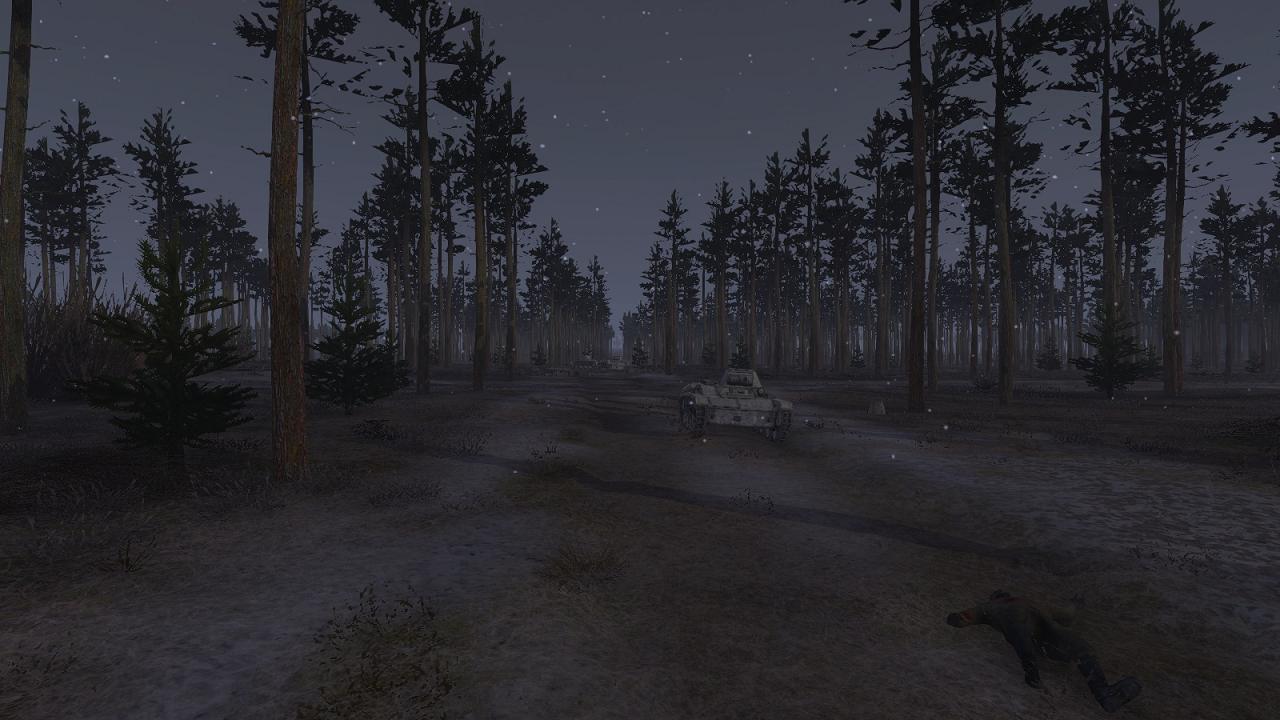
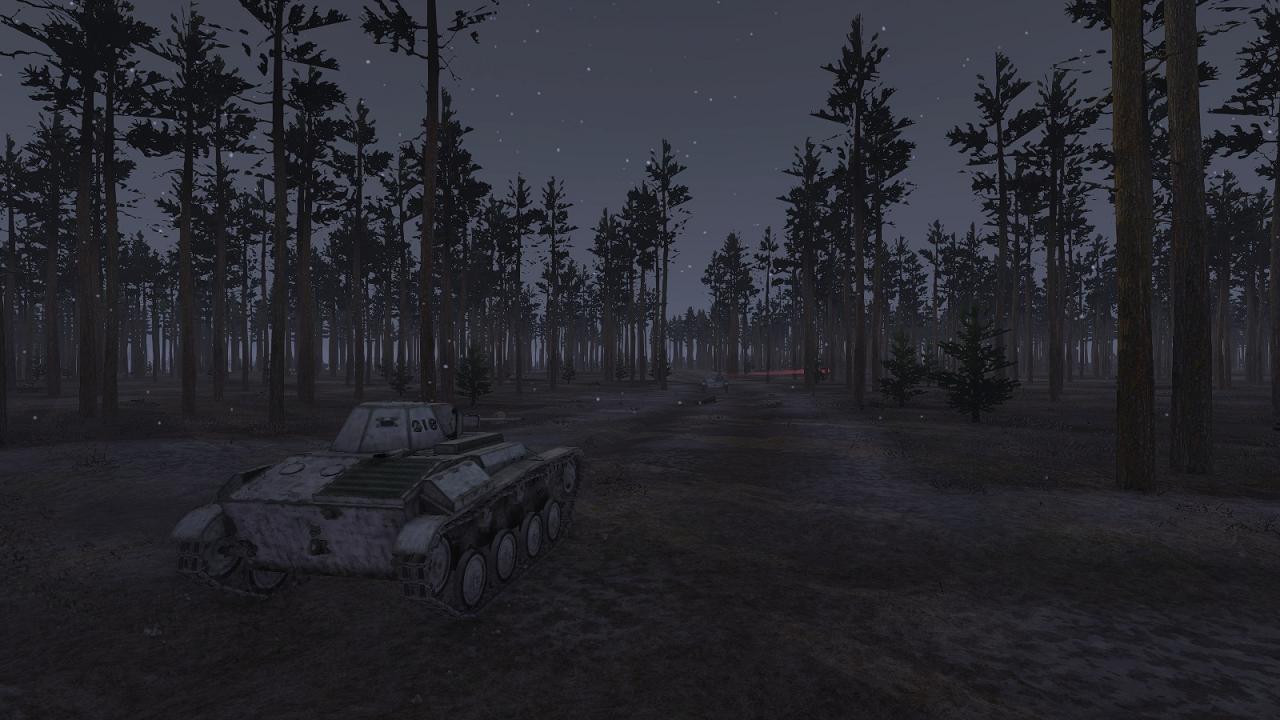
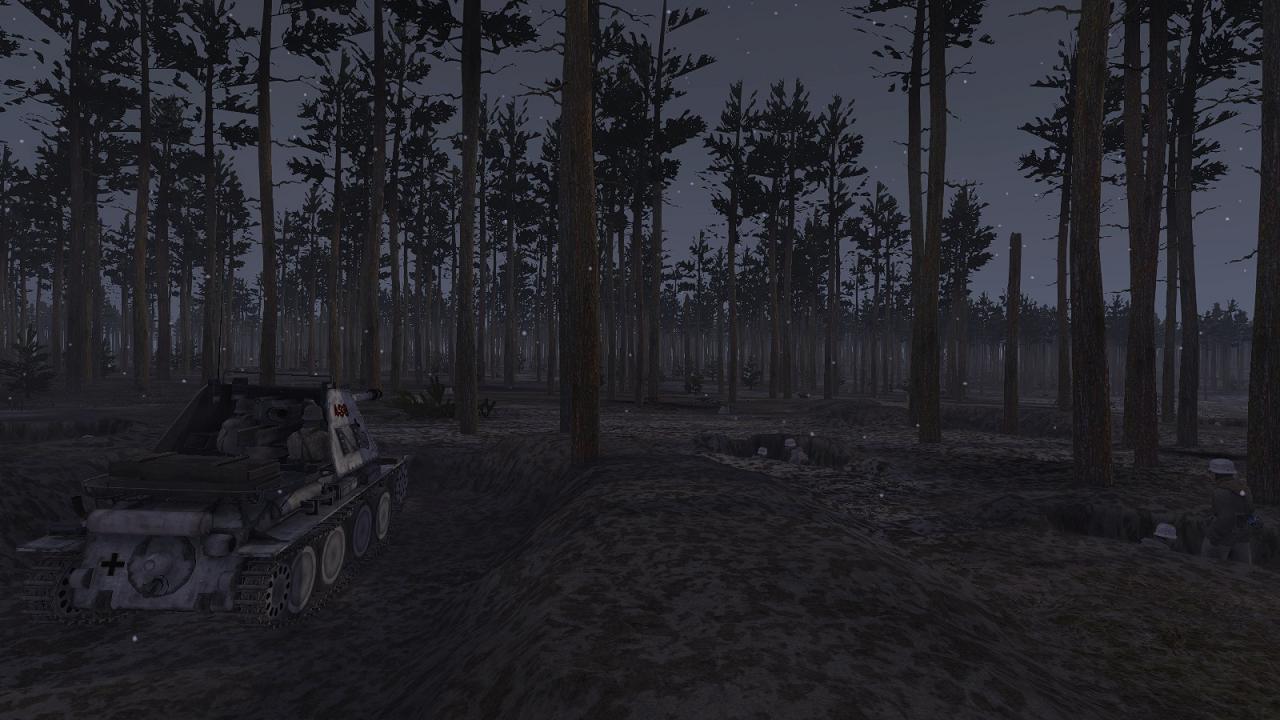
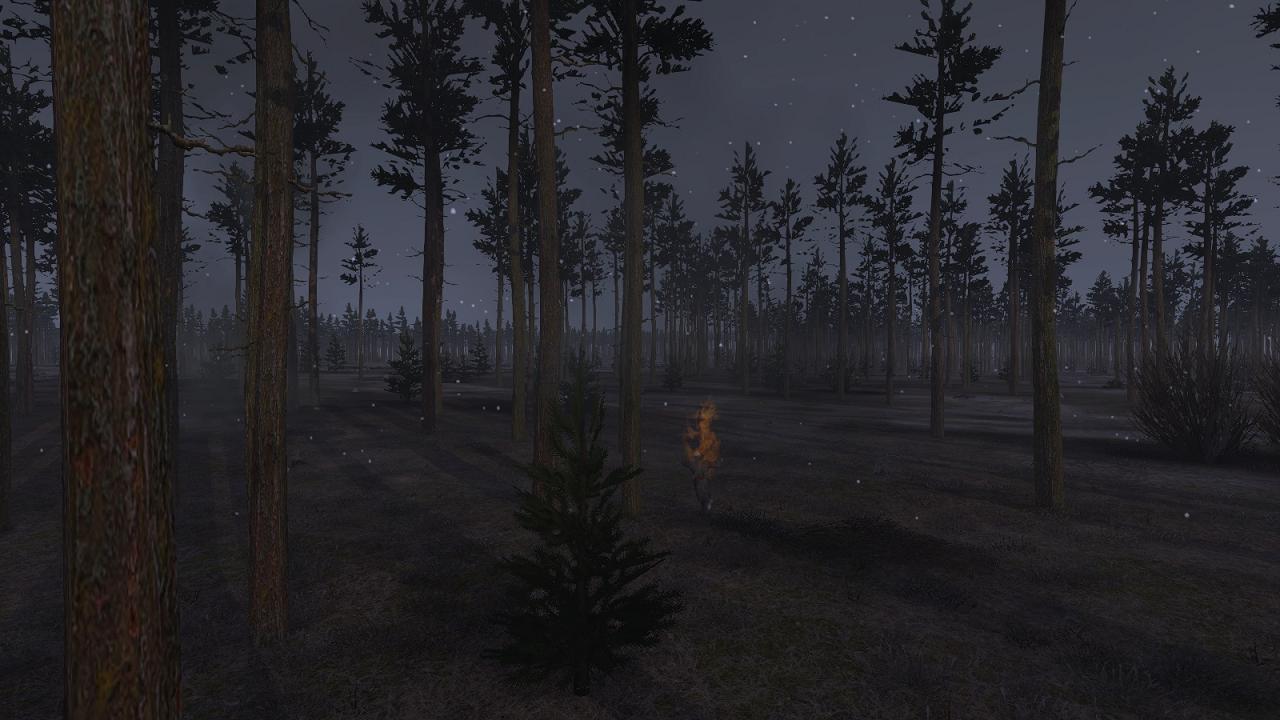
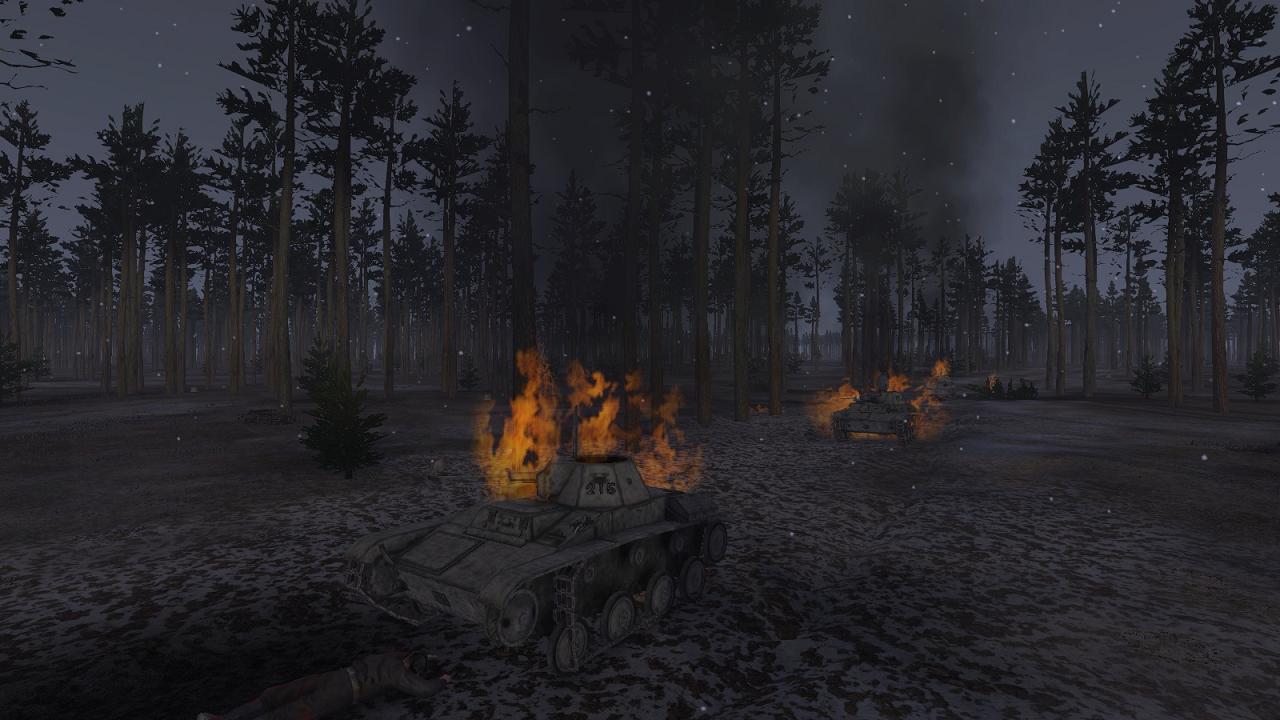
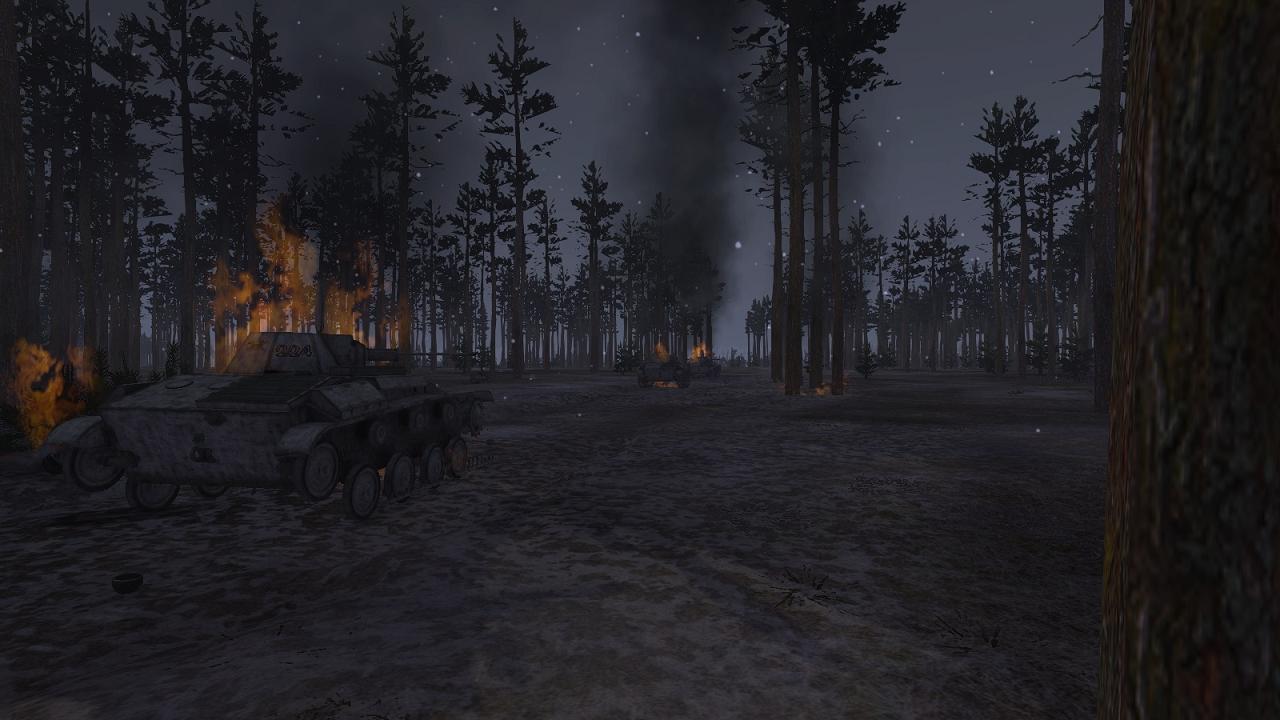
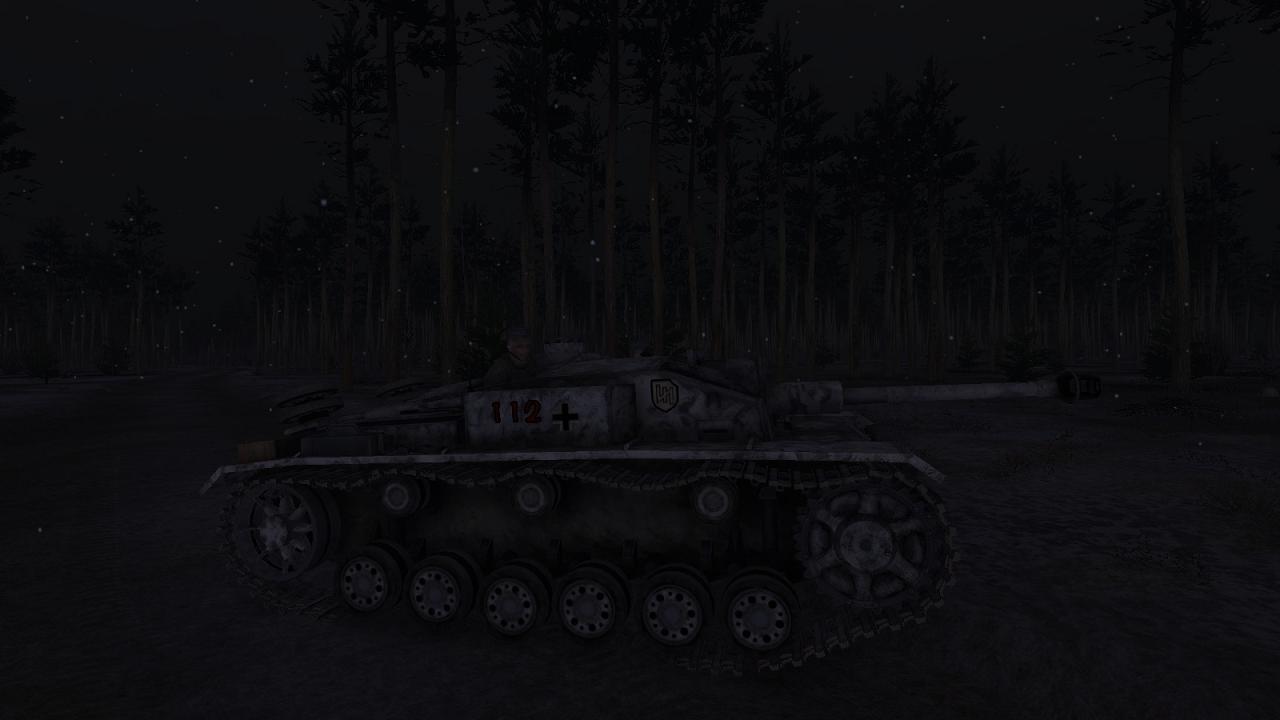
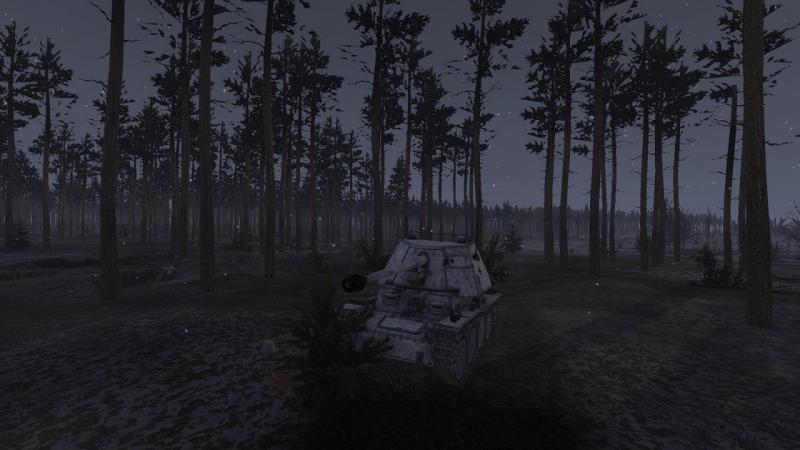
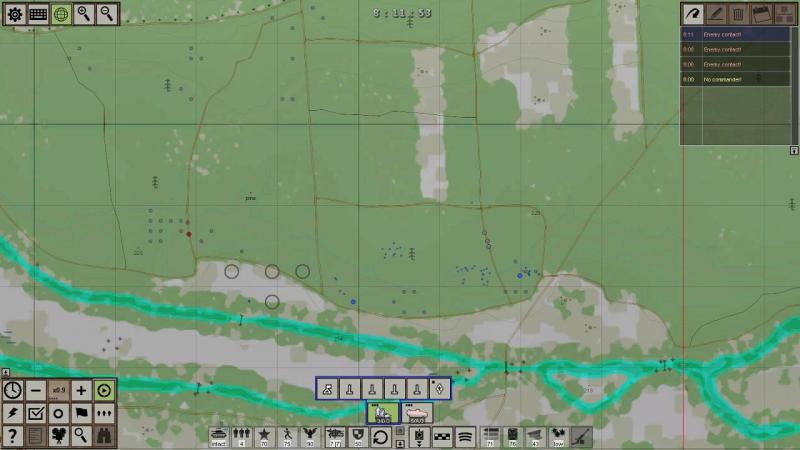
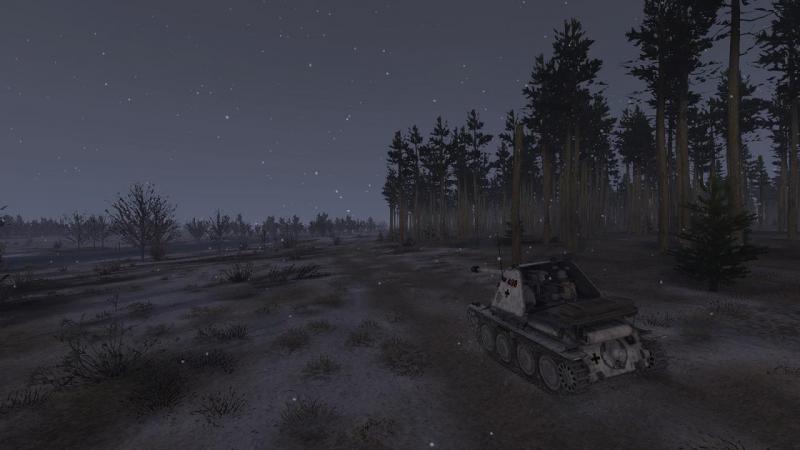
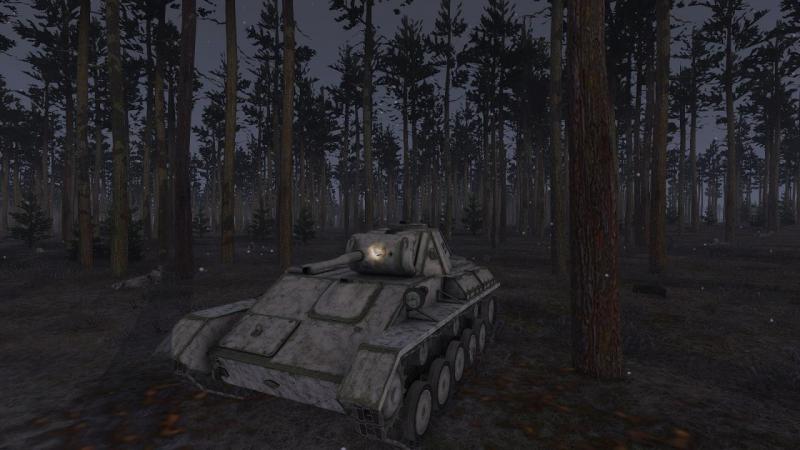
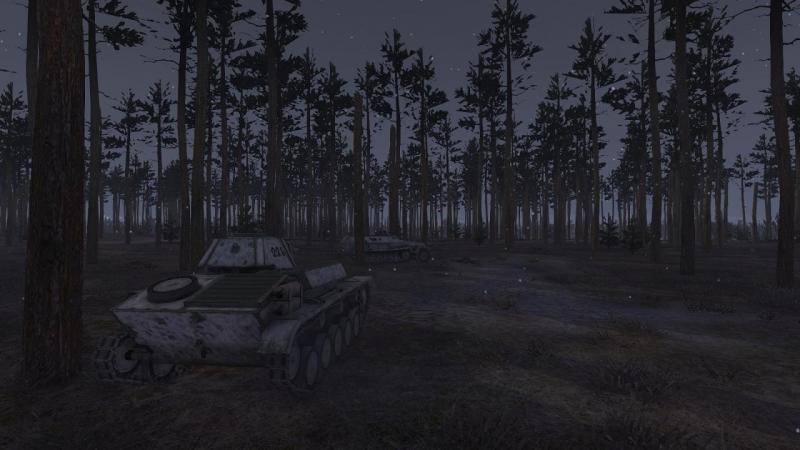
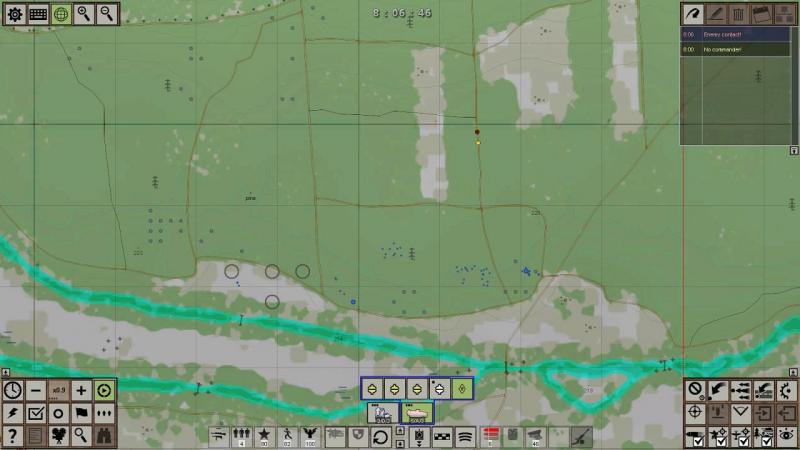
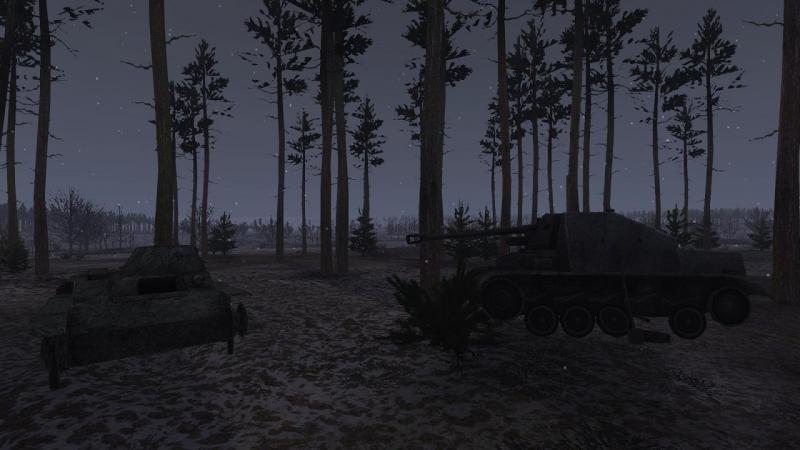
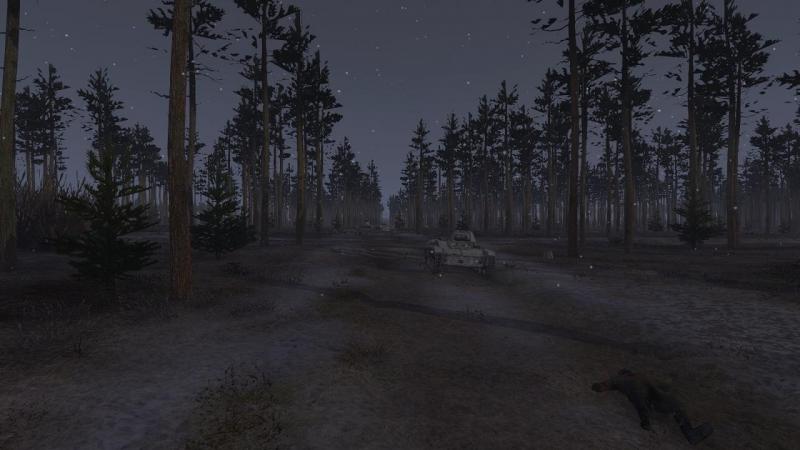
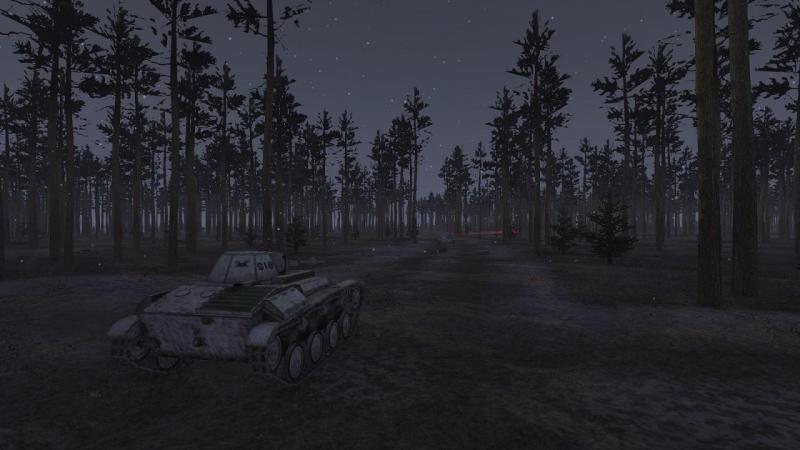
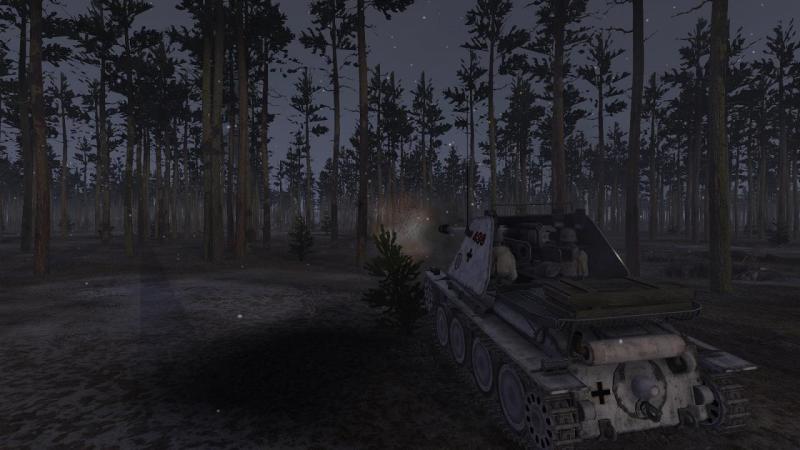
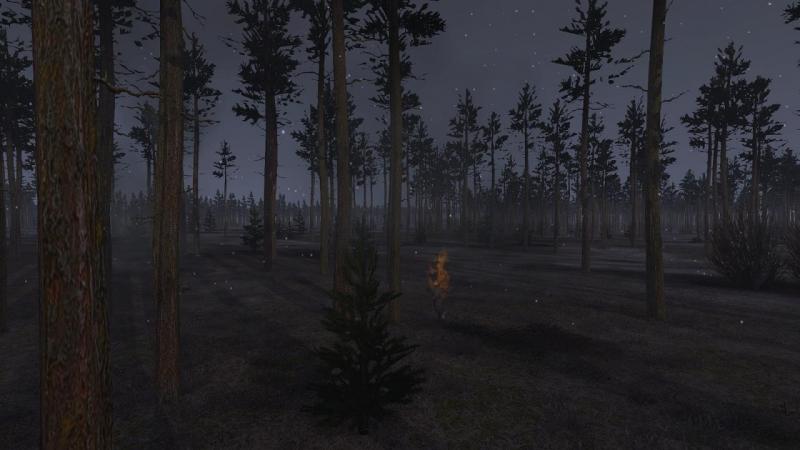
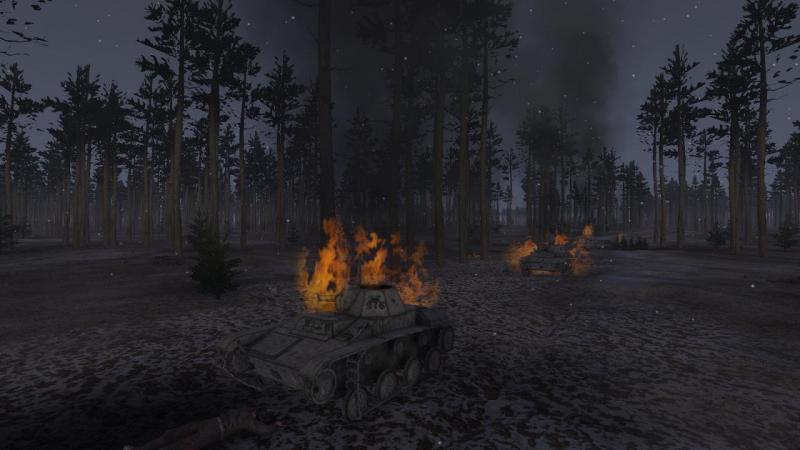
Contact on the right flank! Maybe I'm missing something, but I'm finding it mildly frustrating that there can appear to be some inter-mission discontinuity, between GT:OS campaign missions. The map view below, at the start of my final operational-level turn, shows my StuGs (blue unit marker, 'tracked vehicle' oval with the dot in the centre) not across the river to the north west (where I left them at the end of the last move) but back on the southern bank. True, within limits you get to reposition units before each tactical phase, but in what turns out to be my last roll of the proverbial dice, my StuGs will be playing no part. Instead, as the red arrows on the map show, the surviving troops from my original eastern bridgehead are what I've got, and they're being counterattacked. Perhaps things would have turned out differently had I made different choices earlier, but having been denied my heavy armour until well into the operation, it's a bit frustrating that this last battle will be fought without my StuGs, never mind my Tigers. What I do have is the remains of two infantry platoons. The one on the right is dug in and has a lightly-armoured but powerful Marder III self-propelled A/T gun. I place this so as to cover the track leading down from the north-east, and then set up the infantry nearby, to cover it. On the left, I set up the other platoon in the same woods. This is what's left of my leading panzer pioneers, with a single SPW their only available armour. They're basically covering the left flank and rear of the other lot, with a field of fire as far as another track which runs north-south and is a second likely axis of advance for the enemy. We did have another SP gun in this sector, a Marder II, but it was knocked out in the earlier battle with Soviet light tanks. Both the Marder and one of its victms still stand where they lay after that fight, just to the right of my positions. I'm pretty thinly stretched and hoping not to be heavily attacked, but of course that's exactly what happens. Enemy armour is spotted (and heard) coming down another north-south track. This is not the one covered by my sole decent A/T weapon. This is early 1943 and we have no infantry A/T weapons like Panzerfausts or Panzerschrecks. As usual, I'm playing with all 3-d world markers turned off and from a near ground level viewpoint, for maximum immersion - I prefer GT:OS to simulate war, not simulate a wargame. But I roll the camera out and just ahead of my forward troops, to see what they can see. And what they can see is a platoon of T-60 light tanks, headed down the centre track towards us, roughly in my centre. They've got a few infantrymen with them too, and while my grenadiers are soon lacing into these, the light tanks return fire with 20mm cannon and co-axial MGs. I don't especailly want my thin-skinned Marder to leave the protection of its tank scrape, but I know that it has no clear field of fire through the woods towards the centre of my positions. I hestitate briefly, before accepting the inevitable and ordering him to displace to the north-west, leaving the wreck of the other Marder behind. He doesn't have to go far. He spots the T-60s and lets fly. I see at least one of his rounds splinter a tree to his front, but others find their mark, and the effect of a 7.5cm AP round on light tanks is all too predictably disastrous, for the latter. Some of the accompanying troops are caught up in the fireballs which engulf their armour. They run mindlessly to and fro, their clothing ablaze. The 20mm cannon of the T-60s are a serious danger for my Marder, so I'm relieved when the rearmost Soviet llight tank also goes up in flames. So far, so good! But no sooner is the first battle on the right flank won, than it's kicking off, over on my left. ...to be continued!


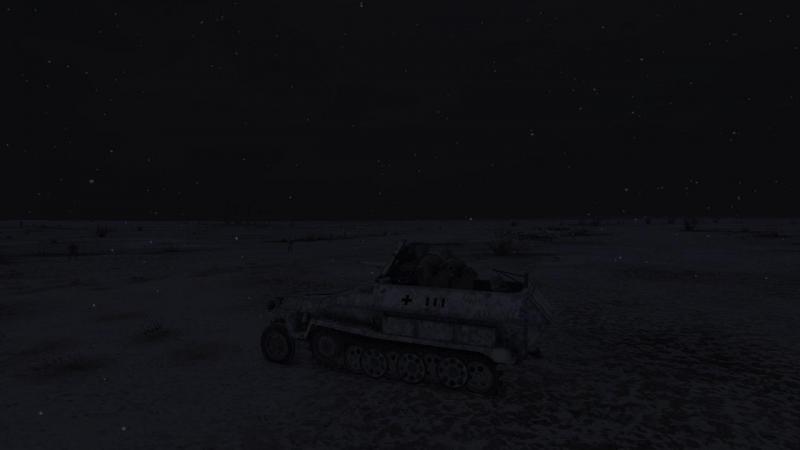
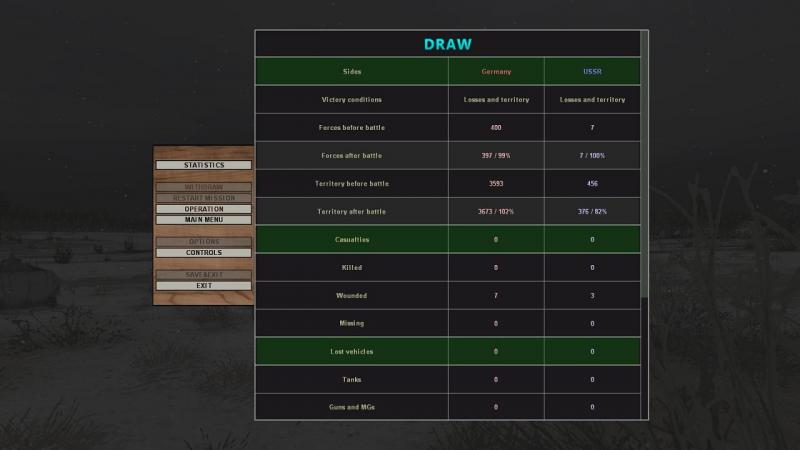
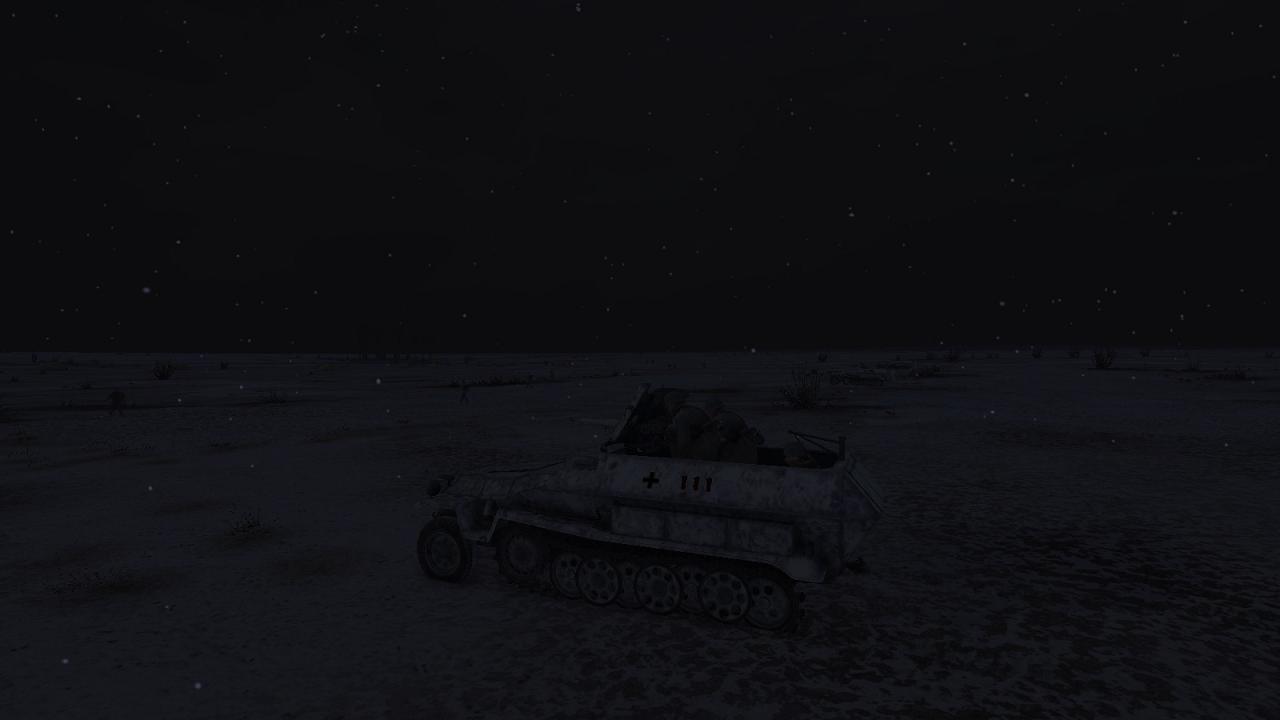
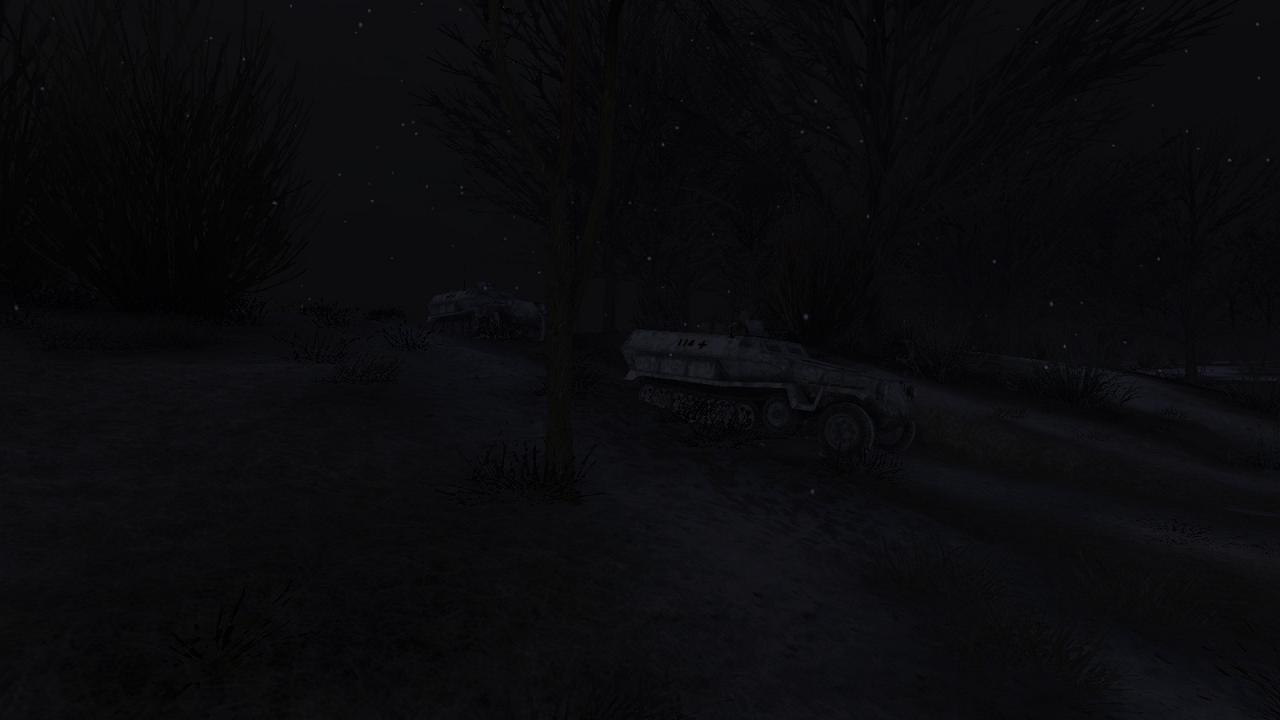
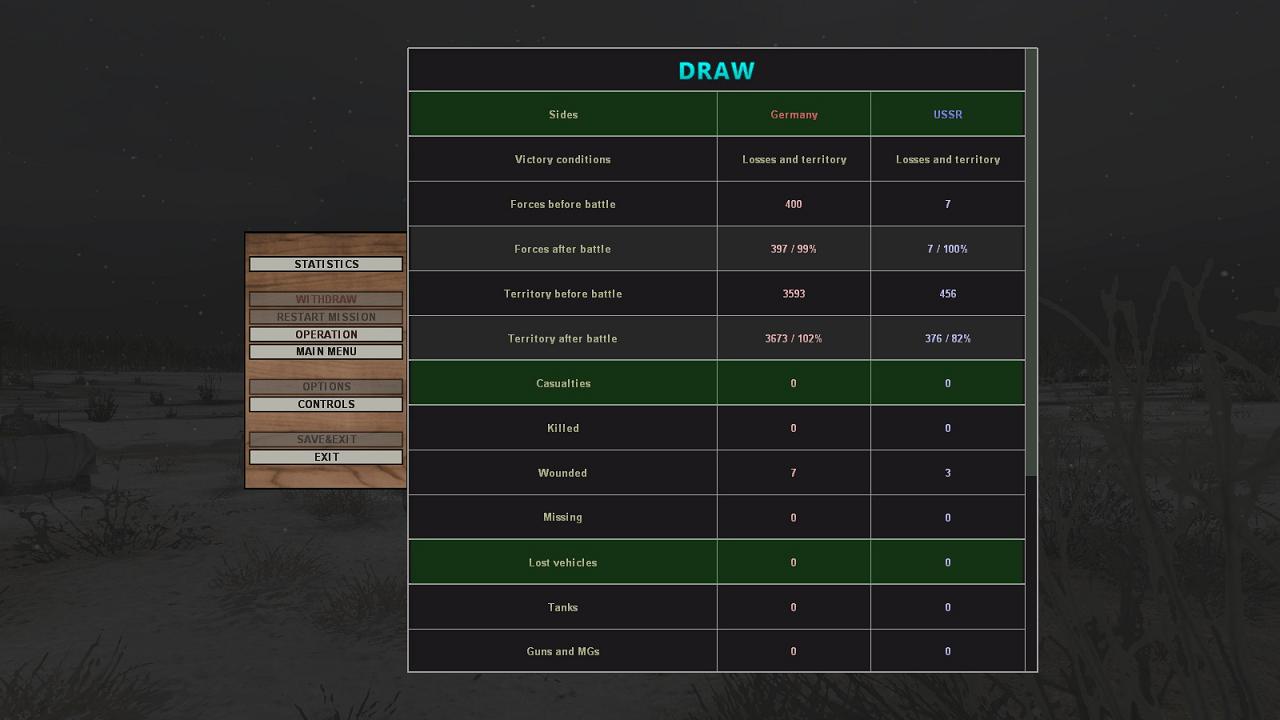
-
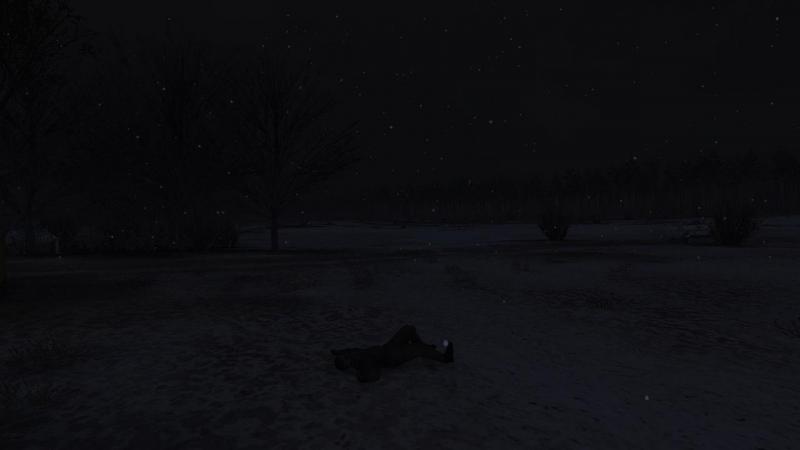
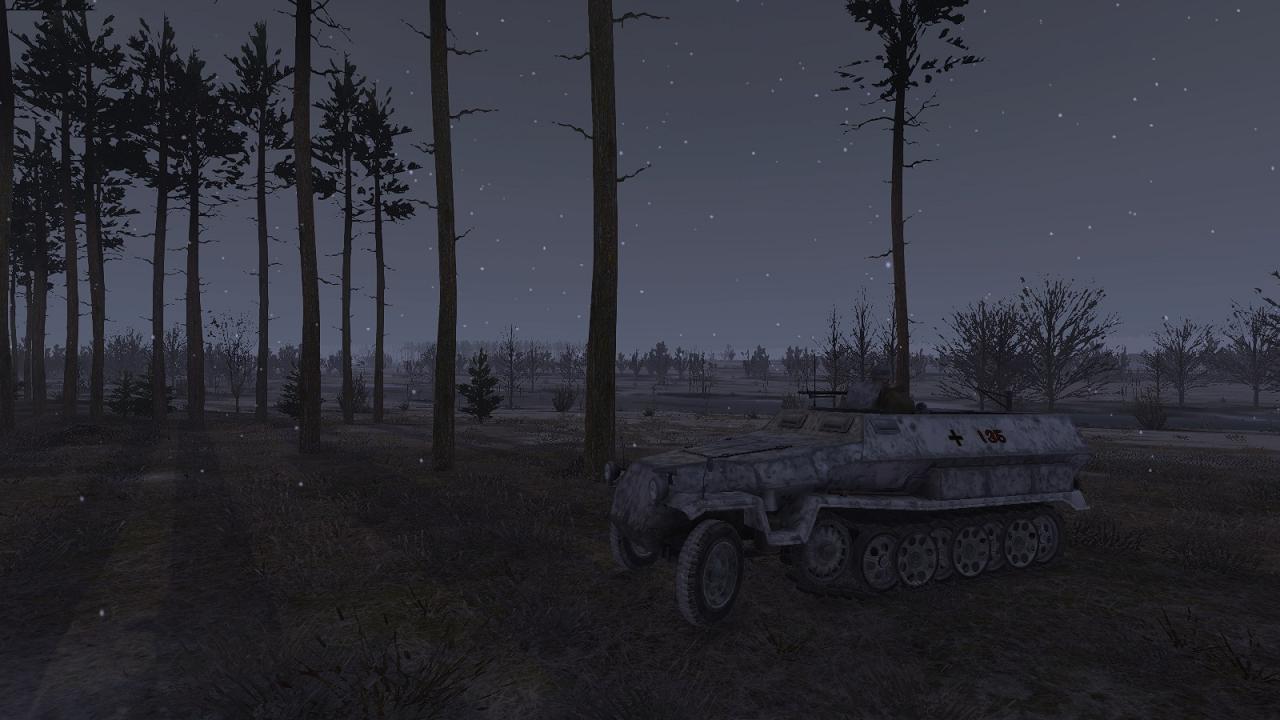
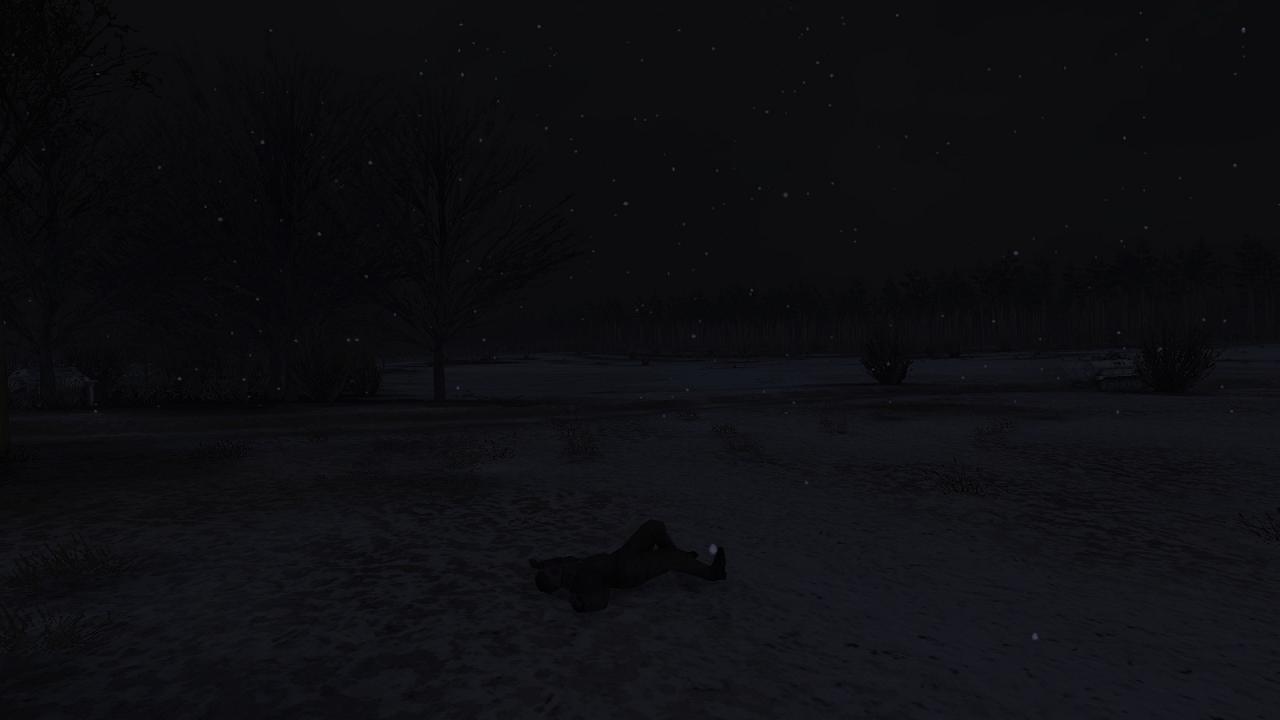
Das Reich finally secures the Pavlovka bridgeheads! Well, I finally reached the end of my first campaign in Graviteam Tactics: Operation Star, having in the process just about secured and held my campaign objectives, though not earning a victory (in a typically arcane GT:OS reckoning!). The Pavlovka campaign had reached its final (eighth) operational-level turn, so although I might have several battles to fight at tactical level, I knew my time was running out. So to the east of Pavlovka, I pushed a combined force of StuG III assault guns and panzer pioneers northwards towards the River Mzha, intending to reinforce my battered units on the far bank and establish a bridgehead so strong that the Reds would be unable to kick me out of it, try as they might. That was the plan, anyway. It was quite a tense business, as my SPWs, advancing on the left, changed from line to column formation to ford the river in the snowy darkness. There was a certain amount of bunching up as they reached the near bank... ...but the half-tracks quickly shook themselves out and made the crossing without opposition, passing the frozen bodies of casualties from the earlier fighting. To their right, my two StuGs had moved up to a fire position on the southern bank, accompanied by an infantry platoon... ,,,but meeting no opposition, they then made their own crossing and swung north-east, to establish a blocking position against the Red tank brigade still expected to hit us from that direction. At this point, the GT:OS curtain came down. I don't recall there being any contact as I write this, so I'm not clear what caused the handful of wounded reported on each side (or why they aren't counted in the casualty total). I'd achieved what I'd set out to, and gained some ground at the enemy's expense, so I'm not especially bothered that GT:OS only awarded me a draw. Equally I'm not bothered about the lack of combat. For me, 75% of the fun is laying and carrying out your plans, with the excitement and uncertainty as to whether, how and when the other side may, or may not, make the effort to mess things up for you. I didn't know it at the time, but the next battle was going to be my last one of the campaign. And it was going to be an altogether more violent and bloody affair. ...to be continued!