33LIMA
-
Posts
3,749 -
Joined
-
Last visited
-
Days Won
7
Content Type
Profiles
Forums
Gallery
Downloads
Store
Everything posted by 33LIMA
-
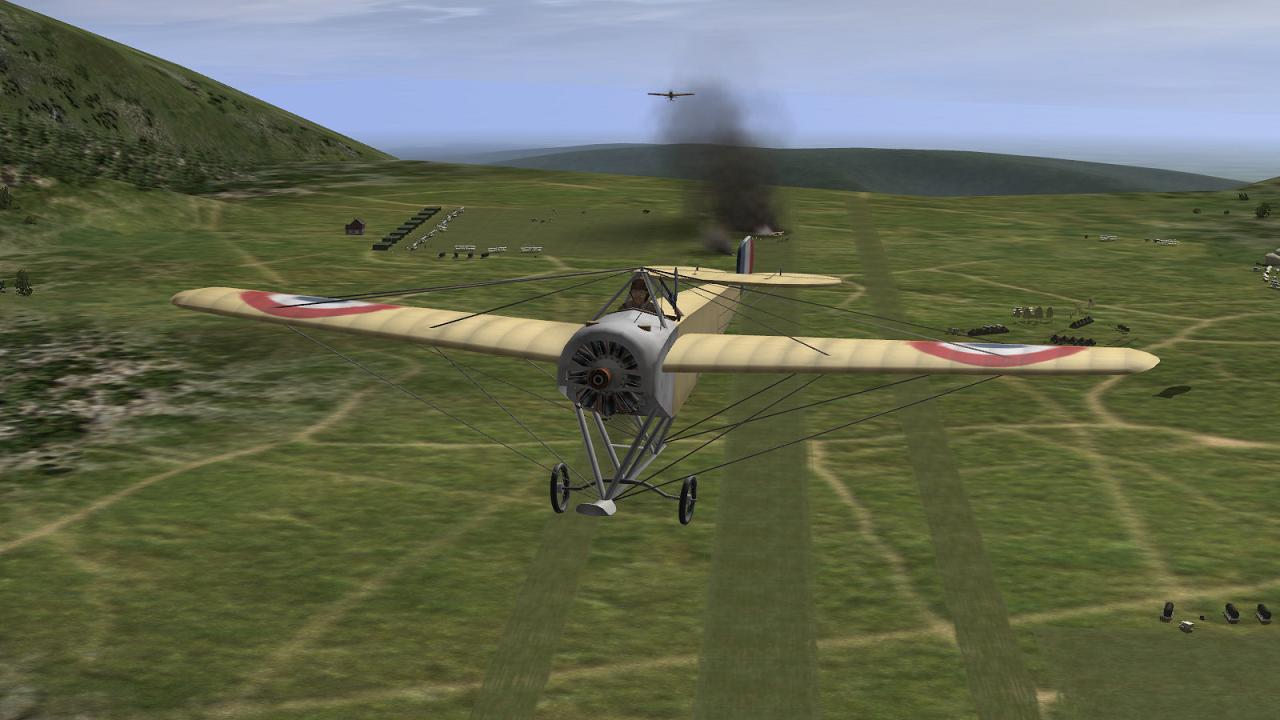
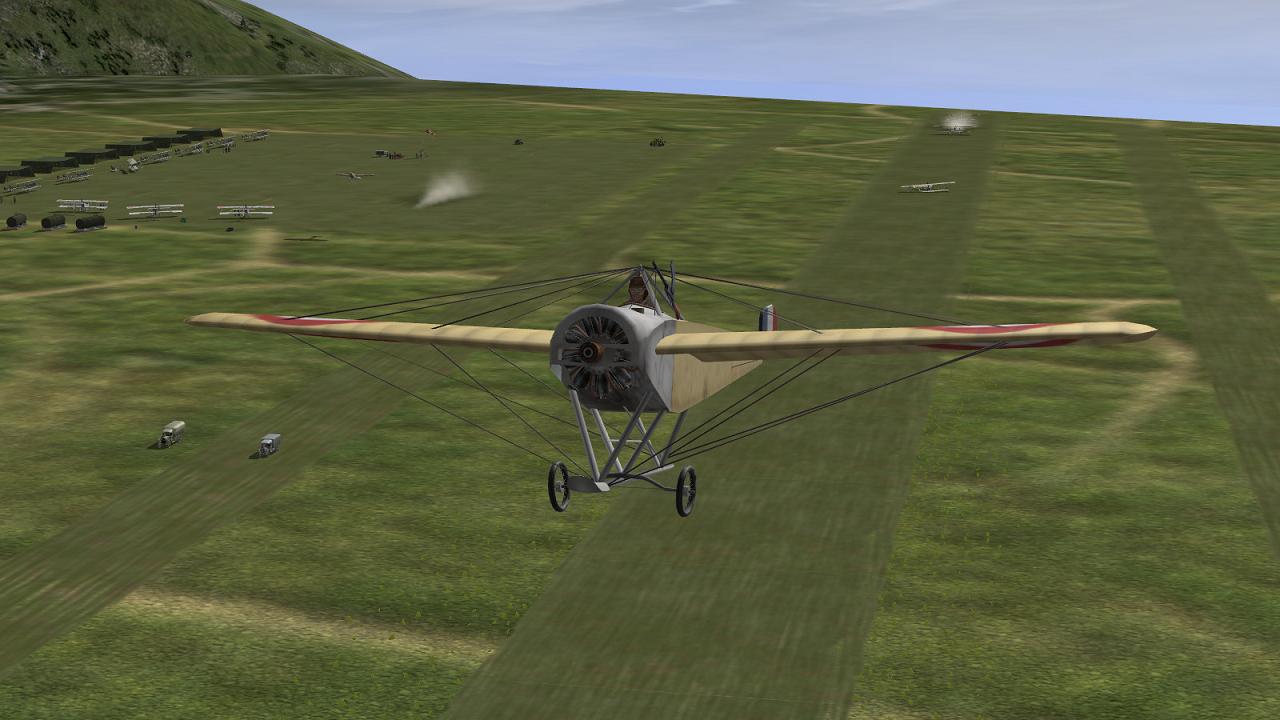
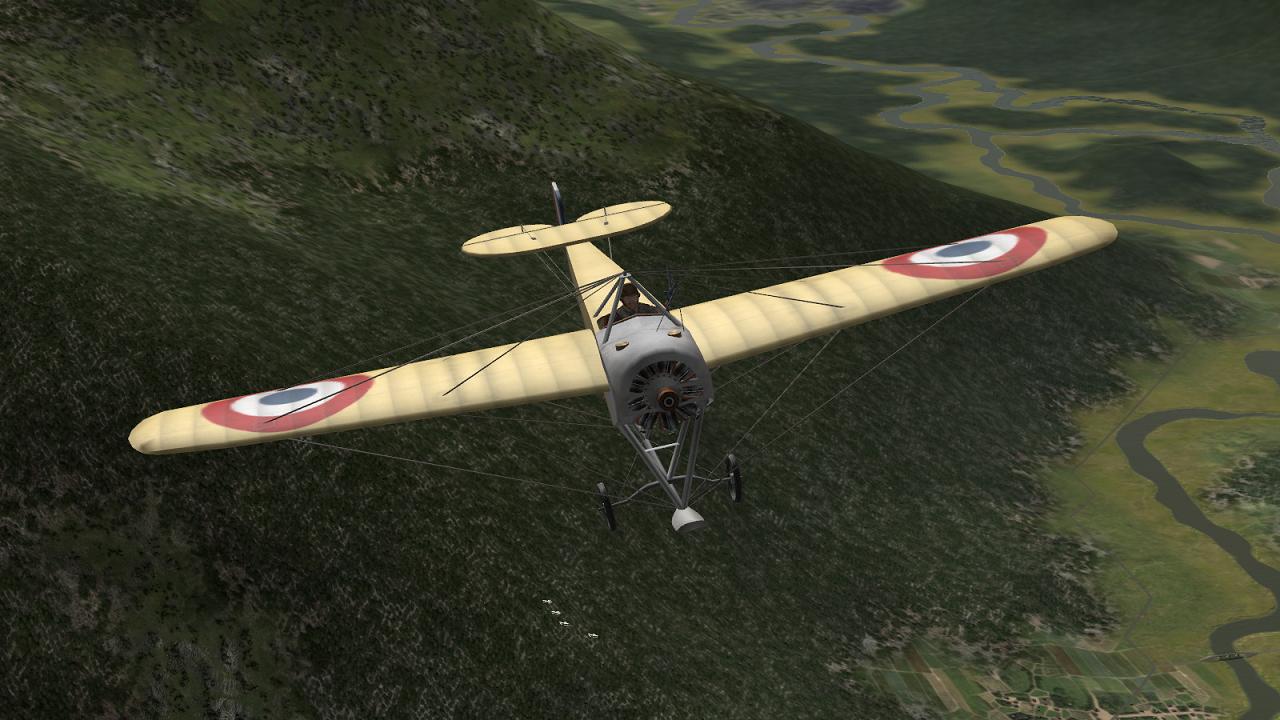
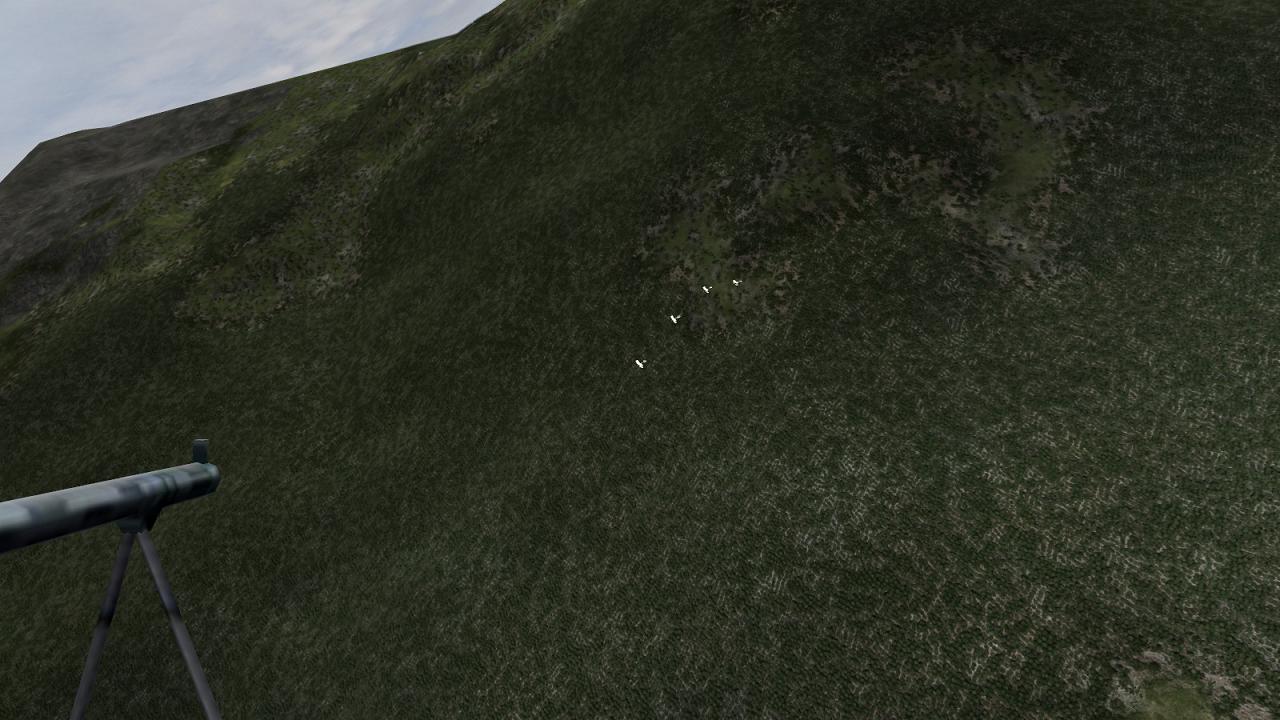
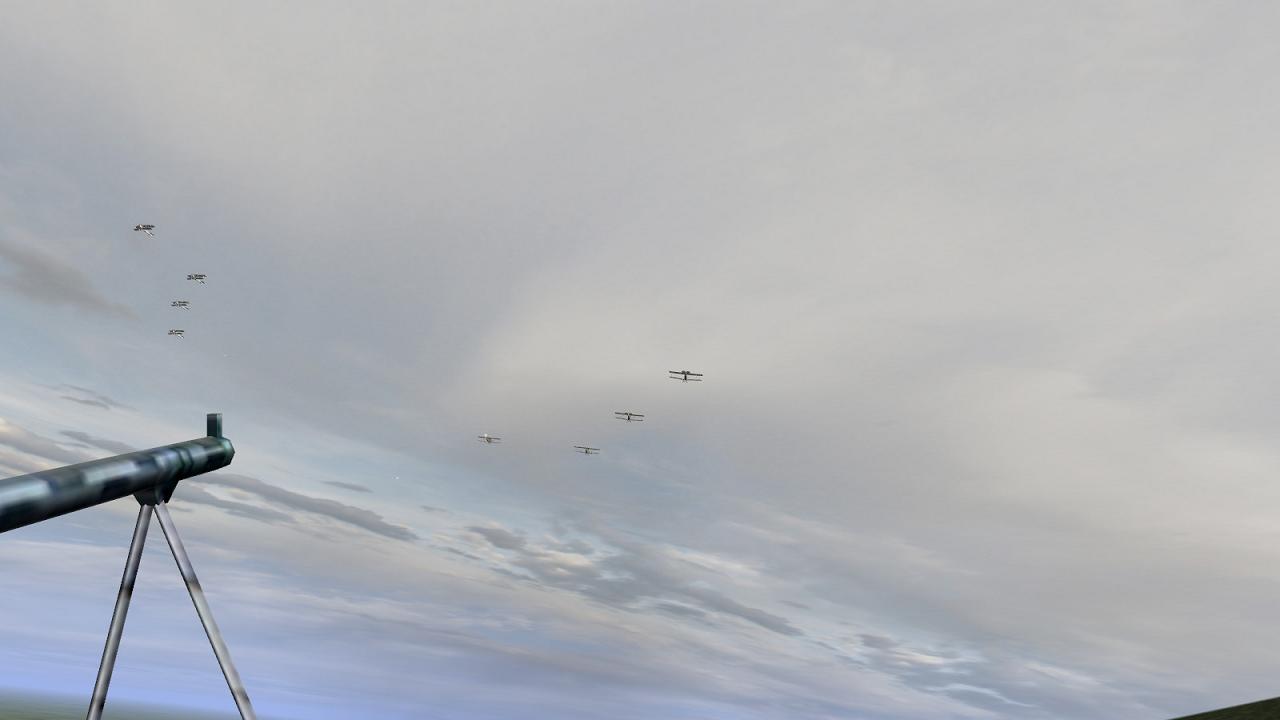
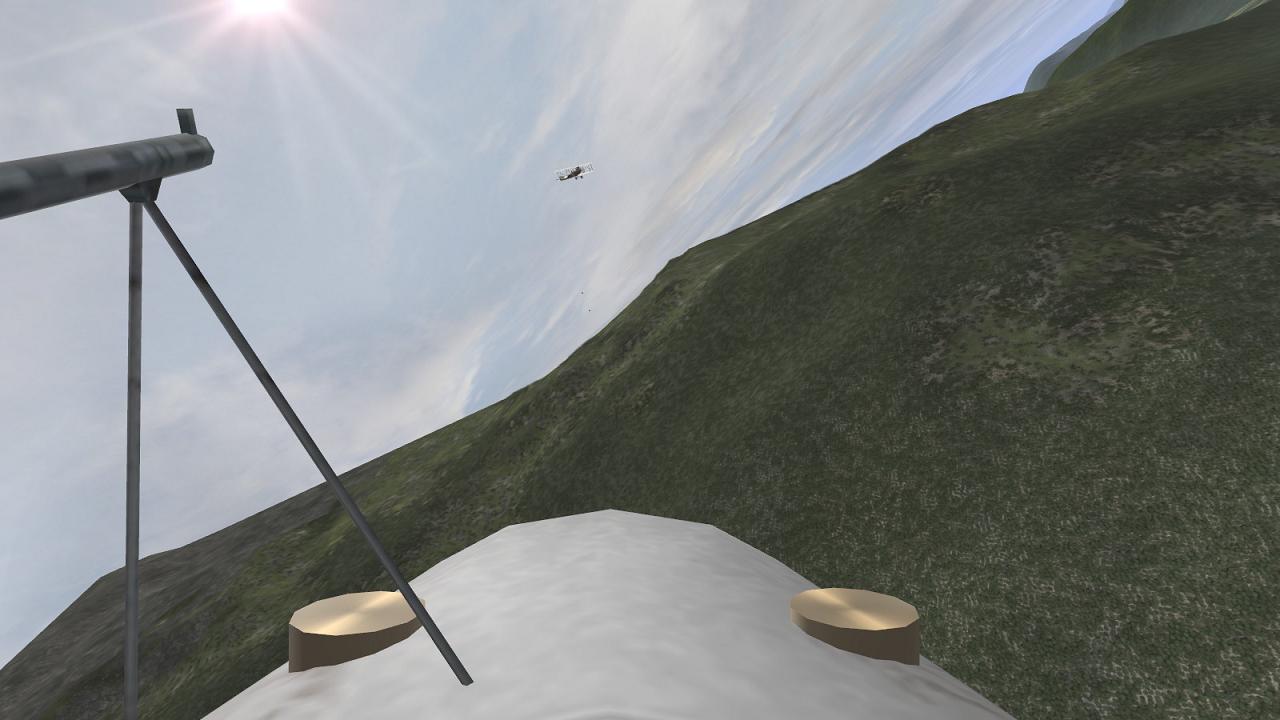
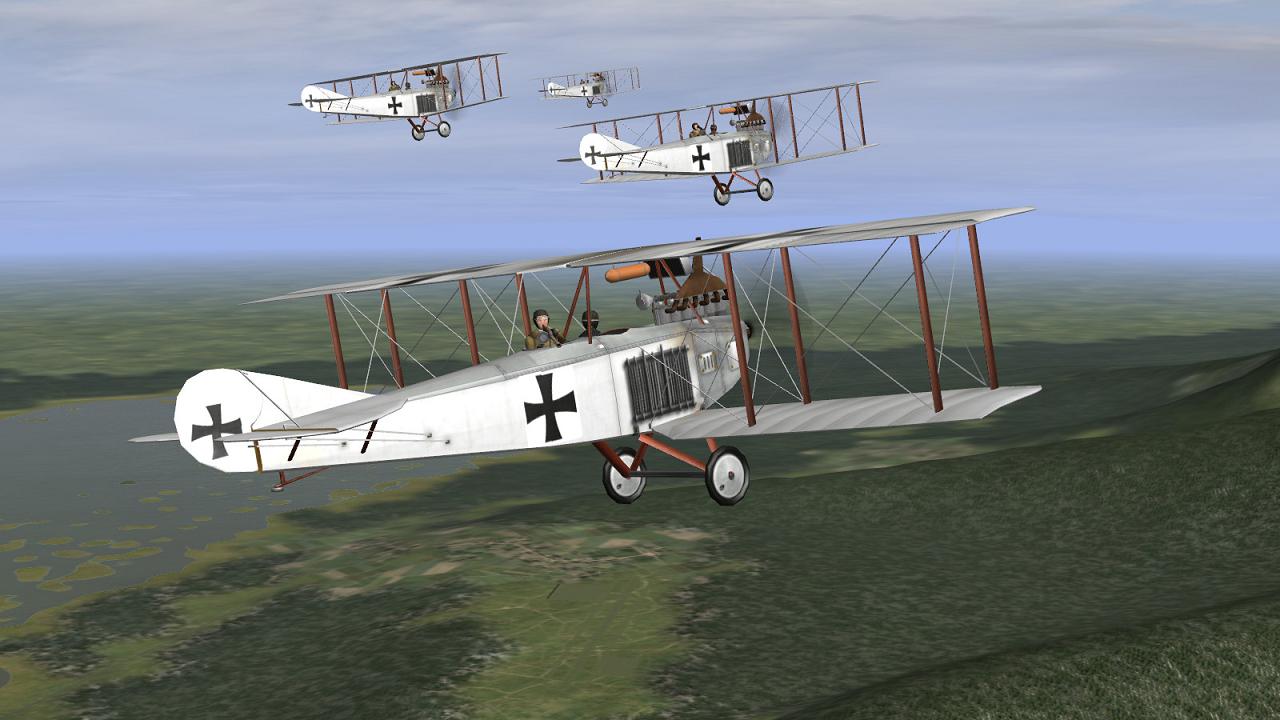
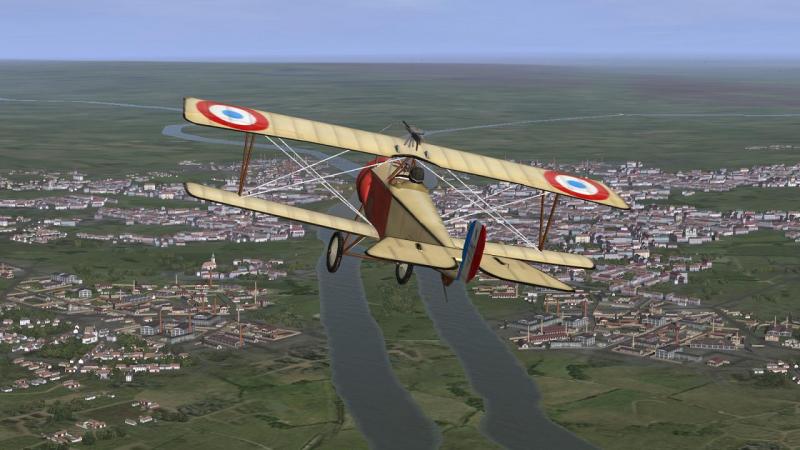
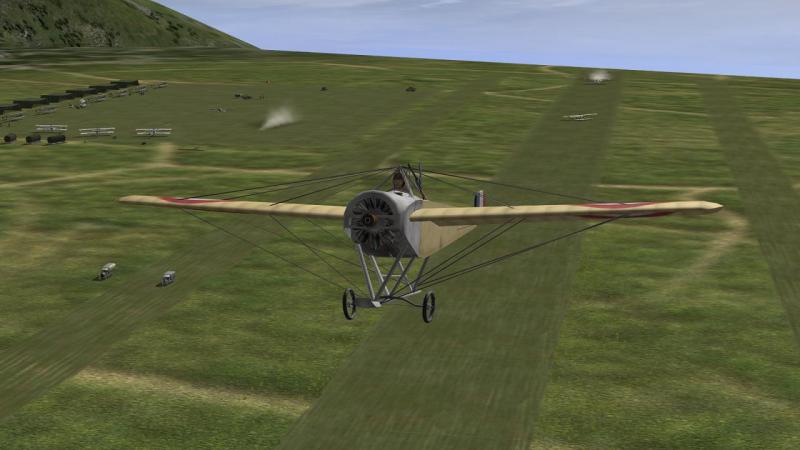
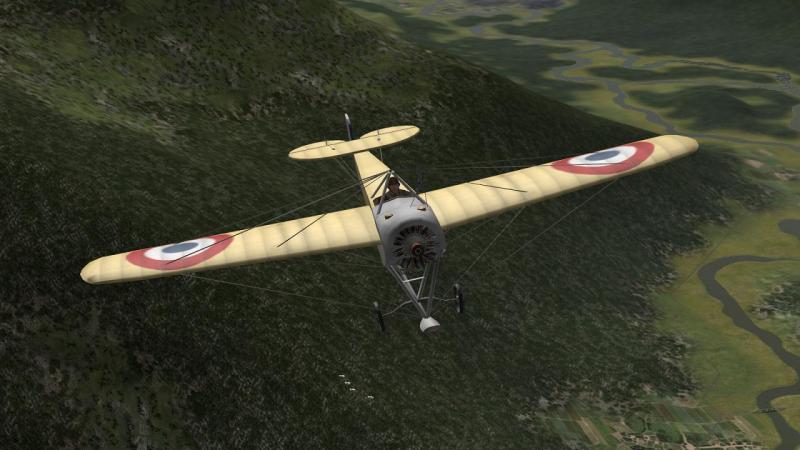
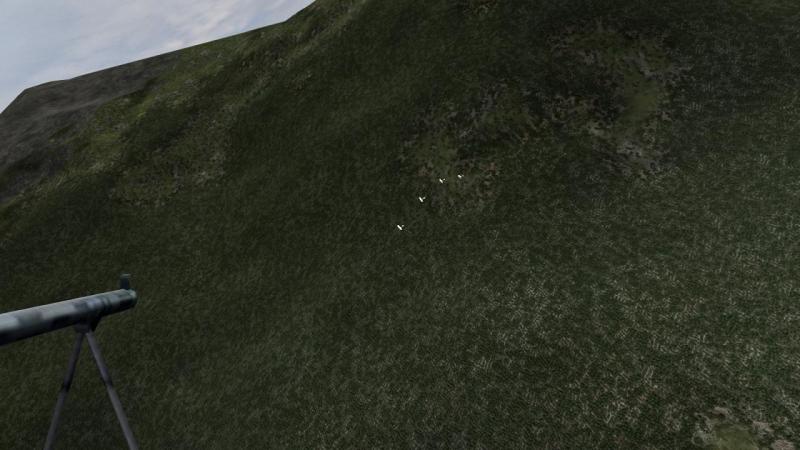
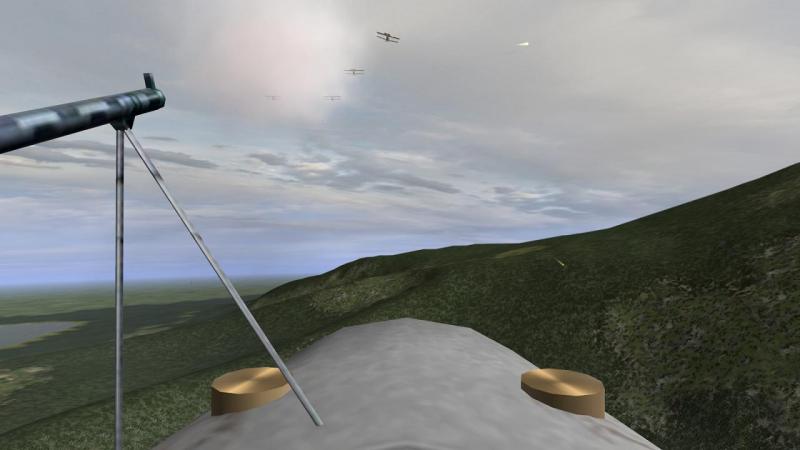
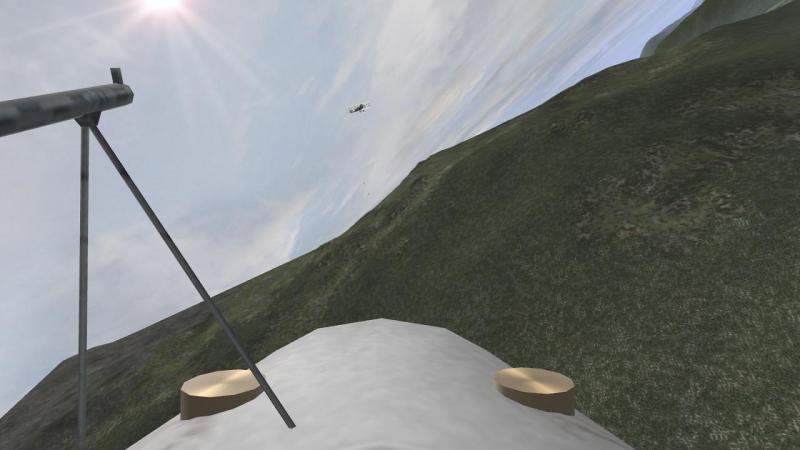
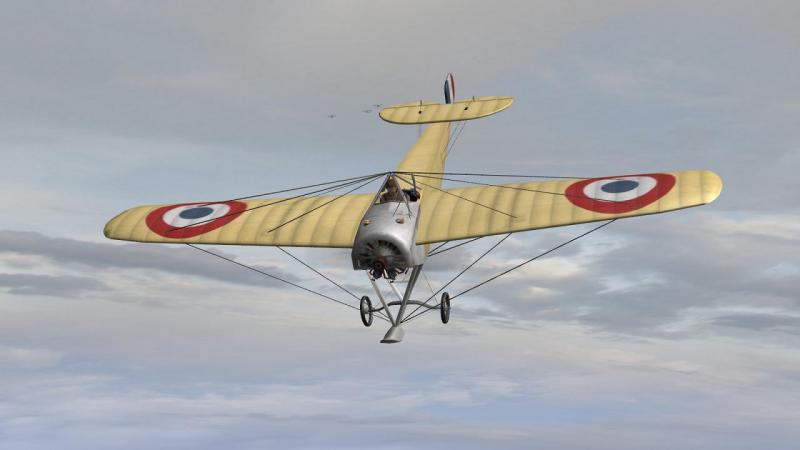
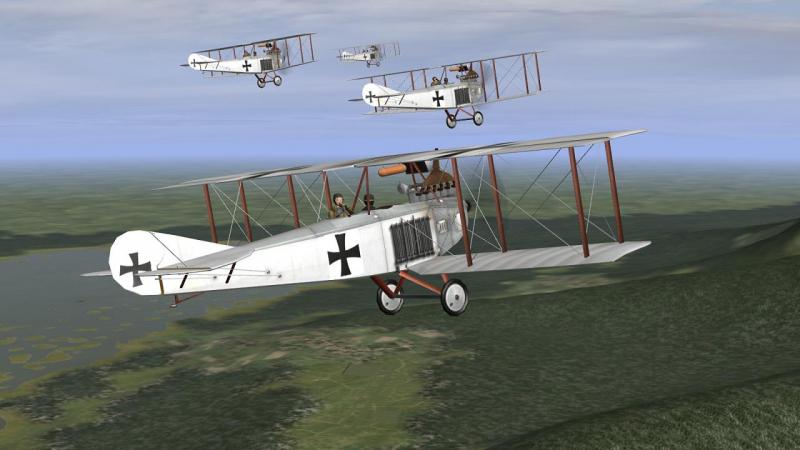
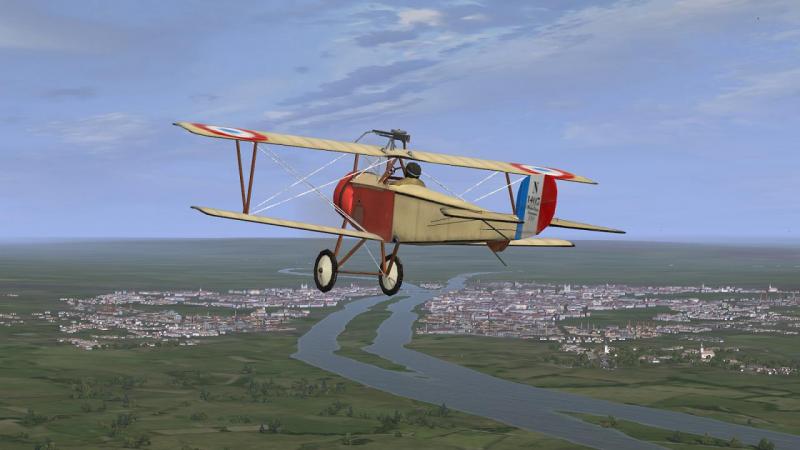
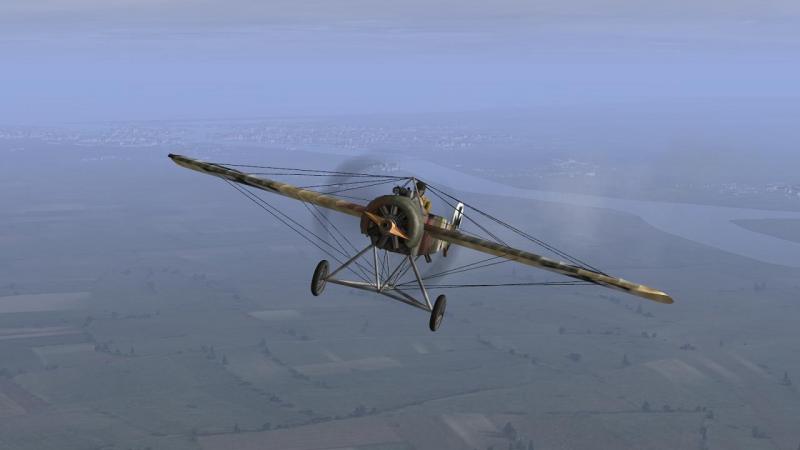
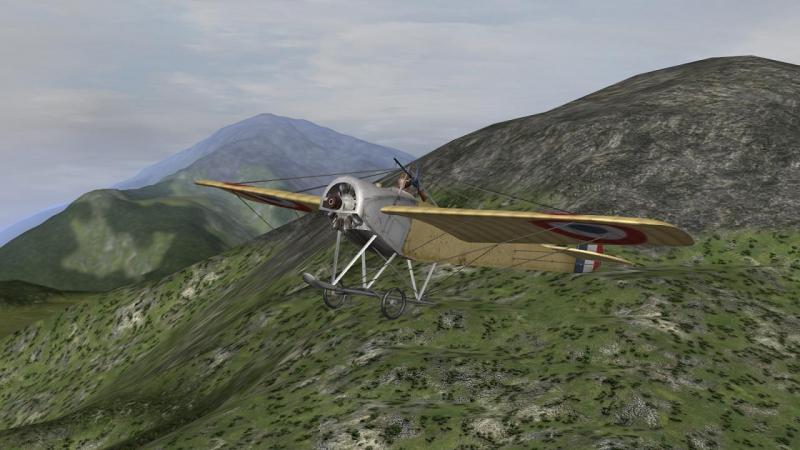
Big City Blues, World War 1 style... Well, as intended. I flew a second mission with the armed but underpowered Nieuport 4. There's definitely an art to making your takeoff roll in one of these, without engine start being followed by a wobble and a nose-over; so far it's still hit and miss for me. Anyway here's the mission briefing - and it sounds exciting. We are to escort some Farman recce aircraft - and opposition in the air is expected. I managed to get moving - after a couple of attempts and restarts, I admit. After that, takeoff was uneventful, for me and my number two. For the Farmans, it was a different matter. The leading machine, taking off on a strip parallel to mine, went ass over t*ts about 50 metres into his takeoff run. The two Farmans behind him had plenty of time to abort or avoid, but they did neither. Instead, they started their runs blindly and ran straight into the wreckage, one after the other. Not a terribly auspicious start to the mission. It soon got worse. I slowly climbed away and looked back to check that the other Nieuport was still following me. He wasn't. Instead, a second clound of dark smoke had appeared, this time on the edge of the mountainside plateau on which our airbase sat. Now I was really on my own! I continued the mission; what else was I to do? The honour of France demanded no less! As it happens, I had left turned on, the display of aircraft icons. So on the mini-map, I could see the blue icons whose presence confirmed that the Boche were in the air, having seemingly experienced no comparable difficulties. Aircraft icons aren't too unrealistic for WW2 ,where you are often operating with the assistance of a radar-assisted ground controllers; but they're hugely unrealistic for WW1, or course. Normally in WW1 sims,you can rely instead on friendly AA bursts to mark at least some possible targets. But not this time; looking around, the skies were devoid of 'Archie', as far as the eye could see. Having said that, I might have spotted the first enemies to appear on this mission unassisted, because they were lower and their plain linen finishes showed them up nicely, against the greenery below. The briefing had advised me to avoid attacking from the rear enemy 2-seaters whose observers had good fields of fire over that arc. Not in 1914 they didn't - the 'C-type' 2-seater, which moved the observer to the rear seat and gave him a machine gun, didn't appear till 1915. Few if any B-types, such as fomed the main complement of the German air service in the first year of the war, would have carried such weapon. At any rate, with my own MG pointing diagonally upwards to clear my prop arc, I decided, to hell with that advice. I'd attack from behind and below, von unten hinten, in the manner of Schrage Musik-equipped German night fighters a World War later. I let the enemy formation slip underneath me and began a tight spiral descent, calculated to being me down into approximately the right position. I came out of my corkscrew descent a little further behind and below than I'd have liked but my momentun carried me steadily up towards the enemy formation. As I approached, another four aircraft, also German from the cut of their jibs, sailed past, in the opposite direction. Ignoring the newcomers, I selected the left-hand machine in the first German formation. Soon, tracers were coming my way. Even if I stayed under my target's tail, the others in the enemy formation could probably clearly me. I needed to knock my target out of formation, preferably quickly! Lacking any form of gunsight, my first bursts were fired purely to judge, from the tracers, by how much I needed to adjust my aim, to get my rounds heading my target's way. This didn't prove as hard as I'd thought and my third or fourth burst got some hits. I was delighted to see that exactly on cue, my oponent turned right, to get out of my fire - out of formation. Naturally, I turned after him. I should have turned away then back in, to stay out of his sight under his tail, but I didn't have enough of a speed advantage. Instead, I tried to cut the corner and turn inside him. Things seemed to be going tolerably well, when suddenly the screen went black. Switching to the external view confirmed my PC hadn't died - my virtual pilot had. My machine went down in a dive, completely unresponsive to control inputs, then zoomed and fell off into another dive. Finis. I hadn't seen any fire coming from my target, so maybe it was one of his kamaraden who got me. The air in that particular part of France seemed to be fairly full of Avaitiks and they probably had a jolly good row in their mess afterwards, sorting out who would get the credit for shooting me down. Determined to get my own back, I decided to carry on as planned and switch to flying a proper fighting aeroplane, a Nieuport 11 in defence of Verdun in early 1916, which is a later mission set campaign in this series. This started well, with the same excellent aircraft and airfield representations, but ended badly. This time, the problem was the city which lay across my route. The numerous buildings, once they popped into view, slowed my framerates to a crawl. So I stepped back in time, to an earlier campaign: this time, Summer 1915, with the Fokker Scourge. This started with the same promise... ...but ended with the same result. Chasing a distant enemy aircraft northwards, I came in sight of a town near the channel coast. And down went the frame rates, faster than a BE2c under a hail of Spandau fire. So regretfully, I turned for home. Similar problems with airfields in the Dark Blue World 1916 module had been solved by applying 'Vertical synch - adaptive (half refresh rate)' in my Nvidia Control Panel. I checked this was still set, which it was. Perhaps I need to set it separately, for my separate, CUP install of IL-2. Until I find some fix, this set of campaigns doesn't look to be playable for me, which is a pity, because they look rather good. Hopefully, others will have better luck!


-
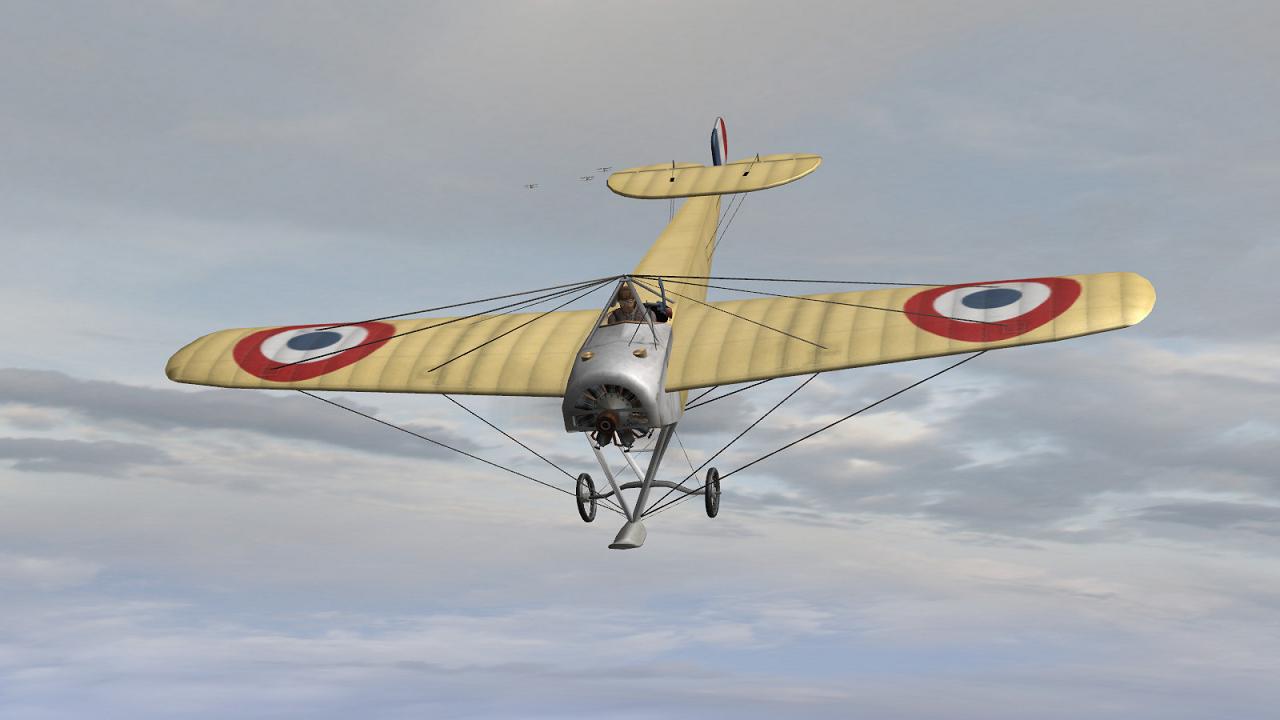
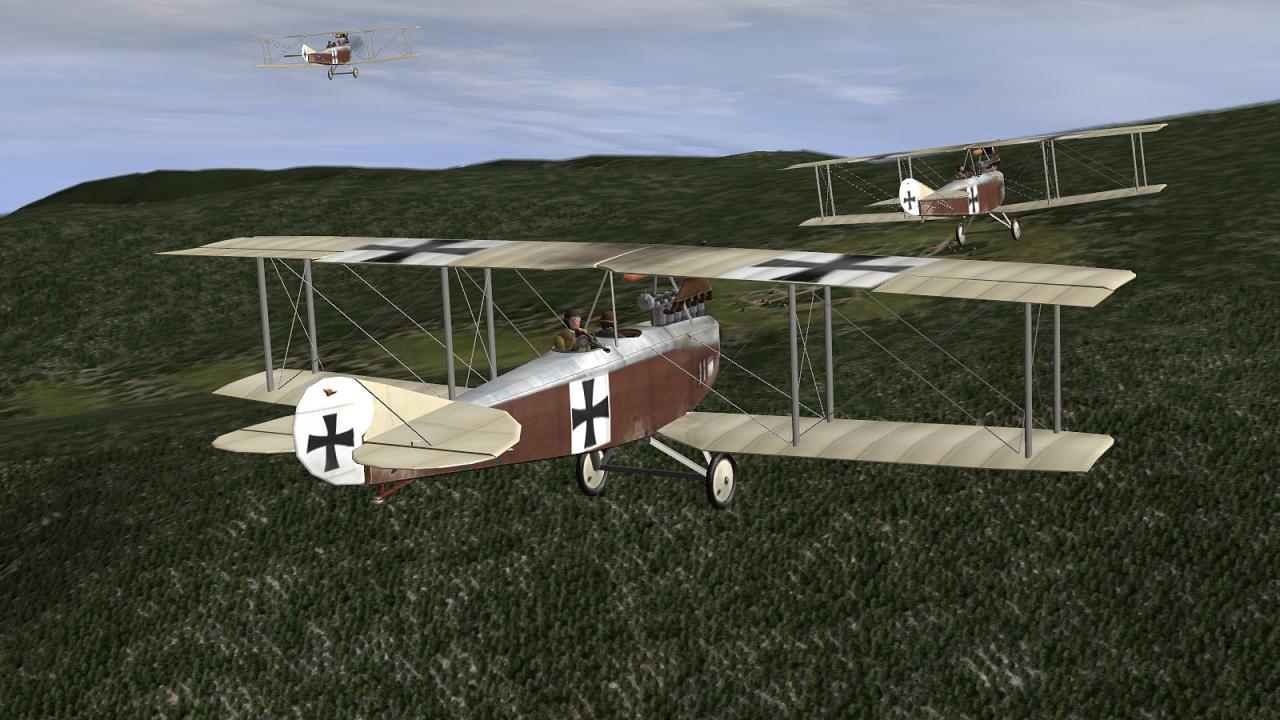
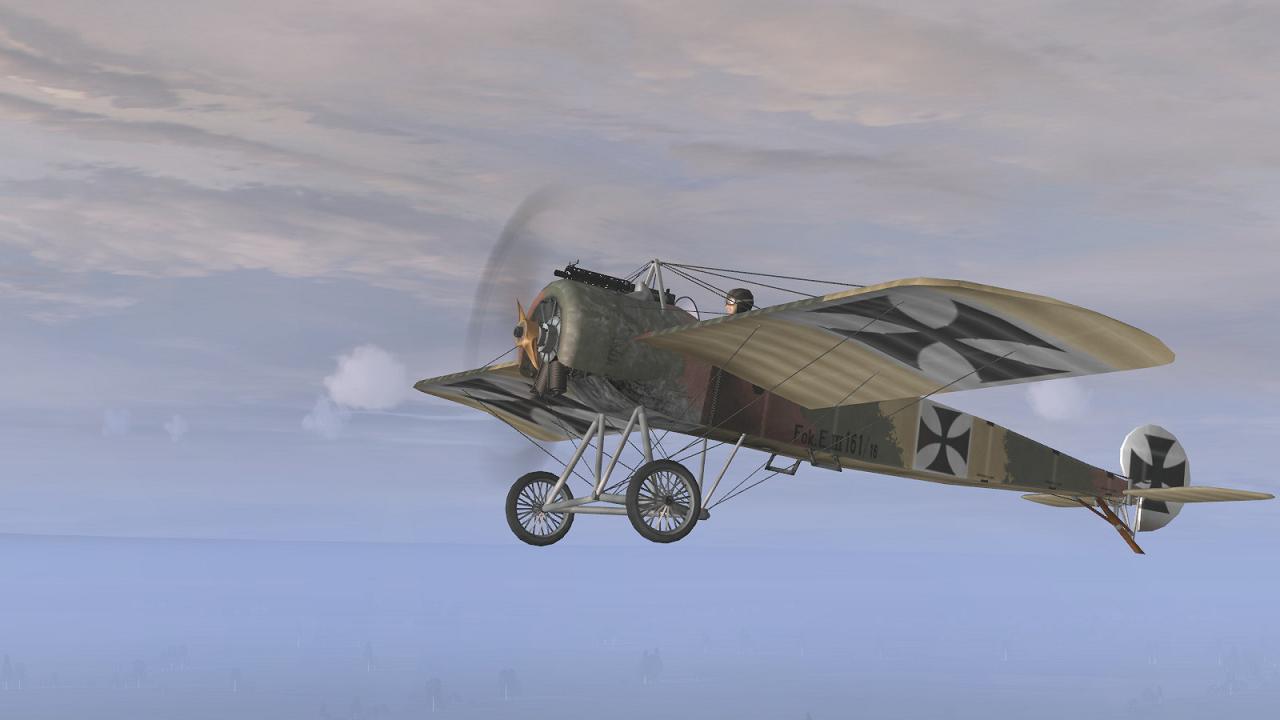
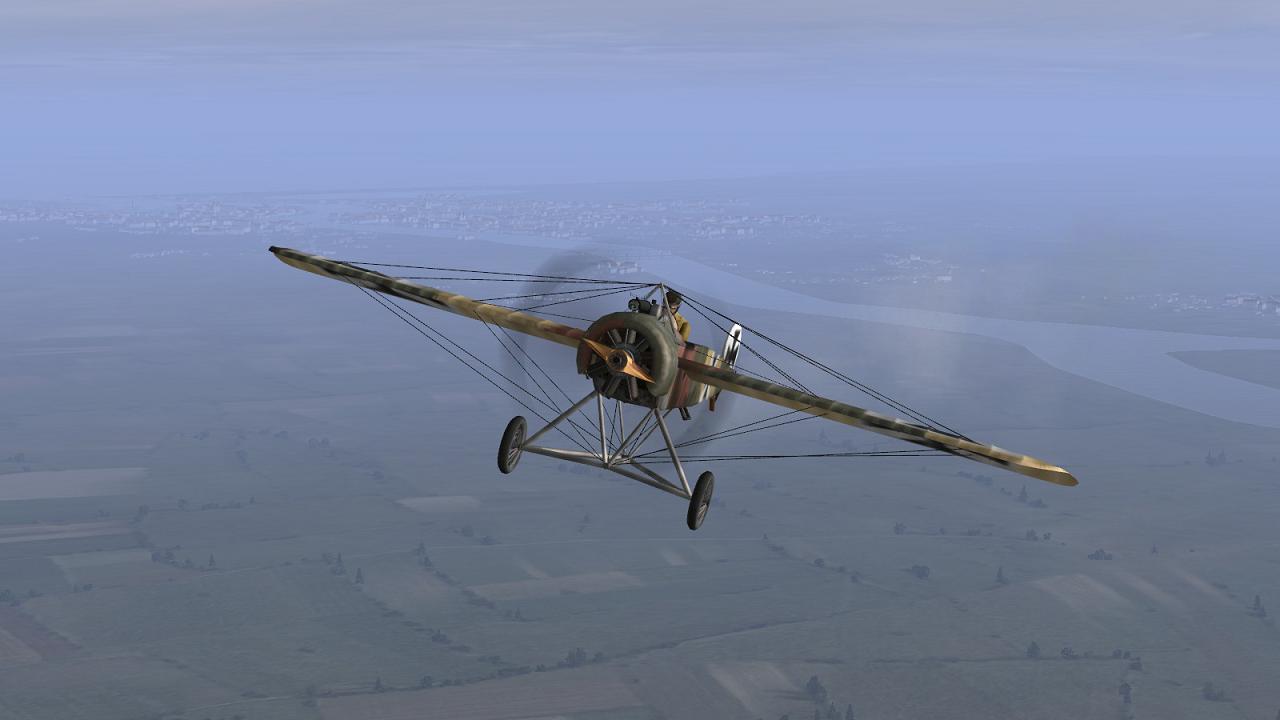
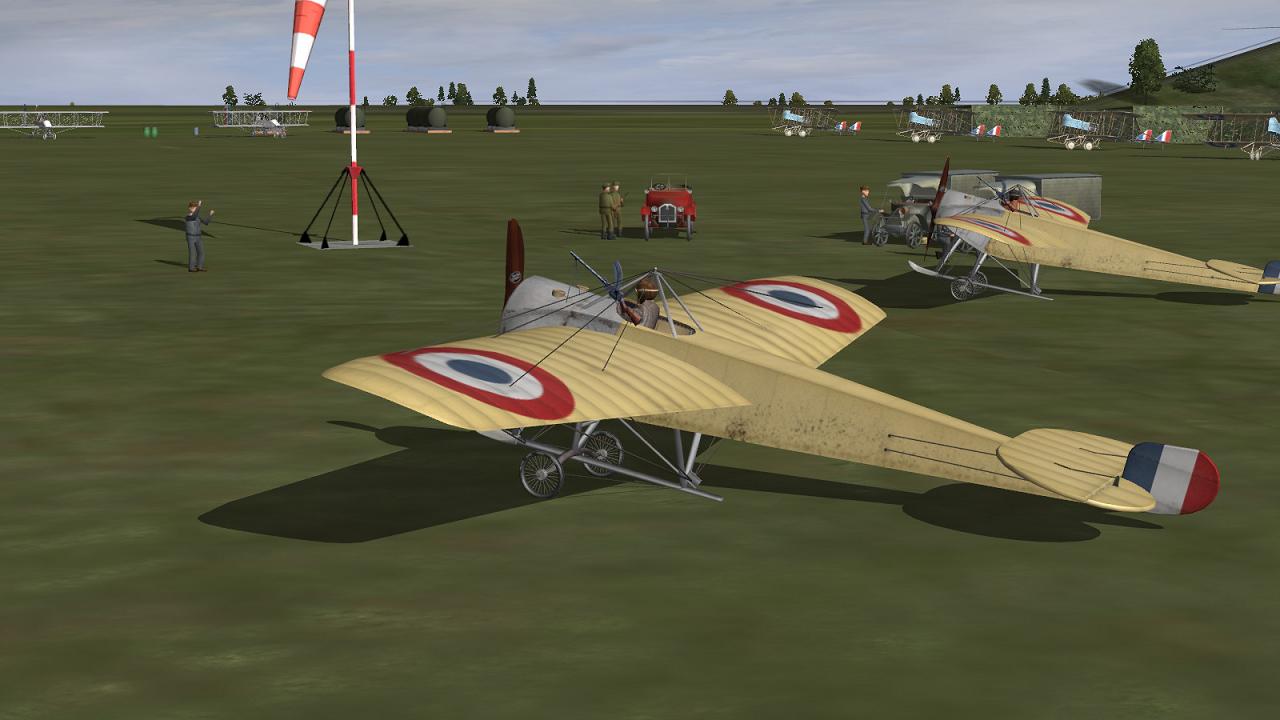
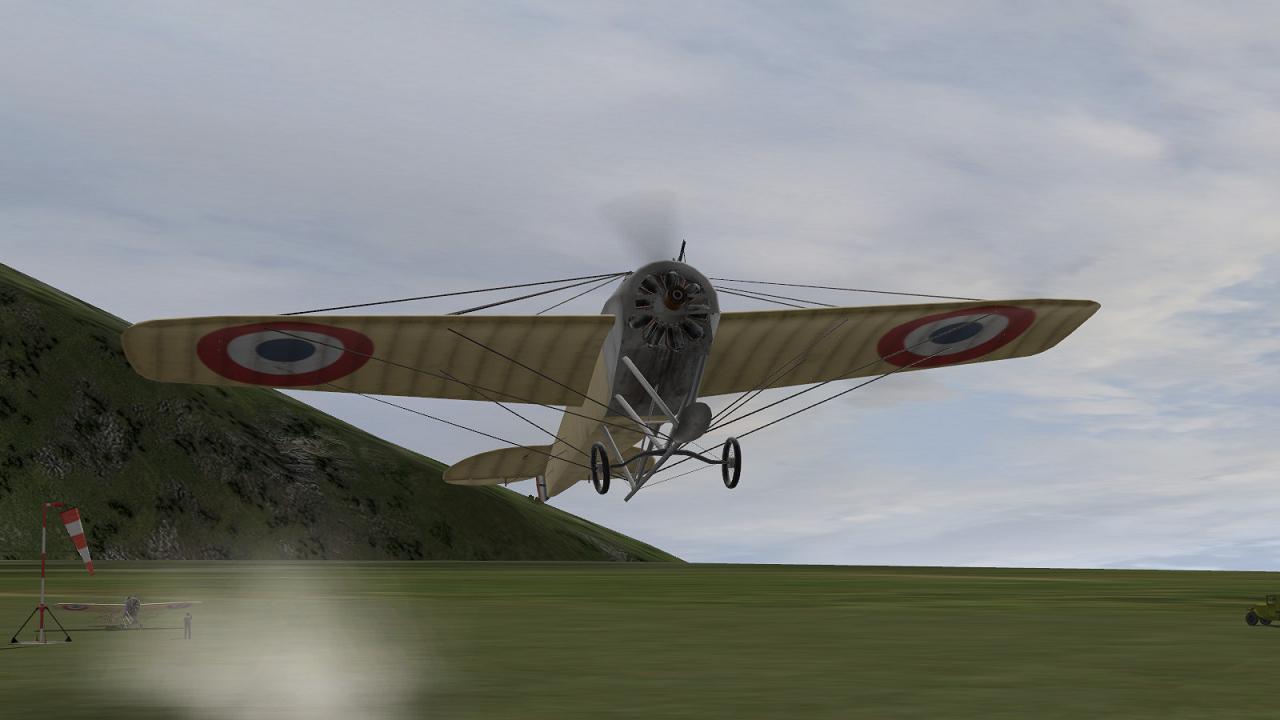
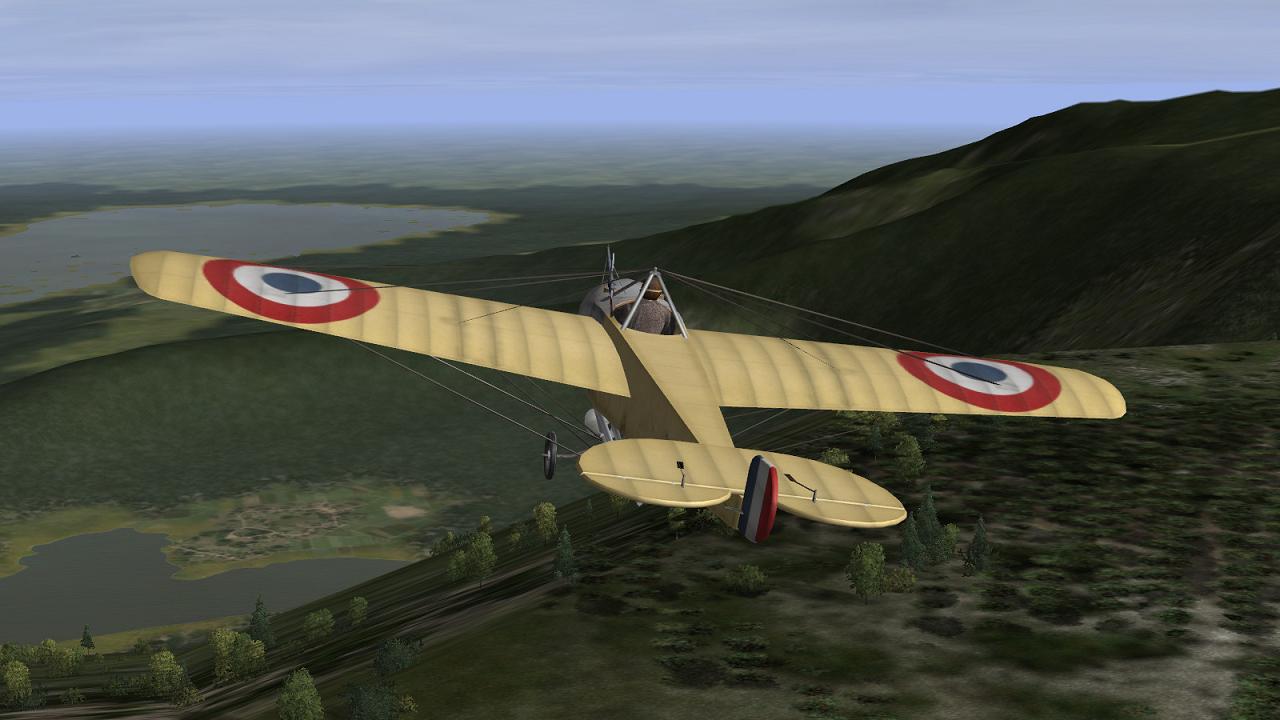
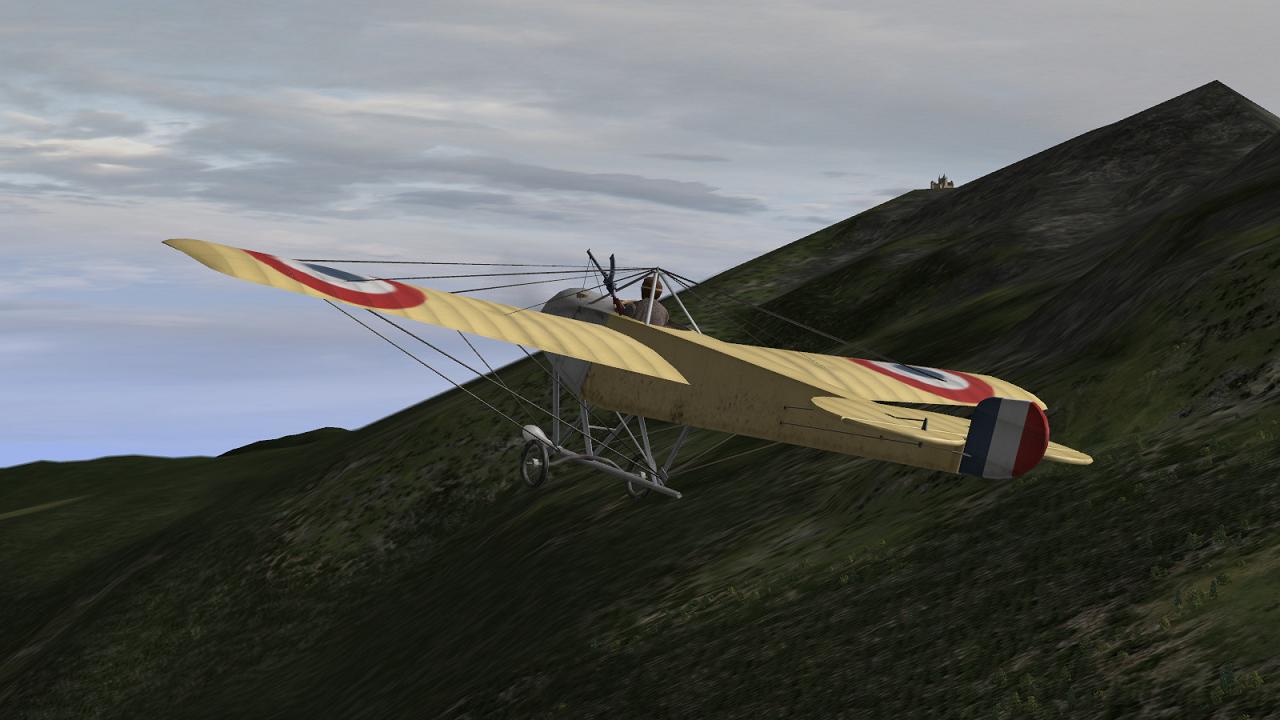
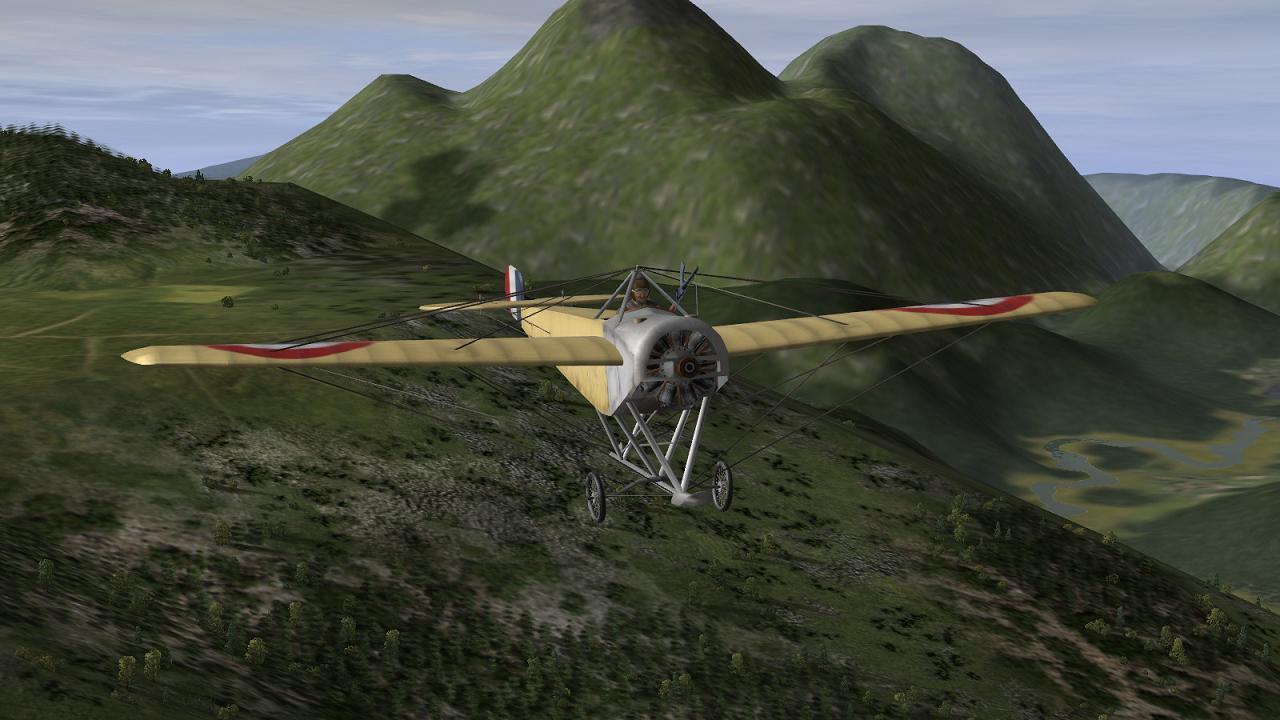
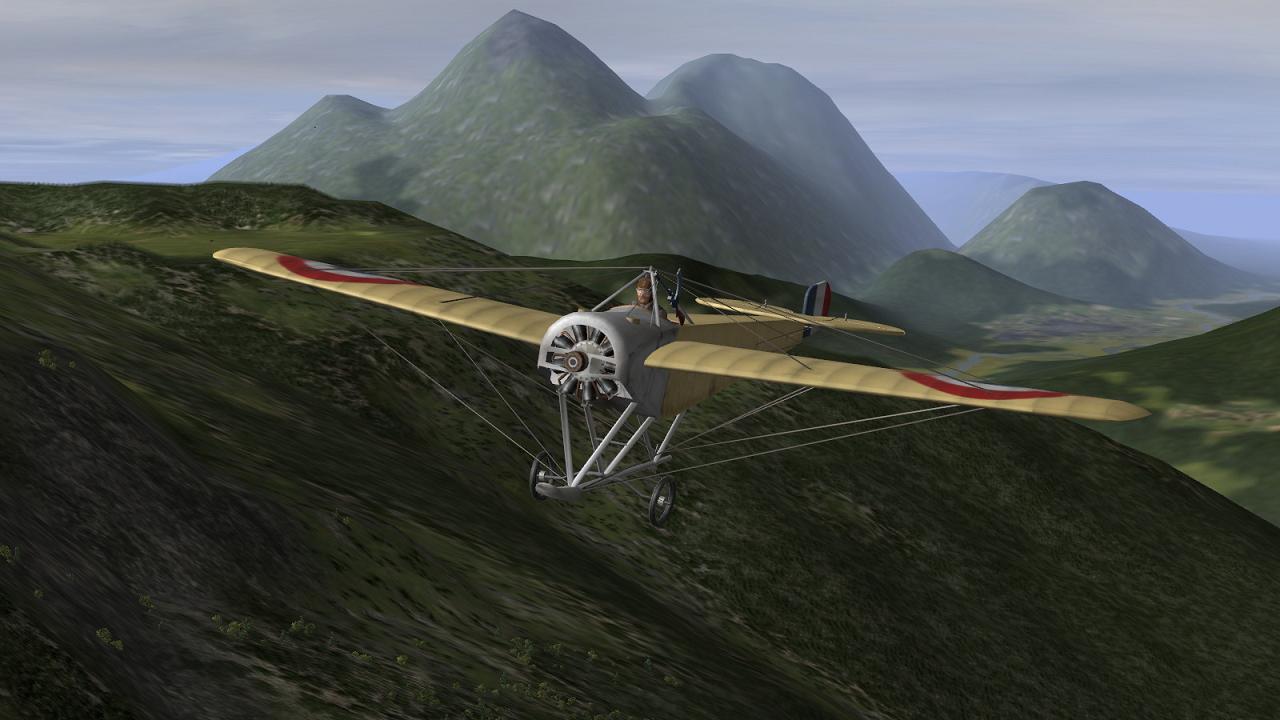
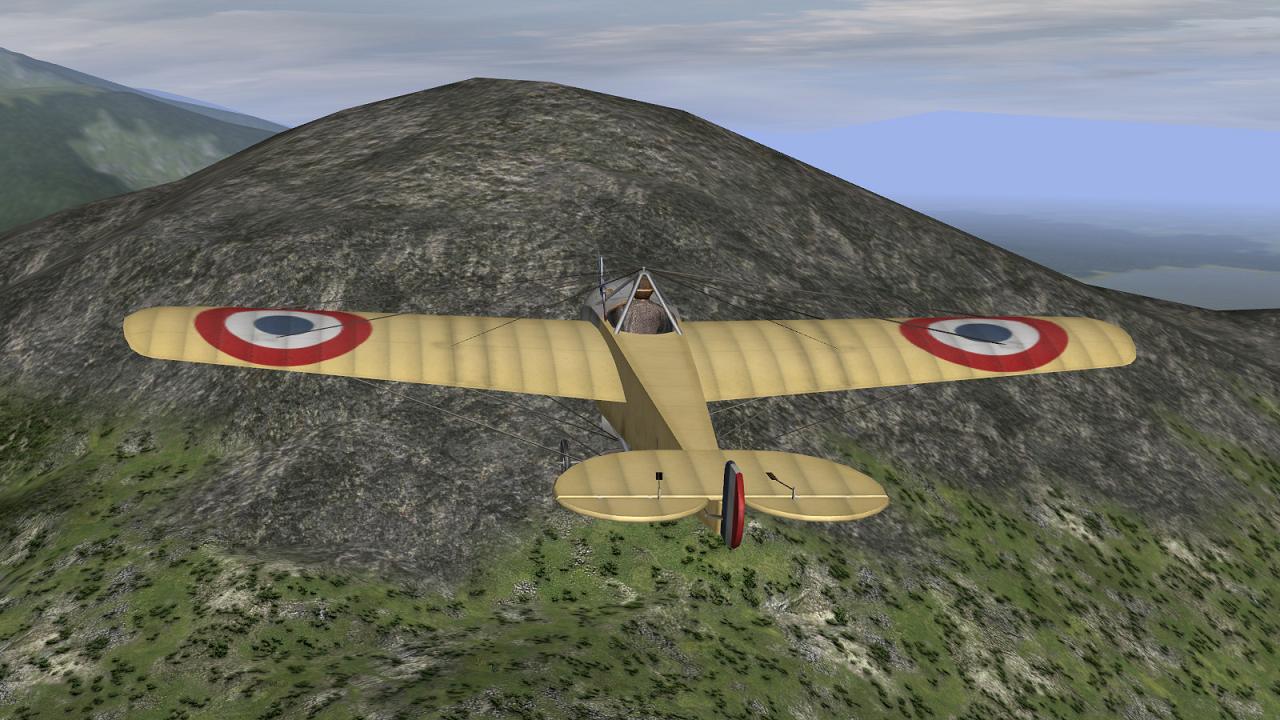
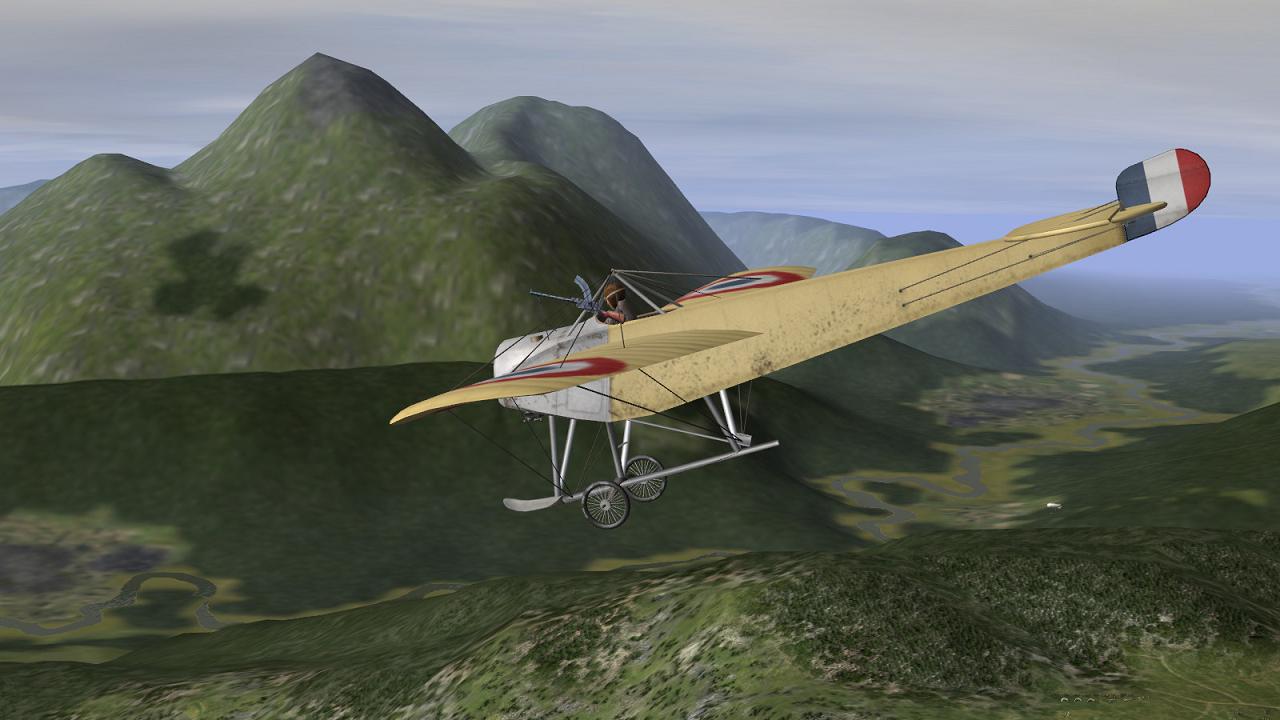
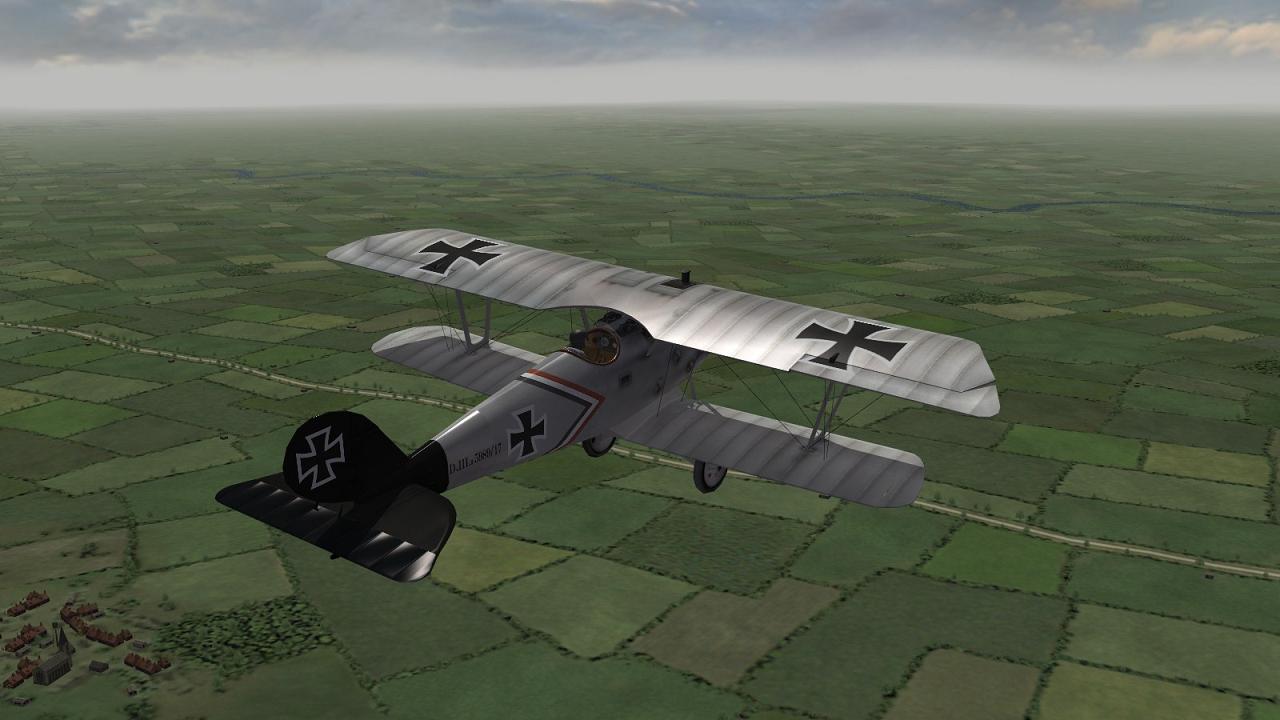
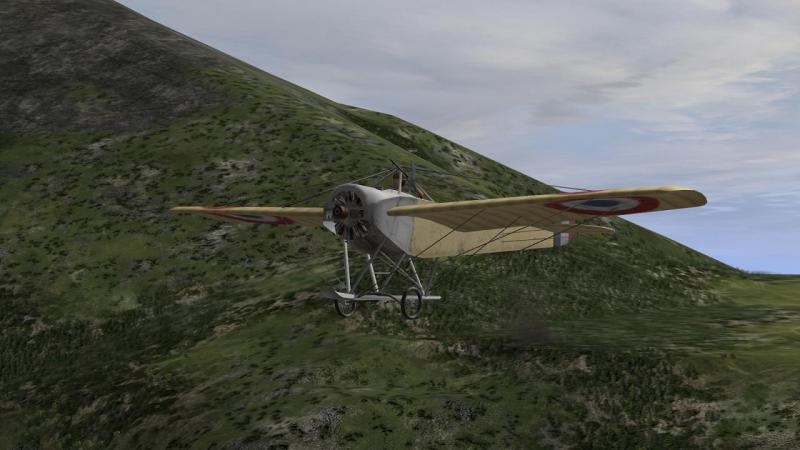
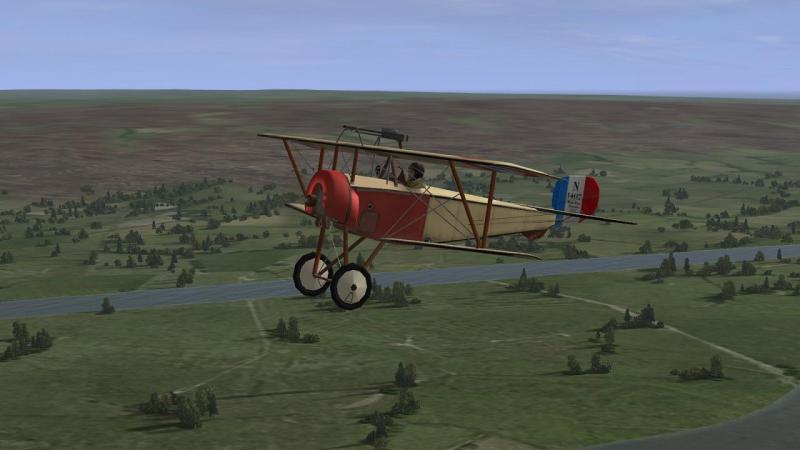
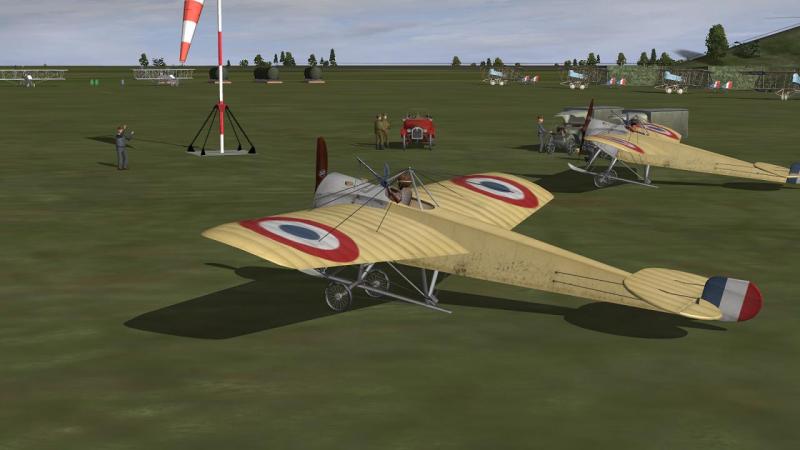
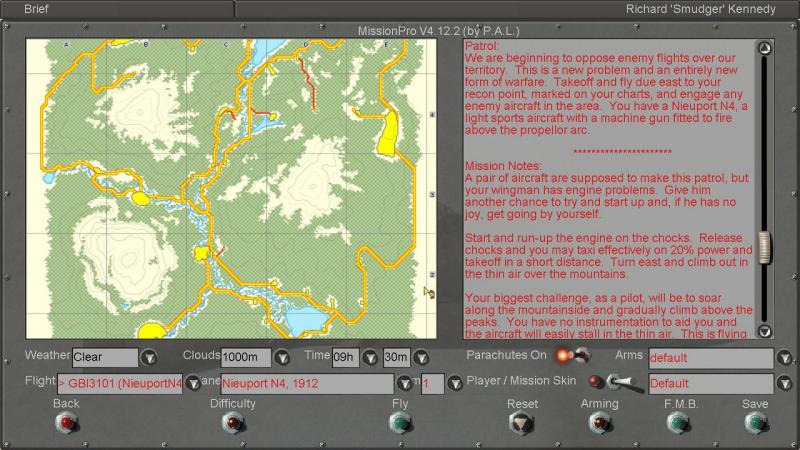
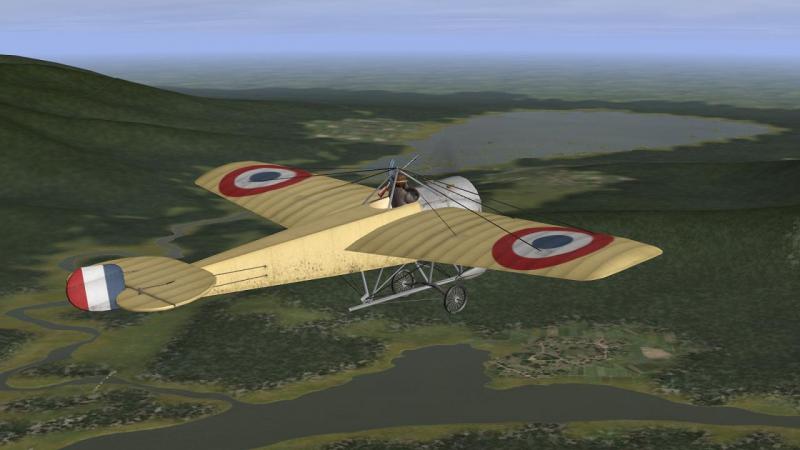
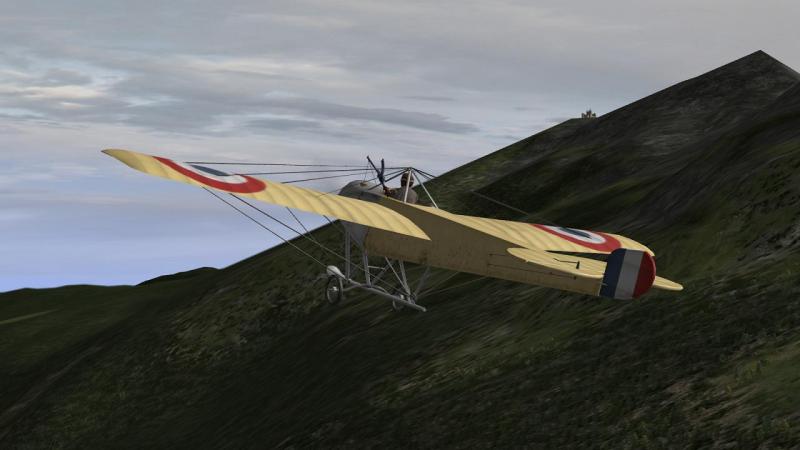
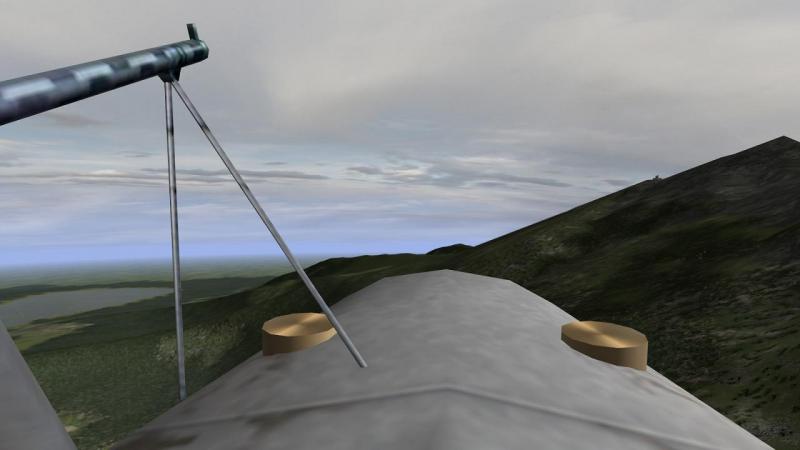
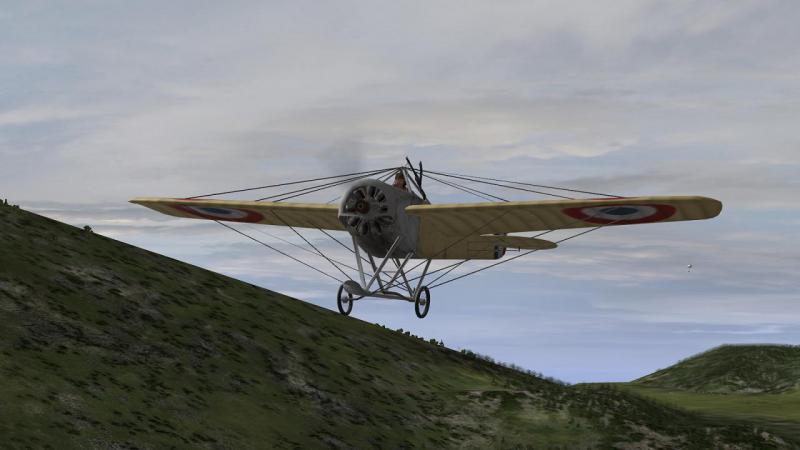
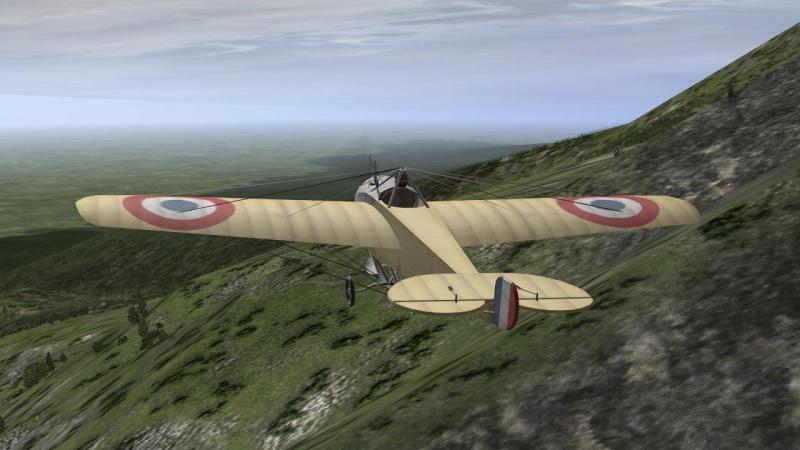
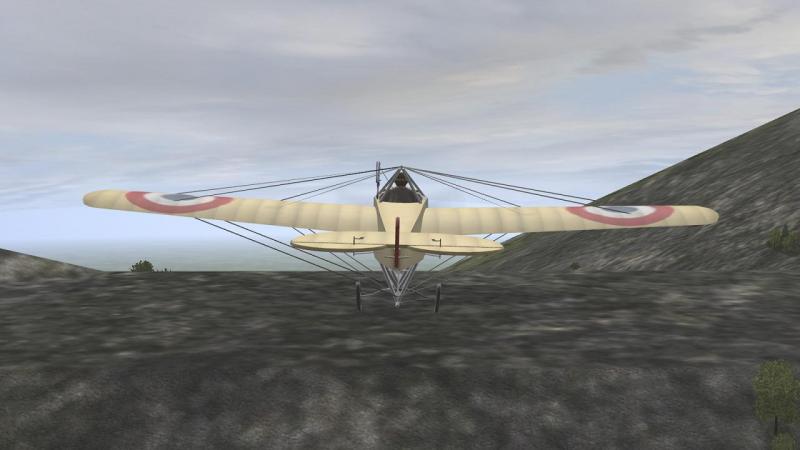
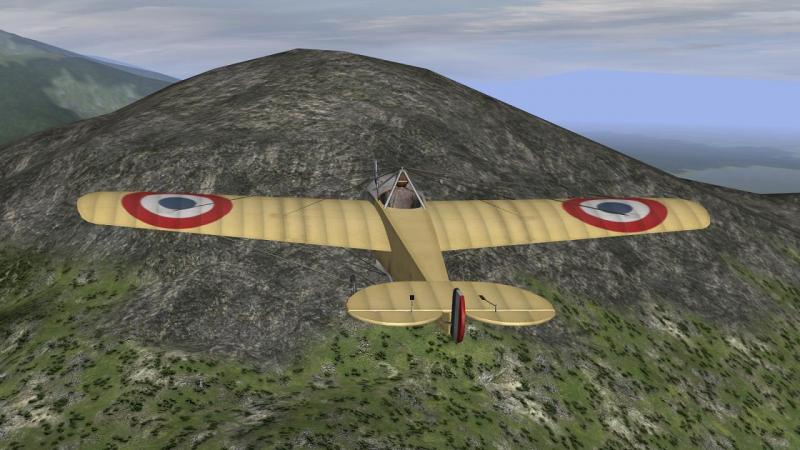
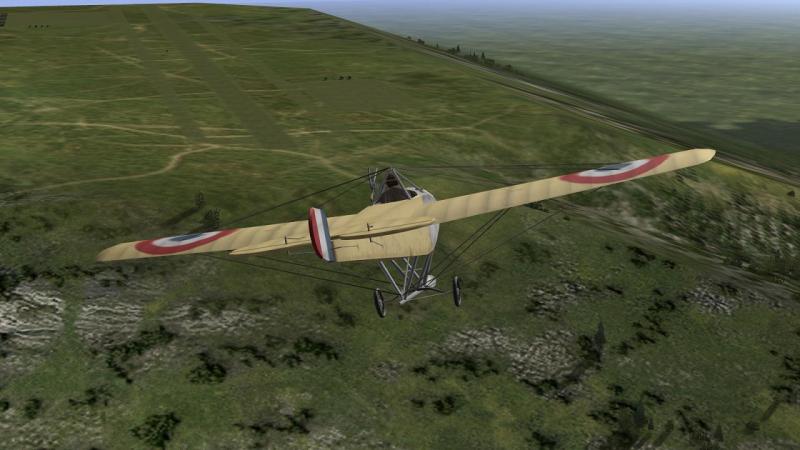
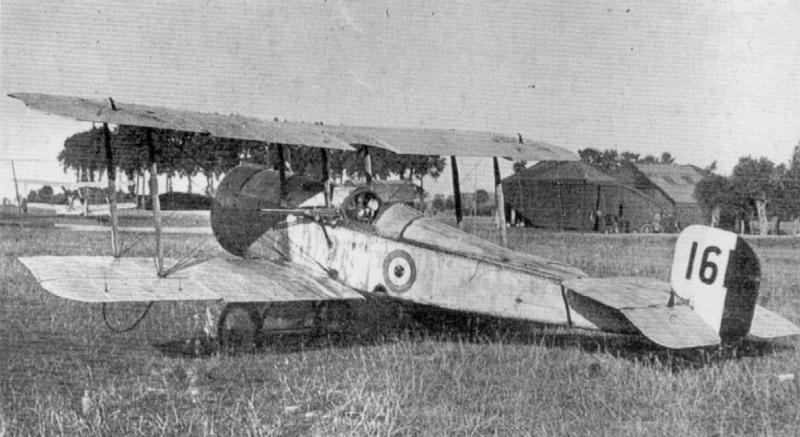
Flying World War 1 from the start, with some new campaigns for Il-2's CUP mod! The recent Combined User Patch (CUP) for Il-2 1946 now has four modules: Dawn of Flight for World War 1, Golden Age for the inter-war period, Wings at War for WW2, and the Jet Age for the post-war era. For the first of these, SAS's Monty, of The Full Monty fame - the Il-2 mod, not the movie! - has just released a set of scripted-mission campaigns. And naturally, being long interested in the air war of that period, this was one that I wasted no time in trying out. So far, the first part of an eventual 32 'mission set campaigns' is available, and you can find the details over at the SAS forum, here. Most unusually for a WW1 sim, what this first part gives us is the ability to fly from the very start of the First World War, in August 1914. The first mission set - 'Demarcation' - kicks off in the Vosges, where the demarcation line ran between the French and German empires or that period. Up to now, the earliest WW1 flight sim missions have flown have been from the era of the Fokker Scourge in the summer of 1915. So while I knew not to expect too much in the way of air combat at a time when most aircraft were unarmed and those that were, generally relied on carbines or pistols carried aloft by their crew, I was keen to try out something new, with the option of jumping ahead any time I wanted; in particular, the 1916 Verdun campaign tickled my fancy, with the opportunity it seemed to fly as the famous Jean Navarre, whose Nieuport Bébé, painted red before von Richthofen copied him, was the terror of the Boches and the hero of the Poilus. The 'Demarcation' campaign is the first mission-set in the series and sees the player flying a Nieuport N4 monoplane. This famous French company is of course more famous for their V-strutted fighters starting with the Nieuport 10 and 11. But pre-war, Nieuport was noted for its racing or sports planes including a line of neat monoplanes, from which comes the aircraft I’ll be flying on this campaign. There’s some more info about the type on Wikipedia, here; evidently the type was quite widely used, albeit in small numbers, notably by the Russian Air Service. For this campaign I’m with the French air service, which was probably the biggest and best of the combatant air forces at the start of the war and in the thick of it from start to last. In the early months of WW1, aircraft were purely for visual reconnaissance and were not routinely armed. Rare exceptions included the Farman of Louis Strange, 5 Squadron Royal Flying Corps, who contrived to fit a Lewis Gun, only to be ordered to remove it after the extra weight resulted in the aircraft failing to get high enough to intercept a snooping German warplane. Thereafter, pistols and carbines remained the only (generally ineffectual) option for aircrew who fancied having a crack at their opposite numbers in the air. The first air-to-air ‘kill’ came in October 1914, when Sergeant Joseph Frantz and Corporal Louis Quénault brought down a German Aviatik; Quénault reportedly had to finish the job with a rifle after his Hotckhiss MG packed it in. As I was soon to discover, my single-seater Nieuport is armed from the get-go, with what looks like a Danish Masden mag-fed LMG. The real catch is that it’s mounted to fire upwards to clear the propeller arc, this being before the introduction of deflectors or interrupter gear. Lanoe Hawker had some success in 1915 in a Bristol Scout with a Lewis gun mounted to fire left and ahead so this arrangement isn’t entirely untypical of the sort of lash-ups early aviators made from early in the war, to get a decent crack at the enemy in a single-seater, with no observer to man a flexibly-mounted gun. Here’s the mission brief. It's just as well I've got the MG, because apparently, the enemy fliers have been activer over our territory. While my patrol zone is marked as a recce objective (eye graphic on a yellow triangle) our aims are offensive in nature. It's a defensive patrol, for two of us, though by the sound of it, my companion’s dodgy motor means that I might be alone. We don’t have far to go, in the horizontal sense anyway. But this is the Vosges and elevation will be a different matter, as I will soon find out. Typically for these new missions, you can forget about one of IL-2's most useful navigational map aids - there's no minimap path. This is 1914 after all, just over ten years from Kittyhawk and Orville and Wilbur's first successful flights in a heavier-than-air flying machine. Intrigued to find out how my first venture into virtual 1914 military aviation will work out, I wasted no time launching the mission, having made sure that in the difficulty settings, I had turned off flutter and wind effects (which the WW1 flight models can’t cope with – IIRC they result in planes having regular attacks of ‘the wobbles’). And this is what I saw. Truly, our airfield is a veritable diorama, packed with people, vehicles and other aircraft. While the people aren’t animated, it’s still an impressive spectacle, packed with interest. My number two tried a couple of times to get his engine running but each time it spluttered to a stop; possibly just as well as the bloke in front of him seemed disinclined to get out of his way. My motor showed no such reluctance and after a quick look around I decided to take off straight ahead, without worrying about runways. This worked out just fine, my lightweight aircraft lifting off at a speed which didn’t seem much faster than some of the trucks motoring around the airfield. Sitting roughly at mid-chord above a broad wing, it was obvious I wasn’t going to see much from the cockpit. The Voisins and Farmans parked around the airfield would have made much better reconnaissance machines, and indeed they served on after Nieuport monoplanes had disappeared from the front lines. Flying from the external view, I got a much better view of both my aircraft and its surroundings. And fine surroundings they were. Our airfield turned out to be on a little plateau set into the side of an impressive mountain, which comprised a series of peaks with lower ‘saddles’ in between. I resisted the temptation to play that song from that musical, but the hills, if not alive with the sound of music, certainly looked worth the trip. After a bit of sight-seeing, orienting myself with the help of the map, I realised that my reconnaissance objective had been rather inconveniently sited at the top of the highest peak. As my rate of climb seemed to be rather close to the ‘imperceptible’ end of the scale, this presented me with a bit of a problem. Throttle fully open, I settled into the best climb I could manage on a course parallel to the long side of the ridge or peaks. Compared to the WW2 planes I’m used to flying in Il-2, it felt like I was in a powered glider, and a nose-heavy one at that. Heck, this ‘racing’ plane felt slow, compared to the WW1 planes I’d flown in other sims. Slow...but not too sedate, with a tendency to dive away or begin a roll to either side, if I didn’t concentrate on keeping things level. With little dihedral, a small unbalanced rudder and wing warping for lateral control, this seemed to make sense. Quite an interesting experience in itself, the flight was shaping up to be. Realising that I was not going to gain enough height on one leg, I could not resist the temptation of turning right and crossing the ridgeline over one of the saddles. Even getting high enough to do this, took a certain amount of time and effort and I just scraped across. Having gone over the mountain to see what I could see, like the bear in the song the result was not unexpected – the other side of the mountain. I now flew a long leg away from the objective to gain sufficient height. That done, I turned around - gently, so as not to lose any of my precious height - and made my way back, aiming for the top of the correct peak. Finally I was right over the summit. I should have over-flown my objective to one side or the other, but I was quite keen for my track on the map to intersect the centre of the target marker, lest such precision was needed for mission success or to trigger some necessary mission event. In fact it worked – I got the ‘mission completed’ text so that was it. And I didn’t get shot at, or even see a single enemy aircraft. They were there, though, but I only realised that later, when I noticed an enemy aircraft icon on a screenshot which I had taken with the mini-map view briefly turned on!!! To be honest, I'd sort of forgotten the briefing, having been so taken up with the actual flying side of the challenge. And I had become rather fixated on overflying that big marker, as if I were genuinely on a recce flight. Anyway, the top of that mountain was about as bare as a mountain-top can be. Giving up on earlier ideas about putting in a flypast at the castle I’d seen on a lower peak nearby, I decided that honour had been satisfied; it was time to go home. A nice hot brandy in the Mess would help me recover from the rigours of flying amongst the mountains in my little powered glider. Down we went. The early aviators were in the habit of turning off their motors during a descent but I just cut the throttle to idle and experimented a bit with diving angle and airspeed. The unfamiliar flight model I found quite convincing; I have no idea at all how a real Nieuport 4 handled but this one felt just about perfect, for such an aircraft. It wasn't long before I was turning onto my final approach...although to the wrong airfield I believe, a deceptively-similar one on a similar mountainside plateau. I must have had my mind firmly set on that brandy! For a sortie on which I'd missed my opportunity to have my first air fight, I'd actually found the experience surprisingly absorbing. I think I'll try at least one more campaign mission in the Nieuport 4, before moving on to something more warlike. There's just something about the mission which seemed to capture so well the experience of stooging around in an aircraft that is little more than a docile but ungainly powered glider..albeit one with a sting. ...to be continued!


- 3 replies
-
- 2
-

-
- dawn of flight
- il-2
- (and 1 more)
-
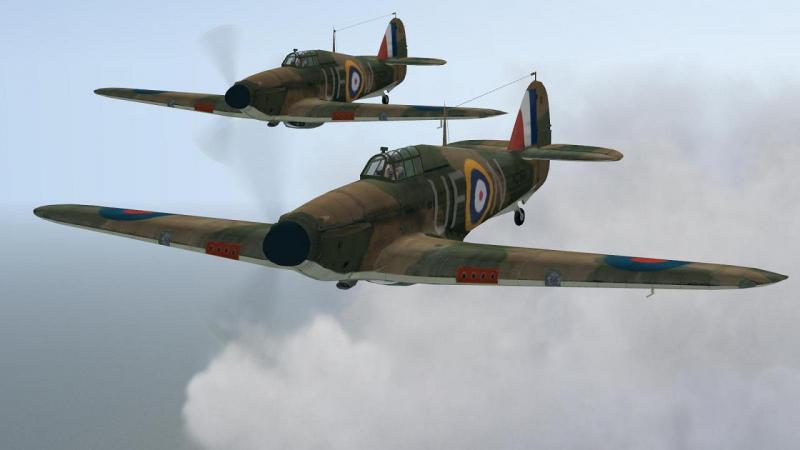
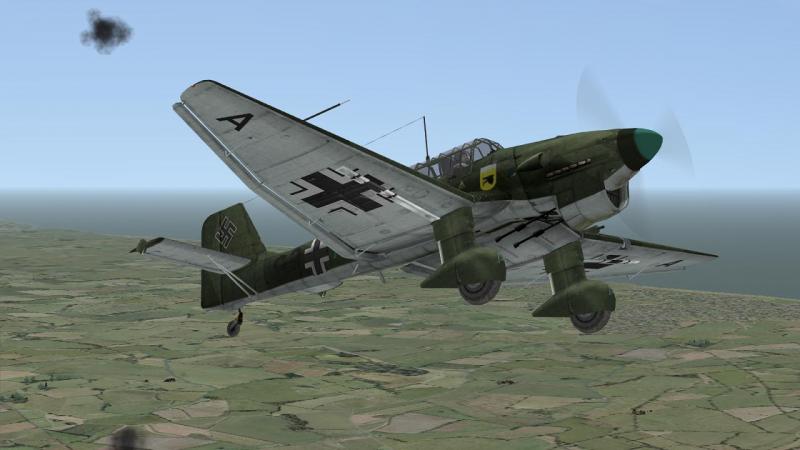
Strangely enough, for someone who's always been very interested in the Battle to the extent I once made my own map-based wargame for it, I've never really got into BoB (Rowan's or the WoV revamp). The sim-within-a-wargame element, far from being an attraction, rather turned me off. By the time I came to BoB/BoB2 I had become accustomed to more conventional single-player campaigns, where you pick a squadron flying the type you want to fly and track your virtual pilot's career via some form of pilot record or logbook. Good old European Air War being the Gold standard for such things, added features like a between-mission bunk for your pilot with creaking bedsprings, tune-able radio playing hits of the time, and exiting the campaign treating you to a screen made up like a leave pass, complete with show tickets. In BoB you can opt to fly with any participating unit with flyable (or gun-able) planes but you have no virtual pilot. From what I can see, the available method of approximating a conventional pilot career or campaign simply sets things up so you get prompted to fly when the squadron you choose to fly with is scrambled. Not bad, but not really the same. There are also some glitches like invisible Stuka bombloads and formations which bank in a robotically-synchronised and jerky fashion. High points seem to be the fantastic air combat AI and the excellent range of historical missions. Clicakable cockpits will also be a plus for folk who like such things. Having found that the wargame element actually added to my appreciation of tanksim Steel Armor Blaze of War after making the effort, I will one day make a more sustained attempt to get into BoB2, for as a sim of the Battle it has so much going for it. The Just Flight BoB add-on for CFS3 was one of the few add-ons for that sim I never tried; nor have I tried that freeware one for the ETO Expansion. One of CFS3's worst features to my mind is the bombers using fighter-type formations. Plus I was unimpressed by fighter-vs-fighter because the AI was not especially good and flew at empty weight (I found a Bf110 could pretty well escape Spits or Hurries in a turning fight); so I always thought it played better if you stuck to its core, fighter-bomber scenarios. CLoD I have not tried yet; it's SP campaigns don't seem to be well regarded and it seems more of a simulator of BoB planes (with some unusual planeset choices) rather than a sim of flying boB planes in the BoB. Now that Il-2 '46 has decent channel maps and a good selection of period aircraft, my own starting point for decent BoB campaigns - as indeed, for decent campaigns for any WW2 theatre and beyond - would be some of those available at mission4today for Il-2 '46 (preferably with a good mod like DBW or CUP), like 'Spitfire Scramble' which I reported on here: http://combatace.com/topic/86059-il-2cup-spitfire-scramble/


-

Hawker Hunter T7 goes down at airshow
33LIMA replied to MigBuster's topic in Military and General Aviation
That was my reaction. I'm no expert but I was surprised, at how low he started the loop. And the manouevre itself seemed sluggish from quite early on, as if he didn't have enough airspeed going into it. Maybe the engine faltered. What a mess. -
Were can I find a Pfalz D.III and D.IIIa for FE2?
33LIMA replied to Verdun's topic in General Discussion
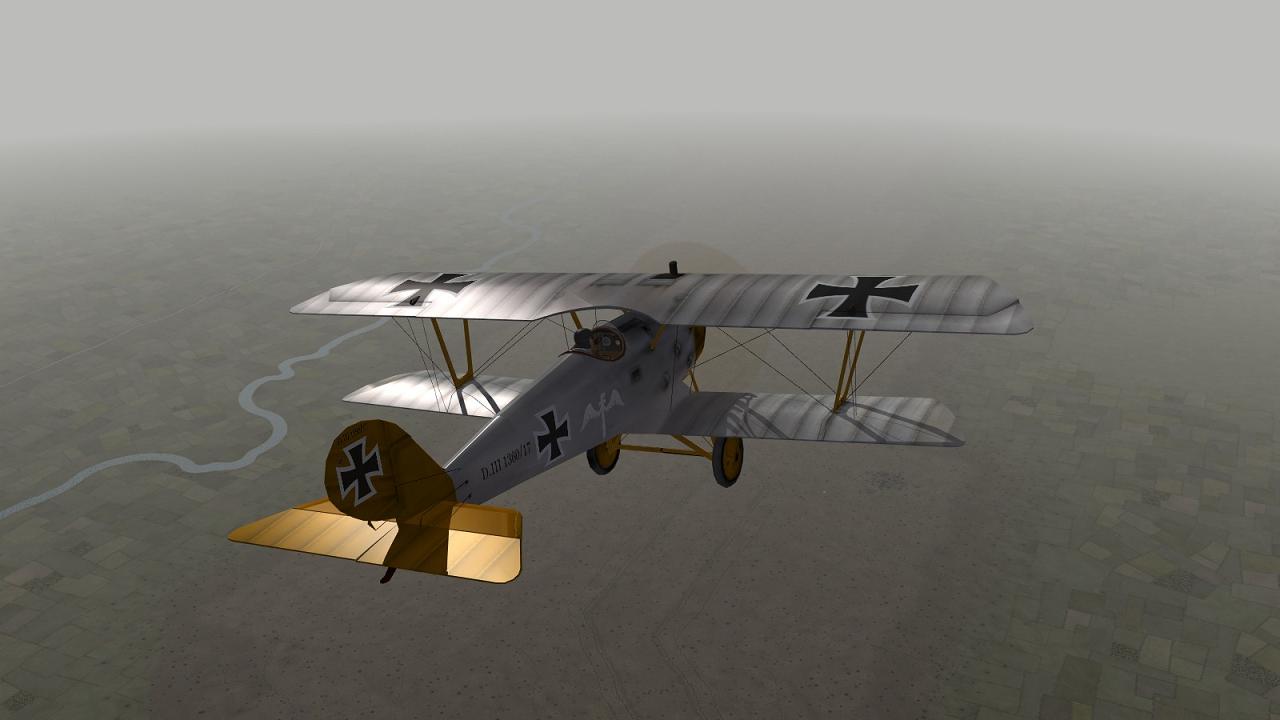
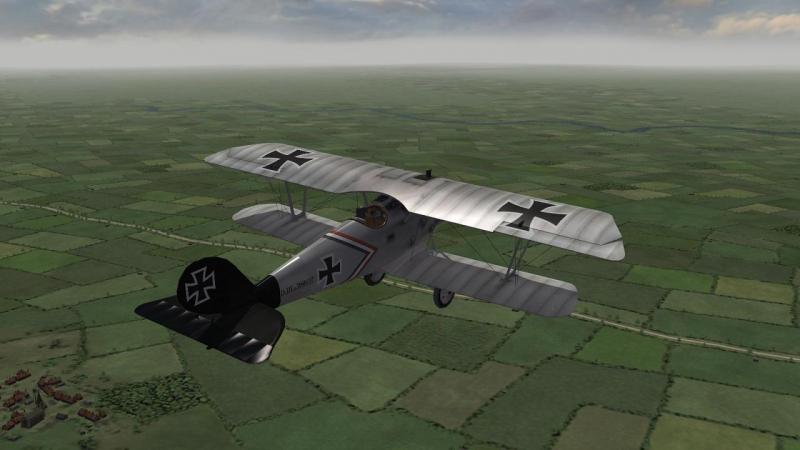
Yes, the A Team DIIIa is the preferred solution. It's not just a matter of data files, the A Team DIIIa replicates the latter's distinctive features - guns on top of the forward fuselage rather than buried in them, rounded lower wingtips and deeper, more rounded horizontal stabiliser:
-

From the album: Combat Sims
-
From the album: Combat Sims
-
From the album: Combat Sims
-
Shooting's too good for 'em! ...but thanks for sharing!
-
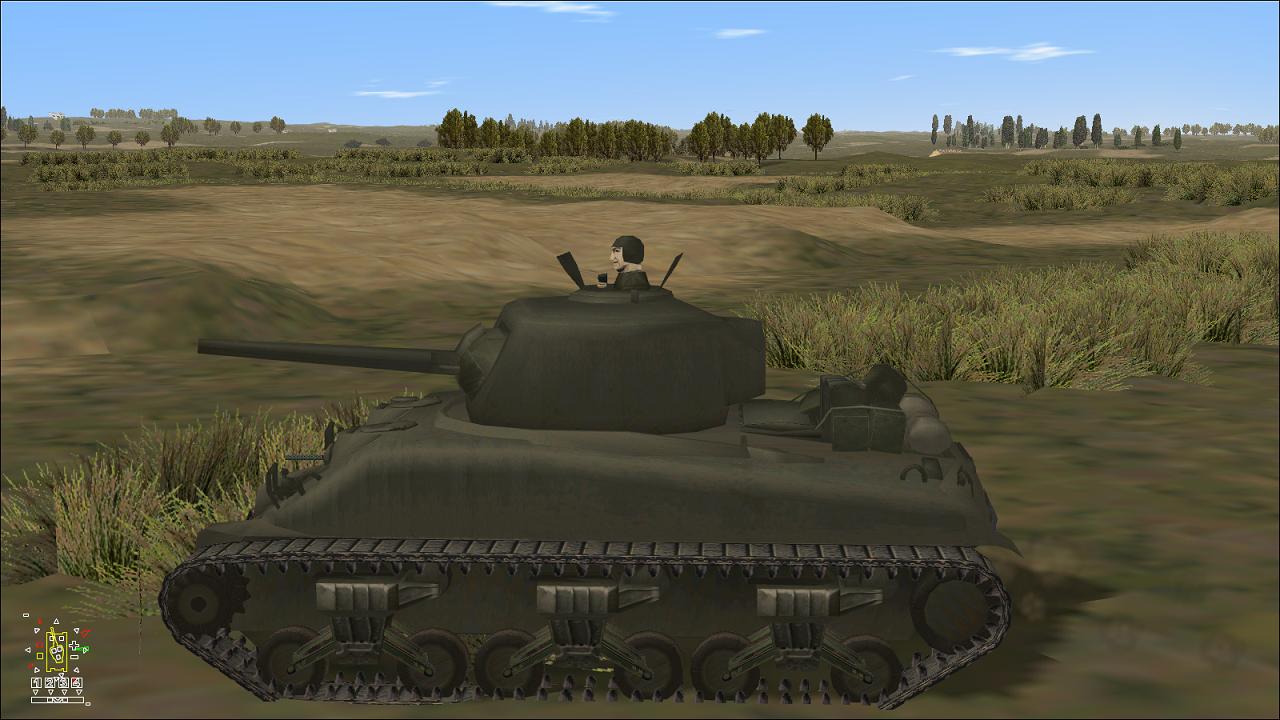
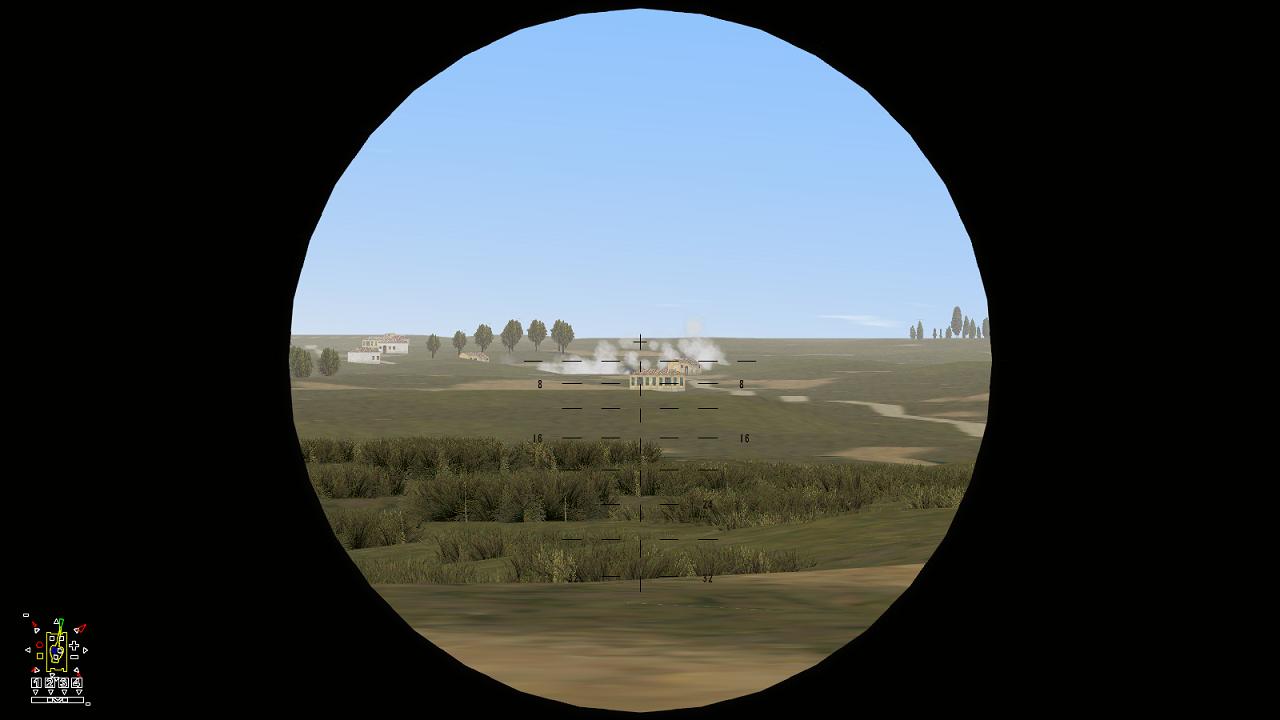
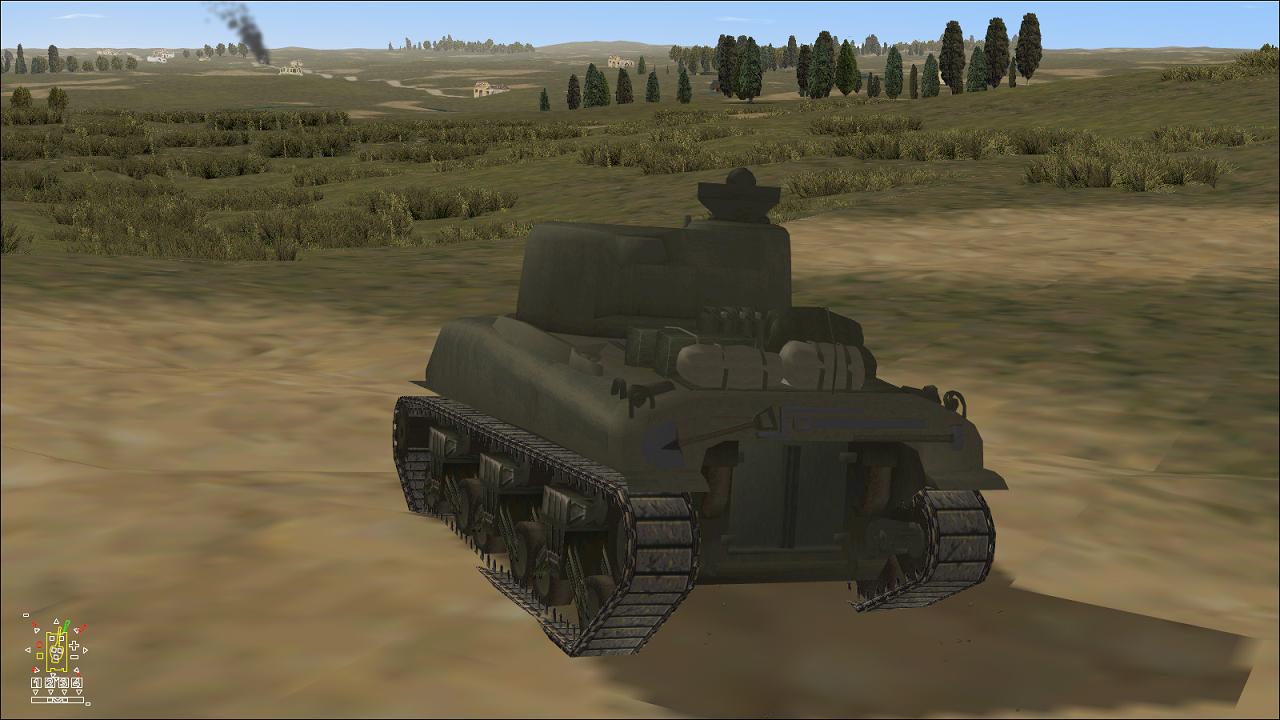
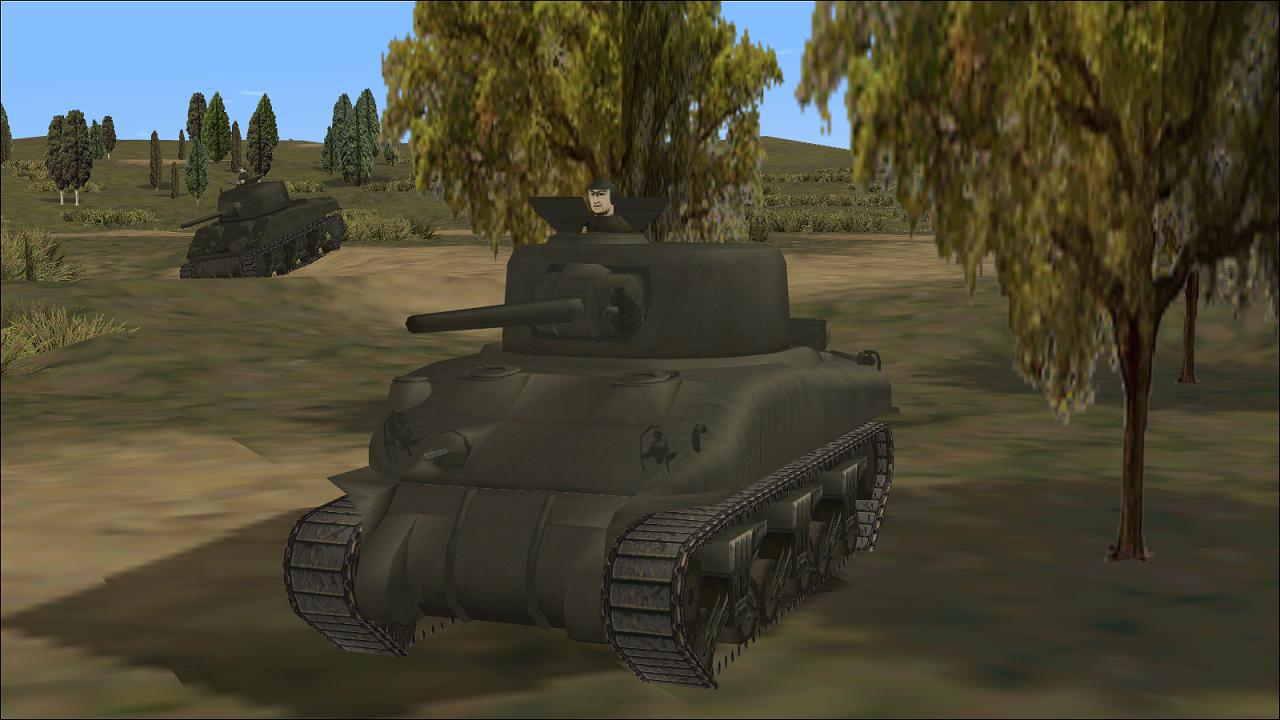
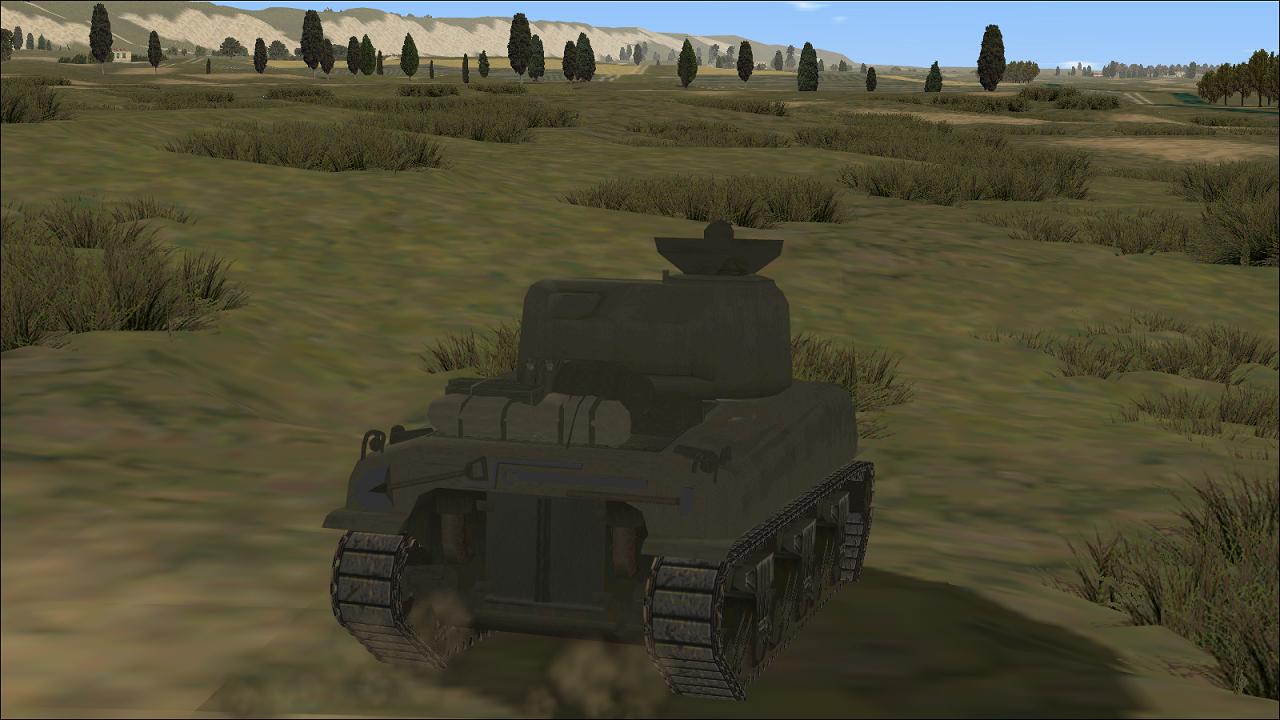
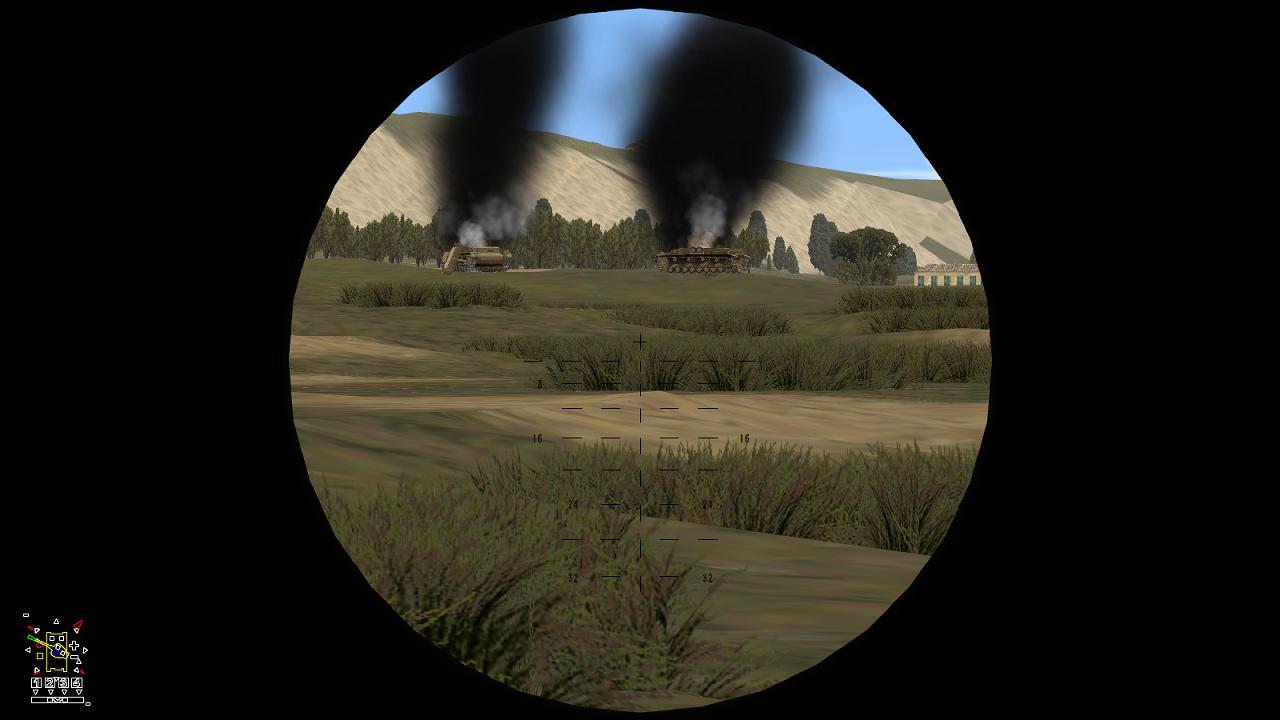
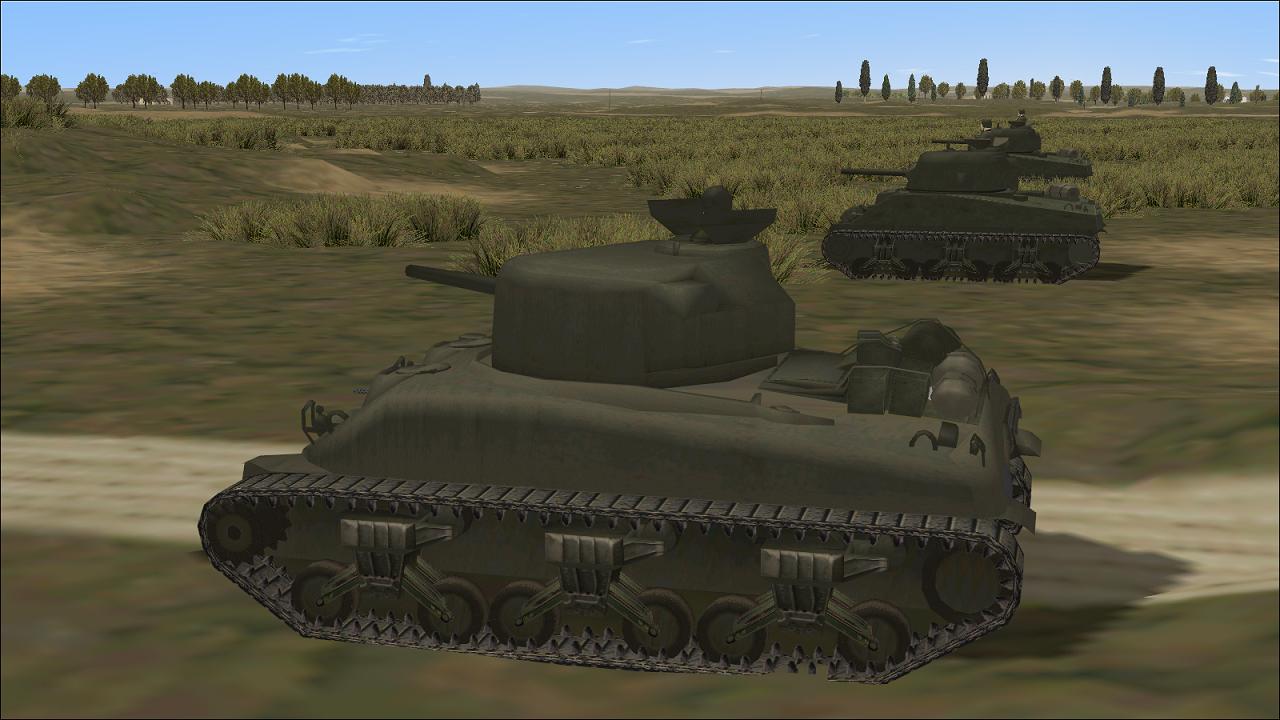
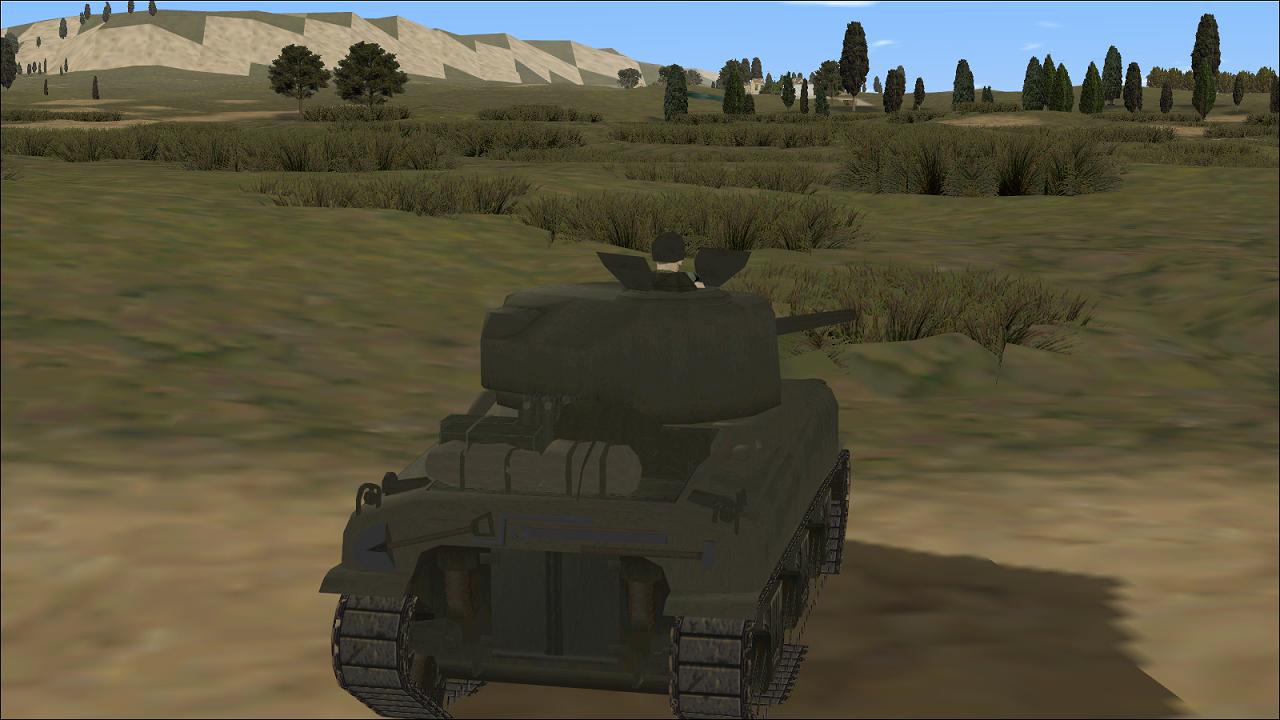
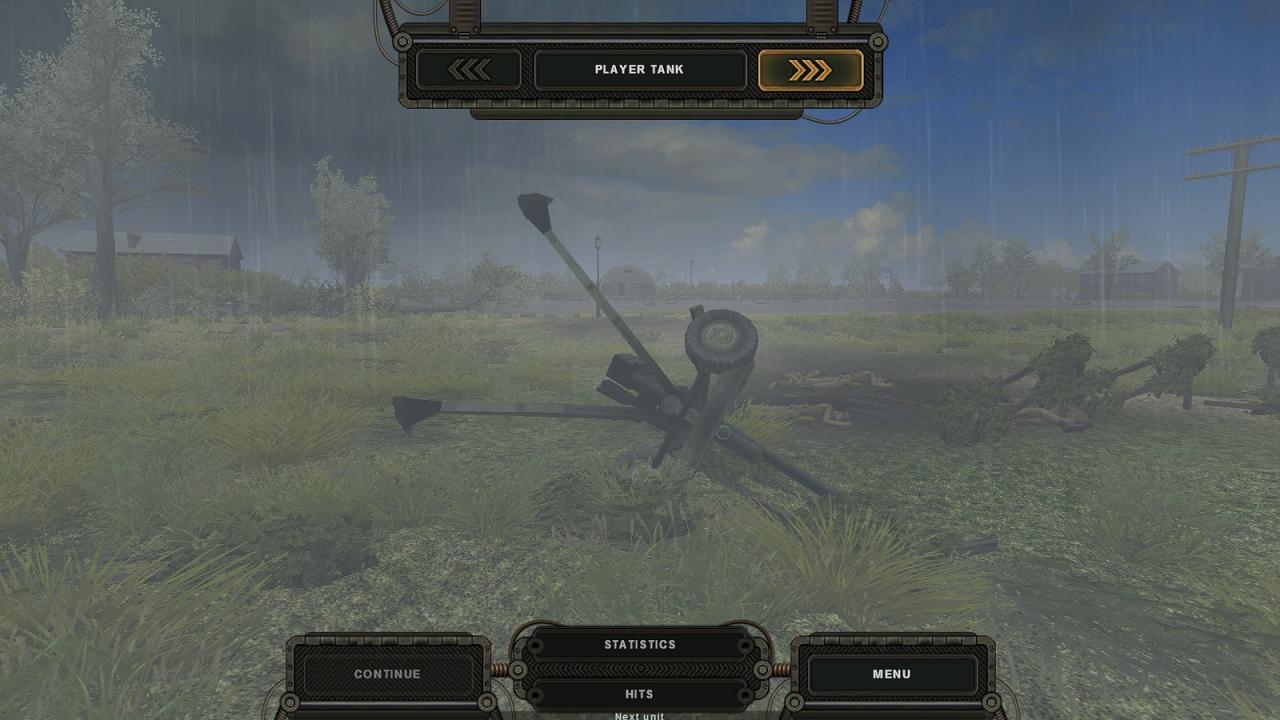
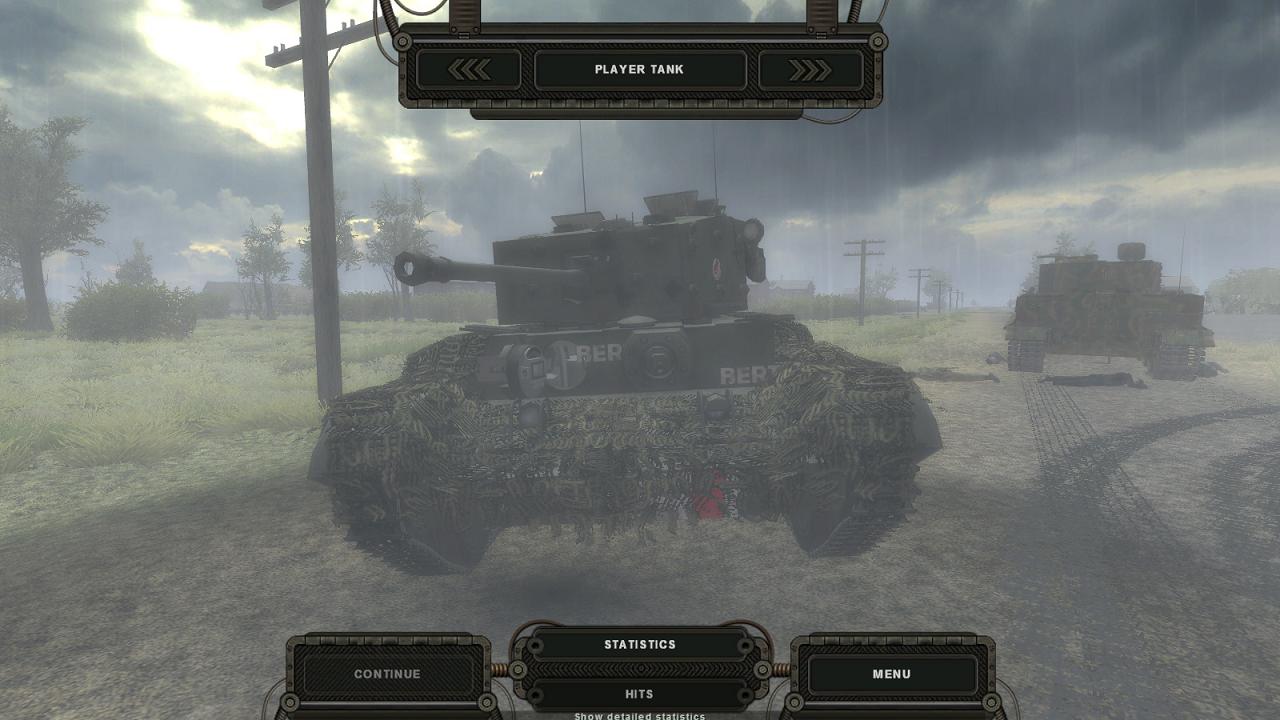
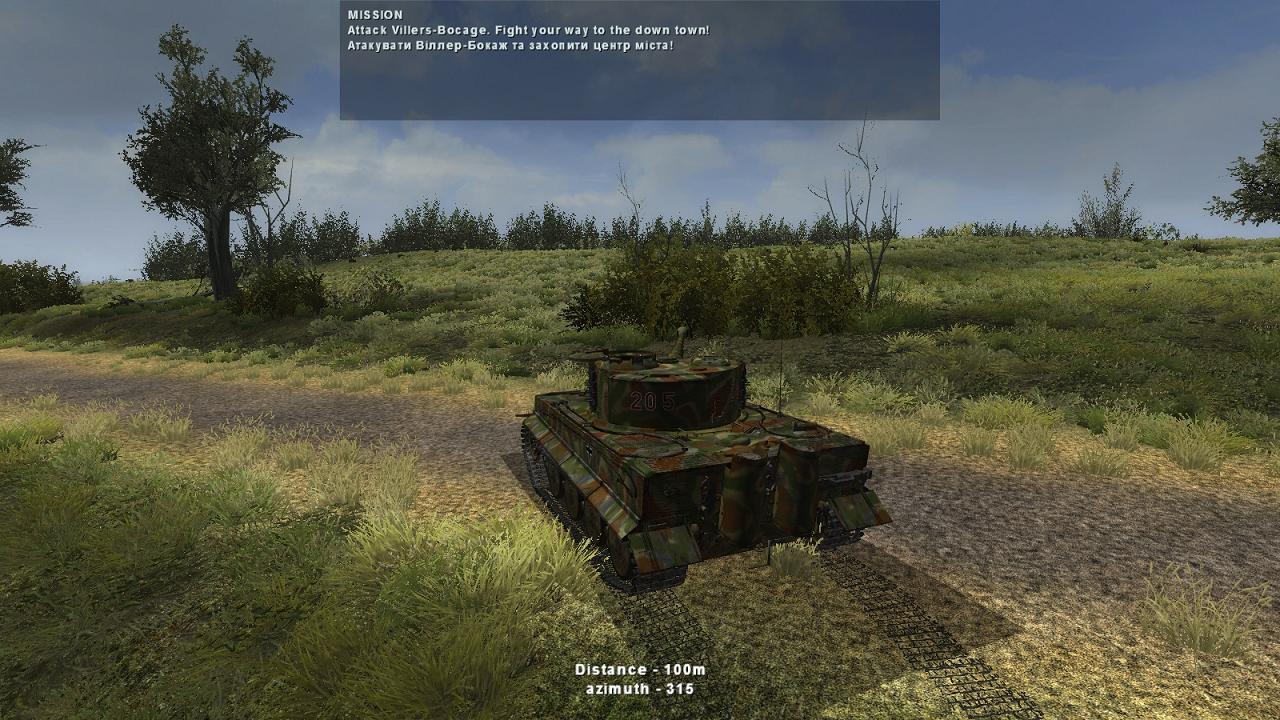
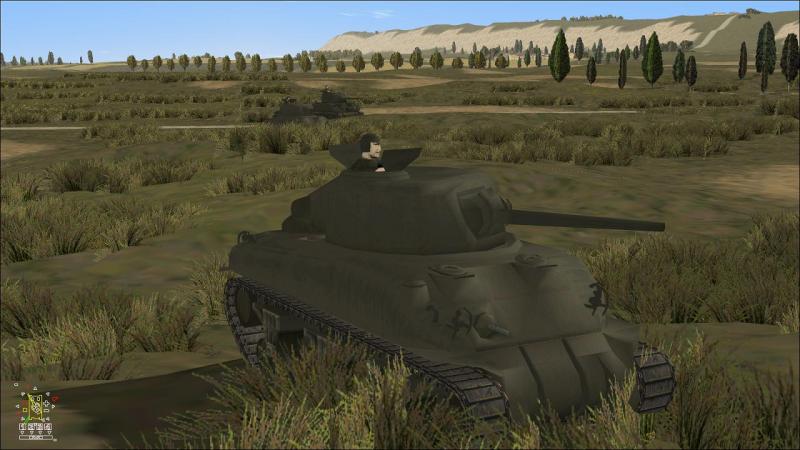
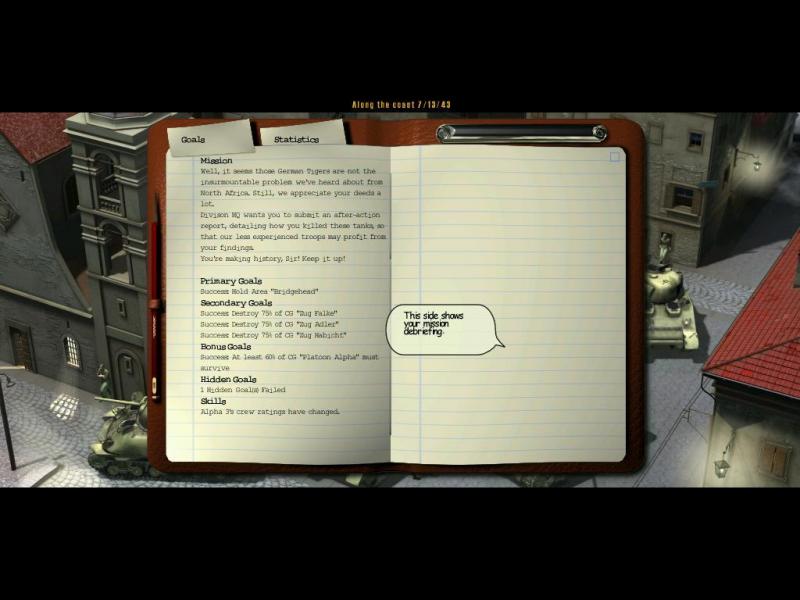
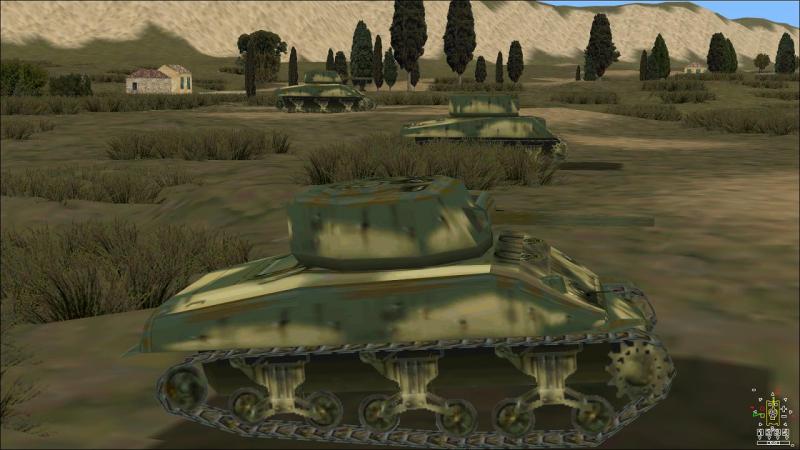
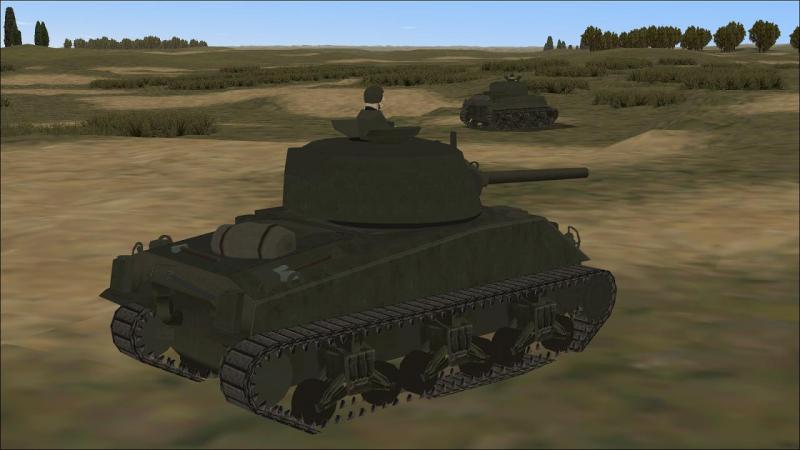
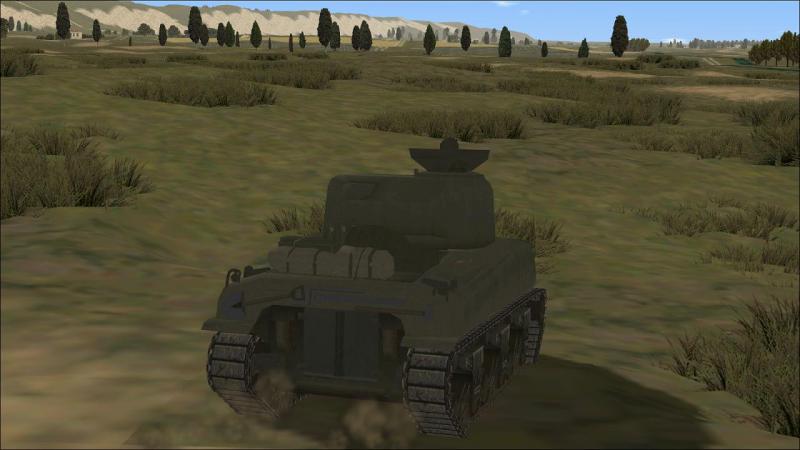
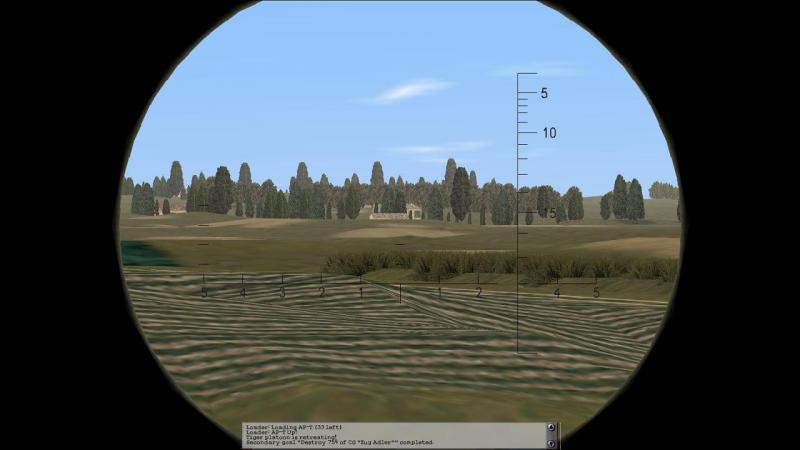
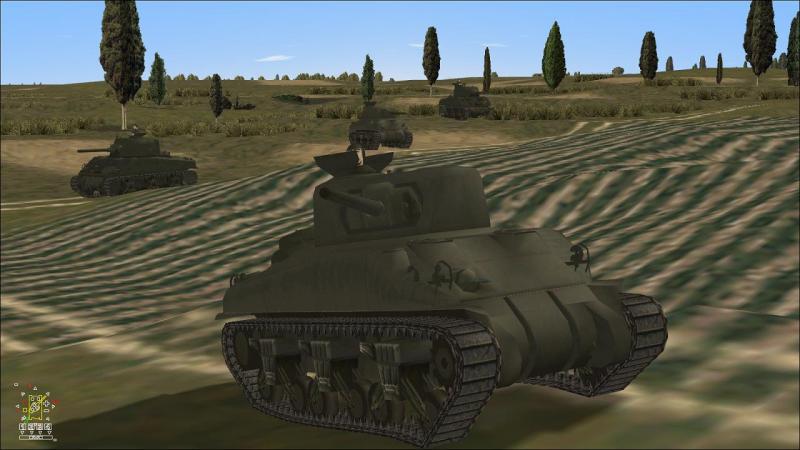
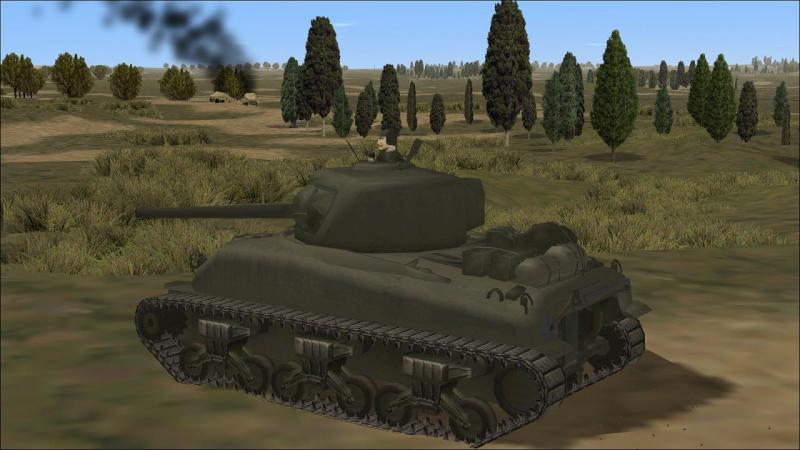
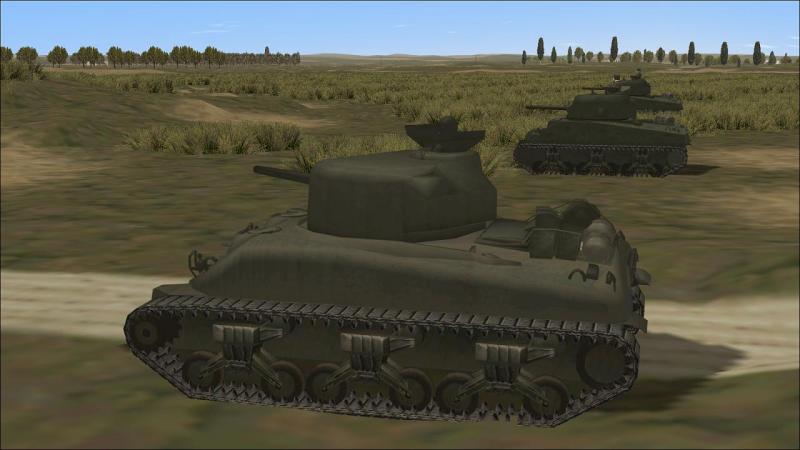
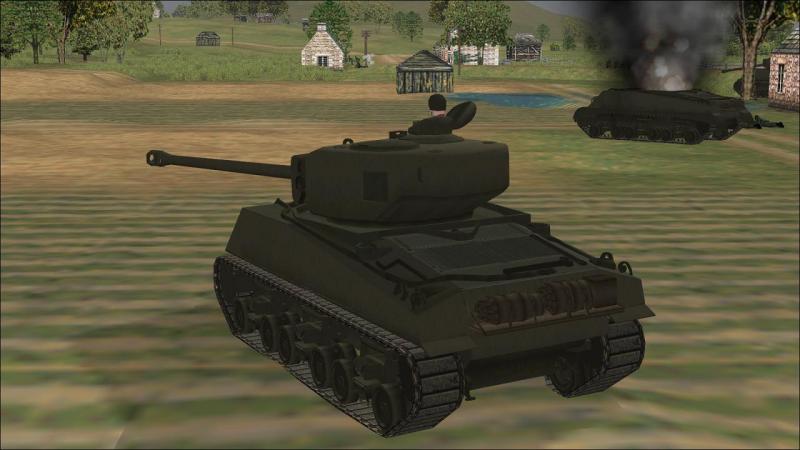
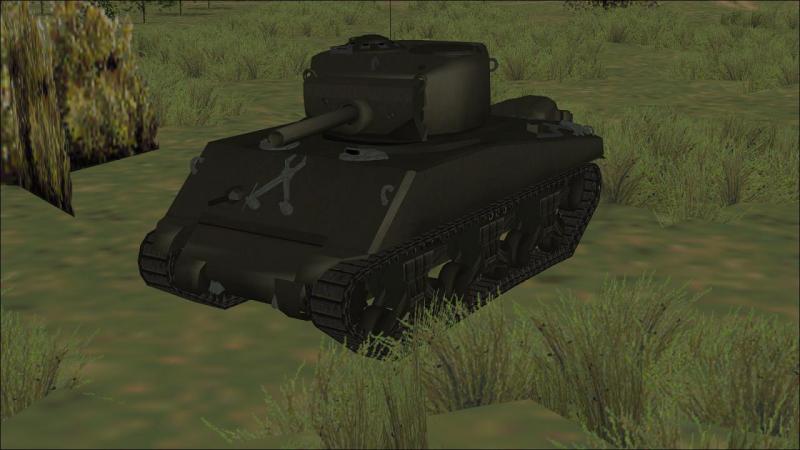
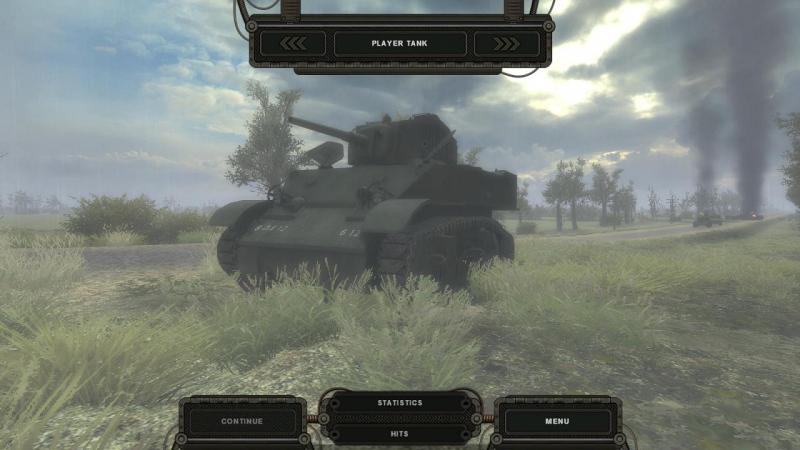
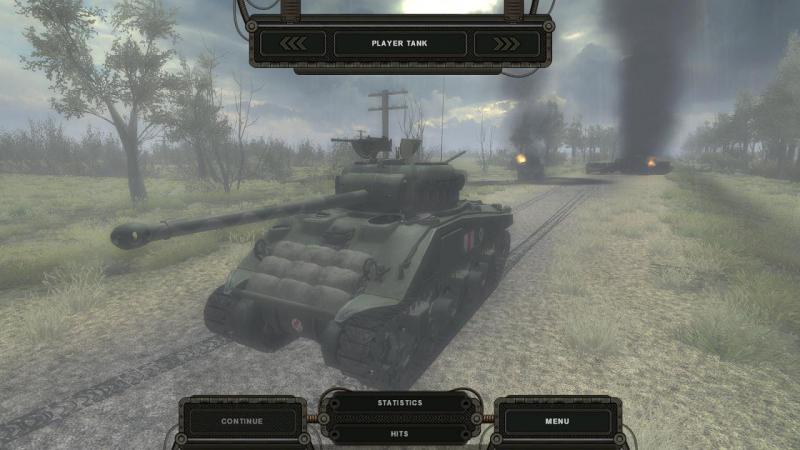
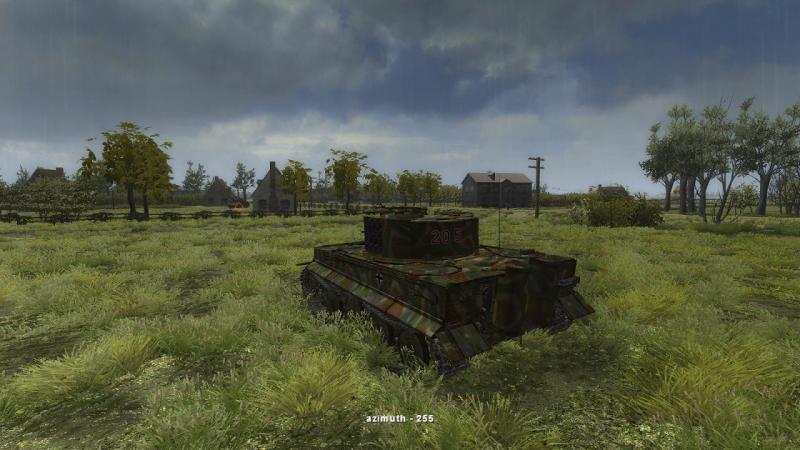
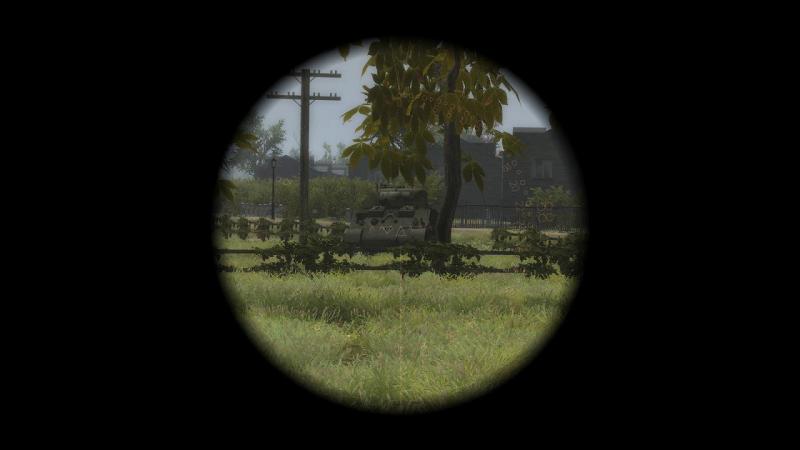
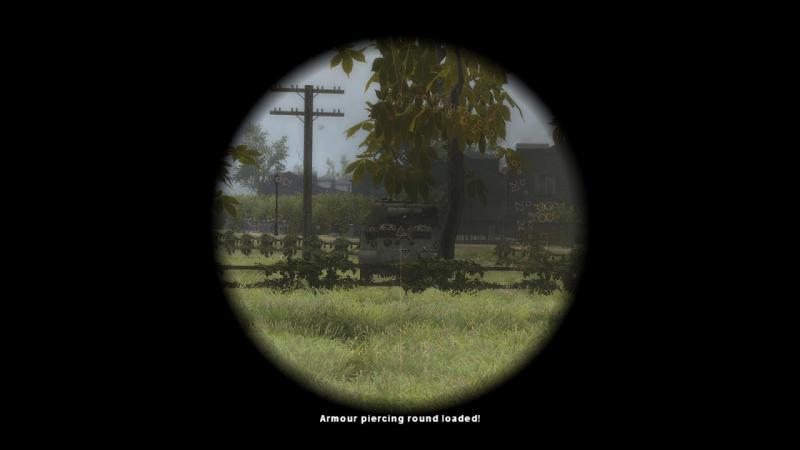
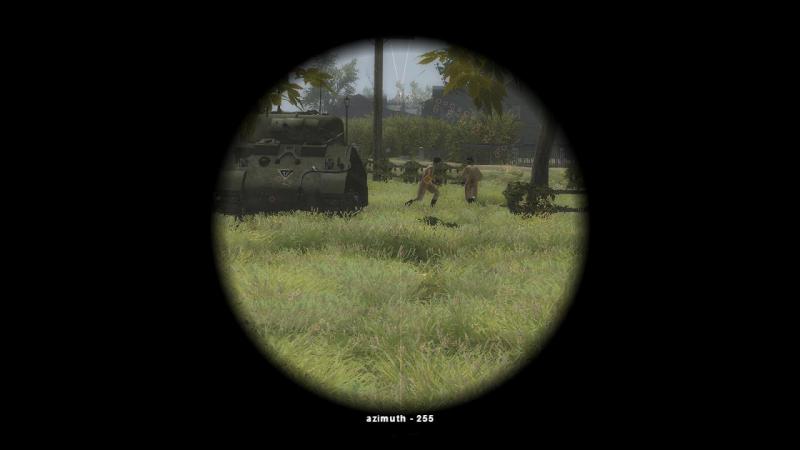
The final phase... At last, our platoon was moving forward not on its own, but as part of a larger force, comprising three platoons of Shermans and a pair of 105mm SP guns. Which was just as well, because I didn’t much like the look of the ground we had to cross next – and it turned out to be worse than it looked. We sat tight for a while while I had a good look, before deciding on my next move. Ahead of us was a shallow depression, a wide area of slightly lower terrain overlooked by higher ground maybe a thousand metres to our front; not unlike a giant saucer. The bowl of the saucer was broken ground but it seemed to afford little cover, from any enemies perched on its far rim. And as we crossed, out platoon’s wedge formation was soon disrupted, as first one tank then another got held up on obstacles, like the streams which snaked across out line of advance. Had our platoon still been on its own, I would have veered left or right in search of better cover, or started moving tactically, with half the platoon covering while the other half moved ahead. My own tank was still descending into the depression when a radio report announced an enemy tank, spotted up ahead. Fortunately I was amongst a belt of trees which provided some concealment. Here I halted, to see what I could see. I use the ‘show spotted enemies’ option so the contact was marked up on my map, but edging forward, I could only see the straggling group of buildings around the stretch of road where the enemy had been seen. From what I’d seen and heard, I came to the conclusion that this was likely the Tiger tank reported in the area earlier. In real life, whoever was in command of our force would have made a plan to deal with this threat and then communicated this to me and the other platoon commanders, in the form of new orders over the radio. Current tanksims simply don’t have this sort of higher-commander AI, beyond whatever might be scripted into the mission. Steel Armor: Blaze of War and I believe Steel Beasts cope with this by letting you assume the force commander role and rescript the mission on the fly, as it were, before stepping back to command your chosen platoon. In sims like PE and SF, all you can do is carry on. PE gives you an option you don’t get in SF, though, and it was that card that I now chose to play. I would call in a shoot from our supporting artillery. In this mission, IIRC I had two shoots available from a battery of 105mm howizters. One-five-fives would have been better for dealing with tanks, especially a Tiger, but beggars can’t be choosers. This is WW2 so you have no fancy options like cluster munitions or top attack weapons. From the map’s support tab, I selected HE for the fire mission (smoke being the only alternative) and when the target box appeared, mouse-dragged it on top of the marker denoting the enemy tank. Fortunately, the target didn’t move, while I waited for the rounds to arrive. There’s a delay but there’s no need or facility to adjust fire; the shoot generally seems to arrive not too far from where you’ve indicated. While the rounds were in the air, I decided to call in my second shoot on the same target, while he was obliging enough to sit in one place. I suspect he was lining up to engage the other Shermans. At any rate, nosing forward to get a better view of the results of the strike, I saw a lot of white smoke in the target area, which made me wonder if in my haste I had selected smoke for the first strike. But no, it was just the PP2-x effects. This was confirmed when my second strike, falling slightly further left, produced the same white smoke but this time, also a column of dark smoke from a stricken enemy vehicle. At this point, a couple of M4s trundled in from the right, just short of the target area, giving me an anxious few seconds. If my strikes had left some enemies un- clobbered, in halting to call in the artillery I was now too far behind the other M4s to help them. But I needn’t have worried. The Shermans rolled on, unmolested . Got him just in time, it seemed. By the miracle of PE’s ‘objectives’ tab on the map screen, which lets you view your progress against all mission objectives in real time, I suspected that this target might be the one I needed, to complete my appointed ‘kill list’, which accounted for my secondary objectives. But no - some portion of Zug (platoon) Falke still needed our attention. And there was still the matter of my primary objective: to prevent our bridgehead being over-run. And it was less clear what I needed to do now, to achieve that objective. Emboldened by the visible destruction of the enemy up ahead and the survival of the Shermans, I lost no time in emerging from the scant cover of the trees and making another bound forward, into the wide depression to our front. As it turned out, the answer to the question 'What do I need to do to win?' was ‘nothing’: I now got the ‘mission completed’ message. This also meant I had achieved my ‘bonus’ objective, of at least 60% of the platoon surviving. This is all a bit ‘gamey’. But apart from air combat sims, where mission success can be neatly resolved in terms of survival and kill, many games seem to struggle with generating a sensible ‘win/lose’ answer. At least, in PE the victory conditions are there for you to see, any time you want to see them. I could have driven on up to see what the damage was up ahead, but I decided not to push my luck. I’d already taken enough of a chance, pushing out ahead of most of the other US armour to confront an incoming enemy attack. Here’s the results screen. As with the ‘briefing’, the narrative is spoken as well as typed up for you, and once again, the speaker is calling you ‘Sir’, when he should be your boss. I don’t think I’ll be able to tell him much that will be of use, in combating Tiger tanks. My recipe was rapid application of massed fires, killing his lighter supporting tanks and spooking the Tiger. Then dropping a lot of arty on him, once he’d gone to ground. And moving cautiously, preferably bringing lots of friends with me. Don’t ask me what the ‘Hidden’ goal was, that I missed: it was, well, hidden. You can see that mission success has earned us some credits, in terms of improved 'crew ratings', which means skill improvements, which will affect things like gunnery accuracy of the speed of reloading or spotting enemies. This was a fairly typical sort of Panzer Elite mission, my main criticism of this being that the friendly and/or enemy units tend to be rather scattered and un-coordinated, instead of operating as a coherent company group, working together to the sort of plan a real-life company commander would create, for a given mission. The positive side of this is that you have plenty of scope to manoeuvre and manage your platoon, using PE’s outstanding command and control facilities. While AI units mightn’t be scripted to co-operate much with you, there’s nothing to stop you creating and taking opportunities to co-ordinate your movements with them. Individual tank AI that was a bit smarter about ‘action on halts’ and use of cover, would help; but then, the conscript armies of WW2 weren’t perfect either, witness Ken Tout’s description in ‘Tank!’ of a Panzer IV commander who took his tank onto a Normandy skyline, with predictable results. Anyhow, this mission was played to put Slomo’s new Shermans through their paces and it seems apt to finish with a visual comparison of stock and modded Shermans, in this case the cast-hulled M4A1 I operated on this mission. As you can see, the vanilla one has no ‘unbuttoned’ tank commander and is generally rather crude. Textures are low resolution, the distinctive slope to the upper rear of the turret is missing and the suspension is completely two-dimensional. The new version is streets ahead. And it’s just one of a full range of Shermans now available for the PP2x mod. As a footnote, Panzer Elite is still available, cheaply, via GoG, here. While this comes with the original mods (as released with Panzer Elite Special Edition, aka PESE) and is still very playable, these days the PE-x executable is probably de rigueur. So the main options are (either or both of!) PP2x or PE3. PP2x has many improvements including some re-worked vehicles, now including Shermans, but isn’t compatible with the original mods which added nationalities, theatres and campaigns. PE3, available here, isn’t adapted for the latest PE-x but includes much of the content (including the extra nationalities, theatres and campaigns) of the original mods and more besides; vehicles generally have the relatively basic 3d models but have much better textures, seen below on a T-34-76 in a PE3 Ostpak mission. Whichever mod or mods you choose and despite the dated graphics and animations, PE is still a ‘must have’ sim, for simmers with an interest in the WW2 era.


-
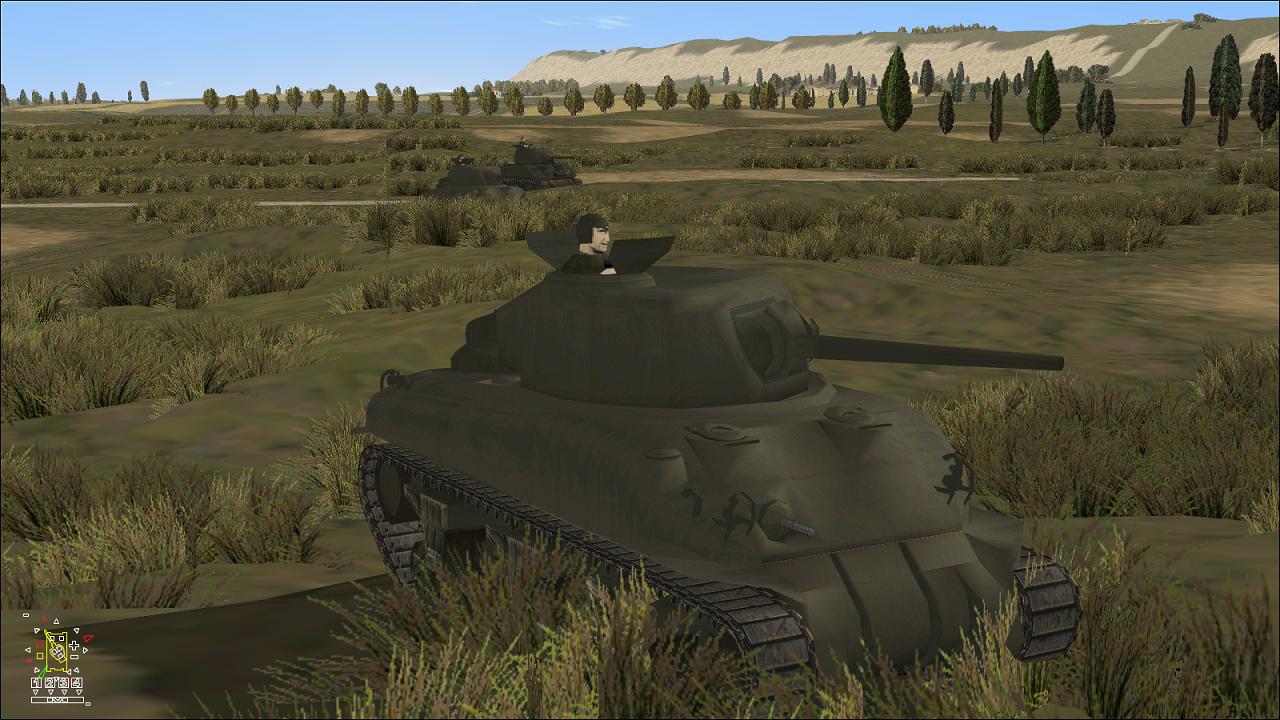
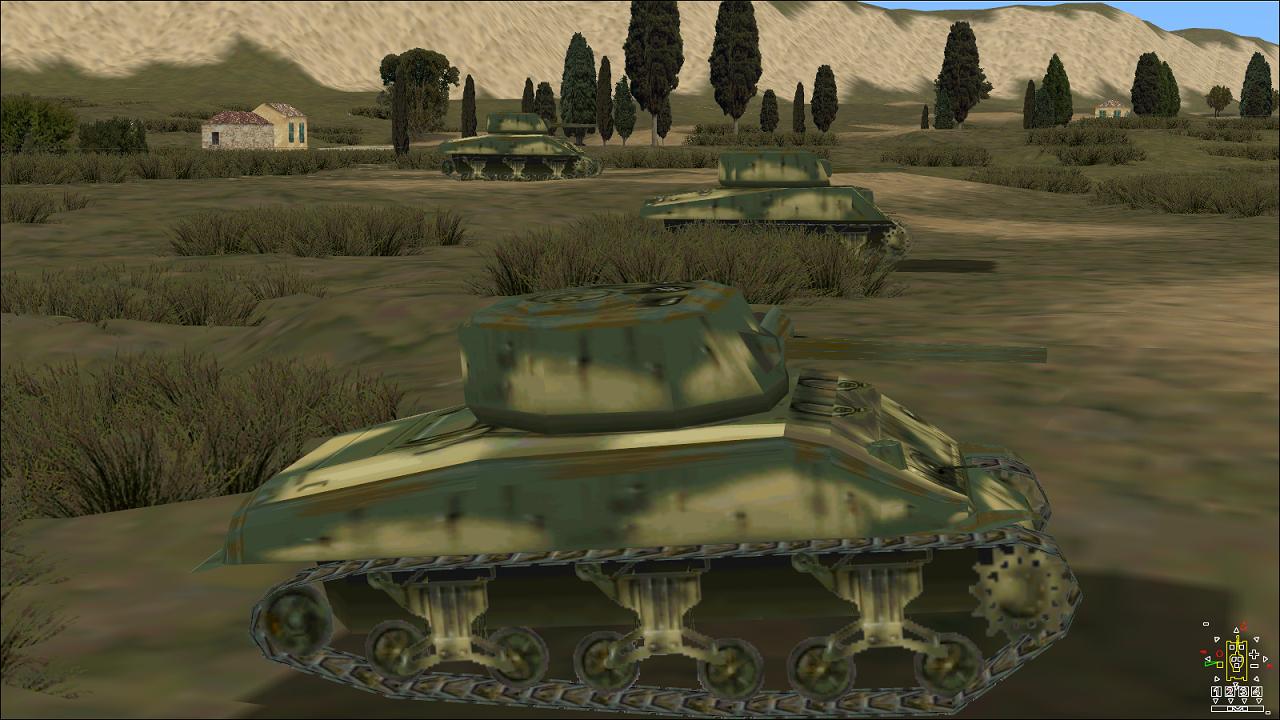
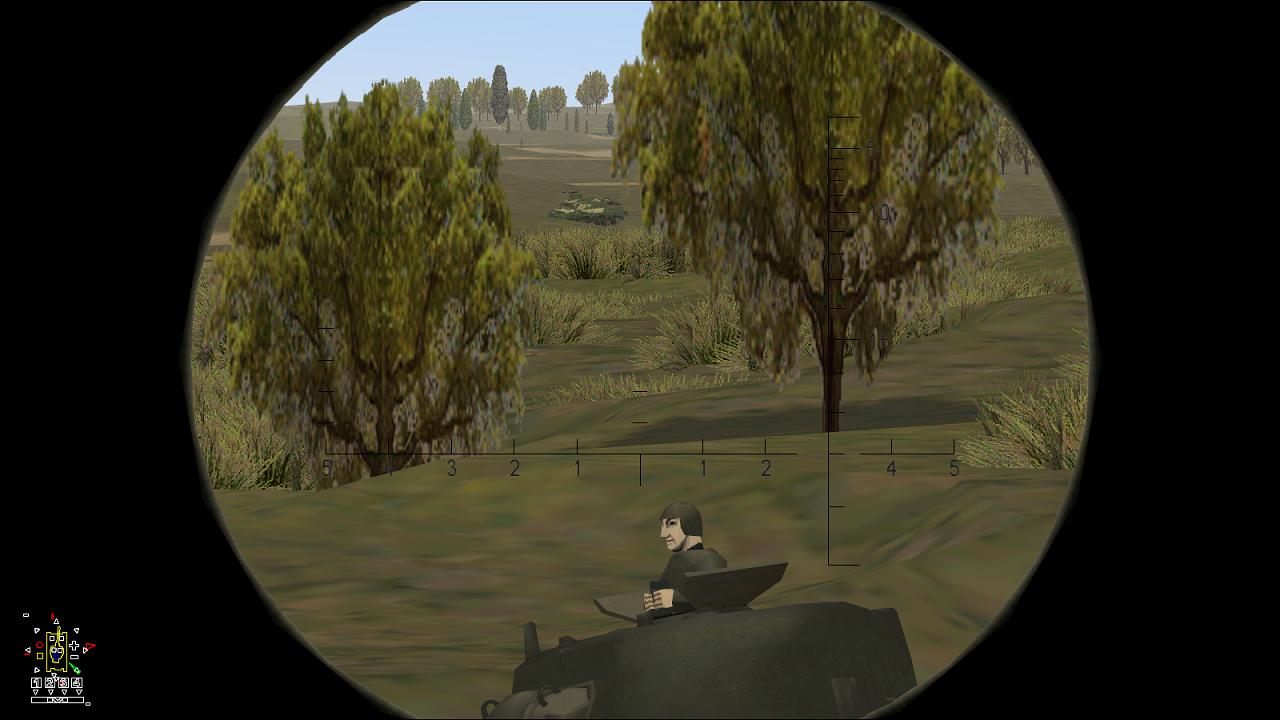
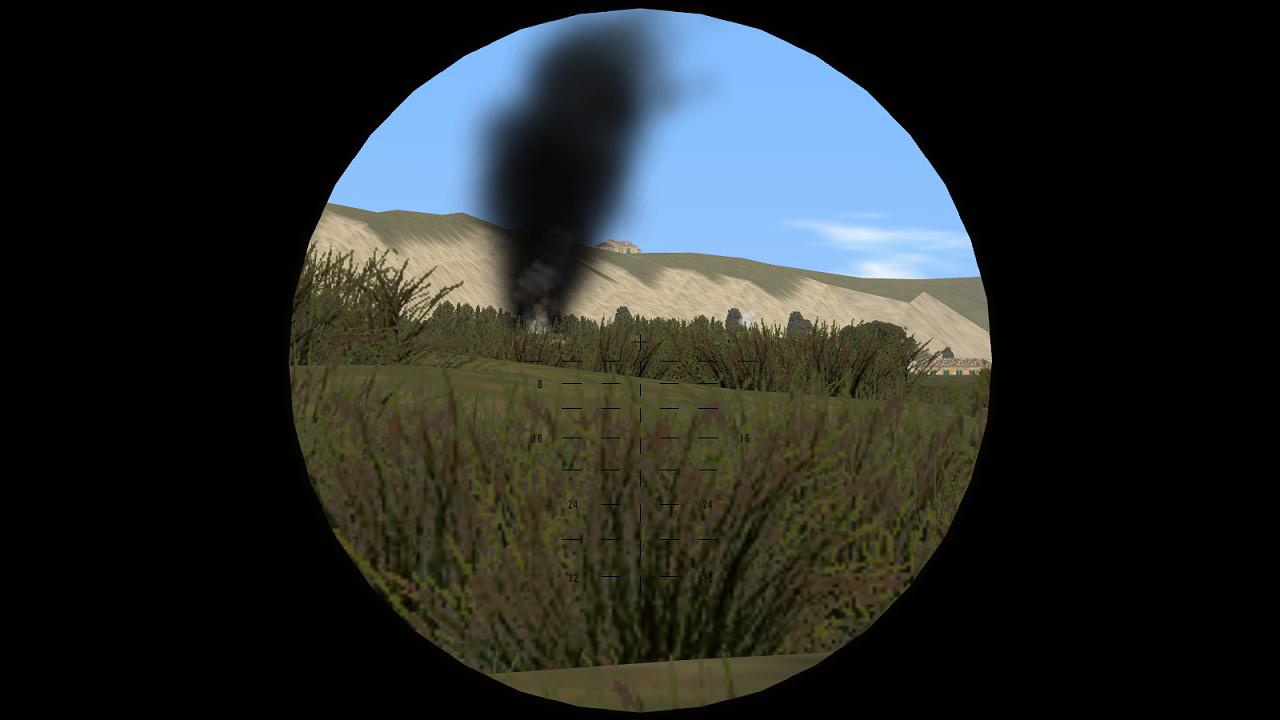
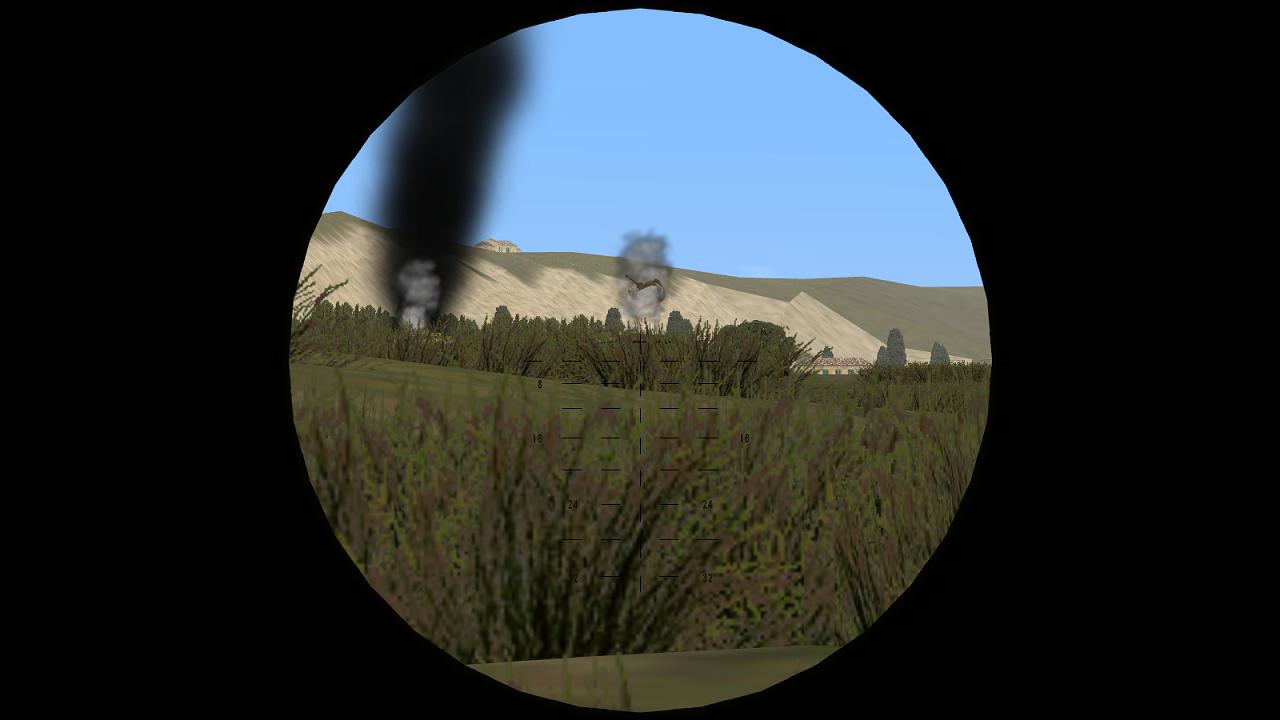
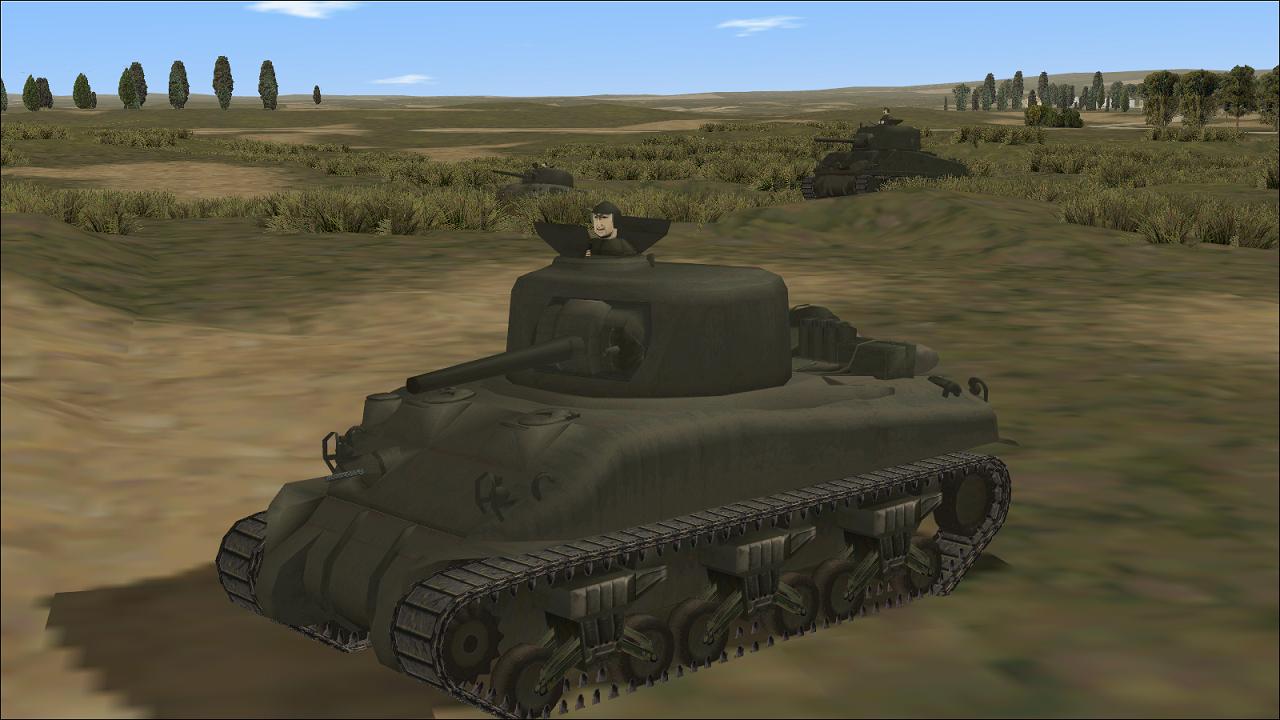
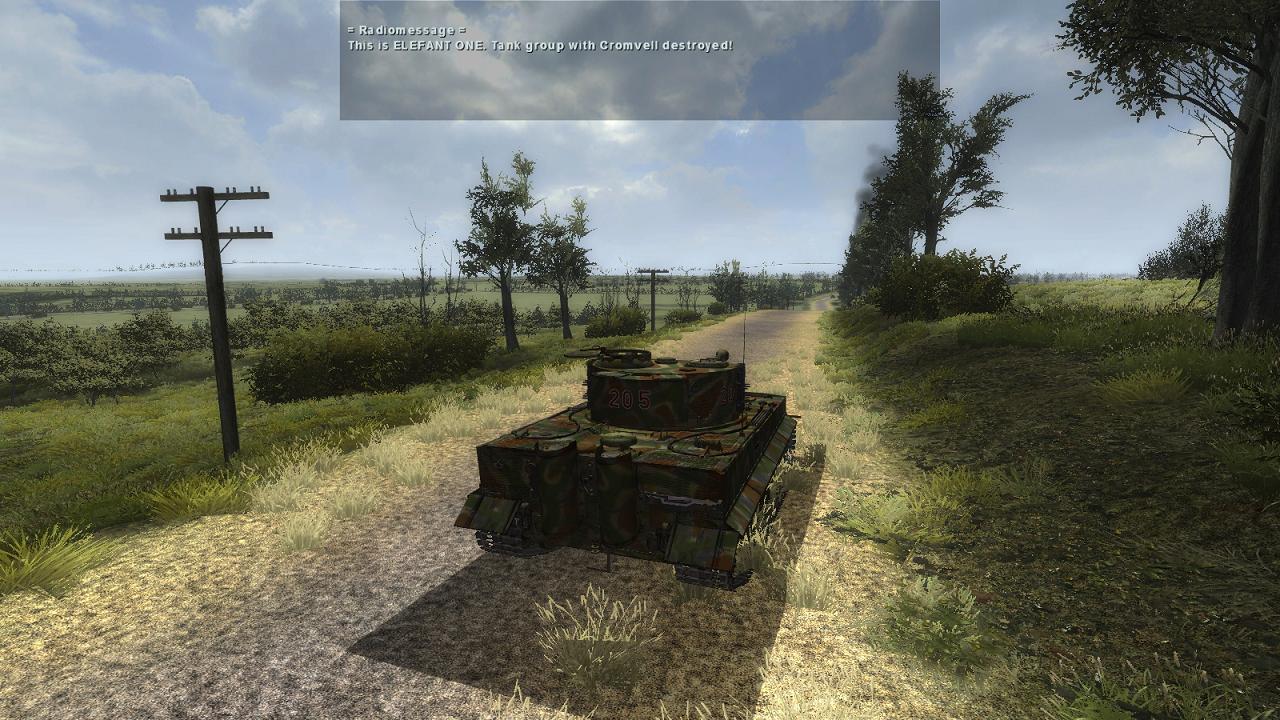
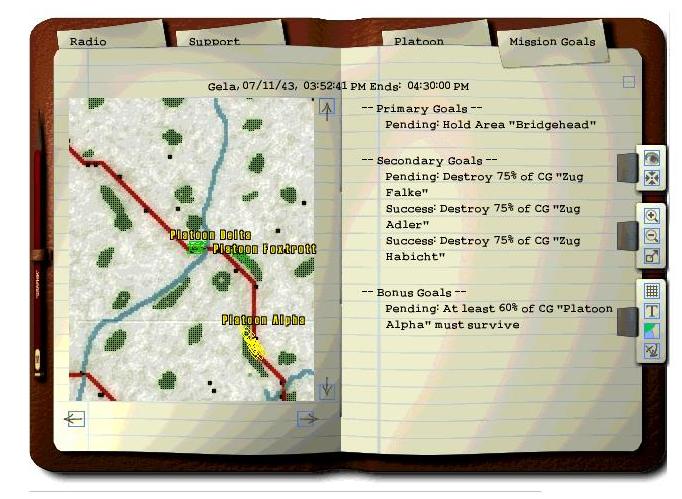
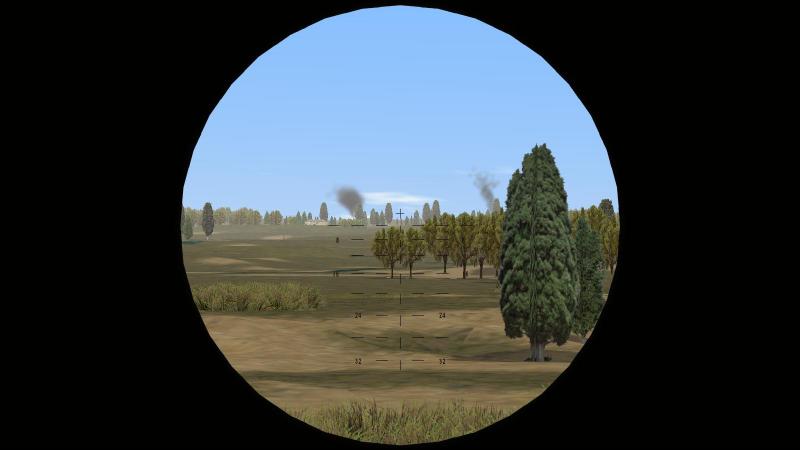
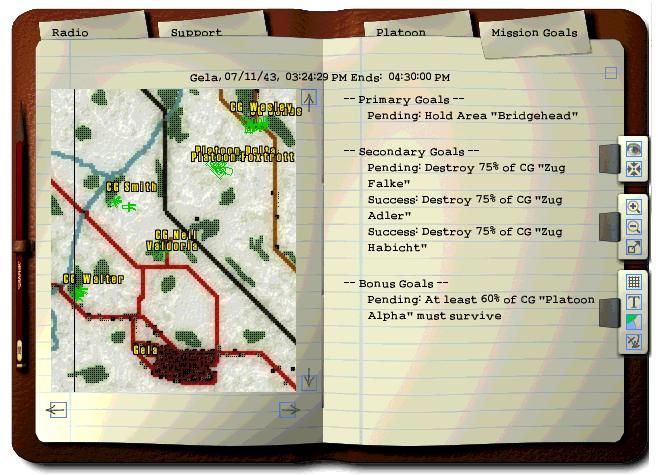
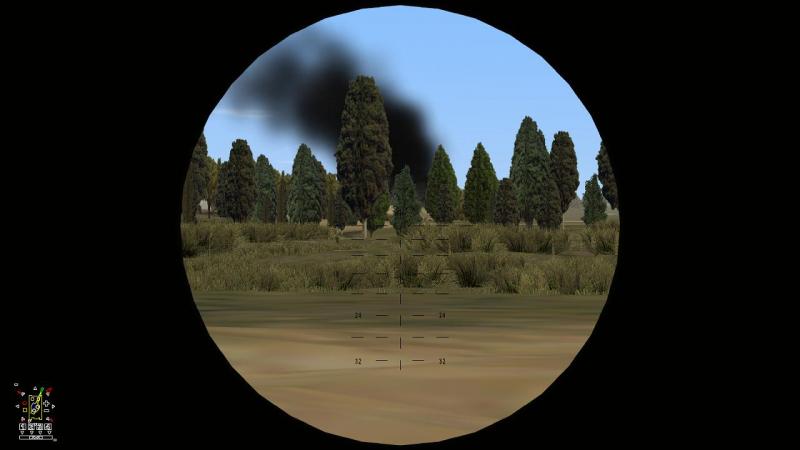
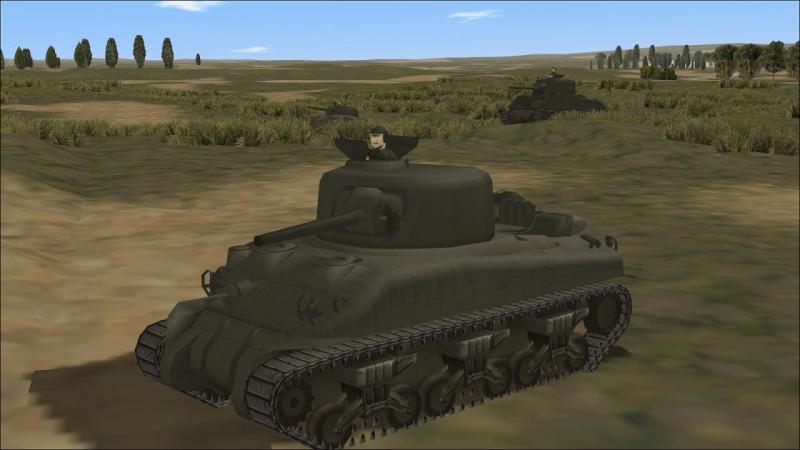
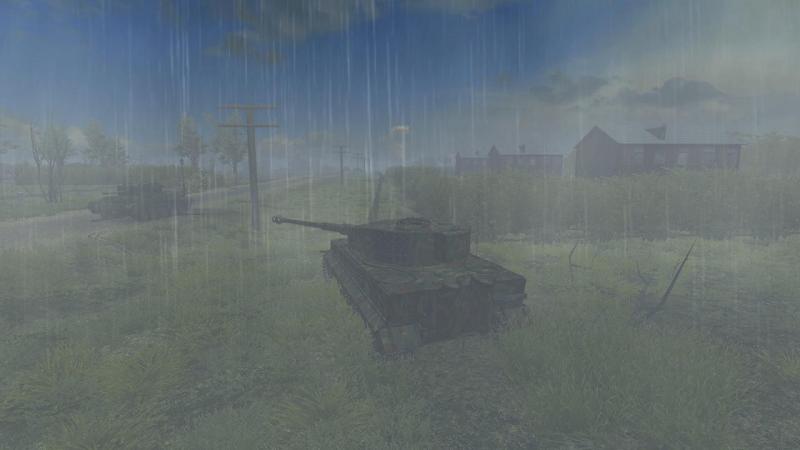
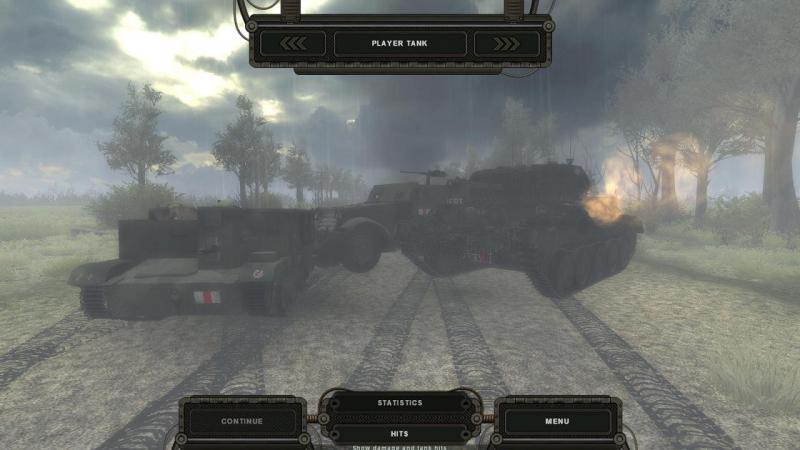
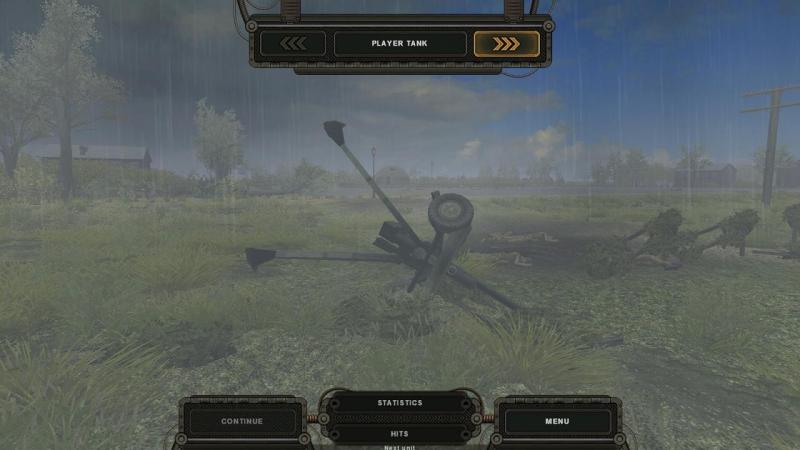
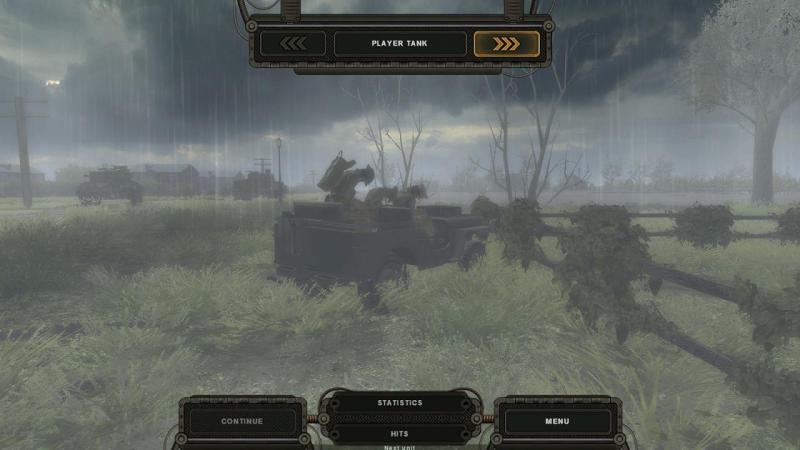
Sicily by Sherman, part the next It was at this point that I realised that we hadn't been the only unit engaged with the Germans. In the heat of the recent action, I had been only vaguely aware that there had been other traffic on the radio net, that didn't directly concern me there and then. But looking left, I could now see burning vehicles on the skyline - the remains of 'Combat Group Dirty Boys', as they had been marked on the map. I could only guess that they must have been victims of the mixed Panzer platoon we had bumped into, knocked out after they had foolishly skylined themselves. A look at my map confirmed their identity; alas, the Dirty Boys were no more. Incidentally, while we're looking at the map, I will mention that PE is a bit inconsistent in its terms for units. Some are described, correctly, as platoons, but other apparently platoon-sized units are labelled 'Combat Groups', which suggests a much larger force. Anyhow, the map showed that we were now well out in front of our own defensive positions, indicated on the map by Combat Groups Walter, Smith and Neil, which appeared from the map markings to be infantry supported by anti-tank guns. The tank platoons behind seemed to have no intention of joining us, which re-inforced my determination not to play the hero. Instead, I made another cautious bound forward, steering around the right-hand edge of some slightly higher ground and aiming for a low crest which I could see in front, between us and a stream. At this point, a target was reported on our right, about 1500 metres away. This turned out to be more Panzers, of which I could see only one, who looked to be a Mark III. I lobbed a round at him as he flitted in and out of some distant trees, but missed. Damn! We were being outflanked. But I needn't have worried. It seemed that those other US tankers had decided to earn their pay, after all. Scanning through the gunsight, pillars of smoke marked out the scene of the action. Seemingly I could carry on, secure in the knowledge that this second German thrust had been blunted. So far, our trusty Shermans were giving Jerry a good old beating, assisted by the fact that he seemed to be just as bad at us, of arranging matters so that tank platoons advanced to as to be capable of supporting one another and at least, maintaining interlocking fields of fire. So far, the enemy had just been feeding Oxo Cubes to the lion, one at a time. as a British General described later operations at Arnhem. As my turret crew reloaded another armour-piercing round, I jumped to the commander's position and started scanning ahead again, through the binoculars. This gave me a slighty greater zoom and a slightly higher viewpoint, all the better to see Tigers and suchlike. As I scanned, the radio announced that somebody else had spotted some Germans, who were retreating. I called up the text message panel to get the full details and was delighted to see that our erstwhile foe, the Tiger, had apparently decided to continue with his withdrawal. The same message log confirmed we were credited with a secondary mission goal. I called up the map and selected the 'objectives' tab to confirm this, which you can see on the right-hand page in the map display, below. It's not entirely realistic that you can get this sort of real-time, in-mission confirmation of which target enemies you have destroyed. But it's typical of the thoroughness of Teut Weidenberger and the team at Wings Simulations, who really have packed into Panzer Elite more features than a thing with an awful lot of features; with Teutonic thoroughness you might say if you will forgive the pun. And another thing: the PE AI doesn't always pick bad fire positions, in case you got the wrong idea, from what I said earlier; as you can see from this view of one of my platoon-mates. This hull-down Sherman is a cast-hulled M4A1 like my own, with one of at least two different tank commander figures visible. This one has a radio mike in one hand, another variant holds a pair of binos. At about this time, another radio message announced that other friendly tank platoons were advancing again, which a glance at the map confirmed - depending on the game settings you have applied, friendly units (who would be able to report their position by radio) can be displayed on your map, along with spotted (or all, or no) enemies. OK, good. Soon we would have company. And this time, it wouldn't be the enemy. I decided to wait for some friendly forces to draw level, so that we could all advance together. After a short wait, I was able to make out the first Shermans, moving up on our right. Another unit, closer in, was a pair of M7 'Priest' SP 105mm howitzers. They really would have been better staying to the rear and sticking to indirect fire, being much too lightly armoured to act as assault guns. These two are orignal PE models, and while they lack the detail of the new Shermans, they feature a reasonably accurate MTO sand and green camouflage, the new M4s so far only having an Olive Drab finish. Anyhow, I certainly wasn't going to be goaded into racing the M7s. But I wasn't going to sit back and let them get shot to pieces, either. Off we went again, shadowing the M7s. If they hapened to flush out some Germans under our guns, well, I wouldn't get too upset. ...to be continued!


-
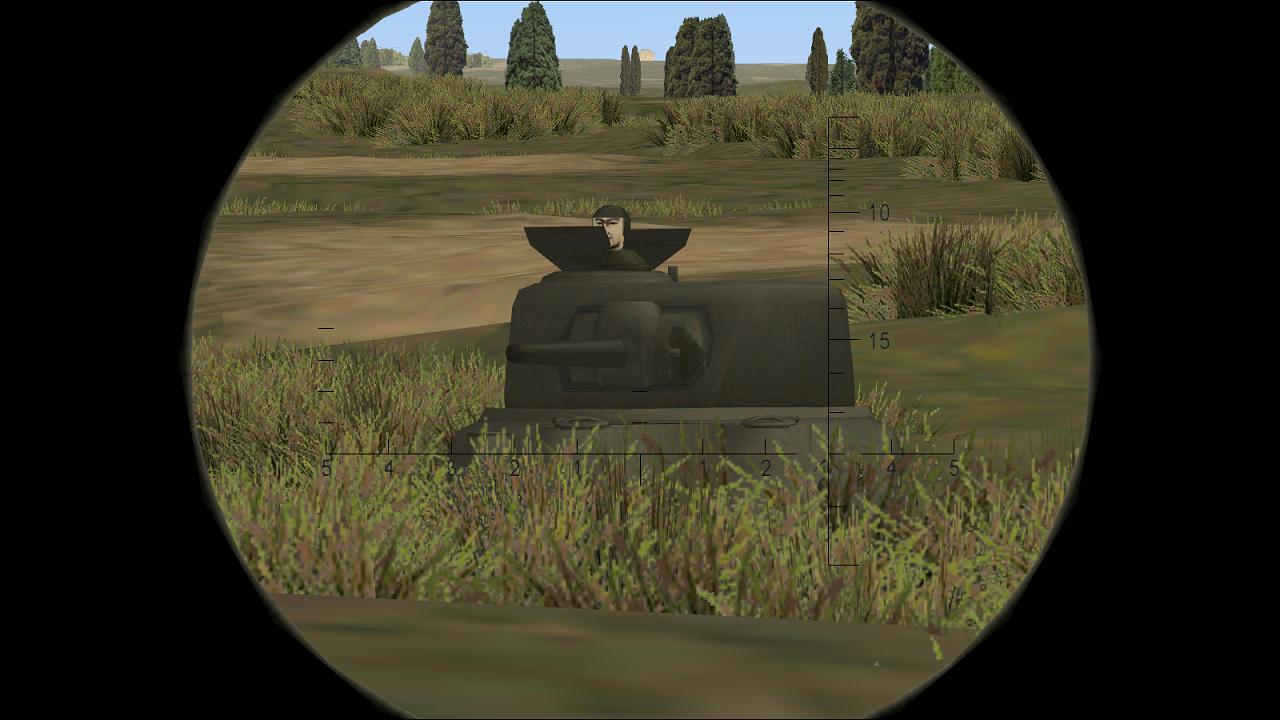
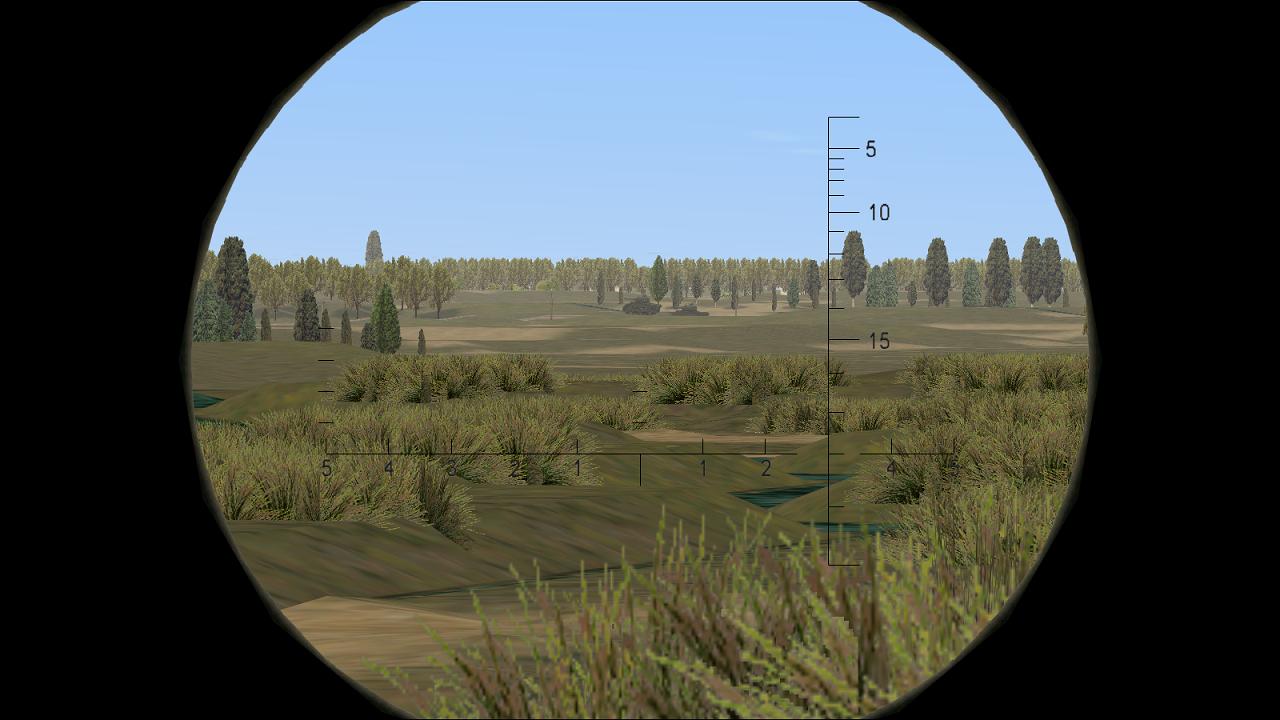
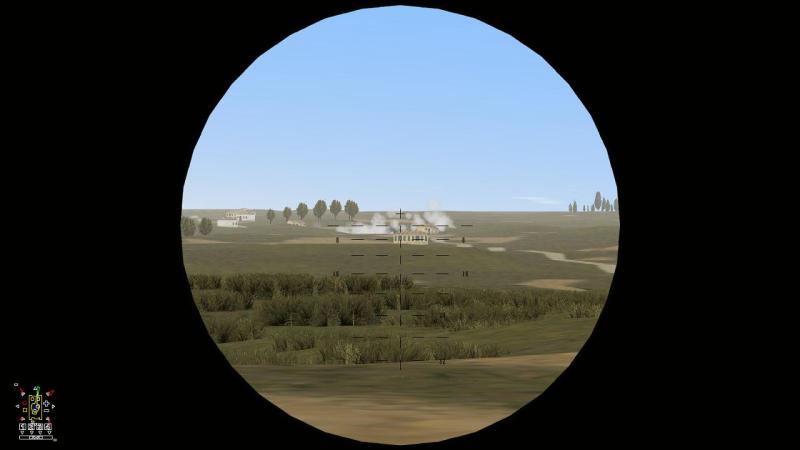
Contact! Our five Shermans moved on steadily, over the undulating terrain, which provided fairly decent cover, provided you stayed off the road and put up with the reduced speed. I was tempted to organise my tanks into two half platoons or sections so that one could cover while the other moved, which Panzer Elite will let you do. However, I decided - as I usually do in PE - to keep the platoon together. If you send your PE 'wingmen' ahead, they're liable to halt in exposed positions. So instead, I usually move the platoon in bounds, from cover to cover, and trying to halt in a position - like a fold in the ground - that will provide cover not just for my own tank, but for the whole platoon. Whichever way you do it, PE lets you switch to any tank in your platoon so you always have a way of fine tuning positions...if the enemy will let you. Leapfrogging is also much slower, and I was already moving slowly enough, halting in cover at frequent intervals. If and when we did hit contact, I reckoned it'd be better to have all of us in a compact group, for better mutual support. And so it came to pass, for when one of my 'wingmen' called in an enemy target - a good demonstration of the sim's capabilities, where your platoon is really a co-operating team, not just a bunch of silent, individual bots - I was able to get my gun onto him quickly. Hitting him was another matter. All I could see was a sand-coloured shape, flitting between a stand of typical Italian poplars, off to our right. I jumped to the gunner's sight - in PE, you can also stay at the tank commander's station and designate targets by mouse-click - and fired at what I could see. It wasn't much, but it was enough. There were two of them, armoured cars I though, and between us, we quickly got both of them. A radio message from somewhere or other told us that enemies were retreating so it seemed that there were more of them and the survivors had wisely decided that tangling with tanks was not in their job description. If I had left the text display panel on screen, I would have got further details than in the simulated radio message, but I tend to leave such things turned off. We moved off again to the next cover. And once again, my platoon-mates reported another contact, to our left, this time. I swung my turret around onto the indicated bearing - PE uses the clock code for this, and gives a range as well and again, the text display may also state the type of target, if that had been recognised. It's really quite a thorough tank sim, is Panzer Elite. This time, it was real trouble - panzers. Seemed like we had now run into the enemy counterattack, coming the other way - a meeting engagement, in the venacular. Two of my Shermans opened fire immediately. Turning my platoon into the threat - my usual Immediate Action in such circumstances - went by the wayside. Quick shooting seemed more important, so that's what I did, letting my two shooters get on with it and joining in myself. Once again, I couldn't see much of the targets due to intervening foliage and the lie of the land. I resisted the temptation to advance for a better view, figuring that would work both ways. The enemy tanks turned towards us and halted to shoot. They were Panzer IIIs or IVs, at least two of them. Under fire from at least three Shermans, one of them was soon burning. At that point, I got a bit of a fright. Amongst the other Panzers, I saw the unmistakeable shape of a Tiger! I laid my gun onto him and let him have two quick rounds, aiming for his turret ring. But he motored on out of sight. Wasting no time, I switched targets to a Panzer IV which was swapping rounds with my platoon-mates. He didn't last long; he started smoking then suddenly, an internal explosion sent his turret flying. The Tiger seemed to have pulled back, for he was no-where to be seen and the shooting died away. Taking no chances, I rolled forward just far enough to get a better line of sight over to my left. This revealed what was left of our two victims, but happily, no sign of the Tiger. It's a very welcome feature that PE is good at platoon communications, because you have five crews looking for targets - and more to the point, indicating them to you, on the radio or the intercom. For now the airwaves stayed silent, so I felt reasonably sure the Tiger had pulled back. Our next move brought our earlier victims into sight, just to our right front. There were indeed armoured cars, seemingly the command version of the big Sdkfz 222 8-wheeled job, no threat for a medium tank. So far, so good. Two German platoons defeated and a Tiger apparently put to flight! Not a bad day's work, thus far anyway. Especially as I like to bring all the boys home afterwards, rather than use them as cannon-fodder. I like to think that the boys believe I'm a decent officer who cares about his men and not a Kamikaze, a glory boy or a full-on f***ing f***wit (to borrow Sgt Wells's pithy observation in 'Dog Soldiers'). Whether that would continue, remained to be seen. ...to be continued!


-
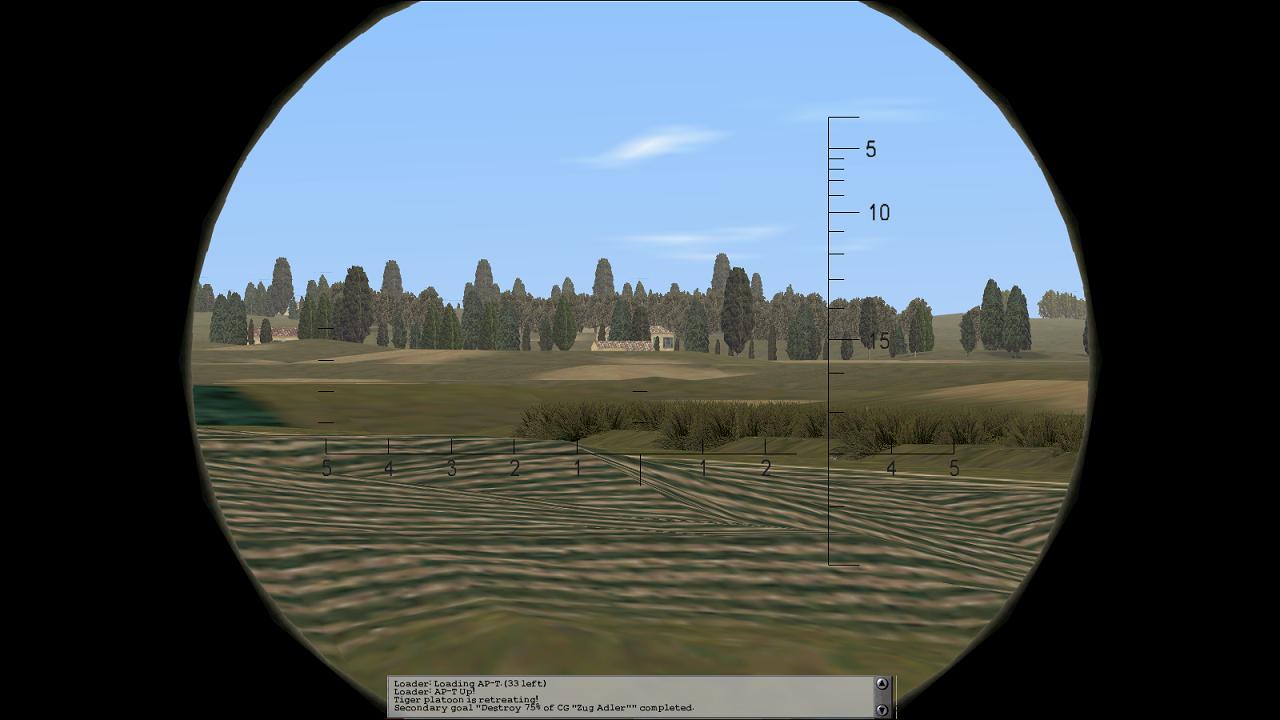
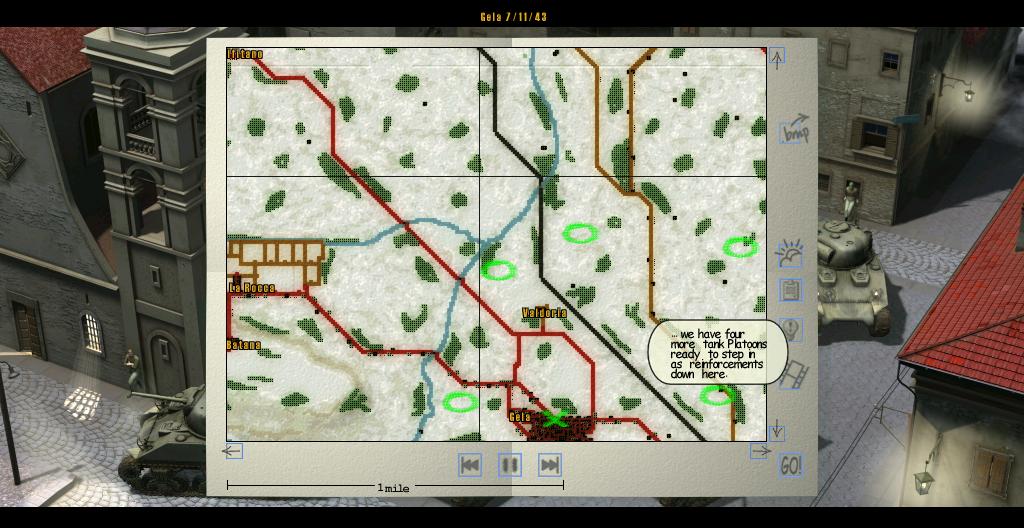
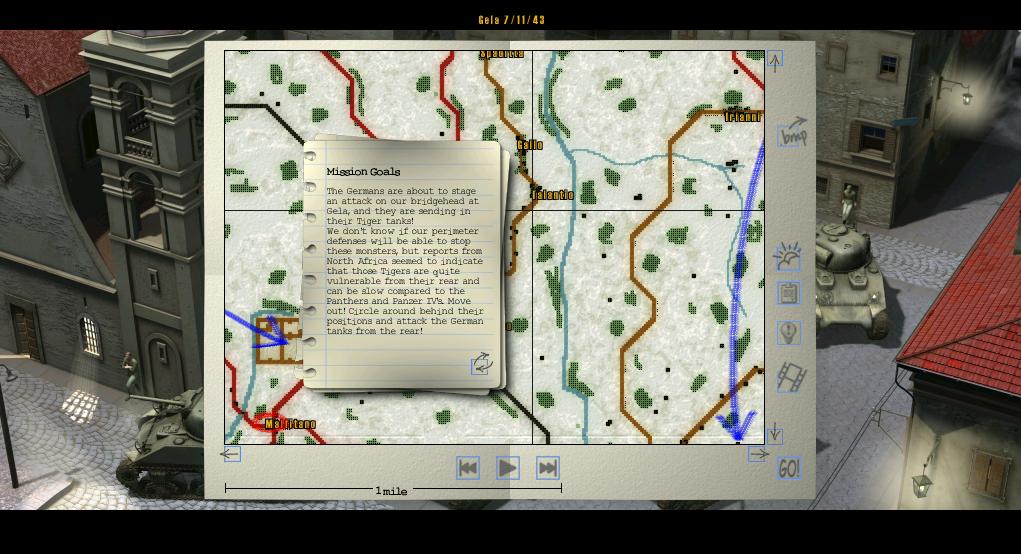
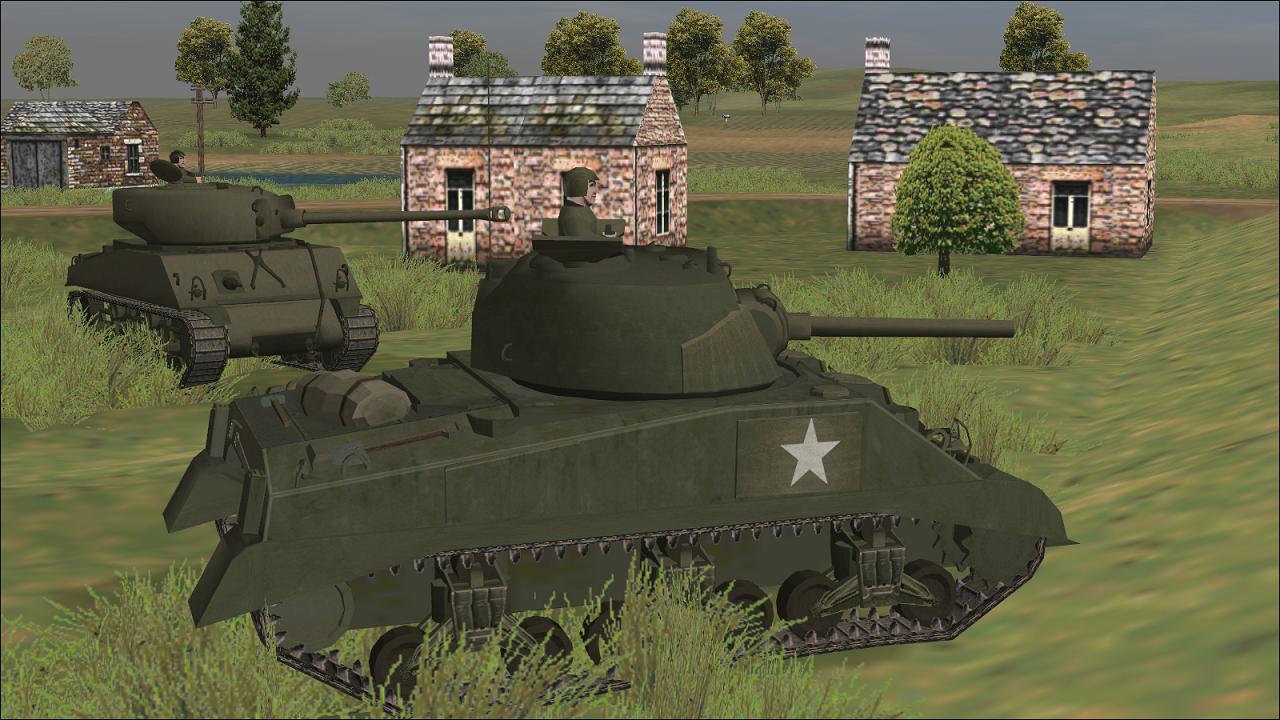
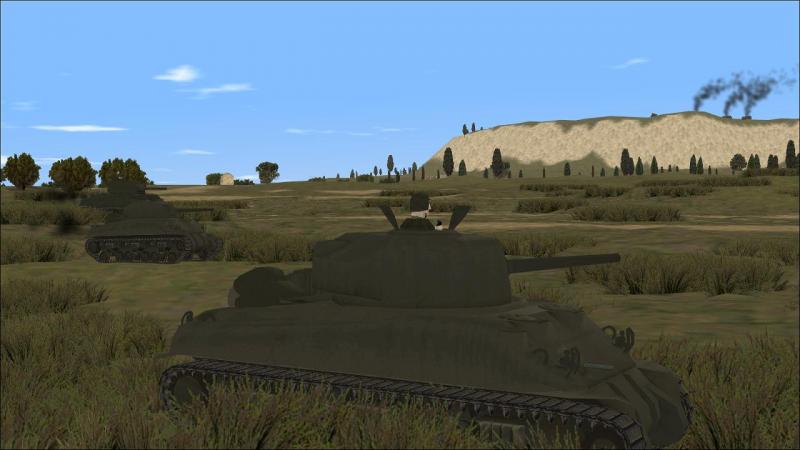
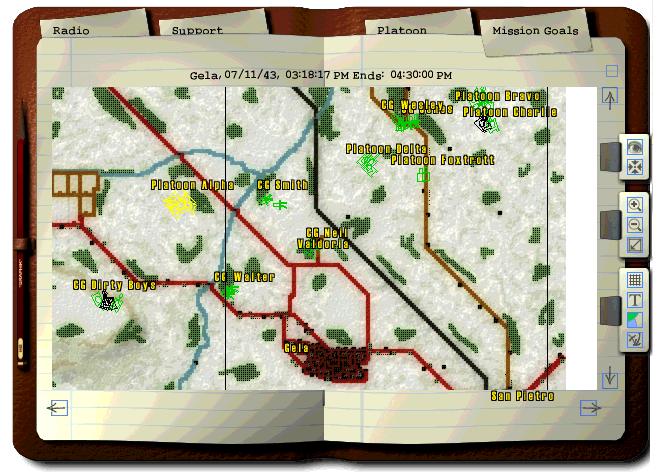
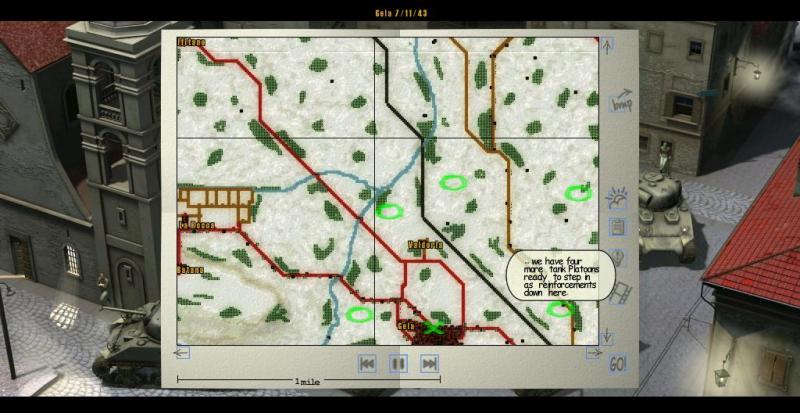
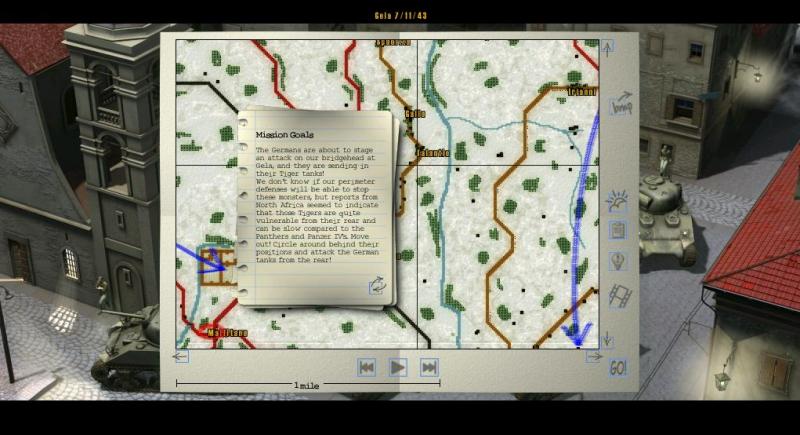
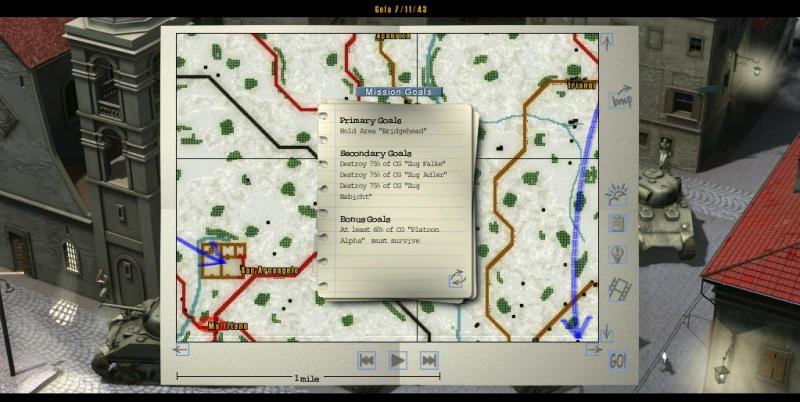
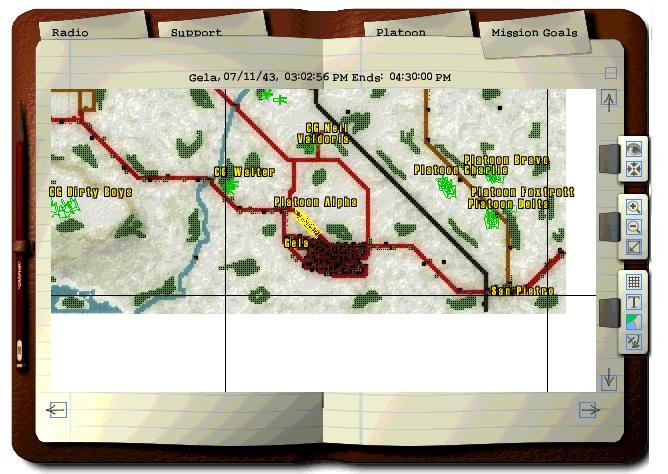
Bring on the Shermans! Panzer Elite is pretty well unique amongst sims in that it provides by far the most realistic 'briefing' for the player. When you kick it off, you are taken to an map. A suitably-accented voice-over describes the tactical situation, including the disposition and actions of friendly forces and the expected dispositions and actions of the enemy. You are then given your own tasks. This is a quite decent representation of the process of 'oral orders' and is how it works in real life, nowadays as well as in WW2. When the briefing's done you can read a summary, view specific objectives, check the weather forecast and see what artillery support is available. Unfortunately, these tools - the animated map and the verbal 'briefing' - are not as well utlised as they could and should be. The player is given his orders alone, whereas in real life, he and the other participating platoon commanders would all be sitting in on the same session (or 'Orders Group'). And in PE, the person giving you the briefing - in the US missions, anyway - calls you 'sir': in real life you get your orders from your boss, absolutely not from a subordinate. And the missions themselves often seem a bit disorganised, with platoons moving hither and thither, often rather widely spaced and with little apparent effort at co-ordination. Most PE missions - offensive ones, anyway - feel like a rather lonely advance to contact. All that said, they are still pretty good and within the sim's conventions and limitations, they offer players an exceptional experience of not just operating their own tank, but also playing the role of a tank platoon commander. Here are our dispositions for this mission, in green; the 'X' marks my on platoon's starting location. We're defending the US bridgehead at the town of Gela, in southern Sicily. Apart from scattered infantry units in a wide arc to the west and north, our forces seem to consist of a group of tank platoons. One of the nice things about the PE campaign missions is that they follow the course of a series of real battles from each campaign, fought on maps which are decent representations of the ground at the time. This mission replicates one day in the Battle of Gela, 11 July 1943, when German armoued units, including some Tiger tanks, made a sustained effort to crush the US beachead there. In re-fighting this battle, we have been told that the Germans are expected to mount concentric attacks on Gela from north, north-west and west. My platoon is ordered to make what is described rather oddly as a recce, just inland from the coast, to the west-north-west. Not for us, the luxury of finding fire positions from which we can wait for the enemy to come to us. It's implied (but not really made clear) that the other tank platoons will also move out, later. I decided I would move only slowly, from fire psoition to fire position, to avoid getting too far out in front. And I would edge northwards towards the others, for better mutual support...I so hoped. As usual, the PE briefing lets you see the specific goals which determine mission failure or success, as well as 'bonus' or secondary goals which I believe can result in medals or experience being won. This is uesful, if not entirely realistic, not least as it displayes the actual names and presence of units that you are not going to know so much about. Incidentally, in stock PE, all units are pretty anonymous, even though their missions closely follow real ones. I rarely bother swapping my crew around in PE and on this mission, I forgot to check out what extras I might be able to add to my tanks, which was not a good thing. But I was keen to see the new Shermans in action; so after a quick review of the objectives, I kicked off the operation. I quickly got my tanks into line abreast formation - I have a full-strength platoon of five - facing the enemy. Halted again, I checked out the immediate locality, before moving off again. Ahead of us lay a road through some scattered buildings, on the northern outskirts of Gela. I called my platoon into column and drove on through, intending to deploy again on the far side. After playing a lot of Steel Fury, it's a pleasure to be able to take advantage again of Panzer Elite's much superior command and control facilities. You can do so much more, and all of it via hotkeys, though there so many key commands that it takes a while to remember them all again. Calling up the map, I checked out our side's dispositions; you can see friendly forces in green (spotted enemies appear blue) with their names as text labels. My tanks are the yellow symbols, making their way in column up the road. In game, in modded PE, the map appears rather small, but you still have all the control of the stock sim's map, including options to configure the display, check your orders and progress and call up artillery support - if you have any. And we do on this mission, in the form of a limited number of HE or smoke 'shoots' from 105mm howitzers. Sadly, we have none of the naval gunfire support that drenched the German and Italian defenders, in the real Battle of Gela. Once out into the open again, I gave the order for wedge formation. As anyone who's read the handbooks, played the sims or done the training for real will know, for both infantry and tanks, this is a good formation for an advance, giving decent observation and fields of fire to both flanks, as well as straight ahead. Whether every army used every formation or not, it's good to have the full range of options PE allows, which includes the ability to close up or spread out. Your AI 'wingmen' can dilly-dally a bit sometimes, especially if there are obstacles about - in the screenie below, only one of the two tanks on my right has so far made it into position. But generally, they keep up quite well and with the mods, their turrets aren't all rigidly stuck facing straight ahead. Soon enough, we were formed up and en route, giving me a bit of time to admire the improvements wrought by Slomo to these staple PE tanks, which includes external stowage as well as 3-d suspensions. But I wasn't here for the sight-seeing. Up ahead somewhere, the Germans were said to be coming, and we had been flung out to meet them, Tigers and all. With a long ridge between me and the coast to my left, I felt reasonably secure on that flank. Ahead and right were the arcs we most needed to watch. I rolled forward, seeking a suitable fire position from which to halt and observe before making my next bound, with my turret turned slightly right, about as ready as I could be for whatever it was lay out there. ...to be continued!


-
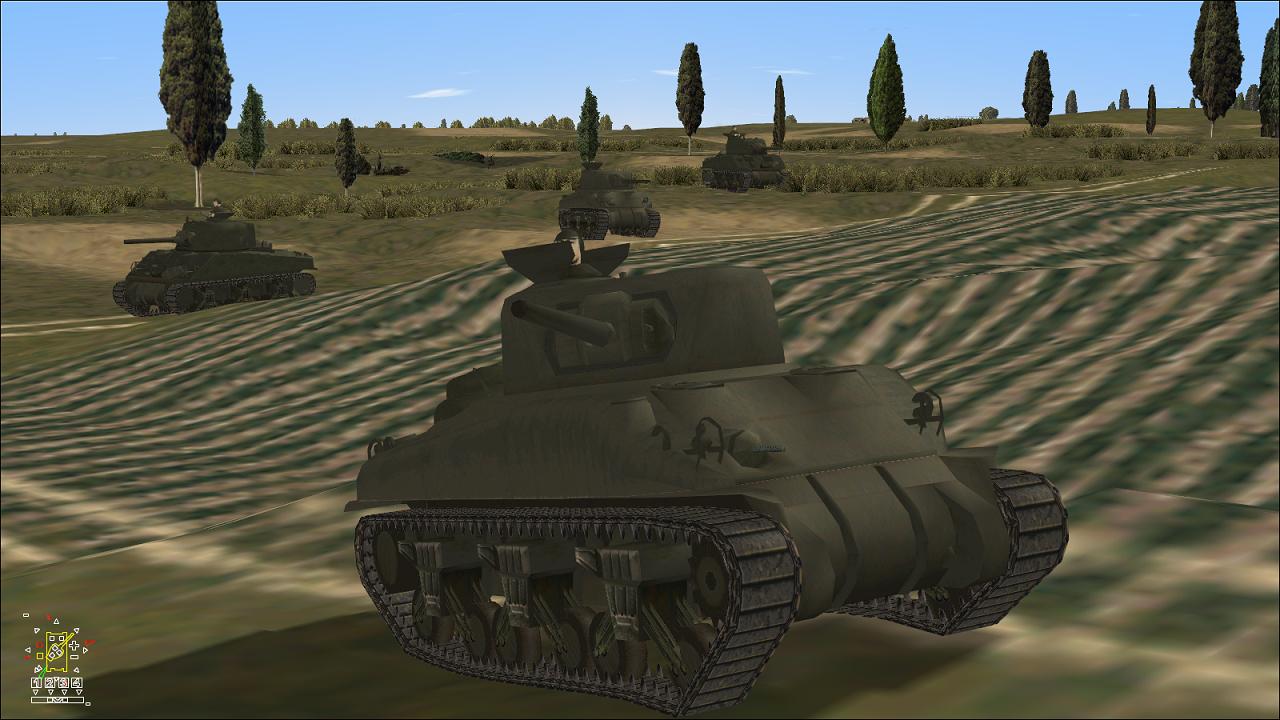
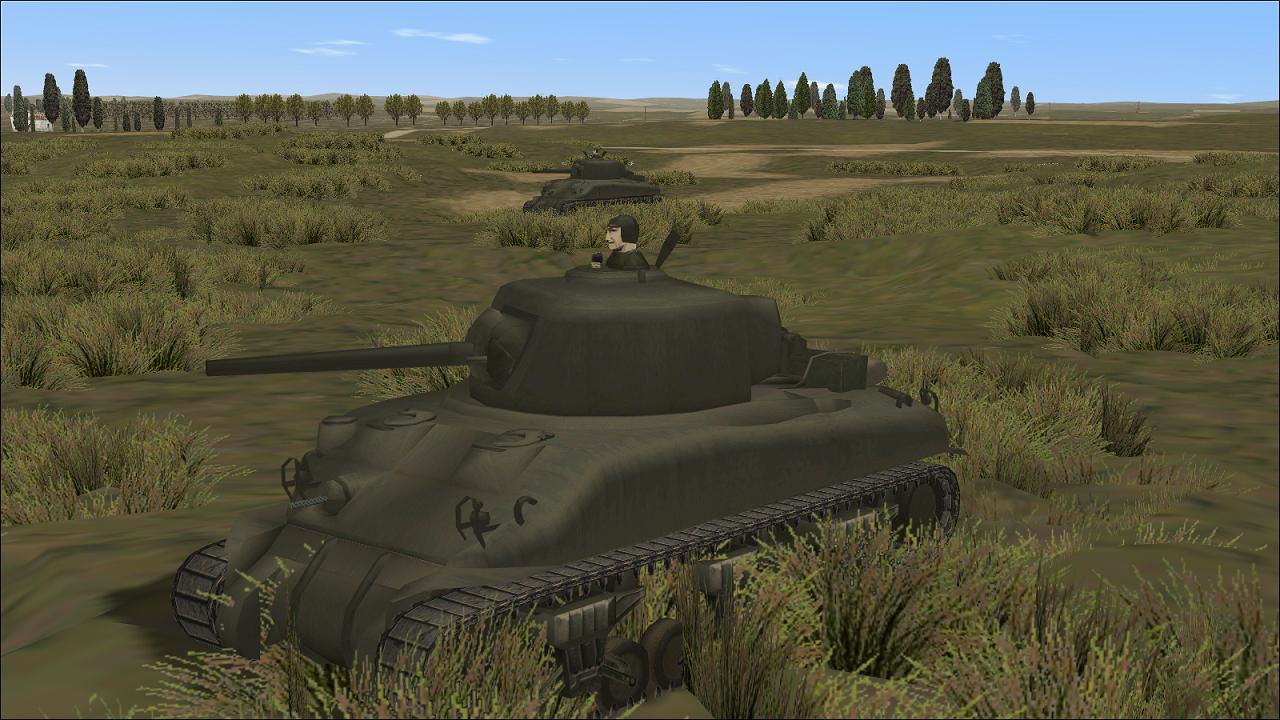
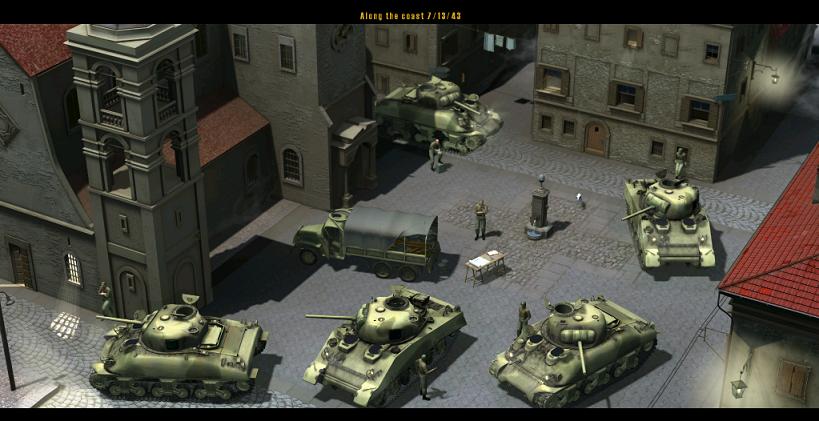
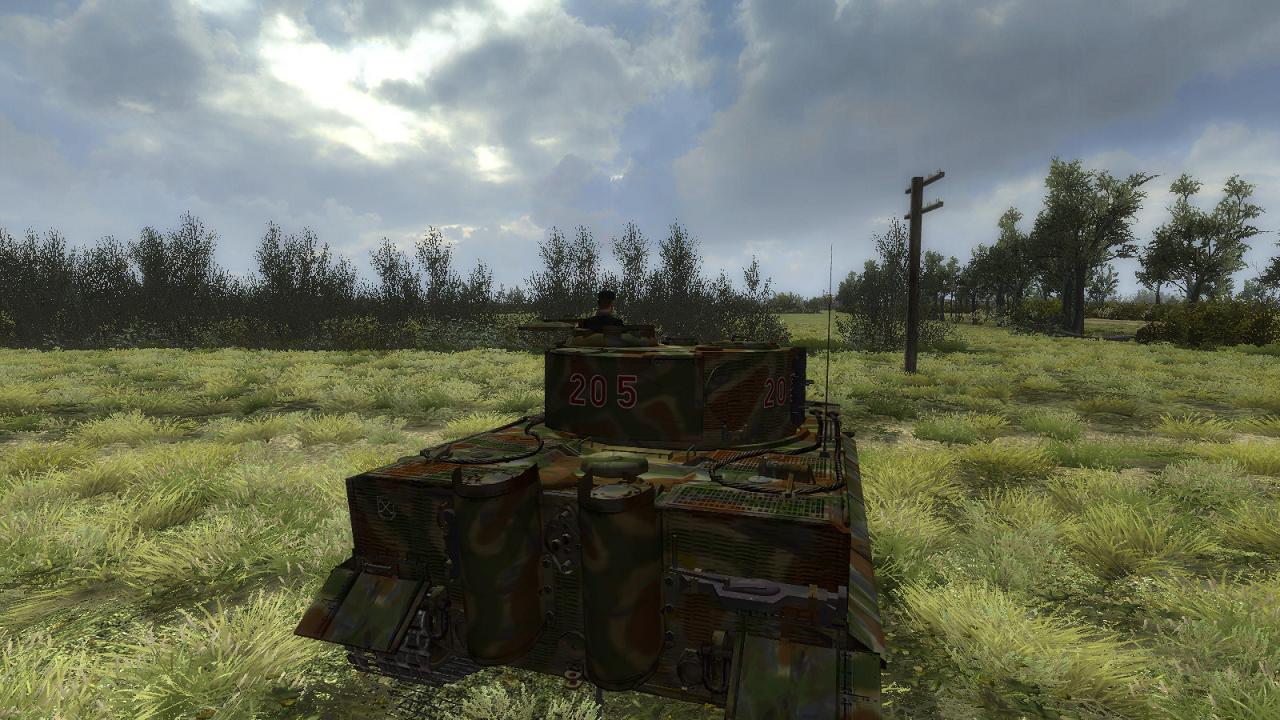
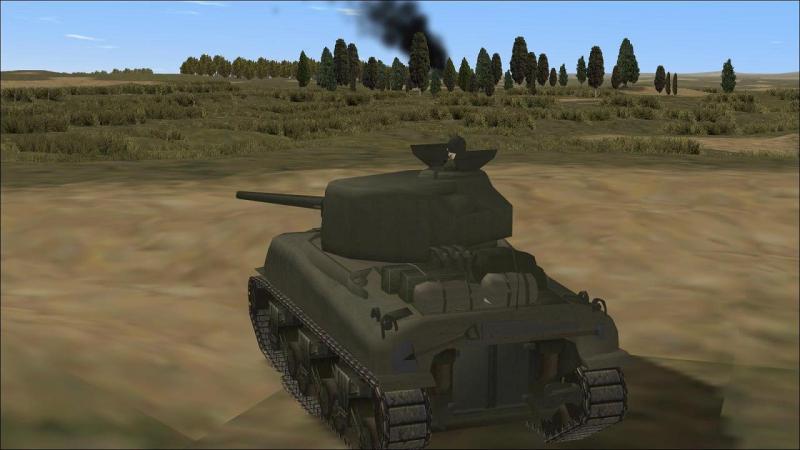
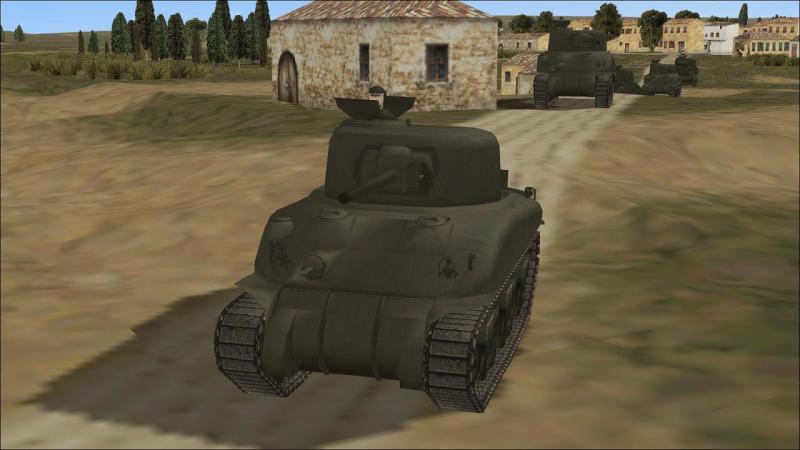
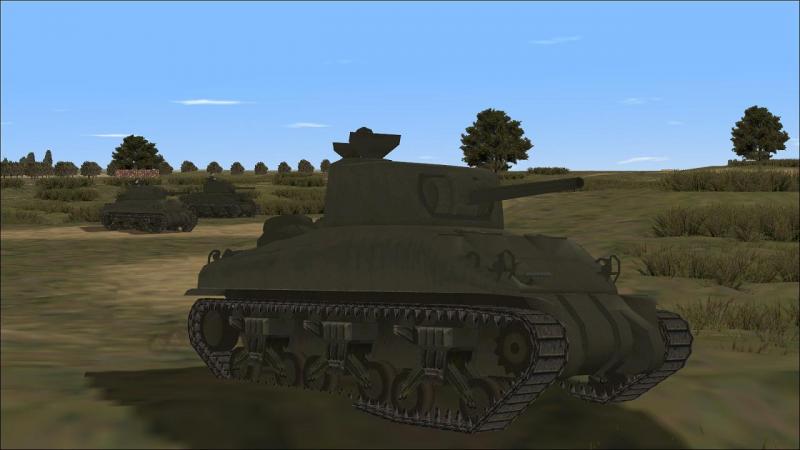
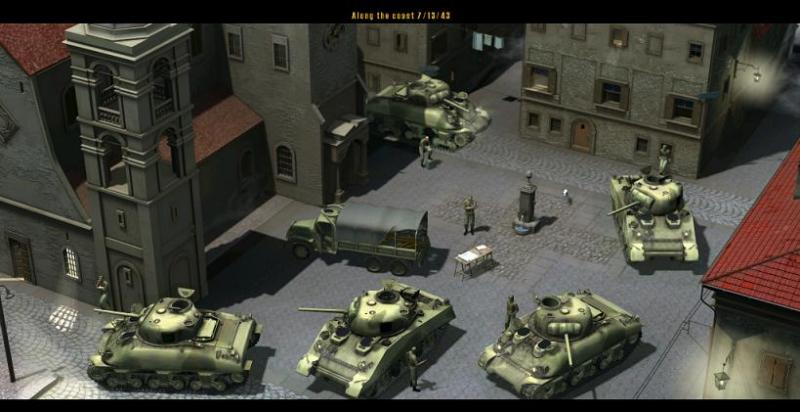
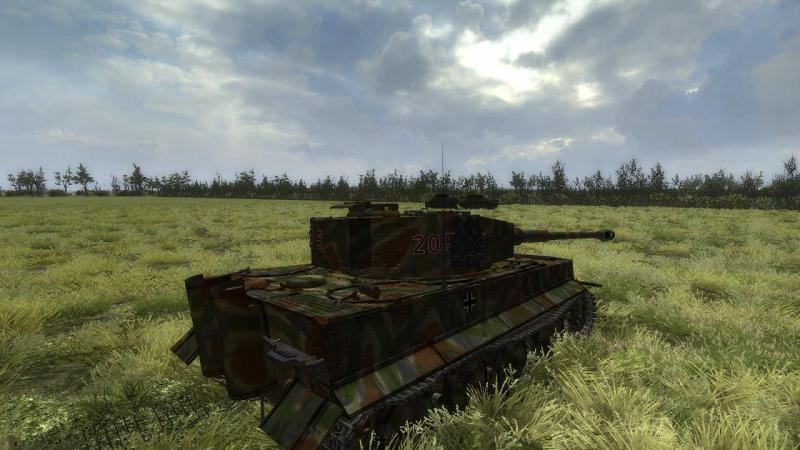
'We're the D-Day Dodgers, in sunny Ital-ee...' It's an eloquent testimony to both exceptional design and the skill of its mod community, that Panzer Elite, first released in 1999, is still one of the best tank simulators you can play, sixteen years later. Sims like WW2 Battle Tanks (despite the awful AI) and Steel Fury (the only other WW2 tanksim in the same class as PE) can boast much better graphics and some other points of superiority. But good old PE still beats them all, in some important fields. Not the least of these are decent representation of both radio and intercom traffic; very good platoon command and control facilities; and a superb, linked set of single player campaigns, which enables you to start in Tunisia, move on to Italy and then finish off in Normandy, fighting for either the US Army or the Wehrmacht. And that's before the modders added France 1940, Libya 1941-2 and the Eastern Front, plus new playable nationalities like the British and Red Armies. Modder Slomo's Panzer Pack 2x (PP2x) has recently been enhanced by the addition of a vehicle update, which you can get along with the mod itself, via the links here, on the PE Development Group PP2x subforum. The update adds new M4 Shermans, which have 3-d wheels and suspension and better animation, including tank commander figures which can close hatches. There are 75 and 76mm-gunned versions and if you want something that will keep out more of the German weapons, there's a 'Jumbo' M4A3E2 heavy version, too. The 'x' in 'PP2x' signifies that the mod uses Brit44 Aldo's new PE executable, whose latest version adds smoother movement of vehicles to the other improvements, the most significant of which is probably proper 'time of flight' and ballistic trajectories, so that you can see your tracers arc towards the enemy, and more to the point, see their tracers arecing towards you! It's hard to over-state the improvement this mod brings to PE. Anyhow, to try out the Shermans, I decided to join 'the D-day Dodgers', as the Allied troops in Italy sardonically referred to themselves. You can start off a PE campaign in any of the three 'sub-campaigns' (as well as playing any individual campaign mission, via the 'Single Mission' option) so you don't have to play all the way through the Tunisia segment, if you want to begin 'in sunny Ital-ee'. As I did. In fact, the first missions are on Sicily, where the British and Americans first landed. As usual in PE, you start at a nice rendering of your platoon waiting to move up, here set in a typical Italian plaza. PE often starts you with a mix of vehicles for your platoon, but here, I have already replaced an M5 light tank and an M10 tank destroyer with Shermans. I chose a mix of the round-hulled M4A1 and the original M4, which would have been found in the same units as they had the same engine. Seventy-six millimetre-gunned versions didn't arrive until Normandy, so we've all got 75s, as you can see. The little white dog visible between the water trough and the right-hand Sherman is fully-animated! Truly, they don't make sims like this any more. At this screen you can do things like check out your crew skills and move people around; add any available modifications to your tanks (like in some cases radios, or extra armour) and adjust your ammo supply. When you're ready, you click on the trestle table (behind the two and a half ton truck) and that starts the briefing (or more accurately, your orders) for the mission. So that's waht we'll look at, next. ...to be continued!

-
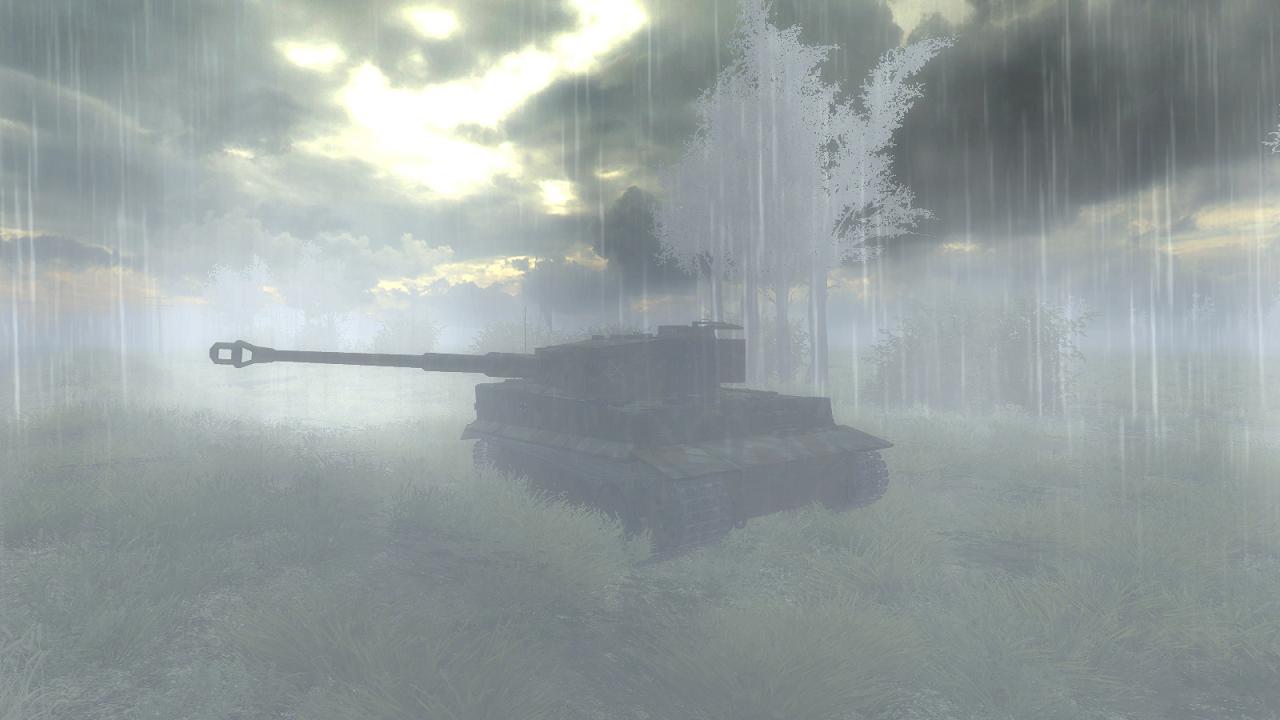
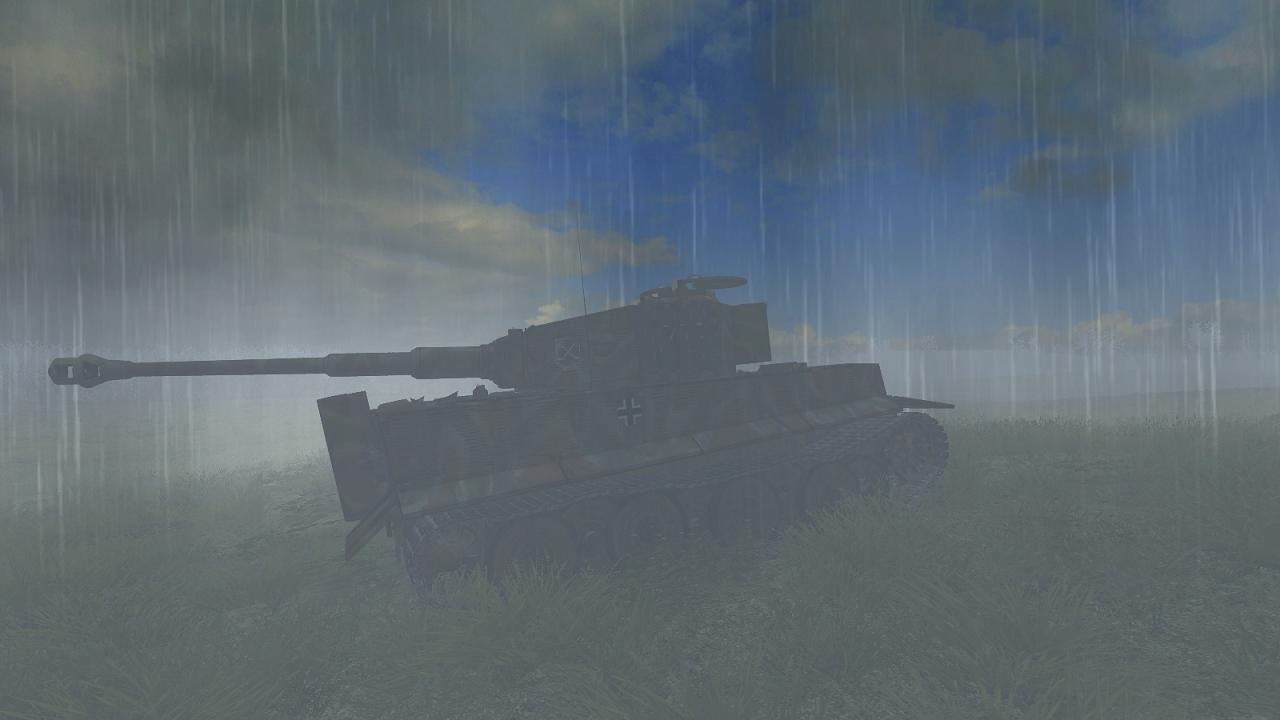
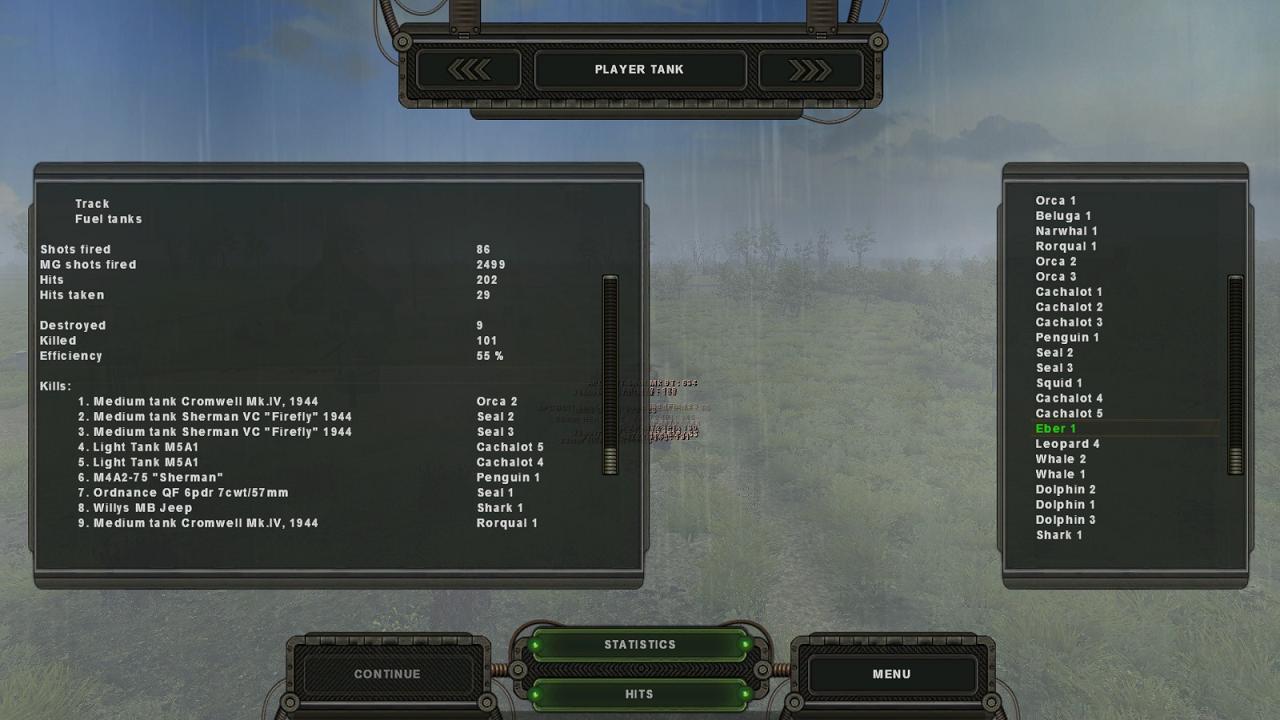
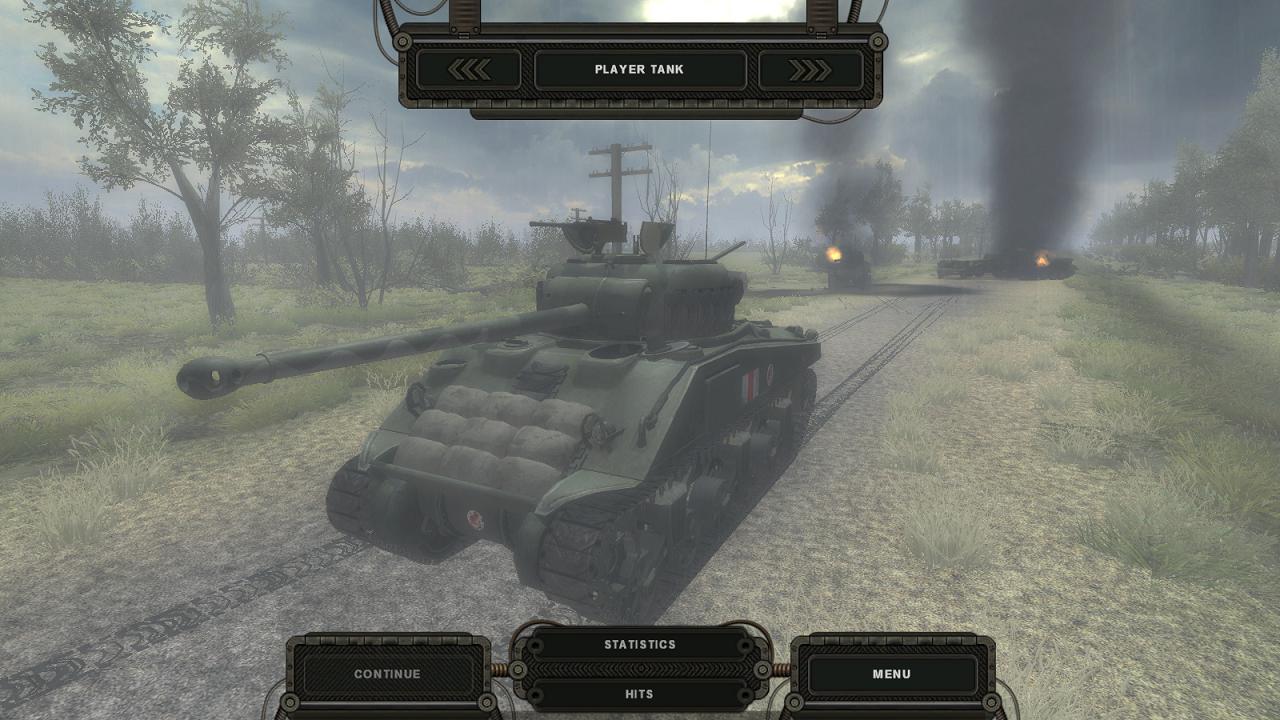
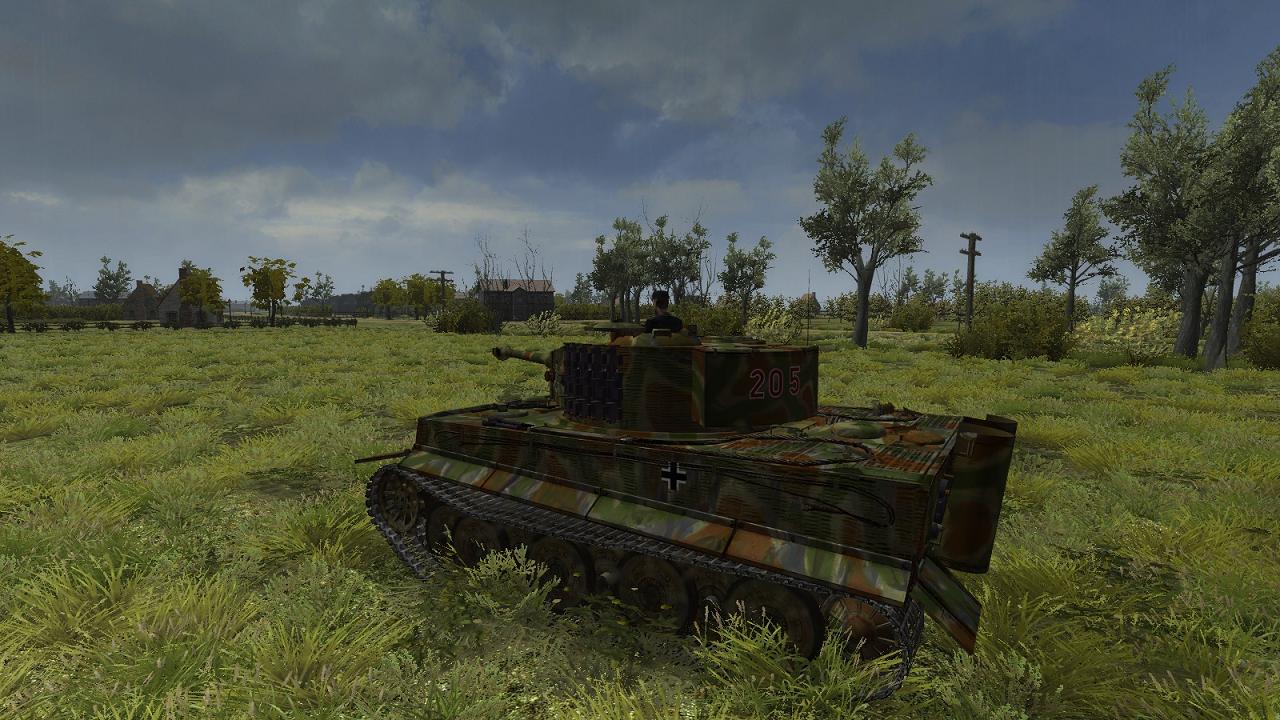
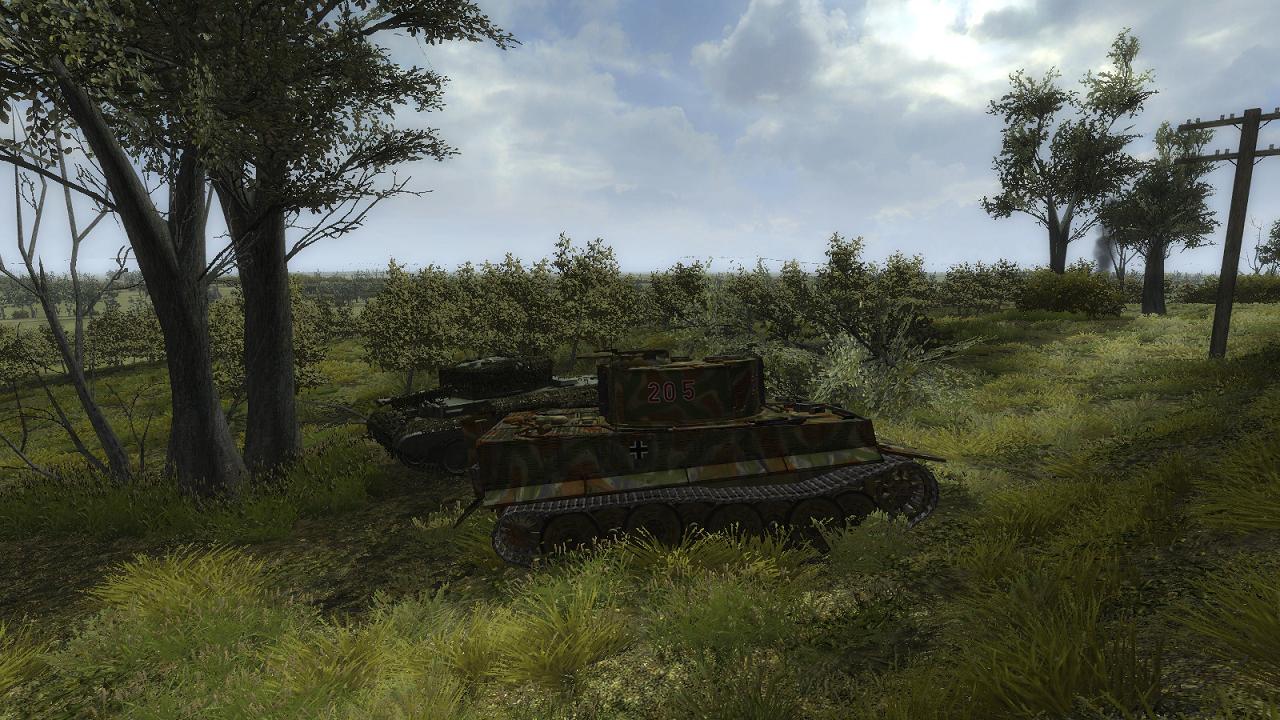
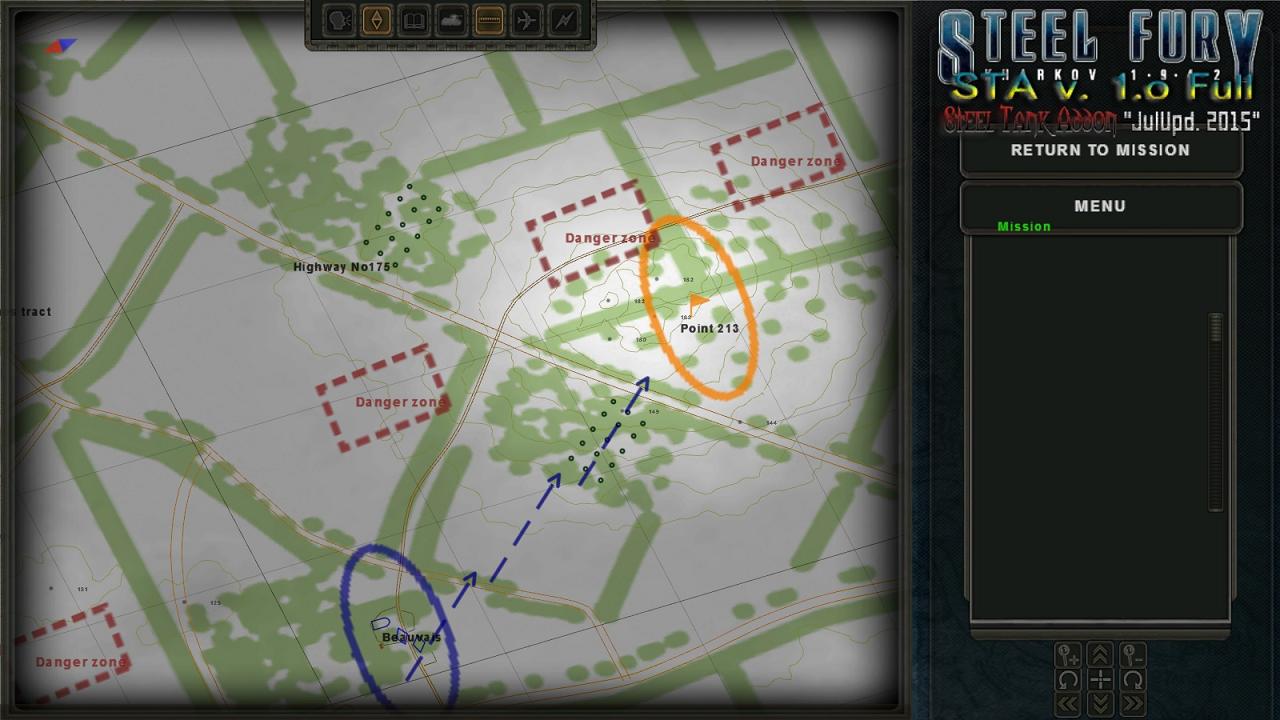
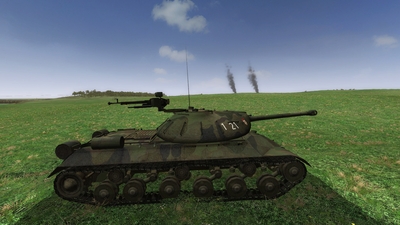
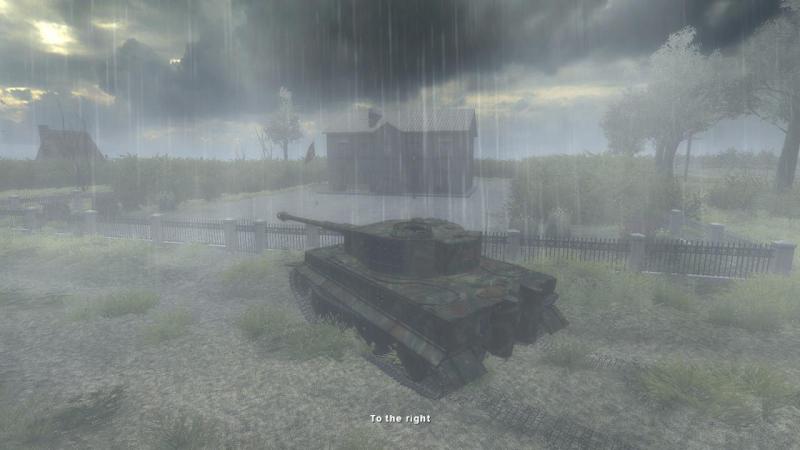
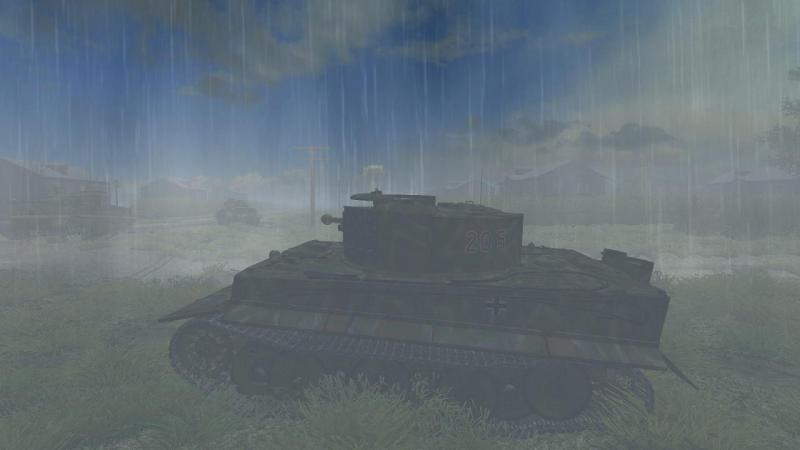
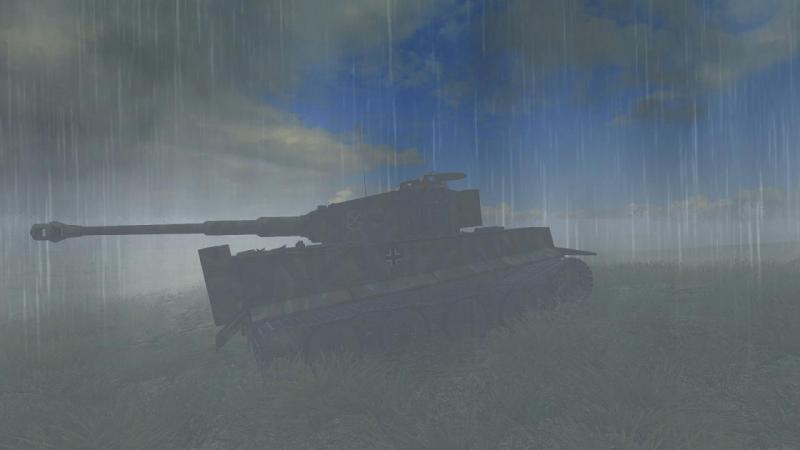
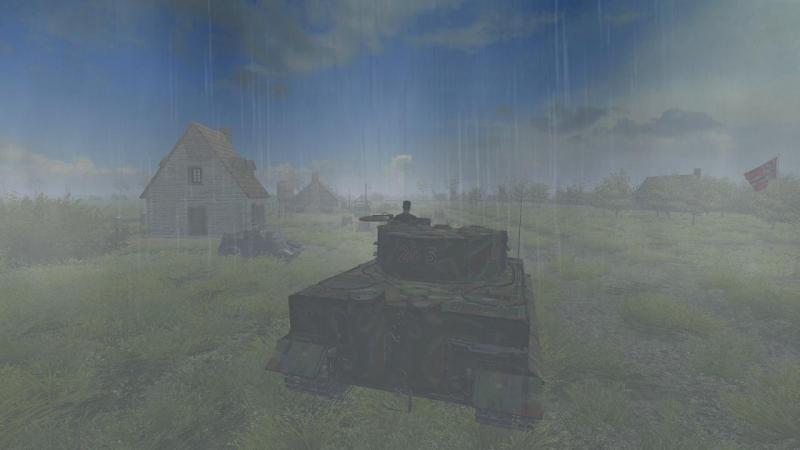
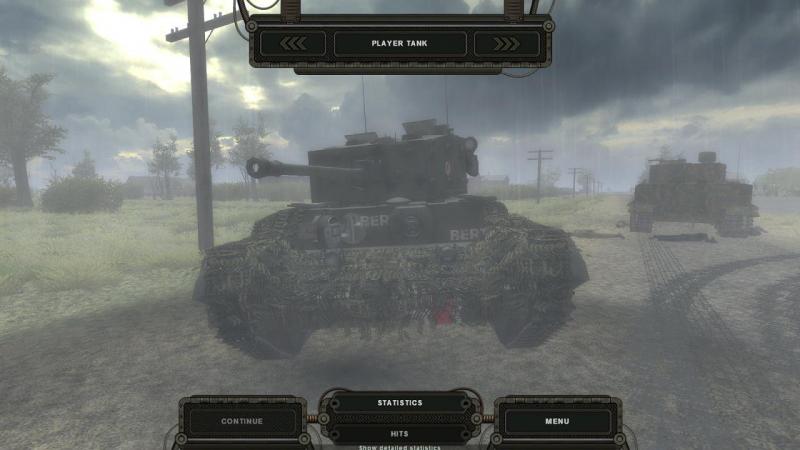
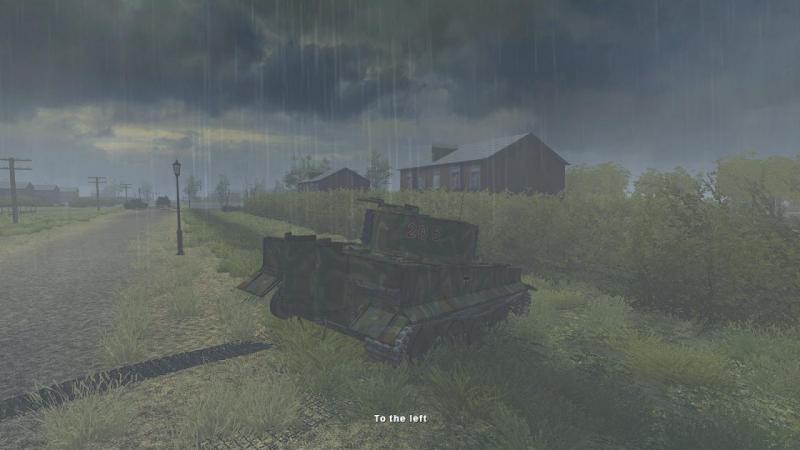
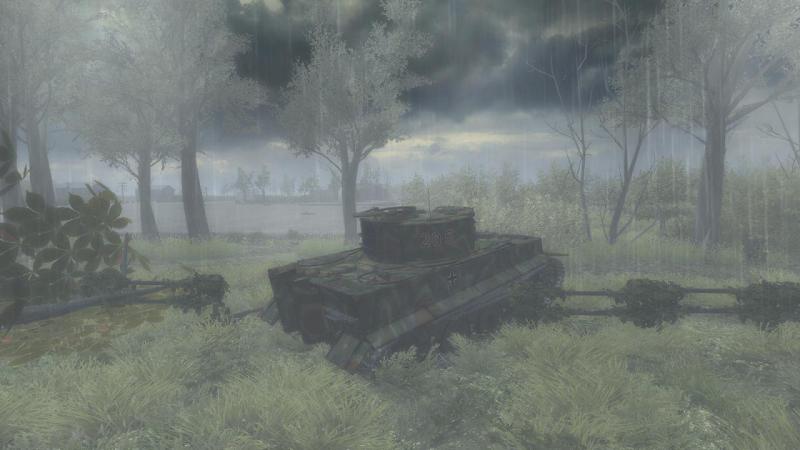
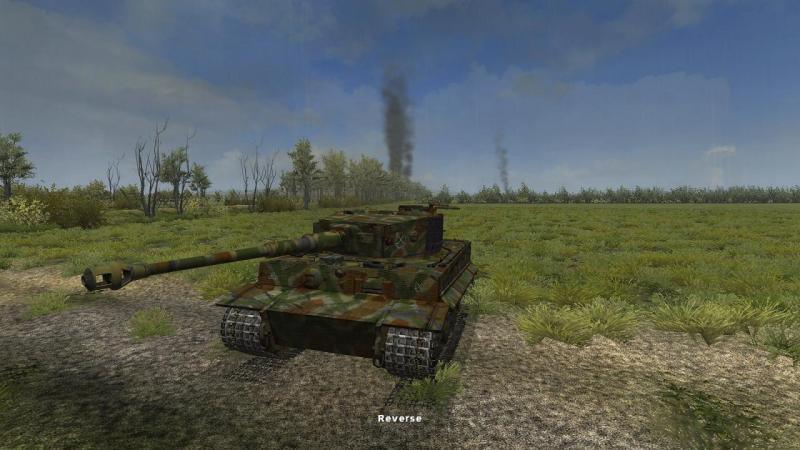
An end, of sorts... Slowing down, I moved more cautiously down the left-hand verge of this road, hugging the cover. This brought us out onto the flank of the furthest Cromwell. He didn’t move but he didn’t look particularly dead, either. So, encouraged by my tank commander, I blasted him at close range with some of my remaining HE ammunition. We pressed on, crossing the N175 and bypassing the Cromwell. The Hotel de Ville, the map indicated, was just across the road, set back a little, so our ultimate objective was only seconds away. We roared up the last stretch and there it was; the Tommies hadn’t had time to haul down the German flag, which was still flying in the front garden. Halting, I looked around, expecting some final ambush. Nothing in sight, not a round came our way. No mad lawnmower sounds. I probed cautiously around the building. We'd done it and the coast was clear, but still, there was none of SF's usual confirmation message that we had completed the mission. Obviously, simply reaching the stated objective - even being in sole possession of it - was not enough. Evidently I needed to find and kill more Tommies, somewhere in the vicinity. However, by now, I rather lacked the means to do so. In particular, if those Cromwells I’d smothered with HE weren’t quite dead and needed to be, then I was as out of luck, as I was out of AP rounds. I could see what looked like bailed out British tank crews up the road, beside the Cromwell I'd knocked out as it sat next to the crippled second Tiger. They looked pretty miserable, standing there in the rain next to their broken tank, but I hosed them with the co-ax anyway. A lot of good it did me - still no victory confirmation. They had died in vain. It can be frustrating if you have to drive around to locate and destroy some last enemy to complete a mission, rather than just reaching the objective and holding it. But I decided that I would play along, to a degree. Instead of ending the mission and stomping off in a huff, I would attempt to do what Wittmann might have done in similar circumstances. Unsupported and low on ammo, I reckoned he’d probably have withdrawn and attempted to get back to his company lines, there to get 'bombed up' and organised for a fresh attack. With this in mind I turned about and drove north, getting out of Dodge as fast as my Tiger could go. No subtleties this time, I just ‘floored it’ and off we went, hoping we had already sprung most of the mousetraps. On my way out, I took a chance and passed close to the site of the British ambush in a last effort to mop up remaining enemies, but this just seemed to confirm that the other Tiger's crew had become casualties, which made me feel less bad about shooting down the Cromwell crew nearby. Swinging around clear of Villers, I made for our original ambush site. A glance at the map showed this to be a good landmark on a more or less direct route back to Beauvais, where we had started. As I drew away from Villers Bocage, I turned the turret around until my gun was laid over the engine decking, facing the enemy, in the approved fashion for a withdrawing tank. SF doesn't really do 'blue on blue' so I was more worried about being able to respond quickly to any threat to my rear, than being mistaken for an enemy by friendly forces. Reaching the kill zone, I turned slightly right, to give the wrecks a wider berth, crossed the N175 diagonally and then turned left again, on a heading for Beauvais. And in that fashion, as the rain fell steadily from dappled skies, we made it back to our starting point. Despite the mission not being recorded as a success, my own Tiger’s stats were rather good, if not quite up to the standard set by Wittmann in the real mission (probably with a full ammo load, and certainly with more opportunity to smash up light armour). Behind us, we left a goodly assortment of damaged or broken ironmongery. Much of this was in our original killing ground on the N175. There was plenty in and around Villers Bocage itself, too. All in all, this was an excellent mission (a beta, at the time of playing). It’s very different from the traditional Steel Fury job, in which you are usually commanding a platoon as part of a closely-knit attacking force which you can see and thus co-operate with. This solo mission looks, feels and plays very differently. Because you’re on your own (apart from that second, AI-controlled Tiger, which is liable to be out of sight often) the mission helps you learn and apply some basic lessons in handling a single tank – notably selection of fire positions, use of ground and cover and of course, application of fire or gunnery, whether you play from the tank commander or (as I did) gunner positions. I was disappointed to run out of main gun rounds, particularly the AP ones I needed most, and was surprised to discover that my ammo supply had actually been reduced by design. I feel a full ammo load would have been preferable, as the mission can be difficult enough without reducing your ammo load. If you want a greater challenge, in game setup, you can vary the balance of forces (one setting introduces a 17 Pounder towed anti-tank gun, I believe!). The limited ammo would have mattered less, had mission success not required the destruction of more enemies, beyond merely arriving at the final objective. As usual, some of SF’s limitations were apparent. As you’re not in command of other vehicles on this mission, it doesn’t matter that you have limited platoon control or that what you have, you must switch to the map view to exercise, rather than using hotkeys. But the excessively aggressive AI was also in evidence. This can see your platoon-mates make wild charges against detected enemy instead of staying with you. In this mission, single or light AFVs or troops were too willing to advance or attack regardless of losses or risk. However, decent AI was also on display, with vehicles driving out of the kill zone and that Cromwell making good use of dead ground and cover to stalk my Tiger...up to the point he just charged me. SF’s AI does take some account of morale but should have more regard to danger and losses – in particular, the loss of platoon (or higher) command elements, which should visibly degrade unit performance. Another downside is the near complete lack of radio comms in SF, except for event-triggered traffic incorporated by individual mission designers. It’s a pity that SF platoons do not routinely transmit by radio things they would in real life, like situation or contact reports. Panzer Elite was outstanding in this respect. Steel Fury is probably suited to mid-war Soviet (or early-war western) practice where maybe only platoon (and above) command tanks had transmitters. A good feature of this particular late-war, western front mission is that Lockie has built in plenty of radio traffic. This is exactly how it should be done for western armies and compensates quite well for the sims’ lack of AI radio traffic. It’s also frustrating that while the German tank commanders in Steel Fury use the clock code to indicate targets in spoken intercom messages, 12 0’clock is not straight ahead, as it was in real Panzer practice (as replicated in Panzer Elite), but due north. This makes it needlessly difficult to play with the visual aids turned off. Graviteam’s newer tanksim, Steel Armor: Blaze of War, replaces this with a still-slightly-quirky but more intuitive system. Indeed, with many other improvements and a dynamic campaign system, SABOW should be a great basis for WW2 virtual tanking on any front, if and when suitable mods or downloadable content appears. Even then, and regardless of some limitations, Steel Fury with the Steel Tank Add-on will still be a top tier WW2 tanksim, a title shared currently only with the visually inferior but still exceptional Panzer Elite. I’m particularly delighted to see Steel Fury now at last fighting in Normandy, with a range of really excellent new US and British vehicles and some of the best terrain and ground objects seen in the sim to date. Far from facing defeat, with this content and these missions, Steel Fury has truly opened up a new front!


- 12 replies
-
- 1
-
-
- sta mod
- steel fury
- (and 2 more)
-
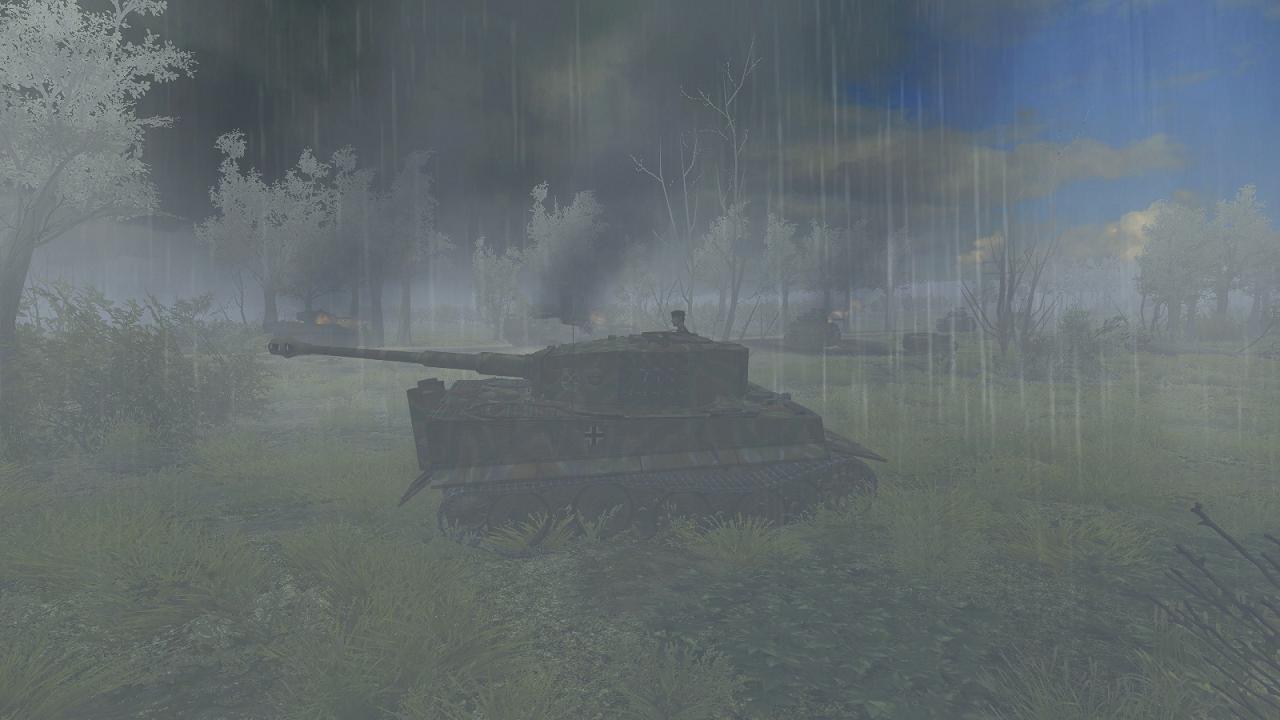
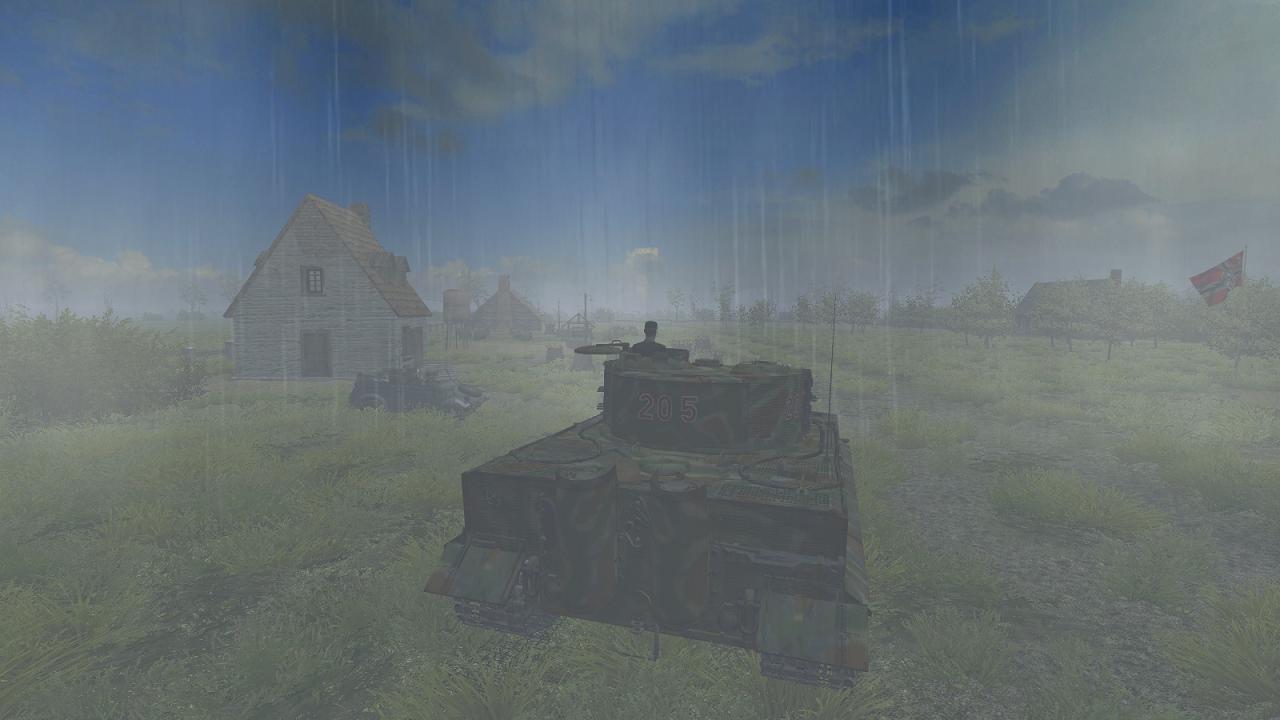
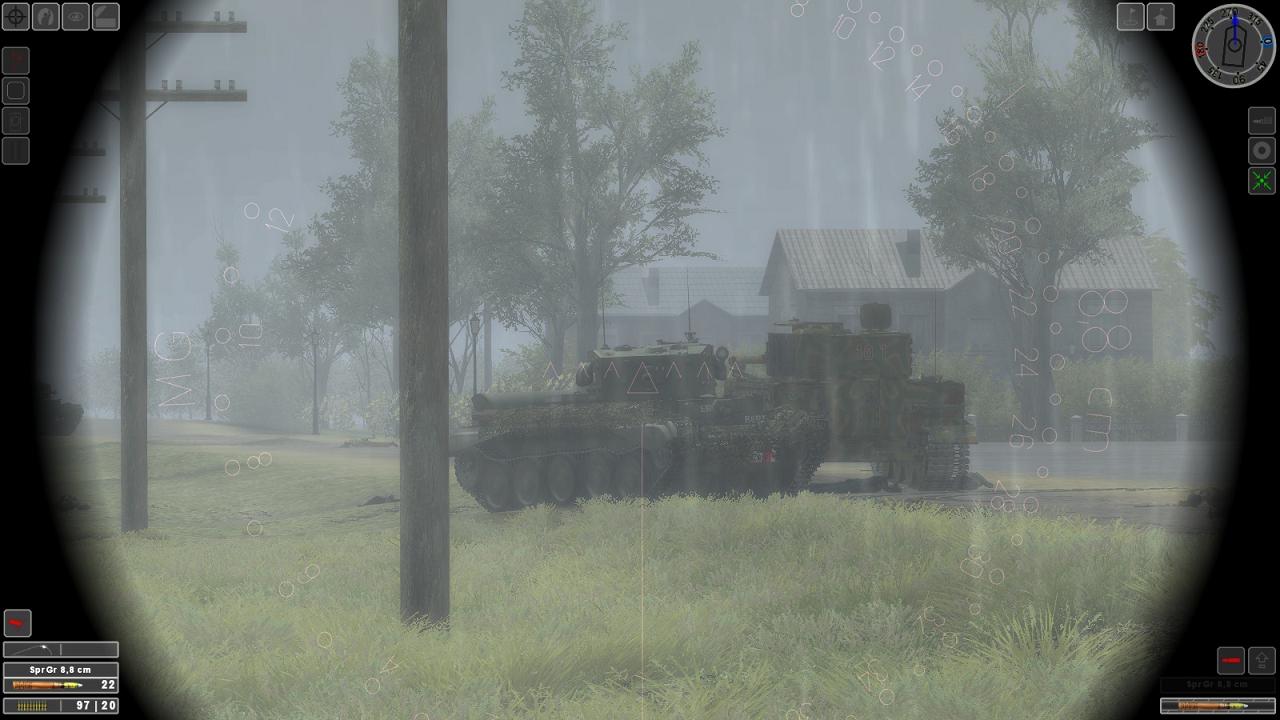
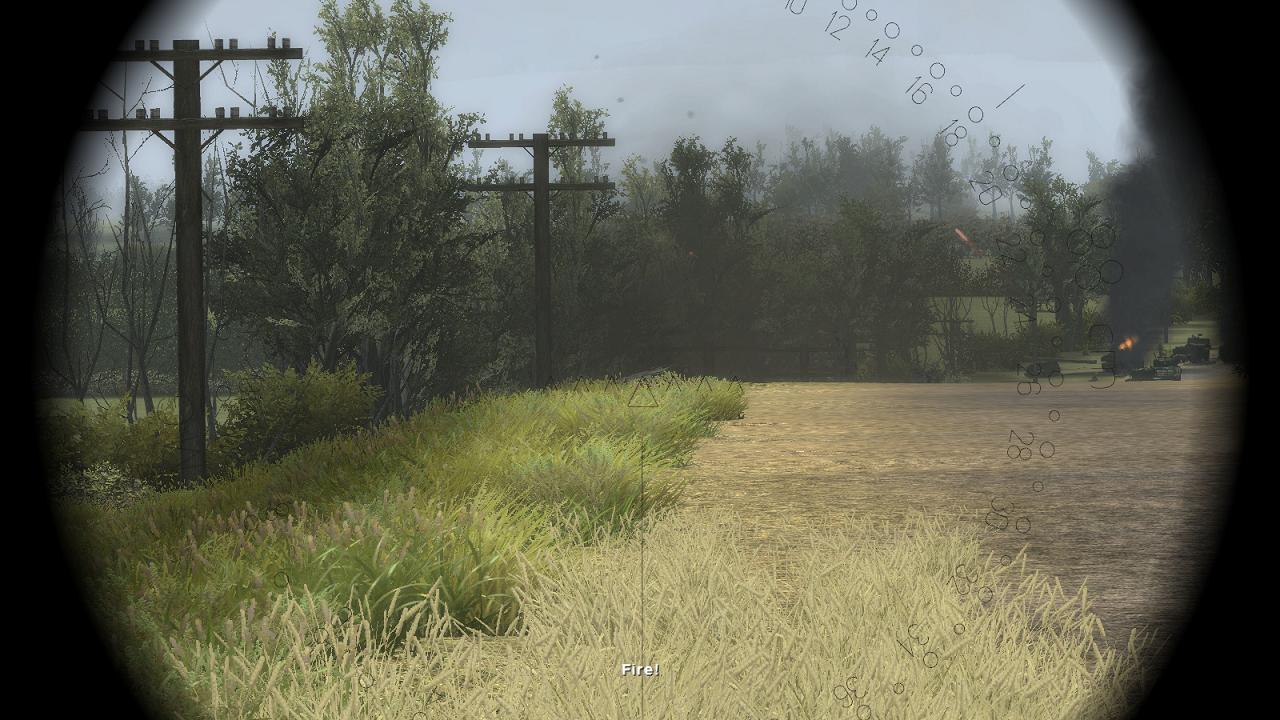
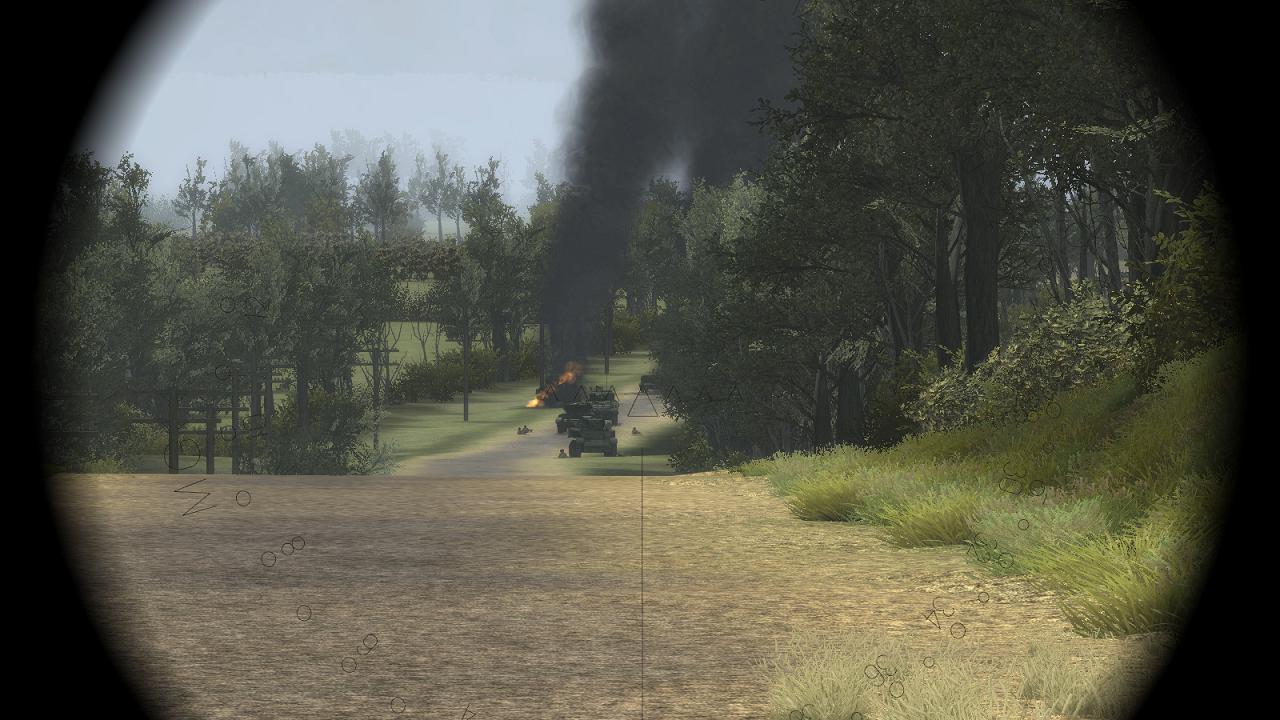
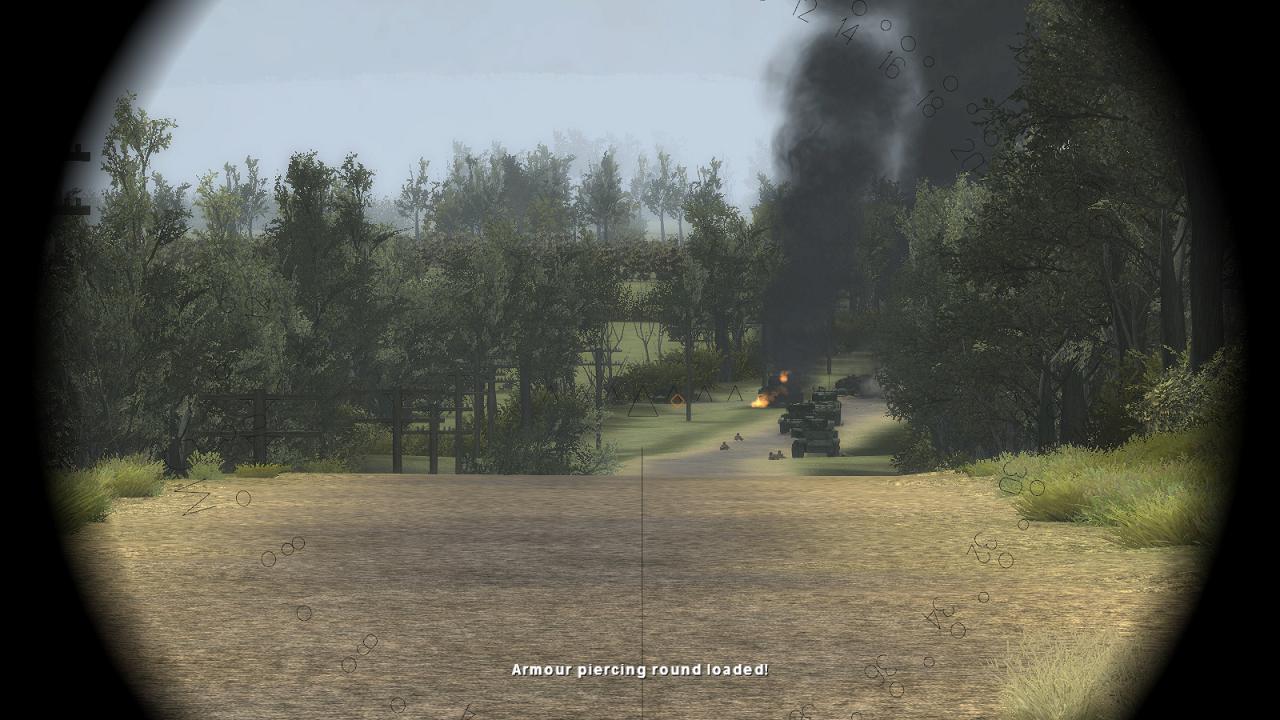
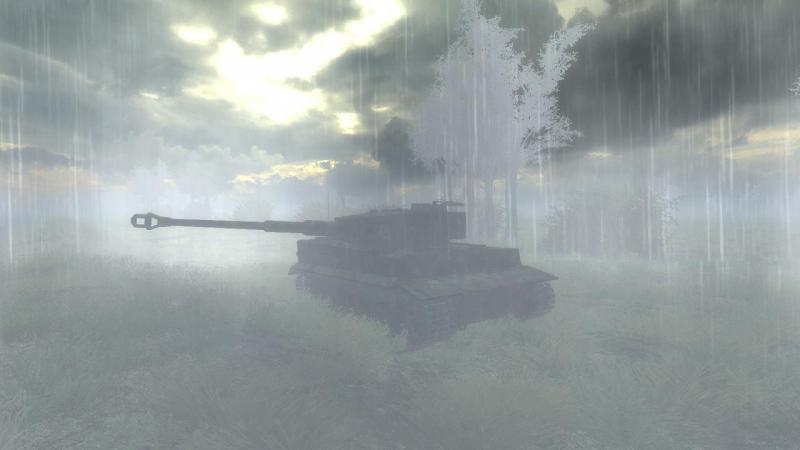
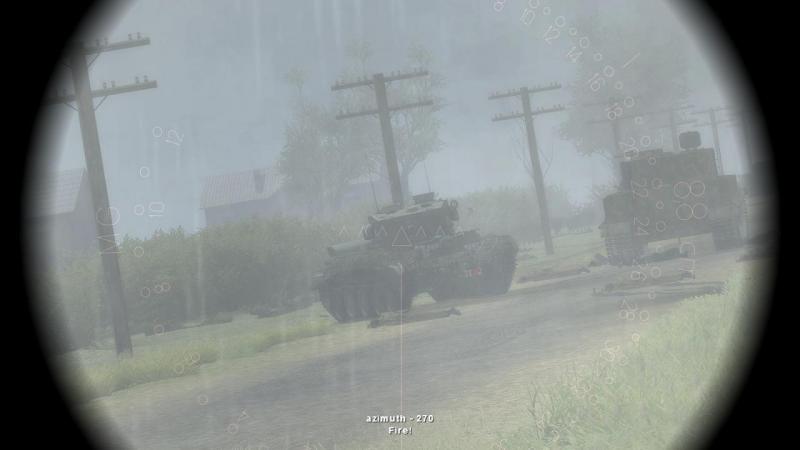
Villers Bocage, hin und zuruck Through the sunflowers we went, crop damage be damned. Time to get that anti-tank gun! We rolled out the other side and there he was – a 6-Pounder. He was a bit to far away to rush him so I stopped to shoot instead - this time with the correct round, having loaded HE after emptying my chambered AT round at him, earlier. Strange! He was just sitting there, side on. Was he tracking the other Tiger? His crew seemed to be down – perhaps he was out of action, from my earlier fire! I was in no position to take chances, so I let him have the HE round. That put matters beyond doubt! My tank commander started calling in more infantry targets, slightly right, where an smaller road or open area joined the N175. As we were shooting these people, a radio-equipped jeep was silly enough to drive up the street and was suitably dealt with. As if to avenge him, to the accompaniment of more ‘lawnmower amok’ noises which caused me to back up again, a Cromwell barged out onto the road, just in front of us. He got rather clsoe but lasted no longer than the jeep, perhaps in part because the other Tiger had showed up again. Which one of us got him, we could settle later. The second Tiger started off down the N175. Abandoning my plan to keep off the road, I decided to conform to his movements, for better mutual support. Whatever one Tiger can do, two can surely do better. I slipped in behind and left of him, glad to have some friendly company in this dangerous close quarter battle zone. A quick look at the map showed that not far beyond the turn in the road, lay the Hotel de Ville. With our two big tanks now poised to sweep aside any remaining opposition, I looked forward to sampling Monsieur le Maire’s best cognac...should any remain. At that point, it all went tits up. As we were stopped to shoot up some more seemingly-helpless enemy troops who lay prone on the road in front of us, first one, then another Cromwell turned onto the road just ahead of us. I started shooting at once, only to find out that I was quickly down to my last AP round. Bad drills, that I hadn’t checked the supply at the start of the mission, but I was now rather shocked to find that I had no other anti-tank rounds, either – no hollow charge, no tungsten-cored Panzergranate 40. Just High Explosive. I laid into the Cromwells with this, hosing them with the co-ax in between reloads and praying the other Tiger would get them. But this wasn’t just a tank battle. In amongst all the shooting, I heard the distinctive ‘whoosh’ of an infantry anti-tank weapon firing; then again. Strictly speaking, this sound isn’t really right for the spigot-fired PIAT used by the British rather than bazookas, but when you’re under attack with the things, you have more pressing concerns. Like preventing you and your crew from being incinerated. I backed up and traversed right, but it was too late for the other Tiger. He was further forward and on my right. The PIATs must have got him. The crew bailed out into the roadway. I hosed some troops I could see over there, but could not be sure that I got the Tiger’s killer. One of the Cromwells seemed to be out of it but the second one advanced, even as I backed up. He halted next to the disabled Tiger and we exchanged rounds. With only HE left, I tried to break his tracks, clobber his optics, anything. In the end it seemed to work, for he fell silent. Now what? I still had a fair bit if HE left but that was it. After this tank-infantry ambush, it seemed to me that the prospects of our completing the mission had just slipped from excellent to abysmal. To match the mood, the skies darkened and the rains came down. But we’re the Hundred and First SS Heavy, I told myself, panzer men as tough as our tank's Krupps steel, and we don’t give up easily. I was going to make a last, death-or-glory push for the Hotel de Ville. What I wasn’t going to do, was drive any further down than particular stretch of road. Instead, after checking my map, I backed up and turned off to the right. I didn't get far. The silent Cromwell came back to life, putting a round into my side. My left-hand tracks parted and unrolled behind me as I pitched into the roadside ditch. It seemed that all I could do now was let fly at the Cromwell from where I sat, with the remains of my HE ammo, hoping he would go down before one of his 75mm rounds did me more serious damage. So that's what I did. I took a certain amount of satisfaction in winning this particular duel, when his hatches opened and the crew started to bail out. But we weren't done yet. I had forgotten that crews in Steel Fury can do a certain level of repair work in the field. Happily, track repairs come into this category. IIRC there's a gameplay option to speed this up and I must have had it selected, for in a matter of minutes we were mobile again. I wasted no time in pressing on and emerged from cover with an open area to my left, where most of the infantry had been. Fearful of a getting a PIAT in the flank, I rattled on without pausing, coming finally, as planned from the map, to a minor road running parallel to the N175. Here, all was clear . I breathed a sigh of relief that I was finally out of that hornet’s nest behind me. At full speed again, we moved down the road to the next junction and there, turned left. Still no opposition! Maybe we might yet be relieving Monsieur le Maire of some of that cognac! ...to be continued!

- 12 replies
-
- 1
-
-
- sta mod
- steel fury
- (and 2 more)
-
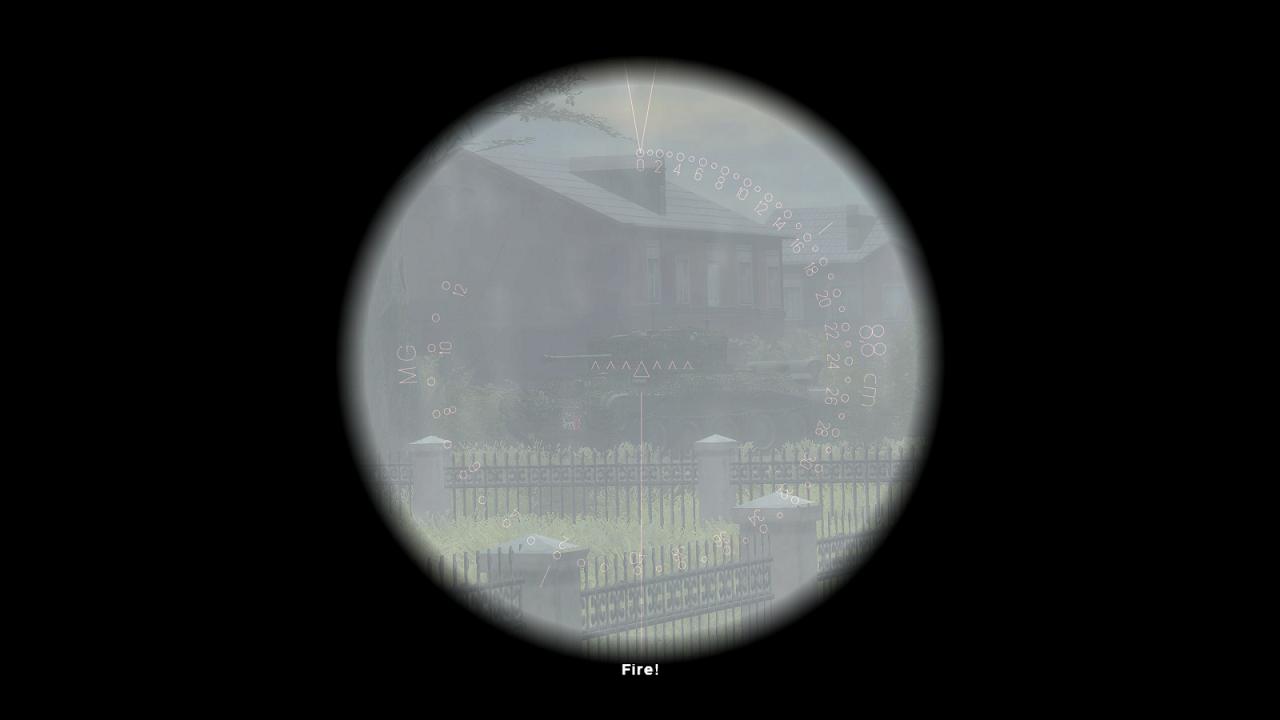
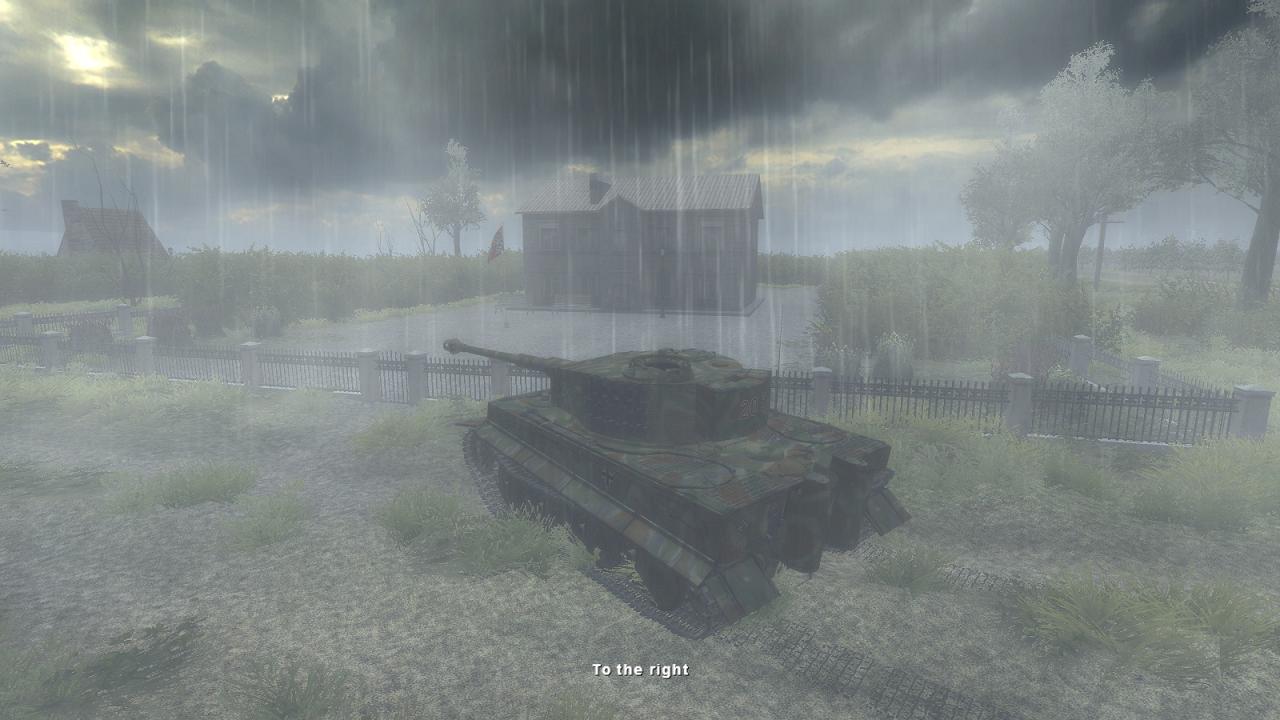
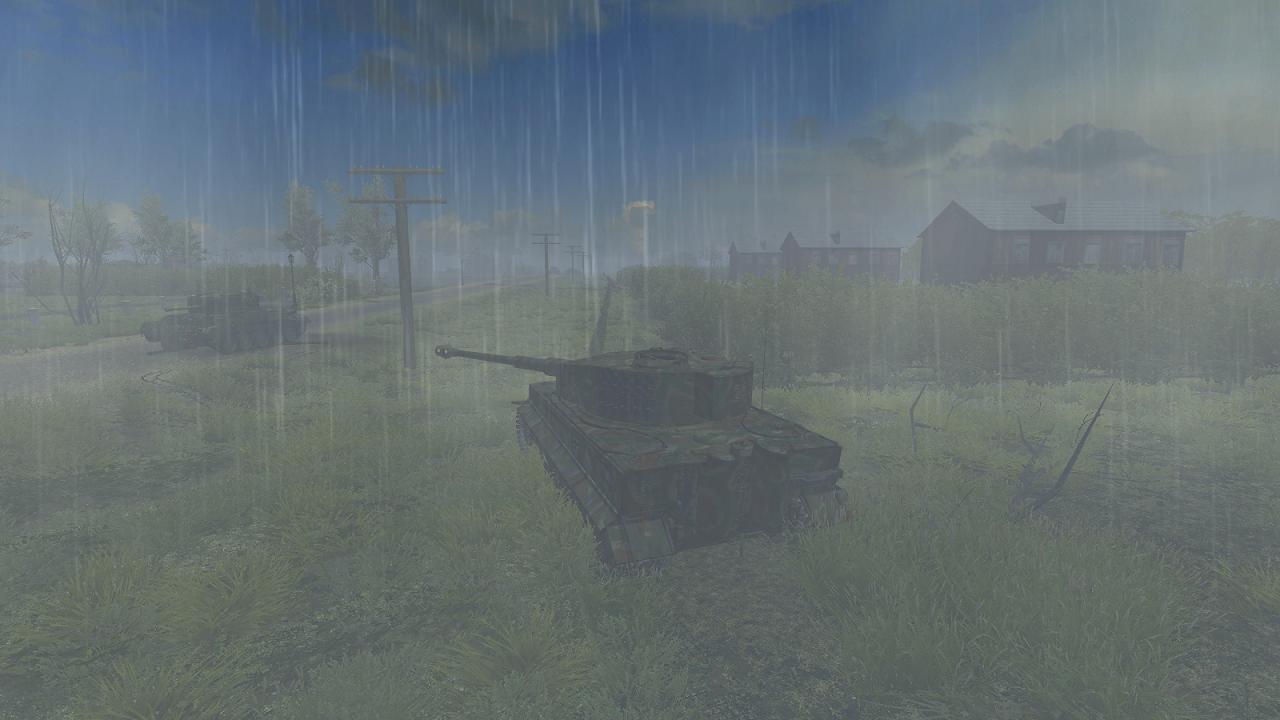
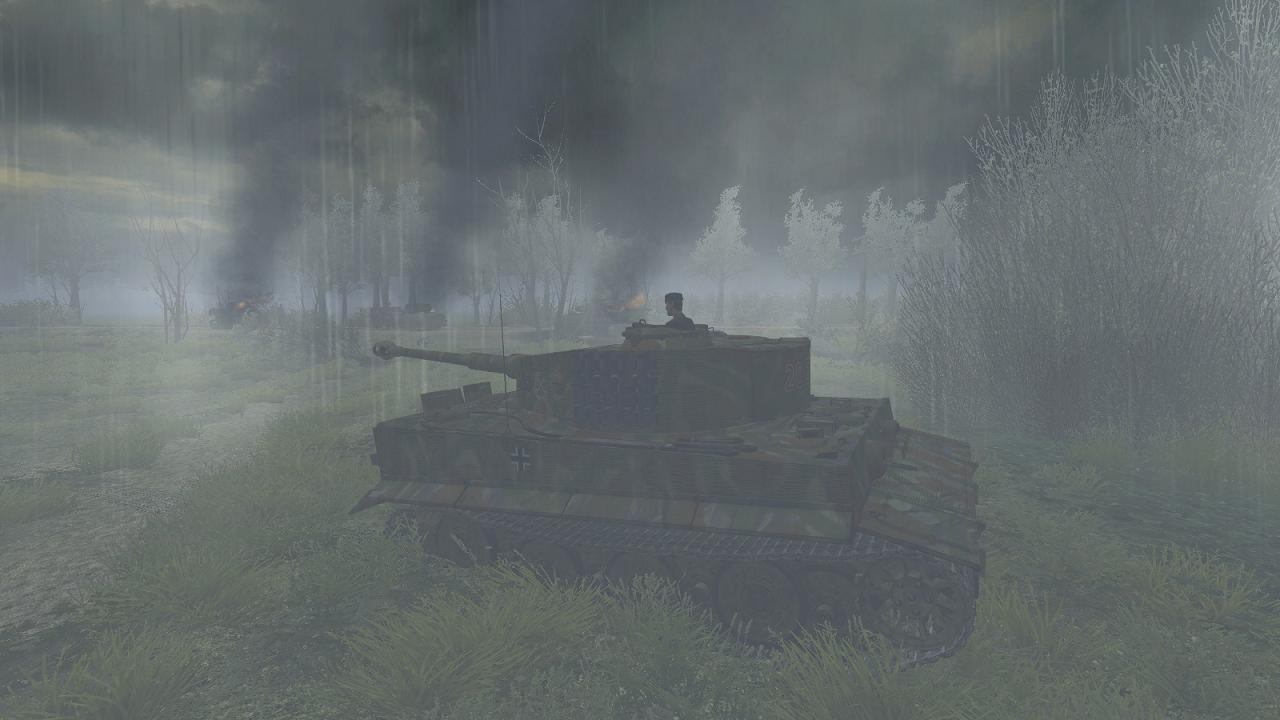
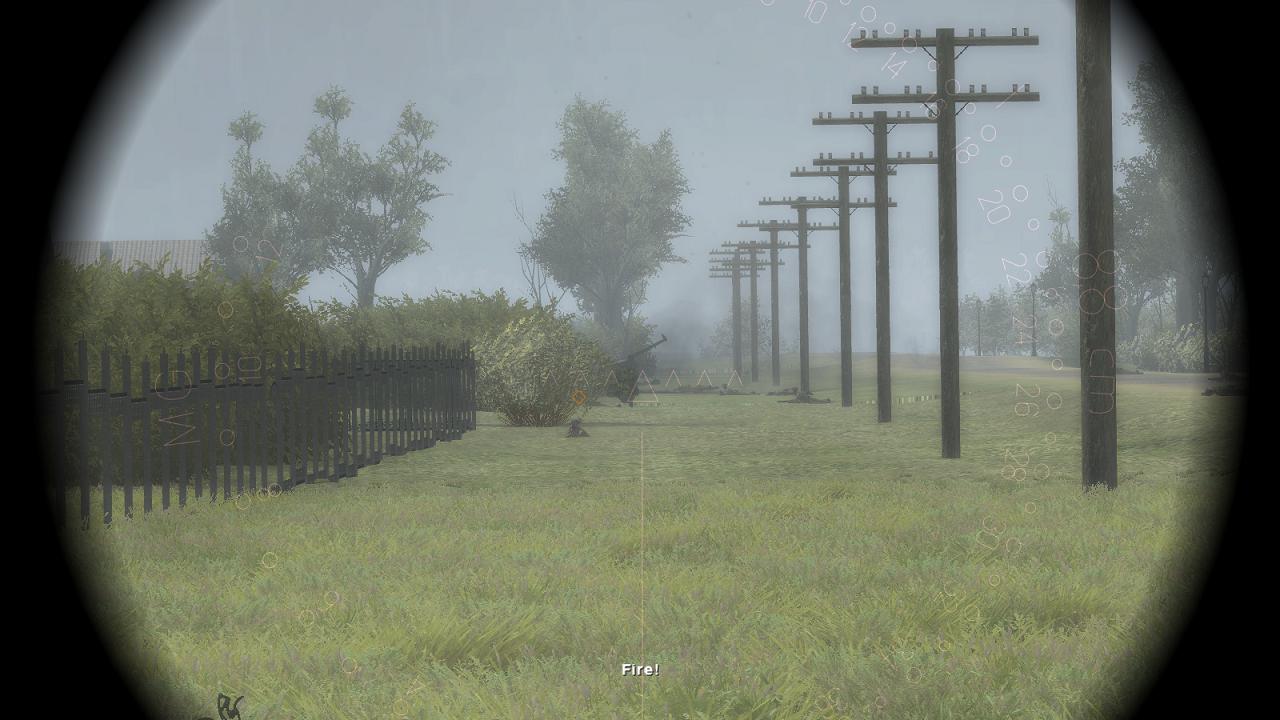
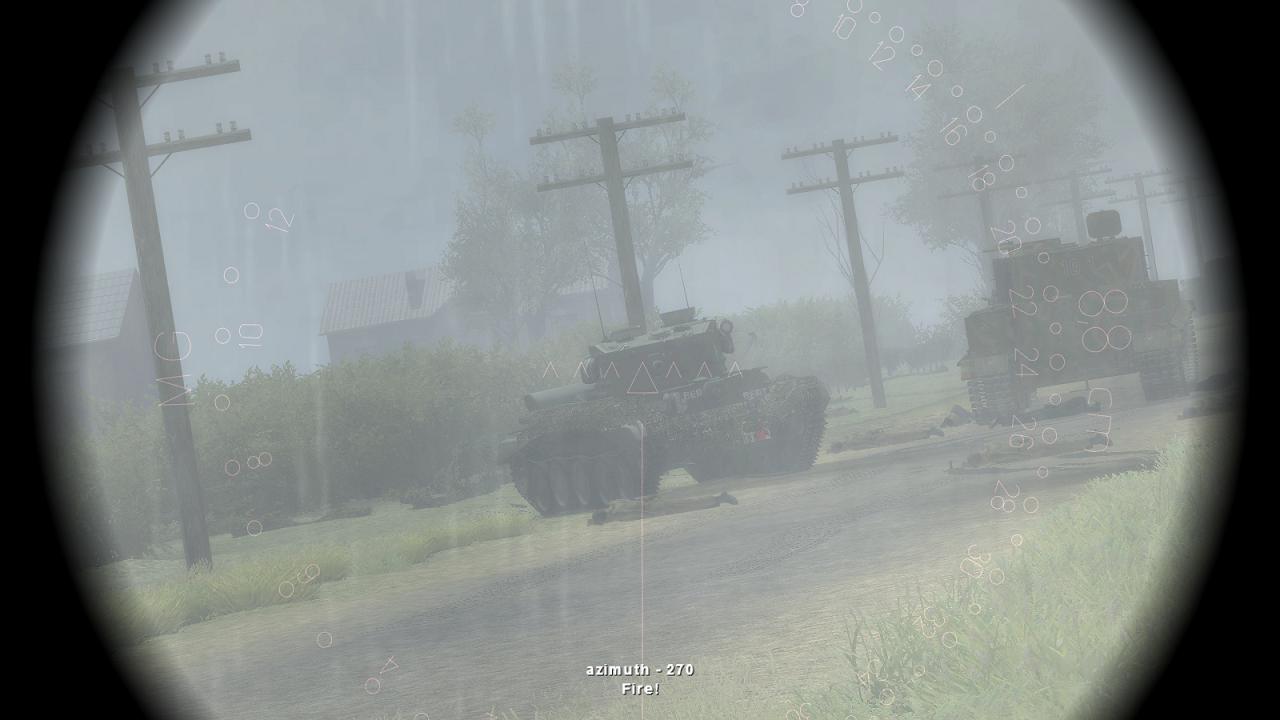
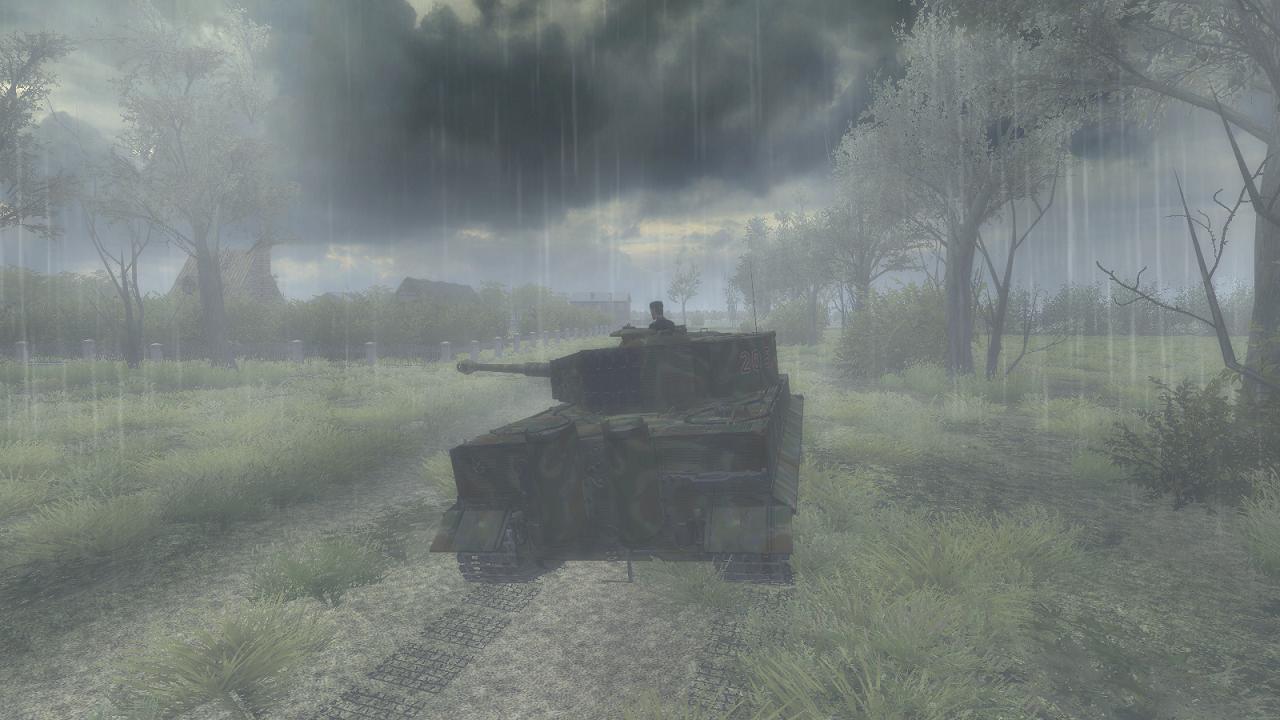
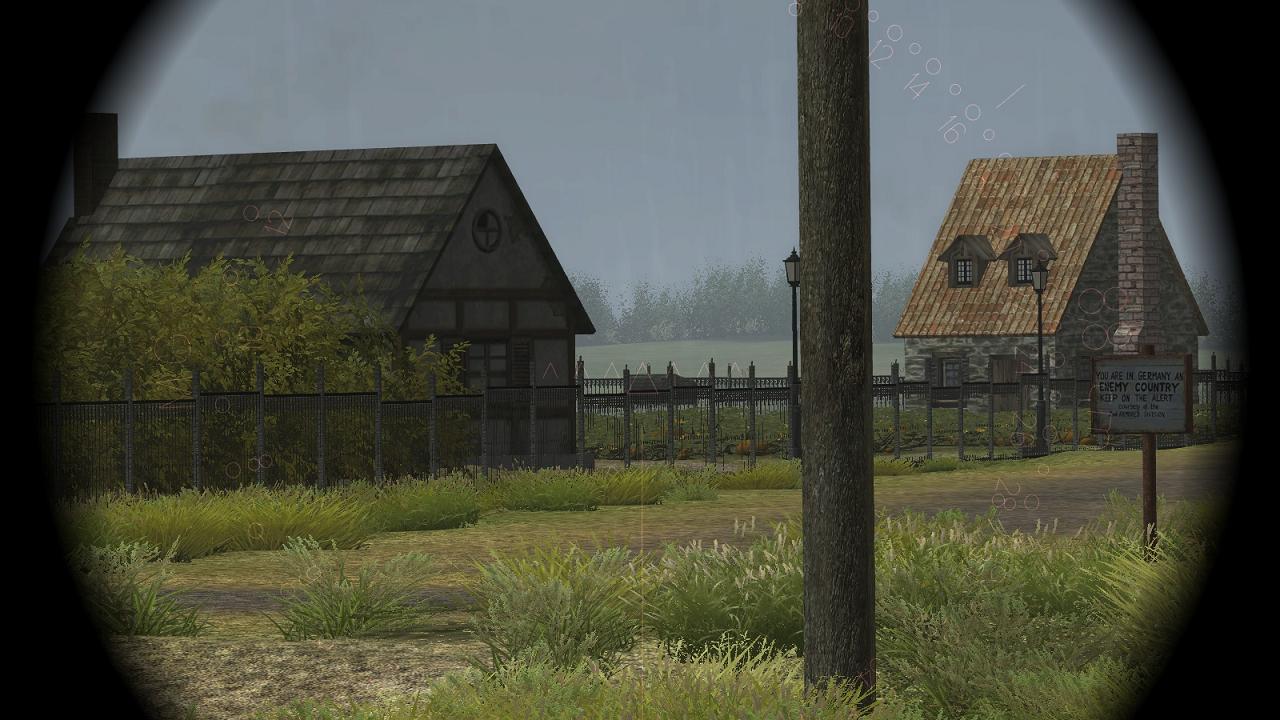
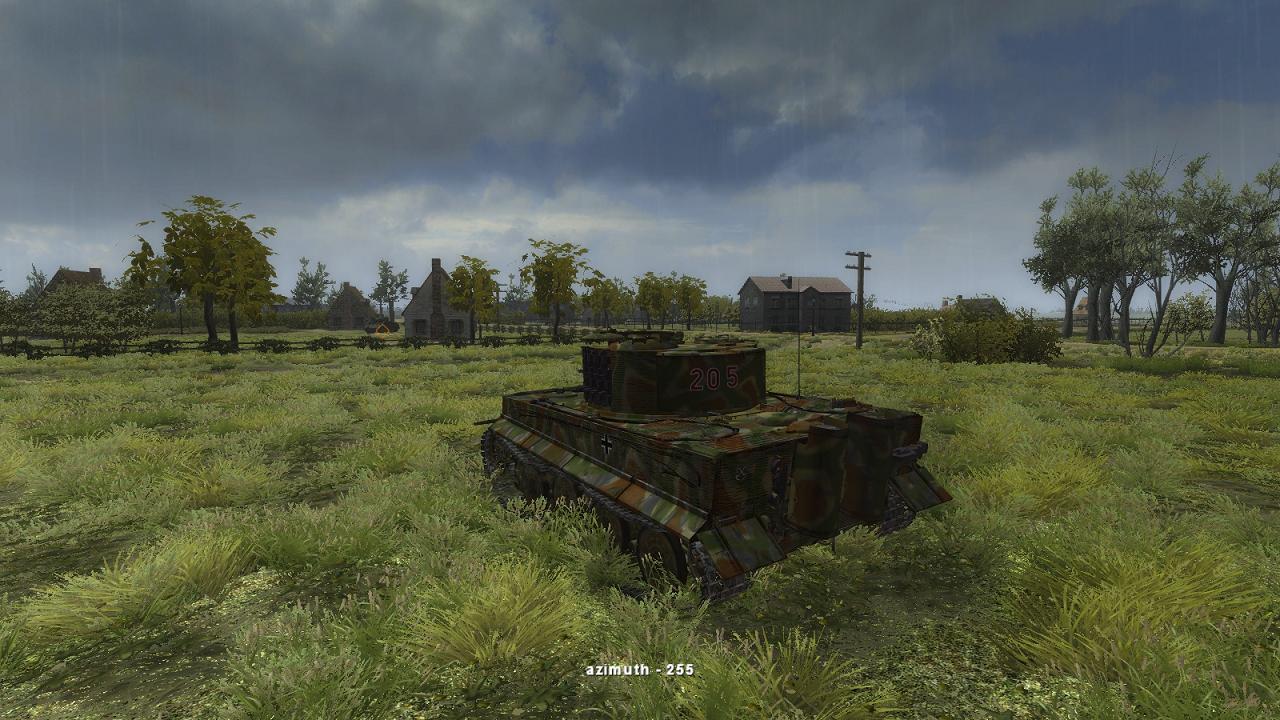
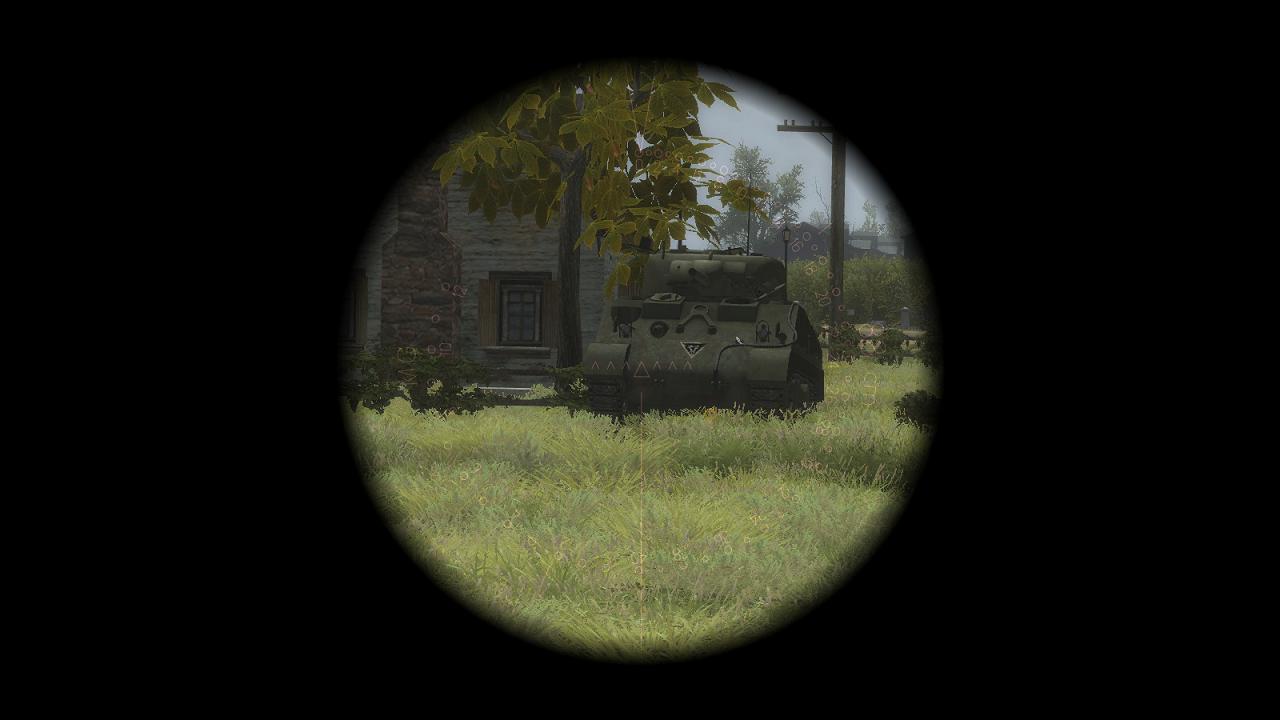
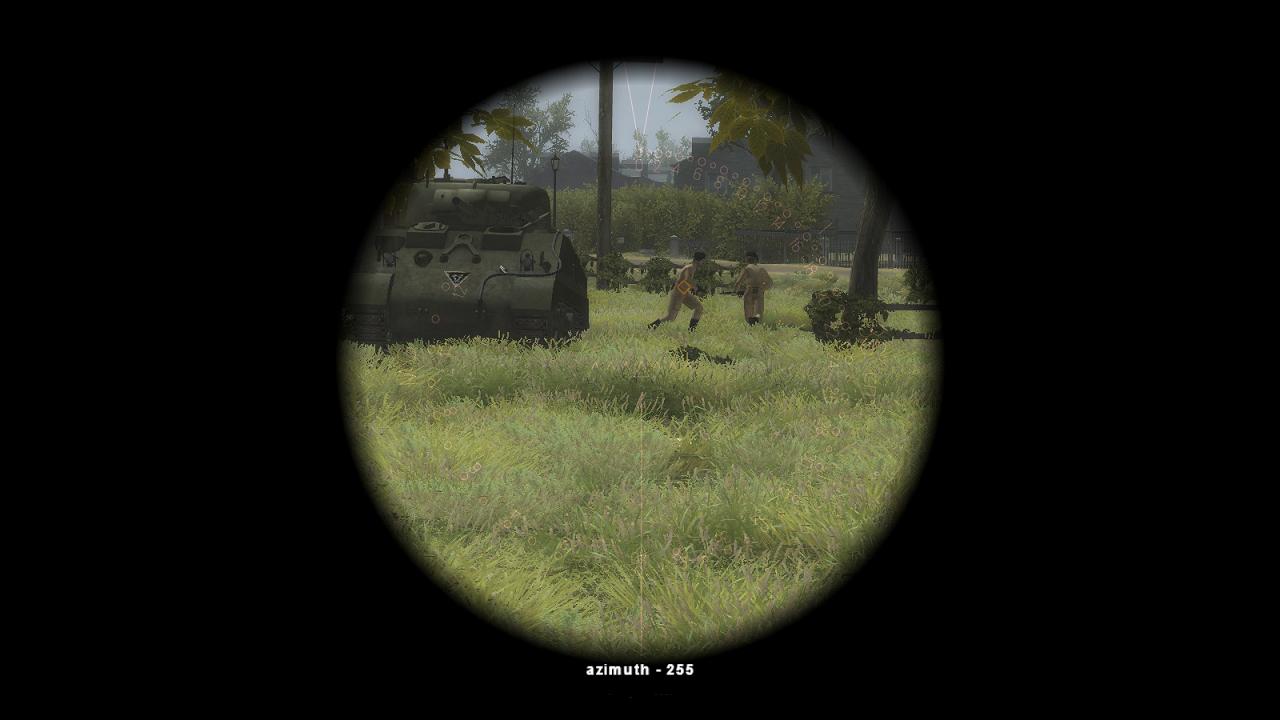
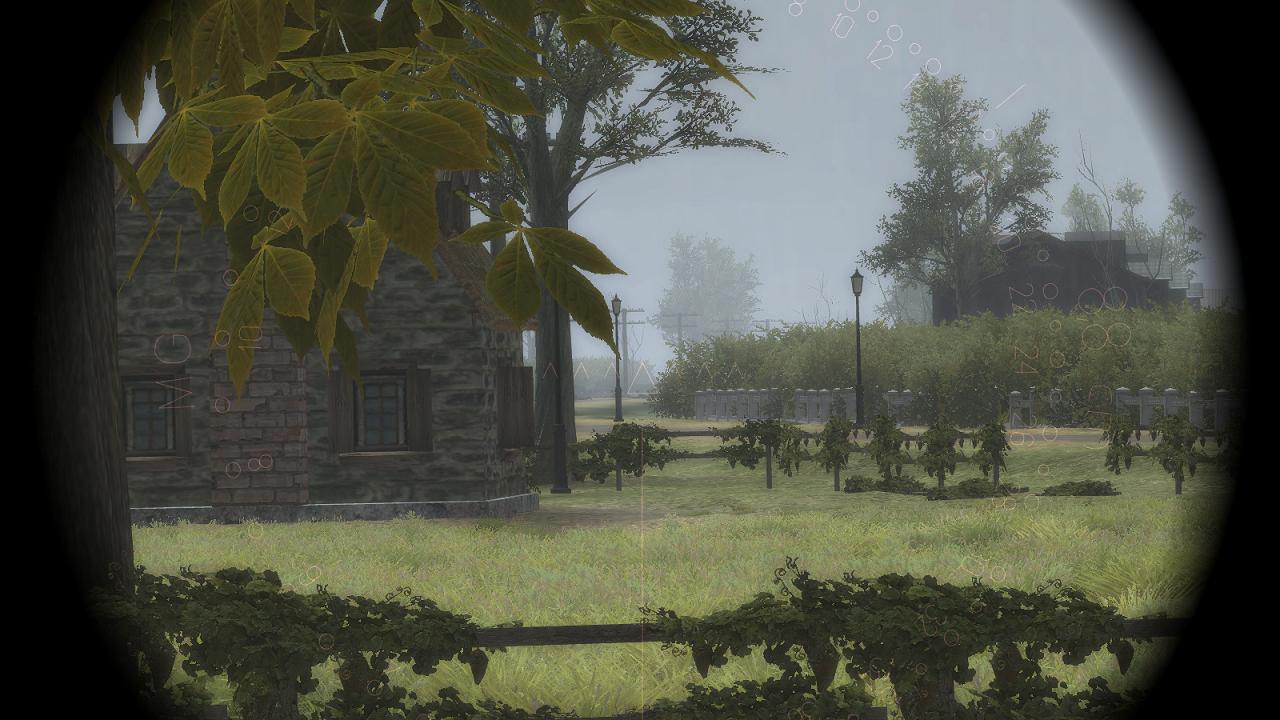
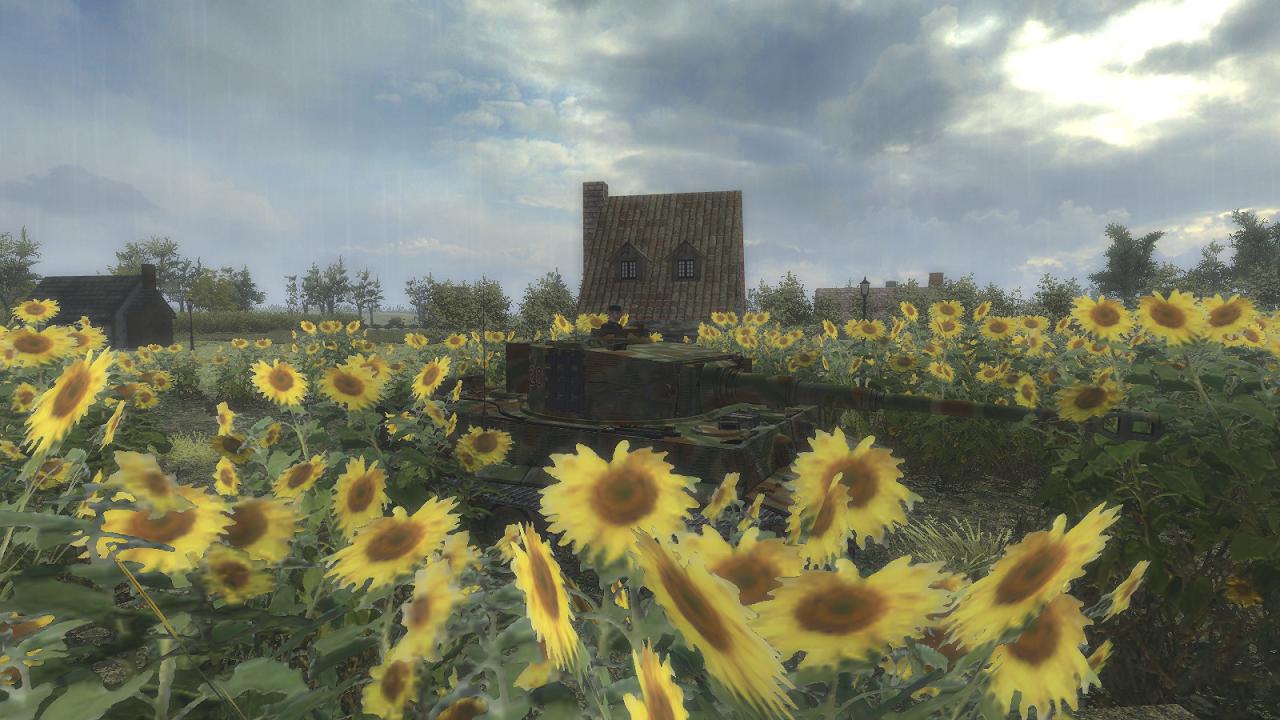
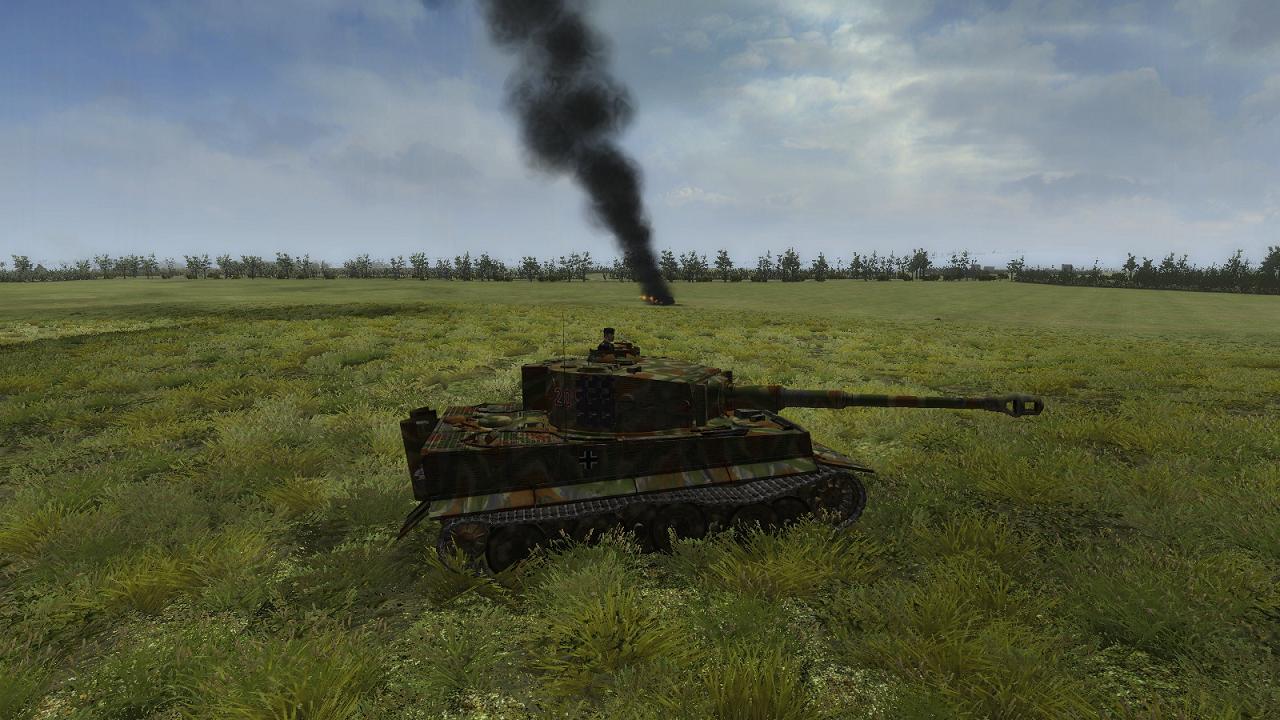
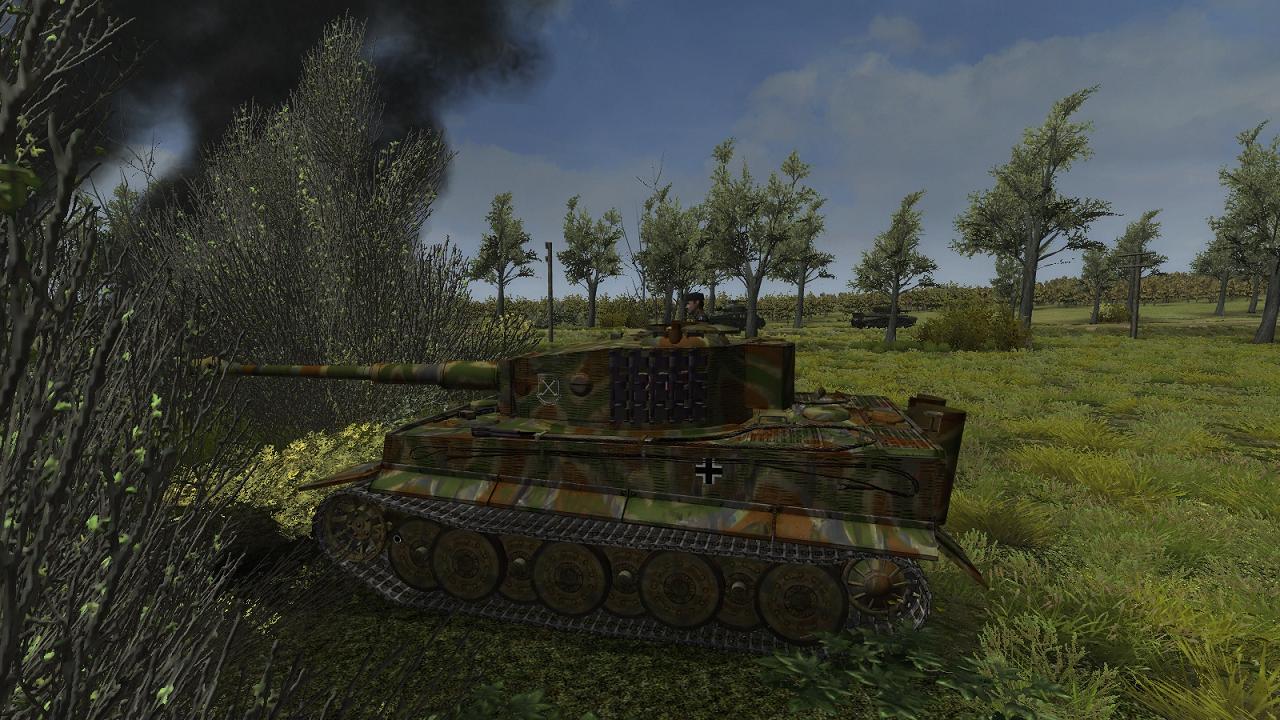
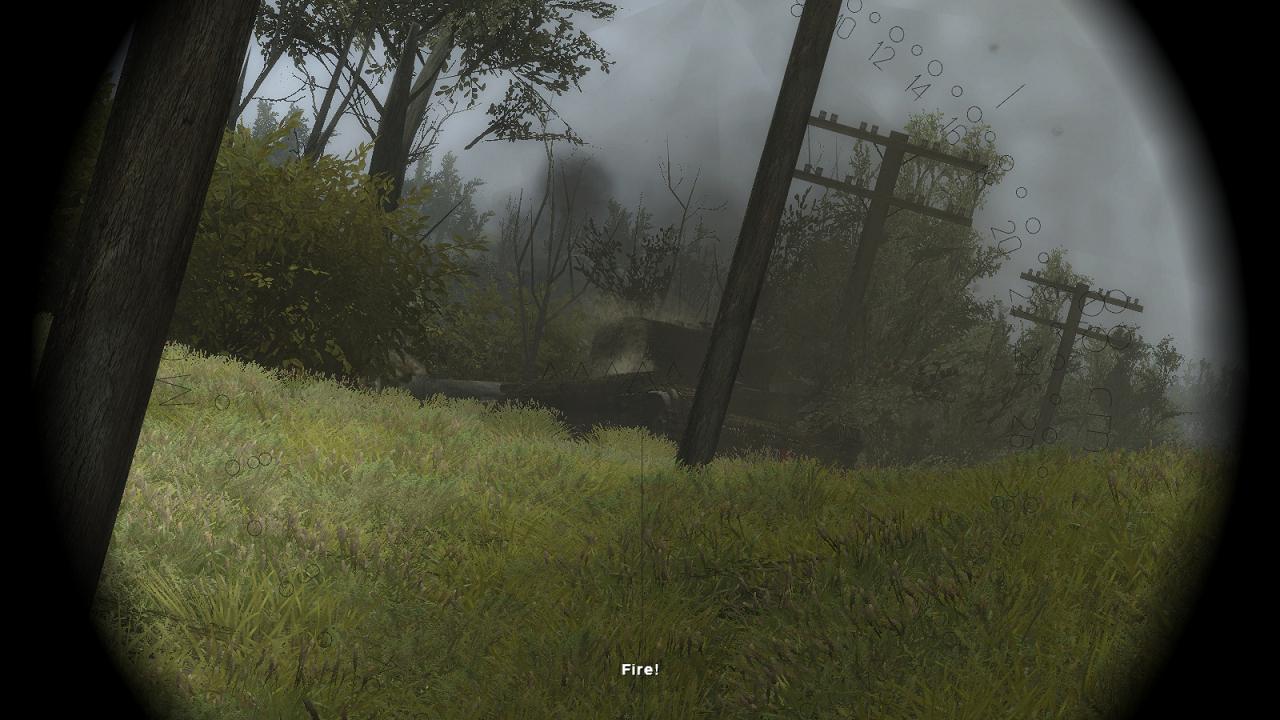
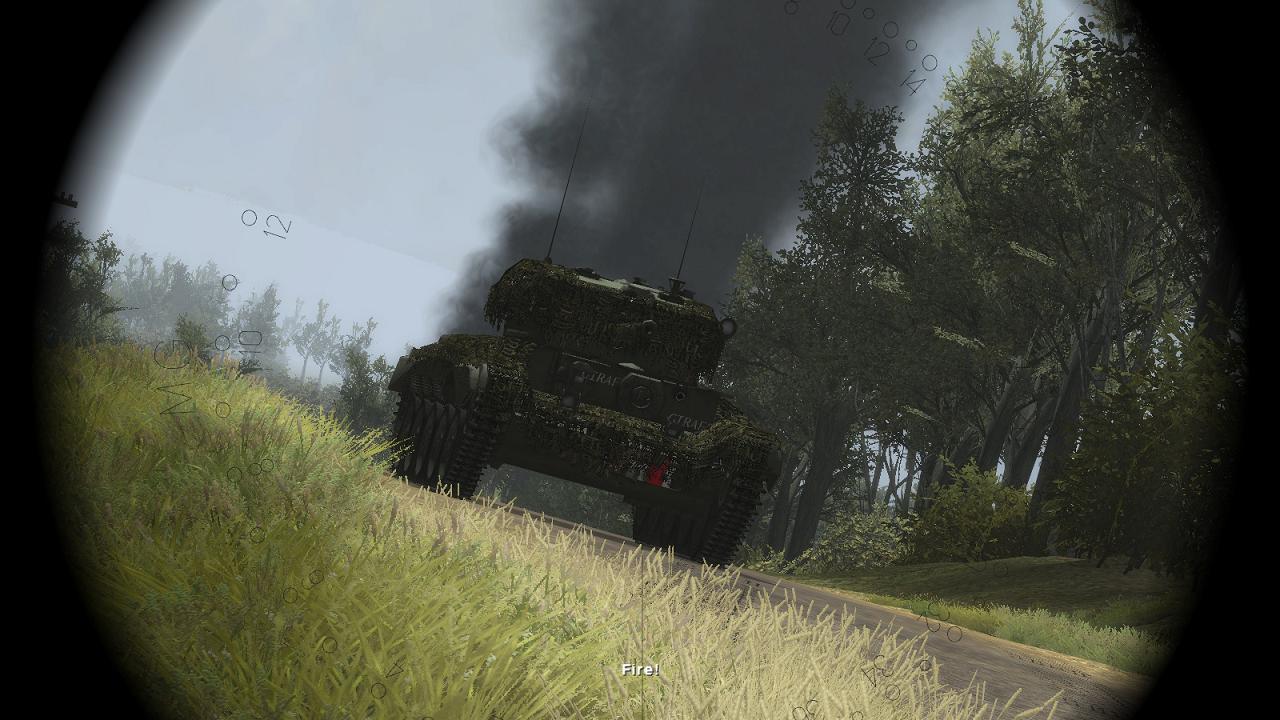
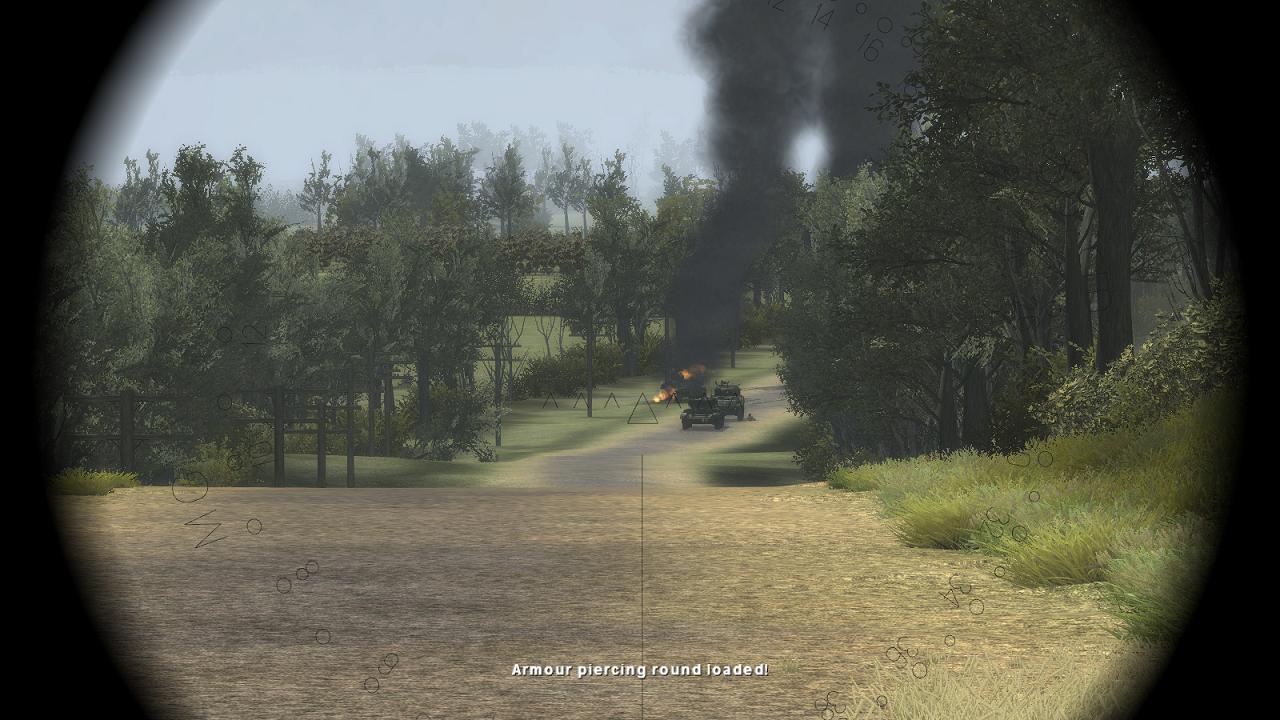
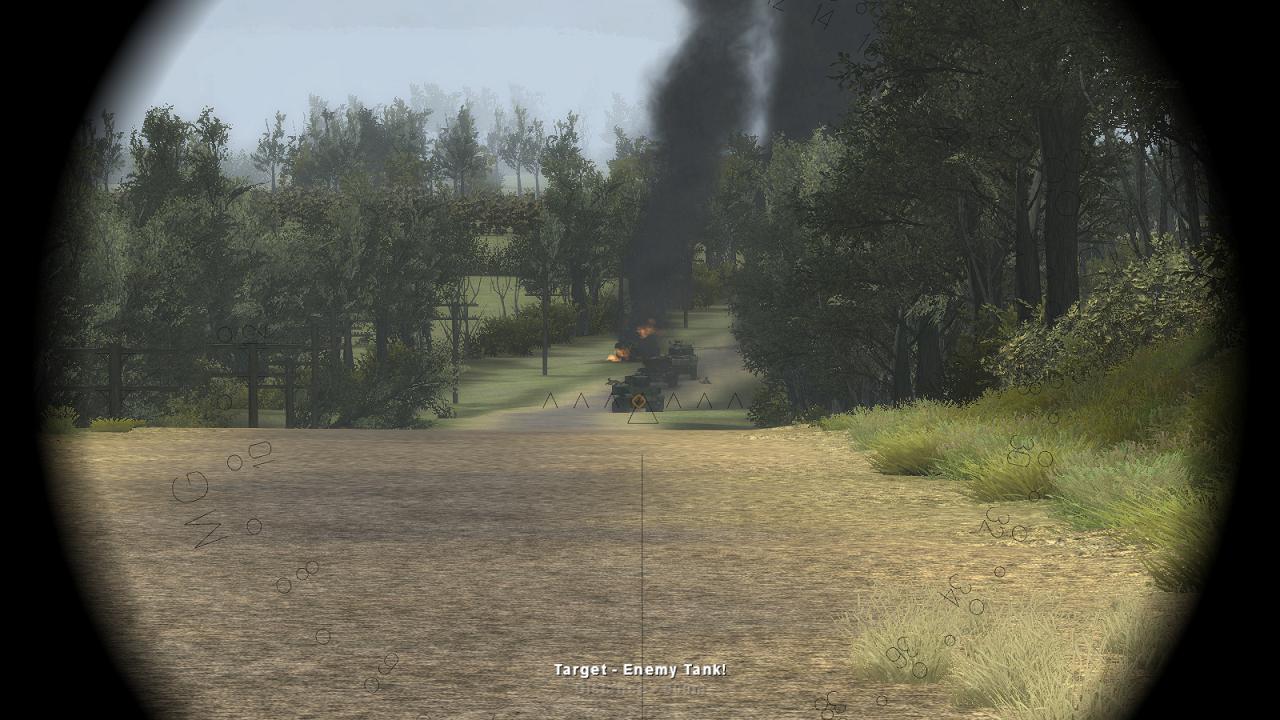
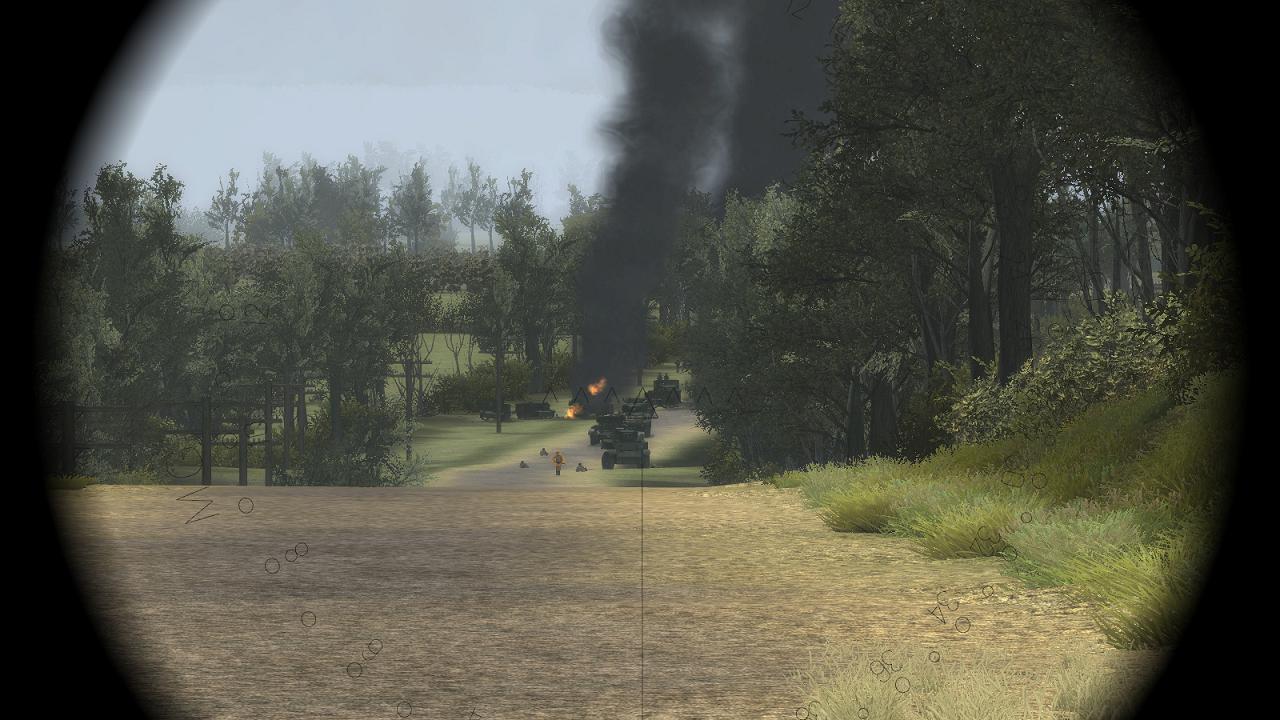
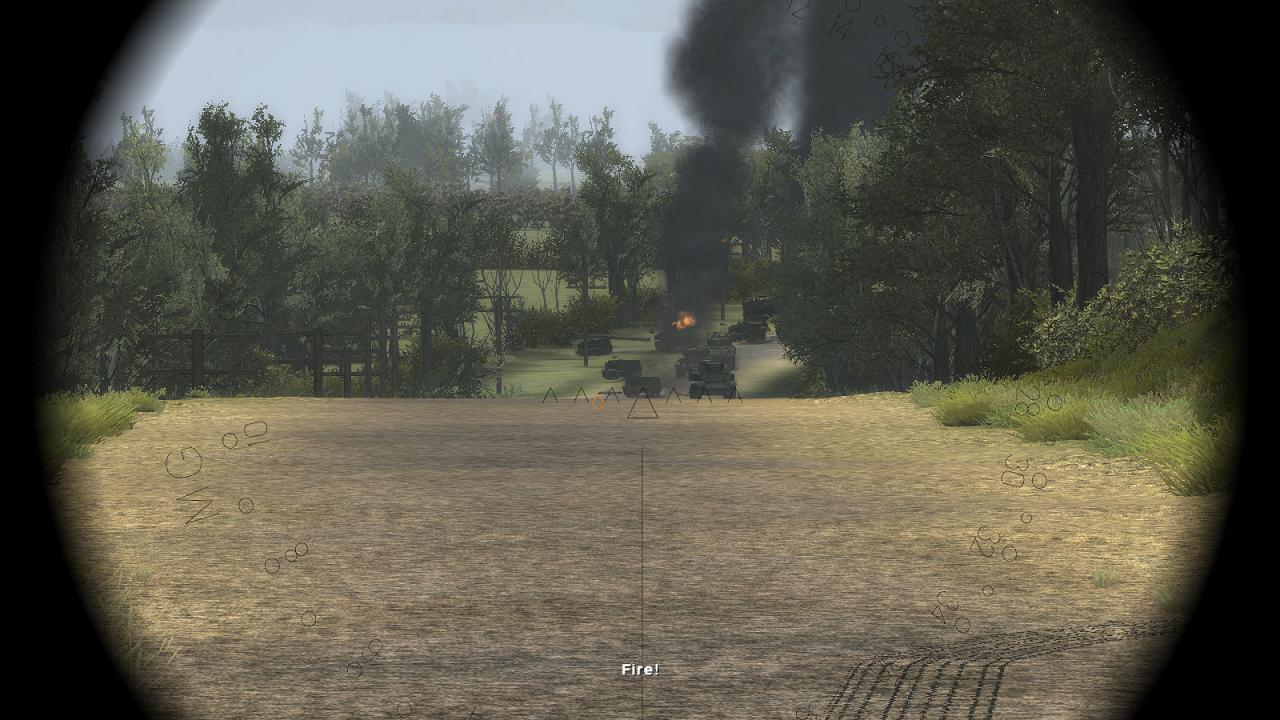
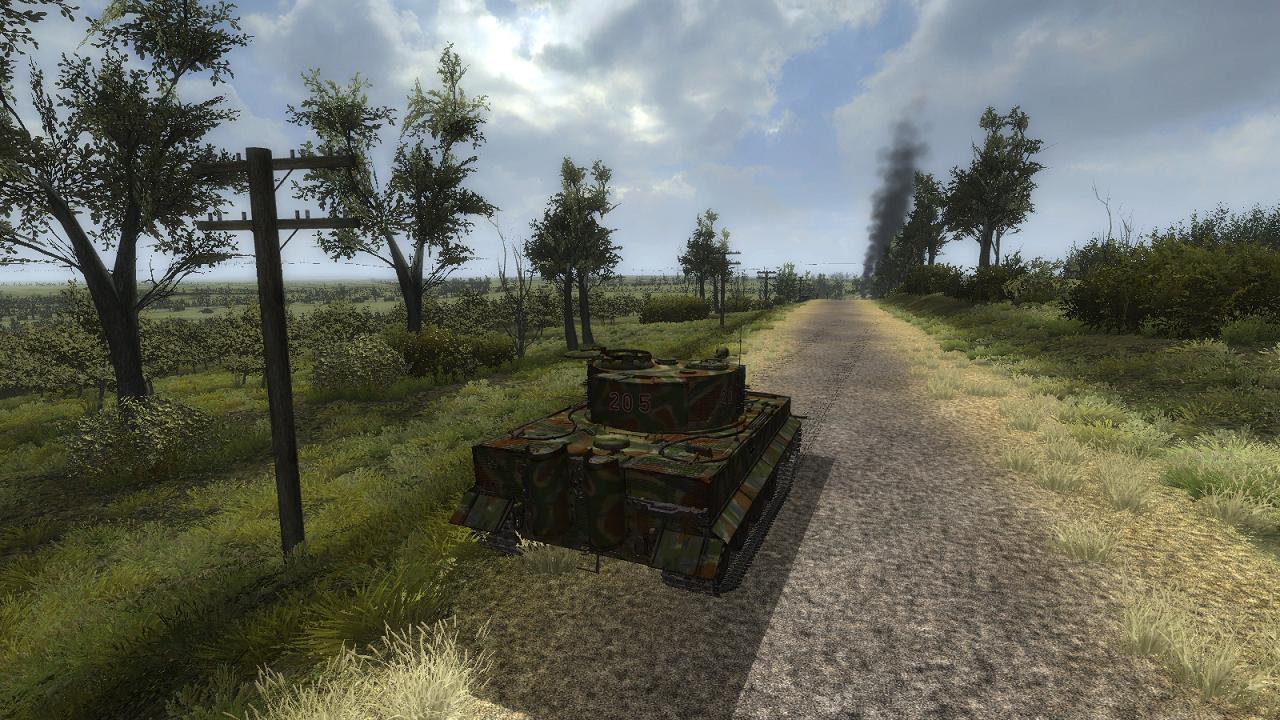
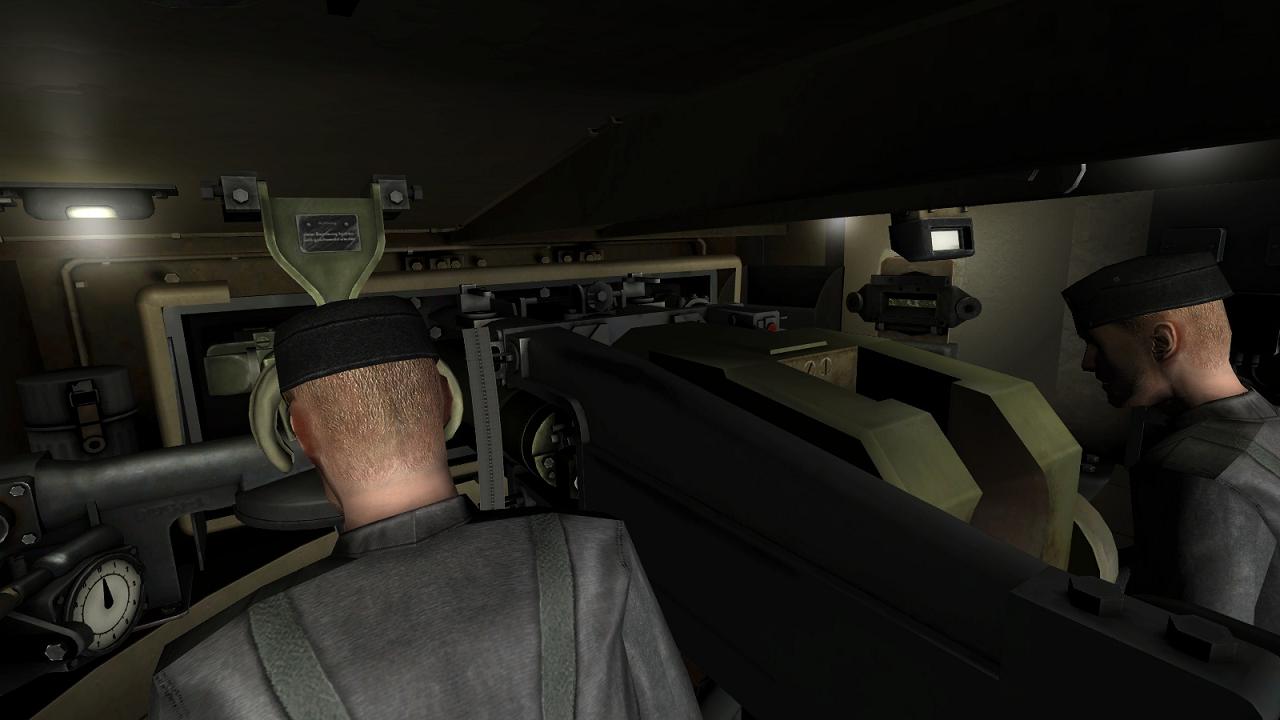
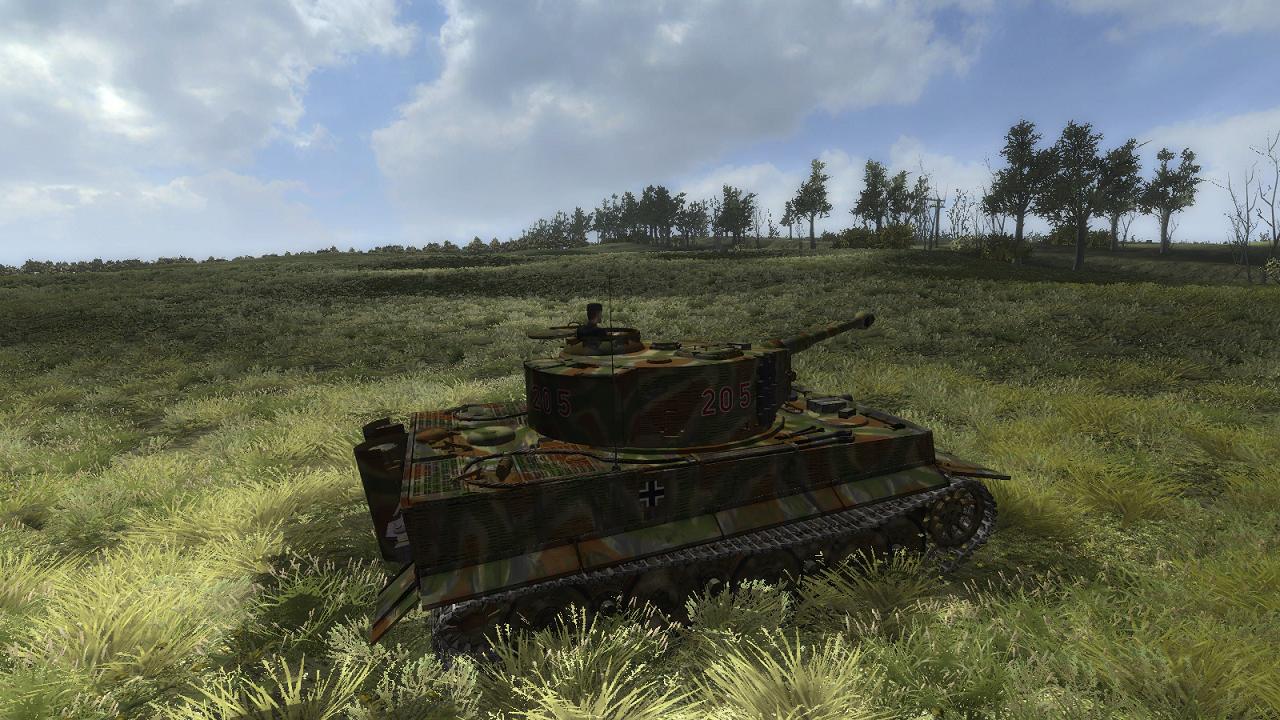
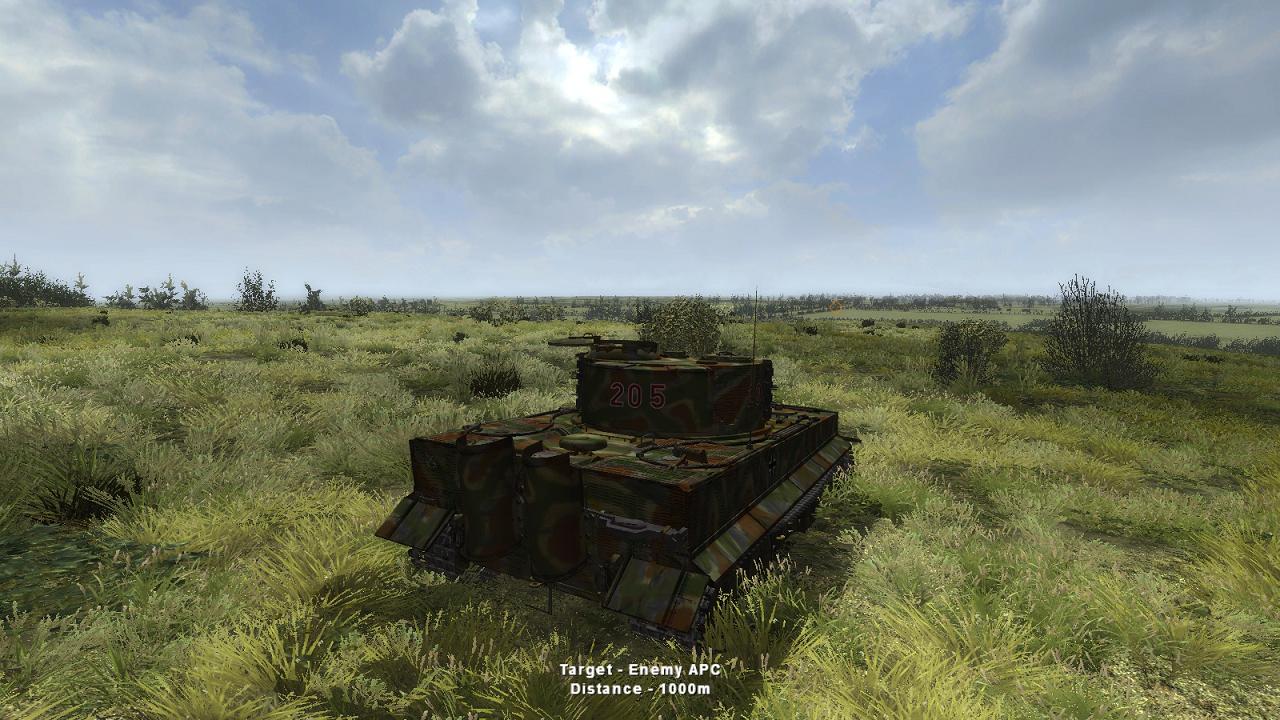
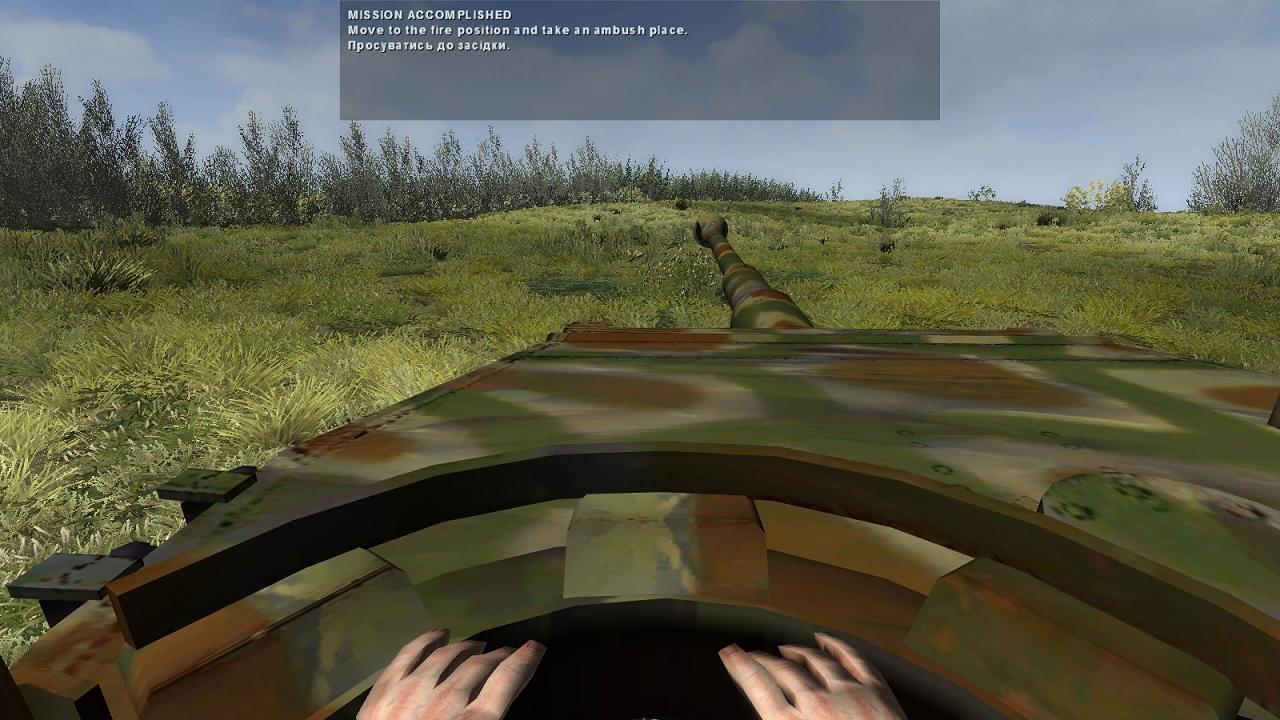
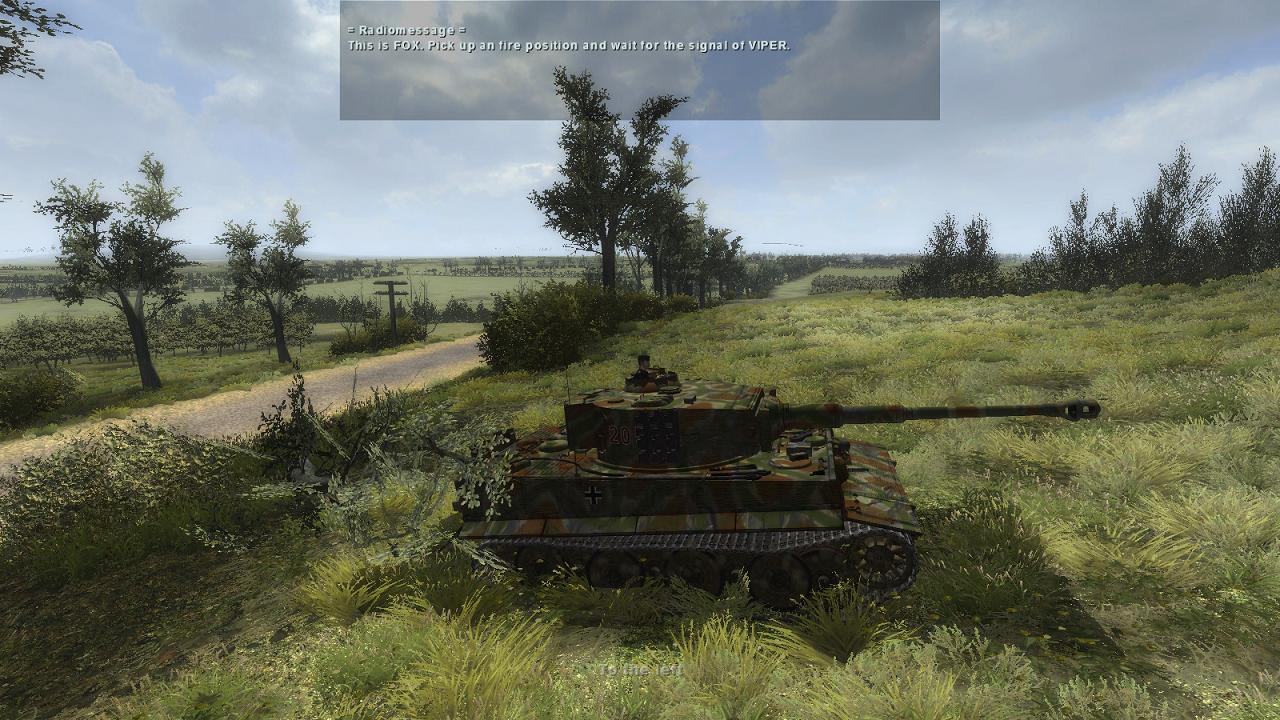
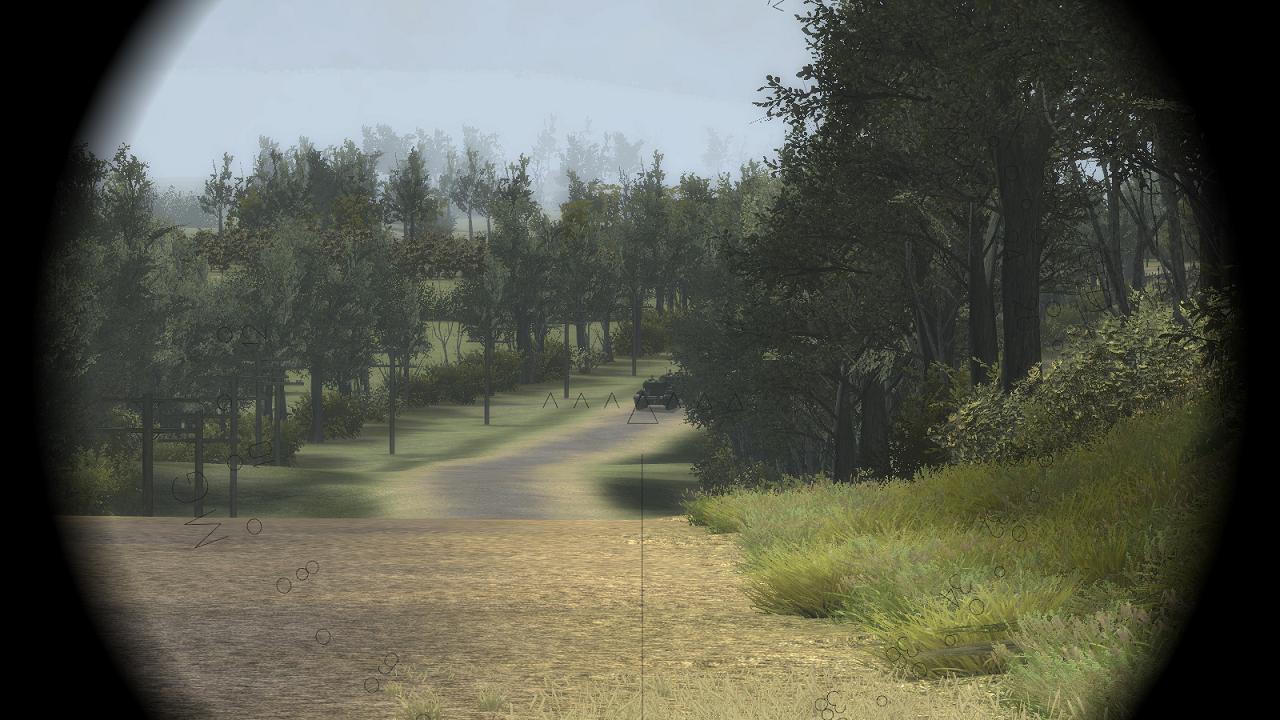
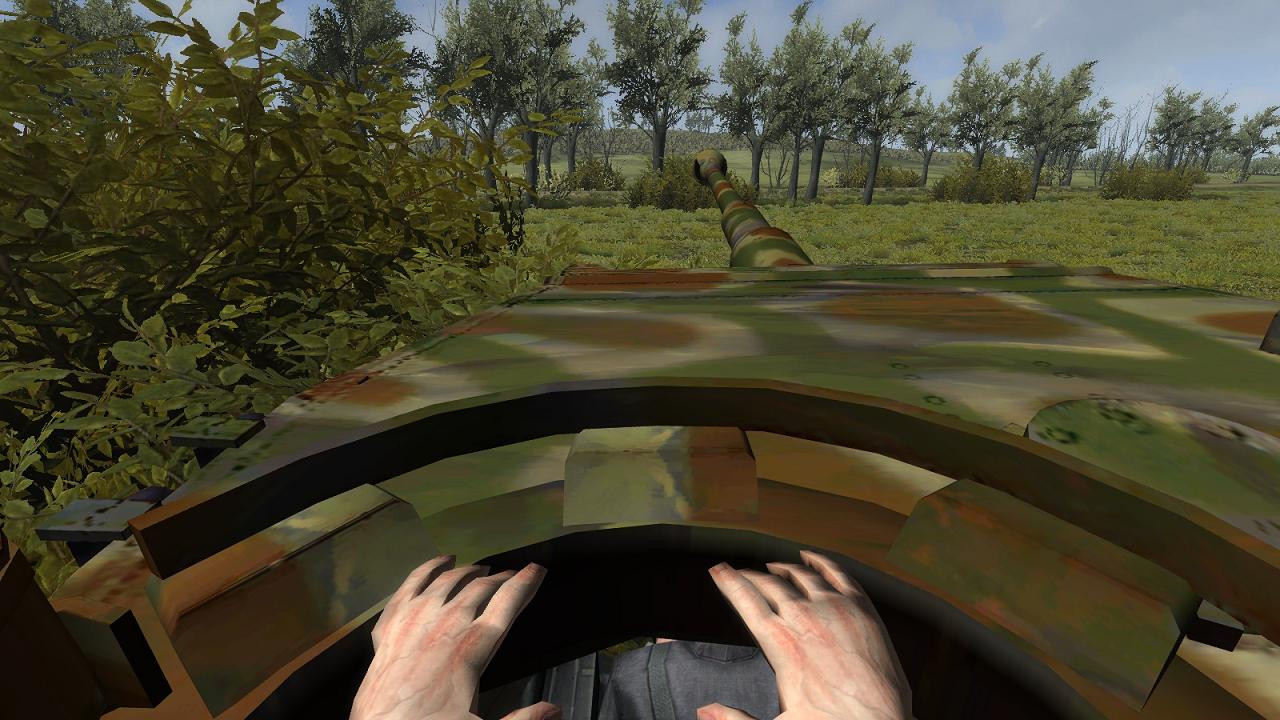
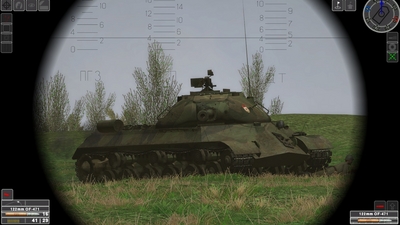
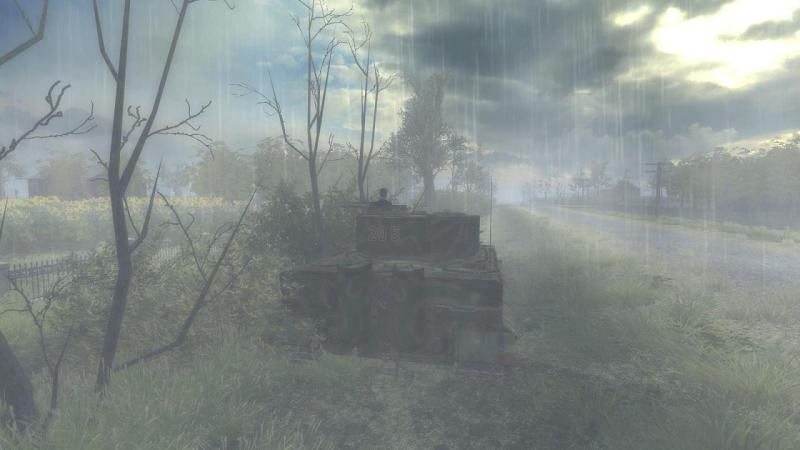
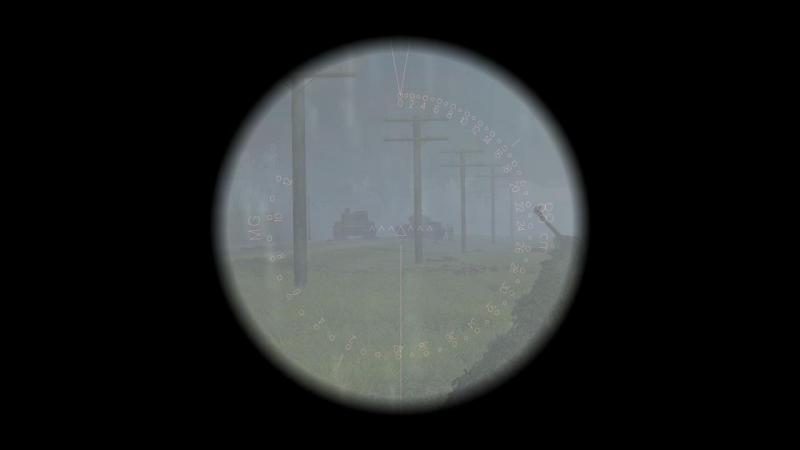
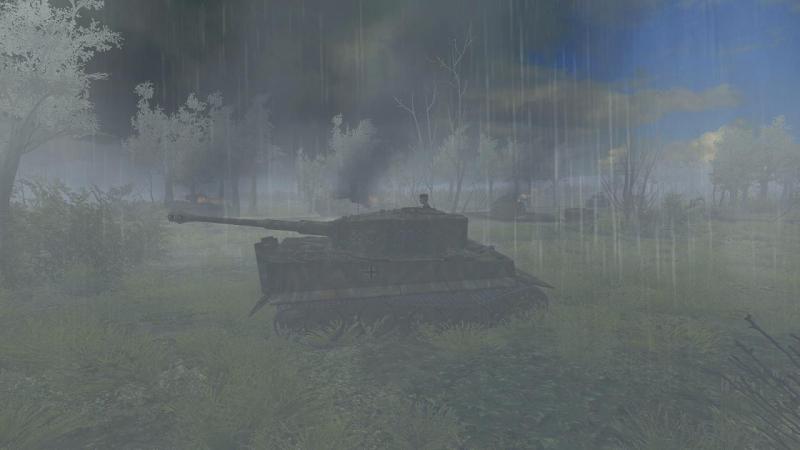
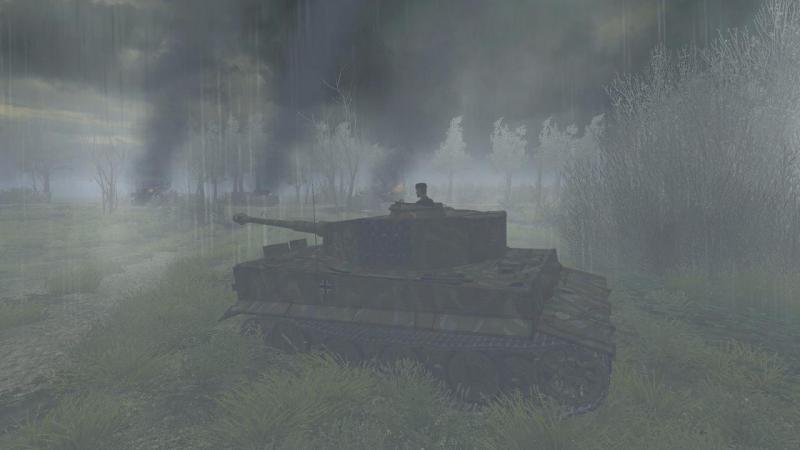
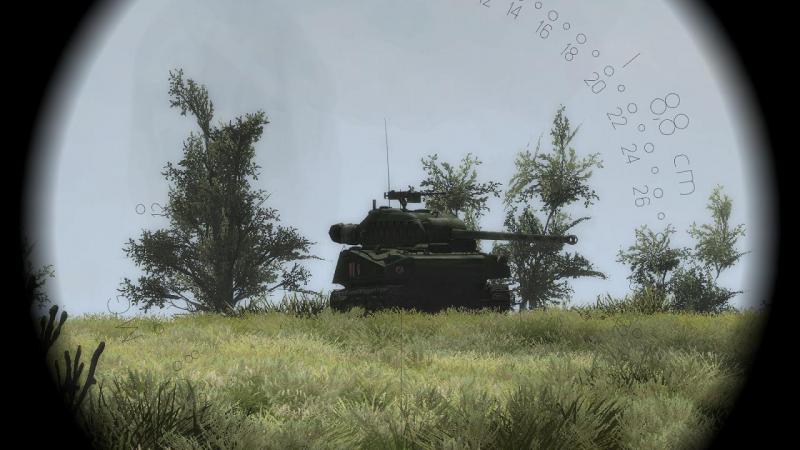
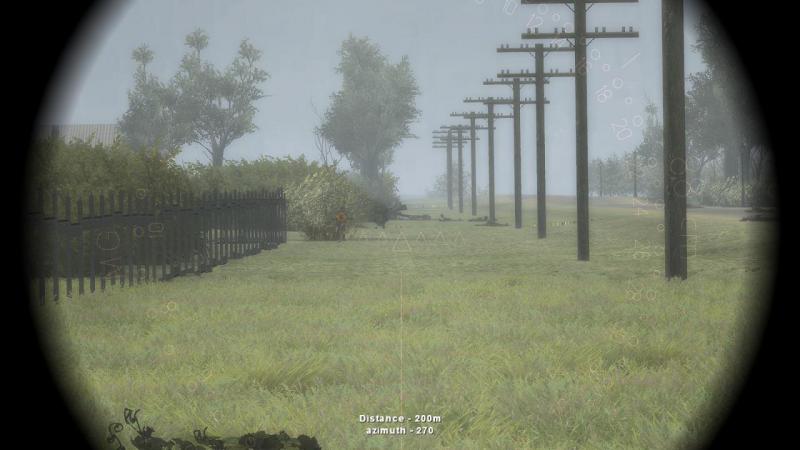
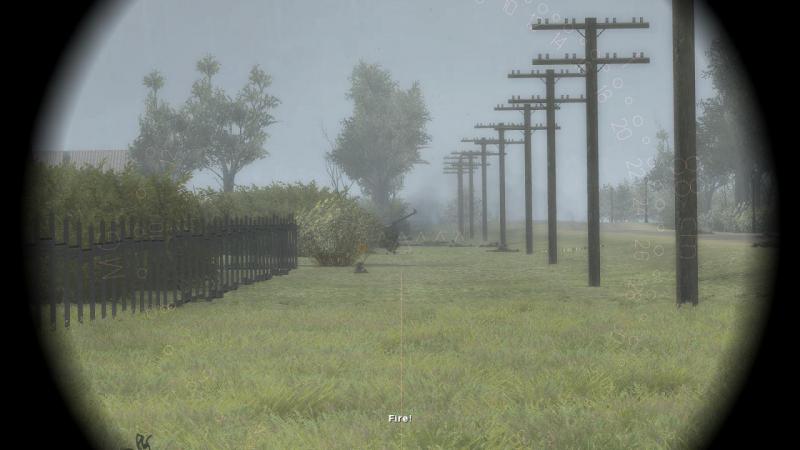
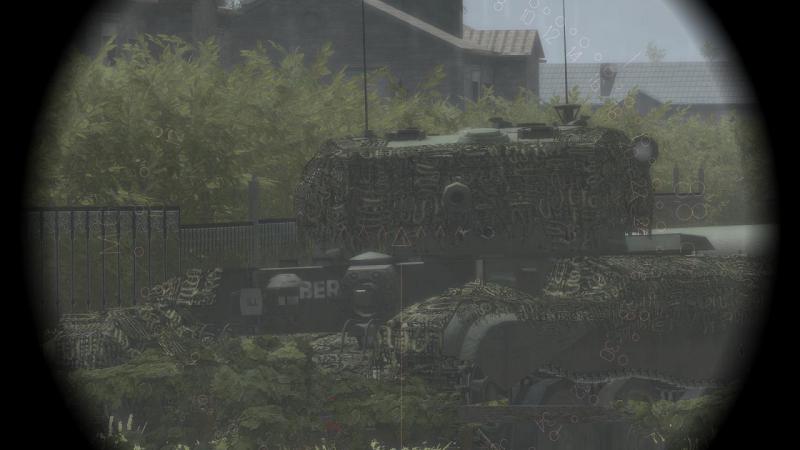
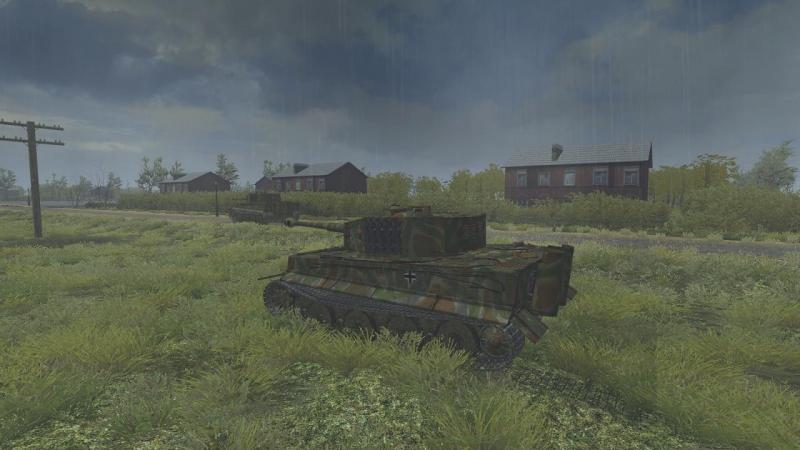
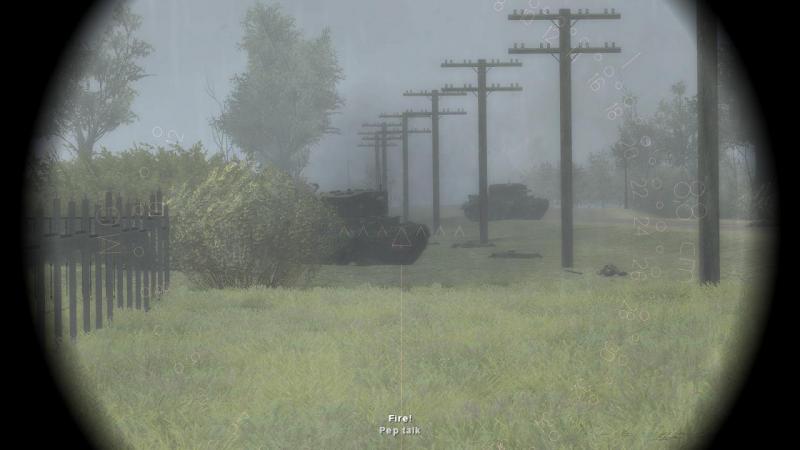
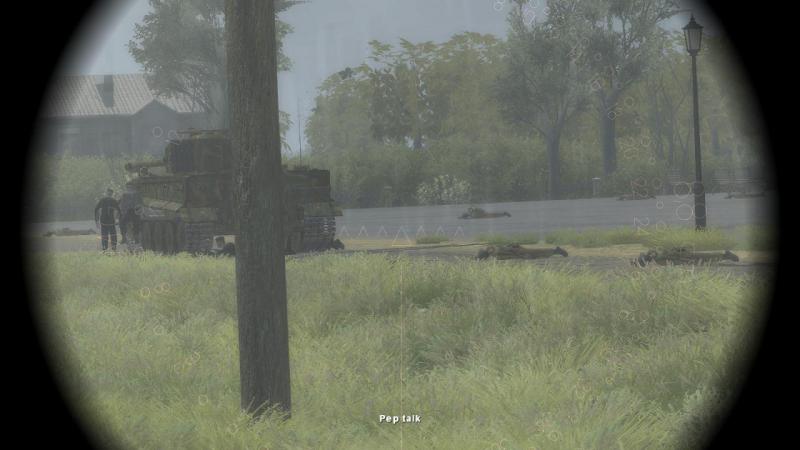
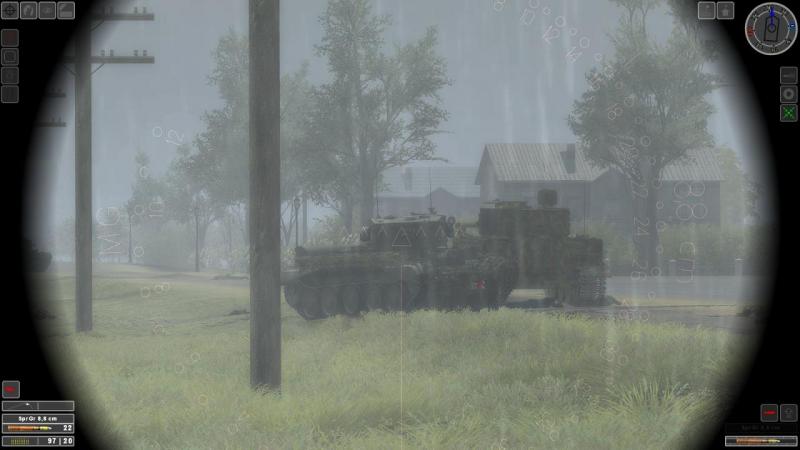
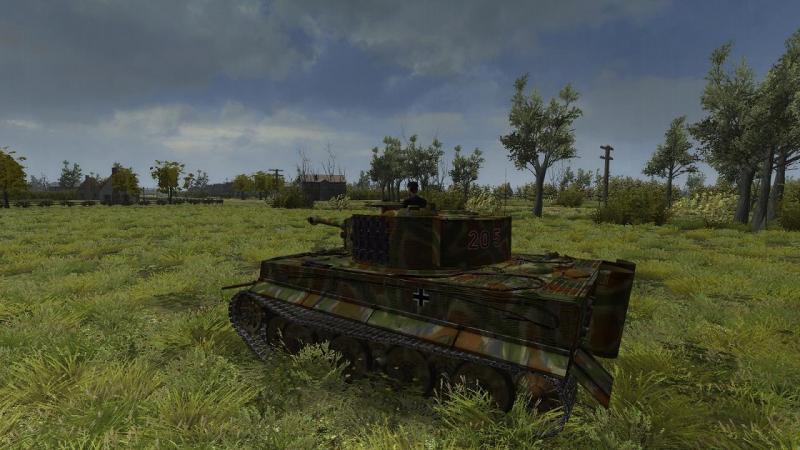
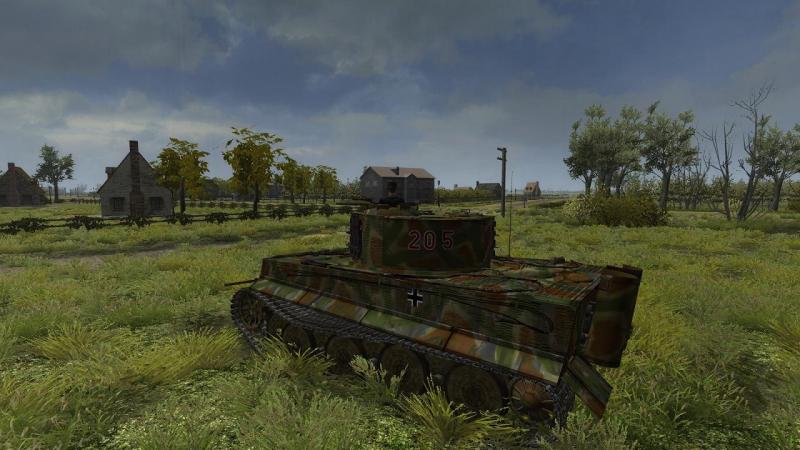
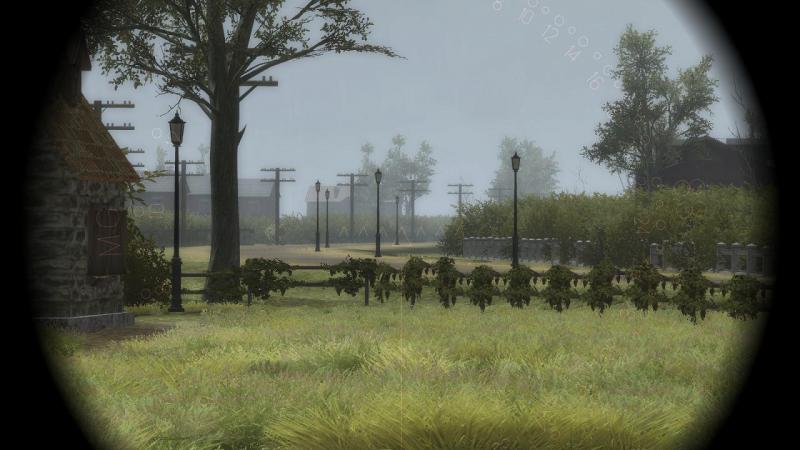
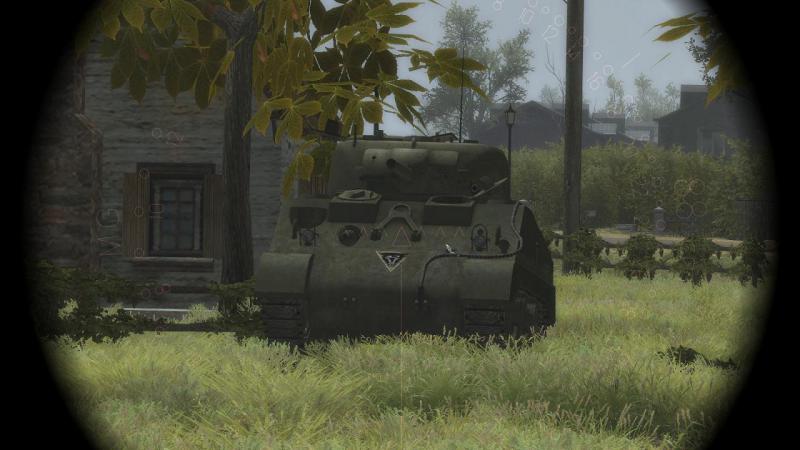
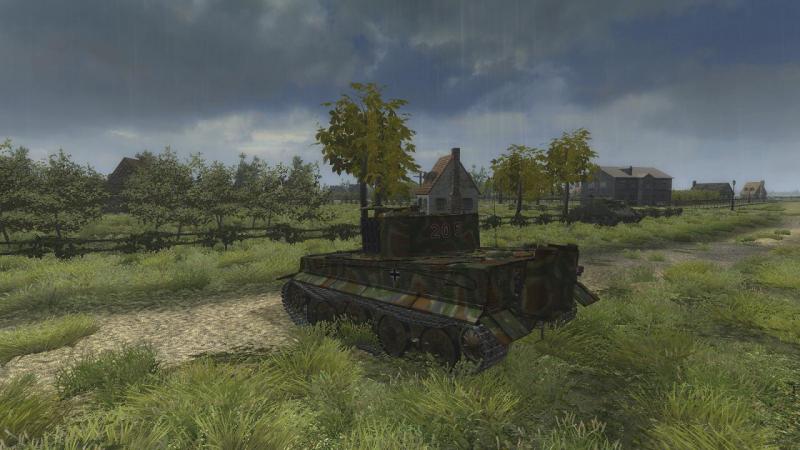
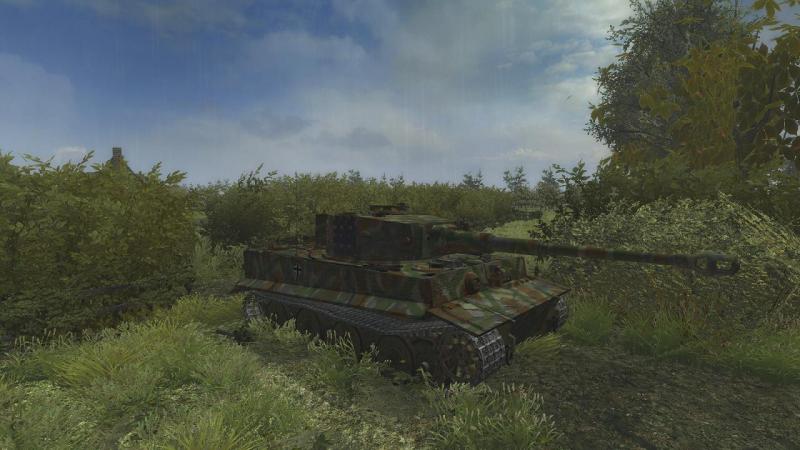
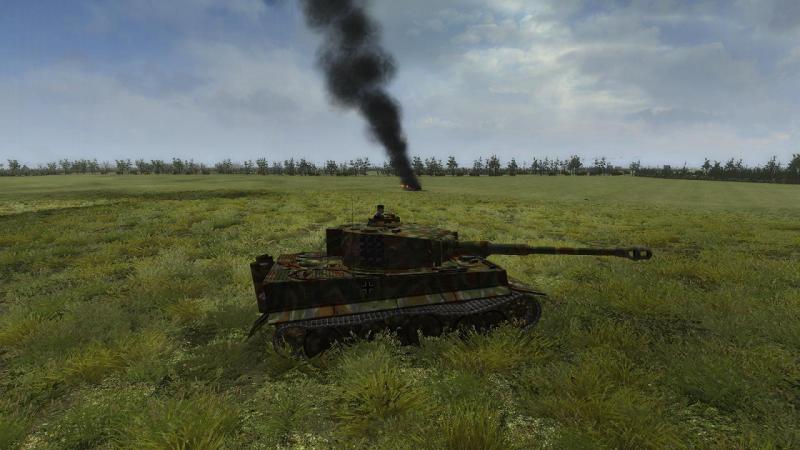
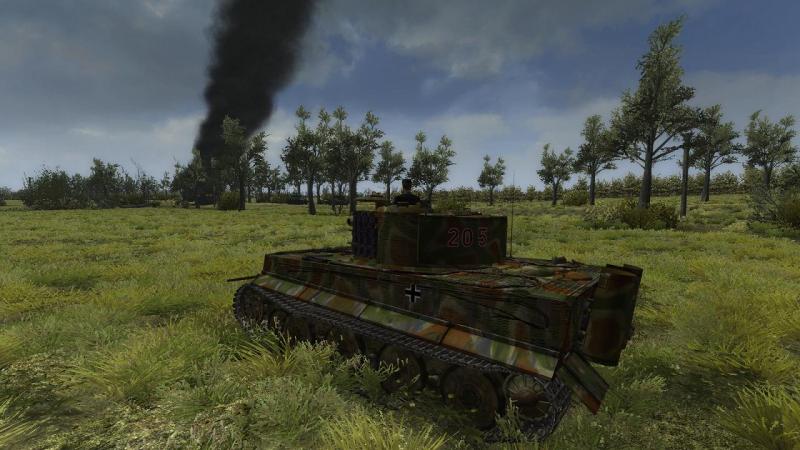
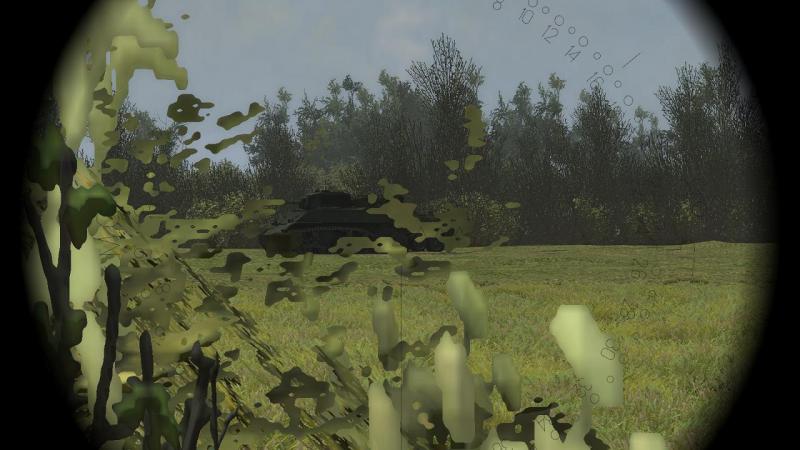
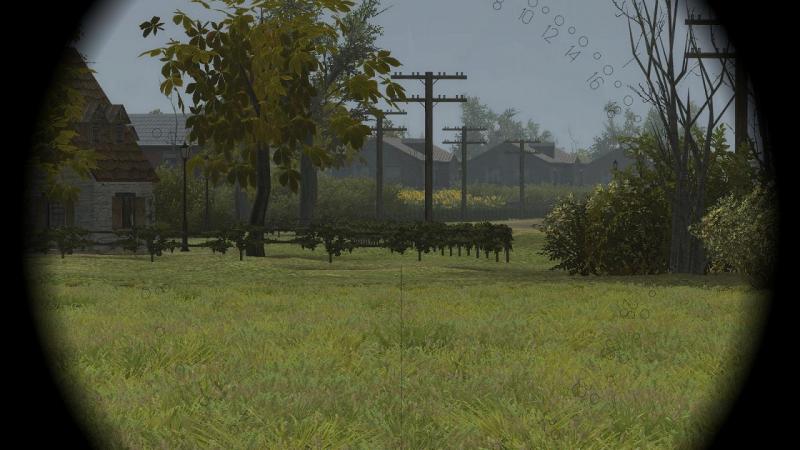
Where Tigers fear to tread... I sat for a while, scanning left and right, across the vista of Villers Bocage, waiting for something to happen. Something, anything, that might relieve me of the necessity of driving into what should be the last place anyone would take a tank, even a thick-skinned Tiger. A place where a single infantryman with a hollow-charge weapon or even a sticky bomb could end my mission in unpleasant fashion. Where an anti-tank gun or a tank could be lurking behind each piece of cover, ready to slam a solid shot into my thinner side armour, at point-blank range. But of course, nothing happened. In Panzer Elite, I would have been saving my artillery support for moments like these, to flatten as much of the town as possible before venturing into it. But this wasn't Panzer Elite. In Steel Fury, artillery is pre-programmed and in any event, there was none, not on this mission. Not so much as a mortar bomb fell from the heavens onto Villers. Nothing else for it, then. Time to motor on, into town. There was no way I was going to drive straight down the main road. Instead, my plan, such as it was, was to move via the back gardens of the houses, parallel to the N175 and with the intention of outflanking anything that was set up to ambush the road itself. And I would do it in short bounds, pausing frequently for observation, before making my next bound. I would use the same cover that might hide my enemies, to hide my own tank, until the last minute. I covered the stretch of open ground in front of Villers as quickly as I could. About three-quarters of the way there, scanning to both sides for possible targets, I suddenly saw one - a low, rectangular object, about half right, between two houses. I should have turned into him but my gun was already laid in his general direction so I just halted in place and steadied my aim...onto a garden shed. Had he known, the owner would doubtless have been grateful I'd noticed, before pulling the trigger. And that I didn't shoot anyway. I don't know about you, but I don't take kindly to being frightened by garden sheds. I moved off again and soon arrived at a low fence. Just before churning my way across the unfortunate householders' gardens, I stopped to scan again for targets. And this time, I spotted a real one. It was a prone soldier, presumed enemy, near the base of a telegraph pole, where the road turned to the right. He was unfortunate enough to be lying in a short stretch of the N175 which I could see, between the buildings and foliage. I quickly shot him with the co-ax, firing short bursts until I was dropping the rounds right onto him. At this point, I became aware of what sounded like a very large petrol lawnmower, running amok. I realised quickly that it was a tank on the move. Where he was, I could not see. Except that he seemed to be getting closer. At first, I thought it might be the other Tiger; but no, this was quite a different sound, smaller, faster. More from instinct than anything else, I started backing away, across the field behind me. Whatever it was, it seemed to be somewhere to my front...and coming right at us. As I backed up, I looked desperately to see what it could be. And there he was! A single Sherman, dodging between the houses and shrubbery but headed my way. My tank commander spotted him at the same moment and called him in. My mind registered the fact that he wasn't a Firefly, but at close range, winding down rapidly, I couldn't afford to stretch my luck. I stopped and fired as my turret traverse took my point of aim across him. A hit, but low and right, with no penetration, just a metal scar where it glanced off the point his transmission housing meets the glacis plate. He kept coming and put a round into us, which seemed to do no serious damage. I took more time to aim the next round, but too long - he jinked right disappeared behind the nearest house, just as I let rip. I laid the gun onto the spot on the other side where he should re-appear, but he didn’t. Damn and blast! Had I got him, perhaps? I could still hear his engine. Suddenly, he burst out into the open, to the right of the house, and turned again towards me. Resisting the temptation just to let fly, I forced myself to fine-tune my aim, going for the turret. He had got off only one round but I needed to get that gun before he fired another - at such short range even a 75 could do me some harm. Got him! The hatches flew open and the crew bailed out - some of them, anyway. They ran off to my right into cover, pursued by tracers from my co-ax. After my earlier experience with the grenade-throwing tankie back up the road, I was disinclined to be merciful to bailed out crewmen. While collecting my wits for my next move, I had a quick look through the gunsight at my latest victim, noticing for the first time the spash mark made on his front hull by my first round. The hole in the turret to the right of the gun mantlet told its own story. The bow gunner's and loader's hatches were shut, which confirmed that not everybody had made it out. Details like that bring SF to life in a way that few other tanksims can match. Right, now, where was I? Ah yes, the plan. Get into Villers and drop by the Hotel de Ville. I advanced again, driving past the Sherman I had just knocked out and halting in the lee of the first houses. Between the cover ahead, I could see again that stretch of the main road, at the point it turned to the right. It was starting to rain and visibility was deteriorating. But I could make out some more prone infantrymen, lying near the road. I started shooting, short bursts with the co-ax, feeling for the range, dropping bursts onto the enemy, one at a time. Suddenly my tank commander called out an anti-tank gun, just left of the troops, on the other side of the road. I laid my gun in the direction indicated but saw nothing, just a murky area of shadow in the lee of some shrubbery. Ordering HE loaded next, I rather desperately hosed the dark area with the co-ax, feeling rather helpless and thinking that instead I should be backing up, rather than messing about with a potentially deadly enemy I could not yet see. This opinion was confirmed when a tracer round flashed out of the murk and crashed into us. Keeping my finger on the co-ax trigger, I let fly also with the AP round I had up the spout. At the same time I ordered the driver to charge forward, to take us into cover. We were out of sight in seconds, thereby escaping further unpleasantness...for the time being. ] Now what? Get that anti-tank gun, obviously. But how? Time for a rapid Combat Appreciation. A quick look at the ground ahead decided the issue. I would swing slightly left, keeping a large house between me and where the gun seemed to be. When I got there, I would halt, then plan another short bound forward, again keeping left of the gun but steadily getting closer. Once I had got close enough, I would make a final rush at him from cover, on a flank, at point-blank range. Plan made, it was time to get weaving. I picked my next fire position in the lee of a house and broke cover, making straight for it. I reached the side of the house and edged up to the corner. From there, I scanned in all directions, to make sure that I was clear, before making my next move. My tank commander must have been feeling safer here, for he was heads out of the turret again. You can order your crew members to duck down and/or close hatches but the AI tank commanders in SF seem quite capable of behaving sensibly, according the the actual or perceived threat. It's another nice feature that helps make Steel Fury rather special. But let's get back to the business at hand... I set off across a short stretch of open ground towards a patch of what looked like sunflowers, standing tall as my tank, as sunflowers are apt to do. A reminder to my crew of sunny days on the Soviet steppes, no doubt. The sunflower patch seemed to extend up to the road on my right, roughly to where I thought the anti-tank gun should be. It was all a bit disorienting. To hell with it. We would get into those sunflowers, drive diagonally across them and come out the other side. The closer to the gun, the better. If all else failed, I wouldn’t stop, I’d just roll straight over the b*****d. ...to be continued!


- 12 replies
-
- 1
-
-
- sta mod
- steel fury
- (and 2 more)
-
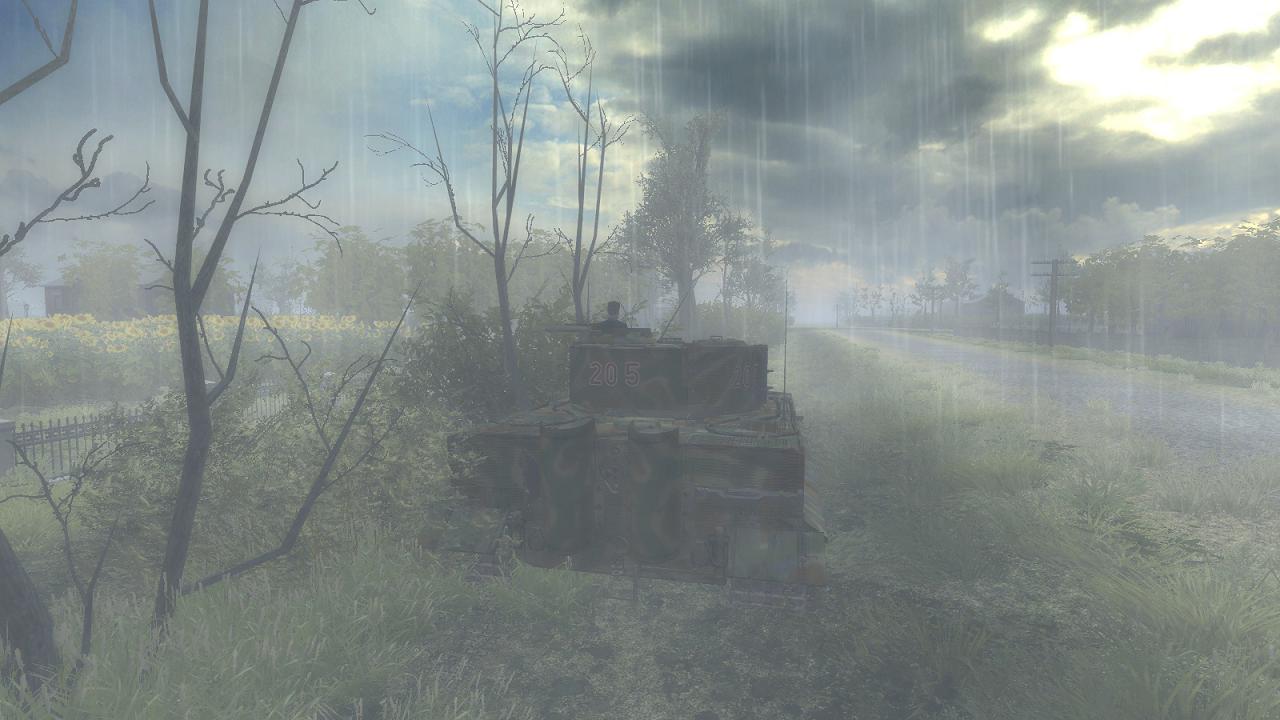
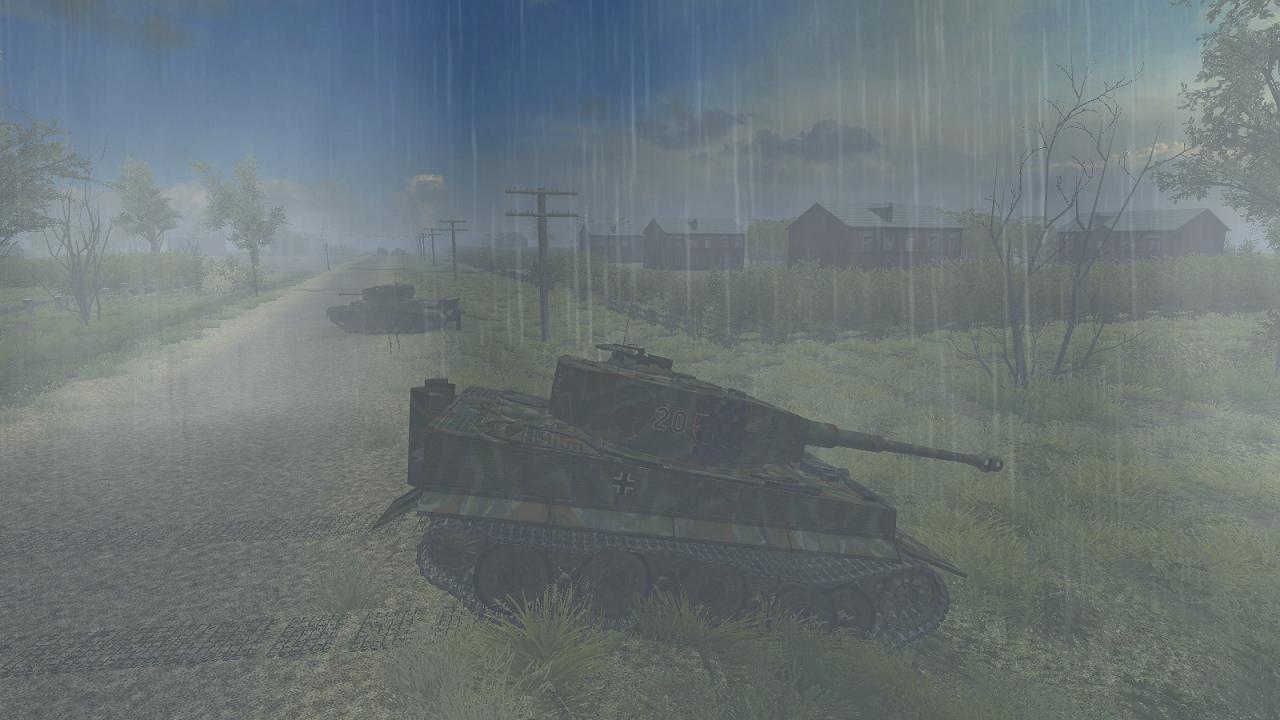
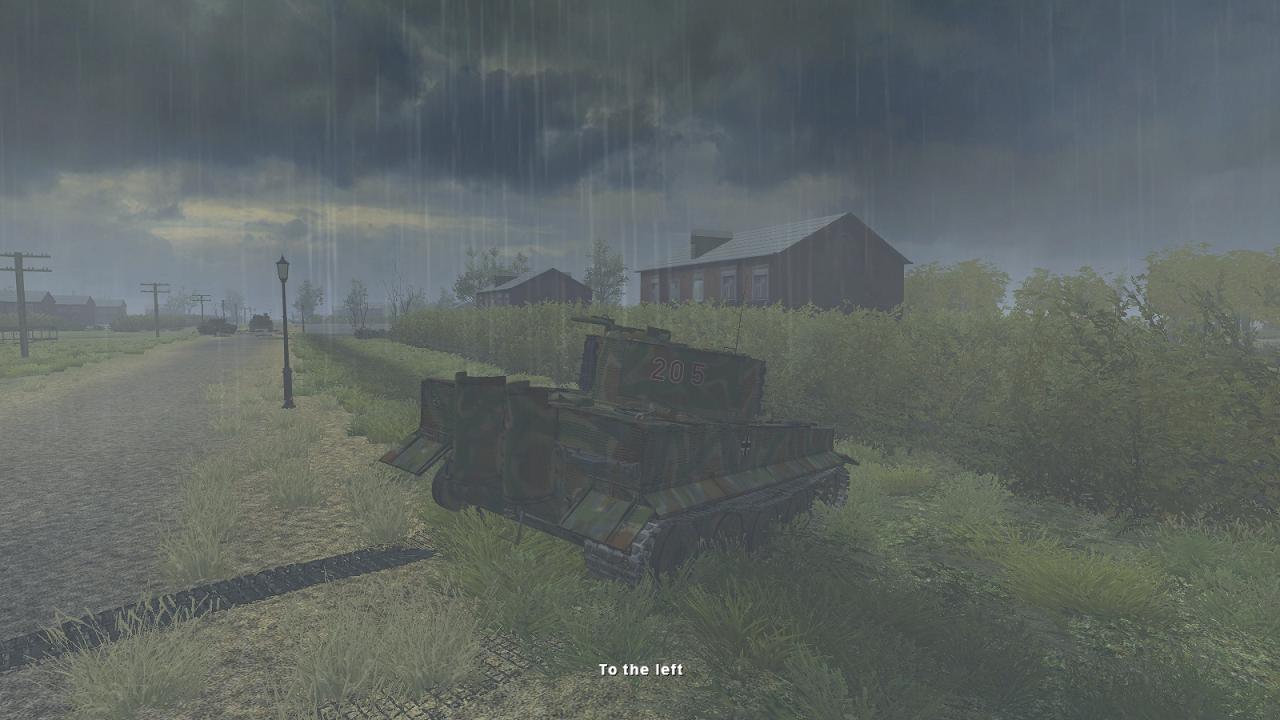
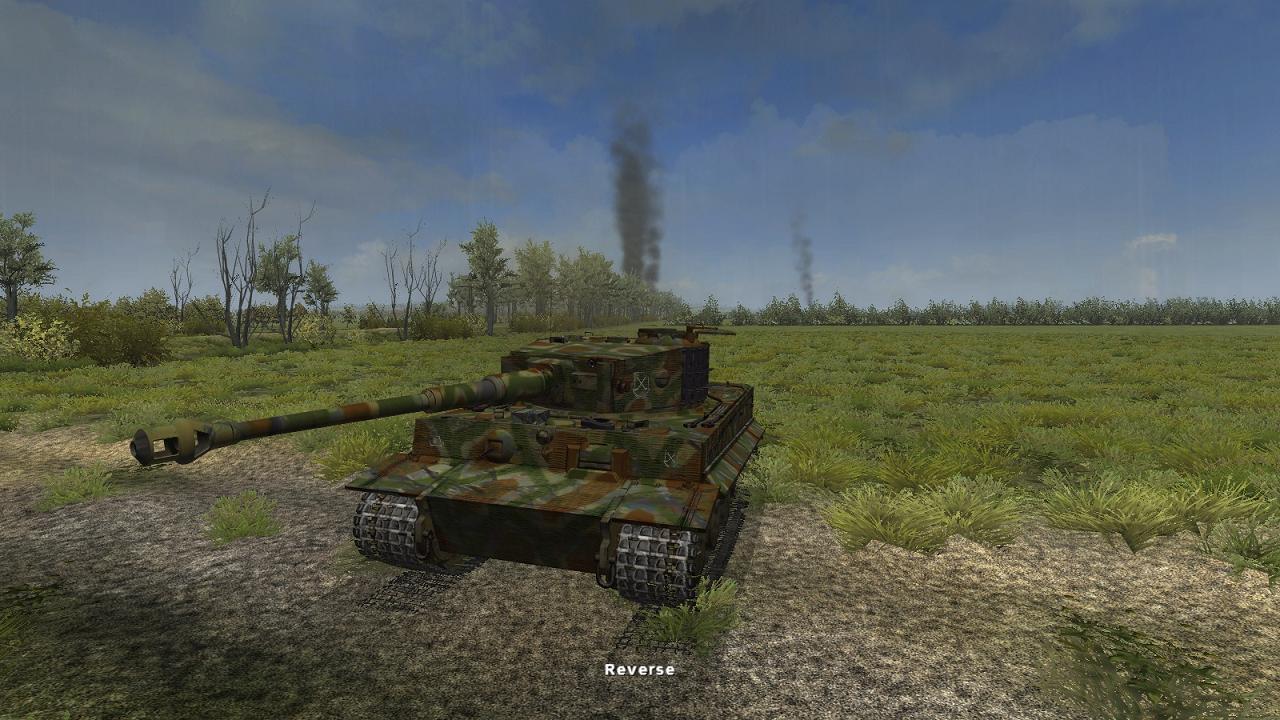
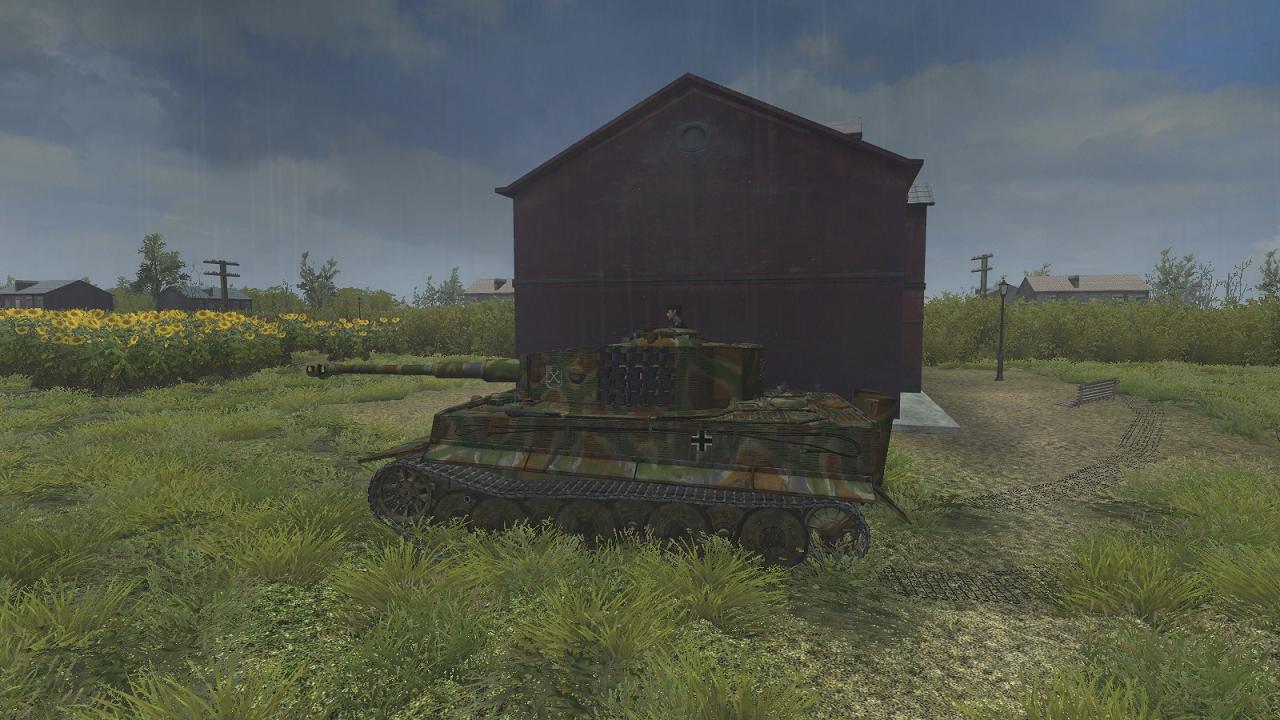
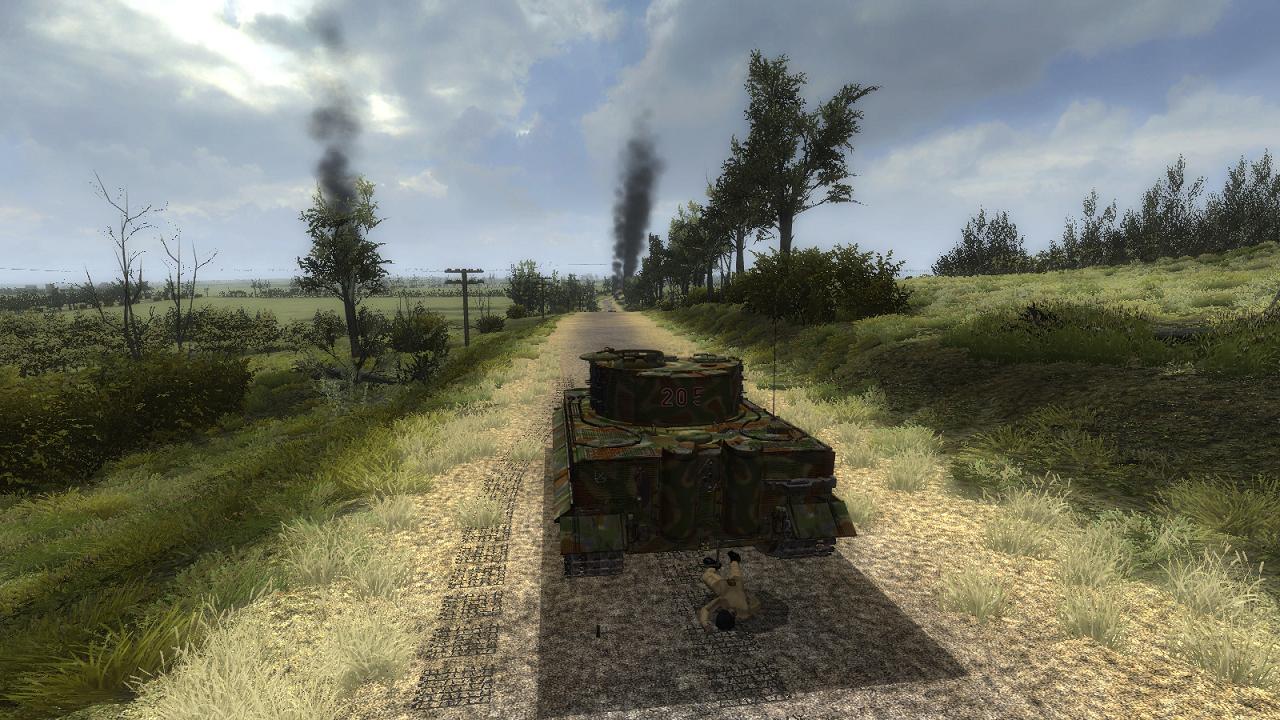
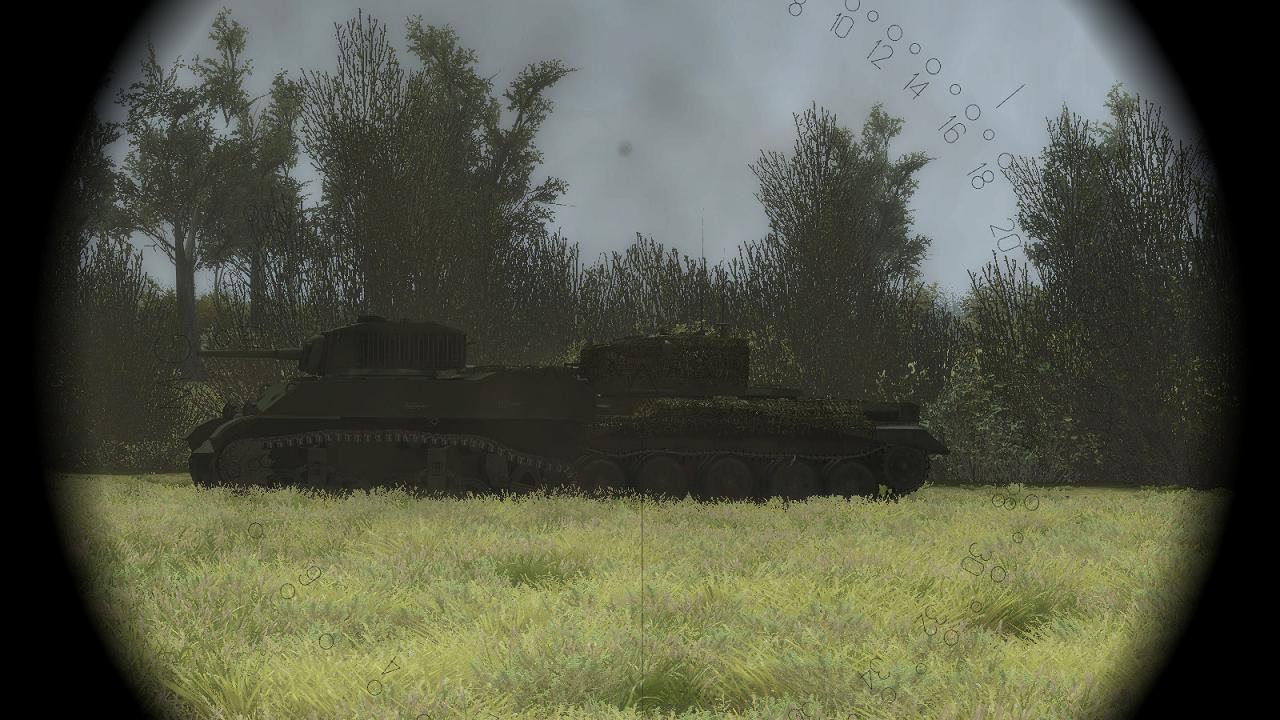
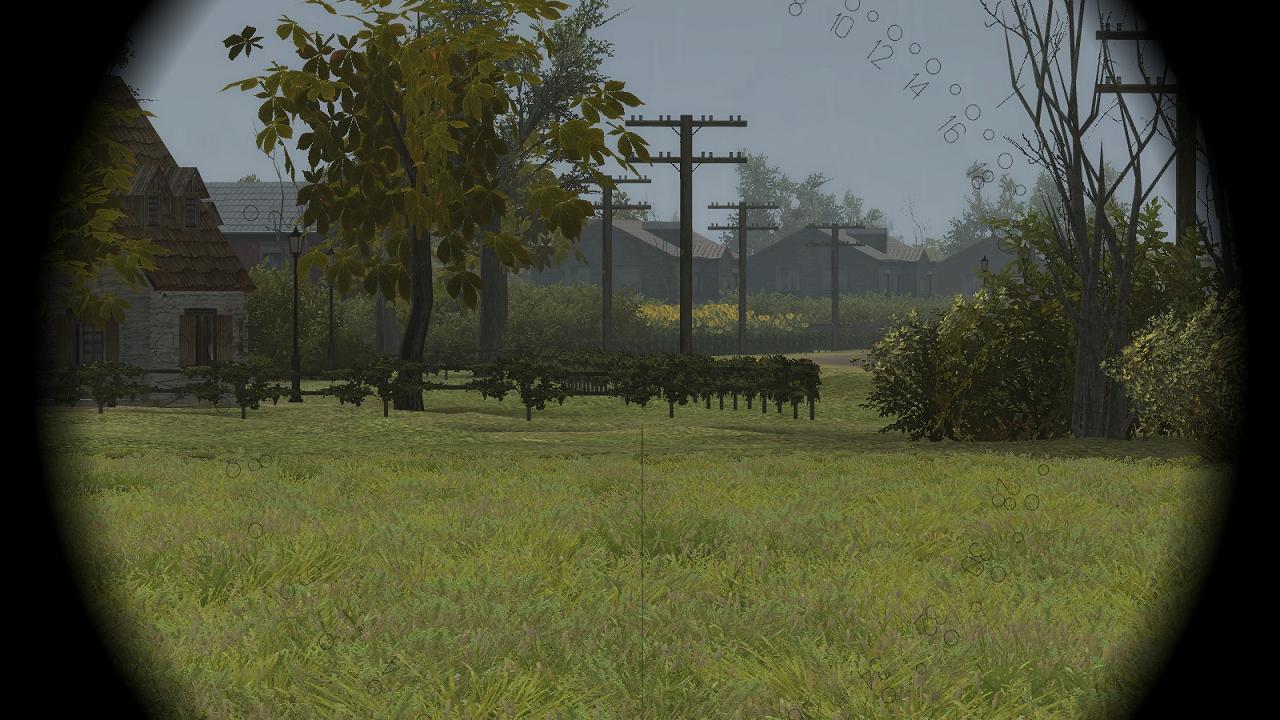
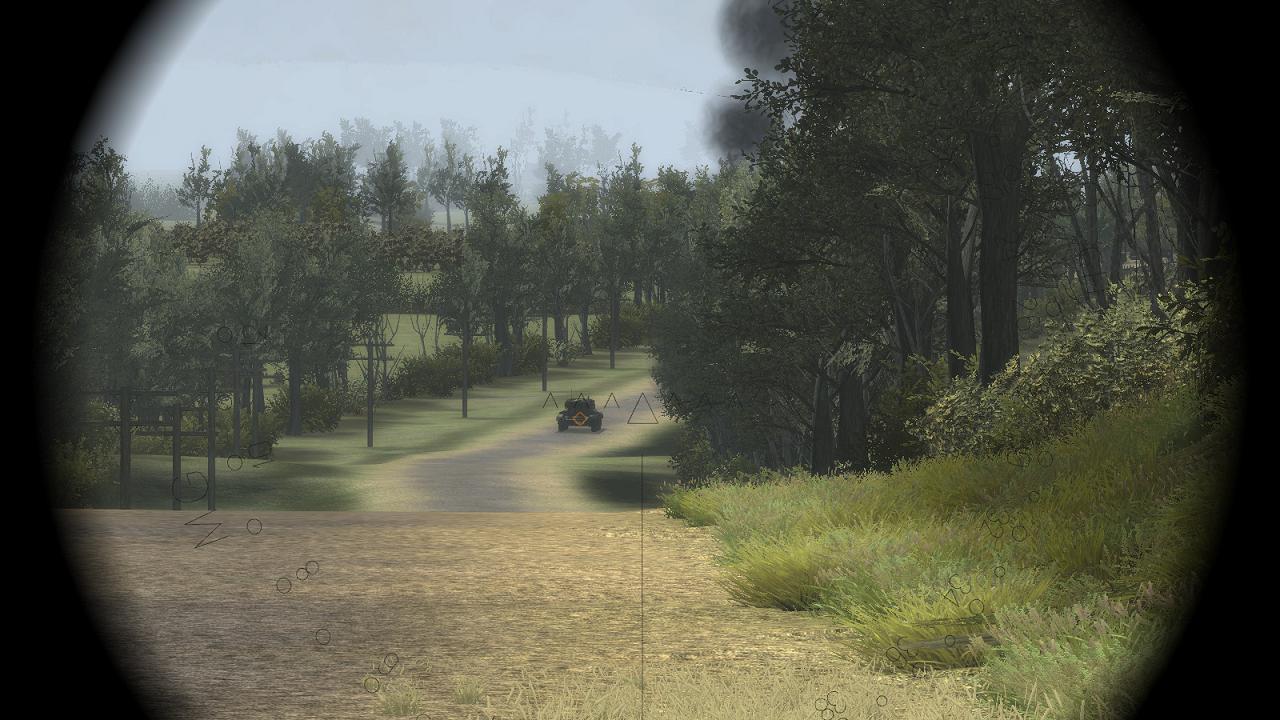
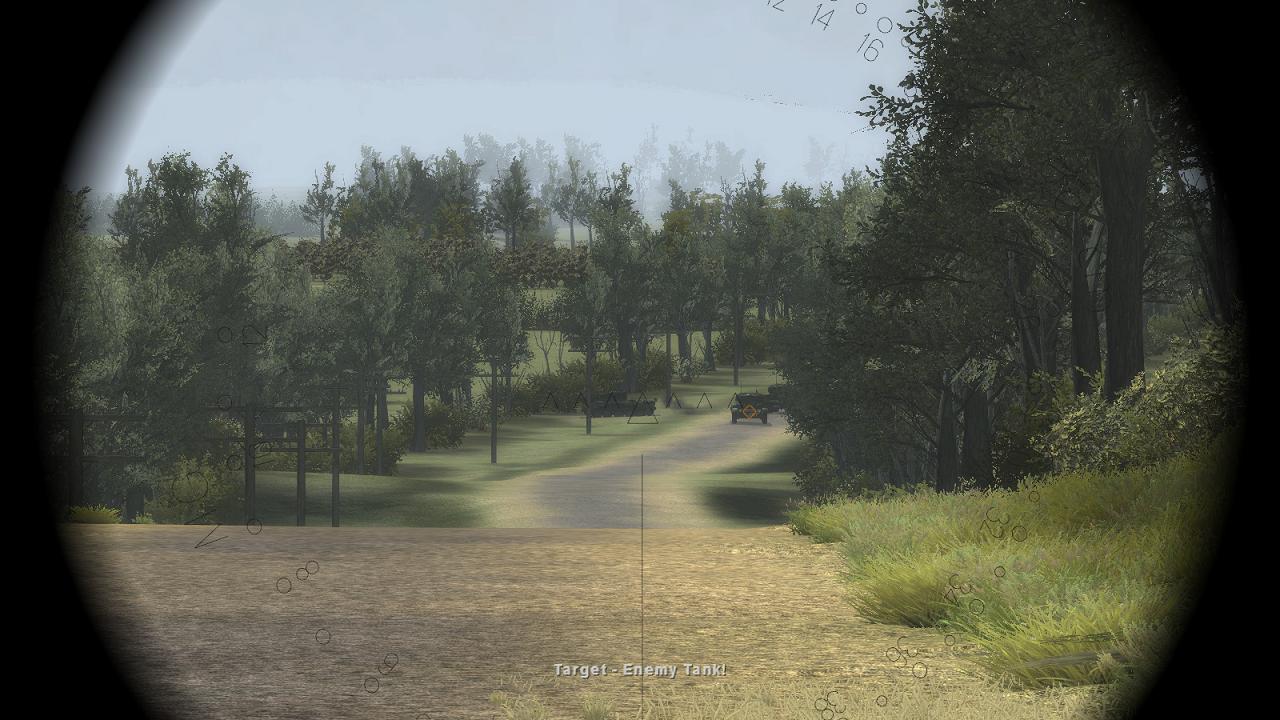
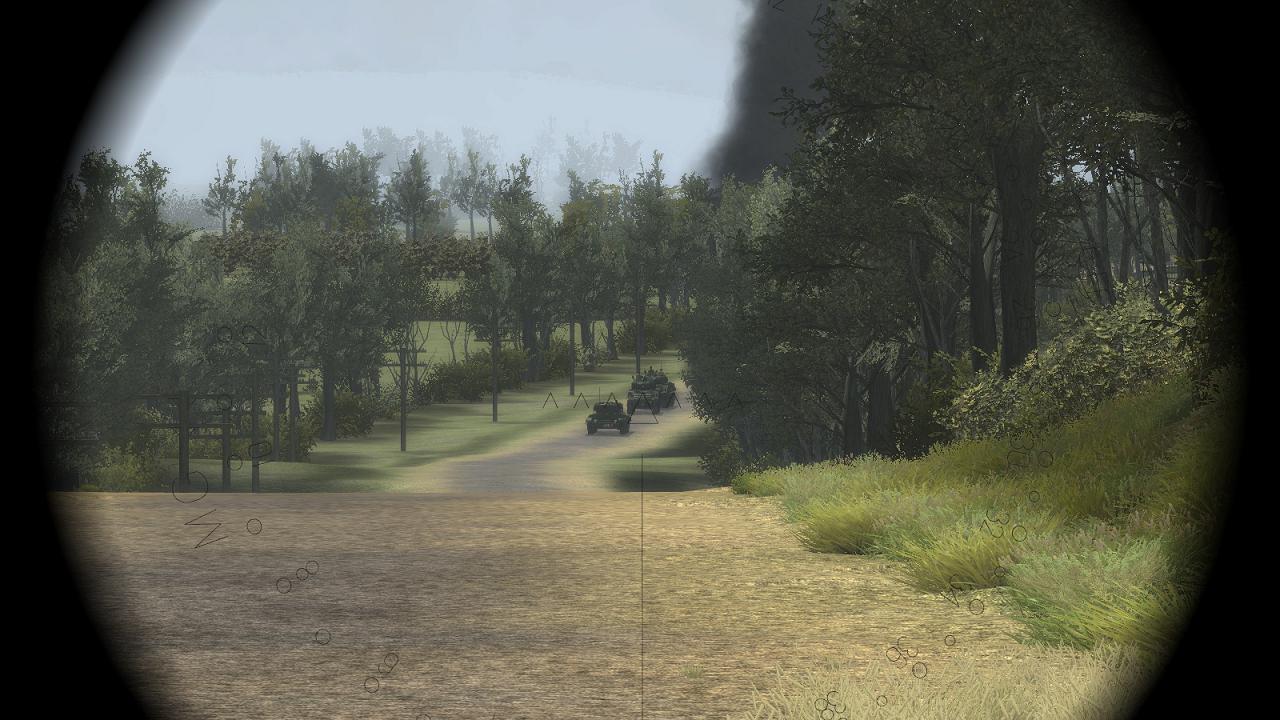
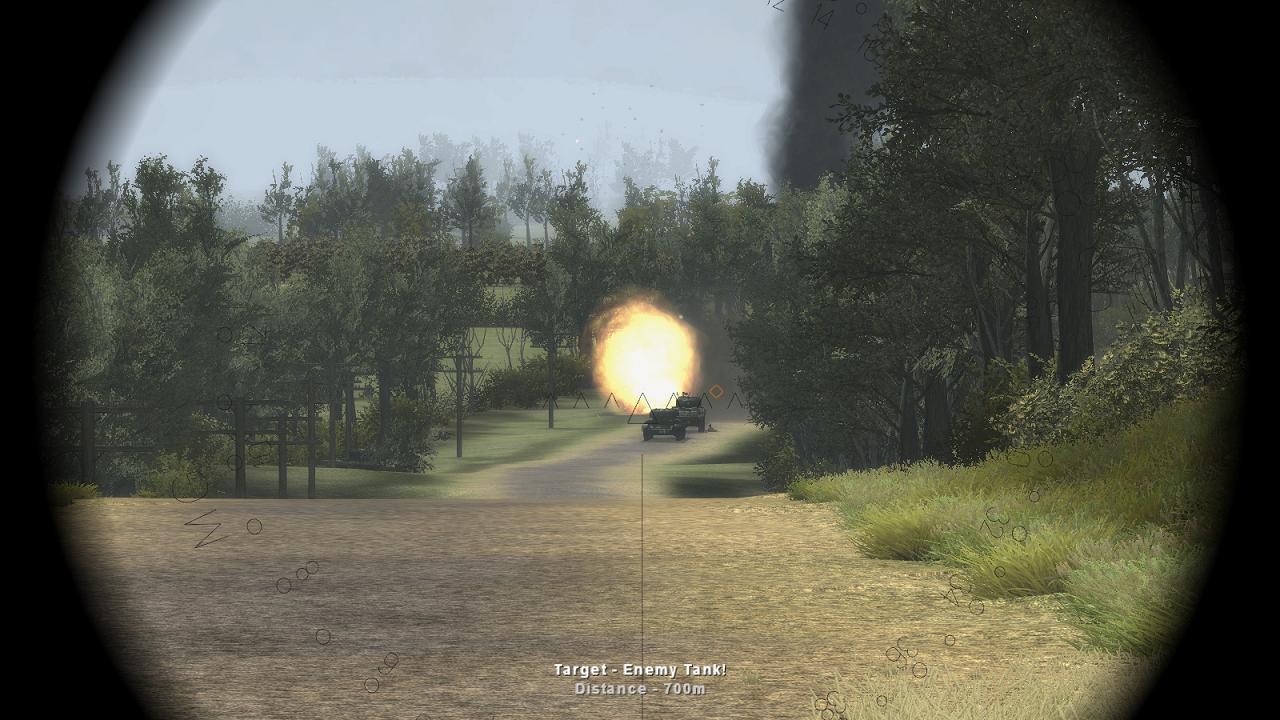
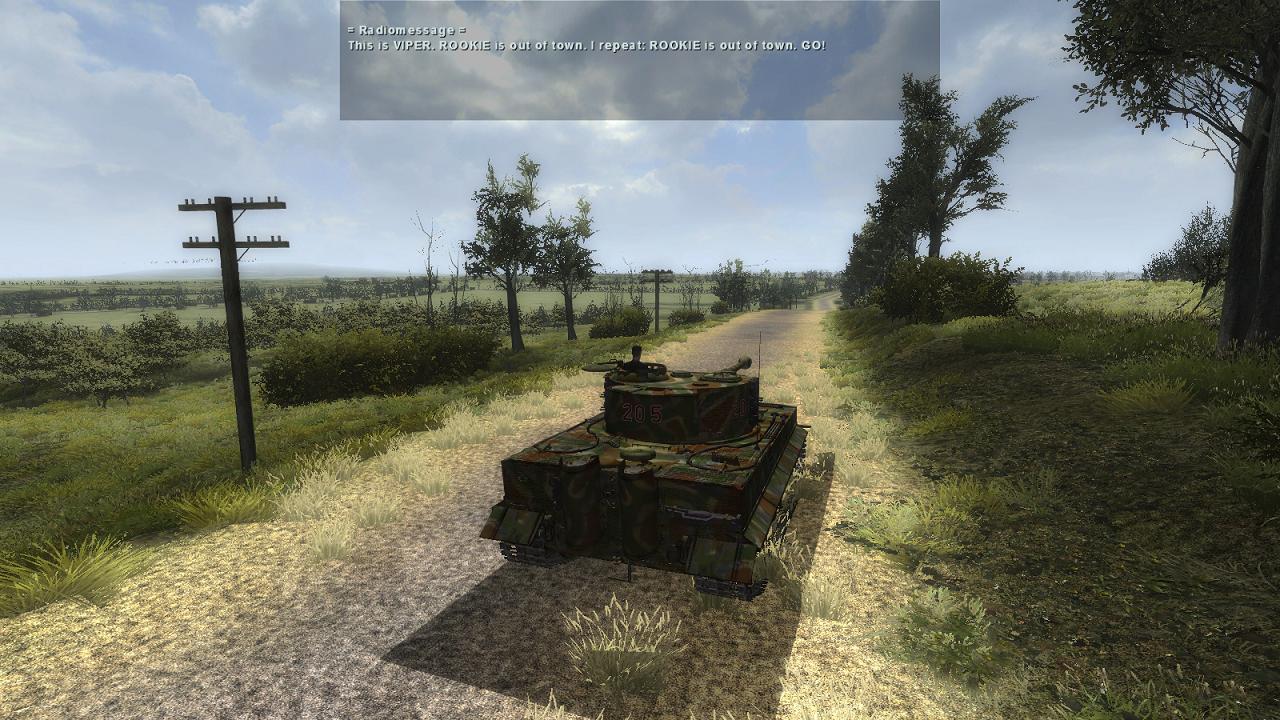
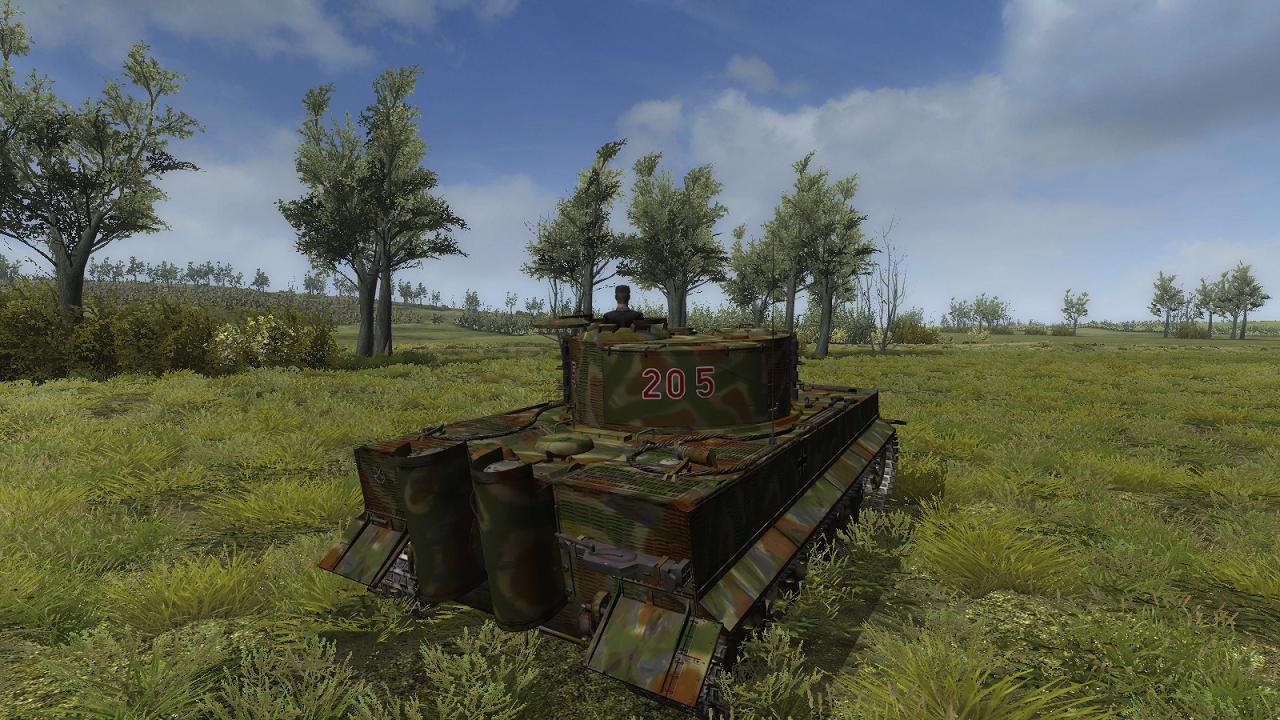
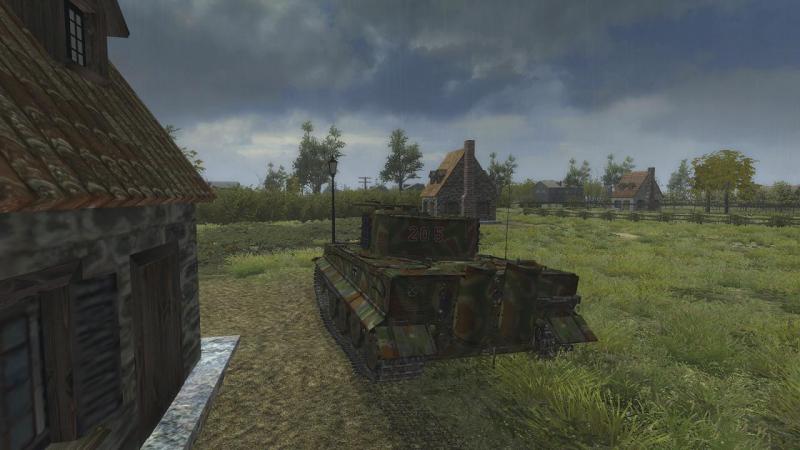
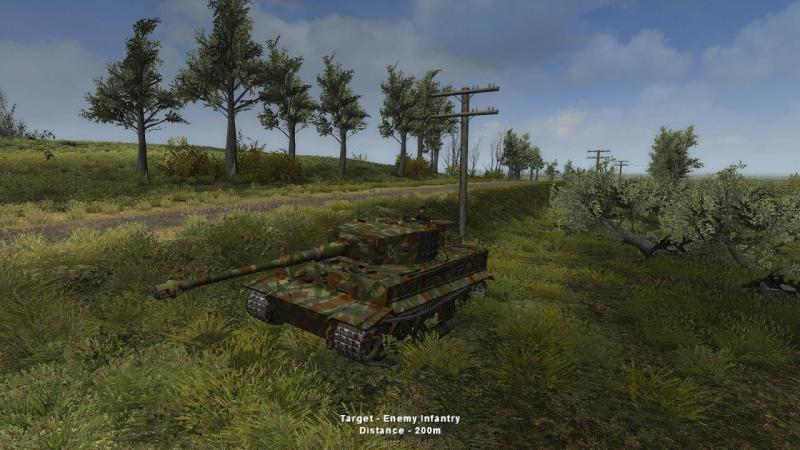
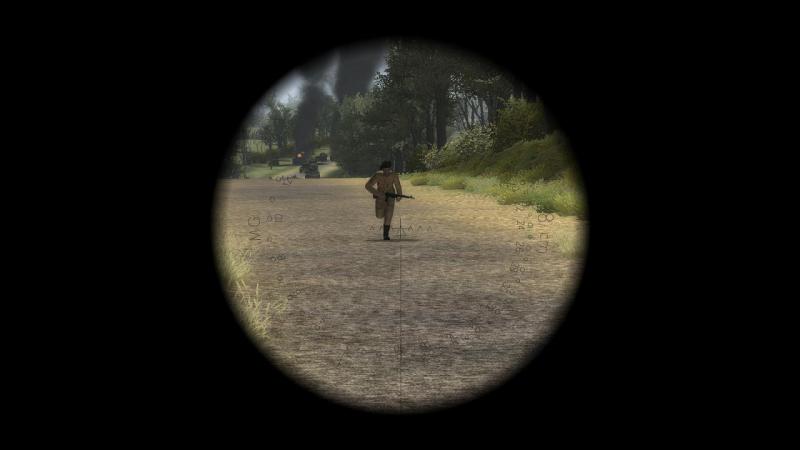
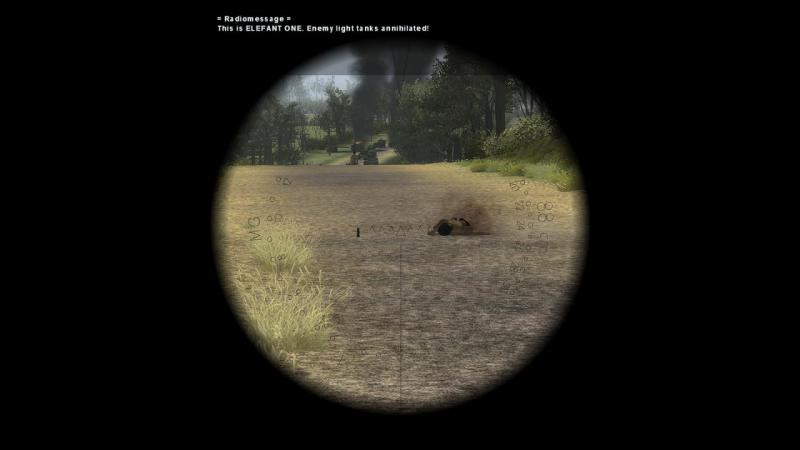
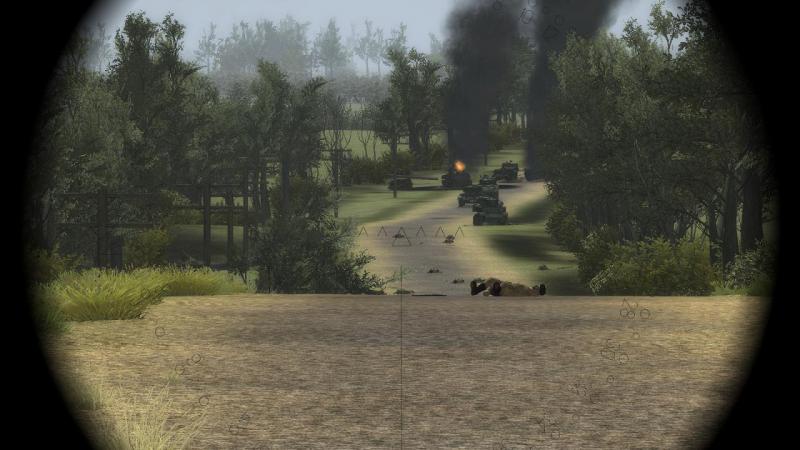
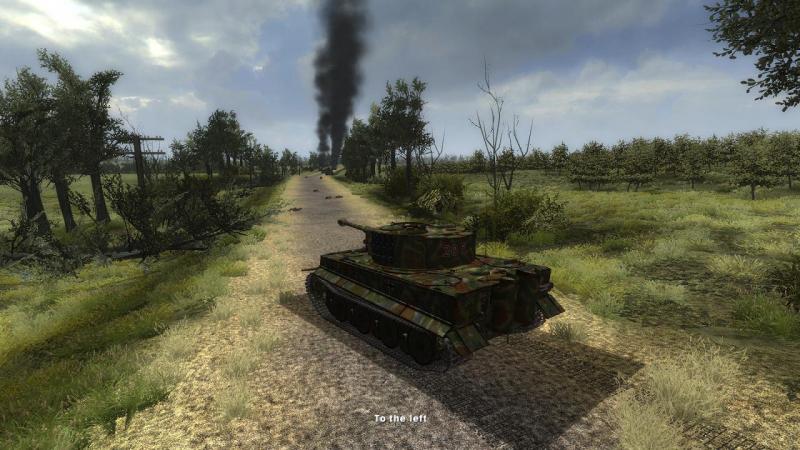
Grunt troubles I didn’t have much time to recover my composure after being rushed by the Cromwell which now lay just to our rear. There was a loud bang as something hit us, up front. My tank commander started calling out infantry targets. I immediately started backing up again, onto the road, applying the principle ‘distance is your friend’. Until I had identified whatever it was that had hit us, getting further away from it seemed like a good first move. As it was, I soon picked up the enemy in my gunsight – a single soldier, standing in the road just in front of us. Even as I saw him, he threw a grenade, which explained the earlier bang. He was in fact a bailed out tankie with a bad attitude. He should have stayed down the road, instead of trying to kill a Tiger tank with hand grenades. Down he went. Why is my commander - we are 'Elephant 1' - announcing the destruction of the enemy light tanks? No idea...maybe the crewman was the last survivor from one. He wasn’t alone, though. Further down the road were proper infantrymen, skirmishing towards us. I spent a bit of time putting a stop to that, with the co-ax. Some of them had worked up onto the high ground to the right, but my alert boss spotted them. The enemy troops seemed intent on infiltrating past me and were rather hard targets in the undulating ground and long grass. Fortunately, they didn’t seem to to have brought with them any serious anti-tank weaponry and after some more busy work with the co-ax, the supply of targets dried up. By now, we had already been reminded that our next task was to assault Villers Bocage and clear up to the Hotel de Ville or town hall. So I rolled forward again down the N175, towards the crest in the road. Happily, we managing to avoid squishing the bloke who’d grenaded us. There seemed little point killing dead things; besides, the driver wouldn't have thanked us if we had added to his maintenance tasks the job of cleaning up the tracks, afterwards. Looking down, the wrecks of my original victims lay where I’d left them, now with a scattering or enemy dead in front and around. I rolled on down and past the crest. No fresh targets appeared and we were not fired upon. I had lost sight of the second Tiger, but glance at the map told me he was just to the left of the ambush site. I considered briefly going wide on either left or right flanks. But for no better reason than that was how Wittmann did it, I decided that I would now go ‘straight down the middle’ - just drive down the road, straight to Villers. About half-way down the hill to the ambush killing ground, feeling sure that the risk of bumping live enemies must be increasing, I swung left, off the road. The other Tiger had cleared this flank – witnessed by a string of knocked-out British AFVs in the field – and the road and associated shrubbery on both sides of it would help cover my right. To my front, the map showed that two hedgerows ran left to right across my line of advance. These would cover my approach to the town, which was still out of sight on the other side. Running along parallel to the road, I passed the ambush site, keeping a careful look-out all around. There was no sign of life. Neither could I see the other Tiger; I was reluctant to call up the map to see if I could locate him even for a second, while in my current rather exposed position. I ploughed on, until I had reached the first hedgerow. I nosed slowly into this, just far enough to be able to see what lay on the other side. The answer was, not a lot. In fact, nothing at all, enemy-wise. So I pushed on through the hedgerow and out the other side, towards the next one, maybe a hundred metres to my front. This time, nosing into the next hedgerow, there they were: two enemy tanks, facing off to my left. They looked undamaged but didn’t move. The nearest one was a Stuart. Partly hidden the other side of him, was a Cromwell. Halted, I put a round into the Stuart, as much to prod them into life while I had them at a disadvantage...if life there was, left in them. This produced no reaction, so I drove on. The Cromwell looked equally undamaged so before driving close to him, I stopped and let him have a round, too. I was conscious by this time that my supply of AP was dwindling – though as yet, I was unaware that I hadn’t started with a full load! But I was disinclined to take any chances. Finally, I rolled up to the last hedge and getting my first real view of our Phase 2 objective, Villers Bocage. I halted and scanned hastily left and right, then settled down to a more careful check of the view that now presented itself – scattered houses on either side and stretching away along the N175, with lots of foliage cover around and between them. This was quite different to Steel Fury’s usual Soviet hovels – hardly Park Lane, but much more ‘up market’. It was also a going to be a bit of a tactical nightmare: short lines of sight everywhere, a good place to get ambushed, where a single infantryman with an A/T weapon would be deadly for a even a Tiger. No place for any tank, especially a single one. This was going to be scary. Maybe I should have gone wide on a flank, after all? ...to be continued!


- 12 replies
-
- 2
-
-
- sta mod
- steel fury
- (and 2 more)
-
Up close and personal! My ambush of the British spearhead had gone much as planned, even if that had meant interpreting my orders somewhat widely. Their tanks lay smashed or burning in my chosen killing ground. Some lighter armour had escaped, but had run into the second Tiger, now in action down on my left. The fly in this particular ointment was that one of the Cromwell tanks had escaped both my ambush and the attentions of the other Tiger. He had made it off the road to the left of the ambush site and from the occasional falling tree, I reckoned that he was creeping up the left verge of the road, evidently intent upon getting a crack at me. Head on, his 75mm gun should not be able to kill me, even at very close range. But he might break a track (an 'M' or mobility kill, in more modern tankspeak) or get onto a flank, from whence he might just be able to do me more serious damage. To counter this threat, I had reversed back down the road, back from the point it dipped down to the ambush site. This meant that when he came to the point the road levelled out and we saw one another, he would not be at point blank range and I should be able to kill him, before he got close enough to get me, instead. The first part of this little scheme went pretty well to plan. I had suspected the Cromwell was using the shrubbery along the road's left-hand verge for cover, and I was right. The boxy shape of his turret pushed into view, almost exactly where I had laid my gun, in anticipation of him breaking cover. I shot him straight away and I'm pretty sure I got him, though he fell back amidst a plume of dispersing dust and muck from the impact. My tank commander, optimistic as ever, had evidently come to a similar conclusion. At any rate he directed me to engage some infanty to our front, possibly the bailed-out tank crews. I wasn't having any of this, for I now saw that the Cromwell was still on the move, slipping down the roadside embankment, further to our left. A tough cookie, as the Amis would have said. He turned towards us again and I let him have another round. But the b***er kept coming and drifted left, behind a large bush. Though he didn't immediately re-appear, I was sure he was still in action. This was becoming rather worrying. I backed up some more. That Cromwell was getting too close for comfort. He appeared again and my commander directed me to engage him. The Tommy broke right, out of the bush, moving uphill but fast. By this time, I had rolled back off the road and was sat at an angle, on the verge. From there, I put yet another round into the Cromwell and saw the muck and dust fly again. I was getting hits, but he was still coming. This wasn't how it was supposed to happen! He reached the road and drove in our direction, looking massive in my gunsight, framed by the smoke from his burning comrades on the road behind. I've never had the feeling in a tanksim before that I was being rushed by a zombie, but I had that feeling now. I fired again. Whether I hit him or not I don't know, but he swung sharply left across my nose and drove past me, seemingly centimeteres away. My turret traverse wasn't fast enough and I was lucky he didn't shoot me in the flank. I can only guess that his turret crew had become casualties or my damage had knocked out his gun. The Cromwell crashed into some bushes just behind me and lurched to a sudden stop, like he had run into a giant net. As my sights came onto him I let him have it. Then a second round, right into his rear. Probably overkill, but after what I'd just seen, I was taking no chances. That did the trick. About time, too! ...to be continued!
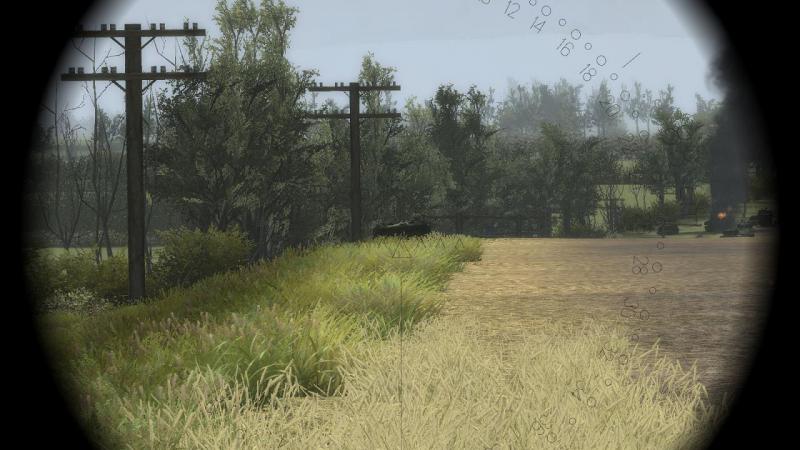

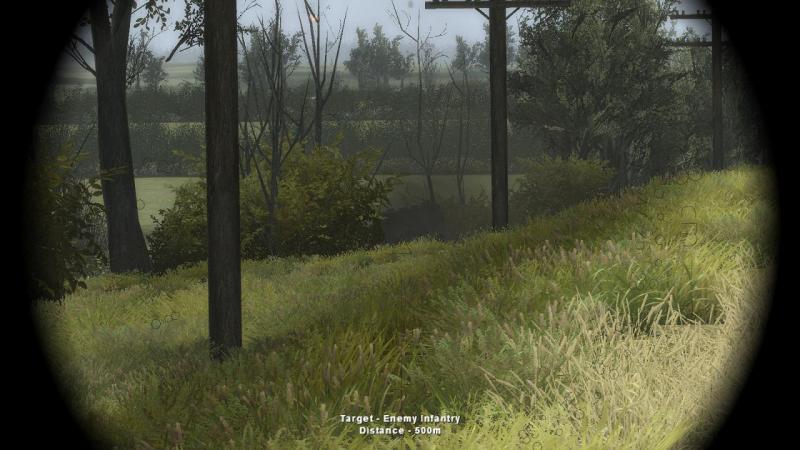
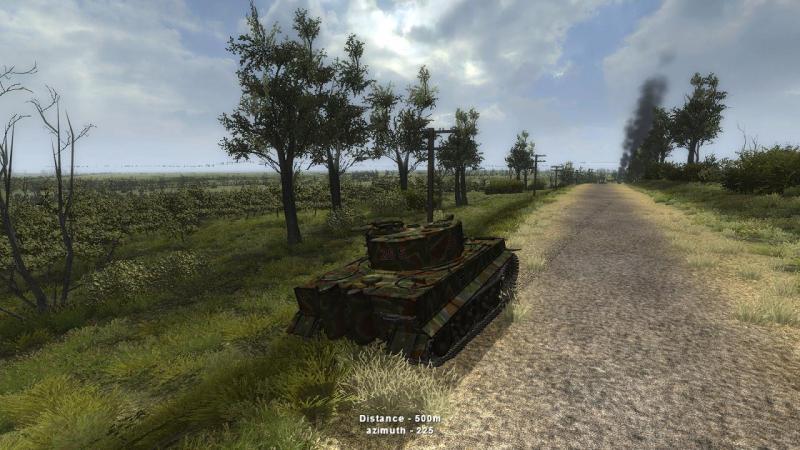
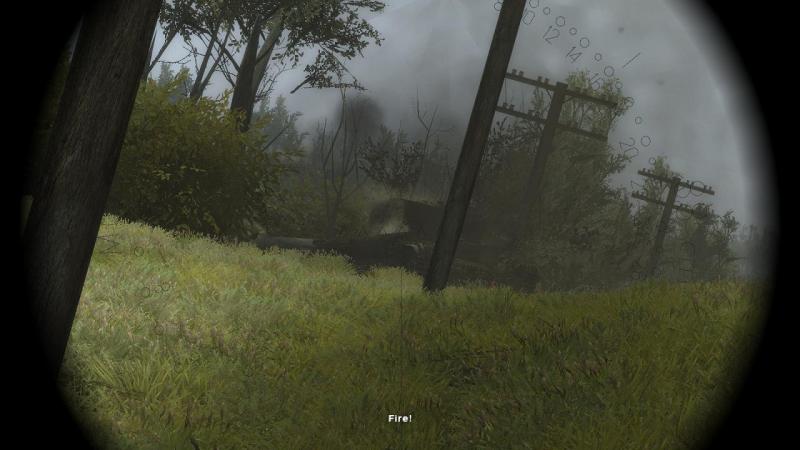

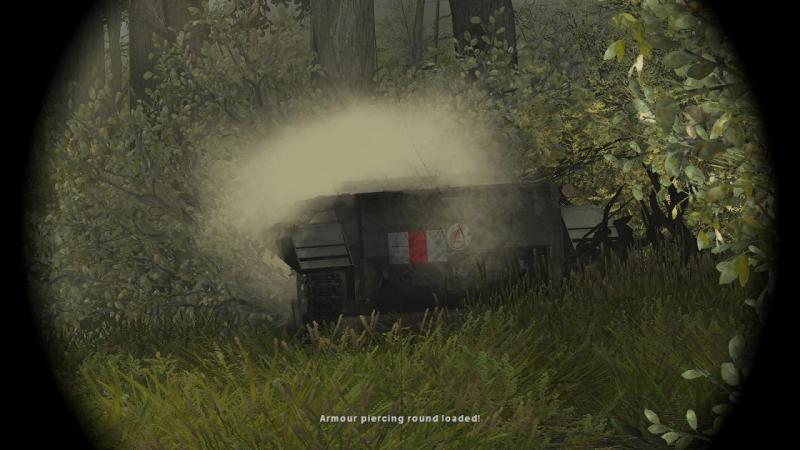

- 12 replies
-
- 2
-
-
- sta mod
- steel fury
- (and 2 more)
-
From a view to a kill... From my vantage point looking down the N175, I waited just long for the leading Tommies to come into the open; a troop of three Cromwells, they looked to be. My first round crashed into the leading tank...which kept coming. My tank commander insisted that I do something about this and I obliged, with another round. The good part was that this stopped the Cromwell. The not-so-good part was that the two behind him - not entirely unexpectedly - promptly took advantage and scattered off the road, one each side. The Cromwell which went right didn't get very far. Estimating where he had got to, I let rip into the shrubbery. I didn't really expect to hit him, so I was quite pleased to see a column of smoke appear above the tees, evidently coming from my point of aim. Not a bad start. I tried the same with the Cromwell that had gone left, but while I didn't see any results, my tank commander seemed to think we had got him, for I 'heard' him announce the destruction of a group of enemy tanks, on the radio. I think maybe he was exaggerating a little, or at least, just a tad optimistic. Even so, things weren't going too badly. I rolled back a little way up the N175, to get a bit more hull down, knowing now that the element of surprise was lost. I also wanted to see if I could open up a line of sight amongst the vegetation, to the left of the road by the kill zone, where I suspected the third Cromwell might have gone to ground. But my attention was quickly drawn back to the road, with the appearance of two Shermans - Firelfies, as it turned out. Their hatches were open and they didn't seem to be put off by the knocked-out Cromwell sitting in front of them. Events began to move pretty rapidly, from this point. I immediately engaged the lead Sherman. One or two rounds, and he ground to a halt, just behind the Cromwell, the crew bailing out. My tank commander promptly ordered me to switch targets to the second Sherman, which had started to evade, backing up to the left. Even as he did so, more British armour turned the corner, into my line of sight. I needed no urging and let the other Sherman have it. There was a brief but satisfying explosion as my 88mm AP round smashed into him. No time to lose, though. My boss was already indicating a third target, which seemed to be a Stuart light tank. By the time my loader had chambered the next round, the Sherman I'd just shot was burning, but the Stuart had disappeared somewhere to the right. At about this time, I noticed some trees falling on the left of the road, indicating that the Cromwell that had driven off the road down there was still in action and on the move. I'd need to watch that! Now would be a good time for the second Tiger to show up, I thought to myself. To my surprise, at this point the Stuart re-appeared, having driven back onto the road in front of the tanks I had clobbered. My ever-watchful tank commander saw him, too, and directed me onto him. To digress briefly, I like to turn off the on-screen targeting aid you can see marking the enemy tank below and rely on the voices, but while there is a brief on-screen text display of the intercom traffic, SF uses a rather weird system, giving the compass bearing of the target. This seems to be the Soviet system - in the SABOW T-62, you can see, next to the gunner, a little compass repeater disc that seems designed for this purpose. SABOW backs this up with a more intuitive target indication system but the SF one is rather harder to follow, without using on-screen aids. Anyway, there was I, and there was my target, the foolhardy Stuart, driving up the road towards me... ...but not for long. Another 88mm AP round saw to that. Even as he jerked to a halt and the crew bailed out, more enemy armour appeared, this time, a group of the little 'Carriers' so widely used by the British Army in WW2. I was soon laying into these. I should perhaps have changed to HE rounds at this point and conserved my supply of AP but I decided just to crack on. The Carriers were small and quite fast-moving targets and at that range, the higher velocity and flatter trajectory of the AP rounds would give a higher hit probability. It wasn't long before the scene down in my chosen killing ground was a jumble of smashed British armour, reminiscent of the well-known German Propaganda Kompanie photographs of the actual battle (a clip of newsreel footage they took is featured as a video intro to this mission). Some armoured half-tracks which joined the party just added to the mess. At this point things seemed to settle down and I backed up a little further, to take stock of the situation from better cover. My tank commander - Michael Wittmann himself, presumably - took the opportunity to provide HQ with another upbeat Sitrep. Some of the half-tracks had escaped off the road to the left and now, some carriers took the opportunity to do the same. I got one of them, but the ones in front made it into cover. A lot of good it did them. At last, the second Tiger had appeared and they ran straight into him. You can see him about half-left in the screenshot below, in the field, just left of the telegraph pole in the foregrround. At this point I was backing up again, because some more tumbling trees along the roadside on the left indicated that the missing Cromwell was working his way up towards me, out of my line of sight in the dead ground to my front and probably concealed from the other Tiger by the foliage. If he got close enough or flanked me, his 75mm gun might immobilise or even kill my Tiger, and I wasn't going to let that happen, not now...not if I could help it, that is... ...to be continued!


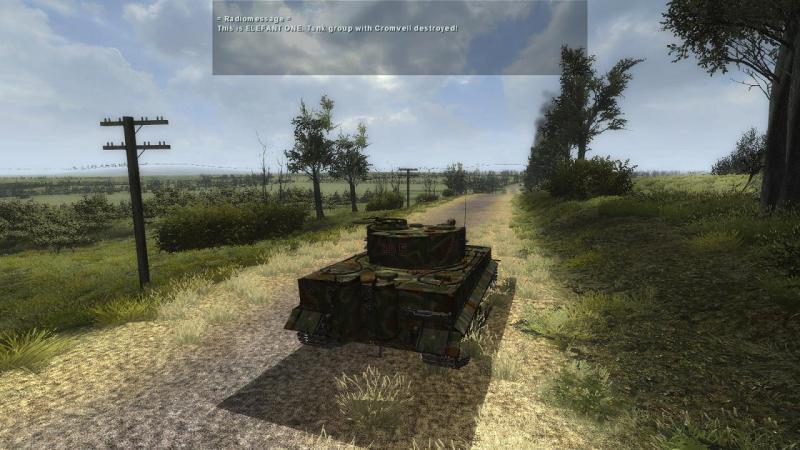

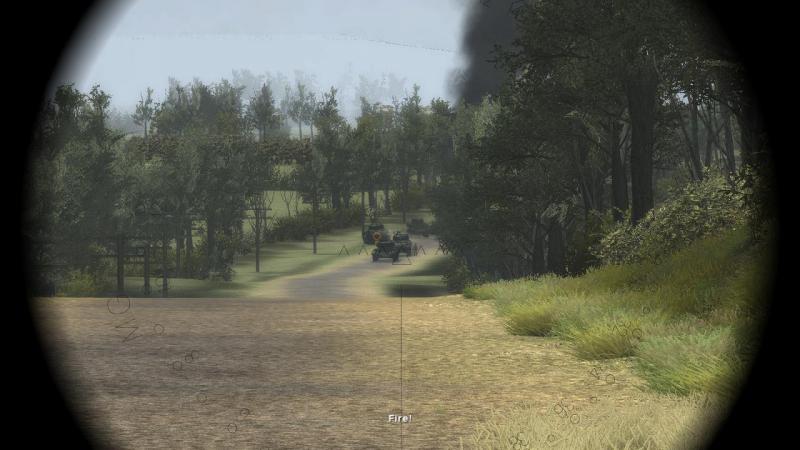


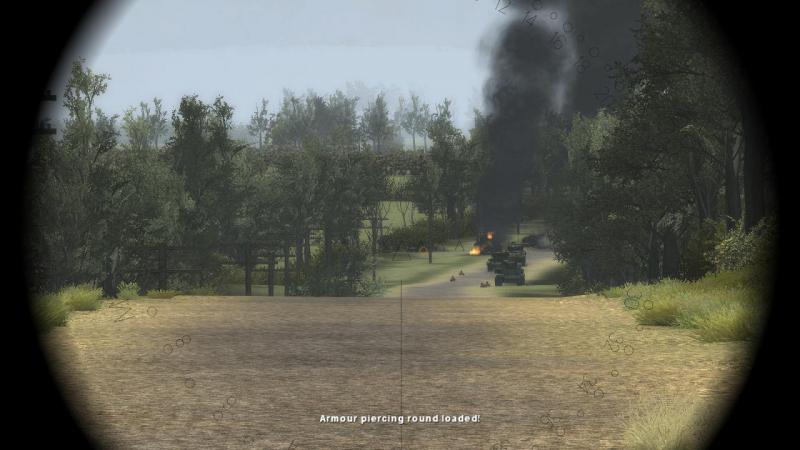

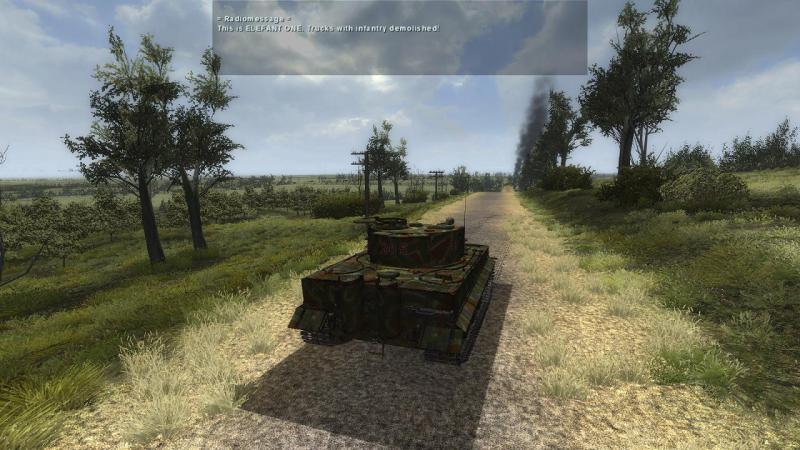


- 12 replies
-
- 2
-
-
- sta mod
- steel fury
- (and 2 more)
-
On to Point 213...sort of... As my solitary tank roared and rattled over the undulating countryside towards the covered side of Point 213, I had a bit of free time to admire my mount, which is a mid-production model Tiger with, amongst other things, ribbed ‘Zimmerit’ anti-magnetic mine paste and a low-profile commander’s cupola. Modder Lockie has provided a ‘dirtied up’ version of the common three-colour later-war camouflage scheme, complete with tactical number 205, which was carried by one of Wittmann’s Tigers in Normandy. The vehicle is well animated and the engine sound is well above stock SF standards. It also has a detailed interior complete with animated crewmen, which is unusual for modder-made vehicles. I don’t tend to spend much (if any) time in these views and can well play entirely without them, but they are certainly very nice to have; below you can see the tank commander’s closed-up view, with my gunner (left) and loader (right) sitting tense but ready for action. If you know the story of the real battle, you’ll appreciate that Wittmann wasn’t ordered to set up an ambush at Point 213. Rather, he acted on his own initiative after the British column drove up the road and halted, just a few hundred meters from where his newly-arrived Tigers had harboured. He first attacked the halted column on the road itself, mostly half-tracks and carriers, defended mainly by some infantry 6 Pounder A/T guns. This mission doesn’t attempt to recreate precisely the actual action fought that morning; instead, it presents the player with some different challenges. Starting quite early! At this point I should confess that this report isn’t describing my first play-through. I’ve been testing different versions of the mission for Lockie and in fact, I ‘came unstuck’ on Point 213 the first few times i played. Carefull choice of fire position is the key issue here, methinks, followed by sensible tactics when you get there. [spoiler alert - you may want to skip this next bit, if you want to find all this out for yourself!] First time out, I set up in defilade, on the side of Point 213 that’s away from the enemy. There, I turned back to face the way I had come, watching over the N175 where it passed the high ground, so as to catch the enemy from the flank, as they drove along. Lined up like little metal ducks in a fairground shooting gallery; you get the idea. The first problem here is with the lie of the land around Point 213, your nominated ambush position. There’s lots of shrubbery, many dips and folds in the ground and a generally convex shape to the hill. This means that wherever you set up, there’s a lot of dead ground, close around you (‘dead ground’ meaning ground which is not visible to the observer). In particular, it can be hard to get a decent line of sight onto the N175, unless you sit dangerously close to it. Or, to open out the range, you can move further back, to where the hill falls away and the N175 comes back into sight. But that leaves the door, which you're trying to keep shut, half open, letting the enemy come rather too far past Point 213 itself. The second problem here is that you’re on your own. Firing from defilade – to one side, with an obstacle in front, hiding you from an advancing enemy until you can shoot them in the flank – is generally a good idea. But not so much, when you’re alone and aren’t planning for just a quick ‘shoot and scoot’ kill. To hold your ground, you really need other friendly forces, all in defilade, either side of you, and indeed behind, in depth. This gives interlocking (or better still, overlapping) fields of fire, covering the complete front and in particular, each other’s blind spots. Without this, once the enemy knows you’re there, it’s only a matter of time before he flanks you, possibly using your own cover to close in unseen, for the kill. Don't believe me? Have a look at this, then: There's my Tiger, in a decent defiladed position. Hidden from the enemy coming up the N175 in front of me. Until I started blasting them...witness my victims, one afire. Note also the Sherman Firefly, on the right, who crept over the hill, and got me from the flank. See what I mean? On your own, firing from defilade works...for a while. After that, you need to move, or you'll get the chop. I also tried setting up just over the enemy side of Point 213. There’s a good deal of cover; and from there, you can shoot the enemy as they come into sight, just beyond Villers Bocage, at longer range. But unless you drive right onto the forward slope and make a clear target of yourself - not a brilliant idea, need I say - the enemy can quickly get into dead ground, in the lee of Point 213, under your nose as it were. In fact, the leading tanks will likely have passed out of your field of fire, by the time you get into position. This leaves you with some light armour to shoot up...while the leading tanks are steadily closing in, out of sight. [spoiler alert ends!] Anyhow...I knew (or believed) that I had to get close to Point 213, to trigger the enemy advance. But I didn’t really want to set up there. Decisions, decisions! And all the while, my Tiger rolled on, towards the fateful Point 213. Just ahead now, I could see the row of trees, interspersed with telegraph poles, which a quick glance at my map told me must be the N175. My speed fell off and my Tiger struggled noisily as it lurched up the bank onto the road. While well away from those red ‘danger zones’, I came a bit too close to the crest of the road. But a nervous look down the long, nearly straight section I could see of the N175 as I crossed it, showed the road to be clear. The same view also confirmed my plan, which was simple enough. I would drive up towards Point 213 until I heard the radio message announcing that I was in position and to wait for confirmation the enemy was moving my way. I would then retrace my steps – or my tracks, to be more precise. Just a little way. I would in fact set up on the road itself, facing back down towards Villers Bocage. The road levelled out near Point 213, so I could be hull down, by sitting back from the crest. Backing up would take me out of sight or turret down. There was tree cover on both sides, to screen a move to either flank if need be. The long straight stretch of road which I could see offered a decent field of fire. The Tommies would not see me until they turned the corner at the end of this straight stretch, offering me targets at about 6-800 metres, where my combination of a big gun and thick armour would be more than a match for even the 17 Pounders. In fact this is a classic ambush position for enemies moving along a stretch of a road or track. Shoot down the length of it, at a point there’s a curve which keeps you out of sight, except to the people you are shooting, with the rest behind wondering what the hell's going on. Hopefully. I duly got the message that confirmed I was in the ambush area. Now, I had to get into position and await confirmation from our recce people that the enemy were enemy were on the move up the N175, towards Point 213. I stopped and backed up, down towards the N175. As I was nearing the road, I received another radio message telling me - lest I had forgotten - to do what I was now doing - get into position and await the signal from callsign Viper, the recce boys. These in-mission messages help remind players who may be inclined to go swanning off, doing their own thing, that they need to stick to the plan. Reaching the road, I swung around, still in reverse, then stopped, facing the enemy. At this point, with near perfect timing, came the news I was waiting for. My guests were on their way. I tested and adjusted my position, mainly from the gunsight, lining her up and setting the range for the point a little closer than where the road curved right, out of sight. A hint of a smile doubtless played around the corners of my mouth as I realised that I now had a nice little killing ground set up ahead of me, into which the Tommies were obligingly about to drive. The main problem was that there was good cover left and right of the road, into which the emeny could quickly scarper. The trick would be to do as much damage as I could, while I had the chance. Sherman Fireflies, with their dangerous 17 Pounders, would be my priority target, though hard to distinguish, seen from the front. I’d have to treat any Sherman as a potential Firefly. At some point, the second Tiger, from Beauvais where I’d started, should be able to cover the open left flank.Or so I hoped. From where I sat, I had a clear line of sight into my kill zone. I was parked far back enough from the crest in the road just ahead, to be mostly hull down to the enemy, when they came. I had an AP round loaded and my sights were set for the range. The Tommies were about to pay me a visit and I was now quite ready to ensure that they received an appropriate welcome. I didn't have long to wait. ...to be continued!
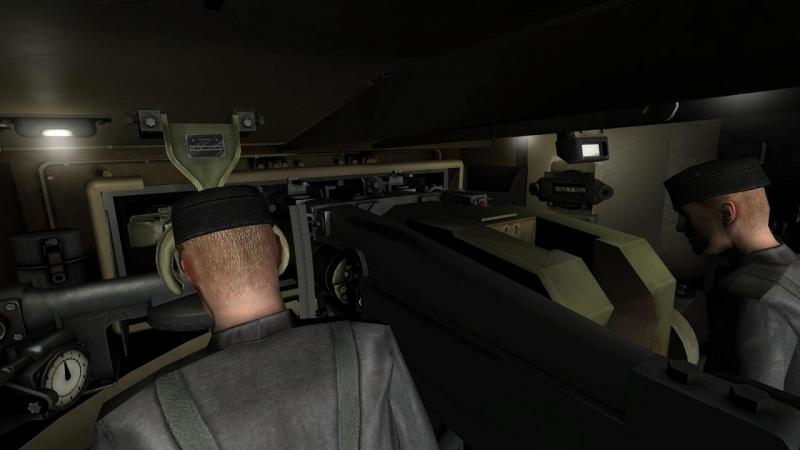

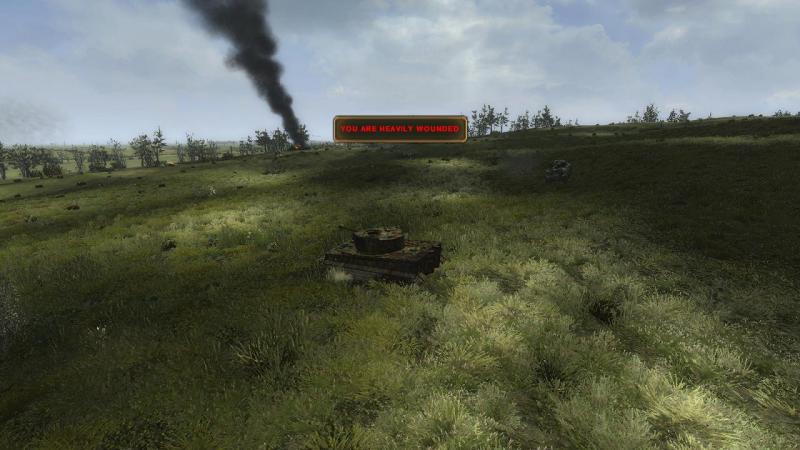
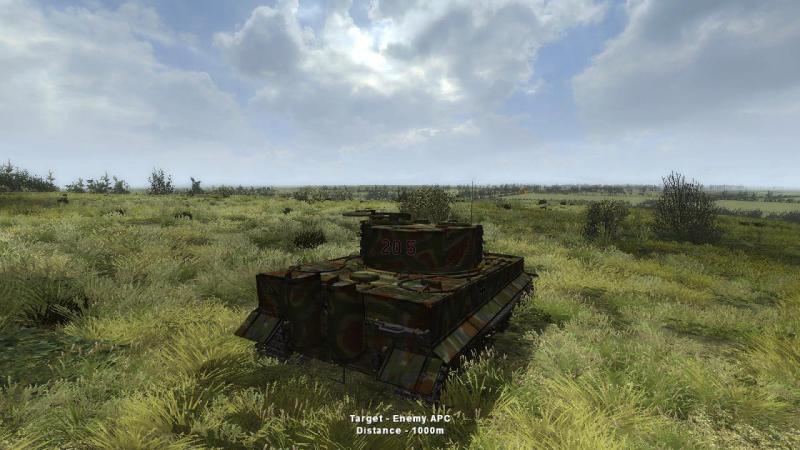
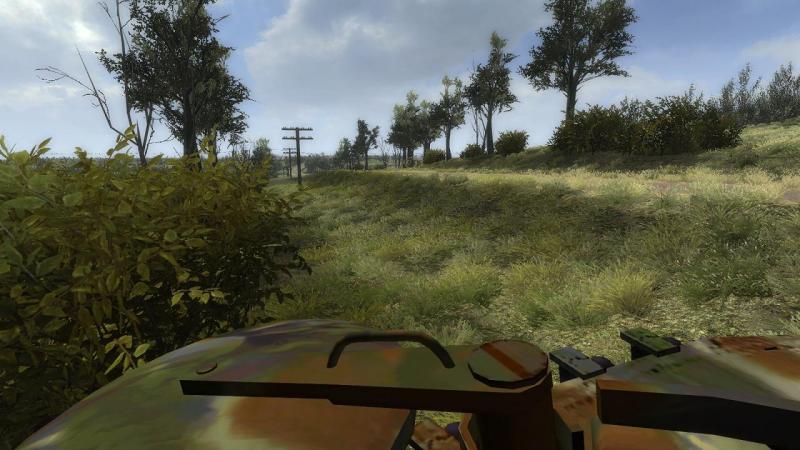
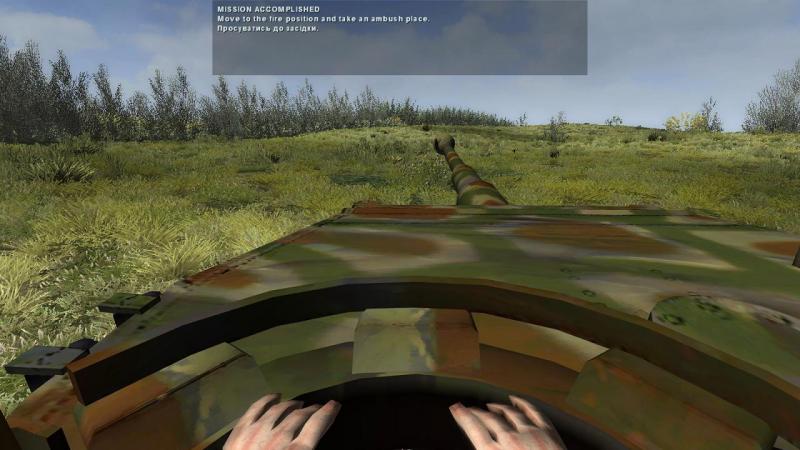

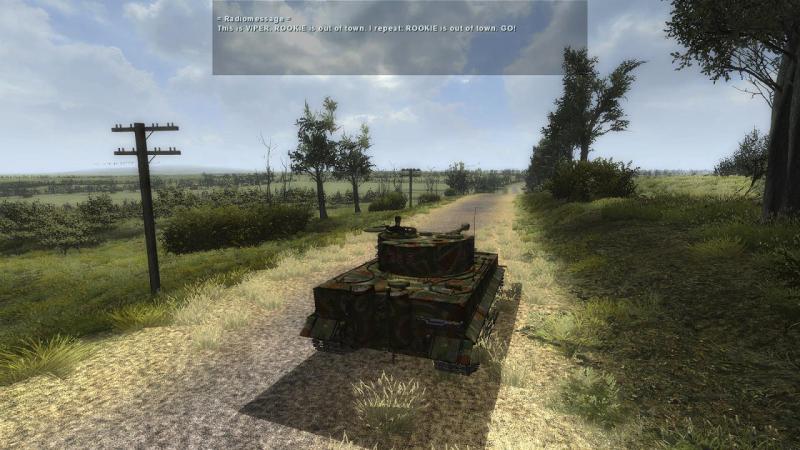
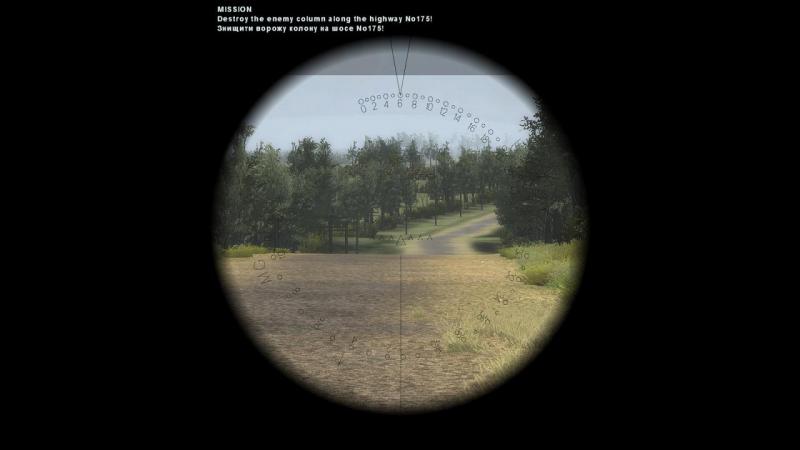
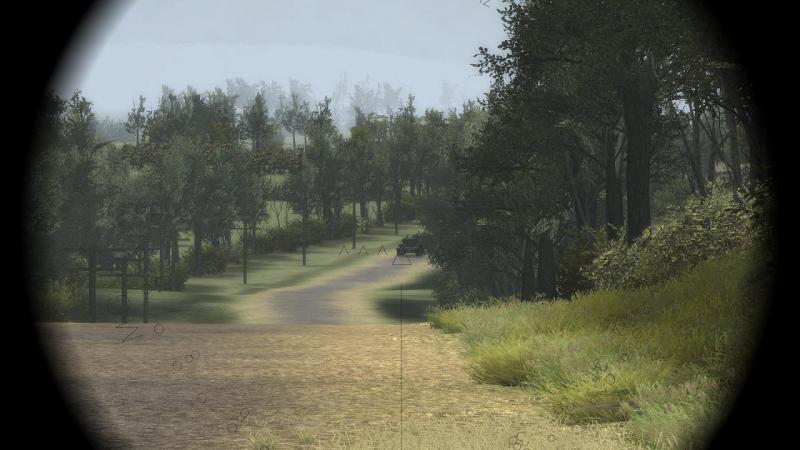
- 12 replies
-
- 2
-
-
- sta mod
- steel fury
- (and 2 more)
-
Fighting Steel Fury's version of WW2's most famous tank action! OK, so maybe Kursk was more famous, but it was a battle with tanks in it, rather than a specific tank action. In the latter category, few can be more well-known that Michael Wittman's (largely) solo action against the spearhead of the British 7th Armoured Division at Villers Bocage in Normandy, on 13 June 1944. This mission report is based on the first of three new missions by the Steel Tank Addon (STA) team, featuring the equally-new Normandy terrain; my earlier Panzer IV report was based on one of the other missions in this set. This is a very welcome addition to what's been a solidly Eastern Front tanksim, apart from a desert mod and some NW European missions, the latter nearly all based on Soviet maps. The Villers Bocage map isn't an exact replica of the actual terrain: for example, Villers Bocage itself lacks the closely-spaced rows of buildings on some narrow streets, I suspect because SF's AI would have difficulties with these. But it's pretty close, and with its hedgerows and distinctive buildings and structures, it really makes the player feel like he's somewhere different, where lines of sight are short and an A?T gun, a bazooka or a tank could be lurking on the other side of every hedgerow. As with the terrain, the mission is not an attempt to reproduce exactly the Witmann action, which itself has been the subject of different interpretations over the years. Rather, it captures the spirit of the fighting that morning, fifty-one years ago. You're playing the role of Michael Wittmann and you are ordered firstly to get to Point 213 a few hundred metres to your north, and ambush the British advance guard from there. Having done that, you are to attack into Villers Bocage itself and destroy the enemy there, too. You have just your own Tiger initially, but a second one is being made ready and will join you at some point. You are also warned to keep out of red zones marked on the map, as these areas are known to be under enemy observation and you will compromise the ambush if you're spotted first. Below is the mission map, showing the first phase. You're starting from Beauvais, marked by the blue oval. On this mission, it's important you follow your orders reasonably closely; for example, your arrival within the oval area around Point 213 will, I believe, trigger the British advance from the town, up the N175, towards you (along with simulated radio traffic warning you of this). Kicking off the mission, I ordered an AP round loaded and from the external view, had a look around. Below is my Tiger in the hamlet of Beauvais, with the as-yet-unready second Tiger stationary close by; to my front was a radio-equiped Kubelwagen field car. Wasting no time, I turned north and rattled off, towards Point 213. You can just about see Point 213 in the screenshot below: it's the rising ground more or less right behind the little house, half left. I was steering slightly right of it, to ensure that I stayed away from those darned red zones. I was careful not to smash the well or otherwise do more damage than I could avoid, to the nice Norman scenery. The fence in front of me was the exception. It was a shame to mangle that nice ironwork but the shortest distance between two points being a straight line, it just had to go. Soon, I was rattling as fast as I could go, over the relatively flat, open ground towards my first objective. I say 'open', but the terrain is a good deal less open than the usual SF landscape, criss-crossed with hedgerows and dotted with patches of woodland. Not ideal Tiger country, as I was soon to find out! ...to be continued!

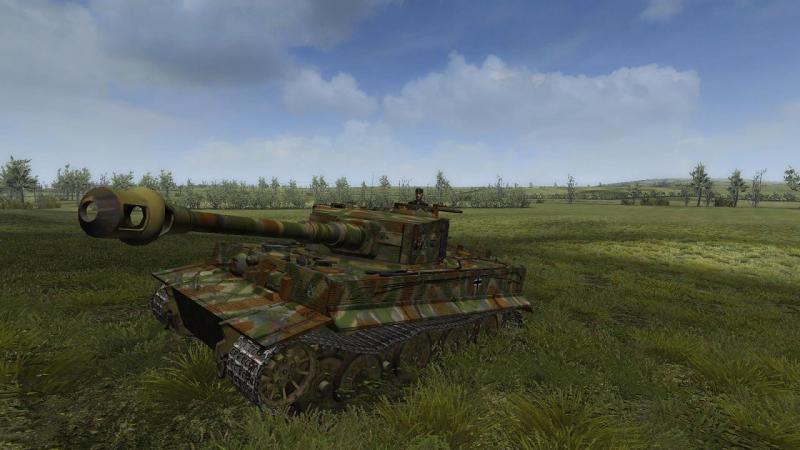
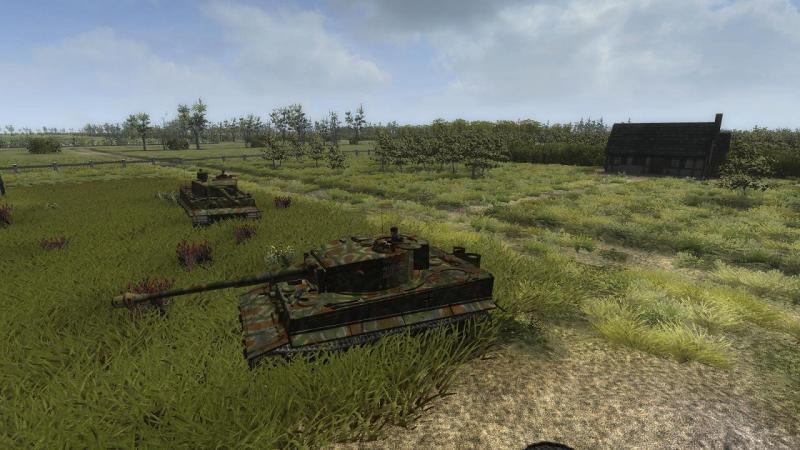
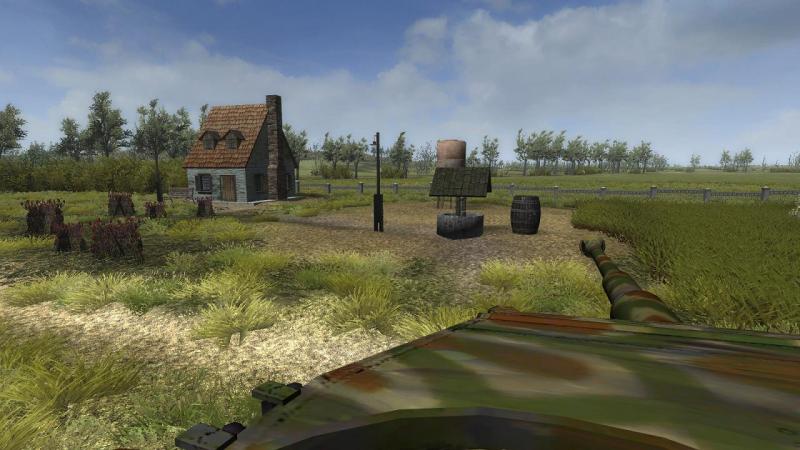

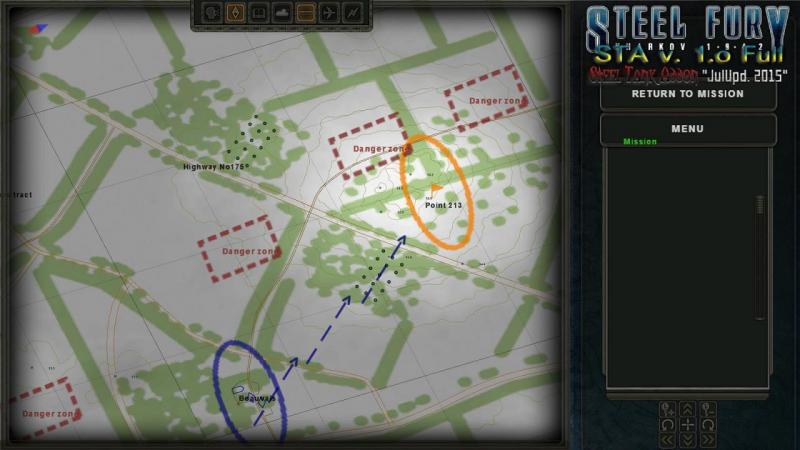
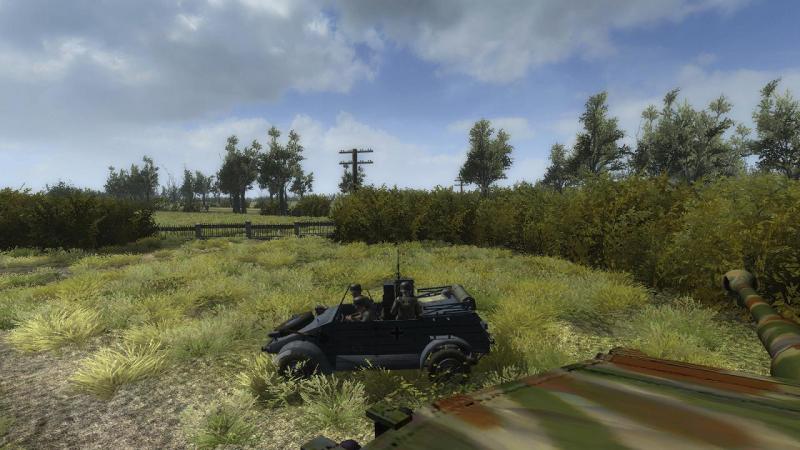
- 12 replies
-
- 5
-
-
- sta mod
- steel fury
- (and 2 more)
-
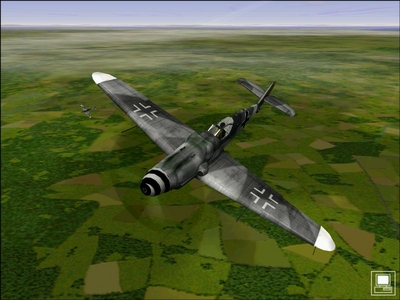
From the album: Combat Sims
-
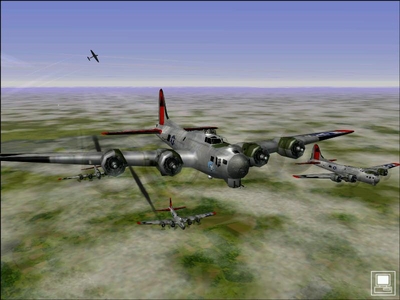
From the album: Combat Sims
-
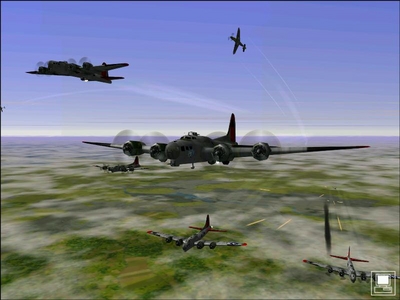
From the album: Combat Sims