33LIMA
-
Posts
3,749 -
Joined
-
Last visited
-
Days Won
7
Content Type
Profiles
Forums
Gallery
Downloads
Store
Everything posted by 33LIMA
-

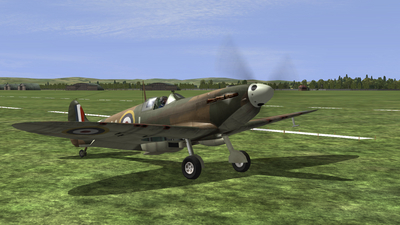
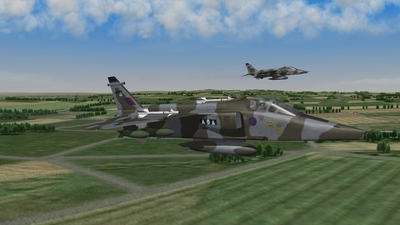
Spitfire II, 'Spitfire Scramble' campaign, IL-2 '46+CUP
33LIMA posted a gallery image in Member's Albums
From the album: Combat Sims
-
Spitfire II, 'Spitfire Scramble' campaign, IL-2 '46+CUP
33LIMA posted a gallery image in Member's Albums
From the album: Combat Sims
-
From the album: Combat Sims
-
From the album: Combat Sims
-
From the album: Combat Sims
-
PS there is now a demo available; at time of writing, this is of the April 2015 version of SABOW, and the Gamersgate and Steam sales are still on: http://graviteam.com/games/SABOW.html?action=downloads The first May update is reported to be coming soon, with additional single missions and other improvements. SABOW is already one serious tanksim, in the same league as Steel Beasts in my experience and highly recommended to anyone with a serious interest in this genre.
- 3 replies
-
- 1
-

-
- sabow
- steel armor blaze of war
- (and 1 more)
-
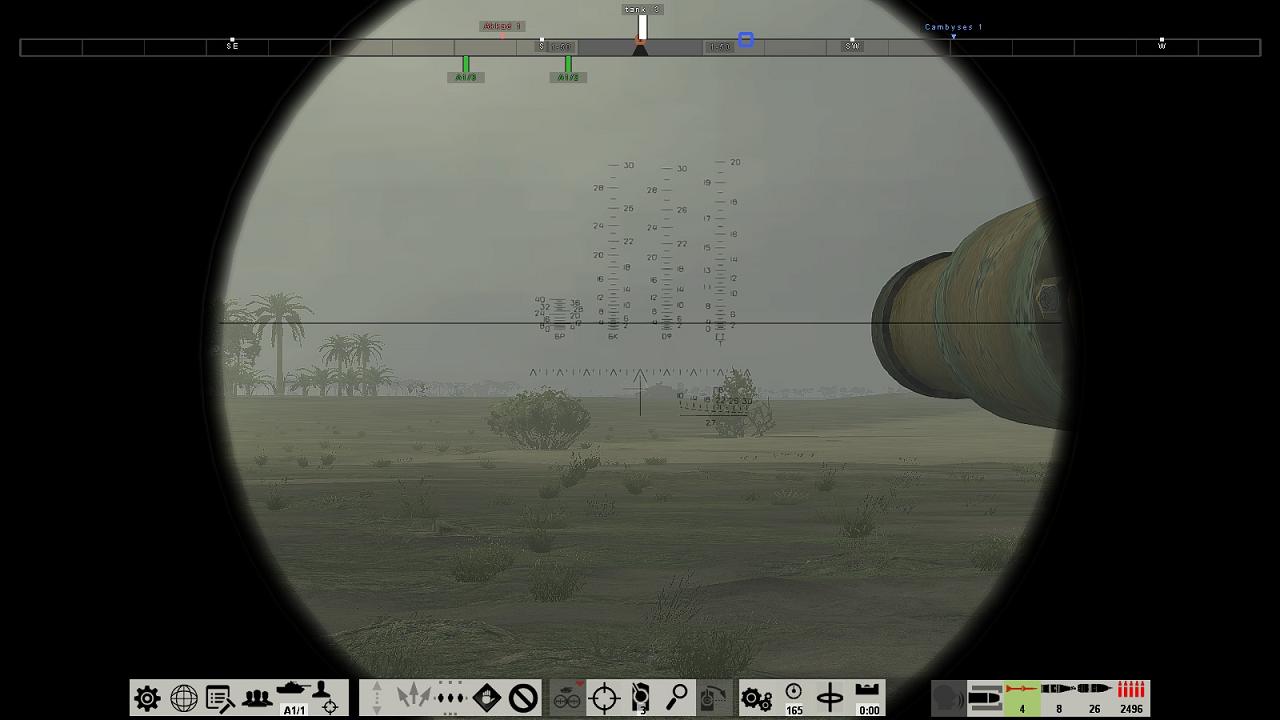
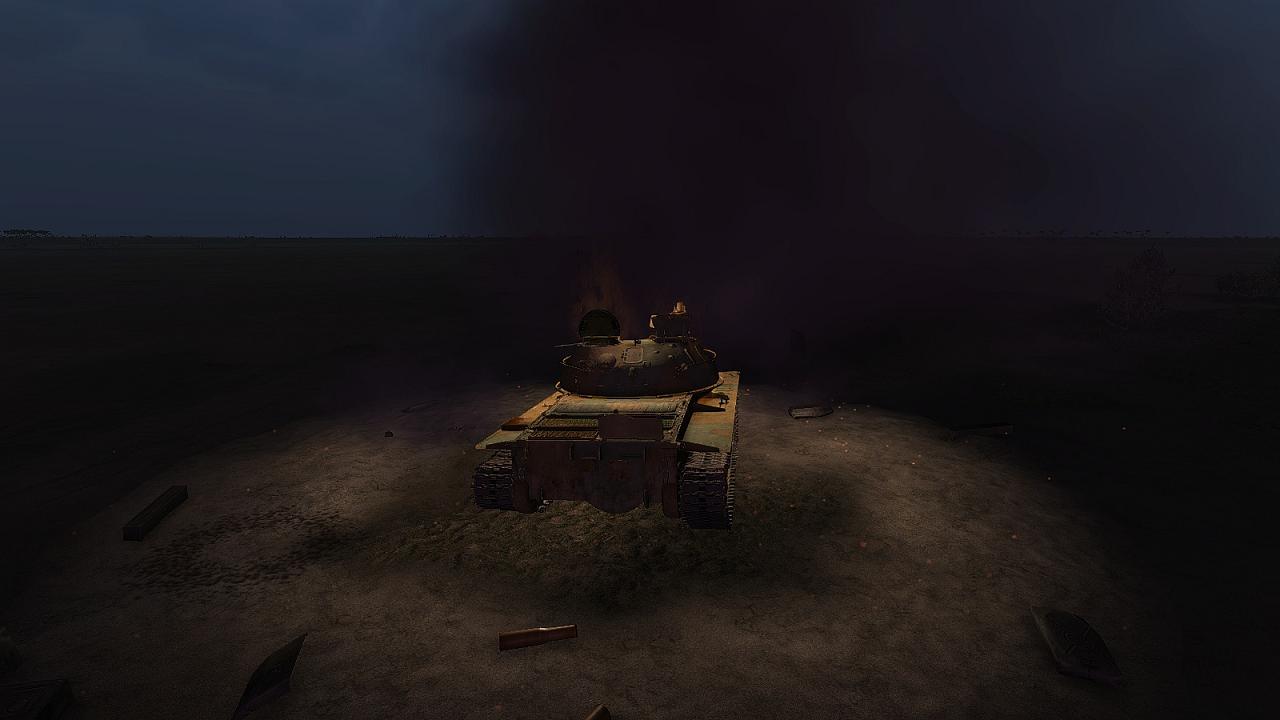
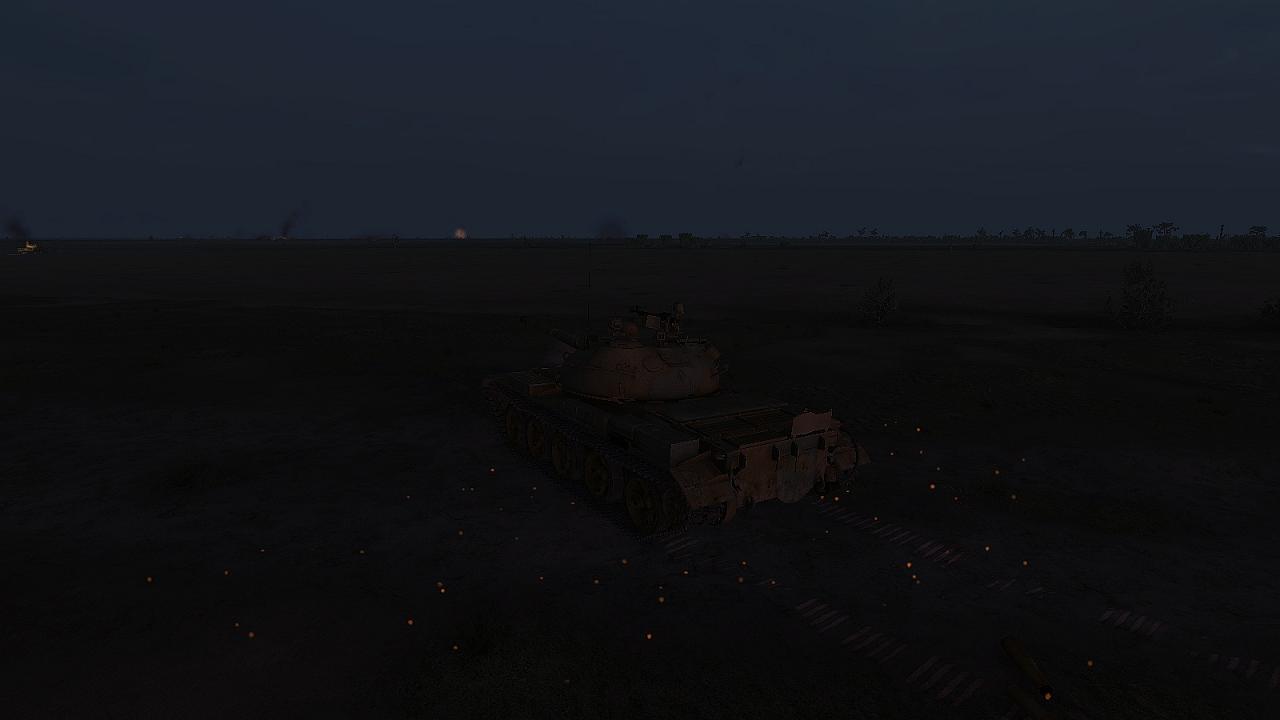
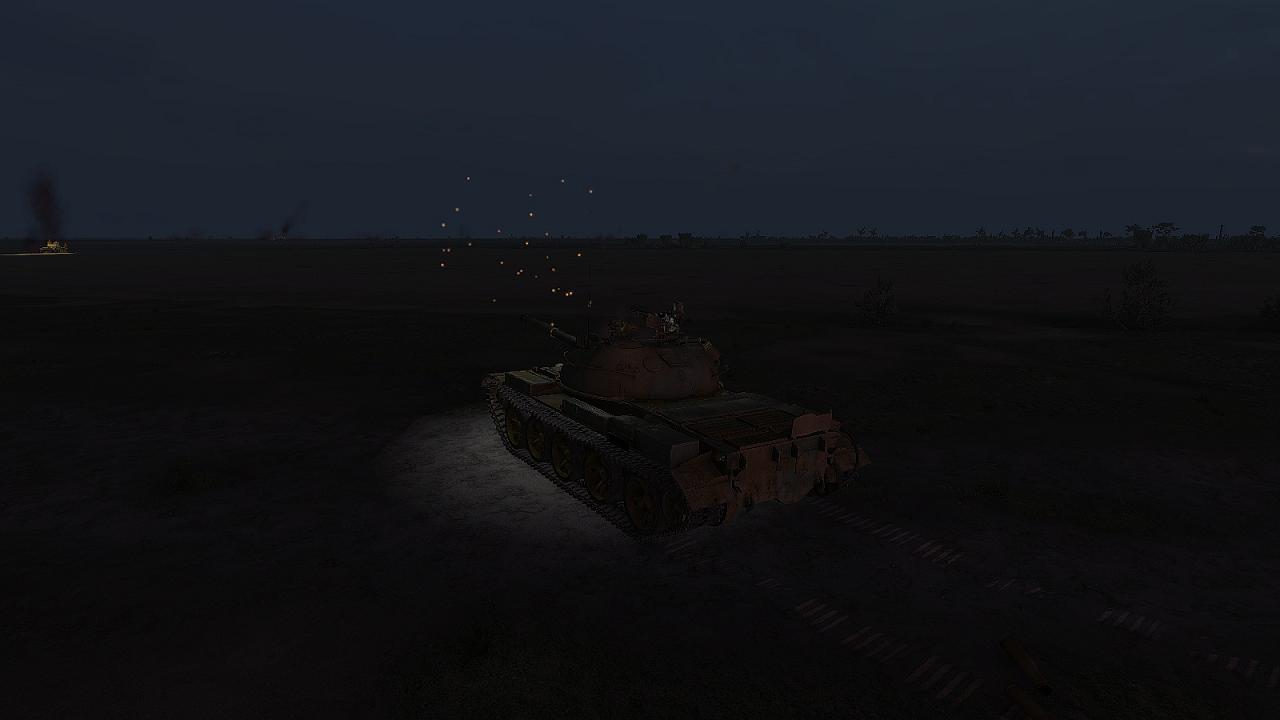
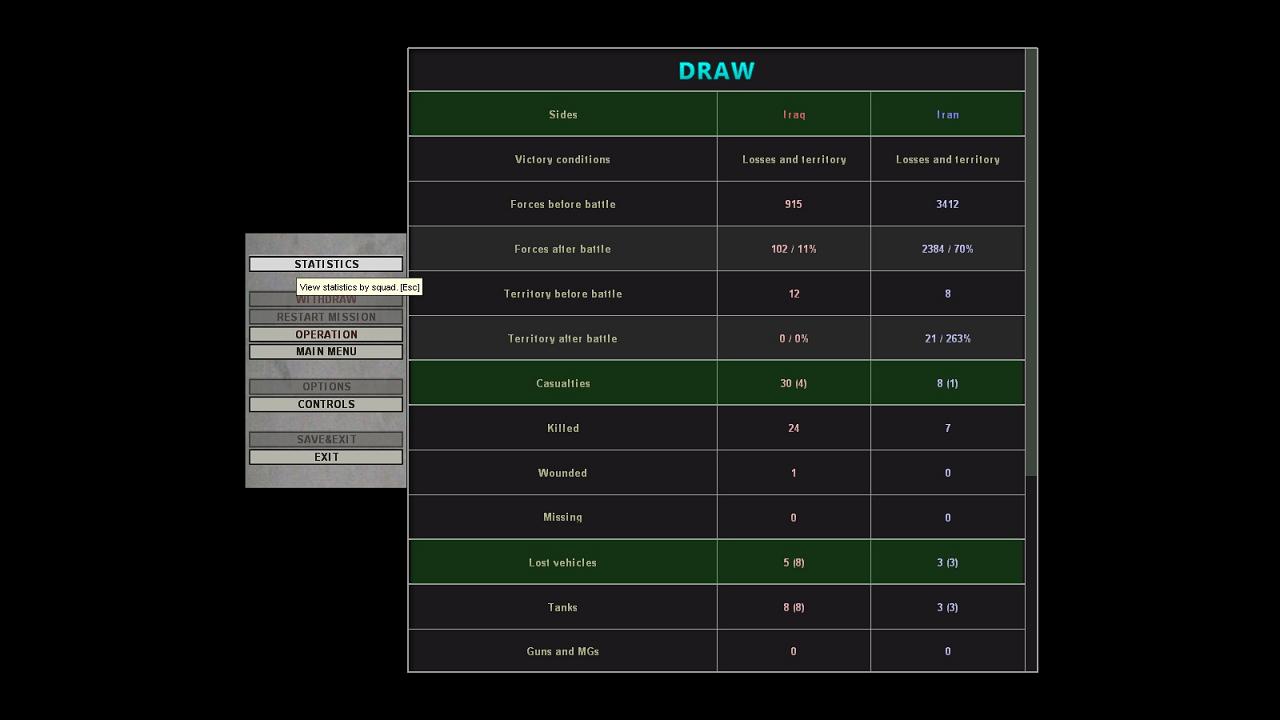
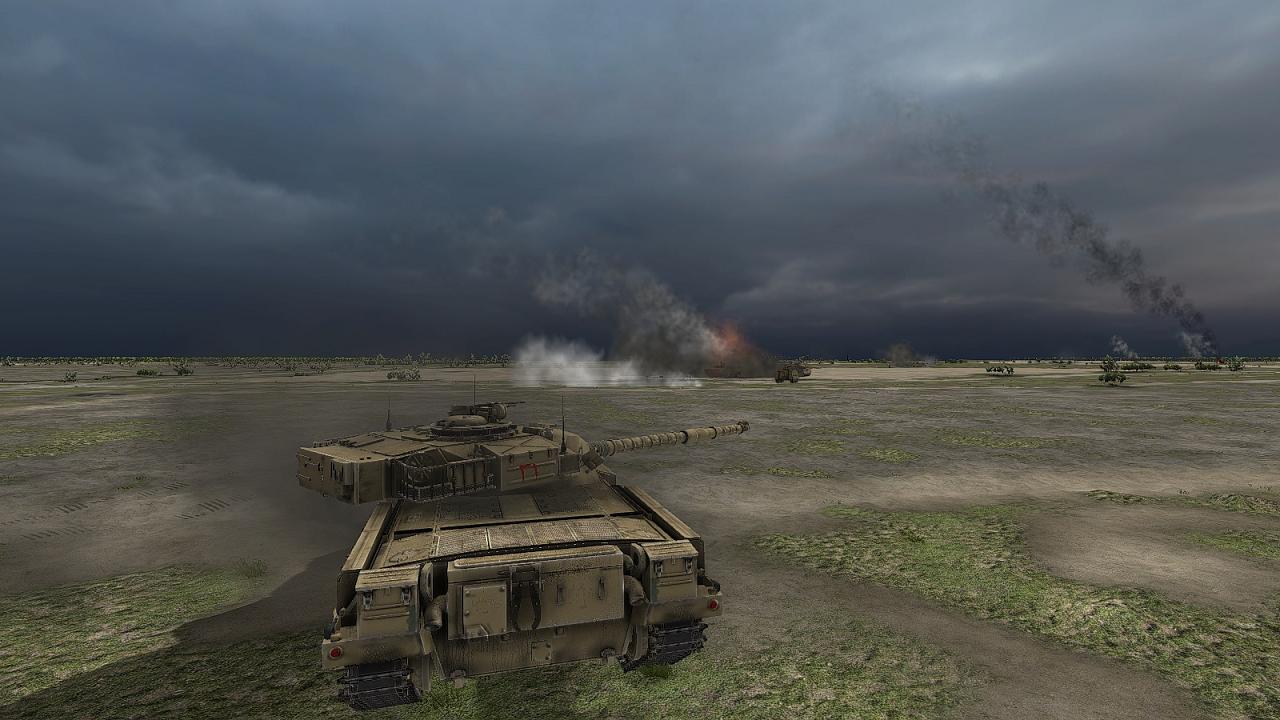
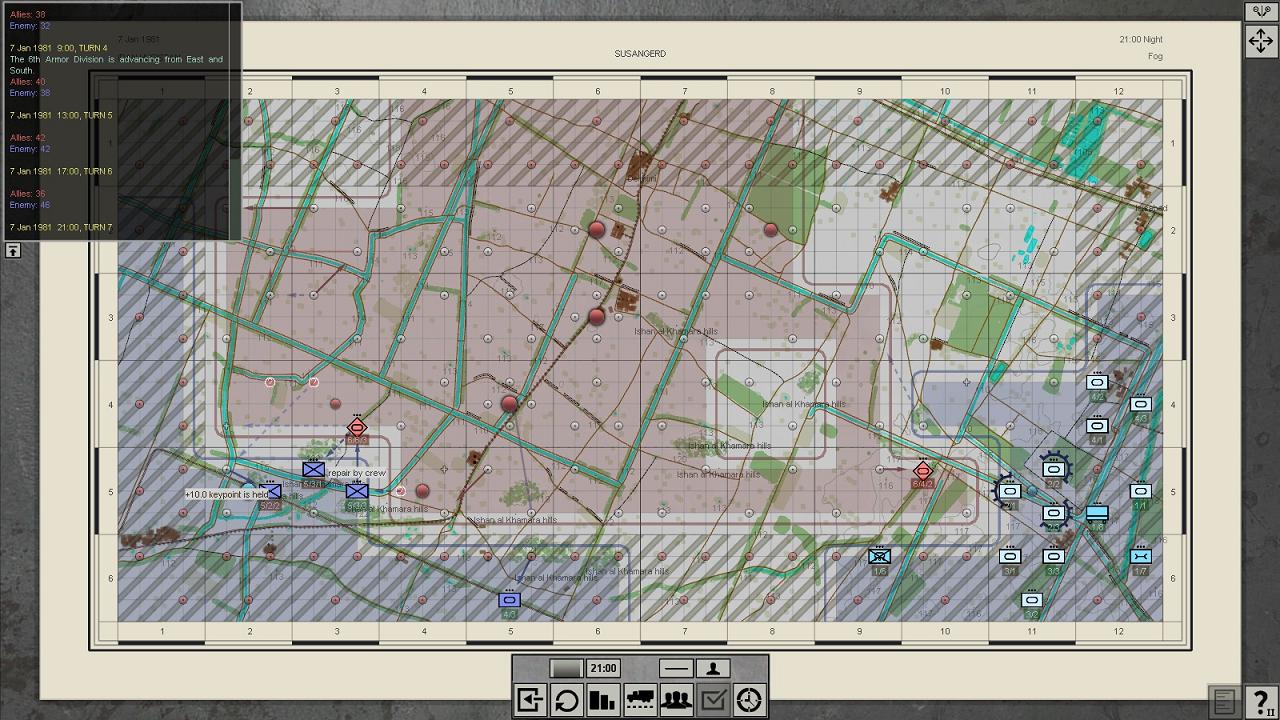
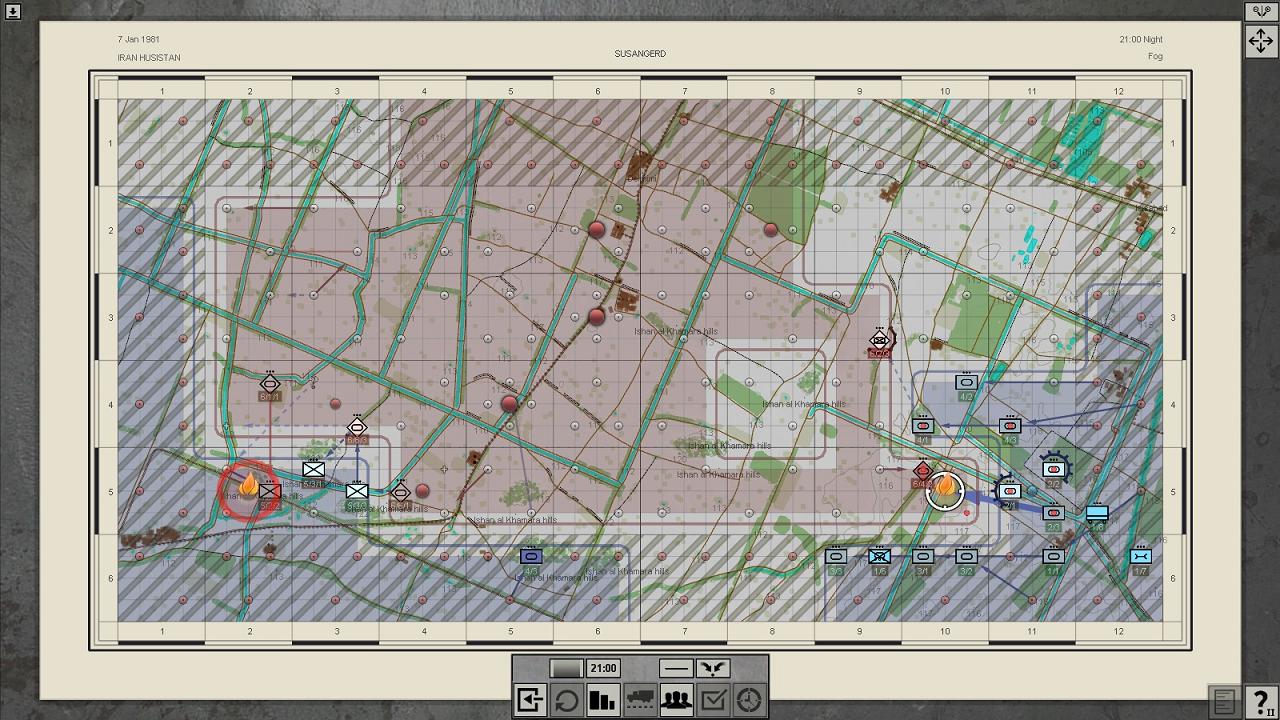
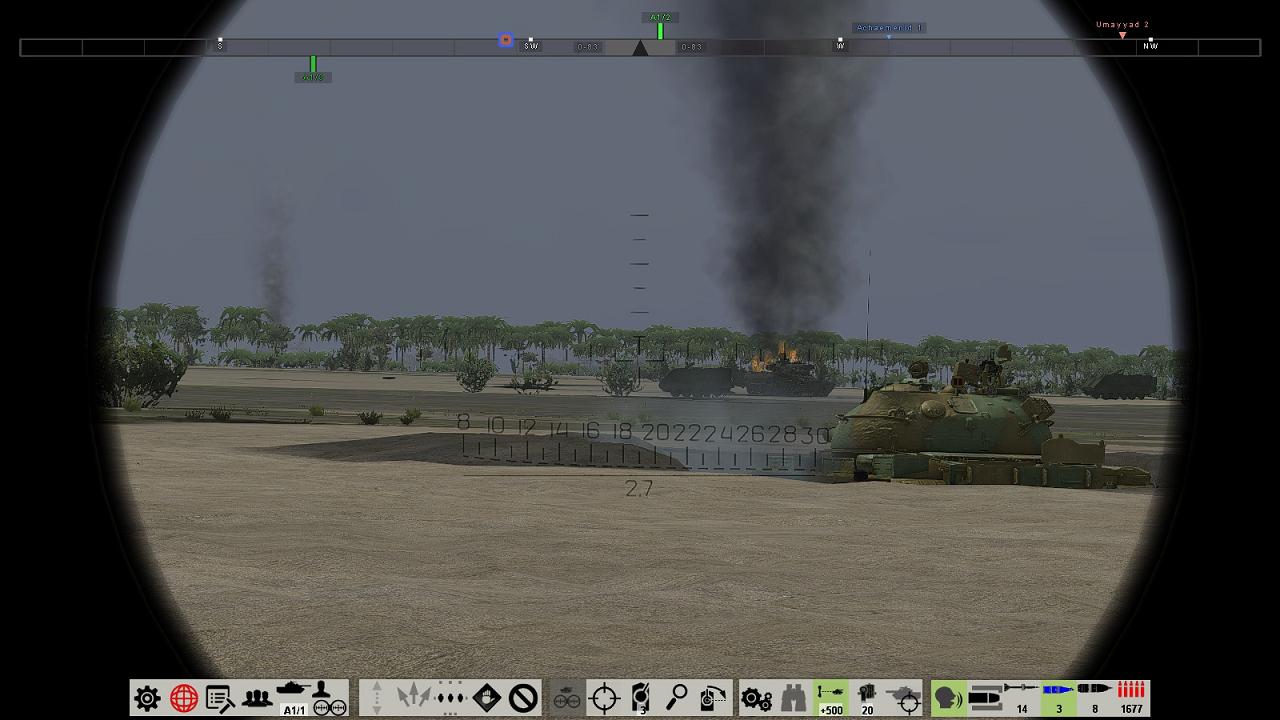
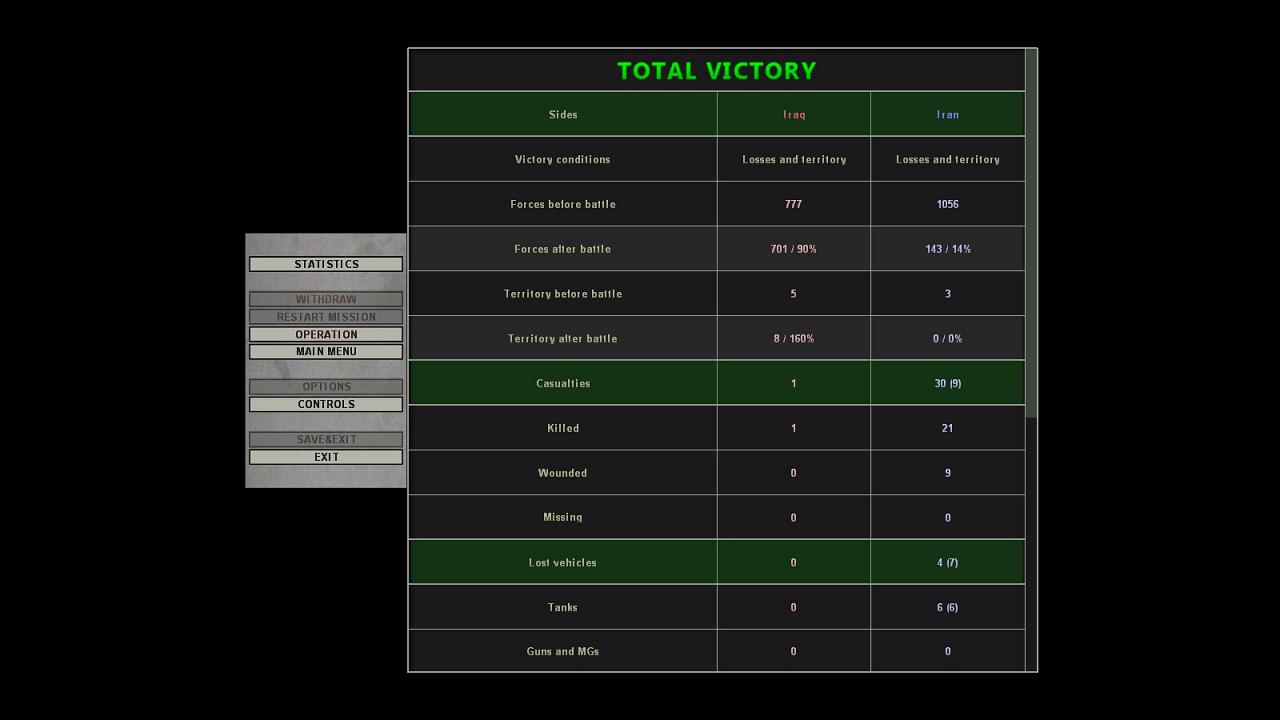
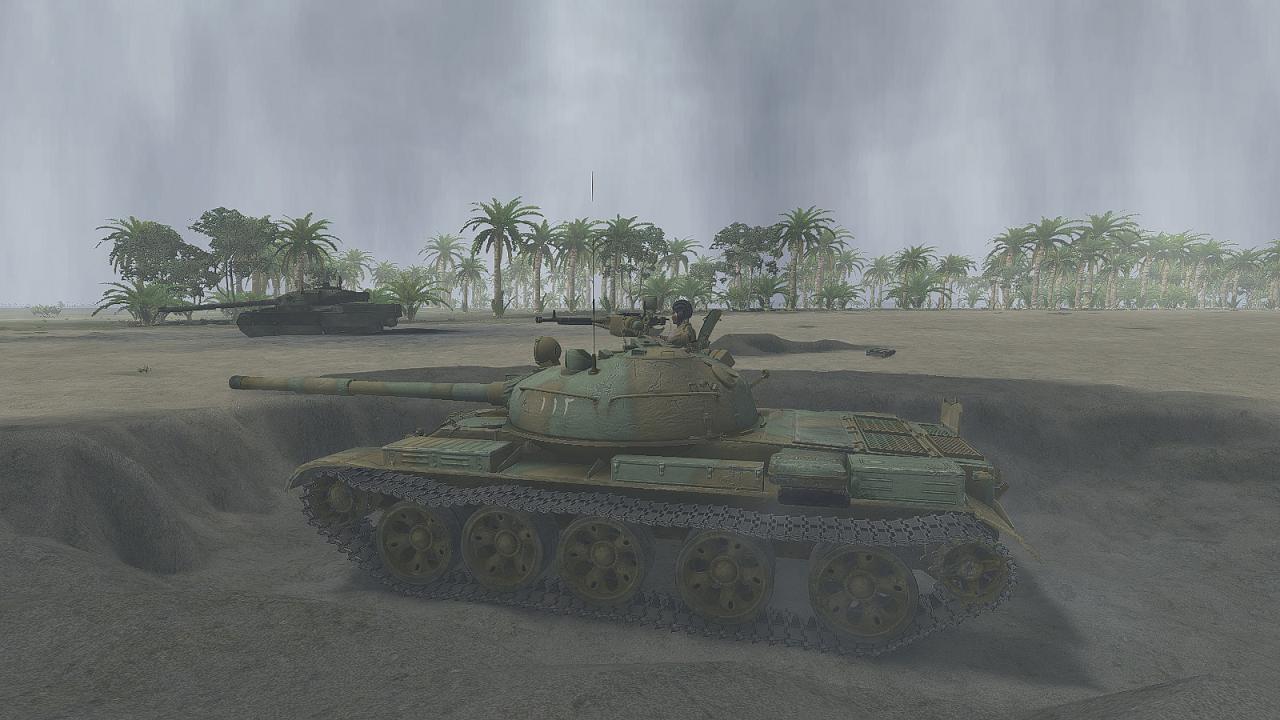
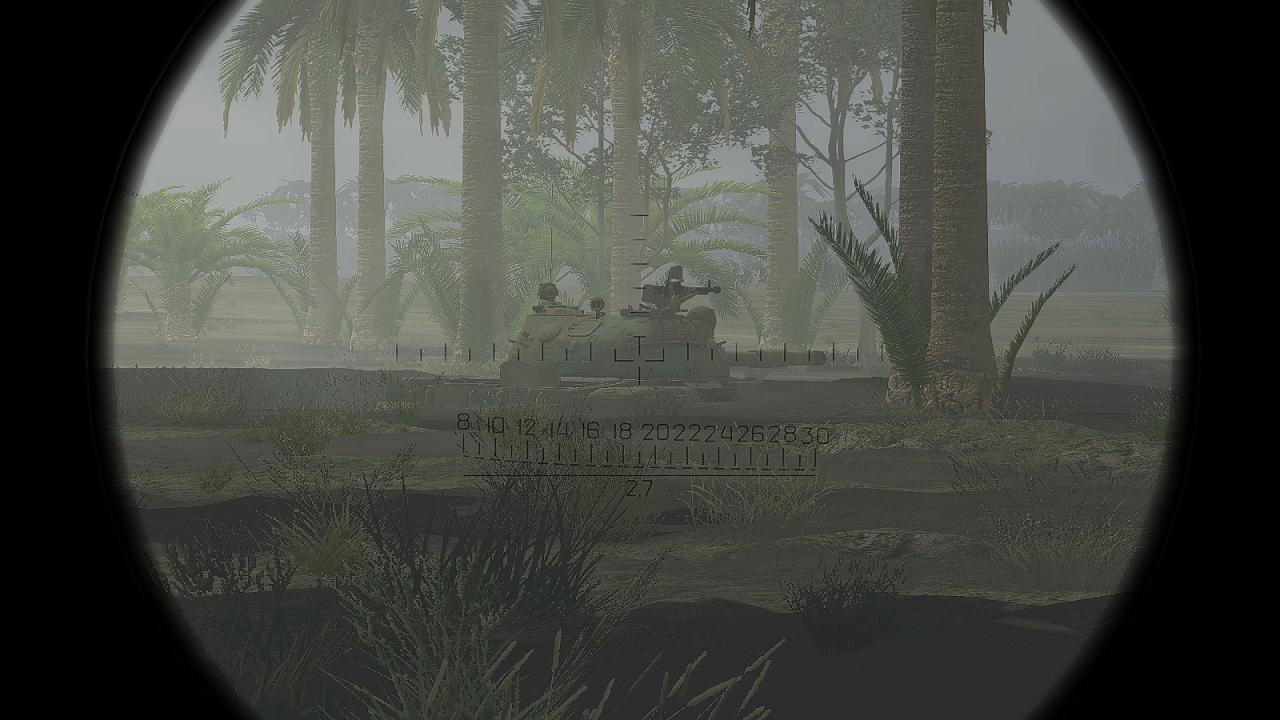
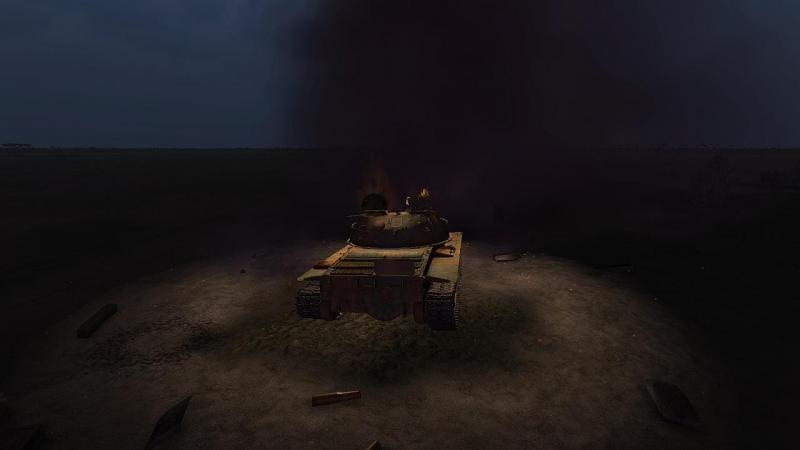
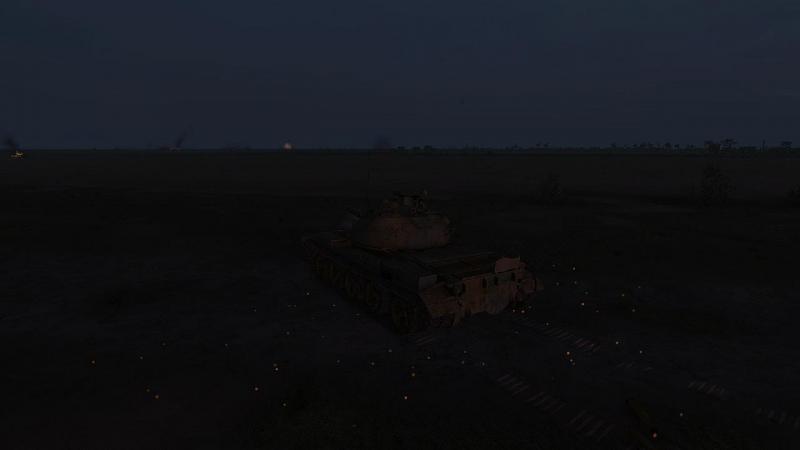
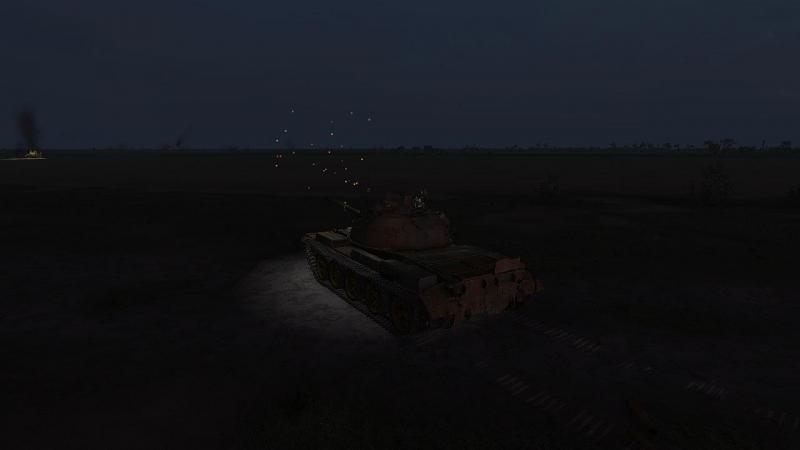
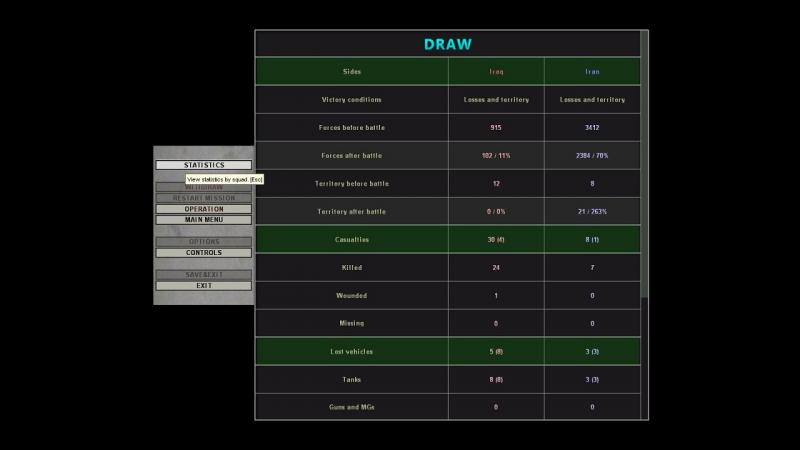
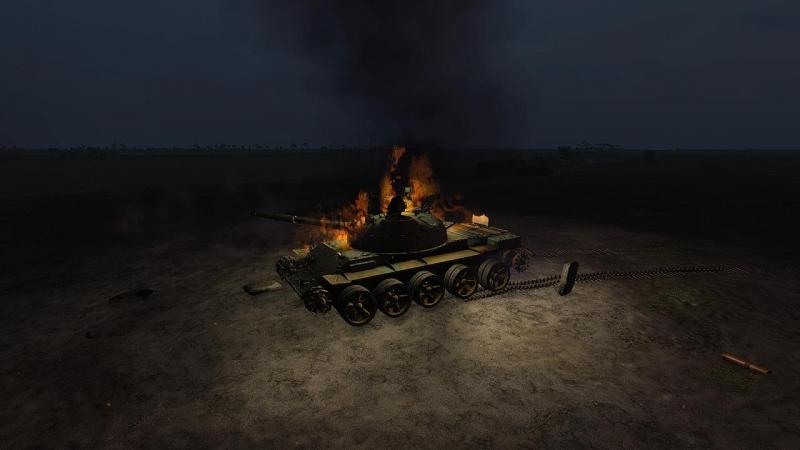
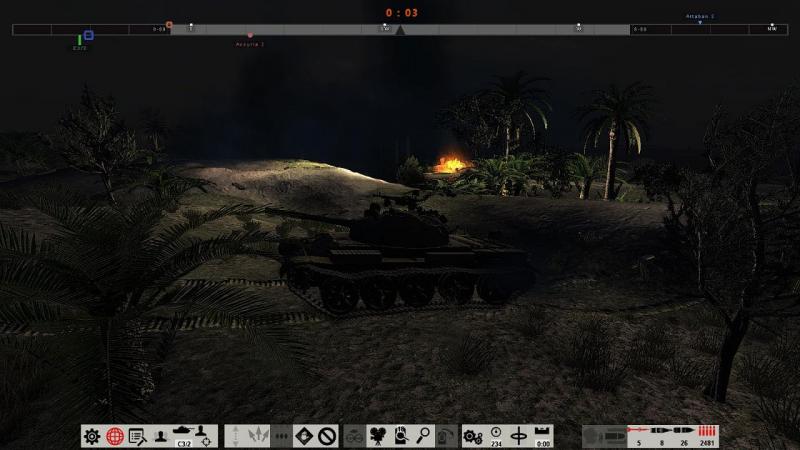
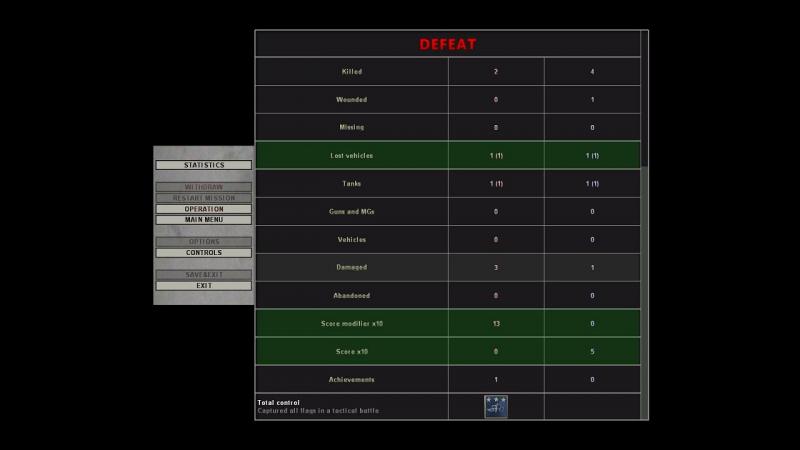
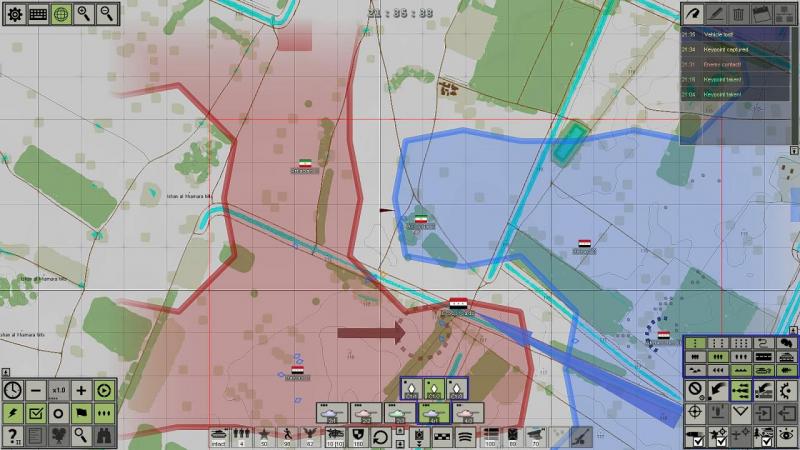
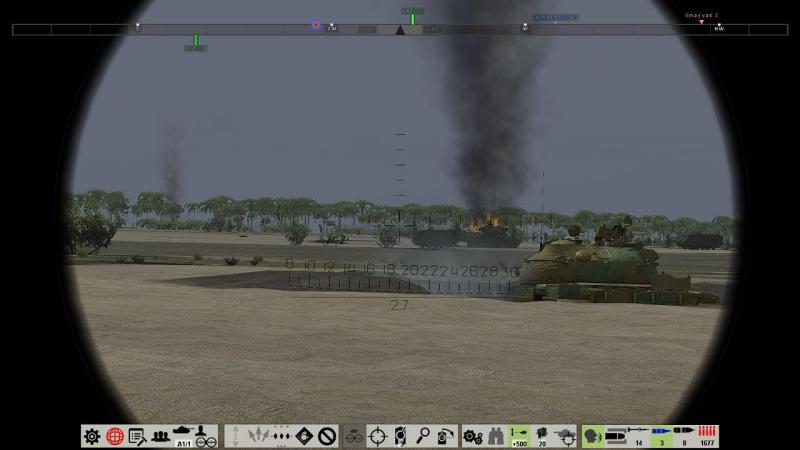
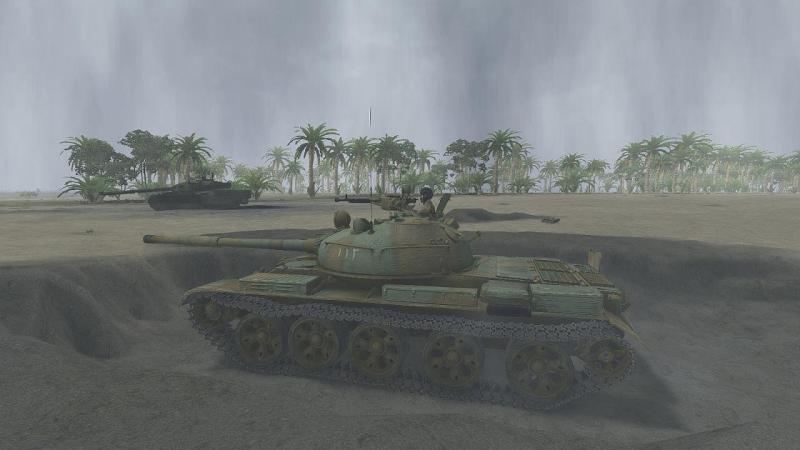
A final enemy fling! The a lull in the firing continued. I ordered my platoon to cease fire, to prevent ammo being wasted shooting up escaped tank crews, that might soon be needed for more important targets. Various beeps on the radio net had indicated incoming radio messages which, if they had displayed as text, I hadn’t read or if played in Russian, I hadn’t understood (all SABOW voices are in that language). I now called up the map, to read the message log...and in particular, to find out how my left-hand platoon had stood up to the concentrated Iranian tank attack. This we had halted, but at what cost? In the message log, top right of the screen above, contact reports mingled with reports of tanks lost and commanders killed. In fact, my left-hand platoon had been wiped out in the short but vicious firefight. The map indicated intact enemy tanks still down there but they were old contacts still marked up, sighted by my dead platoon before the end came. However, I had myself seen two Chieftains turn towards us and drive into cover from which they had not yet emerged. I decided it was time to shift position, partly to thwart any enemy countermove and partly to get into a better position from which to get at the remaining enemy. To the left rear of my centre platoon was a strip of woods, running north-south beside an irrigation channel. I drove my tanks over there and into cover, one moving while the others covered. A track worn into the ground just beyond the trees gave us a little extra protection. We made it without incident and I started scanning again. I put a round into a stationary Chieftain who wasn’t already burning, just in case. To our left rear, I now had a clear view of what was left of my platoon down there – basically, blazing T-62s whose ammo cooked off noisily, every so often. Hard left, we were now much closer to the knocked-out Chieftains. The company had paid a price, but we had held our key point and reaped a savage harvest from amongst our attackers. It looked like we had done it, this time! A heavy attack by at least two platoons of enemy heavy tanks had been reduced to scrap metal. I couldn’t see the one or two Chieftains that had gone to ground so kept a wary eye out for them, but I suspected it (or they) had re-appeared unseen and were now amongst the many knocked-out tanks which marked the course of the failed enemy thrust. Just as well, because all but HE ammo was getting very low; the T-62’s 40-round loadout doesn’t seem to go very far, in a sustained tank action. I began to relax... ...but not for long! A contact report suddenly came in from my right hand platoon, up north, reporting another enemy advance - more tanks! I jumped back to the gunner's sight in my centre platoon's command T-62 and scanned for the enemy. There they were - at least two more Chieftains! They were barely visible in the gloomy conditions as they crossed the open ground over to the north west, maybe 800 metres away at most. At this point I remembered that this tank was out of armour piercing rounds of any description! In something approaching panic, I switched to my next tank, who wasn't much better off, with just a few HEAT rounds left. By this time, however, the enemy armour was flitting into and out of sight, screened most of the time by the ragged line of trees to out front, which stretched off to our right. If the enemy tanks had spotted us, we were in trouble! But no, we were in luck. They came back into view as they carried on to the east, then turned north-east towards our platoon and the nearby key point up there. I started firing at the leading Chieftain as soon as my sights came on. By this time the enemy tank was nearly rear-on to me, which helped, as it reduced his effective crossing speed and presented his thinnest armour. I quickly hit him, waited impatiently for the reloading cycle, then hit him again. He stopped and the crew bailed out, catching a short burst from my co-ax in the process. But he wasn’t alone. First one, then two more Chieftains emerged from behind the palm tree screen to my right front. They seemed unaware that their leader had been shot from behind and I was soon treating them in the same manner with my remaining HEAT ammo, while rounds from my other platoon crashed into them from the north. This was exactly the way I had planned it – the enemy advance locking on to the platoon defending their objective then being caught by concentric fire from their flank. I’d now pulled this off twice, in fact! This second time was easier, a smaller enemy force, caught in a more exposed position. It was soon all over. That was about it! SABOW called it time...and on this occasion, I had no difficulty agreeing with the final assessment - a 'TOTAL VICTORY'! The ‘Operation’ option to the left of the results table above would, I think, have let me carry on with the next battle or turn. It was getting late, though, and I decided to call it a day. But first, I used the ‘Statistics’ option to run a free camera over the battlefield. This lets you look at hits, damage and other key stuff for every tank or other unit; but I just wanted to take a quick peek at the damage I had done. It was satisfyingly extensive. The southern attack had included no less than ten Chieftains. Most were on fire, though realistically, they don’t burn as fiercely as T-62s, Chieftains having water stowage for their bagged main round propellant charges. The ones I had seen dipping out of view had evidently ended up destroyed or mired in the irrigation channel next to which they had attacked. In turning to counterattack my centre platoon, they hadn’t got very far. Which was just as well for me! To the north, another trail of knocked-out Iranian heavy tanks, four in number, marked the failure of their second attack, with surviving crew members seeking what cover they could. All in all, it was an impressive testament to the firepower of my T-62s, when brought to bear from an advantageous quarter and in overlapping fields of fire. As the previous mission had shown, Chieftain is a very dangerous adversary for the T-62 and head on, is well able to take on and destroy superior numbers, day or night - much as they were designed to do. Caught in the flank, though, they die just as quickly as any lesser tank. And it’s the tanks that seem to dominate the action in this campaign so far, with little to see of the infantry and nothing so far of air or artillery support; new challenges which I’m looking forward to SABOW throwing at me, in due course. At any rate, I’d had my revenge! This was the most intense and exciting mission I have had so far in SABOW and I’m looking forward to the next clash with a mixture of trepidation and enthusiasm!

-
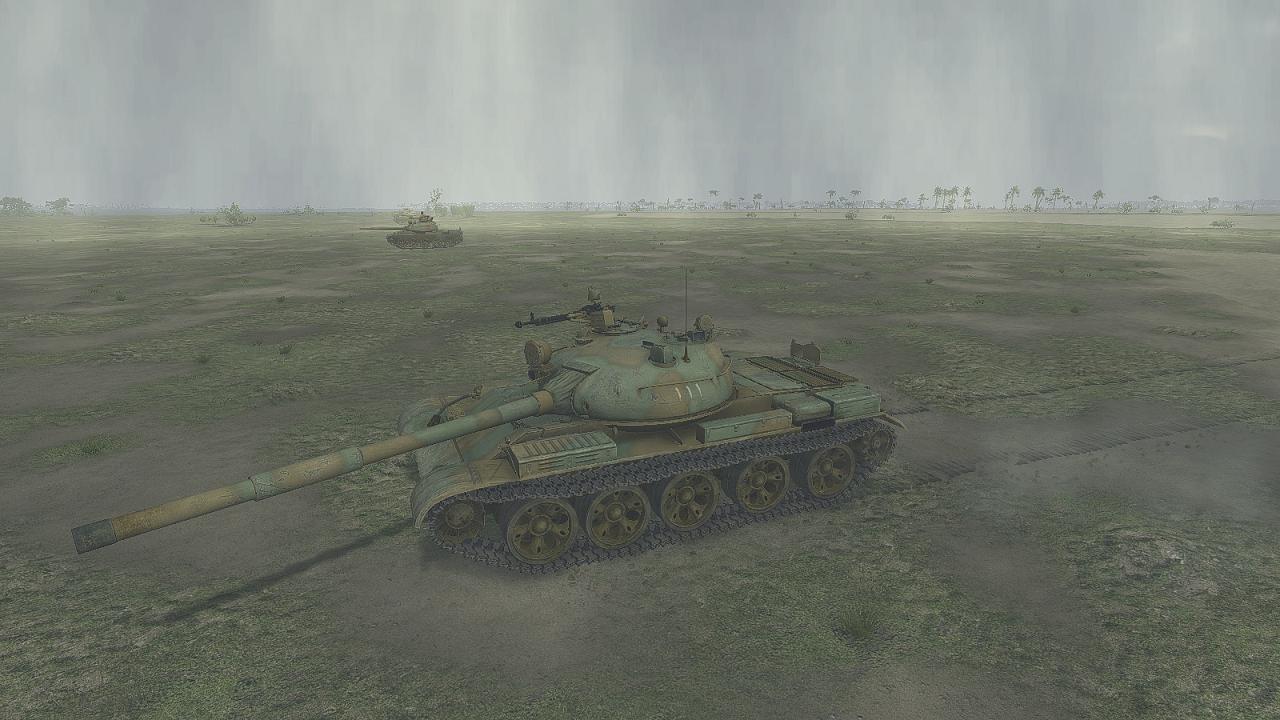
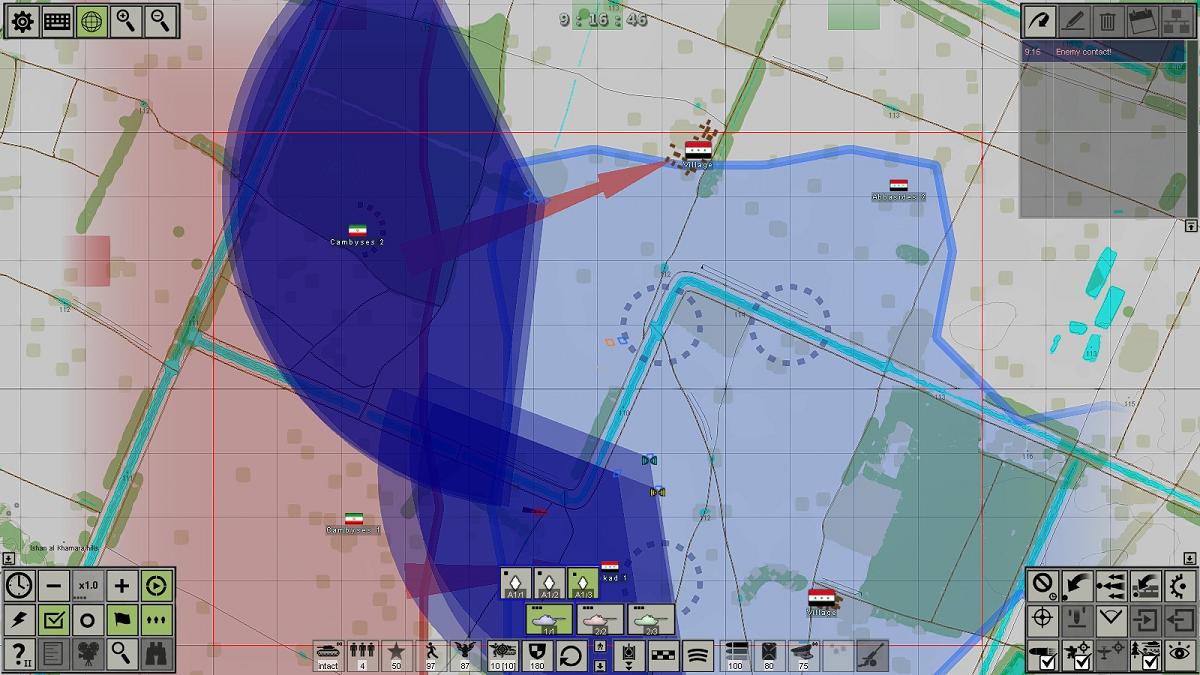
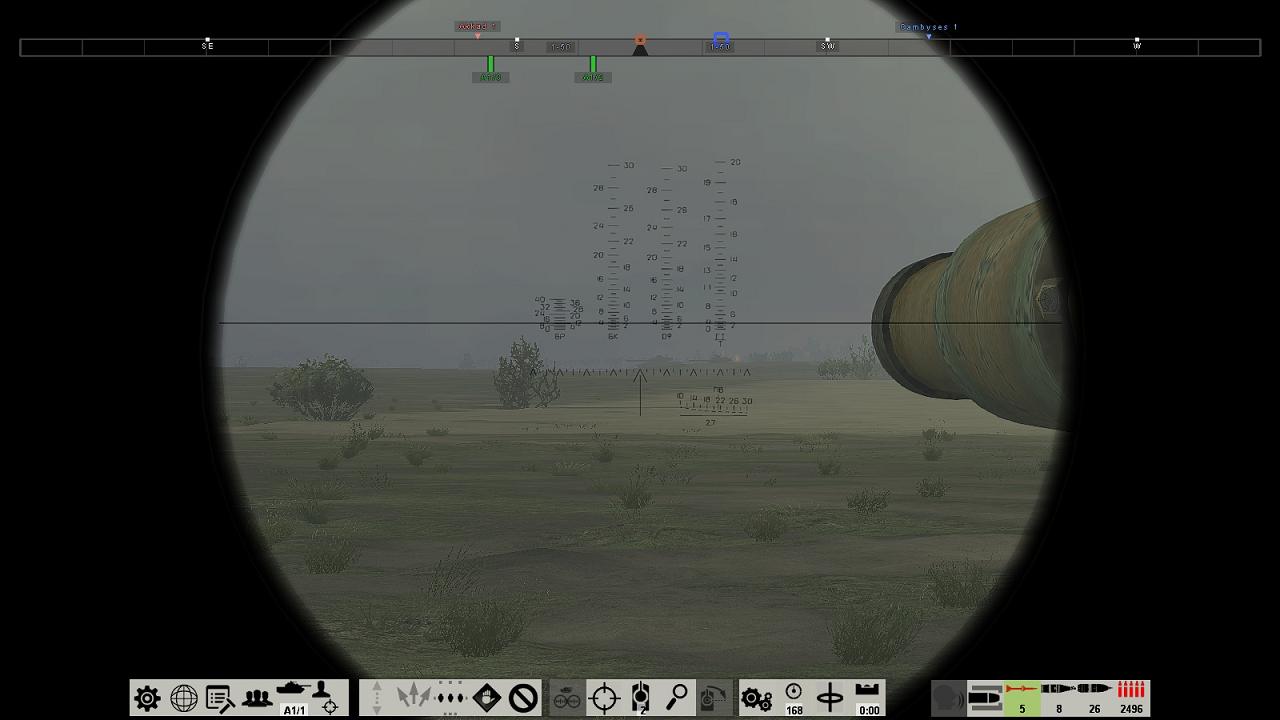
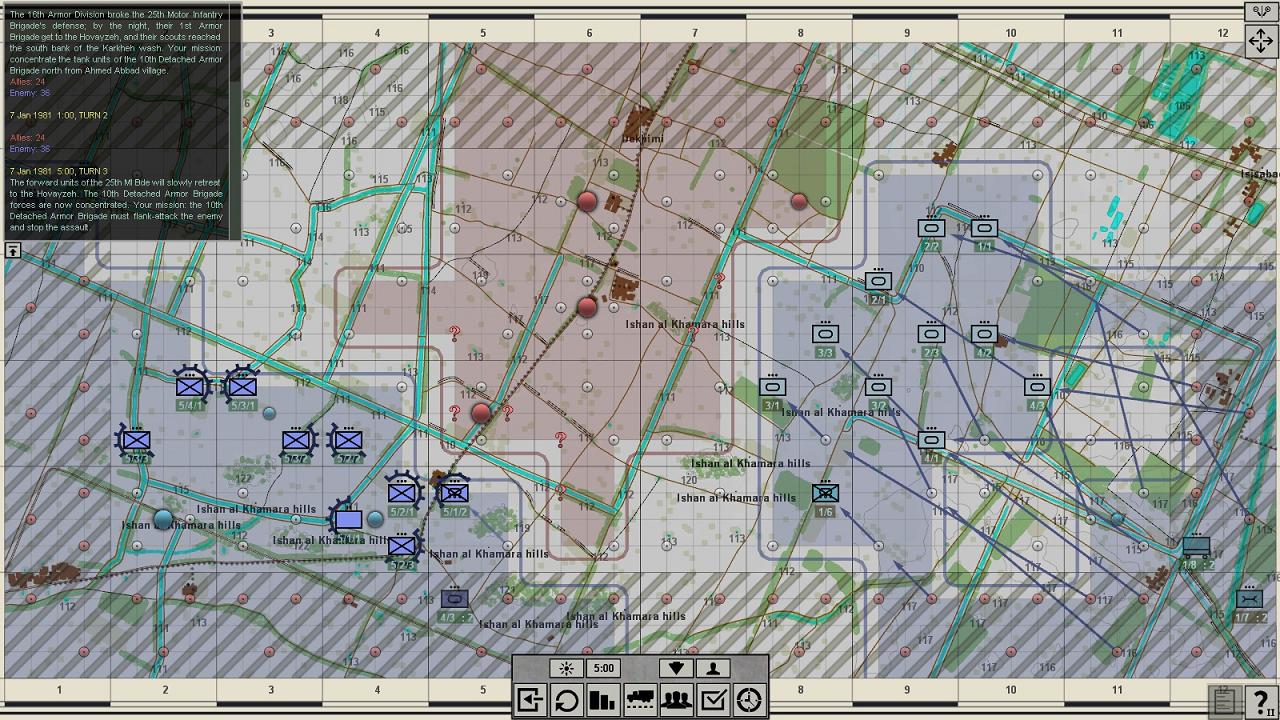
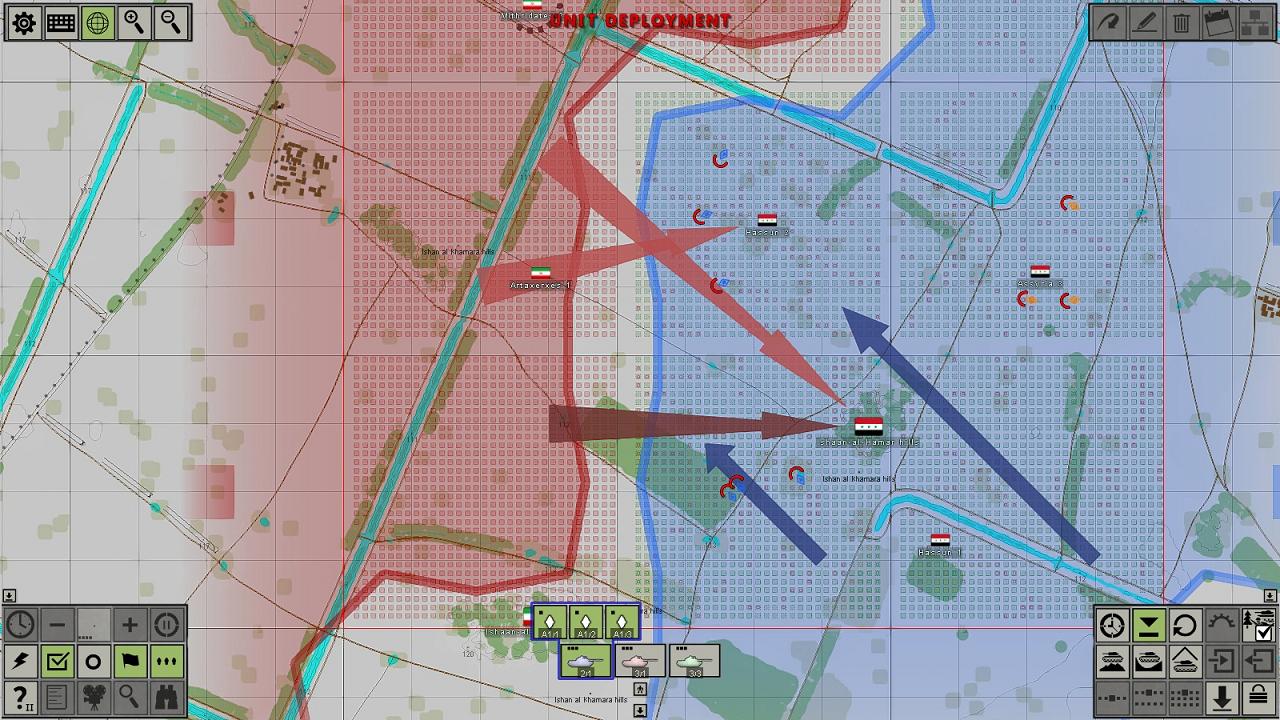
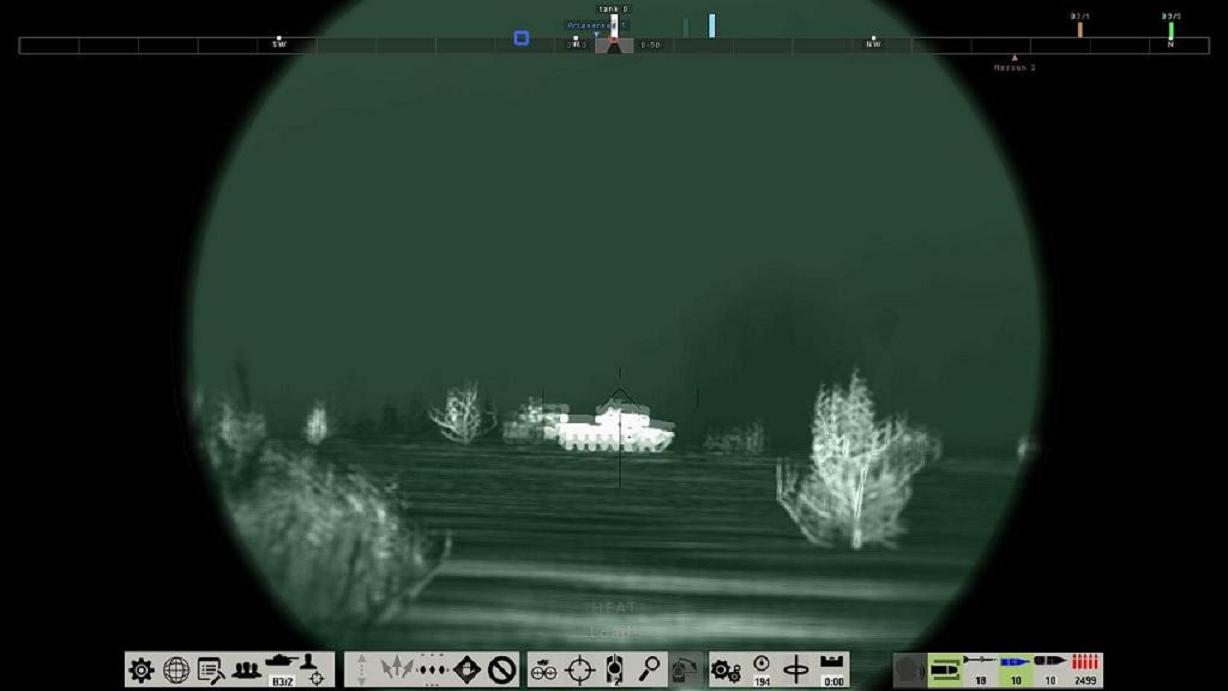
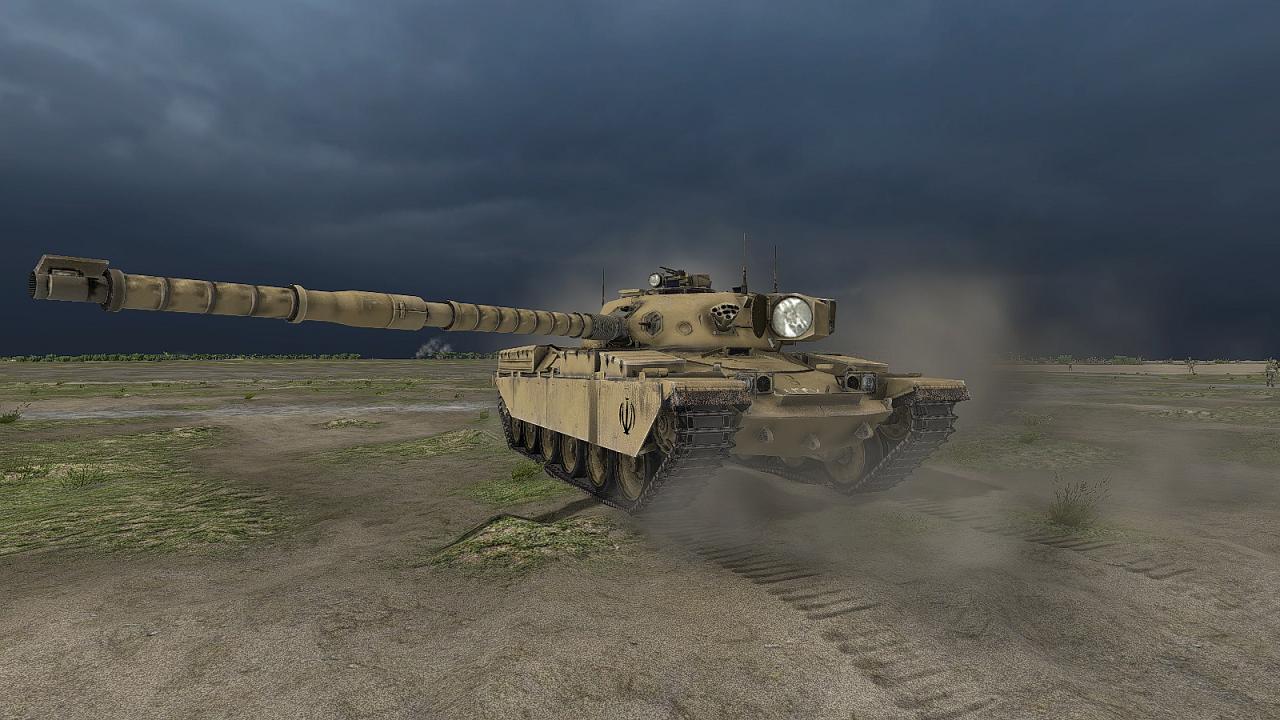
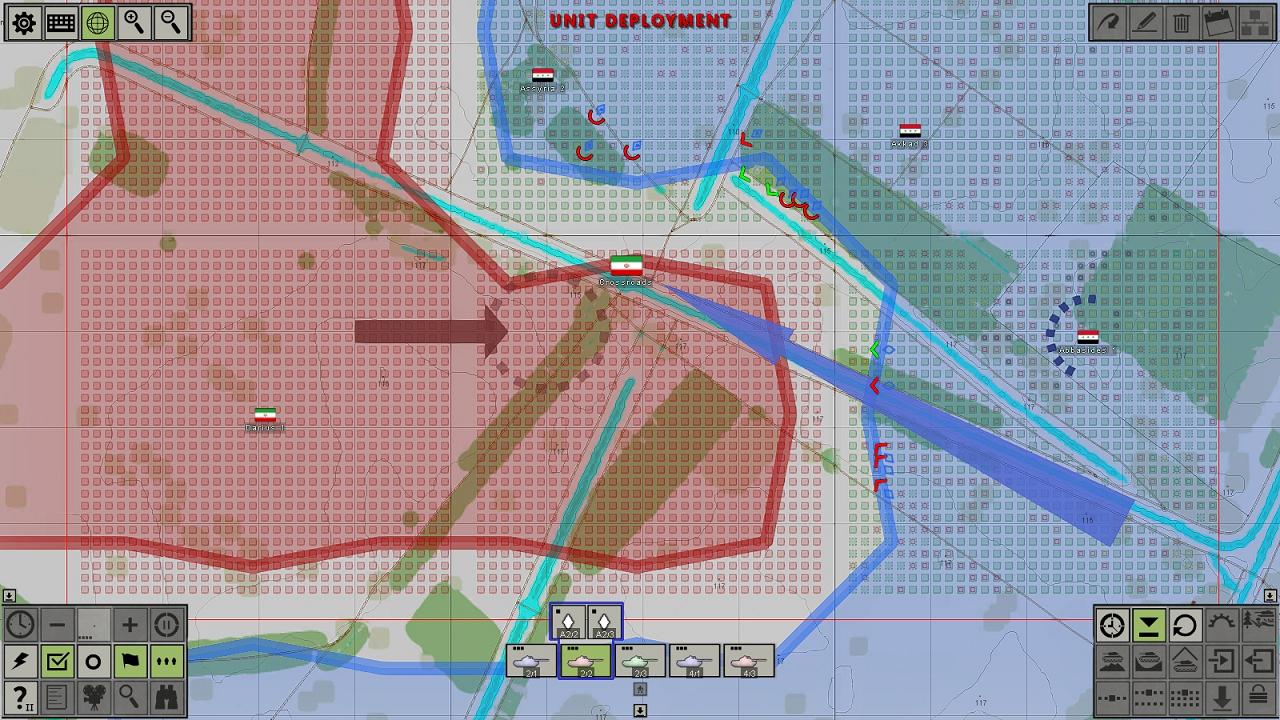
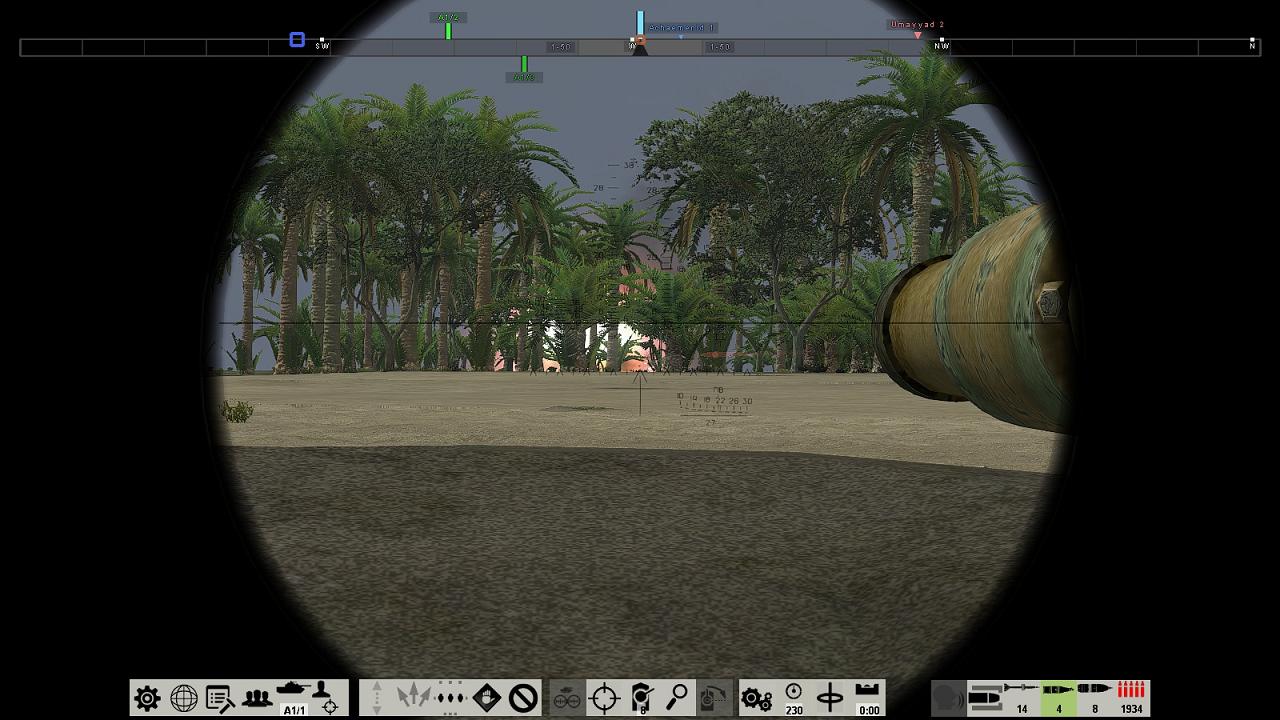
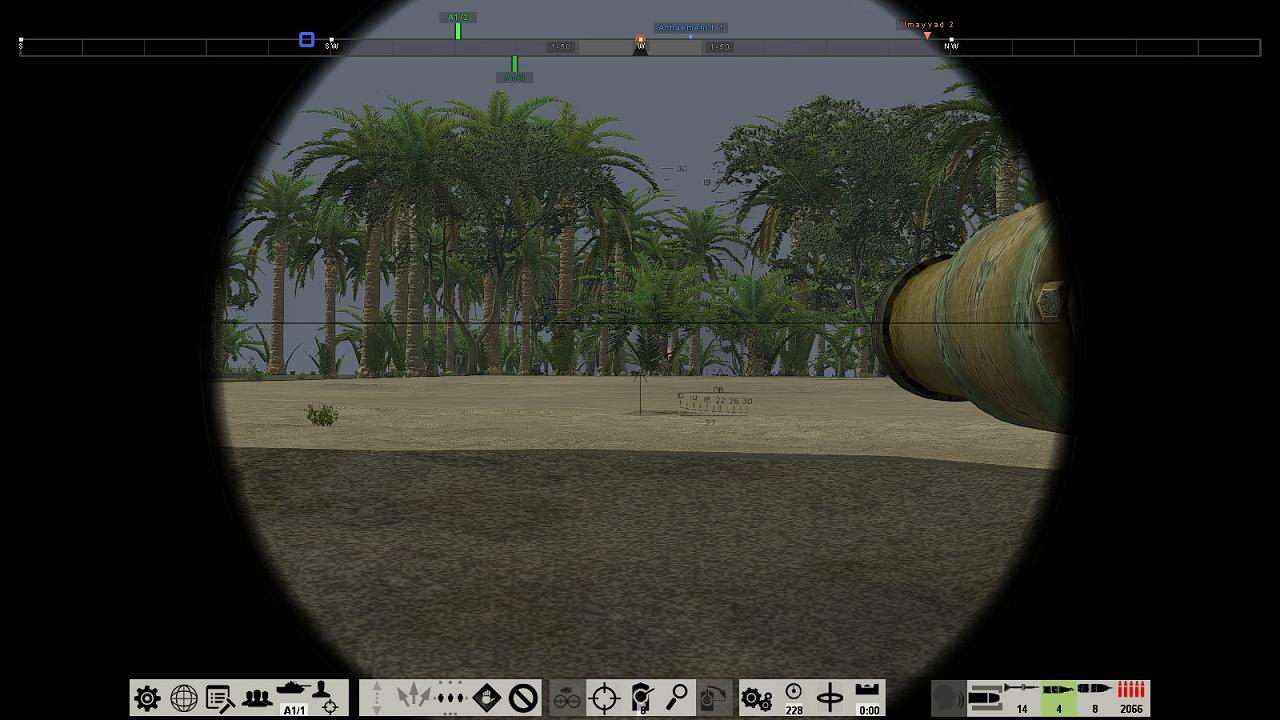
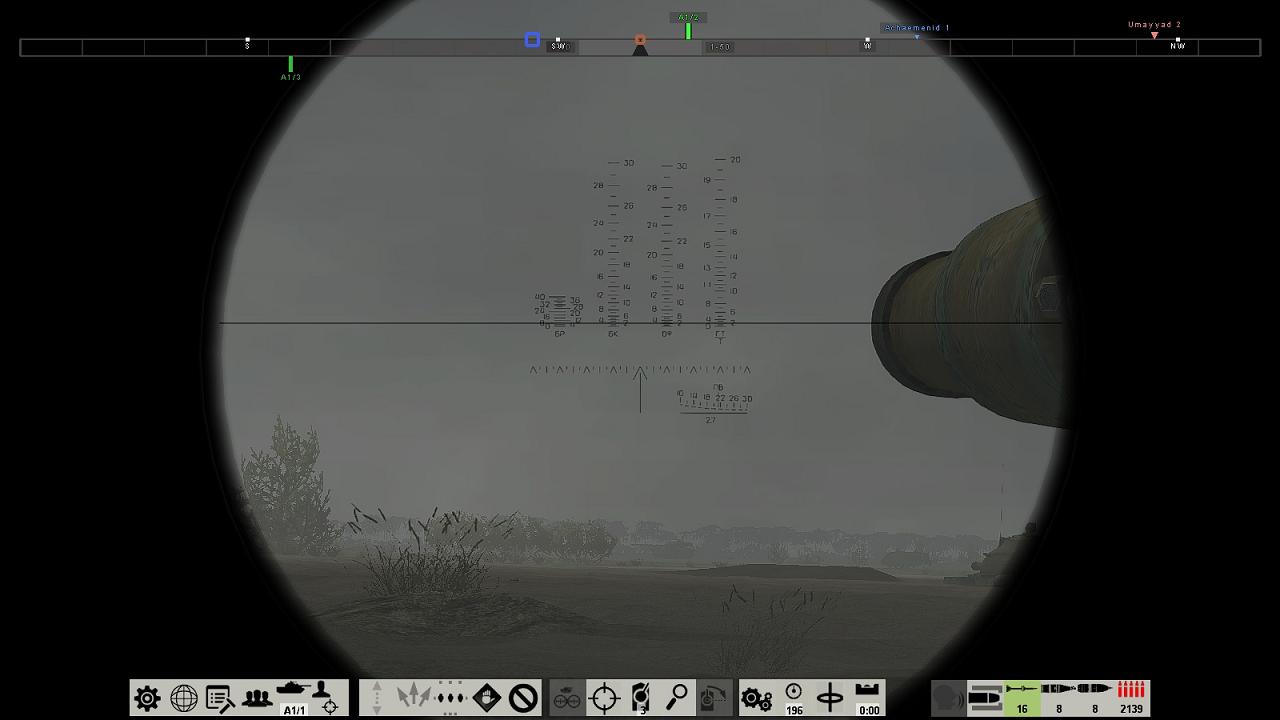
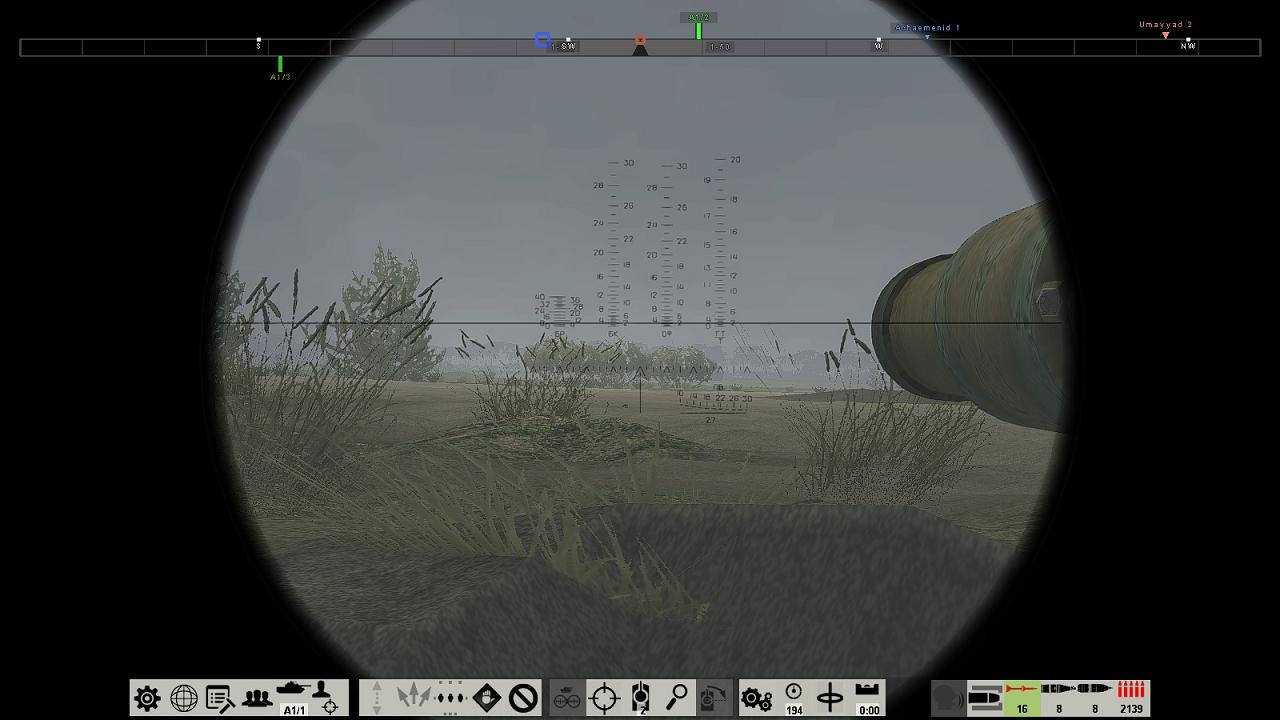
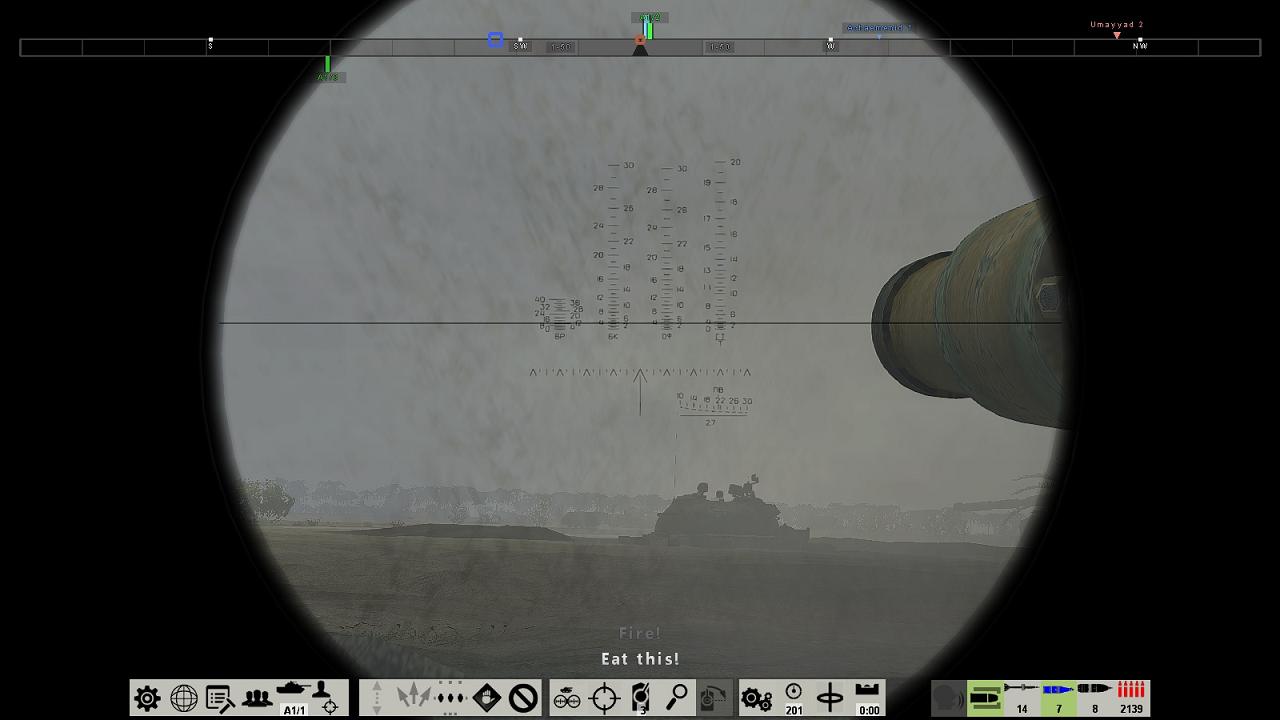
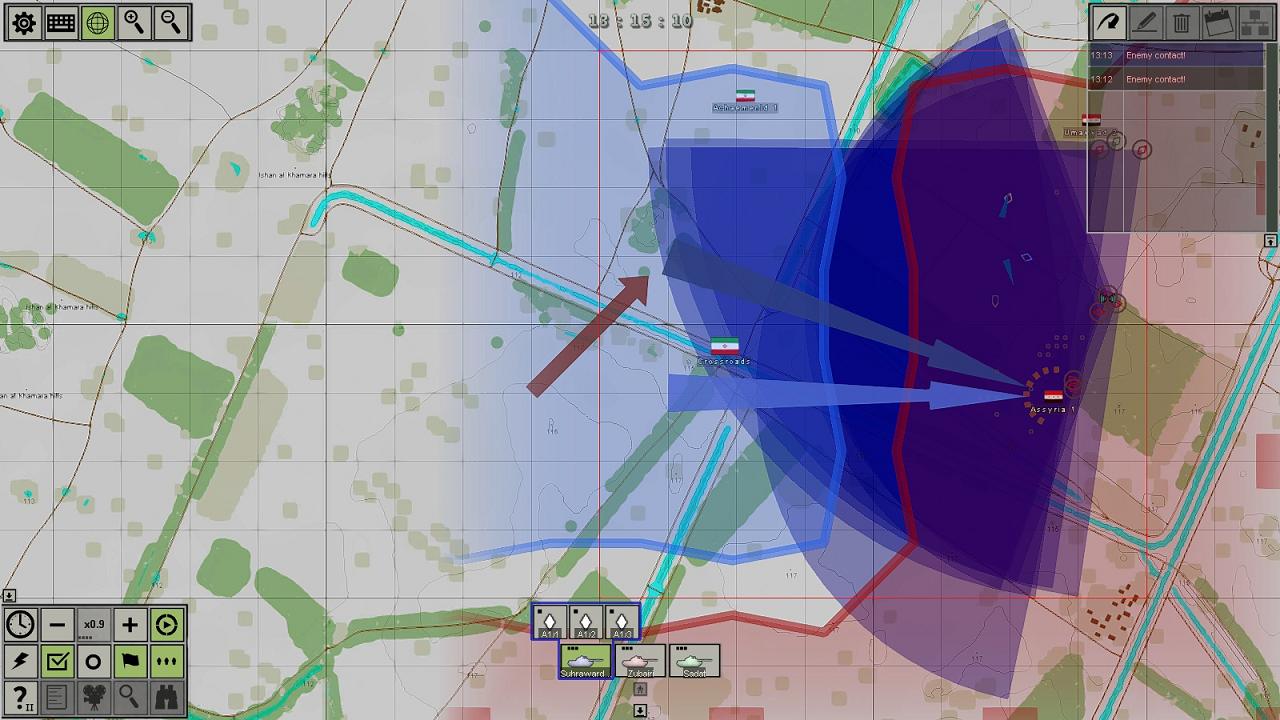
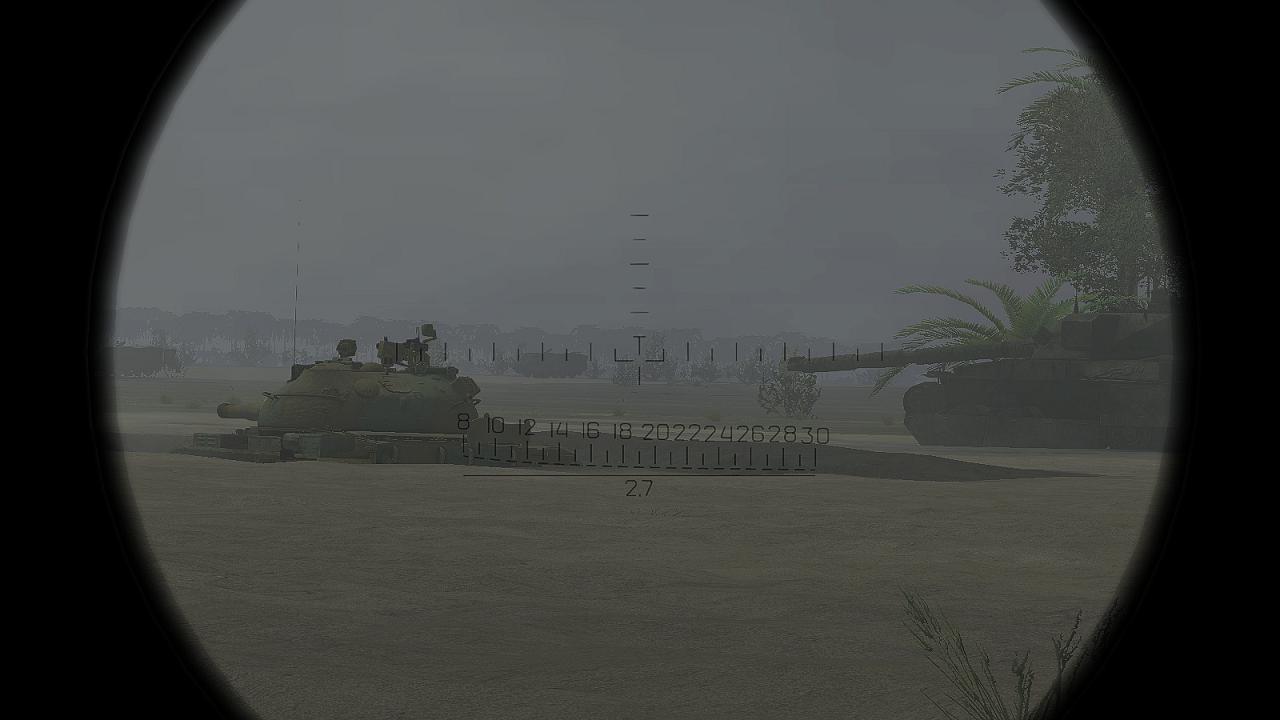
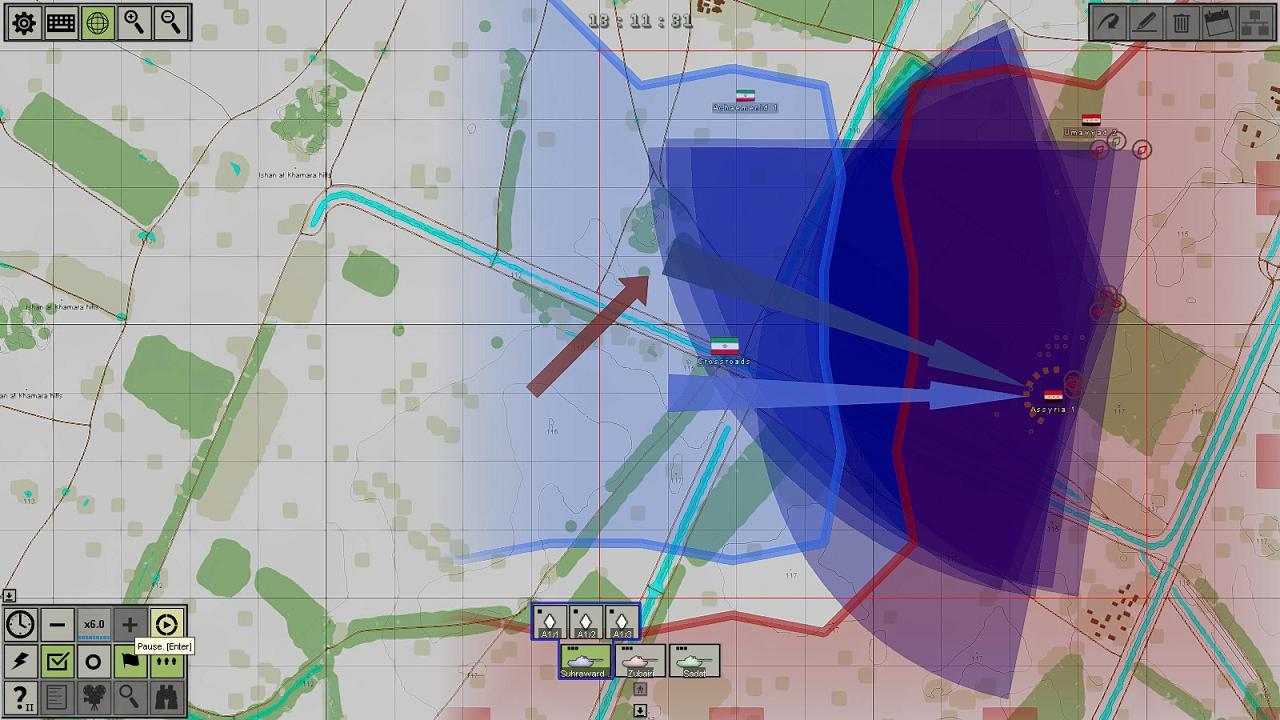
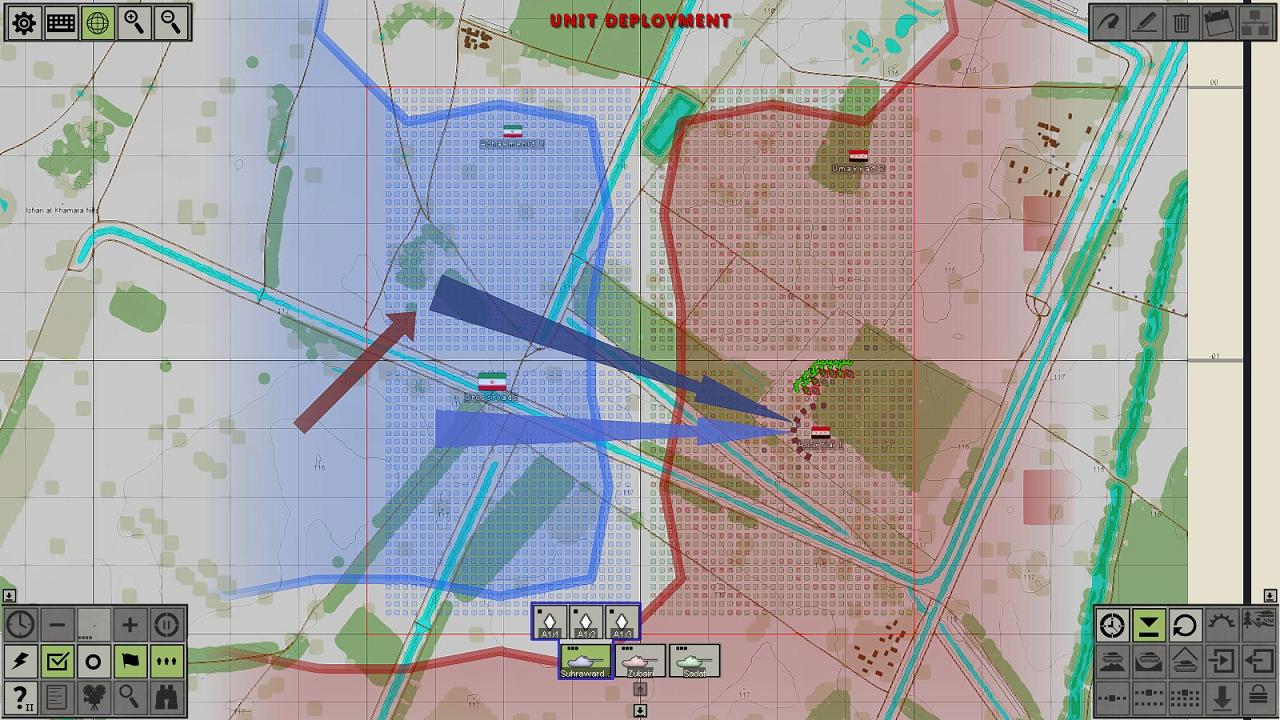
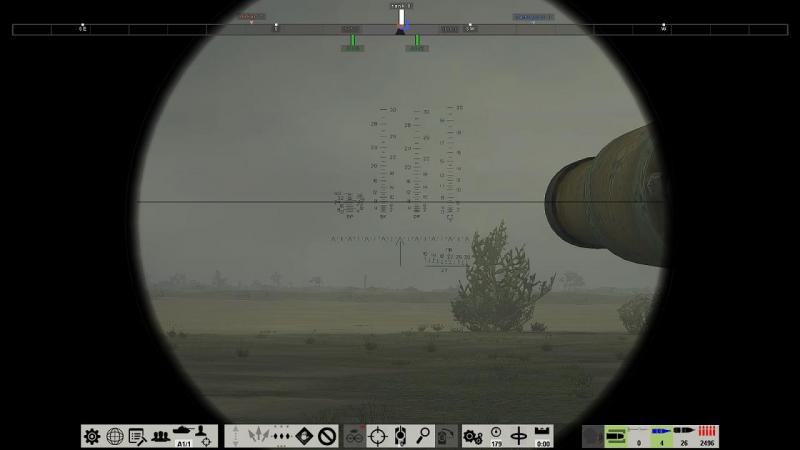
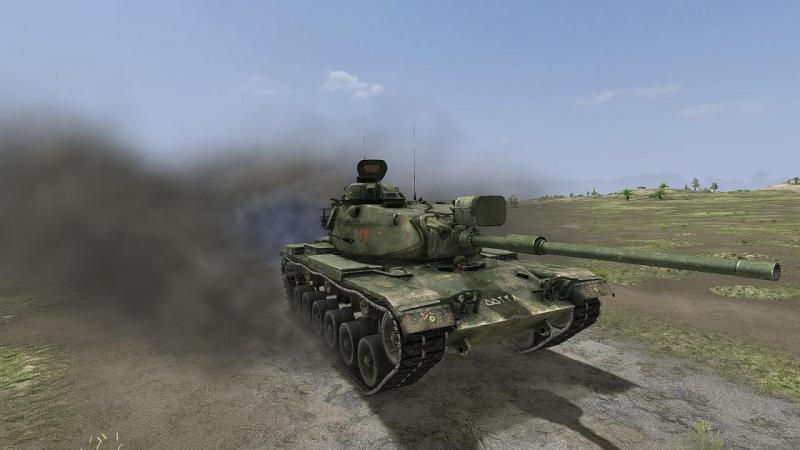
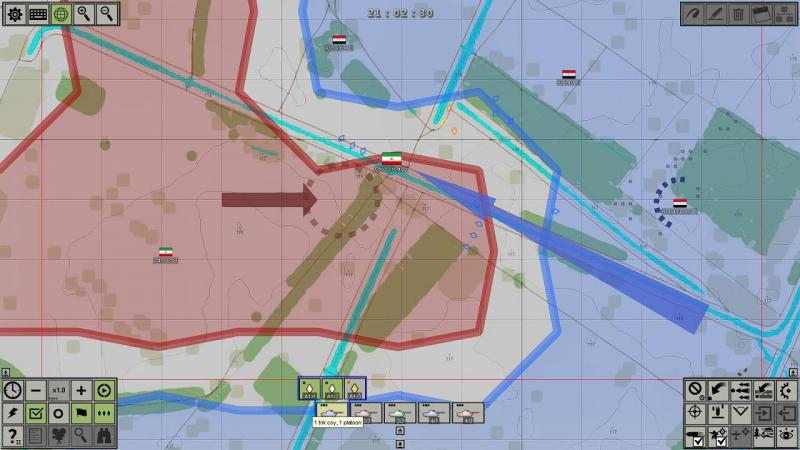
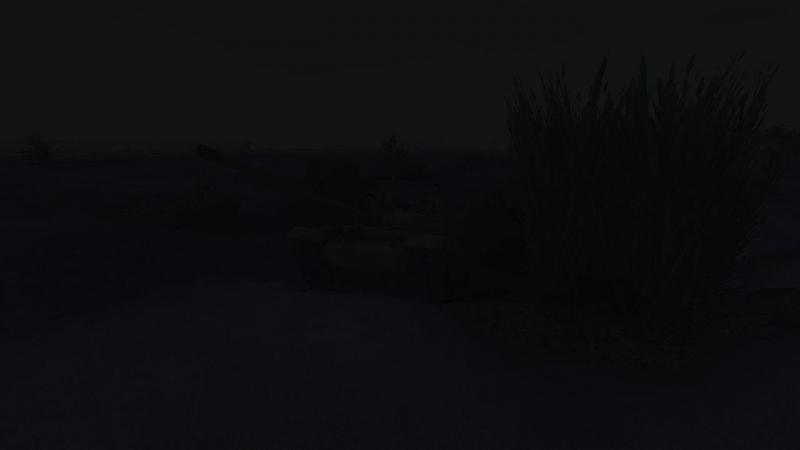
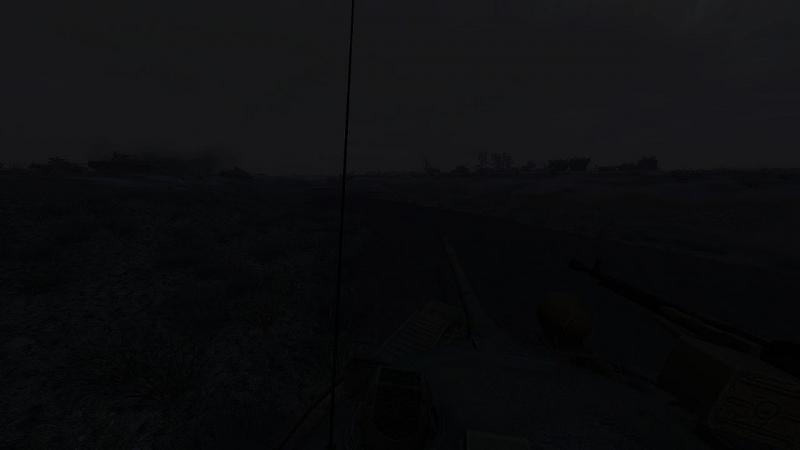
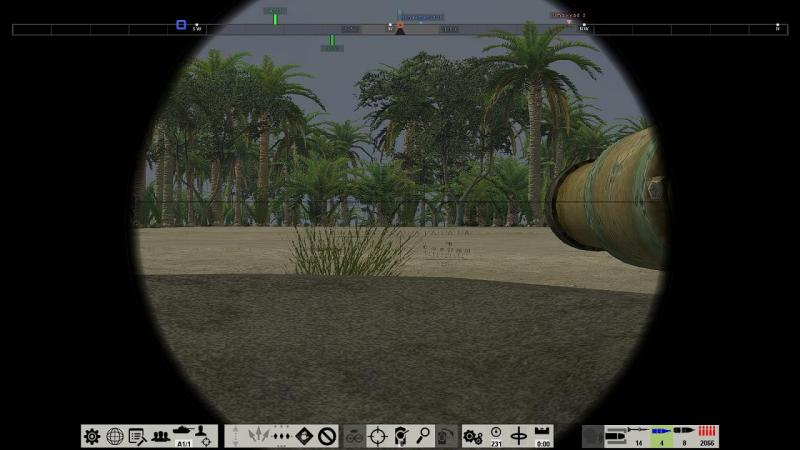
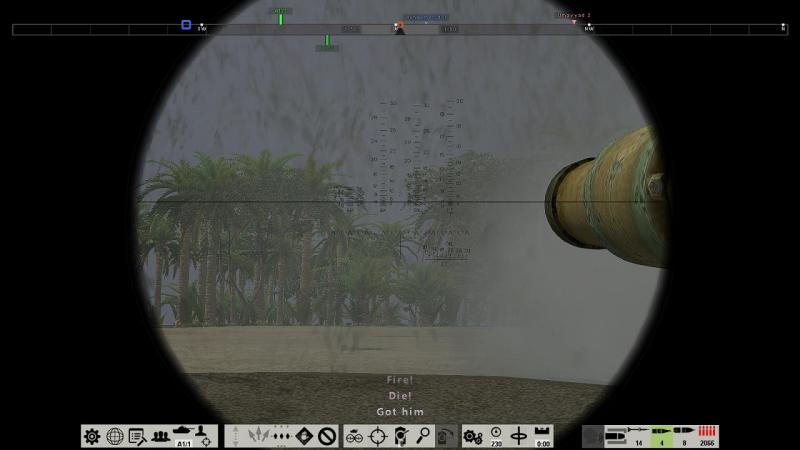
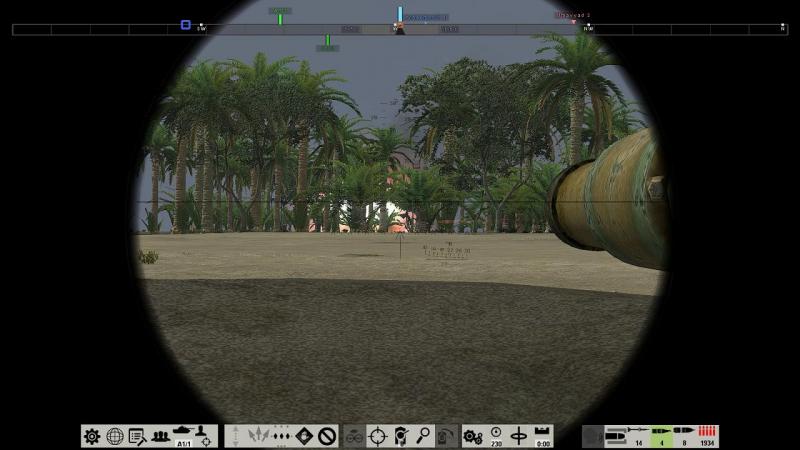
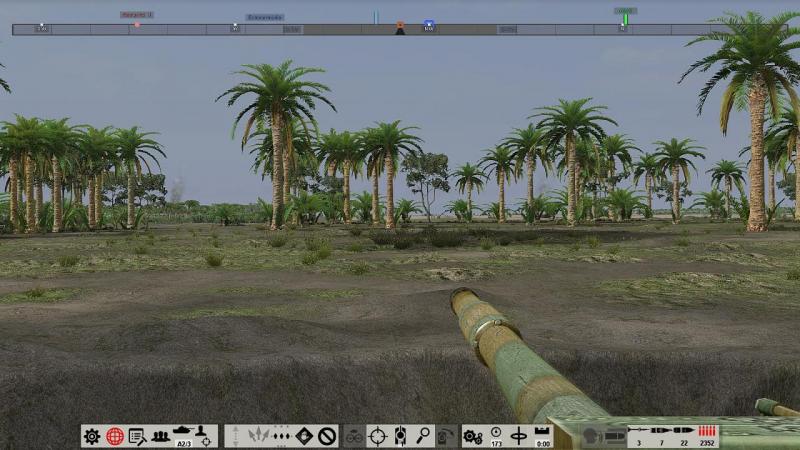
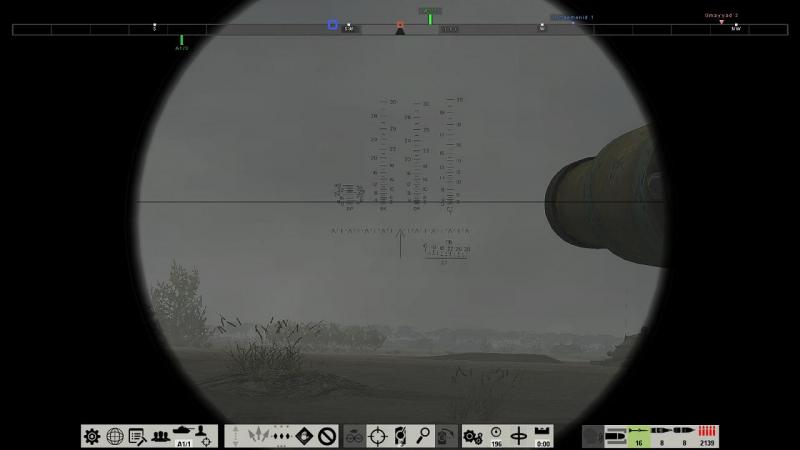
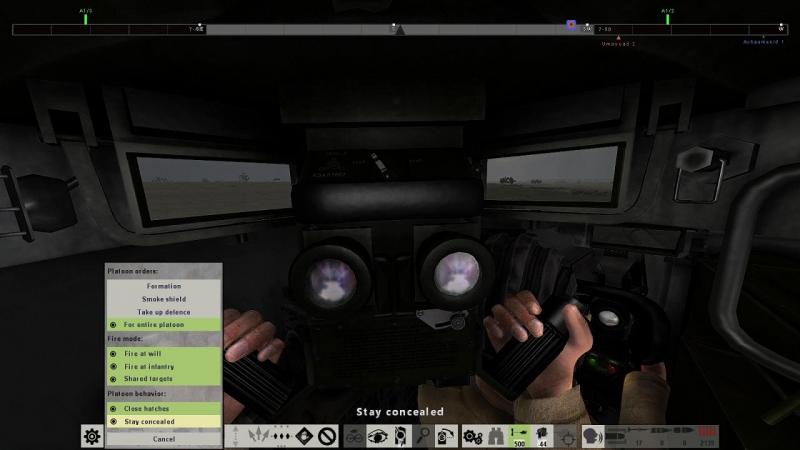
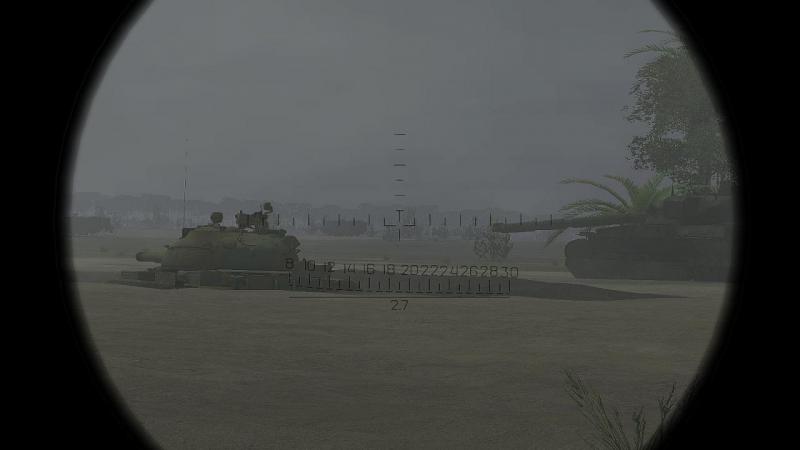
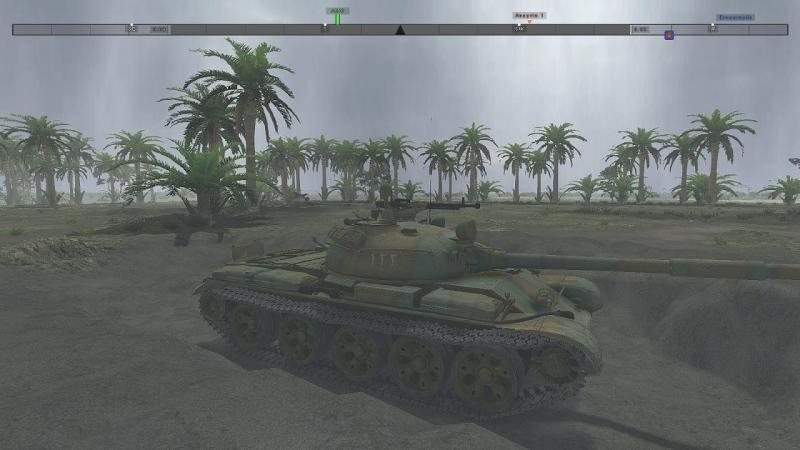
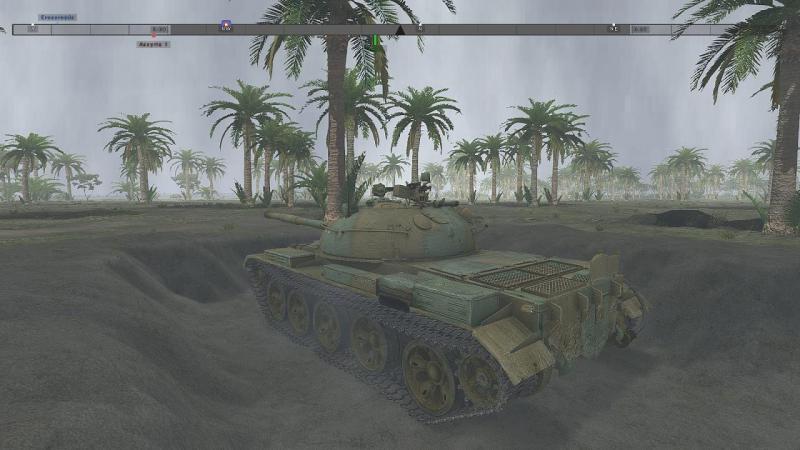
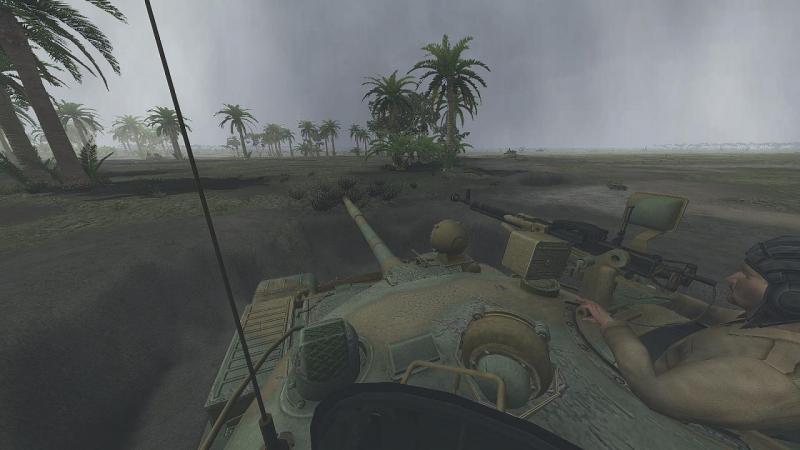
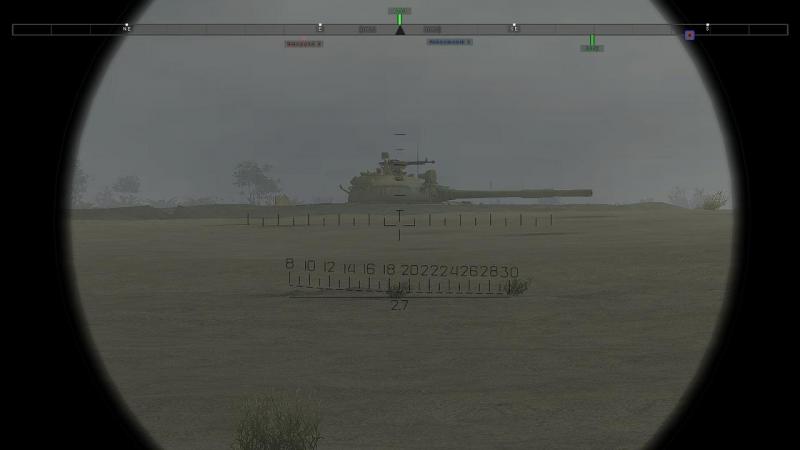
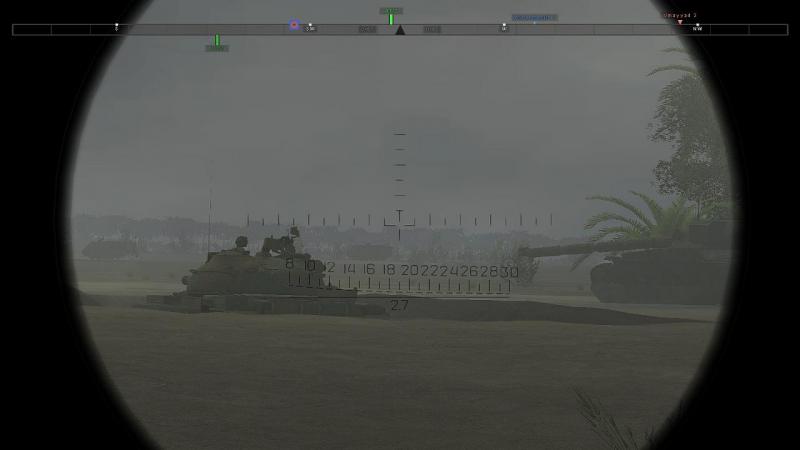
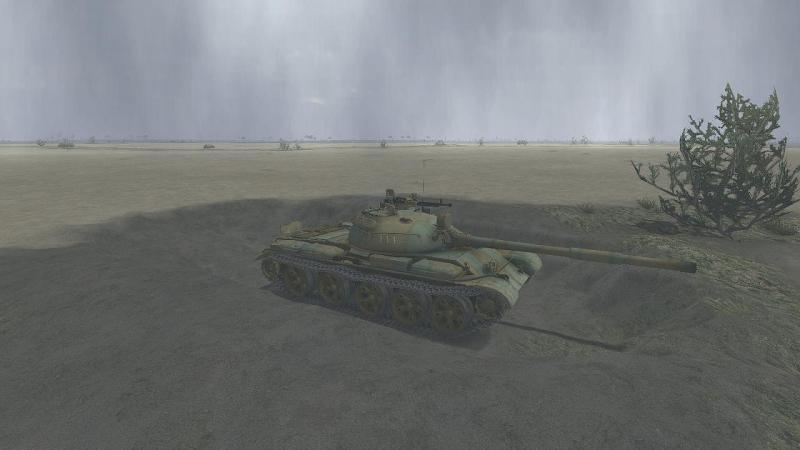
Revenge on the Chieftains! I don’t understand why SABOW considered my last battle a draw. My nicely-laid out battalion attack, designed to concentrate my three tank companies against a hopefully thinly-defended enemy flank, had been pretty well smashed by the guns of the Iranian Chieftains. I had hoped their armour would all be further south and west, where the enemy attacks had been concentrated. And I expected to face a different challenge – without artillery support or adequate reconnaissance, attacking likely dug-in infantry defending the enemy flank. But the Chieftains had turned up and had won the fire fight, hands-down. The suddenness and violence with which my force had been smashed had come as a nasty shock. Determined to do better, I returned to the fray. Starting on the ‘Operational’ map, I could see that the enemy was hitting our defences hard, in the south-west. I studied the dispositions of what I had left, over on the south-east. In short, I seemed to have lost two platoons of T-62s. But I still had a considerable force. My tank platoons had been concentrated east of the enemy salient for the failed attack and I chose to stay concentrated there, shifting my units just slightly, ready instead for a defence in depth. Further south, nearer the tip of the enemy salient, I juggled the two tank platoons and one recce platoon I had down there, pulling them back slightly, into positions from which they could at least support one another, if attacked. That was my weakest sector but I accepted that, so as to be strong where I still intended the decisive battle would be fought - on the salient’s north-eastern flank. As Frederick the Great put it, ‘Wer alles defendieren will, defendiert gar nichts’. I then ‘started the clock’ and SABOW offered me two battles, against incoming enemy attacks – one on my weak southern sector and another, to the north east, where I was more concentrated. I was naturally alarmed that the enemy had decided to attack my southern weak spot. But I quickly decided I would not be deflected from my own ‘schwerpunkt’. So I let the AI handle the fight in the south and instead, chose to accept battle to the north-east. This brought me as usual to the Unit Deployment map, where I found that I was now in command of the three-platoon tank company I had placed there, and whose dispositions I could now fine-tune. The red, enemy arrows which I could now see pointed my way showed the attacks we now anticipated. Now, this was interesting! The arrows were diverging, rather than converging on a single area. This suggested a certain dispersal, rather than concentration, of enemy effort. And that their attacks could therefore be defeated in detail, one at a time, if I played my cards right...or got lucky. I would settle for either. I placed one platoon in decent cover, facing south-west. They would be able to fire from defilade from beside a wood, near our northern position in a village, from where they could block the enemy if they moved against us there. To the south, I placed another platoon to block the way to our position down there, facing north-west. I didn’t used the 3-d deployment option but on the map, experimented with the line of sight tool to check that the platoons would not be too exposed to the enemy until they came into a suitable killing ground. Having moved on to the ‘Initial Orders’ screen, this killing ground I set our arcs of fire to cover, ensuring they overlapped. As for my third T-62 platoon, I had placed this in the centre, in a slight fold in the ground, slightly set back from the one to the north to add a bit of depth and so that it could fire into the flanks of enemy advancing against either the northern or the southern platoons. Unfortunately, I was unable to dig defensive positions. And the artillery support icons remained obstinately greyed out. For the second time, I would fight this battle with just our tank’s guns. But this time, it was daylight. You'll see the layout I'm trying to describe here soon, but I somehow neglected to get a map screenshot until the battle had started! But in short, my three T-62 platoons, three tanks each, were arrayed in a ragged row, running north to south, like the prongs of a trident pointing west at the enemy. The 'prong' in the middle could hit anybody heading for either of the other two 'prongs', who were protecting our two foremost key points. Good to go! I started the battle and checked out the view from the command tank in each platoon. Below is the view to the south, from the lead tank of my centre platoon. you can see one of the tanks of my left-hand platoon, through the murky conditions which seem common in this campaign. All of my tanks felt rather exposed, sitting out in the open. But appearances were somewhat deceptive; my centre platoon, for example, was hull-down behind a slight crest. And sitting halted in the poor visibility, I felt sure that we would be able to get in the first shots from such cover as we had, at any enemy who drove into our overlapping fields of fire. In effect, I had set up an area ambush, with fire from six tanks from two different directions covering each of the two likely enemy axes of advance. I’d have preferred all of us to be dug-in and generally, in better cover but I had tried to make the best use of what was available. Plan and dispositions made! Time to find out what the enemy’s plans were. I believe it was Field Marshall Slim, of 14th Army fame, who said that, however preoccupied a commander may be with the elaboration of his own plans, it is sometimes necessary to take the enemy into account. While I waited, I made some adjustments to my tanks’ positions, driving them individually into better positions where necessary. SABOW crews tend to unbutton when it’s quiet but I made them all close up and ordered them to ‘Stay concealed’ – at night invokes a ban on showing lights and in daytime, I hoped it would encourage people to stay in what cover there was. I went back to the map and turned on time compression. It wasn’t long before this was stopped by a contact report, from the left-hand T-62 platoon, to the south. A small dark-coloured dart showed where the approaching enemy had been spotted. It was tipped with red diamonds - enemy tanks! You can see the little 'radio mast' symbols on two tanks from my southern platoon, indicating they are the source of the most recent radio message. My current tank, the closest tank in the centre platoon, is the amber diamond in the middle of the screen. I jumped back to my tank and swung the commander’s sight around to the south-west. Higher up and with greater magnification, this would give me a better view than the gunner’s sight. My pulse quickened as tank tracers suddenly zipped back and forth across my line of sight. Then I saw them through the murk. The turrets of two tanks, which I identified at once as Chieftains, emerged from some broken ground, moving right to left towards my left-hand platoon and the friendly position they were covering. The range I estimated at 600 metres. This needed no adjustment to my gunner’s sight, set to suit APFSDS, to which I now dropped, after designating one of the tanks as a platoon target. Though now lower down, I could still see the turrets and aiming slightly ahead for forward movement, I let her rip, going for the leading tank. A Chieftain turret, which was all I could see, is a rather low profile target, so I was quite relieved when my first round ht home with a dull flash, confirmed by my commander. The reloading cycle didn’t completely destroy my view of the enemy and I fired again when ready. Another hit! This time the enemy tank stopped moving, its gun still facing away from me. The second Chieftain speeded up and passed my now-burning first target, moving fast. I traversed left and applied a suitable lead. He had come out into the open and made a better target, broadside on, still facing my left-hand platoon. They were obviously now in grave danger; suddenly, the stakes were as high as they could be. I fired again, aiming lower now, the enemy tank’s sides having come into view. And again. Parts flew off the Iranian tank, perhaps dislodged stowage boxes or bazooka plates from over her tracks. He too started to burn! I knew that where there were two enemy tanks, there were likely to be more. Traversing right again, further right from my first target, I spotted another Chieftain turret, stationary, and let him have it. At this point, things started to get a bit frantic. The cover from which the enemy tanks were emerging just seemed to keep on spewing forth more and more Chieftains. A veritable procession of tank turrets appeared, like targets in some sort of crazy fairground shooting gallery. I was soon out of 'fin' rounds and switched to HEAT. This was now real sweaty-palm stuff. I was conscious that I had rather abandoned any attempt to control my platoon or direct its fire, apart from making a couple of efforts to mark targets. I could only hope for the best and keep shooting; a moment's hestiation seemed likely to invite a firey disaster. During all this, I finally saw a Chieftain turn to face us. Before I could shoot him, he dipped down out of sight somewhere. I lined up my sights where I expected him to re-appear, but he didn’t. My command T-62 was by now almost out of armour piercing rounds and I switched to my number three tank to carry on the fight. Scannning from the commander's sight, I engaged what must have been a different Chieftain which appeared to be climbing towards us from a ditch, well to the left of where I had just seen one drop out of sight. I engaged him with results unobserved, except that he promptly dropped out of view again. By this time, my fresh mount was completely out of anti-tank rounds - more than half our T-62's unspectacular 40-round ammo load was HE fragmentation, not much use in a tank fight. I should have tried to get some more AP rounds before the battle! There was a lull in the firing. Ahead of me, the ground was littered with knocked out Iranian tanks, many burning, some flaring up from ammo cooking off. My centre platoon had had no losses. But what had become of my left-hand platoon, which had been directly in the path of the oncoming torrent of Chieftains? ...to be continued!


- 3 replies
-
- 1
-
-
- sabow
- steel armor blaze of war
- (and 1 more)
-
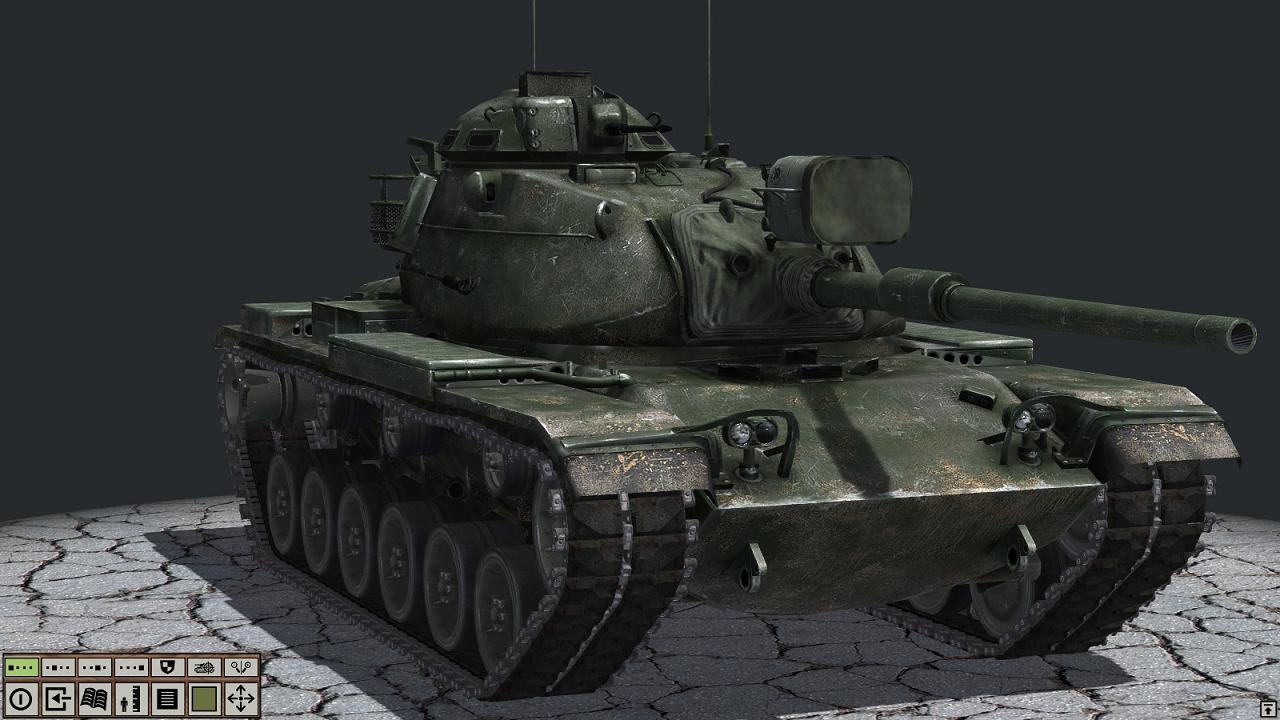
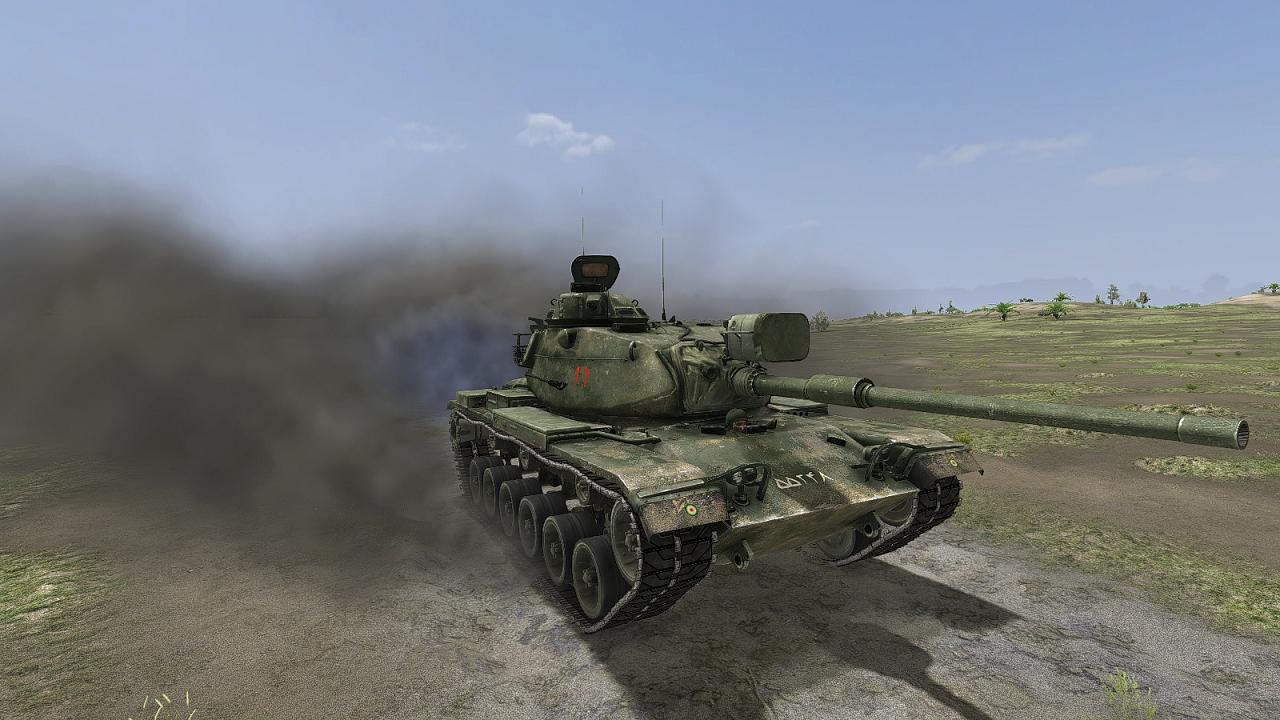
Swings and roundabouts...with tanks! My first Iran-Iraq War campaign in Graviteam's rather excellent & recently-relaunched wargame/tanksim Steel Armor - Blaze of War (SABOW) had been a bit experimental, not least as I only discovered some quite useful aspects of the wagrame interface towards the end of my assigned eight turns. My final battle had been inconclusive, resulting in a drawn campaign overall. So I decided to replay it from the get go, rather than move on to the other available campaign in that war, which is from the Iranian side in an M60. No, I decided to stick with my trusty T-62. With my new-found knowledge I would fling my platoons across the battlefield with the verve of a Rommel and the cunning of a Montgomery. At least that was the idea. Needless to say, it didn't work out quite like that...to begin with, anyway. Reasonably enough, it seems that each SABOW campaign starts off with the same tactical situation, based on the real-life battle - in this case, with an Iranian salient (red) having been driven into Iraqi territory (blue in the map below - I have reversed the Soviet-style SABOW colour convention in the options menu). What makes each campaign run-through different is (i) the different moves made by the AI in the 'wargame layer' (which AI controls all enemy units and those friendly ones the player can't give orders to) and (ii) the moves you the player make, with the platoons you do control. Last time, I had spent a lot of time in 'wait and see' mode, mostly in a defensive posture - let the enemy come to me, if he dared. Which of course he did dare, though in his own sweet time. On this occasion, I decided that I would call the shots. I waited for the first part of the turn to play out, during which the enemy's movements are made. Having discovered that I could then pre-position my units in the initial map, shown below, I shifted my troops - three tank platoons plus the tank company HQ element. I moved them north-west, along the tracks shown by the little blue arrows. Basically I laid the company out so as to be able to advance 'two up' - two platoons leading, roughly side-by-side, with the third platoon 'in depth' to the rear, along with Company HQ. My intention was to drive north-west, cutting the shaft of the enemy spear, somewhere behind its tip, where I hoped most of its offensive strength (tanks!) would lie. As expected, these dispositions caused SABOW to offer me a battle, in my chosen sector. So it was off to the Unit Deployment screen to...well, to deploy my units, what else? I didn't seem to have air or artillery support available and the available infantry were evidently fully occupied defending on the other side of the battlefield. Our tank platoons were the only forces available in my sector so we would have to be thown into battle alone. The nasty red arrows on the map above showed that we now had intelligence that the enemy was expected to attack in our sector, coming in roughly from the oppisite direction to my planned offensive. If I'd had that particular piece of 'int' earlier, I might have sat and taken them on from defensive positions. But I'd made my plans and decided to stick to them. The 'int' might be wrong. Even if it wasn't, we might catch them while they were forming up. It was not yet daylight and I had confidence in the night-fighting abilities of my T-62s, not to mention our stabilised 115mm smoothbore guns. If a meeting engagement developed, so be it. I was up for it. I quickly switched to the orders screen. A few clicks and my platoons had their orders - attack towards the north-west! Fire at will! My experience so far has been that enemy attacks in SABOW take time to develop. But not this time. I had no sooner begun scanning through the commander's sight of one of my platoon leader's T-62s when the shooting started. I switched to the gunner's sight and picked up an M-113 APC coming straight at us, coming into and out of sight amongst intervening clumps of vegetation. This was not a good time to discover that I hadn't bothered to learn the gunner's night sight. Which of its markings represented my point of aim, for the APFSDS round I had loaded? I struggled to remember my brief perusal of the manual's description, but failed. I took aim, fired, and missed. I only knew that I had missed, because when the gun came back into firing position after the usual T-62 reloading cycle, the M-113 was still on the move and my commander didn't announce a hit. I had no idea whether I was over or short, because the elevation of the gun to reload took my gunsight skywards, with it, before I could see the fall of shot. This T-62 characteristic is bad enough in daylight, with a sight you are used to. In near darkness with an unfamiliar one, it was a recipe for disaster. Disaster duly showed up. My tank commander called out a more pressing target. A Chieftain tank. Two of them, in fact. The was a dull ringing, thumping sound which tailed off into a sort of buzzing. My view slipped down and off the gunsight, revealing bloody bodies in the turret. The tank brewed up rapidly as further AP rounds slammed into us. I think no-one got out. I changed tanks several times. Those Chieftains seemed to be able to knock out my tanks, about as fast as I could occupy them. Their 120mm APDS rounds hit home and red-hot sparks flew. As if to spare my blushes, SABOW decided enough was enough and ended the battle. Apaprently there are set conditions which trigger this, like one side calling it a day and retreating, or a truce being offered and accepted (an odd feature, which I haven't used yet). I considered myself lucky, that the fight was adjudged a draw. It didn't seem so, from where I had been sitting. Day was breaking and the enemy seemed to be ranging freely over the battlefield, just to rub my nose in it. So, the Chieftains had had their revenge, for such indignities as my T-62s had been able to inflict, in previous missions. Where had I gone wrong? For one thing, I'm not yet fully accustomed to the scale of the SABOW maps, which are not huge and limit your elbow room for deployment - not unreasonably in my view, as you are commanding a tank company in a battlegroup not a Panzer Armee or a fleet at sea, with wide boundaries and considerable freedom of movement. Still, I had set up my forces just a little too close to the enemy. And when I discovered they were attacking, I should have been a bit more flexible and changed to a defensive posture, moving onto the offensive after I had let the enemy waves break. This wasn't over, though. The Chieftains had got some pay-back. Now, it was my turn. ...to be continued!


- 3 replies
-
- 1
-
-
- sabow
- steel armor blaze of war
- (and 1 more)
-
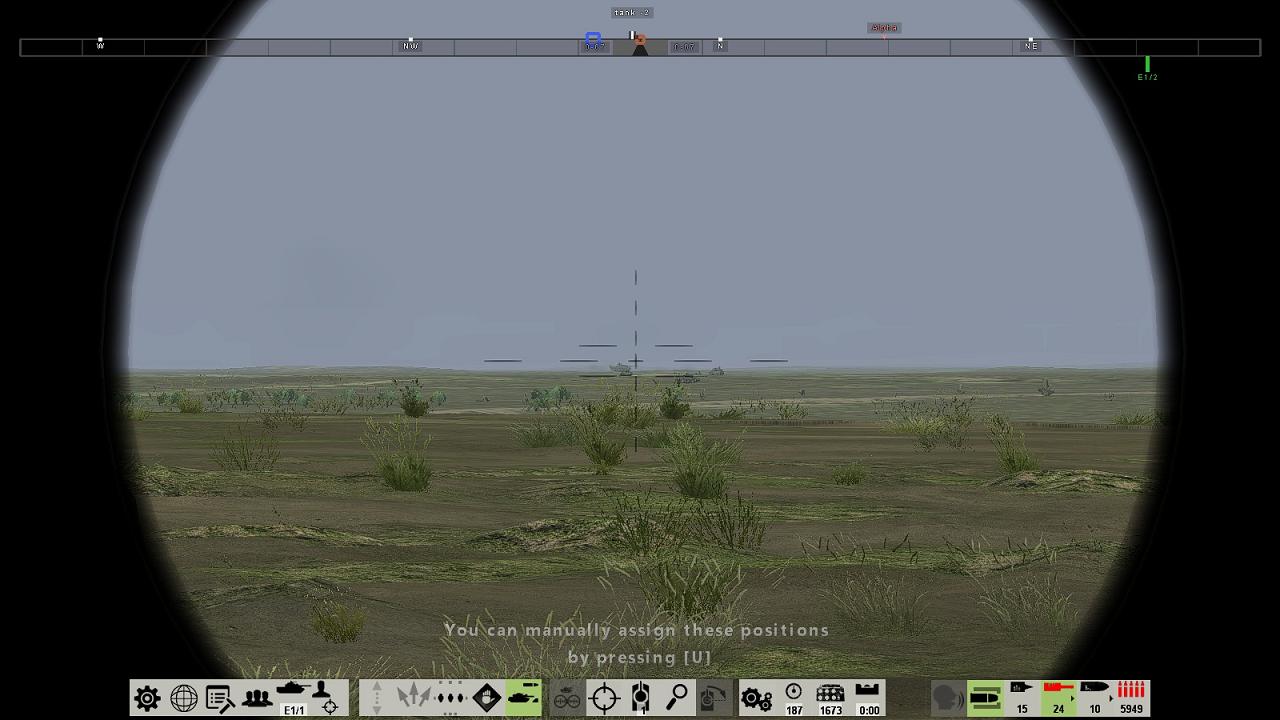
It looks like we CAN initiate 'active' defence in respect of a given direction, without having to set a priority target. I should read the manuals more often, especially as they are updated after every game update! The 'tank manual' says: 5.1 Active Defense To activate the active defense mode, press and hold the [0] by moving the center of sight to a point relative which will seek cover, and release the button then. If you assign a priority target for the firing before, you can press [9] button, in this case the cover is found with respect to the priority target. If you hold [shift] (or switch platoon command mode) command will be executed only for player's tank. In this mode, tanks will find cover for hull - the main firing position, and then cover for the entire tank - stand for reloading, and will maneuver between them when fired from a main gun and requires reloading. Points for maneuvering may be assigned manually by pressing or right mouse button in the cursor mode on the “Stop” icon in the interface. The same button is used to forced moves between defense points. To stop the tank between this points using the [E] button. To rotate the tank (and formation) on the priority target, use the [K] button. Any order of rotation, stop, or change the formation cancels active defense mode. Table 5.3 Active defense interface Interface Action [grapic] The crew is looking cover for the tank hull and for the whole tank. [graphic] The tank is moved between a position for firing (hull-down) and cover for reloading, respectively. [graphic] Status of the main tank gun: a gun is not loaded or is not ready for firing, the projectile loaded and fire can be opened. It also says later on 'Mark of active defence point appears as a small red stroke' [on the top of screen situational awareness 'header tape']. There's a lot of depth to this sim! I'm tempted to start an M-60 campaign next... ...but first, I have a few scores to settle with my T-62s south of Susangerd!

-
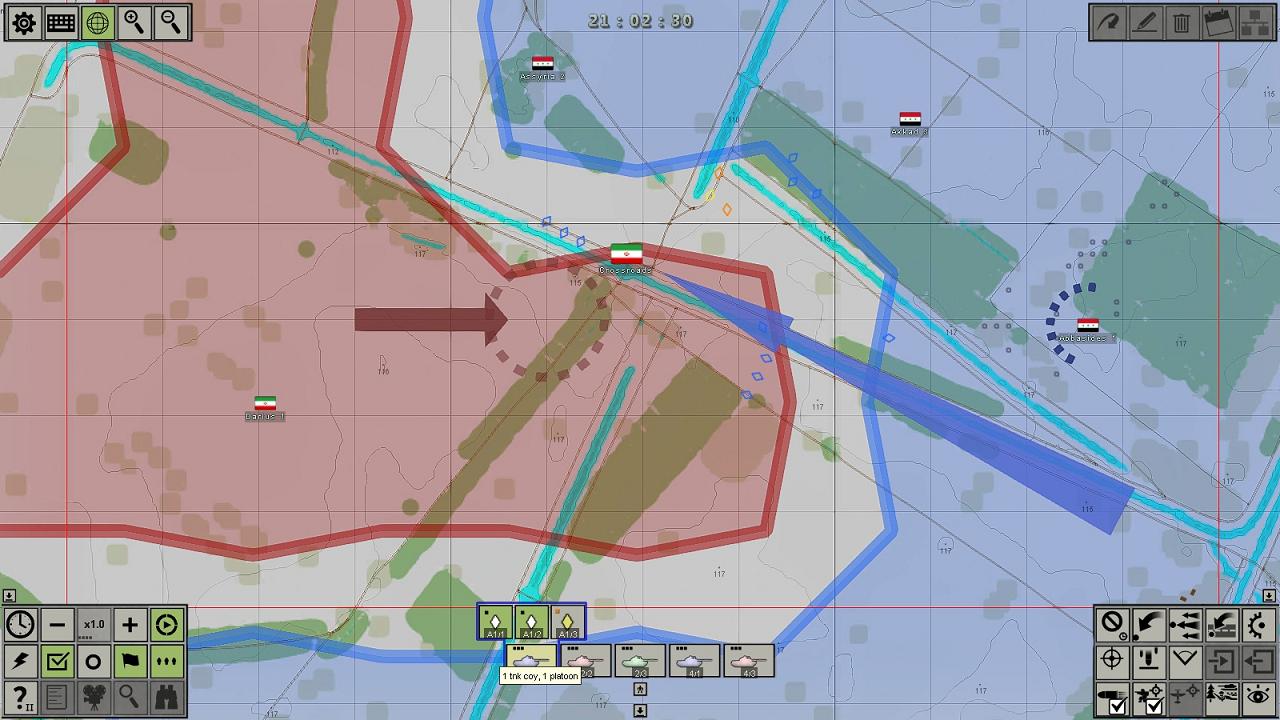
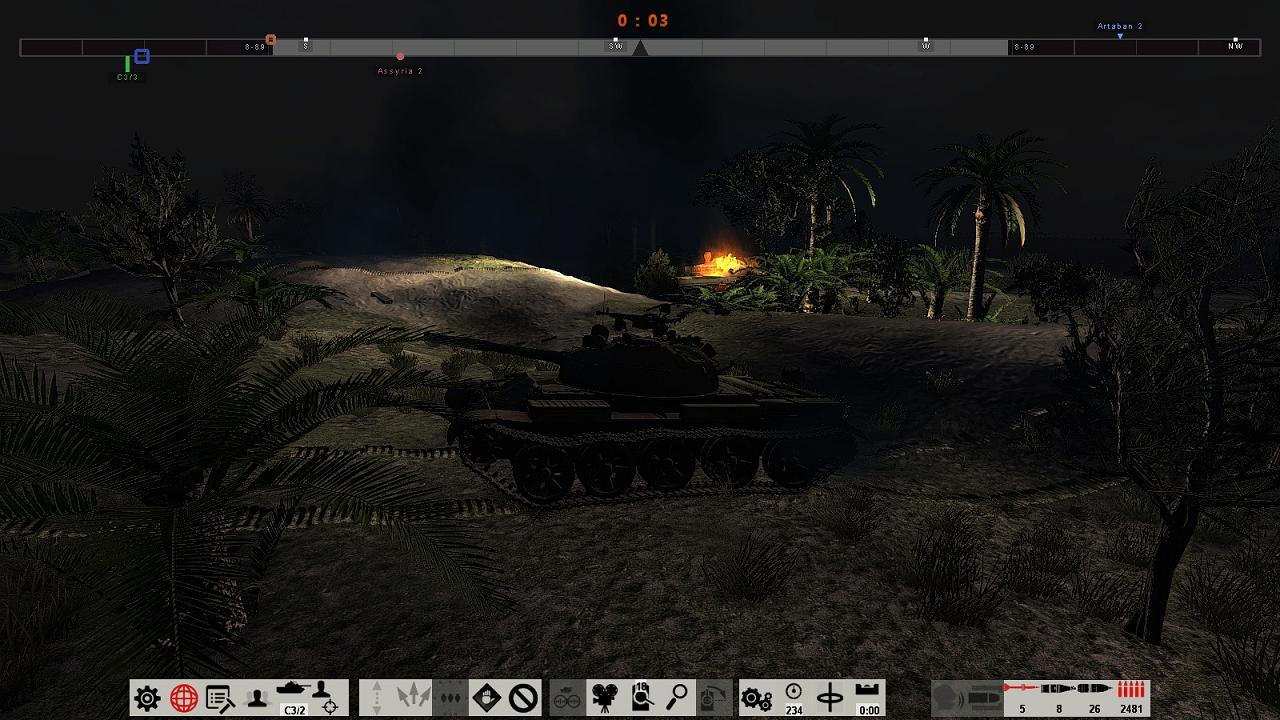
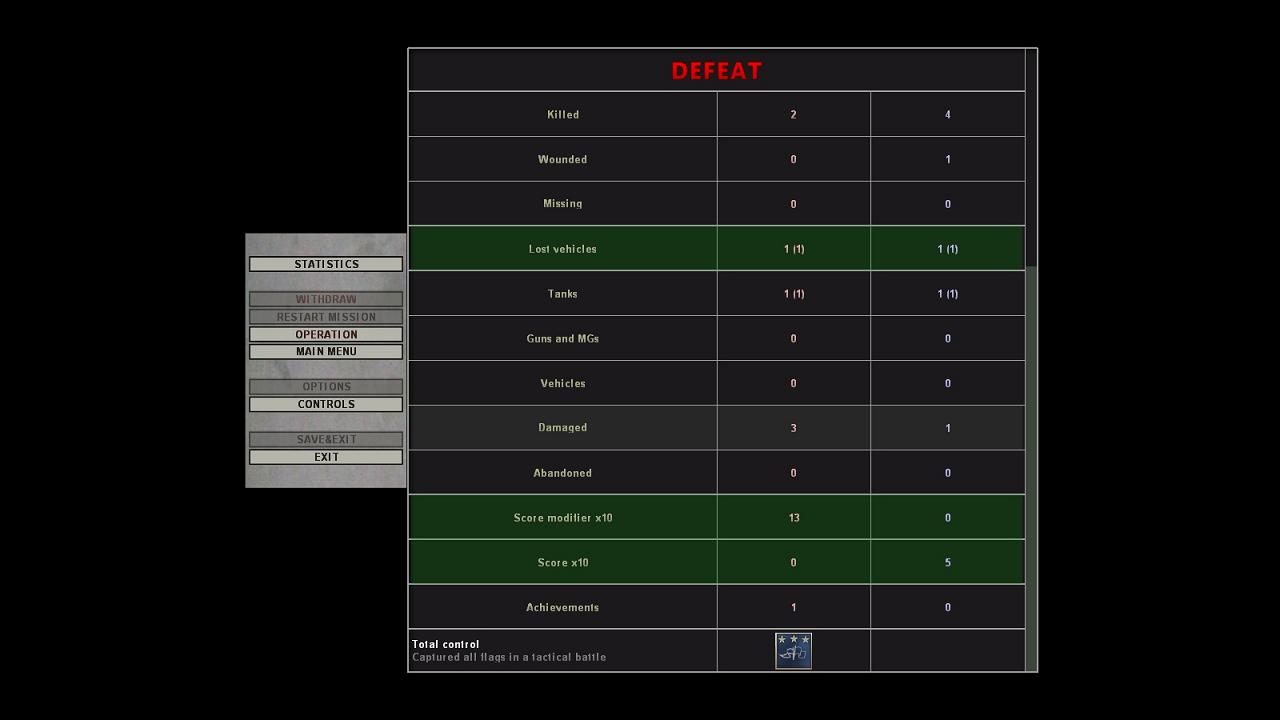
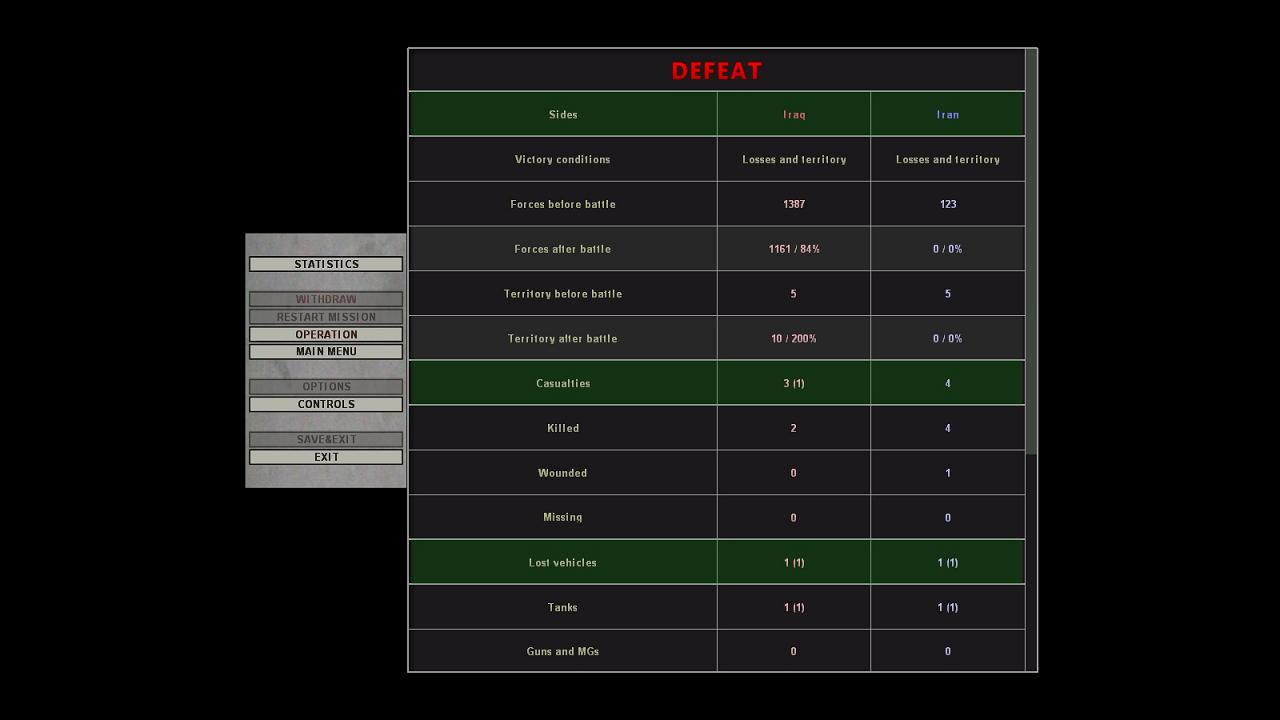
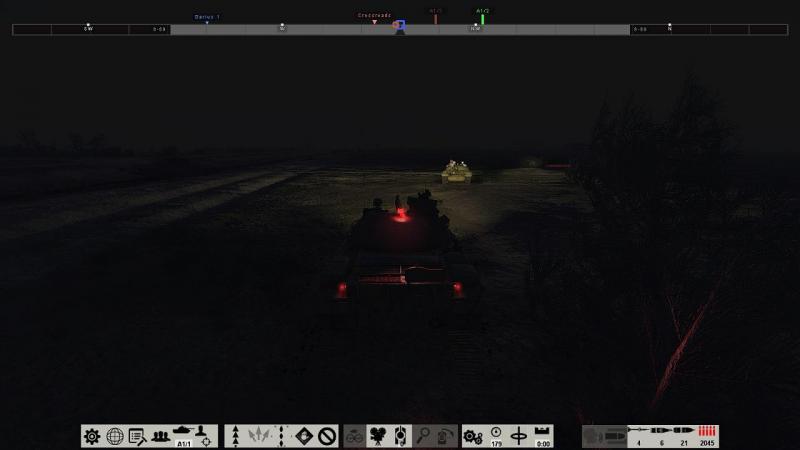
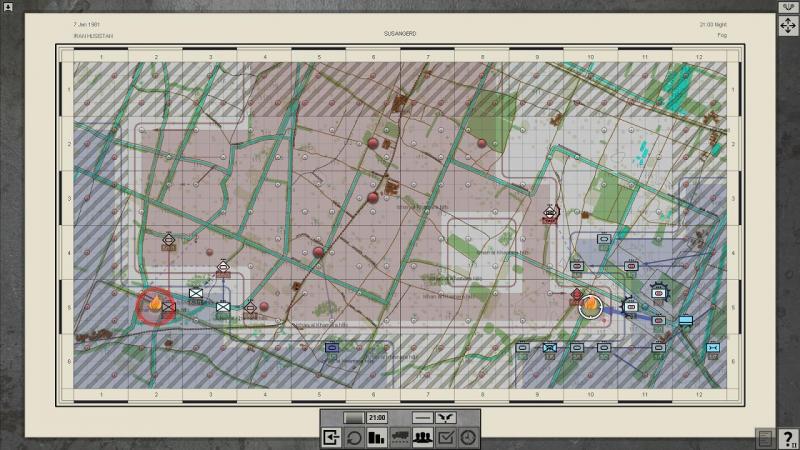
To wind up this rather meandering mission(s) report I thought I should relate how my replayed night attack panned out, after being interrupted by a PC reboot last time. In short, I think I won, but I actually lost, officially! As before, at the initial map screen, I lined up my tank platoons in positions around the enemy mini-salient in my sector, this time to its north and east. I planed to crush this 'Crossroads' position first. Then I would attack the marked enemy position at 'Darius 1', to the west. If that went well. I would then swing north and attack the enemy positions up there, opposite our people at 'Assyria 2'. I had five platoons all told, not all of them up to full strength (and I soon discovered that one tank was still immobilized from previous damage - SABOW's campaign seems truly dynamic). I had no infantry or recce troops at my disposal, nor artillery support. This would be a tanks-only show. I clicked through my platoons in turn and gave each of them attack orders, some into positions from which they would be able to cover the crossroads from the north, others to assault through it from the east and shake out the far side. In the screenshot below, of the tactical map after several minutes of action, you can see that the platoons to the north of the red enemy salient are moving in bounds and one has already advanced up to the northern edge of the irrigation channel, just next to the Phase 1 objective, marked 'Crossroads.' If I'd had artillery support I would have made good use of this to hit suspected enemy positions as we advanced and perhaps put up some illumination over them. As it was, I was limited to what I could see and shoot from my tanks, in the darkness. Despite being given 'Attack' rather than 'Move' orders, some of my crews turned their lights on at times, which was rather silly of them. One such occasion was when I ordered the covering platoon to cross the irrigation channel and join the rest of the force, reorganising around the objective. Fortunately, this performance drew no fire, although it doubtless gave the enemy something interesting to look at. At this time I was commanding the lead tank in this platoon and it was quite a struggle to get us up the bank and back onto level ground, I think because we ran into a step in the ground. SABOW does a quite convincing job on the physics, conveying the best impression I have seen in any tanksim that you are in a real tracked vehicle driven by real people and moving over real terrain. At this point, some confusion set in. A couple of platoons seemed to become split up, like some vehicles were no longer receiving radio messages or able to respond, or had just got separated and become lost or confused. I spent a bit of a while trying to get a grip. Anyone who's ever been on a night exercise, let alone a real operation in darkness, expects a certain amount of chaos to build up as things develop. So while it was frustrating, i did not find this unrealistic. If you're commanding a force in such conditions part of your job is keeping on top of things like this and I took it that this was a factor SABOW was simulating, intentionally or not. Military operations are not a chess game with pieces which move instantly at your beck and call. The good news is that the message log credited us with having taken two key points, aptly named as these contribute significant victory points when SABOW is calculating winners and losers. I'm not sure that the enemy position to the west, 'Darius 1' was one of these, but it seemed unoccupied. So I decided that I would re-orient to the north and move straight to Phase 3, the attack on the enemy opposite our positions at 'Assyria 2'. I had got the two platoons nearest the crossroads lined up and ready to jump off and was waiting for the more scattered platoons near 'Darius 1' to get into position, when the enemy finally decided to take a hand. A T-62 platoon east of the crossroads made a contact report: enemy armour to the north! Shortly afterwards, our men at 'Assyria 1' reported they were under attack. The enemy had turned the tables and now it was our turn to face the possible loss of a key point. I would have preferred to have met this attack with my whole force but the enemy were evidently right on top of our positions and there was no time to lose. The two platoons already in position near the crossroads would have to pitch in now. I ordered both to attack northwards; hopefully they might catch the enemy in the flank. One platoon was slightly closer than the other so there would be an element of separation and therefore mutual support. The remaining platoons, further west and south, I ordered north on their left flank, to render what belated cover and support they could. The first T-62s to reach the scene of battle were quickly engaged at very close quarters, with the platoon commander's tank knocked out before I had a chance to take over in person. Worse still, 'Assyria 2' was reported captured by the enemy. All of a sudden, this wasn't going so well! A smarter move would have been to jump to my second platoon which was just coming up; this I could have led into the fray to best effect. But instead I took over the second tank in the platoon that was already engaged. This tank too was hit almost immediately. We could still move but the gunner's main sight was out. I backed up desperately, scanning for targets. We got into some bushes which likely saved us from destruction. Tank cannon fire erupted all round. The platoons third T-62 flashed past close by, caught in the green light of our IR spotlight. I tried to follow him but he seemed to have vanished like a ghost in the night. Still no sign of the enemy. Where were they? Total chaos. It all ended as quickly as it had started. Firing died away. Something flared up next to me in the darkness. It was an Iranian Chietfain, burning. That was it. The SABOW curtain came down at that point. Having taken two key points from the enemy and now apaprently beaten off their own attack, I was a bit surprised to be told we had lost. The statistics presented, seen in full below, just added to my confusion. It's probably not that complicated; all wargames have their methods of resolving a battle into who won and who didn't and I just need to get used to the SABOW way. At least we got an 'achievement' recognised. Regardless, it was an interesting battle and the challenges of trying to manage my forces was part of the fun, not a distraction from the tanksimming. Somehow or other, SABOW gets the tanksim/wargame balance about right, for me. In this respect it actually does a better job than 'pure' tanksim M1 Tank Platoon II (where you tended to have to choose between abandoning your secondary units after the initial planning, or spending too much time micro-managing them in the IVIS screen 'map'). in fact, SABOW reminds me a lot of Steel Beasts in this respect, which is no bad thing!


-
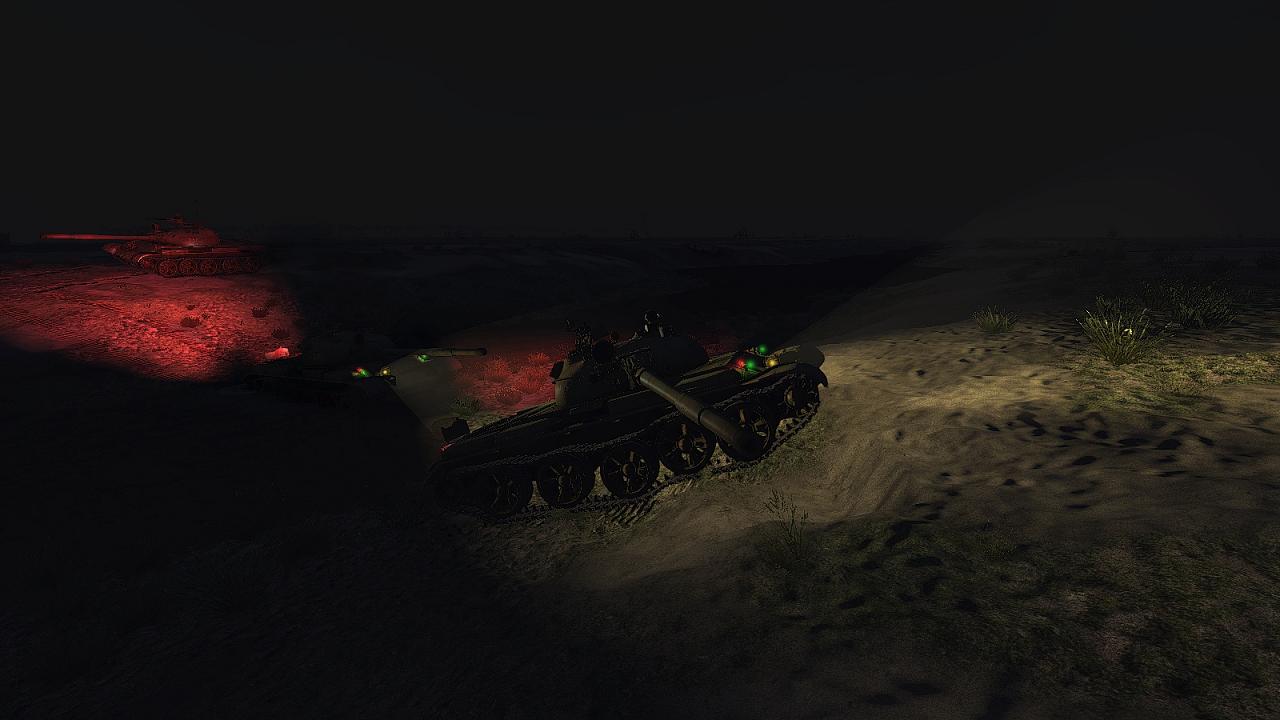
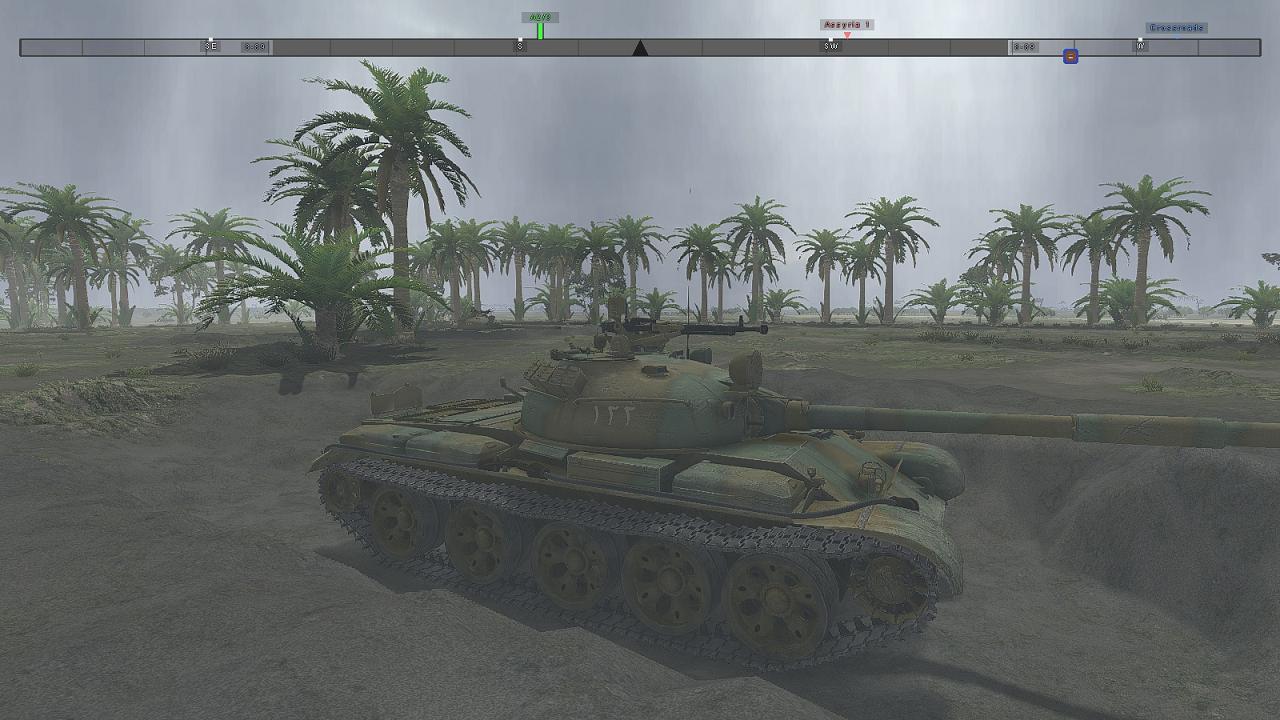
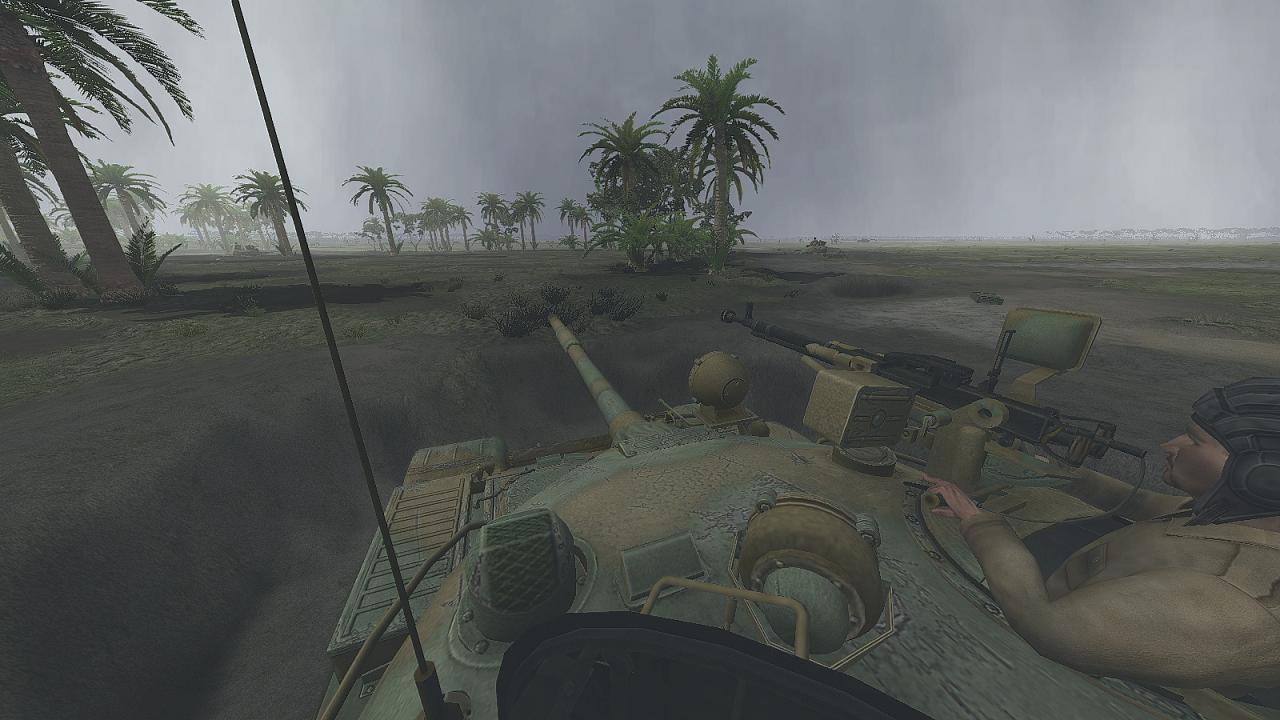
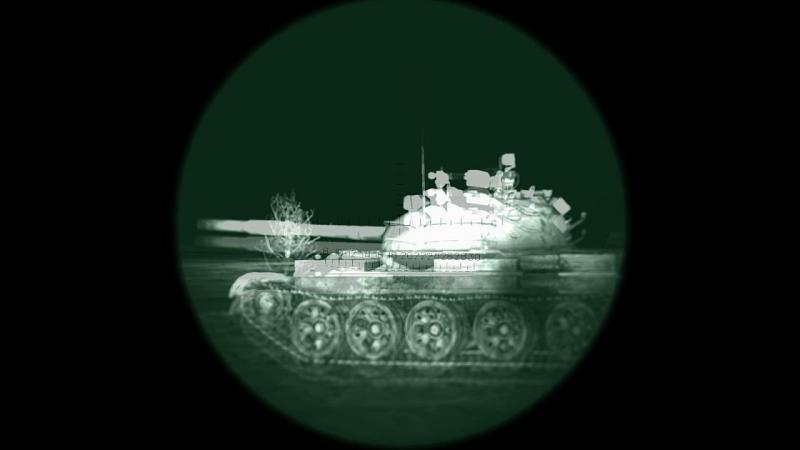
Slow on the uptake as I can be, I have only just realised that the initial battle map you see when you start a campaign 'turn' isn't, as I had thought, just the wargame AI working through events and generating battles, one of which will involve the player. You can actually move units about via this map, thereby setting them up for whatever move you have in mind, be it offensive or defensive, possibly triggering a battle yourself. In the campaign I've been playing, for the Iraqi side, the Iranian enemy has been making life difficult for us by repeatedly attacking out of a minor salient they hold, around a crossroads next to one of the region's ubiquitous irrigation channels. In the battle reported above, we destroyed their latest attack, resulting in some of their forces withdrawing to the north. Faced with the initial planning map at the start of the next turn, after watching the wargame AI doing some stuff as before, it was then that I discovered by chance that I could move my units around, within the area we held. So, starting with this, with us on the blue side in the bottom right-hand corner (and having opted to display units using NATO symbols, each one here representing a platoon)... ...a few mouse-clicks redeployed my platoons along the southern and northern shoulders of the red enemy salient, as in the screenshot below. From these positions I would launch concentric attacks designed to 'pinch out' the enemy salient and finally occupy that troublesome crossroads. After that, we would re-orient and exploit to the west, catching other Iranian positions there between my advancing tanks and the friendly forces on the far side of the bigger, north-south bulge which the enemy had driven into our territory. Sure enough, my moves triggered SABOW to offer me a battle and I Iost no time in ordering my tank platoons to begin their attacks, as I had planned. Switching between the units and the tactical map, I was able to watch my plans take shape...although it sure does get dark early, in these parts. Fortunately, night fighting and driving wise, the T-62's active IR systems were quite capable for the day, the view below being that from the tank commander's sight, which nicely reproduces the effect of looking at a scene illuminated by an Infra Red spotlight. Spooky! My plans went rather well...helped by the fact that the enemy seemed to have bugged out completely. Still, it was quite satisfying to watch from the turret of a covering platoon's tank, as another trio of T-62s, following my orders from the map, crossed the ford next to the crossroads and took up defensive positions on the southern side. My PC, I now suspect, is an enemy agent, because it saved the Iranians to the west from my phase 2 attack by re-booting at that critical juncture. Never mind; I've learned another few tricks along the way and will be all the better placed to drive the Iranian infidels from Iraq's holy ground, next time! I'm still some way from seeing everything SABOW can do, let alone mastering it to the point I can get decent all-arms operations going, as opposed to trying to co-ordinate moves by just a few tank platoons, as on this mission. However, the tools are there and I'm getting to grips with them. What a package this is! With SABOW I can get the sort of experience I used to try to create with 1/300 scale minuatures on a tabletop, combined with a first-class tank simulator. Far from getting in the way of the tanksimming side, the wargame component enhances it, as well as adding interest of its own. Like a hand fits in a glove. A steel glove, in this case :)

-
I think the trick is to turn on the little crosshairs thingy with the Ctrl key - for example, from the TC station, may work from the gunner station too - and then with the mouse, place those on the target you want to be in cover from. Then click, right or left, can't recall. Then hit the '9' key. This seems to work for me; maybe if you don't select a target first, things get confused like you're describing, as if the driver is going, 'Cover? From what direction? Here...or maybe there? Oh, I give up!'. The other thing is that so far, I have only used this in the training mission, where there is a low crest to your front, providing the AI with suitable, nearby cover. I'm not sure what would happen if I gave the order where no such cover existed. That too would likely confuse the driver, real or AI. I don't know yet what happens if you try to set this up by clicking on a spot on the ground rather than an actual enemy. It may need the latter. And of course if there are several enemies, your solution will be good for just one, so care is likely needed. Good luck! I haven't tried the 'U' key yet, so I'm not sure how that one works out.
-
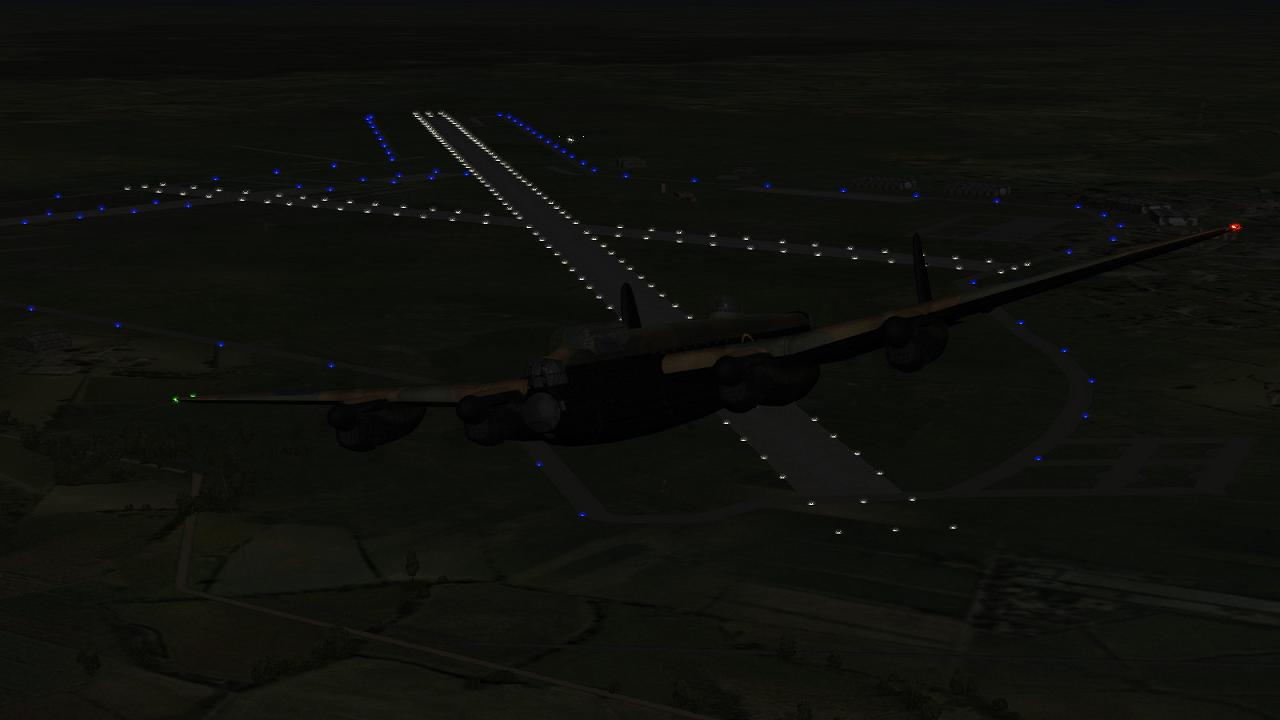
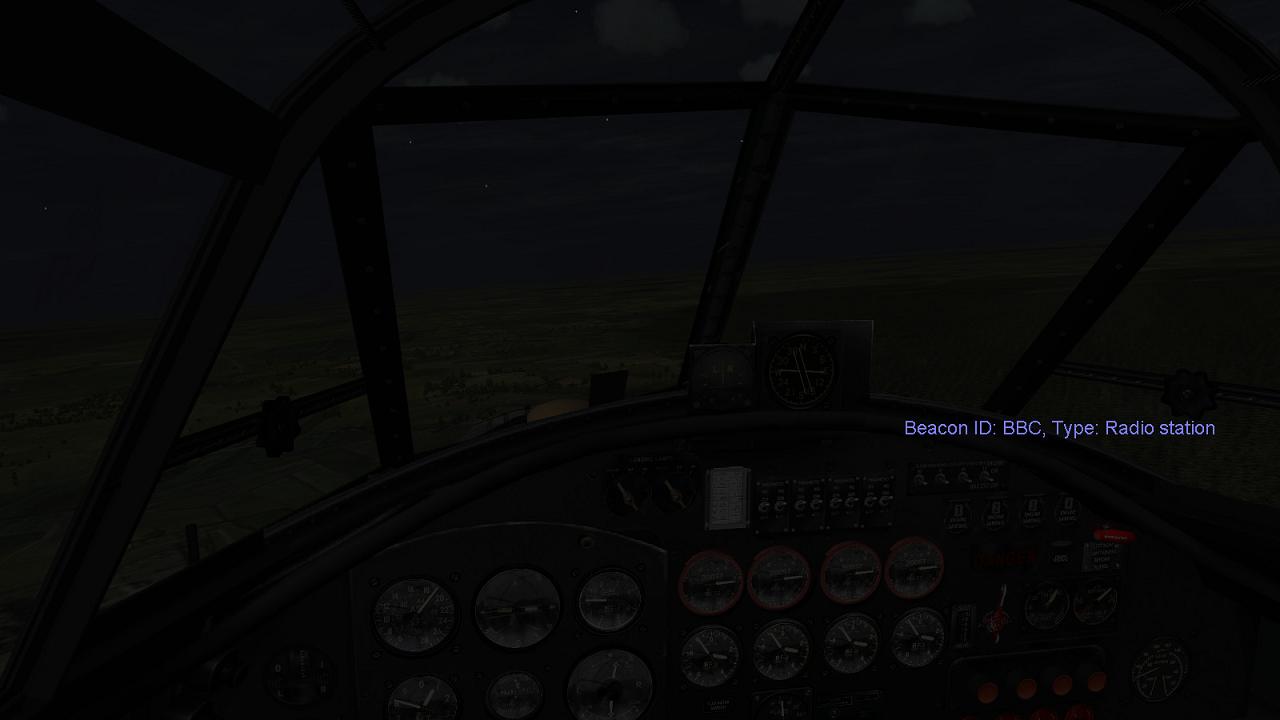
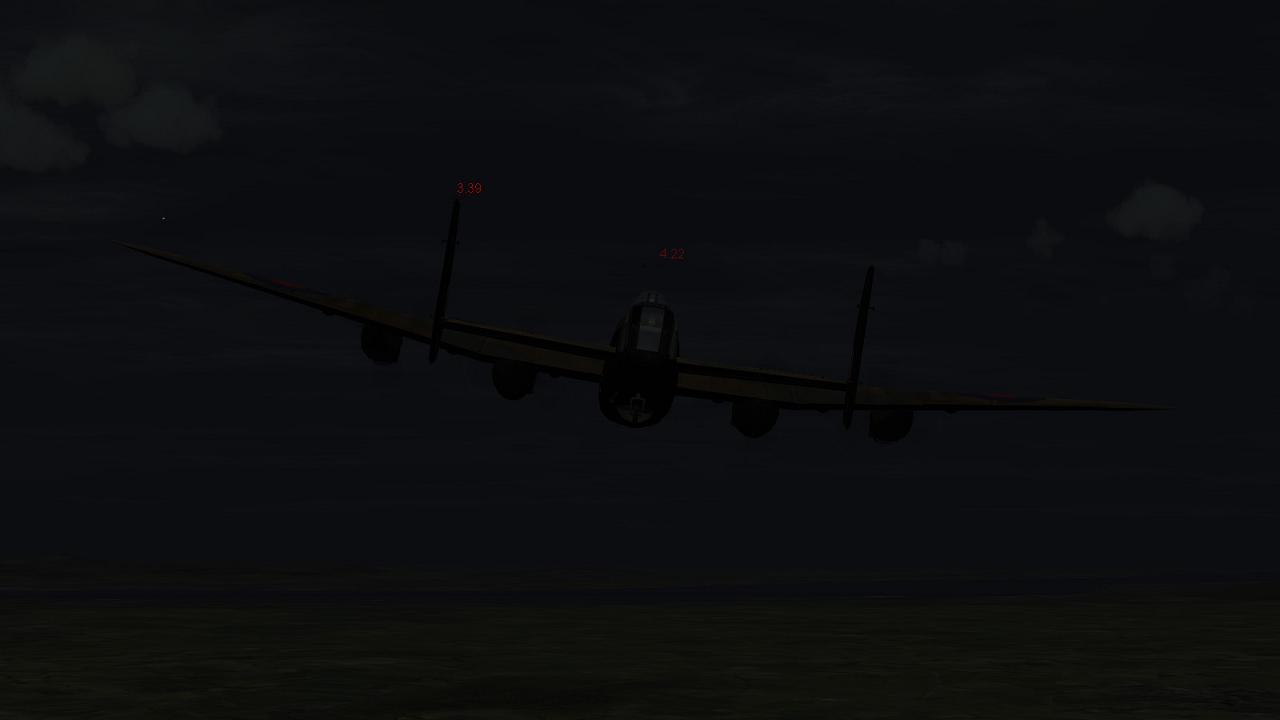
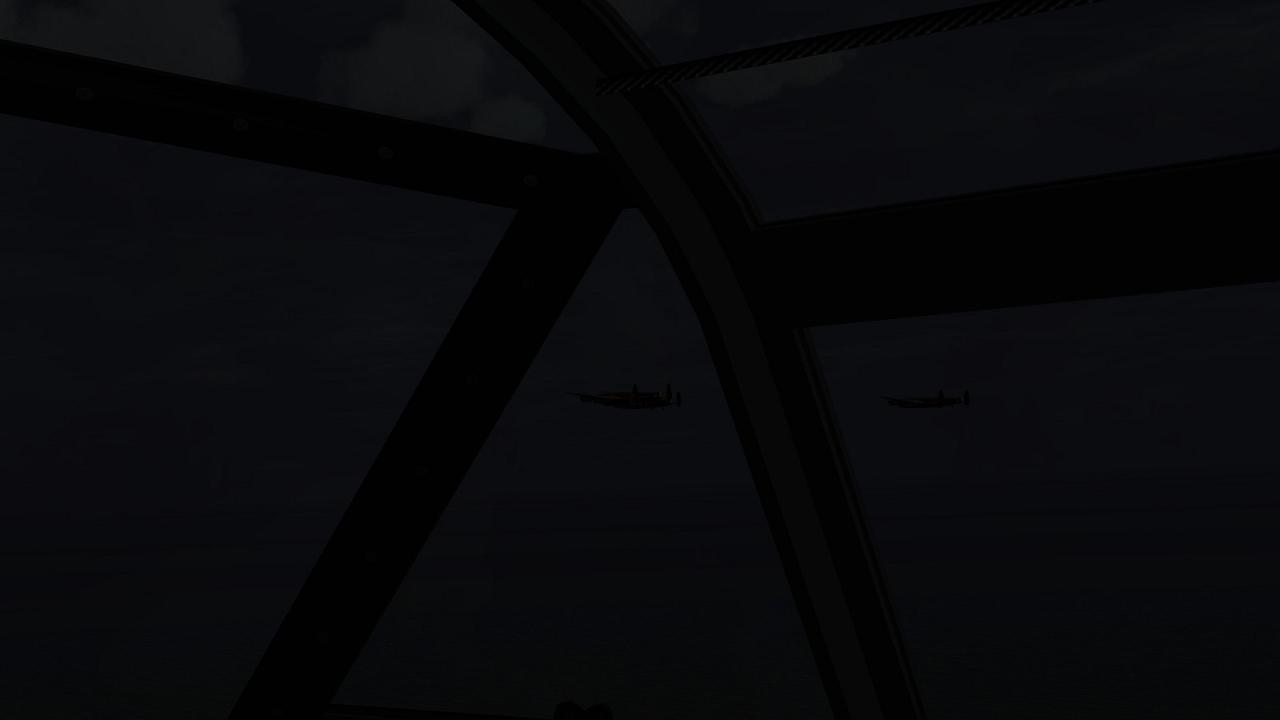
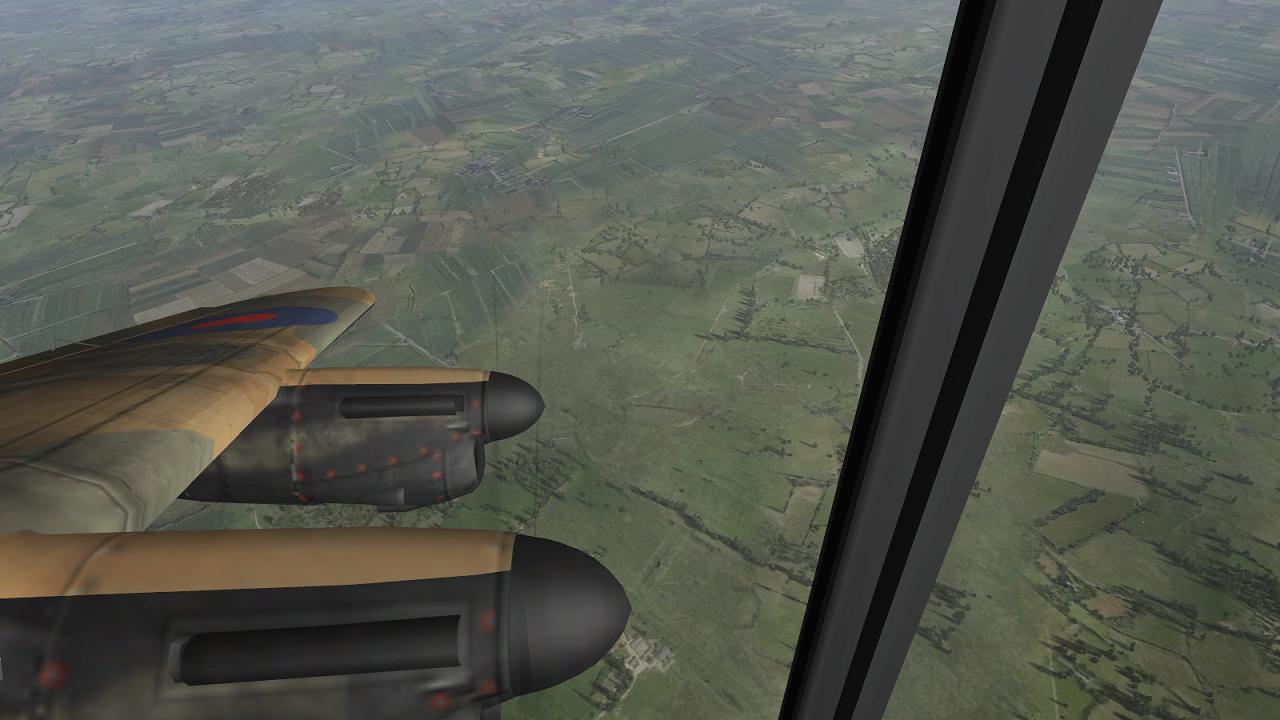
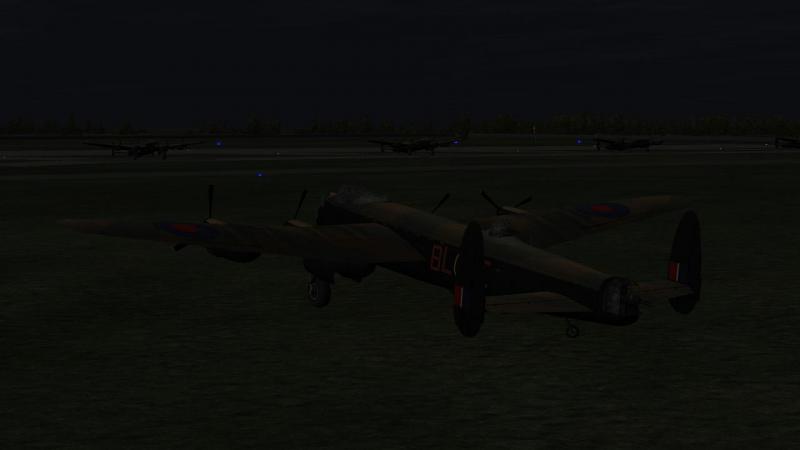
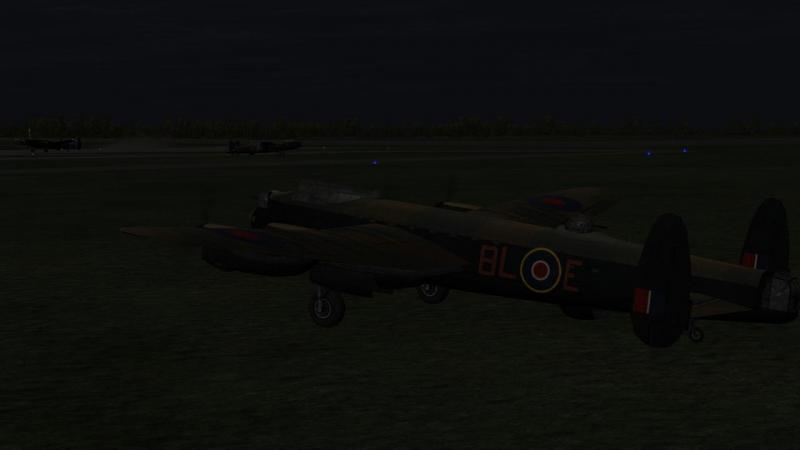
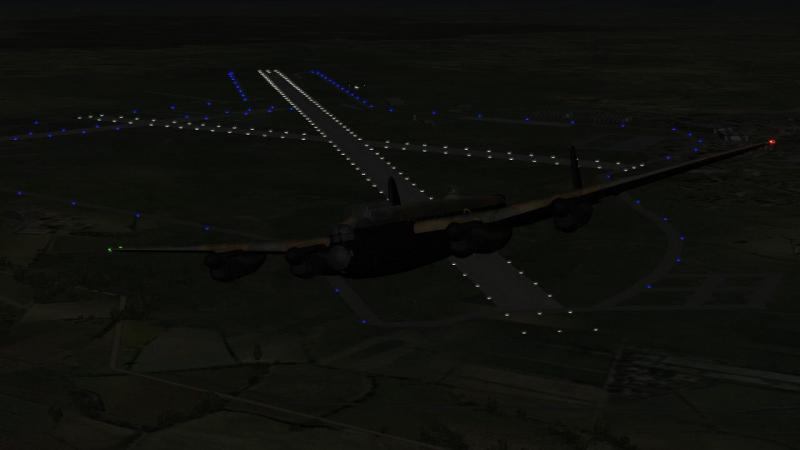
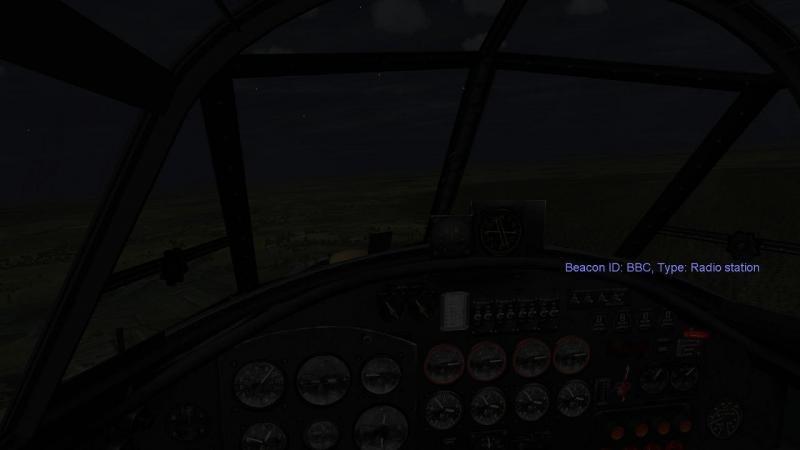
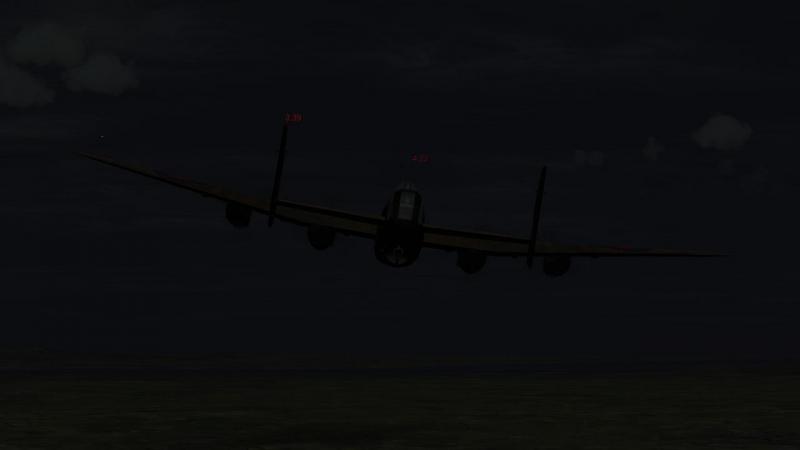
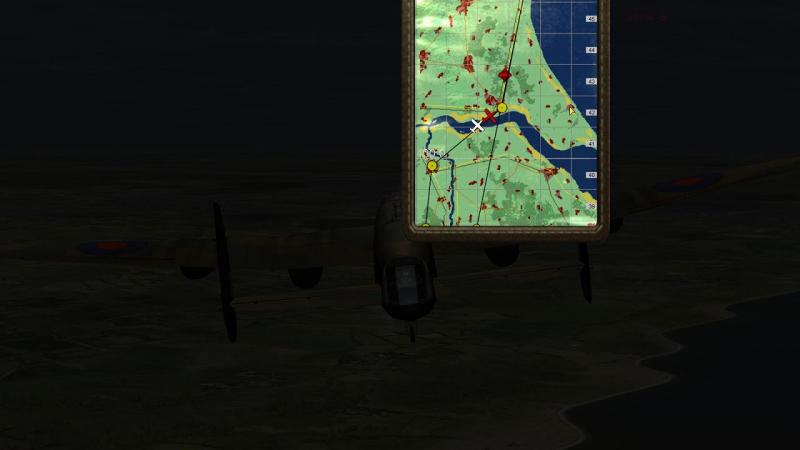
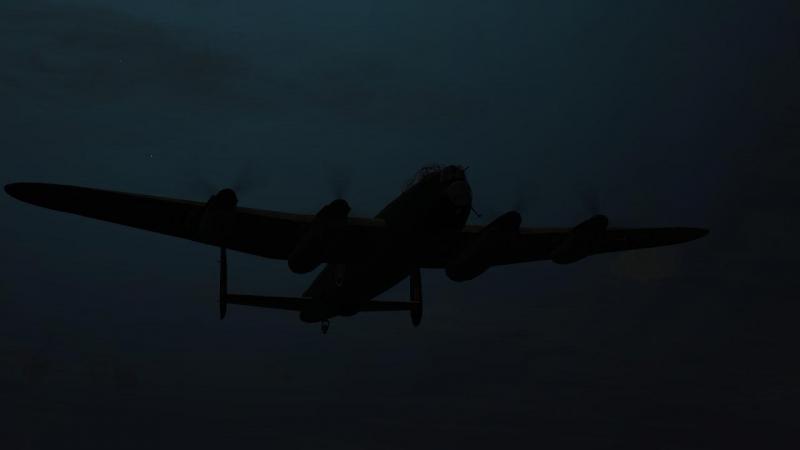
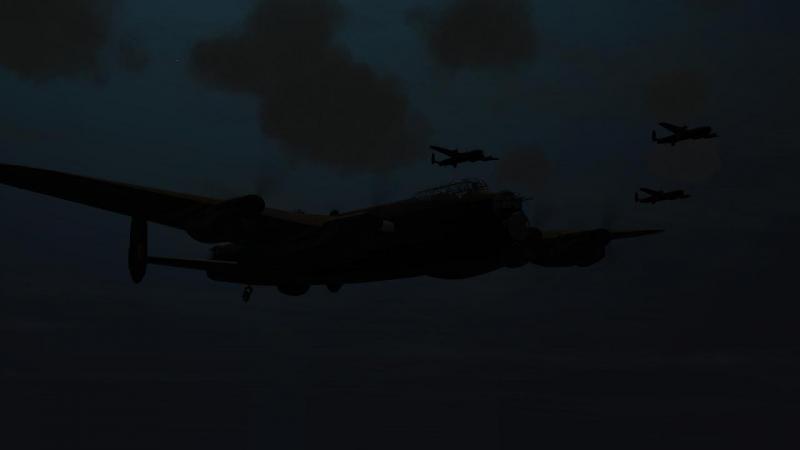
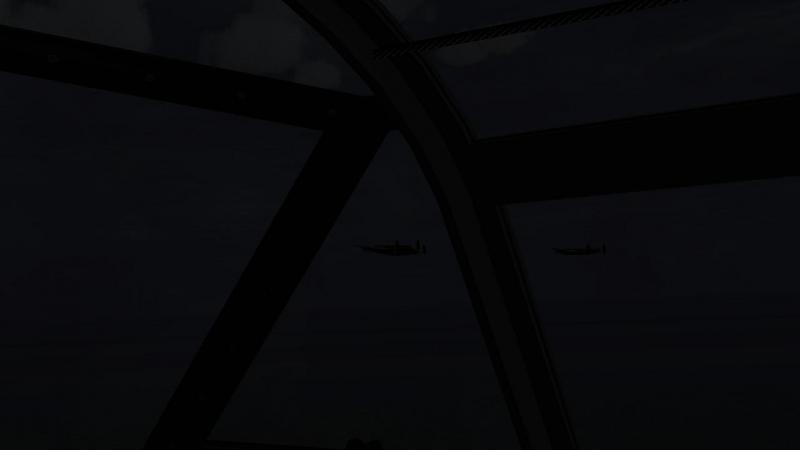
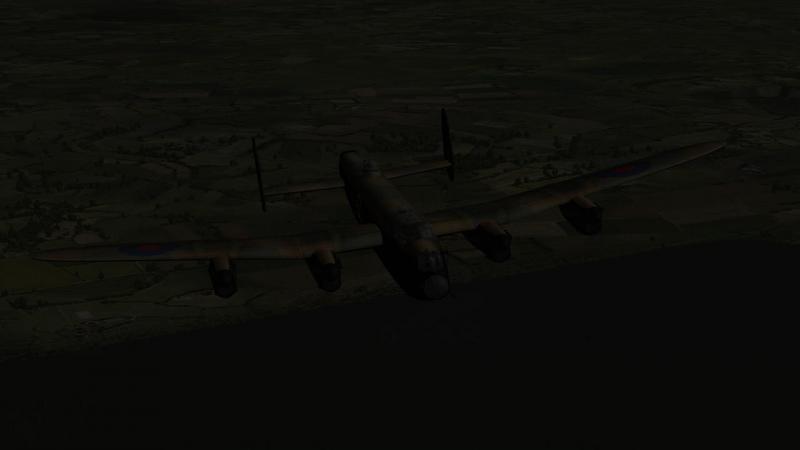
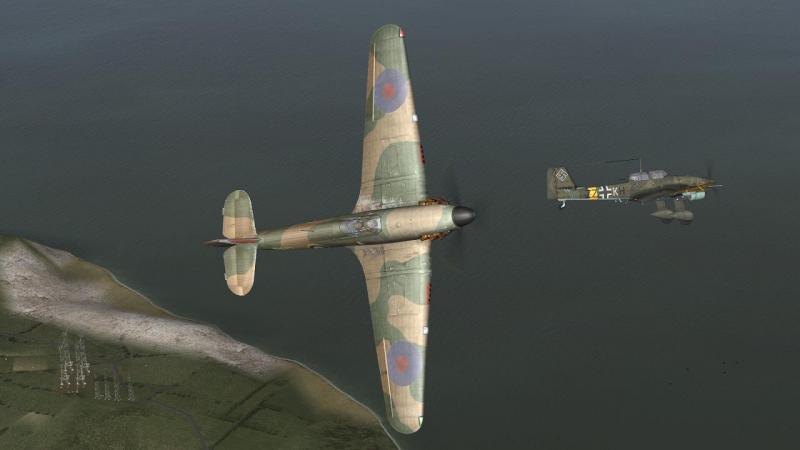
Thanks guys! I'm not sure I've the patience for this heavy night bomber business, as I found out on my first operational mission in this campaign. It was an easy enough turn, minelaying (with fused delay 1000 lb bombs simulating the mines). I must have hit the wrong key - the penalty of switching between different sims! - so I failed to get a screenie of the briefing. But it was a straightfoward trip, a short hop up to the coast to the north-east, then a long leg due east over the North Sea to the Heligoland Bight. The complicated bits were that it was dark, I was number four in a formation and we had to fly there at a thousand feet, to come in under the radar. As with my familiarisation flight, the first bit of fun was just getting to the runway, this time in darkness and from a dispersal point on the grass. At least the active runway was well lit! By the time I had started up and checked the controls, the others had begun to take off, so I wasted no time and got cracking myself. If this had been Flight Unlimited, the tower would have told me politely that they were already paying someone else to cut the grass and didn't need my help but I was in a hurry. I got onto a proper taxiway as soon as I could and switched on my navigation lights. I did a bit more grass-cutting but eventually made it onto the runway, just as the last of the other three Lancs was lifting off and disappearing into the night, marked only by its navigation lights. Despite carrying four thousand pounds of ordnance, the takeoff was undramatic and I was soon in my way. The campaign readme had advised me to set keys to change radio beacons so I tried these now, thinking that perhaps, in some fashion of which I was totally clue-less, they would help me navigate, perhaps showing up on my radio compass. All I saw was a text message which indicated that I was tuning in to different radio stations, starting with the good old BBC and ending with Grossdeutches Rundfunk or some other enemy station. As clue-less as I'd started, I ploughed on into the darkness. If flying a precise course and altitude wasn't hard enough in the daytime, doing the same thing in complete darkness and in a room which I couldn't darken down enough, was in a different league of difficulty, at least for me. And I had to combine all that with trying to get into, and then maintain, formation. I heartily dislike formation-flying in sims - it's too much like hard work, compared to the freedom of flying as a leader. No option, tonight, though. So I shamelessly used all the help I could get, including the mini-map and icons. Even with all that, it was a struggle to catch up and stay caught up. Pausing to set up and take screenshots just made it worse. Orientation dispelled, formation lost, start over. This screenie alone probably cost me a few hundred yards and a proportionate amount of sweat and tears. I don't know if this counts as 'in formation', but it's about as close as I got. I tried to stay just below the others, so that I could see them against the lighter sky above, without resorting to labels. This worked tolerably well, but in the dark it was very hard to detect gradual changes in distance, so that I would often find myself drifting away or getting to close. Hard work indeed! I didn't dare try time compression but instead I turned on the autopilot. Not a good idea. I almost never use this in Il-2 and haven't for ages, but the very odd time I have, flying fighters, I remember seeing this initially send my plane banking off to one side before swinging back into formation. This time, it just turned my Lanc around and settled us onto what looked like a course for home. Was it taking me back to that waypoint I had missed, when I cut a corner to catch up? I don't know, and I don't think Il-2 has the Strike Fighters style 'next waypoint' option to tell the autopilot that's where you want to go next. None of CFS's 'warp' feature either. Meanwhile, the rest of my formation, which I had spent the last twenty or so minutes sweating to catch up and then stay with, disappeared to the east. Brilliant. I decided to call it quits. When I got back to Waddington, I'd tell them some vital piece of equipment failed. Which was almost true. I'm not sure I have either the patience or the aptitude for this heavy night bomber lark. Maybe I'll ask for a transfer back to Fighter Command!
-
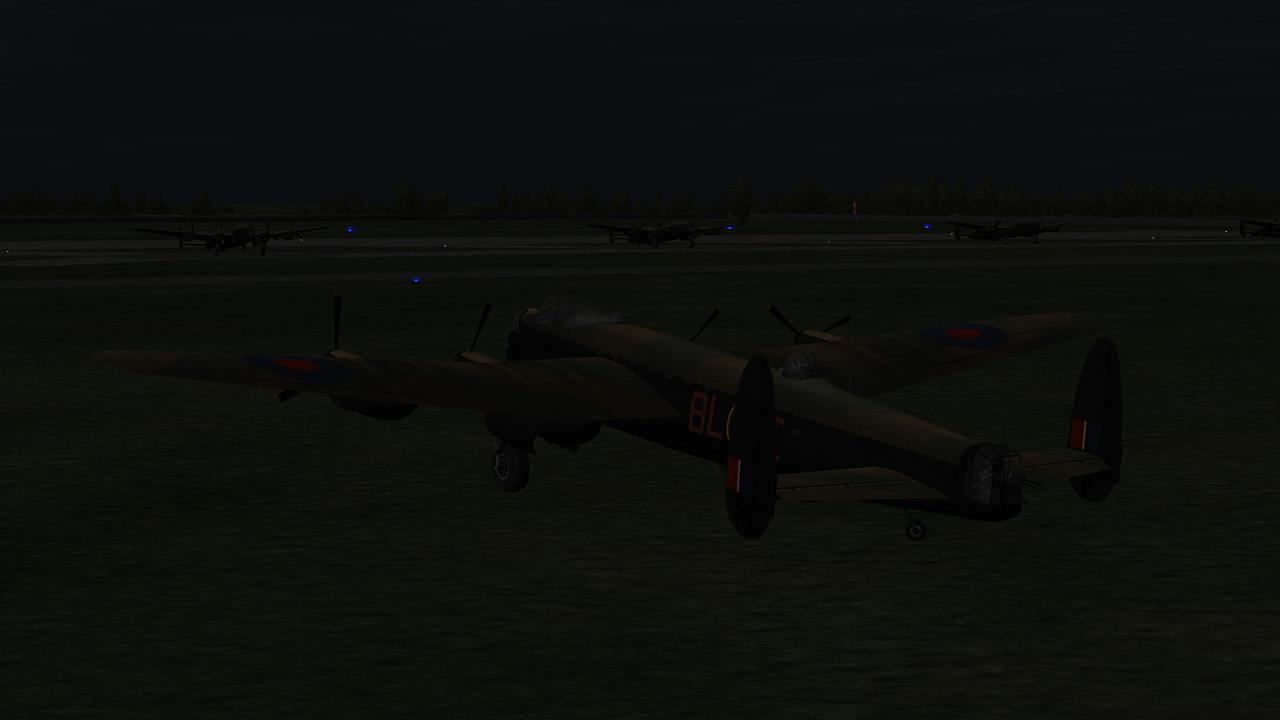
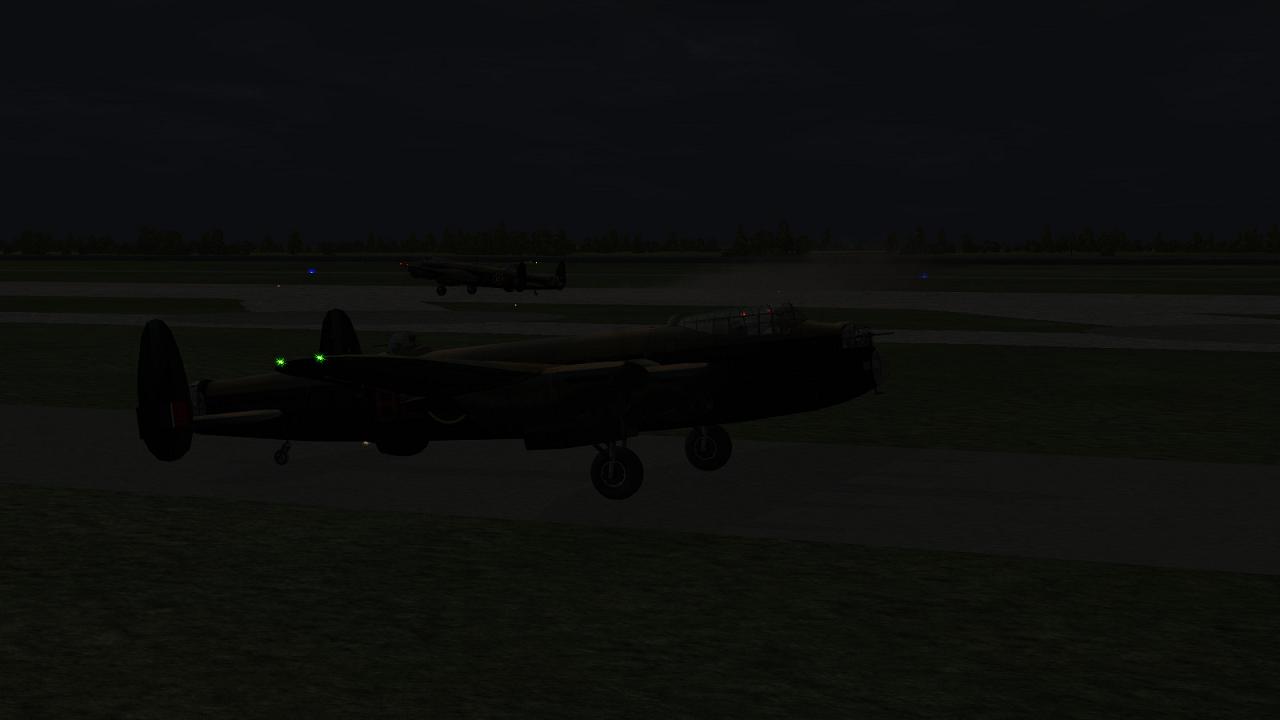
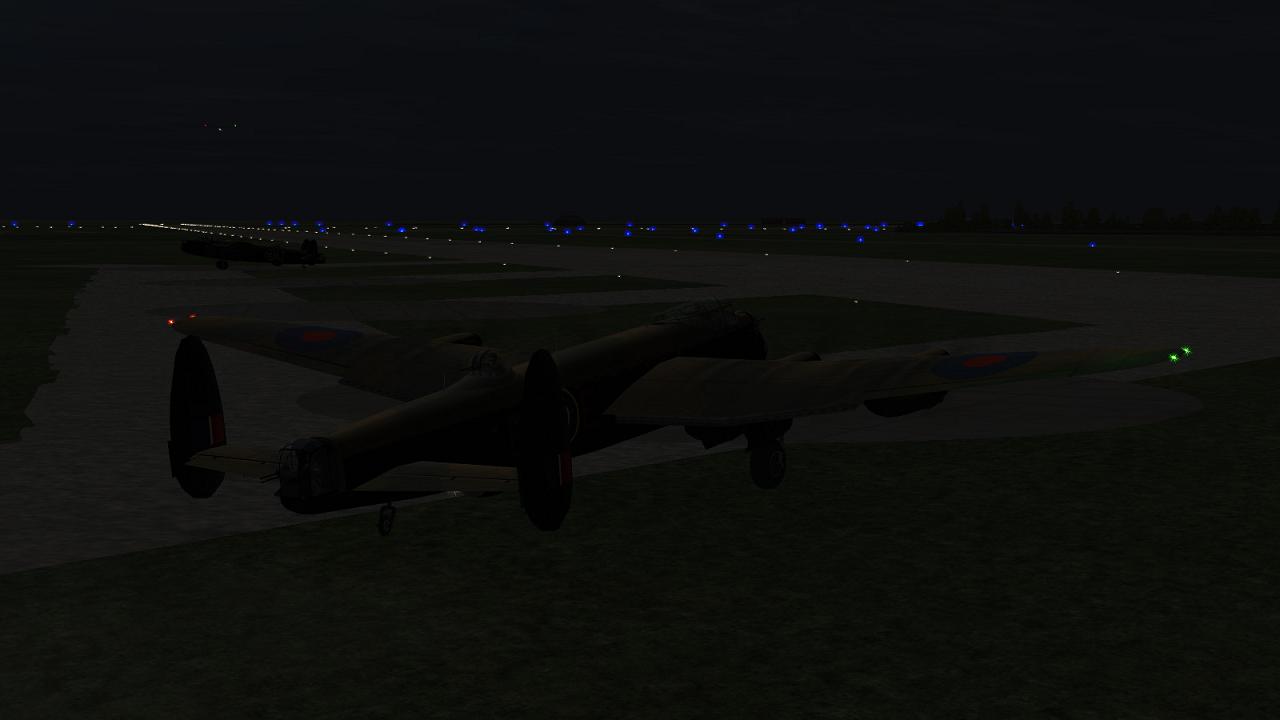
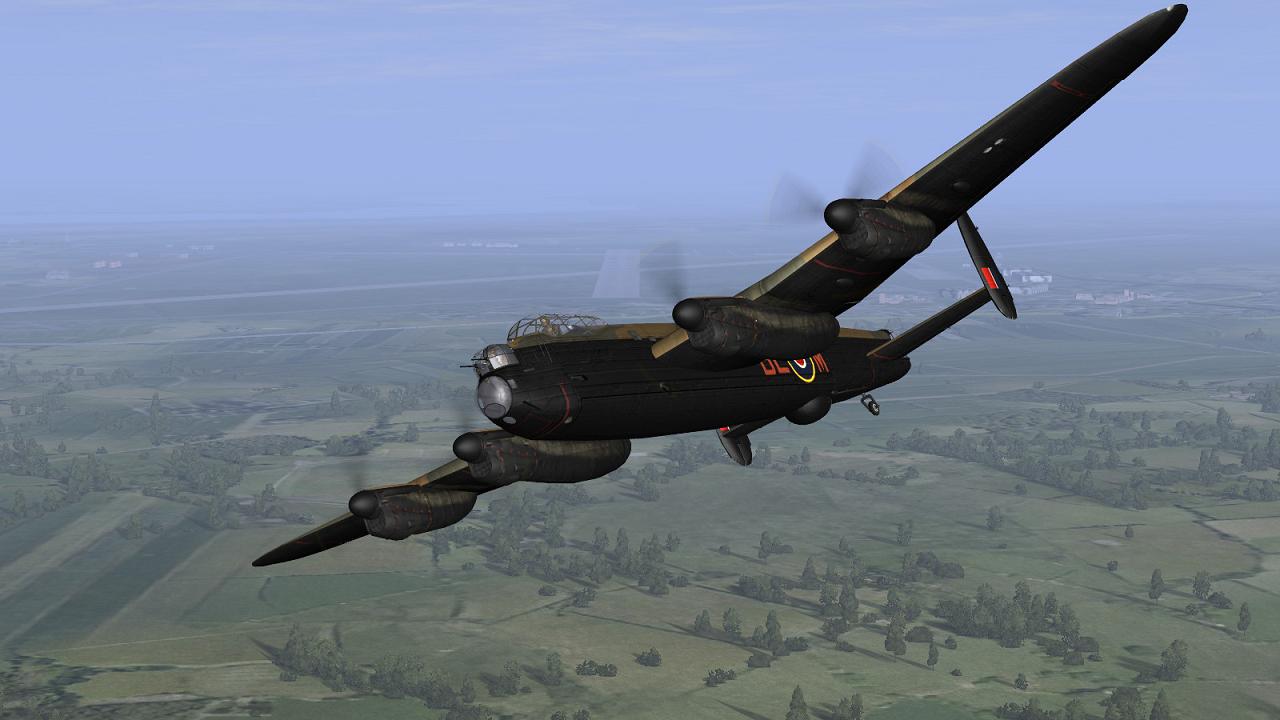
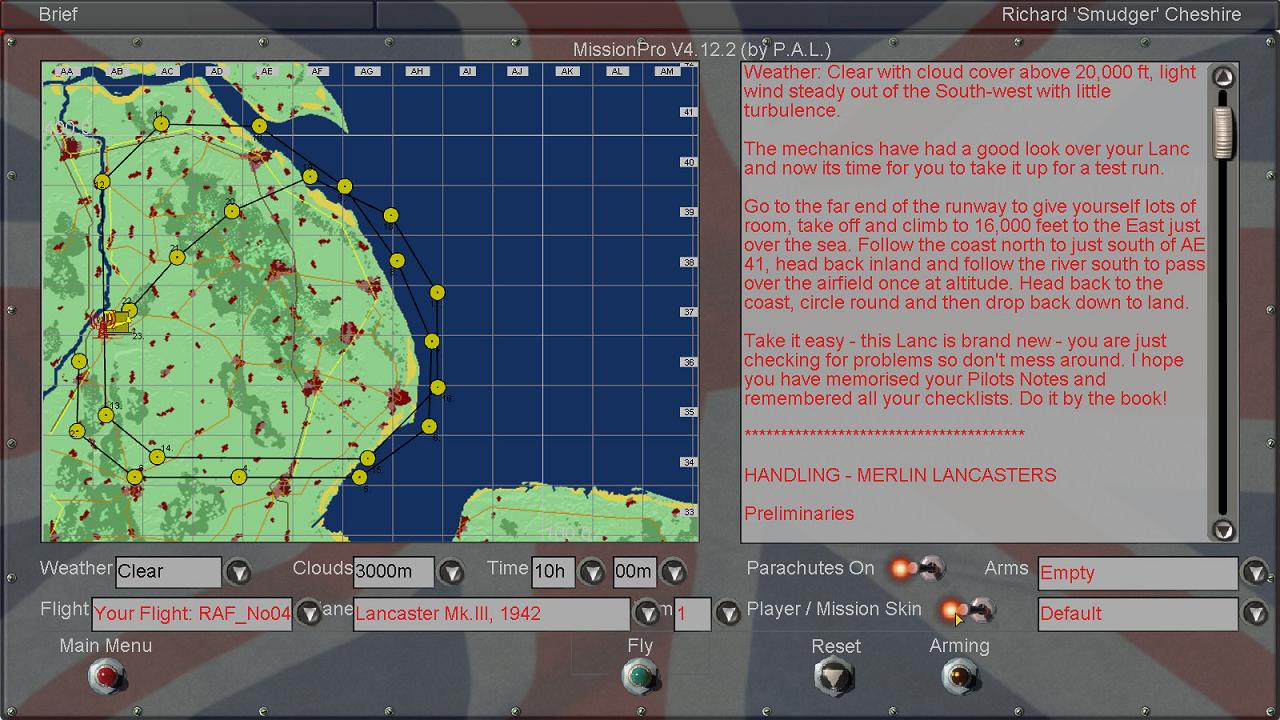
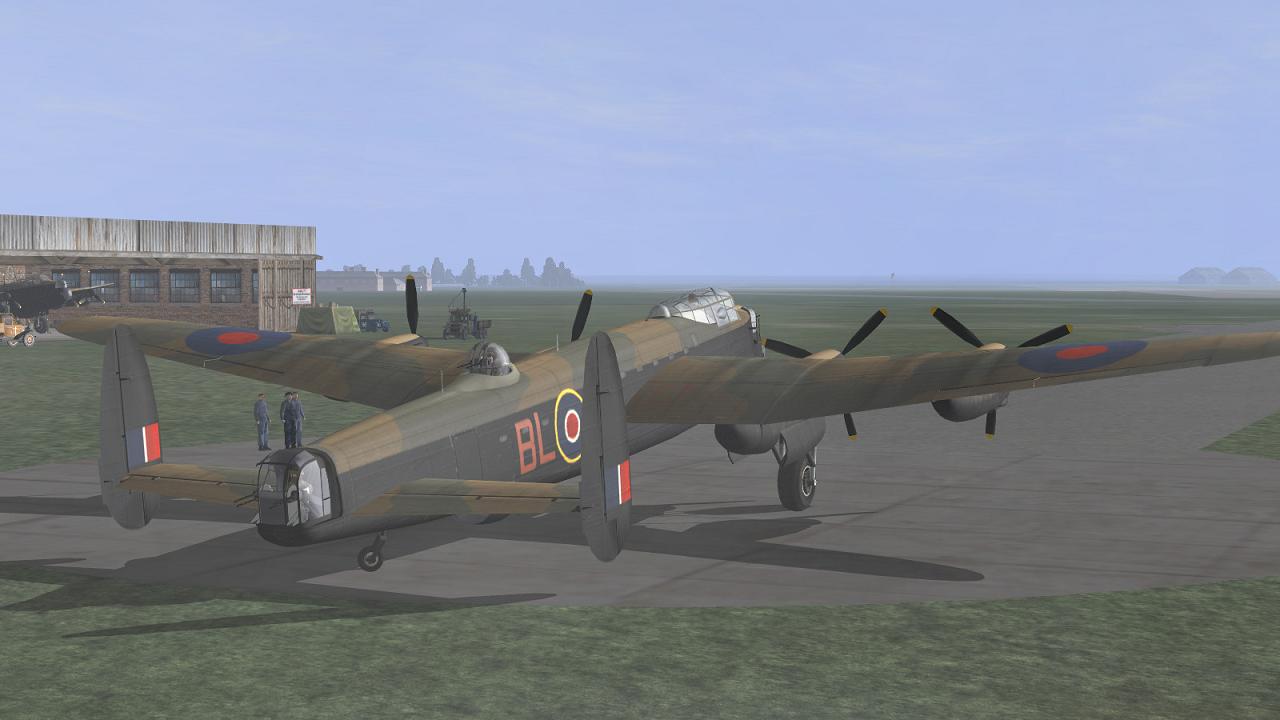
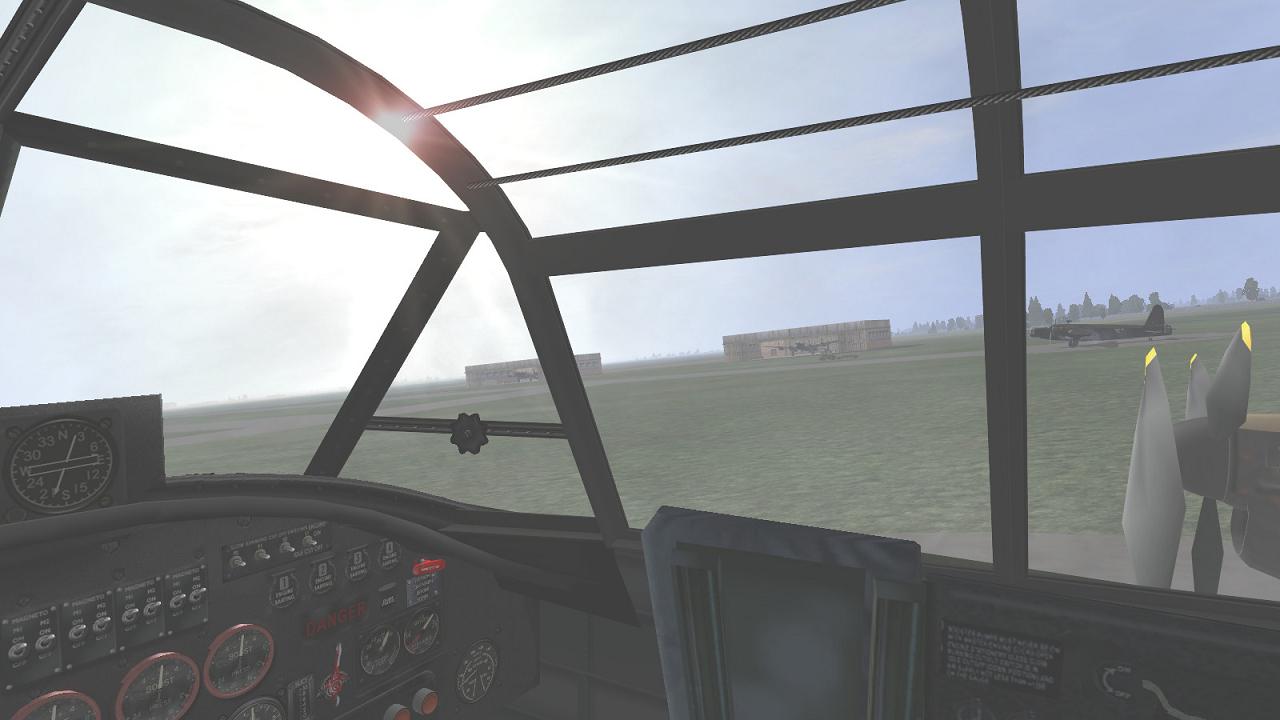
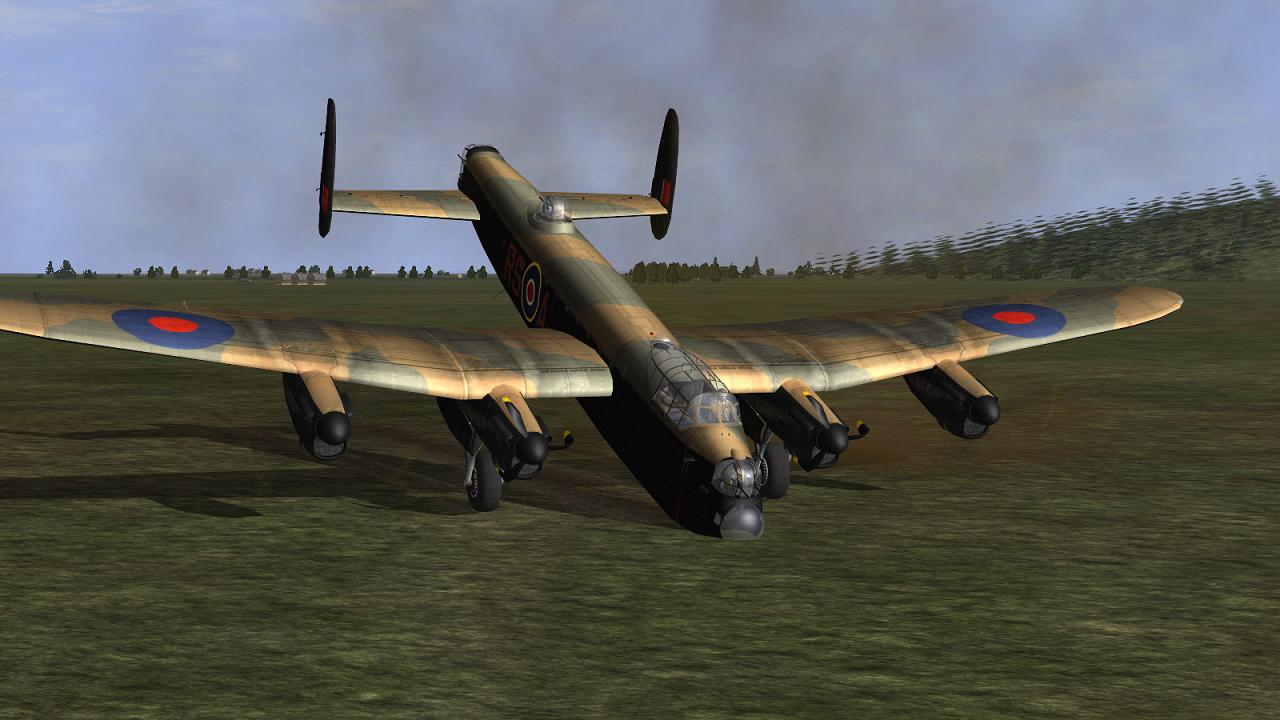
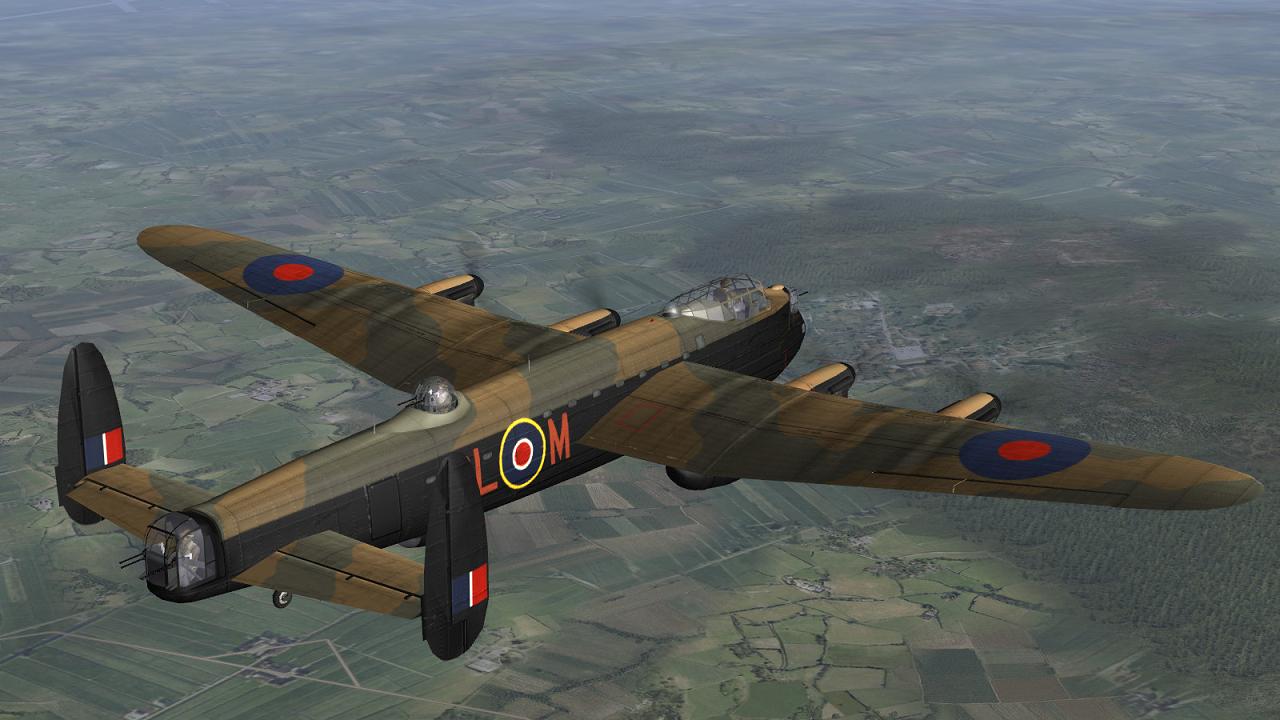
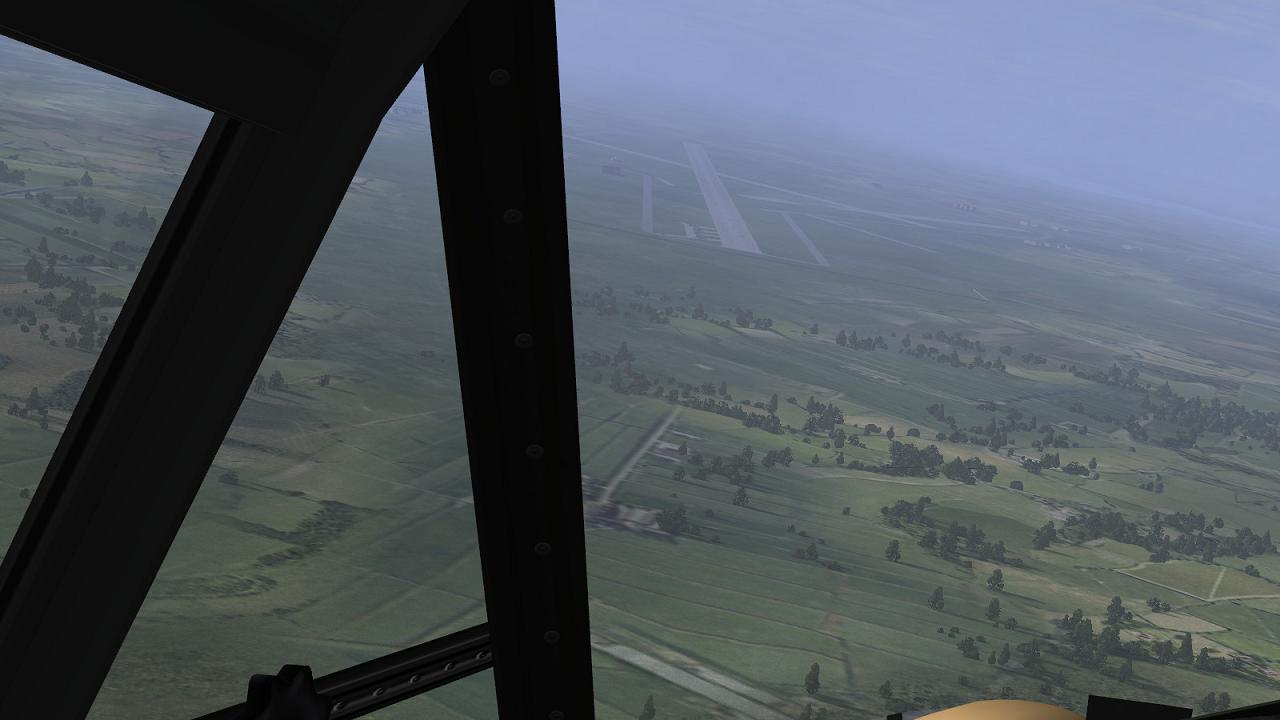
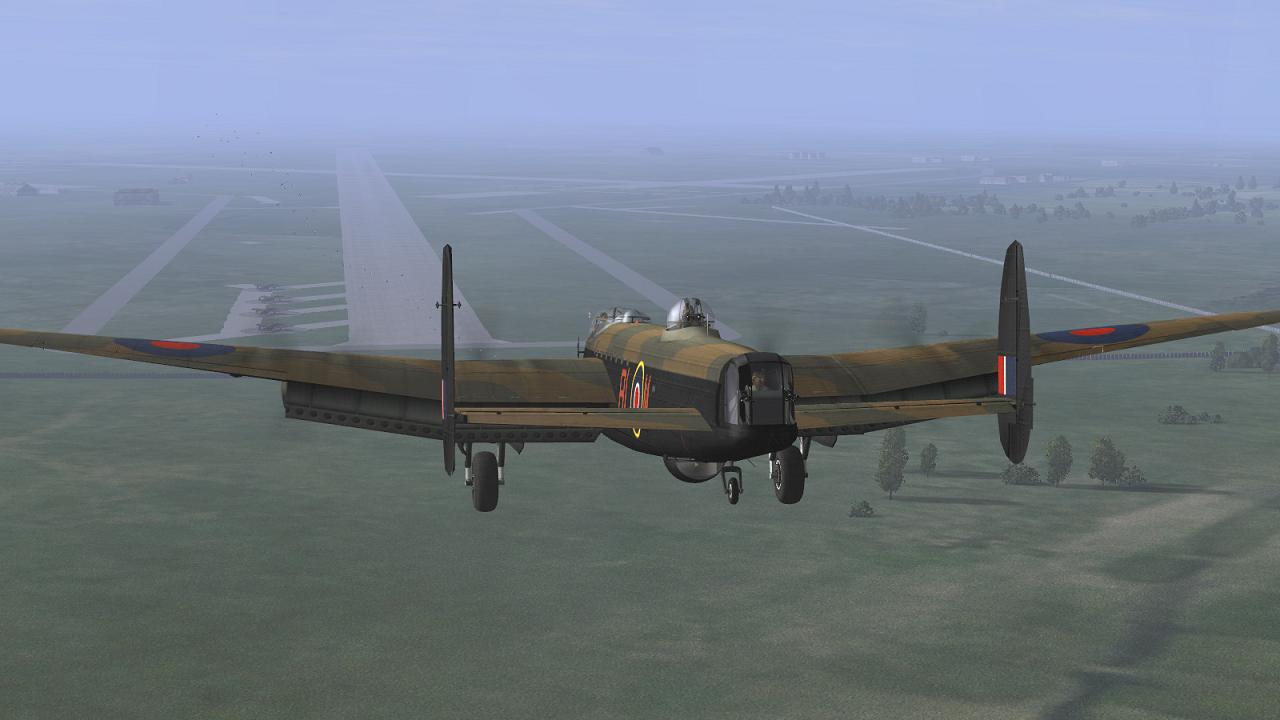
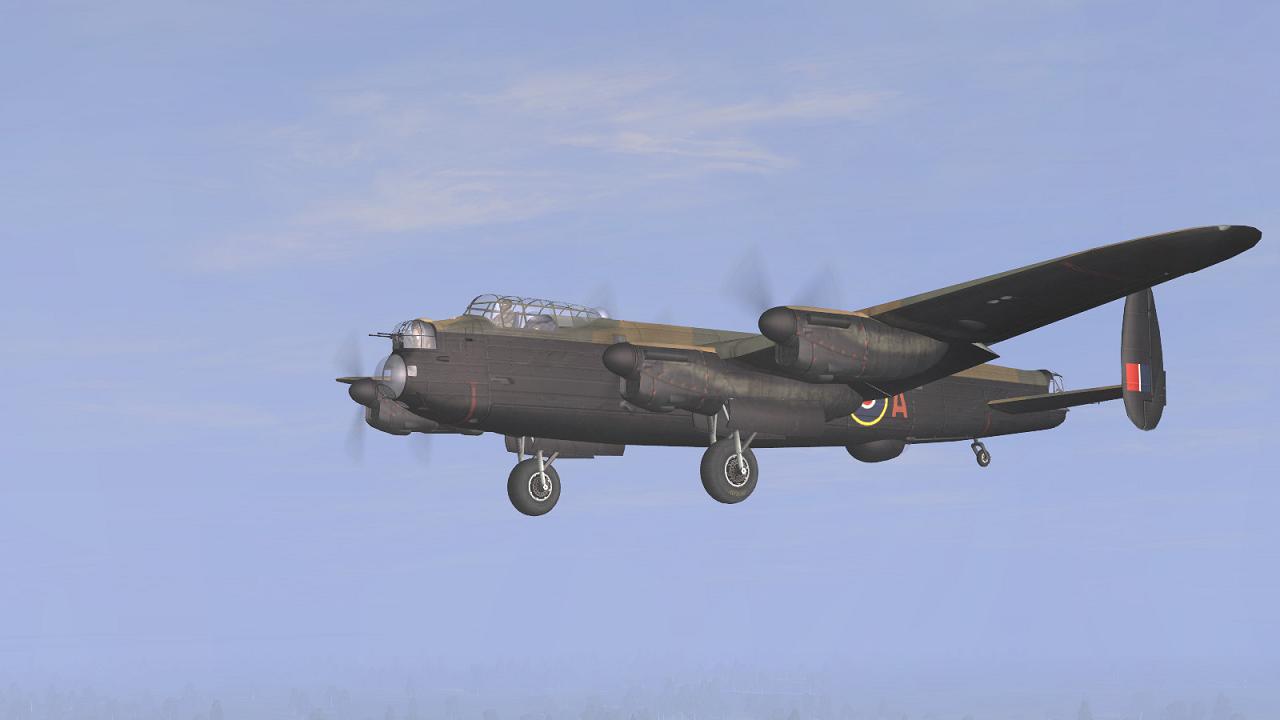
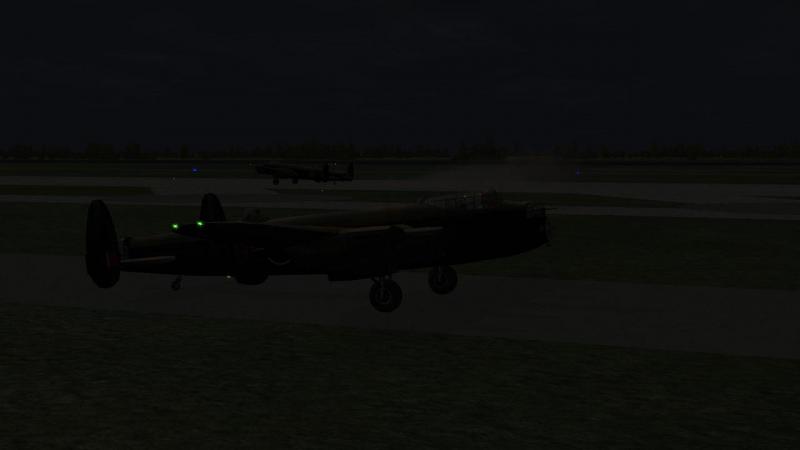
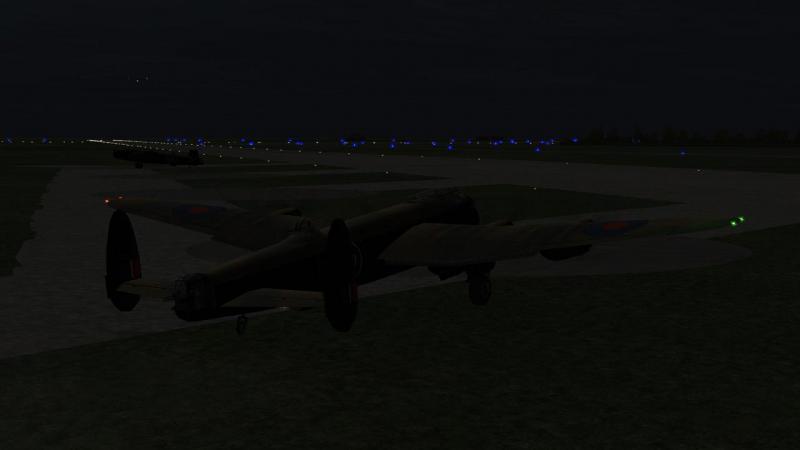
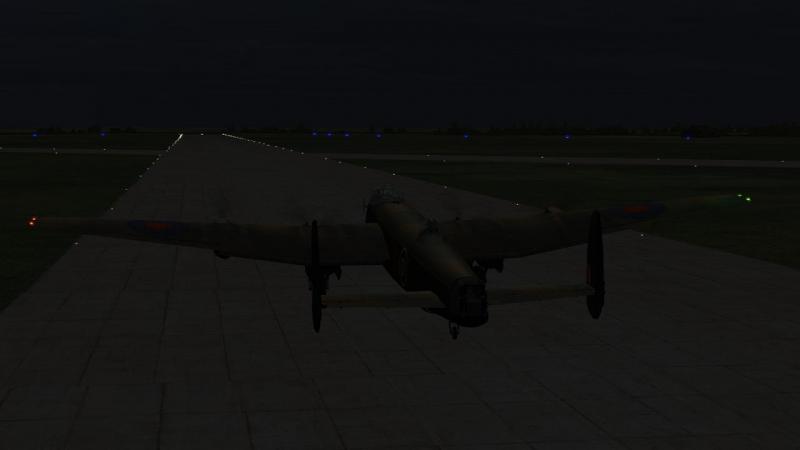
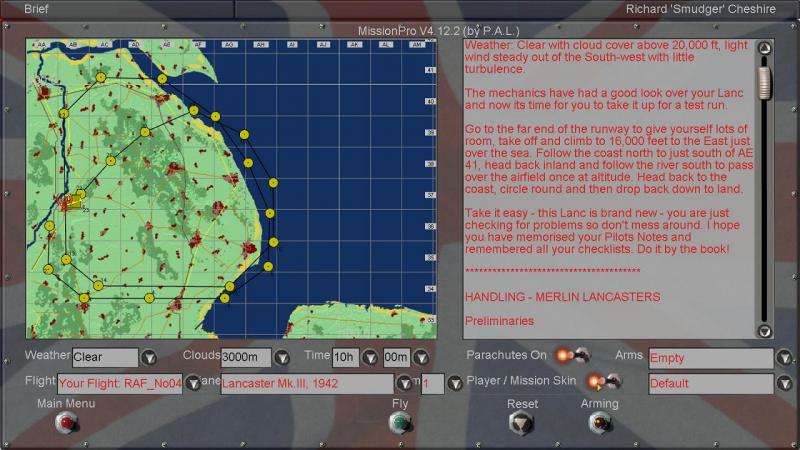
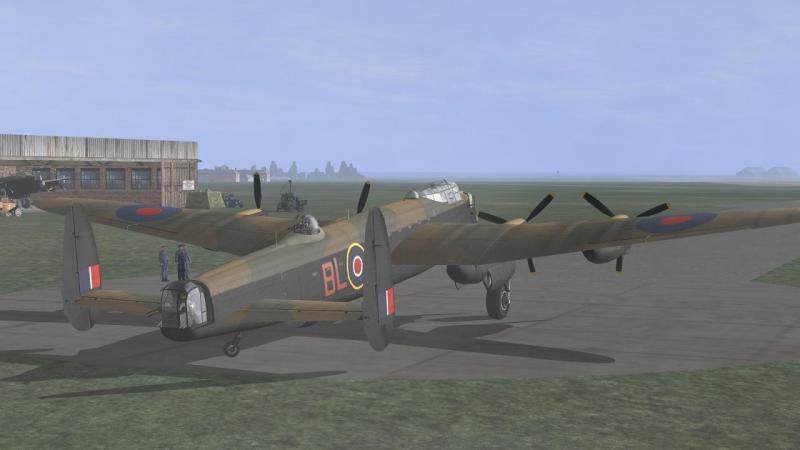
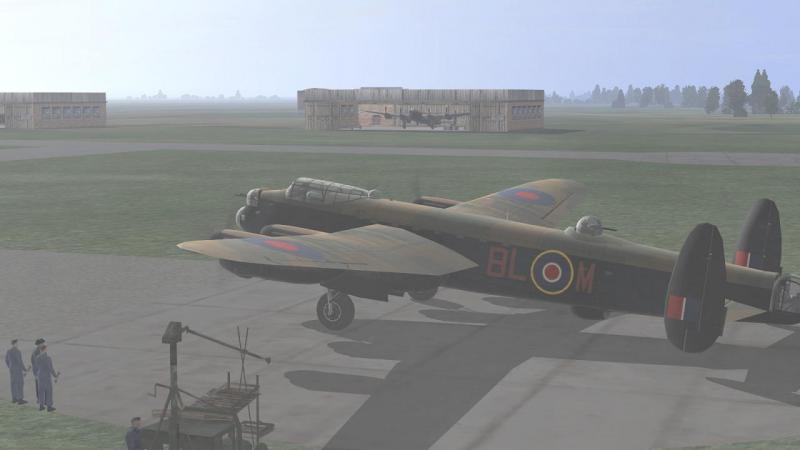
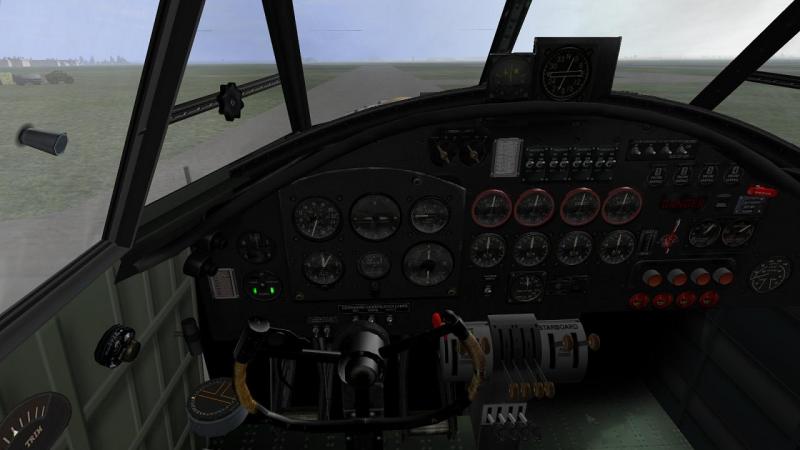
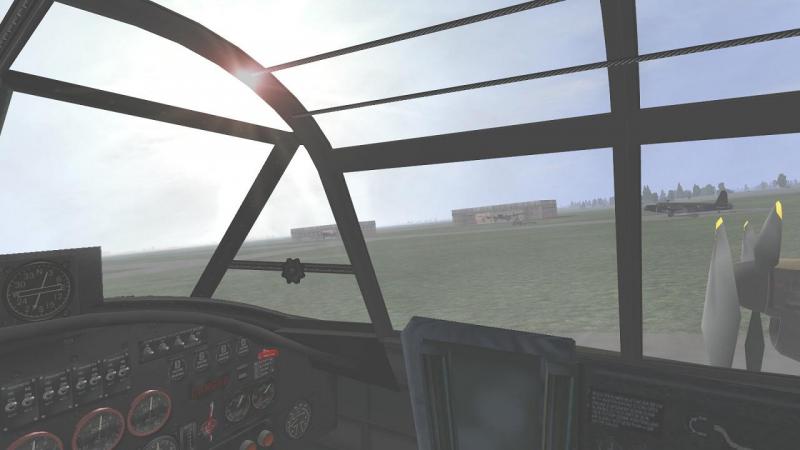
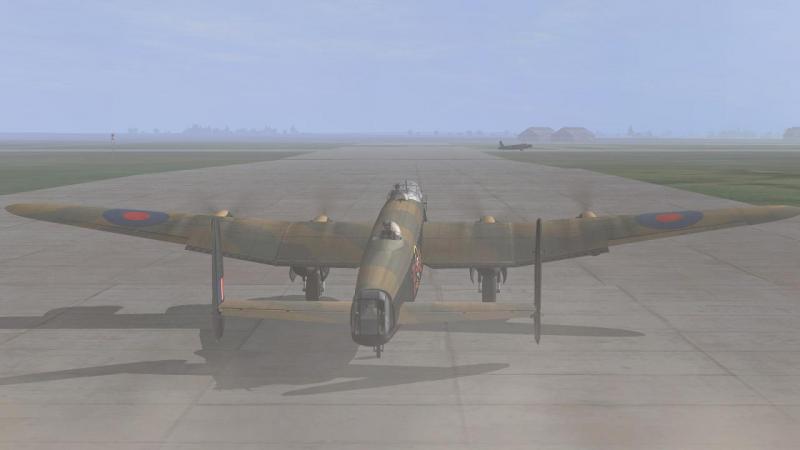
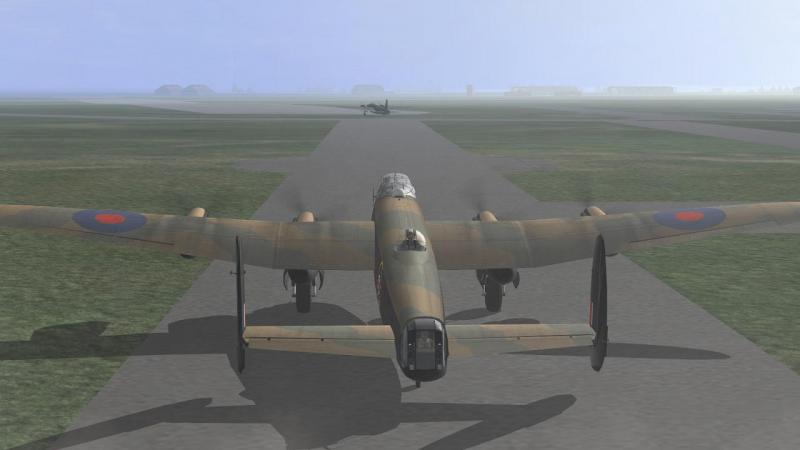
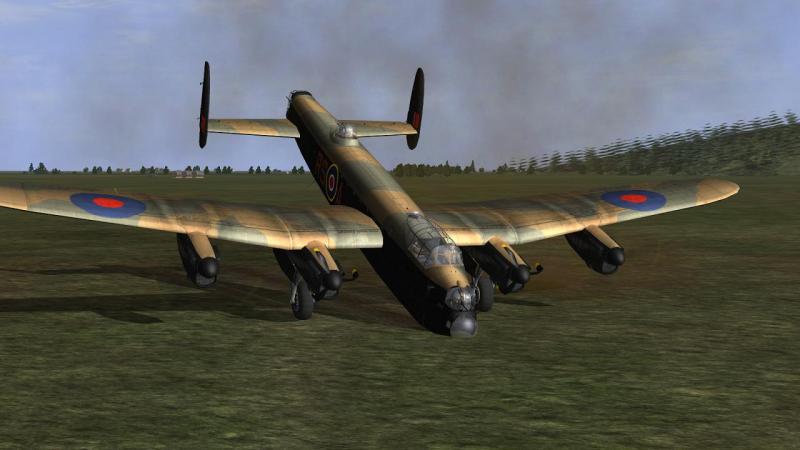
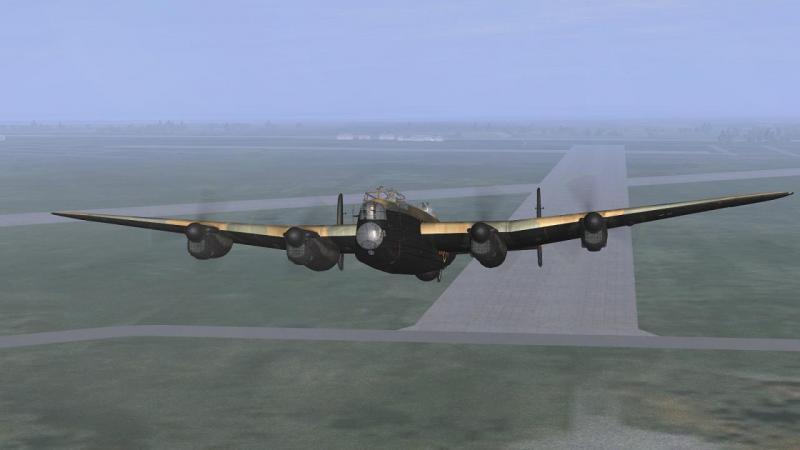
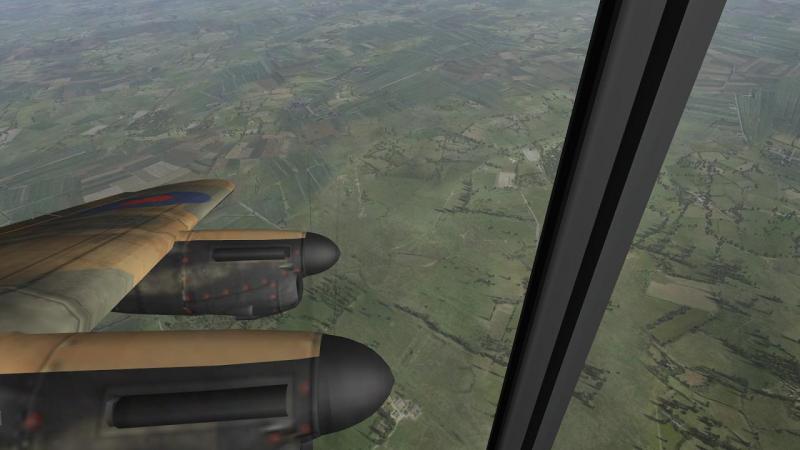
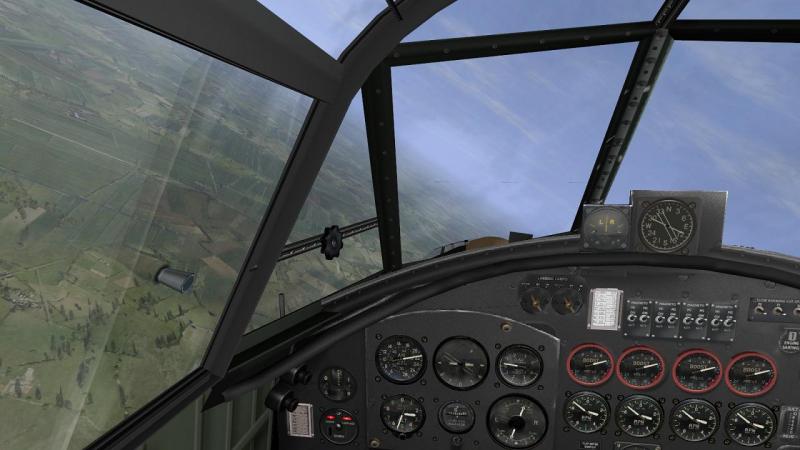
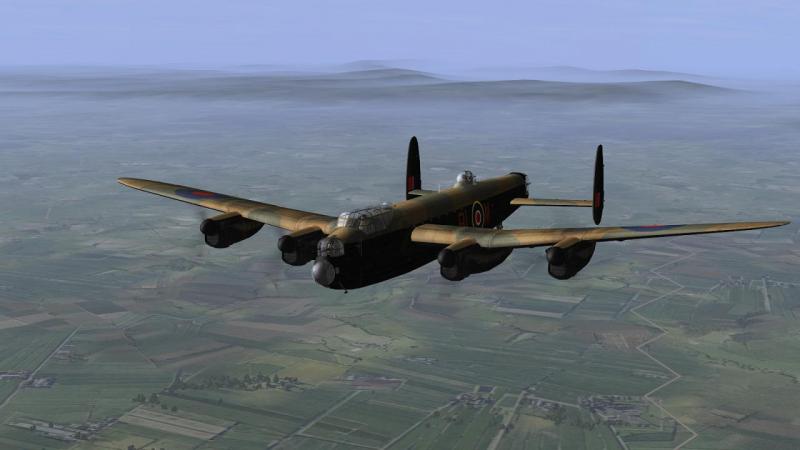
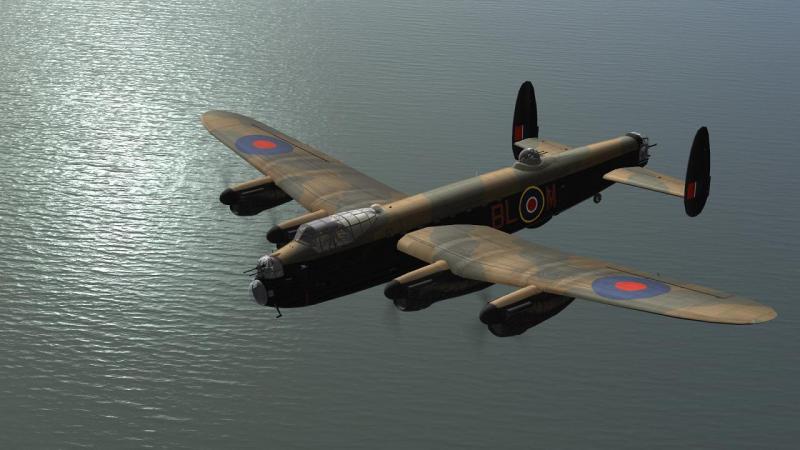
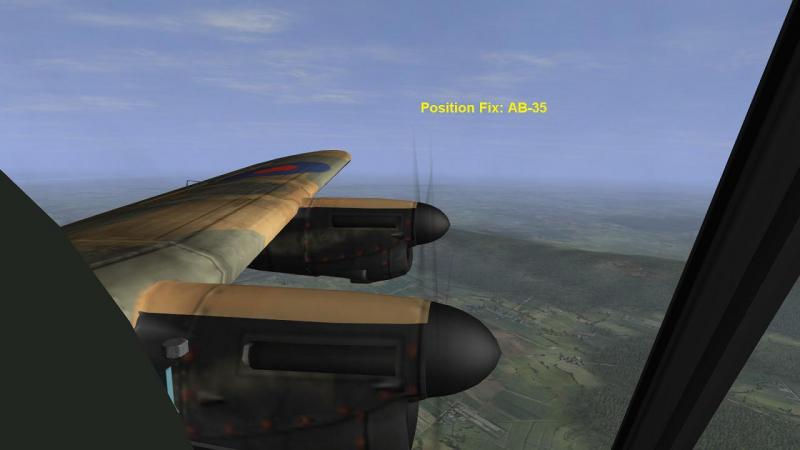
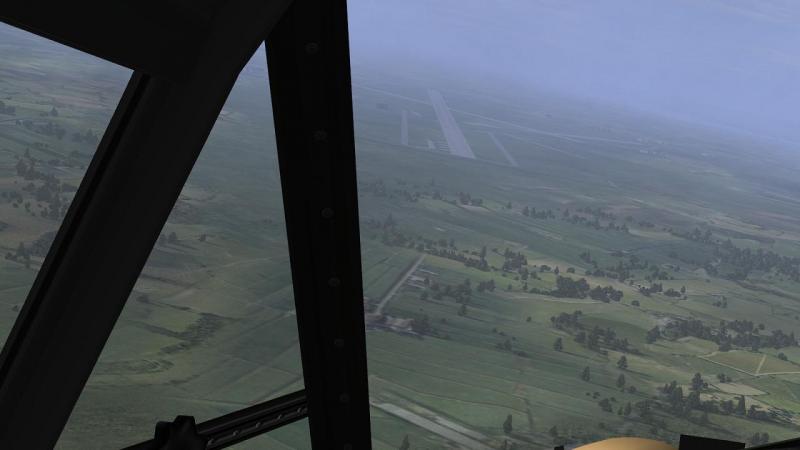
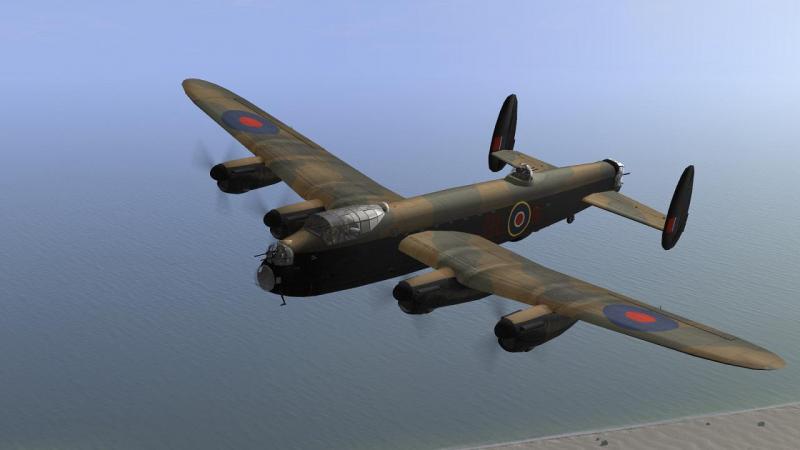
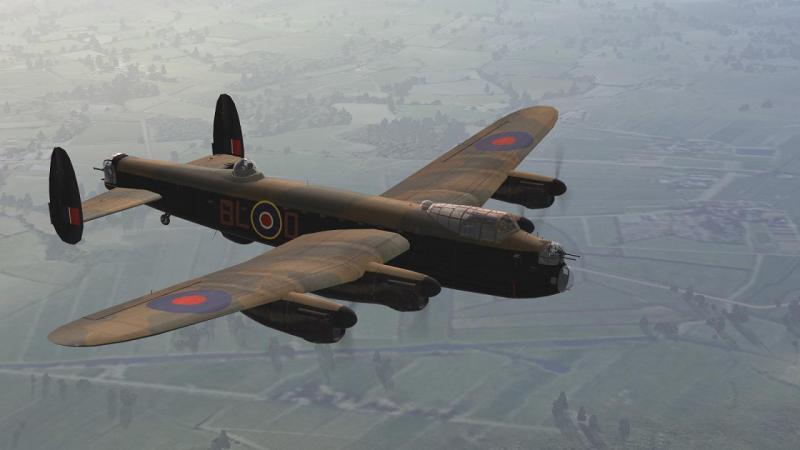
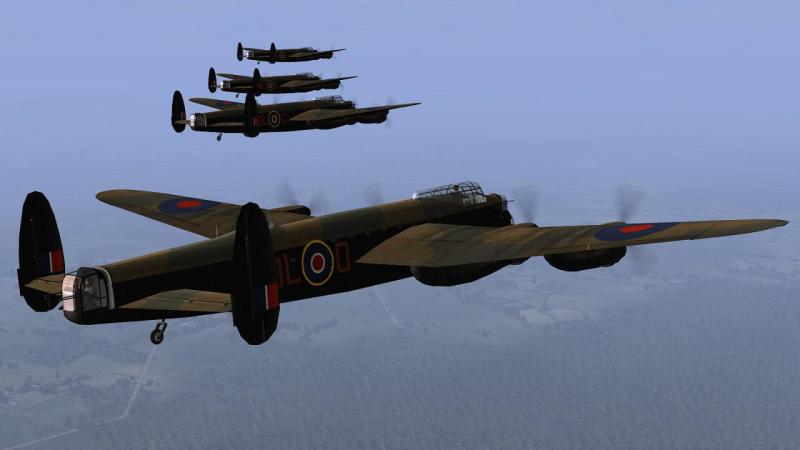
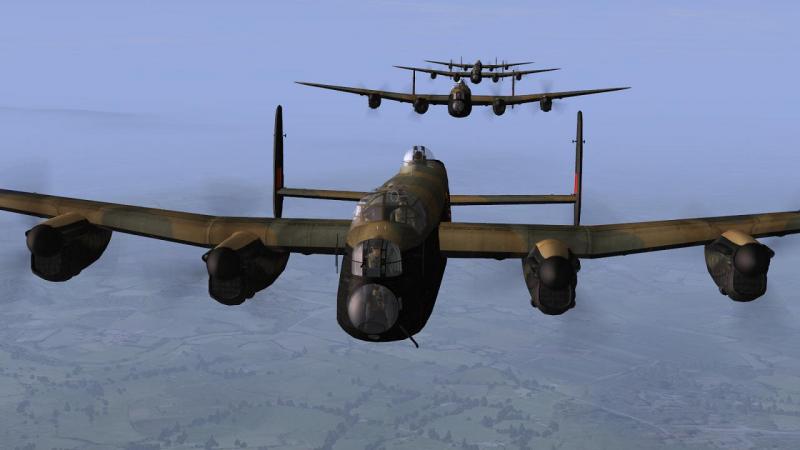
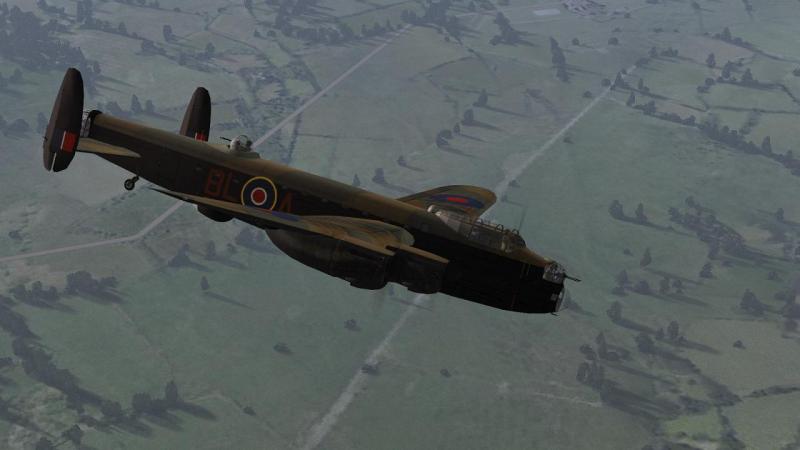
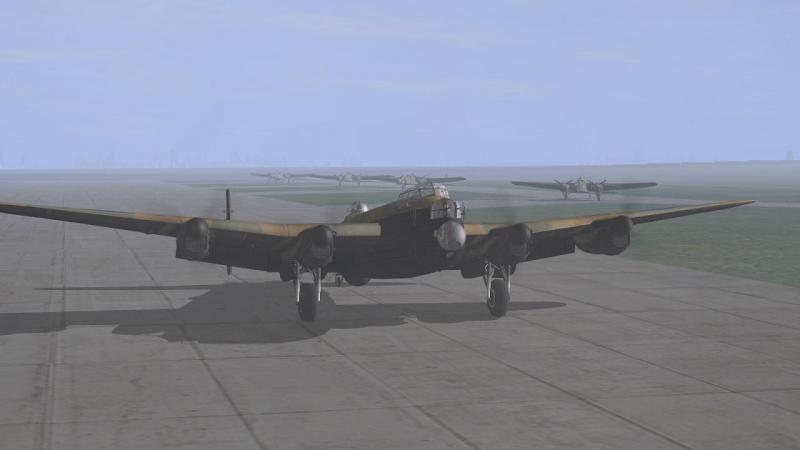
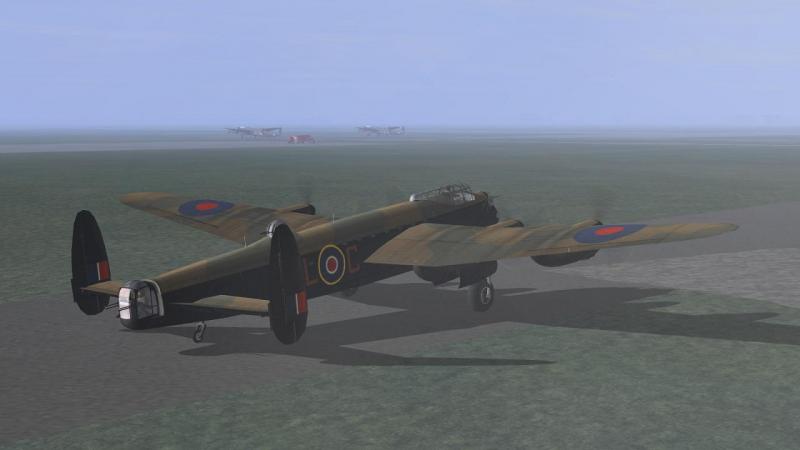
First flight! The next mission in this campaign has me on a long cross country familiarisation flight in my very own Lancaster. Here's the briefing. Our base is at Waddingon, and in addition to the usual airfield icon it has a radio mast symbol, whose significance will become apparent later. Although not labelled in the level of map zoom seen in the screenshot, a closer look will confirm that the map is nicely detailed, complete with well-known local landmarks like the resort of Skegness ('So bracing', according to the railway company posters, possibly a nice way of saying 'windswept'?) and further north along the coast, the famous fishing port of Grimsby (soon to be the subject - or should that be 'object' - of a Sacha Baron Cohen film, apparently): So I kicked off the mission. And immediately hit the first challenge. The CUP mod is based on the Team Daedalos 4.12 .exe. Amongst its features apparently is the ability to create missions which involve taxying out to the runway. As someone who has often railed against the stock IL-2 'conga line' takeoffs, you would think I would have been pleased, to find the mission starting with my Lanc ready to taxy out, instead of lined up on the runway and ready to go. The problem of course is that suddenly, I needed to do a little bit of ground-handling and in a big bomber, to boot. While contemplating this, I had a good look around, admiring the well-laid-out recreation of an operational bomber airfield, complete with animated vehicles, aircraft undergoing maintenance, and a little group of airmen who had come out to watch me make an idiot of myself. The IL-2 Lanc is billed as a Mark III and has an H2S ground-mapping radar dome under the rear fuselage, paddle-blade airscrews and a few aerials the Mk1 of 1941-2 probably should not have, but all 'normal' Lancs looked much alike and it's a fine replica. The fighter-style cocpkit is nicely reproduced with an impressive array of functional flying and engine instruments. I get a faint, intermittent horizontal line across the left front winscreen but it's no big deal. There doesn't seem to be a 44 Squadron skin available so I'm flying a machine in its delivery markings. Time to get weaving! I don't use Complex Engine Management in IL-2 but selected and started the four Merlins individually. When done, I held her on the brakes while I listened to their roar as I throttled up. Sweet! I checked the controls, set the flaps and began to roll forward. Helpfully, a Wellington was taxying out ahead of me so I decided to follow him, in the hope that at least one of us knew where we were going. First time trying out a Lanc takeoff in CUP, I was all over the place until I realised that the way to accomplish a tight turn on the ground was Soviet-style, hold down the brake key while applying rudder in the desired direction. You daren't over-do it though, as it seems fairly easy do do this: No such mishaps this time: soon we were up and away, leaving Waddington slipping into the Lincolnshire murk behind us. The sounds of flaps and gear retracting are nicely done. The training flight which followed was more like something out of FSX or an elementary flying lesson, getting the Lanc trimed and settled down into level flight at my chosen airspeed and altitude, all the while trying to maintain my heading and resist the temptation to admire the view, outside and inside. Soon I was heading east and out to the coast, where I turned north, up towards Grimsby. Every so often, a text message would appear, giving me my position as if from a fix from radio beacons. I haven't used this facility in Il-2 before - apparently it's useful for finding your way home, in realistic carrier operations - but suspected it would become important, flying nocturnal bomber sorties, in this campaign. Learning to fly the Lanc was interesting but I decided enough was enough and cut across to the west. Time to go home! As is my wont, I was flying with my own plane's icon and my route displayed on the 'mini-map' so it wasn't hard to find my way back. I was soon turning into my approach. I got a bit of a shock on short finals when a flock of those darn geese took to the air from the runway threshold just ahead of me. Obviously, these creatures were going to me our regular companions at Waddington. I made it down all right, despite this unwanted excitement. Landing's not my strong point in Il-2 and the cushioning effect of those big wings saw me flare too soon. But I caught her and then set her down without so much as a bounce, which is a good landing by my standards. Sometimes just flying an aircraft in a combat flight sim can be fun and so it was with the Il-2 Lanc, on this cross country flight. Helpfully, the campaign missions are included also as single missions so you can fly this one as many times as you want. However, I was now keen to get my operational tour in the Lancaster off to an early start. That would come next! ...to be continued!


- 6 replies
-
- 2
-
-
- community user patch
- cup
- (and 2 more)
-
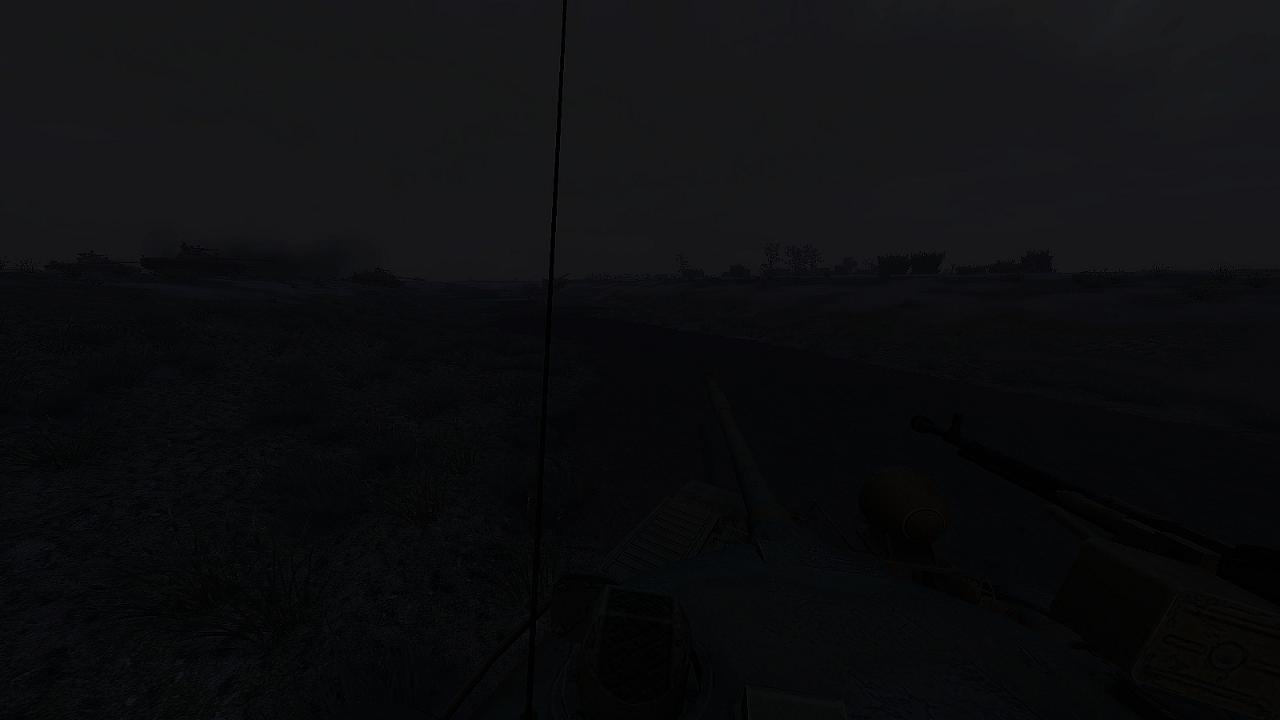
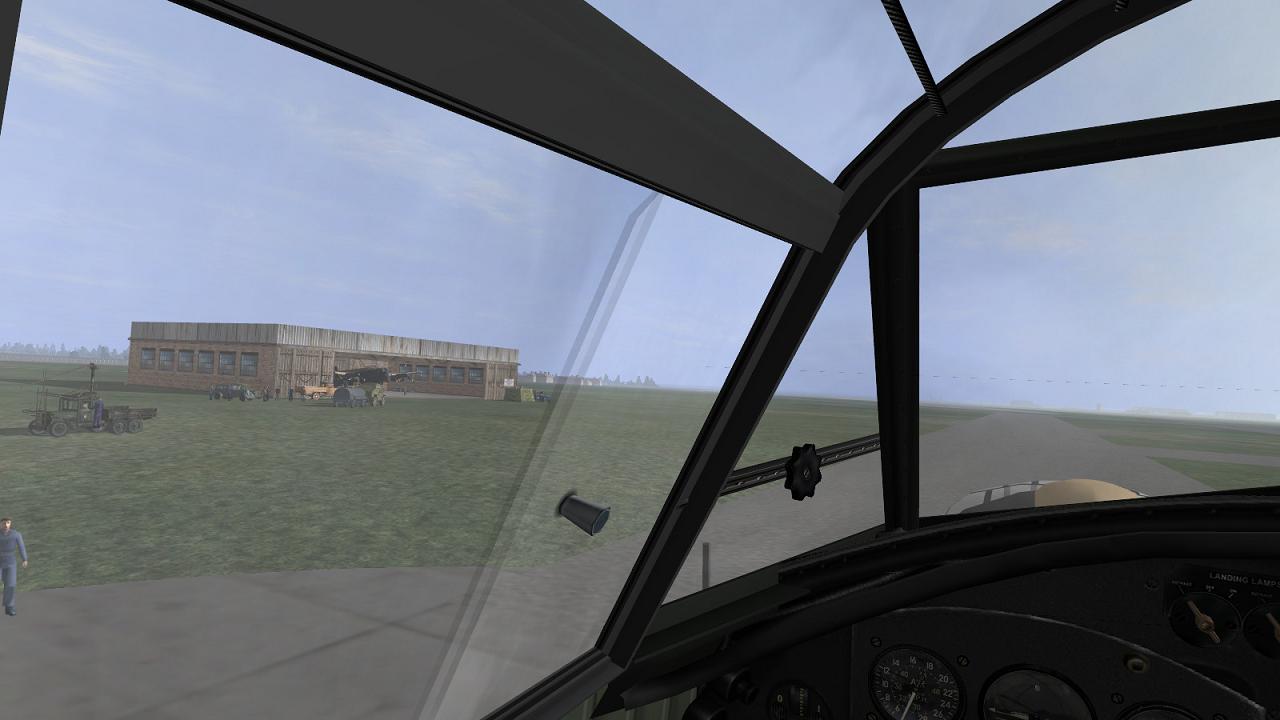
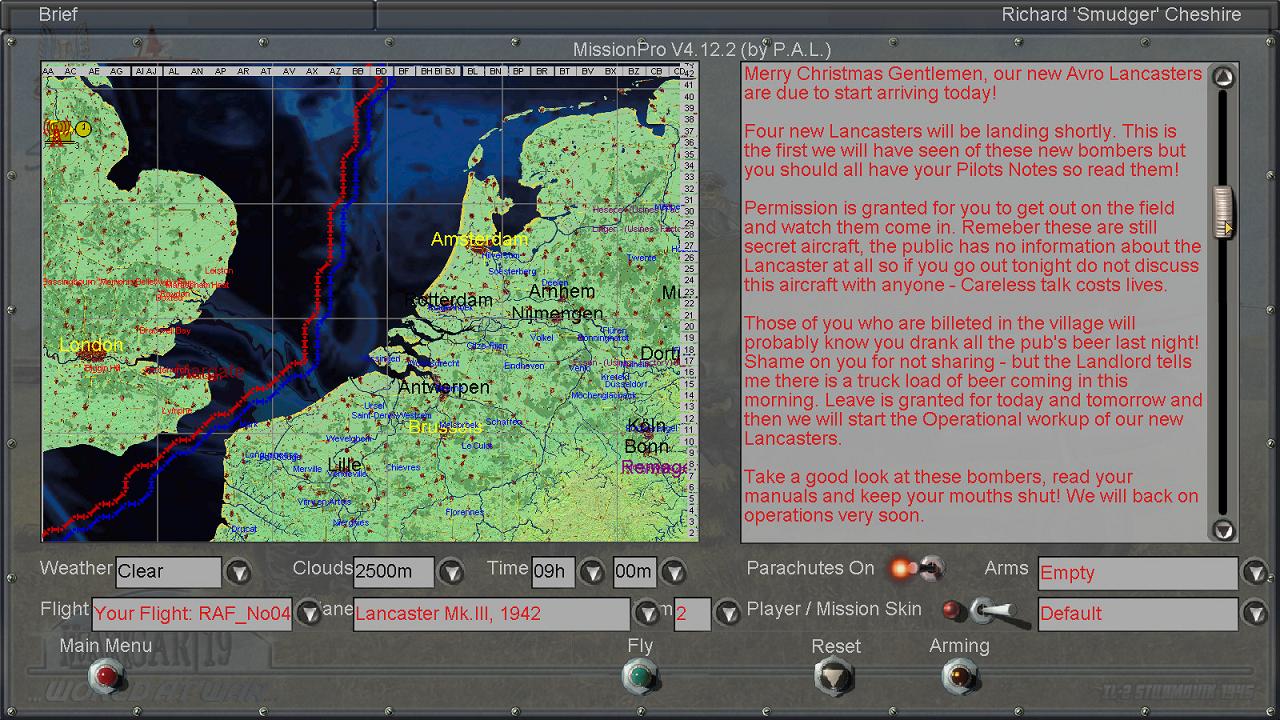
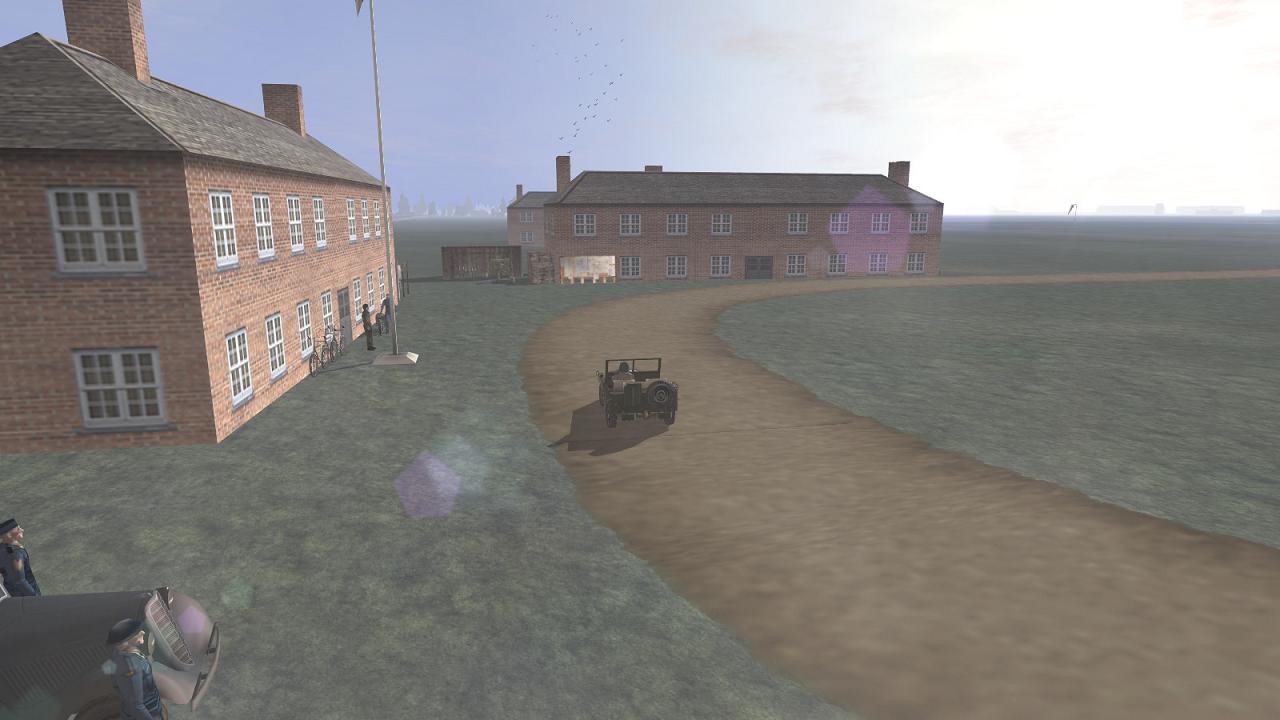
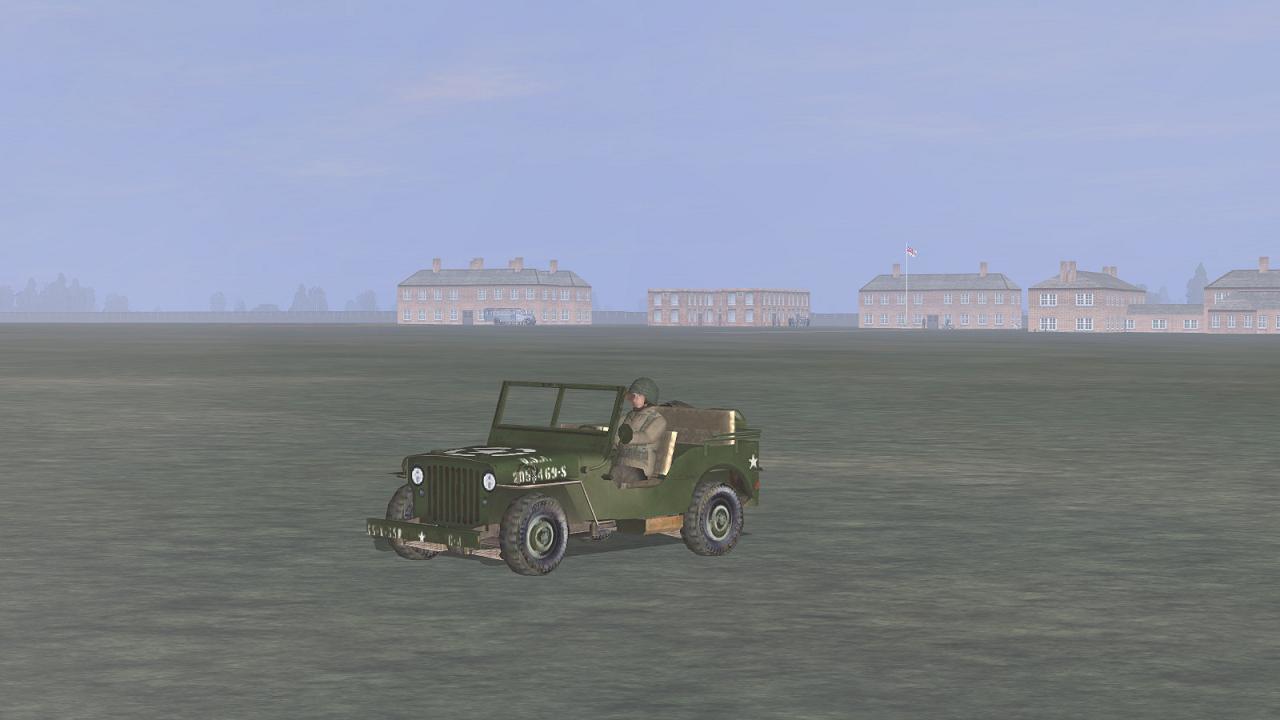
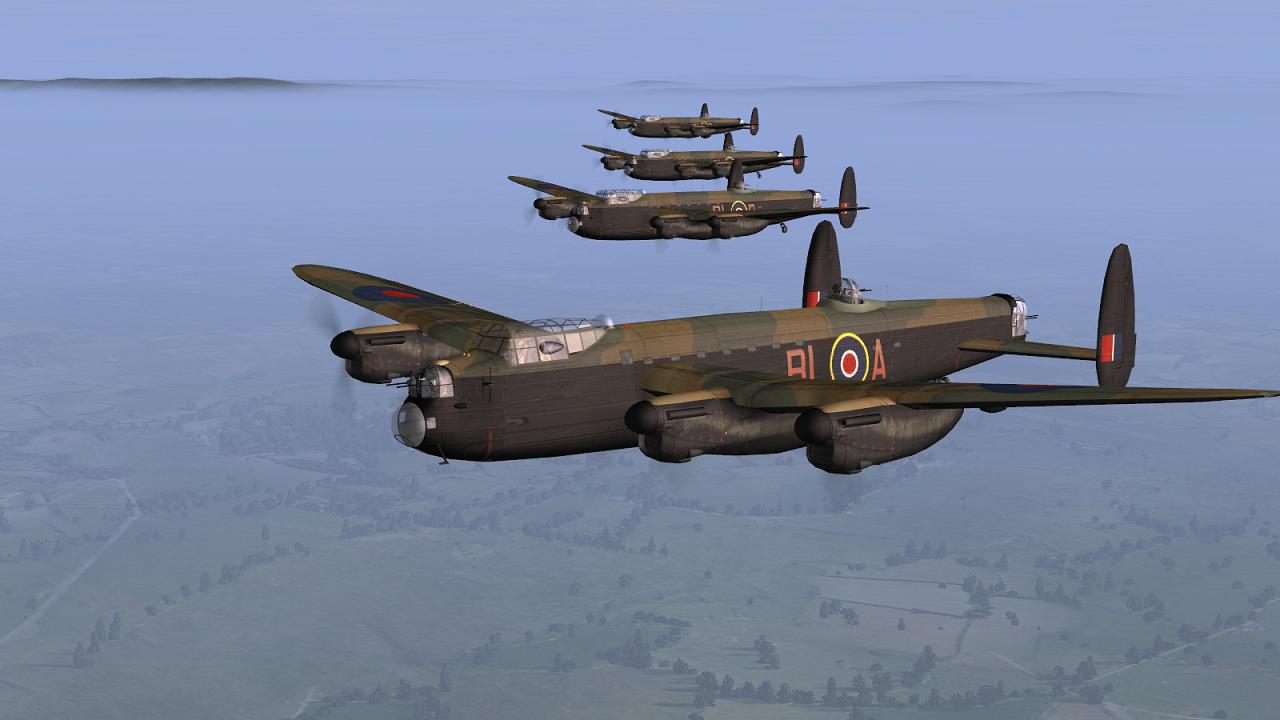
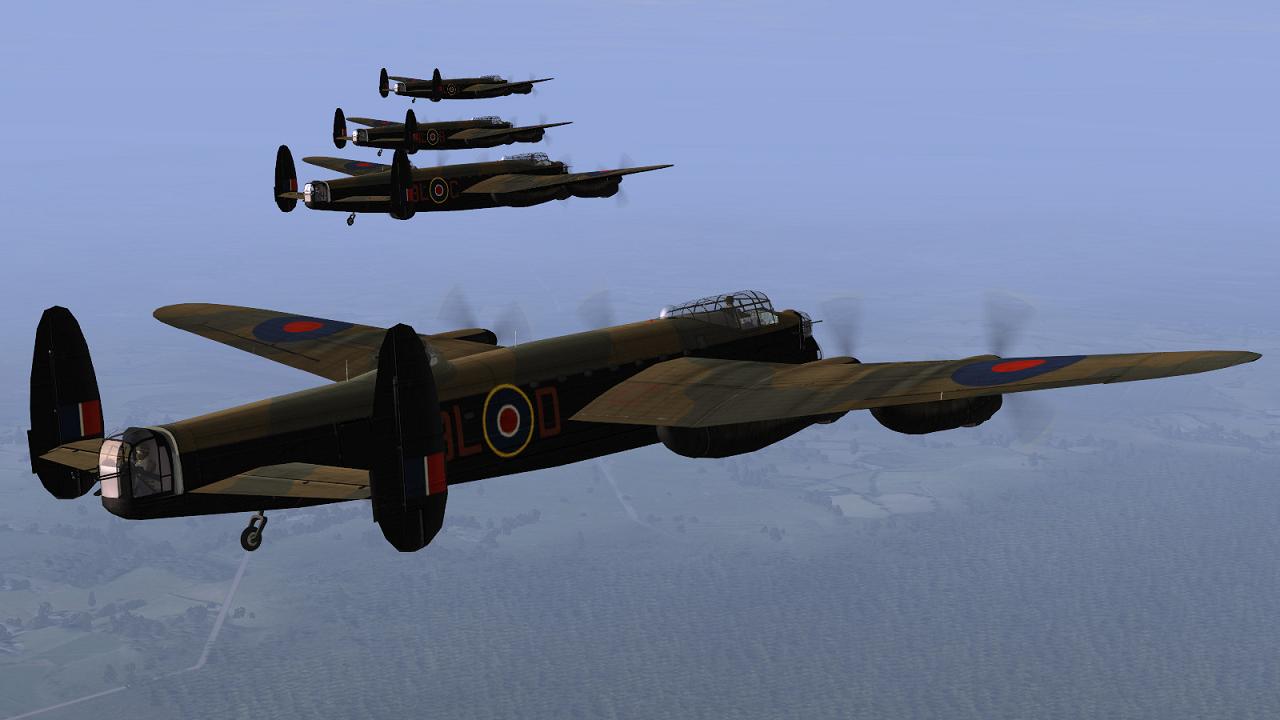
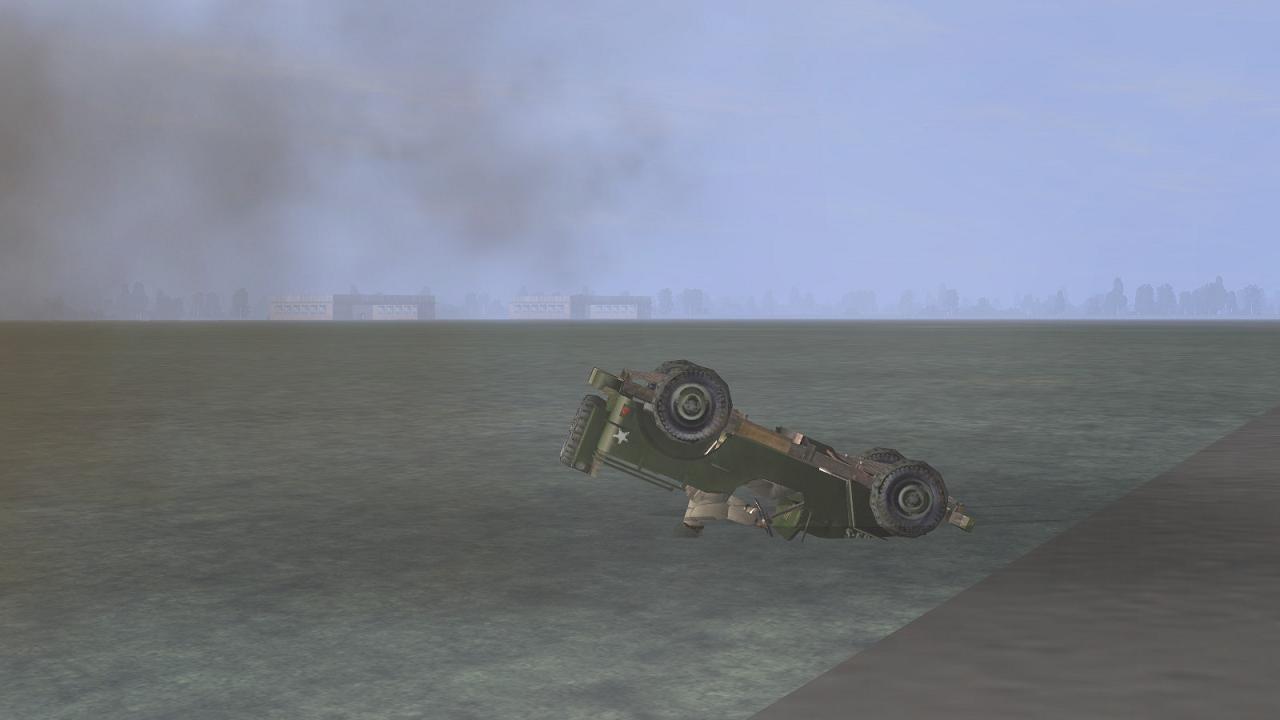
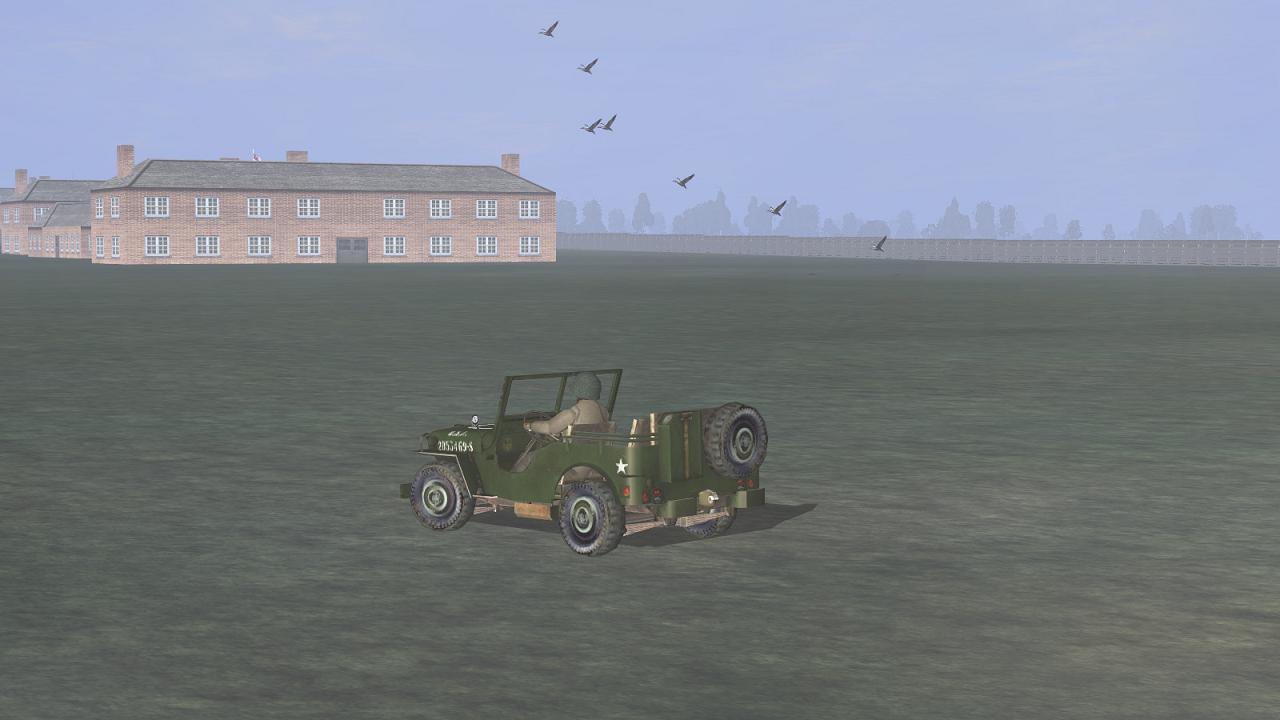
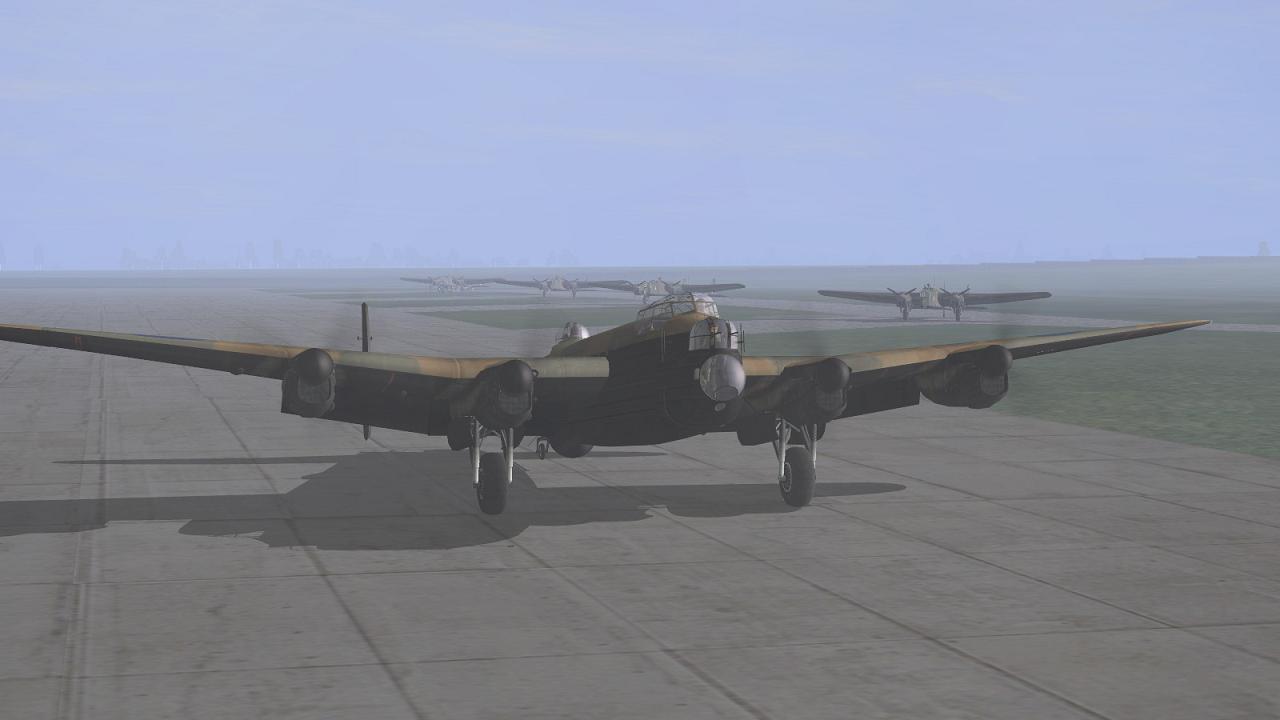
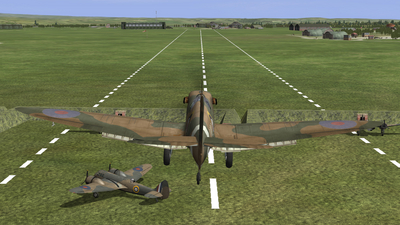
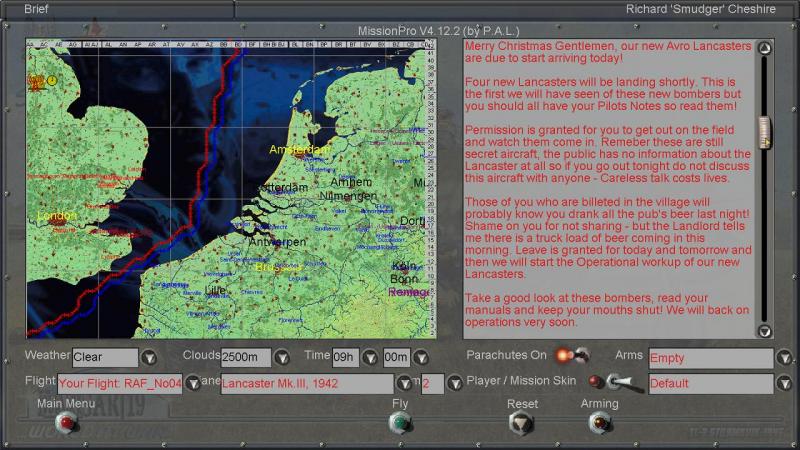
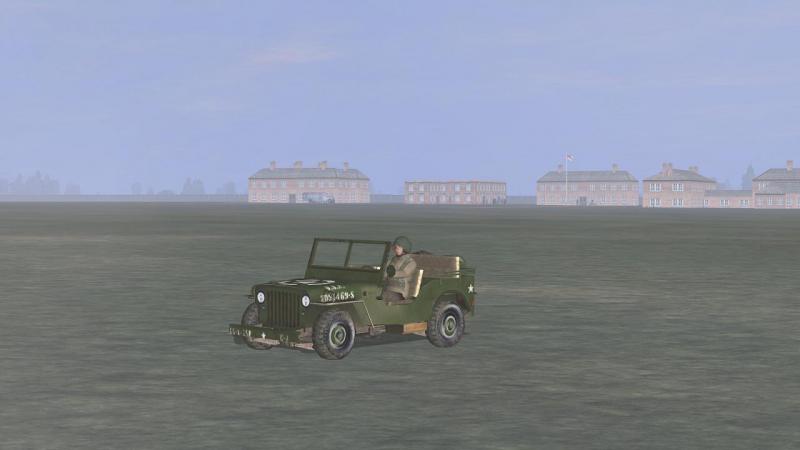
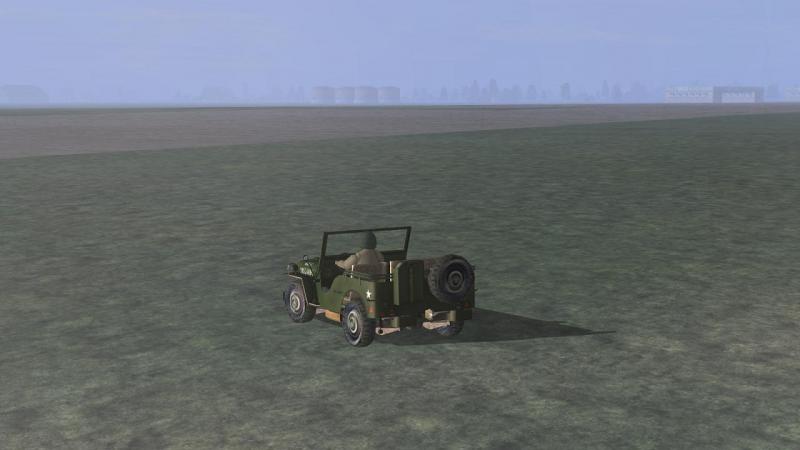
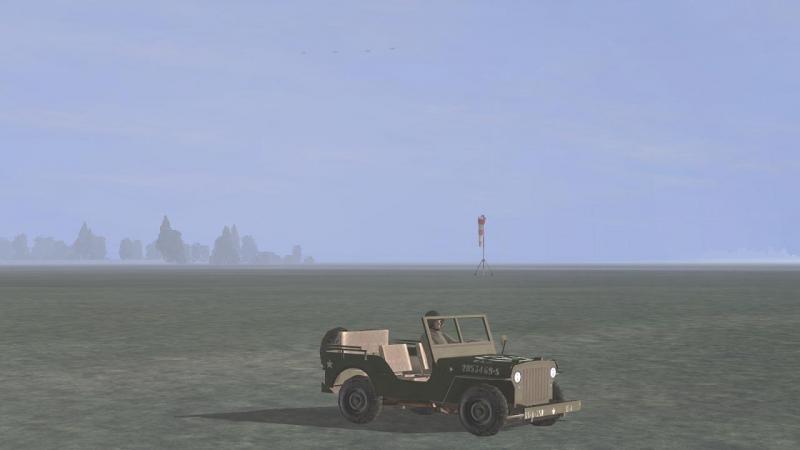
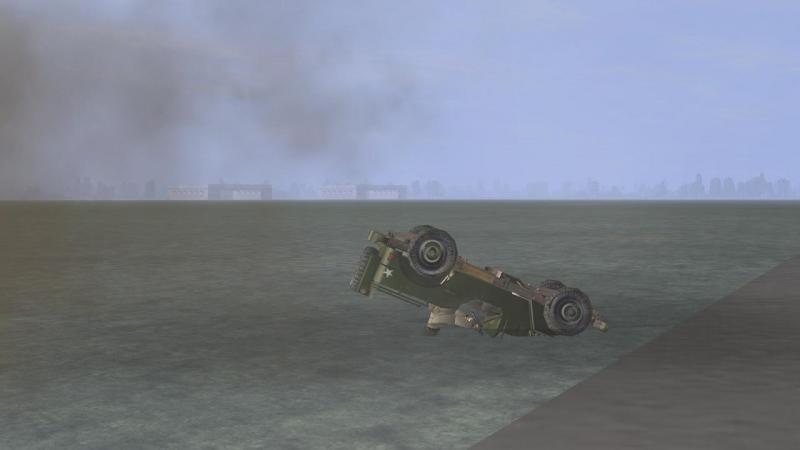
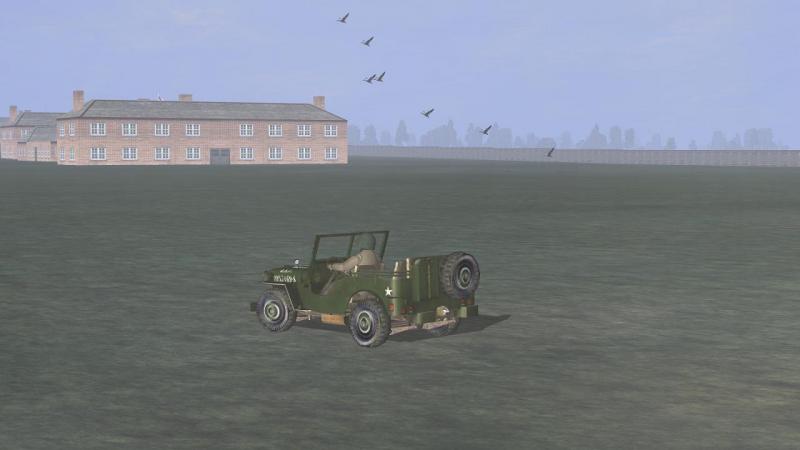
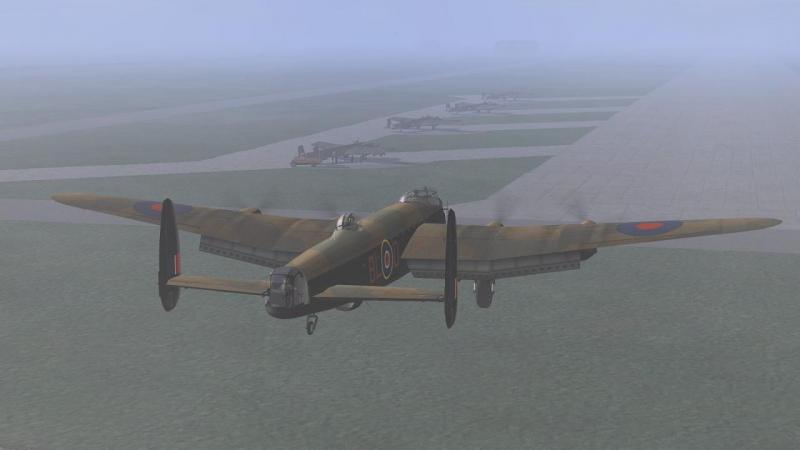
First mission in a brand new campaign! Apart from the occasional mission, I have never seriously tried flying bombers in Il-2. I'm quite fond of shooting them down...or trying to, at any rate. I have flown bombers in CFS3 using that sim's simplified bombing system and in B-17 II The Mighty Eighth, with its much superior facilities, including a decent simulation of the Norden bombsight. However, having of late much enjoyed flying with Il-2's new Community User Patch (CUP), I decided it was time to get serious with bombing in this sim. The deciding factor was the recent arrival of a brand-new bomber campaign, made specifically for CUP and featuring one of my favourite aircraft, the mighty Avro Lancaster. I had enjoyed flying this big bird in Just Flight's excellent CFS2 'Dambusters' add-on and wasn't going to miss the chance to try her out in an Il-2 campaign...even if it meant sitting for long periods in a darkened room! The campaign is by Hamm66 and you can get it over at Mission4Today, here: http://www.mission4today.com/index.php?name=Downloads3&file=details&id=2137 '1942 Lancaster Tour of Duty' features ten semi-historical missions from the wartime career of 44 (Rhodesia) Squadron, RAF Bomber Command, apparently the first unit to re-equip with the Lancaster. We are based at RAF Waddington in Lincolnshire, a county where so many bomber squadrons were based for what became the great Allied bomber offensive against Nazi Germany. Here's the briefing for the first mission...an unusual one, to be sure. It's Christmas 1941 and - as in real life - the squadron is about to get its first Lancs. My 'mission' is to trundle down to the runway in a jeep and watch our brand new aircraft arrive, presumably flown in by RAF Ferry Command, recently formed to fly new planes to operational airfields. Just like ours. So I loaded up the mission and there I was, sitting in my jeep, alone. The weather was rather murky and it seemed the others had decided that their first close-up look at the new planes could wait. Fair enough! This was my first time driving a ground vehicle of any type, in Il-2. The silence suggested that starting my engine might be a good way to get going, so that's what I did. The joystick seemed to control things much as with an aircraft and I was soon on my way. But which way? I followed the track I was on, which led to a long, wide paved area which was obviously a runway. Here I stopped. I was reminded of the story told me by my late dad, who was a mechanic in the RAF, post-war, and served all over the world, much of the time, of all things, in an Air Sea Rescue launch. On this occasion he was based closer to home and on terra firma, at RAF Ballykelly in Northern Ireland. He was on a tea break, the problem being that the tea was being served from a NAAFI van which was over on the opposite side of the runway. He had a bike at his disposal and while it was of course strictly forbidden, there was nobody about and so he cycled straight across to the NAFFI van. As he was sipping his tea there, a Lanc came in and landed. But instead of taxying off to dispersal, the bomber came to a halt next to the NAFFI van. Out came the navigator, and ran across to the van. Who was the airman, he demanded to know, who had cycled across the runway a few minutes ago, causing the Lanc to have to break off its approach and go around? He had been despatched by the pilot to get that man's name. The presence of the bicycle next to my dad made denials rather fruitless! This was a mistake I wasn't going to make now! So I pulled up short of the runway, and I waited... ...and I waited. No sign of the Lancs. Was I at the right runway? Hard to say, but I decided to sit tight where I was. No point in incurring the wrath of the ferry pilots or worse, the Rock Apes (as Air Force people call the RAF Police, after those famously cheeky primates who inhabit the Rock of Gibraltar). Had the flight been cancelled, perhaps? It was Christmas, after all. But no, the party was still on. Undeterred by the rather poor visibility, the Lancasters were coming! And a fine sight they made, too, even though they were still carrying the squadron codes of an Operational Conversion Unit. Soon, hopefully, they would carry instead the 'KM' of our very own 'Forty-four'. Finally, I saw them, slipping into and out of the murk that lay all around, as they joined the circuit. By this time, they had shaken out into line astern and the landings could not now be long away. Soon, the leader was breaking off and then settling down into his approach. Of all this, I saw nothing. I WAS at the wrong runway, although I could hear the R/T chatter, which somebody was evidently blasting out on a loudspeaker for all and sundry to hear. Except that all and sundry were likely watching from the comfort of their respective messes, leaving me sitting out here in the cold. At the wrong runway. Enough! I daren't cross the apparently-inactive runway ahead even so but I'd sat there long enough. Off I went, seeming to startle a flock of geese, which took to the skies as I roared past...hopefully not heading in the direction of those other, much bigger birds now in the vicinity. Recklessly endangering Government property - to wit, four Avro Lancaster aircraft - by driving geese into the skies while they were landing, would make for an interesting Charge Sheet, but this was the RAF and anything was possible, in the pursuit those guilty of any form of of '..conduct to the prejudice of good order and military discipline'. I never did get to see the Lancasters land. Taking a turn too tightly brought my trip around the airfield to a sudden end. All I could hope for was everybody else was watching the bombers land, rather than my four-wheel drive aerobatics. Happily, the Lancs didn't put a wheel wrong, landing one after another, past a row of rather obsolete-looking Whitleys. Once down, each machine taxied out to a dispersal point. Soon all were down. The first of our new warplanes had arrived. From here on in, it was over to us! ...to be continued!


- 6 replies
-
- 2
-
-
- community user patch
- cup
- (and 2 more)
-
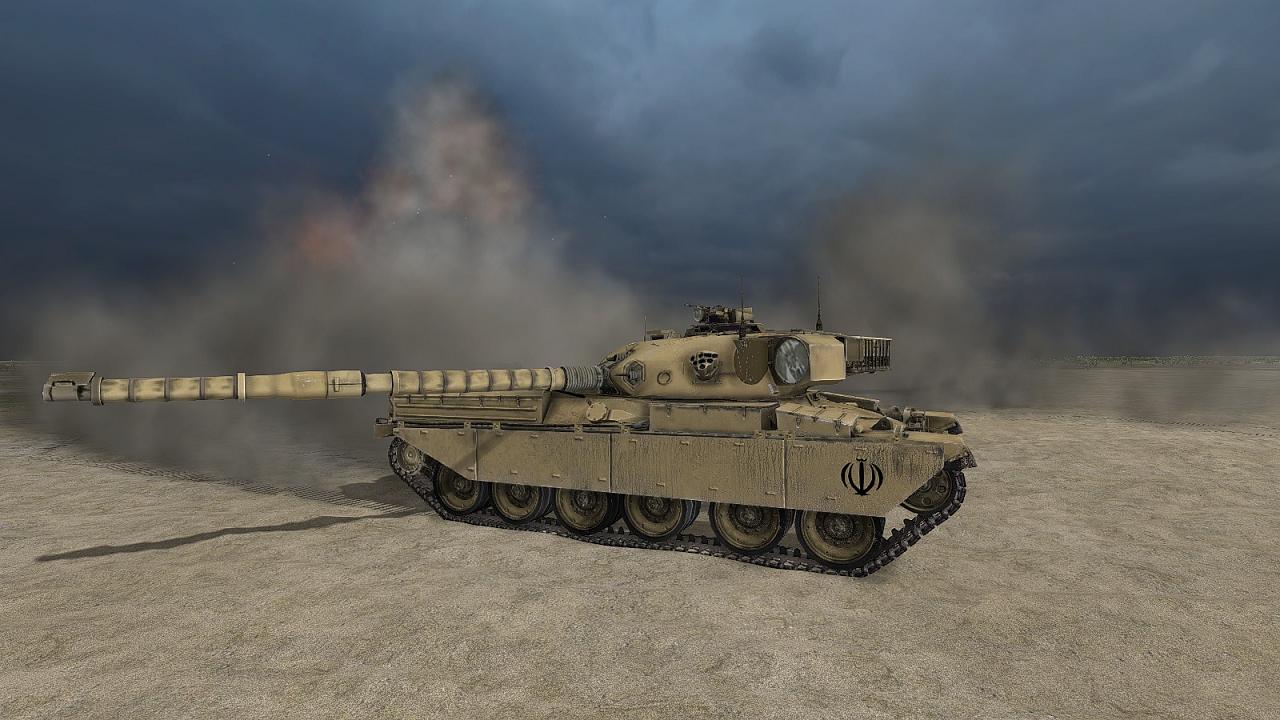
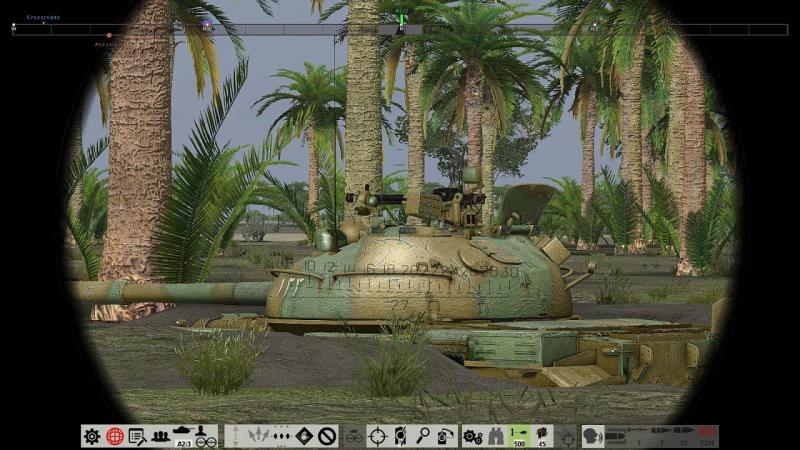
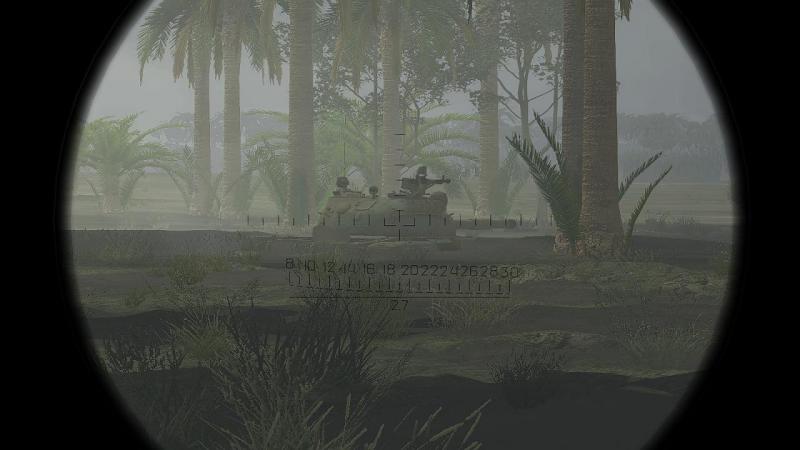
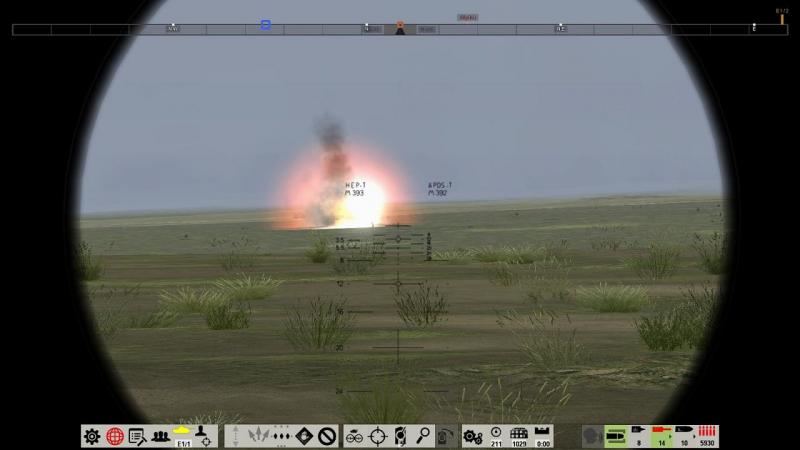
I dropped back to the gunner's sight in the command tank of my First Platoon. To the left of the burning Chieftain, the last wisps were fading of a smoke screen. I couldn't see any other enemies, so concluded that this was likely laid earlier, by the knocked-out Iranian tank, whose turret, with its bank or electrically-fired smoke dischargers, had originally been facing that way. Further left another tank burned. Though partly hidden by the lie of the land and some intervening vegetation, he looked like another Chieftain. So far, this seemed to be going our way, although just sitting in a tank with a narrow field of fire, waiting for a mostly unseen enemy to make an appearance while relying on your initial dispositions turning out to be reasonably sound, was proving to be rather a nerve-wracking business. The urge to back out of our tank scrapes and seek out the enemy was considerable. But I held my ground. I'd made it my plan to fight from our fixed positions - a tactic used with some success by the Iraqi Army during the real-life version of the virtual battle I was now fighting - and I would stick to that. Every now and again, ammo in one or other of the burning Chieftains would cook off, producing a bright flash and a bang I couldn't hear from inside my own tank. There but for the Grace of God, as they say... Then, it happened. The moment I had been dreading. Fortunately, my AI tank commander, with the benefit of a sight with greater magnification and sited higher up, had been keeping a good lookout and had spotted the enemy tank which was now stalking us, throught the woods on our right flank. Frantically, I swung the turret round to the indicated bearing. The rain had stopped and visibility was better, but still I saw...nothing. Just trees and shrubbery. The ground dipped away in that direction. It seemed that with his higher sight position, my tank commander could see something that I could not. Then, there he was! Just becoming visible over the low crest amongst the vegetation, a third Chieftain! I had a HEAT round up the spout and as soon as I could get a clear shot at him, I let fly. At that range it would have been hard to miss...and I didn't. This time, he burned at once. The boss indicated some troops in his vicinity and though I was pretty sure this was the bailed out enemy crew, I cut loose with some bursts from the co-ax in their general direction, just as an ammunition explosion flared in the enemy tank. Although we had caught the other two Chieftains from the flank while they were attacking our other troops, that third one had definitely reacted to our presence by attempting to stalk us. However, I had deliberately placed the command tank of my two 3-tank platoons back from the other two, to provide a bit of depth and all-round defence. Despite our primary arcs of fire being to the front, my AI tank commander had been on the ball and had watched our flanks, especially that wood to our right. Top marks there to SABOW, for both friendly and enemy AI! The battle seemed to have gone quiet in my platoon's sector so I now switched to my two-tank Second Platoon, in the woods just behind our position 'Assyria 1'. There was what sounded like a heavy MG firing somehere close by but from the command tank, I could see no targets, just a knocked-out M-113 APC in the killing ground to our front. I cut loose in his general direction with the co-ax. Tracer fire in SABOW is really well done, the rounds looking a most realistic pink colour and often bouncing or ricochetting on impact, just as I have seen them do in real life. At that point, as if in reply, there was a sort of whoosh which sounded like an incoming RPG and something went bang in the woods about 50 metres to my left; you can just about see the dark smoke from this impact in the screenshot below. Deciding that there must still be some really nasty people out there, I resumed hosing the ground to our front with the co-ax. That seemed to have the desired effect, as peace returned to the battlefield. I switched back to my original platoon, up north. All I could see was wrecked enemy armour, the ones from their most recent attack still burning. Every now and again I saw a distant figure running to the rear, likely unhorsed enemy crew. The T-62 ahead of us fired at these intermittent targets but considering this a waste of ammo, I ordered firing to cease. Meanwhile the burning tanks would flare up every so often as propellant fires took hold. We weren't done yet, though! The radio net came alive with a report of enemy movement, spotted in the direction of the crossroads, a prominent landmark to our west and a known enemy strongpoint. The Second Platoon I had just left seemed best placed to deal with this, or at least get 'eyes on', so I switched back there. What was this? Another attack? There was now nothing to be seen, in the direction of the last sighting. To my left, something was burning, hidden by the trees. To my right, the under-strength platoon's second tank sat in its own defensive position, its turret turning at intervals as its gunner scanned his arcs. A look at the map showed the battlefield littered with killed enemy arrmour. Most interesting of all, the latest report of movement near the crossroads indicated that the enemy there were in fact withdrawing northwards! We'd won!!! A few seconds later, the results screen confirmed what had suddenly become clear. No ordinary win, this, it was a Total Victory'! I didn't have time to tour the virtual battlefield and take the obligatory snaps of the destruction we had wrought but I'd seen it for myself through the gunsight. A good days work, ending with the Iranians withdrawIng from the tactically-important ground from which they had been attacking us for the last few engagements. The fight had been quite small in scale, emphasised by the realistically-limited view of the battlefield from the concealed positions I'd chosen to fight from, and with the map set to display only spotted targets. But it had been a tense, exciting, realistic and thoroughly immersive tanksimming experience. No doubt about it now, in my mind. Steel Armor - Blaze of War is a top-notch tanksim, probably the best I have ever played and certainly second to none. If you take your tanksimming at all seriously, this is one you really must have.


-
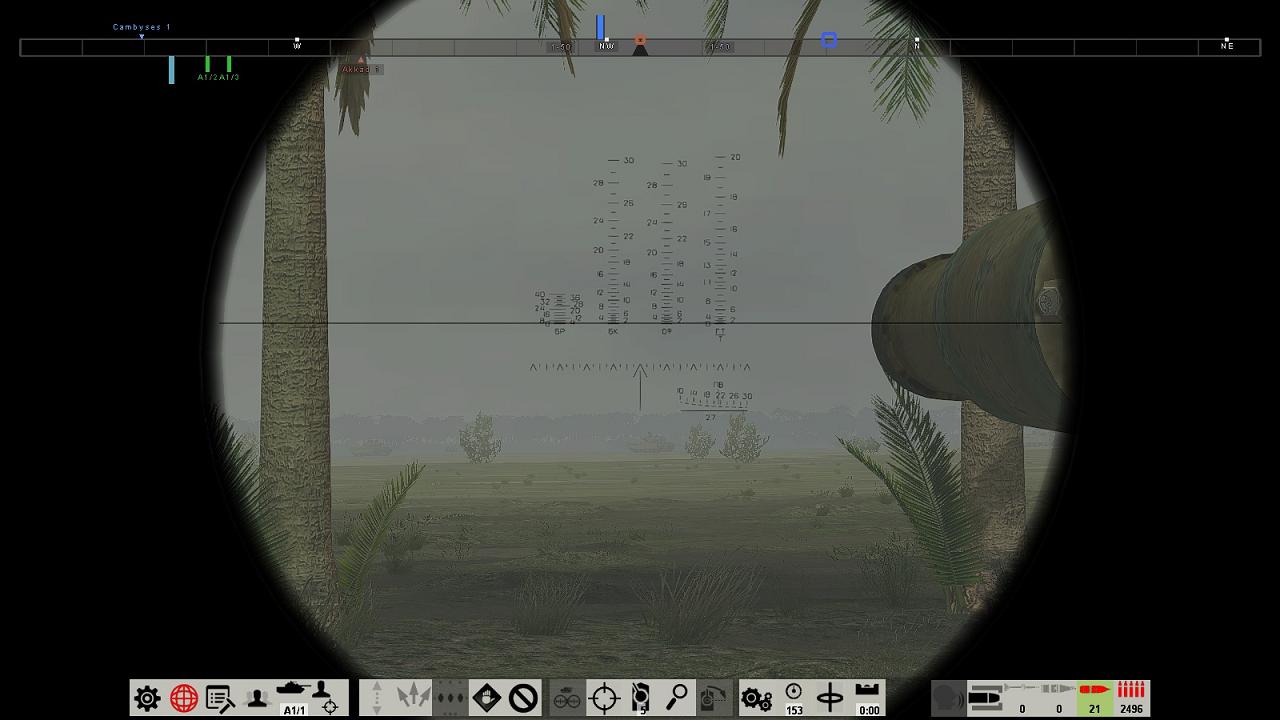
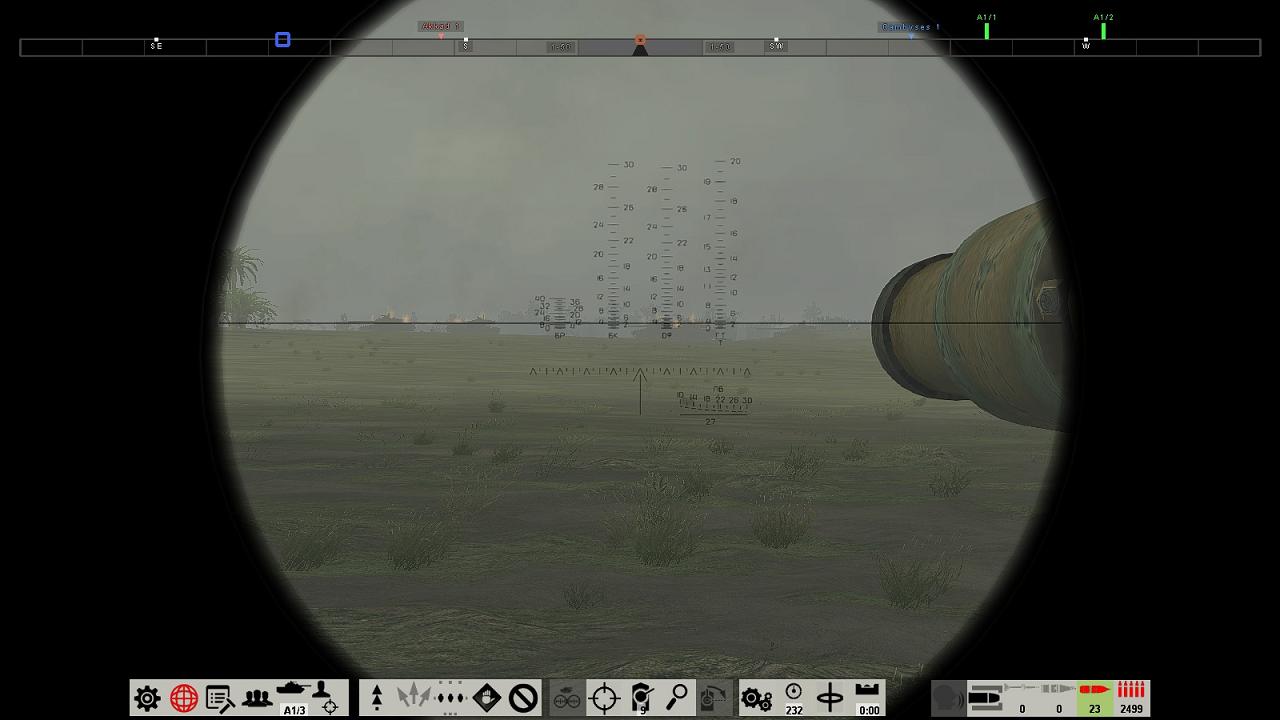
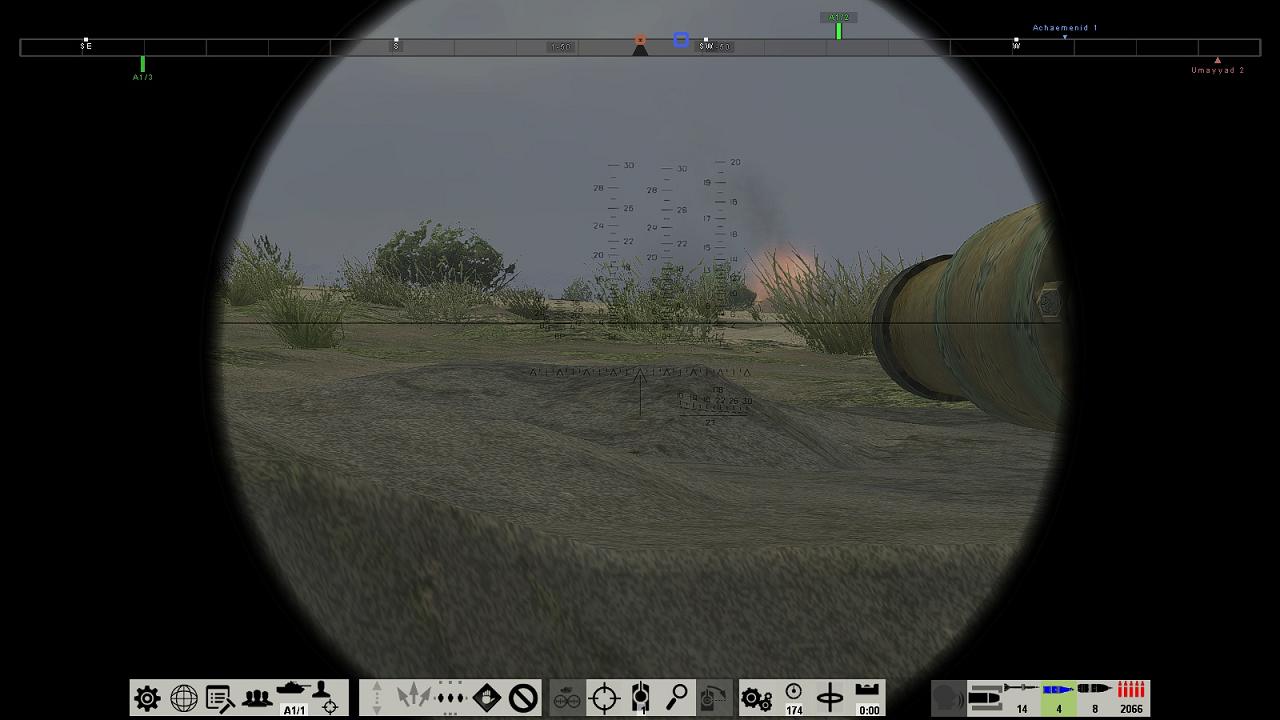
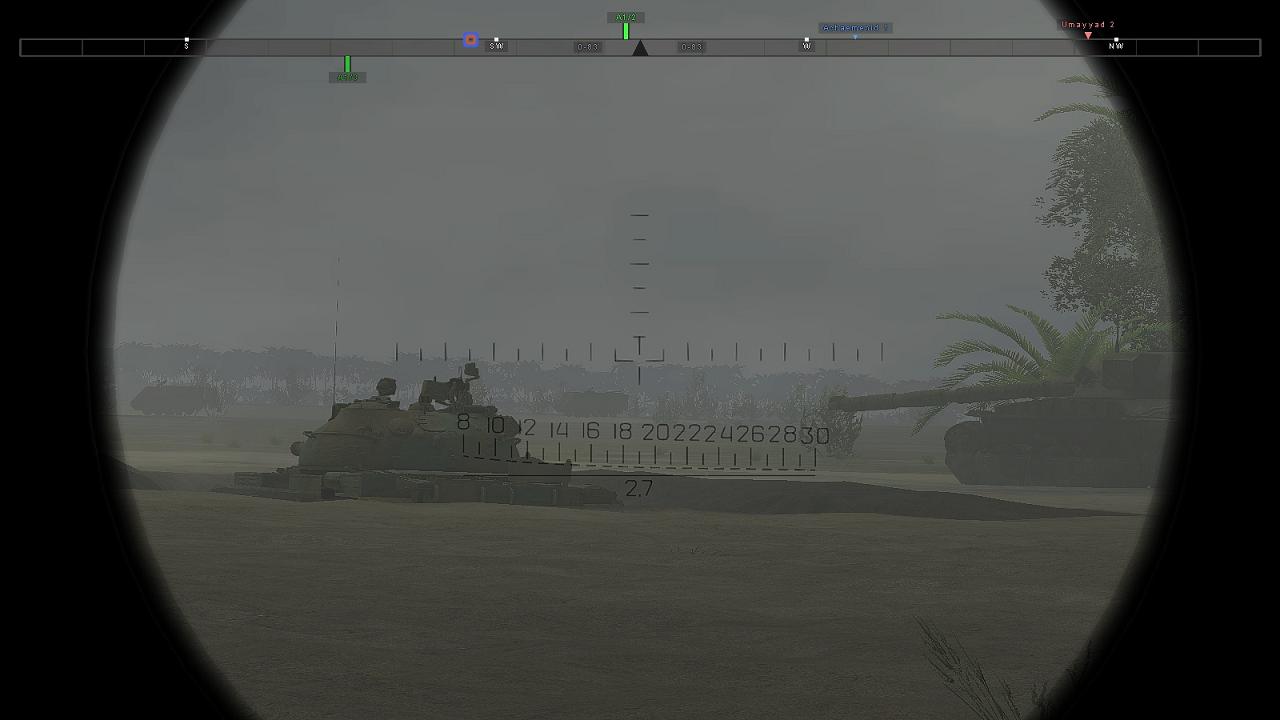
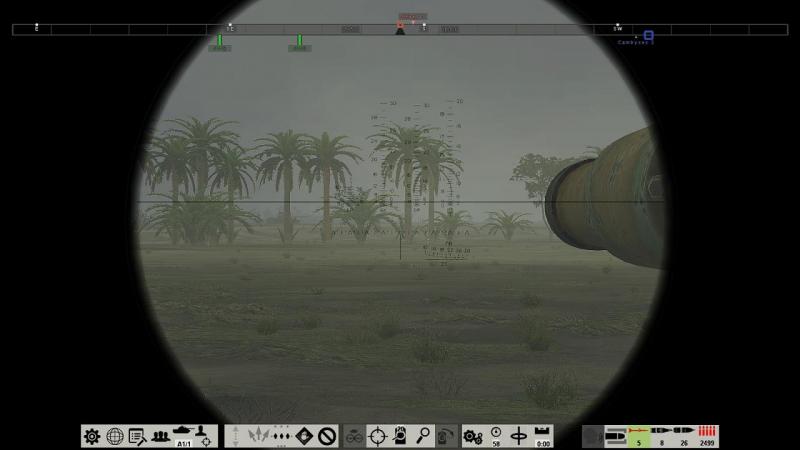
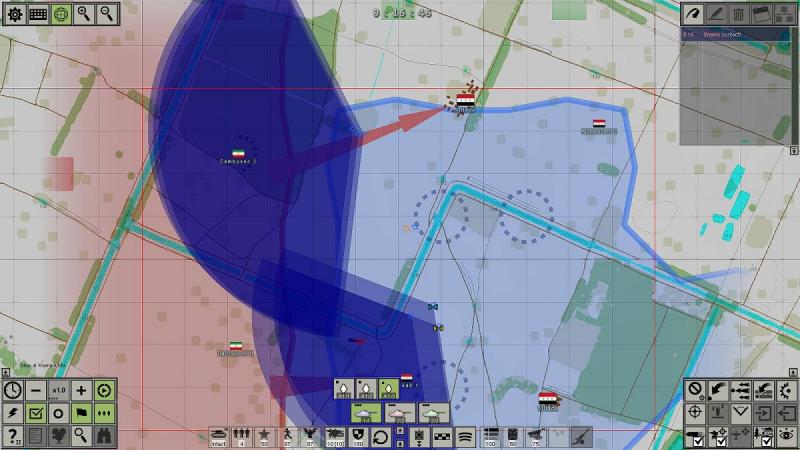
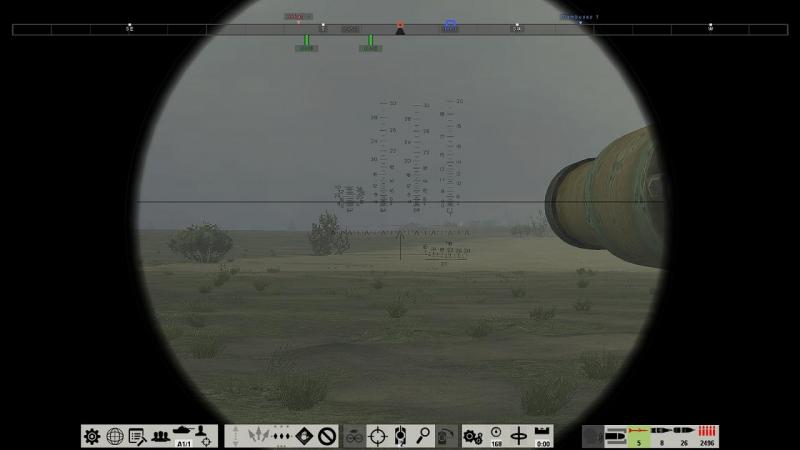
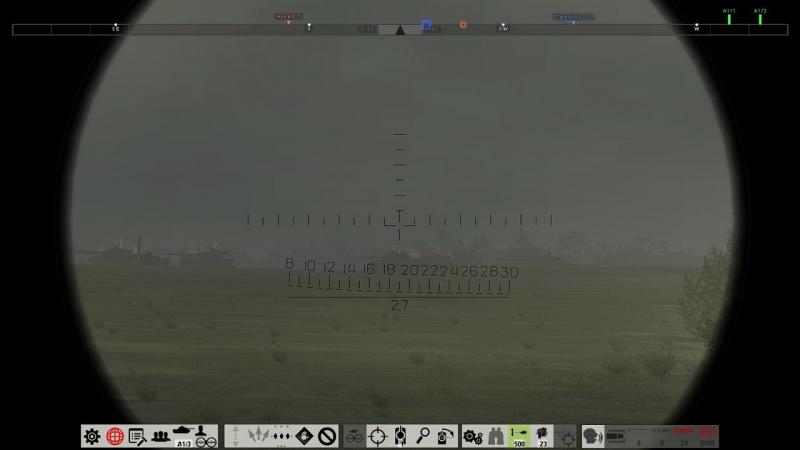
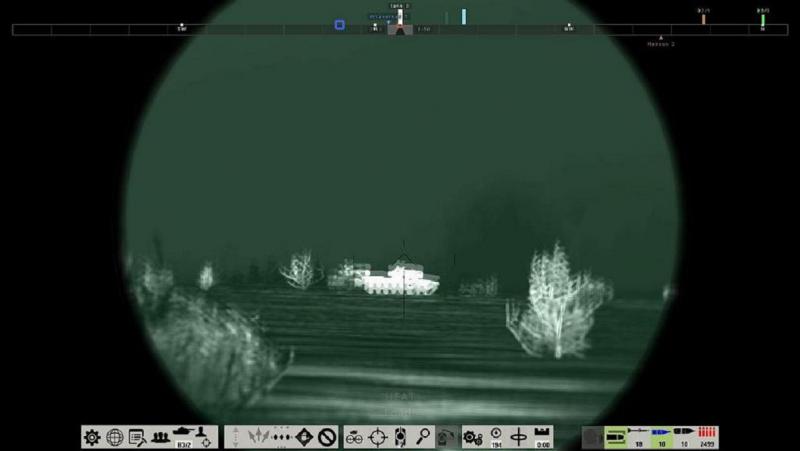
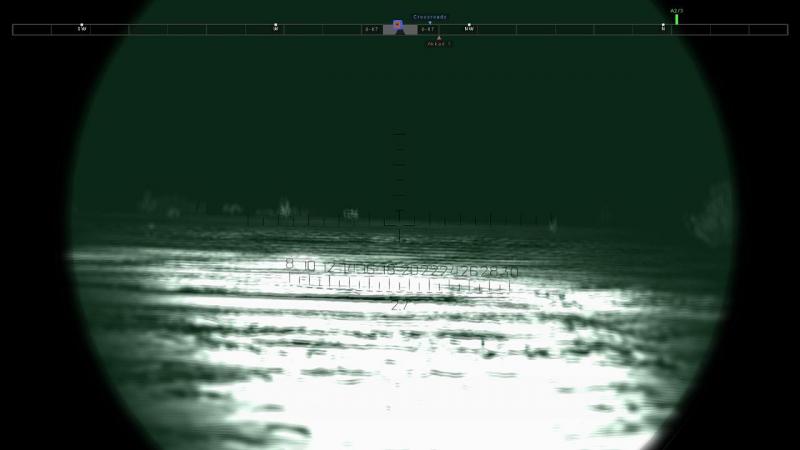
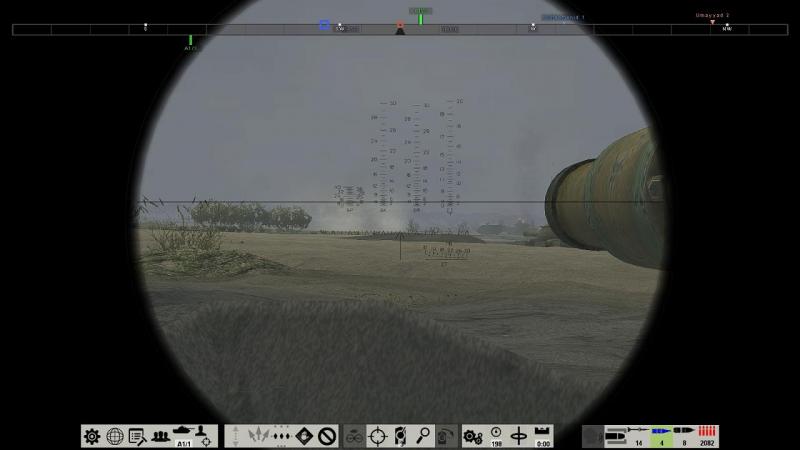
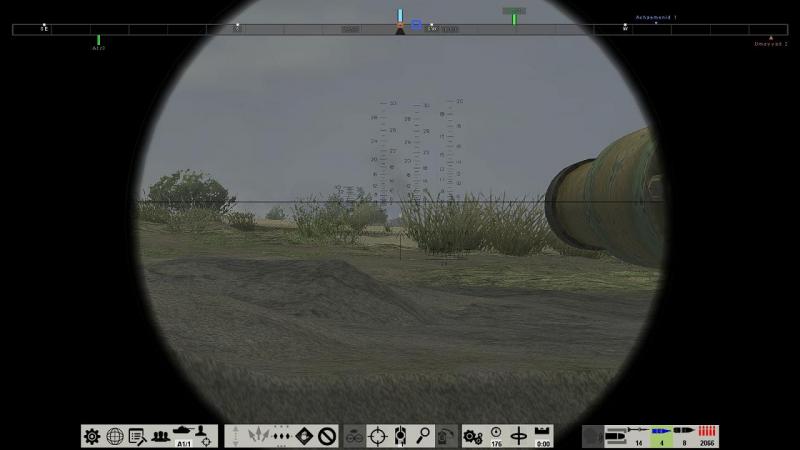
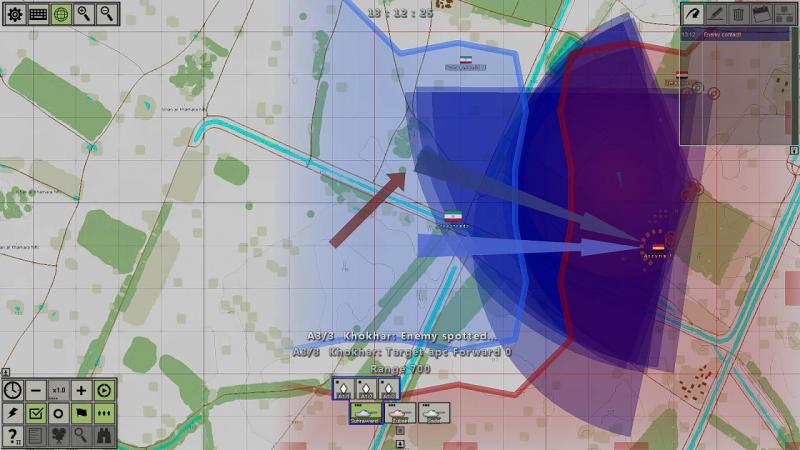
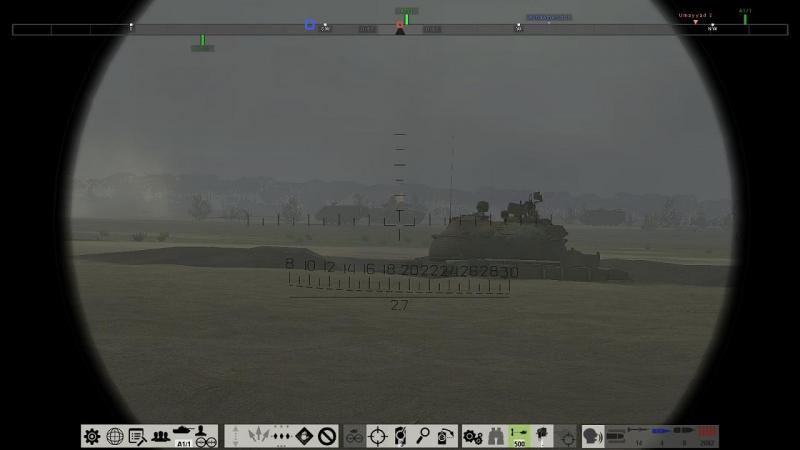
I had started time compression to reduce the time spent waiting around for the real fun to begin, but only a few minutes had passed, before it all kicked off. My first indication that trouble had arrived was a 'Spotrep' from A3/3, the number three tank in my Third Platoon, in the centre of my ragged platoon line (radio messages are displayed as text, the voices all being Russian). As I called up the map to locate the sighting, he also sent a Contact Report, being engaged with APCs to his front. Whether from the murky conditions or clever use of terrain, the enemy had somehow arrived pretty well right in front of our positions, just 700 metres away. This wasn't quite turning out as I'd planned; I'd hoped to hit them further out. Anyway they had arrived in our killing ground and it was now time to do some killing. As well as the text from the Spotrep and the contact report, you can see the entry in the message log, top right of the map screen in the screenshot above. Mousing over each message will display details of the sender, who is also highlighted via a 'transmitting radio mast' graphic, superimposed on their vehicle marker. Neat! So, battle had commenced and while the enemy so far consisted of APCs, I was anxious that my centre platoon was engaged on its own. time to see if we could lend them some support and hopefully, catch the enemy advance from their flank. I dropped down to the gunner's sight and scanned left and right. Nothing! Where were the beggars? Moving out of our tank scrapes and into the open, to go hunting an unseen but very present enemy, was not how I'd planned this one would go. Suddenly, my tank commander burst onto the intercom with a fire order - a tank! I used to have a bit of bother interpreting his directions but now I'm well used to it and I quickly laid my gun in the direction he'd indicated, referring to the little turret direction indicator icon, bottom centre of the screen. And there he was - unmistakeably a mighty Chieftain, lumbering out of the murk and heading our way. Furtunately his own gun was laid to our left, towards our Third Platoon. I had a sabot round 'up the spout' and let him have it, only to see the tracer flash skywards from a ricochet. I fumed with impatience as my 115mm gun elevated for the reloading cycle, taking my sight with it. The big Iranian tank swung to our right, exposing more of his side to my platoon, possibly still fixated with the enemies to the east. This part of my plan was working out, but that Chieftain was refusing to die, despite the fact that the T-62 to my front had also started shooting. Our slow rate of fire didn't help and at one point the Chieftain drifted behind my right-hand tank, masking him from my own fire. As he came back into sight, I let him have a HEAT round, firing practically over the fenders of the T-62 just ahead of me. You can see the muck thrown up by my muzzle blast in the pic below, taken as the gun elevates to reload, with one of the crew celebrating our hit over the intercom. Finally, after what seemed like ages but was probably just a few short seconds, the Chieftain started to burn and the tension began to unwind a notch or two. I returned to the tank commander's sight and had a brief look at him, just to be sure. But the battle wasn't over yet! To the left of the burning enemy tank, wisps of smoke showed where another AFV was putting down some smoke for concealment and it wasn't long before I heard another Contact Report on the radio. While closed down in your own tank in SABOW you can't hear too much of what's going on outside but although I couldn't get 'eyes on' any more enemies, I could see tracers from cannon fire going back in forth to my front. A look at the map showed me that the battle was in full swing. From a quick glance it seemed that there were two killed enemy tanks to our front and a live APC in dead ground somewhere further out. And enemy infantry, likely debussed from that and possibly other APCs, were assaulting the woods in between my Second and Third Platoons. From dead quiet to utter chaos in seconds! In other words, absolutely fantastic! Just what the tanksim doctor ordered! SABOW had delivered me a great little battle. Now all I had to do was win it! ...to be continued!


-
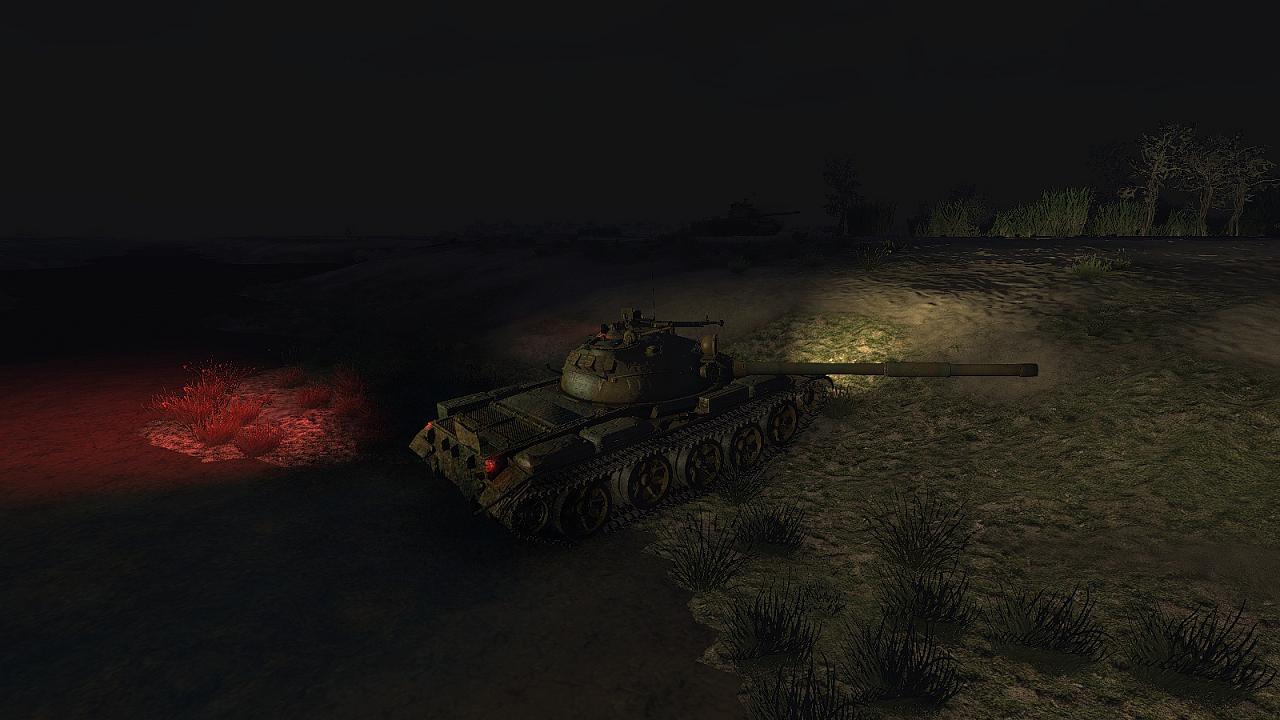
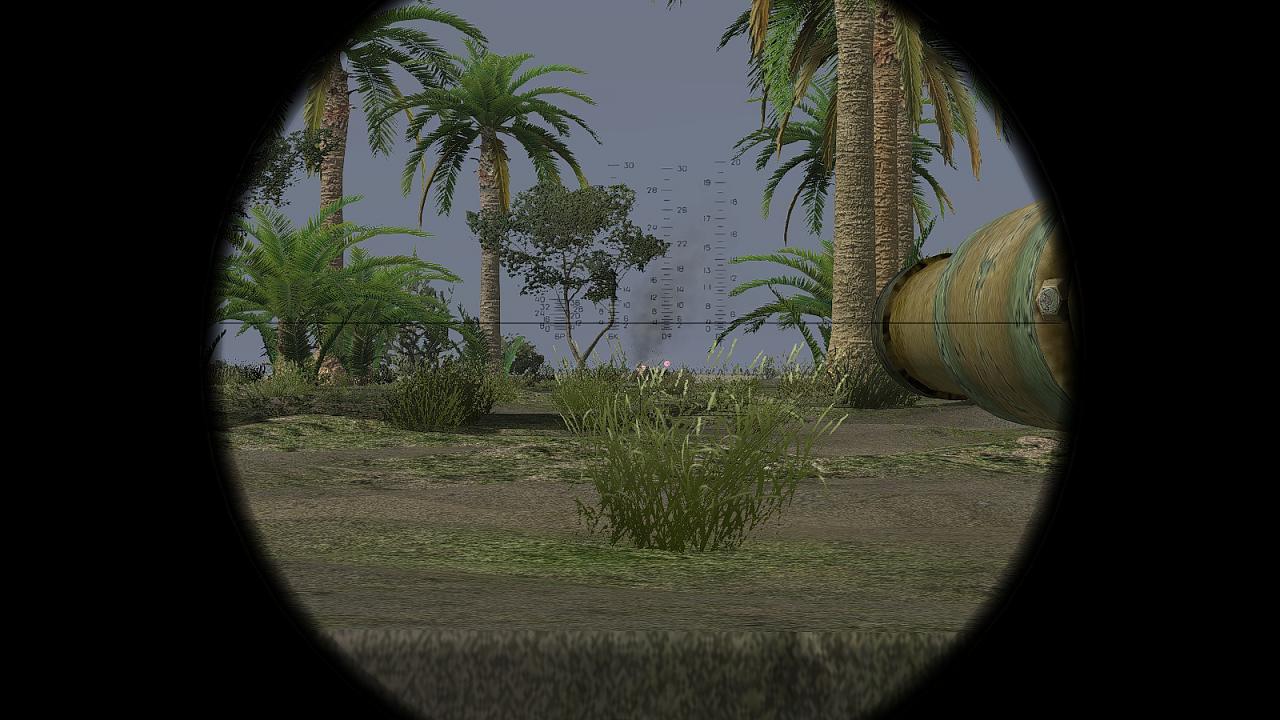
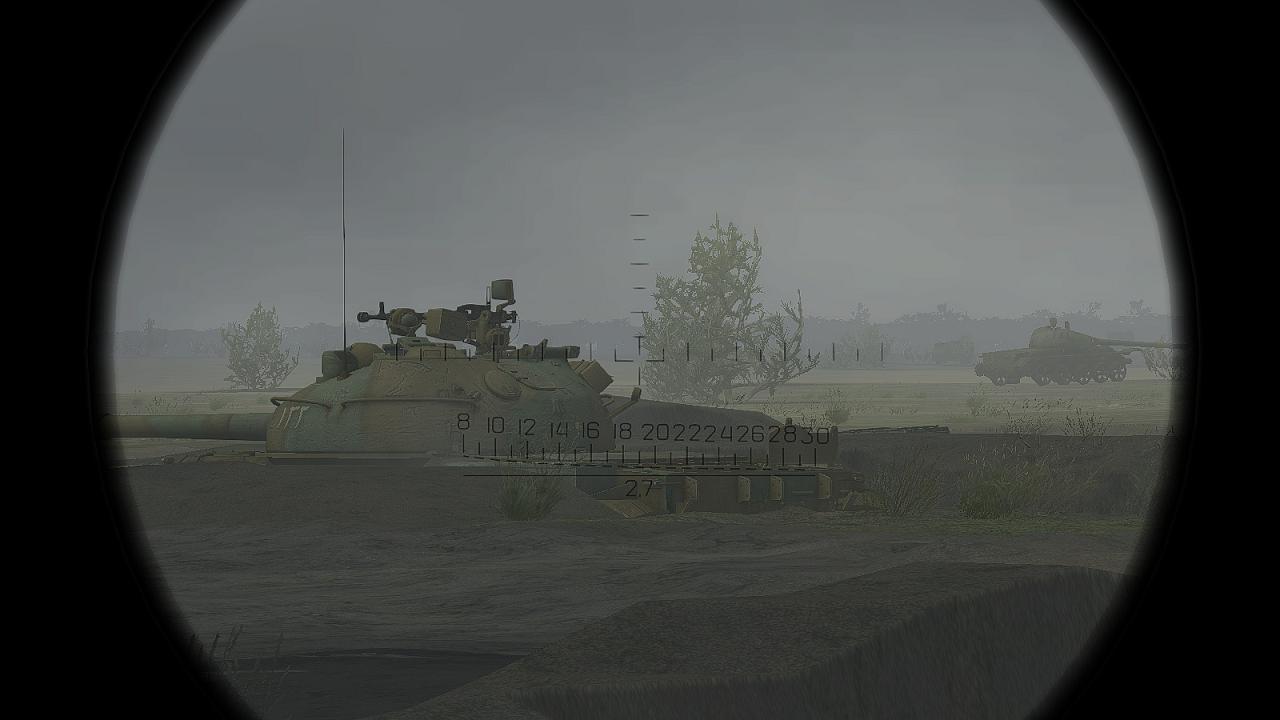
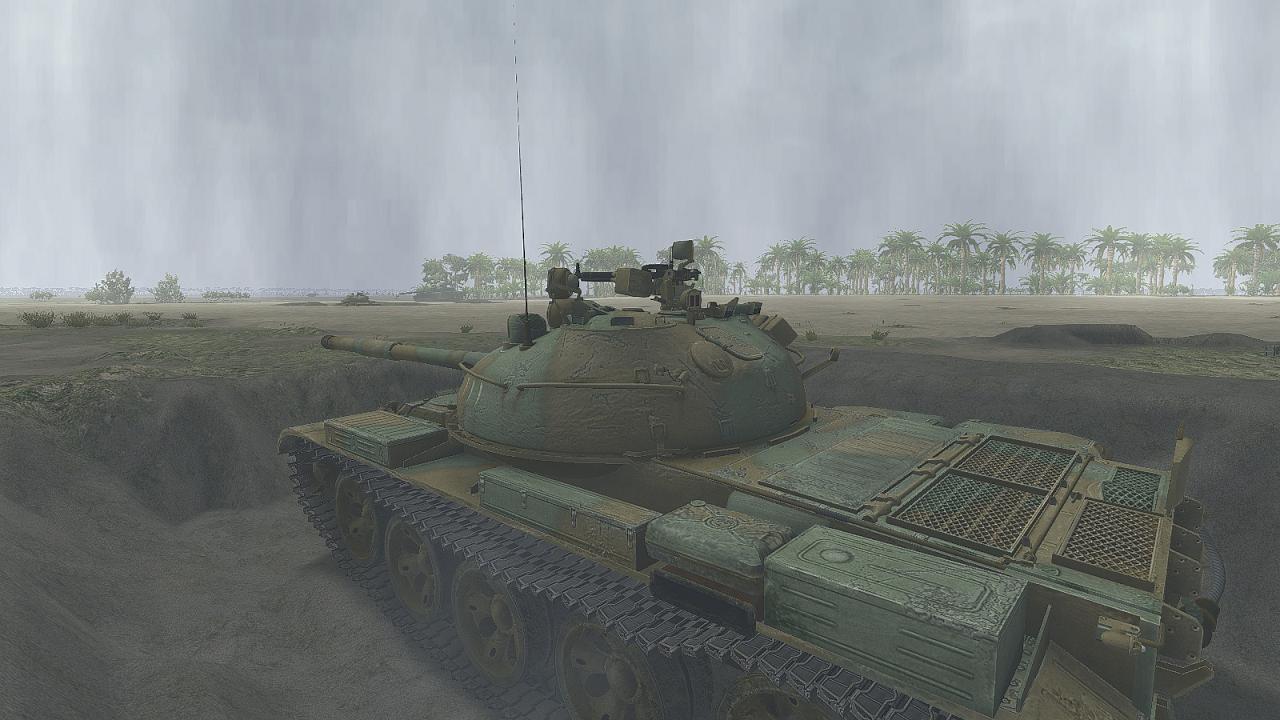
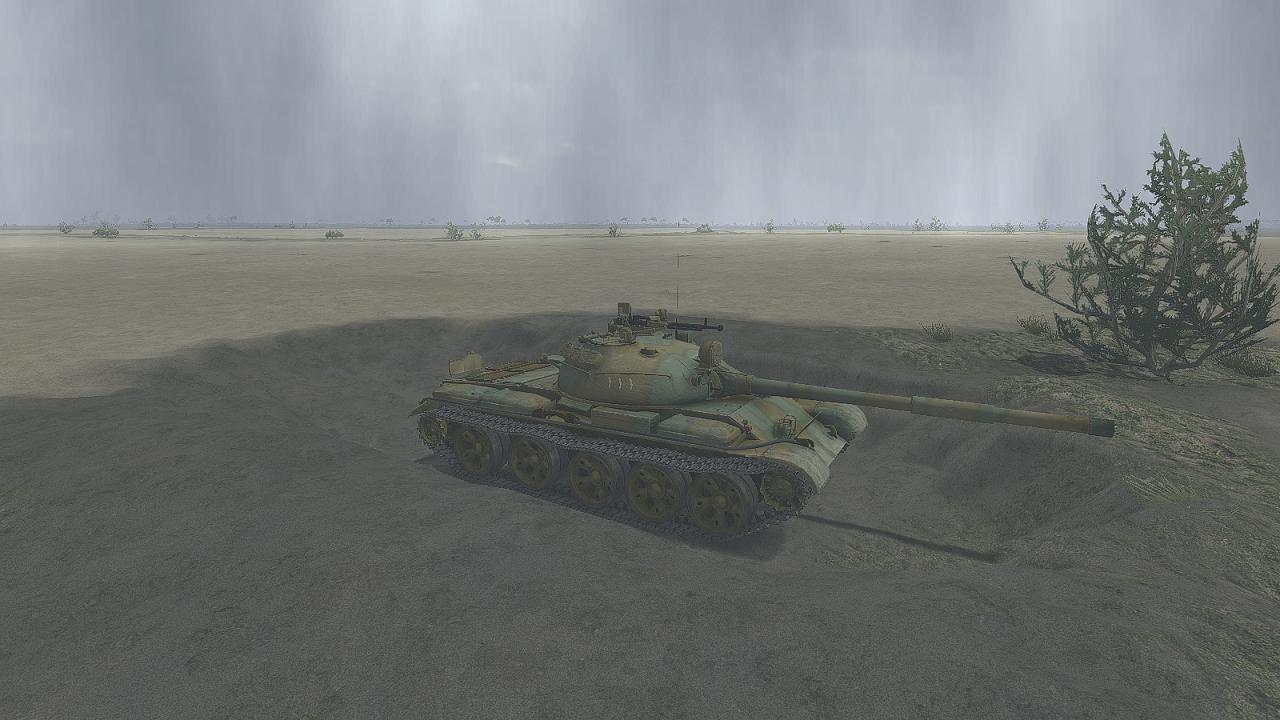
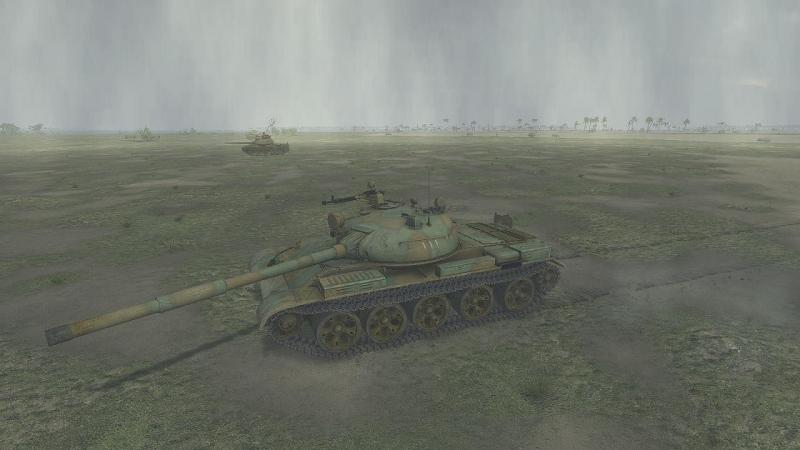
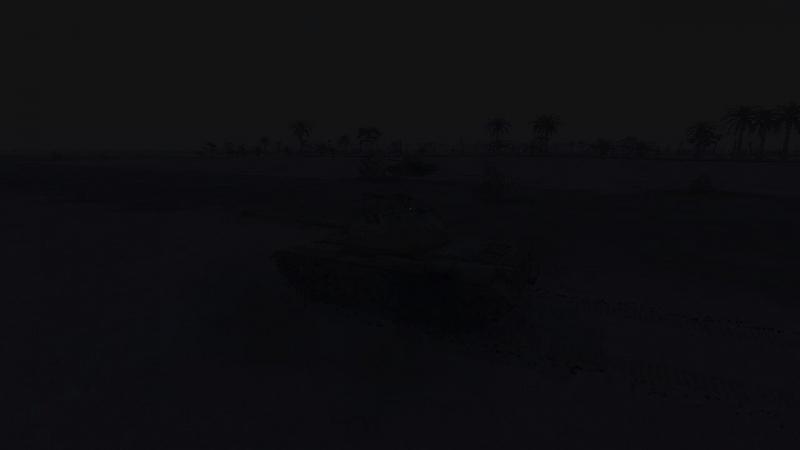
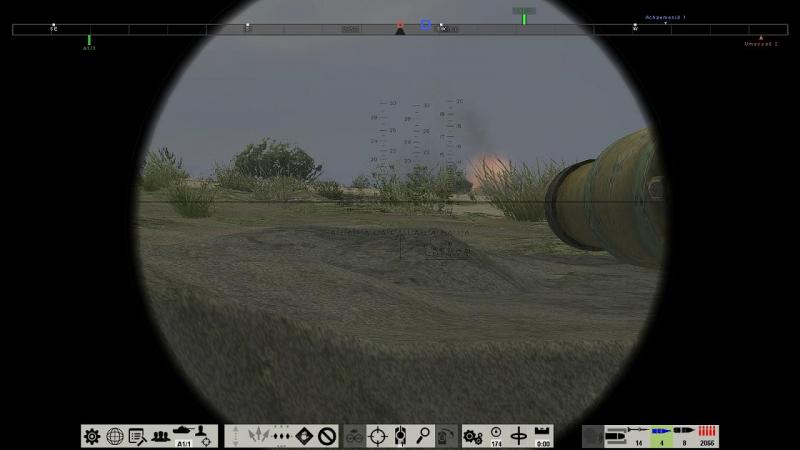
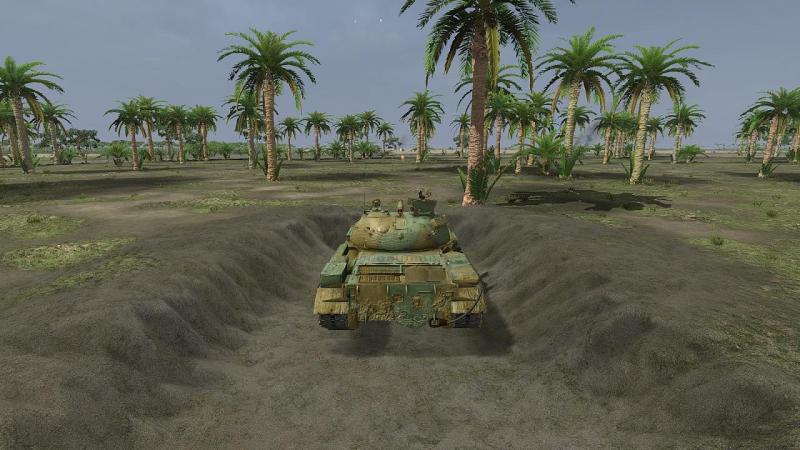
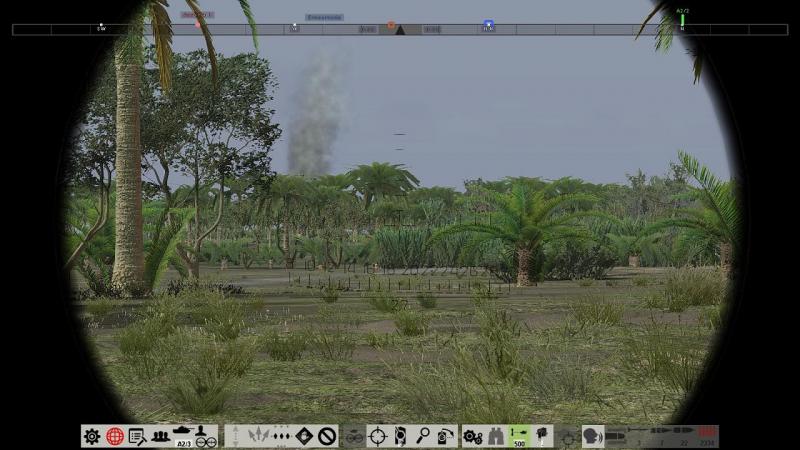
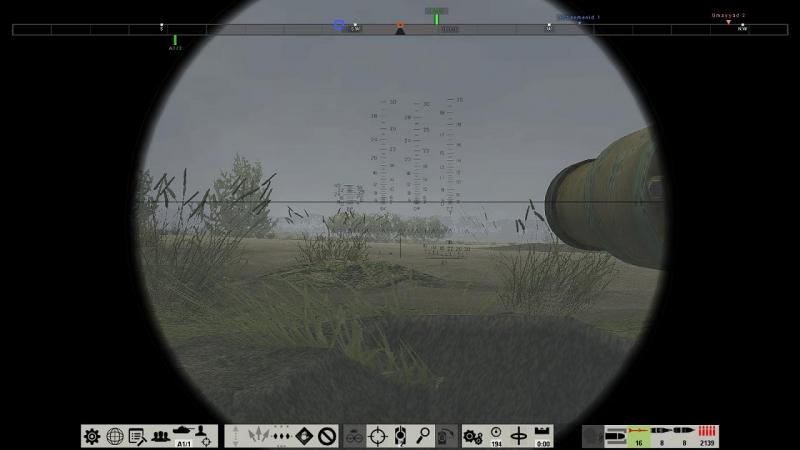
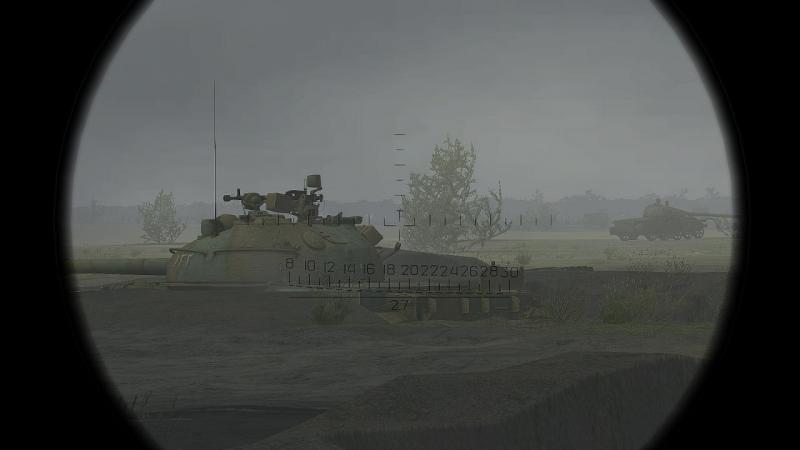
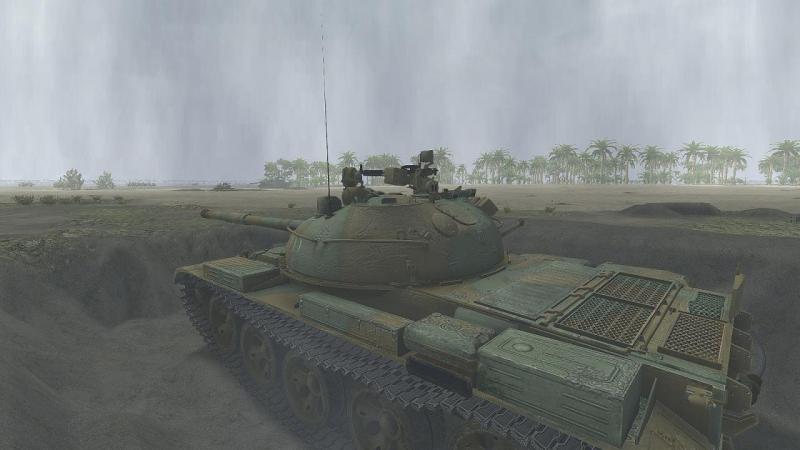
I unpaused the action and found myself in the tank commander's station of the command tank of my first platoon, up at 'Ummayad 2'. It was raining heavily, thoroughly murky conditions with visibility poor. I quickly gave the platoon the order to close up and stay concealed, checking that they were also ordered to fire at will. I could see that the enemy might be at quite close quarters when they appeared - hopefully, under our guns, as they crossed ahead of us, from right to left. On our right, hopefully hiding us from the Iranians until they appeared in front of us, we had some cover from a slight rise in the ground, topped with a long strip of woodland. Next to my left-hand tank, which was dug in like all our T-62s, was a Chieftain knocked out in the previous battle. Scanning my arcs through the commander's sight, I could see that my chosen killing ground was littered with some other wrecks from the enemy's last attack, in the form of a couple of knocked-out M113 APCs. I hoped that this sight would not deter them from coming much the same way, although I was hoping the next attack would come from slightly further south. I next switched to my second platoon, set back inside the edge of the wood at 'Assyria 1'. They were deep enough into the woods to be reasonably well concealed without completely sacrificing their fields of fire. I was still quite worried about them, though, for they seemed likely to be at the sharp end of the enemy's attack. They would be the anvil against which my first platoon would smash the enemy. My dispositions were in any event designed to ensure that no single platoon would meet the enemy unaided, mutual support being an important principle of defensive operations. Finally I 'visited' my third platoon, in the centre. I would have prefered to have them out of sight as a mobile reserve but I didn't have the elbow room so here they were, set back slightly from my planned killing ground but with arcs of fire which overlapped with the other platoons, on either side of them. In the pic below, taken from the commander's cupola of the platoon leader's tank, you can see the other two T-62s, just ahead and to either side, all well dug in. Again, I gave orders to close up and stay concealed. From the commander's sight I scanned left and right. Once more I could see casualties from the last fight, in this case a T-62, one of my own losses no doubt, and beyond that, an enemy M-113. Having had a look at the battlefield from the viewpoint of each platoon in turn, I switched back to the first platoon and settled down to wait. Here's the tactical map, pictured at about this point in time. My first platoon is top right, with the command tank the green diamond. The third platoon is the group of three red diamonds in the centre, with the two further south, near 'Assyria 1', representing the second platoon, on my left flank. The blue segments represent my allocated arcs of fire (I've suggested to Graviteam that they lighten these markings as for one or more platoons, then tend to obliterate the map markings beneath!) Nervously, I went to the commander's sight and scanned left to right and back again, with the occasional wider sweep in case the Iranians somehow managed to elude other friendly forces to come in behind us. But all there was to be seen was my number three tank, dug in to my left rear... ...and to my right front, my number two, next to the dead Chieftain, with the equally-dead carcasses of the enemy APCs looming through the murk just ahead. I had the feeling that I should have set up this platoon further north, away from the open ground ahead, in case the enemy came in more to the north than I was hoping they would. But I was committed. I wasn't going to forsake our current dug-in positions, for the sake of a few hundred metres more separation. I was about as ready as I was ever going to be. The next move would be the enemy's. ...to be continued!

-
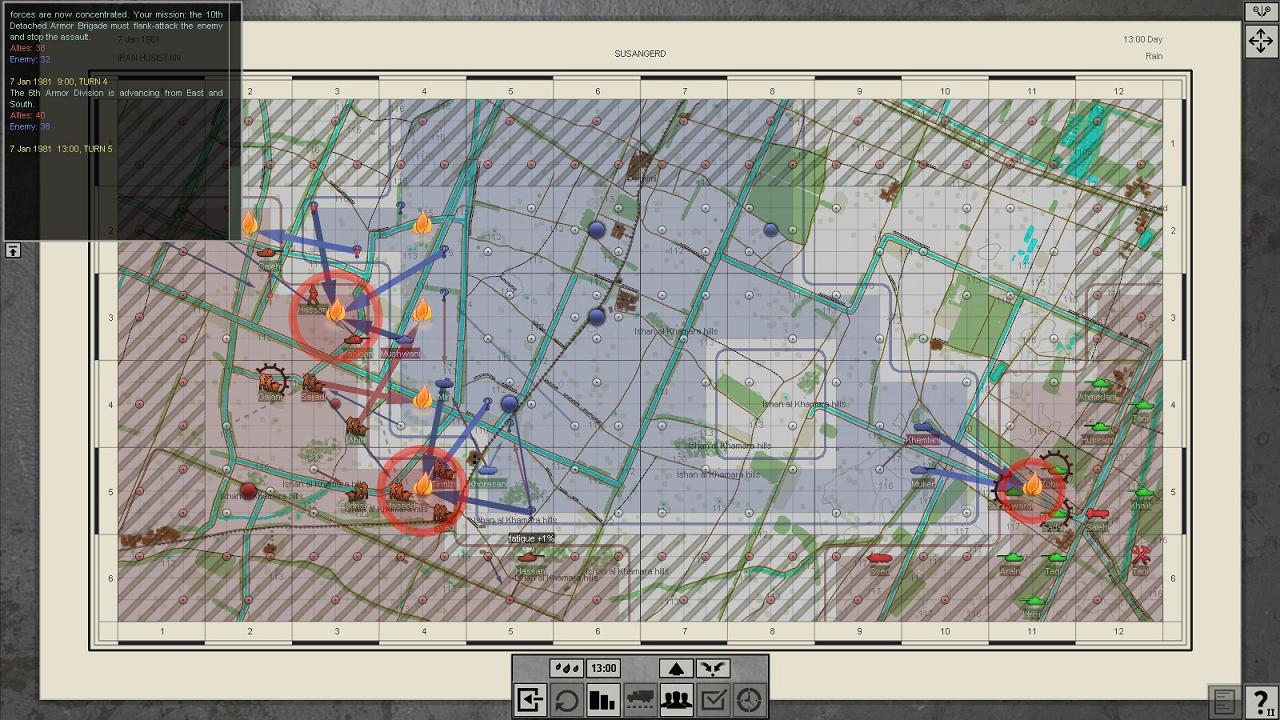
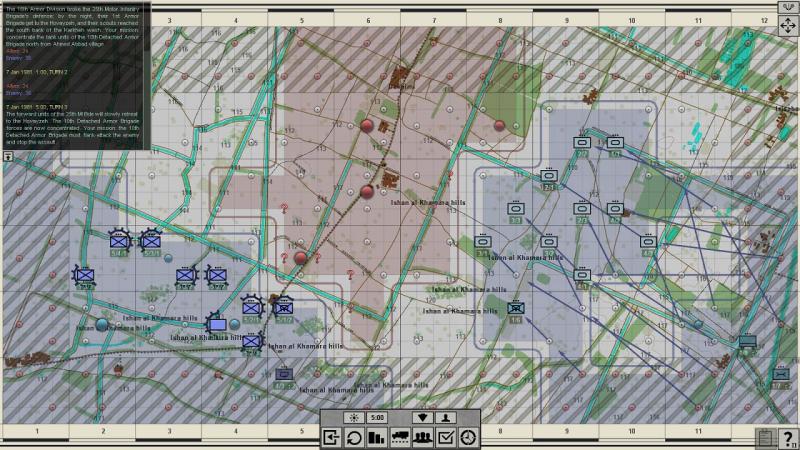
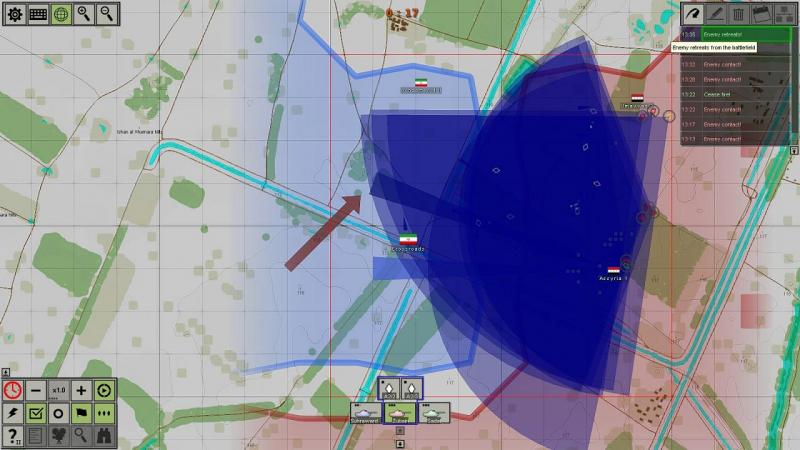
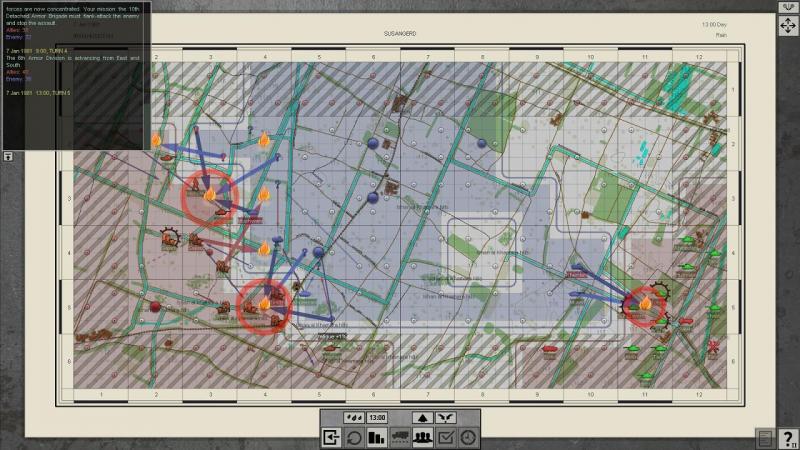
Emboldened by my success in that single mission, I decided to return to my current campaign, playing for the Iraqi side in the war with Iran. Last campaign mission, we had moved out from our defensive positions and met an Iranian advance more or less head on. Though we'd stopped the enemy in his tracks, we had paid a high price, in terms of tanks knocked out, at any rate. It's now the early afternoon of 7th January and fighting has broken out on both shoulders of the enemy salient, marked in blue below. The enemy is renewing his attacks towards my unit, the 10th Detached Armoured Brigade, in the bottom right hand corner of the map. I haven't been given any specific orders from on high but it's fairly obvious that the task will be to stop the enemy attack. In SABOW's campaigns, much as in real life, victory is decided according to the ground you manage to occupy...or in this case, prevent the other side from occupying. I'm still learning the ropes as far as SABOW's campaigns go - for example, so far I've not so far encountered air or artillery support options, the bad weather in this campaign being enough to explain the lack of the former. But I do know that having opted to join the developing battle, my next step is to set out my forces in the 'Deployment' screen, seen below. Bottom centre, you can see the icons that show that I am still commanding three T-62 platoons. Though we have had some re-inforcements, one of the platoons is down to two tanks, the others having the full three. I decided I didn't like the offered deployment, with all of us bunched up around the key point we were evidently to defend, marked 'Assyria 1'. Unfortunately I didn't take a screenshot of my deployment - you'll see this later - but after a look at the map, I decided to move my 1st platoon well to the north, up to the position marked 'Ummayad 2'. There I sited them in defensive positions with arcs of fire to the south-west. I kept the under-strength 2nd platoon near 'Assyria 1' but backed them into the wood, facing north and west. My third platoon I placed more or less in between these two, just inside the north-west corner of the large wood behind 'Assyria 1', facing west. I would have liked to place this platoon further back, in depth and in reserve, out of sight behind a low crest further east. But that was not allowed. SABOW can be quite strict about platoons sticking to their assigned areas (in terms of map squares), it seems. for each platoon in turn, I adjusted the positions of tanks individually, till I was satisfied. I then went to the 'Initial Orders' screen and set arcs of fire so that they all overlapped nicely, covering from north-west to south-east. The markings on the map told me my tanks were all dug in and my plan was to let the enemy come to is and destroy him by concentric fire from our fixed positions. The ground over which he was most likely to advance would form an excellent killing ground, into which at least two platoons should be able to fire simultaneously. Or so I hoped! ...to be continued!

-
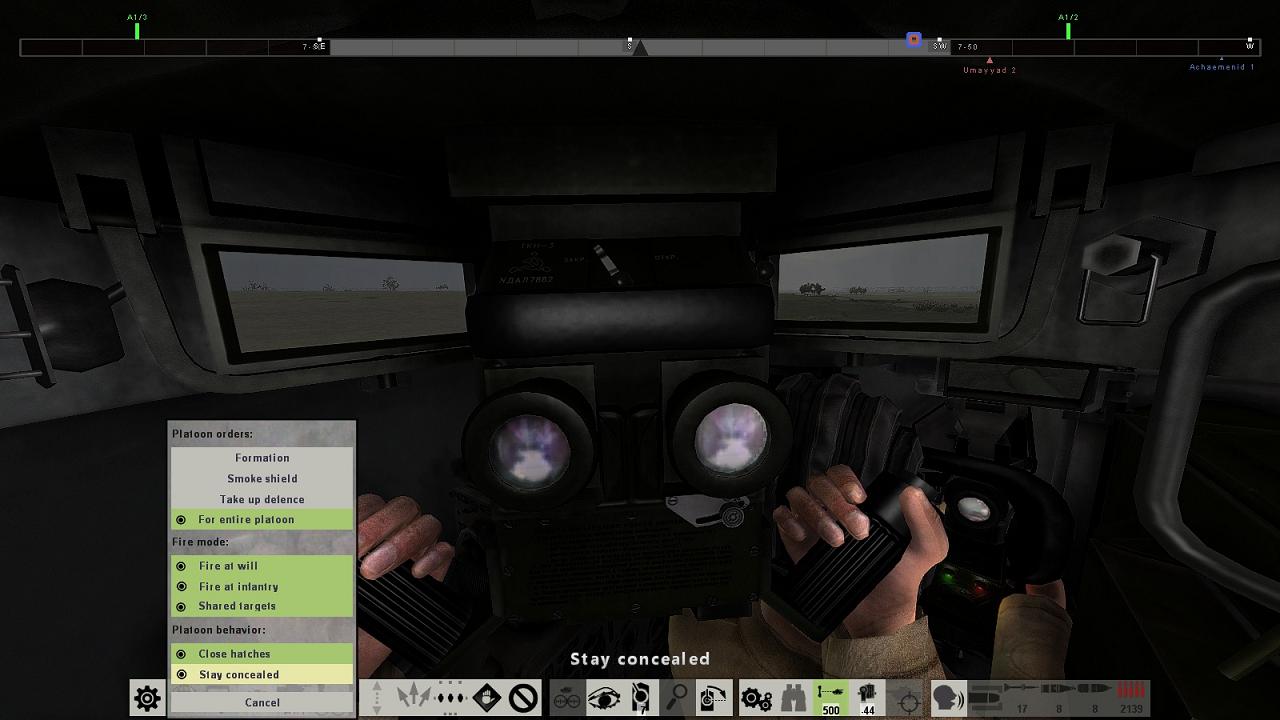
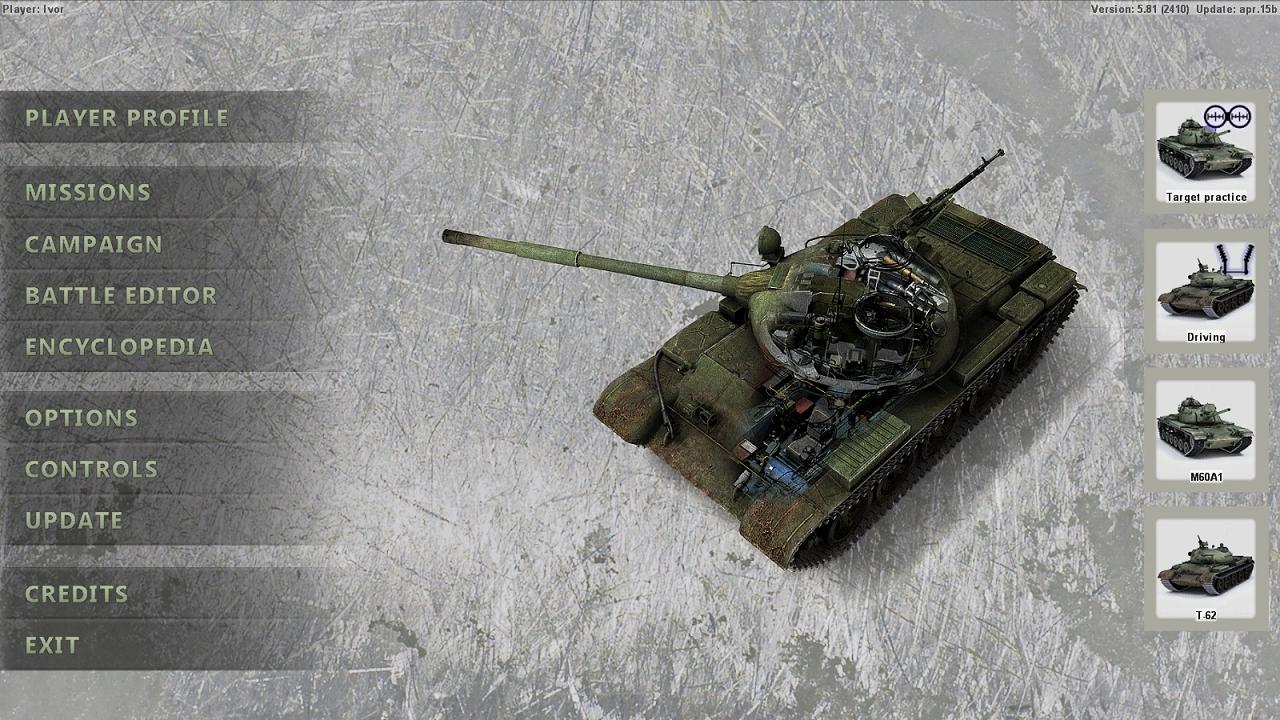
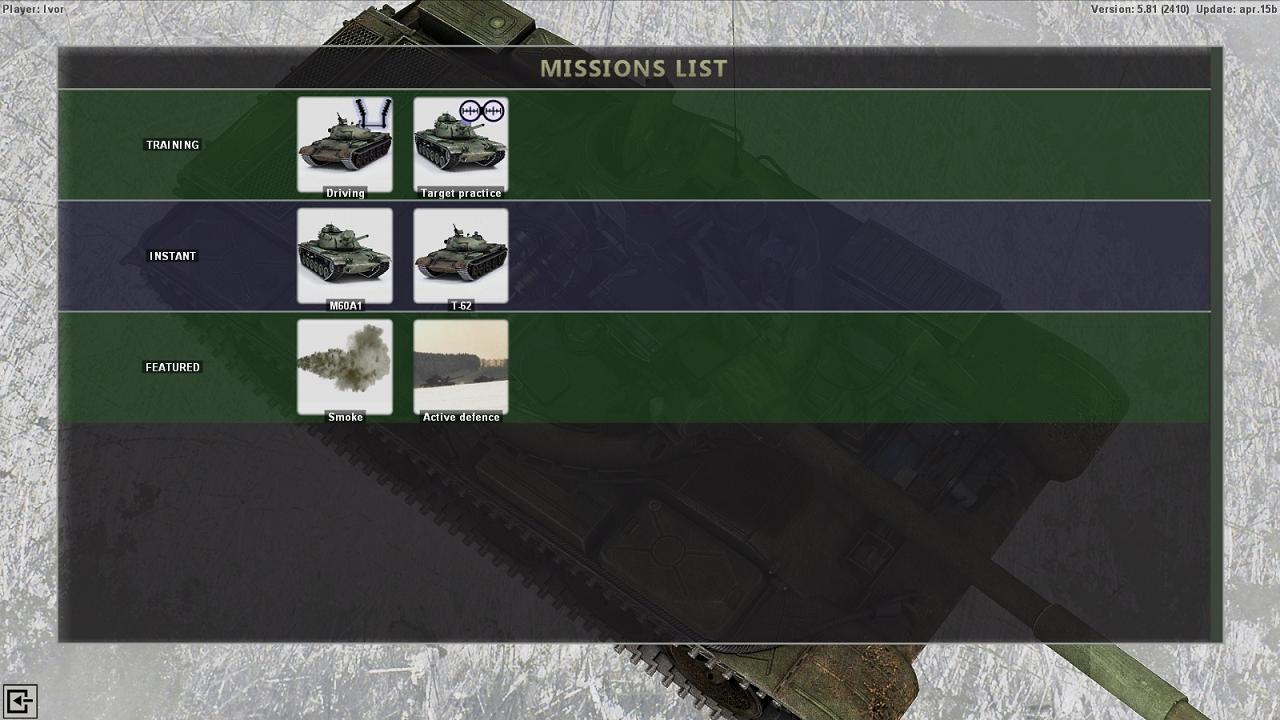
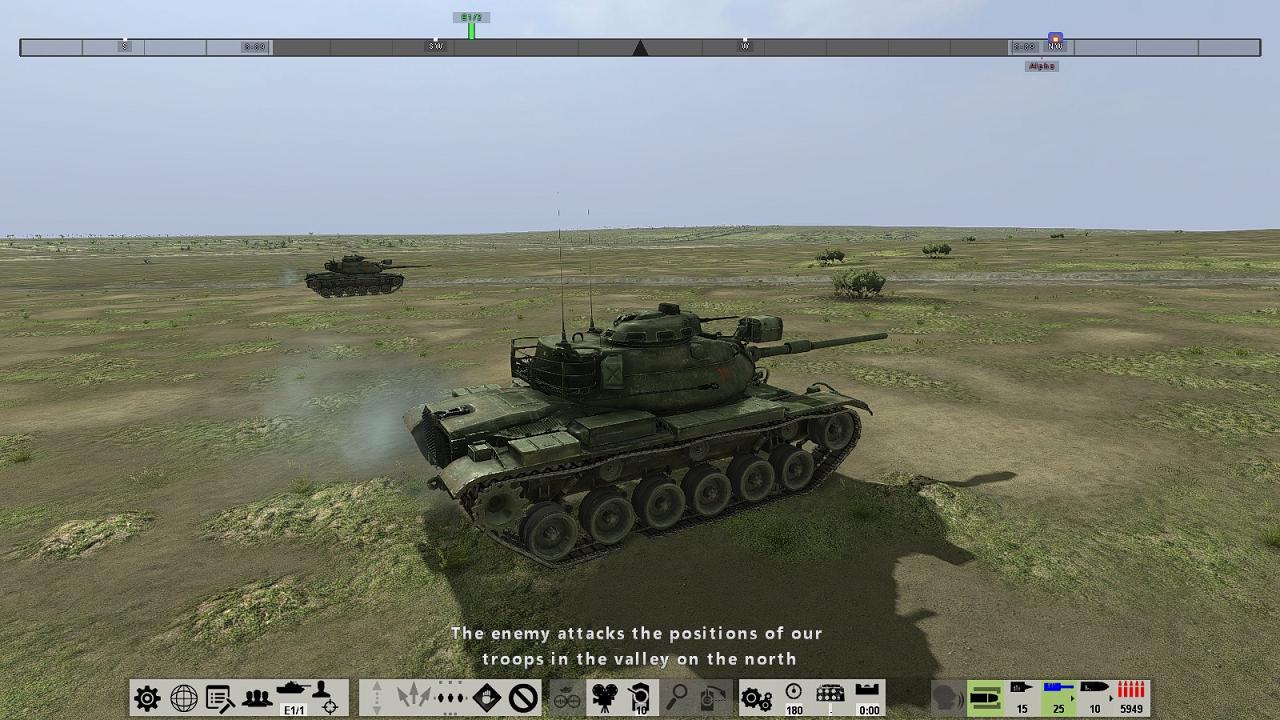
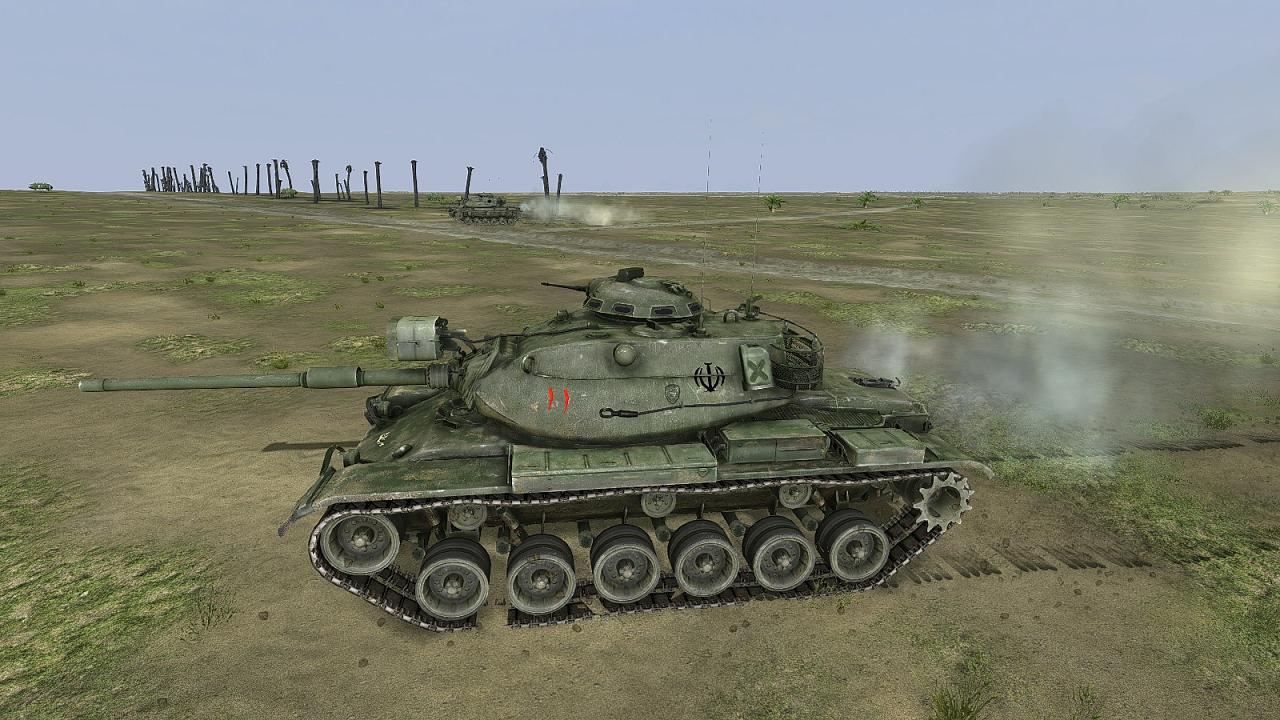
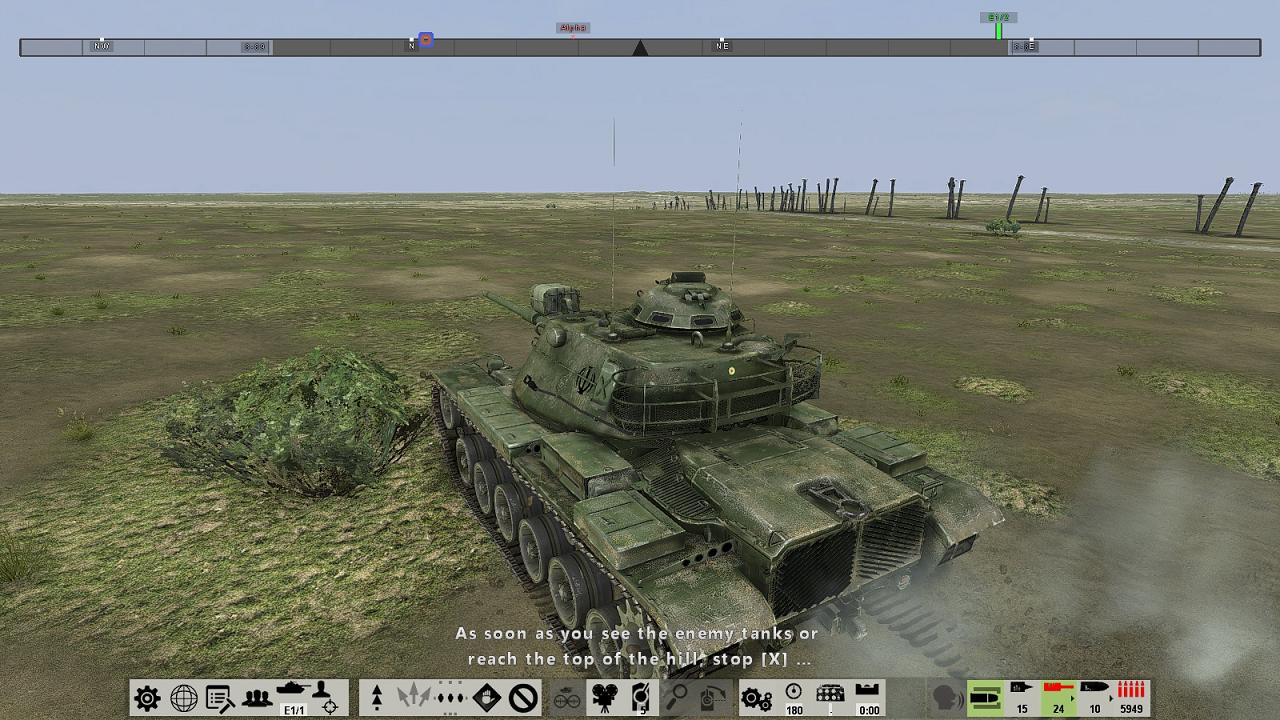
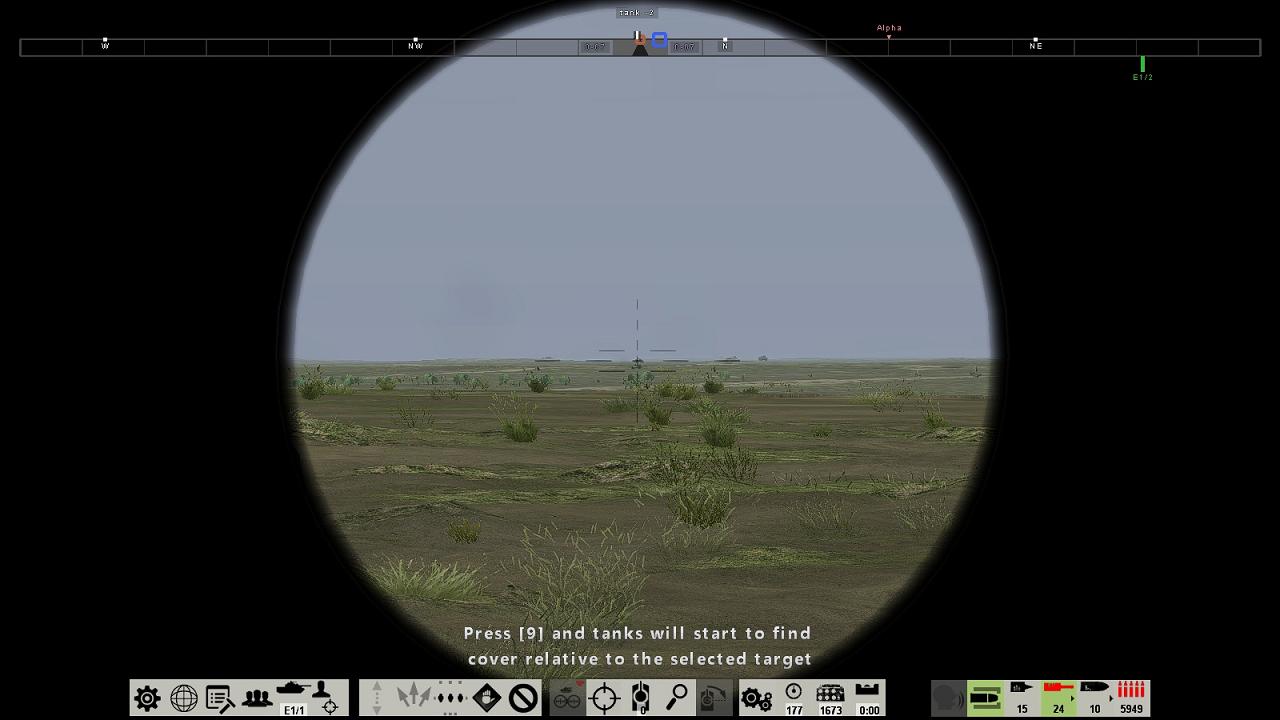
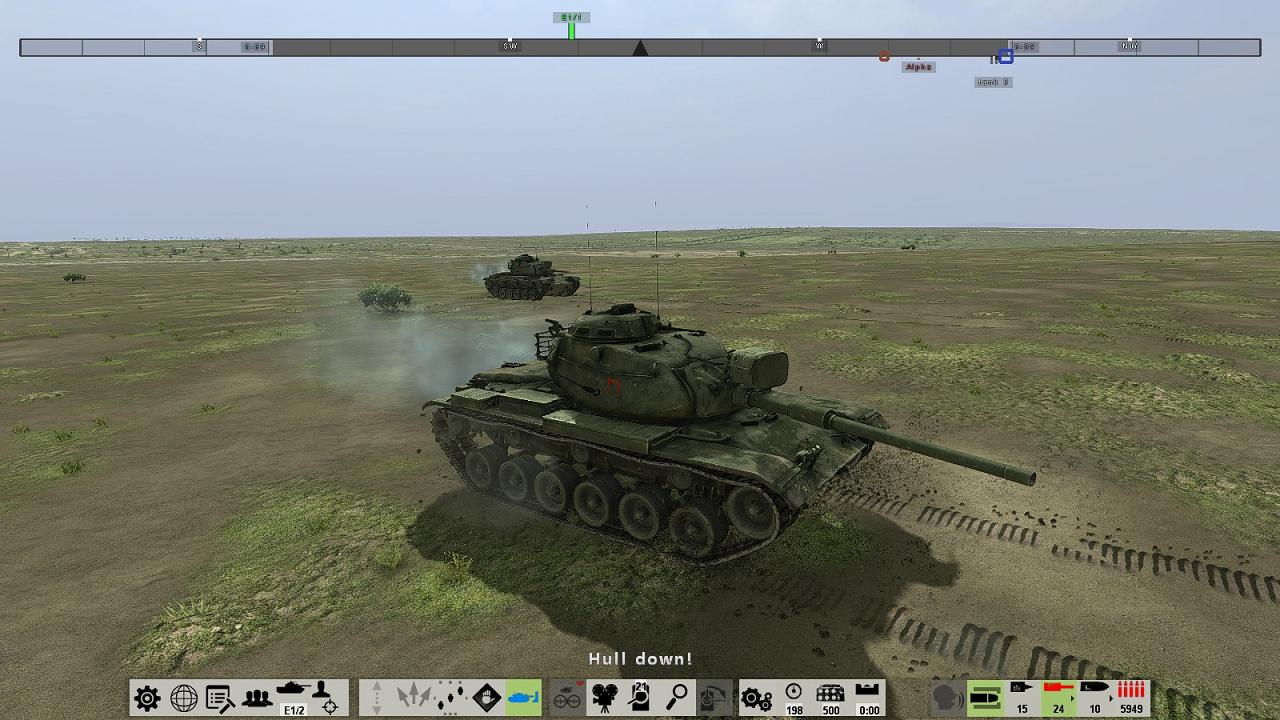
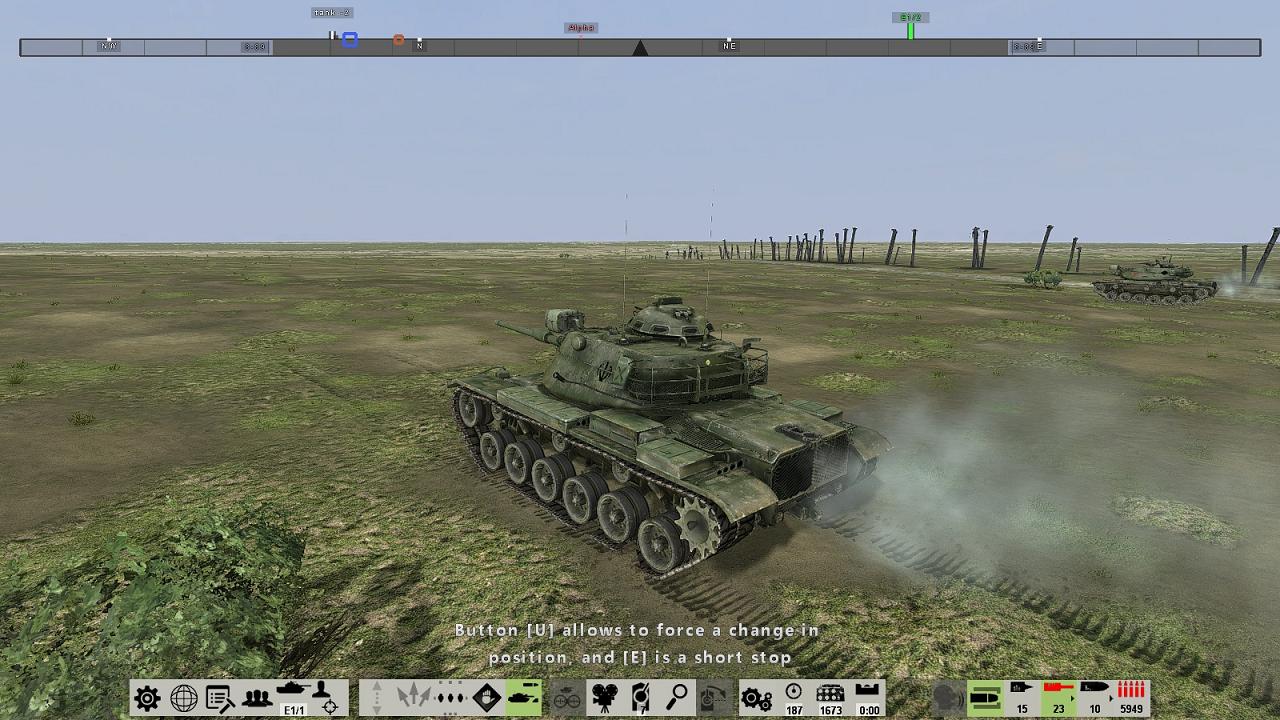
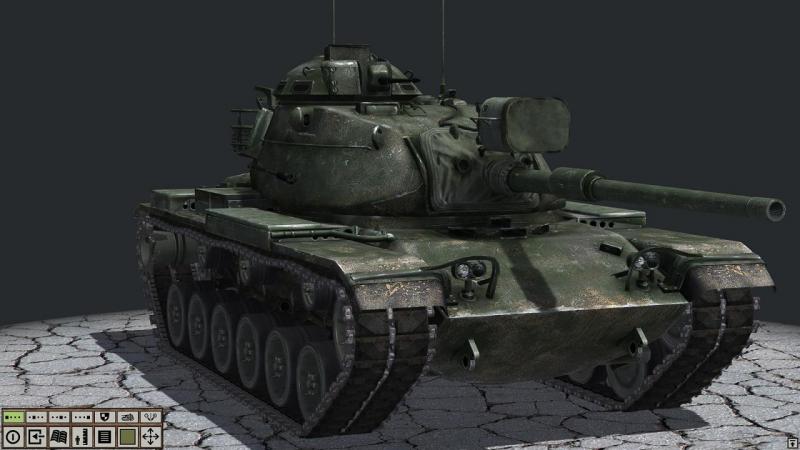
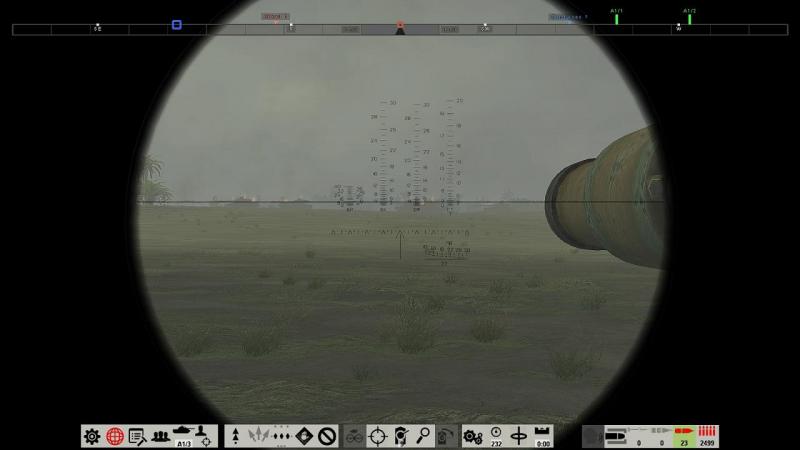
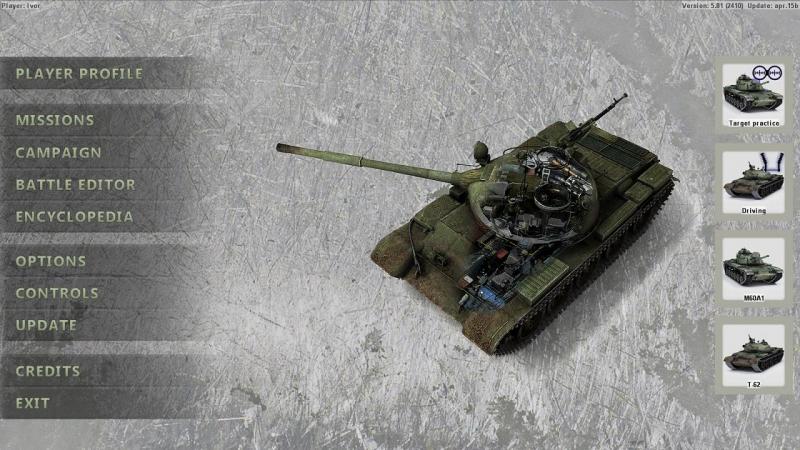
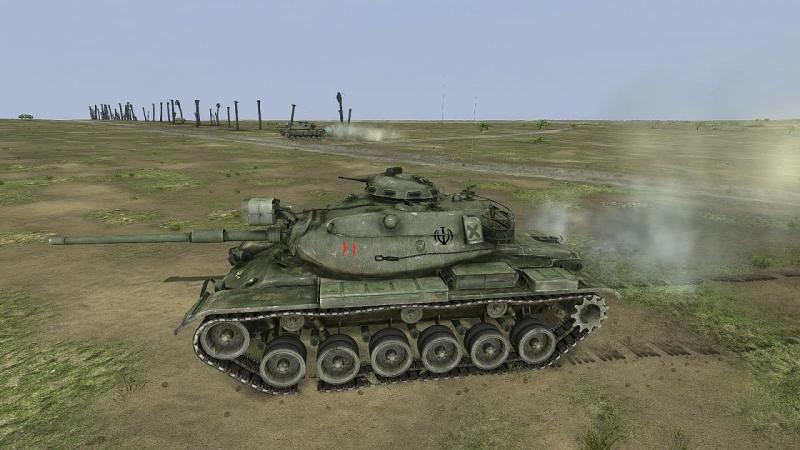
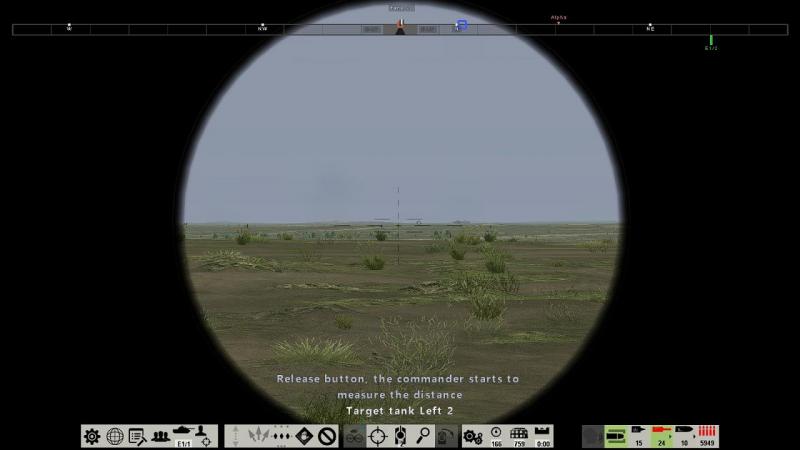
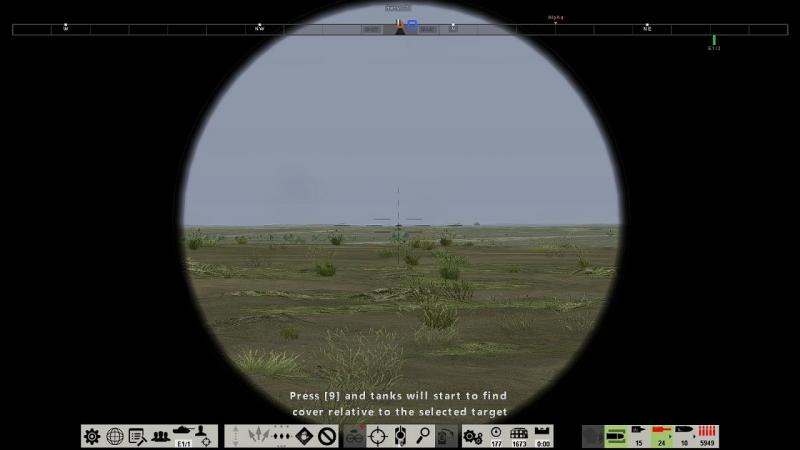
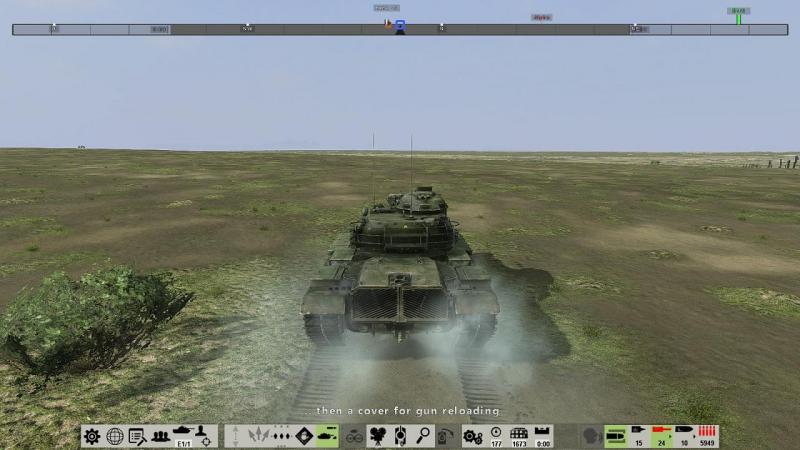
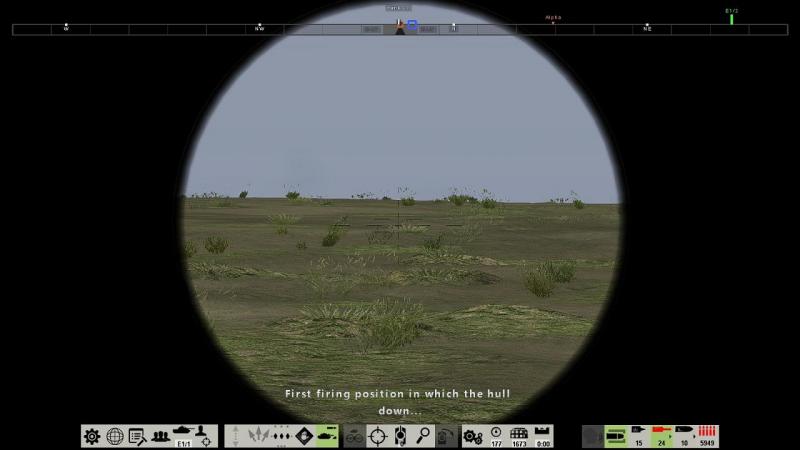
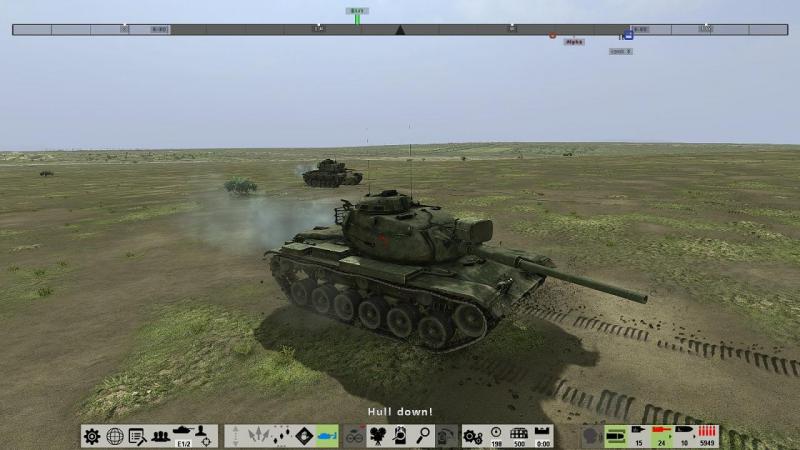
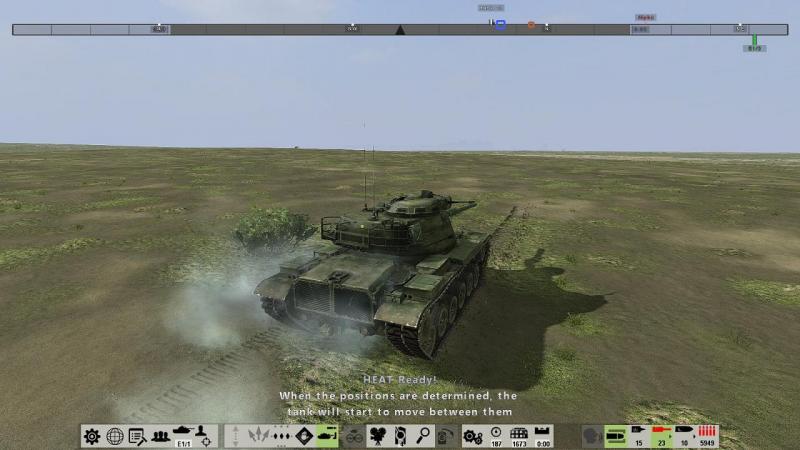
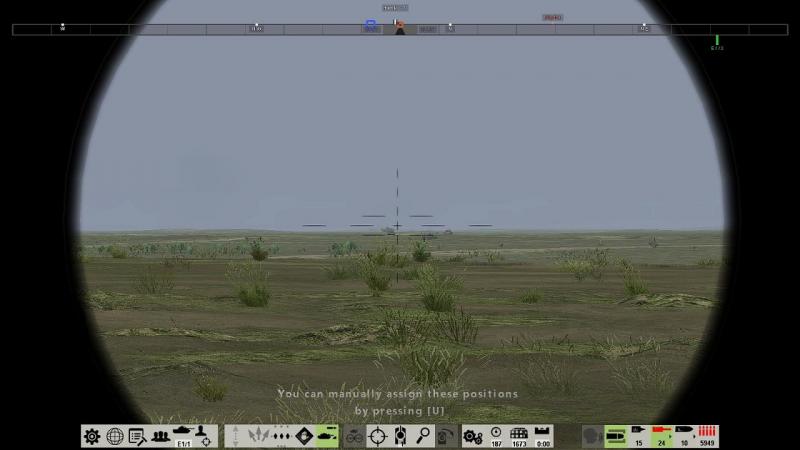
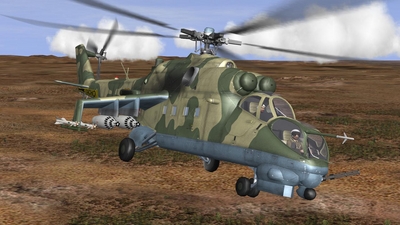
Updates for SABOW are still coming thick and fast from developers Graviteam. As well as the abillity of tanks to lay smoke screens, there are new tank control options. One of the cleverest and most useful - and until now, seen only in Steel Beasts - is a command to order your tank or tanks to start moving into and out of hull down positions, in between shots - called 'active defence' in SABOW. In fact there is now a new training mission to enable you to understand and practice this. And another one, to practice the use of smoke generators. In fact, a new main menu option, 'Missions', has been added... ...to give more convenient access to the mounting number of additional single missions, which I expect will provide an equally-convenient way to access user-made missions, too... The 'active defence' mission is for the M-60 and starts with a text prompt to advance to a crest line ahead, to engage advancing enemies. You have a couple of tanks on this mission. As you advance, a HEAT round is loaded and your wingman slides over to your right. As you come up to the crest, the on-screen text messages continue to prompt you, like an instructor on a real training exercise. Having sighted the enemy through the gunner's sight - the one shown below with the simpler reticle is used with the analogue ballistic fire control computer and stereo rangefinder - you are prompted to ctrl+click on a target, to get a range from the tank commander, who dials this into the computer... You are then told to hit the hotkey which will start your tanks 'jockeying' (to use the British Army term) into and out of fire positions, relative to your selected target... This is where it gets really cool! You can take a shot, then your AI driver will back up into cover, while your loader chambers the next round... Your tank will then move forward again into a hull down position, halting long enough for you to take your shot, then back into cover while reloading, then move up again. Unless you have ordered otherwise, your wingman will do the same. This is a joy to behold! You can intervene at any time, as the text messages below suggests, for example, to change firing position or to order a short stop ahead of time. In the pic below, my own tank is reversing into cover after firing, while my wingman has started to move forward again for his next shot. Tanks appear to move back up to the same fire position each time. While it would be safer to 'pop up' even slightly to one side each time, you can adjust this manually at any point. The convincing detail in which SABOW replicates so many aspects of the functioning and handling of its featured tanks I am finding incredibly impressive and immersive. Largely thanks to the wargame layer, SABOW has what I believe may be the best single-player campaign system of any tanksim, ever. The sounds and visuals are just great. The most recent update added some improved damage modelling and associated effects: the sudden, vicious flare-ups of the ammo cooking off in a knocked-out tank look at once fearsome, authentic and spectacular, without being overdone. The first time I saw this, I just went, 'Oh WOW!' and could not suppress a grin. New video clip showing some of the new features here: A few weeks ago, when I finally decided to make the effort to get acquainted with this one, I was wondering if SABOW would be much good as a tanksim. Now, I'm beginning to wonder if there is a better one.


- 17 replies
-
- 1
-
-
- sabow
- steel armor blaze of war
- (and 1 more)
-
Good hunting!


-
Worth watching:
-
From the album: Combat Sims
-
From the album: Combat Sims