

33LIMA
-
Posts
3,749 -
Joined
-
Last visited
-
Days Won
7
Content Type
Profiles
Forums
Gallery
Downloads
Store
Everything posted by 33LIMA
-
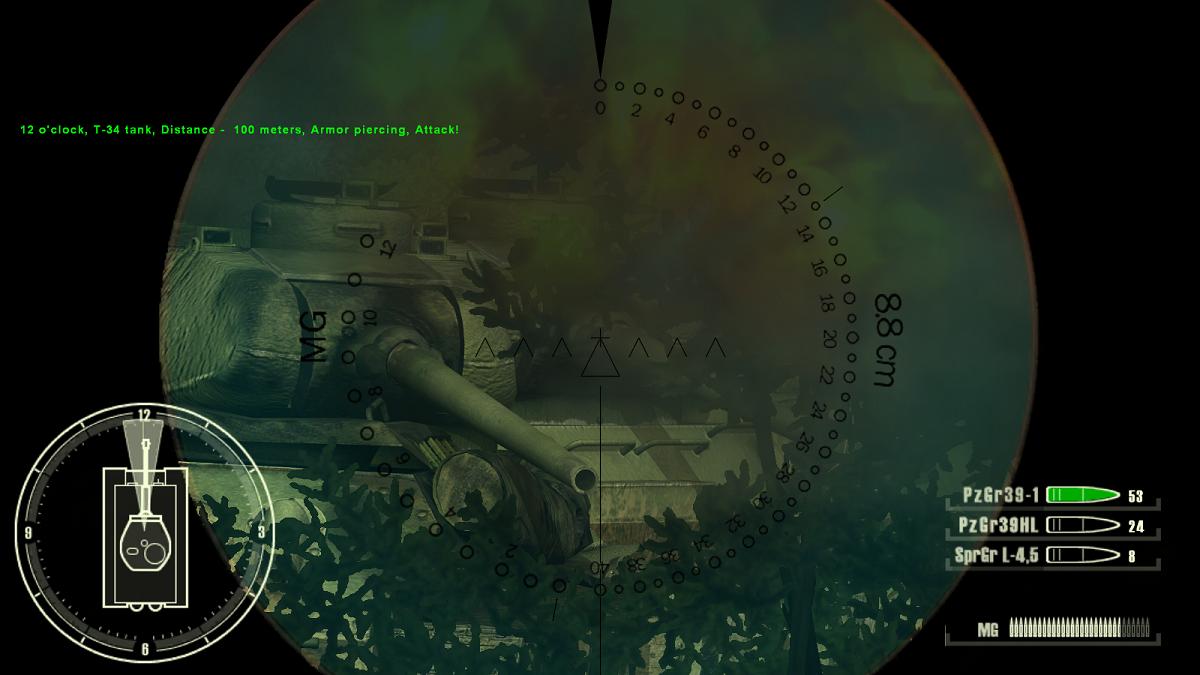
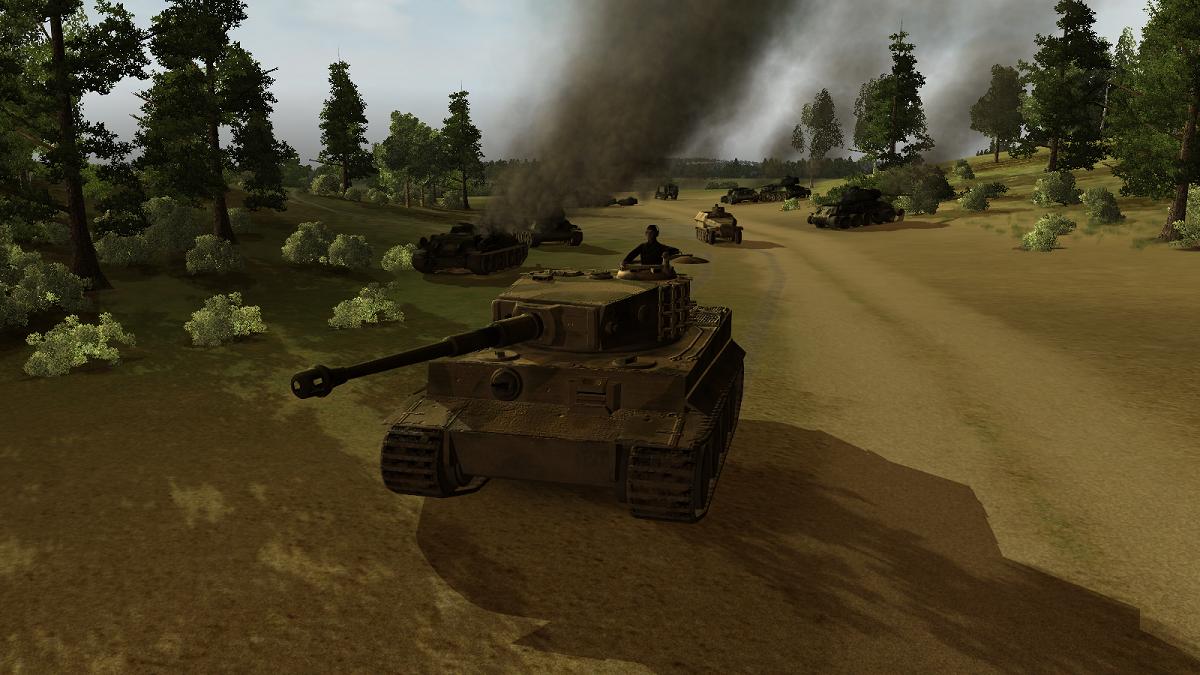
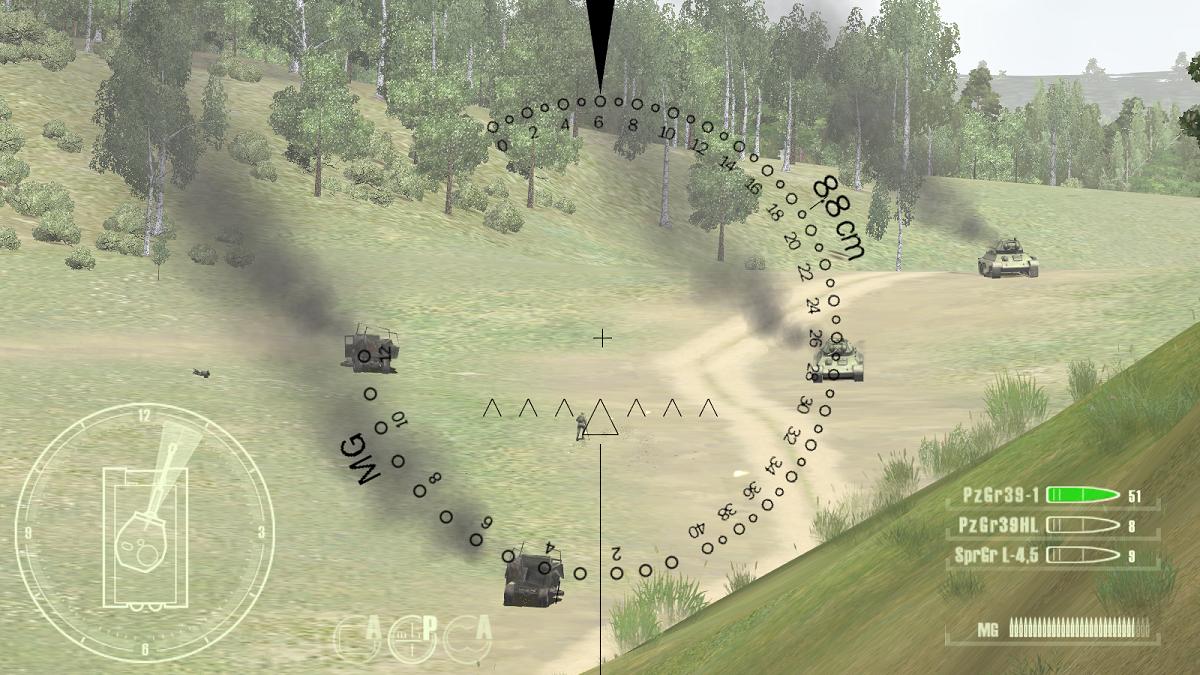
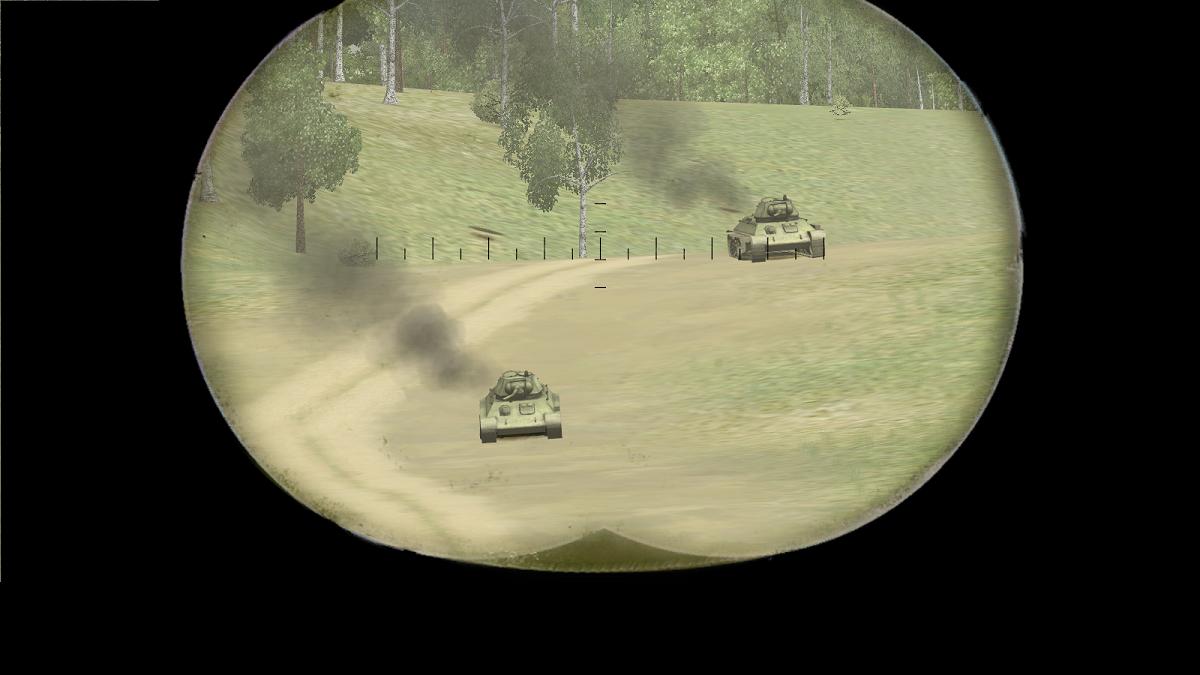
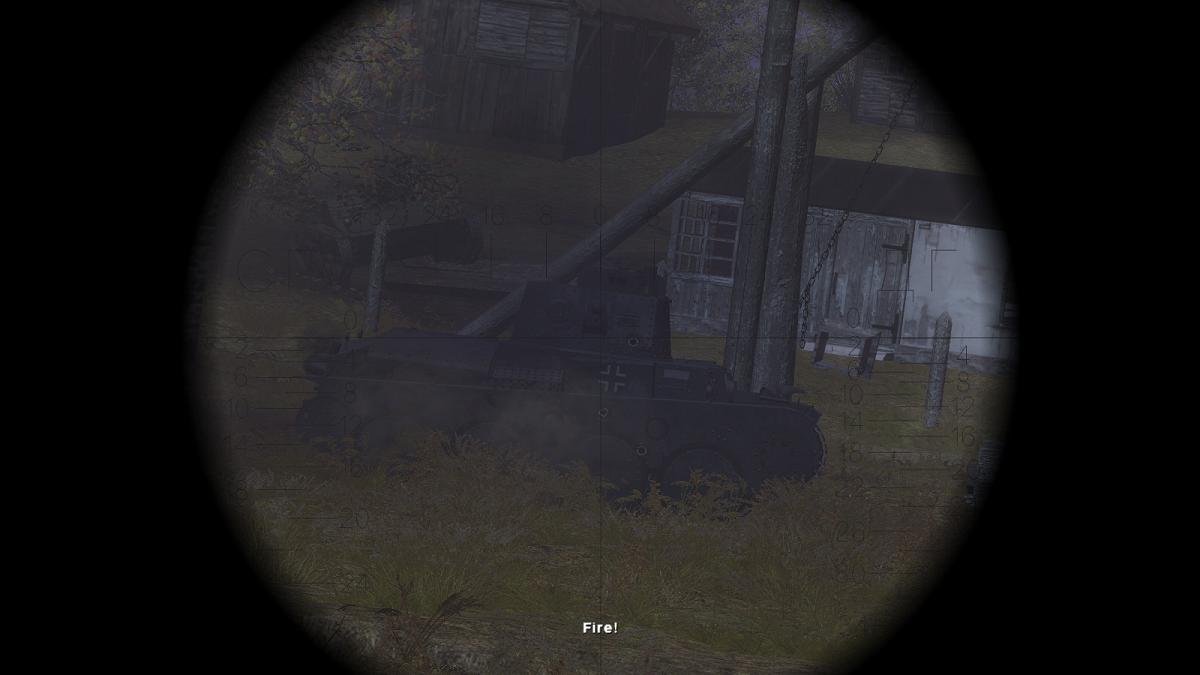
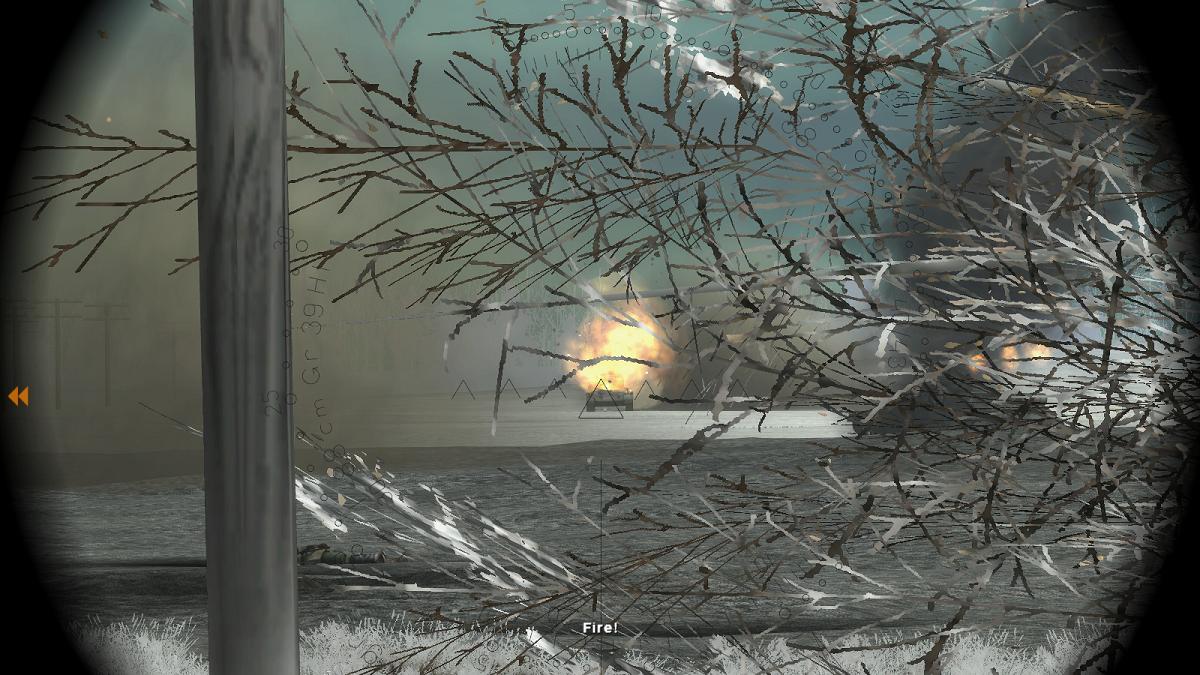
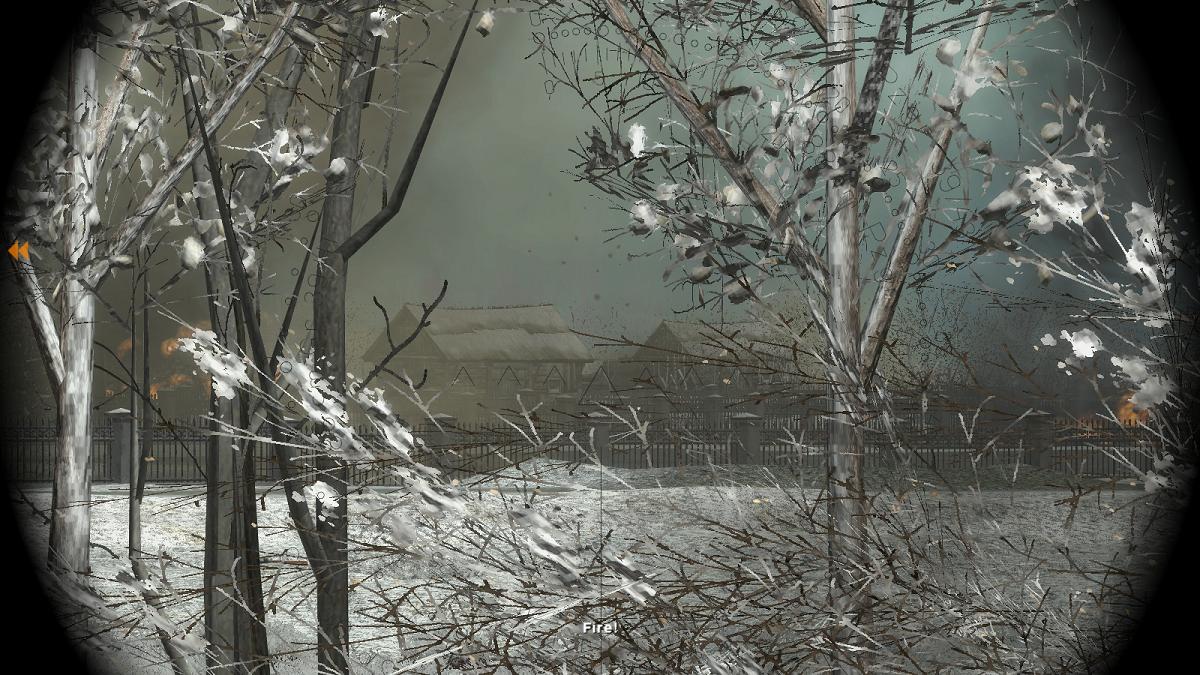
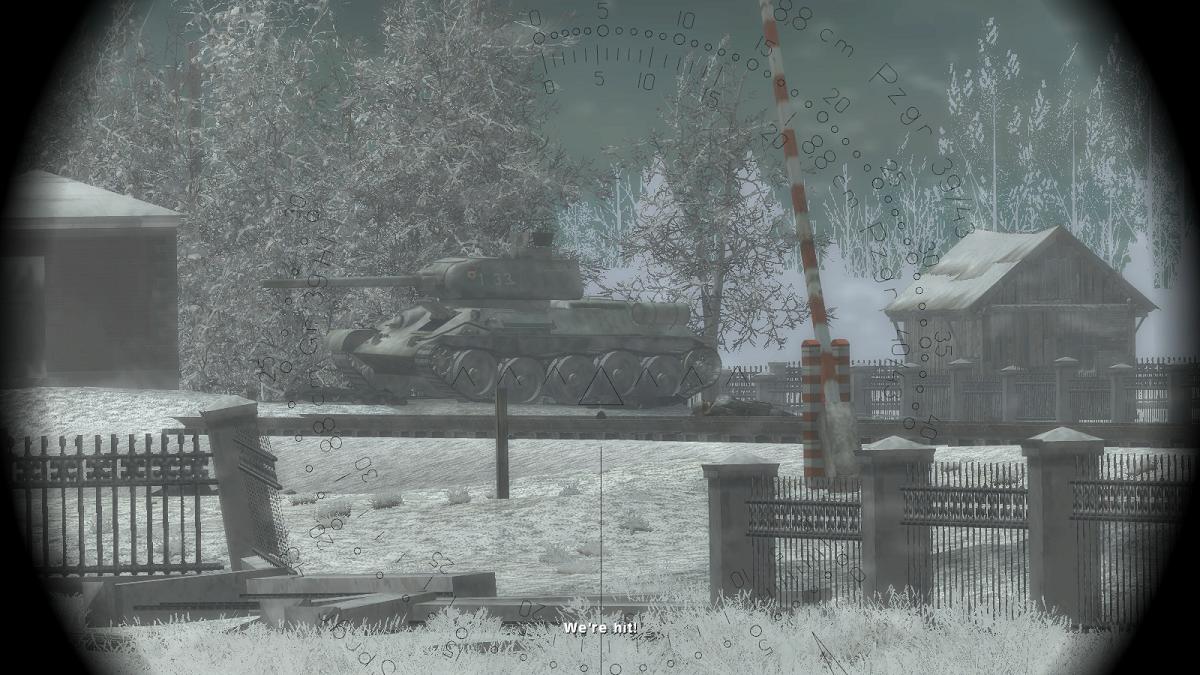
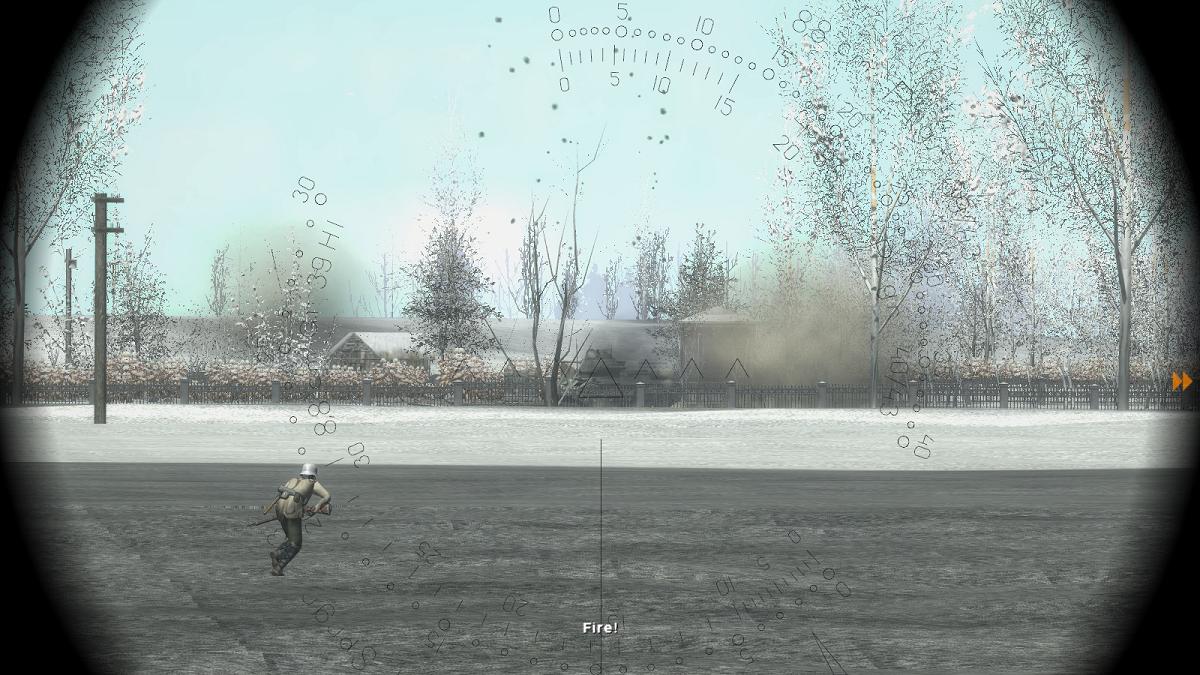
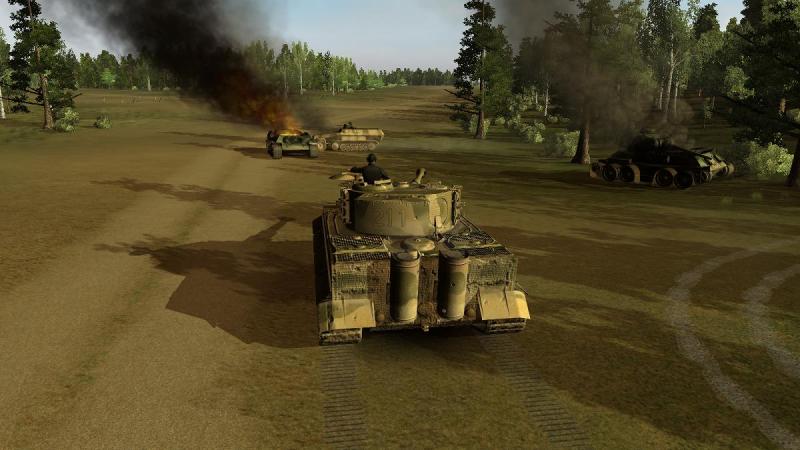
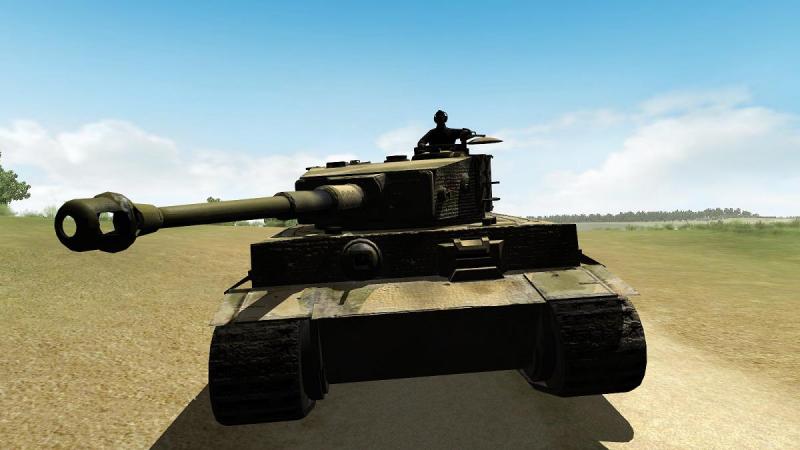
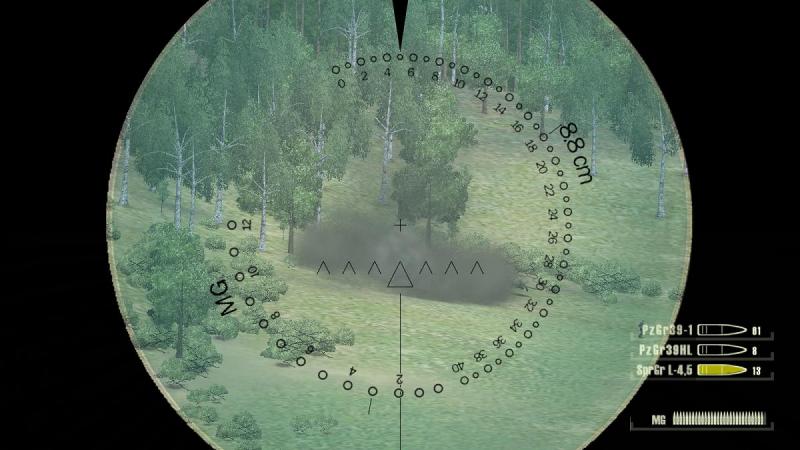
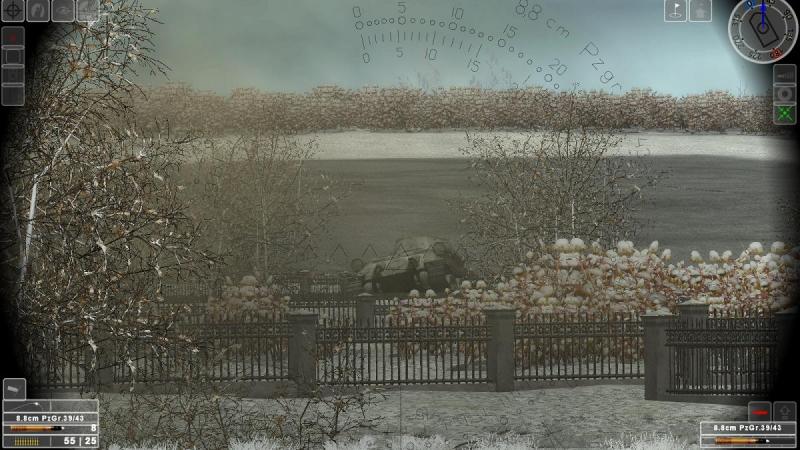
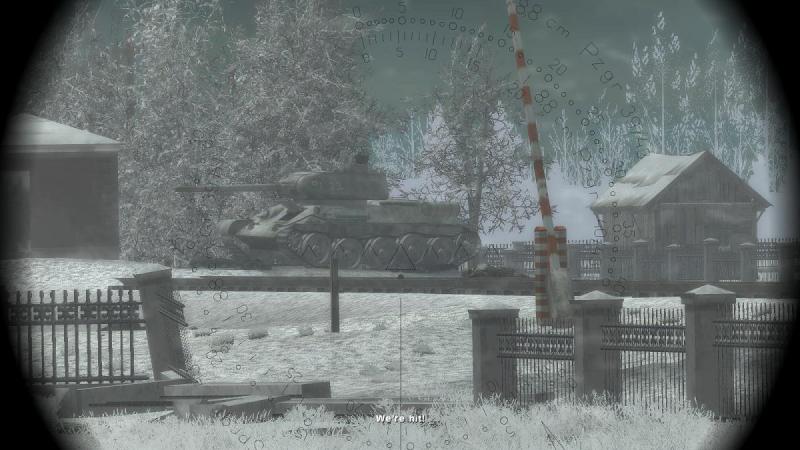
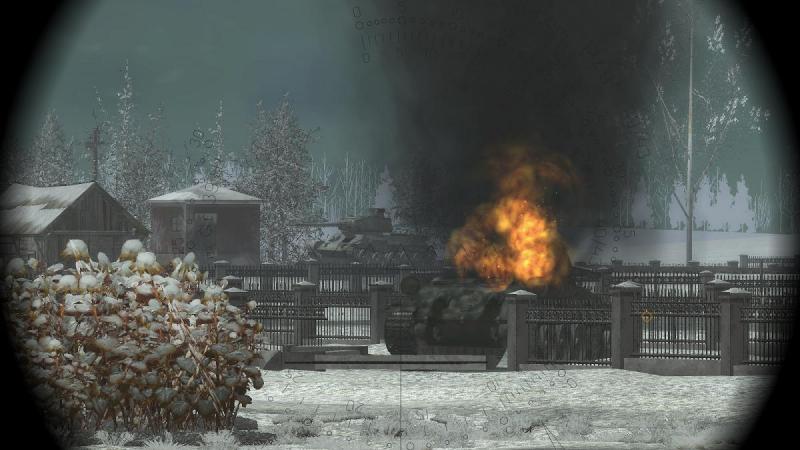
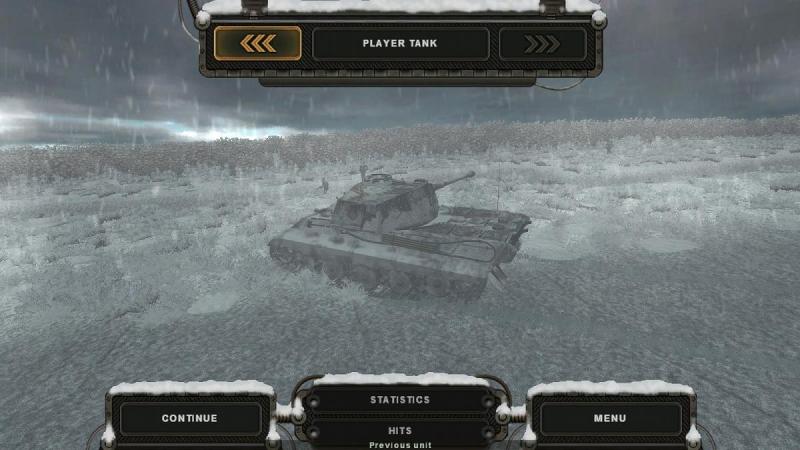
The ZeeWolf mission, part 2 As I trundled cautiously around the corner of the woods, I wasn't really expecting to bump into any nastiness, since the remaining Tiger in my 3-tank platoon had already just driven on ahead that way. You can imagine my surprise and general consternation when my AI tank commander called out a fire order for a T-34-85 which was racing towards us down the gap between the woods, a mere two hundred metres away. I hastily lined up my turret with the commander's line of sight as indicated on the turret position indicator graphic. As I was playing as gunner, I had already swung my turret towards the danger zone so I was able to pick up the target quickly. Fortunately, perhaps because he was preoccupied with the other Tiger, the T-34's turret was turned away from us. He was crossing fast from right to left and before I could get off my first round he disappeared behind a wrecked tank. I let him have it as he came out the other side. Evidently caught by suprise, he pulled back behind a killed T-34 but not tightly enough and urged on by my tank commander, I put two more rounds into him, and that was that. On I went, past the sad little clutch of wrecked AFVs. As I went, I was followed by a half-tracked SPW (Shutzenpanzerwagen or armoured personnel carrier) which seemed to represent some infantry support. It was an impressive scene of armoured destruction, even if my crew could only claim one of the victims for ourselves. The SPW's driver had evidently either been trained in a fairground, or he had rather overdone the Schnapps for at one point, he seemed to be playing dodgems with the enemy wrecks. But he then moved back in behind me and off we went, down the widening gap between the woods, in the wake of the other Tiger. ...to be continued!


-
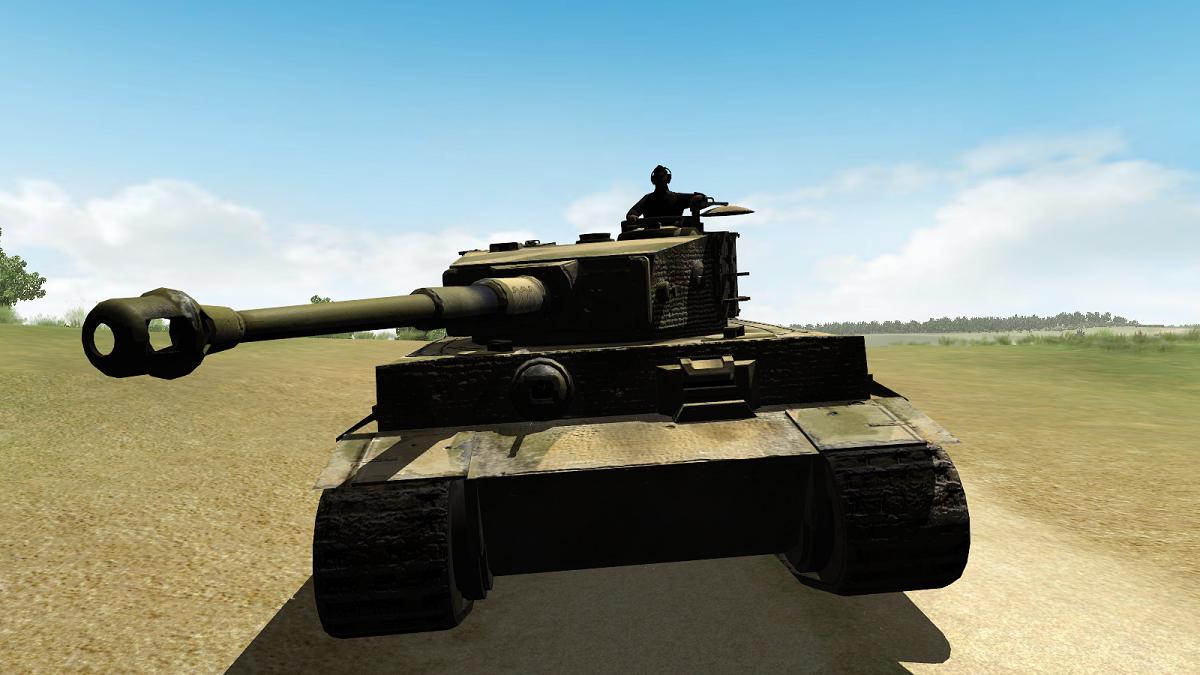
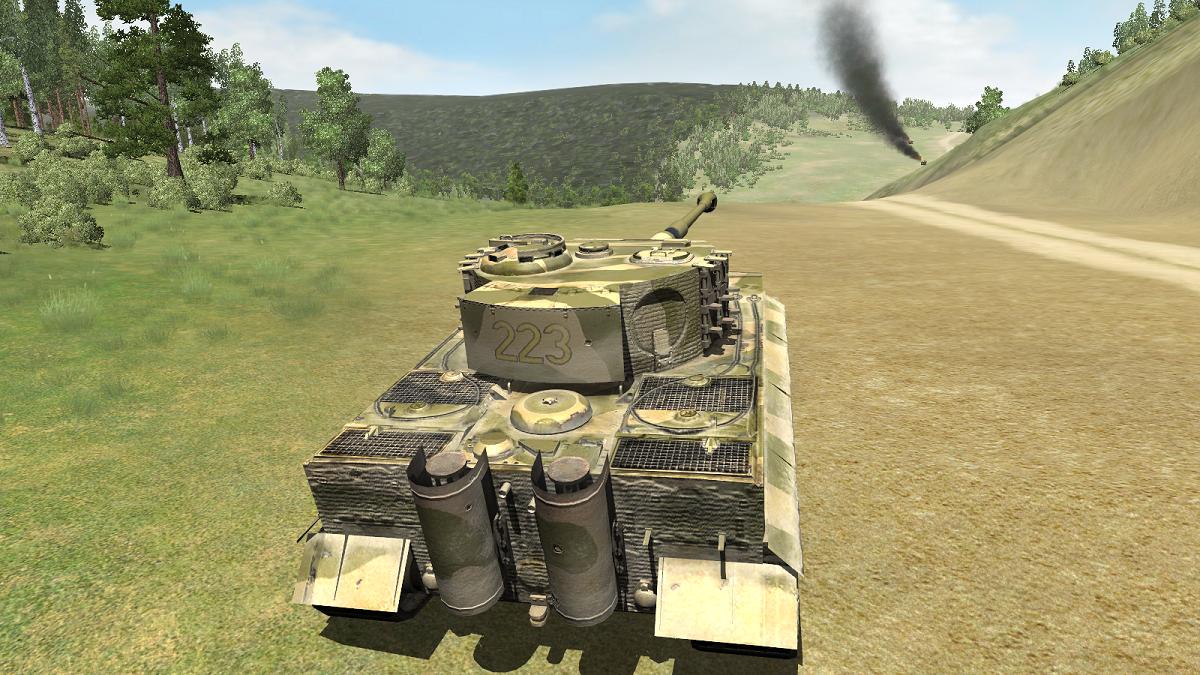
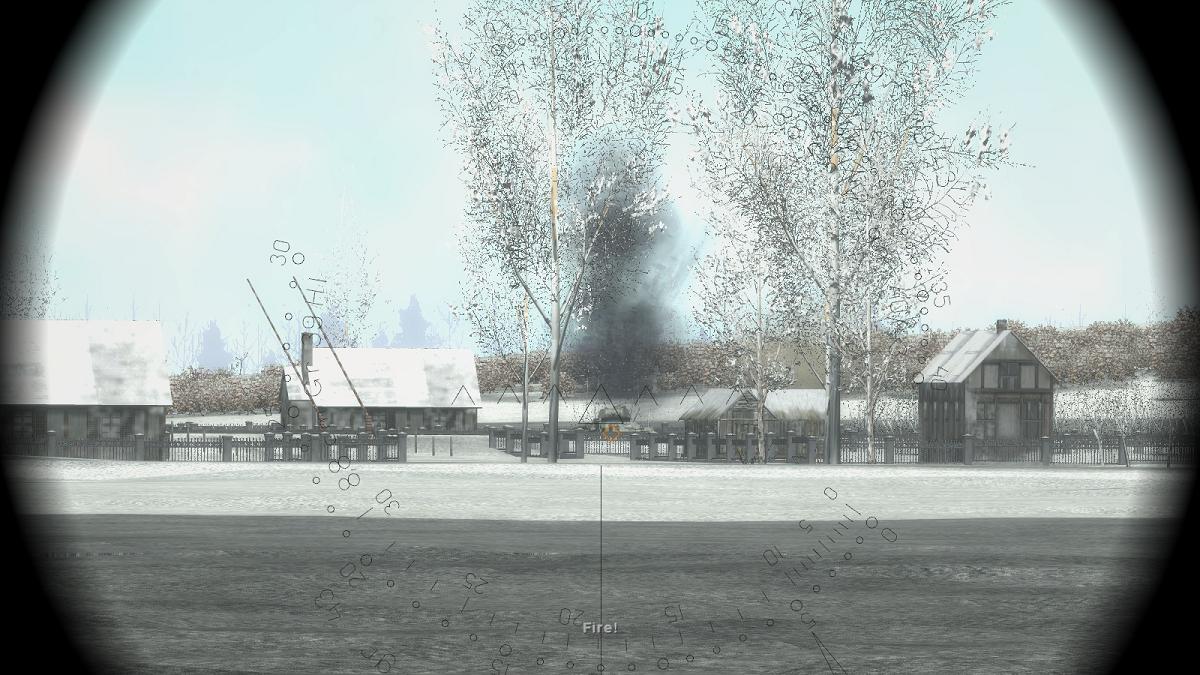
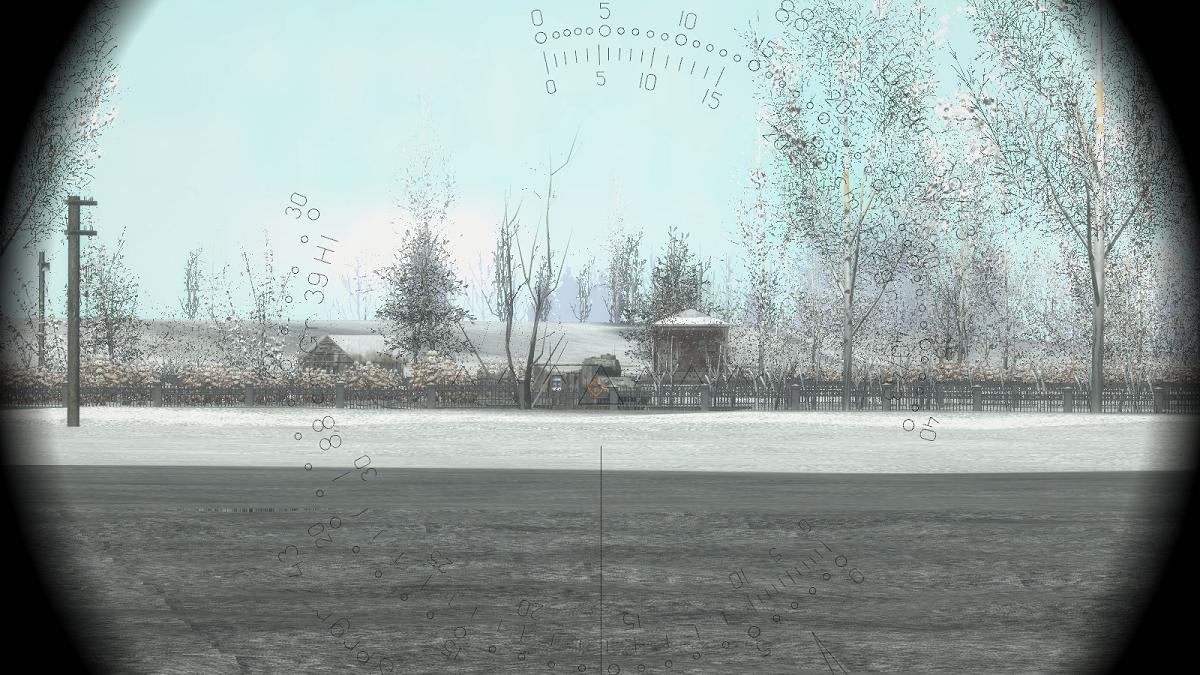
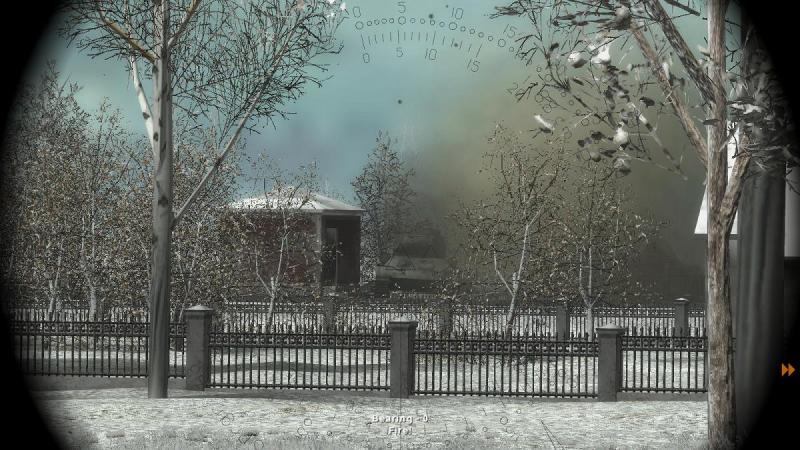
The ZeeWolf mission This mission comes with the pack of TvT freebies released by modder ZeeWolf. You can find more details of his project here. The mission's called 'Tigers Shake Kurtenki' and is based on a different part of the map to the stock mission. It may be unfamiliarity or an illusion created by different-time-of-day lighting, but the visuals look better - my Tiger no longer has the very deep black shadows and the colours of tanks and landscape appear less washed out. And it's back to the earlier rubber-tired roadwheels. After unzipping he package in which it came, the mission appeared alone in my available German single-player missions, instead of the stock one. Here's the briefing. As an operation order, it's in a somewhat military format like the stock briefings, a bit on the light side perhaps but it gives me a passable idea of who I am, what's going on and what I'm supposed to do about it. As before, having launched the mission I went to the gunner station and turned on AI driver and commander - if you switch stations without also then activating the AI roles, your tank just sits there quietly, engine off, refusing to budge. The brief had stated that I was 'commander of a Tiger unit' so I looked around for the others - five tanks would have been full strength for a platoon, but there were just three of us (the usual strength of a Soviet tank platoon). My first problem was that it took a while for me to orient myself and decide where to go, as my map was set with my tank marker stuck bottom left, pointing 'off screen' and I didn't know how to change this without opening the manual. One of the other Tigers moved off rapidly and with the third Tiger to my right, I followed, hoping that at least one of the others knew where he was going! The failure of TvT to enable you to command the other tanks in your platoon really is a big negative. Next best would have been making you the 'wing-man' of an AI platoon-leader, but it doesn't do this either. The nearest you can come to playing as a 'wing-man' is decide for yourself who your boss is and try to conform to his movements and actions, in the complete absence of any commands or similar assistance from him. By the time I had discovered that the F5 key centered the mini-map on my tank and oriented myself, I was well behind the Tiger I had decided to follow. A few hundred meters ahead, he turned right, away from Kurtenki, and headed towards a wide gap or ride between some tracts of woodland. A few seconds later my tank commander indidated an APC target. This was a lend-lease US half-track, which fairly whizzed out of the same gap in the trees, crossing my front from right to left. He must have driven right past the other Tiger! I had an AP round 'up the spout' and cracked off a couple of these at him, missing him both times as he disappeared behind some low buildings on the edge of the village. A second later he went up in smoke - I think the third Tiger, which was still near me, got him. At this point, it kicked off again. A swarm of Soviet infantry emerged from the gap in the trees, also heading for Kurtenki and more or less straight for the leading Tiger. I recovered from my surprise and opened up with the co-ax, hosing the enemy troops as they doubled across my front. My MG fire bowled over the Ivans like pins in a bowling alley. I got the last of them just as they reached the leading Tiger. Yet another enemy half-track then appeared from the right and drove hard for Kurtenki, straight past the leading Tiger, who was shooting at something in the direction from which the enemy vehicle had come. My tank commander belted out a fire order and I got my sights onto the Ivan, who was either foolishly courageous, completely mad, or blind drunk. Again the half-track made it into cover on the outskirts of Kurtenki, but again, one of the others got him. Or perhaps there were German troops in the village, who had clobbered him. Either way, he was done. I turned my attention back to the right, were the skies were darkened by the smoke from several burning vehicles, likely more Ivans of some sort which the first Tiger had shot up. With the other Tiger still to my right, I rolled forward at full tilt, ignoring the burning half-tracks at Kurtenki, over to my left. As I got closer I saw that the leading Tiger was smoking. What had got him, I was not sure, but I suspected it was enemy armour, still hidden around the corner of the woods on my right. I came up to the edge of the woods, slowing down as I edged towards the corner. The third Tiger had no such qualms and roared on ahead, past what I could now see to be the wrecks of miscellaneous Soviet AFVs, some still burning. By this time the lead Tiger, to my left, had also begun to burn fiercely. I edged cautiously around the corner, towards the cluster of destroyed enemy vehicles, which were a mix of T-34-85 tanks, half-tracks and SU-85 self-propelled guns. The other Tiger showed no such caution and despite being nominally his platoon comamnder, TvT being what it is, I could excerise no control over him as he rattled off down the track and out of sight. My continued caution, despite my comrade's confident performance, was soon to be proved wise! ...to be continued!
-

Wings Over Flanders Fields - the CombatAce Review, part 3
33LIMA replied to 33LIMA's topic in Game Reviews
Here you go von Oben: http://simhq.com/forum/ubbthreads.php/ubb/showflat/Number/3923620/Searchpage/2/Main/384856/Words/texture+size/Search/true/Just_received_Woff!#Post3923620 -
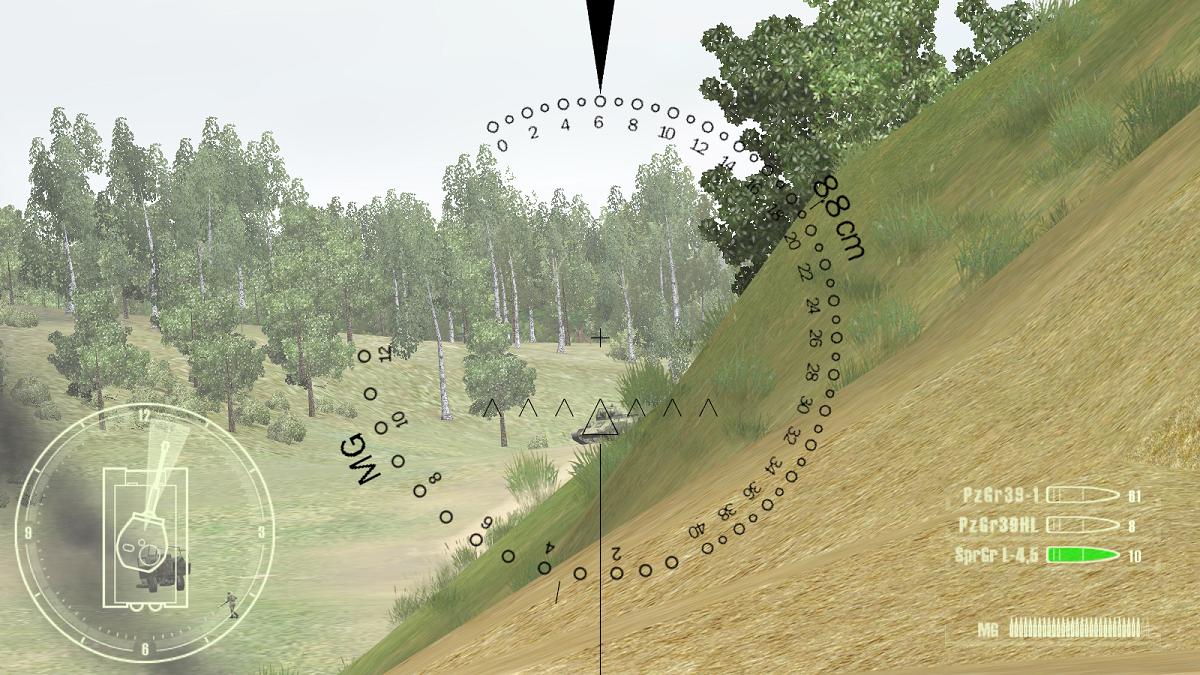
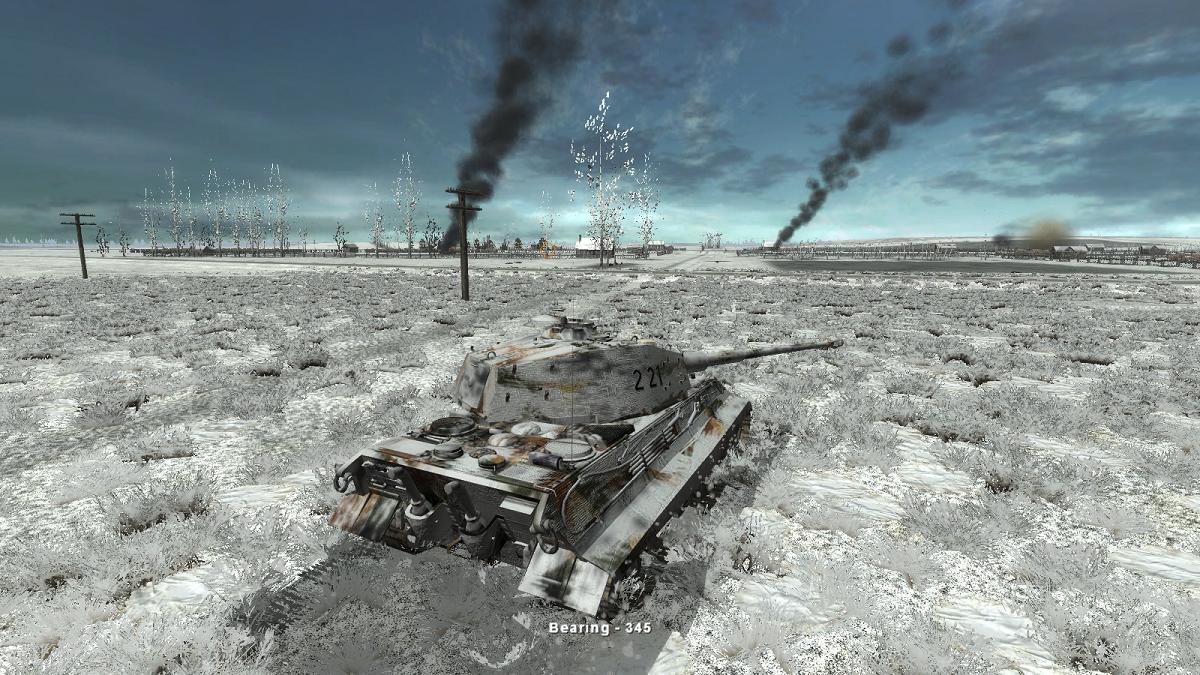
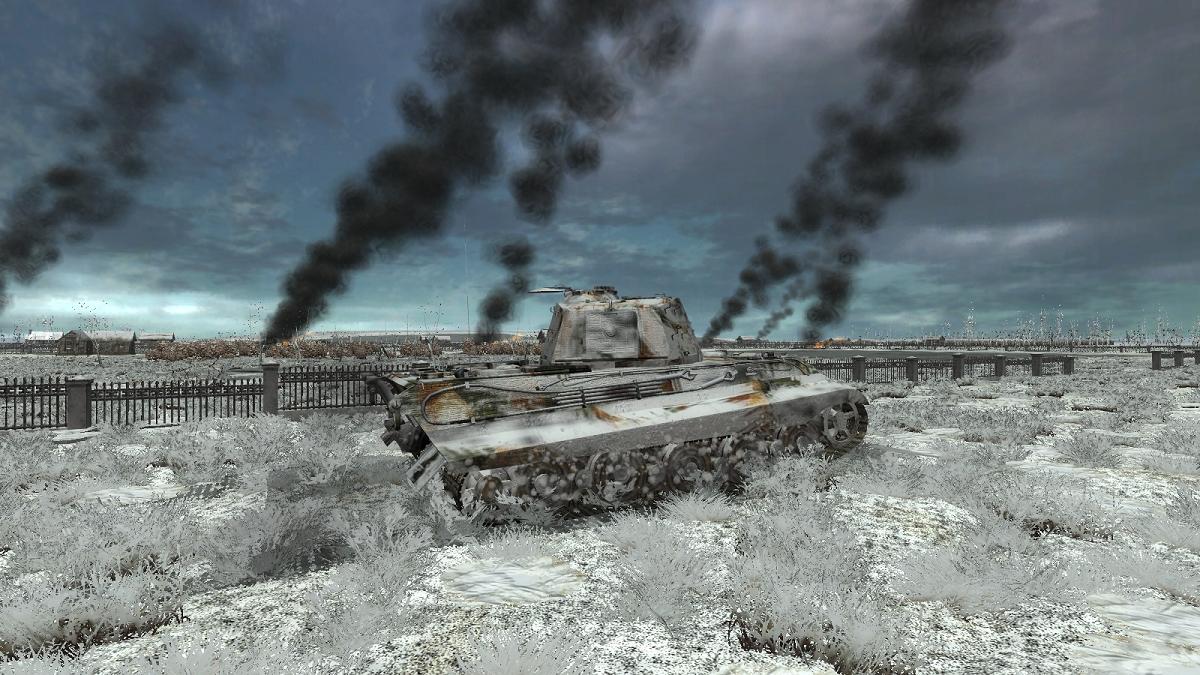
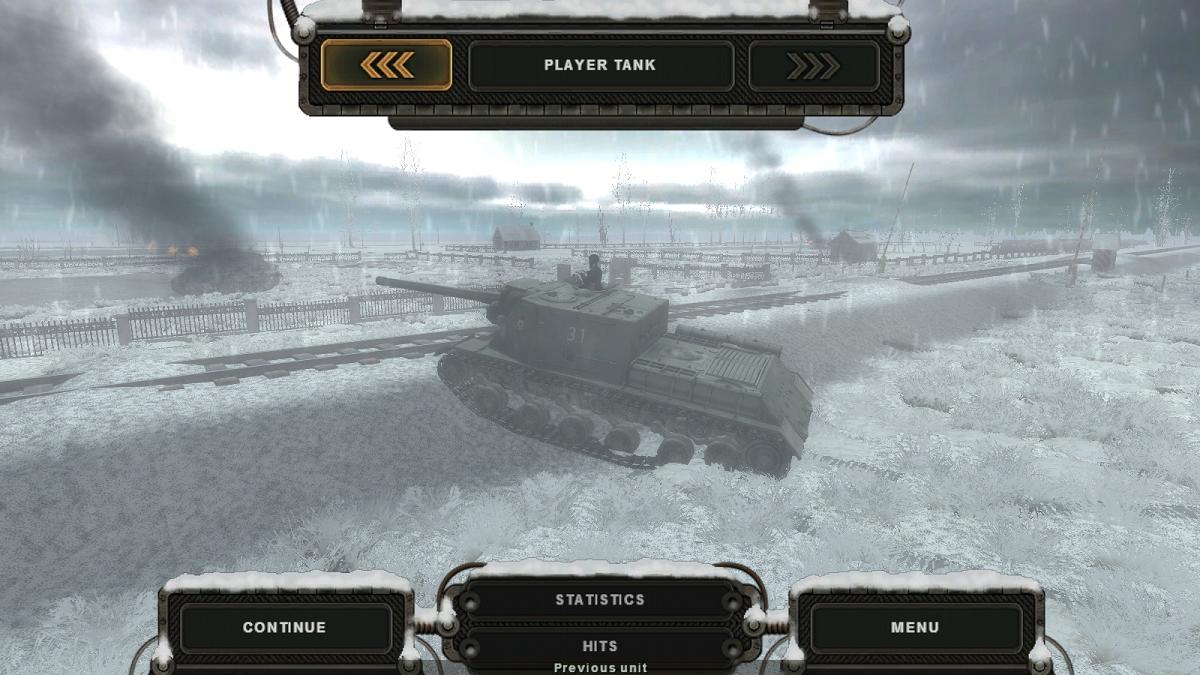
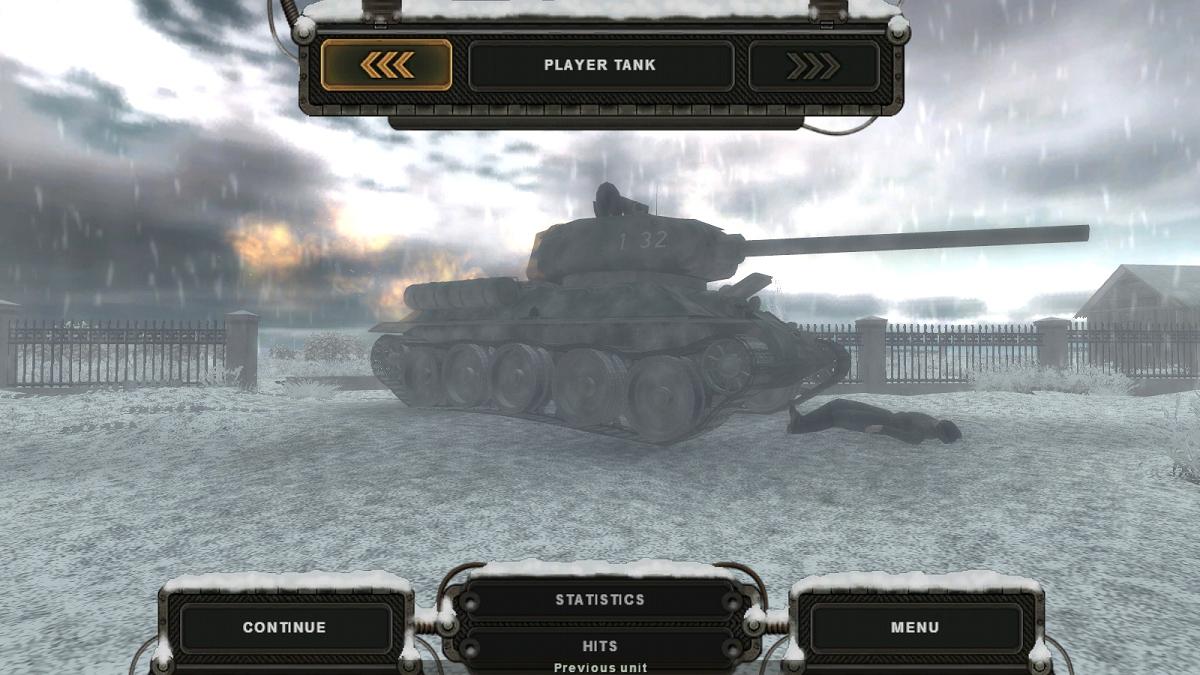
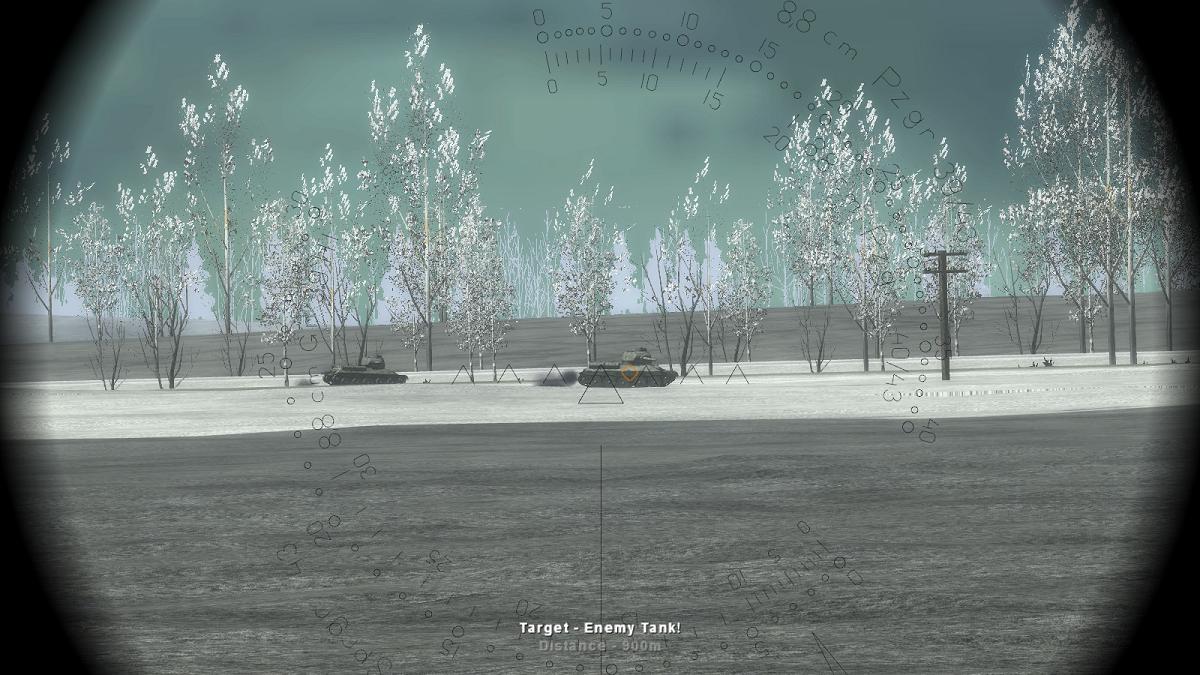
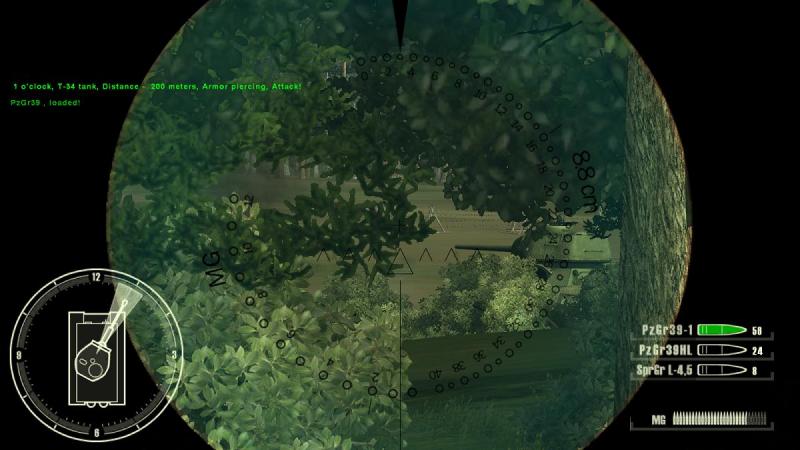
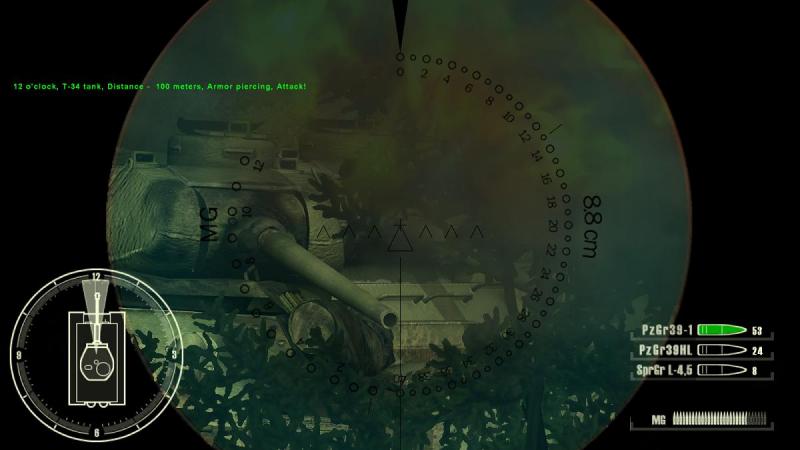
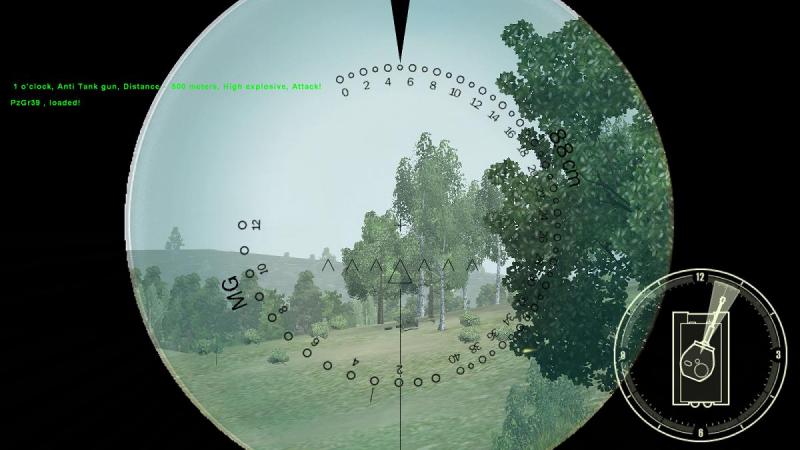
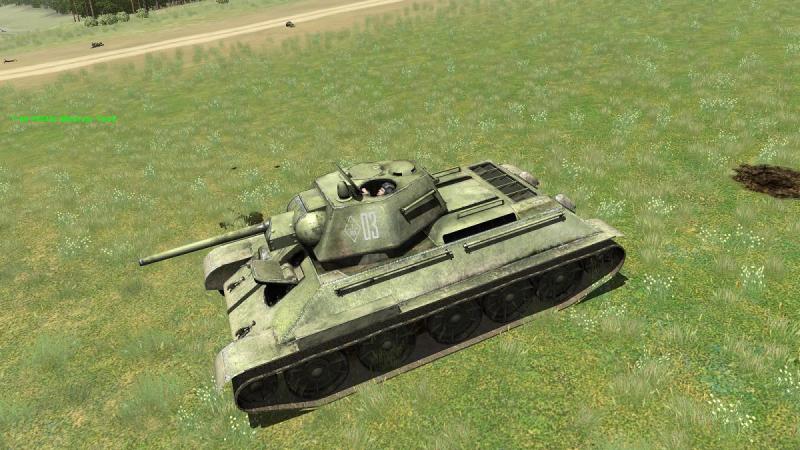
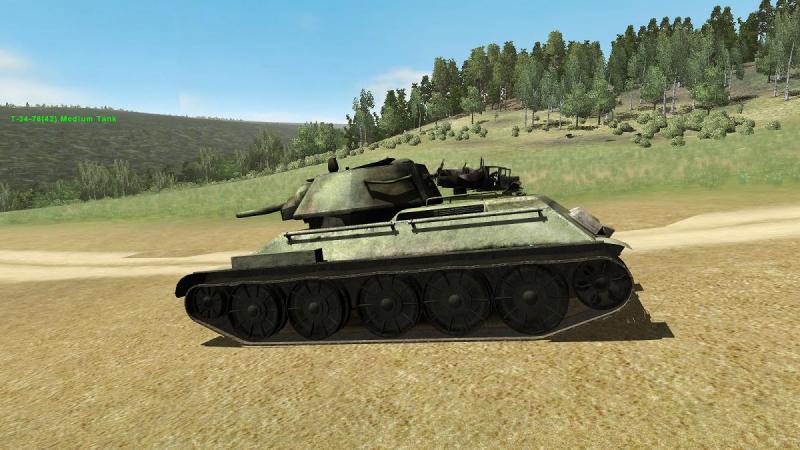
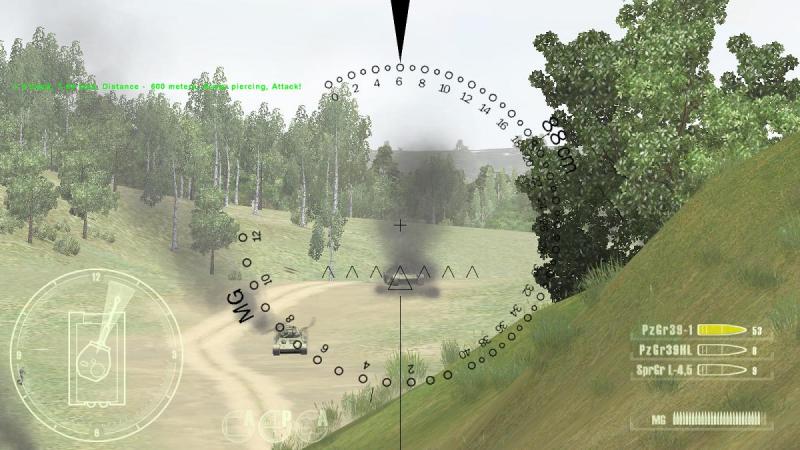
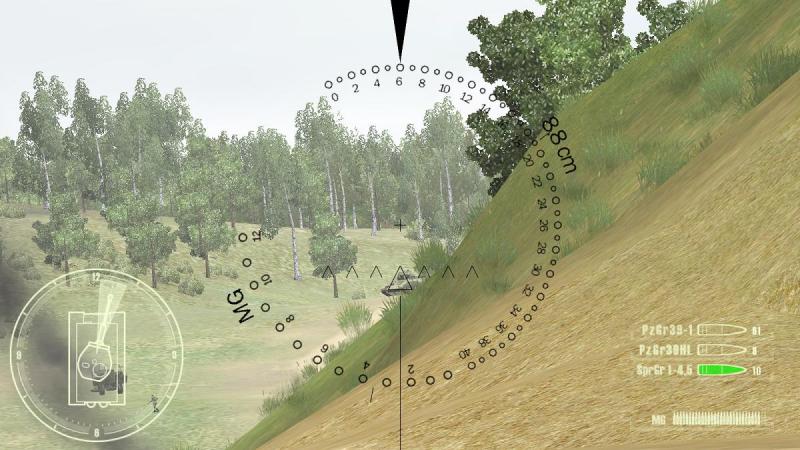
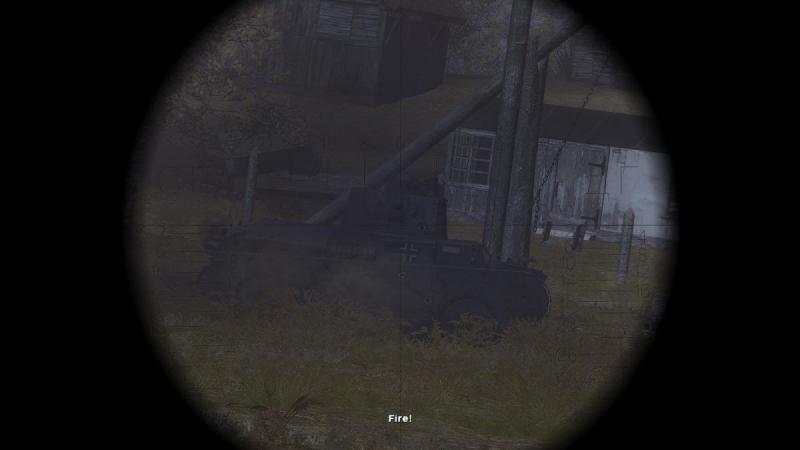
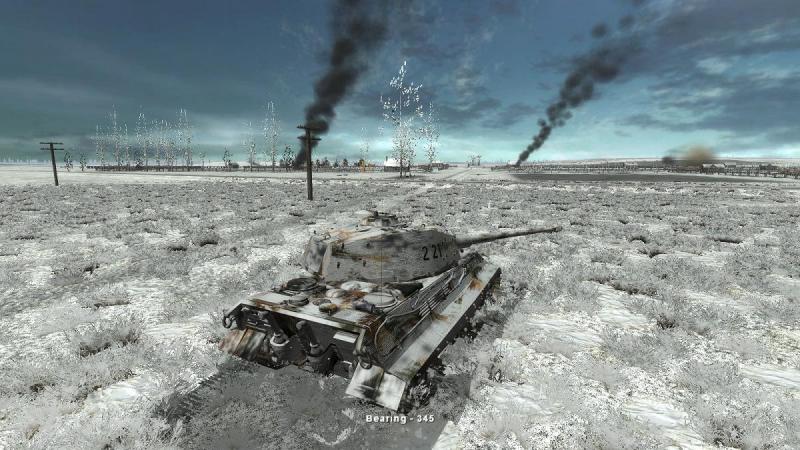
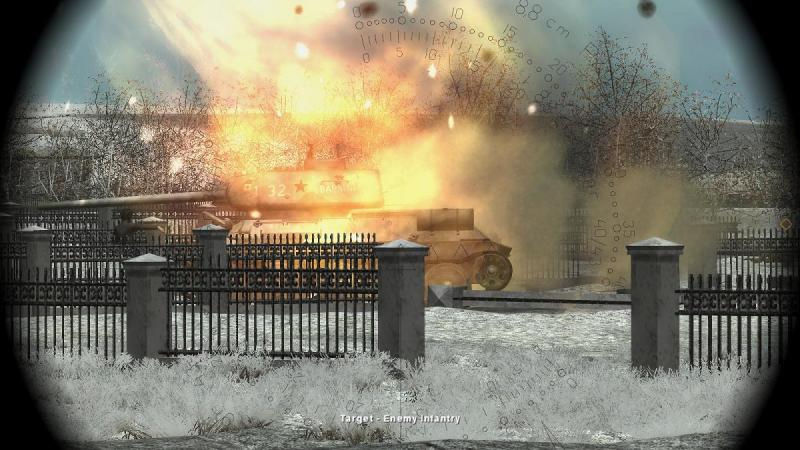
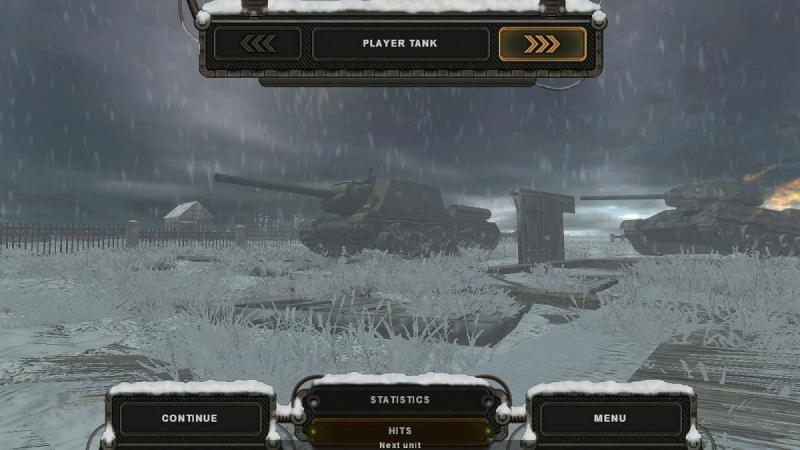
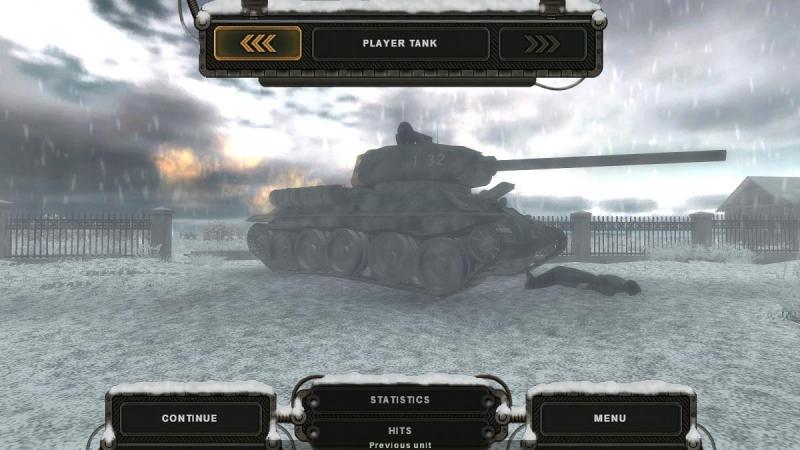
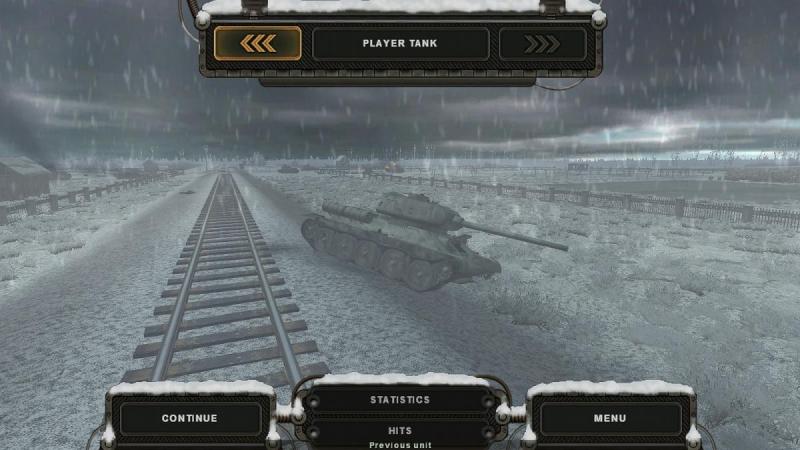
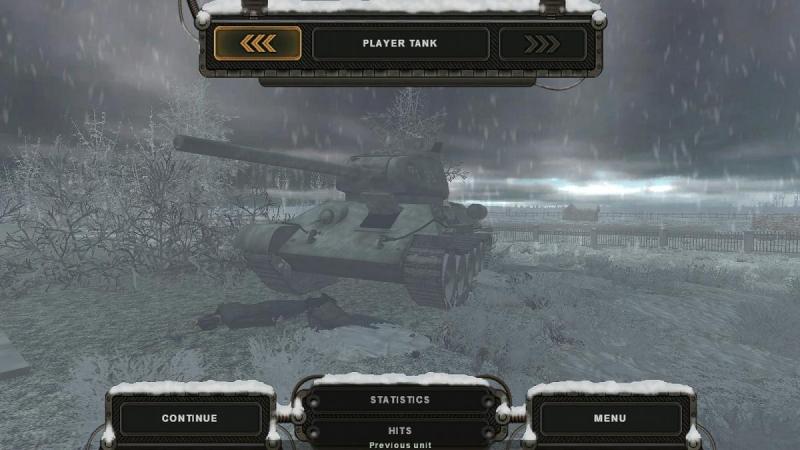
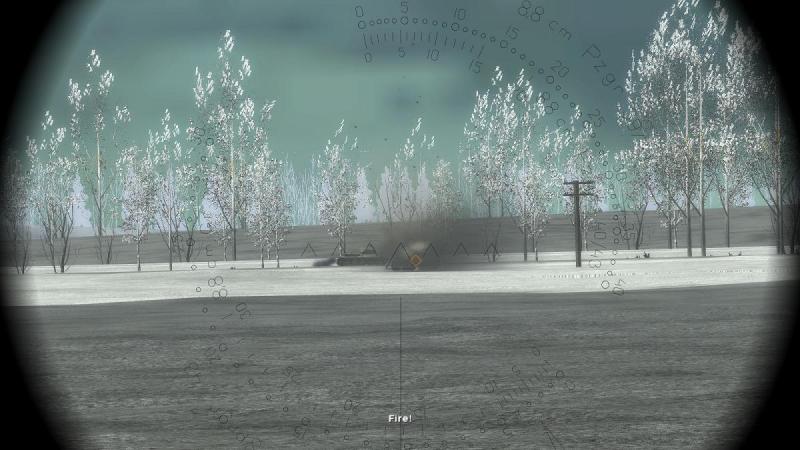
Ivan's revenge As I was edging towards the crest, I had noticed some fading black smoke curling up from the dead ground in the valley ahead...roughly in the direction in which I had last seen the other Tiger tank disappear. Not good. Back in the gunsight view again and scanning for threats, I got another target indication from my AI tank commander, pointing out an anti-tank gun 500 metres away, bearing 1 o'clock. As well as the audio (crew voices are in German), you can see from the next screenie that you get a text read-out, in green, to the top left. I was caught out here because I had switched off all the 'HUD' displays for the sake of a better appearance in the external view. Back in the gunsight view, I had to glance down and fiddle with the keyboard to re-activate the turret position indicator! I should have either lined up the turret while still in the external view, or turned the turret position indicator back on the instant I switched back to the gunsight view. Once I was able to line up the main gun with the commander's line of sight, it was easy enough, having halted to fire, to pick up the target and let him have it. In this I was helped by the A/T gun being on roughly the same level, across the other side of the valley - once the main gun was lined up on the right bearring I didn't have to scan much up or down to pick up the target. And at this close a range, I didn't have to fiddle about with the sight's range settings, before getting the desired result. The gun destroyed, I trundled forward again, finally crossing the crest and dipping down into the valley, where lay the destroyed bridge - and a destroyed Tiger. At this point I made a big mistake and it all went belly up pretty remorselessly. The gradient down into the valley looked awfully steep; it seemed that I might get down too quickly, and get back up with great difficulty - or not at all. And so it proved. I tried to halt but by this time I was already on the slippery slope. Down I rolled. By the time I had brought my tank back under control and got her to a halt, I had already heard my TC calling out another target. This time it was a T-34 within 300 meters, roughly straight ahead. I scanned desperately through the gunsight but failed to pick him up - there is a fixed zoom on the gunsight, so the only way to get a wider angle is to switch to the full screen version of the gunsight view. I hadn't done this and my options quickly ran out while I searched for that Soviet tank. Armour-piercing rounds slammed into my Tiger (TvT re-inforces this by 'throwing' you momentarily back from the gunner's sight to an interior view of the gunner's station, irritating but perhaps effective!). Finally I acquired the target and shot him. At that range I could hardly miss and I didn't. I would have expected a single square-on 88mm AP hit to kill a T-34 at that range, with no questions asked. But I had an HE round loaded from the previous encounter and that didn't do enough damage. The T-34 promptly shot me again and it was goodnight, Vienna. I think that final T-34 was all that lay between me and completing the rather too precise and fixed mission objectives. Oh well, better luck next time! I'll be more careful about turning off HUD displays in future, especially the turret position indicator which is really essential for effective gunnery, when you need to respond quickly to a target indication from the tank commander and lay your gun onto his line of sight. You don't have the little orange edge-of-screen arrows that prompt you in Steel Fury. Another lesson learned. After a TvT battle you can tab around the other vehicles or guns involved in the mission, and here is one of my kills, a 1943 model T-34-76. in TvT, the bent gun is common in killed tanks - T-34s, anyway; not very realistic perhaps but it is a good visual indicator of a dead tank. Behind him, one of the Soviet trucks lies smashed with the driver slumped in the cab. You can't get Steel Fury-style statistics or hit point arrows in the TvT post-mission battlefield tour but it's clearly still nice to have. And here's the tank that ended the mission for me! Next, it's another mission at Kurtenki, but this time, a Zeewolf version. ...to be continued!


-
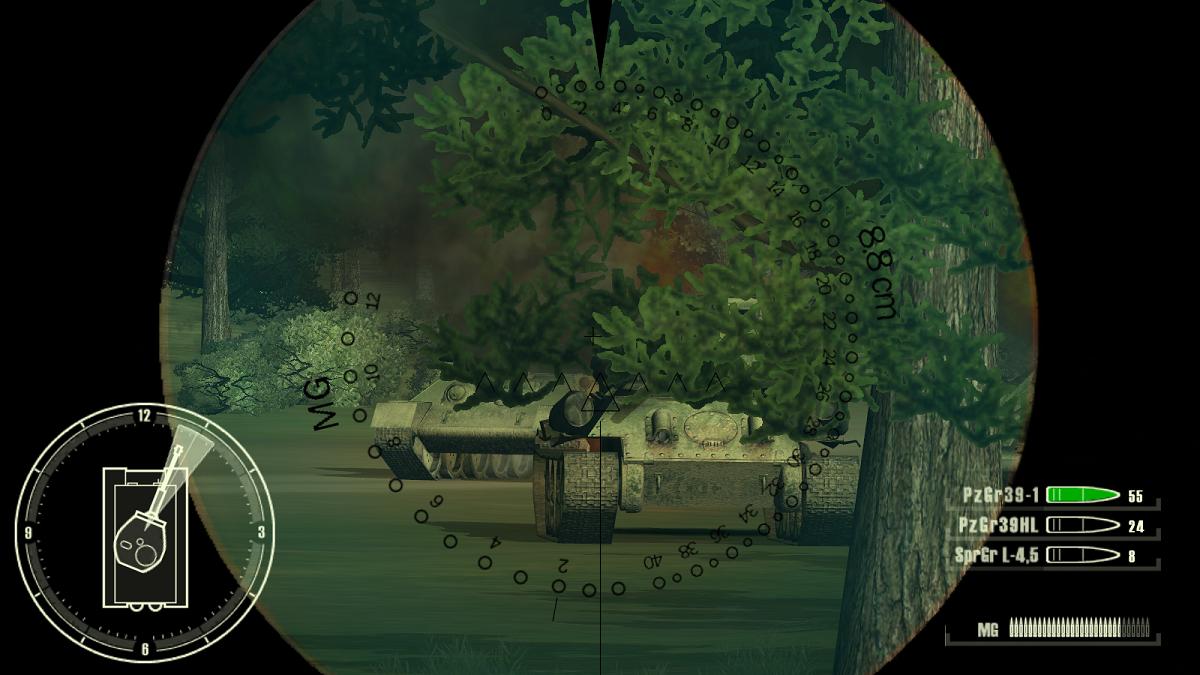
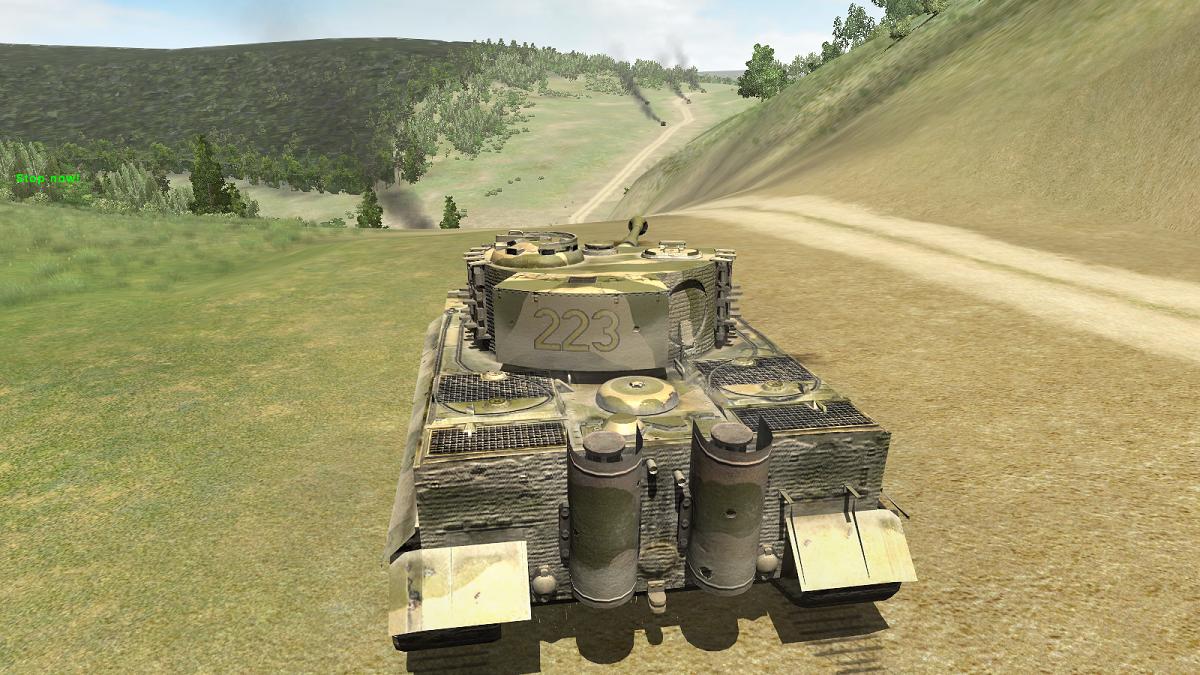
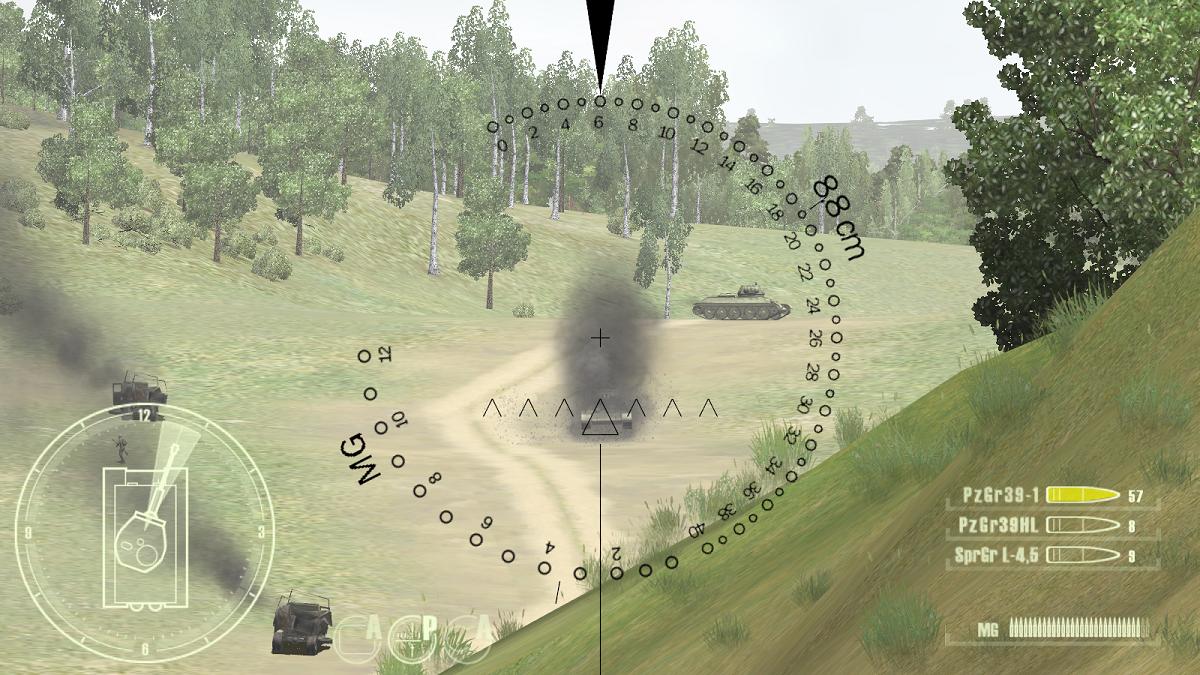
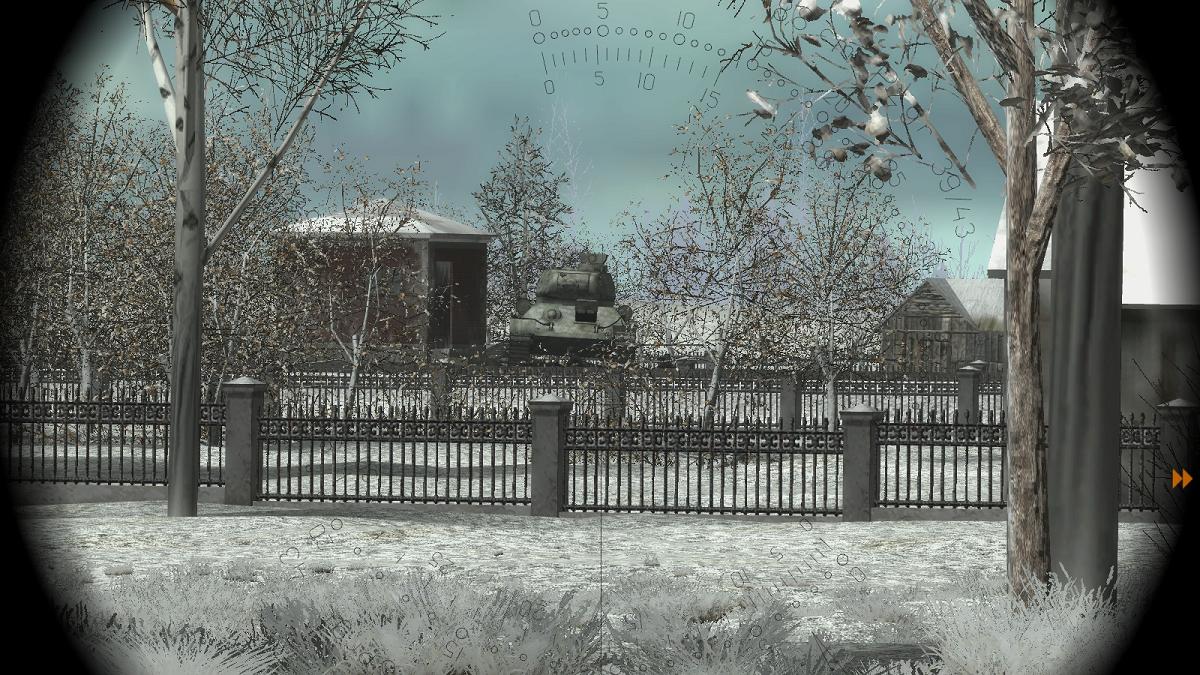
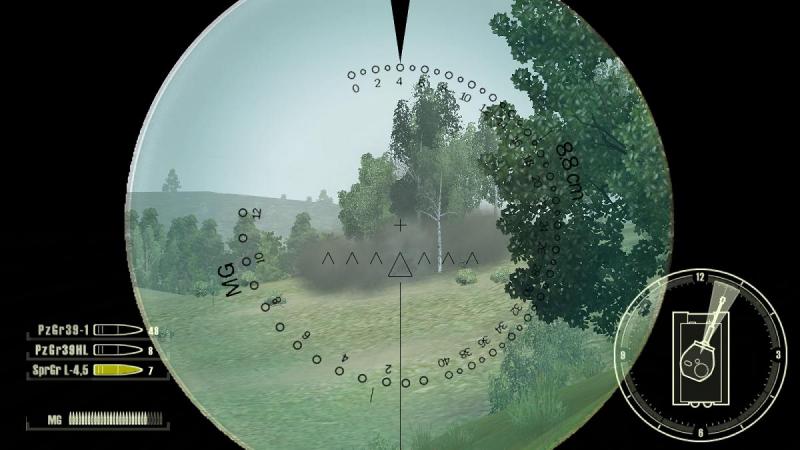
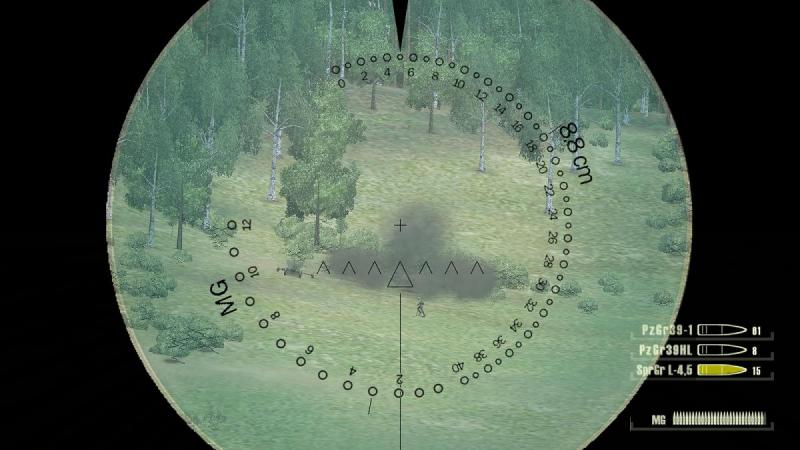
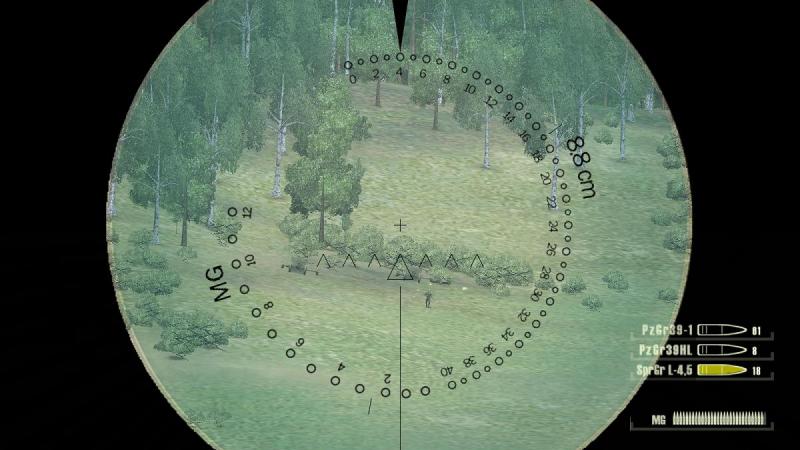
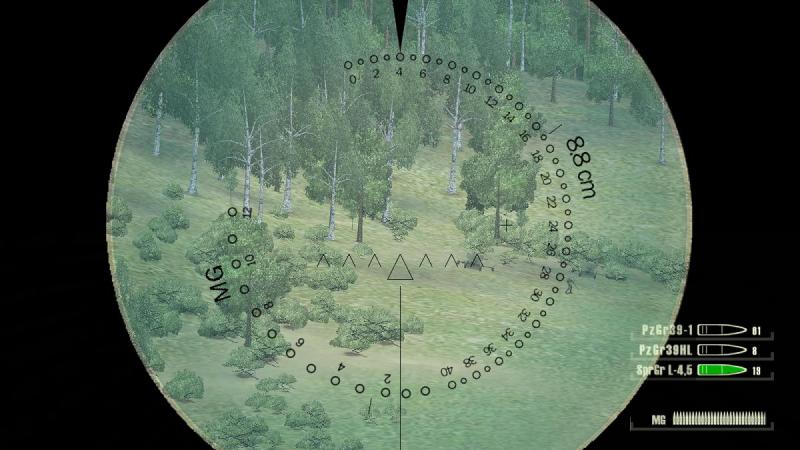
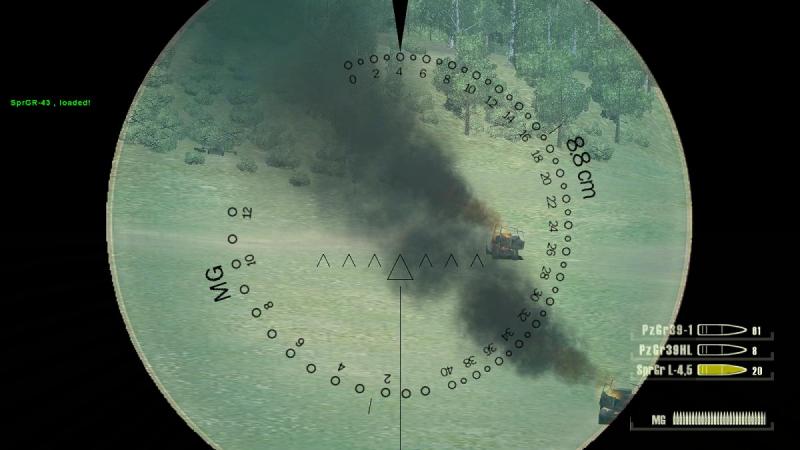
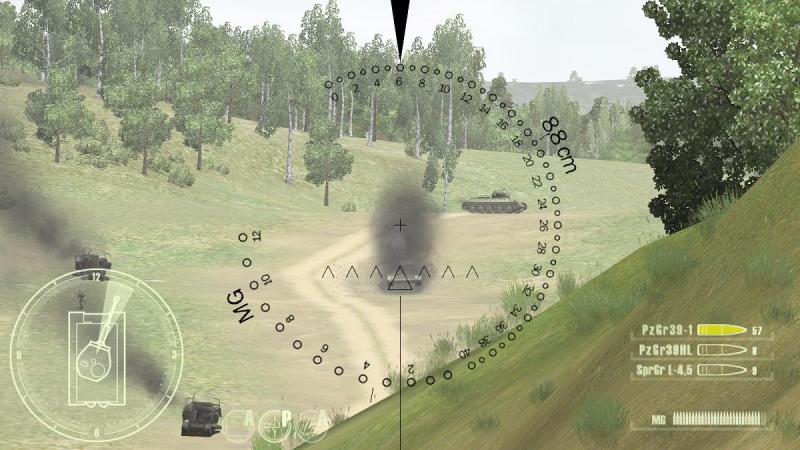
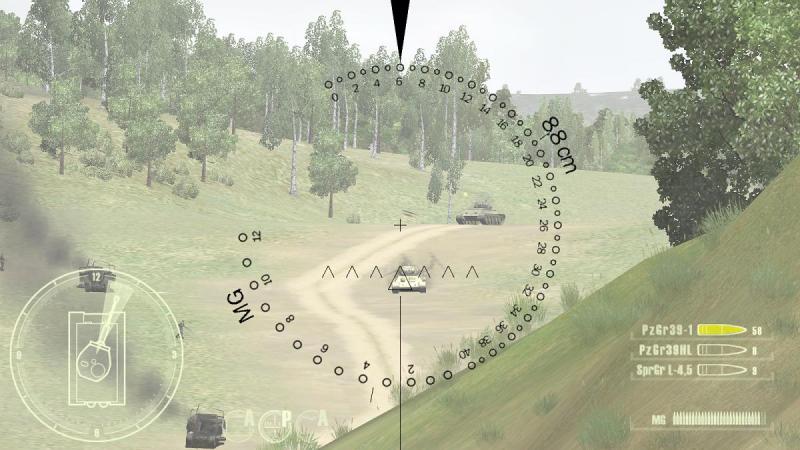
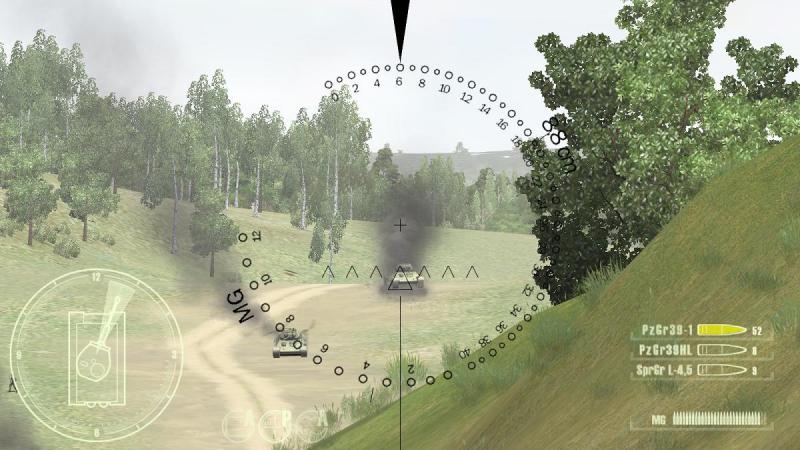
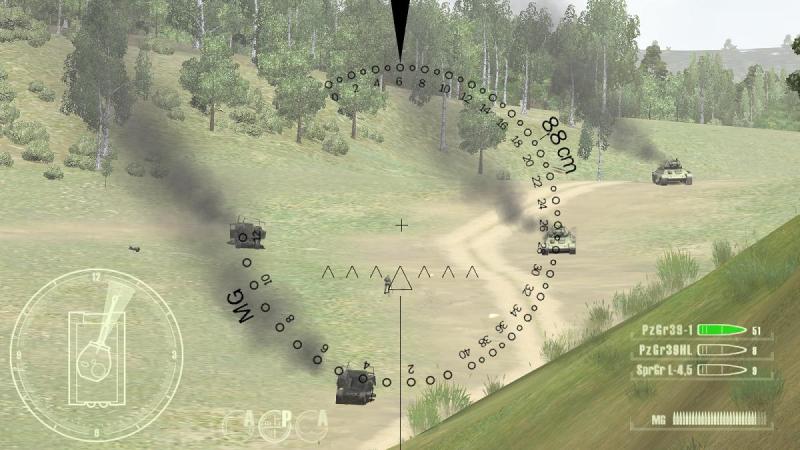
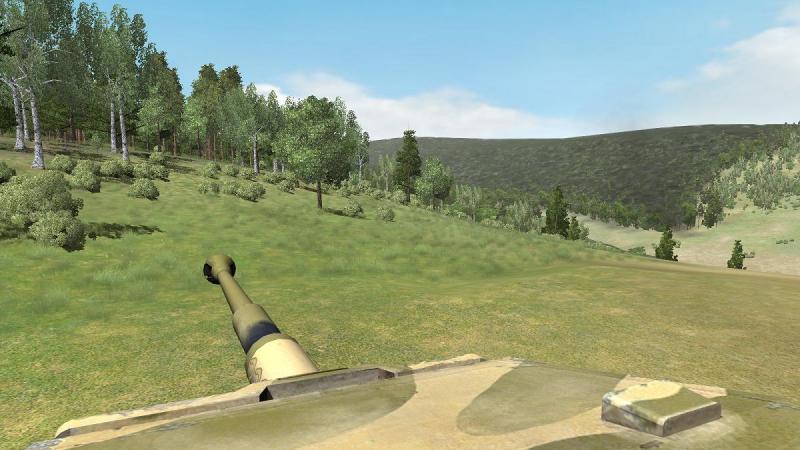
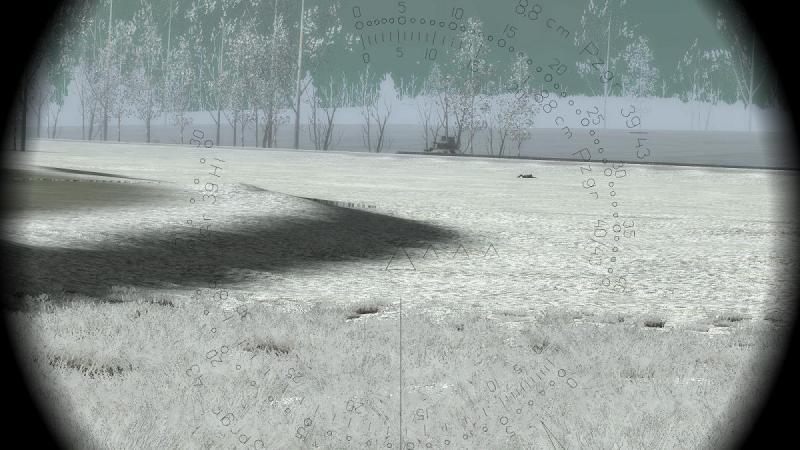
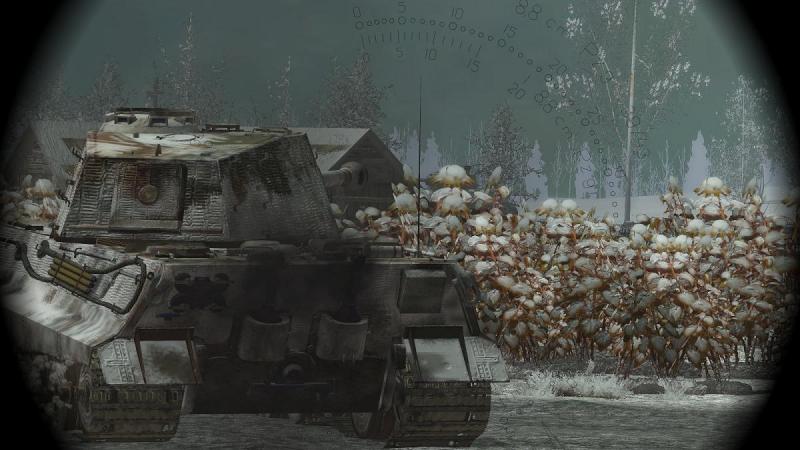
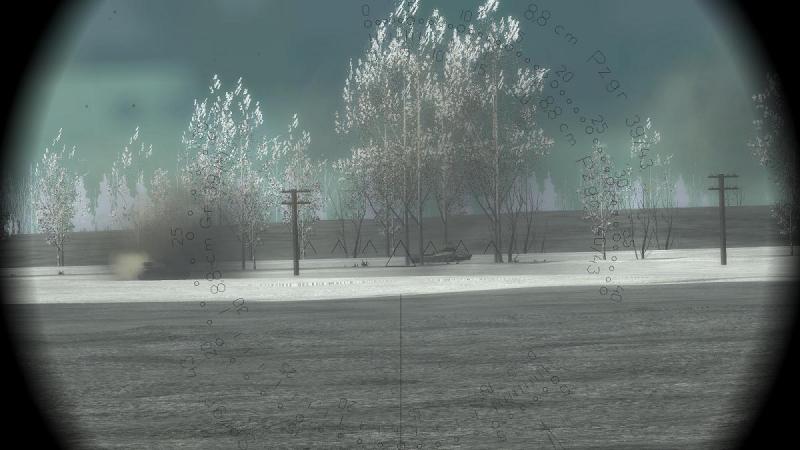
On to the 'two-way firing range'! Having seen the other Tiger tank rashly press on and disappear into the dip in the ground to my front, I decided that I would not be rushed. No need to risk the loss of two precious Tigers rather than one, to whatever Ivans might be waiting hidden over or in the river valley. Instead, I continued with my original plan - I crept up to the crest, pausing to scan for targets. First there came into view a series of what looked like the common Soviet 76.2mm field guns that had such a good anti-tank capability that captured specimens were often used or adapted by the Wehrmacht. Perhaps distracted by the other Tiger, they seemed to ignore me...but I didn't ignore them. As they came into view I hit them with HE rounds, raising my sights and hosing them and some nearby troops with coaxial MG fire, in between reloads. You can see lower left one of the four available on-screen 'Head Up Display' elements, showing ammo status, from top to bottom: standard Armour Piercing; High Explosive Anti-Tank (hollow charge); conventional HE; and co-ax MG. A green filler indicates that type of round is 'up the spout'. The other 'HUD elements are mini-map; turret direction and tank damage display; crew manning indicator (player or AI); and driver aids display. I tend to turn off the last two immediately after making my initial crew manning selections and to use the others sparingly, turning them off usually, which looks less 'gamey' but can be disorienting at the worst possible moments. But I nailed those field guns! There were several isolated Soviet soldiers on the hill, who ran around the whole time like headless chickens, and lasted about as long. Giving up on the last of such easy prey I nudged forward a little more, enabling me to see a little deeper into the valley. Two foolish Soviet trucks were rushing uphill away from me across the valley and they, too, were soon despatched. I edged forward a little more. This had been a little too easy, so far! There must be a catch, I felt sure. There was a catch, and edging forward a bit more, I soon saw what it was. It was a T-34-76, whose front end came into view, with his rear end masked behind the bank to the right of the track down which I had been advancing. I cracked off a quick round of HE, which missed - apparently tankers consider it best to fire off what they have loaded, even if it's not the right round, rather than unloading a live round in action. The T-34 backed up, so I quickly nosed forward to bring him back into view. I could have backed up myself, moved out of sight to one side then reappeared at a different point; but I had little elbow room for such tactics and I judged that a rapid second strike was my best bet. But when the enemy came into view again, there were two of them. I lost no time in engaging the nearer tank, with the right ammo this time - a Panzergranate 39 AP round, which unlike solid British AP shot, has a small explosive filler fused to detonate after penetration. Gunnery is one of the high points of TvT. The crew voices are generally better done than in SF, and the firing, empty brass and loading sound effects are also very good. The visuals are quite good too, with passable muzzle blast effects and decent visibility of your main gun tracers...and an even better view of incoming tank rounds! I quickly clobbered the first Ivan with three rounds then switched to the more distant one. The Tiger's 88mm is no tin-opener against T-34s, even at this short range, and more than one round seems often needed to be reasonably sure of a kill, unless the enemy 'brews up'. The second T-34 having received similar treatment I checked my fire. Though neither tank burned brightly, their bent and smoking appearance told the tale. Note that this last set of screenies is in a full screen gunsight view, which is less realistic but offers a wider field of view. I started edging forward again, feeling that victory was close and keen not to snatch defeat from its jaws at this late juncture. I traversed left and scanned the woods anxiously, lest some cruel mission designer had placed some Ivans there, to kill me at my moment of triumph. At this point I decided that for an even less restricted view I'd hand over to the AI gunner and play as tank commander. All seemed clear. I edged forward a little more, now scanning the area to my front alternately with and without binoculars. What could go wrong now? Quite a lot, as it turned out. ...to be continued!


-
Wings Over Flanders Fields - the CombatAce Review, part 3
33LIMA replied to 33LIMA's topic in Game Reviews
Thanks vonOben. The answer to your question seems to be 'yes' - it says on the WOFF website under 'campaign features': Accurate tracking of all player squadron pilots, including the players A and B flight members, in runtime, for accurate post mission results and tallies. Each of the AI pilots in your squad have logbooks which you can peruse to evaluate their progression strengths, weaknesses, claims and kills, and even view their medals I say 'seems' only because I'm not able to confirm this personally. I don't use labels for one thing. Also compared to OFF, air fights more often seem to result in the combatants becoming dispersed and certainly often now feature damaged enemies trying to escape home, instead of a fight to the death at or close to the point contact was made. These improvements make it harder for me to be aware of what happened to flight-mates in a fight. So far I have not seen any cases of pilots I have good reason to believe were lost, appearing back at the breakfast table the next day! And I have seen the logbooks of the other pilots in my unit, evolving as their own career progresses and often complete with what are often real pics of the actual real-life pilot like Arthur Gould Lee in 46 Squadron. -
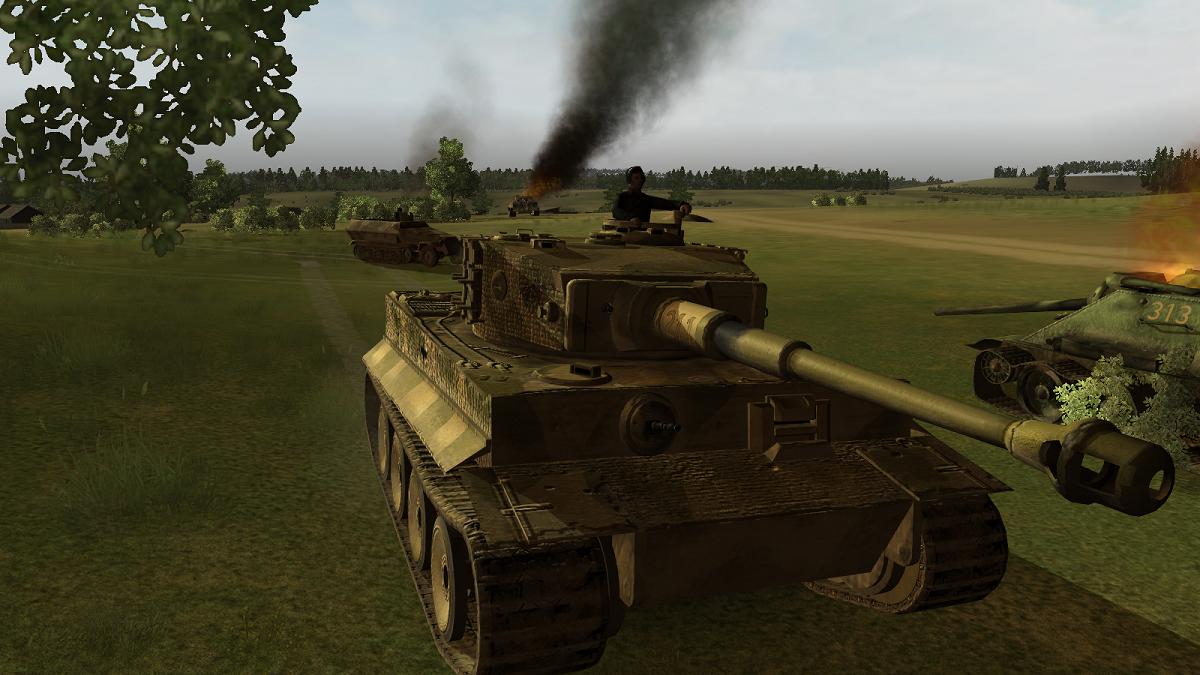
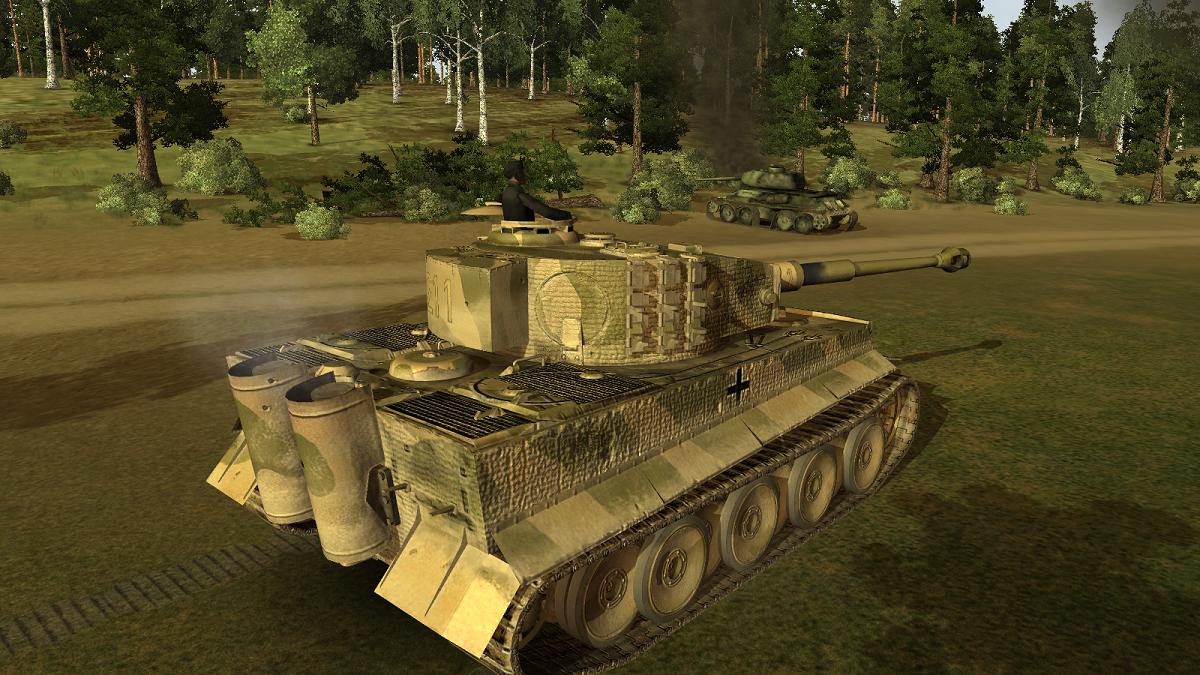
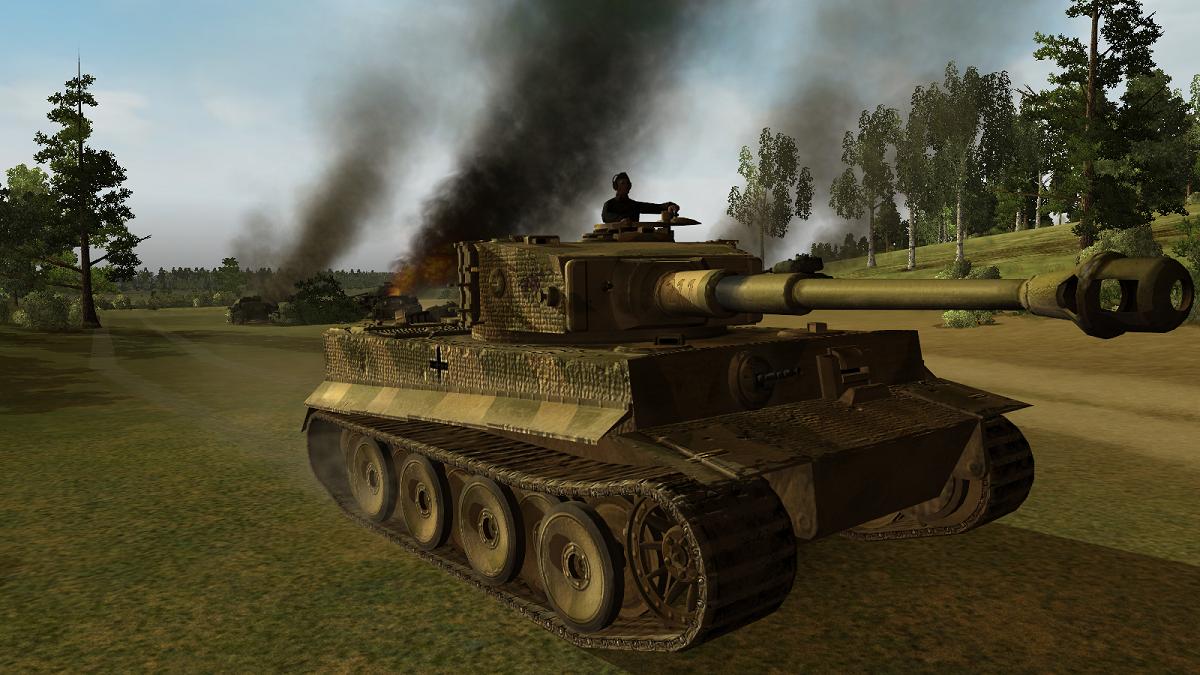
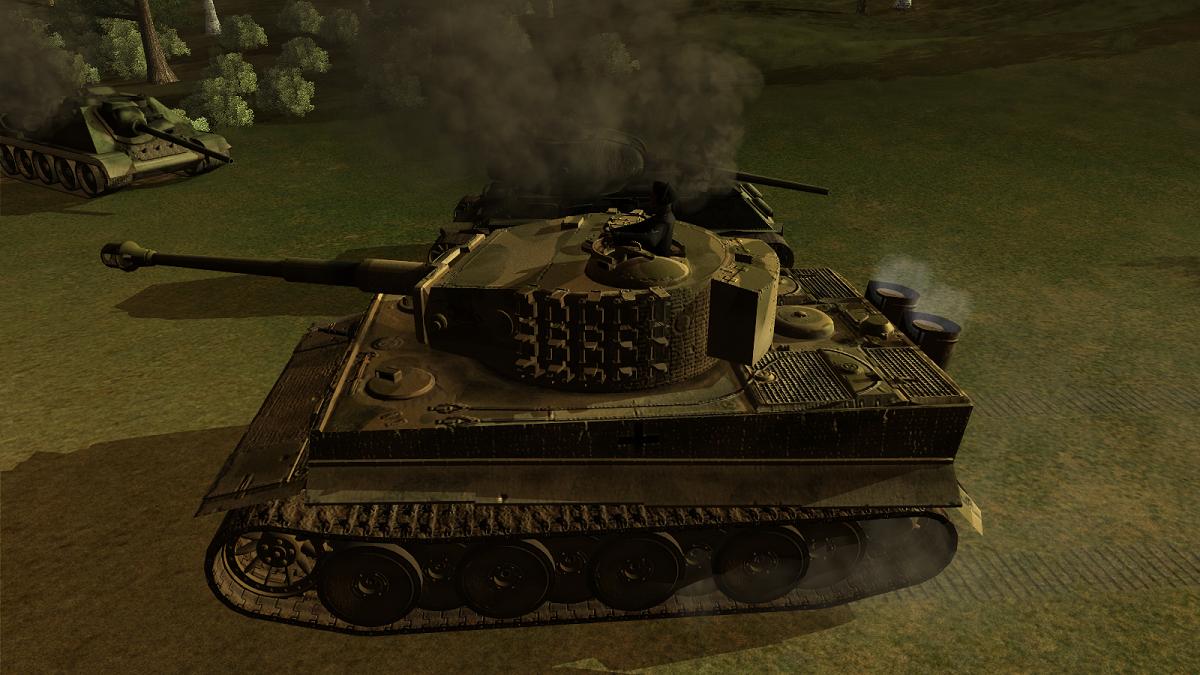
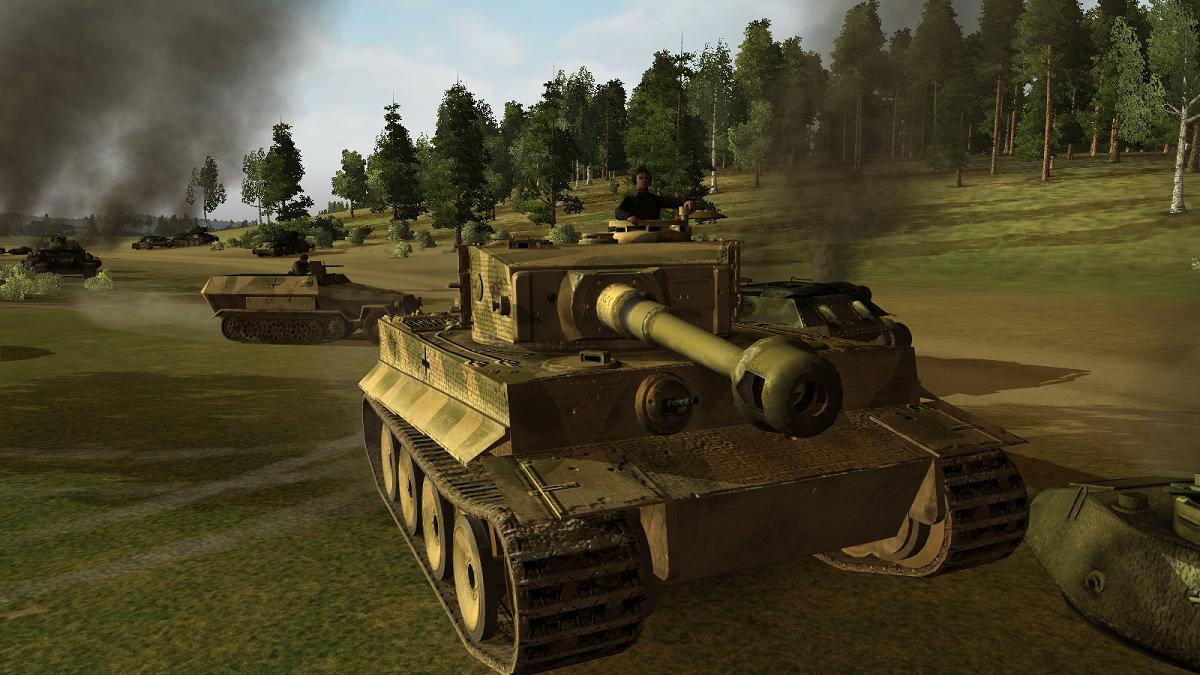
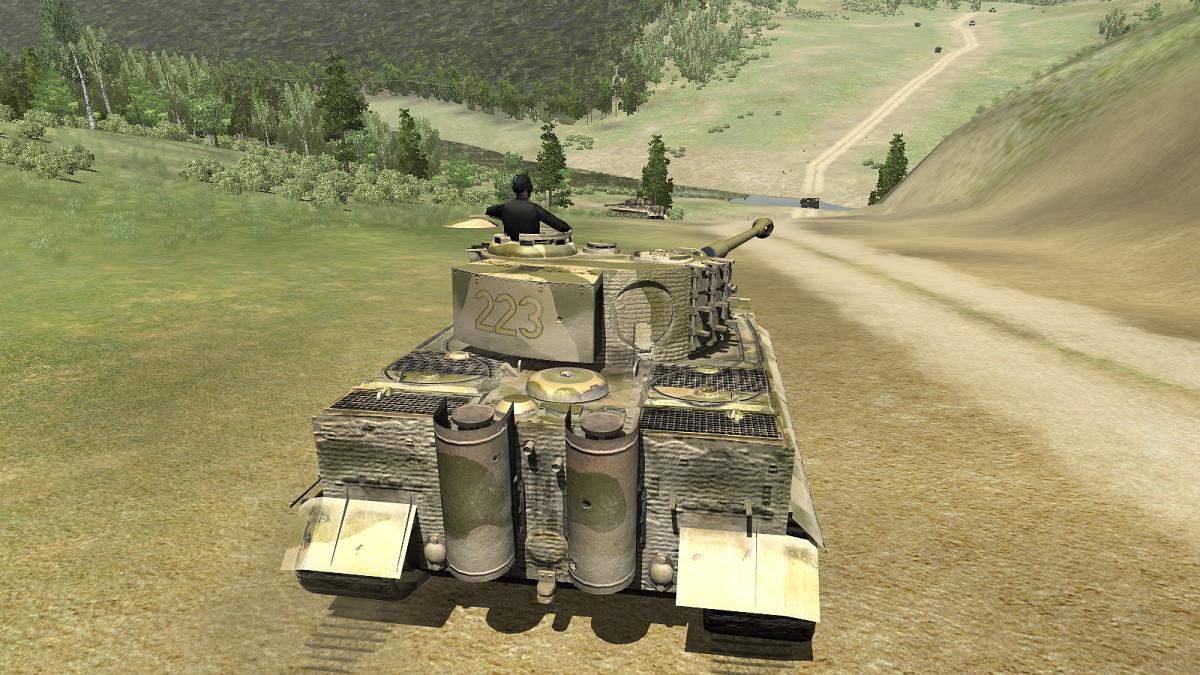
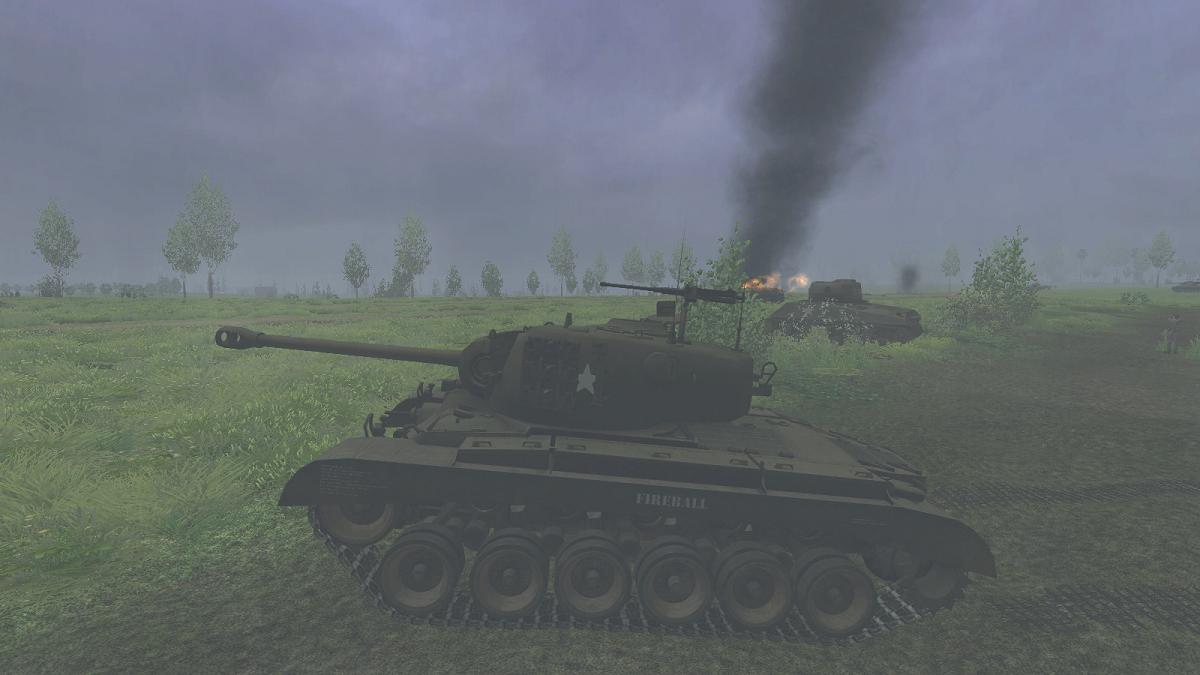
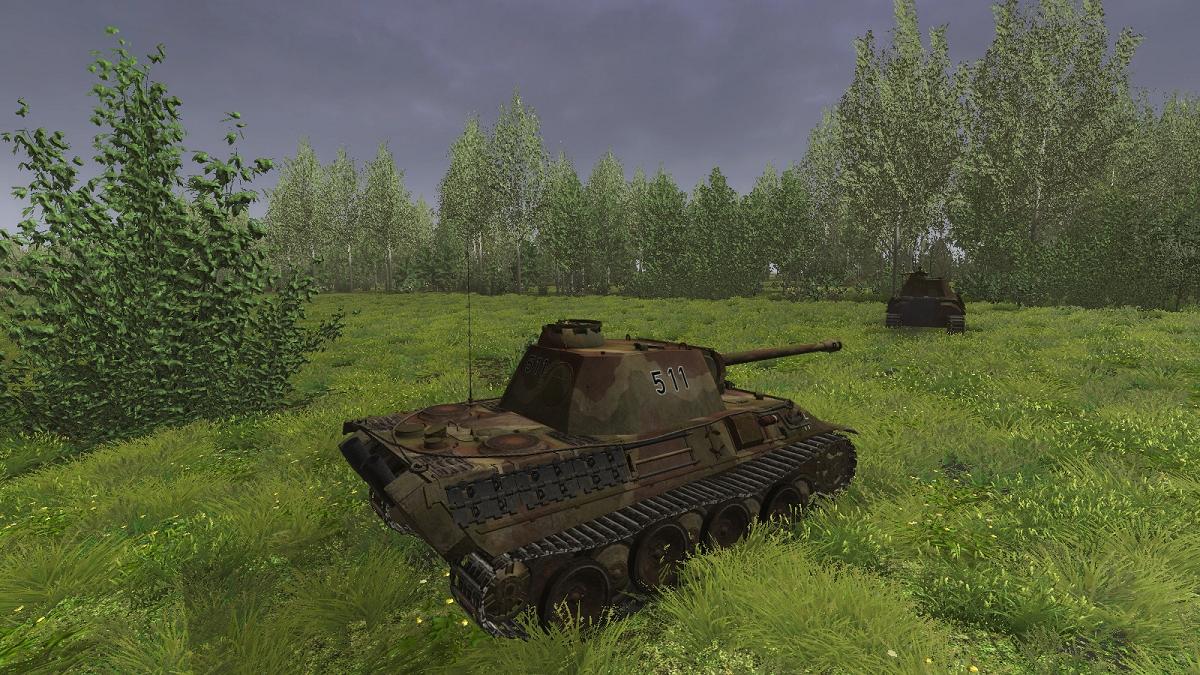
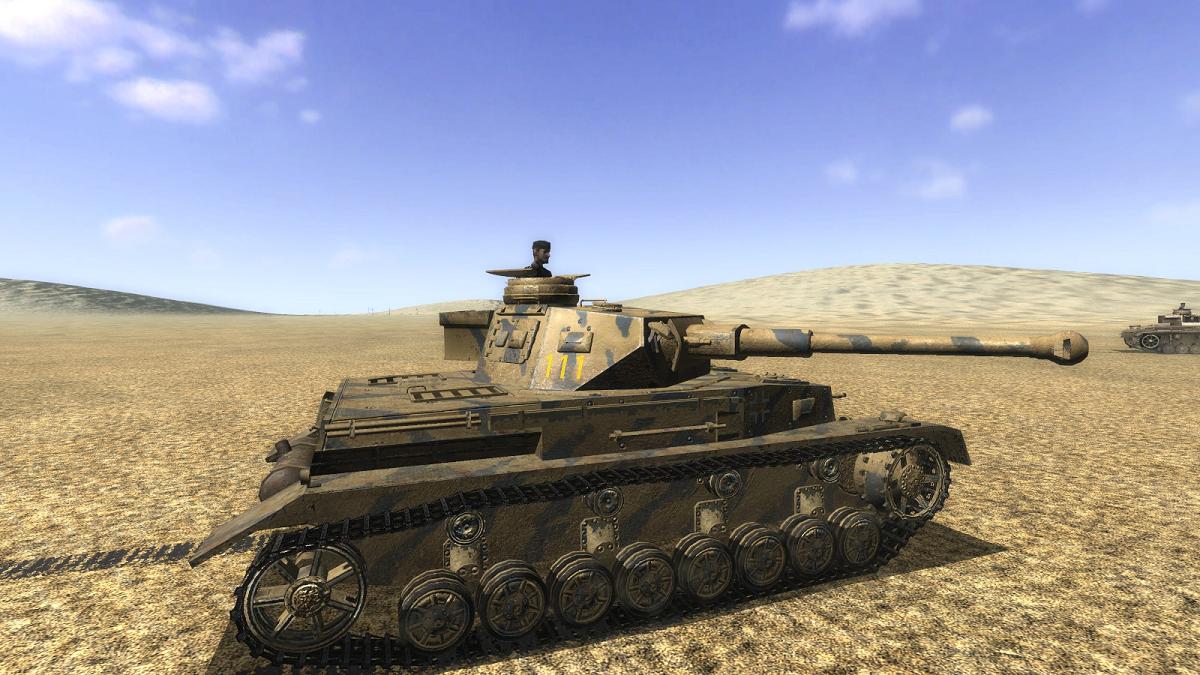
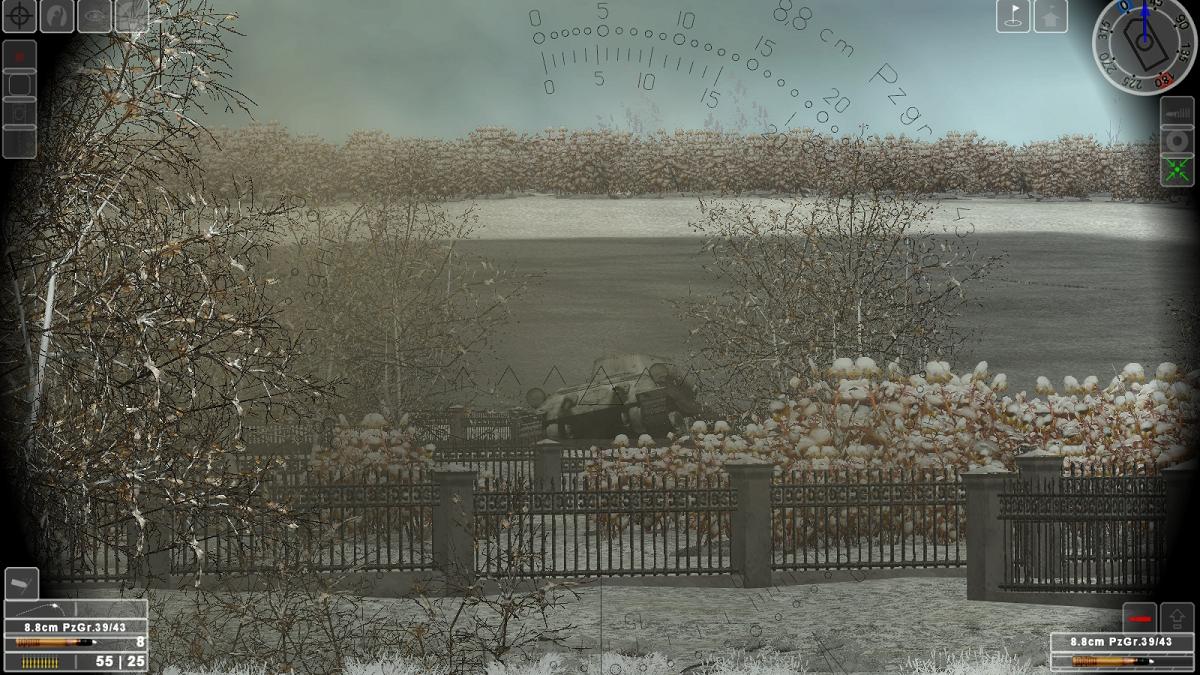
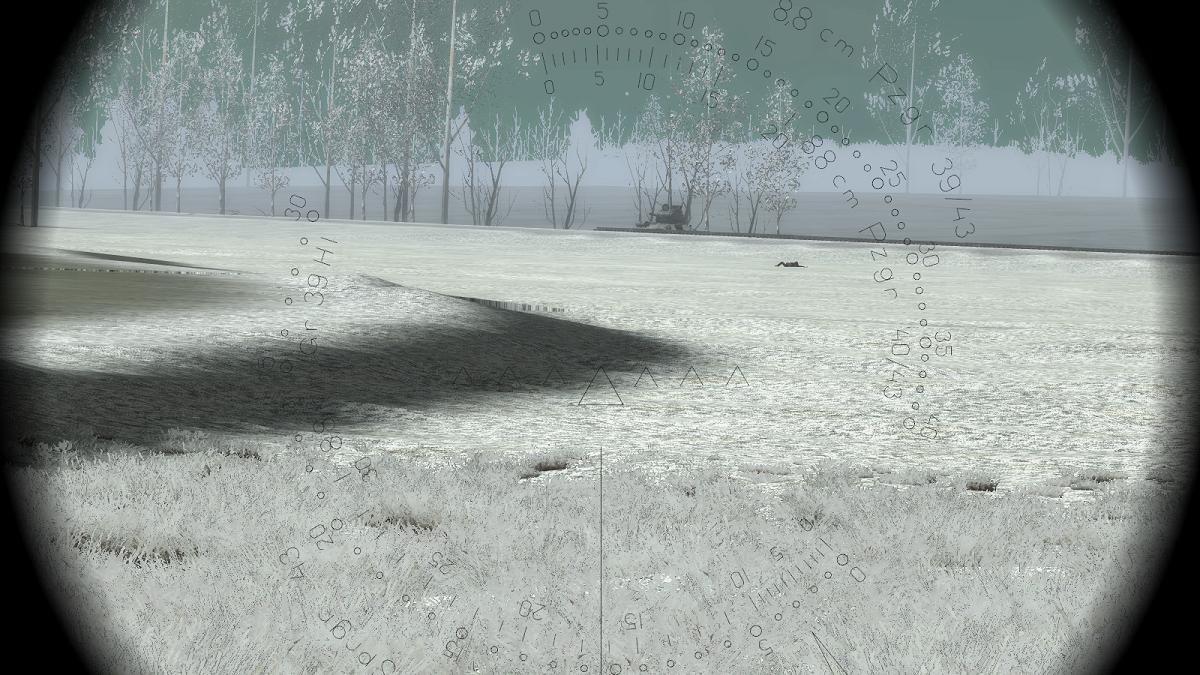
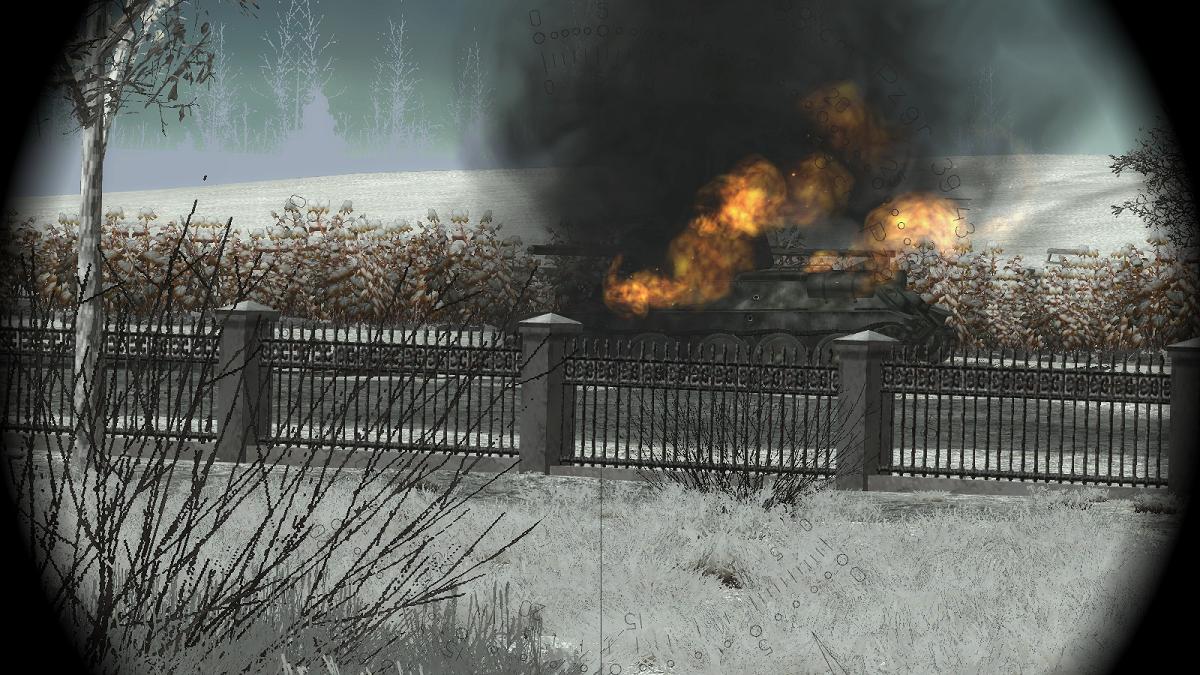
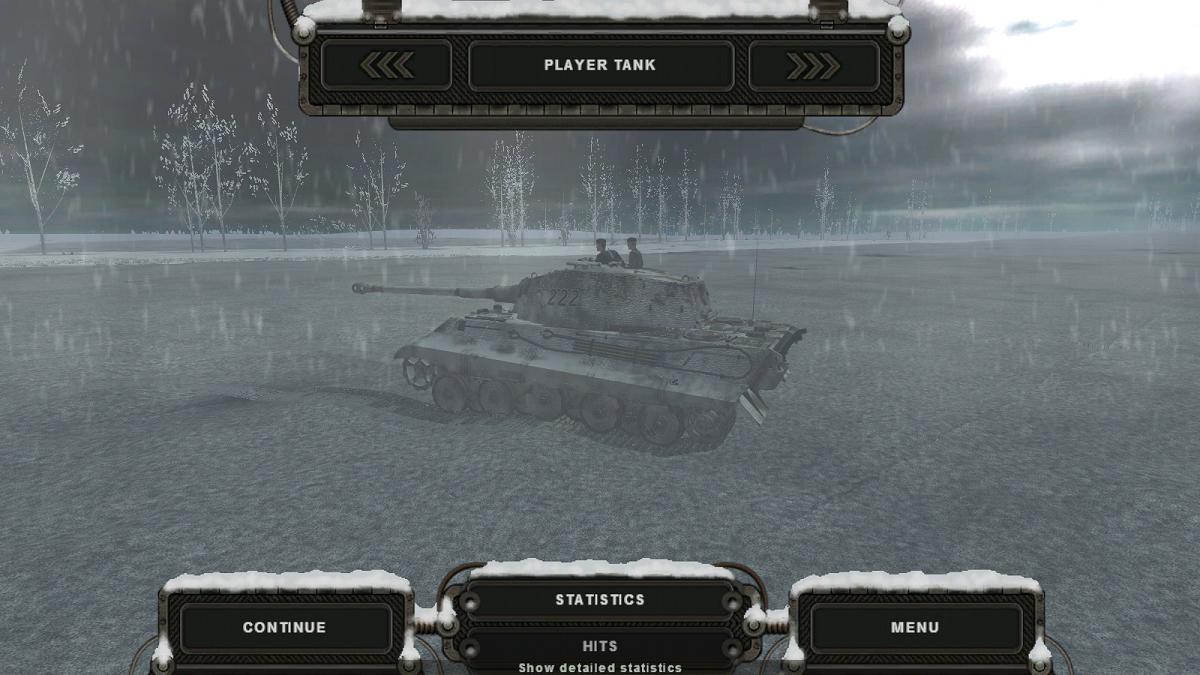
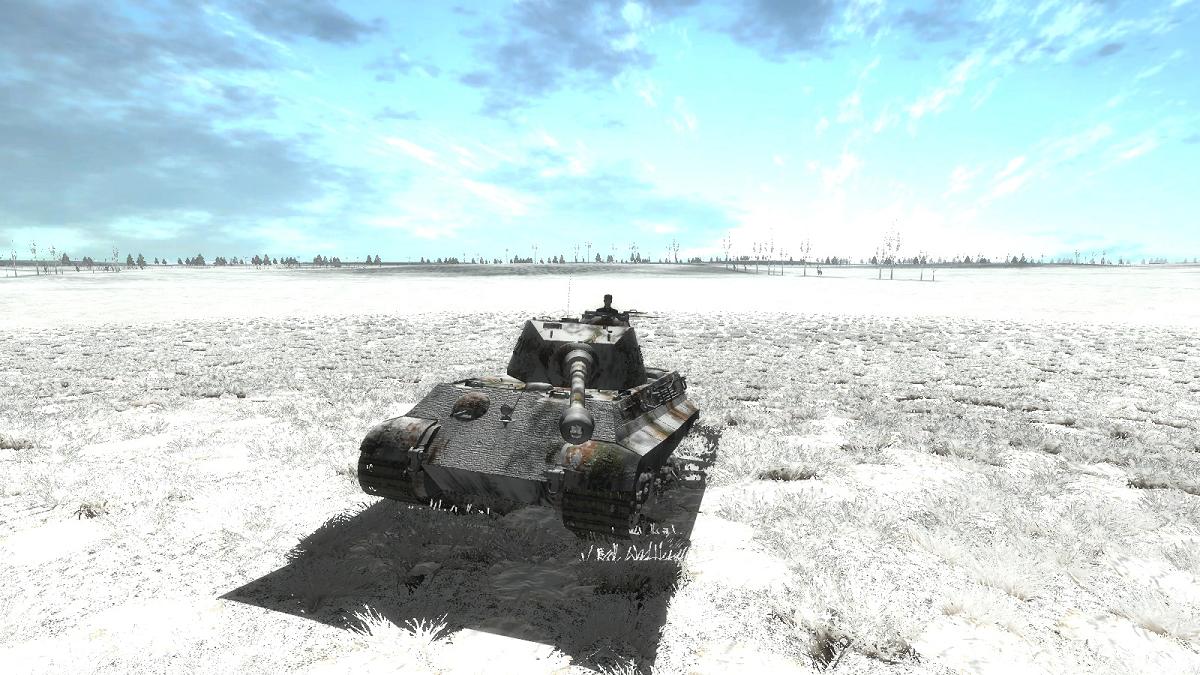
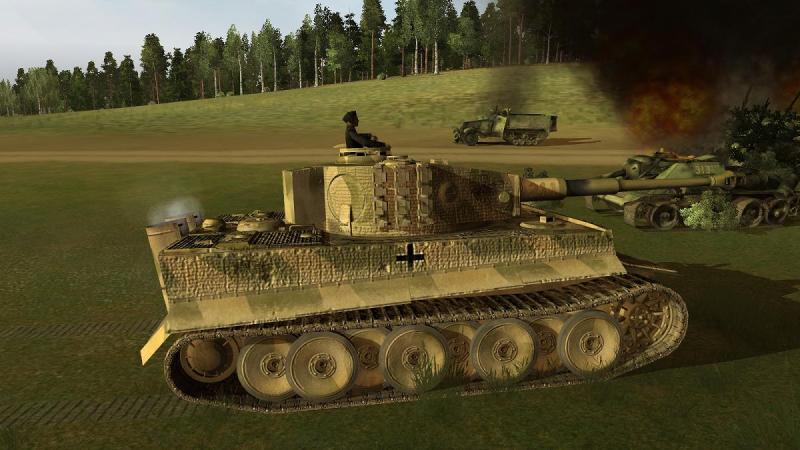
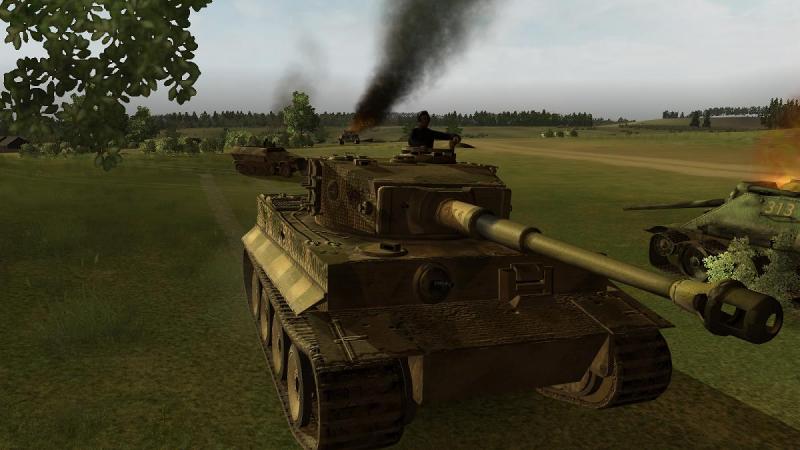
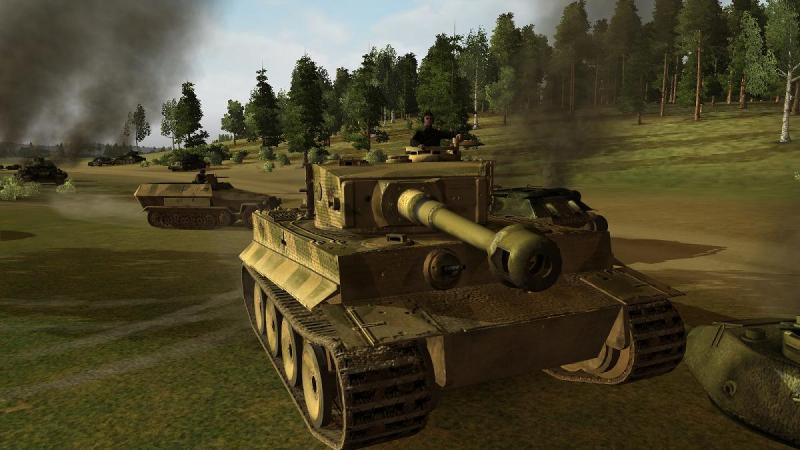
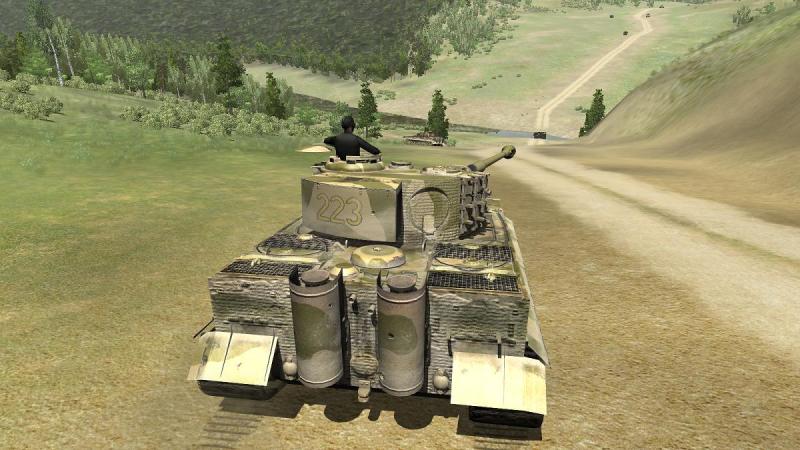
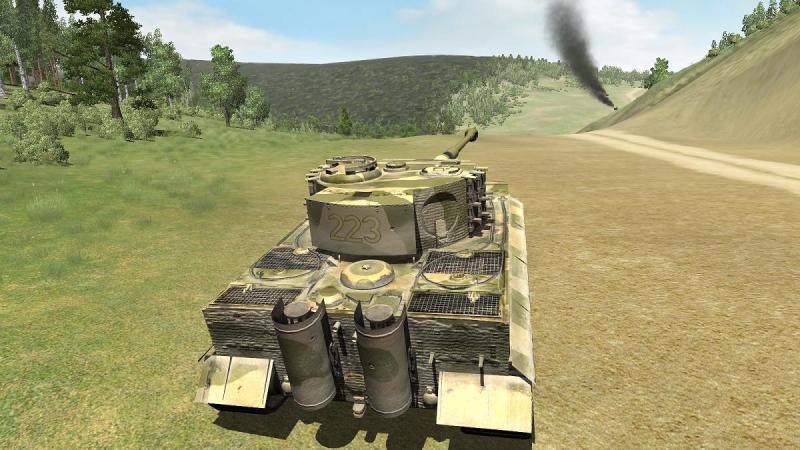
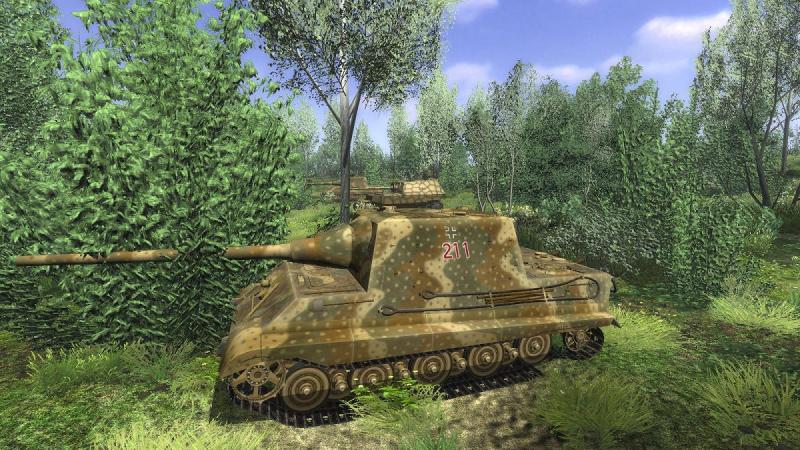
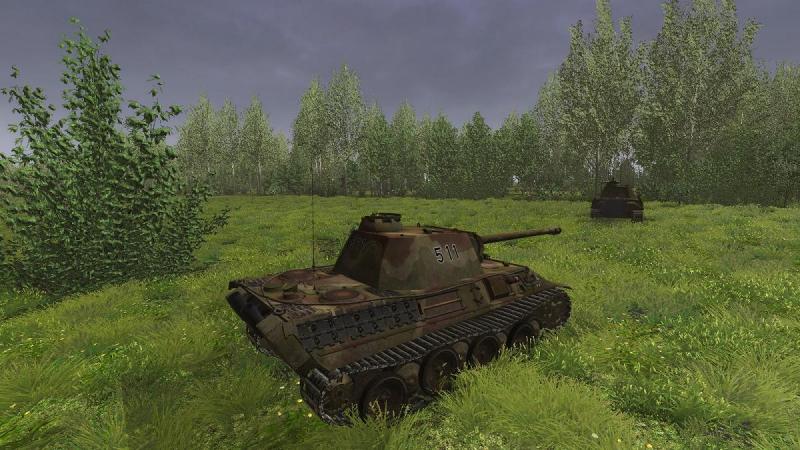
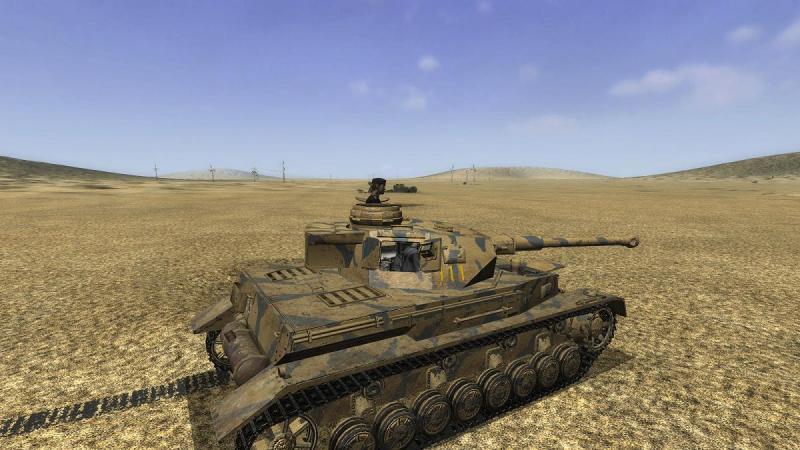
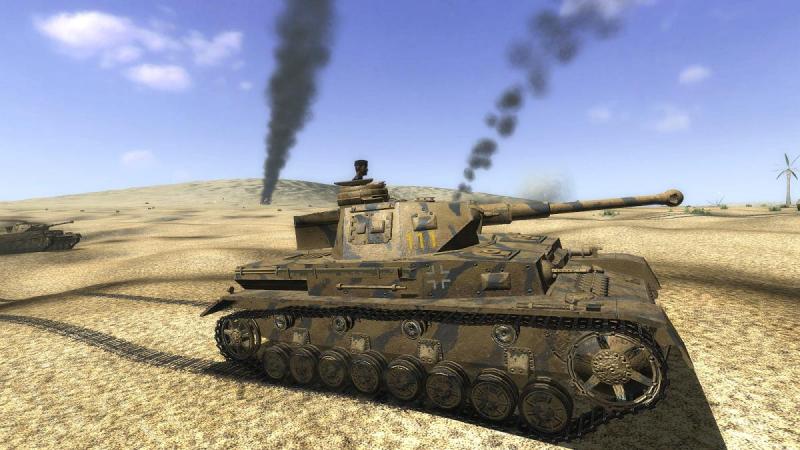
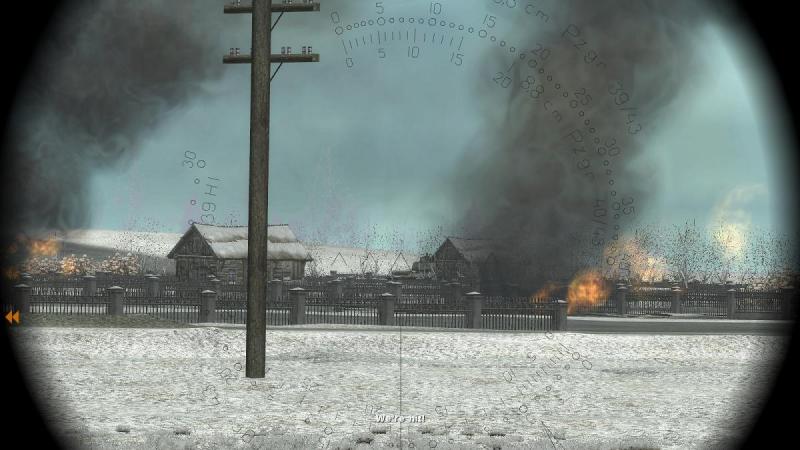
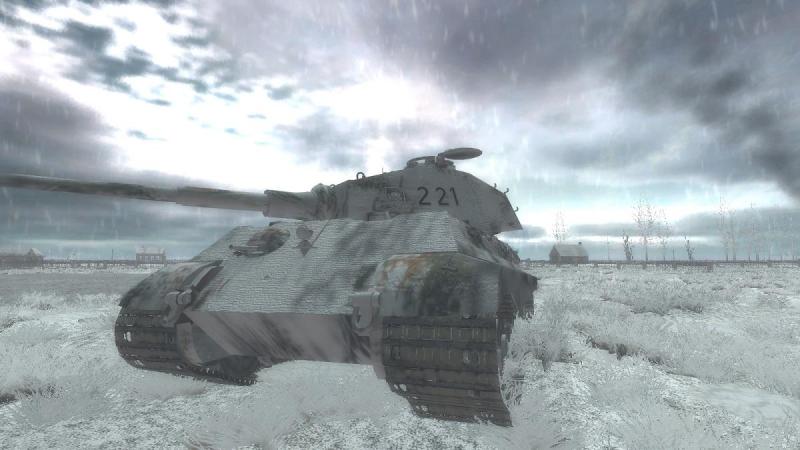
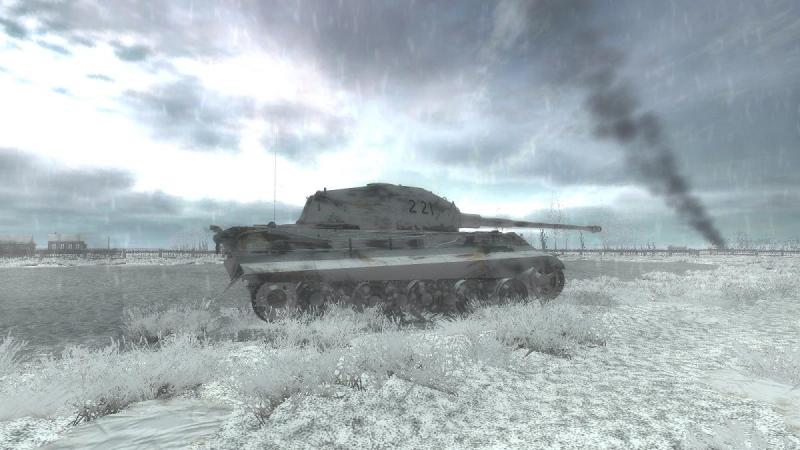
Back to the Russian Front with 'WWII Battle Tanks - T-34 vs Tiger'! The year 2008 was a promising one for tank simulation enthusiasts, with two new WW2 tank sims released around the same time. One was Steel Fury - Kharkov 1942, which found most favour with players, continues to be modded and played, and has been featured in three recent mission reports here at CombatAce. This time it's the turn of 'the other sim' - the aptly-named T-34 vs Tiger. Strangely, this was released by the same publishers - Lighthouse Interactive - as Steel Fury; my T34 - vs Tiger manual even has a 2-page, centre-fold spread advert for SF! As a fan of the Tiger tank in particular and something of a tanksim nut since discovering Panzer Commander, I was keen to try out the new sim. But with sub-par AI, no interaction with other tanks or vehicles in your unit and a very limited set of heavily-scripted (and questionably realistic) missions, I soon realised why most players seemed to gravitate (sic) to Graviteam's 'Steel Fury', instead. Still, 'TvT' has some really good features and in particular, is in most respects a very good simulation of operating the two featured tanks. And if you like it enough to hanker for more, there's an ongoing payware mod by Zeewolf which adds vehicles and missions. Having fairly recently taken some time off combat flight sims to play Steel Fury and report the results, I thought I'd dust off T-34 vs Tiger and do likewise. Will a fresh crack at the sim after the passage of several years change my first impressions? Let's find out! The mission If you're single-player only like me you won't be too bothered that the sim's apparently promising multi-player capability never seemed to have been realised. But the single-player option also had its issues. There's only six missions for each side. There are no training missions - it's all on-the-job-training, as it were. Together, the missions form a campaign of sorts but they seem to be no more than a loosely-sequenced series of small operations in the same general area in the same timeframe. The area is between Smolensk and Vitebsk in what is now Belarus, in the northern sector of Germany's Army Group Centre. The timeframe is summer 1944, during Operation Bagration, the Soviet summer offensive for that year. This was a major disaster for the Wehrmacht and a great success for the Red Army, with large swathes of Soviet territory being liberated and much destruction being visited on Army Croup Centre. I was tempted to try out the T-34; but for better comparison with both my early efforts with TvT and my recent forays with SF, I decided that I'd let the Tiger off his leash once more. As for my choice of mission, this was limited..to one mission in fact. Irrititatingly, it seems you have to 'unlock' the missions by winning them. There may have been a cheat to unlock missions but if there was I can't find it now. [EDIT - found it! it's here] I don't know if this approach was a crude attempt to make the best of the twelve missions by forcing replays but I find this pretty hateful - and unrealistic, to boot. Unless you get the chop in one sense or another, life goes on, whether or not the powers-that-be deemed your last operation was a success. It doesn't help that mission success in TvT seems tightly-defined in terms of things you must kill, down to the last tank...and I mean 'you must kill' because the AI may be little help. But more of this anon. So - this report deals with the first of the six German missions, because that was all I could get at, readily. Except that there will be two flavours - stock and ZeeWolf. This is because ZeeWolf's TvT project, though subscription-only, includes some freebies. And one of them is a new mission, which seems to replace the original first mission, when you install it (at least it did for me). The package seems to make some other changes, too; it may be a different time of day in each mission is fooling me here but I get the impression that the very harsh lighting is softened, losing the too-dark shadows and warming up the colours. And the Tiger is back to the full set of rubber-tired roadwheels (it started like this but the TvT official patch changed these to the resilient steel-tired roadwheels with the outer row removed). Top pic is stock+patch; bottom is with ZeeWolf's freebies installed: Kurtenki - the stock mission I'll keep this one short, not least because if you have ever played TvT, you'll know this one off by heart; there seems to be little-to-no variability in TvT missions, with friends and enemies identically scripted and positioned each time...unfortunately. I didn't get a screenie of the briefing but...it's brief. Basically, drive down the road/track towards a 'blown' river bridge and destroy any enemies seen massing (or doing anything else, for that matter) on the enemy bank. I don't find it easy to tell the lie of the land from the little briefing and in-game maps in TvT - that they show forests, the 'rides' between them and the roads is their most useful feature - but we're starting between the village of Kurtenki and the river, on a sort of plateau from which the ground falls away steeply to the river, then rises just as steeply on the other side - terrain perhaps more suitable for a mountain lion than a tiger. Anyway, here we go. There's two of us in Tigers, on this job. See what I mean about that harsh lighting? Apart from that, these are mostly very nice renditions of a fairly late-production Tiger 1. Apart from the steel roadwheels, distinguishing features for mid- and/or late-production vehicles include the commander's 'low profile' cupola with episcopes instead of the older 'dustbin' type; the ribbed 'Zimmerit' anti-magnetic mine paste on vertical surfaces; the lack of turret-side triple smoke dischargers; no 'Fiefel' air cleaner filters on the rear plate; and spare track stowage moved from the lower nose to the turret sides. Are you the boss on this operation? Or just a 'wing-man'? Search me. But never fear, it doesn't matter. The AI, including your boss (or 'wing-man') pay you no attention, unless the mission designer has built in triggers which provoke them into action when you (or others) do a certain thing. You have no way of controlling your fellow tankers and playing as a platoon/troop commander. It's hard even to co-operate with them, as their actions seem hasty, unpredictable or silly - sometimes all three at once. As is my wont, I switched to the gunner position then turned on the AI driver and AI tank commander (TC). The former I can give driving orders W-A-S-D fashion, from the gunner's station. I can also tell the loader whether to load HE or AP rounds. The AI TC will spot targets for me. Another advantage of playing in the gunner's sattion is that you can orient the turret to cover likely threats, instead of just driving around with the gun at twelve o-clock all the time - with the Tiger's slow traverse, this can help you get onto targets faster. I could equally have stuck to the commander's station and let AI both drive and gun. The AI gunner wil engage what he sees but if you're playing TC you can also mouse-click targets to designate them. In SF the AI crew will open or close hatches as they see fit but not in TvT. As only Soviet TCs fought entirely buttoned up I briefly switched to the TC position, unbuttoned, and then once the TC had popped into position, left him there and went back to the gunner's station. For some reason the TvT Tank Commander insists on standing tall in his cupola, instead of sensibly operating with just his head exposed. But I still prefer this to hatches permanently closed. There are well-rendered tank interiors in TvT but I never use them. External view, TC hatch open, or gunsight/binocular view, that's my style As I passed the other Tiger he sprang into life. After that, he did his own thing. I drove south towards the river, past some grenadiers with an SPW manning a flimsy barricade. The sounds of my Tiger rumbling along and my TC calling out my driving commands were well done; sound effects are one of TvT's strengths, to my ears. After I passed this little barricade the other Tiger rumbled past me. The terrain - a wood on one side of our track and a steep slope on the other - seemed designed to funnel us in a certain direction. No Operation Flashpoint-style wide open sandboxes, here. Making the most of it, I was planning to creep up to the crest line - beyond which the terrain looked to dip down into the valley. Scan every inch of terrain as it revealed itself in front of me. Hug the woods on the left and watch what emerged across the river to my right. My fellow tank commander, bless his cotton socks, had no such concerns. He drove right up to the crest, stopped, and started shooting. He then drove on down the other side, out of sight. 'Bloody Hell!', I said to myself. 'There goes Plan A. Now what?' ...to be continued!
-
Nice pics! Yes the environmentals are first-class, likewise the battle ambience. I especially like the variety of vehicles (and missions to match) that's now available in SF; now including a decent selection of British AFVs, some US ones and of course the later-war German stuff. We're probably stuck with the so-so AI and the limited and map-based platoon control we have now. But the basic engine's pretty good and more missions are evidently on the way; it would be nice to have some packaged into mini-campaigns, Panzer Elite style. Perhaps the modders will also one day add the bazooka and panzerfaust for the late-war missions.
-
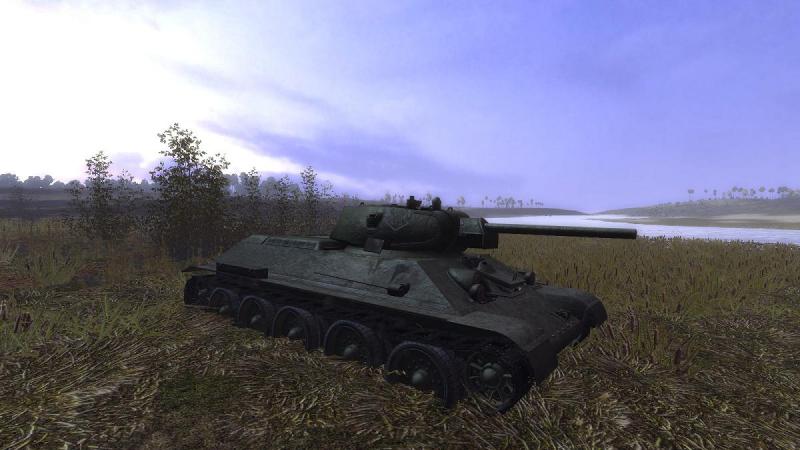
Thanks guys! I'm running SF on Vista 64, early Intel Core 2 Quad, 6GB RAM, 1GB Nvidia GTS 250. As seems recommended with many older programs like IL-2, I installed it outside the Programs (x86) folder to avoid probs and apparently this is also the drill with Win 7: http://graviteam.com/forum/index.php?topic=10219.0 Only issue you might have PCPilot is that the Nvidia Inspector tweak that enables anti-aliasing, which is otherwise inoperative, is no good for Radeon users. But Xambrium here reports getting AA on an ATI card: http://simhq.com/forum/ubbthreads.php/topics/3487371/Forcing_AA_in_Steel_Fury_WOW.html#Post3487371 Anyway I've left North Africa for now, swapped sides and am back on the Russian Front finding out what made the T-34 special:
-
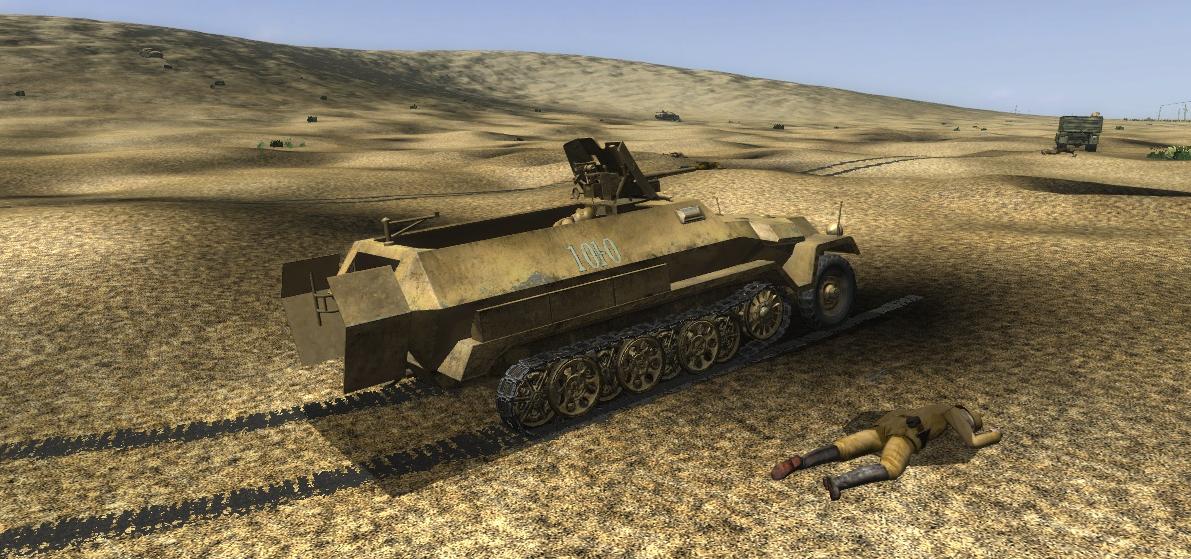
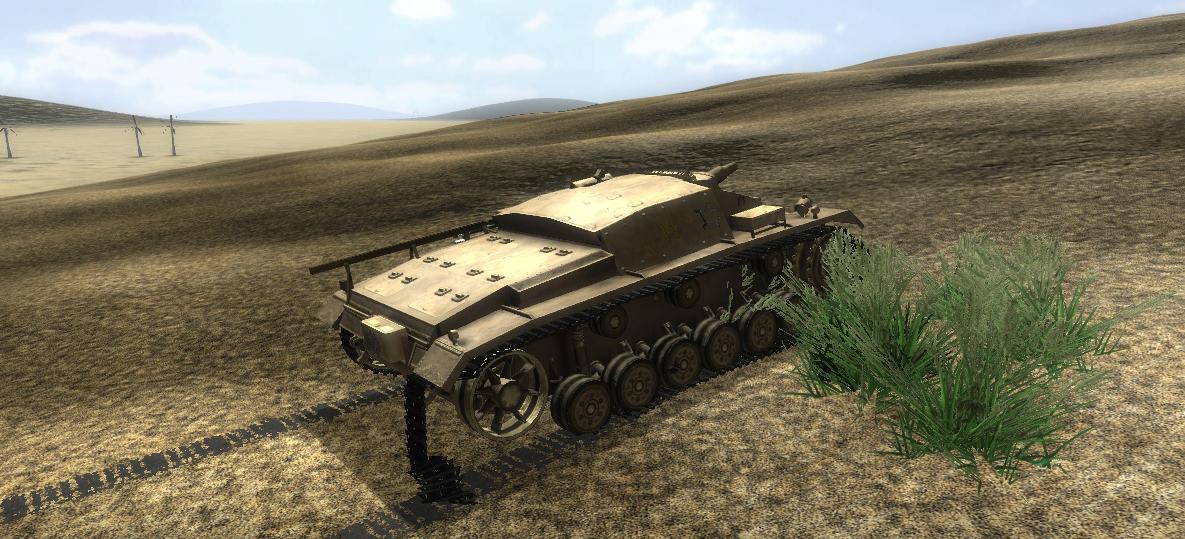
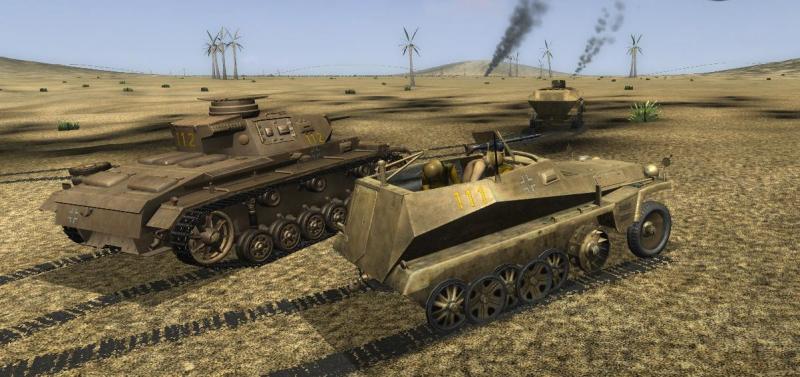
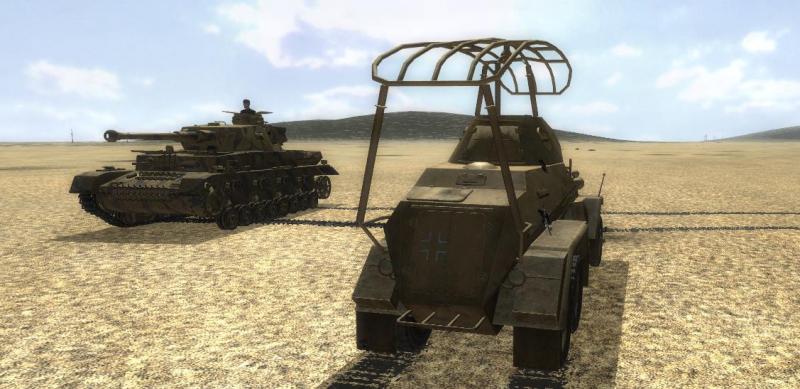
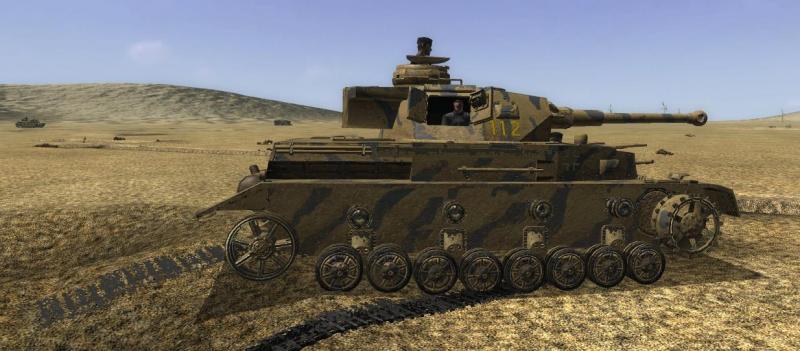
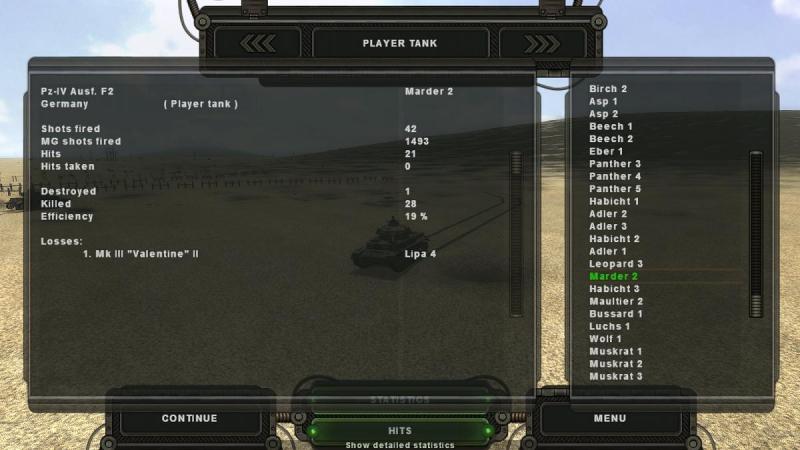
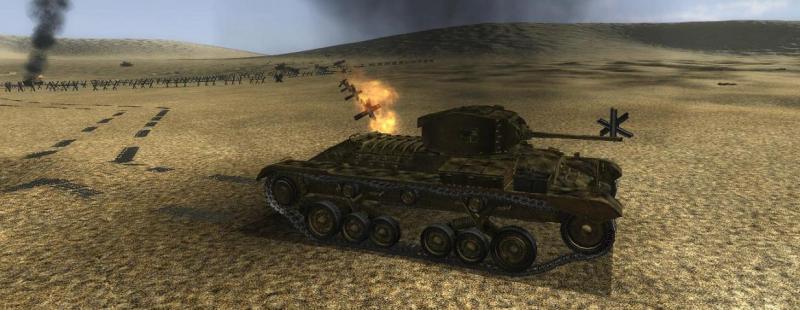
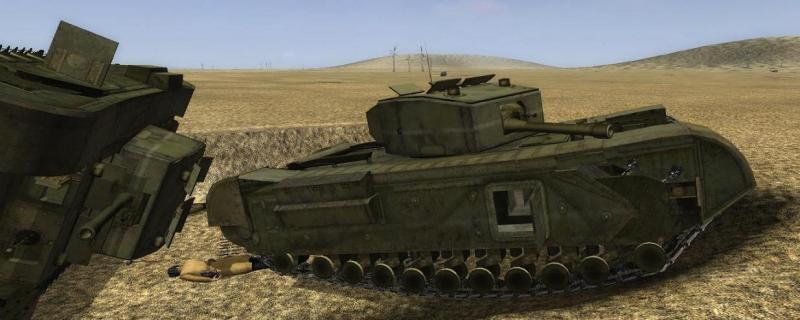
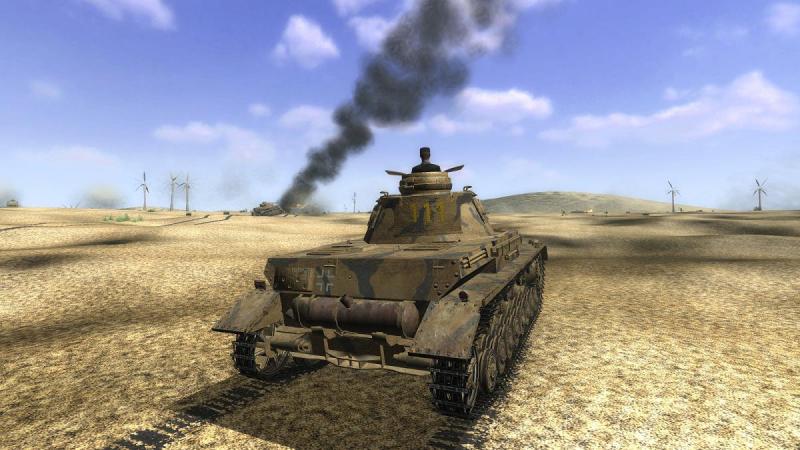
The butcher's bill One of the neat features of Steel Fury is the ability, win or lose, to roam the battlefield after the fighting's over and see what damage has been done. Starting with my own tank's statistics, here we go. Having lagged behind the battle and spent most of my main gun ammo clobbering dead tanks, 'to be sure, to be sure', I ended up with just one Valentine tank knocked out and a number of dead infantrymen to my 'credit'. No medals earned on this mission, methinks, even if SF supported them (and single missions don't, I'm fairly sure - not certain about campaigns). From the turret number, this looks like my number two. Like me, he has made it through into the enemy positions on the far side of the minefield, where he's lost a track. But at least he appears otherwise all right. Further back is another immobilised Panzer IV, next to a six-wheeled armoured car - a command variant, from the prominent 'bedstead' radio antenna frame which he carries. Also further back is this sad little group, all intact but evidently knocked out - a Panzer III, a light Sdkfz 250 SPW with a broken track and a dead crew and just ahead, one of the bigger Sdkfz 251 versions. Also knocked out is this medium SPW, a platoon commander's vehicle by the look of it, from the 37mm anti-tank gun mounted atop the driving compartment. Beyond the enemy positions was an immobilised Stug III, though others in his platoon had fared better. So, onto the enemy. Steel Fury so far has a limited range of British kit - the troops look like repainted mid-war Soviet infantry, lacking the distinctive 'Brodie' rimmed helmets for one thing. Likewise, instead of the 2-Pounder (40mm) AT guns, there are German 37mm ones. Here are those knocked-out Churchill tanks. With their very heavy armour and effective 6-pounder (57mm) guns, these Infantry Tanks were undoubtedly our toughest opposition on this mission. They weren't at the front yet, in reality - if I recall right, three were used at the later battle of El Alamein, one being knocked out. How one of the two pictured here came to be up-ended in this fashion is a bit of a mystery; in real life, Churchills had a low centre of gravity and though slow, were exceptionally agile, with a reputation for climbing hills considered 'tank-proof'. And so to the Valentines, the previous British Infantry Tank. They had suffered pretty heavily on this mission; outnumbered and mostly caught in the open during attempted counter-attacks, their heavy armour and compact silhouettes had not saved them. All in all, this was an interesting mission, and not just because it was a change from the Russian Front. In particular, I liked the in-game radio messages which gave me the impression that the Kompaniefuhrer was running the battle, as he should have been - too often, tank sims cut you loose on your own, when you would most often be operating as part of a tightly-night company-sized team. As for my slow tank, looking again at the map, it was perhaps a patch of what might have been poor going in the centre that slowed me down, even though it may have saved my life by ensuring the others bore the brunt! I'm sure this will be one of those missions that'll be a lot of fun to replay, trying different tactics. Great stuff! But I'll leave you with another view of my crew, relaxing after the battle; I think they have earned their break.


- 8 replies
-
- 1
-

-
- steel fury
- panzer iv
- (and 1 more)
-
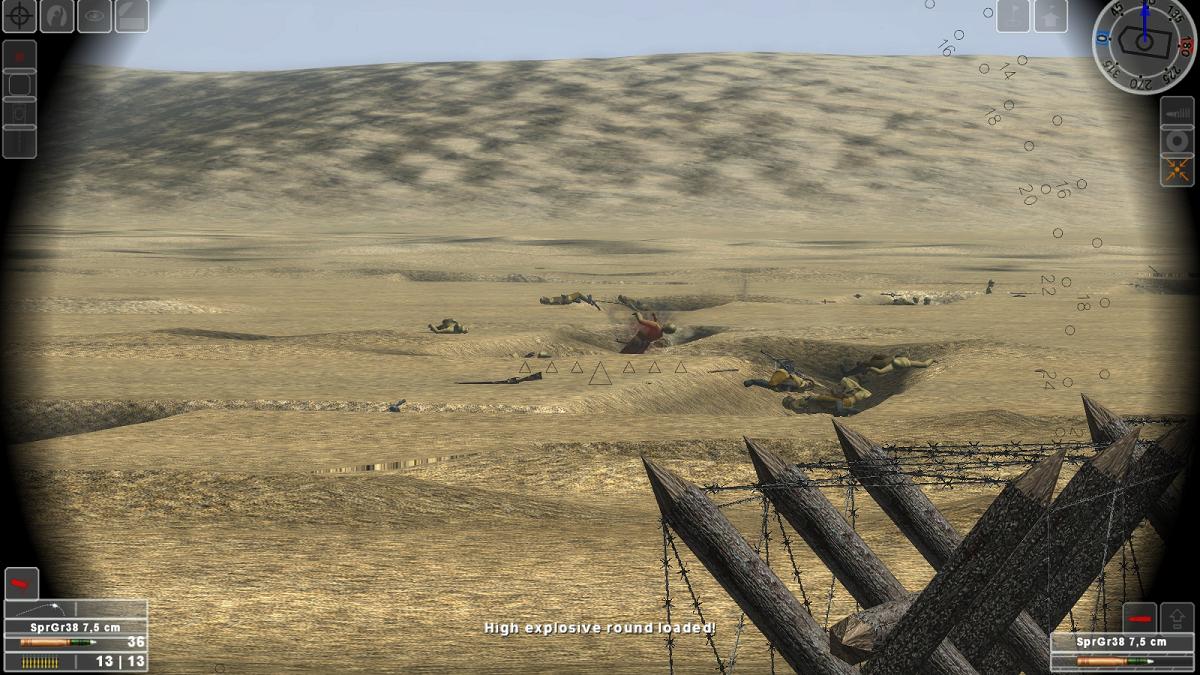
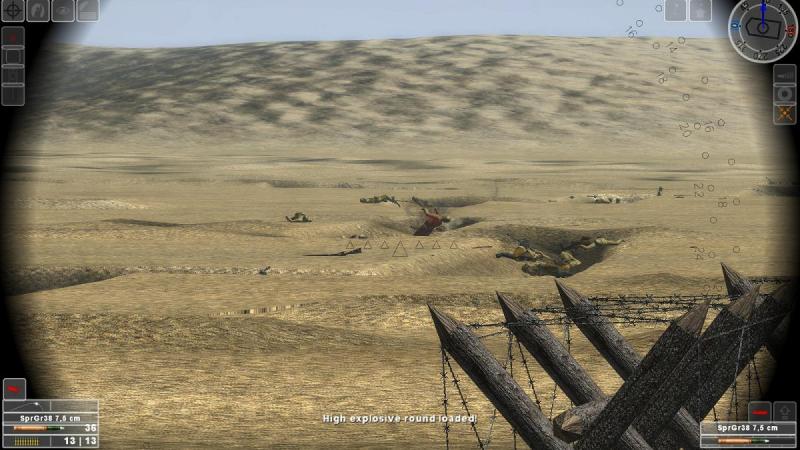
On to the objective! I brought my Panzer IV to a halt on the near side of the low crest and for the first time I saw the enemy position. Rows of obstacles indicated what I took to be the area of the minefield. On the far side were two more Valentine tanks, which my tank commander directed me to engage. Two rounds apiece and it was all over. I sat tight and scanned ahead. To the left, all was clear. Ahead, I cut loose with the co-ax at some prone enemy troops near one of our Panzer IVs. That seemed to do the trick; I saw them crumple and disappear from view, although in retrospect they may merely have ducked down into a trench I could not see. Suddenly, the tank commander called out a fresh target - another Valentine tank, slightly right. I lined him up and put an AP round into him The Valentine jinked to my right. Tracking him, I fired again and then again. The enemy tank finally lurched to a halt and I put another AP round into him, followed by a burst from the co-ax, in anticipation of the crew bailing out. I wasn't feeling very charitable, right then. As I watched the smoking Valentine suspiciously, two advancing Panzers slid into my view. The situation on the right flank seemed pretty secure, now. So I moved off again, straight towards the minefield, looking for targets in that direction. My tank commander put me onto some British infantry who seemed to be engaged in shooting up the bailed-out crew of a Panzer IV that was immobilized in front of the obstacles. I machine-gunned these enemy troops mercilessly, ignoring a pair of knocked-out Churchill tanks I could see beyond them. That job done, I now swung my Panzer to the left. My plan now was to come around the left side of the long rows of obstacles, hopefully avoiding the minefield, and to attack any remaining enemy positions from that flank. As I came level with the last row of knife-rest obstacles, I saw clearly that there was a maze of trenches behind the minefield and that they were still full of enemy infantry. This was going to be a bad day for the Tommies. First, I opened up with the co-ax, hosing the trench which seemed to have the most occupants, and ignoring one closer to my tank. Weapons flew and bodies crumpled as my rounds hit home. Further away, another Panzer was similarly engaged, shooting up the hapless enemy infantry. Next I put an HE round into the closest trench. The effect was devastating. While the main gun was being reloaded, I turned the co-ax onto the occupants crouching in another section of trench, slightly left. Traversing right and elevating the gun slightly, I repeated the process. Another HE round slammed into a trench, followed by long bursts of MG fire. Shortly after arriving on the enemy's flank I had got the 'Mission completed!' message but my blood was up and I was in no mood to stop. I ended up with a few other Panzers which had broken through, machine-gunning the occasional enemy infantryman who broke cover and ran for it. They didn't get far. For an encore, I put another round into a stationary Valentine which was doubtless long since knocked out. It seemed like a more fitting end to the mission than hunting down a few desperate enemy troops. Relaxing, our crew opened the hatches to let out the fumes and admit some fresher air. Job done! But at what cost? ...to be continued!
-
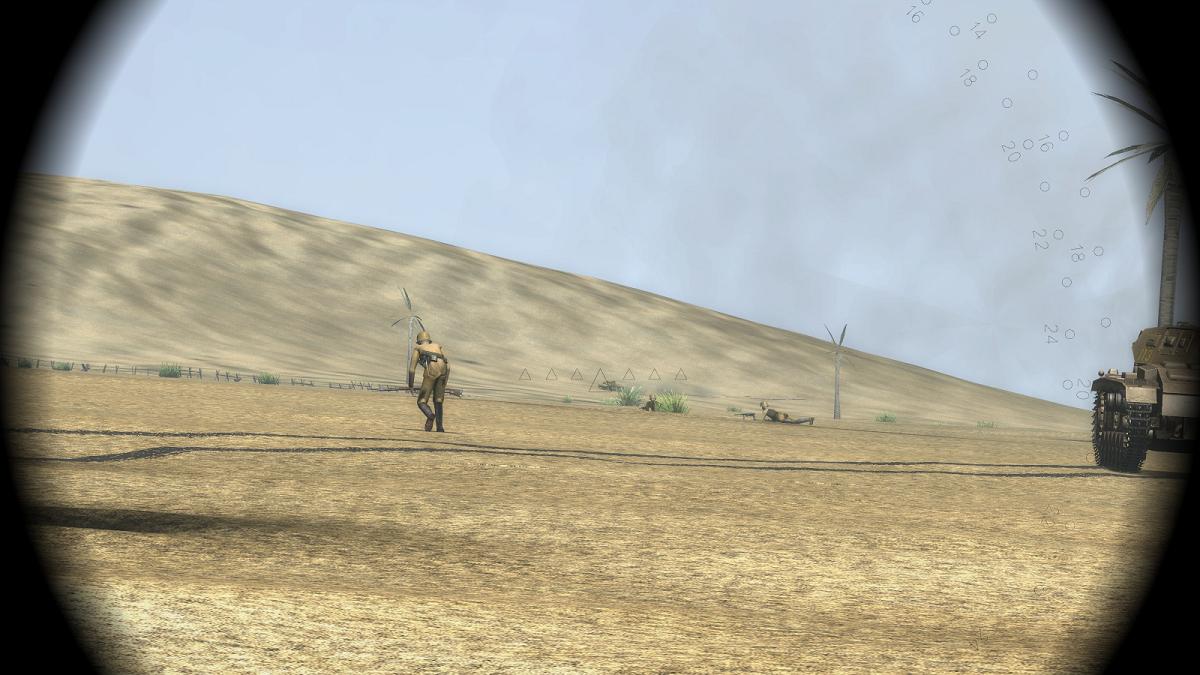
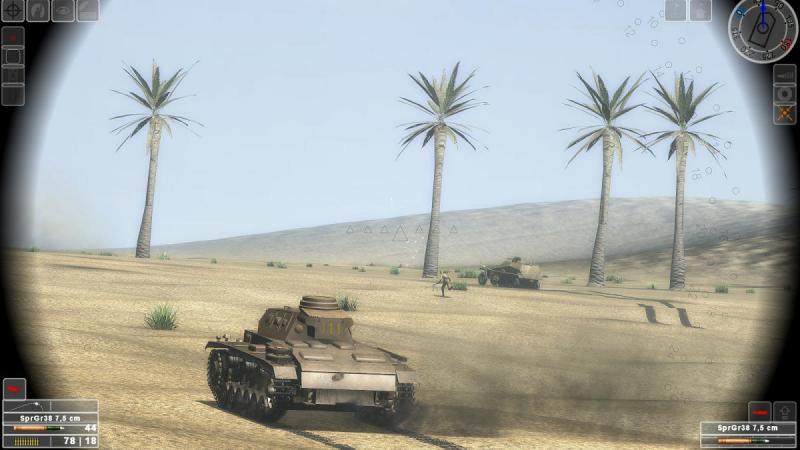
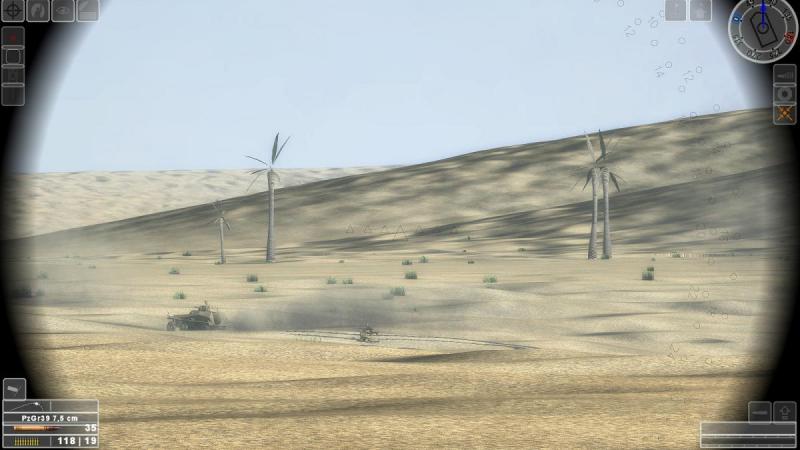
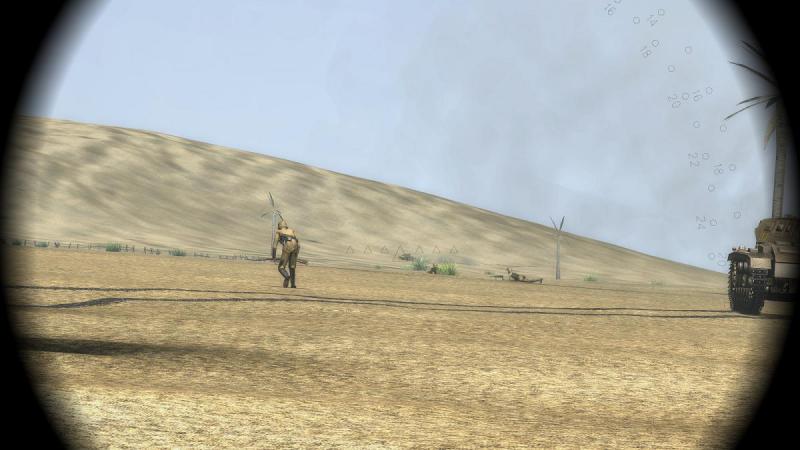
Battle is joined! The Valentine tank seemed to notice us for he turned to face us and halted, presenting his thickest armour. I let him have two AP rounds, firing just over the heads of some crawling German infantry. The Panzer III also fired at him. This seemed to do the trick. The enemy tank didn't burn, but he sat there inactive, evidently immobilized and unable to shoot back. Traversing right in case he wasn't alone, I quickly spotted a second Valentine, hull down and showing me just the side of his turret. I opened fire, joined again by the Panzer III. Again I let him have two rounds, after which the Valentine began to burn. I rolled forward again. Ahead of me more panzergrenadiers had debussed from a half-track. Ahead of them, two Valentines were now on fire. I moved on again. I halted and started scanning for targets again. I wasn't long in spotting one! Between two burning Valentines was another one, stopped and side on. Until then, he'd been hidden behind the halted SPW. Was he dead? Most likely he was, but I wasn't taking any chances. I put two AP rounds into him, just in case. I edged forward cautiously, foolishly halting next to a large palm tree which would have made a good marker for anyone wanting to indicate me as a target. But I remained unmolested, while I took stock. All around were the funeral pyres of burning vehicles, friend and foe. With no further enemies in sight, I rolled forward again. The speed of our advance had slowed down, as our armour paused to deal with the enemies they had spotted. There was a low crest ahead of me and I roared up to it. Perhaps from there I would be able to see at last the enemy defensive positions which were our principal objectives. ...to be continued!
-
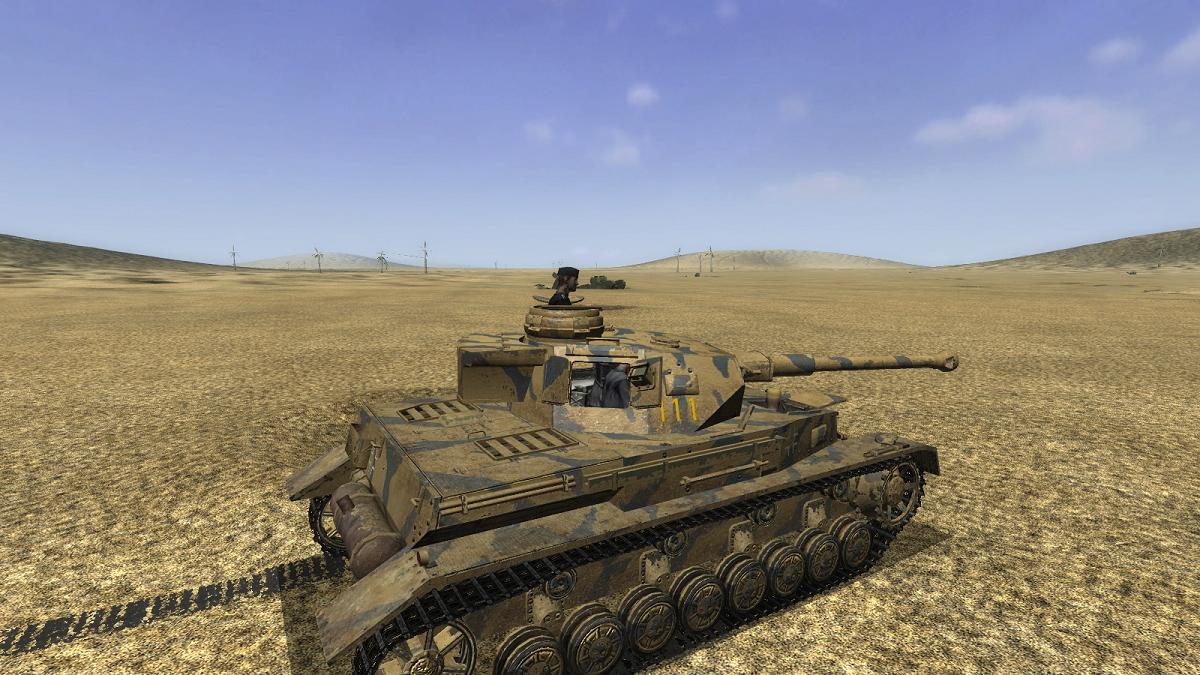
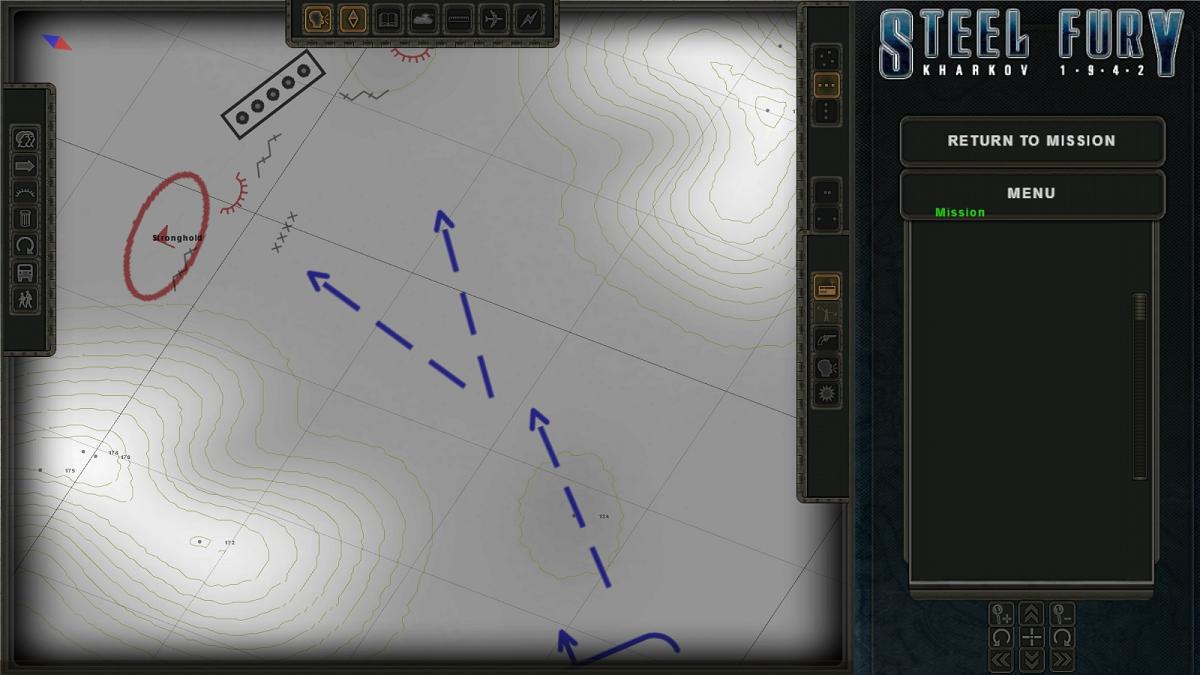
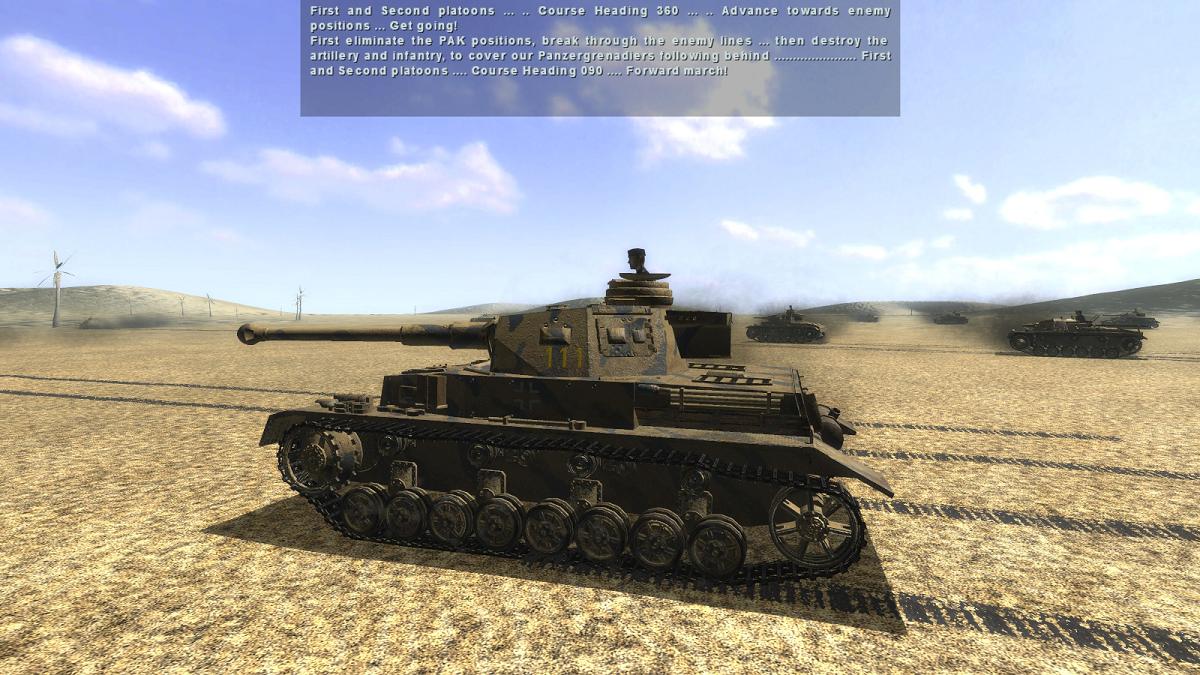
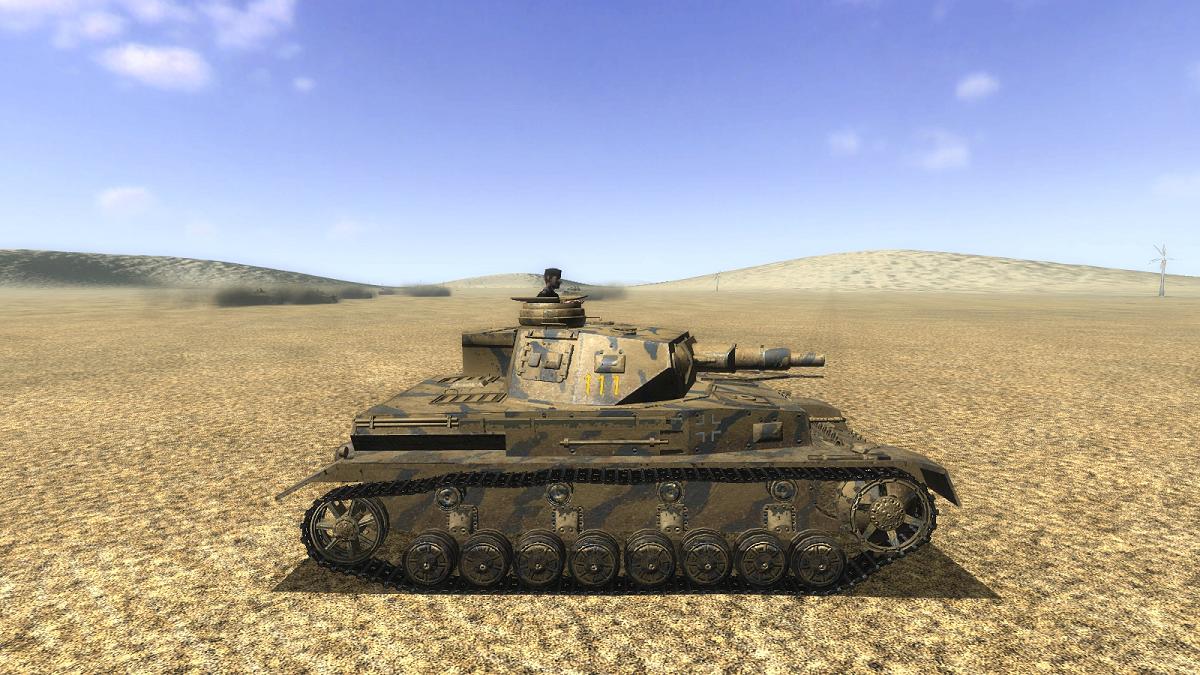
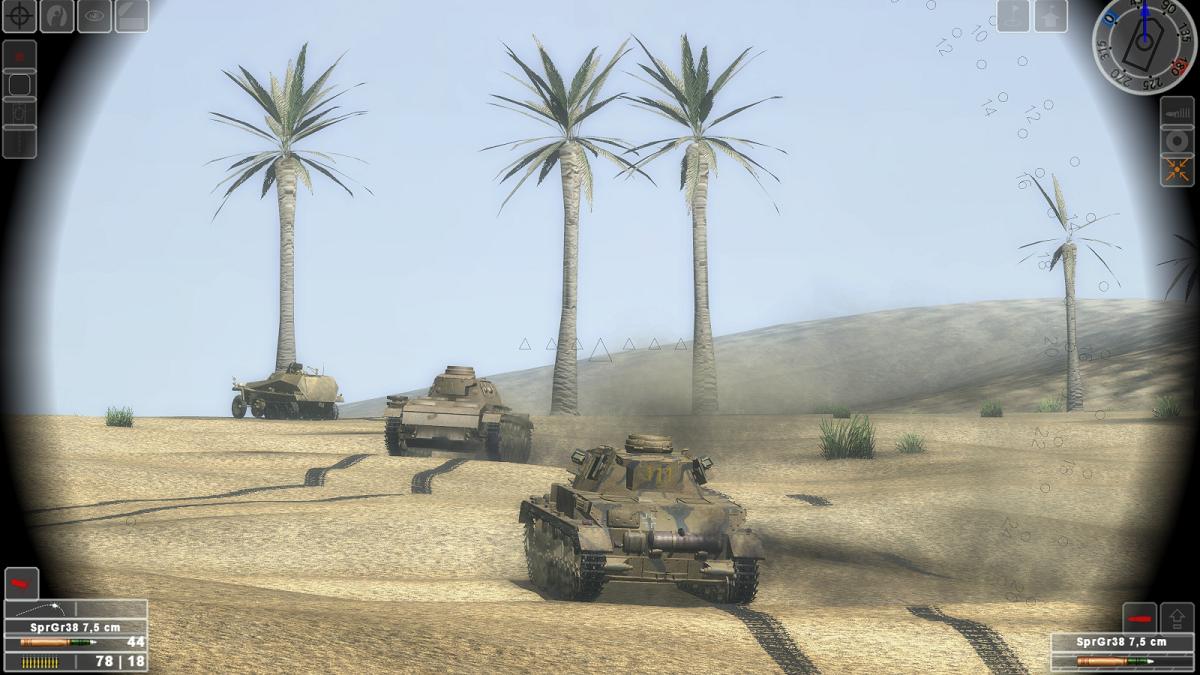
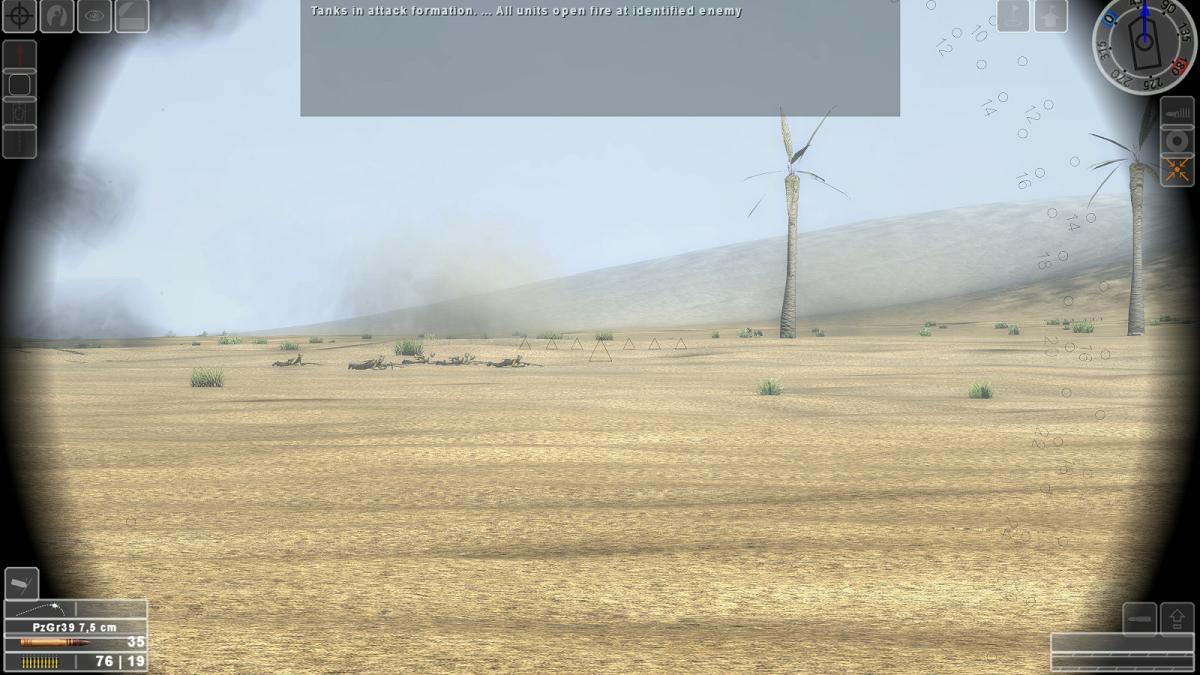
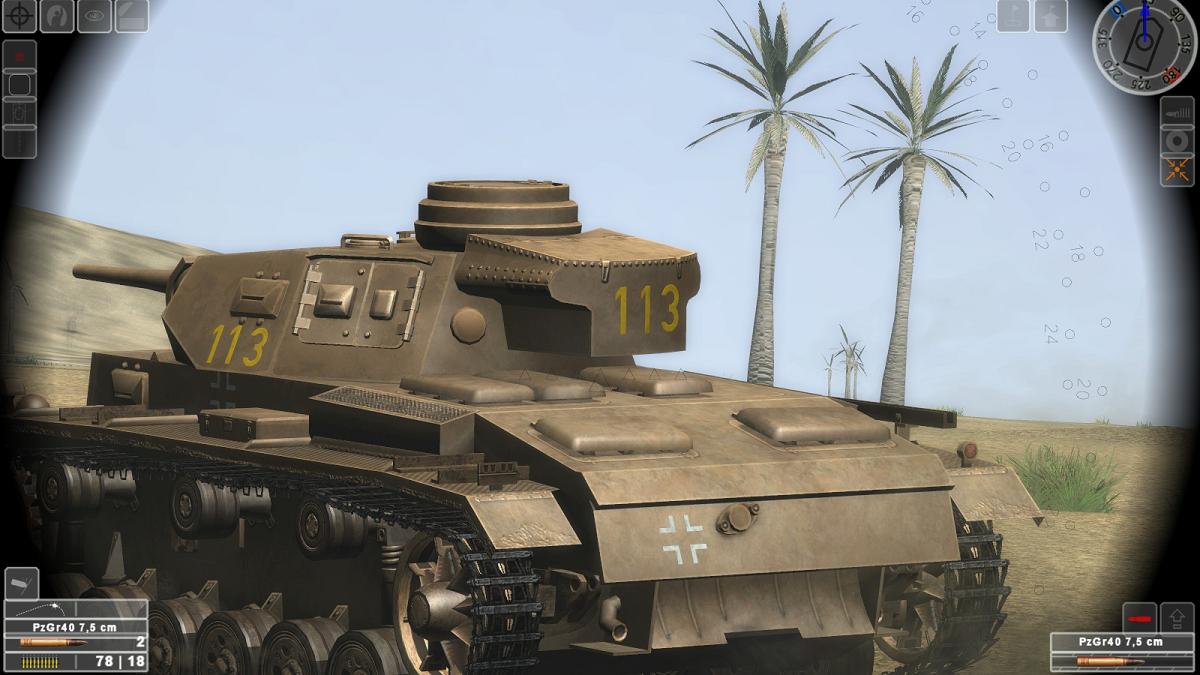
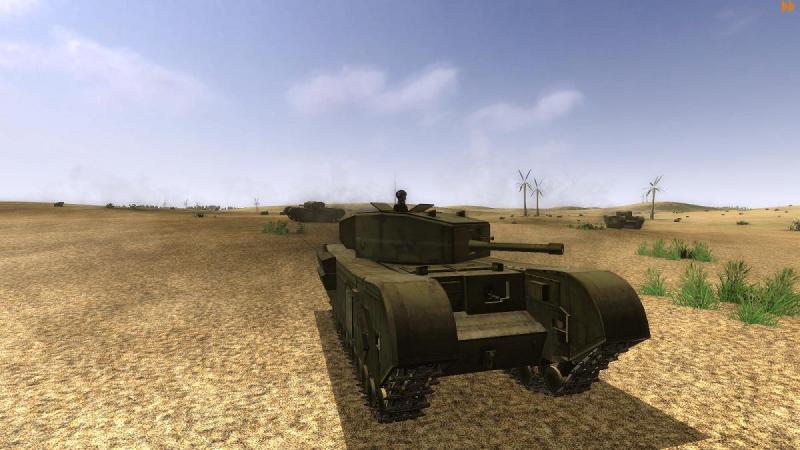
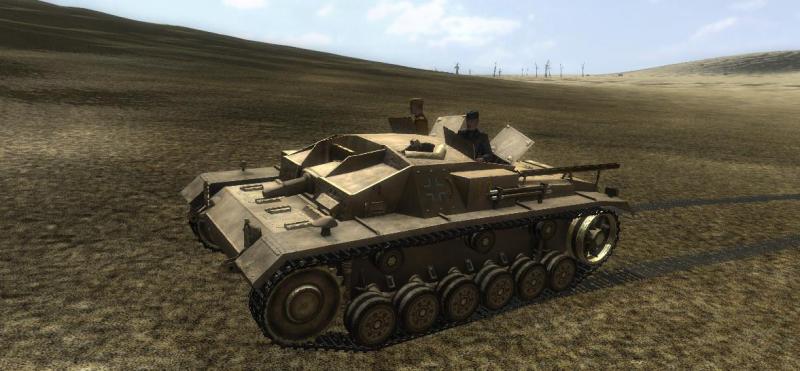
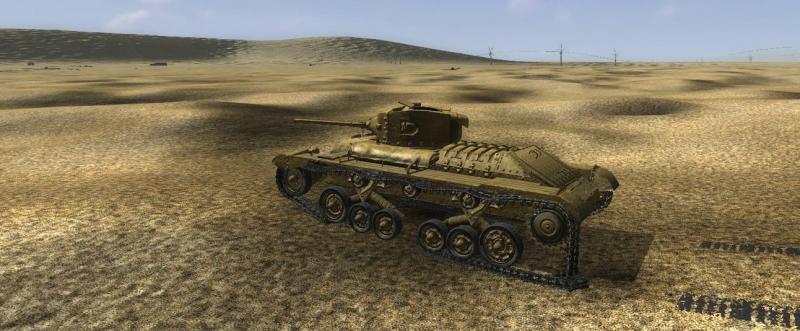
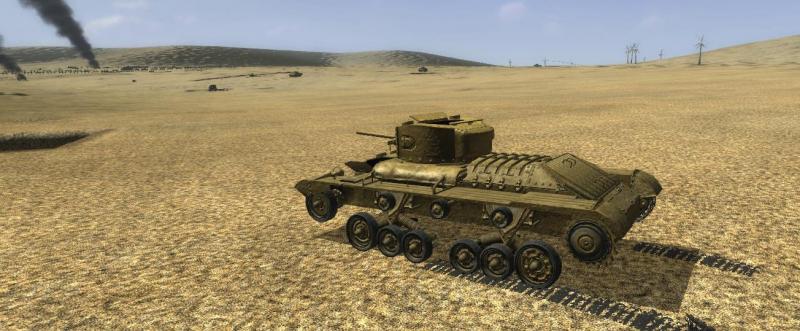
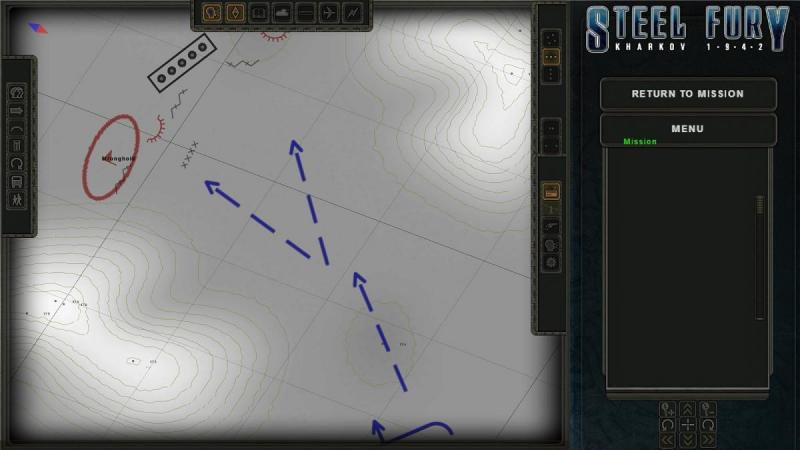
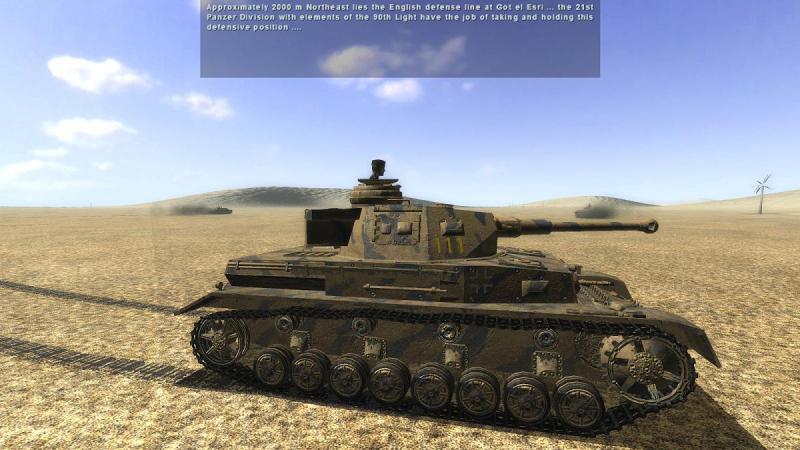
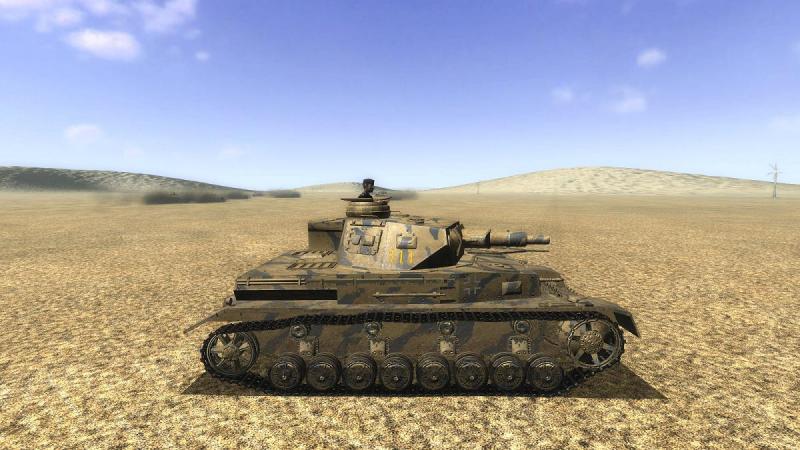
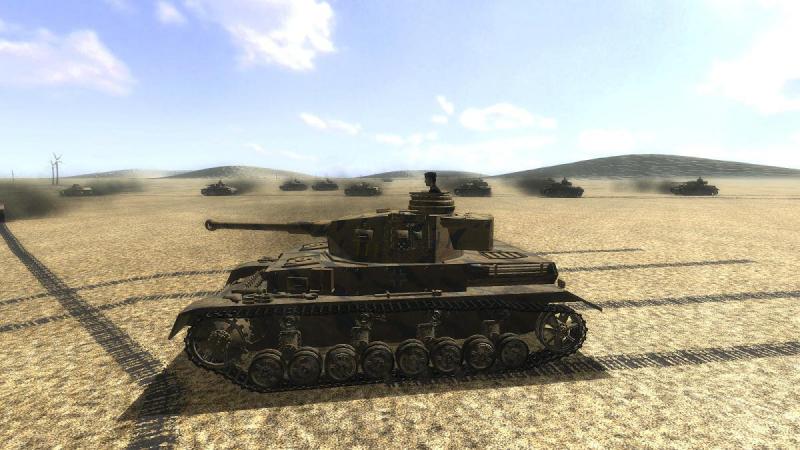
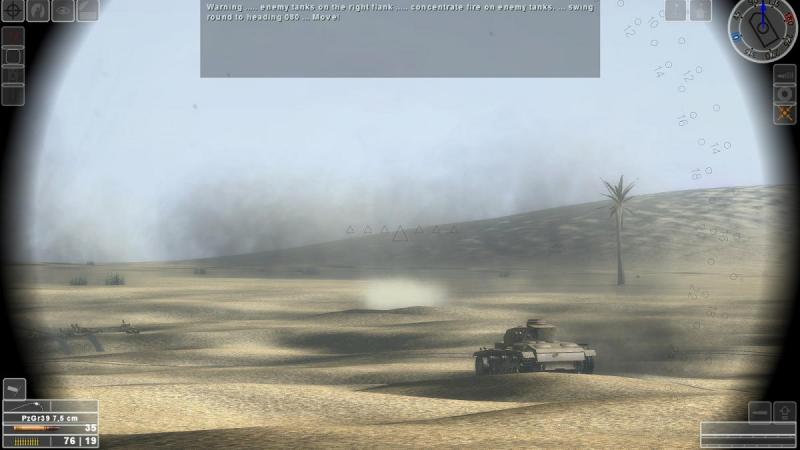
Steel Fury joins the Deutsches Afrika Korps! Graviteam's tanksim Steel Fury - Kharkov 1942, as its name indicates, started out limited to the Eastern front, about a year into 'The Great Patriotic War' between the Soviet Union and Nazi Germany. However, thanks to the efforts of modders you can now travel a bit further afield in time and space! This mission report is set in the sim's original time frame. But for a battlefield, we're bidding adieu to the Steppes and are off instead to the desert of North Africa. Here were fought some of the war's classic tank battles, between the Germans and Italians on the one side and the British Commonwealth and later the USA, on the other. By mid-1942, the war in the desert had developed into a see-saw battle as first one side then the other enjoyed the advantage. In 1940, Operation Compass saw the British fling back westwards a much larger invading Italian force. The following year the British 'Desert Rats', robbed of troops to prop up the war in Greece, were in their turn flung back east towards Egypt by the Axis forces, now re-inforced by Erwin Rommel's Afrika Korps. At the end of 1941, the British Operation Crusader, after some fierce battles, threw the Germans back again. In mid-1942, after a lull, the Afrika Korps was one more on the offensive; once again the British were pushed back well to the west. The mission The mission I'm playing here is 'Gazala', which signs me up with the famous 21st Panzer Division, justly famous for its combat record with the Afrika Korps. As usual, I'm using the latest NTA mod and the current Mission Pack. I also enabled the Africa mod, which I'm assuming is needed to replace the stock SF terrain with something appropriate for (in the words of that RAF song) '...a very pleasant land, where miles and miles of sweet eff-all are covered up with sand.' Full details of all the necessary items you need to get NTA installed with all the bells and whistles are over at the Graviteam Steel Fury forum, here. Edit, August 2014 - the NTA mod has been discontinued but its successor, the STA Mod, is now available: http://stasf2008.eph...d-on-steel-fury This mission starts off with an excellent German newsreel compilation from the theatre, some of it in colour or colourised. The briefing itself is in the stock SF style. This has rather a lot on the regimental/divisional battle picture which is fine, but not much on the company-level operation that you're involved with. The map gives you some idea what's going on but it's no substitute for something in the format of proper 'oral orders' given to you, and the other platoon commanders in your Combat Team, by your own company commander. Despite the 'Gazala' title, the mission is set on 26 June 1942, after the battle of that name. By this time, the victorious Germans and Italians were pressing on east towards the Egyptian frontier, and the date is more appropriate for the fighting that took place around Mersa Matruh. Here's the map for the mission. Basically I am part of a roughly company-strength tank/armoured infantry team, with no air or artillery support. We've to carry out an attack on British defensive positions either side and behind a long minefield of the sort that so often protected the infantry in this sort of warfare. While in the map screen, I called up the orders panel and selected line abreast formation and 'Do as I do', which I interpret as 'Conform to my movements and actions' and should really be default behaviour - Standard Operating Procedure or 'SOP', as it's called. My mount was billed as a Panzer IVF1. This has the short-barrelled 75mm gun more suited to infantry support, its low muzzle velocity limiting its effectiveness in the anti-tank role. For some reason I ended up instead with what the British called the 'Mark 4 Special', the Panzer IV F2 (later renamed as the G subtype). Part of the German response to the T-34 and KV-1, this had a much longer 75mm gun and was a potent tank-killer. Needless to say I had absolutely no objection to being up-gunned in this fashion! I switched to the gunner role (F2) and then toggled on the internal view (F9) and to the gunsight view (Insert). I selected and loaded an armour-piercing round. Then I toggled back to the external view (F9 again) for better situational awareness and to have a better look around at our force. It comprised a mix of Panzer IVs like my own, lighter Panzer IIIs with the short 50mm gun, and some Sturmgeschutze (assault guns) with short seventy-fives. Amongst us were panzergrenadiers in light and medium half-tracked Schutzenpanzerwagens (SPWs). There was even a soft-skinned Opel Blitz truck, living rather dangerously! It was quite an impressive phalanx, each vehicle raising a dark plume of dust as it rolled north towards the enemy. I ordered the driver to advance and joined the throng. As we moved off, orders came over the radio. These were in German and it was helpful to have them spelt out in a text panel atop the screen. The others set a fairly fast pace but I could not keep up. My driver ignored commands to go faster, and I gradually fell behind. Perhaps it was just as well, but my platoon - which I took to be the pair of long-barrelled Panzer IVs which I could see nearby - didn't wait for me. I have no idea why. There is a game setting ''Always obey orders' which i had turned off as recommended for a previous mission; perhaps that was why. Either way, I felt like the Duke of Plaza-Toro in that Gilbert and Sullivan song: In enterprise of martial kind When there was any fighting He led his regiment from behind He found it less exciting. I ended up watching the first phase of our assault through the gunsight. And this is what I saw. In the centre, enemy mortar or artillery fire whacked into our leading elements. Slightly right, some troops debussed from a light SPW which then then rattled on ahead. To my front, some more Panzergrenadiers had also debussed and were crawling ahead. I wondered whether it would have been safer for them to have stayed in their armoured carriers. Other dismounted infantry were being helped forward by other Panzers, like these Panzer IIIs. Feeling rather left out and seeing no sign of the enemy tanks reported on the right, I stopped and rattled off some rounds from the co-axial MG at what might have been an enemy heavy weapon which I could see as a rectangular-looking blob which came into sight above dip in the ground. I walked my tracers onto him until I saw the ricochets sail skywards. My target might just as well have been a rock but the shooting made me feel a little better, if nothing else. What this Panzer IV was doing sitting in the middle of a battle with all hatches open, I didn't know - immobilized and abandoned already, perhaps. The enemy position seemed to be in dead ground ahead of me; I rolled forwards again but I could see nothing of them, apart from the odd tracer whipping past on either side. That the defenders could clearly see at least some of us was obvious from the burning vehicles which began to appear around me as I slowly ground forward, accompanied for a while by another Panzer IV which may have been one of my platoon who had decided to stay with me, after all, By now, I'd begun to catch up with some of my comrades, as they paused to fire at targets which I could not yet see, like this Panzer III ahead and left of me. As that Panzer moved off and swung right, I noticed his turret spin around, as if he were tracking a target. Then I saw it too! A single enemy tank, some way off, was moving quite rapidly from right to left. He looked like a Valentine, a small but heavily-armoured British infantry tank, successor to the famous Maltida that reigned as 'Queen of the Battlefield' until our eighty-eights tore them apart at Halfaya Pass in '41. I knew that the Valentine would be a tough target for the Panzer III's short-barrelled 50mm gun. This one would be up to me! I set the range on my sight and lined him up with the lower right corner of the middle triangle. A little adjustment for his movement and my first round would be on its way. ...to be continued!


- 8 replies
-
- 1
-
-
- steel fury
- panzer iv
- (and 1 more)
-
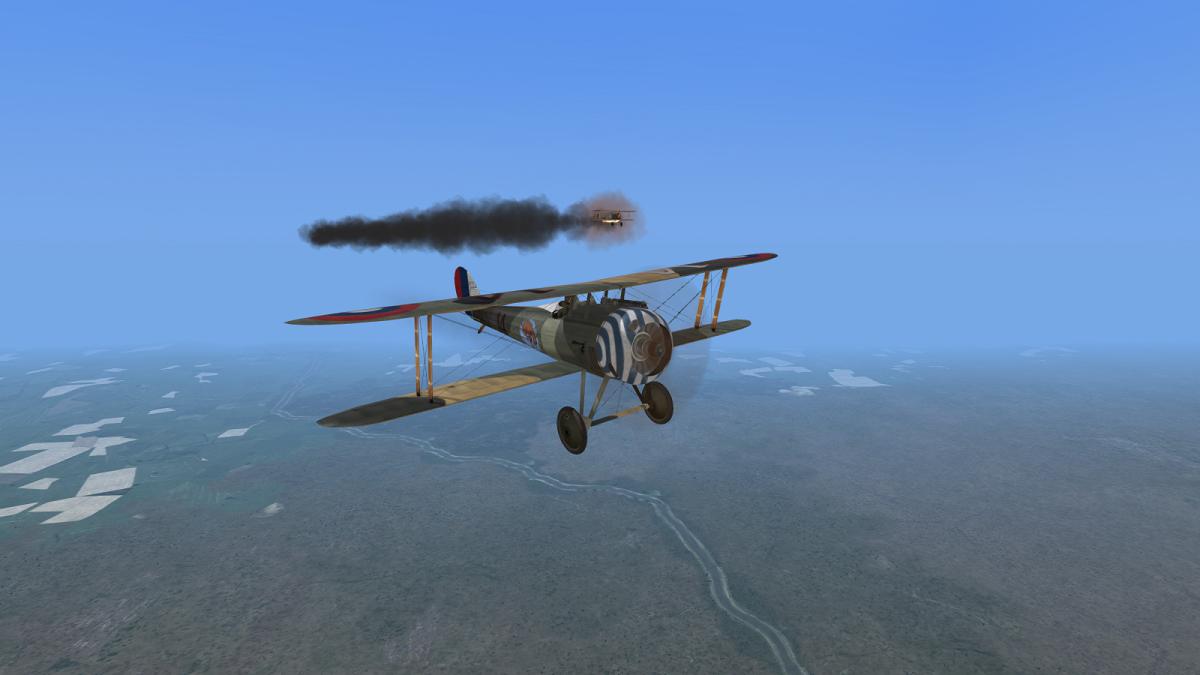
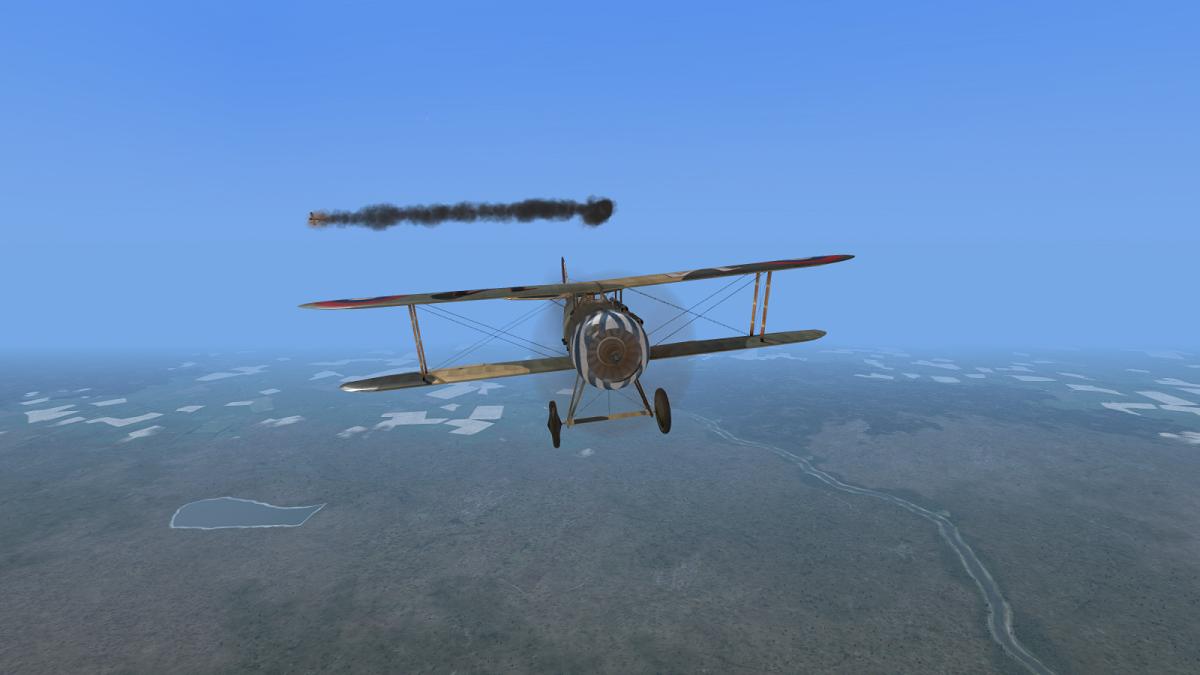
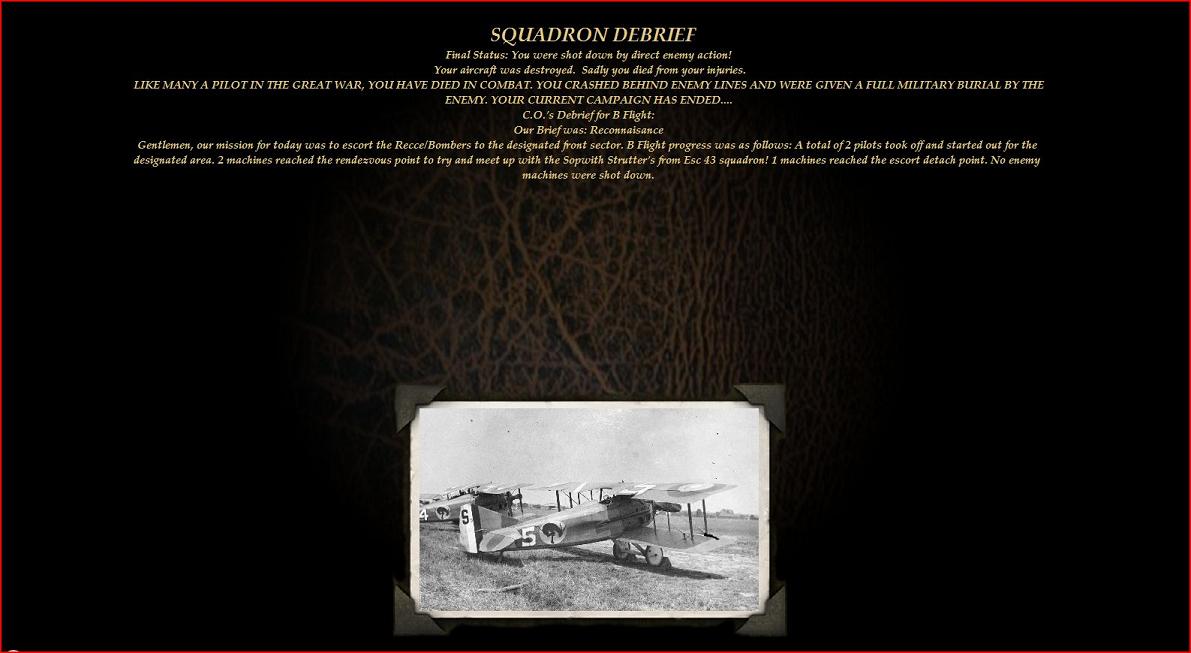
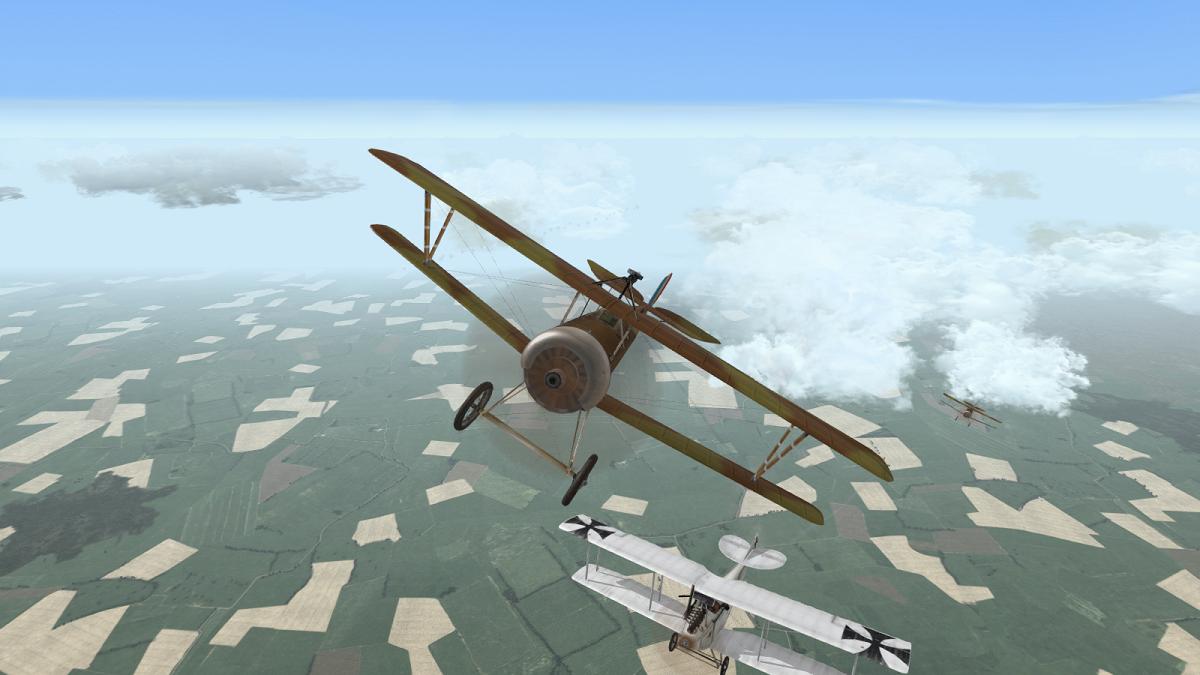
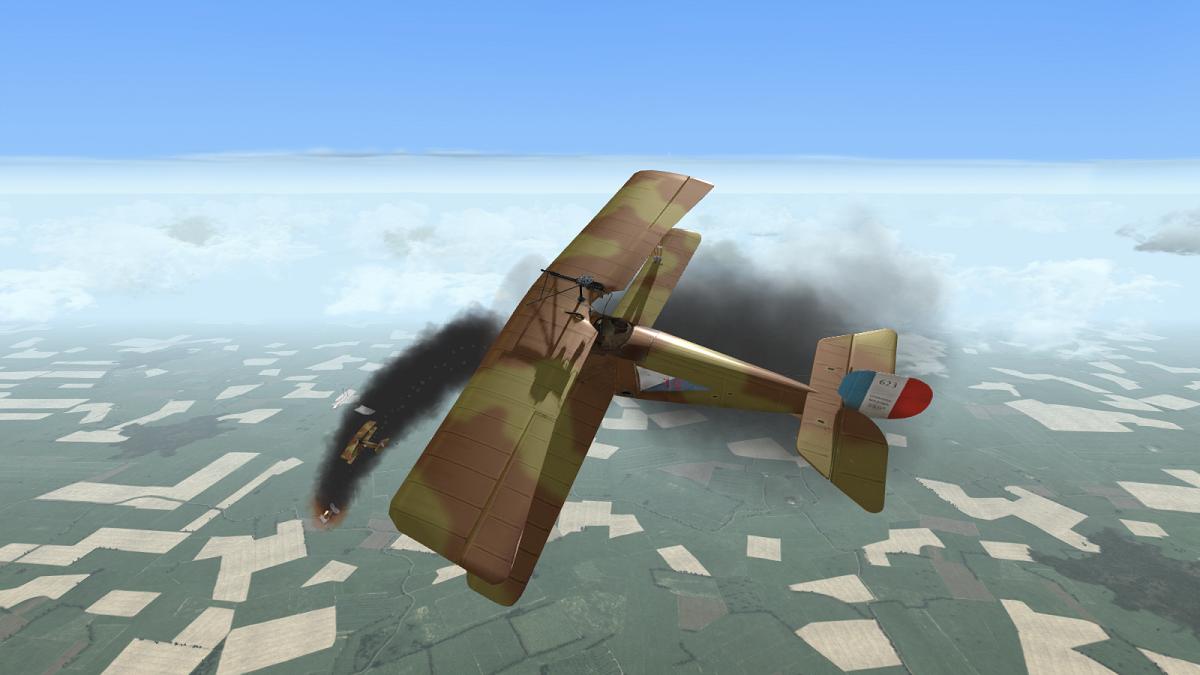
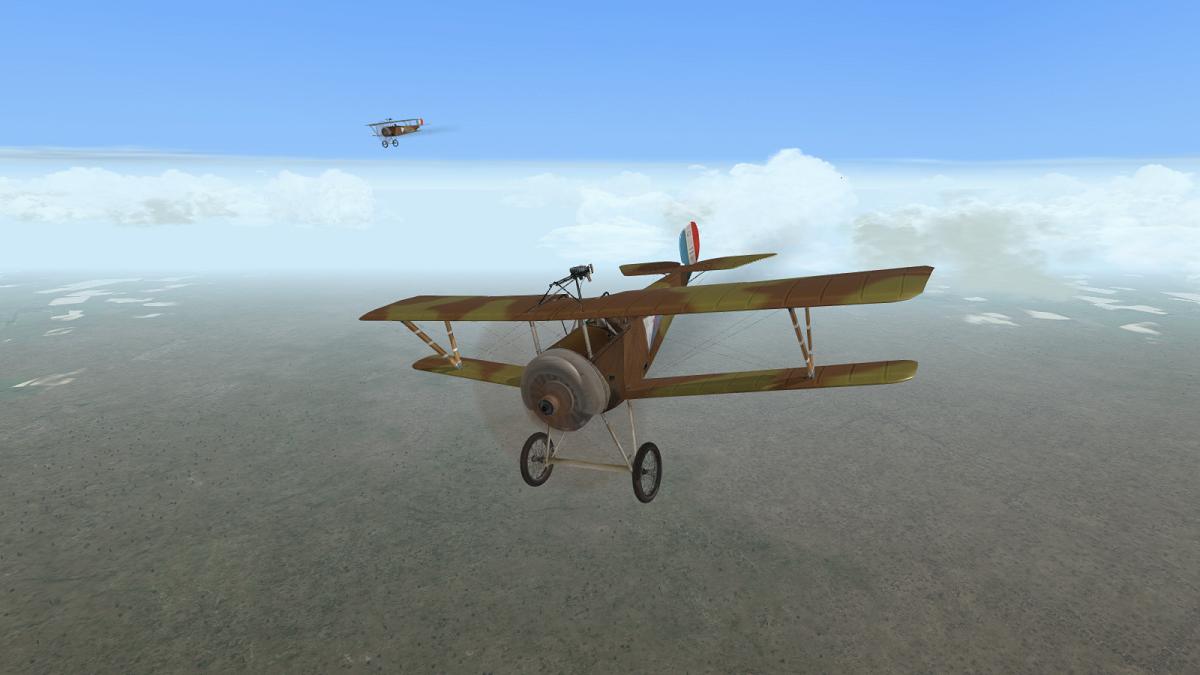
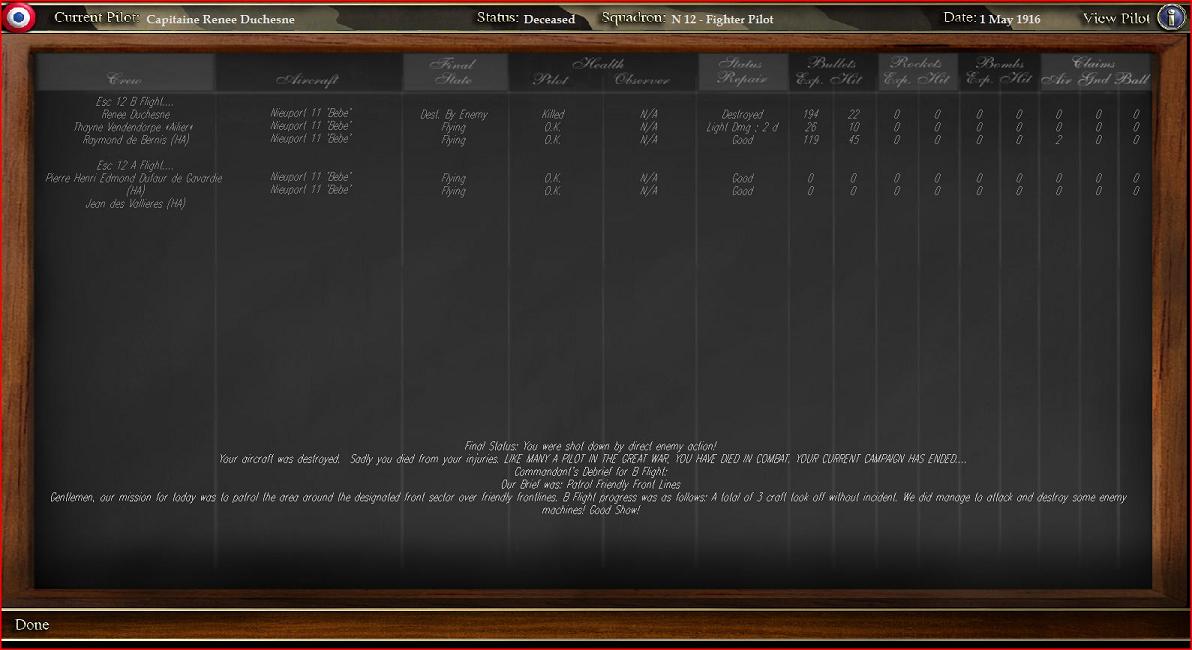
In the air and on the ground... Having knocked down one of the Nieuport Scouts that had diverted my formation from its assigned task of spotting for the Gunners, I was naturally elated. But I had lost a lot of what altitude I'd started with. Now of all times, I didn't want to be the next one for the chop! So I began a full-power climbing turn, in the general direction of our side of the Lines and comparative safety. Looking around, I took stock. The air combat seemed to have petered out. Some distance behind me, I could see three or four planes slowly closing up on me - hopefully members of my six-aircraft flight. But while most of the aircraft seemed to be in the distinctive light blue Roland factory finish, one was not. An Englishmen had not given up and was hunting us again! I turned around and went for him, ordering my two flight-mates to attack as I did so. Individually our two-seaters might be pushed to handle a nimbler Nieuport. But as with the last combat, I hoped that one or the other of us would get in a good crack at him, while he was occupied with the rest of us. And so it came to pass! The Nieuport was soon on the defensive, with our Rolands rolling and swooping all around him. And once again, it fell to me to finish the fight. A single and rather slow-firing fixed MG fired from a comparatively cumbersome two-seater is not the most effective killer of fighter planes. And with my Roland's comparatively effective ailerons, more than once I found myself over-banked, with the wings near the vertical and side-slipping rather than turning. Twice I barely managed to level her before hitting the ground, recovering at literally tree-top level. But in the end I got into a good position on the Nieuport, who was again handicapped by having to deal with several Rolands who were all out to nail him. And down he went. Two kills! And in a single mission! I checked the time and my location - I wasn't going to let a sloppy combat report cost me confirmation of my double victory! My next problem was that I was suddenly alone again. The other Rolands had disappeared, as if by magic. Looking to the south, I finally spotted a single distant aircraft hearing east, which might have been one of them. I circled for a while, gaining some height, in the hope some of my flight might rejoin me. In the end, still alone, I turned my machine to the west, determined to complete my mission, even if I had to do so on my own. And that mission was artillery observation - using morse code and a radio transmitter to adjust the fire of friendly artillery batteries onto ground targets. WOFF doesn't simulate this process but happily - whether put there by the WOFF campaign system or not - I could see that there was an artillery barrage already in progress in my objective area. So as I used to do in OFF when flying an 'art obs' mission, I headed that way, intending to loiter over the barrage and thereby simulate as best I could the task of spotting and correcting the fall of shot. As far as I could make out, the barrage was falling into a beaten zone which was across and roughly diagonal to the line of the enemy trenches. I orbited the shelling, watching the bombardment hit home but also keeping a wary eye out for enemies in the air, not least any sign that my observer might be tracking one. What I did see, was on the ground. A long track or narrow road ran roughly north to south, close behind the enemy trenches being bombarded. And on the road, I saw that there were two groups of enemy Motor Transport, trundling along. I watched them for a while, mentally urging the artillery to shift its fire onto these tempting new, soft-skinned targets. Of course, no such thing could happen, as even WOFF doesn't support telepathy. Or perhaps it does! As I watched, artillery rounds suddenly bracketed the MT convoy. Some of the trucks stopped, while others continued along. Then more artillery fell, this time right amongst the northernmost group of vehicles. As the smoke cleared, I could see a column of dark smoke rising, as one of the trucks burned. Others seemed to have been immobilised! Our Gunners were not done yet. Further salvos clobbered the southernmost group of vehicles, producing another column of smoke from a burning truck. If I hadn't seen this with my own eyes, I would not have believed it. I presume that telepathy can be ruled out here. So, maybe it was a complete co-incidence that there happened to be an artillery bombardment at approximately the position of my own objective. Perhaps it was just a further co-incidence, that there was MT on the move close by. And perhaps it was yet one more co-incidence, that soon after I noticed the trucks, our artillery engaged them. But however it happened, short of providing a fully functioning system for calling down and correcting artillery fire, WOFF could not have done a better job of creating a believable impression that I had completed my artillery-spotting mission in this most satisfactory fashion. It was a magical moment! Mission well and truly accomplished, I thought to myself! Time to call it quits and go home. I swung around the nose of my trusty Roland until she was headed east once more. The skies around me looked to be empty and devoid of either succor or threat. I suddenly felt rather alone and vulnerable. I very much wanted now to make it home, with our two aerial victories and a successful shoot under our proverbial belts. I need not have worried. Soon, in a shallow full-power dive to pick up speed, our machine was back over friendly territory, with the Lines falling away behind us. Not long after, we were joining the circuit over Houplin, still on our own and quite unmolested. Despite the Roland's reputation for cracking up on landing, I got her down without any particular drama and trundled happily up to the sheds. In my excitement and my anxiety to find out what fates had befallen the others, I neglected to check the detailed debriefing screen. But the initial debrief and squadron information screen told the tale. Of our six machines, three had made it back to base. Two of the three Rolands which didn't, had been destroyed and their crews killed. The two victories and the successful shoot had been team successes; without the others, they would likely never have come my way. But the team had paid a high price. It was a sobering moment, set against the satisfaction of a job well done. As missions go, this was one of the very best two-seater sorties I have flown in any WW1 sim. The air-to-air combat was dangerous and exciting. And even if it was a complete fluke which never happens again, the sight of that artillery fire, arriving just as it might have done, had I called it in by radio, smashing up that road convoy, was one of those classic moments of pure simming immersion and delight that I will not forget in a long time. Simply brilliant!
-
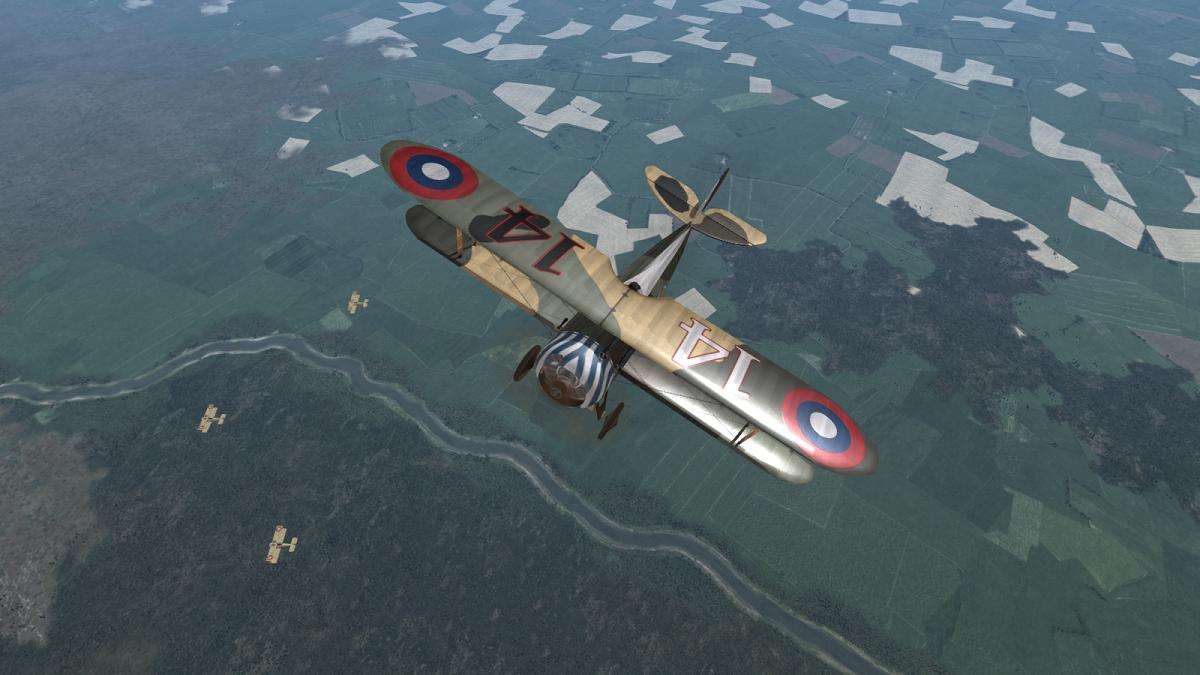
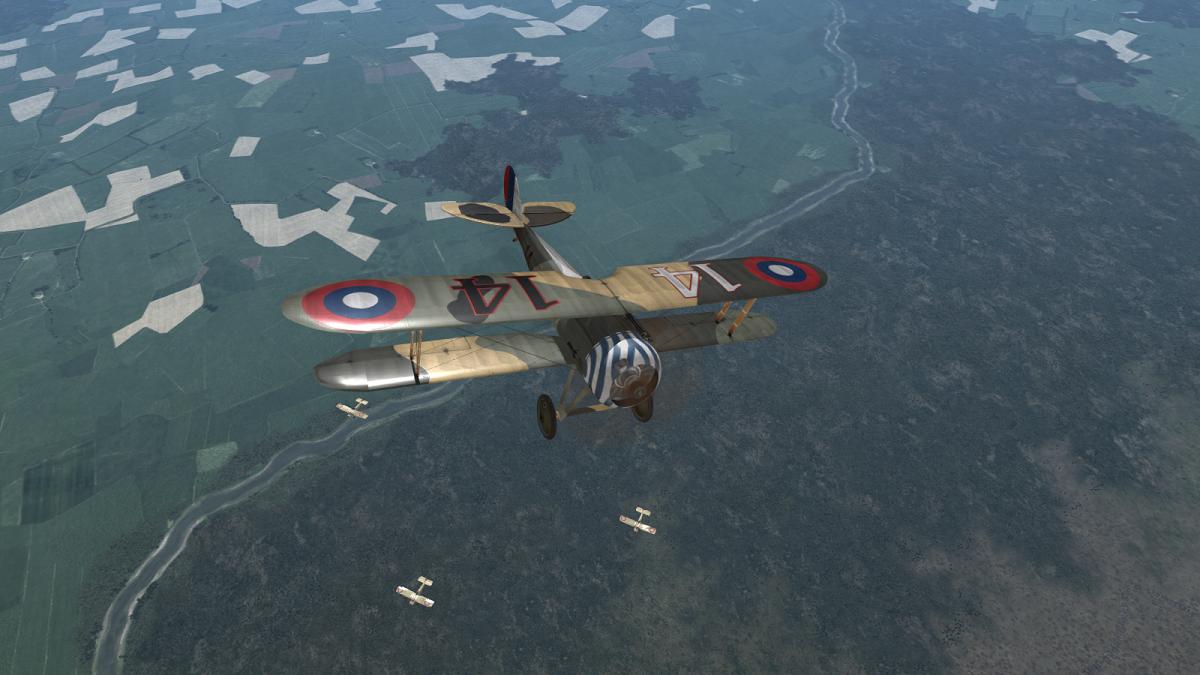
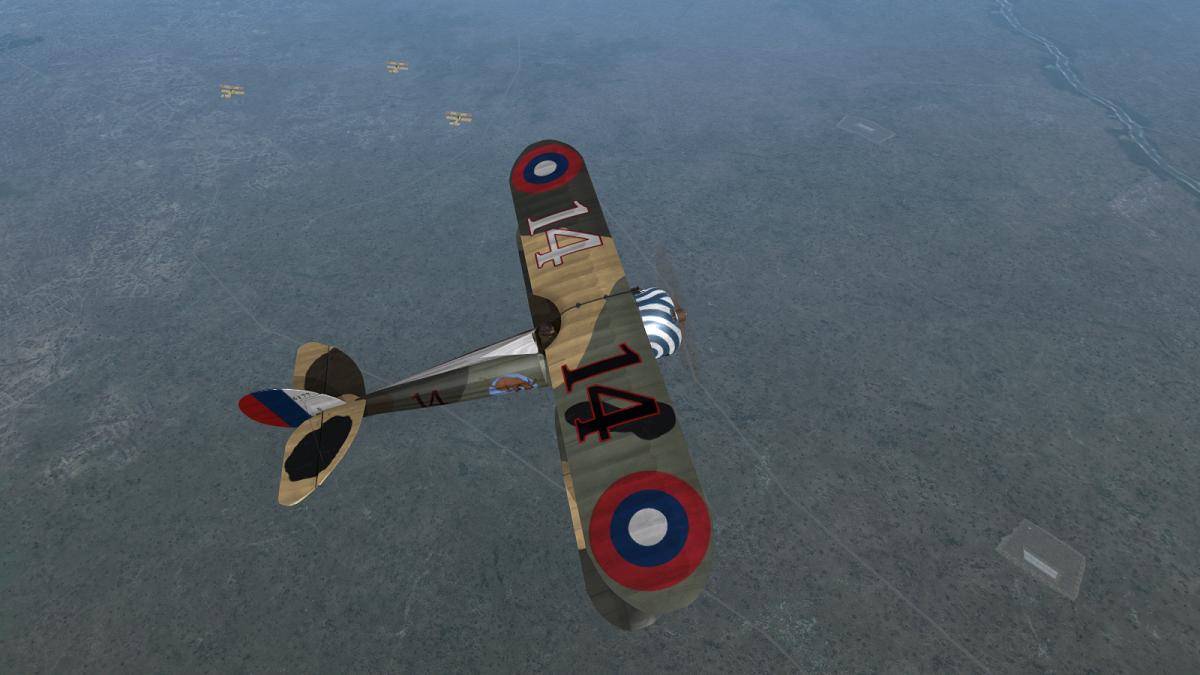
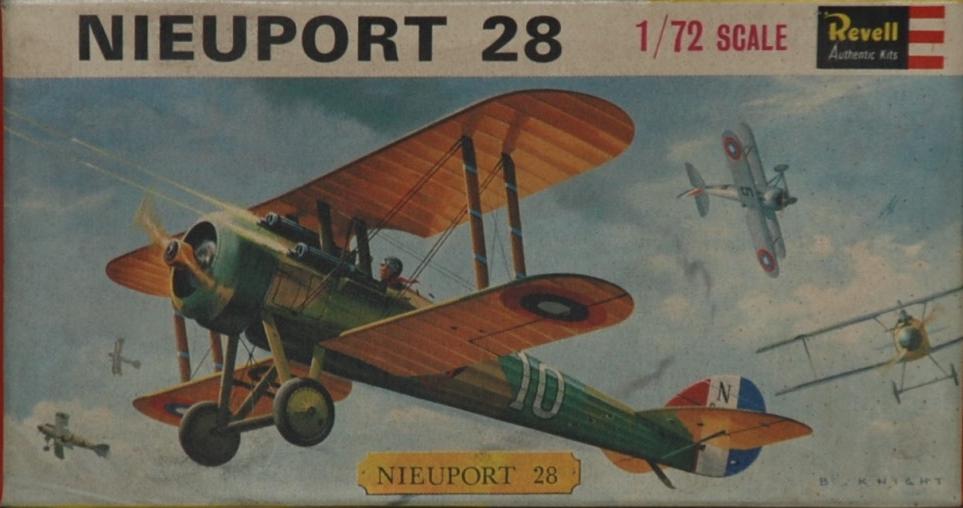
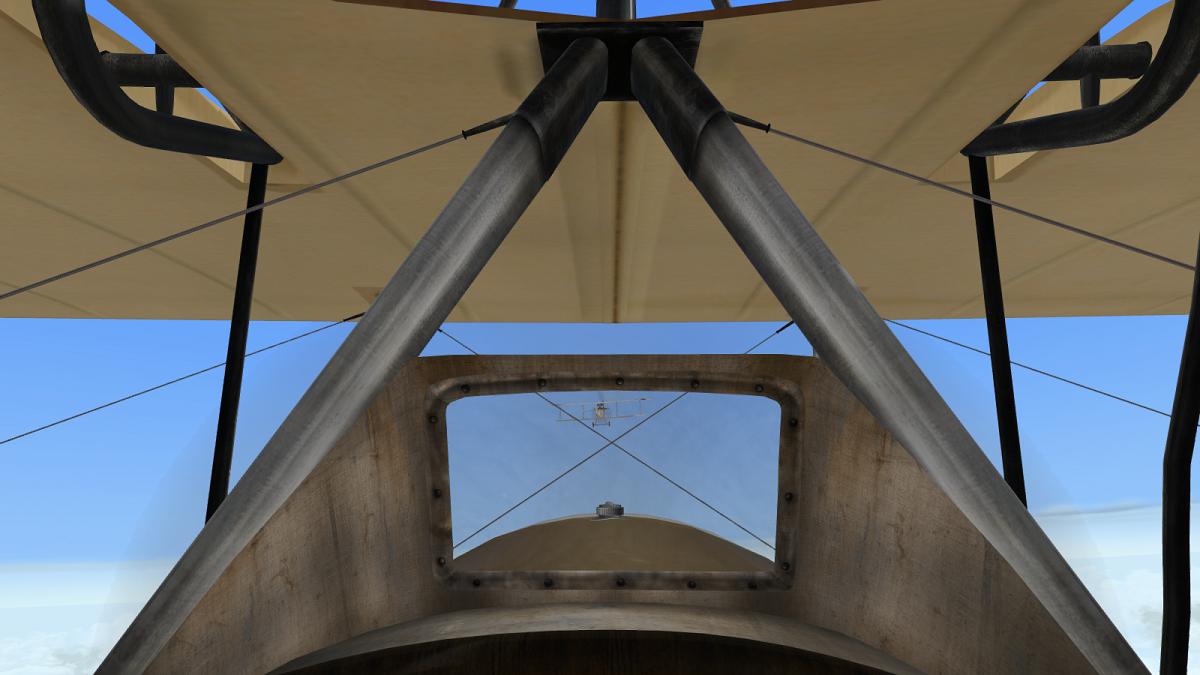
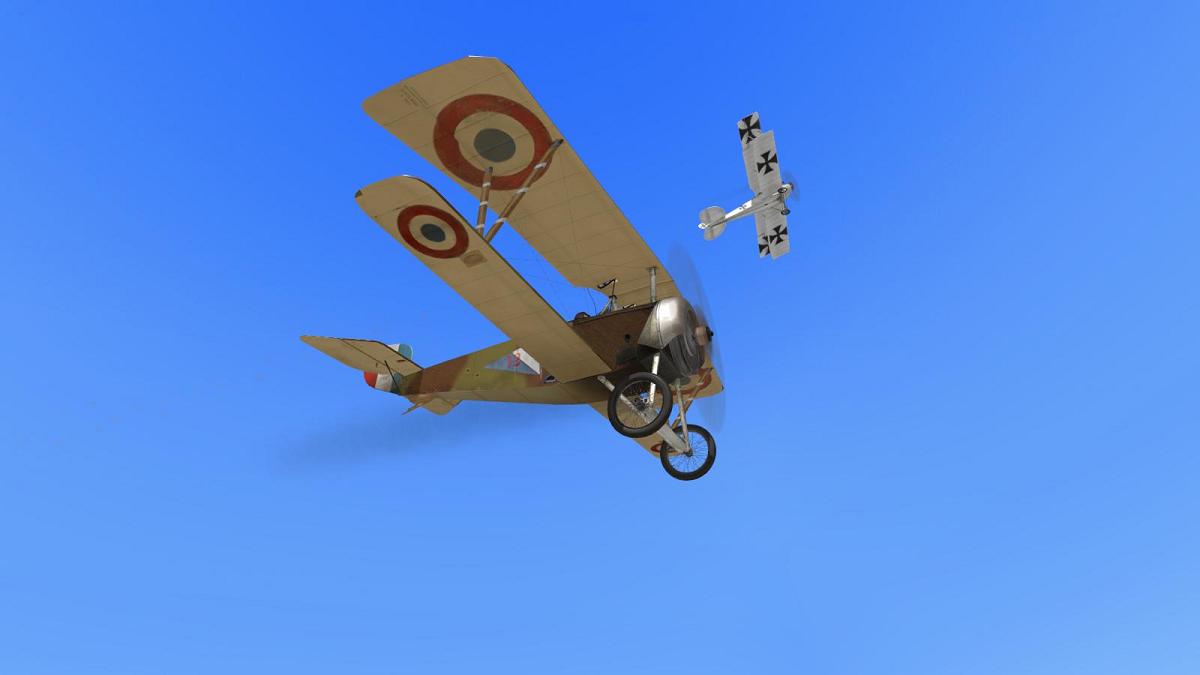
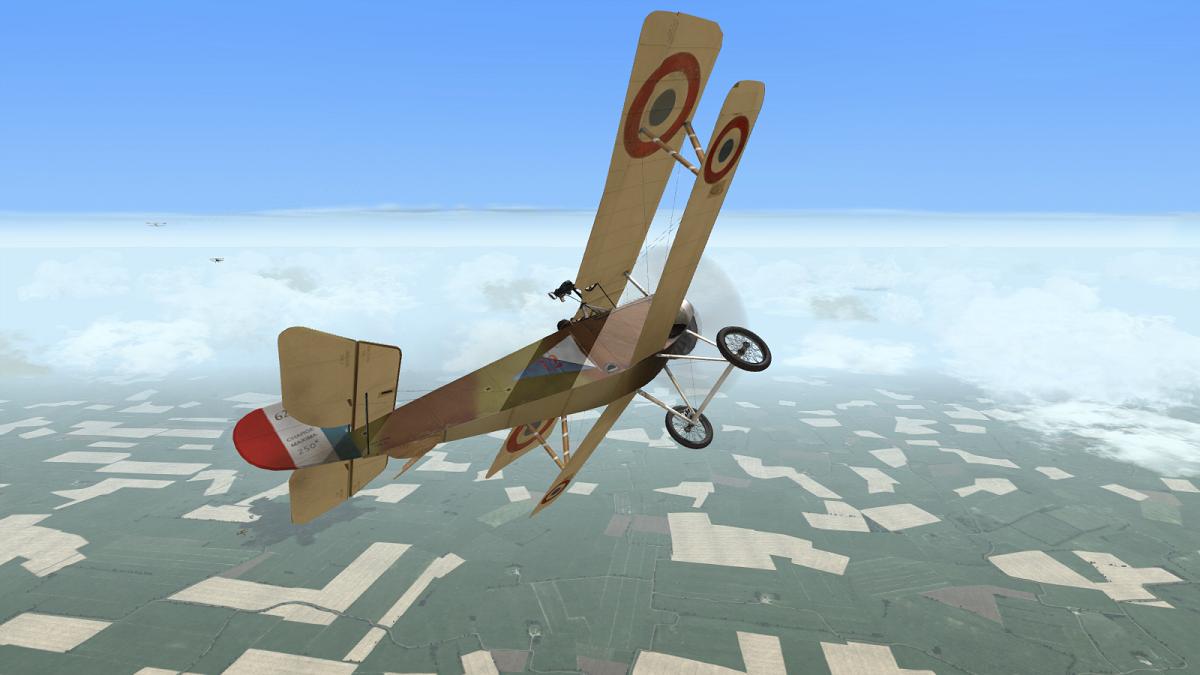
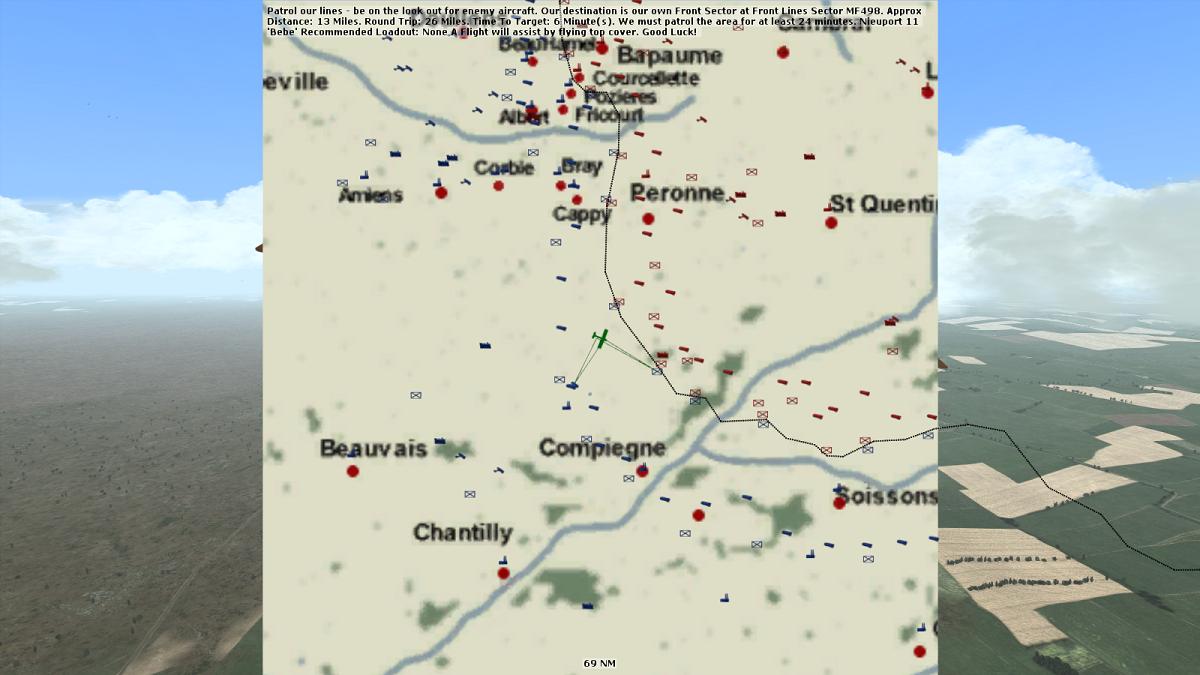
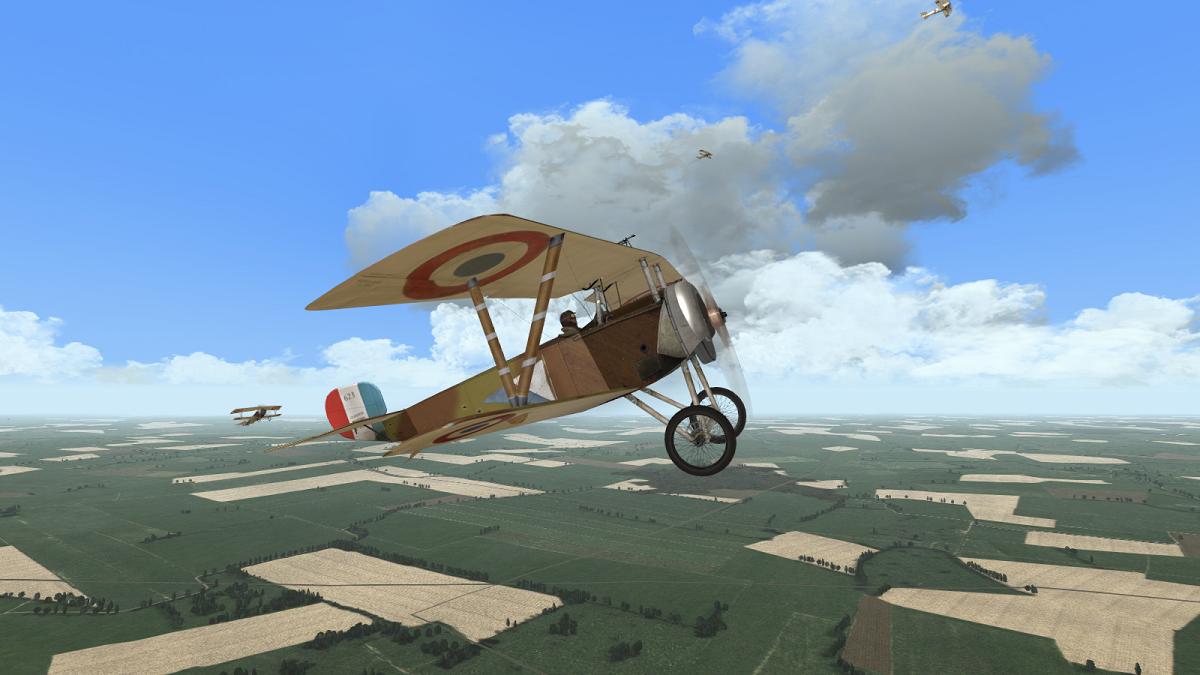
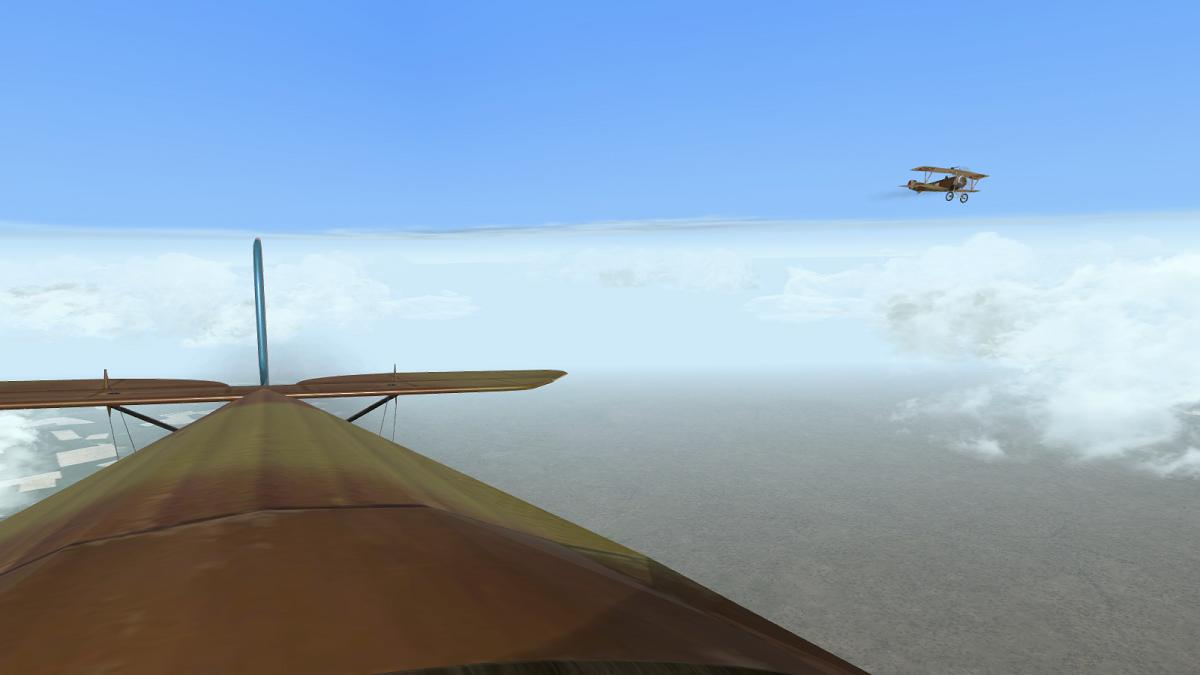
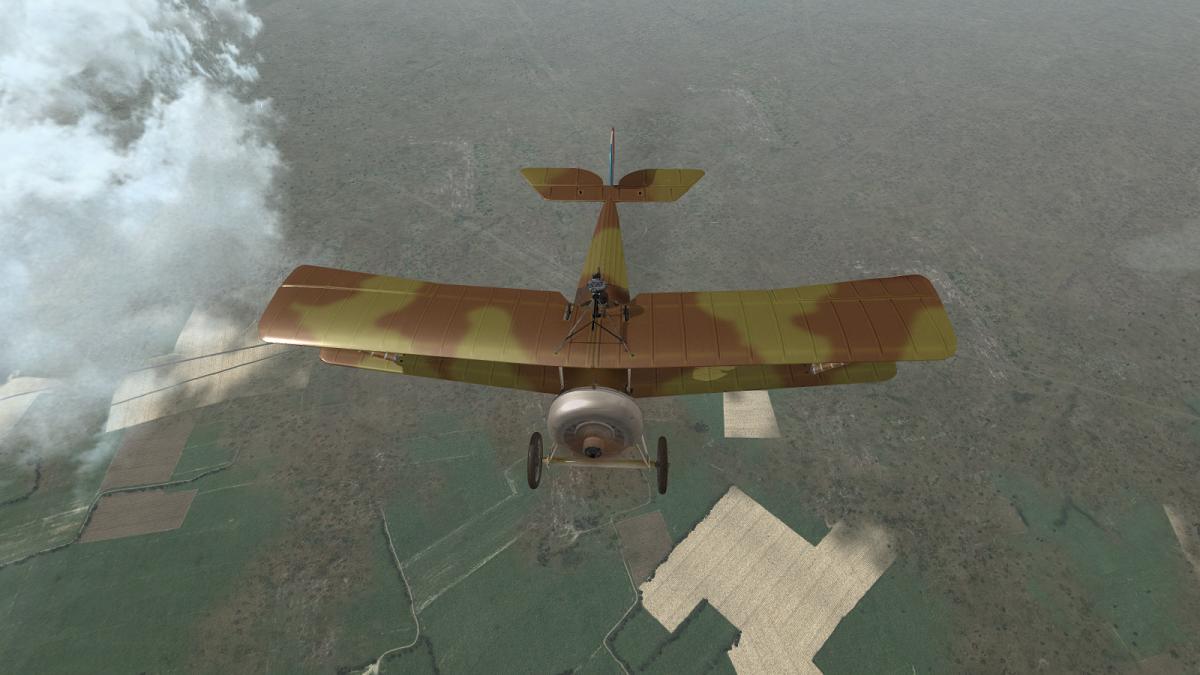
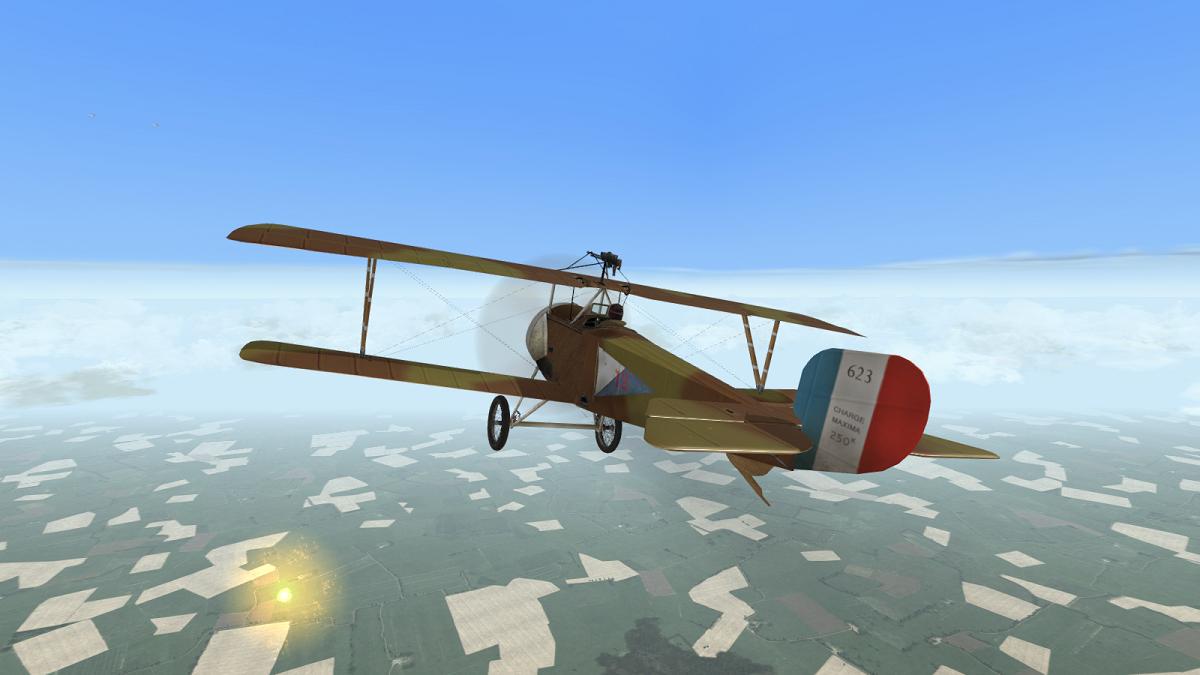
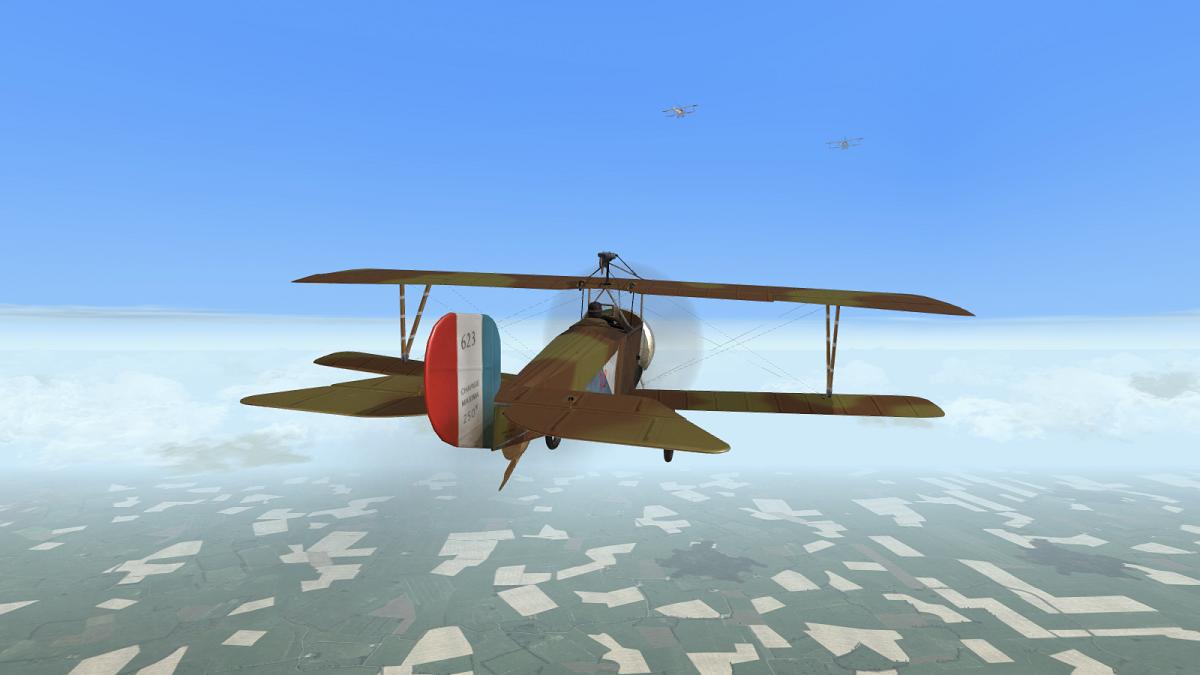
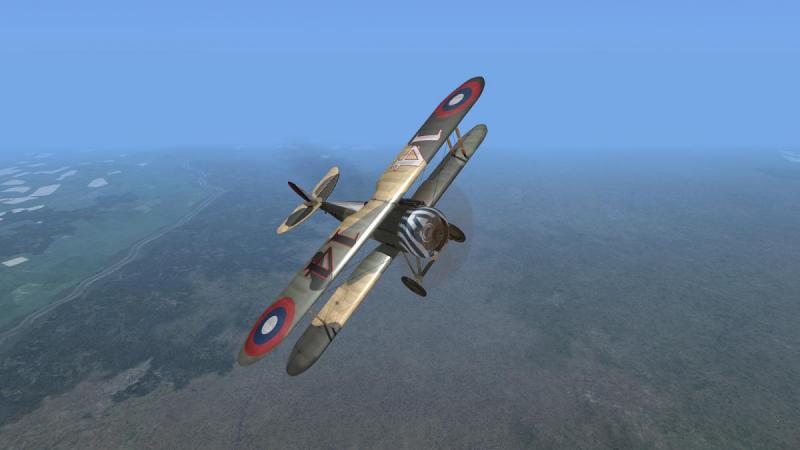
Spotting for the Gunners in the LFG Roland C II! In an air war notable for the sheer variety of planes of all shapes and sizes that made it to the front, the LFG Roland C II must be one of the most distinctive, if not also one of the most attractive. 'Truely, this aircraft is a whale!' was the reaction of one of the German procurement people who came to see what they'd be getting for their reichsmarks, giving the Walfisch its enduring nick-name. But it was also one of the most advanced aircraft of its day, a compact, fast, streamlined single-bay two-seater general purpose aeroplane in a world where other such machines were bigger, slower or ungainlier…and mostly, all three. 'The best German aircraft now' was reportedly the verdict of RFC ace Albert Ball, who frequently came up against (and shot down) the type in the summer and early autumn of 1916. However, though sometimes encountered in sizeable formations in this its heyday, the Roland was produced in comparatively small numbers and its front-line service career was over by about mid-1917. Speedy in the air, it was slow and expensive to make. Its thin wings tended to warp in the harsh conditions of front-line airfields and visibility for landing was poor, resulting in many crashes or hard landings. But still, it was a notable performer for its time, whose capabilities generally matched its good looks. Many of us will know the type from the 1960s Airfix 1/72 kit, helpfully moulded in light blue plastic in imitation of the distinctive finish initially carried by the Roland. It made up into a nice model, with decent crew figures instead of the dreaded 'goggled alien' of earlier Airfix WW1 kits. One day, I will make this kit again, notwithstanding that newer versions are available. In the meantime, I can fly the Roland in simulators. I don't yet have the Rise of Flight Roland, seen here escorting my DFW C V in a recent mission... ...but I do have and like the First Eagles versions from the A Team Skunkworks. Though they have a 'Spandau' machine gun for the observer, instead of a 'Parabellum', there are a couple of interesting variants, including this one with a captured Lewis Gun fitted to fire ahead over the propeller arc, which was tried in real life: But for this mission I chose Wings Over Flanders Fields. Having flown the Roland in Over Flanders Fields, I was keen to see how I made out with this machine in the latest incarnation of this sim, with Ankor's self-shadowing mod and the new AI and landscapes of WOFF. The campaign Creating a new pilot, I tabbed throught the available German 'Bomber/recce' squadrons flying in September 1916 till I found one that flew the Roland in the British sector - WOFF still provides a better representation of the RFC order of battle, and would benefit in particular from the addition of French two-seaters more suitable for either 1916 or 1918 than the Morane L (really a 1914-15 type) and the licence-built Strutter (gone from the front by mid-1918). I ended up with Feldflieger Abteilung (Artillerie) 240, based at in Flanders. I believe the 'Artillerie' indicates that we specialise in observing for the artillery and can correct their fire using radio transmitters, one of the major jobs for two-seaters in WW1, along with photo or visual reconnaisance and to a lesser extent, bombing. Here's our roster and our operational area. Even without tabbing to the Intelligence summary, I knew that the deadliest foes we could expect to face in our sector would be DH-2 'pusher' fighters and the more modern French Nieuport scout, both types used by several RFC squadrons. With the British fighters apt to patrol up to ten to twelve miles on the German side of the Lines, I knew also that we must be prepared to meet them in the air, whatever our task would be. The mission It's 12 September 1916, and our assigned task for this morning is artillery observation. Down to the south west we must go, from our airfield at Houplin down to the trench-lines. There are no less of six of us on this operation, with myself leading the full flying strength of the staffel. When I draw an 'art obs' mission in OFF or WOFF, I generally fly to the front and orbit near any friendly artillery barrage in progress, as if I was directing the fire. It's not possible actually to call down fire onto ground targets (although after this mission I'm no longer so sure, of which, more later). If there's no artillery fire going on, I regard my radio transmitter (or the battery's receiver) as having 'gone dark' and do a bit of recce work, so that the taxpayers still get their money's worth. We have an escort, but I wasn't going to put much faith in the two obsolete Fokker Eindekkers we'd been allocated. For all I knew they were the last ones at the Front, still able to beat up a BE2c but well outclassed by any fighter we were likely to meet. My own flight would serve as my escort. I would do the virtual artillery-spotting. Knowing that formation-keeping in WOFF was considerably improved over OFF, I knew my comrades would be able to keep up quite well as I circled over the front. Anyone trying to shoot down the spotter - me - would have to get through them, first. At least, that was the theory. Here we are, lined up opposite the sheds and ready for the 'off'. I had chosen a camouflaged skin from those available in WOFF, but the rest of the flight are in the original, distinctive and rather racy light blue. I checked my controls and started up. Then I called up the Tactical Display (TAC), set its target type to 'aircraft', checked its range was suitably low (I left it at half a mile) and turned the TAC off again: it was now ready to padlock air targets, when turned on again. I didn't expect to do too much (if any) dog-fighting on this mission but if I had to break formation and fight individually, I decided I was going to make good use of my forward-firing MG, relying on the observer to cover my tail. Which is more or less how it came to pass. But that lay in the furture. I roared off the airfield and tried some gentle turns before setting course for the Front and throttling back to allow my flight to catch up. I found the ailerons deceptively light and the rudder heavy. It was easy to under-bank and slip outwards, or worse still, over-bank and find yourself in a nasty side-slip, if you didn't give her plenty of top or bottom rudder. This was nearly to be my undoing. But that, too, lay in the future. For now, I watched my flight catch up from astern. One of them took several minutes, during which time I saw two aircraft fly past overhead - the two Fokkers, I supposed. This was the only time I saw them, as it turned out. At at last we were all in a nice diamond formation. I opened the throttle wide and I began to climb, maintaining forward pressure on the stick to stop my tail heavy plane's nose from rising too much. All around us, thin clouds loomed, slipped past below, beneath or beside us, then loomed ahead again. I spent a little time admiring and exploring my plane, inside and out, between navigating and scanning the skies. Visibility downwards was, as expected, not good, but in every other direction, I had a superb view, unobstructed by the usual high-mounted biplane upper wing. Looking behind, the sight of my flight tucked in behind me inspired confidence…to much, perhaps, I thought, remembering Albert Ball's opinion that such formations were easier to surprise as the aircrew tended to feel a false sense of security and relax. On we went. Climb rate was less than stellar and we were not far above five thousand feet as we came up the the trench-lines. Our Fokker escorts were nowhere to be seen and I decided I wasn't going to hang about looking for them. I was at a respectable height for artillery observation and was now at the Front, where lay our targets. I leveled off and throttled back slightly. I had arrived at the war. Approaching the area over the Lines where we were tasked with spotting for the Gunners, I turned on the Tactical Display to get a navigation check. Instead, I got a surprise. In fact, I got two surprises. First, knowing that I was headed roughly in the direction of my target area, I was startled to notice that the pale blue line showing the path to my next waypoint, instead of pointing up, straight ahead, had slewed around to my left rear. If that wasn't strange enough, the text displayed beneath the TAC itself was telling me that it was high time to go home. In fact, not even home - to the nearest airfield. Had I inadvertently skipped a waypoint? No, I was fairly sure I had done no such thing. My true objective still lay ahead. Who's leading this mission, anyway - me or the Tactical Display? Pilots in the German Air Service may often be mere NCOs but while I may have to take orders from my commissioned observer - my own alter ego, anyway - I'm certainly not at the beck and call of an on-screen visual aid. Sod that, I thought. On we go. Actually, the TAC was trying to be helpful. Looking behind, the reason for the device's caution was not hard to see. An aircraft was slicing into our formation from our left rear. And though I didn't notice it at the time, three other aircraft were below and behind us to the right. My initial reaction, seeing just the one presumed enemy attacking, was that I'm not going to break formation and get distracted from my objective for the sake of one aggressive Englishman. Unfortunately, those on the right of my formation didn't agree that staying together and meeting the enemy with massed fires was the best bet. That side of my formation broke up rapidly, as Rolands wheeled off and after the Nieuport. All very commendable perhaps and it certainly seemed to put off the foe-man, who turned away. I now had a decision to make, and I needed to make it immediately, before the passage of time removed one of my options. I could hold my course to the objective, with what looked to be two remaining flight-mates. Or I could turn us back to join the battle, keeping my formation, if not intact, then together; and resuming my progress to the objective when the battle had been won. Keeping to my present course seemed to comply with the Master Principle of War - Selection and Maintenance of the Aim...but at the expense of one nearly as important - Concentration of Force. Incidentally, contrary to what John Keegan said in 'The Face of Battle', these principles, far from being thought old-fashioned, were taught at Sandhurst in the late 1970s. Anyhow I had read too many accounts - Trafalgar, for one - of forces that are (or get) split up, then being defeated in detail, even by numerically weaker enemies. So I turned back to join the fight. By this point I had realised there was more than one enemy aircraft. I picked up one who lay ahead and gave the attack order, so that the others would pick their own targets. Mine, I recognised as a Nieuport Scout. He was manouevring a few hundred feet below, to my half-right. I made a series of swooping attacks on him, allowing my observer a crack as I whizzed past. While I kept up my speed and most of my height, the tightly-turning Nieuport was able to turn in under my attacks most of the time. He in his turn was prevented from having a determined go at me by the presence nearby of at least one other Roland. After a few more passes I got behind him and stayed there long enough to get in several good bursts from not too far out. He stopped manoeuvring and settled into a steady glide earthwards, emitting a spluttering trail of grey smoke. I watched as he piled up into the mud behind me. Got him! But the fight wasn't over yet! ...to be continued!
-
Thanks for the positive feedback! And yes, good idea about campaigns; I had been thinking of featuring a campaign with 60 Squadron RFC as they went through a good variety of aircraft types (if you live that long) but there are many more possibilities, 'On campaign with the Flying Tigers/56 Squadron/the Red Baron/JG 26/Second Panzer Division/the Desert Rats' or whatever...yep will give it a go soon!
-
Try this: http://combatace.com/topic/81279-blitzkreig-1940-cfs3-eto-expansion/ http://combatace.com/topic/81631-cfs3-eto-spanish-civil-war/ http://combatace.com/topic/81323-arm%C3%A9e-de-lair-1940-cfs3-eto-expansion/ CFS3 is not great at air-to-air but not bad at fighter-bomber or even medium bomber ops. It's a lot better with the ETO Expansion. There's also the Mediterranean Air War (MAW) expansion and a PTO one, tho I'm happy with CFS2 and IL-2 '46 + DBW for the Pacific.
-
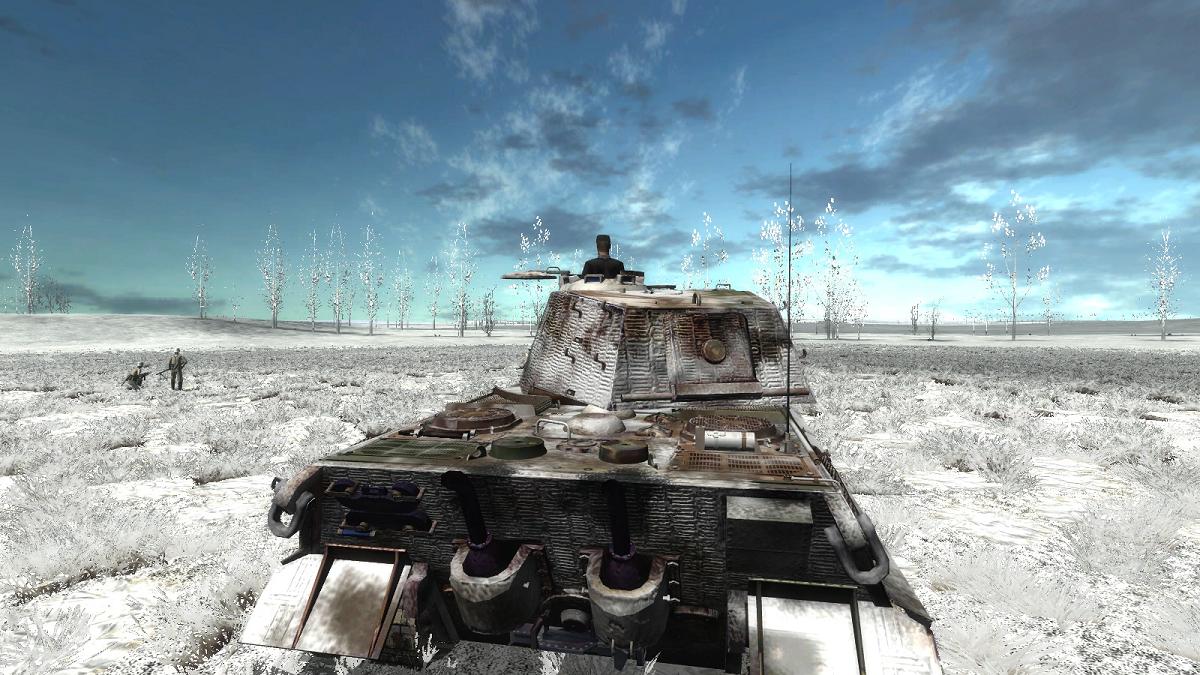
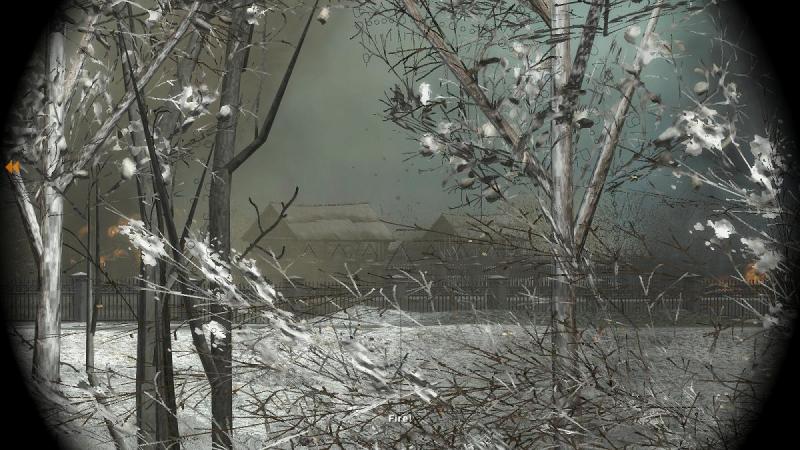
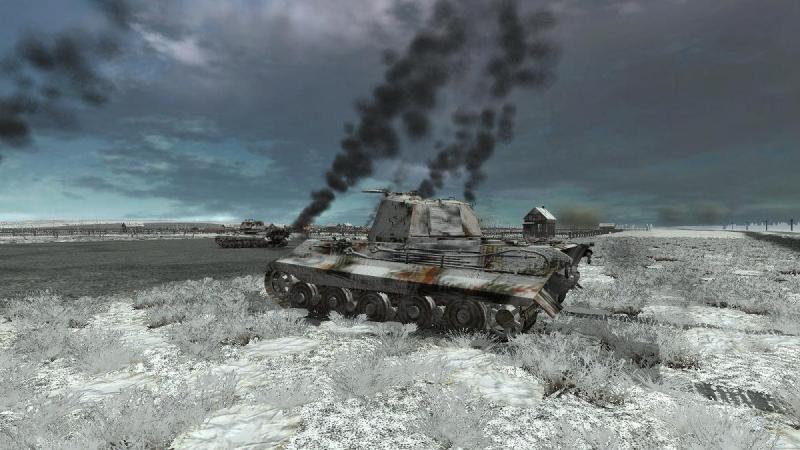
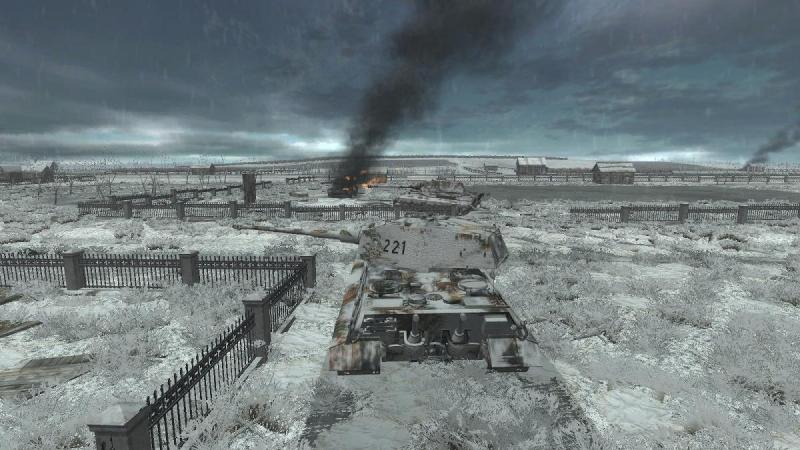
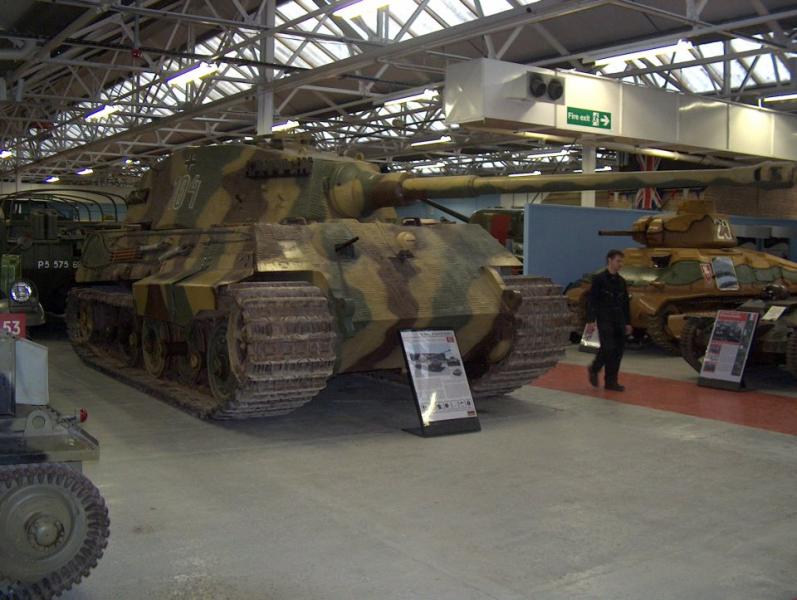
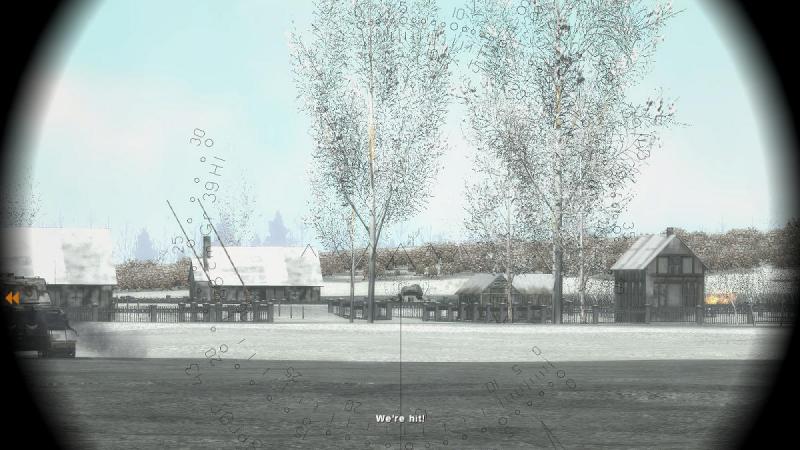
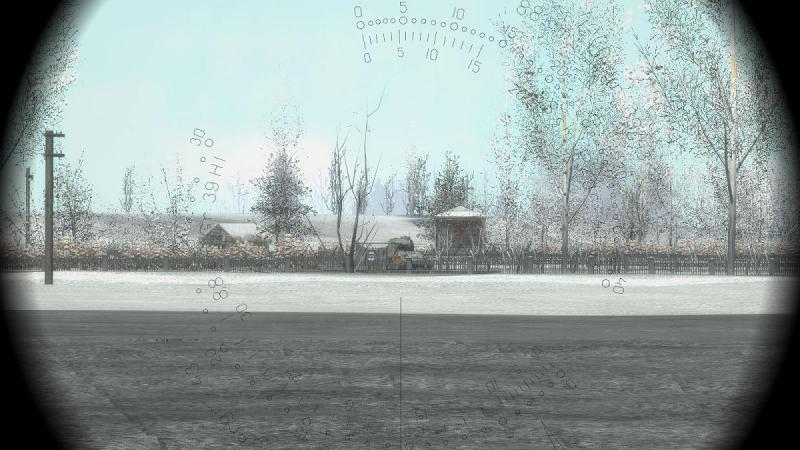
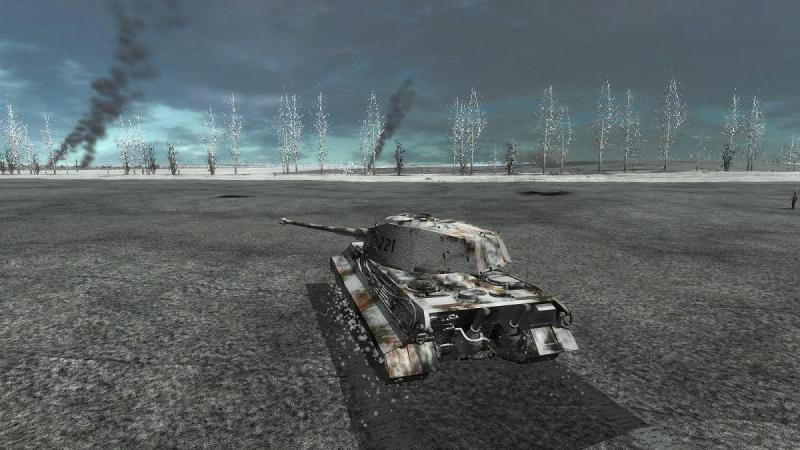
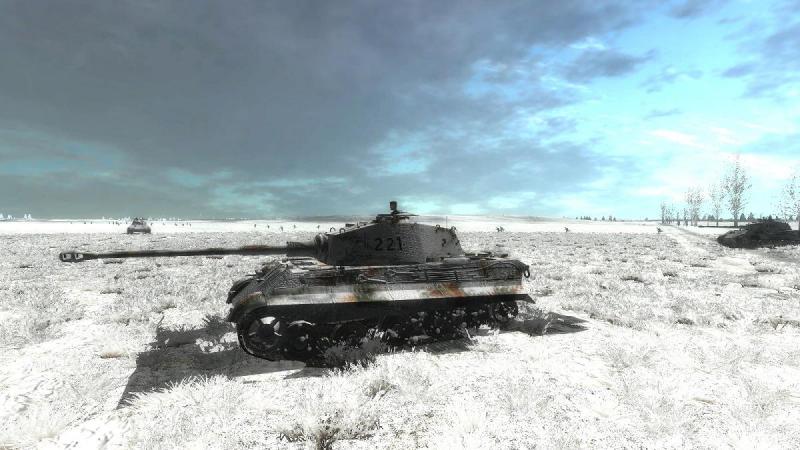
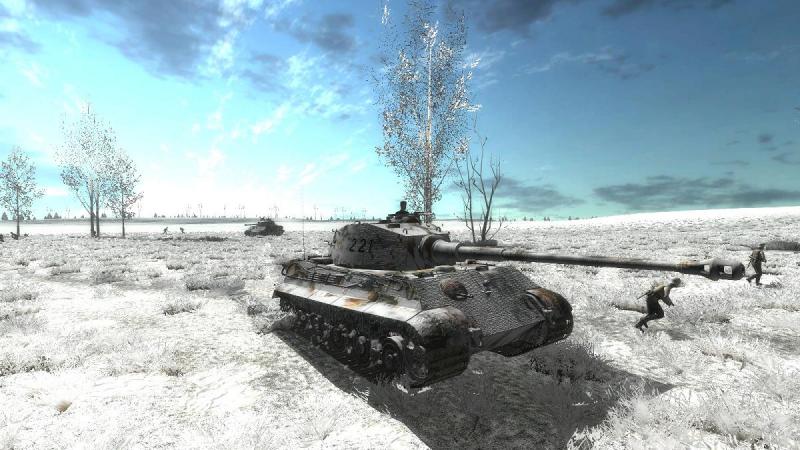
On to the objective! Just as I was beginning to think we had dealt with Ivan's armour, a new threat developed from the opposite flank. My tank commander indicated yet another tank target, off to the right. Again I spun my tank on its tracks and swung the turret right, at the same time. He wasn't hard to find, stopped out in the open and aiming right at us. I let him have it and he burst into flames after my second round. But the fight was still not over. Scanning left again, I picked up the shape of yet another T-34, partly concealed behind some buildings. I swung the tank left to get a better shot at him, then put two rounds into him, too. Moving off again, I approached the outskirts of Pettend. There was still a lot of small-arms fire flying back and forth, but I was on the look-out for deadlier prey than enemy troops. As I edged over to the left, yet another T-34 suddenly came into view, this time at scarily short range. I saw his 85mm gun fire and the tracer flash past to my right, likely aimed at another King Tiger. I fired once in return and the Soviet crew promptly bailed out. Some of them were carrying weapons so I machine-gunned them mercilessly, seeing two of them stagger to their feet and collapse. I continued slowly edging towards Pettend, relying on this to open up new arcs of view and hopefully continue to reveal whatever might be concealed the other side of the scattered buildings. From the gunsight, I scanned back and forth. There was nothing to be seen to my front, but smashed or burning Soviet armour. The small-arms fire seemed to be easing off, too Continuing my cautious advance, I came across a stationary T-34 at close range. Taking no chances, I put a round into his side. I immediately realised he was already knocked out; my round succeeded only in killing a crew member who was foolishly hanging around, in front of his tank. The fighting definitely seemed to have died down now, with our grenadiers having reached the objective and apparently being engaged in mopping up the last remnants of whatever Russian infantry was still holed up in or around Pettend. I swung right, intending to come around that flank and help clear the village, without venturing too deeply into it. At this point, I was rewarded with the news that the mission objective had been achieved! I opted to play on, however, continuing to edge around the right flank and looking out for any surviving Ivans. One of my King Tigers seemed to have been left behind - I was to find out later that he had lost a track - but my other tank was still with me. All I could see was smashed T-34s. There was still some desultory small-arms fire, whether involving holed-up infantry or bailed-out tankies. Between us in our two King Tigers, we machine-gunned any enemies we saw. The snow began to fall heavily, as I halted in the middle of the village, after machine-gunning some Ivans clustered around a knocked-out tank. Job done! I was literally about to hit the 'escape' key to quit the mission when a round slammed into the front of my tank. I hesitated, then as I made again to quit, my tank was hit again, the split second before my finger hit the key. Too late to do anything about it but determined to find out who was responsible, I used the post-mission 'review' facility to tab from target to target. And this is what I saw. Apparently the Russians called these self-propelled 122mm guns 'beast killers' because of their ability to destroy the German Panthers and Tigers; and it was this ISU-122 that had clobbered me. He had the nerve to sidle up to the railway embankment and settle into a nice fire position, while the commander had a good look at my King Tiger, which had begun to burn nicely. Lockie tells me that the opposition you face in a mission like this will vary with your game settings for 'balance' and 'experience' - for example, enemy AT guns may appear in this mission at the more difficult settings. Oh well! At least we had won the battle. Tabbing around, the Soviets had lost heavily. The Red infantry hadn't had any anti-tank guns, it seemed, nothing heavier than a few of those distinctive Maxim guns on wheeled mounts with little armoured shields. They had been relying for protection on a company of T-34/85s, which we seemed to have wiped out. One of my King Tigers was sitting back in a ploughed field, immobilised. One of his tracks lay unrolled onto the ground in front of him, but the crew looked pretty relaxed, as the snow fell around them. The other King Tiger was helping the grenadiers mop up near some scrub on the outskirts of Pettend. Both seemed oblivious to my own fate. Overall this was an exciting and interesting mission. The lack of anti-tank guns on the Soviet side had perhaps been compensated for by the lack of artillery or air support for my own side, and the superior numbers of T-34/85s meant that even for three King Tigers, things might have turned out differently. Next time, though, I will make sure I am settting my sights correctly...and try out one of the lighter tanks, from the many now available for Steel Fury - Kharkov 1942. King Tiger at the Royal Armoured Corps Tank Museum, Bovington Camp, Dorset, in 2008 - author's picture


-
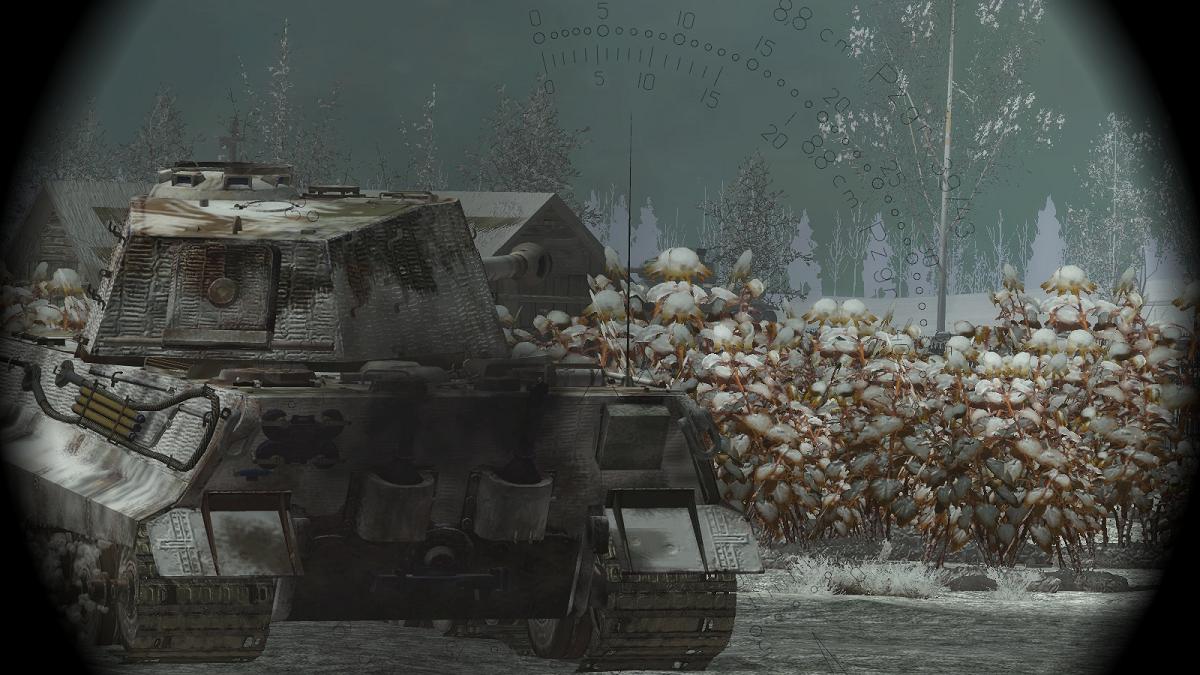
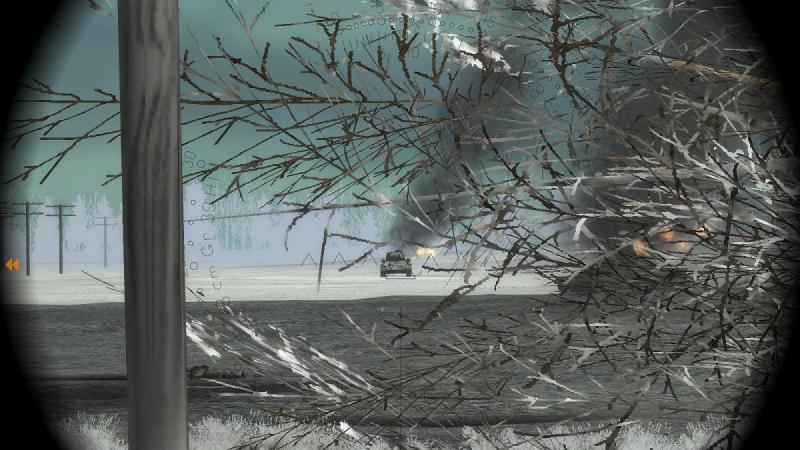
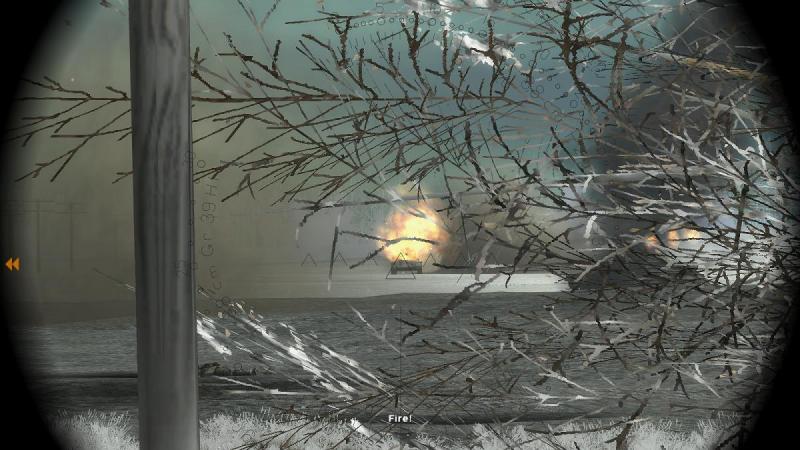
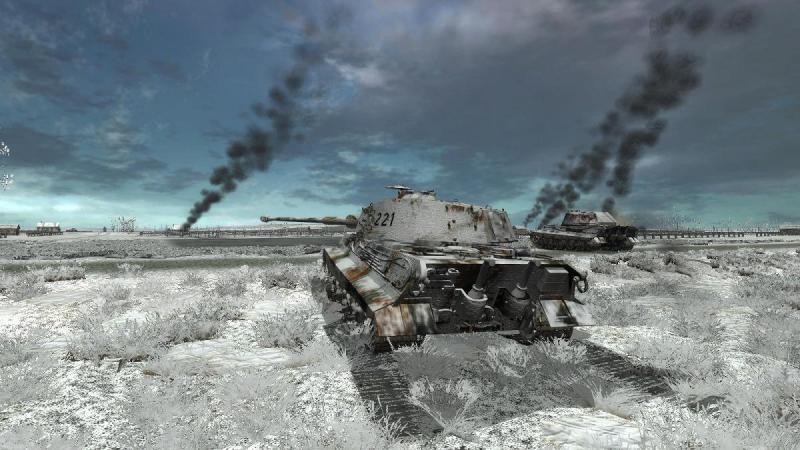
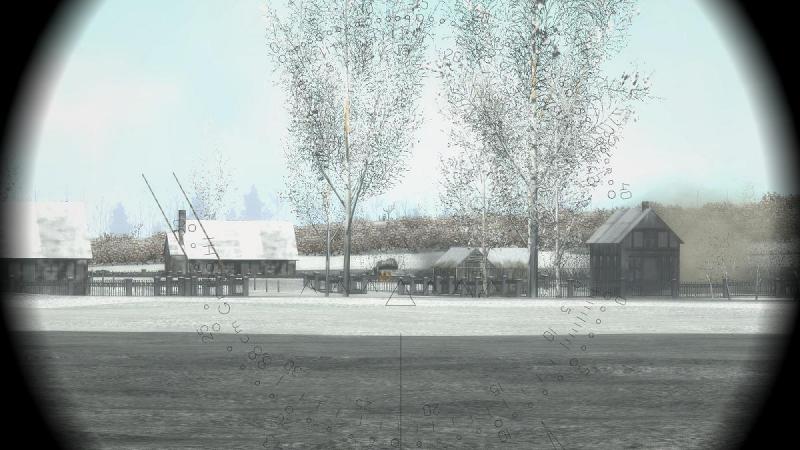
Into action! With my other two King Tigers I raced for the Start Line, which was a tree-lined track running across our front. At this point, I thought better of charging in ahead of the infantry. The mission brief had suggested there were enemy tanks around, and it seemed wiser to hang back and exploit the greater effective range of my long-barreled and accurate gun, rather than do them the favour of closing the range. So I modified my plan, on the fly. I would still go in on the same axis as the infantry, but I would not rush it. Instead, I would pause every few hundred metres, to scan my arcs carefully for targets - and for tanks in particular - before resuming my advance. I decided my first halt for observation would be on the Start Line. As I approached, I could see the objective, Pettend, a straggling group of buildings to my direct front, maybe 800 metres ahead. I gave the loader the order to load Armour Piercing; I had 30 of these rounds, and 40 High Explosive. As usual, I was playing by going first to the gunner's station (F2) and then toggling between the external view (for optimum all around vision) and the gunsight view (to scan for and engage targets). Although nominally in the gunner's station you can give steering commands to the driver from here. The alternative is probably to play from the tank commander's view (F3) and use the open hatch view for general observation, supplemented by the binoculars, and leave gunnery mostly to the AI gunner. I think I'll try that next time! Halted in my first fire position - in the open, the ground between Pettend and our force didn't have much in the way of cover - I scanned from left to right. And there he was! With the sight zoomed in, I was able to pick out a T-34/85 amongst the buildings, near some railings on a low wall. This is where I made a potentially serious mistake. In my haste, I set the range using the wrong scale. These are not the easiest to read - I think there is a mod somewhere which changes their colour - but there are four scales. Two, which appear on top in the screenie below, are for different AP rounds - the one marked 'Pzgr 39/43' is for conventional German AP (which has a small explosive filler) while 'Pzgr 40/43' is for a lighter tungsten-cored round with greater penetration at shorter range. The two larger, lower scales are for HE ('Spgr 39') and HEAT/hollow charge ('Gr 39 Hl'). In SF 42 you rotate these scales using the mousewheel and read the range against the spike at the bottom right, at about the 5 o'clock position. Your aiming point is the bottom right apex of the large central triangle, which moves up or down as you adjust the range - the other traingles are to help you aim off for crossing targets. But I ended up using the HE scale for an AP round! Realistic gunsight reticles and usage is one of the marks of a realistic tanksim and I really ought to have been more careful! Even at fairly close range it took me three rounds to hit and kill the T-34. He didn't burn but I knew he was dead when his driver's hatch popped open and the crew bailed out. By now, targets seemed to be popping up everywhere and I traversed left to pick up another T-34/85 which was coming in from the outskirts of the village on that side. After my first round, he jinked to my left, giving me a shot into his side, which did the trick. A command to engage infantry to the right was quickly replaced with a more urgent call to engage another T-34, on our left flank. Two of the beggars had appeared as if from nowhere, likely out of a fold in the ground. They were were fairly racing across the snow, stopping to fire from the short halt as they came. I pivoted my tank on its tracks to face them, both to get my gun around faster and to present them with my thickest, frontal armour. The range was still short enough not to make my sight-setting error totally fatal and my first target shuddered to a stop after a first-round hit. I then switched to the second T-34 as he sped right and after my second round, he too halted and the crew bailed out. No more targets! I rolled forwards again, across a barren ploughed field. My platoon-mates had also been busy. The funeral pyres of burning enemy tanks stained the winter skies in several directions. But the battle was far from over! ...to be continued!


-
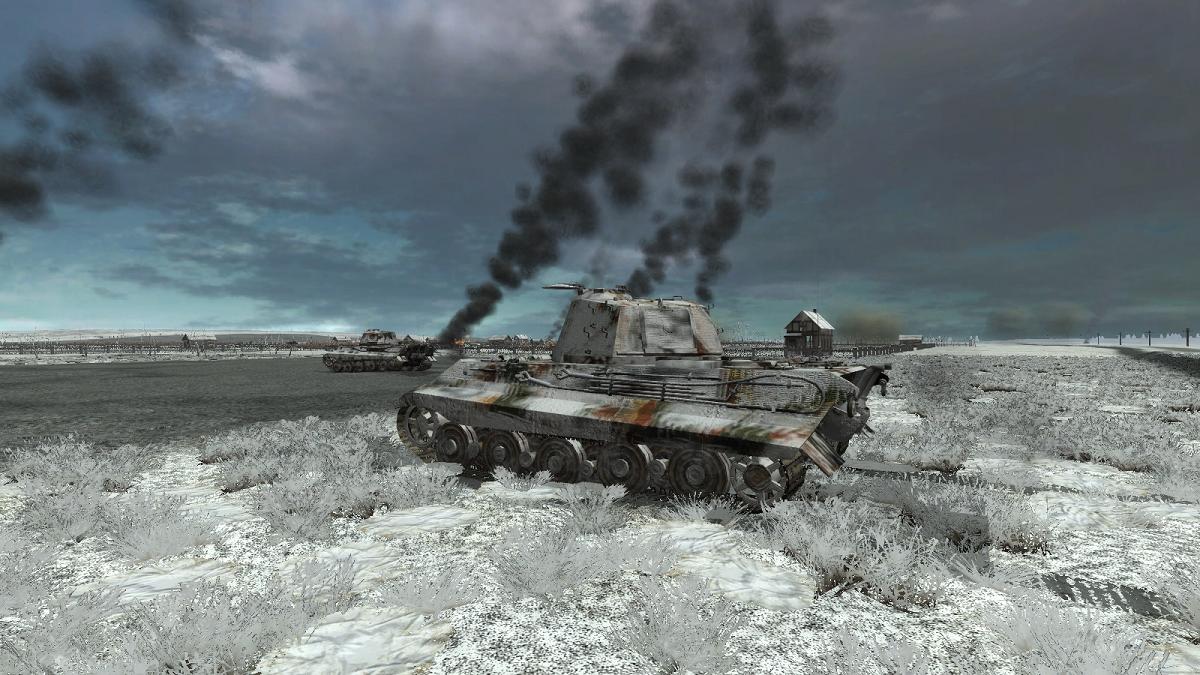
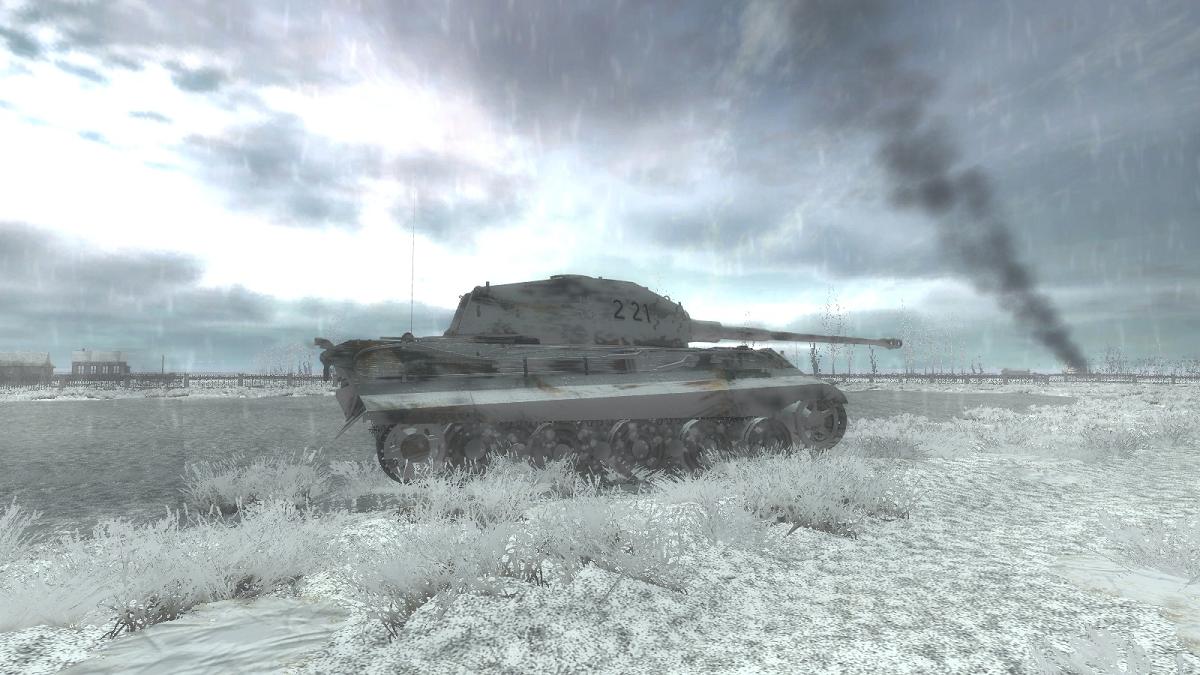
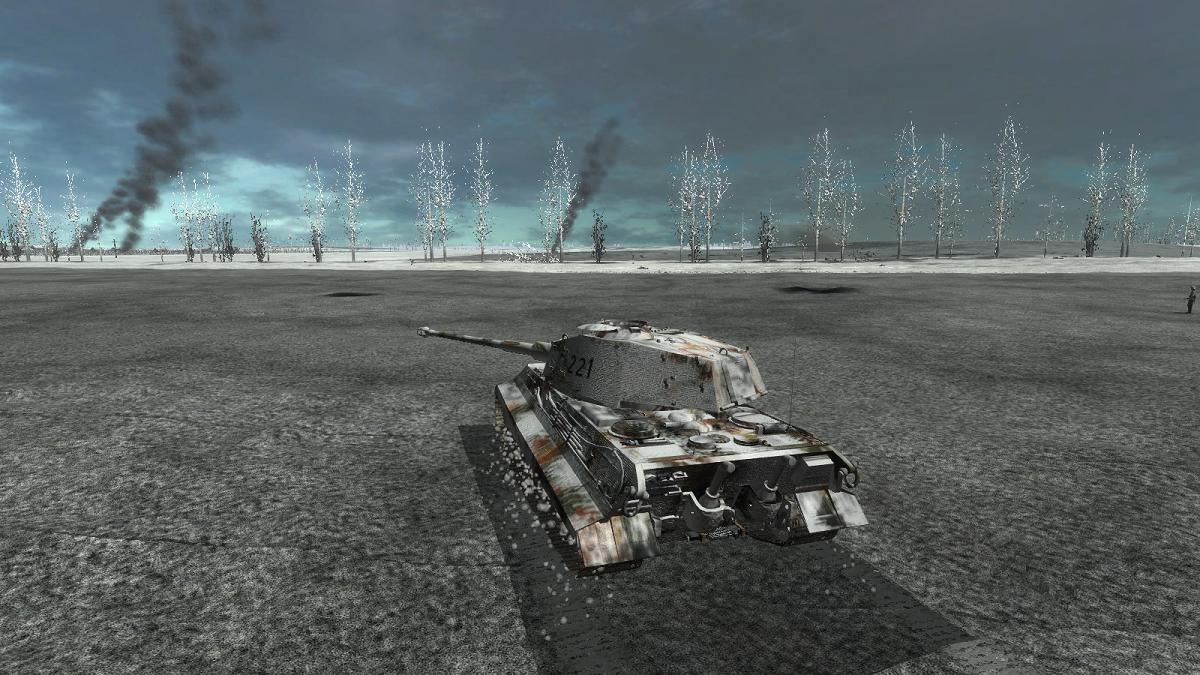
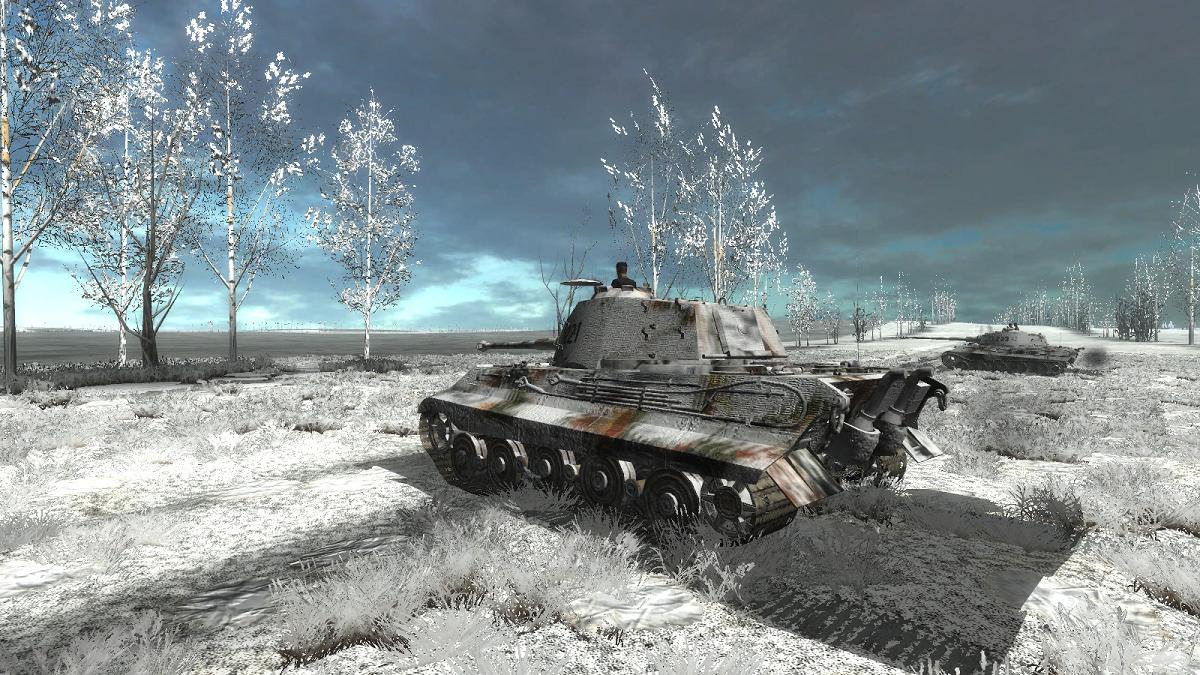
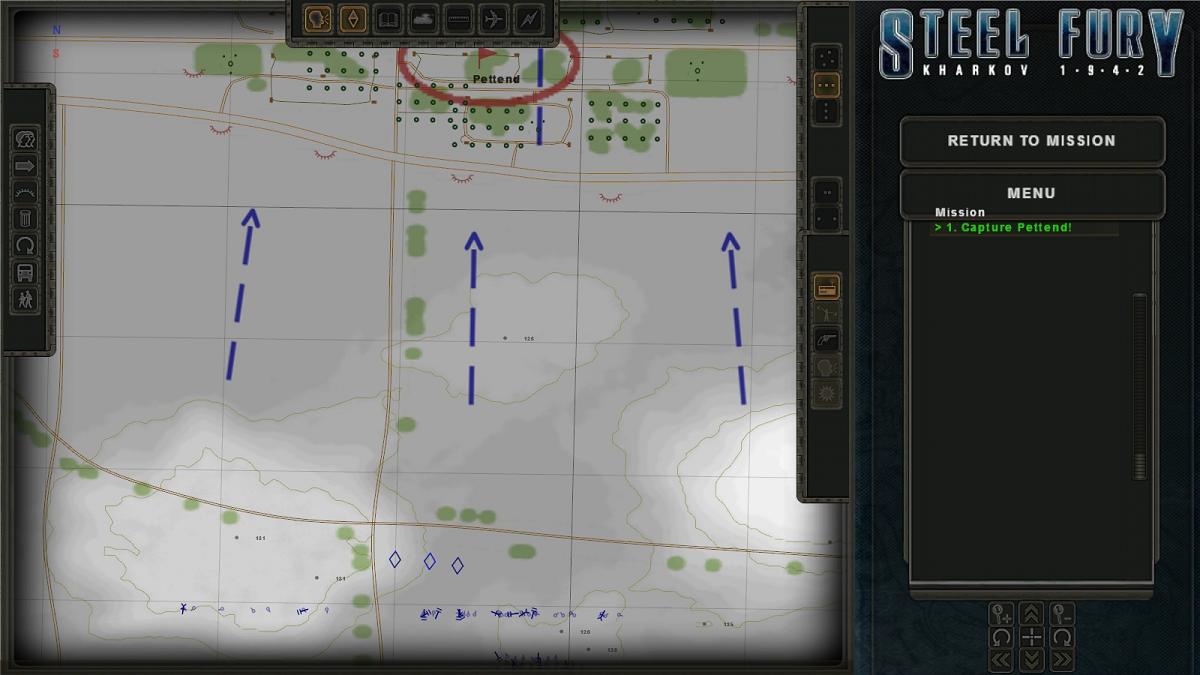
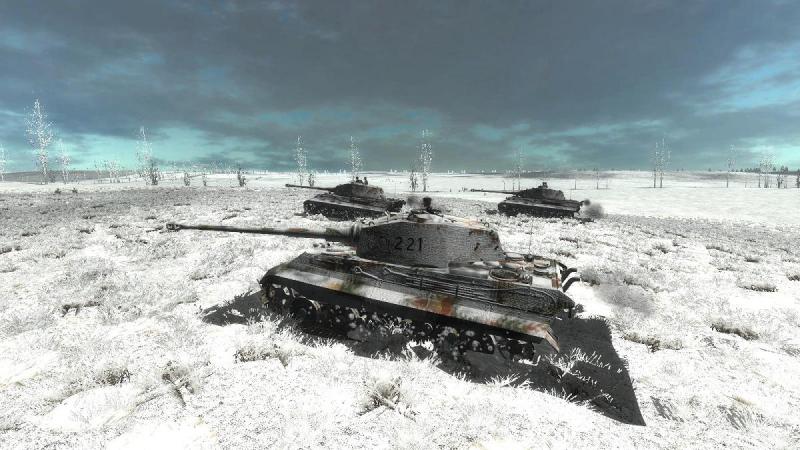
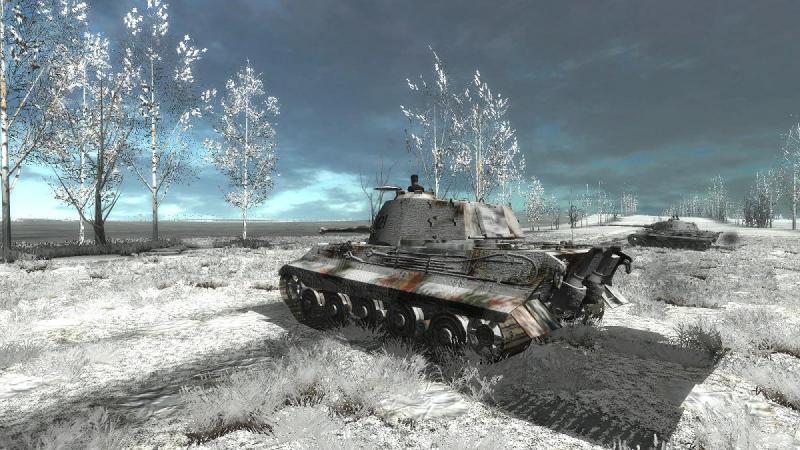
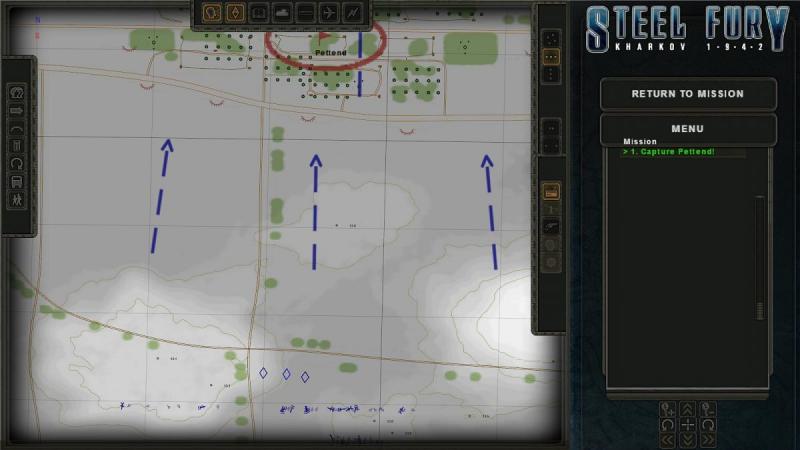
Going to war with the ultimate predator - the Koenigstiger heavy tank! For this mission reports, it's back to terra firma - speficically, to the snowy wastes of the Russian Front in World War Two. Our hosts are Graviteam, in the form of their excellent tank simulator Steel Fury - Kharkov 1942. The 'Kharkov 1942' bit of the title is now pretty well redundant, as modders have greatly extended the scope of the sim, not least into North Africa and with many later-war AFVs...including the tank which is the star of this particular show. The tank The mighty Panzerkampfwagen Tiger Ausfuehrung B - better known as the Tiger II or the King Tiger - needs little introduction. Combining the sloped armour that the Soviet T-34 taught the Germans to apply to tanks with the other design concepts of the original Tiger I, the King Tiger was one of the outstanding tank designs of World War 2; perhaps the most effective tank on the battlefield from the summer of 1944 till the end of the war. Its early transmission problems were dealt with and its reliability was soon adequate. With very thick armour all around and especially frontally, and a powerful gun that combimed deadly armour-piercing capability with extreme accuracy, the King Tiger was a formidable enemy, if you were unlucky enough to meet one in the field. They were not invincible, of course. In Normandy in July 1944, Lt John Gorman of the 2nd Battalion, Irish Guards, Guards Armoured Division, surpised a King Tiger but was perhaps himself surprised when his gunner's first round - they had a 75mm HE 'up the spout' - had little effect. The Sherman's gun then got a stoppage and Gorman ordered his driver to ram, which caused the startled German crew to bail out. Gorman's crew did likewise, one of them briefly sharing a ditch with the German tankers. A 'borrowed' Sherman Firefly's 17 pounder gun enabled the intrepid Gorman to settle the matter permanently. The mission One of these days I will go to virtual war in Steel Fury in a Panzer 38(t) or even a Panzer III. But for now, the prospect of fighting in, rather than against, heavily-armed and heavily-armoured tanks retains, for me, a certain irresistible appeal. So I was glad to find that the modders have not only provided SF with a King Tiger, but some missions for the beast as well. Here's the one I elected to play for this mission report - 'Counterstrike' by Deviator, with adjustments by Lockie and input also from Woofiedog and Tanker. I'm using the latest NTA mod, Lockie's latest mission pack, and the winter weather mod, all enabled via the indispensable Jonesoft Generic Mod Enabler (JSGME). The weather mod by Maleshkin transforms the standard SF environment into a winter wonderland which nicely captures the essence of the Eastern Front at its chilliest. Details of all of these are available over on the Graviteam Steel Fury forum, here. [Edit, August 2014 - the NTA add-on has been discontinued, but a successor, the Steel Tank Add-on (STA) is now available: http://stasf2008.ephpbb.com/t6-steel-tank-add-on-steel-fury ] It's worth mentioning that the this mission has a long video intro consisting of some excellent clips of German armour and other troops in action, including some combat camera footage I had not seen before - from the Deutsche Wochenschau newsreels by the look of it. And here's the mission. The screenie below was taken a little way into the mission itself, by which time my platoon of King Tigers (blue trapezoids) had driven out in front of the dismounted infantry we were supporting. It was early 1945 and the mission itself was a counterattack, by elements of the 3rd SS Panzer Division 'Totenkopf', on the village of Pettend in Hungary, a German ally which was then feeling the full weight of the Soviet steamroller as the red tide swept westwards towards the Reich. I have the orders panel turned off for clarity; incidentally, in-game, I also turned off the 'head up display (ammo load, turret orientation etc) using Ctrl+backspace and could also have turned off the orange diamond/arrowheads (Ctrl+|) that act as target indicators, which you can see in some of the screenshots which follow. The orders in the panel I have turned off tell us simply that our the aim is to seize and hold the village, destroying enemy forces in the area. From the markings on the map, these can be seen to consist of infantry defensive positions in an arc on the outskirts of the village, likely with tank support; I'm not ruling out the possibility that they may also have antitank guns. Our own force consists of our brave grenadiers in what appears to be weak company strength, with just my under-strength platoon of three King Tigers for fire support. Looking at the map, the terrain was fairly open and I contemplated going either left- or right-flanking. From either flank, I could have supported the advancing grenadiers by fire at roughly right-angles to their axis of advance, in the approved manner, perhaps finishing with an assault on Pettend timed to arrive on the objective at the same time as the troops, for maximum shock effect. But after milling about a bit the grenadiers seemed to be in a hurry to get at the Ivans rather than give me time for any fancy manoeuvres. So I formed us up in line formation and decided we would just roll on into the objective, ahead of the infantry, to shield them, and basically shooting anything that looked likely to hold them up. Plan made - time to get busy! I lined myself up and waited for my two other King Tigers to get into position, either side of my own tank. ...to be continued!

-
Just for completeness, with Wings Over Flanders Fields having supplanted OFF, I've posted a mission report with the Nieu.28 in WOFF in the CombatAce mission Reports forum, over here.
-
The other nationalities in Wings Over Flanders Fields Part 2 - the US Army Air Service The plane For this WOFF campaign mission with the US Army Air Service, I should perhaps have chosen the SPAD XIII, instead of 'yet another Nieuport'. But this Nieuport is different. For starters, the Nieu.28 has been one of my personal favourites, from the mid-1960s when I built Revell's little 1/72 kit in their new range of WW1 fighters, great models for their day, with classic Brian Knight box art. And while the 28 retained the rotary engine of its predecessors, it replaced the weak single spar lower wing and V-struts with a more conventional, but no less elegant, wing structure. The aircraft may have been infamous for shedding the plywood leading edge of the upper wing and attached fabric on pulling out from a power dive. Sometimes, unburnt petrol collected in the engine cowl went on fire. But apparently, unlike the lower wing failures of the V-strutted Nieuports, these issues, though alarming, were rarely if ever fatal. And the Nieu.28 was fast, agile and fairly reliable - certainly more so than the SPAD XIIIs which replaced them, the geared Hispano-Suiza engine proving so unreliable that French units equipped with the XIII reportedly kept a stock of SPAD VIIs to maintain flying strength. Besides, I had previously flown a series of comparative mission reports featuring the Nieu.28 in First Eagles 2, Rise of Flight, Over Flanders Fields and IL-2 Dark Blue World 1916 (here). So with WOFF having supplanted OFF, this mission report serves nicely, if I may say so, to bring that series up-to-date. The unit I elected to fly with the first unit to receive the Nieuport 28, the 95th Pursuit Squadron, the 'Kicking Mules'. Held back for additional gunnery training, the unit wasn't in action until the beginning of May 1918, by which time fellow First Pursuit Group unit the 94th 'Hat in the Ring' Pursuit had already seen some action. Here's the WOFF squadron board for the 95th; many of the named pilots are recognisably those who really flew with the squadron at this time. We are based at Toul, not far from the shattered battlefield of Verdun, scene of one of the war's most awful battles, during 1916, when the French army fought the Germans to a standstill in a desperate and costly but successful defensive effort. Two years later the front here is relatively quiet, although further north in the British sector, the Germans have unleashed their spring offensive in a last-gasp effort to turn the tide and win the war in the west. The mission Here's the mission briefing. We're putting up two flights as escort to a reconnaisance by three French Sopwith 1 1/2 Strutters from Escadrille Sop 43, flying down from Beauzee sur Aire. This type was already obsolescent when the French started using it in large numbers during 1917, to replace even older 'pusher' types. At this point in the war, the French Strutters were in the course of being replaced themselves, generally by the excellent Breguet 14. Here were are lined up and good to go. I'm flying with a single flight-mate, with the squadron's other flight on 'top cover'. I have chosen the 'skin' of Lt Quentin Roosevelt, the President's son, who had the dubious distinction of being pictured on German postcards lying dead and broken beside his crashed Nieuport, after being shot down in July. If this is one of the 'skins' I've copied over from OFF, it works fine; the long grey fillet atop the rear fuselage is not a glitch, it was on the real aircraft. After take-off I took it easy until my number two had caught up, then sped off to the rendez-vous point with the two-seaters, climbing hard. The skies were an unbroken blue, visibility good but hazy at longer range. It wasn't long before I spotted them; three Strutters with the distinctive French roundels, all in un-camouflaged clear doped linen finish, which made them relatively easy to see from above, against the ground. By this time I had lost sight of the squadron's other flight but trusted they would be up and behind us, somewhere. In turn, I took my own station above and behind the Sopwiths, weaving left and right to keep station while maintaining my airspeed. Our route was a long slanting one which took us back and forward over the zig-zagging front lines. All seemed peaceful, until I heard from somewhere close by, above the noise of my own motor, the sound of an aero-engine revving and stuttering. Looking back, the cause was not hard to see. My flight-mate's engine was on fire! There had been some Archie fire earlier but the skies were now clear of both AA bursts and enemy aircraft. So I took this to be one of the random failures WOFF simulates (unless you have it turned off) - perhaps one of those fires from pooling petrol in the cowling. Despite the dark smoke and the pyrotechnics, my buddy seemed under control, and quickly turned back towards friendly territory. Though I was relieved at the prospect my flight-mate would get away with it, I was rather less happy at the thought of a long solo escort flight. Suddenly, I felt very lonely. I'd have felt a whole lot happier if I could have seen the other flight of Nieuports, but wherever they were, they were invisible to me. Nothing else for it. I flew on, zig-zagging behind and above the three Sopwiths, varying my turning points and keeping an even more careful look-out. But the skies around us remained clear, apart from some intermittent Archie. The German gunners must have fancied a challenge, for instead of targeting the straight-flying two-seaters, when they did cut loose, it generally seemed to be at my Nieuport. This did no damage but it certainly made me feel all the more exposed and vulnerable. The flight stretched on interminably. Whether it's Silent Hunter 2/SH3 or IL-2, I've never much liked time compression. The 'warp' feature of CFS/CFS2 I did like, though not quite so well when in CFS3 it changed to very rapid time acceleration. At least it dropped you out if enemies were near, which WOFF's current time acceleration 'warp replacement' does not. Best of all is the 'next encounter' facility in European Air War and Strike Fighters/First Eagles. But without it auto-quitting when contact was imminent, and especially up on my own, I was reluctant to speed things up. I flew on in real time. The tension left little room for boredom! Nearing their turning point for home, the Sopwiths flew past two of Verdun's large forts, both set in the sea of shell-cratered mud that stretched all around and as far as Verdun itself to the south-west. I urged them on. Since my flight-mate's departure, any desire on my part for a fight with the Boche had evaporated. My sole concern now was to see my charges as far as their objective, watch them make that turn for home, then see them safely over the lines. And then get myself home in one piece. Victory claims and medals could wait for another day! Finally, the Sopwiths turned left and headed back towards friendly territory, just a short distance to the south. I turned with them. The mission had ended uneventfully, but I had no regrets. The relief of the anxiety I'd felt since losing my flight-mate was palpable. The satisfaction of a mission accomplished more than made up for the lack of air combat. I'd got my charges back safely! But not quite. Looking back not a moment too soon, I was appalled to see at least three Albatros scouts with candy-striped tails breaking formation and peeling off to attack. Worse if anything, they looked to be after my Sopwiths! Groaning at being so nearly home free and now having to fight at bay and badly outnumbered, I nosed down and around, and cut them off. An aggressive defence seemed the best policy. At any rate, they were not going to get my Sopwiths! Get stuck into them, give them plenty to keep themselves occupied, then dive for home at the first opportunity. And I would do my level best to get one of the Boche first, if I possibly could. This seemed to work quite well. The enemy pilots appeared to forget about the Strutters, evidently intent on shooting me down first. I was soon in the middle of a stiff little dogfight with the three Albatros scouts, hurling my machine about the sky, taking snap-shots each time an Albatros sailed across my path. Likewise, the Boche were taking shots at me, whenever they got the chance. I tried to edge the fight towards my own side of the Lines, ready to dive away for safety when the right moment came. But it never did. Instead, there was a horrible rending and ripping sound as the top left wing of my evidently over-stressed aircraft tore off! Down she went, straight down. I throttled back but the flight controls seemed not to be answering. The end came suddenly, inevitably. To add insult to injury, what I was quite certain was a structural failure was credited to enemy action; either way one of the Boche will doubtless be putting in a claim for ein Amerikaner kaput. Given that the real-life Nieuport 28's structural issues seemed to have killed few if any pilots, I was a little miffed that my tenacity and at the end, my rather courageous solo defence of the Sopwiths should end thus. I hope mes camarades Francais in the two-seaters will carry with them back to their base a suitably glowing account of the brave end of the pilote Américain courageux who saw them safely home at the expense of his own virtual life. Perhaps a posthumous Légion d'Honneur will be in order?
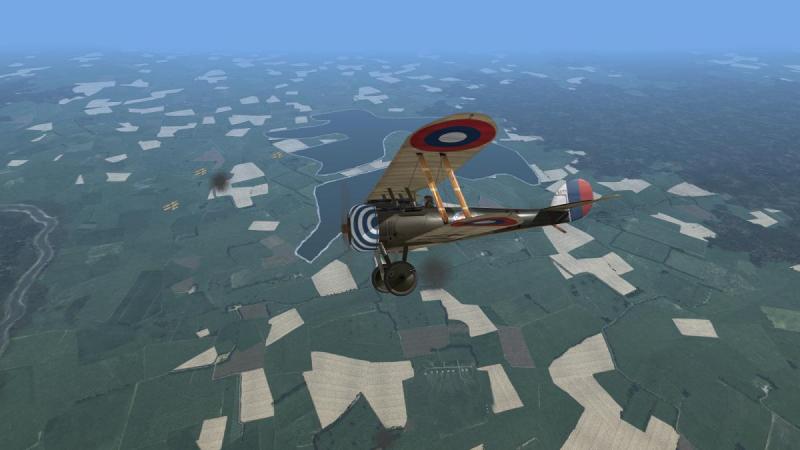


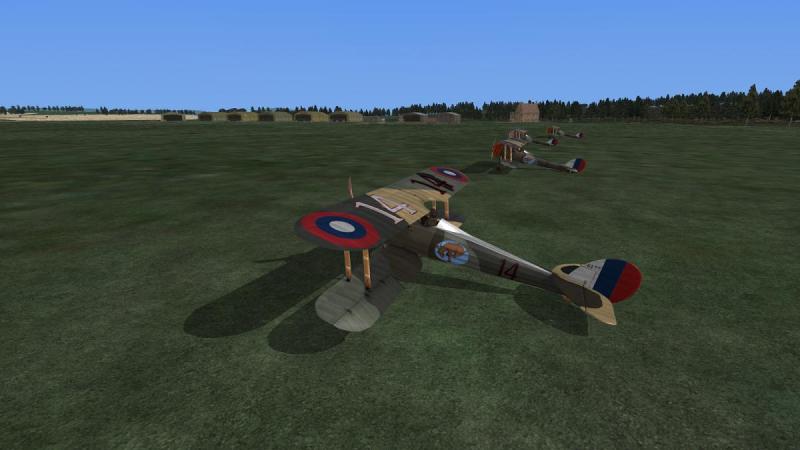

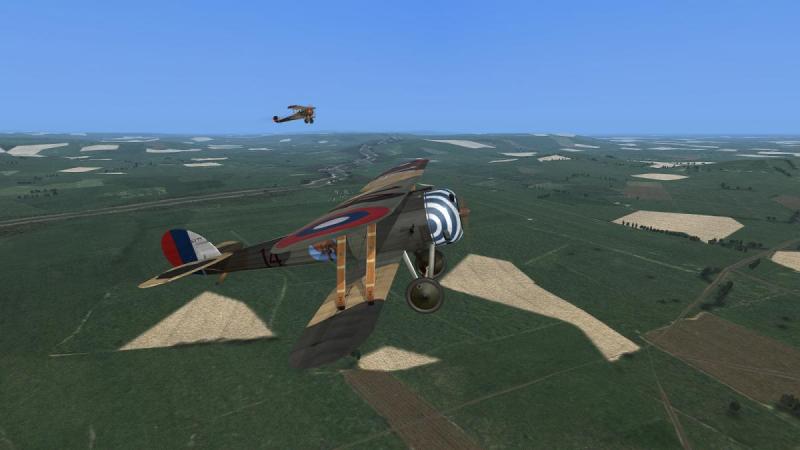

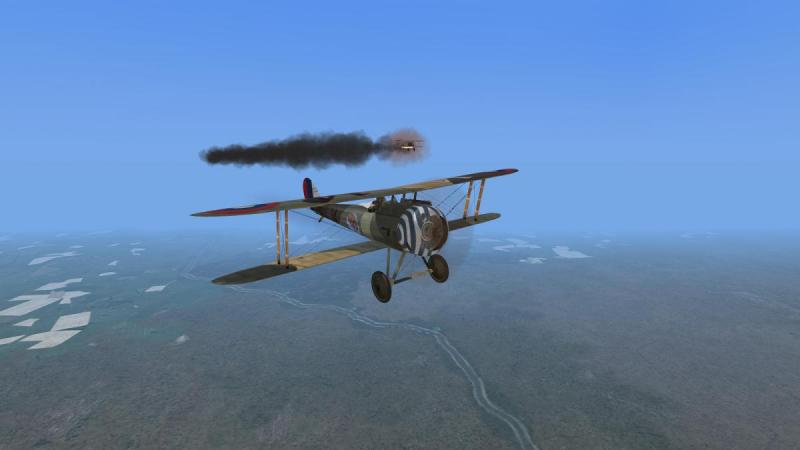
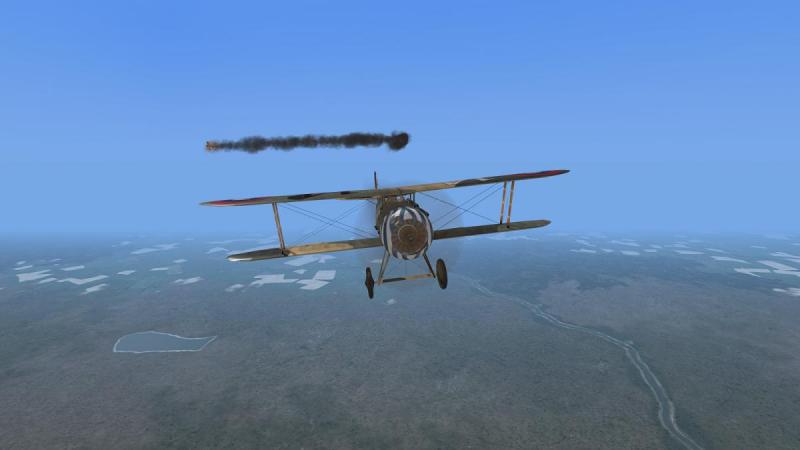
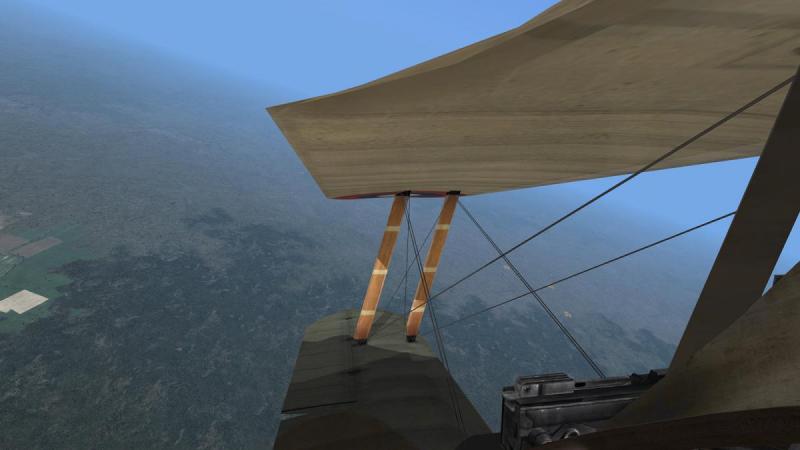
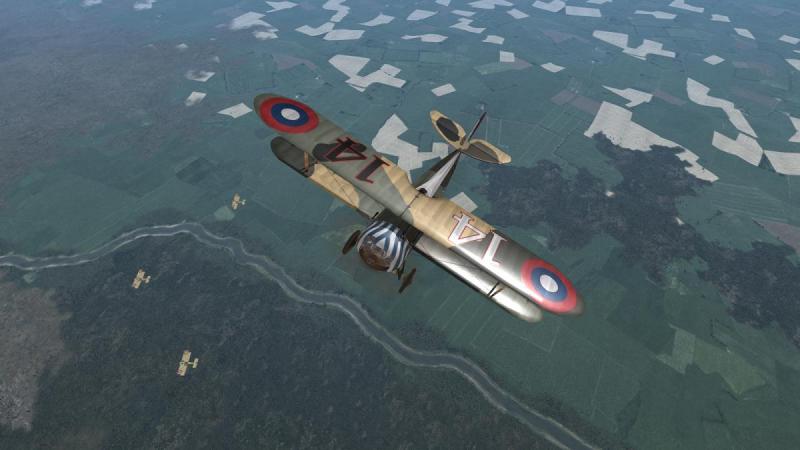
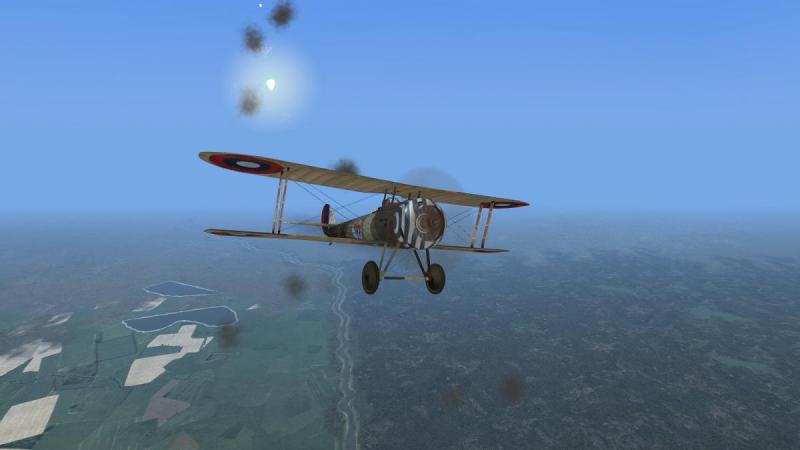


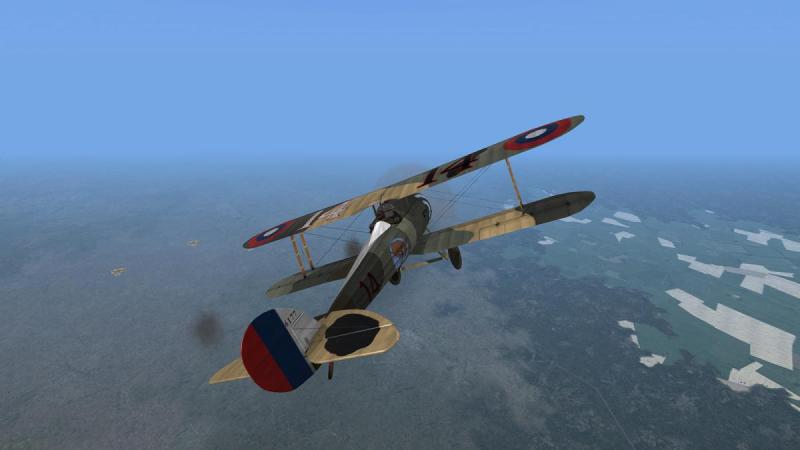
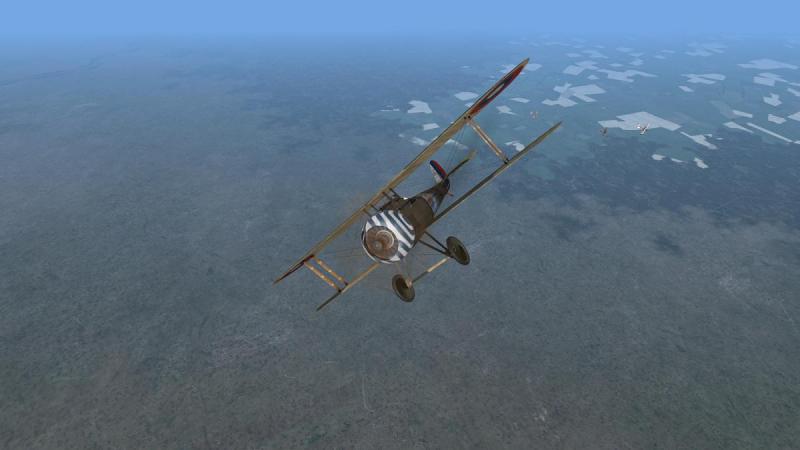
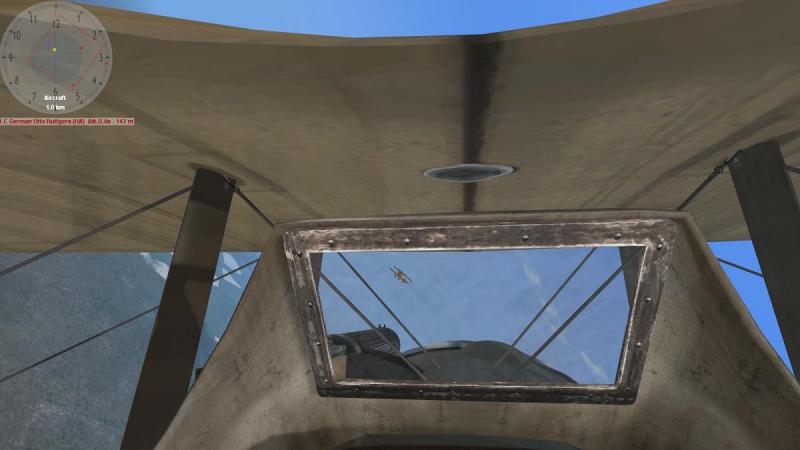
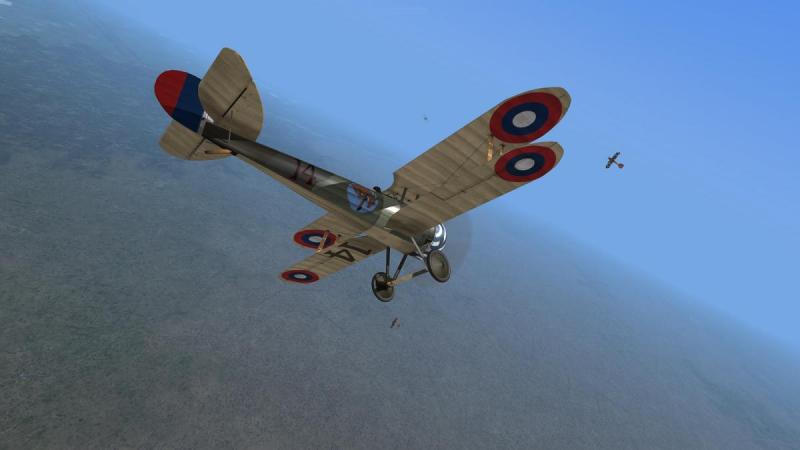
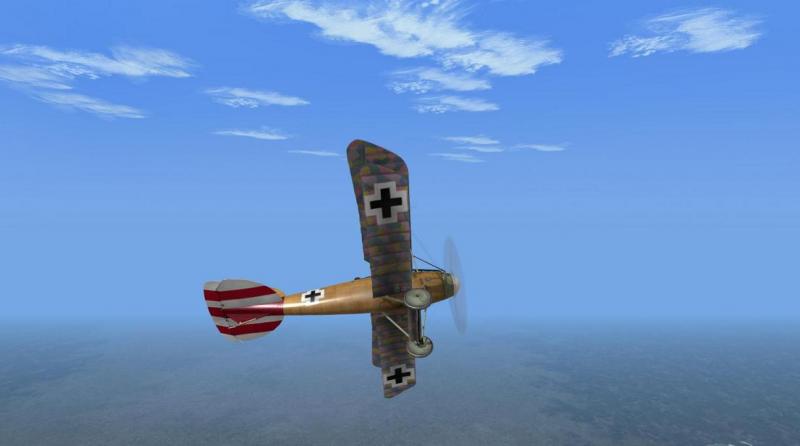
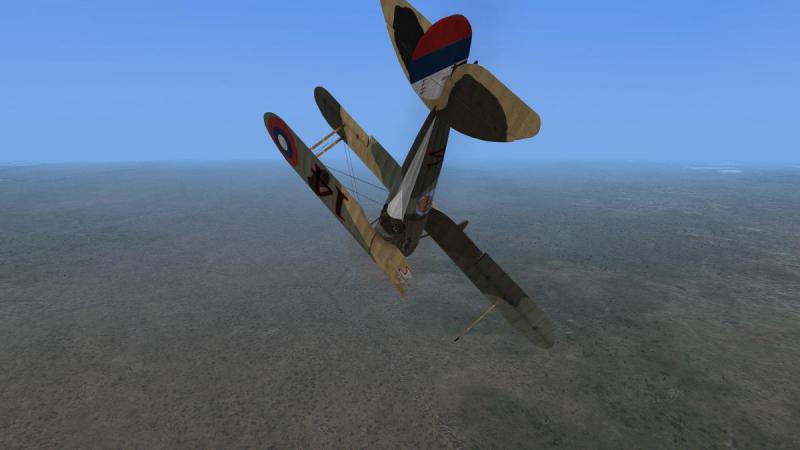
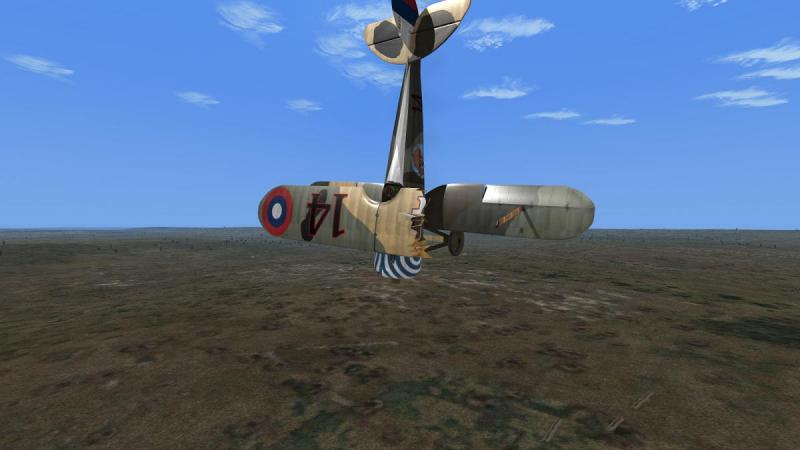
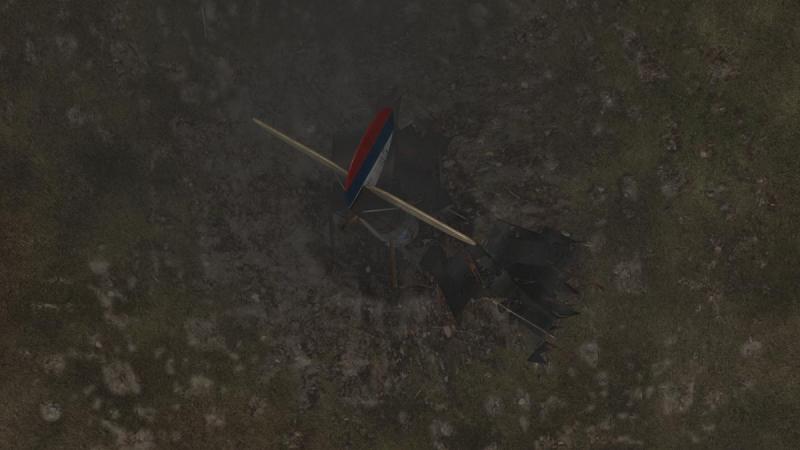
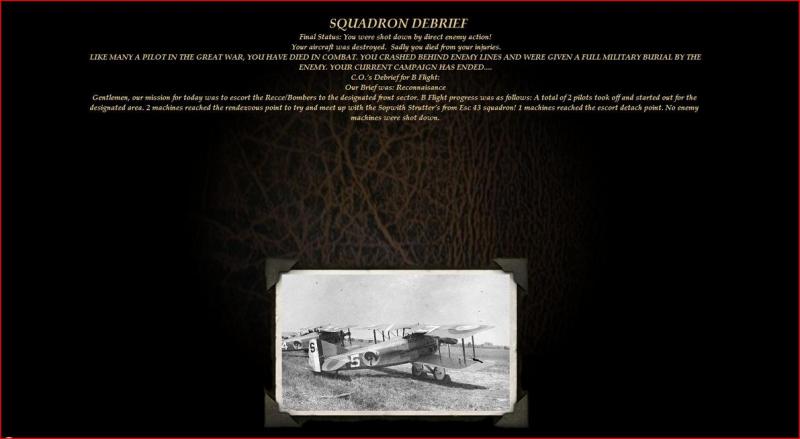
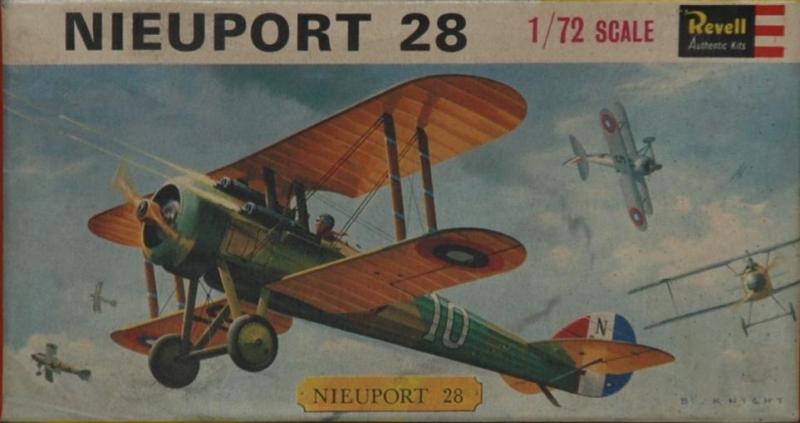
- 4 replies
-
- 1
-
-
- woff
- wings over flanders fields
- (and 1 more)
-
Into action! I was soon at reasonably close range and started shooting. This is where it got tricky. With my machine-gun several feet above my head and no proper gunsight, I found it rather hard to get my rounds on target. The rather low rate of fire from just one gun and the visible dispersion of my tracer rounds didn't help. the natural thing to do was use the crossed bracing wires in front as a reference point and aim off accordingly. By the time I had sort of worked this out, it was time to break off and come around for another pass...and then another! A third attack proved un-necessary. While lining up I had given my two comrades the signal to attack and one of them took me at my word. I straightened up and came in for another pass at the Aviatik, but he was no longer there. What was left of him was falling in flames, shorn of his wings which fluttered behind him, as my victorious flight-mate flew past in triumph. Right, then, the second Aviatik would be mine. Again I attacked. And again, I broke off my firing pass with the Aviatik flying serenely on. This was not how it was supposed to work out. Having broke low, it took me longer to come around again. I made a second pass, during which my ammunition gave out. As I rolled out again as if to line myself up for another firing pass, I could see that a flight-mate was taking full advantage, and had beaten me to the mark. Not that I had any rounds left, anyway...just one gun, no proper sight, and under two hundred rounds, even for that. I was too used to flying Albatrosses! For the second time, mixed feelings were the order of the day, as I watched my comrade's target stream black smoke and plunge earthwards. Two kills from the mission, two German working aeroplanes and crews who would work no more. But neither of them were mine. I consoled myself with the thought that my attacks had perhaps softened up both victims and contributed to my team's success. I rolled in after my successful comrade and then throttled back till they were both back in formation, which took some time, as one of them had lost a bit of height. Then I opened her up and steered us both back towards the front. One of my flight-mates gave me some anxious moments, falling well behind then doing it again, after I orbited so he could catch up. But we made it over with no more than some desultory Archie fire to worry about. As we reached our side of the Lines, I nosed down into a gentle dive to complete the transit back into safer skies. Soon we were back at La Cense and in the circuit. I have screwed up several virtual landings by pausing and un-pausing the action in an effort to get a decent screenie and managed to do it again today. The crash didn't look too bad but was fatal, although it was galling to read that I was considered a victim of enemy action. Perhaps the CO thought that would look better in the unit records than 'Killed after crash landing while trying to take a screenshot'. Can't say I blame him, I suppose. I enjoyed flying the little Nieuport 11 but was a bit disappointed at the paucity of targets...and my inability to hit them hard, when they did show up. With such an armament as I had, I really needed to get much closer and conserve my limited supply of ammunition. Nice that a good combat flight sim can reinforce the same lessons the real pilots of World War One had to learn!

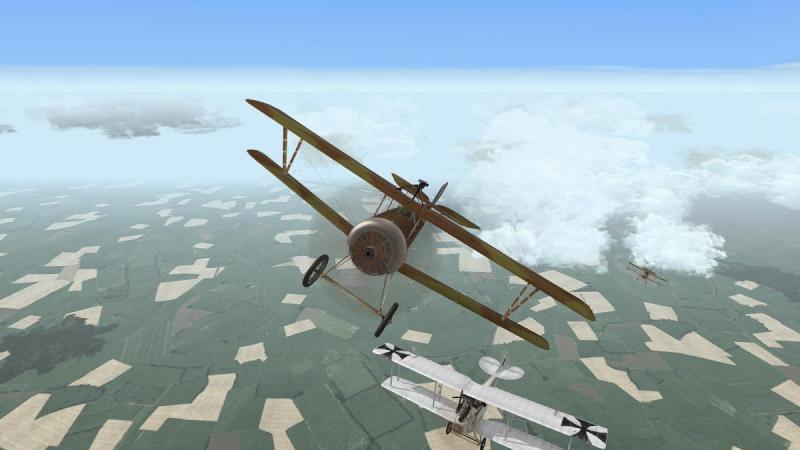
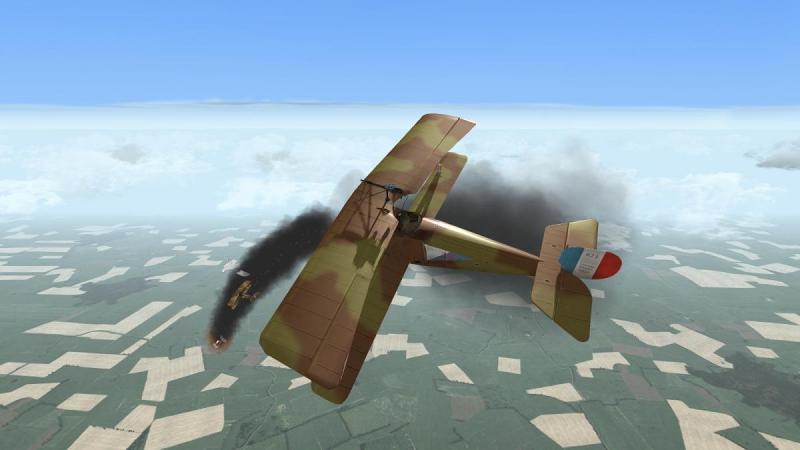


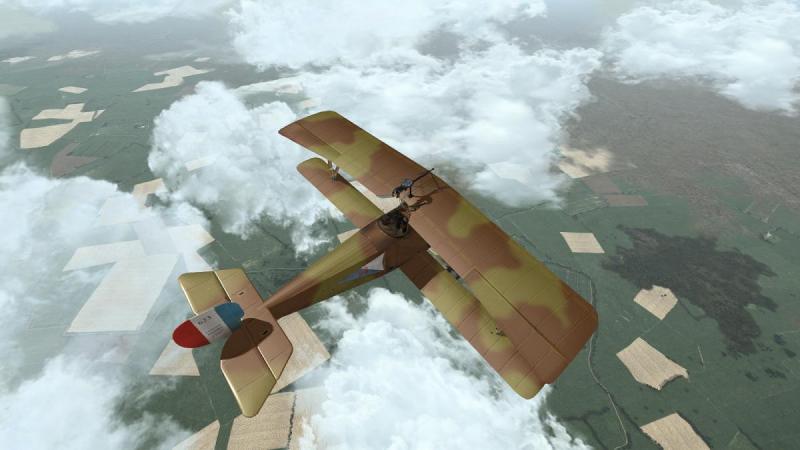
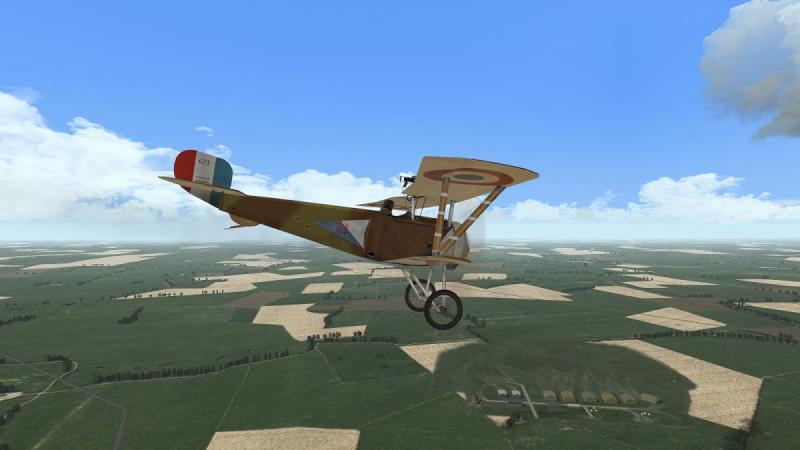
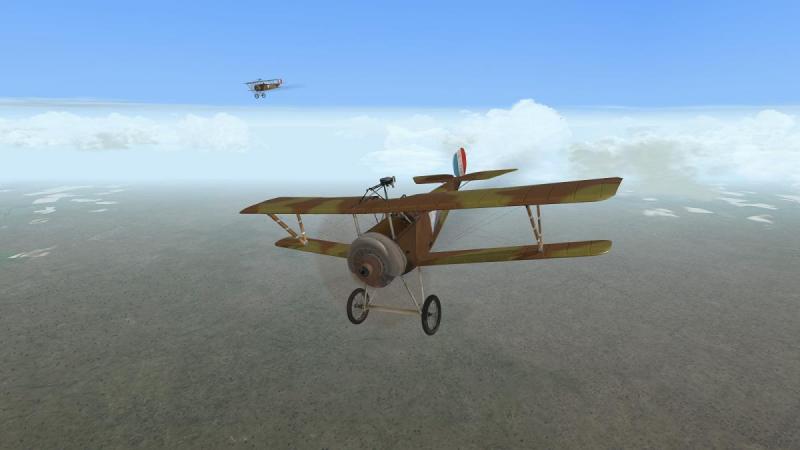
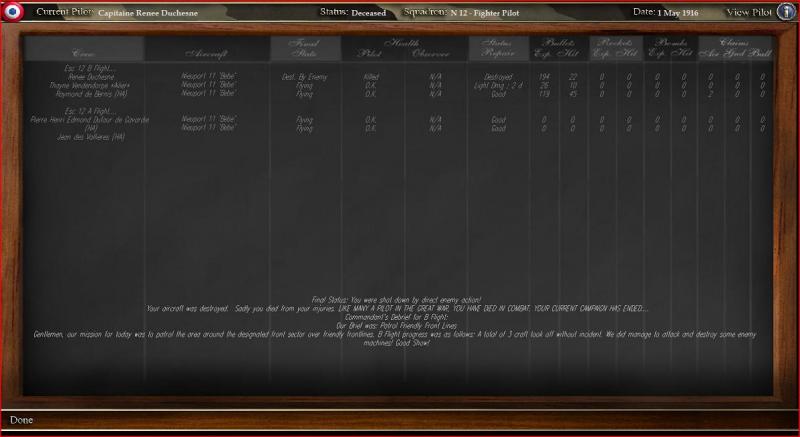
-
Over the front! With my two flight-mates in Vee formation either side, I climbed hard on the short leg to the north-east, with the other flight also going strong, just ahead and above me. Approaching the waypoint nearly half-way to the Lines, I checked my map then, at the right moment, eased off my climb rate and turned ninety degrees right, keeping a more careful look-out, now. In the danger zone to my rear, the skies remained clear, except for my faithful flight-mates. It wasn't long before we had company, though. Anxious to meet the Boche in the air, I had edged out into No-Man's Land and soon had Archie for company. The barrage was reasonably accurate but not particularly intense. I threw in a few random course and height changes, just in case. There was now no sign of the other flight. Seemingly alone with my own flight, and as the Boche airmen were not co-operating with my plans for fame and ace-dom, I decided that a little show of initiative was now in order. I turned left into enemy territory, soon leaving the trench-lines behind and below. For a while it looked like this flexible interpretation of my orders might draw a blank. Then I saw them. Two pale dots appeared in the sky, slightly higher and half left. They were edging slowly left to right, deeper into enemy territory. After tracking their progress for a while, I turned onto an interception course, cursing the Archie bursts close to my plane, which might give my game away, if these two dots were enemy aircraft. As indeed they were. As I slowly closed the range, the dots resolved themselves into a pair of white aircraft, which I correctly judged to be Aviatik two-seaters. This was more like it! I slid into position, behind and below them in the approved manner, and crept ever closer, waiting for the right moment to let them have it. ...to be continued!
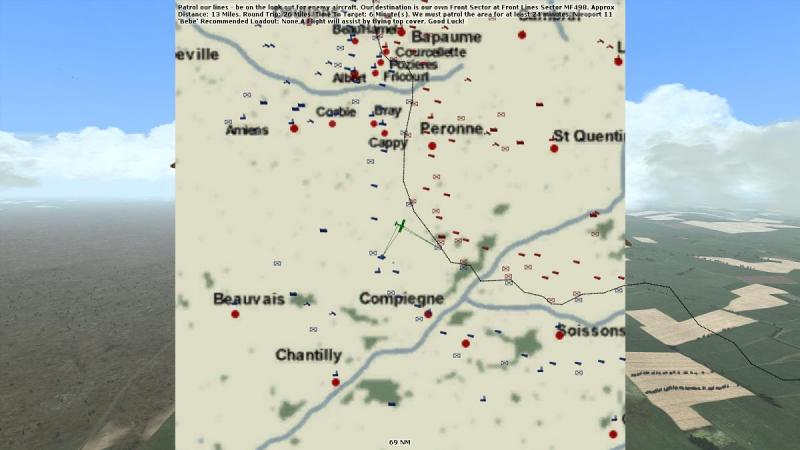

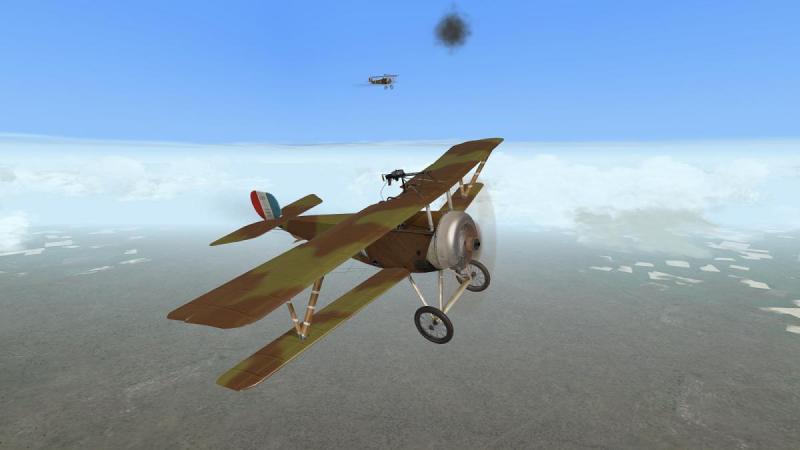


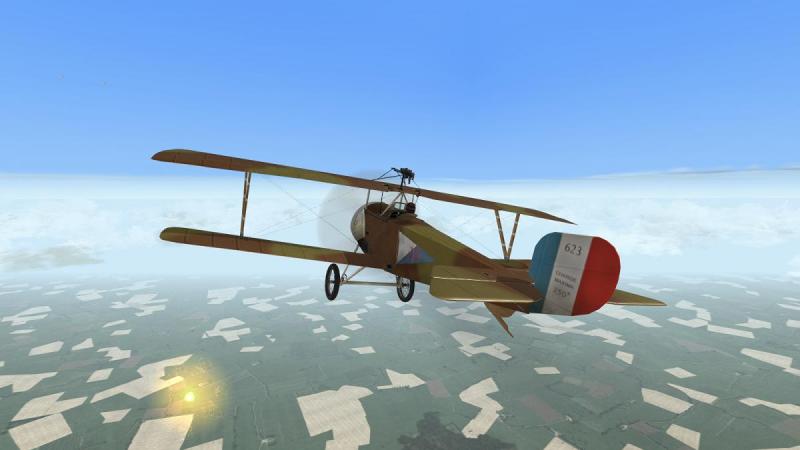

-
JSGME enable mod for custom UI.XML file for WOFF
33LIMA replied to rjw's topic in WOFF UE/PE - General Discussion
Thanks Robert, that's great - got it now. I have seen at least one other user express a preference for darker dots so you might want to upload this to the CombatAce mods section for OFF/WOFF. Many thanks again!