
Wrench
-
Posts
27,731 -
Joined
-
Last visited
-
Days Won
156
Content Type
Profiles
Forums
Gallery
Downloads
Store
Everything posted by Wrench
-
Got lots of question, Brian! Don't forget to check out the screenies in the gallery mostly dealing with the front line and the dogfights ini. I know the front line is based off target areas, but for this map I don't think it's all that critical. Have no real idea what the dogfight ini does, by the little voices I keep hearing tell me it might be only for online play. New movement ini has been created, and it works pretty damn good!! I'm just guessing at a lot of this stuff, so if things work, I'm really pleased (could use a few successes in my life right now!) Let me put a package together and PM you and Dave, so you can have a look see at what I've done (that sounds baaaad!) You'll need the factory place and truck park in you DS terrain folder; all other objects are pretty much stock in game, includng Polaks oil feilds -- those look really cool, and blow up just fine!! I"ll include my shipwreck, as I dropped that around a few places. I just hate to waste a good object!! TIA! Wrench Kevin Stein
-

443 downloads
McD/Boeing RAF Eagle FGR.1 Mod for WoE ONLY!! Another "What If..." This is a package of ini and skin (well, decals, anyway) mods for the stock F-15A that comes with WoE. It creates a new aircraft, for use by the Royal Air Force. From the ReadMe: = TO INSTALL: It IS suggested that you have the latest weapons pak installed to get the maximum use out of the available weapons capabilities....but this is easily changed to use the "stock" non-modifed weapons. More on that later.... == REMEMBER: This mod is for use in WOE -ONLY!!!- as all the parts ONLY exist there == --- Also -- this if for the STOCK 3rd Wire F-15A ONLY - NOT the MF version --- REMEMBER -- this is NOT a full aircraft, and you MUST have Wings Over Europe to make use of this aircraft mod. When you unzip to a temp directory, a new "Eagle_FGR1" folder will be created. In it you'll find everything you need to just copy/paste this new bird into your /objects/aircraft folder. Including all the modified stock inis and new damage tgas, somehow overlooked, which are also usable on the standard WoE F-15A. But you'r not ready to fly yet..... All the cockpit files, cockpit ini, etc, are making use of ALL the stock WoE bits. They are NOT included, but the ini is (to make your life a little easier; & cause I forgot to remove it!) You'll find a bunch of inis, bmps, tgas, whathave you for this install. The data ini has had the NationName= set to "RAF", so when you fly you'll get RAF medals, and have British flightmates. The loadout has also been adjusted to use UK and USAF weapons. Just about all types of weapons are loadable, most particulary EOGB, ASM, ARM, EOGR, TV guided missiles, iron bombs and CBUs. The aircraft is NOT equiped with a laser designator, so LGBs are not an option. REMEMBER -- this is NOT a full aircraft, and you MUST have Wings Over Europe to make use of this aircraft mod. You'll have the skin folders; "RAF" which just contains a few decals and inis -- you'll need to transfer over the 6 skin bmps from your stock WOE F-15A, as these are reused. In fact, even the decals are the stock ones, just desaturated by me to give them that 'lo-viz' look. The RAF serials are also stock in-game from the F-4M Phantom. They may not be historically correct (yeah, like anything in this mod IS???), but they fit into the era, and look nice. -getting the point?? this is for WoE ONLY -- I will not violate copyright and upload files that at not leagle to share. -- There are further, more detailed instructions for those without the weapons pak -- folks, I spent a lot of time on the readme (actually, more on that than modding the bird!!!), so for the love of flying, I beg you -PLEASE- read it!! With thanks to all the other crazies out there like me that just can't leave a good thing alone! Take that Fighter Mafia!!! Good Hunting! Wrench Kevin Stein -
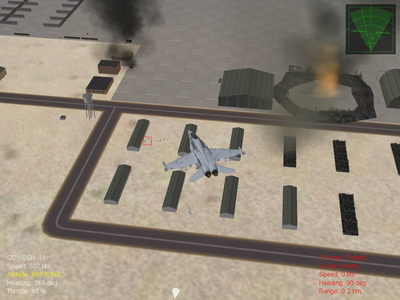
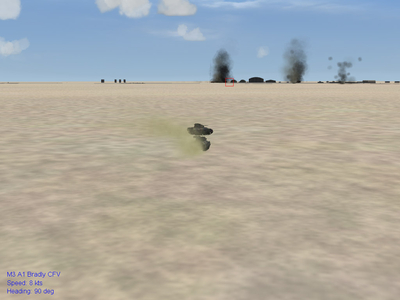
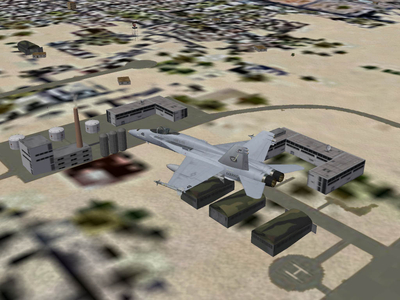
My experiment at KKMC came out slightly better than I'd hoped for. With judicious editing, and simple replacments, you can change just about anything (structure wise) The screenies below show KKMC, with the airbase (original) plus the addition of the vehicle depot and barracks complex (edited from the factory place - which got edited again into the Al Basra Republician Guard barracks) I know this is NOT historically accurate, I remember seeing lots of pics of the tent city. The Citybuliding2 kinda reminds me of Kohbar Towers.... Aerial view Close up of the barracks complex Target areas are pretty much done. Just awaiting, still a reply at the 3rdW forums about the dogfights ini. Wrench Kevin Stein ps: wish me luck -- I've a job interview in about 30 minutes...my first job interview in like 25 years!
-
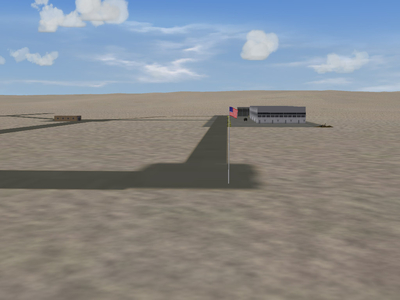
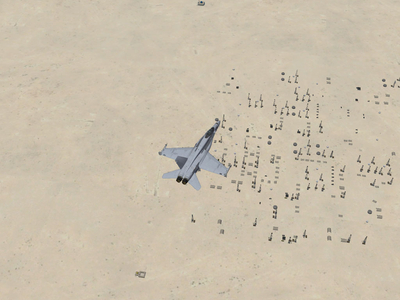
Ok, as promised Ive uploaded a few screen shots to the Gallery of some of the 'upgraded' targets. Actually, there's nothing really new, just throwing the old one (factroy and truck park) out into newly created target areas. I also got the 'floating' building out of the Gulf and dropped them on that island off Kuwait city. 2 are from a test CAS mission, supported Bradley's attacking Al Grabass AB, another overflight of the Kuwait oil fields, factroy center at somewhere, the generic truck park, and 2 of the flags I've added. Somehow, I forgot to take a shot of the Iragi flag; it's the one used pre-invasion, and should be correct for the time frame up to then. Fixed the untextured buildings (the white ones), got the water effect working. Like Dave said before, it really needs a complete overhaul; need the Tigris and Euphrates cutting through Bagdhad and out to the sea...would look really cool! Still have one 'experiment for KKMC, and then USAFMTL and JSF_Aggie can have their shots at it. Of course, once TK or someone over on the 3rd Wire boards answer the dogfights ini question. Enjoy! Wrench Kevin Stein
-
-
-
-

-

-
-
-
-
btw, I'll be uploading it today, both to my site and, of course, here to CombatAce, in increase the 'uneasiness' of the pointy-nosed Fighter Mafia Wrench Kevin Stein
-
Well, based on what I 'figgured out' on the ww2 range for truck routes, it seem like they only need a start and end point with the coordinates (here's where the QMD come in handy!!) [Route001] RouteType=TRUCK StartArea=Baghdad EndArea=Karbala RoutePosition[001]=403699,635860 RoutePosition[002]=396691,534810 one of the shipping routes goes like this: [Route008] RouteType=SHIPPING StartArea=Basra Oil Fields EndArea=Kuwait City RoutePosition[001]=709312,421917 RoutePosition[002]=662487,366013 which I'm sure the game engine will take a straight line right across the desert. btw, got the water effect working too. I'm up to about 50 total target areas, some within others. Oh, and I added flags to the Iragi bases, and a few to the Coalition too, (Saudi, US, UK). And just for fun, my shipwreck off Kuwait City. (I hate to waste a perfecly good object...hmmm...might do a little CE3K with that too...) Front line is all weirded out though. Once a get a few more target areas placed, I'm gonna try something with the GROUND_ATTACK sections. Just to test an idea. Just placing the damn things, even though it's simple copy/paste is a damn nightmare! Gotta be a way to totally automate this process (man, do I miss the mission builder in FA!!!!) I'll to get some screenies posted later. Wrench Kevin Stein
-
Seeing the little byplay about the DS terrain, got me to thinking and fiddling with it. Adding target areas in no real big deal (by use the HUD debug and QMD). It's a simple copy/paste job. So... I've got about 5-8 new target areas (by using the old standards of the Factory Center and Vehicle depot), Polak's Oil Field as seen at simhq -- which looks really cool outside Kuwait City. Still have a few HQ centers to add; both from the Factory center and one that someone put together a long time ago. Added about 10 truck routes, 2 shipping routes (they may have the 'ship that sails over land and sea...might have to add another port or 3) Now, my basic questions are: Dogfight ini -- there aint one. How are the corrdinates figured? ie, do they center over airbases?, with the x/y like truck routes? movement ini -- building a new one, but don't understand the routing for GROUND_ATTACK. Truck and ship routes aint' nothing to do. Is the GA set simililary, and is this used for CAS missions?? and what does this all mean: I'm assuming the "FrontLine" creates the red line on the map, showing the border between the Good Guys and Evil Minions? Using this one above, kinda creates an inverted V shape, so I'm thinking of adding other coords that represent other target locations, ie Kuwait City at the eastern end and however far west I can find or place something (maybe a depot or Coalation listening post) just to anchor the western edge. so.. do they have to be airfields, or will any target center do? When this gets figured out, maybe add this to the knowledge base! I'll post some screenies tommorrow with some of the 'rebuilt' target areas and such like. TIA! Wrench Kevin Stein
-
It's at my site, on the "New Aircraft and Skins Page", down near the bottom in the "what if" airplanes section (link in sig below) Wrench kevin stein
-
So, who's working on the Zentradi Battle Pods??? That is just soooo cool!!! The major problem I see is, we don't have the SDF-1 to land on!! Wonder if we could find the theme music and use it to replace the in-game stuff??? I've got the Robotech soundtrack somewhere on CD...have to find it.... Wrench Kevin Stein ps: please, no Minmei singing, ok???
-
Here's the exact quote from the read me, basicly restating the first sentence: I DO have the number of a good therapist at hand, and I'll probably be giving them a call come Monday. Dave, you're just jealous, cause I put your F-111K out of business!!! (which I actualy like -- better than the Tornado!) A few more tweeks, and then....Cry Havoc...and let slip the crazed eagles of whatever...!!!! "Frances" Wrench Kevin Stein
-
Before anyone asks, yes, I'm off my meds. Hence, this little bit of craziness. Whilst I'm still on the Modern What If kick, I had this little idea, for the RAF (actually came to me while fiddling with the Tornados) -------------------------- Ladies, Gentlemen and Assorted Beings... I present the Eagle FGR.1 Here we see it configured for a strike mission, with 6 Mk.2 540 pounders. Here she is, now fully loaded for bear (or for T-72s anyway) in the CAS role. now, in the Pathfinder role of SEAD. You'll note the asymetrical loadings, giving the pilot more options for prosecuting his attack on the enemy SAM and AAA units. The combined use of anti-radiaton missiles, and prescision guided electro-optical Mavericks, allow him to 'thin out' the defenses from a stand-off range before closing into the extreamly high threat environment to deliver the cluster bombs. And, of course, it fully retains it's primary air-superority role with it's load of 8 air-to-air missiles; infra-red homing AIM-9 series Sidewinders, and the radar-guided Skyflash and Sparrow. Not shown in this advertisment flyer, is it's capabilities in the Anti-shipping role, with Martel TV guided missiles, Mavericks, or any of several other types of of Electro-opticaly guided bombs. Unfortunatley, this aircraft is not equiped with a laser designator, and therefore is not capable of deploying Laser Guided Bombs. However, for an additional fee, our technical staff can arrange for the mounting of such a device, although it is not reccomended as it would take space away from other, vital equipment. The aircraft is fully equipped with the latest countermeasues, from it's electronic jamming suite to disposable chaff and flare cartridges. We'd like to thank you for stopping by our booth here, and hope you all have a pleasent day. ------- the best thing abuot this mod, it uses EVERYTHING that's stock in WoE. Uses the stock skin bmps, stock cockpit; only the inis get changed. Even the decals, which I desaturated to fade them for a more lo-viz look, are stock. Unfortunately, it's designed for ONLY WoE, as all the bits only exist there. Just have to do up a hangar screen (WoE style), and it'll be ready to go. So, whatya think? Time to put Kevin in the rubber room???? "Frances" The Wrench Kevin Stein ps: hell, I did the Tomcat, why not an Eagle???
-
F/A-37A Talon - ALPHA 1.0 Ready for Download
Wrench replied to Zurawski's topic in General Discussion
Ok, folks, as seen the the 'Flaming Talon' thread, the pilots are now ready. They're only available at my site, so heres a direct link: Talon PIlots Hope you like 'em! Wrench Kevin Stein -
View File "What If" WGAF A-4E Skyhawk West German Luftwaffe A-4E Skyhawk for SF, WoV & WoE: This is a mod the stock 3rd Wire A-4E Skyhawk joining the ranks of "What If..." they had been purchased by the West German Air Force, to replace their Fiat G-91s while awaiting the arrival of the Tornado IDS, in the light to medium attack/strike role. (due to 'unforseen delays' in the Toros) I feel an aircraft like the Scooter is almost perfect for the European environment: light, fast, manuverable, good weapons fits, easy to fly and maintain, survivable, etc. Did I mention it was fun to fly??? This is a full aircraft mod tested in SF, WoV, and totally designed for WoE. This aircraft is designed with the latest Weapons Pak in mind, and has had it's loadouts adjusted accordingly. I also 'split' the hardpoints, to allow for asymetrical loads on the outboard pylons. It uses the stock A-4F cockpit (supplied via the cat file! - saves on space in the d/load) I've also repainted the stock gunsight tga, by making in a brighter yellow. Makes it easier to see for us old folks ;) Also, it is reccomened that you grab 'Range Counter Fix' for the Skyhawks. . There's also a real nice 'photoreal' cockpit upgrade for F model Scooters. Both are available here at CombatAce ... I reccomend them! This is version 2 of this mod, as there were some issues I need to fix, and had relased the other before total completion. If you d/led the original, I suggest deleting it and getting this upgraded version. Sorry for the inconvience Skin created using stock 3rd Wire templates. Camo pattern by Gramps; modified for European-style colors (thanks Richard!!) Good Hunting & Happy Landings! Wrench Kevin Stein Submitter Wrench Submitted 03/08/2007 Category Fictional Aircraft, Experimental and UAV's
-

344 downloads
West German Luftwaffe A-4E Skyhawk for SF, WoV & WoE: This is a mod the stock 3rd Wire A-4E Skyhawk joining the ranks of "What If..." they had been purchased by the West German Air Force, to replace their Fiat G-91s while awaiting the arrival of the Tornado IDS, in the light to medium attack/strike role. (due to 'unforseen delays' in the Toros) I feel an aircraft like the Scooter is almost perfect for the European environment: light, fast, manuverable, good weapons fits, easy to fly and maintain, survivable, etc. Did I mention it was fun to fly??? This is a full aircraft mod tested in SF, WoV, and totally designed for WoE. This aircraft is designed with the latest Weapons Pak in mind, and has had it's loadouts adjusted accordingly. I also 'split' the hardpoints, to allow for asymetrical loads on the outboard pylons. It uses the stock A-4F cockpit (supplied via the cat file! - saves on space in the d/load) I've also repainted the stock gunsight tga, by making in a brighter yellow. Makes it easier to see for us old folks ;) Also, it is reccomened that you grab 'Range Counter Fix' for the Skyhawks. . There's also a real nice 'photoreal' cockpit upgrade for F model Scooters. Both are available here at CombatAce ... I reccomend them! This is version 2 of this mod, as there were some issues I need to fix, and had relased the other before total completion. If you d/led the original, I suggest deleting it and getting this upgraded version. Sorry for the inconvience Skin created using stock 3rd Wire templates. Camo pattern by Gramps; modified for European-style colors (thanks Richard!!) Good Hunting & Happy Landings! Wrench Kevin Stein -
Ok, as requested here's a male pilot: Bonus points to name the person (and no, it ain't me) How's this one look to ya, Zur?? Probably release both the male and female, if no one has any objections????? Wrench Kevin Stein
-
Hell, you WON didn't you???? I'll see what I can come up with... Sag's pic shows exactly what I was trying for; ah....let me rephrase that... the harness type/color I was trying for, anyway. Come to think of it, look at pic 4...is that chest sticking out a little? or am I just giving in to my longings...... Wrench Kevin Stein
-
To fix your Red Air birds follow this link... The World Famous Weapons Wiki In the Aircraft Data section, instructions on how to fix those commies Wrench Kevin Stein