
Stephen1918
-
Posts
1,181 -
Joined
-
Last visited
-
Days Won
19
Content Type
Profiles
Forums
Gallery
Downloads
Store
Everything posted by Stephen1918
-

-

-

-
Taube (grenade armed)
Stephen1918 commented on whiteknight06604's file in Other Central Powers Aircraft
 Big Al, Open the file using Notepad. Go to "Save As..." (not "Save") At the bottom of the box is a place where you can change from Unicode to ANSI. I sent the file to you attached to a PM.
 -
Taube (grenade armed)
Stephen1918 commented on whiteknight06604's file in Other Central Powers Aircraft
Big Al - If you are using FE1, then you need to convert the Loadout file to ANSI instead of Unicode. -
Buddy1998 - First, thanks for asking. Second - I have spent several years working with other modders to make First Eagles a better game. Other modders have also contributed, and I have benefited from their contributions. I really do not want to see my efforts used to make another game a better game because I will not be able to benefit from that. Please do not use my planes for anything other than FE. Of course, if you want to make mods for FE, contact me and you will have my full support.
-
The Real World has been holding me prisoner for several weeks. I managed to escape today, but I'll have to go back tomorrow. Gambit168 - thanks for the revised skins. They're a good addition to the plane. I like it when I can download something new for FE. HerGr, whiteknight06604, Crawford - I tried making a rifleman as an add-on pilot, but there is no way to make him move, so the static armed observer is the best alternative. VonS has figured out how to alter the FM so that gun shots come from his vicinty, and that works pretty well. Whiteknight - I approve of your revisions to the Taube. Check your messages. Crawford - There is an ini for my pilots included with the FE2 version. But I don't know where to place it in FE1. If you can figure it out, please post your solution here.
-
Thanks for pointing this out. I'll look into it. The problem was with the elevators. In the Taube, the tailplane used warping and didn't have moving elevators, but the data file was causing the parts to move anyway. You were seeing the cables detaching when the part moved. I went into the data file and removed the model node names. I have uploaded a new version. If you have already downloaded the Taube. Use this data file to correct the problem. TaubeDataV2.zip Thank you!
-
The canals look good. Are you making new TODs for the city?
-
Gambit, these look great. Will you put them into the Download section, please?
-
Problem with First Eagles, Not running
Stephen1918 replied to waterloo's topic in General Discussion
I'm running FE Gold on Windows 7 - I had to install an older version of Direct X, I don't remember which one, 9 I think. -
If you guys want to help out, there are several planes already here that could be converted to Spanish Civil War. They would need new skins/decals and some tweaks to the data.ini to change nations, dates, weapons, pilots, etc. The DH9 bomber was introduced at the end of WWI, production continued into the 20's. Spain got several of them and pulled them back into service at the beginning of the civil war. They were used by both sides during the early days of the war. If somebody wants to make SCW versions of the Airco DH9 and upload them into the Golden Era section, you have my blessing. There are several planes in the Strike Fighters downloads that could be converted to FE. I don't know what kind of permissions you would need from the original authors, but I think it would be polite to ask. You would need to make new skins, change the data.ini to change nations and dates, and to use FE pilots and weapons. I have only looked in the SF1 downloads, there may be others in SF2. Russouk2004 has a Messerschmitt Bf.109 - there are several versions there. The Me. Bf.109C was used by the Legion Condor and the Nationalists. I think the major difference between the types was in the weapons, you might need to do some "RemoveNode" tricks. Pasko has a Junkers Ju87 Stuka. Wrench has made a Ju87B for the Italians. The 87B was also used by the Nationalists in Spain. Russouk2004 has also made a DH82 Tigermoth. The Tigermoth was used by the Spanish as a trainer, and was used by both sides for recon and liaison in the Civil War. The Tigermoth is unarmed, but would still be a good plane to have. Raven has a Fiesler Fi156 Storch. There were only 5 or 6 used by the Nationalists in Spain. Raven's is armed with a machine gun and has a bomb loadout, but I don't know if the planes in Spain were armed. Bunyap has a Boeing P-26 Peashooter. There was exactly 1 of them used by the Republic side in Spain. The Spanish got it for evaluation, decided not to buy any more, but used it when the civil war started. There may be others. And there may be some that were not used, but have a configuration similar to planes that were used and could be used as placeholders until a better version shows up. So... if any of you want to help out, we could get several more planes in SCW in just a few weeks.
-
The cockpit is still getting skins, I'll post some screen shots when it's more finished. I did forget about the drop tank, but I think I can make it a separate part that can be added with a loadout. I want to get some more planes so we can start flying the SCW!
-
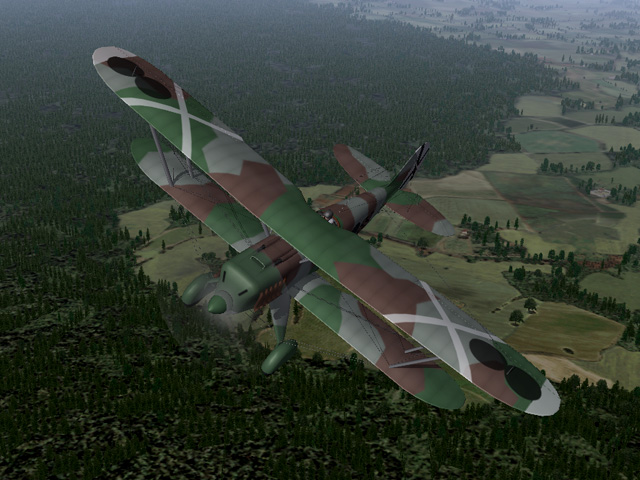
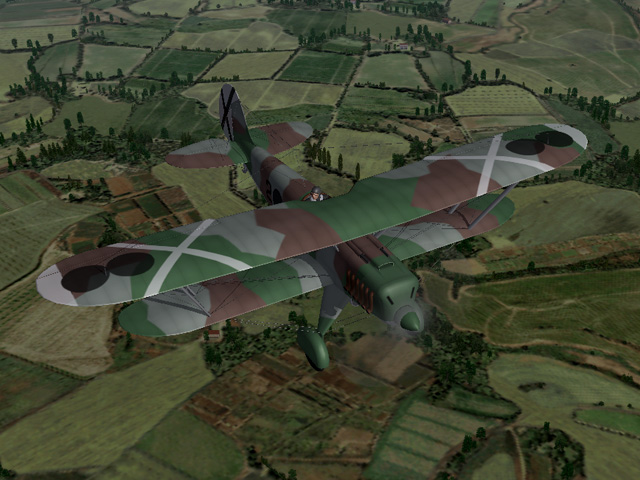
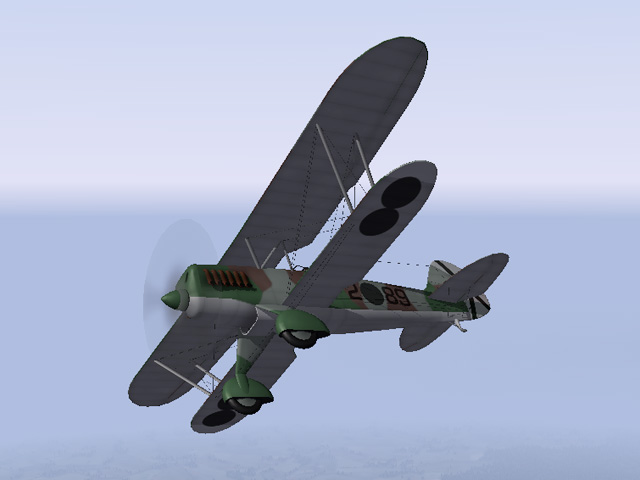
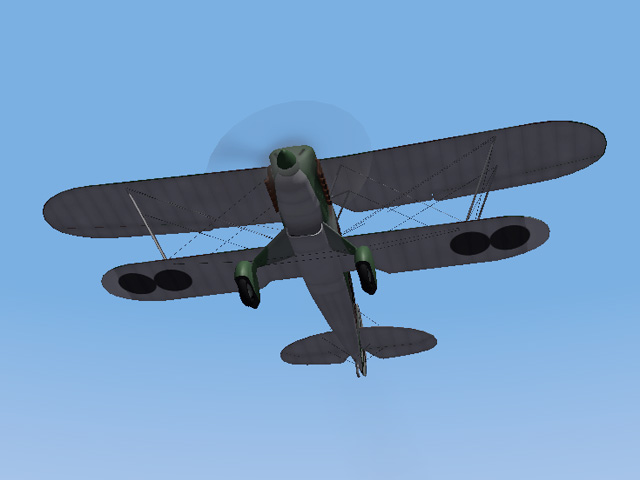
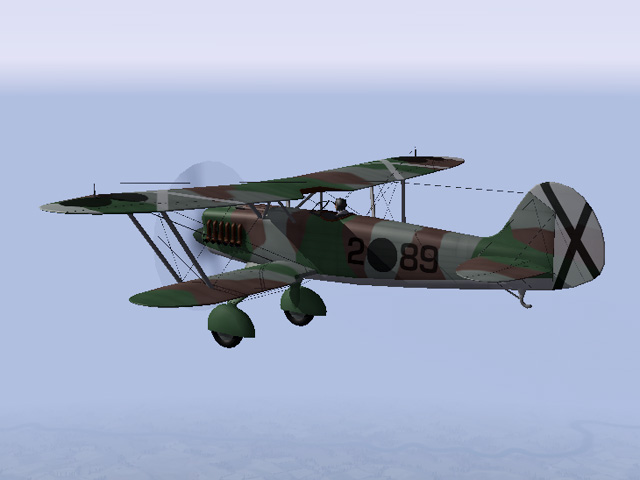
Another plane for the Spanish Civil War, the Heinkel He.51 was used by Nationalist forces as a fighter, escort, interceptor and ground attack plane. The plane itself and cockpit are mostly finished. I'm still working on skins and the LODs.

-
 Big Al, I made the gunner so he only shoots over the prop, you need to be under and behind your enemy before the gunner shoots. Remember the Taube is not a fighter, the gunner is just there to pose a threat more than to score a victory. In the Forum, VonS has posted revisions to the data.ini to make the gunner more aggressive (post #6) - which I think may help you: http://combatace.com/topic/90636-taube-with-rifleman/
 -
Nice! The reason the gunner is so ineffective in my version is that I tried to prevent him from shooting through the prop, so you need to come up under your enemy before the gunner reacts. But you will definitely see him shoot more often by using VonS's revisions. Enjoy!
-
For historical realism (and to keep the game challenging) you probably don't want to make the gunner too accurate. Changing the the Pitch and Yaw values will affect how the gunner moves. If you have a guy whose feet are poking through the fuselage sometimes, then change the min and max numbers (these are measured in degrees) Changing the angle rate will determine how fast the gunner moves. He'll be able to track an enemy plane better if he moves faster, but this can get unrealistic because the guns were moved by muscle power alone and probably couldn't rotate very fast. Changing the Aim Offset and Gun Fire Chance will affect how accurate the gunner is. I don't know how much you want to distort the game, but the gun data ini has settings for accuracy, most guns seem to be set to 70, but some are lower.
-
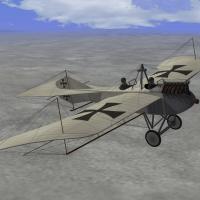
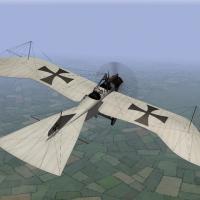
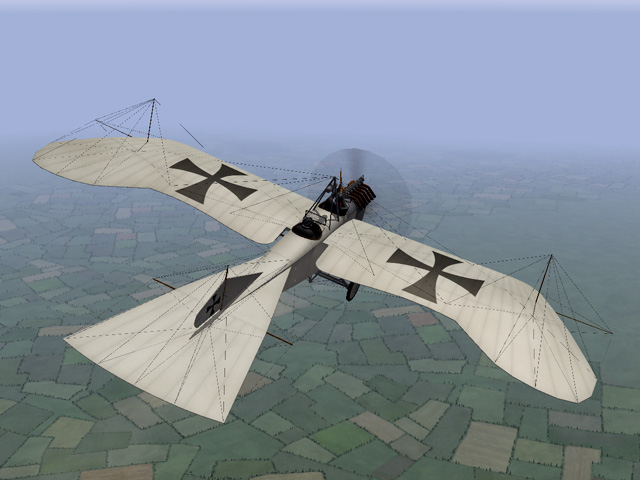
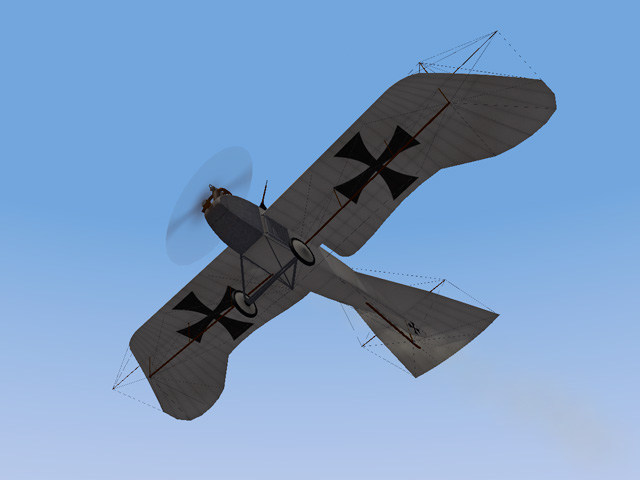
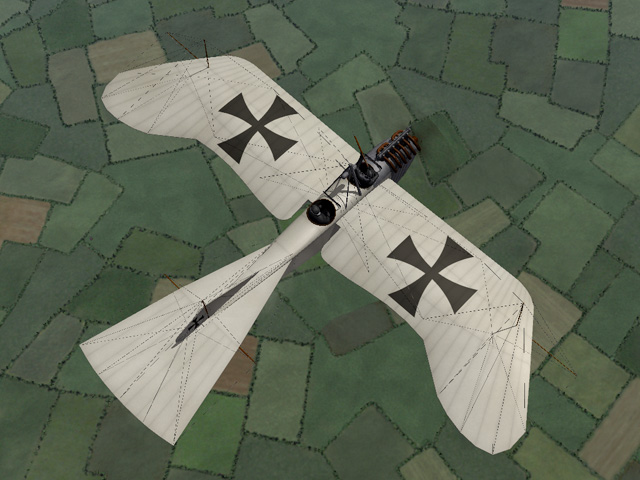
Today I uploaded a Taube for First Eagles. There were many versions of the Taube produced in the years leading up to World War I. When the war began different versions were being used in large numbers, on all fronts for recon missions. This is the Kondor Taube, which I think is representive of the "classic" Taube. I have added a rifle for the observer, which he will aim and fire. I have made significant changes to the wires on the front to give the gunner more room to move. Ojcar made the FM, and he made signifuicant improvements to the way the gunner moves and fires.

-
View File Taube There were many versions of the Taube produced in the years leading up to World War I. When the war began different versions were being used in large numbers, on all fronts for recon missions. This is the Kondor Taube, which I think is representive of the "classic" Taube. It has the typical wing shape, uses wing warping for both the aileron and elevator surfaces, and has a six cylinder 100HP engine. I have added a rifle for the observer, which he will aim and fire. I have made significant changes to the wires on the front to give the gunner more room to move. Ojcar has created a fake machine gun for the pilot, which causes the AI plane to be more aggressive in pursuing enemy planes. I have installed that gun on this plane. Ojcar's "DummyMachineGun" data is included with this download, in case you don't already have it. Some flyers wore simple crash helmets in WWI, especially in the early days. I am using a pilot with a helmet in this plane. The pilot and installation instructions are included in the download, in case you don't already have it. The download includes my skinning templates, data for the guns and the German pilot with helmet. Credits Thanks to Ojcar for making the data file for the Taube, and for greatly improving the gunner. Ojcar also made the data for the dummy machine gun. Thanks to Crawford for identifying a problem with the elevators. Installation Instructions For FE1 - Unzip the file. Move the folder named "Taube" into your FirstEagles/Objects/Aircraft folder. For FE2 - Unzip the file. Move the folder named "Taube" into your FirstEagles/Objects/Aircraft folder. Then in the FirstEagles/Objects/Decals folder, create a new folder named "Taube". Move the folder named "D" from your Aircraft/Taube folder into the Decals/Taube folder you just made. You may not need to install the dummy machine gun, it has been used on other planes and you may already have it. If you don't already have it, I have included the gun and instructions for installing in a separate folder included in this download. You may not need to install the infantry, it has been used on ground units and you may already have it. If you don't already have it, I have included the gun and instructions for installing in a separate folder included in this download. You may not need to install the pilot with helmet, it has been available for download for some time and you may already have it. If you don't already have it, I have included the pilot and instructions for installing in a separate folder included in this download. Submitter Stephen1918 Submitted 05/14/2017 Category Other Central Powers Aircraft
-
Version v2
204 downloads
There were many versions of the Taube produced in the years leading up to World War I. When the war began different versions were being used in large numbers, on all fronts for recon missions. This is the Kondor Taube, which I think is representive of the "classic" Taube. It has the typical wing shape, uses wing warping for both the aileron and elevator surfaces, and has a six cylinder 100HP engine. I have added a rifle for the observer, which he will aim and fire. I have made significant changes to the wires on the front to give the gunner more room to move. Ojcar has created a fake machine gun for the pilot, which causes the AI plane to be more aggressive in pursuing enemy planes. I have installed that gun on this plane. Ojcar's "DummyMachineGun" data is included with this download, in case you don't already have it. Some flyers wore simple crash helmets in WWI, especially in the early days. I am using a pilot with a helmet in this plane. The pilot and installation instructions are included in the download, in case you don't already have it. The download includes my skinning templates, data for the guns and the German pilot with helmet. Credits Thanks to Ojcar for making the data file for the Taube, and for greatly improving the gunner. Ojcar also made the data for the dummy machine gun. Thanks to Crawford for identifying a problem with the elevators. Installation Instructions For FE1 - Unzip the file. Move the folder named "Taube" into your FirstEagles/Objects/Aircraft folder. For FE2 - Unzip the file. Move the folder named "Taube" into your FirstEagles/Objects/Aircraft folder. Then in the FirstEagles/Objects/Decals folder, create a new folder named "Taube". Move the folder named "D" from your Aircraft/Taube folder into the Decals/Taube folder you just made. You may not need to install the dummy machine gun, it has been used on other planes and you may already have it. If you don't already have it, I have included the gun and instructions for installing in a separate folder included in this download. You may not need to install the infantry, it has been used on ground units and you may already have it. If you don't already have it, I have included the gun and instructions for installing in a separate folder included in this download. You may not need to install the pilot with helmet, it has been available for download for some time and you may already have it. If you don't already have it, I have included the pilot and instructions for installing in a separate folder included in this download. -
A few weeks ago Mike Dora contacted me about a problem with the gunner in the RAF BE 2c. I looked into it and discovered some problems with the LODs and with model node names in the FM. I made some corrections, he did some testing and we worked out a solution. (His discussion about Aim Offset Parameters was related to that.) Since I was making changes anyway, Ii improved the skins a little and incorporated the hit box corrections that Nicholas Bell provided some time ago. Last night I uploaded new versions of the RAF BE 2c and 2e. The new versions have a much improved gunner, better skins and correct hit box coordinates. I replaced the old versions rather than make a new upload, so they're buried in the downloads section: http://combatace.com/files/file/14468-raf-be2c/ http://combatace.com/files/file/15111-raf-be2e/
- 6 replies
-
- 10
-

-
Another project I had started some time ago and just finished - the Anatra D with a gun for the pilot. The stock Anatra D only had a gun for the observer. I have taken some liberties and made a version with a gun for the pilot, which I am calling a "field mod". This may be fictitious, but it's more fun to fly.


- 1 reply
-
- 6
-
-
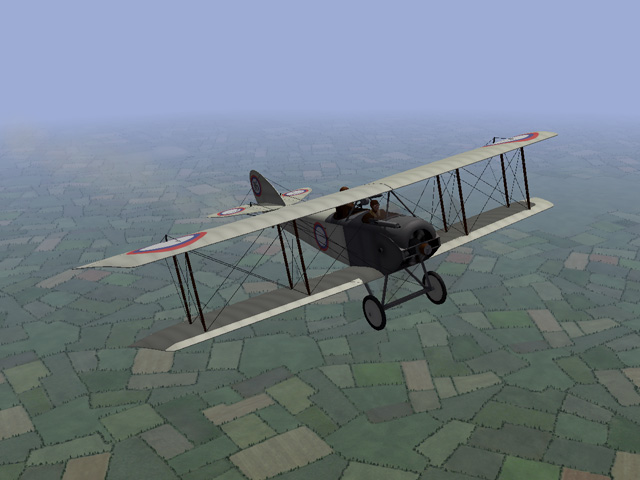
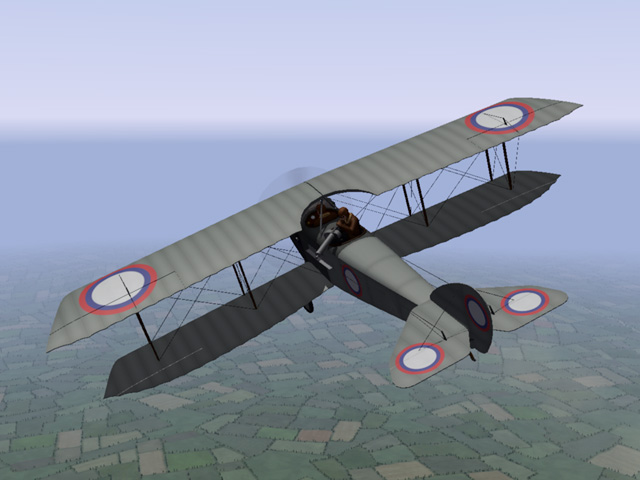
View File Anatra D - "Field Mod" The Anatra D was a predecessor to the Anatra DS. The stock plane was powered by a Gnome rotary engine and armed with a single machine gun for the observer. I have made a "field mod" version with a fuselage mounted machine gun for the pilot. Anades with additional machine guns are known to have existed, but I haven't found any photos of them. I added the gun for the pilot in what seemed to be a logical position. The Anatra D was used mostly for reconnaissance, but also as a fighter and light bomber. After overcoming some initial design problems, it entered service in May, 1916 and was produced in relatively large numbers. Many of them survived the war and were used in the fighting in Eastern Europe after the end of World War I. I have included three skins, two linen and a grey paint. A full set of number decals and a loadout for light bombs are included. I have also included my skinning templates for those who wish to make their own skins. Credits: My thanks to Ojcar for making the original data.ini for this plane. I have modified Ojcar's file to include the additional gun. Installation instructions: For FE1: Unzip the file and move the folder named "AnatraDMod" into the FirstEagles/Objects/Aircraft folder. For FE2: Unzip the file and move the folder named "AnatraDMod" into the FirstEagles/Objects/Aircraft folder. Then in the FirstEagles/Objects/Decals folder, create a new folder named "AnatraDMod". Move the folder named "D" from the Aircraft/AnatraDMod folder into the Decals/AnatraDMod folder you just made. Submitter Stephen1918 Submitted 05/09/2017 Category Other Entente Aircraft
-
89 downloads
The Anatra D was a predecessor to the Anatra DS. The stock plane was powered by a Gnome rotary engine and armed with a single machine gun for the observer. I have made a "field mod" version with a fuselage mounted machine gun for the pilot. Anades with additional machine guns are known to have existed, but I haven't found any photos of them. I added the gun for the pilot in what seemed to be a logical position. The Anatra D was used mostly for reconnaissance, but also as a fighter and light bomber. After overcoming some initial design problems, it entered service in May, 1916 and was produced in relatively large numbers. Many of them survived the war and were used in the fighting in Eastern Europe after the end of World War I. I have included three skins, two linen and a grey paint. A full set of number decals and a loadout for light bombs are included. I have also included my skinning templates for those who wish to make their own skins. Credits: My thanks to Ojcar for making the original data.ini for this plane. I have modified Ojcar's file to include the additional gun. Installation instructions: For FE1: Unzip the file and move the folder named "AnatraDMod" into the FirstEagles/Objects/Aircraft folder. For FE2: Unzip the file and move the folder named "AnatraDMod" into the FirstEagles/Objects/Aircraft folder. Then in the FirstEagles/Objects/Decals folder, create a new folder named "AnatraDMod". Move the folder named "D" from the Aircraft/AnatraDMod folder into the Decals/AnatraDMod folder you just made. -
Two Armored Cars for the Eastern Front
Stephen1918 replied to Stephen1918's topic in General Discussion
I want to say that I consider Crawford one of my good friends here at Combat Ace. Although I admit there have been times when I simply didn't want to hear it, I must say that his comments have always been honest, accurate, and delivered with respect. I believe that nobody is above learning, so I try to welcome all comments. I don't approve of the "take it or leave it" attitude that some modders seem to have. Crawford and others here have helped me improve my contributions to FE. I hope that everyone here will feel free to suggest improvements to my projects, as long as you understand that I will decide if and when to make changes.
