

Caesar
-
Posts
2,177 -
Joined
-
Last visited
-
Days Won
2
Content Type
Profiles
Forums
Gallery
Downloads
Store
Everything posted by Caesar
-
Heard about this one through several sources. Sucks; most sincere condolences to the families.
-
SF2 Series DACT Reports And Related A2A Discussions (Game only)
Caesar replied to Flanker562's topic in General Discussion
Okay, gang, I've been flying a lot of Turkey sorties, so I figured I'd take a bit of a break...sort of. Two DACT reports thus far, first is an A-4F Skyhawk vs. F-14A Tomcat. That's right, I decided to school some Turkey students and go against my beloved F-14. Second fight was two legends: F-8J Crusader vs. F-4J Phantom. Engagement 1 Loadouts: A-4F: 2x AIM-9H, guns, 100% fuel, no tanks F-14A: 4x AIM-9H, 4x AIM-7E-2, guns, 100% fuel, no tanks This first fight proves that the AI can't handle the Turkey well at all. Unlike some of the more modern planes, which use their thrust and turn rates to their advantage, or even some earlier planes like the Phantom and Crusader, the AI does not seem to be able to make calculated, energy saving turns in the F-14A, nor does it drive the fight to the vertical, where the Tomcat has the advantage. This was a basic one circle fight, where I had just firewalled my engine (no burner) and put on a sustained 6g turn against the Tomcat. The Turkey crew initially turned with me, but then for some reason, cut throttles. He's in a heavy jet at 100% fuel, and the TF-30's aren't helping his cause, now he takes it out of blower? It takes about a minute for me to decidedly get on his tail, but once I got behind his 3/9 line, he begins dolphining the plane! Let's burn more energy that we don't have, shall we? This winds up putting me right on his tail. Screw this guy, he doesn't deserve a quick missile to the ass (which by now I could have delivered with ease.) Close on the F-14 and tear him apart piece by piece with my 20mm. Like the Tornado, the Tomcat took three good bursts to kill, fired within about a 15 second period total. The first burst caused him to pull high, but I followed. Second burst caused him to try to unload nose low, and third finally caused the crew to punch out. What an embarrassment! Well, true, A-4F's and Super Fox's would better both F-14's and F-15's (even later F-16's and -18's!) if those later fighters fought the Scooter's fight (which this Tomcat did), but it wasn't even funny. Bingo, Maverick's dead, you're outta there, kid. Engagement 2 Loadouts: F-8J: 4x AIM-9H, 4x 20mm gun, 100% fuel, no tanks F-4J: 4x AIM-9H, 4x AIM-7E-2, 100% fuel, no tanks This fight took longer, but was almost entirely offensive on my part. It was, above anything else, a drawn out one-circle, which turned into a descending one-circle. When I was getting onto the Phantom's tail, I was somewhat low on energy, but faster than the Phantom, which meant that I couldn't get my nose on him completely, and was probably going to overshoot. A rolling scissors ensued for about two iterations, and it then flattened, with the F-4 just barely getting inside my turn. I pushed the nose vertical, dropped flaps and pulled to get inside of his turn. He ran, and I stood on the rudder to get my nose to slice down. It did, but the F-4 was getting away. Fortunately, he went in a straight line for a bit, then turned into me, but hadn't regained enough energy to effectively loose me. I went to gun for a high angle-off attack, but the F-8's cockpit got in the way and I couldn't see the F-4. He shot out in front of me, and I kept pulling moderately, which allowed me to get on his six. He was now climbing and getting away. Hell with it, FOX 2! I figured he's got enough energy to get away, I'm just trying to get him back into gun range. Nope, Sidewinder Hotel hits right under the tails and the Phantom detonates about a mile in front of my Crusader. Wow, wasn't expecting that one. The second fight, like the first, called for energy management, but the F-4 didn't piss it away like the F-14 guy did. For the most part, my F-8 was in a 5g or less turning fight, but with some random spikes into the 9g region to get nose positioning (didn't work well anyway). Since I took on the Echo, I might take on the Fox in a Turkey to see if there's much difference, I think the AI just botched this fight. -
SF2 Series DACT Reports And Related A2A Discussions (Game only)
Caesar replied to Flanker562's topic in General Discussion
Damn, EricJ, congrats on the MiG with the Thud! Two engagements here, one from 1974, one from...well, since the F-35A isn't in service yet, we'll assume in some alternate reality where the Turkey Beast still flies. Anyhow, first engagement was in an F-14A against the nimble A-4E Skyhawk. Fight 1 Loadouts: F-14A: 4x AIM-7E-2, 4x AIM-9H, gun, no tanks, 75% fuel A-4E: 2x AIM-9H, guns, no tanks, 100% fuel This fight started with a one-circle at 5.5g, until I got nose-low and could bring the A minus into a more proper 6.5g sustained turn. The Scooter's and Turkey's turns got tighter until it wasn't a circle as much as a flat ellipse, and both of us ended up nose-on. Like the Mirage, I know the Scooter can zap me nose-on easier than I can zap him, so I elected to perform a high-g barrel roll over him. As we passed, it occurred to me that even with the TF-30's, the F-14 could fight better in the vertical than the A-4. Solution, begin a loop! The A-4 did not follow, but instead continued straight, and then rolled and pulled left. I had gained 2 miles of separation and was above him. VSL-Hi, AIM-7E-2 selected, and FOX 1! I had the feeling it'd miss, so I switched to guns. That loop had burnt some good energy, so I know I can't start turning with the A-4 right off the bat, but I've got gravity helping me, and "High Angle-Off" enters my squash. Scooter-Echo is still locked up, I stand on the rudder to the left and give the Turkey some pull. Viola! That looks about right. Pull the trigger and the Scooter gets Swiss-cheesed, catching fire. The Scooter driver holds it for a second and I pull up and into him. Just as I get nose on to reverse, he punches out and the Scooter begins to break apart, eventually crashing into the desert. Second engagement was F-14B (96) Tomcat vs. F-35A JSF. Now, I'm a fan of the JSF, and having not flown the bird in a while, wanted to see what it could do. Fight 2 Loadouts: F-14B: 4x AIM-9M, gun, no tanks, 75% fuel F-35A: 4x AIM-120C, 4x AIM-9X, gun, no tanks, 100% fuel Typical one-circle, and I'm gaining on this sucker heavily. As I get nose-on, I get intermittent warnings from my RHAW gear - that phased array can see HIGH! It didn't matter, as I pulled into him hard. Right here, I could have shot, but he suddenly jinked, then pulled hard into my turn. I had to release a bit since I had just brought my energy down to about 380KIAS, and he rolled back into me. He wasn't threatening yet, but I again got the intermittent warning. I used gravity and full blower to regain energy a bit, and we did two iterations of a horizontal scissors. What I noticed was that the F-35's instantaneous turn rate was pretty damn high, but it wasn't sustaining its turns as well as the Turkey Beast. This turned into a descending one-circle fight after I performed a low yo-yo, and the JSF kept turning to the left. Now it wasn't energy loss that was hurting me, but rather, my Tomcat was sustaining energy too well! The JSF was getting inside of my turn because I was pegged in an 9g turn at Mach 1.1, and at low altitude and high airspeed, the Turkey's engines start putting out a LOT of power (real world, 32,000/lbs per engine at .9M at sea level!) We are down in the dirt, and I cut the throttles to try to expend some of my energy and get the fight neutral. This worked, and the JSF began to loose his edge, then lost neutral, as I slipped in behind him. At about 20 degrees angle off, I fired an AIM-9. The JSF driver deployed flares, but the missile couldn't turn enough to hit him. I plugged the blower back in to sustain the 350 or so KIAS. This put me very close to his tail. At about 10 degrees angle off, I fired my second AIM-9M, which also missed (tracked initially, but went for flares). I closed, thus, to gun him. I was gaining, and didn't want to overshoot, so I pulled into a high yo-yo. After reaching the bottom, the JSF driver tried to break right, then straightened. I could see I was getting close to overshoot, was on my side, and stood on the rudder, electing to let the stream of cannon rounds do the work as my nose sliced right through center mass of the F-35. After the hit, I pulled hard, since I initially didn't know if his plane went down (last pic). He was going down, indeed. In the latter case, the Tomcat's better thrust to weight helped me to keep the energy where it needed to be to beat the F-35. What I noticed during the scissors was an initial nose-buck, followed by a slightly less extreme sustained turn. The initial buck seemed to be an attempt to get into AIM-9X parameters early, but thankfully, it didn't work for him today. The A-4, just a nasty little bastard if you let it get you down on energy and fight its fight (turning). -
Not internally, no, but they do have a specially designed gun pod for the B and C, while the A's gun is internal. Think it has to do with the lift fan assembly in the B; but I don't know why the C's gun isn't internal - suffice to say they've all been designed with the compatibility to carry a gun.
-
The prevailing thought at the time was that missiles would finish any fight well before planes would see each other. Why install a gun when you have missiles to kill someone 15 miles away? Of course, Vietnam changed all that with the WVR ROE that nullified the range advantages, combined with the fact that the missiles of the time turned out to be horrendously unreliable. Lesson learned: fighters need guns! F-14, F-15, F-16, F/A-18, and even the new F-22 all were designed with guns.
-
SF2 Series DACT Reports And Related A2A Discussions (Game only)
Caesar replied to Flanker562's topic in General Discussion
Did two DACT bouts today with the F-14A- (A minus) Tomcat. First one was against the Tornado F.3. This wasn't much of a fight, I pulled behind him from a one-circle pretty darn quick. After a sustained 6.5g turn, I wound up saddled on the Tornado, waiting for him to stop jinking to get a clean shot. Well, let it be known that the Tornado is a tough bird! It took three bursts of 20mm to bring that sucker down. First one zipped through his port wing, horizontal stab, and vertical stab - nothing but blown off Sidewinders. Second went through his starboard flaps, rudder and port engine. Third burst finally sheared off his tail and he spun out of control to the desert floor. Looks like I might have to try to reverse the tables and take on the A- in a Tornado. Second DACT was F-14A- vs. F-15A. This fight I had to take more seriously, since the F-14A- doesn't have the thrust to accelerate with the F-15. Variable geometry is the name of the game, but I'm also a lot heavier than the F-15, so I'm going to be burning more energy anyway. For this fight, I had loaded up my Turkey with 2x AIM-54's on the glove pylons 1B & 8B, 2x AIM-7's at stations 3 and 6, and 2x AIM-9's on stations 1A & 8A. Why the heavy loadout? I'm not entirely certain. Suffice to say, I had beaten the F-15A in the past easily enough only packing AIM-9's and the gun. By the way, this fight took place in 1976, so no all-aspect AIM-9's. The fight started off with a one-circle, and I was inside the F-15 in no time. The problem was that, thanks to the TF-30 engines, I couldn't sustain my turn much longer before the Eagle began out turning my Tomcat. I sustained my turn, but the Eagle was getting away; not good if he could keep his turn to get on my tail. I rolled the Tomcat onto its back and pulled into the F-15 to get gravity to aid me. It worked, but the F-15 was still turning better, so I performed a second iteration, again getting near-nose on. We were now down in the dirt at about 5,000 feet, an area where the F-14A has a decided advantage in the real world according to its aviators ("Fight the F-15 below 18,000 feet in an F-14A") and in the sim world, it seems to be the same way, since I was now locked in another one-circle, but was neither gaining, nor loosing advantage against the better powered F-15. I reversed into a two-circle fight and curled inside of the F-15 who initially hesitated, pulling away from my turn to gain some separation, then pulled back into me. I got angle off and hit him with a snap-shot of my gun. We were very slow now, which is why I took a shot with the game data in the lower left. I continued my pull into him after the snap shot connected (notice flaps down). The Eagle wound up electing to go vertical, exposing those huge Pratt and Whitney engines, and I fired both of my AIM-9H's. The AIM-9H, by the way, likes flares. First one didn't even guide, second one started to guide, but the F-15 unloaded and deployed flares, which fooled the missiles. I was now chasing the F-15, not gaining on him well enough, but getting to AIM-7 parameters. The Eagle was just outside of Rmin, so I fired a Sparrow. That missile went stupid, so I fired the second one, which also went stupid. I had two options now; cut power and wait for the F-15 to get outside of 1.2NM (AIM-54 Rmin) or try to close again and gun him. I went for the latter option. I had the F-15 saddled, and every time he tried to pull into me, I followed him without issue. After some pulling and unloading, I got the F-15 lined up and gunned him. This second fight again illustrates how much better WVR the F-14B is compared to the F-14A. In the B, I can beat an F-15A, C, or otherwise pretty darn quick (reference last page for example). In the F-14A, the plane needs to be lighter (loadout wise), and the energy burns have to be far more calculated. The F-15 simply has superior thrust compared to the F-14A, which is why I tried to shoot him with the AIM-9's as he climbed; no way I'd be able to fight him in the vertical. This particular fight was entirely offensive on my part, but it took a LOT more work to beat the F-15 than it took in an F-14B, or a more lightly loaded F-14A-. -
SF2 Series DACT Reports And Related A2A Discussions (Game only)
Caesar replied to Flanker562's topic in General Discussion
Did a couple DACT fights against the Mirage F-1C 200 in the F-14A Tomcat. Standard A-A loadout on the Mirage, and an older-school loadout of 2x AIM-7E-2 and 4x AIM-9H with gun for me. I have to get back into some of the older fighters, because these fights took entirely too long. In the initial fight, I figured I'd try for a two-circle engagement. This wound up with both aircraft achieving nose-on very early, and also saw the Mirage take a pot shot with an AIM-7E well inside of Rmin. The missile flew past harmlessly, and we turned into a one-circle descending corkscrew. Every time my Tomcat got close to the Mirage, he would wind up with me on his tail, just outside missile parameters (as if the AIM-9H could make the turn). Tried some vertical stuff, but nothing really worked until we both got slow enough, and on the deck, for me to drop my flaps. This got my nose around quicker than he could keep away from me and I finally got in parameters to shoot. After two AIM-9H's failed to guide, it occurred to me that guns was the only way this was going to end. He became predictable when I shot my missiles at him, and I was able to raise flaps and accelerate to within gun range. He tried a few turns, but my energy was better, and I shot him with the gun. He spiraled a few times, then blew up. The second fight, I figured, should have gone faster, and it did...sort of. Rather than do a two-circle that would result in poor parameters and both aircraft nose-on (not desirable in a Turkey, since the Mirage F-1 is a smaller plane, thus harder to hit with gun while he could have shot me pretty easy with his own gun), I started a one-circle sustained turn fight. This also wound up turning into a long, drawn out turning match; I had nose-on first, but was too close to effectively shoot at him. He maintained his turn and I maintained mine, but the F-14A- doesn't sustain or regain energy anywhere NEAR as fast as the Turkey Beast (F-14B). Again the fight descended, I got my flaps out, then pulled 'em back in when the Mirage was defensive, then put 'em back out as the fight went back into a turning fight. I knew I'd have to shoot him sooner than later, since this whole thing would take a while to get another good shot on him, so, electing to attack with a high angle-off gun shot, I got the flaps down, pulled inside his turn for a brief moment, got the pipper just right and ZZIP! Initially I didn't think I killed him as he continued to turn for a second, then flopped over into a slow, descending spiral, the canopy missing with gun holes in the nose section of the aircraft. Ouch. His plane crashed into the desert floor. Takeaways: The Mirage F-1C is a comparable airplane to the F-14A Tomcat in a knife fight. The Mirage driver never really threatened my plane more than once, but damn, did these fights take a while to conclude! They'd have probably been faster with AIM-9M's, and in all cases, I fired AIM-9H's at the Mirage, only to have them miss. I think if I kept the fight to even lower g, I'd have probably saved my energy better, but then I'd also loose angles a lot more, and the Mirage would have probably threatened me more. Successful, yes, but also showed me that the F-1C should certainly not be underestimated. -
SF2 Series DACT Reports And Related A2A Discussions (Game only)
Caesar replied to Flanker562's topic in General Discussion
Okay, since it was requested (and genuinely with no malice aimed at the Super Hornet), here's some tips on how to defeat the F/A-18F in close. My aircraft was the F-14B Tomcat (VF-1 Wolfpack "what should have been skin") with 2x AIM-7M, 4x AIM-9M, gun, 75% fuel, no tanks. The Super Bug was packing 2x AIM-9X, 4x AIM-120C AMRAAM, gun and 100% fuel but no tanks. I fought the Bug 3 times. First, make sure you get some good lateral separation between you and the Super Bug - don't go at him directly from nose-to-nose, or his instantaneous turn rate will get you. If he only needs to sustain a 9g turn for a couple seconds to get his nose to a threatening position, being too close in a plane that doesn't burn energy as quick will kill you. In all three instances of my engagements, we passed and were neutral with some space between us. The next thing was to select the right energy area to stay in. In my case, I choose about 450KIAS, which allows me to sustain between 7.5 and 8.5g with my Turkey Beast in full blower. Pulling 9-10g will burn your energy too quick. The F/A-18's phased array will give you warnings in a one-circle right around the same time your AWG-9 will begin to see the Bug. That said, I noticed in all instances with the Target-to-Self camera that my Turkey Beast would end up slightly behind the AI Bug's tail, but clearly not enough for a reliable shot, and with about 30-degrees off-boresight, and the Bug pulling harder into me. At this point, I pull back on the throttles to get the Cat to corner and burn the speed to about 380KIAS. Even if the Rhino is pulling into me, the F-14 is burning its energy slightly faster at this point and the nose will come 'round to at least allow for an AIM-9 shot. One-Circle, 8g turning fight In most instances, the Bug should reverse as you get nose on, which will leave him open for a safe Sidewinder shot. If you want to go for guns, your GE engines will out-accelerate the Rhino (real world and sim world), but bear in mind, he can out turn you instantaneously, and can force an overshoot quick. With his AIM-9X's compared to your AIM-9M's, that's a dangerous bet to play, better to end the fight with a Sidewinder to the tail than a bullet to the cockpit. Rhino reverses right into my nose Calculated pulls result in a gun kill If you start off in a one-circle, you can also force the Bug to do what you want to by expending one of your AIM-9's as if it were your Forlorn Hope. First AIM-9 will cause the Bug to break off his one-circle as you both get close to missile parameters. He will then turn back into you after having extended his circle by having to go tangent to you to fool the missile. This opens him up for a second missile pretty damn quick. Look close, and you'll see a Turkey Beast at 6o'clock Finally, should you decide not to shoot him with an AIM-9, or you don't have any left, keep pressing the initial turn, and manage your energy such that you get to where your nose is slightly behind him and pull in to threaten him by going to MIL power. He should start to run. If he doesn't (seen below), he might turn into you. Keep turning into the Bug and plug in the blower. Don't go for Max G, but rather probably 5g or so turn. If he keeps turning, you can roll and pull into a descending half-loop. This will put him back on your nose and within AIM-9 parameters. If you have no AIM-9's left, you'll probably keep iterating this to prevent the Bug from threatening you until the deck is right close, or he might break away from you, allowing you to regain energy and chase him down. In the instance I was in, I had some AIM-9's left and he wound up right on the nose. The descending half-turn On the Rhino's tail, turning with him Kill shot So, you can very well beat the Rhino in the Turkey, especially the B or D, probably not as easily in the A. The thing is going to be trading off either max performance or max g turns at advantageous points. In all instances, I initially started the one-circle fight nose-low to save energy once I found a good speed to fight the Bug at. 380-450KIAS seems to be the range where you're still in the fight. At slower speeds, you can still curl inside the Bug, but if you get too slow, you'll be spending too much time rebuilding energy, and will probably have to open yourself up to attack by flying at very low g or in a near straight line. 300 is the number to keep above. Below that, the Super Bug is going to outperform your Turkey until VERY slow speeds, where it doesn't generate vortex lift and the Turkey's flaps give it superior wing loading with superior thrust to weight. You probably won't get that slow before dying. Also, the majority of these fights ended at about 15K feet. Only the fight with the half-loop ended lower (13K feet). Hope this gives some ideas on how to kill the Rhino that's been giving you such problems! -
SF2 Series DACT Reports And Related A2A Discussions (Game only)
Caesar replied to Flanker562's topic in General Discussion
Okay, got a few F-14B vs. X engagements - none of 'em involving Super Bugs, Bugs, or otherwise. I wound up nearly loosing, or rather exposing myself during the first two fights while reaching for the print screen button for the screenies! In all instances, the F-14B was loaded with 75% fuel, clean pancake, 2x AIM-7M, 2x AIM-9M. Enemy A/C were 100% fuel, standard air to air loadout. It should be pointed out that I always hit the DACT engagements at 75% fuel since it is actually more fuel than "combat weight" (60%) but with only 75%fuel and 4x AIM-9's, the F-14B produces about .99:1 thrust to weight, so once I open those GE engines, I burn it to 1+:1 right quick. First was a fight against the Mirage 2000C (TMF). I expected to fight the airplane similarly to the F-16, but got sloppy a bit. The thing is, this aircraft doesn't seem to sustain turns as well as the F-16, so apart from my initial overshoot caused by the screen capture button, he never got his nose on me long enough for a shot. This went from a one circle to a short horizontal scissors, to another one-circle, sustained, that got low. The Mirage didn't want to crash like the F-16 so abandoned his turn, making himself predictable, then began turning again. I followed and shot him with an AIM-9. If I had shot at him earlier, I'd have probably had him within the first one-circle. Second fight was against an F-15C Eagle (85). This one would have been pretty damn quick if I didn't want a picture of a gun kill. I entered a one-circle, and rather than worry about preserving energy, I just pulled into him, getting a tone before his nose was anywhere near me. I still had excellent energy, and would have actually pulled in front of him (which would have killed me). I botched the shot thanks to my screen shot processing (again), and a short scissors ensued, lasting one iteration. I was back on the Eagle's tail and shot him with my gun. The last fight was against an Su-27 Flanker. Now, bearing in mind that I faced a Su-33 earlier, I still treated the Flanker with respect, because I knew it wouldn't be bogged down by 6x AA-9's. Indeed, this fight was the fastest, only because we both burnt energy to get inside each other and ended up nose-on within the first few seconds of the fight. I shot two AIM-9's at him, the first one at high off-boresight, and it did not track. Second one was nose-on and hit him right behind the cockpit, killing him in a total of 37 seconds. Conclusions: Mirage 2000C doesn't sustain turns as well as F-16 and can be fought to a draw with the F-14B pretty easily and probably killed quick enough if you manage your energy better. F-15C was easy. Su-27, kill as fast as possible. If I hadn't shot first, he'd have had me probably within seconds of nose-on. -
SF2 Series DACT Reports And Related A2A Discussions (Game only)
Caesar replied to Flanker562's topic in General Discussion
Just got back from a short TDY. Eric, Iranian Turkey shoots are A-OK with me (might love the bird, but in the hands of the enemy? No way, Baby!) - Might take my Turkey against a Bug, but it'll be a tough one if I'm flying the A. Will see. -
SF2 Series DACT Reports And Related A2A Discussions (Game only)
Caesar replied to Flanker562's topic in General Discussion
F-4E Phantom II (78) vs. F-15C Eagle (85) Loadouts- F-4E: 4x AIM-9M, 2x AIM-7M, gun, 100% fuel, no tanks F-15C: 4x AIM-9M, 4x AIM-7M, gun, 100% fuel, no tanks In a 59 second fight with surprising results, I wound up killing the F-15 with the F-4E. Now, something to remember here is that I started with both aircraft passing each other at the merge with a bit of distance between the two. This was, like my Tomcat vs. Fulcrum, J-10 and Flanker, a matter of smart energy burning. One thing for damn sure is that the F-4 is a speedbreak compared to the Tomcat, but unlike the F-14B (or even the F-14A) is that it doesn't like to get its energy back up as quickly. In this case, I started probably at about 6-7g turn (one-circle), and at about 600KIAS at the start of the fight. As I turned into the Eagle, I noticed a scant few seconds into the fight that my stall warning came on almost immediately. I'm not even through 90 degrees of turn yet! Well, I backed off a bit, probably down to about 5g (no noticeable accelerometer in the F-4E, so I'm going off "feel") which still puts the Eagle about 20-degrees nose off, just enough to send a heater his way. His nose was just barely starting to get on me when I fired. He rolled to go tangent to my turn, and dropped flares, fooling the Mike. Problem was that I kept turning, and wound up at his 7o'clock, FOX 2 again. This one guided and blew off his wing. Rather than wait for him to hit the ground, I closed with the wreckage and gunned it to get Red Crown to clear me from the mission. Now, here's the thing - this mission ended in my favor, but had I decided to burn too much energy too early, the Eagle would have eaten me alive. The simple fact that the Phantom couldn't hold a roughly 6.5g turn without giving me grief (stall warning) illustrated that well. If I let my energy get below 450KIAS, he'd have had me, and if I hadn't taken the shot with the Mike early (if I were guns only) he'd have probably pulled inside of my turn (I was close to overshooting when I fired my first Mike) and then reversed, and shot me. This was an instance of luck, and knowing he'd have to fool a heater if I put one out in his direction, in spite of the fact that I was bleeding energy like a madman. Might try it with guns only, but I seriously doubt I'll survive... -
For some of you, this might be old news. For those of you who never heard of it, Super Mario Crossover allows you to play Super Mario Bros. with characters from other games, such as Mega Man, Link, Samus (Metroid), Simon (Castlevania), Bill (Contra), among others. Been playing it for a little while today, gets the nostalgia going and answers the question: how would (x) do in Mario Bros? Link: http://www.explodingrabbit.com/games/super-mario-bros-crossover
-
how to launch missiles with trigger
Caesar replied to Delta6Actual's topic in Mods/Skinning Discussion
Does your trigger have two detentes? I use my trigger for guns, but it has two "buttons" in one - pulling the trigger to the first detente does nothing, second detente fires the gun (while I was breaking the stick in, the first detente was gun, and it'd just shoot for no reason, so I switched it). If so, you could assign first detente to missile, second detente to gun, just make sure you don't pull all the way back if you want only a missile to go off, or that you don't have missiles selected if you want to shoot your gun! -
Glad to hear they got him. Hopefully learned his lesson.
-
SF2 Series DACT Reports And Related A2A Discussions (Game only)
Caesar replied to Flanker562's topic in General Discussion
Had a couple fights today: First was a CF-5A vs. MiG-21PFM Both aircraft were armed with all-aspect short ranged missiles and guns, full fuel. The fight started with both of us entering a sustained high g one circle fight in a slightly descending turn. I managed my energy better to get nose-on, but I was at a poor angle, and didn't take the shot. He passed and a horizontal scissors ensued. Both aircraft are highly comparable, and both of us were turning at almost identical rates, with the MiG-21 just barely getting inside my turn for the first two iterations; no where near enough for a shot. The third iteration I had cut throttles to point the nose at him, and it worked. The fourth also saw me inside his turn, and it was here that he tried to run after I reversed inside of his turn. He reversed, and then we went into a rolling scissors, which flattened into a vertical scissors. I decided to try a little trick, stepping on the rudder to force my nose to slice into him. Didn't work as well as hoped, and he rolled through the bottom of the scissors, but I was able to snap my nose back towards him. He had run a bit and was now climbing to come over me vertically. The position allowed for a good shot with the AIM-9, and I took it. One MiG-21 down. Second fight was ACEVAL/AIMVAL style in an F-14A Tomcat vs. a CF-5A. This fight was over very quickly, with an initial sustained one turn fight, with the sudden nose pull I had used on the MiG-29 and J-10A. The F-5 saw me and tried to pull into my turn, but I rolled with him and pressed the advantage. Guns on the F-5. Third fight was what I expected to be the most difficult: F-14B Tomcat vs. Su-33 "Sea Flanker" I knew the Flanker was more maneuverable, so I'd have to play the game of turn rate vs. available energy - like fighting the J-10, if I was too fast, I'd not be able to turn with the Flanker, and if I was too slow, the Flanker's better slow-speed handling would probably cost me the fight. In this instance, I had 75% fuel, 2x AIM-7, 4x AIM-9, no tanks. The pancake was otherwise clean, and the Sparrows don't ruin airflow like the Phoenix pylons. The Flanker, however, was heavily laden (I did not realize this when I set up the fight). Carrying some 6 AA-9's and 2 AA-8's with full fuel, a more fair fight would have been if I had loaded up my Turkey with 6 AIM-54's and 2 AIM-9's. The fight was actually very quick. In this case, I wasn't aiming for total energy conservation, as mentioned. I started the fight in a more aggressive 7.5-8g turn, keeping some energy, but also trying to bleed a little to sustain about 410kts or so rather than 500. The Flanker was turning initially at about the same rate as me, but as I slowed, I turned in a smaller radius without sacrificing turn rate by keeping the plane in the blower after the initial energy burn. I pulled the Tomcat a little high as I started to see my opportunity open to curl onto his six. Once I was at around his 8o'clock region, the Flanker initially reversed direction, which caused me to unload - 6o'clock, time to shoot, but wait, he's pulling back left. I'm still easily on his tail and follow him. My nose gets right back to his dead 6, and I take the opportunity. I'm not looking to gun this guy, FOX 2! Flanker pops flares, but keeps flying in a predictable direction - the Mike isn't fooled and blasts off his right wing, at the same time igniting the whole plane. Fight was over in 1 minute and 50 seconds. -
SF2 Series DACT Reports And Related A2A Discussions (Game only)
Caesar replied to Flanker562's topic in General Discussion
F-14B Tomcat vs. J-10A Loadouts- F-14B: 4x AIM-9M, gun, 75% fuel, no tanks, clean pancake J-10A: 23mm GSh-23, 100% fuel, no tank Because the J-10A doesn't have its missiles for some reason, I flew the DACT three times. What I found seems to reflect what open-source documents say about the J-10A - it has better instantaneous turn than the F-16, but not as good sustained turn rates. Knowing this, I knew I would have better chances of survival, or indeed killing the J-10 if I could force him into a drawn-out turning fight. What I didn't realize was exactly how much of a flying speedbreak the J-10 could be. Two of three engagements ended up with missile kills on the J-10, the third with a gun kill, and the third engagement was the shortest "true" engagement, lasting 1 minute, 49 seconds (second was solved with a quick heater to the face). The first engagement was the longest, by far, and ended up with the J-10 in my 5 to 7-o'clock quadrant three times, never long enough to have been able to take a missile shot (if he had missiles). During the first and second engagements, I went against my gut and decided to do a hard two-circle, the first time having what would have been potentially detrimental effects to my fine Grumman war machine. Because I plugged in the burner, I wasn't turning as fast as he was, and he pulled inside my circle. The energy I saved was burned pulling quickly into the vertical to try to reverse. It worked, though he probably could have called a snap shot on me. We continued through both vertical and horizontal planes, but I kept my energy up enough (>310kts) so that he couldn't ever directly threaten more than a second or two. After about the third time he got nose-on, he took a snap shot, which I performed a high g barrel roll to evade, followed by an inverted pitch-moment-coupling maneuver that was actually unintentonal, but left me inverted at the end and caused him to overshoot. Time to extend! I brought the Tomcat into a descending loop to gain energy and get some distance. The J-10 performed a moderate nose-low spiral to come down to my altitude, only to have my Turkey rocket past him into the vertical. I continued the high loop, as the J-10 brought his turn to an ascending turn; I cut throttles towards the top of the loop trading airspeed for g until I was close to the bottom, plugged burner in to sustain g and was now level with the J-10 on my nose at the bottom of the loop. Set up the heater, FOX 2 and BOOM! Sheared off his vert stab. DACT #2 started similarly, only this time, instead of plugging in the burners, I decided to cut throttles, yank the Tomcat into an absolute max g turn, got my turn inside of the J-10's, then unloaded a bit (his nose still wasn't threatening at this point) and shot him. Kill #2. DACT #3 was the first one that I did where I actually followed my gut instinct and went into a one-circle, sustained turn fight. Just like the Fulcrum, and as predicted by the open-source docs, the J-10 wasn't just yanking on his stick like in the first two engagements, but was instead trying to pull more "g" than me, and he didn't sustain his turn as well as the F-16. This higher g burnt his energy, and I performed a calculated 8.5-9g turn after my sustained 6.5g circle that had gotten me aft of his wing line. This put my nose right on the J-10. Unlike my blunder against the F-16, I went to match speed with the J-10 and brought the throttles to below military power. The J-10 initially tried to break left, but I followed him without problem. He leveled. 20mm, 6000 rounds/min SELECTED! GUNS! ZZip! Off goes his right wing! The pilot literally rode the aircraft into the ground as it spiraled in a tight corkscrew to the desert floor. So, what can I take away from the J-10 fight? Don't do a two-circle, especially if he has heaters! The second DACT turned out in my favor because I decided to burn my airspeed very quickly to get inside him, but probably wouldn't have worked as well in a 2v2, or if I were carrying other stores. Looping vertically seemed to work well, as did a sustained one-circle turn fight. Also, the J-10 required a lot better energy management, since if I had too much, the Turkey wouldn't make the corner. If I had too little, I'd leave myself exposed. I made sure to unload a bit in the first fight, costing angles, but in the end probably keeping myself alive. Unlike the MiG-21 or MiG-17, the J-10 doesn't like to get into a scissors, so trying to beat down his energy to a point where I had the advantage was out of the question - it'd have left me as a wide open target. This engagement was far more satisfying than the Viper was, going off and killing himself. J-10? Anytime, Baby! -
SF2 Series DACT Reports And Related A2A Discussions (Game only)
Caesar replied to Flanker562's topic in General Discussion
F-14B Tomcat vs. F-16A Blk 15 Fighting Falcon DACT Loadouts- F-14B: 4x AIM-9M, gun, 75% fuel, no tanks, clean pancake F-16A: 4x AIM-9M, gun, 100% fuel, no tanks This fight started similarly to the MiG-29 fight, with both aircraft entering a one-circle engagement. I figured that rather than just yank for a two-circle, where we'd both end up nose-on, I'd rather try for sustained turn rate to match him. It worked well for the first 20 seconds or so, but unlike the Fulcrum, who went nose-high/high g, the Viper went nose low, moderate g. The result was a descending spiral with neither side gaining much of an advantage until I began to slide into his six in a 7g turn at about 550kts. I turned this into a max g turn to get on his tail, and should have shot him then and there - by this point I had more energy than him, and was approaching fast. I selected guns as the Viper driver decided to pull into the vertical. He was around 450kts to my 550, and it was then that I had the horrible realization that I was going to overshoot. I pulled for all I had, probably doing a 9.5g yank for about three seconds, but I had already overshot. The Viper quickly performed a high yo-yo and was quite literally dead six. I didn't have much room to maneuver, since we had gotten down to about 5k feet. That energy that I still had wound up saving my bacon, as the Viper began to slide back, and was unable to get a missile solution on me. The fight went neutral, and I tried to press into the vertical to force him to do something. I was being careful not to press past 6g at this point, since I was trying to maintain some energy to work with. Both aircraft went vertical, then we turned into each other, at roughly the same turn rate, nose to nose. No shot, rolled back into him and he came out a bit wider. Screw the gun, I'm bagging this SOB! FOX 2! Wouldn't you know it, he deployed flares and the Mike went for 'em! He pulled back into me and we got into another nose-on-nose situation; I figured I might as well have another shot, I still had 3 heaters left. This one had no chance, the closure was way too fast. By this point, I was bleeding energy, and both of the aircraft were hanging around 4g turns trying to rebuild some speed. The Viper extended, then turned back into me. I got my nose on him, FOX 2 again. One of these damn things HAS to hit! Nope. Flares again. Now I'm ticked, because I know he's got 4 heaters, I've got 1 and I might yet just have to gun him. This turned into another slow turn where neither the Turkey, nor the Viper was gaining on each other. We're literally on the deck (<500 feet), and by now, I've got my flaps down, curling inside the F-16. Problem, we end up nose to nose, no shots, he hits the burner and extends some as I continue my turn. I'm still on the deck, and he's gained a bit of energy. I pull the flaps back up, seeing he didn't want to get into a scissors, and having them down added drag and burnt energy. The Viper is now in a better situation, slightly above me, with more energy, and 4 heaters. He decided to cash in on his good position, at the same time made a fatal flaw. I'm about 200 feet off the deck, and he yanks for all he's worth into a diving attack (not pure vertical, actually quite horizontal, not unlike a low yo-yo). The Viper driver realizes too late that his jet isn't going to make the pull and crashes, lawn-dart style, into the desert. This particular DACT didn't go as well as I had hoped, but then, the F-16 is not an easy opponent. Ideally, I'd have shot him down at range with an AIM-7 or AIM-54, but that's not the point of DACT. In this instance, it was also the Viper, not me, that decided to drag the fight low - he initiated the descending turn, and continued to follow down to fight in the dirt. In the end, it cost him the fight. At the end of the DACT session, I think I had about 6000lbs of gas left, so we nearly ran each other out of gas (if the AI could run out of gas). -
SF2 Series DACT Reports And Related A2A Discussions (Game only)
Caesar replied to Flanker562's topic in General Discussion
DACT/BFM: F-14B Tomcat vs. MiG-29A Fulcrum Loadouts were as follows - F-14B: 4x AIM-9M, gun, 75% fuel, no tanks, clean "pancake" MiG-29A: 2x AA-10, 4x AA-8, gun, 100% fuel, no tank Fight started at the merge at about 15,000 feet with both fighters turning into each other, generating a one-circle fight. I plugged in the Tomcat's blowers and the Fulcrum did the same. I initially came into the turn a bit hard, at 8-8.5G, and realized I would bleed away my speed way too early, so I dropped the turn to the typical 6.5G, saving me energy. This resulted in a sustained 6.5G turn at about 400KIAS - the GE engines did not have to work as hard with the Tomcat having about a 1:1 thrust to weight ratio in the configuration I had selected, and had decided to turn into the Fulcrum nose-low, by comparison to the Fulcrum driver's decision to go nose-high, while trying to sustain higher G earlier on - he was bleeding energy. This became immediately apparent to me as we got through about the first 30 seconds of the fight, and I was gaining on him, still pulling 6.5G, now correcting to nose level as he started to go nose low to regain energy. I knew I'd have to exploit my position of advantage soon, so I went from max performance to max G turn to get my nose on him. Pushed the Turkey to a quick 9G yank, getting my nose on the MiG, and causing him to reverse. At this point, I'd have called a missile shot on the Fulcrum, hell, I had 4 heaters with his name on 'em, but this had to end correctly. Because he initially reversed, I let the plane unload and rolled toward him. For a short time, he flew in a straight line, probably trying to regain speed. In real life, the Fulcrum driver wouldn't have been able to see me, thanks to the huge headrest and poor visibility from about 4-8 o'clock, and it seems like he reacted similarly as he might have in real life, initially pulling hard left. I had more energy than him, so followed, then he reversed again, and began bucking the plane - burning more energy and loading up positive, then negative G. He did about two iterations of this, and I took a snap shot with the Vulcan cannon as he began a dive, knocking off part of his right wing. It was here that he decided to only dive and run, but to no avail. His dive made him completely predictable, and I fired another short burst, igniting a fuel cell behind the cockpit. This was the death blow, as his aircraft spiraled in. By the end of the fight, I still had more gas in my jet than he did at the start of it. Pretty straight forward example of energy management deciding the victor. Total fight time was around 2.5 minutes. -
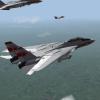
F-14B DACM vs. Su-33 gun kill
-
Welcome Back!
-
@ Eric - The reversal works pretty well (as mentioned illustrated in black aces high, but it was done vs. a MiG-29, not an F-4!), though I found it depends heavily on the energy state of the Fulcrum - sometimes he'll reverse and put his nose right on me! Ever try to get the MiG into a rolling scissors? Usually the AI doesn't handle that as well (at least I've noticed); of course I "cheat" by using flaps...then again, No rules in a gun fight! DACT with an F-16 (EDIT: result was a missile kill with an AIM-9M) Returning to Base
-
Normally either the engine sound of a pair of F110's or TF-30's, since I don't usually listen to music during the mission itself. If I'm ever screwing around with music and captured video, something along the lines of Iron Maiden, Ozzy Osbourne, Dio, or other heavy metal bands (the same on the few occasions I do listen to music during the mission). Think I did a Falcon 4 one to "Whiskey in the Jar" by Thin Lizzy.
-
Would love to hear about it sometime!
-
I've not had much an issue with the F-15C, but then again, I'm usually flying an F-14B and those two are very evenly matched (works both ways, I'll normally beat an F-14B if I'm in an F-15C, too). The Flanker, Viper and Fulcrum can be a PITA without question. I've found that I can get the better of an F-16 easily enough if I beat him down on energy, but those F/A-18's just keep turning! End up having to keep the energy high and give up angles 'till they make a mistake. In the case of the screenie, the Bug got low, and I pulled a max performance turn to point my nose at him. Luckily we were both low on energy and he tried to run, but I was out-accelerating him. Got in range and zzzip! Haven't tried against the F-22 or Mirage 2000 yet; will have to post when I do!
-
After no less than three months in waiting (commissioned while I was back at Thule, AB) I've received my brand new Albion-mark sword - the Albion "Talhoffer." Named after the 15th century Fechtmeister Hans Talhoffer, and designed after the swords of his Fechtbuch illustrations, the Talhoffer is an Oakeshott Type XVa hand-and-a-half longsword. The XV and XVa blade design was in use in Western Europe from roughly 1350AD to beyond 1500AD, and was clearly influenced by advances in armor development. XV/XVa blades are of a rigid, heavily tapering diamond cross section and balance very close to the hands for exceptional point control - especially maneuverable and useful to punch into the gaps of plated defenses, while rigid enough to pop the rings of mail that might be found in those gaps. The Talhoffer is an armor fighting design if there ever was one - simply looking at the clubbed-ends of the cross and the mace-like pommel one can assess the blunt-force strikes that can be made by blows from the hilt, and I can say from a bit of handling that it is an extraordinarily maneuverable weapon, able to deliver quick cuts and terrifying thrusts with its blade. Because of its tapered design, the Talhoffer's Type XVa blade does sacrifice some cutting capacity; the Type XV/XVa is not as good a cutter as a Type XVIII or XX, which are a bit wider and flatter, but anyone who would think that they'd be safe from a hew delivered with intent from an XVa like the Talhoffer is a fool. The edge is sharp enough to cause deep lacerations, and a solidly delivered cut could well be expected to de-limb an opponent. As I swing the weapon it makes such beautiful song, slicing the air - that's really the only way to describe it. Even as an armor fighter, as I've written in my web log, the longsword is a fairly lightweight weapon. The Talhoffer, at 46 and 3/8 inches in length weighs 3 pounds 5 ounces - just about average weight for historic specimens. More than 3 feet of its length is blade, and although rigid, does have a little flex to disperse impact from another weapon, quite unlike the Tuck, a weapon that might be considered a rod with a cross, and which has no cutting capacity. I'll have to wait until probably late spring to be able to do serious test cutting and thrusting, thanks to the crap-tastic winters in central New York, but just the minor handling at this time is satisfactory. It takes its place as the first "true" sword I've owned, alongside the more modern firearms of my collection, and stands as a standard for the handling characteristics of a properly made, functional weapon.
