
Stephen1918
-
Posts
1,199 -
Joined
-
Last visited
-
Days Won
19
Content Type
Profiles
Forums
Gallery
Downloads
Store
Everything posted by Stephen1918
-
I uploaded the LFG Roland D.II today. My thanks to ojcar for making another excellent FM.
-
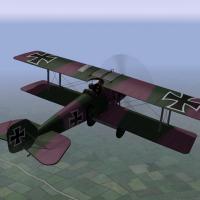
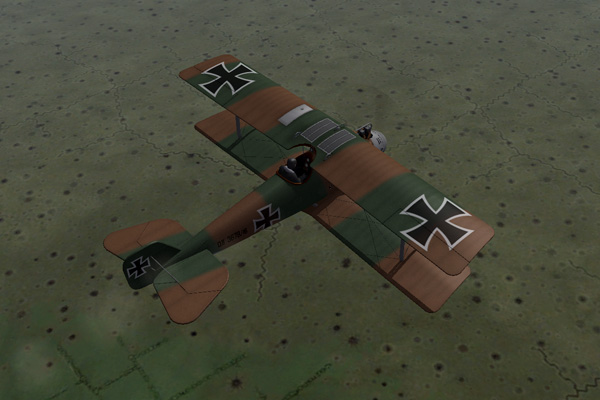
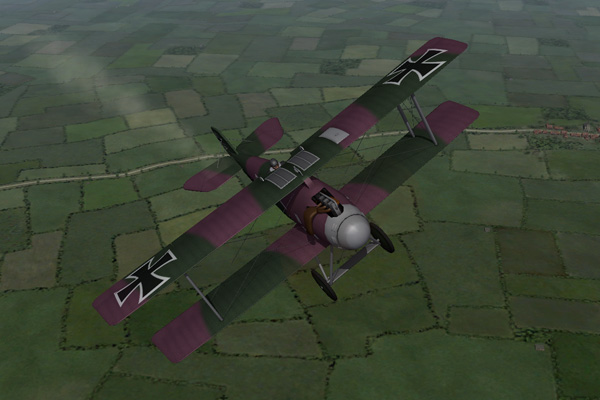
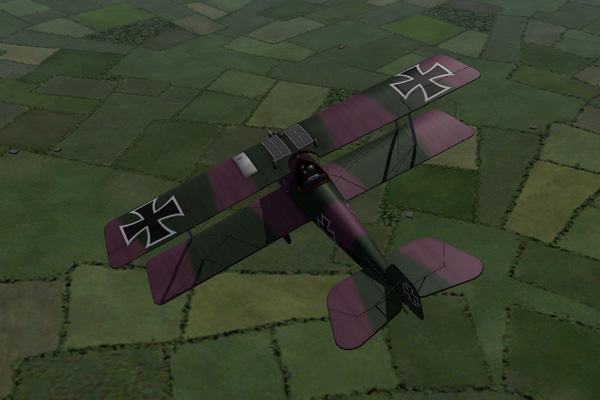
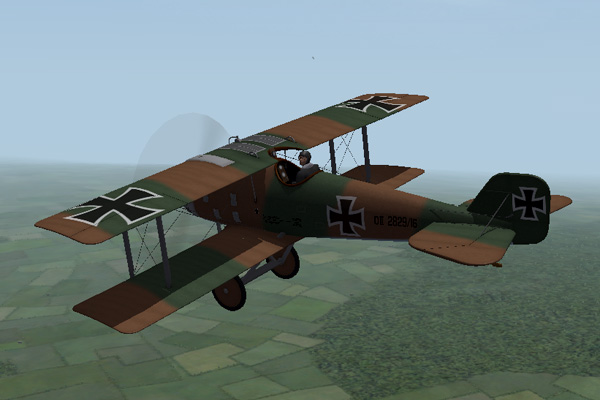
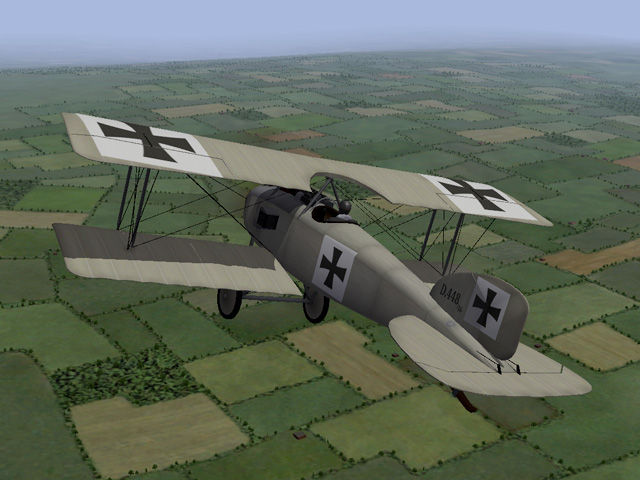
View File LFG Roland D.II The Roland D.II was a German fighter introduced in early 1917. It featured an unusual fuselage, with the upper wings attached to a pylon in front of the pilot. Although the plane had a strong structure and performed reasonably well, the poor forward view limited its effectiveness as a fighter. On the Western Front, it was soon replaced by other planes, but continued in service on the Eastern and Macedonian Fronts until the end of the war. I have included two skins, a green and lilac camo, and a green and brown camo. I have also included a full set of number decals. My skinning templates are included in the download. Credits Thanks to Ojcar for making the data file for the Roland D.II. Thanks also to Nix, who made the sound file for the Mercedes 160hp engine. Thanks also to Crowford who offered many suggestions and beta-tested version 3. Installation Instructions Note - The engine sound file has been used in several other planes. If you already have a file with the same name in your Sounds folder, then you don't need to install mine. For FE1 - Unzip the file and move the folder named "RolandD2" into your FirstEagles/Objects/Aircraft folder. If you don't already have it, you will also need to move the sound file "mercedes160m2.wav" into the FirstEagles/Sounds folder. For FE2 - Unzip the file and move the folder named "RolandD2" into the FirstEagles/Objects/Aircraft folder. Then in the FirstEagles/Objects/Decals folder, create new folder named "RolandD2". Move the folder named "D" from the Aircraft/RolandD2 folder into the Decals/RolandD2 folder you just made. If you don't already have it, you will also need to move the sound file "mercedes160m2.wav" into the FirstEagles/Sounds folder. Submitter Stephen1918 Submitted 09/11/2015 Category Other Central Powers Aircraft
-
Version v3.1
336 downloads
The Roland D.II was a German fighter introduced in early 1917. It featured an unusual fuselage, with the upper wings attached to a pylon in front of the pilot. Although the plane had a strong structure and performed reasonably well, the poor forward view limited its effectiveness as a fighter. On the Western Front, it was soon replaced by other planes, but continued in service on the Eastern and Macedonian Fronts until the end of the war. I have included two skins, a green and lilac camo, and a green and brown camo. I have also included a full set of number decals. My skinning templates are included in the download. Credits Thanks to Ojcar for making the data file for the Roland D.II. Thanks also to Nix, who made the sound file for the Mercedes 160hp engine. Thanks also to Crowford who offered many suggestions and beta-tested version 3. Installation Instructions Note - The engine sound file has been used in several other planes. If you already have a file with the same name in your Sounds folder, then you don't need to install mine. For FE1 - Unzip the file and move the folder named "RolandD2" into your FirstEagles/Objects/Aircraft folder. If you don't already have it, you will also need to move the sound file "mercedes160m2.wav" into the FirstEagles/Sounds folder. For FE2 - Unzip the file and move the folder named "RolandD2" into the FirstEagles/Objects/Aircraft folder. Then in the FirstEagles/Objects/Decals folder, create new folder named "RolandD2". Move the folder named "D" from the Aircraft/RolandD2 folder into the Decals/RolandD2 folder you just made. If you don't already have it, you will also need to move the sound file "mercedes160m2.wav" into the FirstEagles/Sounds folder. -
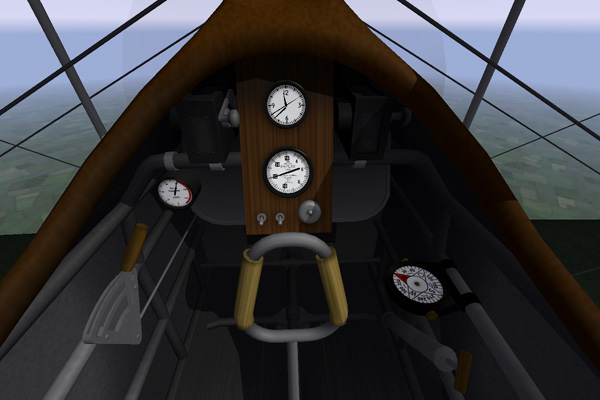
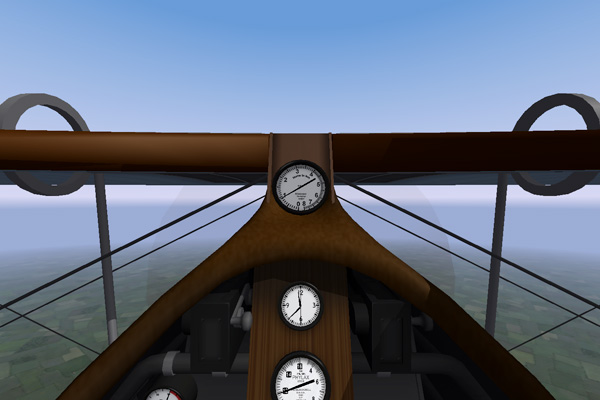
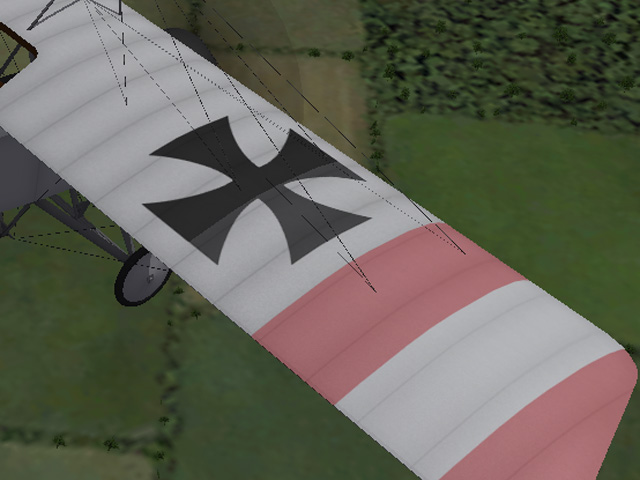
Thanks Geezer. The second shot shows what so many pilots complained about. The pylon on the fuselage that held the upper wing made it a very strong plane, but blocked the pilot's forward view. Later Roland D series planes had a more conventional construction.
-
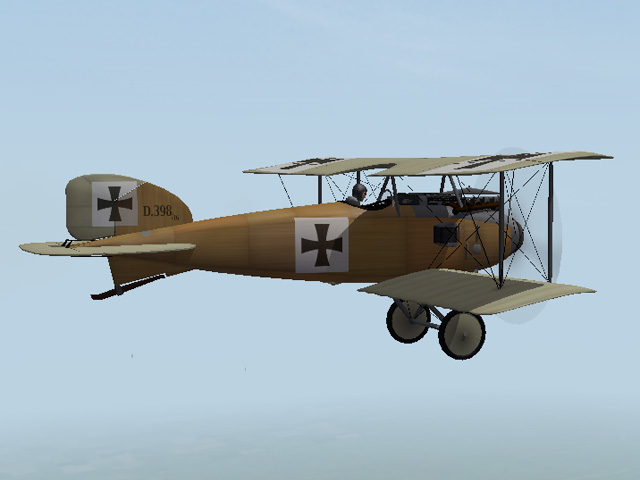
I've refined the fuselage a little more, finished the cockpit, worked on the skins, and made some decals. Right now I'm finishing the LODs, adding node names and min/max extents to the data.ini, and asking myself "what am I forgetting?" - it won't be long now. I'm not sure about the green and mauve skin, but the green and brown seems right.
-
I made a correction to the text and it was offline for a while until the moderators approved it again. It should be back now - with corrections.
-
 Ojcar's FM (included in the download) is definitely up to the task. Try it, I think you'll be impressed.
 -
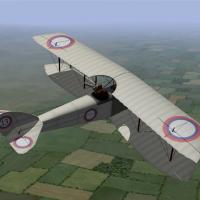
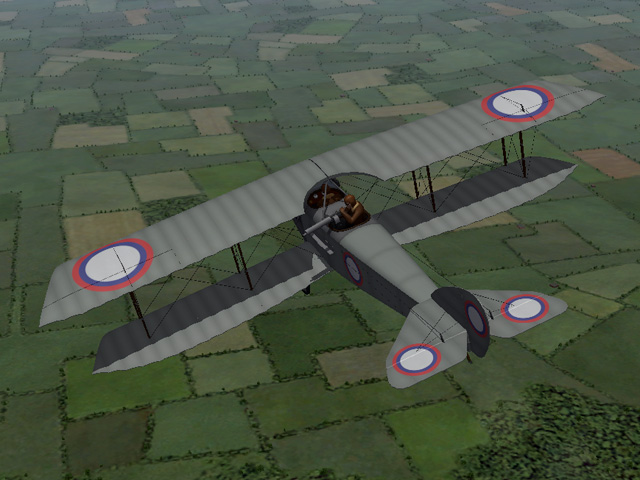
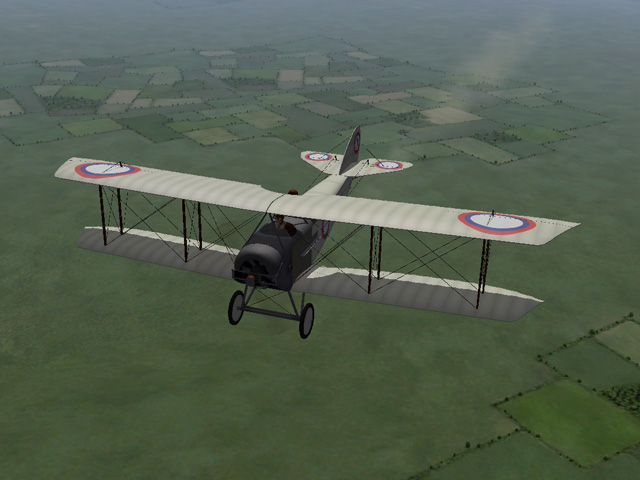
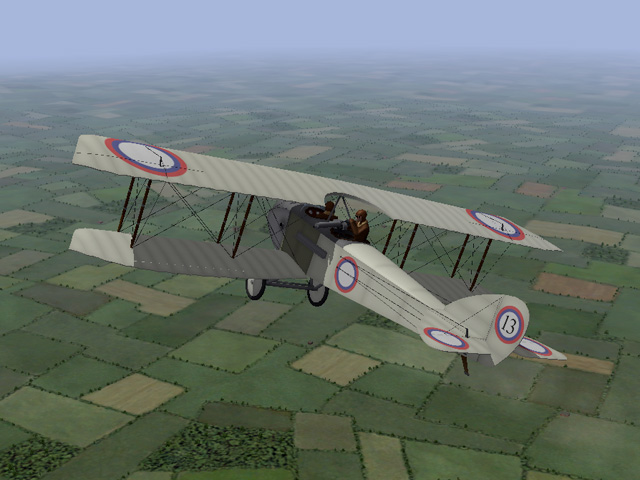
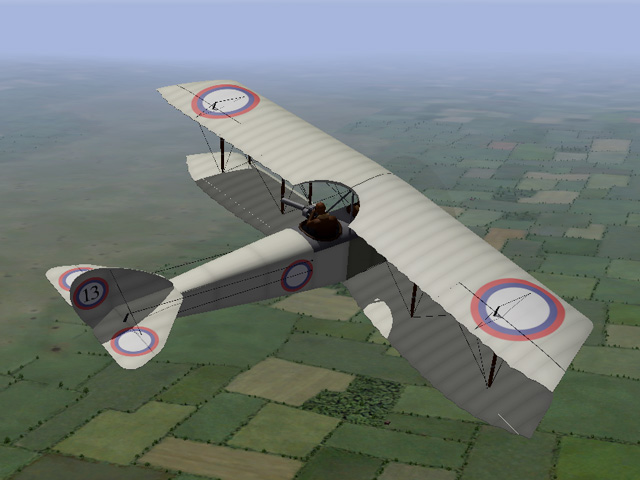
I have uploaded a new plane, the Russian two-seater, the Anatra D. It was armed with a single machine gun and could carry a light bomb load. My upload includes two skins and my skinning templates. My thanks to Ojcar for making the FM. This makes the 50th plane for First Eagles that we've made together!

-
View File Anatra D "Anade" The Anatra D was a predecessor to the Anatra DS. It was powered by a Gnome rotary engine and armed with a single machine gun for the observer. The Anatra D was used mostly for reconnaissance, but also as a fighter and light bomber. After overcoming some initial design problems, it entered service in May, 1916 and was produced in relatively large numbers. Many of them survived the war and were used in the fighting in Eastern Europe after the end of World War I. I have included two skins, a plain linen and a grey paint. A full set of number decals and a loadout for light bombs are included. I have also included my skinning templates for those who wish to make their own skins. Credits: My thanks to Ojcar once again for making the excellent data.ini for this plane. My thanks also to Crowford who provided valuable reference material for the Anatra D. Installation instructions: For FE1: Unzip the file and move the folder named "AnatraD" into the FirstEagles/Objects/Aircraft folder. For FE2: Unzip the file and move the folder named "AnatraD" into the FirstEagles/Objects/Aircraft folder. Then in the FirstEagles/Objects/Decals folder, create a new folder named "AnatraD". Move the folder named "D" from the Aircraft/AnatraD folder into the Decals/AnatraD folder you just made. Submitter Stephen1918 Submitted 09/07/2015 Category Other Entente Aircraft
- 1 reply
-
- 1
-

-
164 downloads
The Anatra D was a predecessor to the Anatra DS. It was powered by a Gnome rotary engine and armed with a single machine gun for the observer. The Anatra D was used mostly for reconnaissance, but also as a fighter and light bomber. After overcoming some initial design problems, it entered service in May, 1916 and was produced in relatively large numbers. Many of them survived the war and were used in the fighting in Eastern Europe after the end of World War I. I have included two skins, a plain linen and a grey paint. A full set of number decals and a loadout for light bombs are included. I have also included my skinning templates for those who wish to make their own skins. Credits: My thanks to Ojcar once again for making the excellent data.ini for this plane. My thanks also to Crowford who provided valuable reference material for the Anatra D. Installation instructions: For FE1: Unzip the file and move the folder named "AnatraD" into the FirstEagles/Objects/Aircraft folder. For FE2: Unzip the file and move the folder named "AnatraD" into the FirstEagles/Objects/Aircraft folder. Then in the FirstEagles/Objects/Decals folder, create a new folder named "AnatraD". Move the folder named "D" from the Aircraft/AnatraD folder into the Decals/AnatraD folder you just made. -
I'm impressed with your dedication to the game, modifying all the insignia decals sounds very tedious. My issue was not with overlapping decals. Its the way my graphics card is calculating the transparency. If there are two decals on the same part (like the fuselage, which has a left and right insignia) then it makes those decals a little more transparent than the decals on the wings, which only has one top or bottom decal. The effect is really only noticeable when you have decals over two adjacent parts - like the wings in the Fokker B.I, which has stripes and insignia on the wing tip, but only the insignia on the mid wing. Anyway, if there is no transparency, then there's nothing to multiply so the problem goes away.
-
Did you do that for all the stock decals, too?
-
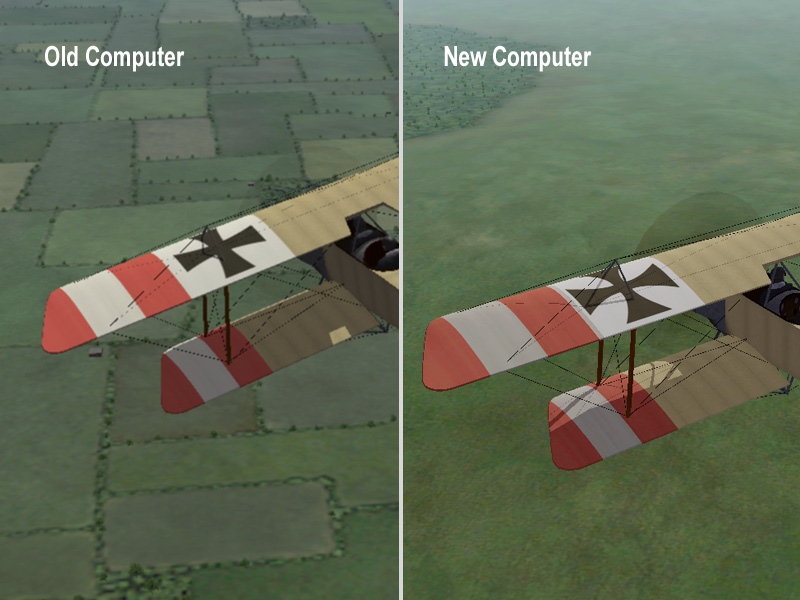
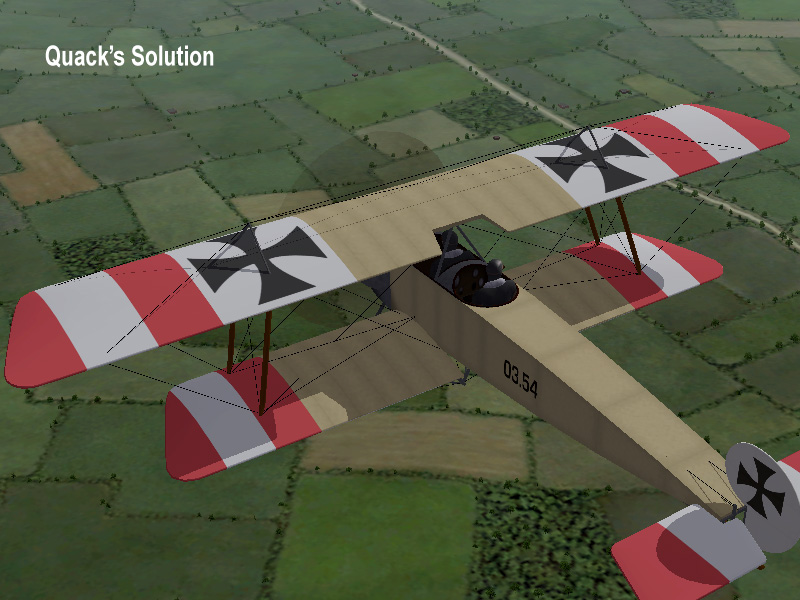
Quack's idea solves the problem. The issue with the transparency of the decals seems to be caused by the computer, not by anything in First Eagles. I looked at my Fokker B.I, which was uploaded a few years ago when I had a different computer with a different graphics card. You can see the difference between a screen shot I made on the old computer and a screen shot I made recently on my new computer: I looks like the graphics card on my newer computer is multiplying the transparency (making the alpha channel in the tga file darker) making the decal more transparent. I tried Quack's idea of making the decal opaque (I brightened the alpha channel until it was pure white) and that seemed to fix the problem: Fortunately the problem only occurs on some computers and only when there are two decals on the same piece of the model. This usually happens on the fuselage and is mostly visible in the white parts of the decal. So it took me a couple of years to even notice it. I will watch for this in future planes and adjust the decals if necessary. Thanks for the help, Quack!
-
Thanks for the info Quack, I'll look into it.
-
Thanks for letting me know Sky High. I thought it was just my machine, but of it's a common problem I'll try to come up with a solution that works for everyone.
-
Coupi - Thanks for posting the pictures. It looks like the decals display fine on your computer, so the problem must be with my graphics card.
-
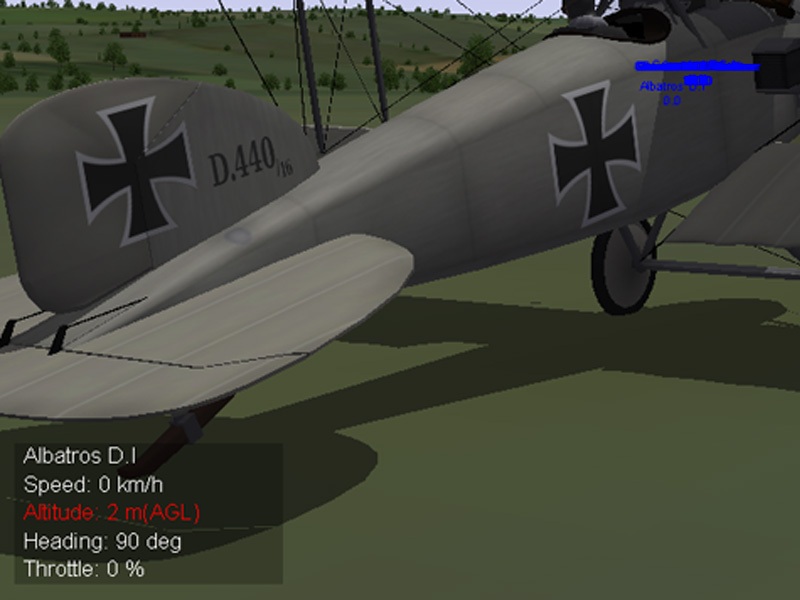
In the first post, the edge you see is where the wing tip part meets the inner wing part. Both decals are level 0 (the red stripes are early Austro-Hungarian national markings.) The decals do not overlap. Here is a screen shot of the tail of the Albatros D.I. The problem is most noticeable in the white area of the cross. The cross is one of the stock decals, level 0. The numbers on the vertical stabilizer are my decals, level 2. Can someone post a screen shot of the tail of their Albatros D.I for comparison? I'm wondering if it's my graphics card.
-
I just noticed it recently, but now that I'm looking for it, I see that it's happened on several planes. You can see it on the tail fin of the Albatros D.I, which has the insignia and a serial number decal.
-
Has anyone else had this problem? If I put two decals on the same part, they get lighter. The wing tip has a stripe decal and an insignia decal, the inner wing has just an insignia decal. You can clearly see the edge between the inner and outer wings. I'm wondering if it's something in the game engine or if it's the way I'm making my decals, or something else?
-
Is it the engine exhaust effect?
-
I discovered a problem with the number decals for the Albatros D.I - some of them were white instead of black. I uploaded a new version with corrected decals. I also made some improvements to the skins and decal.ini's. If anyone spots a problem with any of my planes or objects, please let me know by posting here in the Forum, or by sending me a message. I may not spot a review in the download section.

- 1 reply
-
- 2
-
-
Sorry yamato74, I've done a lot of testing in different terrains and the airships always seem to explode. I don't know what is causing your problem. Try posting a question in the regular forum and see if anyone else is having a similar issue.
-
The airships should explode the same way balloons do. They have no armor at all so they should go after just a few hits.
-

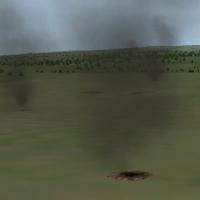
Smoking Craters for Battlefields
Stephen1918 commented on Stephen1918's file in Terrain and Environmental Mods
 Bubu, thanks for your comments. I don't think it's possible to make an effect part of the TOD for the tile, so they're going to have to be placed manually.
 -
I was trying to bring some action to the battlefields, trying to make it look like the battle started before you got there. I was looking for something like smouldering debris rather than a raging fire. I kept it kind of low to the ground to reduce the impact on frame rate. It's enough to obscure the battlefield and make targeting a little more challenging. There will be other kinds of effects as the ground units shoot each other up, so you'll get some variety, as you can see in my screen shots. I experimented with a lot of the existing effects (and Wrench did too) but I ended up making some new ones. I made two - a large one and a smaller one. You of course can use different effects or modify them if you want bigger or higher smoke effects.