-
New Downloads
-
New Topics
-
- 0 replies
- 122 views
-
- 3 replies
- 148 views
-
- 3 replies
- 161 views
-
- 2 replies
- 133 views
-
- 3 replies
- 172 views
-
![More information about "[Fictional] Dassault Mirage F-1CJ for STRIKE FIGHTERS 2"](https://combatace.com/applications/downloads/interface/legacy/screenshot.php?path=/monthly_2026_04/img00013.thumb.png.5f024a56dd1dcdbe9360129e6571d62d.png)


![More information about "[Fictional] Panavia Tornado GR.1E (CB.15) for STRIKE FIGHTERS 2"](https://combatace.com/applications/downloads/interface/legacy/screenshot.php?path=/monthly_2026_04/img00006.thumb.JPG.b7f506a5682355937b12df8e8c5cff13.JPG)


News Releases
- 9 replies
- 17,073 views
- Add Reply
- 8 replies
- 9,541 views
- Add Reply
- 4 replies
- 7,523 views
- Add Reply
- 9 replies
- 13,380 views
- Add Reply
- 0 replies
- 2,675 views
- Add Reply
- 14 replies
- 4,411 views
- Add Reply
- 8 replies
- 9,595 views
- Add Reply

By 33LIMA,
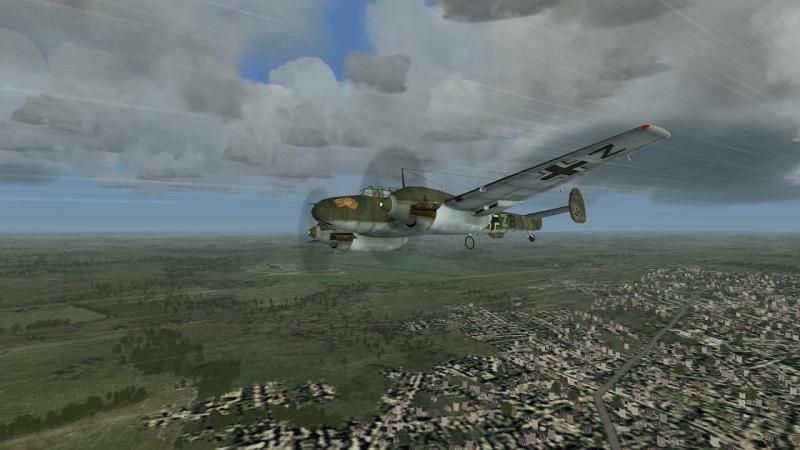
A Luftwaffe Messerschmitt Bf110 Campaign in the ultimate CFS3 expansion
CFS3 - so far anyway - marks a controversial end to the Microsoft Combat Flight Simulator series. In returning from CFS2's Pacific to the European Theatre of Operations, CFS3 had many new features. On the positive side, there was a modest but intriguing range of flyable aircraft, including the 'usual suspects' like the Spitfire, FW190 and P-51 but also medium bombers like the Ju-88 and B-25 Mitchell and some late-wa
By 33LIMA,
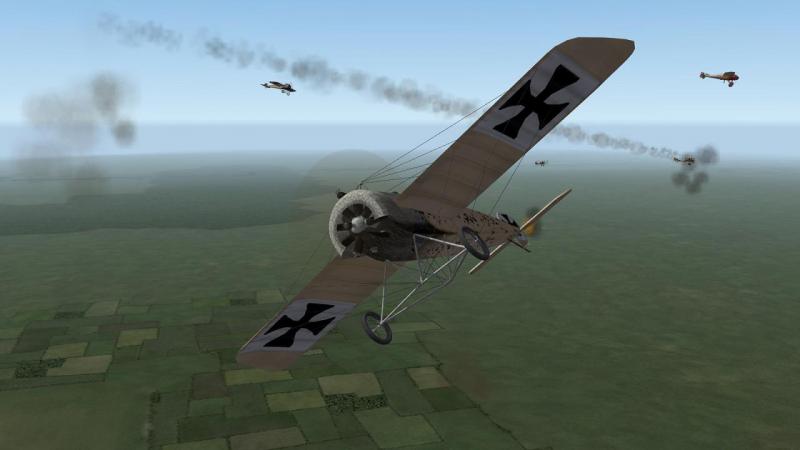
Recreating the dawn of the fighter aircraft in First Eagles 2
"Hundreds, nay thousands of machines have been ordered which have been referred to by our pilots as "Fokker Fodder" ... I would suggest that quite a number of our gallant officers in the Royal Flying Corps have been rather murdered than killed" Noel Pemberton-Billing MP, campaigning in 1916 against the dominance of the Royal Aircraft Factory in the design of RFC aircraft
"...McCudden gave him another burst, and the Fokker bro
By 33LIMA,
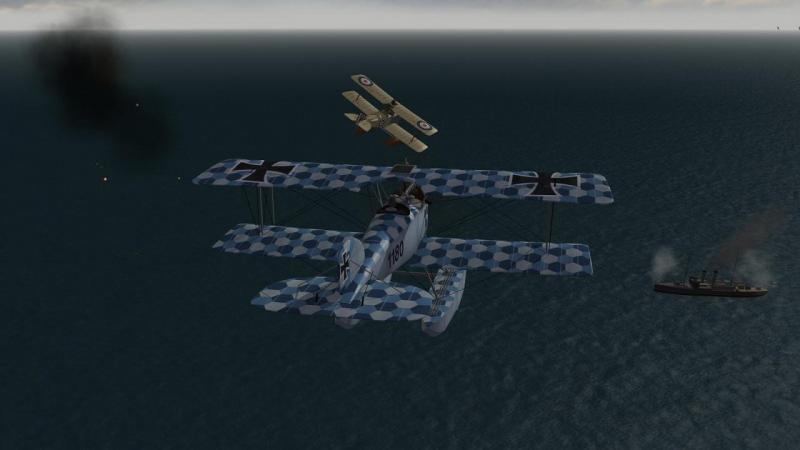
Life and virtual death on and above the ocean waves in Ojcar's 'Unsung Heroes' seaplane campaign
Rise of Flight is not the only WW1 flightsim to feature seaplanes. Thanks to modder Stephen1918, First Eagles/FE2 also got its feet wet, with a series of floatplanes suitable for the Channel coast and a 'terrain' package, complete with some shipping. Fellow-modder Ojcar then provided us with a campaign to complete the scene.
The aircraft are available here...
http://combatace.com/fil
By 33LIMA,
First try-out with the latest version of Pat Wilson's Campaign Generator
Fans of classic WW1 sim Red Baron 3d like myself will likely know Pat Wilson from his outstanding 'Western Front Patch' which added shed-loads of good stuff to RB3d - I still have a WFP install on my current PC! More recently, Pat has turned his attentions to Rise of Flight. The latter shipped with simple 'mission set' linear campaigns, later joined by a career mode (which is still nominally in beta!). To this, Pat ad

By Skyviper,

COMBATACE Spotlight: Interview with Russouk2004
“The community here is so talented, I’m surprised we ain’t got together and made our own sim yet…”
-Russouk2004
This week CombatACE got the chance to catch up with Russouk2004. He hails from Cardiff, South Wales, in the United Kingdom and has been a member here at CombatACE since 2004. Over the years he’s a released a number of mods but his most downloaded mod is the BF109E. A download link will be inlcuded at the bottom of this interview

By MigBuster,
DCS Winter Sale
Friday, 20 December 2013
From December 20 to January 5 2014, Eagle Dynamics will have a 60% off Winter sale for the following DCS products:
DCS: Mi-8MTV2 Magnificent Eight, Pre-Purchase Beta. $49.99 now $19.99
DCS: UH-1H Huey, Pre-Purchase Beta. $49.99 now $19.99
Lock On: Flaming Cliffs 3. $49.99 now $19.99
DCS: A-10C Warthog. $39.99 now $15.99
DCS: Black Shark 2. $39.99 now $15.99
DCS: P-51D Mustang. $39.99 now $15.99
DCS: Combined Arms. $29.99 now $11.99
DC
By 33LIMA,
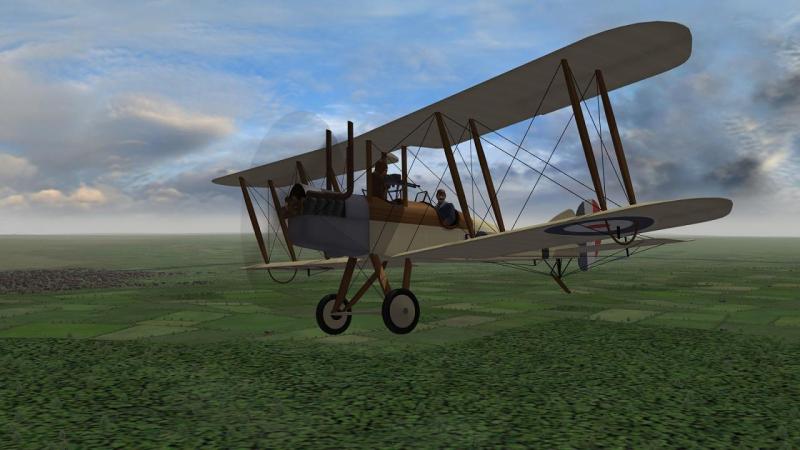
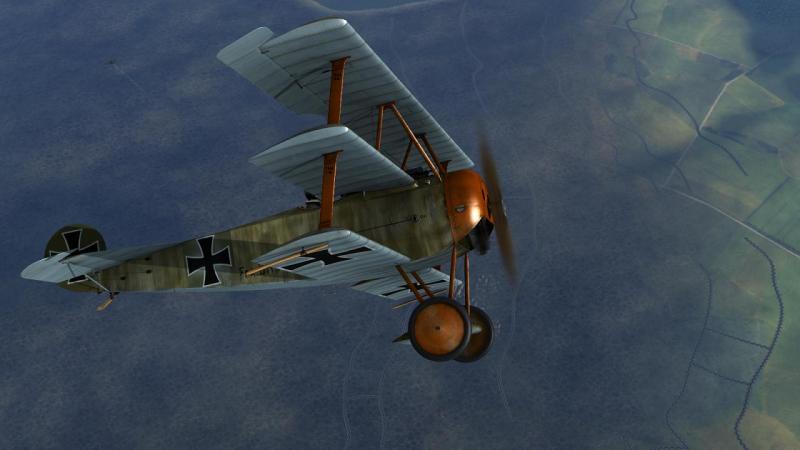
First outing with Stephen1918's latest addition to First Eagles/FE2
Of the three current WW1 airwar sims, one of the areas where First Eagles is ahead (and likely to remain so!) is its planeset. Including variants, I have about two hundred installed! This is not just padding - one of the features which distinguished WW1 in the air was the considerable variety of aircraft which fought it. As FE shipped with a small set of planes which just about covered its intended 1918 era, th
-
Popular Destinations
-
New Topics
-
Our Picks