LATEST NEWS
- 11 replies
- 7,971 views
- Add Reply
- 3 replies
- 3,279 views
- Add Reply
- 2 replies
- 9,950 views
- Add Reply
- 0 replies
- 5,597 views
- Add Reply
- 3 replies
- 8,094 views
- Add Reply
- 0 replies
- 3,991 views
- Add Reply
Defence of the Reich - the final missions

By 33LIMA,

Concluding FlatSpinMan's Il-2 '46 campaign for the Bf 109!
Having some months back posted reports for the first four missions in this entertaining and highly recommended campaign, I thought it was over-due time to complete the story! The Allied bomber offensive 1942-45 has always been a particular interest of mine and the ability of modded Il-2 '46 to support this - and other 'Western Front' campaigns - transformed my opinions of and interest in this classic sim, which, in its latest forms, is in my opinion still much the best combat flight sim for World War 2...and beyond.
FlatSpinMann's Defence of the Reich campaign is one of several which enable you to pit your virtual life against the might of the USAAF's famous 8th Air Force in its campaign of daylight 'precision bombing'. You're cast as Willi Jedermann, an experienced member of the Jagdflieger whose Bf109's aft fuselage carries the white cross, black disc marking of the Nationalist Spanish Air Force, doubtless denoting time spent with the Condor Legion during the Spanish Civil War. The campaign comes with several nicely-rendered variations of the 'skin' for the player's Messerschmitt, the one below being for the 109G-6, to which the player transitions during the missions in this report, having started with the G-2.
Earlier missions had seen our Willi transferred south from JG5 'Eismeer' in the frozen north to join I Gruppe, Jagdgeschwader 1 in defence of the Deutsche Bucht or 'German Bight', as they called the area of the North Sea bounded by Schleswig-Hollstein/Denmark to the east and the north German coastline near Bremen and Hamburg, to the south. That Willi is an alter hase, an 'old hare' who has seen it all before and then some, is clear from the mission briefings, which often feature Willi's frank expressions of his views, ranging from his reservations about operating so often over the seas on convoy escort, to his opinions on the latest bright ideas from his superiors.
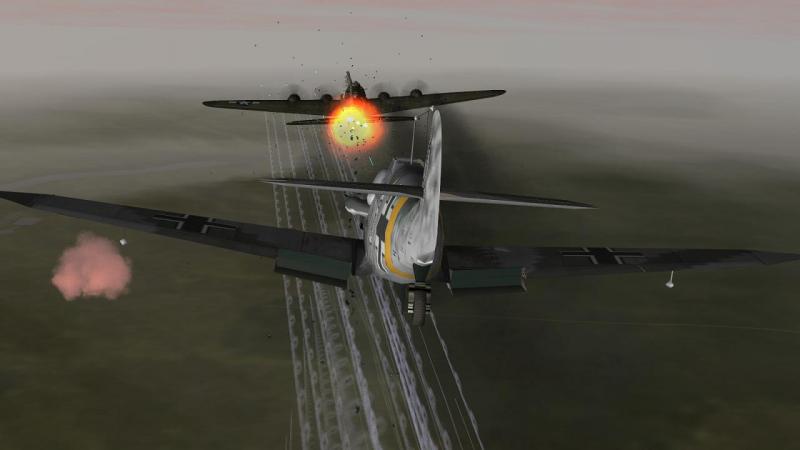
My fifth mission is a case in point. Willi is being sent aloft to practice air-to-air bombing of enemy bomber formations, prompted by the success achieved by real-life Luftwaffe ace Heinze Knoke (recounted in 'I Flew for the Fuhrer' and quoted in many other books). Willi is fairly scathing about the prospects for this tactic...but orders are orders! Soon, flying as Willi, I'm airborne and headed north, in rather murky weather with a 250Kg bomb slung under my Messerschmitt. I'm rather glad to be on my own. Level bombing in a bombsight-less fighter seems unlikely to go well and, methinks, the fewer of my squadron-mates who witness my efforts with this contraption, the better.
Callling up the inflight map, I checked my bearings. Our base is at Windau, which Goggle tells me is these days called Ventspils and is in Latvia, on the Baltic Sea coast. A stock Il-2 map of this area is topographically not a bad substitute for the German Bight, though.
I have been told that the target on this practice mission has been marked out on some muddy coastal land, in the form of something resembling a plan view of a formation of heavy bombers. I'm to bomb from about a thousand metres, apparently.
On arrival, I first overflew the range, just to get a good look at what they have cooked up for me. It's not too bad a job, I soon find out: a series of large white crosses in a decent representation of an American heavy bomber formation. And there's a large white circle-and-arrow marking on the ground a few hundred meters short of the 'formation'. You can't see it in the screenie below because it's hidden by the junction of those canopy farmes on the left, but it wasn't too hard for me to work out that this marked my suggested bomb release point. It seems the idiots who dreamed up this aerial bombing nonsense have at least been thorough in laying out my practice target.
What they hadn't done so well was explain how I was supposed to aim my bomb, given that on a straight run-in, both the 'formation' and the bomb release mark are hidden under my nose. I suppose they expect an officer of the Luftwaffe to be able to work out such things for himself. So that's what I did. I approached on an offset course and picked out a landmark inland to my right - to my left, there was only the sea - which was level with the aiming mark. Unfortunately landmarks were rather limited in this weather and in this neck of the woods but I picked out a reasonably distinctive point on the edge of a suitably-positioned forest. Nearing the bomb release point on this offset course, I made a sort of 'Z' curve, turning left to get the the aiming mark and the target in line and then back right, back onto the same course as before, but in line with the target somewhere under my nose. Looking to the right, when the aiming mark came level, I let go the bomb and turned right, mildly curious to see what happened next. Below you can see the bomb on its way down, about half an aircraft's length, directly ahead of my spinner.
The results were a good deal better than I expected. The bomb went off just on the leading edge of the 'formation', close enough I thought to have done some damage. Had it been for real, lacking proximity fuses, the trick would have been to get the thing to go off at the same level, the problem being a three-dimensional one.
As I came off the target, I got a bit of a surprise when I saw the shadow of a vic of aircraft flit across theground below and behind. At this point I suddenly remembered that the briefing warned me to watch out for the presence of some boys from a Jagdfliegerschule, who were on some training flights somewhere in the general area. Of course in concentrating on my bombing run I had completely forgotten about them. There were undoubtedly at a much, much higher risk of me flying into them, than bombing them.
Looking around more carefully, I soon spotted the others, off to my right. Three Messerschmitts like my own, they were, also headed south, towards my airfield.
I gave them a wide beth and watched as they dipped down directly towards the runway. For some reason they didn't land, but pulled up short of landing and climbed away. Drat! Now I was going to have to be more careful in making my own approach!
As it happened, these three were not the trainees; or if they were, they were nearing the end of their course, flying operational types. The real trainees were also in the air, flying impressed Czech-built Avia B-534s.
Having flown past my base on my right to keep my distance from the other 109s, I gradually let down to about 300 meters. I looked around again for the others and seeing nothing, turned right onto my base leg. The skies remained murky but clear of aircraft and it wasn't long before I was down. As I completed my roll-out, I heard two other aircraft advising they were going around and the tower acknowledging. So I opened up again and smartly cleared the runway, steering towards the hardstanding in front of the hangers, at the left end of the long grass strip.
I thought to myself, that wasn't too bad, unfortunately...'unfortunately' as only a complete disaster seemed likely to offer any hope of the next step in the process being cancelled. That next step, I felt sure, would be to put the training into practice, on operations.
I was right.
To be continued...!
The First Air Force One

By Erik,

A nice look back at the first aircraft with the callsign Air Force One, its history, and its final home. I hope you enjoy this as much as I did.
Stalingrad Stuka - new style!

By 33LIMA,

Flying the Ju 87 in Il-2: Battle of Stalingrad!
Having flown a Stalingrad Stuka campaign mission in Il-2 '46, it's time to repeat the process, this time in the new sim devoted to the famous battle. My first time playing through the BoS Single Player campaign, I've been sticking to flying the Yak-1, in an approximation of a conventional pilot career. While BoS doesn't support multiple virtual pilots, each active with a given squadron, you can fly any aircraft you choose on any campaign mission. Rather than 'switching sides' as well as planes in mid-campaign, I decided to start over at the beginning of the first 'chapter' of BoS's Stalingrad campaign, 'Prelude to Counteroffensive'. This BoS allows the player to do, with the option to 'fast forward' to the current campaign 'Chapter', enabling me to resume my Yak career at any time I chose.
The only active German airfield at the start of the campaign is Gumrak, which became one of the two main active airfields within the Stalingrad pocket, after 6th Army was cut off there. Having chosen to fly the Ju 87 from Gumrak, I was offered a choice of mission type and from those available, chose 'Bombing'. As you can see, the other options are 'Ground attack' and 'Ground support'. Apparently the latter is a form of close air support or air cover for ground forces, but I'm not sure what the distinction is between 'Bombing' and 'Ground attack'...especially for a Stuka!
And here's the mission I've been allocated. I am to bomb a supply dump well into Soviet-held territory, across the River Volga to the east of Stalingrad itself. At this stage, I have no other details of the mission.
In the 'Plane setup' screen I reviewed my options. I haven't flown the Stuka much outside of single missions so havent 'unlocked' any skin or equipment options. Perhaps because I've chosen a bombing mission, I don't have the usual choiced of bombload, either. All I can carry is an SC 1000, which from memory is a 2000 pound thin-skinned HE bomb, no use for attacking targets that need any knd of penetration but with excellent blast effects. Just one bomb but a big load for a Stuka!
And here's the full mission briefing screen. At the same time as choosing a bombing mission, I had also picked an air start ('Short' mission duration). I much prefer ground starts but the BoS AI just cannot reliably handle takeoffs in laden Stukas!
As I mentioned in the previous Stuka mission report, most of the time, the AI crack up, shortly after takeoff. The dive bombing single mission that ships with BoS puts the player at the head of a flight of six Stukas and once when I flew it, four out of five AI planes managed to avoid a crash. But that seems to be exceptional, so I'm glad I got a screenshot or two, if only to prove to myself I didn't imagine it!
As I usually do before a mission, I zoomed in on the map at the target area and planned my approach and 'action on the objective'. This being an air start, the mission would begin with my flight at the right altitude and lined up on the last leg to the target area. As for said target, I wasn't quite sure what a 'supply dump' might look like but at least this one was located in a spot which I thought should be easy to identify, even from my planned approach height of 3500 metres...weather permitting, or course. In BoS, thanks to cloud cover, the weather often isn't very permissive of target acquisition from altitude, and the mission brief's weather notes said nothing about this important factor. So I decided that I would fly direct to the target, bombing it straight off my line of approach if I managed to get 'eyes on'. If not, I would overfly the target, turn 180 degrees and try again. If that didn't work, I would descend below the cloudbase and attack from there, likely in a shallow dive.
Plan made! Time to head off the the flight line and get cracking!
...to be continued!
Ground attack in Il-2: Battle of Stalingrad

By 33LIMA,

Helping close the ring around Stalingrad in a new phase of the battle!
One of the things I like about the Single Player campaign in IL-2: Battle of Stalingrad (BoS) is the way it follows the main phases of the historical battle. BoS unfortunately doesn't let you create multiple pilot identities who can serve with named, historical squadrons; the next best thing is to choose the same plane for each campaign mission, as if you were flying with the same unit. For my first run through the campaign, I decided to fly for the VVS and soon settled on the superior Yak-1, first in a long line of successful fighters that went on to serve throughout the 'Great Patriotic War'.
The second 'chapter' in BoS's campaign is set during Operation Uranus, the Soviet counterattack which trapped the German 6th Army in Stalingrad. Having got several missions into the chapter, I had by then unlocked some bombs and rockets, as well as several 'skins'. I had flown escort and intercept missions so far, so I decided it was time to try out my new weapons and hit some ground targets, in direct support of our forces on the ground. I rationalised this as our aviation regiment being called upon to play a more tactical role, now that the ground war had become more mobile and reached a critical phase, with Red Army units having broken through and fighting hard to link up and complete the encirclement of 6th Army. I could have chosen to fly a Sturmovik instead but for the sake of continuity in my simulated fighter pilot career I stuck with my trusty Yak, operating in the fighter-bomber role
Here's the the initial mission selection screen, showing that the flight I will lead, operating from our airfield at Illarionovskiy, has been ordered to take out enemy artillery positions. These are presumably resisting the advance of our 65th Army up on the northern flank of the developing Stalingrad pocket.
Moving on to the detailed mission briefing, I can see that this will be an early morning sortie. As usual, this briefing provides quite a detailed flight plan, complete with distances, bearings and timings for each leg, but I have to start the mission itself to confirm the size of my flight and the escort (if any) and see the actual weather conditions for myself.
Beforehand, I zoomed in on the target area and had a good look at the lie of the land. I wanted to pre-familiarise myself with the terrain features on the run-in to the target, to help orient myself during this critical time. I also wanted to plan my run. Seeing that there were enemy airfields north and south of my planned track, I decided I would stick to the latter and attack from east to west. If anything, I would drift slightly south of the leg to the target, with the wooded but gentle bend in the River Don providing a good line and the town of Bolshe Nabatov providing a last major reference point for my final run-in to the target. The latter was in very open country and the town seemed likely to be very useful in helping me pick up the target with the minimum of delay. The BoS map is an excellent rendition of what you can see in-game and despite all that snow, decent visual navigation is not only possible but fun, with aircraft map icons just a key stroke away if you get lost or otherwise feel the need of them.
For this mission I had a choice of bombs or rockets and selected the latter: six ROS-82 rockets in fact, three, on rails, under each wing. I also chose my favourite stock skin for my own Yak, featuring a red nose, as befits a proper 'Stalin Falcon'. My two wingmen were more sensibly attired, in worn winter camouflage.
Take-off is always an interesting time for me in BoS. I don't find the Yak nearly as tricky as the LaGG-3 for ground handling but with your flight roaring off soon after you begin to roll, it can still go seriously Pete Tong. Dawdle or swerve too much, and a flight-mate can be into you, in no time, flat.
But not this time. It wasn't one of my better take-offs but it worked and soon, we were on our way!
On the way!
I swung around towards the south in a gentle right-hand turn, throttled back to let the other two Yaks catch up. Al-flown aircraft in BoS use the same flight model as the player's aircraft so they have no magical ability to overhaul your plane, if you fly full throttle!
At this point I looked around and above for any sign that the powers-that-be had thought our mission worthy of an escort - and if they had, whether they'd showed up. Reassuringly, the answer to both questions was 'Yes'. Above and behind us, a flight of LaGGs was already in position.
Hopefully, if we were intercepted, I would be able to rely on our comrades to cover us. My contingency plan in the event that didn't work out was that I would order my own flight-mates to cover me and attack the ground targets myself. I had been taught that 'Selection and Maintenance of the Aim' is the master principle of warfare (and contrary to what John Keegan who lectured there said in 'The Face of Battle', these principles WERE taught at Sandhurst at least up to that time). My aim on this mission was clearly to destroy the enemy gun positions and that would take absolute priority over running up my modest score of air-to-air victories. Whatever else happened, I was determined that those German guns were going to get a pounding!
Sensibly in my view, BoS casts the player in the flight-leader role. Some may like to fly as a wingman but I relish the additional tactical responsibilities and challenges of flight leadership, including thinking through how I will carry out my orders before the mission starts and then leading and controlling my flight, during the sortie.
My first task now was to get us to the initial waypoint, from which we would fly our leg to the target. As is often the case in BoS and as it should be, navigation points are laid over real-life landmarks which are visible both on the map and in the 3d world. In this case, our waypoint lay over a roughly inverted L-shaped stretch of woods, the stem of which ran alongside the River Don, which at that point ran nearly north-south. Here's that part of the map again: see what I mean?
There was very little cloud cover and looking ahead, I could soon make out the distinctive piece of woodland by the left-hand bank of the frozen river. It wasn't long before we reached it and I made the right-hand turn that would take us into the target area. I currently let the sim handle my radiator and engine settings beyond throttle; you can see from the screenies below that the engine management AI is visibly opening and closing the flap at the back of the big water radiator cowling under my fuselage, to manage my engine temperatures for me. Neat!
I was by now flying at about 75% throttle and had accepted the recommended fuel load (about 65% IIRC). As there was no cloudbase I didn't have to stick to the recommended height of around 500m but had decided against going in high. Unfortunately the BoS inflight and detailed briefing map doesn't show the front lines but I remembered from the original map, which does, that I would be in enemy territory more or less the whole way, from this point forward. I had now arrived at the war!
Target in sight!
Not long after turning onto the last leg up towards our target, I noticed a single condensation trail, which appeared briefly at about four o'clock high. It seemed to be curving away from us and to betoken no immediate threat.
Another of the things I like about the BoS Single Player campaign is that while individual formations are often quite small, the sky is very often alive with other flights, going about their own business. I won't always see them but I have come across other friendly and enemy flights which have clearly nothing to do with my own objective and which generally continue with their own mission, even to the extent that enemy fighters will ignore me and carry on, as they should, sticking to the bombers they were escorting, rather automatically and robotically diverting to attack me.
Today I had my own mission and I ignored the distant sighting. On we went, leaving further behind us the point where our three rocket-laden Yaks and our LaGG escort had crossed the River Don.
The river had curved around and now lay off to our left, helping guide us towards the town of Bolshe Nabatov which I would use to pick up the target, out in the open country to the west. It wasn't long before I had the town in sight. Having studied the map before taking off, I knew the main road running through Bolshe Nabatov pointed slightly north of the target area. So If I followed the line of that stretch of road, I should soon spot the enemy gun positions, just to my left. That was the plan, at any rate.
Armies in the field being trained to camouflage their positions, picking up a target in open countyside was always going to be a challenge. And this was very open countryside, particularly featureless. Where were they?
Anxious not to miss my target or to lose time stooging around looking for it like an idiot, I 'cheated' and briefly turned on the on-screen icons, just to get a quick indication before I got too close. Even then, icons off again, I nearly failed to see the target. It was only when I noticed a muzzle flash from a field that I finally spotted the gun line itself. By that time, I was practically on top of it!
Well, there they were! I could now see that our target was a line of four field guns, standard LeFH 18M 10.5 cm field howitzers as it turned out, complete with a couple of little ammo bunkers behind the gun line. I was too close to attack and flew over them, dipping my wing to get a good look and relieved to find I wasn't being shot at during my unplanned little flypast.
I opened the throttle and pulled up and away. As I did so, I looked around and seeing no enemy aircraft, gave my flight the order to attack the nearest ground target. I think I'm right in saying that in BoS you cannot (as in CFS3, for example) padlock a specific target then order it attacked, which is admittedly a bit too precise for a time before laser designators or even thoroughly reliable radios. From the occasional foray with a Stuka in a single mission, I was unsure how well this would work out. Would the AI do as they were bid? If so, would they attack the right target? I was soon to find out!
Down to business!
I had more or less stumbled onto the German battery and, as I overflew it, ordered my flight-mates to attack independently. My plan now was to pull up at full power, chop the throttle and wing over, reversing my course and dropping back down onto the target in a shallow dive.
As I came around and rolled out, I realised that I was flying into the rising sun, but in a way, that helped me pick up the targets, since the guns stood out as darker spots against the bright white sheen of the snow.
I lined 'em up and cut loose with my rockets. Or tried to. Nothing happened. No rocket so much as left the rails. I should have paid more attention when the armourer was explaining how to use these things - I was hitting the wrong switch...or keystroke, to be precise! I flashed over the guns, mortified that the gunners hadn't even bothered to run for cover! I all but expected to see one of them thumbing his nose at me, as I flashed past overhead!
Opening the throttle, I climbed away again, then throttled back and pulled up and around again. This time, I was coming in with the light behind me.
And this time, the rockets performed as advertised. I had a bit of difficulty, though, keeping the targets lined up as I dived onto them and was unsure how much to allow for the fall-off in rocket trajectory, compared to guns and cannon. I'd had no previous practice with this weapon, which didn't help. There was also the little matter of pulling up before hitting the gound. Not having set up to fire salvoes, I fired one missile with each trigger press. The results were reasonably spectacular but not otherwise terribly encouraging.
I did manage to clobber one gun position before running out of rockets. Emboldened by the lack of AA fire, I made a couple of further passes with my guns, which knocked out a second field piece.
Looking back, I could now see two of those proverbial 'smokin' holes in the ground'. But half the battery was still intact, and my orders called for its complete destruction.
Where were my flightmates? What were they up to? In the excitement of making my own runs, I had rather left them to get on with setting up and making their own attacks. But so far, this was turning into a one-Yak show.
Mission accomplished!
Pulling up from my last run, I finally looked around the skies again. I wasn't the only one having a bit of excitement, as it happened. My LaGG escort was doing a good job; there were no German fighters around but they were enthusiastically drawing fire from what looked like every AA gun in the neighbourhood.
As I reached the top of my pull-up after my last pass, I came up just below the LaGGs, who seemed to have become tired of being shot at. Or more likely, their protective orbits just happened to have taken them over in my direction.
I made another pass with guns. This time I didn't do much further damage but the German gunners, having by now realised that I did occasionally manage to hit what I was shooting at, did me the courtesy of abandoning their weapon and making themselves scarce.
It wasn't until I was pulling up, that I realised that somebody had managed to destroy a third gun. Now that I thought of it, I recalled some radio chatter indicating that a flight-mate was attacking a target. Further confirmation that I was not being left to complete the enemy's destruction alone wasn't long in coming. First one Yak, then another, slipped in behind and beneath me and blew up the last German howitzer with some well-aimed rocket salvos! Urrah! Bravo!
Job done - time to go home! I slowly levelled off and oriented myself for the trip back to the next waypoint, calling my flight back into formation as I did so. The LaGG escort had fallen behind and they gave me an anxious moment until I identified them as friendlies. They were soon climbing back up to cover us and it wasn't long before they were once more above and behind.
Soon, my own guys were close behind me as we headed back up north. They had not expended all their rockets but I wasn't about to risk their necks and valuable Soviet property for the sake of such opportunity targets as we might have been able to find. We had got those guns and were all still in the Land of the Living; that would do us nicely. It's always a source of satisfaction to me, if I can bring my flight-mates back in one piece. Even if they are nameless 'bots', in my imagination they are my comrades, looking to me for leadership...and for their survival.
Above us, the LaGGs followed protectively. If it wasn't for their finnicky ground-handling, I'd probably be flying one of these machines now, instead of transitioning to the Yak after my BoS training missions. They really are sleek birds, even if less well-armed and lower-performing than the Yaks.
The rest of the flight was uneventful. We turned for home at the last waypoint and I took the opportunity to admire the view, with the low sun's rays nicely picking up the subtleties of the frozen landscape. As in real life, the steppes in BoS are frequently traversed by balkas (gullies) and in appropriate lighting, you realise that the BoS terrain is not the flat, featureless white affair that it can sometimes appear to be.
Nearing our home base, I gave the 'Return to base' order. While I orbited, I was pleased to see my two flight-mates make their own approaches and land successfully, with navigation lights lit. I then made my own approach and managed to get down without seriously breaking something, for once. In the screenie below, you can see the red and green wingtip lights of one of the other Yaks as it taxies into the dispersal area, having cleared the active runway. Neat!
Here's my mission results screen. With this sortie I unlocked another skin and some additional weaponry, which I may put to good use at some point. I even got an award! it's likely not an authentic, historical medal, but at least it shows that comebody cares, up there in the higher echelons of the RKKA, the Red Army of Peasants and Workers!
As I've said elsewhere I'm not a big fan of BoS's unconventional approach to the SP campaign trimmings, nicely-implemented though it is. I'd much prefer the ability to fly conventional pilot careers or failing that, the sort of themed mision sets that will likely come once the sim's full mission editor is widely released. In the meantime, an approximation of a pilot career can be achieved with what we have now and I'm finding the results highly satisfactory!
Stalingrad Stuka - classic style

By 33LIMA,

Flying the Ju 87 over the front on the Volga - in Il-2 1946!
Why fly the Stuka in 'classic' Il-2 - over Stalingrad, to boot - when you can fly it in Il-2: Battle of Stalingrad (BoS)? If you have access to both sims, that's a good question. The new sim models the Stuka to a level of detail that is visually much superior, plus BoS portrays the city and the battlefield around it in tremendous detail. See what I mean?
Well, there are three reasons for playing this mission in the earlier sim, in my case. Firstly, I want to to make a comparison - to feature Stuka campaign mission reports from both sims, one after the other. Secondly, flying the Stuka and some Soviet fighers in the newer sim actually spurred me to do something I had only dabbled in before - start some serious Eastern Front campaigns in the older sim, for the VVS and flying the Stuka. And the third reason is this:
At the moment, AI-flown Stukas in BoS regularly crack up soon after takeoff, often leaving you on your own, after your flight-mates have fire-balled or belly-flopped onto the snow. Well, that's the result I'm getting anyway, and I'm not alone. The solution, for now, appears to be - fly an air start. So that's likely what I'll do, for the next mission report. But for his one, I'm starting with the original sim. Well, not quite the original, since what we have now is a sim that's had about thirteen years development and modding. Here, I'm using Il-2 1946 with the latest Dark Blue World mod installed. The mission itself is, I believe, from a stock Stuka campaign. This is divided into several mini-campaigns, starting early on during Operation Barbarossa and extending to the Battle of Kursk and beyond. Having created a new pilot with the surname of the most famous and successful Stuka pilot, I was pleased to find out that I could go straight to the Battle of Stalingrad. So that's what I did.
The Il-2 '46 Stuka has a comparatively lower-polygon 3d model but it's still a pleasing replica. Moreover, the sim features several Ju 87 variants, notably the early-war B version; the more angular D version most common on the Eastern Front; and the G model tankbuster with two 3.7 cm cannon. Here's the plane I'll be flying now, a Ju 87D-3. It has the correct fuselage code (A5+AH) for the campaign's unit, the 1st Staffel in I Gruppe, Stukageschwader 1 - 'A5' signifying StG1 and 'H' indicating the 1st Staffel, which is in I Gruppe. The second 'A' is my individual aircraft letter; one of IL-2's nice touches is of course that other aircraft not only also have the correct unit markings, they each have different, individual aircraft letters.
A virtual tour of operations with an historical sqaudron is one thing that you don't get in BoS for now. In Il-2 '46 you do and you can look up your unit roster, where you can keep track of your comrades and your relative success...or the lack thereof, as the case may be. I dislike flying as a wingman, preferring the tactical challenges of flight leadership. So for my pilot, I have selected the rank of Hauptman, which I hope will give me plenty of opportunity to show my mettle as a Stuka leader...or again, the lack thereof, as the case may be.
Here's the briefing for my first mission. We're kicking off in mid-September, just before 6th Army's first big attack into the city of Stalingrad itself; the snows and the first Soviet encircling attacks are still a couple of months away. In the second screenshot below, I have scrolled down the text to show how Il-2 lists your flight's composition, which BoS doesn't; though like BoS, I'm only going to find out that we've got an escort when I start the mission itself.
And here we are on the runway, six Stukas in single file, with no less that eight Bf 109s lined up behind us. With an escort like that, surely we should be quite safe from any Bolsheviks foolish enough to try conclusions with the might of the Jagdwaffe!
One way or another, I would find out, soon enough.
...to be continued!
Mini DCS A-10C Review by Eric J

By Skyviper,
Mini DCS A-10C Review
By Eric J
The A-10C is perhaps one of the best aircraft to fly, along with the A model Hog I reviewed beforehand. However the A-10C is the jewel in my opinion of the study modules (FC3 is still good don’t get me wrong) and deserves note as it’s perhaps the most complex aircraft compared to the other modules. That and its wartime record (of which I’ve used in Afghanistan myself) gives the aircraft an excellent reputation for an old aircraft still doing its job to the warfighters currently in Afghanistan and again in Iraq against ISIS.
Flight Model
As of 1.2.14 the flight model of the C model is unchanged, but there are still some nuances when flying the C compared to the A model in Flaming Cliffs 3. Maneuverability is better but there is still oscillation when you pull too hard on the stick, and you can lose control of the aircraft but that’s if you consistently pull the stick. Generally though the C model flies better and in various mountain flying tests can be inverted and not crash into the side of the mountain, but again take it easy when handling the A-10C anyway. And it is recommended as always to be firm with the aircraft and it will perform for you. It is not a speedy aircraft but overall it is comfortable for me is that what it does in real life.
To start somewhere on this aircraft I will start with cockpit stuff and then go into the other details as they come along. So the first thing is of course the cockpit is fully clickable with full 6DOF support. Of course most of these have keyboard mapping and quite honestly when transitioning from the A model to the C model it looks daunting at first. Well, the most daunting task of the A-10C is of course the startup sequence. If I remember correctly there are nineteen steps in performing this task and quite frankly was one thing that initially turned me off about this aircraft. I don’t mind taking the time to learn clickable planes and compared to the VRS Super Hornet F/A-18E, the C Hog is way more complex than that aircraft, which relatively speaking is easier and when the DCS: Super Hornet comes out (or DCS: Hornet) I may transition to those jets. However there is an automated sequence that is available for both startup and shutdown so if you’re like me who really doesn’t care about learning the steps, then that option is always available.
Along with that are the myriad CDUs, radios that of course are well explained in the rather exhaustive manual (which is as a PDF document, 671 pages. So there’s a lot of manual reading. However while complete, it still takes a lot of flying and practicing to get proficient at the basic level as it’s highly recommended to take it one step at a time and recommended to (if you can afford it) a Thrustmaster Warthog stick. However I do use a TM Hotas X and quite honestly don’t mind using it as it’s growing on me and recommended as a “low end” stick but otherwise has proven to be real nice for the most part in flying in the C model. However, if you can afford to purchase such a stick then it’s highly recommended and the simulation recognizes the stick and automatically maps everything for you according to the correct stick functions. It also shows you what does what in the manual. For those without such a stick it takes some hunting and pecking and while not as complete as the regular manual, the Quick Start manual does help greatly in figuring out what to at least get you shooting. The reason is that it shows the keys to use and below is a small short reference for those who need to get flying in the air and have spent hours trying to figure everything out:
HOTAS CMS Forward = Ejects flares/co untermeasures
HOTAS Boat Switch Aft = White Hot switch for TGP
HOTAS Boat Switch Center = CCD (normal camera) switch for TGP
HOTAS Boat Switch Forward = Black Hot switch for TGP
HOTAS China Hat Switch Aft = Resets TGP and Maverick and HUD when thatpage is SOI
HOTAS China Hat Switch Forward = Zoom in/out for Maverick and TGP when on that specific page
HOTAS DMS Aft = Zooms out TGP view
HOTAS DMS Forward = Zooms in TGP view
HOTAS Master Mode Button = Switches between NAV, GUNS, CCIP, and CCRP modes
HOTAS Slew Do wn = Moves Pipper down when TGP/HUD/Maverick is SOI
HOTAS Slew Left = Same as above and moves the pipper left
HOTAS Slew Right = Same as above and moves the pipper right
HOTAS Slew Up = Same as above and moves the pipper up
HOTAS TMS Forward = Allows you to select AREA and POINT settings on the TGP,
where POINT is designed for moving targets.To designate for targets hold this command down which
is necessary for JDAM and the CBU-103/105
Nosewheel Steering Button = During flight allows you to fire the laser from your TGP
(IR or Designator/Both) and naturally when you land allows you to steer the nosewheel
While the above doesn’t cover everything it does allow you to get started and as you spend more time in the manuals as well as the various supporting forums to ease you along in your journey (and what it is) in becoming a proficient pilot, as well as getting in the virtual cockpit and flying the aircraft. As you see also most of this focuses on weapon employment which of course is what the A-10C is best at, in the simulation and most definitely in the real world. As a former JFO who deployed to Afghanistan needless to say when these were supporting elements in my light infantry company they were always welcome. But overall the handling of the C Warthog is of course better than the A but I still fly the A because I like both for their own reasons. The A version for its simplicity and ability to focus sometimes better on the fight, while the C model with its bells and whistles offers expanded capabilities and abilities in the close air support fight. The only other thing compared to the FC3 A-10A is that when you land ensure you activate the Nosewheel by pressing the N button (keyboard default) and it will enable steering. I’ve found this out the hard way when starting on the C as when I landed at speed the rudder does provide some input and help but when you slow down the aircraft moves around so remember to do this everytime you land. It also when using the TGP enables you to fire the laser designator/IR Laser when the system is SOI. And for those who always hear it and wonder what it is, it means Sensor of Interest, or in layman’s terms, makes that page or HUD active for you to directly manipulate.
The last part of the module is the JTAC portion, which is very comprehensive and while as a JFO I offered my input to the module I can’t think of everything and therefore the other JTACs or SMEs still made this one of the best modules to date. And yes I am one of them but the product shines through as the least buggy of the modules so far and quite honestly while I tend to express my opinions later in the review, I do highly recommend learning this plane. As five weeks into flying it I still have a long way to go in knowing everything, but then again I know enough to be successful on the virtual battlefield. Admittedly I did not and don’t use the JTAC portion of the module simply because I’ve done the real thing so overall I don’t need to “get on the ground” that much and simply fly as if a JTAC was talking to me for when I practice flying.
While I touched on weapons use above, the aircraft with its upgrades uses the AN/AAQ-28 Litening III targeting pod (or as colloquially referred to as the “TGP” on various forums) as its main sensor platform and at first is hard to use but once you get the basic familiarity of the system and its limits and capabilities, becomes second nature to use compared to the A model. But the merit of the A model is that you can focus on shooting more than the C, which to be fair has done its fair share but overall in some cases takes a bit longer as you need to put the TGP in the right spot but in some cases allows you to setup for shots better than the A version. And like most other things when the DCS: Hornet and DCS: Super Hornet modules are released the constant use of the TGP will help you along (given the constraints of those airframes of course) in using that on those aircraft.
The C model can also through the TGP use the JDAM and WCMD munitions, as well as the Paveway GBU-12 and GBU-10 through the internal laser designator (which can also “shoot” an IR laser as well for A-FAC duties). More often than not I use the GBU-12s more than the GBU-12s or even the GBU-31s as their better and more precise than the big brothers. However even I like the big booms (former forward observer so high explosives in a way my specialty) and needless to say they deliver. However a full range of rockets, and bombs are available for use if you prefer the old iron bombs (and the TGP can also enhance accuracy if you use it right) to hang off the pylons, as well as fuel tanks and travel pods (which don’t do anything but good enough for atmosphere for a related mission) and uses historical configurations as well as preset configurations for you to explore the aircraft and use. And the gun of course is well modeled, and you can select from a Combat Mix to HEI to Training Practice rounds. And while the screenshot is just a taste of what you can carry the aircraft responds accordingly when the munitions are dropped from the aircraft as re-trimming your aircraft is of course a necessity.
With all of this the aircraft is fun to fly just on its own and without the weapons play. The aircraft does come with Night Vision Goggles so unlike the un-modded A-10A, is day and night capable and only enhances your virtual flight.
3D Model/Textures
Like the A model Hog the A-10C is accurately modeled in the 3D model. My only complaint which is superficial is the inclusion of the Pave Penny pod and the mounting frame. Current A-10Cs do not mount this as its unnecessary weight and drag on the aircraft. While practically this doesn’t hinder or enhance play it would be good to have a correct aircraft (and so the Hog C pilots have another reason to act superior on the forums). Despite this everything works as it should and the cockpit needless to say is fully functional.
From what I’ve seen on the forums a lot of people seem to make a lot of skins for the A-10C and therefore neglect the A version, which uses the same templates and textures. It causes confusion for some people from what I’ve seen who assume A-10A textures don’t work with the A-10C, and after doing a few myself, the only major difference is the wedge behind the cockpit is mapped… somewhere. In any case the details are always amazing and always appreciate the time put into the default textures. My only real complaint is the 23rd FG version, in which the colors are totally off and to me looks like the artist used some decals from an image for the shark mouth, which in my opinion is lazy but overall though the two-tone grey textures are topnotch, and while as an artist it’s slightly off to me, it works and therefore I deal with it. I just prefer the European 1 still to the two tone grey but again that’s a personal opinion and not anything against the art team of Eagle Dynamics.
And needless to say if you don’t like the textures at all that Eagle Dynamics supplied with the module, the templates in Photoshop format are available from the main DCS site. Manipulating them is at first difficult but again the quality of the templates (I wish they would add some more of the 3D mesh areas for the other bits that seem to be missing, such as the wedge antenna and the doghouse between the engines as well as the holes in the airframe) is very impressive and comes with the MD textures, so I do appreciate putting MD first as a Maryland resident but that’s not the case. While there is no reason to assume anything it does help with orienting various textures on the 3D mesh, such as the engines, which require careful orientation in order to look right.
And last but not least, various liveries are available online at Lockonfiles.com, the main DCS site, as well as on CombatAce.com. Adding them to the stock liveries is easy and if done correctly can enhance your play online or by yourself.
Functionality
I went over most of the functionality of the aircraft above, but for this portion again it looks daunting at first but overall the cockpit is fully clickable and works great. After a while the operation of various systems does become second nature and instinctive to use but overall if you take the time to figure the aircraft out, is very rewarding (like anything in the DCS series) the aircraft will provide you with good playtime as well.
Major issues so far
It wouldn’t be fair to say that the aircraft is bug free; however compared to some other aircraft it’s relatively bug-free. Granted Eagle Dynamics/TFC doesn’t catch all of the bugs but overall there is no feeling of it being bugged and not usable. It’s fun and enjoyable to fly and that reason alone that the bugs are kept to a minimum keeps me flying it. However the ones that seem to be notable is improper inventory notations through the DSMS page when rearming on the ground but as such the weapons do show correctly on the aircraft.
Final Thoughts
While at first I shied away from the A-10C because of the complexity, not the overall quality of the product I highly recommend buying this module if you can. Not because I had a personal part in the overall grand scheme of things but the fact that it is one of the best polished modules to date. Granted every program has its issues but the patch updates keep it flying well and starting to enjoy the aircraft more and more as I get more competent with it.