
gerwin
-
Posts
823 -
Joined
-
Last visited
-
Days Won
8
Content Type
Profiles
Forums
Gallery
Downloads
Store
Everything posted by gerwin
-
Think so, as it seems that only one file has changed compared to the earlier okt patch, being: wox\system\TerrainEngine.dll
-
AFAIK, There are not that much 'mods' for the sturmovik games, with the exception of versions 4.05 and above. As illustrated by allaircraftarcade. The sturmovik file system was quite inaccessible for years, so it seems there were not much ways to make any real mods in the time of these older versions. Though I too wish there were ways to use mods without getting such a bloated IL-2 1946 install. As after getting the ace expansion pack I really don't care much for the other addons. Have you tried the ace expansion?, that one truly adds to forgotten battles. As does 'Battle over Europe'.
-
It seems most downloads currently available are compatible with WOE, WOV or SFP1 V08.30.06 (without the sept 2008 patch that is), and preferably WOE. Using any later version of the game, like WOI, you have to be careful with mods. Either they say WOI/sept patch compatible. or you have to know exactly what you are doing, or you have to read in the forums how to adjust the mods.
-
Can I Remove a file submitted by me
gerwin replied to gerwin's topic in Site Support / Bug Reports / Suggestions
The intruder skin has a newer version as a separate download entry (says v1.1, I did not know about the update feature at the time.) And the other file; An almost identical MiG-21MF skin is now included in the sept-2008 patch for WOE anyway. so that's the reason. -
Can I Remove a file submitted by me earlier?, as some are by now obsolete. it concerns these two files: http://forum.combatace.com/index.php?autoc...p;showfile=6410 http://forum.combatace.com/index.php?autoc...p;showfile=6524 thank you.
-

306 downloads
French Silver Scheme for Mirage 5D (TW model) version 0.9 by Gerwin 5-10-2008 DESCRIPTION: WOI includes the Mirage 5D only as an adversary aircraft, Fortunately this aircraft is almost identical to the Nesher and quite similar to the Mirage III. This package includes a French Airforce silver skin for the Mirage 5D, and also 3 ini files that will make the aircraft Flyable (using the Nesher cockpit). It will also change the default nationality of the Mirage 5D to France, which is by default a 'Friendly' nation. This Silver skin is heavily based on the stock Mirage III silver skin. The Mirage number style 13-S* is correct, but each last letter is made up and might not have actually been used. The red overspray near the intakes is to be adjusted in a final release. INSTALLATION: Copy the included folder with contents to the folder that contains the Mirage5D files, for example: WOI\Objects\Aircraft\Mirage5D When in the game select the skin in the loadout screen. THANKS TO: Third Wire for the Strike Fighters Based Games Column5.us for their Mirage number decals, which I modified. -
View File French Silver Scheme for Mirage 5D (TW model) French Silver Scheme for Mirage 5D (TW model) version 0.9 by Gerwin 5-10-2008 DESCRIPTION: WOI includes the Mirage 5D only as an adversary aircraft, Fortunately this aircraft is almost identical to the Nesher and quite similar to the Mirage III. This package includes a French Airforce silver skin for the Mirage 5D, and also 3 ini files that will make the aircraft Flyable (using the Nesher cockpit). It will also change the default nationality of the Mirage 5D to France, which is by default a 'Friendly' nation. This Silver skin is heavily based on the stock Mirage III silver skin. The Mirage number style 13-S* is correct, but each last letter is made up and might not have actually been used. The red overspray near the intakes is to be adjusted in a final release. INSTALLATION: Copy the included folder with contents to the folder that contains the Mirage5D files, for example: WOI\Objects\Aircraft\Mirage5D When in the game select the skin in the loadout screen. THANKS TO: Third Wire for the Strike Fighters Based Games Column5.us for their Mirage number decals, which I modified. Submitter gerwin Submitted 10/05/2008 Category Mirage Skins
-
one thing: you have to restart the campaign from the start, when you continue an older campaign it will not load the new data. Otherwise it should load the new data, including any changed starting aircraft. tried it this week with the stock SFP1 campaign, worked fine. edit: just changed the 4th USAF sqdr from F-4E to F-15A, and it works. only on the campaign setup screen it says F-4E, because of the line in file LinebackerI.ini, so might wanna change that too, though it doesn't matter much, example wovcampl2_data.ini: //----- Player Unit [AirUnit001] //AircraftType=F-4E AircraftType=F-15A Squadron=4TFS ForceID=1
-
you have to extract either: wovcampl1_data.ini, wovcampl2_data.ini, wovcamprt_data.ini edit them, and put them in the matching campaign folder
-
I dont do 3D models, but IFAIK the community cannot open/import and adjust the stock aircraft models (LOD). you can only create them with the export plugin. correct me if I am wrong.
-
Always missed this feature, so I will put this to good use. Thank you! PS: I prefered the yellow/orange HUD color, and adjusted it like this: A-6A_AVIONICS.INI: HUDColor=1.0,0.85,0.5,1.0 A-6A_SIGHT.TGA: fill with rgb 230,159,92
-
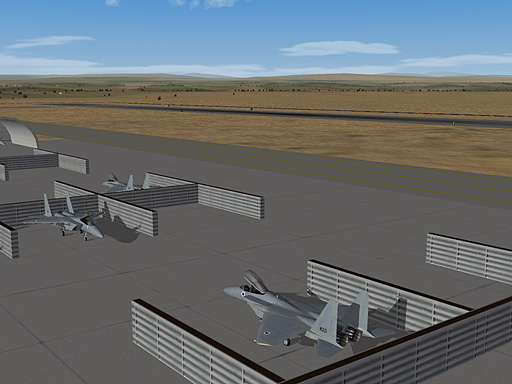
On a side note: concerning the SFP1 desert terrain, you play it up to sept 2008 standards 1) by putting the above header in DESERT_DATA.INI, (put it in the desert terrain folder) 2) by extracting DESERT_AIRFIELD1.INI to DESERT_AIRFIELD6.INI form germanyCE.cat and putting them in the desert terrain folder. 3) then play the terrain using a patched WOV/WOE/WOI game. it gives you more detail-ground textures and random flight-line aircraft:
-
I was comparing all four official terrain datafiles yesterday, (Without knowing what all entries mean I must admit) but I suspect that for a september '08 patched game the top part of the file is supposed to go like this, and it is the same in all four files. sorry for the long text. [TerrainMesh] TextureThreshold=0.80 LowDetailMeshThreshold=0.50 MedDetailMeshThreshold=0.30 TileToHeightGridRatio=4 RenderMeshVertexCount=4096 RenderMeshIndexCount=6144 SolidObjectVertexCount=12288 SolidObjectIndexCount=18432 AlphaObjectVertexCount=8192 AlphaObjectIndexCount=12288 [HeightField] DetailScale=1.0 DetailFrequency=1.0 MaxHeight=1000 MinHeight=0 [HeightOffset] NonTexturedMesh=-10.0 TexturedMesh=-5.0 DetailedMesh=0.0 LowDetailMesh=-1.0 WaterMesh=0.8 [NormalTextureMaterial] UseEffectShader=TRUE EffectShaderName=TerrainEffect.fx DepthBufferCheck=TRUE DepthBufferWrite=TRUE RenderedInOrder=FALSE AlphaTestEnabled=FALSE CullMode=CLOCKWISE LightEnabled=TRUE SpecularEnabled=FALSE EmissiveEnabled=FALSE FogEnabled=TRUE AmbientColor=1.000000,1.000000,1.000000,1.000000 DiffuseColor=1.000000,1.000000,1.000000,1.0000000 ZBufferOffset=0.000000 BlendOp=ONE NumTextureStages=1 TextureStage[01].TextureName= TextureStage[01].MipMap=TRUE TextureStage[01].FilterEnabled=TRUE TextureStage[01].StageColorOp=TEXTURE_MODULATE_DIFFUSE TextureStage[01].StageAlphaOp=NO_OP [WaterTextureMaterial] UseEffectShader=TRUE EffectShaderName=WaterEffect.fx DepthBufferCheck=TRUE DepthBufferWrite=FALSE RenderedInOrder=TRUE AlphaTestEnabled=TRUE CullMode=CLOCKWISE LightEnabled=TRUE SpecularEnabled=TRUE EmissiveEnabled=FALSE FogEnabled=TRUE AmbientColor=1.000000,1.000000,1.000000,1.000000 DiffuseColor=1.000000,1.000000,1.000000,1.000000 SpecularColor=1.000000,1.000000,1.000000,1.000000 SpecularPower=10.000000 Reflectivity=1.00000 ZBufferOffset=2.000000 BlendOp=BLEND_SRC_ALPHA NumTextureStages=2 TextureStage[01].TextureName= TextureStage[01].MipMap=TRUE TextureStage[01].FilterEnabled=TRUE TextureStage[01].StageColorOp=TEXTURE_MODULATE_DIFFUSE TextureStage[01].StageAlphaOp=TEXTURE TextureStage[02].TextureName= TextureStage[02].MipMap=TRUE TextureStage[02].FilterEnabled=TRUE TextureStage[02].ReflectionMapping=TRUE TextureStage[02].StageColorOp=TEXTURE_BLEND_TEXTURE_ALPHA TextureStage[02].StageAlphaOp=DIFFUSE [BackgroundMaterial] UseEffectShader=TRUE EffectShaderName=FarTerrainEffect.fx DepthBufferCheck=TRUE DepthBufferWrite=TRUE RenderedInOrder=FALSE AlphaTestEnabled=FALSE CullMode=CLOCKWISE LightEnabled=TRUE SpecularEnabled=FALSE EmissiveEnabled=FALSE FogEnabled=TRUE AmbientColor=1.000000,1.000000,1.000000,1.000000 DiffuseColor=1.000000,1.000000,1.000000,1.0000000 ZBufferOffset=0.000000 BlendOp=ONE NumTextureStages=1 TextureStage[01].TextureName= TextureStage[01].MipMap=TRUE TextureStage[01].FilterEnabled=TRUE TextureStage[01].StageColorOp=TEXTURE_MODULATE_DIFFUSE TextureStage[01].StageAlphaOp=NO_OP [NoiseTextureMaterial] DepthBufferCheck=TRUE DepthBufferWrite=FALSE RenderedInOrder=TRUE AlphaTestEnabled=TRUE CullMode=CLOCKWISE LightEnabled=FALSE SpecularEnabled=FALSE EmissiveEnabled=FALSE FogEnabled=FALSE AmbientColor=1.000000,1.000000,1.000000,1.000000 DiffuseColor=1.000000,1.000000,1.000000,1.000000 ZBufferOffset=1.000000 BlendOp=MODULATE_INV_SRC NumTextureStages=1 TextureStage[01].TextureName= TextureStage[01].MipMap=FALSE TextureStage[01].FilterEnabled=TRUE TextureStage[01].TileU=TRUE TextureStage[01].TileV=TRUE TextureStage[01].StageColorOp=TEXTURE_MODULATE_DIFFUSE TextureStage[01].StageAlphaOp=NO_OP [SolidObjectTextureMaterial] DepthBufferCheck=TRUE DepthBufferWrite=TRUE RenderedInOrder=FALSE AlphaTestEnabled=FALSE CullMode=CLOCKWISE LightEnabled=TRUE SpecularEnabled=FALSE EmissiveEnabled=FALSE FogEnabled=TRUE AmbientColor=1.000000,1.000000,1.000000,1.000000 DiffuseColor=1.000000,1.000000,1.000000,1.000000 ZBufferOffset=0.000000 BlendOp=ONE NumTextureStages=1 TextureStage[01].TextureName= TextureStage[01].MipMap=TRUE TextureStage[01].FilterEnabled=TRUE TextureStage[01].StageColorOp=TEXTURE_MODULATE_DIFFUSE TextureStage[01].StageAlphaOp=NO_OP [AlphaObjectTextureMaterial] DepthBufferCheck=TRUE DepthBufferWrite=FALSE RenderedInOrder=TRUE AlphaTestEnabled=TRUE CullMode=NO_CULL LightEnabled=TRUE SpecularEnabled=FALSE EmissiveEnabled=FALSE FogEnabled=TRUE AmbientColor=1.000000,1.000000,1.000000,1.000000 DiffuseColor=1.000000,1.000000,1.000000,1.000000 ZBufferOffset=2.000000 BlendOp=BLEND_SRC_ALPHA NumTextureStages=1 TextureStage[01].TextureName= TextureStage[01].MipMap=FALSE TextureStage[01].FilterEnabled=TRUE TextureStage[01].StageColorOp=TEXTURE_MODULATE_DIFFUSE TextureStage[01].StageAlphaOp=TEXTURE [NoiseTexture] Size=256 MinColor=229 MaxColor=255 Frequency=1.7 ResolutionFactor=4.0 StartFadeDistance=200.0 EndFadeDistance=500.0 // and hereafter follow all [TextureXXX] entries
-
Indeed, I saw annoying flickering too, but no longer. Thanks!
-
One correction on my earlier summary: in the Flight folder you have to use MissionData.cat and MissionText.cat form WOI, otherwise the WOI campaign won't work.
-
261 downloads
Skin Template for F-16A (Netz), TW model version 1.0 by Gerwin 22..27-9-2008 DESCRIPTION: This is a template for the original WOI F-16a Netz, It has the following features: - Selection mask for overspray areas - Base color is now one plain tan color instead of the IDF camo, this might be a more practical base for new skins. as the old camo edges are hard to remove. - You can enable layers that make it an USAF hill grey scheme. - Decals related files included for the USAF scheme. INSTALLATION: Open with a paint program that can read PSD format (such as photoshop) THANKS TO: Third Wire for the Strike Fighters Based Games. Column5.us for their F-16A skin (colors reference) and tail code decals -
View File Skin Template for F-16A (Netz), TW model Skin Template for F-16A (Netz), TW model version 1.0 by Gerwin 22..27-9-2008 DESCRIPTION: This is a template for the original WOI F-16a Netz, It has the following features: - Selection mask for overspray areas - Base color is now one plain tan color instead of the IDF camo, this might be a more practical base for new skins. as the old camo edges are hard to remove. - You can enable layers that make it an USAF hill grey scheme. - Decals related files included for the USAF scheme. INSTALLATION: Open with a paint program that can read PSD format (such as photoshop) THANKS TO: Third Wire for the Strike Fighters Based Games. Column5.us for their F-16A skin (colors reference) and tail code decals Submitter gerwin Submitted 09/27/2008 Category Skin Templates / Decal Sets
-
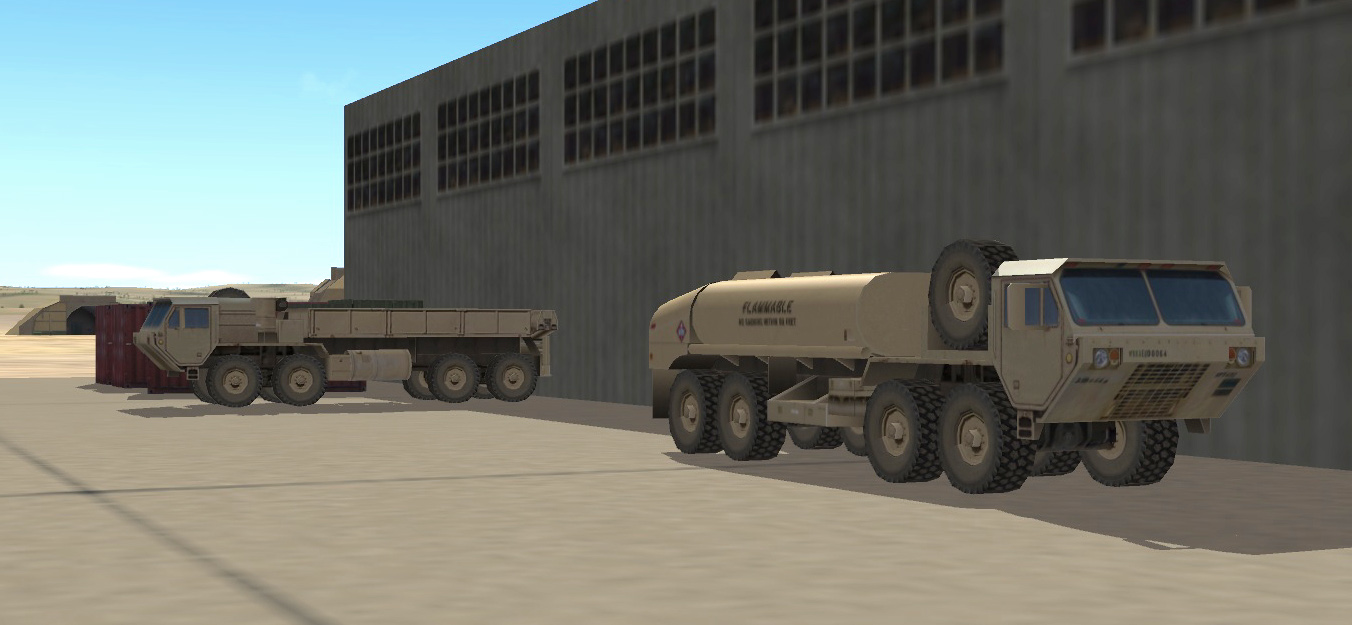
Patch all seperate installs before merging if possible. Currently SFP1 is unpatched which results in a desert terrain without stationary aircraft on the airfields. (That is the only reason I make a backup of my seperate game installs; so they can be patched in the future.) OK wrench, I'll take your word for it, here is INIswitch with all datafiles. (IFAIK it enables one to have a merged install without any drawbacks compared to seperate installs) My install is 2,5 GB, and only 665MB as a rar archive. but I did remove some WOV skins that seemed identical (USMC stuff). @starbucker: wingman skins remain default until selected otherwise by you in the loadout screen. INIswitch.zip
-
Making a merged install SFP1+WOV+WOE+WOI For each folder: Sounds - Use only the folder from WOE Controls - Use only the folder from WOE Campaigns - Combine folder content from all four games (there will be no overwrites) Effects - Combine folder content from all four games (overwrites in any way are OK) Flight - Use only the folder from WOE Menu - Use only the folder from WOE * Missions - Combine folder content from all four games (overwrites in any way are acceptable) ** NetCache - empty Objects - Combine folder content from all four games (overwrites in any way are OK) *** PilotData - Use only the folder from WOE ScreenShots - empty System - Use only the folder from WOE Terrain - Combine folder content from all four games (there will be no overwrites) Speech - Use only the folder from WOE ROOT (not in any folder) - use the WOI exe (blue icon), but the other files from WOE * you might want to add LoadoutMercPad.bmp from SFP1 (mercenary invoice) ** or rename the mission files as you please to prevent overwrites *** special notes on the objects folder: the ObjectData.cat's have to be combined this way: Download CatPack.exe. Take the ObjectData.cat files from WOV+WOE+WOI and extract the contents (drag n drop one after another of these cat files on CatPack to extract). Throw all the extracted files together in a folder, throw in WOE's files last and let them overwrite. When done copy CatPack.exe to this folder and run it, it will make a CatPack.cat file. Rename CatPack.cat to ObjectData.cat, put this in your merged game's objects folder. Optional - For an extra neat install: - Some of the extracted files of the ObjectData.cat's are actually decals that are better moved to the objects\decals folder: you will get overwrites, this is OK, this just removes duplicates. - Pack all files in the objects\decals folder with CatPack (as above) Rename CatPack.cat to ObjectData01.cat, put this in your merged game's objects folder. You can delete the old decals folder - Download the INIswitch utility to add and remove plane-sets from the game, you can optionally add the proper 'planename'_data.ini files to this utility to make it 100% functional (these ini's are in the original ObjectData.cat's). - You can optionally remove all multilanguage files: Cat's/Dll's that start with UKenglish, French, German, Italian, Spanish. (but not USenglish..!) CatPack.zip
-
Reading all that.. my country must be a little behind in what the computer shops offer.. So I rented Chuck Norris at the video store, I hope it works.
-
I compared the weapondata.ini from WOI with the one from WOE. And the WOE ini contains all the entries of WOI and a few more. So no need to merge ini's just take the WOE file. Here is the utility I made to add/remove the stock planesets to a merged install, HOWEVER: I posted it without the required ini-datafiles, so if you want to use it you have to add them yourself. Hmm, actually I think the ini-switch tool also functions quite a bit without the data-ini-files, adding these files will give it the functionality to change the nationality of the aircraft. INIswitch.zip
-
I have some odd FPS drops on an nvidia 6200 256MB (somewhat of a low end card) F-15A external view, looking from the top, with only plain ground below 1024x768,32bpp,2xfsaa -medium graphics options but shadows low (off) - 44 FPS (that is good) -medium graphics options but shadows med (on) - 12 FPS (unacceptable) -medium graphics options but shadows med (on) - 17 FPS (using old shadow lod) -low graphics options but shadows med (on) - 17 FPS (what!) On the other similar PC, but with an nvidia 7600GS 256MB (a newer low/mid end card) things behaved not so extreme, but still: -medium graphics options but shadows low (off) - 67 FPS -medium graphics options but shadows med (on) - 38 FPS -low graphics options but shadows med (on) - 49 FPS ...I am so stubborn on this since even the ancient fighters anthology engine had shadows, and now after half a dozen of TNT/Geforce generations I'd better turn shadows off....
-
Some suggestions on this 1) it is better to make the final overwrite of the files from the objectdata.cats from WOE (not WOI) as WOE has more weapondata entries then WOI. 2) You can optionally pack everyting in the objects\decals folder to objectdata01.cat. But you have to use the WOI.exe to start the game, only then it reads the decals from that file. 3) The only downside compared to running the games separate is the fact that the random single mission generator gives you adversaries that not really fit the environment. (UK harriers and Egyptian Desert camo MiG's in Vietnam for example). It depends on what ini files you packed in the cat file (WOE/WOV/WOI) (I have solved this by a small utility I made that lets you easily add/remove planesets, but I am afraid it comes with ini files (xxx_data.ini) that are game content, and not free to share.. or are they?)
-
Good to hear your succes on building a merged install. I also could not resist and worked on a merged install myself. It seems it is reasonably easy: all is done and working here after just one evening of swapping files. It certainly illustrates just what a flexible game engine TK has created. the actual game engine files (.dll) seem identical in all three games. Indeed the CatPack program is quite indispensable for this matter (it was made it just in time). You can also pack all decals (5000+ files) in ObjectData01.cat, but you have to use the WOI executable for the game to use that cat file. Finally a high quality 'Jane's Fighters-Anthology' successor! I made the merged install as compact as it could possibly be; attached the installation folder index. MERGED.TXT
-
Is there any chance from future WOV/WOE patches?
gerwin replied to Luiz Carlos's topic in General Discussion
Same for me, First I did not touch WOI because it was incompatible with all my addon stuff. But since the august patch I give it another try and now it is the other way around, the opponents behave much more interesting, and that seems to count for more then being able to fly just that particular aricraft in WOE... I suppose that is a good thing.