

starfighter006
-
Posts
30 -
Joined
-
Last visited
Content Type
Profiles
Forums
Gallery
Downloads
Store
Everything posted by starfighter006
-
Thanks for your quick answers. I will just imagine the hook in my mind then Anyways, landings on carriers are no problem anymore if anyone else still uses this model.
-
Hello, I am unable to land on a carrier with this model. I experimented with the [Tailhook] settings and found out that if I change MaxDeflection=-120.0 to MaxDeflection=60 I can easily land on a carrier. Unfortunately, this means that the extended hook is not visible on the outside views. Maybe anyone has any tips on how to completely solve this issue? Thanks and kind regards!
-
F-5A Hellenic Air Force Pack Version
starfighter006 replied to sophocles's topic in File Announcements
Hello, since I downloaded the previous version just some days ago, I wonder if this version is more about adding new aircrafts or have the previous aircrafts significantly enhanced as well? In other words, is it recommended to replace the old aircrafts or are the changes rather minor? Thanks and kind regards -
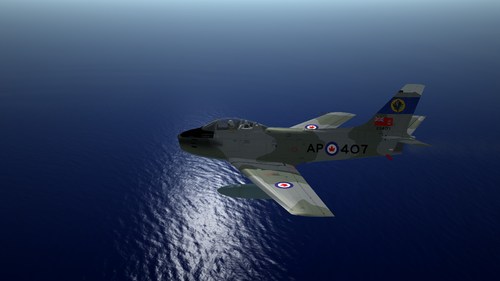 I am impressed by the sheer quantity of mods and skins for this iconic aircraft!
 -
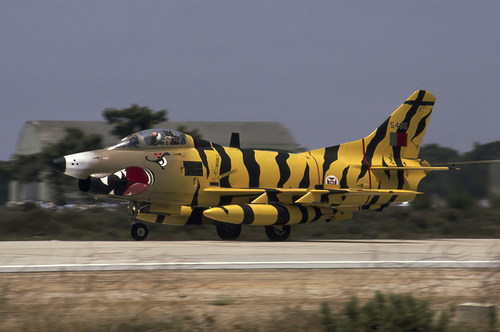 The author was not lying by stating this campaign as beta, unpolished and full of bugs. Avoid this campaign if you are unwilling to mod and correct it by yourself. If you need some inspiration for your own campaign or want to learn to make or fix a campaign, it might be useful.
 -
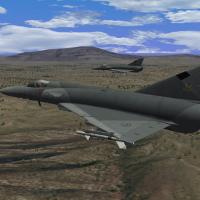 I would love to give this a great score, it has so much potential and I am sure there are many experienced people here who will have much fun with this terrain. The campaigns, objects or skins are so unpolished and full of missing items though, that you will be probably better off with just creating your own campaigns. Not to mention that there is no readme. So if you are a newbie and have no experience in modding or are unwilling to spend a lot lot of time in fixing ini files, you should probably avoid this or just just fly around to appreciate the landscape.
 -
VF- 51, VF-11,VF-121 Skins and INI Pack for F-11F-1 Tiger
starfighter006 reviewed Spectre8750's file in F-11
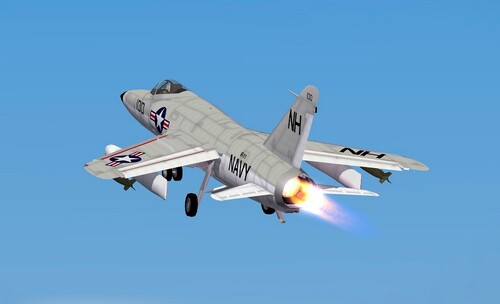 The description states that it is suitable for any Strike Fighters 2 Series. Unfortunately it requires the cockpit of a F-100A, which is only available in Expansion Pack 2, I believe. It would have been very helpful if the pre-requisities would have been clearly stated in the description.
 -
 It makes the game better looking and more realistic regarding bullet impacts, etc. A must-have mod, especially on modern PCs
 -
.thumb.jpg.2a7f3d61575e2744d503fd5ec6e58099.jpg) It makes the game better looking, especially on modern PCs. A must-have mod.
It makes the game better looking, especially on modern PCs. A must-have mod. -
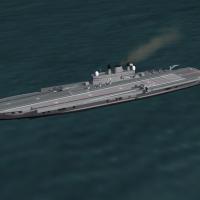 Thanks for the model, a great enhancement for what-if scenarios. I am using it as a main carrier for a fantasy fleet in campaign.
 -
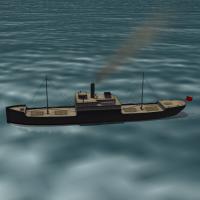 Thanks for the conversion! Very versatile model to add immersion. I am using it as a supplementary freighter in a carrier fleet.
 -
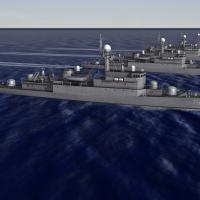 Thanks a lot! These are good looking models!
 -
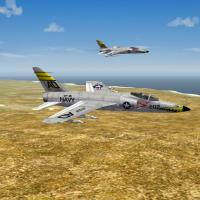 Thanks for doing the enhancements! It‘s a great model for what-if scenarios. I integrated it successfully as a carrier plane in a campaign for a fantasy fleet.
 -
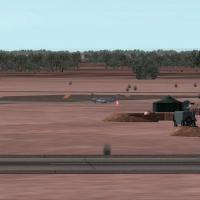 It is a great terrain! I was able to integrate it into the Dhimar campaign and I am looking forward playing it. Thanks a lot!
 -
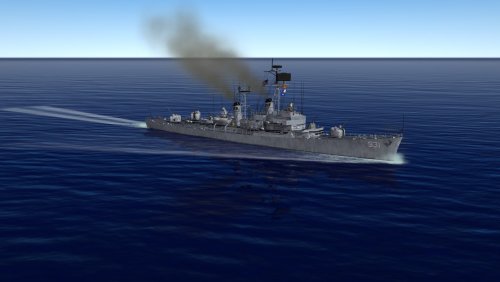 Thanks for the conversion! It is a good looking model!
 -
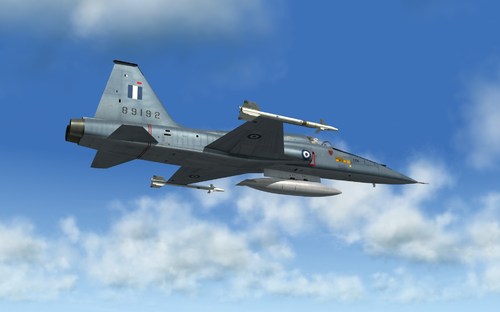 Fantastic quality and it looks gorgeous. The model is very detailed and has additional animations like a chute. Maybe I would tone down the glass reflections a notch, because are a bit distracting. And I wish the ensigns would have been separate graphics, so that they could be exchanged. But besides that, this is a must-have mod.
 -
For anyone who wants to download this mod: You only need to download the YAP3 - Mission Set 9 Part. It includes the required LOD file. It's much smaller in size compared to the main part, which does not even include the file. You can find it on the YAP revamp page under "Legacy". I don't know if it's allowed to post external links here, but you can easily google it. It's a free download.
-
Here are some samples of how they sound: A1LDCS022.wav W1FLGT009.wav T1LEAD020.wav T1GROP021.wav
-
I just did it for fun to give my little fantasy mod a bit more flavor. I didn’t want to do everything by hand, so I came up with this solution. I am not planning to do a historical mod using some historical callsigns or anything. I just like to give my games a bit of a personal touch But I thought it might be useful to others too. You can just copy the script to a file and try it out.
-
Ah, I see, thanks! I will take a look at the ini files, when I have downloaded it
-
Hi all, with the help of AI (Google Gemini), I was able to create some powershell scripts to mass-exchange the audio files for callsigns, i.e. T1FLGT, T1Grop, T1Lead, F1Lead, A1LDCS, by using the windows internal AI voices. Of course, the speech isn't perfect, but it's good enough for me to give the game some individual flavour. I tested it now within several missions and had no issues or CTDs so far. Maybe this is of interest to some of you, so I will share it with you. I did this on Windows 11 using Windows powershell, so this might not work on older operating systems. In general to identify which AI voices are available on your system, you can use this command in the powershell: Add-Type -AssemblyName System.Speech; (New-Object System.Speech.Synthesis.SpeechSynthesizer).GetInstalledVoices() | ForEach-Object { $_.VoiceInfo.Name } On my system, it will show the following voices: Microsoft Hedda Desktop Microsoft Stefan Microsoft David Microsoft Katja Microsoft David Desktop Microsoft Zira Desktop Note: You might not have all voices on your system available at first, due to some Windows restrictions, but you can change that. Unfortunately, I don't remember what you had to do, but I did ask the AI about it and it provided me with the corresponding commands/script. I generally recommend to execute the powershell with Admin rights. This way, you are able to do more modifications to your system, especially regarding the adding of AI voices. Now let's get to the scripts. Below you will find a script to create 140 T1FLGT WAV files for your callsigns, e.g. Maverick 1 - 4, Hunter 1 - 4, etc... Here is a quick description of what you need to do: $Callsigns -> Here you enter your list of Callsigns you want to create $Voice -> Here you define your desired AI Voice And that's basically it. You save your script as "YourScript.ps1" and execute it within the powershell by entering the command: .\YourScript.ps1 The script will create the required T1FLGT001 - T1FLGT140 WAV Files for you, which you will need to copy to the Speech sub-folder of your Mod. The script also gives some basic radio noise and a volume boost. You can change this in $noise and $boost. In the same manner, you can create D1FLGT and W1FLGT files. You just need to rename the file in $Filename accordingly and change the voice from female to male AI, for example. Important note: Please be aware that if you also want to change the subtitles, you have to modify the SPEECHTEXT.STR with a hex editor and replace the original callsigns. But you have to be extra careful, as the string length of each callsign must never change, otherwise the subtitles will break. This means, that you need to add empty spaces (i.e. by pressing the space bar) to fill out the characters to exactly match the string size of your old callsign if your new callsign is shorter or you must abbreviate if it is to long. So again, if the string size is changed, i.e. lengthened or shortened, subtitles will break. I was able to change them all, so it is possible, but I recommend making backups inbetween. Script for changing T1FLGT (or D1FLGT, W1FLGT) # --- HIER DEINE OPTIMIERTE RUFZEICHEN-LISTE --- $Callsigns = @( # DefaultCallsign "Ente", "Gänserich", "Er-pel", "Schwan", "Kücken", # CallsignSet001 "Donald", "Dagobert", "Gustav", "Emil", "Fritz", # CallsignSet002 "Entenhausen", "Erpelheim", "Gansbach", "Erpelfurt", "Hundenhausen", # CallsignSet003 "Falke", "Adler", "Möwe", "Mäusebussard", "Habicht", # CallsignSet004 "Tiger", "Panther", "Puhma", "Löwe", "Leopard", # CallsignSet005 "Haifisch", "Walross", "Delphin", "Walfisch", "Hammerhai", # CallsignSet006 "Wolf", "Marder", "Luchs", "Fuchs", "Eule" ) $Voice = "Microsoft Hedda Desktop" Write-Host "Generiere 140 Funk-Dateien (4 Durchgänge für die Nummern 1 bis 4)..." Write-Host "------------------------------------------------------------------" Add-Type -AssemblyName System.Speech $Synth = New-Object System.Speech.Synthesis.SpeechSynthesizer try { $Synth.SelectVoice($Voice) } catch { Write-Host "Hinweis: Stimme '$Voice' nicht gefunden." -ForegroundColor Yellow } # Funktion für den sauberen PCM-Header und maximalen Lautstärke-Boost function Clean-WavForStrikeFighters { param([string]$FilePath) $bytes = [System.IO.File]::ReadAllBytes($FilePath) $rand = New-Object System.Random # Wir suchen dynamisch nach dem "data"-Chunk im Original-Header $dataPos = -1 for ($i = 12; $i -lt $bytes.Length - 8; $i++) { if ($bytes[$i] -eq 100 -and $bytes[$i+1] -eq 97 -and $bytes[$i+2] -eq 116 -and $bytes[$i+3] -eq 97) { # "data" in ASCII $dataPos = $i break } } # Falls kein gültiger Audio-Datenblock gefunden wurde, abbrechen if ($dataPos -eq -1) { return } # Die Position, an der die echten Audiodaten beginnen (nach "data" + 4 Bytes Längenangabe) $audioStart = $dataPos + 8 # Wir bearbeiten NUR die echten Audiodaten als saubere Ganzzahlen for ($i = $audioStart; $i -lt $bytes.Length - 1; $i += 2) { # 16-Bit Sample sauber auslesen $sample = [BitConverter]::ToInt16($bytes, $i) # Reiner, stabiler Lautstärke-Boost ohne Fließkomma-Drift + leichtes Funkrauschen $noise = $rand.Next(-80, 80) $boosted = [int]($sample * 3.5) + $noise # Harter Schutz vor Übersteuerung (Clipping-Grenzen für Int16) if ($boosted -gt 32767) { $boosted = 32767 } if ($boosted -lt -32768) { $boosted = -32768 } # Zurückschreiben in das originale Byte-Array $newBytes = [BitConverter]::GetBytes([int16]$boosted) $bytes[$i] = $newBytes[0] $bytes[$i+1] = $newBytes[1] } # Überschreibt die Datei mit dem perfekt erhaltenen Original-Header und den modifizierten Daten [System.IO.File]::WriteAllBytes($FilePath, $bytes) } # Globaler Dateizähler (für 001 bis 140) $FileCounter = 1 # Äußere Schleife: Die Nummern 1 bis 4 durchgehen for ($FlightNum = 1; $FlightNum -le 4; $FlightNum++) { Write-Host "--- Starte Durchgang für Nummer $FlightNum ---" -ForegroundColor Cyan # Innere Schleife: Alle 35 Rufzeichen sprechen for ($i = 0; $i -lt $Callsigns.Count; $i++) { $Name = $Callsigns[$i] # Setzt den Namen und die aktuelle Flight-Nummer (1, 2, 3 oder 4) fließend zusammen $SpokenText = $Name + " " + $FlightNum # Formatiert den globalen Zähler dreistellig (z.B. 001, 036, 071, 106) $NumString = $FileCounter.ToString("000") $Filename = "T1FLGT$NumString.wav" Write-Host "Erstelle ($FileCounter/140): '$Name $FlightNum' -> $Filename" $FullPath = Join-Path $PSScriptRoot $Filename $Format = New-Object System.Speech.AudioFormat.SpeechAudioFormatInfo(11025, 16, 1) $Synth.SetOutputToWaveFile($FullPath, $Format) $Synth.Speak($SpokenText) $Synth.SetOutputToNull() Clean-WavForStrikeFighters -FilePath $FullPath # Zähler für die nächste Datei erhöhen $FileCounter++ } } Write-Host "------------------------------------------------------------------" Write-Host "Fertig! Es wurden exakt 140 fortlaufende Dateien erzeugt." Read-Host "Drücken Sie Enter zum Beenden..." For creating F1Lead, A1LDCS, T1Lead or T1Group, I created a slightly different script, because I wanted to use e.g. the german word "Rottenführer" instead of the english word "lead". Therefore, the script creates two words "Rottenführer" and the callsign and merges it to one WAV file. This was necessary to put a little pause between both word to make it sound better. However, in your desired language, this might not necessary and you can probably change the order or just adapt the previous script. But here is a description on how the below script works: $Callsigns -> Again your list of callsigns $VoiceDE -> The desired AI voice $A1Filename -> "A1LDCS$NumString.wav" -> It created A1LDCS001 - A1LDCS036 $F1Filename -> "F1LEAD$NumString.wav" -> I used the same voice also for F1 Lead, so it just copies the files and renames them. $Synth.Speak("Rottenführer") -> Here you can enter whatever word you like in your preferred language. # --- DEINE RUFZEICHEN-LISTE (35 Einträge) --- $Callsigns = @( # DefaultCallsign "Ente", "Gänserich", "Er-pel", "Schwan", "Kücken", # CallsignSet001 "Donald", "Dagobert", "Gustav", "Emil", "Fritz", # CallsignSet002 "Entenhausen", "Erpelheim", "Gansbach", "Erpelfurt", "Hundenhausen", # CallsignSet003 "Falke", "Adler", "Möwe", "Mäusebussard", "Habicht", # CallsignSet004 "Tiger", "Panther", "Puhma", "Löwe", "Leopard", # CallsignSet005 "Haifisch", "Walross", "Delphin", "Walfisch", "Hammerhai", # CallsignSet006 "Wolf", "Marder", "Luchs", "Fuchs", "Eule" ) # Männliche deutsche Stimme für den F1-Rottenführer (Ohne Pitch-Anpassung) $VoiceDE = "Microsoft Stefan" Write-Host "Generiere 35 F1-ROTTENFÜHRER-Funkdateien mit STEFAN (100% CTD-SICHER)..." Write-Host "Erstellt parallel: A1LDCS001.wav bis A1LDCS035.wav UND F1LEAD001.wav bis F1LEAD035.wav" Write-Host "------------------------------------------------------------------" Add-Type -AssemblyName System.Speech $Synth = New-Object System.Speech.Synthesis.SpeechSynthesizer $Format = New-Object System.Speech.AudioFormat.SpeechAudioFormatInfo(11025, 16, 1) # Pfade für die temporären Schnipsel $TmpPart1 = Join-Path $PSScriptRoot "tmp_f1leader.wav" $TmpPart2 = Join-Path $PSScriptRoot "tmp_f1callsign.wav" function Merge-AndBoostWav { param([string]$Part1, [string]$Part2, [string]$OutPath) $bytes1 = [System.IO.File]::ReadAllBytes($Part1) $bytes2 = [System.IO.File]::ReadAllBytes($Part2) $rand = New-Object System.Random # Dynamischer Audio-Finder (Absoluter Schutz vor Headervarianzen) function Get-AudioPos([byte[]]$b) { for ($i = 12; $i -lt $b.Length - 8; $i++) { if ($b[$i] -eq 100 -and $b[$i+1] -eq 97 -and $b[$i+2] -eq 116 -and $b[$i+3] -eq 97) { return $i + 8 } } return -1 } $start1 = Get-AudioPos $bytes1 $start2 = Get-AudioPos $bytes2 # Sicherheits-Abbruch bei beschädigten TTS-Rohdaten if ($start1 -eq -1 -or $start2 -eq -1) { return } # --- SCHRITTSICHERES PAUSEN-KAPPEN (Noise Gate) --- # 1. Teil ("Rottenführer") hinten kappen $cutoff1 = $bytes1.Length $foundVoice1 = $false for ($i = $bytes1.Length - 2; $i -ge $start1; $i -= 2) { $sample = [math]::Abs([BitConverter]::ToInt16($bytes1, $i)) if ($sample -gt 200) { $cutoff1 = $i + 800 # Natürlicher Ausklang-Puffer if ($cutoff1 -gt $bytes1.Length) { $cutoff1 = $bytes1.Length } $foundVoice1 = $true break } } if (-not $foundVoice1) { $cutoff1 = $bytes1.Length } # 2. Teil (Rufzeichen) vorne kappen $cutoff2Start = $start2 $foundVoice2 = $false for ($i = $start2; $i -lt $bytes2.Length - 1; $i += 2) { $sample = [math]::Abs([BitConverter]::ToInt16($bytes2, $i)) if ($sample -gt 200) { $cutoff2Start = $i - 400 # Sicherheitsabstand vor Sprache if ($cutoff2Start -lt $start2) { $cutoff2Start = $start2 } if (($cutoff2Start - $start2) % 2 -ne 0) { $cutoff2Start-- } # 16-Bit Raster-Garantie $foundVoice2 = $true break } } if (-not $foundVoice2) { $cutoff2Start = $start2 } # Längenberechnungen auf das Byte genau $dataLen1 = $cutoff1 - $start1 $dataLen2 = $bytes2.Length - $cutoff2Start $totalDataLen = $dataLen1 + $dataLen2 $totalFileLen = $start1 + $totalDataLen - 8 # Neues Array initialisieren & Header klonen $outBytes = New-Object byte[] ($start1 + $totalDataLen) [Array]::Copy($bytes1, 0, $outBytes, 0, $start1) # Header-Längen mathematisch absolut exakt überschreiben $riffSize = [BitConverter]::GetBytes([int32]$totalFileLen) $outBytes[4] = $riffSize[0]; $outBytes[5] = $riffSize[1]; $outBytes[6] = $riffSize[2]; $outBytes[7] = $riffSize[3] $dataSize = [BitConverter]::GetBytes([int32]$totalDataLen) $outBytes[$start1 - 4] = $dataSize[0]; $outBytes[$start1 - 3] = $dataSize[1]; $outBytes[$start1 - 2] = $dataSize[2]; $outBytes[$start1 - 1] = $dataSize[3] # Daten nahtlos und phasenkorrekt verbinden [Array]::Copy($bytes1, $start1, $outBytes, $start1, $dataLen1) [Array]::Copy($bytes2, $cutoff2Start, $outBytes, ($start1 + $dataLen1), $dataLen2) # Audio-Filter & Funk-Effekt (3.5x Boost + leichtes Rauschen) for ($i = $start1; $i -lt $outBytes.Length - 1; $i += 2) { $sample = [BitConverter]::ToInt16($outBytes, $i) $noise = $rand.Next(-80, 80) $boosted = [int]($sample * 3.5) + $noise if ($boosted -gt 32767) { $boosted = 32767 } if ($boosted -lt -32768) { $boosted = -32768 } $newBytes = [BitConverter]::GetBytes([int16]$boosted) $outBytes[$i] = $newBytes[0] $outBytes[$i+1] = $newBytes[1] } [System.IO.File]::WriteAllBytes($OutPath, $outBytes) } # Hauptschleife über alle 35 Rufzeichen for ($i = 0; $i -lt $Callsigns.Count; $i++) { $Callsign = $Callsigns[$i] $NumString = ($i + 1).ToString("000") # Pfade für beide Dateitypen definieren $A1Filename = "A1LDCS$NumString.wav" $F1Filename = "F1LEAD$NumString.wav" $A1Path = Join-Path $PSScriptRoot $A1Filename $F1Path = Join-Path $PSScriptRoot $F1Filename Write-Host "Erstelle ($($i+1)/35): Stefan -> 'Rottenführer' + '$Callsign' -> $A1Filename & $F1Filename..." try { $Synth.SelectVoice($VoiceDE) } catch {} # Teil 1: Das Wort "Rottenführer" generieren $Synth.SetOutputToWaveFile($TmpPart1, $Format) $Synth.Speak("Rottenführer") $Synth.SetOutputToNull() # Teil 2: Das jeweilige Rufzeichen generieren $Synth.SetOutputToWaveFile($TmpPart2, $Format) $Synth.Speak($Callsign) $Synth.SetOutputToNull() # Erst die primäre A1LDCS-Datei schreiben (Stream wird danach sofort geschlossen!) Merge-AndBoostWav -Part1 $TmpPart1 -Part2 $TmpPart2 -OutPath $A1Path # Dann die fertige, fehlerfreie Datei direkt als F1LEAD duplizieren Copy-Item -Path $A1Path -Destination $F1Path -Force } # Endgültiges Aufräumen der Temporärdateien if (Test-Path $TmpPart1) { Remove-Item $TmpPart1 } if (Test-Path $TmpPart2) { Remove-Item $TmpPart2 } Write-Host "------------------------------------------------------------------" Write-Host "Erfolg! Alle 70 Dateien (35x A1LDCS + 35x F1LEAD) wurden absolut CTD-sicher erzeugt." Read-Host "Druecken Sie Enter zum Beenden..." In the end, I have now all my custom callsigns in voice and subtitles and it was fun doing it. I hope, this information might be useful to some, but do it at your own risk You can play around with it if you are familiar with scripting and modify the voices further, e.g. by changing the pitch or other parameters. It's up to you. Thanks and kind regards.
-
This looks like a great enhancement! I am planning to download it, but I was wondering if it is compatible with following mods: Desert Terrain 4 Desert Terrain V.4 https://combatace.com/files/file/14551-desert-terrain-v4/ Desert 4 Mountain Regions+ Addon V.1.0 https://combatace.com/files/file/14702-desert-4-mountain-regions-addon/ Does anyone know? Thanks and kind regards
-
Desert 4 Mountain Regions+ Addon
starfighter006 commented on Centurion-1's file in Tilesets for Terrains
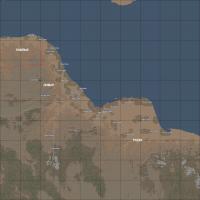 This and the Desert Terrain 4 Mod are my first Mods I downloaded from this page, so thank you all very much for modding this fantastic game I am very eager to use this Terrain in my first ever campaign, which would be the "Burning Sands" Dhimar campaign. So, if I understood correctly, all I need to do is: 1. Set "CampaignMap=DESERT4" in Campaign1.ini 2. Replace all "BaseArea" entries with the airfield names in Campaign1_Data.ini with those from Desert4_Target.ini, e.g. Replace "BaseArea=D3 Airfield" by "BaseArea=Dhimaq Airbase" Is this correct or do I need to do additional changes? Many thanks an kind regards!
 -
Modding of STR Files in SF2
starfighter006 replied to starfighter006's topic in Mods & Skinning Discussion
Ah, that clarifies it! Thank you very much! -
Modding of STR Files in SF2
starfighter006 replied to starfighter006's topic in Mods & Skinning Discussion
Hello and thank you for your quick and detailed answer! Yes, I already did what you all mention. I also noticed that you can just use the name tag and it is displayed in the GUI, like so: [Medal007] Name=This is not only the ID, but it can also be shown as text in the GUI PilotStatus=0 CanBeMultiple=TRUE AwardImage=PurpleHeart_Award.bmp Citation=PurpleHeart.txt But this probably not now the devs intended it and I thought that maybe this might could lead to some strange behavior. As far as I understood, the STR file is used as a text reference for the medal name and is defined in Nations.ini: [Nation002] ... Medals=MedalsUSAF.ini MedalTextFile=MedalsUSAF.str In the MedalsUSAF.str File you have a mapping of medal ID from MedalsUSAF.ini to a medal name shown in the GUI, e.g. in MedalsUSAF.ini: [Medal007] Name=MEDAL_USAF_PH_NAME in MedalsUSAF.str: MEDAL_USAF_PF_NAME mapped to "Purple Heart" --> Then "Purple Heart" is the string shown on the GUI screen . But maybe it is not mandatory to do it...