

Nyghtfall
-
Posts
951 -
Joined
-
Last visited
-
Days Won
20
Content Type
Profiles
Forums
Gallery
Downloads
Store
Everything posted by Nyghtfall
-


-
This looks nice! Don't forget the small numbers on the ruddertip.
-
I know, that's tricky. That's why I made a template some time ago covering such things like tilted, staggered, staggered+tilted, different fonts, etc. :) Here are the decals: 3xx tilted without shadow (300-324) 3xx_tilted_all.7z 3xx tilted with small white shadow (300-324) 3xx_whiteshadow_tilted_all.7z Just say, if you need more.
-
I only have 4xx with red shadow tilted and 3xx with white shadow non-tilted, but I have a template for different modexstyles and can do them later today.
-
You could start learning Blender. Doing Fakepilot-stuff helps getting into it. Finding the correct position and size is easy enough with mue's LOD-viewer and exporting works with his Blender-exporter. Not exactly easy-mode, but it opens up options.
-
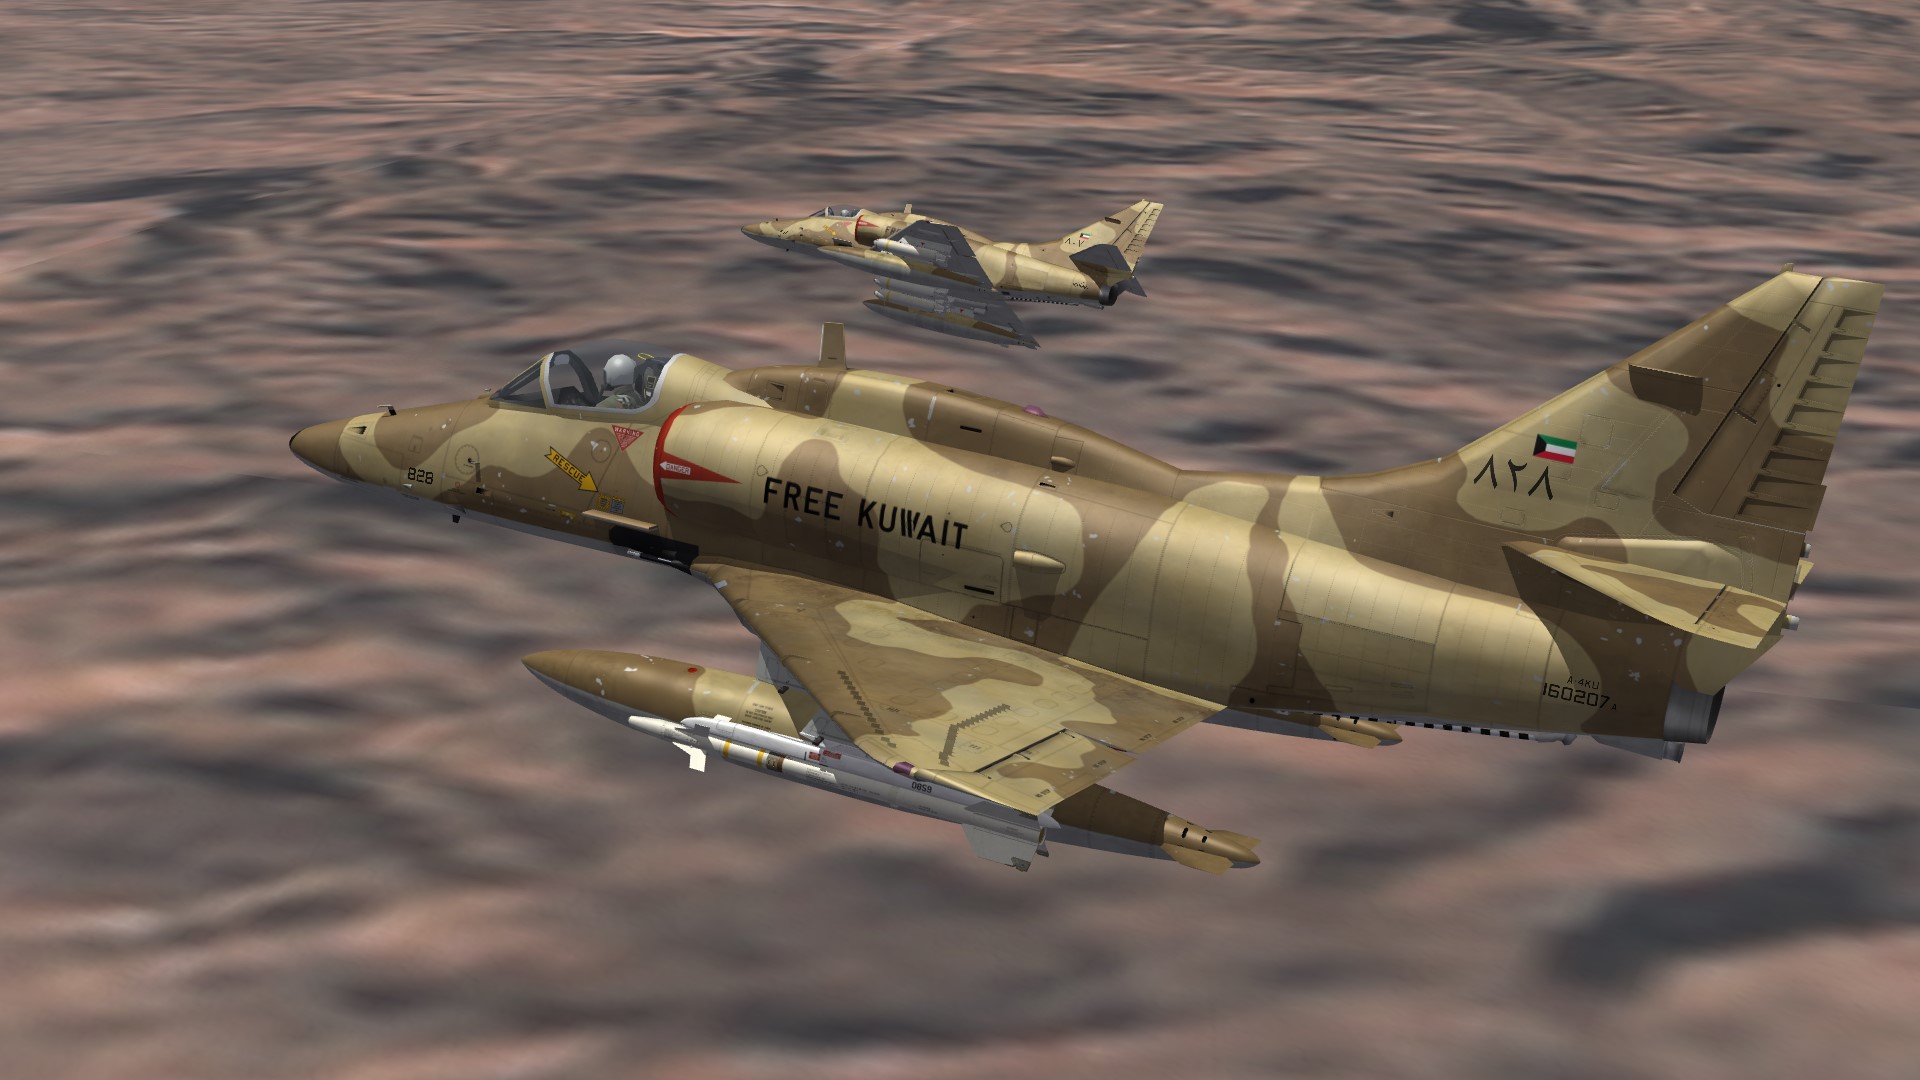
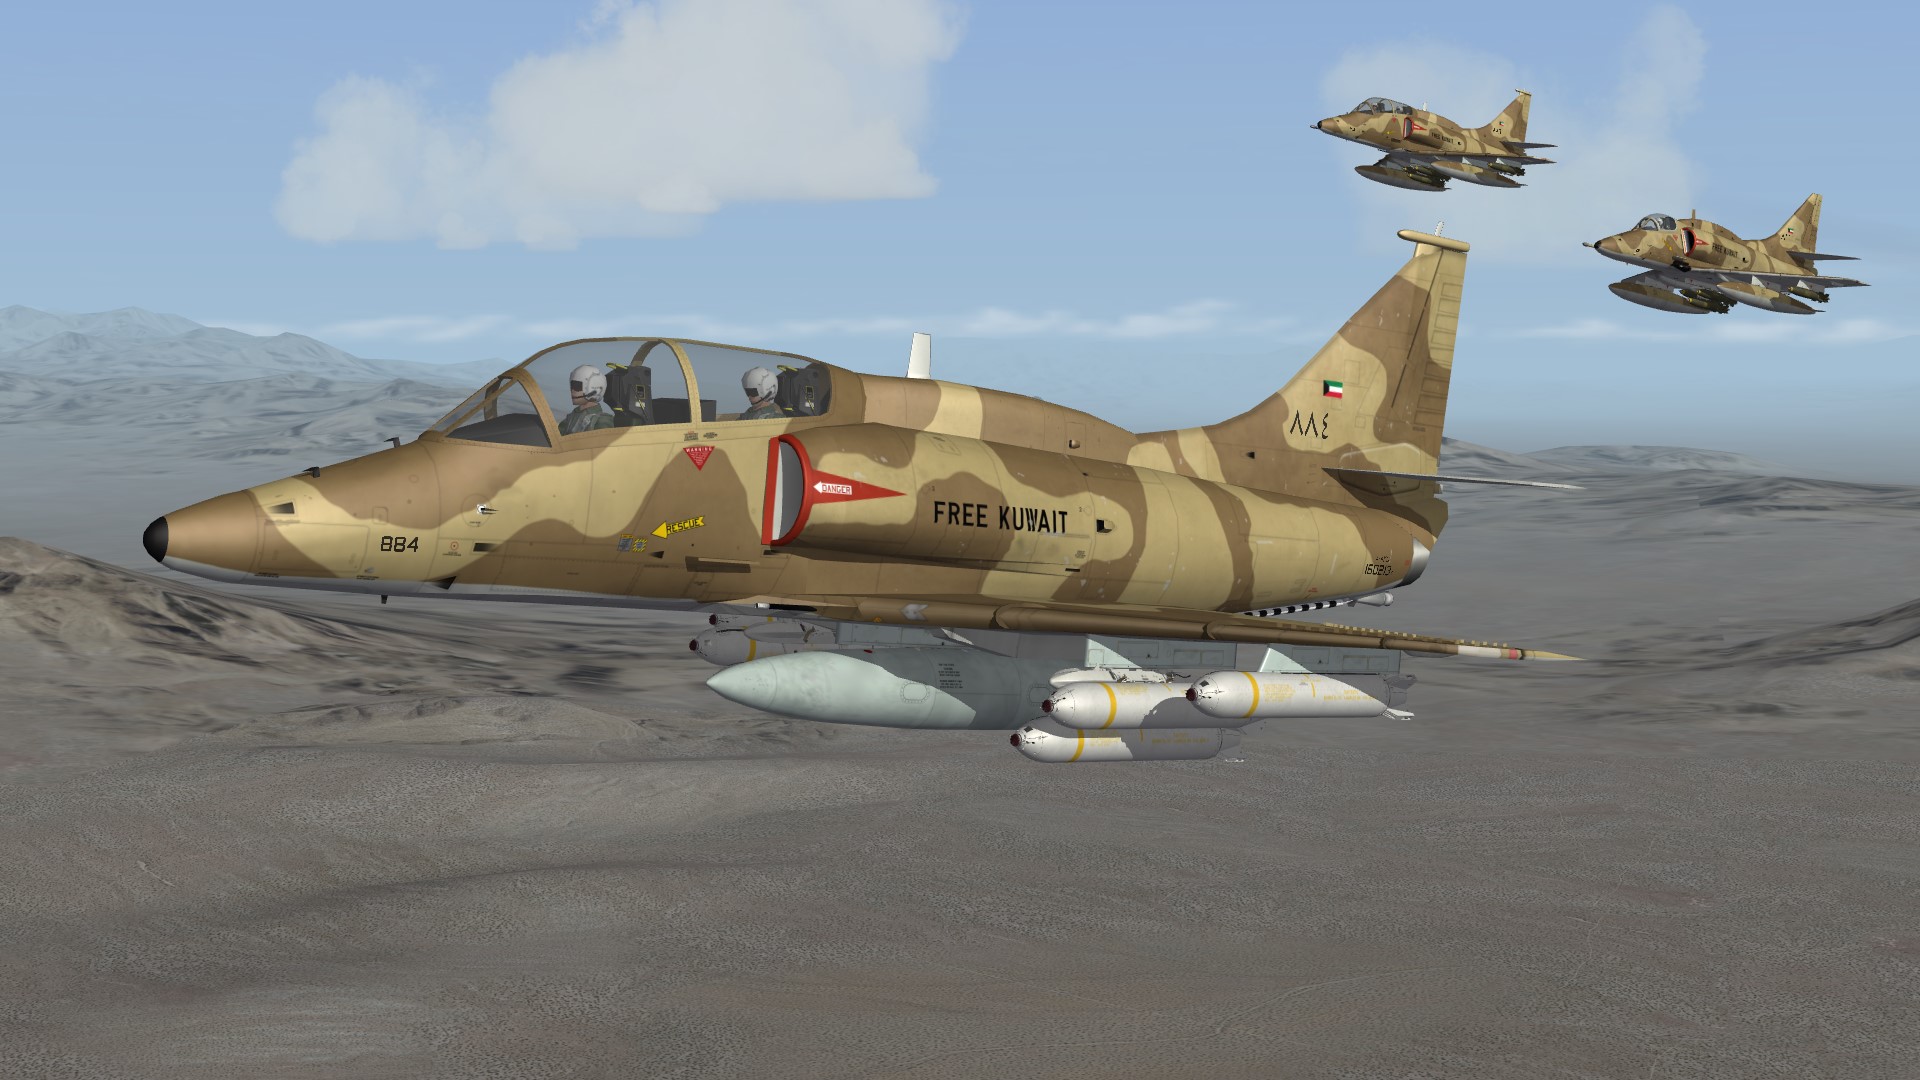
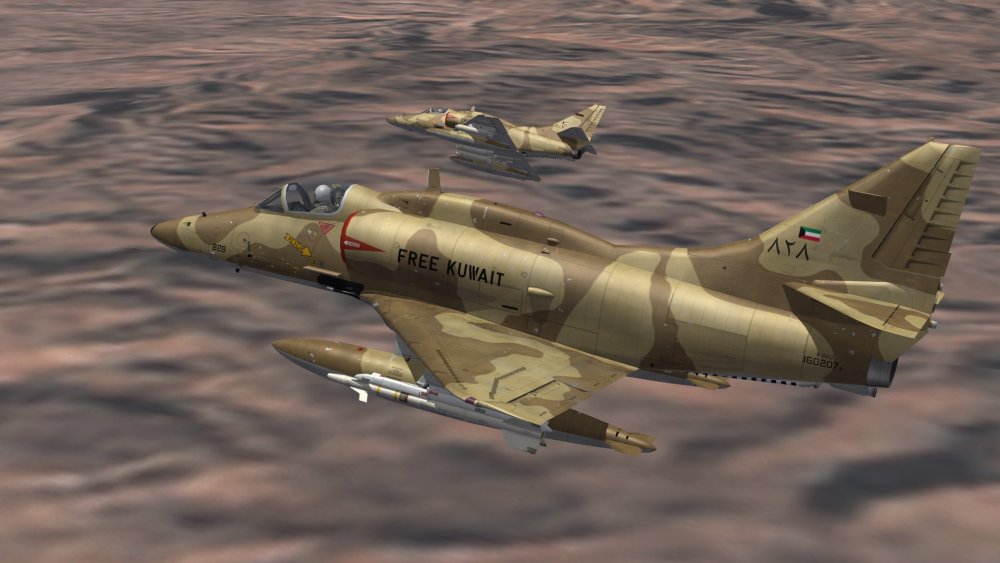
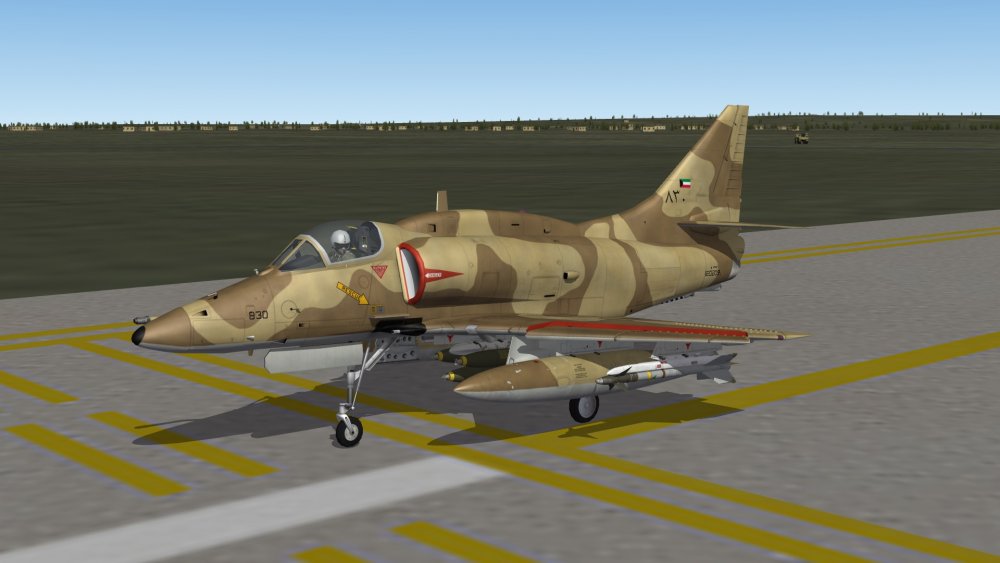
and Kuwaiti single-seaters (based on A-4K-model with ini-edits and additional/corrected stuff)
-
Stary's Mig 15 Cockpit
Nyghtfall replied to Heck's topic in Thirdwire: Strike Fighters 2 Series - Mods & Skinning Discussion
...or you could simply set the type to inactive to get rid of it in SF2. Instrument[xxx]=Mirror01 .... [Mirror01] Type=inactive NodeName=mirror_mounting -
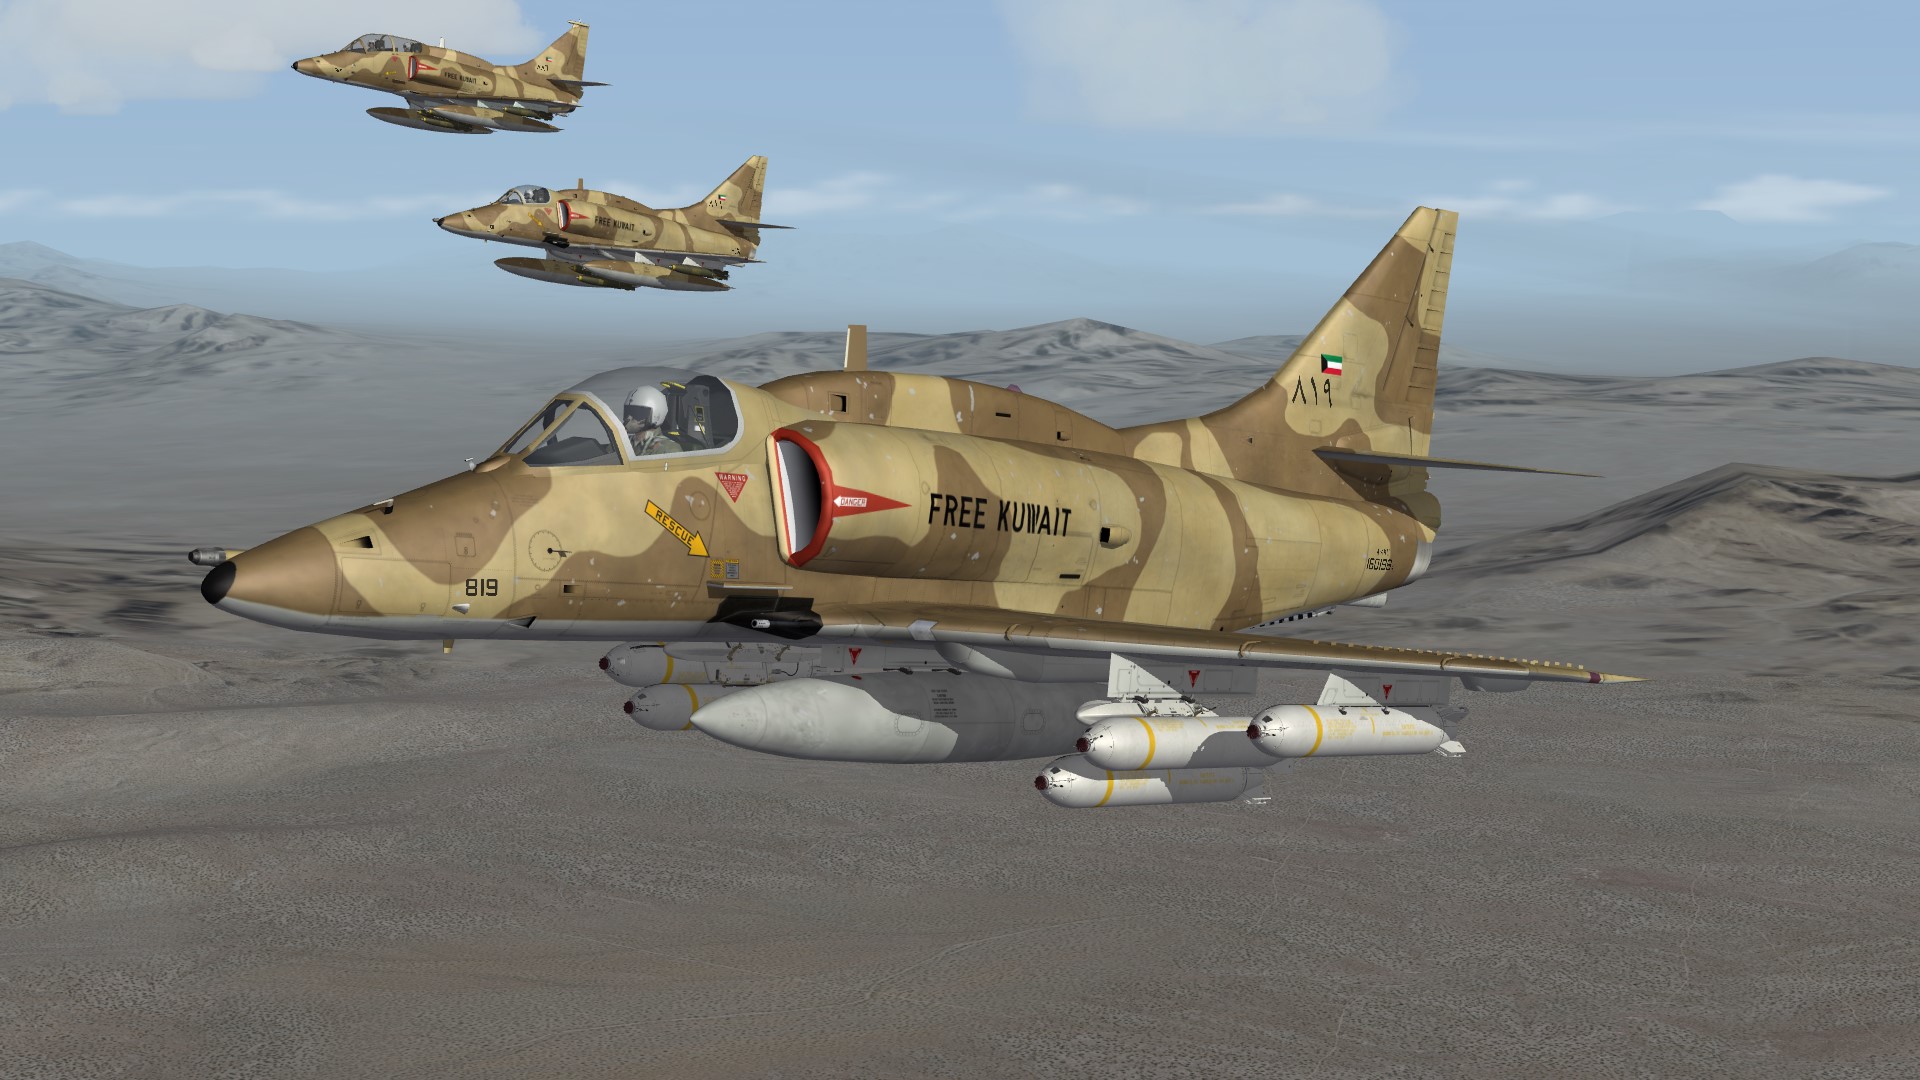
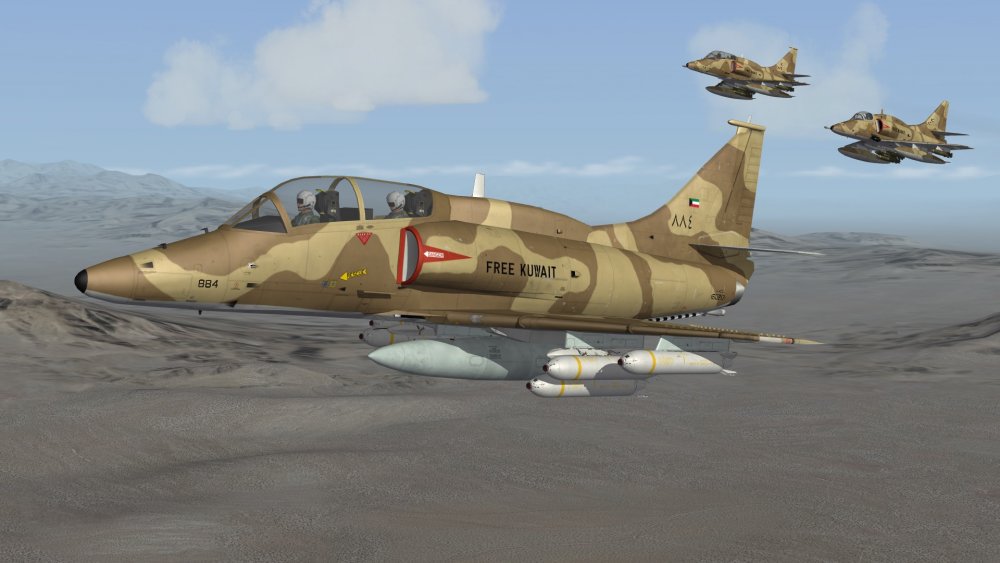
Kuwaiti 2-seater

-
new Tornado 3d model
Nyghtfall replied to guuruu's topic in Thirdwire: Strike Fighters 2 Series - General Discussion
Looks interesting. Too bad we need the 3D-files for the cockpit, though. -
Getting there,

-
LOD Exporter for Blender
Nyghtfall replied to mue's topic in Thirdwire: Strike Fighters 2 Series - Mods & Skinning Discussion
Good to see more people starting to play around with Blender. I learn it myself mostly by trial-and-error. Doing smaller objects and fakepilot-parts has helped me a lot to learn basic things of 3D-modelling and it was and often enough still is a big struggle to get things the way I want them to be. Finding helpful tips and shortcuts to functions was a big help and makes life _a lot_ easier, when you know them. So here are some things and infos that maybe help you guys, that are complete noobs in 3D-business, like myself: Feel free to add more tips, hint and useful infos. They are always welcome! Tips: - set units to metric in your project, so you can see actual measurements of your objects. - useful tools from the tools-section include * subdivide -> split edge or face in 2 or more sections * loop cut and slide -> have a cube and cut it into 2 parts along a loop, you can then slide the cut along the object - remove double vertices: when editing stuff, you sometimes get 2 vertices that are on top of each other. Those should be removed, as they affect shading and other stuff. When in edit-mode, in 3D-view-window, select "Mesh"->"Clean Up"->"Remove Doubles". Mapping: - recalculate normals -> blender tries to find the correct direction of faces (inside/outside). Flipped faces may result in visible holes. - smooth your objects to get rid of hard edges --> "Shading/UVs" in leftside menu of 3D-view-window --> smooth faces, edges, vertices - if a vertex/edges/face does not need to be smoothed, select it and hit flat/sharp/sharp - i recommend also enable autosmooth: properties-window (right side bottom) -> select the triangle-icon and under "normals" select autosmooth and an angle (60° works mostly for me, but sometimes have to be adjusted) - unwrap-menu->unwrap: works best, if you have marked seams on your model. marked seams are the edges, the model will be cut to get the 2d mapping of your 3d object. - unwrap-menu->project from view: works best for complex objects. Attention though: if you do this for example for a cube, the top and bottom-surfaces are just a line in your 3d-view, as those face are rotated 90° to your view. the mapping of those areas is stretched in your final object and can lead to visual distortions. Shortcuts: - Numlock 1 : front view - CTRL + Numlock 1 : back view - Numlock 2 : rotate view horizontal in steps in one direction - Numlock 3 : left view - CTRL + Numlock 3 : right view - Numlock 4 : rotate view vertical in steps in one direction - Numlock 5 : View changed between Orthographic-view (like Drawings) and Perspective view (like Photos) - Numlock 6 : rotate view vertical in steps in opposite direction as "4" - Numlock 7 : top view - CTRL + Numlock 7 : Bottom view - Numlock 8 : rotate view horizontal in steps in the opposite direction as "2" editing (if the key is followed by x, y or z it only affects the according axis. you can also give a value by typing in 2.0 for example): - TAB : changes between Object- and Edit-mode - Shift + s : set cursor to a certain location or move selection to cursor --> useful for scaling, etc. - a : select everything (in edit-mode: vertices/edges/faces, in object-mode: objects) - e : extrude selection --> for example start with a circle and extrude it to get cylinder - s : scaling, "s x 2.0" for example means you scale up the x-axis of your object by factor 2.0 - g : select a vertex, edge or face and move it. - r : rotate --> you should set the cursor with "Shift + s" to set the center of your rotation - CTRL + SHIFT + b : create rounded corners from a vertex or edge. mousewheel changes number of segments ...to be continued... -
LOD Exporter for Blender
Nyghtfall replied to mue's topic in Thirdwire: Strike Fighters 2 Series - Mods & Skinning Discussion
When in Object-mode all 3 scale values of an object should always be 1.0. You can scale your object in edit-mode to the proper size (s key optional followed by x,y or z for the axis) It also helped me to set the units used to metric. So you always know how tall or long something is. -
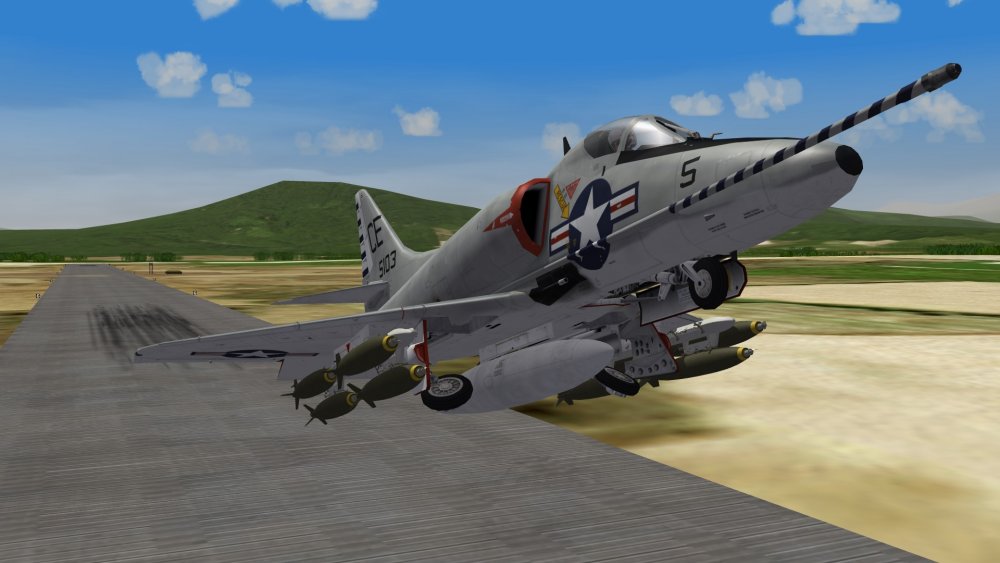
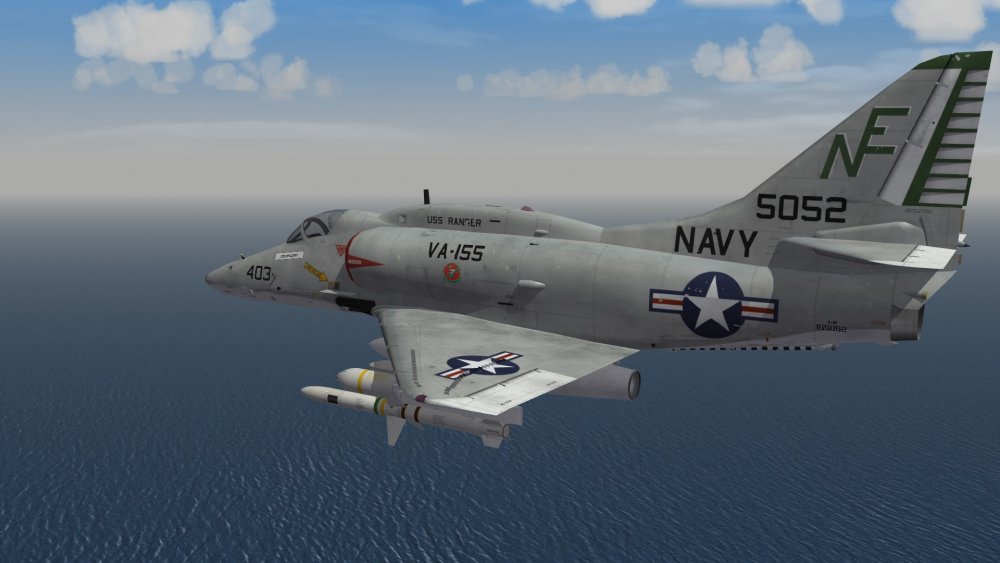
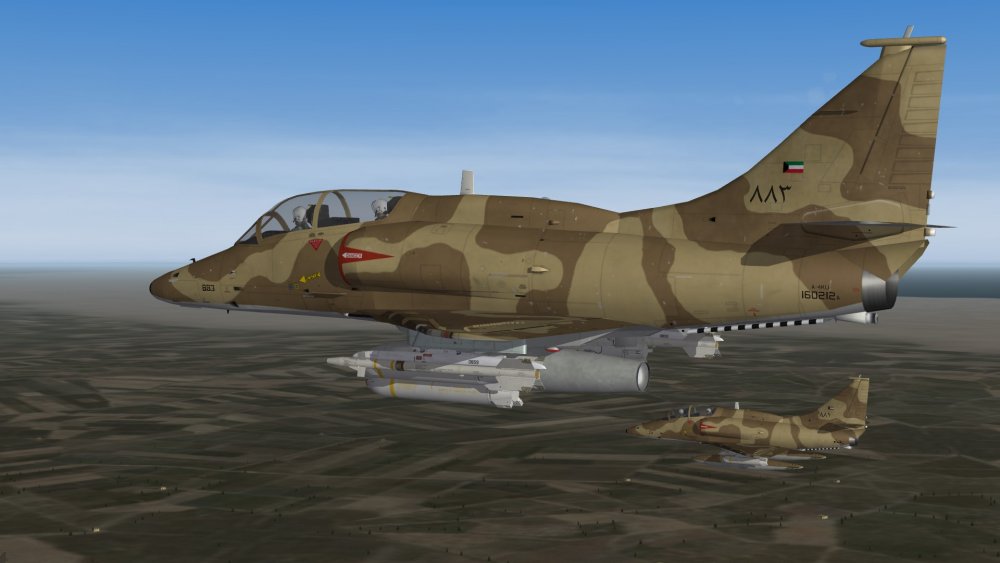
I also have an updated A-4KU/TA-4KU in the works. Although probably mostly optical updated.
-
LOD Exporter for Blender
Nyghtfall replied to mue's topic in Thirdwire: Strike Fighters 2 Series - Mods & Skinning Discussion
As expected, the fault was on my end. It works now as intended! Let me thank you again mue...this Exporter is a HUGE timesaver for me! If we ever get a "Modders Walk of Fame", you are the first one to get a star! -
LOD Exporter for Blender
Nyghtfall replied to mue's topic in Thirdwire: Strike Fighters 2 Series - Mods & Skinning Discussion
Ok, good to know. Thanks. -
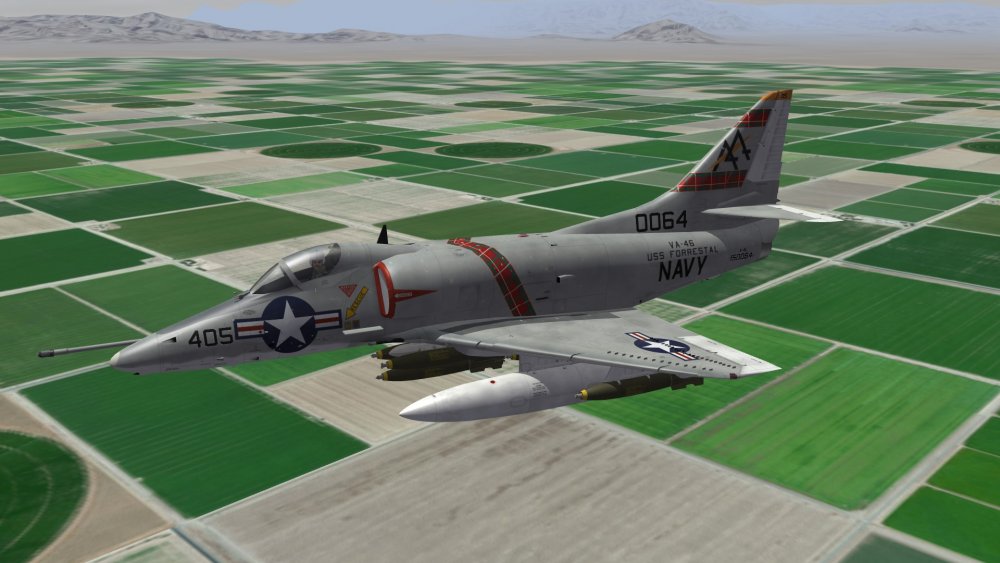
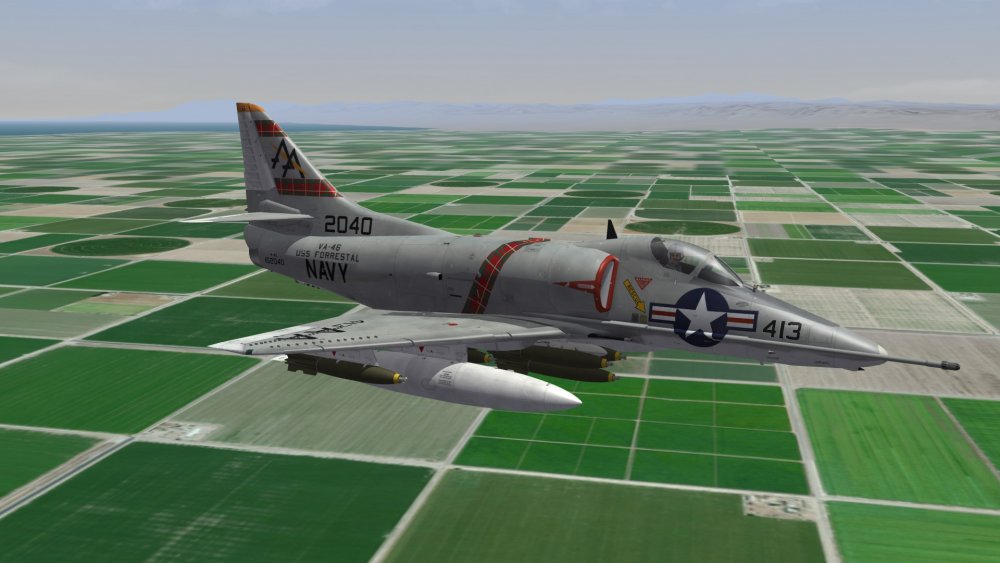
Maybe I should just release what I have done so far, rather than trying to finish all skins for the next 5 years. :) new VA-46 Clansmen.
-
LOD Exporter for Blender
Nyghtfall replied to mue's topic in Thirdwire: Strike Fighters 2 Series - Mods & Skinning Discussion
Great work! v0.2 works like a charm. Just tested some Fakepilot-stuff. Just to understand stuff correct: At the moment the Material of the parent-object is the only material that is exported? So a child-object gets the same material as the parent? Or is it 1 material per object? I seem to get the first case, but I'm not sure, if I did everything correct ;)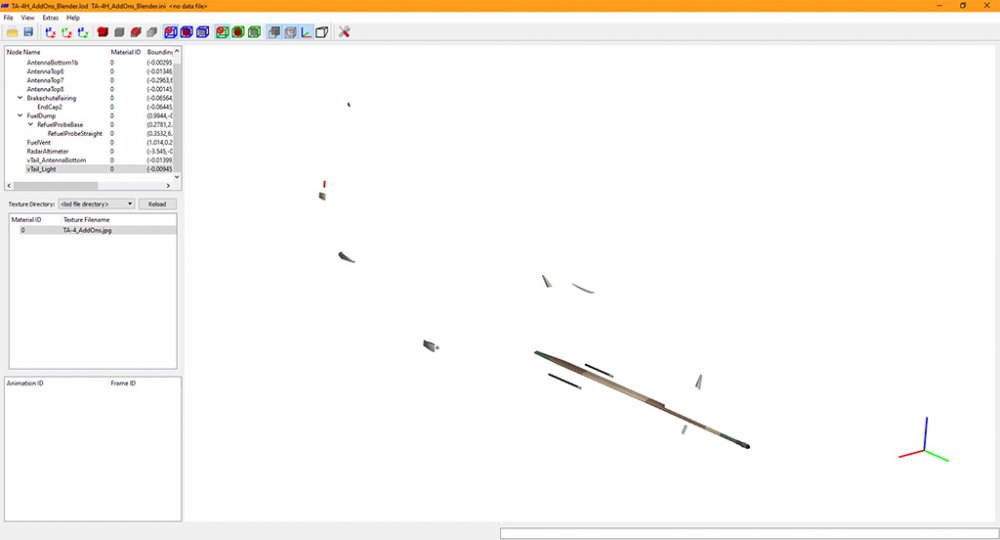
-
LOD Exporter for Blender
Nyghtfall replied to mue's topic in Thirdwire: Strike Fighters 2 Series - Mods & Skinning Discussion
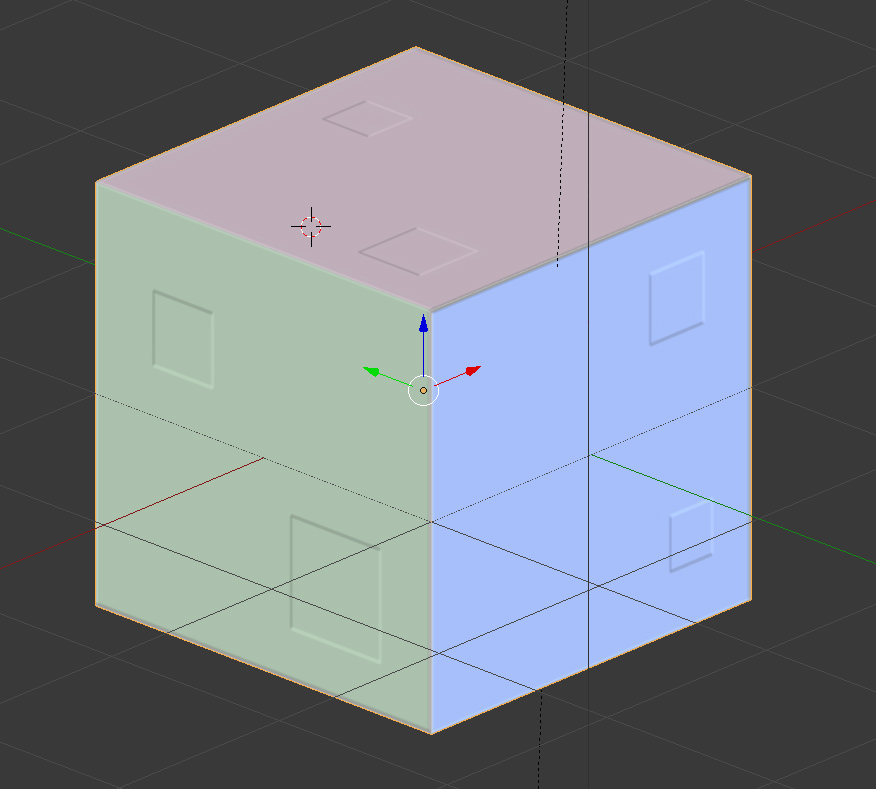
I'm still getting the following errors. Google doesn't really help here. *shrugs* I started a new test with a Cube. Cube has scale 1.0, has UV-mapping, has a material, has BM (squares in the picture), has SM (set up, but not visible?). Testfile is attached. Blender version 2.79, 64bit used. ExporterTest_Cube.7z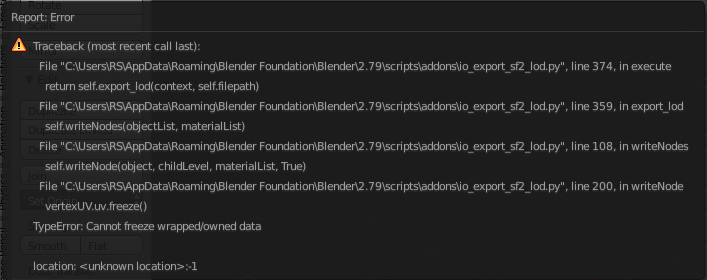

-
LOD Exporter for Blender
Nyghtfall replied to mue's topic in Thirdwire: Strike Fighters 2 Series - Mods & Skinning Discussion
Wow, this is awesome. Good job! I will run some tests later that day, when I have more time. A quick test I just run, got several errors and no loadable lod, but I'm pretty sure the fault was on my end, as I'm not that familiar with setting up materials/bump-/specmaps etc. I will also use some simple object then. :) -
Vikings - started it some time ago, but discontinued watching it. On second try i was hooked. Great actors, characters and an interesting story! Supernatural - My cousin told me to watch it and it is good, reminds me always a bit on Warehouse 13 Warehouse 13 - although older and canceled after 5th season, it's one of my favorite TV series. The characters are amazing. Not currently on Amazon Prime anymore. Sherlock - the new one from BBC, with B. Cumberbatch and M. Freeman. Another of my favorite shows. Not currently on Amazon Prime though.
-
707/E-3/C-135/E-8 pit
Nyghtfall replied to daddyairplanes's topic in Thirdwire: Strike Fighters 2 Series - General Discussion
Have a look at the cockpit of my Malaysian Skyhawks. I moved many things around to get the right look. You can move stuff around in several directions, but always 1 direction at a time. So just add the movements 3 times for the same type. Here's an example - the type is always the same, as is the nodename. Arresting Hook Lever in the Skyhawk cockpit - 1st rotated around X-axis, 2nd moved in the Y-axis and 3rd moved in Z-axis: [ArrestingHookLever_rX] Type=ARRESTING_HOOK_INDICATOR NodeName=side_control_r MovementType=ROTATION_X //1=retracted 2=deployed ValueUnit=DEG Set[01].Position=0.0 Set[01].Value=0.0 Set[02].Position=45.0 Set[02].Value=1.0 [ArrestingHookLever_Y] Type=ARRESTING_HOOK_INDICATOR NodeName=side_control_r MovementType=POSITION_Y //1=retracted 2=deployed Set[01].Position=0.0 Set[01].Value=0.0 Set[02].Position=0.01 Set[02].Value=1.0 [ArrestingHookLever_Z] Type=ARRESTING_HOOK_INDICATOR NodeName=side_control_r MovementType=POSITION_Z //1=retracted 2=deployed Set[01].Position=0.0 Set[01].Value=0.0 Set[02].Position=-0.0175 Set[02].Value=1.0 -
I guess his question is about the loop antenna under the nose.
-
Congratulion to Nyghtfall!!
Nyghtfall replied to Wrench's topic in Thirdwire: Strike Fighters 2 Series - General Discussion
Sorry for being ignorant, but of course I'd like to thank some people I met and worked with over the years and that are of course also responsible for this title! In no particular order: cocas, wrench, dtmdragon, bigstone, denissoliveira, coupi, makoto, soulfreak, ravenclaw007, eole Thank you guys! -
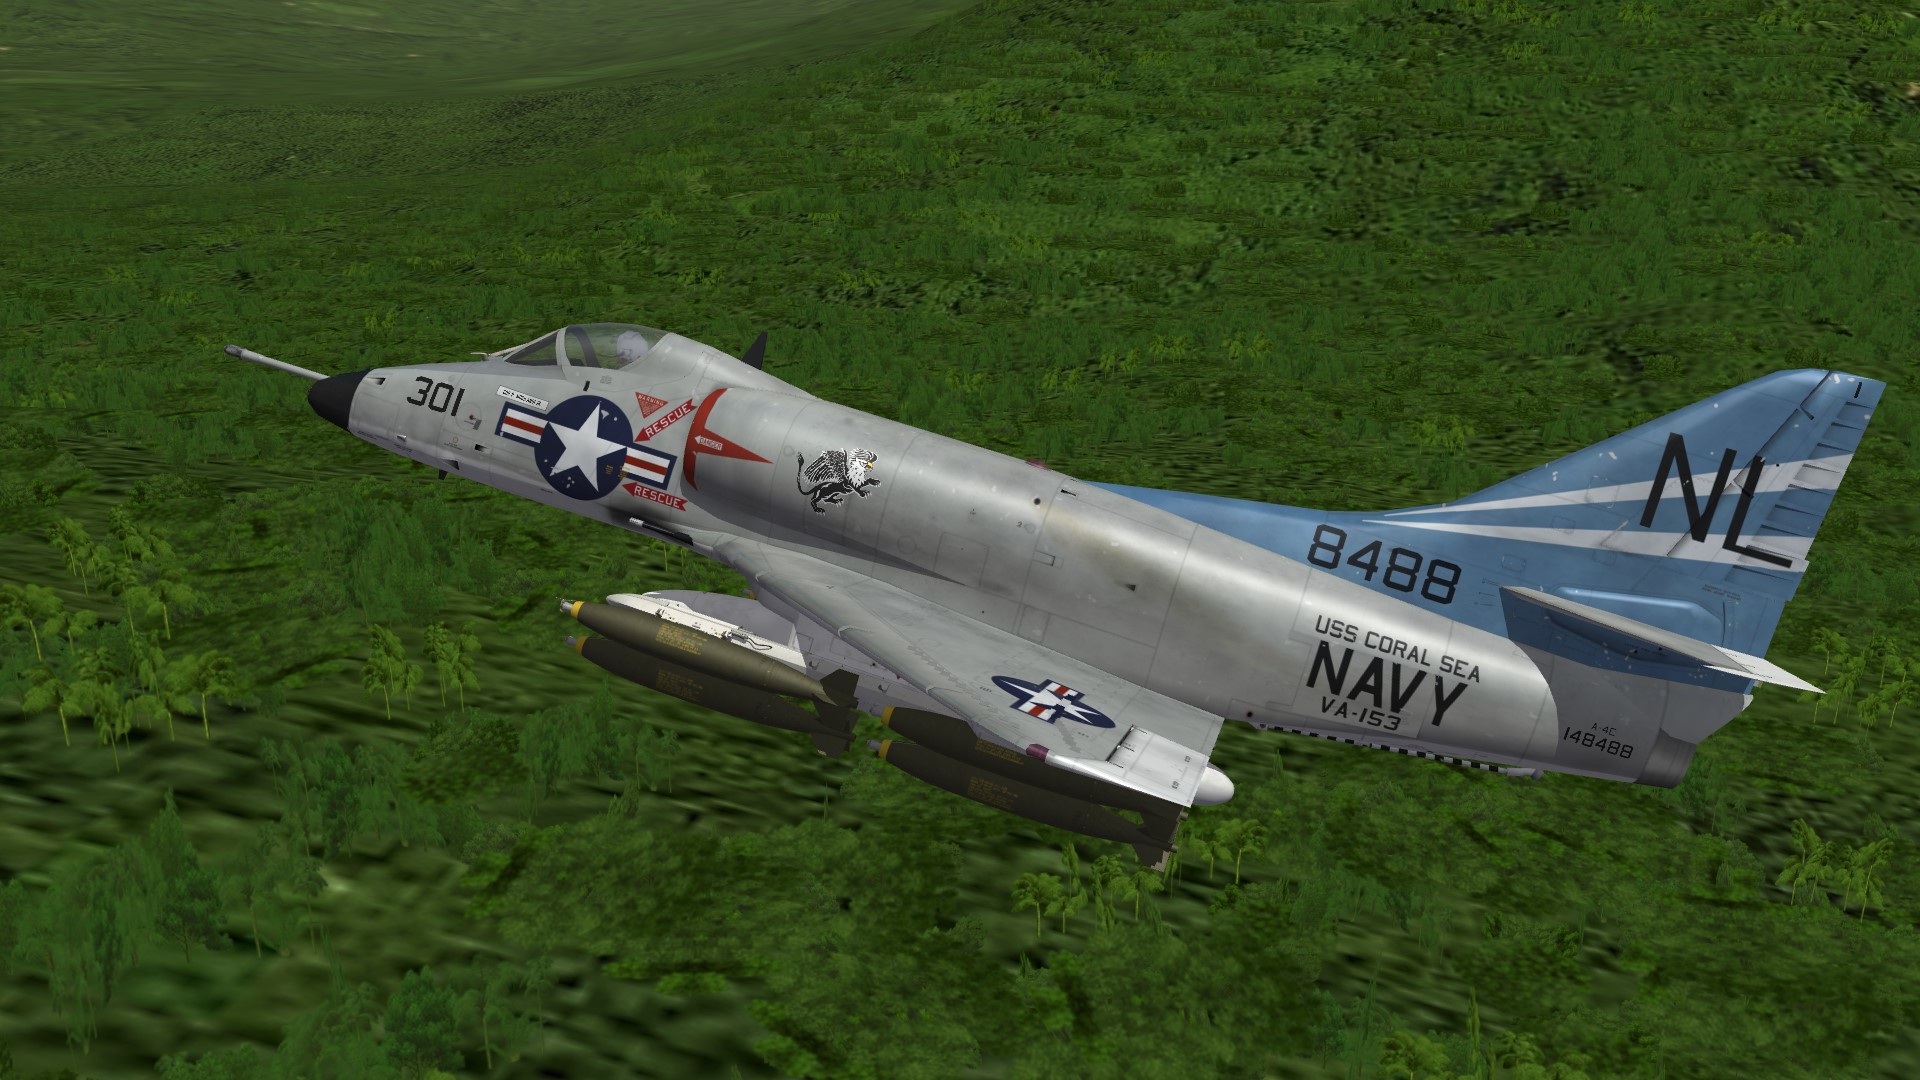
Afaik, Eole was planning or doing revamps of Mytais Phantom-Skins at some time. I don't know the status though, maybe ask him. I'm also for the date-switch, although for campaign-use there may a problem. I didn't know until recently, that you can only upgrade either skin or plane in campaigns, not both at the same time. Not sure, if this applies here too, but it's something I encounter with my Vietnam Skyhawks without a proper solution yet. Maybe in the Phantoms case, one could just copy the skins to all affected models of an upgrade, as the changes are small enough.
-
Congratulion to Nyghtfall!!
Nyghtfall replied to Wrench's topic in Thirdwire: Strike Fighters 2 Series - General Discussion
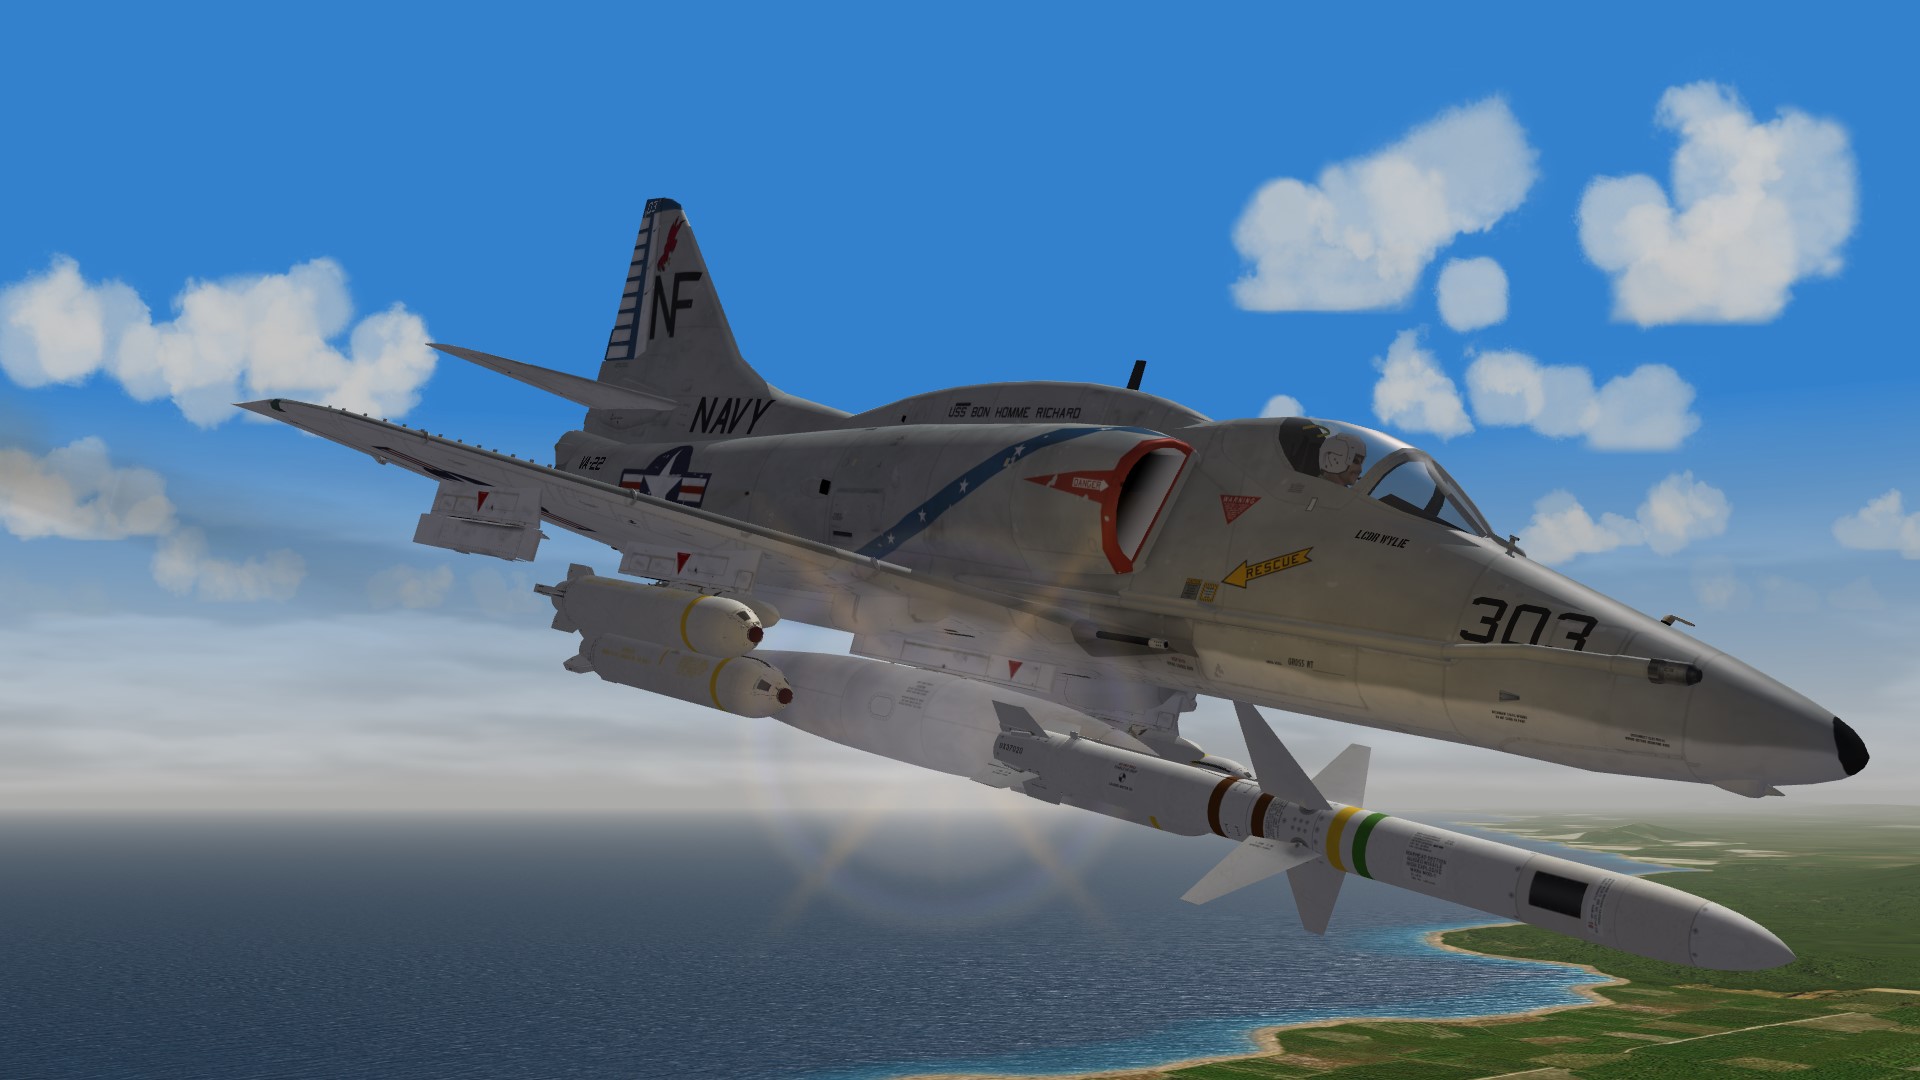
Hey guys, sorry for being late to the party, but as some of you know, I'm moving my living place half across Germany. On workdays I do my job and on weekends I have to get things done in the old flat 500km away. Just came home from a very busy weekend again. If all goes well, I'm finally done at the end of this month and I hope to get back to modding and skinning after that. The last weeks and months I hardly did anything useful regarding SF2, but few things that are on the way: - Update to the TA-4F-FastFACs - highres skins and some fakepilot-addons - Foreign TA-4 Skyhawks (Australia, Israel (with and without extended exhaust tube), New Zealand, Indonesia,...) - all Vietnam Skyhawks units and deployements (long term project) - early AD Skyraider templates - new TA-4 SKyhawk-model from scratch - since it's my first project (and done in Blender), I don't know if it ever leads to something useful, but we'll see. The fuselage is done at the moment. Thank you for this honor, my friends! And now Cheers!