Jump to content

Leaderboard


Popular Content

Showing most liked content on 10/31/2018 in Posts

  1. 11 points
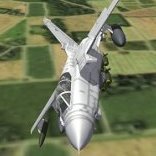
    Hey slow boys... anything you can do, i can do better Ah yeah, for real? I tell you guys, just try me! Okay, i shut down 2 engines. Screw it, i'm out!
  2. 8 points
    standardizing cockpit ta 152 in the rest of the models with some minor changes. apart from the basic instruments, now there is cane, gaces command and mobile pedals
  3. 6 points
  4. 4 points
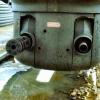
    i´m working on the Mk.77 fire bomb series and i have finished the MK77 mod4 , mod 5 and mod 6 , i would like to make the Mk77 mod2 and or mod 3 as well but i would need some more detail pictures of this bomb in particular of the front and rear as well as the filler holes this are the pictures i have of this Mk77 mod2 or mod 3 bombs , i have no idea what kind of igniter and fuze was used here , so if you have some info or good pictures of this particular bomb pleas send them to me , i NEED them this is what i have finished so far Mk77 mod4 Mk77 mod 4 with AN-M23A1 igniter and Fuze Mk77 mod 5 Mk77 mod 6 without the thread in the front and rear igniter cavity
  5. 4 points
    5 new belles. Check six is the best ;-) Following are finished for now ;-0)
  6. 4 points
  7. 4 points
  8. 3 points
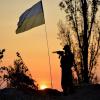
    Or Specnaz sabotage with super-fast growing trees ;-) Sure ;-)
  9. 2 points
  10. 1 point
    Actually, the Br.19 is by Stephen1918 and is available on the FE downloads. As the Belgian Br.19s were mainly built as recon (A) or bombers (B) I'm still tossing up whether to paint in bomb bay doors, an aiming portal for the pilot and changing the loadout to include 50kg of small bombs carried vertically.
  11. 1 point
    I do not know how it in GIMP but in Photoshop i do: 1. load layer with aircraft seams 2. new layer over seams with gray background 3. add filter "noise" on gray layer 4. add filter "blur" after noise 5. Change layer method from "Normal" to "Overlay"! This is importantest step. 6. with "eraser" instrument i clean in some places to do dirt less regular. Change opacity of your brush about 50-30%.
  12. 1 point
    don't remember the link, but somewhere in one of the KB (either in SF/Wo* or SF2) there's a NM tutorial that's pretty damn good. I used it on the B-17s and B-24s Veltro and I did. Plus, I know there's a way to add actual metallic textures, but never figured it out
  13. 1 point
    I would say the following - White riveting can add an impression of depth - Weathering using semi transparent layers. there was a nice set of brushes for weathering in photoshop called "fbs weather effects collection" - Adding a bit of noise maybe. I feel like TK is using this method on a few skins (1% of gaussian monochromatic noise)
  14. 1 point
    Find some dirt texture in net. If possible, similar resolution as your project. Open it in GIMP. Open your project in GIMP too. Add transparent layer over layer you want to modify. Right click -> new layer. In options TRANSPARENT, but I think it's default. Go to dirt EDITION/copy. Go to your new layer EDITION/paste. Resize your dirt and set transparency.
  15. 1 point
    probably many methods that I can think of either play with brush type, size and opacity and make your patterns OR a solid but very transparent layer then same advise as the brushes but with the eraser. looks more like weathering to me, and have done both to weather skins (though brushes are more common)
  16. 1 point
    By the way, which plane cockpît is it ? Tornado ? Mandatory image:
  17. 1 point
  18. 1 point
  19. 1 point
  20. 1 point


×

Important Information

By using this site, you agree to our Terms of Use, Privacy Policy, and We have placed cookies on your device to help make this website better. You can adjust your cookie settings, otherwise we'll assume you're okay to continue..