Leaderboard
Popular Content
Showing most liked content on 11/24/2020 in Posts
-
7 points
-
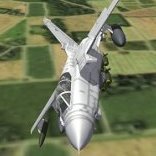
6 pointsBF110E-3 W Nr 2408 of 2/Aufkl Gr14...(recon group) N Africa was taken from 2/Aufkl Gr 123...note...they left badge of Gr123 on a\c and covered over prev units code 4 U .. also this has the different canopy at rear...(Remade the canopy for models that used it)
-
4 pointsSo 1st .. credits . Ground forces thank my wingman for the shortest support mission in history .... ... later was better
-
3 pointsI build everything to work well on my computer. I try to keep the file size similar to the size of the stock planes and objects... maybe a little bit bigger. My computer can handle planes with much bigger file sizes. One or two heavy planes work fine, but if they're all heavy planes then I start seeing reduced numbers of enemy planes and slower frame rates. I'm always trying to find a balance between appearance and frame rate. I've gotten better over the years and my planes have gotten more and more detailed. But it always comes down to the question: do I want to look at the plane, or do I want to play the game?
-
3 pointsFinally, UAZ-469, It not a high poly but It will do, big thanks to compufat for making the textures for the UAZ and the driver. I need to add a gunner for the 106mm gun The driver model is free to use from the net
-
3 points
-
3 pointsSaw this on Imgur had to share it here. I'm not military but I do enjoy how all the branches don't pull punches when making fun of each other.
-
3 pointsI have finished building the Sopwith Triplane. The parts are all unwrapped, the templates are made, and I've started painting the skins. There will be a British and a French skin. I was able to remove some detail from the engine and machine gun so I could add the air pump on the strut. I figured out how to get the FM to make the prop start and stop with the engine. The file size is bigger than I would like, but still acceptable. The cockpit is built, but I still have a lot of work to do on the skins.
-
2 pointsI decided to make a post so I can put all my work in one place I hope you okay with that. Okay here is the update of the M978/M977 HEMTT more detail will be added but this is how it looks so far.
-
2 points
-
2 pointsRecon mission over the Port of Dover The Flak fire was heavy. Suddenly my fighter escorts cried for help. They were ambushed by countless enemy fighters. Spitfires and Hurricanes. A lot of them. The Messerschmitts fought for their live. I decided to engage the enemy, to show them how superb a He-100D4 is. Kill one: Splash two: At the end of the day my wingman and i shot down 17 Tommy fighters. What a wonderfull day!
-
1 point
-
1 pointExcellent! But I think the windshield would need to be down for a more realistic look with the recoiless rifle.
-
1 pointCongratulations on your new job, which is well on its way to completion. This is great news for me and everyone who is waiting for your Triplane. The cockpit already looks excellent )) Why reduce detail? IMHO, the more details the better. Modern PCs can handle large files easily. Here, in the downloads section, there are very "heavy" models, the LODs of which weigh about 5 MB, 10 MB and more. Even my weak PC "digests" them pretty well.
-
1 point
-
1 point
-
1 pointA couple of guys have wondered why my stuff looks so "real." Before returning to aviation in the 1980s, I graduated from a professional art school and had to learn both scientific theory and the techniques of the masters (DaVinci, Rembrandt, etc) to paint realistically. I thought I'd pass on some basic information that will assist you guys in making more realistic mods. First, leave your preconceptions at the door and approach the subject of color theory with an open mind - the odds are, what you think you know is wrong. First, we start with the science. What we call color is reflected light at different frequencies. Every color has a unique frequency which travels through the real world until it is detected by our eyeballs. The real world usually affects these frequencies as they travel through the atmosphere, and shifts them slightly before they strike our eyeballs. These frequency shifts, and other phenomena, create optical illusions that are part of the world we live in. Understanding optical illusions is crucial to creating realistic art. We have all seen railroad tracks converge to a point on the horizon. Your mind knows the tracks are the same distance apart at the horizon as they are at your feet, BUT THAT IS NOT WHAT YOUR EYES SEE. Creating realistic art requires you focus on what your eyes see, and ignore what your mind tells you. Lets say you want to make some new skins for an aircraft. You do careful research and identify some accurate colors, then use a paint program to take samples of those colors, and then start painting the new skins. You just screwed up! Because of the frequency shifts that happen while light is traveling through the atmosphere, the colors seen by your eyeballs seldom match color samples. Yes, your mind knows those color shifts are not "real" but so what? If you want to make realistic art, the only thing that matters is what your eyeballs see. A color frequency consists of three things: - The color itself - is it red, or blue, or green, or whatever. - The saturation of the color - is it vivid or dull. Think of the difference between vivid fire engine red and dull brick red. - The lightness/darkness, called "value" in the art world. The bottom line: because of frequency shift, most colors seem lighter and duller to our eyeballs. So, make copies of your color samples and then lighten the value of each color and also reduce the saturation of each color. OK, how much? It varies due to the situation. Is the noonday sun bright, or is the setting sun dull? Is there a lot of dust or water vapor in the air? It boils down to your own personal interpretation - that's why they call it "art." - If you like your aircraft looking like they just rolled out the paint shop door, then lighten and dull your colors just a little - say 5% to 10%. - If you like your aircraft looking like they have been used but well cared for, then lighten and dull your colors 10% to 20%. - If you like your aircraft looking like they have been beat to hell, then lighten and dull your colors 20% to 30%. To illustrate how these factors affect "realism" let's look at value. NEVER use true black or true white as a general color because THEY SELDOM OCCUR IN NATURE. That's because black and white aren't colors, they are values. White is a combination of all light frequencies, while black is the total absence of any light whatsoever. These conditions - all light or no light - are quite rare, but most people don't know this. What most people describe as black or white is actually EXTREMELY DARK GRAY or EXTREMELY LIGHT GRAY. Shot below of "black" painted Lancaster shows how black seldom occurs in the real world. Note the strips of "true black" added in Photoshop. Close examination of the photo shows the picture is almost always a tiny bit lighter than the strips of "true black." OK you say, what happens if you turn out the lights and darken the hangar? Remember that black is the total absence of any light WHATSOEVER. So long as small amounts of light leak under doors, etc there is some light inside the hangar, so scientifically speaking, the hangar cannot be "black." So, why have I beaten the subject to death? If "black" is darker than any other color, but does not occur outdoors in the real world, then "black" in the real world is actually a slightly lighter dark gray - and all other colors appear lighter too because they are lighter than black. Note the use of black in publications and computer graphics is a form of style. Style is a variant of realism but is not realism itself. Try experimenting with any art you may have already made. Load the new art into the sim and see what it looks like. Below are two shots of MontyCZ's excellent Stuka art. The first is his original art unmodified. The second is his art that has been lightened and dulled around 15%. Another shot of lightened and dulled art, plus a little glossiness.
-
1 pointI don't think anybody will mind you consolidating your work into one topic, makes it so much easier to maintain one topic than so many others. Nice work on the HEMTTs but was wondering which version is the cargo version, never seen one of those in that configuration before.
-
1 point
-
1 pointLeft yes so pilots could transfer to other country a\c without further training....
-
1 pointEric, I extended the "fake" radome and added yellow Bort numbers as per the diagrams...love your work !
-
1 pointNot certainly in that way. Yes, you are right, this is not question of regulations , but more tradition. But this tradition has nothing to do with engine type or torque. It was just that during takeoff, landing or taxiing, the large nose of the aircraft blocked the pilot's forward view. The pilot had to look out of the cockpit. The British decided that it was more convenient to look out from the left. Later, young pilots were taught this way, and very soon it became a habit and became the norm. Also the instructor stand on the left wing when teaching taxiing.
-
1 pointSimple answer ... they are always on correct side. But seriously it is not question of regulations , but more tradition. After World War I, most airplanes had rotary engines with left turning tendencies because it followed the torque of the engine. Therefore, turning left was easier than turning right. Because of this, pilots considered left turns as more convenient maneuver, and thus more experienced pilot started sitting on the left. So .. same as US.
-
1 point
-
1 point
-
1 point
-
1 pointView File SF2NA A-7s Skin Pack SF2NA A-7s Skin Pack = Tested in SF2NA, Full-5 Merged This project started as a personal customization to improve historically the skins for the VA-72 A-7B_71 for the squadron cruise aboard JFK in 1975 and for VA-81 and -83 aboard Saratoga during the clashes with Libya of 1986. So,I realize them basically to be used in the Northern Sabre 75 and El Dorado Canyon Campaignes present in the SF2NA Expansion Pack and SF2 Med Crisis. The starting skins with which I played around are 3W for the A-7B_71 and the Wrench'TPS one for the A-7E_74,so much of the credit will be deserved by them; I added to the Echo skins some missing panel lines and the latches and air vents of the avionic bays plus some extra weathering and corrosion control. The Bravo received the same treatement of the Echo plus the squadron specific blue on the wings and fin tips and the white of the nose. All the decals was done by me. All the Bu.Nos are historycally correct for all three Squadrons; this was one of the hardest part and I was able to barely sort out the required 12 to complete the standard number of planes deployed by a Navy squadron. ========== To Install: As always raccomended,all in the relative folders in your game(s) ----------------------------- Credits: 3W for the A-7B_71 and A-7E_74 Corsairs and the -7B_71 skin Wrench for the already great A-7E_74 TPS skins,a handy starting point Makoto for the idea and permission of the VA-72 fuselage stripe decals Me for the decals and the small improvements ------------ Know issue: The first issue is common to all three skins; despite I'd the pilots name for the Squadrons cruises,I wasn't able to pair name and assigned planes,so the nameplates are present but empty. Next nthe ones for the VA-72: the most important, I forgot one chess line on the rudder;I was misguided by the initial reference found and when I noticed the error,due to unwillingness to redo the work again from such an advanced state,I choose to left all as it was, sorry, The fuselage stripe;actually the stripe will stop at the lower edge of the avionic bays access doors, but I was unable to obtain this and as result the decals continue 'till the most forward of the MLG doors,sorry but my skill are very limited... If someone will address these issues,feel free to try ( and share) the result! -------------------------------------------- Legal note: This package may NOT in any way, shape or form be used in any payware addition. ------------------------------------------- Gianni "RustyKurnass" Coniglio ========== Submitter RustyKurnass Submitted 11/17/2020 Category A-7
-
1 point
Important Information
By using this site, you agree to our Terms of Use, Privacy Policy, and We have placed cookies on your device to help make this website better. You can adjust your cookie settings, otherwise we'll assume you're okay to continue..

