Leaderboard
Popular Content
Showing most liked content on 10/02/2023 in all areas
-
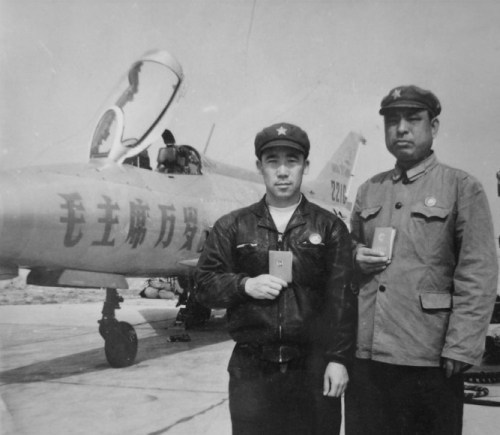
4 pointsWith a range of 1.000 km and 1.900 km with droptanks, the MiG-17 would have had the legs to fight over South England.
-
4 points
-
3 points
-
3 points
-
2 pointsan Impala helped get my Soldier out of trouble (ish) a long time ago back at Bragg so there we were taking a truck with water trailer back to get more water. suddenly the brakes locked up and we swapped ends, doing a 180 turn WITHIN the confines of a two lane road (no tire marks outside the lines). the trailer was a quarter full of water so the sudden shift caused the trailer to tip over as we came to a stop. but nobody hurt (although the other two Soldiers thought I got thrown when i hooped out as soon as we stopped to check the vehicle and surroundings) they tried saying my driver was speeding. i was able to say she wasnt because immediately before this happened i was looking at an Impala and pissed about the rims they had put on a classic car like that. turned out the trailer had an air leak (wasnt ours but the unit we were attached to at that moment) which drained the air tanks in the truck. once the tanks get empty, bam! truck automatically braked itself to a stop. - - - - - - - - - yeah i know long for an off topic bit. heres a plane
-
2 pointsLast news... These are the five main skins you will see it in our release soon. Since we have some time gained until the launch day we decided to make one more. If you paid attention reading the thread you'll guess which one will be. ;)
-
1 point
Version 0.9.8.3
7,750 downloads
Welcome To Duty Built with the extraordinary expertise and dedication of modders from CombatACE.com, Operation Desert Storm – 30th Anniversary Edition promises to be the most complete total conversion ever made for Strike Fighters 2 by ThirdWire. Fly with more than 50 aircraft ranging from Cold War relics to the most advanced platforms. Gain air superiority in the mighty F-15C Eagle or challenge the Coalition with the agile Fulcrum. Support troops with the A-10A Thunderbolt II, bomb strategic targets with the stealthy F-117A Nighthawk, lead airfield denial operations in the iconic Tornado. Enjoy a beautifully rendered scenario on a scaled and accurate terrain. Fly over the lakes and rivers of Mesopotamia, the oil-rich fields of Kuwait, the mountains of Iran and Turkey. Take-off from aircraft carriers stationed in the Persian Gulf to watch over Kuwaiti oil rigs. Perform landings and patrols in more than 90 airports and air bases in the Middle East. Take part in different campaigns including the Iraqi blitzkrieg on Kuwait and the US-led liberation of the Kuwaiti Emirate. Discover how the Iraqi Army was one of the biggest in the world, through the eyes of American, British, Canadian, French, Italian and Arab pilots. Test your skills and abilities flying for the Iraqi Air Force during all stages of the conflict. Thirty years after, Operation Desert Storm still remains the largest air operation of modern warfare to date. Modders and flight sim enthusiasts at CombatACE teamed up to bring you a unique product in the lite flight sim world. Exquisitely detailed aircraft and paint schemes are delivered in a well-researched and thorough order of battle. The ODS 30th AE Development team would like to thank CombatACE.com, its admins, moderators and contributors. We are sure you will enjoy and appreciate this high-quality freeware product. From the aviation enthusiasts, to the aviation enthusiasts... and for the pilots of tomorrow. Minimum Requirements Required products from ThirdWire: Strike Fighters 2, July 2013 patch Strike Fighters 2: Israel, July 2013 patch Strike Fighters 2: North Atlantic, July 2013 patch Full support for: Mission Editor DLC Campaign Customizer DLC System specs: OS: Windows 7 x86 Processor: Dual Core 2.7 GHz Memory: 4.0 GB RAM Hard Drive: 17.0 GB Free Space Video Card: 1024 MB DirectX 10 Sneak Peek Disclaimer CombatACE.com shall at all times retain ownership of the Software as originally downloaded by you and all subsequent downloads of the Software by you. The Software (and the copyright, and other intellectual property rights of whatever nature in the Software, including any modifications made thereto) are and shall remain the property of CombatACE.com and of the respective developers/modders. In no event, unless required by applicable law or agreed to in writing, shall CombatACE.com, or any person be liable for any loss, expense or damage, of any type or nature arising out of the use of, or inability to use this installer or program, including, but not limited to, claims, suits or causes of action involving alleged infringement of copyrights, patents, trademarks, trade secrets, or unfair competition. The Operation Desert Storm: 30th Anniversary Edition modification does NOT comply with CombatACE's Freeware Licensing. Various contents of this modification are exclusive, as such you are NOT allowed to share, redistribute and/or make use of the mod and/or its contents for other purposes, without the consent of the mod's developers. Contents of the modification are the copyright of their respective authors. Notes about the installer Beware, the mod is available only in the ISO format. You can either mount it on a virtual drive, burn it on a DVD like in the good old days, or unzip it with 7-Zip or equivalent software. The installer will automatically detect your installation of the required Strike Fighters 2 games by reading through the registry keys. Game folders that are copied from or manually moved from where they were originally installed are not supported. You need all three aforementioned Strike Fighters 2 games and they must be installed with ThirdWire's original installers, not manually copied from other sources nor moved elsewhere after installation to other folders or drives. If you do not meet any of these requirements, installation cannot proceed and you are on your own. If you install all required games properly, the installation of the mod will proceed correctly as intended. The installer then lets you choose where to install the mod folder; you can even install the mod on a different drive or partition than the one where Strike Fighters 2 is installed. No further user input nor manual edits after installation are ever required; the installer takes care of creating all proper links to your desired path for the mod folder. After installation is over, simply run the mod by using the created Desktop and/or Start Menu links. If you have a previous version of the mod installed, please use the uninstaller to remove it completely. Clean installation is mandatory. You might want to make a backup of the Controls folder, so that you can easily restore your controller settings afterwards. Suggestions on common issues Make sure that you are using your dedicated GPU. By default, Strike Fighters 2 usually selects the integrated GPU you may have on your CPU, which is much weaker in terms of VRAM. In case you have frequent crashes or black/missing textures, I highly suggest you download and install the DXVK graphics wrapper (x86 DLLs) into your Strike Fighters 2 game folder: https://github.com/doitsujin/dxvk. You need a Vulkan-compatible GPU. The wrapper can greatly improve the experience with the mod. With DXVK I can play the mod on a mere Intel UHD 710, whereas without it the mod would always crash to desktop. Go to Sound and set Sound Channels to 32. We got reports that 16 is not enough and will cause crashes on some systems, due to the higher quality sounds included within the mod. The mod is pretty heavy for the game engine despite huge optimizations. Strike Fighters 2's engine is 32bit only and apparently does not manage VRAM properly; consecutive campaign missions might show black/missing textures on objects or cause crashes to desktop because the game does not release the occupied VRAM from the previous mission you played, thus the more missions are loaded consecutively, the more easily you may run out of memory. Set Ground Objects to Medium or Low, Horizon Distance to Near, and Shadows to Medium or Low. These are the most troubling settings. Avoid Unlimited settings as much as possible. If the mod used to work and suddenly crashes to desktop, updating or reinstalling video drivers should help. Make sure that DirectX June 2010 Redistributables are also installed, they are included inside the ISO disk image of the mod. Inside the mod folder, you'll find some extra text files. "(Coalition Order of Battle)" should be of your interest; the mod's terrain covers the entirety of Iraq, at the cost of not having all of Saudi Arabia; this means that a number of important units are based on airbases that are beyond the in-game playable area. With those units you always spawn near the target area, you'll never get to start from a runway nor to land on the assigned runway beyond the invisible wall. You have an entire list of the affected units in the aforementioned text file. By pressing ALT+N, the plane returns to base automatically. The mod is fully compatible with the Campaign Customizer and Mission Editor DLCs by ThirdWire. The Campaign Customizer might be an alternative way to experience those off map units I mentioned previously, since it assigns you to a random airbase of the in-game flyable area. Escort missions are often broken, this is not an issue of the mod, but a bug of the stock game; sometimes the AI flight you escort does not engage its target and keeps flying in a straight line instead of following waypoints, thus the trigger for mission success will never happen. Abandon the mission or retry it if the issue happens, sometimes it works. Pray for ThirdWire AKA Tsuyoshi Kawahito to work on a 64bit version of Strike Fighters 2, maybe even with support for DirectX 12. With that done, any out of memory issues should become an old memory. -
1 point
Version 1.0.0
137 downloads
The first type of J-7 is not manufactured by Chengdu Aircraft Manufacturing Factory, but by Shenyang Aircraft Manufacturing Factory.Approximately only 23-24 J-7 prototypes have been produced, and 12 have been donated to Albania There is basically no difference between the J-7 prototype and the MIG21F-13 model, except that the original engine has been replaced by the WP-7 engine made in China. T's WP-7 engine is modeled after the Soviet Union's r11-300 engine (but historically, the quality and efficiency of the WP-7 have been a concern, with the first WP-7 engine having a lifespan of only 100 hours) References: https://www.bilibili.com/read/cv9813494/ https://www.doc88.com/p-377487159434.html?s=rel&id=3 Chinese Aircraft - China's Aviation Industry since 1951 by Yefim Gordon and Dmitriy Komissarov https://military-history.fandom.com/wiki/Chengdu_J-7 Strike Fighters Legends -
1 pointChina's weapons and equipment confidentiality work is generally done very well, even though some equipment has been retired for a long time, it is still difficult to search for their specific information(Such as aircraft's cockpit) This information is usually discussed extensively in military forums in China, but that was already more than a decade ago. Forums have been declining in China for a long time. Well written books are usually military magazines published by some Chinese publishing houses, but that was a long time ago, and it is also difficult to find resources online,and now Chinese encyclopedias are often poorly written Chinese Aircraft - China's Aviation Industry since 1951 It's a good book to learn about Chinese airplanes(but I don't kown why the writter didn't introduced the J-11 series)
-
1 pointThank you for your suggestion! The Chinese PDF website usually Have many Ads and if you want download it's PDF resources will cost much money,but i found two website that with less Ads,I'll try to download some resources in my computer and share them next time! Now I'm working in correct the wrong infomation in the Chinese aircraft mods from CA include references in to the introduction it's my special hobby,it can avoid some people criticizing me and saying that the information inside the mod is false informatio
-
1 point
-
1 point
-
1 point
-
1 pointyeah, Navy Phantoms didnt carry LGB at all. they left that to the birds in the VA squadrons but its your install, there are no mistakes. go bomb that happy little tree over there ------------------------------- Makos over the Adriatic
-
1 point"Cheating" on my mission by installing a Pave Spike on my F-4. As far as I know (which isn't much admittedly) that the US Navy didn't carry the Pave Spike, but it's usable on my jet anyway, just so I can use LGBs without flying a Strike mission in-game.
-
1 point
-
1 point
Version 1.0.10
239 downloads
Samurai, Headhunters, Panthers and Foxes PACAF F-16C/Ds in the 1990s pt 1 PACAF started transitioning their F-16 fleet in the very early 1990s from the initial F-16A/B models to the more advanced C/D models. 8th Fighter Wing in Korea and 432d Fighter Wing in Japan received Block 30 versions while the 18th Fighter Squadron in Alaska recieved the Block 40s. These units participated in many of the actions the USAF was involved in; including Deny Flight detachments in USAFE's AOR and no fly zone operations over Iraq. Included F-16C and D, Blocks 30 and 40 various period specific weapons and pilots various ini edits to match the era new hangar and loading screens ------------------------------------------------------------------------------------------------------------------------------------------------------------------------------------------------------------------------------------------------------------------------------------------------------------------------------------------------------------------------------ NOTE: The D models have very few serial numbers to each unit. most units only had one or two family models.the best use for these is to add on as a member of a flight of single seaters. The load outs are the same so you will be able to load them out easy ------------------------------------------------------------------------------------------------------------------------------------------------------------------------------------------------------------------------------------------------------------------------------------------------------------------------------------------------------------------------------ Credits Viper Team F-16C Blocks 30 and 40, F-16D Block 30 ravenclaw_007 tweeked F-16D Block 40 and templates (C and D) killerbee331 original weapons pack that many armaments are drawn from here malibu43 2_LAU-88 mod to carry 4 Maverick rather than 6 daddyairplanes skins, tga work, much research, various ini edits, new TW inspired loading screens test team NightshadeP/R, allenjb42, Niels, bigstone, Wrench, Coupi, Svetlin I hope you enjoy this mod. daddyairplanes aka Kevin Unruh 17 Sep 2022 ********************************************************************************************************* This is freeware; it CANNOT be distributed unless permissions are granted by myself. The original readmes, if any, and all other pieces of the package MUST remain intact. The names of all contributors, modders, suppliers, etc =MUST= be listed in any new readmes. This package and any part of it may NOT in any way, shape, or form be used in any payware additions. See the original readme documentation, if any, for further allowances and restrictions Any persons wishing to make further modifications, contact me first. Any persons wishing to make further modifications MUST remember to put everyone's name in it. ********************************************************************************************************* THIS AIRCRAFT MOD OR ANY PART OF IT MUST NOT BE HOSTED OR POSTED FOR DOWNLOAD ON ANY OTHER WEBSITE WITHOUT MY EXPRESS PERMISSION, OR USED FOR ANY OTHER PURPOSE THAN THIRDWIRE FLIGHT SIMULATORS, AND MUST NOT BE SOLD OR OFFERED FOR SALE BY ITSELF OR WITH ANY OTHER FILES OR MODS. ********************************************************************************************************* -
1 pointTK posted this a long time ago, I think it covers just about everything: Strike Fighters: Project 1 Decals Tutorial v11-12-02 Strike Fighters: Project 1 allows you to place high-res textures on top of the basic skin texture. These high-res textures are called decals, and they can even be made to use different textures in response to the aircraft’s Nation ID, Squadron ID, Aircraft Number, and Kill Number. So you can use decals to dynamically add squadron patches, squadron code, aircraft serial number, kill markings, and just about anything else you want to add. This tutorial will cover the basics of how the Strike Fighters’ decal system works, and it included some hands on examples at the end. Keep in mind that because the decal system is fairly powerful and flexible, placing decals can be tricky and frustrating at times. So be prepared to do a lot of trial-and-errors as you play with the decals. Decal Textures All decal textures are normal 32-bit .tga format, using the 8-bit alpha channel to control the transparency. Textures can be created and edited using any of your favorite paint programs that support 32-bit .tga format. (This tutorial assumes you know how to manipulate alpha channel, for more information on how to do this, please consult your paint program’s manual). Decal textures can be any size you want, but they must be square in shape. Typical texture sizes used are 64x64, 128x128, and 256x256. Of course, bigger texture uses more memory, so having too many high-res decal textures may affect the game’s performance. The decal textures are applied so the edge of the texture is stretched out to the area not covered by the texture itself. So to avoid “bleeding” outside the texture, you must have a buffer of transparent pixels (usually 3 pixels will do) on each edges of the texture. If you see a streak or “bleeding” decal, check your alpha channel and keep it at least 3 pixels away from the edge of the file. All decal textures should be placed in the Objects/Aircraft folder. The default decals are not visible to the end user, but any new user created decals placed in this folder will override the default decals of the game. So to replace existing default decal, all you have to do is simply save the new texture with the same name as the default texture. (A list of the name of decal textures shipped with the game is included later in this tutorial) Decals.ini The placements of the decals are specified in decals.ini file in each texture directory. This allows you to have different settings for each texture set. (USAF, Navy, German, etc, etc). If you open the decals.ini file you’ll see a long listing of decals entries, which might look something like this: [Decal001] MeshName=Nose DecalLevel=0 FilenameFormat=Insignia DecalFacing=RIGHT Position=4.707,-0.113 Rotation=0.0 Scale=1.7 DecalMaxLOD=4 Reverse=TRUE [Decal002] ... etc. Breaking these entries apart: [Decal___] This is the section header of the decal entry, and it must be named [DecalXXX] where XXX is a three digit number 001, 002, 003, etc. The numbers have to be consecutive, and any missing number will cause the rest of the decal entries to be skipped. MeshName= Mesh name refers to the name of the mesh object that the decal is to be applied on. The 3d aircraft models in the game are made up of many smaller components called “meshes”. The number and the name of the meshes vary from model to model, and are specified by the 3d model builder. When applying a decal, you must specify the name of the mesh it is applied to. For example, insignia decals are typically applied to left wing mesh, right wing mesh, and fuselage mesh. There is a max limit of 4 decals that you can apply to any single mesh. (ie, 4 decals max per fuselage, 4 per nose, etc, etc). To get some of the basic mesh names, you can browse the existing decals.ini files for the aircraft you are interested and look at the mesh names listed in the file. Generally, the fuselage, nose, vertical tail, right/left outer/inner wings have decals already on them. A complete list of mesh names for each of the objects in the game should be included in the zip file. DecalLevel= Decals can made to use different textures based on one of the four dynamic variables: aircraft’s Nation ID, Squadron ID, Aircraft Number, and Kill Number. You select which variable the decal should use by setting the DecalLevel, as follow: DecalLevel=0 –> Nation ID DecalLevel=1 –> Squadron ID DecalLevel=2 –> Aircraft Number DecalLevel=3 –> Kill Number Every nation and squadron in the game has an ID number assigned to it. Each aircraft is also assigned a different aircraft number, and Kill Number uses the player’s current kill scores. These numbers are passed into the decal system. The game engine changes the texture name by attaching a three-digit number (001, 002, 003, etc) to the name of the texture. So if the texture name specified is Insignia.tga, and the aircraft’s Nation ID is 1 (and DecalLevel=0), the actual texture name used is Insigna001.tga. FilenameFormat= This is the file name of the decal texture (32-bit .tga file). It will first look for the file that has the name plus the three-digit number set by the DecalLevel as above. If no such texture is found, it will then look for a texture without any number added. For example, DecalLevel=1 FilenameFormat=SqPatch The game will look for texture named SqPatch001.tga if the aircraft belongs to Squadron ID = 1, SqPatch002.tga if Squadron ID = 2, etc. If numbered texture is not found, it’ll then look for just SqPatch.tga. DecalFacing= DecalFacing specifies which side of the mesh the decal should appear. It can be LEFT, RIGHT, TOP, BOTTOM, FRONT, or BACK. Position= This controls the position of the decal on the airplane. The coordinate is given relative to the whole airplane, not to the individual mesh. The coordinates are measured in meters. For DecalFacing=LEFT or RIGHT, the coordinate x,y refers to coordinate as you’re looking from the right side of the aircraft. +x toward the nose -x toward the tail +y up -y down For DecalFacing=TOP or BOTTOM the coordinate x,y refers to coordinate as you’re looking down from the top of the aircraft. +x toward the right wing -x toward the left wing +y toward the nose -y toward the tail The coordinate must lie on top of the mesh specified or the decal will not show up in the game, so you must enter coordinates that the mesh actually covers. If you are trying to add nose art to one of the default aircraft, and it isn’t showing up, you may want to check your coordinates and make sure they are in the bounds of the nose mesh. (Granted, this might be difficult without having the model in front of you in 3d studio max - but you should be able to get close by looking at the default decal settings and finding coordinates that are on the nose mesh, and tweak it from there.) Rotation= This sets the rotation angle, in degrees. This is optional, and if entry is not present, it’ll default to no rotation. Scale= This controls the size of the decal on the mesh. DecalMaxLOD= This controls how far out the decal show up on the mesh. Reverse= This is optional, and if entry is set to TRUE, the decal will be applied reversed in x direction. Mainly used for decals that are mirrored on left and right (such as FinFlash and “slanted” type decals). Nations List List of nations included with the Strike Fighters and their corresponding ID numbers are listed at the end of the Skin Tutorial. Squadrons List The squadrons are listed in SquadronList.ini file located in PilotData folder. To add a new squadron, you just have to add a new squadron entry on this file. If you open the .ini file, you see that it contains the following Squadron entries: [Squadron001] Name=10TFS DisplayName=10th TFS, 50th TFW Nation=USAF [Squadron002] … etc. Breaking these entries apart: [Squadronl___] This is the section header of the squadron entry, and it must be named [SquadronXXX] where XXX is the three-digit number 001, 002, 003, etc. of the squadron. The numbers have to be consecutive, and any missing number will cause the rest of the squadron entries to be skipped. This number is the Squadron ID that gets passed into the decal system. Name= Short unique identifier name used to reference the squadron. DisplayName= This is the text description that is displayed in the squadron drop down list. Nation= This is the name of the default nation Examples So, there are basically 2 ways to do decals. The first is the ‘stand-alone’ type decal that you can use to add high-res texture that always appears with a particular skin. (Remember, that each skin has it’s own decals.ini file in its directory, and thus when you chose to fly with this skin, you are using that particular decals.ini file). To add this type of decal, you just follow the following four steps: 1. Create your decal texture using your favorite paint program. 2. Save the decal file as a 32-bit .tga file into the Objects/Aircraft folder. 3. Add a new decal entry in the decals.ini with the line FilenameFormat= set to the name of the decal. 4. Find the name of the mesh you wish to apply the decal to, and determine the facing, position, and size of the decal. And enter them in the decal entry you just created above. Example 1: MyDecal.tga For example, to add MyDecal.tga to the nose of the F-4E Phantom with USAF camo skin (located in Objects\Aircraft\F-4E\USAFtng1 folder), you can add the following new entry to the end of its decals.ini file: [Decal012] MeshName=fuselage_front DecalFacing=LEFT FilenameFormat=MyDecal Position=8.15,-0.25 Scale=0.8 DecalMaxLOD=4 Note that the original decals.ini for F-4E USAF camo has 11 decals, so [Decal012] is the next decal number. With the above decals.ini saved, and MyDecal.tga copied into Objects\Aircraft folder, the new decal should appear on the nose of your F-4E Phantom with USAF camo skin. The second and more useful way of adding decals involves use of the DecalLevel. This requires a series of decal textures that the game can select from based on Nation ID, Squadron ID, Aircraft Number, or Kill Number. You can create a whole new series, or add or change the existing series. You can name the series anything you want, but the textures must be saved with names ending with a three-digit number 001, 002, 003, etc. For example, if you’re planning to use the series with Nation ID (DecalLevel=0), you should save Mercenary (Nation ID = 1) texture with name ending in 001, USAF (Nation ID = 2) texture 002, USN (Nation ID = 3) texture 003, etc. 1. Create a series of decal textures using your favorite paint program. 2. Save them with names ending in three-digit number 001, 002, 003, etc. 3. Add a new decal entry in the decals.ini with DecalLevel set to the variable you want to use to generate the three-digit number (0 = Nation ID, 1 = Squadron ID, 2 = Aircraft Number, 3 = Kill Number) 4. Add the line FilenameFormat= set to the name of the decal, without the three-digit number. 5. Find the name of the mesh you wish to apply the decal to, and determine the facing, position, and size of the decal. And enter them in the decal entry you just created above. Example 2: NationNameWhite003.tga and NationNameWhite004.tga For example, say you’re creating a darker camo skin and would like the letters “NAVY” and “MARINES” to appear in white lettering (instead of default black letters). You can do this by using decals with DecalLevel set to 0 (Nation ID). USN has Nation ID of 3 and USMC has Nation ID of 4, so you can use two decal textures – one with white NAVY letters and another with white MARINES letters. And save them both in the Aircraft folder as NationNameWhite003.tga (Navy texture) and NationNameWhite004.tga (Marines texture). Then, in the decals.ini, add the following entry (these are from F-4B decal.ini) [Decal010] MeshName=fuselage_P DecalLevel=0 DecalFacing=LEFT FilenameFormat=NationNameWhite Position=-1.450,-0.335 Scale=2.2 DecalMaxLOD=3 [Decal011] MeshName=fuselage_P DecalLevel=0 DecalFacing=RIGHT FilenameFormat= NationNameWhite Position=-1.450,-0.335 Scale=2.2 DecalMaxLOD=3 That will apply the decal texture NationNameWhite003.tga when the user selects USN, NationNameWhite004.tga for USMC, and nothing for other service (unless you create other NationNameWhiteXXX.tga textures or default NationNameWhite.tga). Example 3: F4_SqTailL014.tga and F4_SqTailR014.tga Here’s another example. This time, we’re using existing decal series, and adding a new F-4 squadron instead. According to the list of default decals included at the end of this tutorial, F4_SqTailL.tga and F4_SqTailR.tga are the decals used for the tail marking on all F-4s, so we’ll use this series. Open SquadronList.ini in PilotData folder. And add the following new squadron entry: [Squadron014] Name=MYSQUAD DisplayName=MySquadron Nation=USAF Note that the last squadron (assuming you have your default SquadronList.ini) has 13 squadrons, so [Squadron014] is the next squadron. To add more squadron, you just have to increase the number to make it the next squadron ID. (also, it is a good idea to make a backup of the original SquadronList.ini, just in case…) Then, create the F4_SqTailL and F4_SqTailR decals. To make these decals to appear only when you’ve selected your new squadron, you have to save the decal textures with three-digit number 014 (Squadron ID of your new squadron). So for this example, we’ll save them as F4_SqTailL014.tga and F4_SqTailR014.tga, and copy them into the Objects/Aircraft folder. That’s it! Now, whenever you select any aircraft and skin combo that uses F4_SqTailL and F4_SqTailR decal series, your new decals will show up on the tail of your aircraft when you select your squadron from the drop down list. Note that you didn’t have to edit any decals.ini for this example. This is because you’re using already existing decal series (F4_SqTailL and F4_SqTailR). Also, note that when you fly A-4 or F-104, your squadron marking does not show up (yet). In order to make them show up, you’ll need to create similar decals for A4_SqTailL014.tga and A4_SqTailR014.tga. Default Decals Here is a list of filenames for the default Strike Fighters decals: FinFlashXXX.tga – national marking applied on the vertical tail fin. For most nations, this is their national flag. For USAF, this is the TAC symbol, and for some others (such as Soviet), this is the same as regular insignia. InsigniaXXX.tga – insignia marking that appears on wings and fuselages. NationNameXXX.tga – currently, these are just the “USAF” (002), “NAVY” (003) and “MARINES” (004) lettering. USAir002.tga/USForce002.tga – the lettering “US AIR FORCE,” split into two textures for better texture usage. killXXX.tga – default kill markings for the jets showing red stars. F4TailNumXXX.tga – black and white AF serial numbers found on the camouflaged F-4 C/D/E. There are 100 textures containing a small sample of real life F-4 serial numbers. F100NumFuseXXX.tga – 3-digit FW-XXX numbers found on the side of the F-100 fuselage. There are 100 textures that contain some of the real F-100 serial numbers. F100NumTailXXX.tga – 5 digit serial numbers found on the tail of the F-100. These numbers correspond to the numbers in the F100NumFuse files, so if you edit one series, you should also edit the other to make them match. F104FuseNumXXX.tga – 3-digit FG-XXX numbers found on the side of the F-104 fuselage. There are 100 textures that contain some of the real F-104 serial numbers. F104TailNumXXX.tga – 5 digit serial numbers found on the tail of the F-104 also matching the numbers on the fuselage. SovietNumXXX.tga – 2 digit numbers found on all Soviet aircraft. 100 textures (000-099) indicate numbers 00-99 in the color red. USMCNumXXX.tga – 2 digit numbers found on the USMC skins. 100 textures (000-099) indicate numbers 00-99. USNAttackNumXXX.tga – 3 digit numbers found on Navy Skyhawks. 100 textures (000-099) indicate numbers 300-324, 400-424, 500-524 and 600-624. USNFighterNumXXX.tga – 3 digit numbers found on Navy Phantoms. 100 textures (000-099) indicate numbers 100-124, 200-224, 300-324 and 400-424. GermanNumXXX.tga – 2 digit numbers found on the German aircraft. 100 textures (000-099) indicate 00-99. ItalianNumXXX.tga – 2 digit numbers found on the Italian aircraft. 100 textures (000-099) indicate numbers 00-99. SqPatchXXX.tga – squadron badges that are used on certain aircraft and skins. SqNameXXX.tga – squadron names that are used by US Navy and US Marine squadrons. SqNumXXX.tga – squadron “number” that are used by some non-US aircraft and skins. Italian 154/6 (010) has the number “6-”, Italian 155/50 (011) has “50-”, German JBG31 (012) has letter “DA”, and French EC 2/11 (013) has “11-RH” A4_SqTailLXXX.tga and A4_SqTailRXXX.tga – squadron tail markings for A-4 Skyhawks. These have a left and right side, and cannot be flipped in the decals.ini files for various reasons. Each squadron in the game has a decal set for each plane, so although it would not be historically correct for VF-84 Jolly Rogers to fly on A-4, it is still possible in the game. F4_SqTailLXXX.tga and F4_SqTailRXXX.tga – as above, except for F-4 tail. F104_SqTaiilLXXX.tga and F104SqTailRXXX.tga – as above, except for F-104 tail. Troubleshooting tips If your decal isn’t showing up, here are some things you might want to look into… * Remember, the maximum number of these is 4 per mesh piece (fuselage, nose, vertical tail...etc, etc). If you’re applying a lot of decals and some of them are not showing up, check to make sure you didn’t exceed this limit. * Make sure you have the correct name for the mesh you’re trying to apply the decal to. Mesh names are not the same from aircraft to aircraft. * Make sure the position specified is within the mesh. For example, each wings are usually broken up into two meshes – inner wing and outer wing, so make sure you have the right mesh and right position. * If your decal is not responding to the dynamic variable you’ve selected, check the DecalLevel. Set it to 0 to make it use Nation ID, 1 for Squadron ID, 2 for Aircraft Number, and 3 for Kill Number. * Double check your filenames and naming convention. Make sure you’ve saved the file with the correct three-digit number at the end. * Make sure the decal texture is in the right directory. The texture must be placed in Objects/Aircraft, not in the individual aircraft folder. ****
-
1 point
Version v1.0b
263 downloads
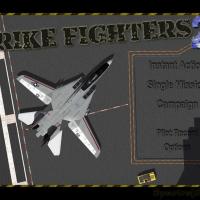
F-14 Menu Screens, Speech and Menu Music Mod. v1.0 For SF2:(Any) Series and or Mods addons. By Spectre8750 This is a set of F-14 Screens plus Navy Speech edited to sound as through a Radio set. Music is Chopped and looped Ace Combat 6 Themed selections. Install: Just drop the Folders into any SF2 Series Stock or Modded Game root Directory. Choose one of three Mainscreens and rename to Mainscreen.jpg. Hope you Enjoy Regards Spectre8750 -
1 point
Important Information
By using this site, you agree to our Terms of Use, Privacy Policy, and We have placed cookies on your device to help make this website better. You can adjust your cookie settings, otherwise we'll assume you're okay to continue..


