Leaderboard
Popular Content
Showing most liked content on 06/24/2022 in all areas
-
3 points
-
3 points
-
2 points
Version 1.0.0
100 downloads
Hello and thank you for downloading my work. https://gkabs.net https://gulfknights.net What's included: Toyota with 107mm Type 63 rockets comes with 3 textures and a new sound file All my files should include the Strike Fighters 2 Series game file (.old) and the texture required. (tested and work only for SF2) Installation: Copy files to their proper folder add this to your soundlist under the Flight folder if you don't have it listed there. [SoundList] SoundFilexxx=Toyota [Toyota] Priority=NORMAL 3DSound=TRUE DopplerEffect=TRUE NumBuffers=4 MaxDist=2500.000000 MinDist=400.000000 InsideConeAngle=360 OutsideConeAngle=360 ConeOutsideVolume=100 Note Change the XXX with the last number in your soundlist If you need any further help please read the Knowledge Base at: https://combatace.com/forums/forum/268-thirdwire-strike-fighters-2-series-knowledge-base/ 1.0.0 LICENSE: You are allowed to use this model and everything included with it for personal non-profit use for Strike fighters 1 and 2. For use outside of this scope, you need to contact me for permission. gkabs@gkabs.net Credit goes to the following: Third Wire for making this outstanding game. Credit goes to https://www.textures.com as I use a lot of their photos to create the skins. Google for some photos and information. And finally not to forget the wonderful site of https://combatace.com and all the nice members and their dedicated support for this game. Software used: 3d Max 2009 UVLayout v2 Pro Substance Painter Adobe Photoshop If you need any assistance please contact me at gkabs@gkabs.net gulfknights.net -
2 pointsthank you sir, although i figure its OCD until burnout in my case taking it back south to kick off Block 25. Texas Falcons yall...
-
1 point
-
1 point
-
1 pointHi DaniloE31. Thank you for the advice. It's not the help I was looking for but you make a valid point. If we're simulating air combat, a huge part of that is mutual support and tactics. It's just that the AI is so bad, it takes the fun out of the game if I have to ignore mission objectives to baby sit the wingman. In any case i think I figured out what I need. I found the file TG78_DATA.INI in the campaign folder and changed these lines from 4 to 16 for all the Navy Air Units. MaxAircraft=16 StartAircraft=16 MaxPilots=16 StartPilots=16 I'm not sure what all the lines mean exactly but now I have a much larger roster. Thanks, Wizard
-
1 pointglad to hear you and the family are ok. hopefully the vacation helps to smooth things back out have a schokobananen for me (the pastry, not the candy)
-
1 pointUkrainian people have already collected more than $10 million to donate three BayraktarTB2 UAVs to the Ukrainian Army in less than 24 hours! The aim of the fundraising was to collect $15 million in a week. Two out of three Bayraktars already guaranteed.
-
1 pointView File Toyota tactical with 107mm rockets launcher Hello and thank you for downloading my work. https://gkabs.net https://gulfknights.net What's included: Toyota with 107mm Type 63 rockets comes with 3 textures and a new sound file All my files should include the Strike Fighters 2 Series game file (.old) and the texture required. (tested and work only for SF2) Installation: Copy files to their proper folder add this to your soundlist under the Flight folder if you don't have it listed there. [SoundList] SoundFilexxx=Toyota [Toyota] Priority=NORMAL 3DSound=TRUE DopplerEffect=TRUE NumBuffers=4 MaxDist=2500.000000 MinDist=400.000000 InsideConeAngle=360 OutsideConeAngle=360 ConeOutsideVolume=100 Note Change the XXX with the last number in your soundlist If you need any further help please read the Knowledge Base at: https://combatace.com/forums/forum/268-thirdwire-strike-fighters-2-series-knowledge-base/ 1.0.0 LICENSE: You are allowed to use this model and everything included with it for personal non-profit use for Strike fighters 1 and 2. For use outside of this scope, you need to contact me for permission. gkabs@gkabs.net Credit goes to the following: Third Wire for making this outstanding game. Credit goes to https://www.textures.com as I use a lot of their photos to create the skins. Google for some photos and information. And finally not to forget the wonderful site of https://combatace.com and all the nice members and their dedicated support for this game. Software used: 3d Max 2009 UVLayout v2 Pro Substance Painter Adobe Photoshop If you need any assistance please contact me at gkabs@gkabs.net gulfknights.net Submitter GKABS Submitted 06/23/2022 Category Ground Object Mods
-
1 point
-
1 point
-
1 pointMirage F1EQ-4 V3.0 waits for approval. There is a lot of improvements inside The usual preview
-
1 pointHello everyone! While working on A-6s and EA-6s series aircraft for SFCE, I just thought of this. I am going to share techniques I use to inplement the wing vortex and pinpoint the location for it. That way any modders can get an idea and use it. IMPORTANT NOTES: Any codes after SystemName[032] will not work. I discovered this limitation. When creating wing vortex, please note that if any aircraft have a large wing, such as A-6, it would be ideal to either make larger vortex to use less SystemName or experiment an alternative methods. Personally I think it is impratical to try to implement the wing vortex on A-6s until TK fix this limitation. I recommend adding wing vortex to any aircraft with smaller wing span, such as F-4s, F-104s, Mirage IIIs, etc.. However, for the sake of tutorial, I will leave this post intact. A-6A is one of perfect example since it have various shapes from engine intaker to wingtip. First step - Pinpoint the location Note: The most useful tools I use is LOD Viewer. This is Godsent tool. Without it, it would have taken me probably twice or even more time required for the project. All hat off to Mue for his masterpieces! 1) Use LOD Viewer to pinpoint the first location of wing vortex. 2) Locator - I use light to help me locating where vortex would be. Here is an example in aircraft data ini file: [Fuselage] . . . (BOTTOM of [AircraftData] code) SystemName[014]=Locator1 SystemName[015]=Locator2 SystemName[016]=Locator3 SystemName[017]=Locator4 SystemName[018]=Locator5 SystemName[019]=Locator6 SystemName[020]=Locator7 SystemName[021]=Locator8 SystemName[022]=Locator9 SystemName[023]=Locator10 SystemName[024]=Locator11 SystemName[025]=Locator12 SystemName[026]=Locator13 SystemName[027]=Locator14 SystemName[028]=Locator15 Then Added this codes: // Wing Vortex --------------------------------------------------------- [Locator1] SystemType=LIGHT Position=-1.0,0.74,0.45 LightSrcOffset=0.0,0.0,0.0 Color=1.0,1.0,1.0 Brightness=0.05 LightSrcRange=50.0 LightRange=10.0 CanFlash=FALSE MovingLight=TRUE [Locator2] SystemType=LIGHT Position=-1.4,0.27,0.43 LightSrcOffset=0.0,0.0,0.0 Color=1.0,1.0,1.0 Brightness=0.05 LightSrcRange=50.0 LightRange=10.0 CanFlash=FALSE MovingLight=TRUE [Locator3] SystemType=LIGHT Position=-1.8,-0.20,0.41 LightSrcOffset=0.0,0.0,0.0 Color=1.0,1.0,1.0 Brightness=0.05 LightSrcRange=50.0 LightRange=10.0 CanFlash=FALSE MovingLight=TRUE [Locator4] SystemType=LIGHT Position=-2.2,-0.75,0.39 LightSrcOffset=0.0,0.0,0.0 Color=1.0,1.0,1.0 Brightness=0.05 LightSrcRange=50.0 LightRange=10.0 CanFlash=FALSE MovingLight=TRUE //-------------------------------- [Locator5] SystemType=LIGHT Position=-2.6,-1.0,0.37 LightSrcOffset=0.0,0.0,0.0 Color=1.0,1.0,1.0 Brightness=0.05 LightSrcRange=50.0 LightRange=10.0 CanFlash=FALSE MovingLight=TRUE [Locator6] SystemType=LIGHT Position=-3.0,-1.21,0.37 LightSrcOffset=0.0,0.0,0.0 Color=1.0,1.0,1.0 Brightness=0.05 LightSrcRange=50.0 LightRange=10.0 CanFlash=FALSE MovingLight=TRUE [Locator7] SystemType=LIGHT Position=-3.4,-1.42,0.37 LightSrcOffset=0.0,0.0,0.0 Color=1.0,1.0,1.0 Brightness=0.05 LightSrcRange=50.0 LightRange=10.0 CanFlash=FALSE MovingLight=TRUE [Locator8] SystemType=LIGHT Position=-3.8,-1.63,0.37 LightSrcOffset=0.0,0.0,0.0 Color=1.0,1.0,1.0 Brightness=0.05 LightSrcRange=50.0 LightRange=10.0 CanFlash=FALSE MovingLight=TRUE [Locator9] SystemType=LIGHT Position=-4.2,-1.84,0.37 LightSrcOffset=0.0,0.0,0.0 Color=1.0,1.0,1.0 Brightness=0.05 LightSrcRange=50.0 LightRange=10.0 CanFlash=FALSE MovingLight=TRUE [Locator10] SystemType=LIGHT Position=-4.6,-2.05,0.37 LightSrcOffset=0.0,0.0,0.0 Color=1.0,1.0,1.0 Brightness=0.05 LightSrcRange=50.0 LightRange=10.0 CanFlash=FALSE MovingLight=TRUE [Locator11] SystemType=LIGHT Position=-5.0,-2.26,0.37 LightSrcOffset=0.0,0.0,0.0 Color=1.0,1.0,1.0 Brightness=0.05 LightSrcRange=50.0 LightRange=10.0 CanFlash=FALSE MovingLight=TRUE [Locator12] SystemType=LIGHT Position=-5.4,-2.47,0.37 LightSrcOffset=0.0,0.0,0.0 Color=1.0,1.0,1.0 Brightness=0.05 LightSrcRange=50.0 LightRange=10.0 CanFlash=FALSE MovingLight=TRUE [Locator13] SystemType=LIGHT Position=-5.8,-2.68,0.37 LightSrcOffset=0.0,0.0,0.0 Color=1.0,1.0,1.0 Brightness=0.05 LightSrcRange=50.0 LightRange=10.0 CanFlash=FALSE MovingLight=TRUE [Locator14] SystemType=LIGHT Position=-6.2,-2.89,0.37 LightSrcOffset=0.0,0.0,0.0 Color=1.0,1.0,1.0 Brightness=0.05 LightSrcRange=50.0 LightRange=10.0 CanFlash=FALSE MovingLight=TRUE [Locator15] SystemType=LIGHT Position=-6.6,-3.10,0.37 LightSrcOffset=0.0,0.0,0.0 Color=1.0,1.0,1.0 Brightness=0.05 LightSrcRange=50.0 LightRange=10.0 CanFlash=FALSE MovingLight=TRUE When running SF2, all light positions are re-adjusted until they match the shape and align with the 'lining' of front edge of wing. NOTE: I recommend being above the wing, not 'on surface' of wing. When you pull high Gs, the wing will sink into the wing. You don't want that. Instead, you would rather for the wing vortex to be direclty above the wing. 3) Save all position information from locator and erase all Locator codes since you no longer need it. It is better to have clean codes instead of messy in aircraft data ini. However, now you have saved positions as reference for wing vortex effects. // Wing Vortex --------------------------------------------------------- // 1 = Position=-1.0,0.74,0.45 // 2 = Position=-1.4,0.27,0.43 // 3 = Position=-1.8,-0.20,0.41 // 4 = Position=-2.2,-0.75,0.39 // 5 = Position=-2.6,-1.0,0.37 // 6 = Position=-3.0,-1.21,0.37 // 7 = Position=-3.4,-1.42,0.37 // 8 = Position=-3.8,-1.63,0.37 // 9 = Position=-4.2,-1.84,0.37 // 10 = Position=-4.6,-2.05,0.37 // 11 = Position=-5.0,-2.26,0.37 // 12 = Position=-5.4,-2.47,0.37 // 13 = Position=-5.8,-2.68,0.37 // 14 = Position=-6.2,-2.89,0.37 // 15 = Position=-6.6,-3.10,0.37 // 16 = Position=-7.0,-3.31,0.37 // 17 = Position=-7.4,-3.52,0.37 // 18 = Position=-7.8,-3.73,0.37 // 19 = Position=-8.2,-3.94,0.37 // 20 = Position=-8.6,-4.15,0.37 4) Prepare effect files for aircraft. In next version of SFCE, you will see two files in Effects folder: AIRCRAFT_A-6_VortexEmitter.ini VORTEX_A6WingVortex.tga In AIRCRAFT_A-6_VortexEmitter.ini, you will see this code: [EmitterType001] Name=A-6VortexEmitter1 EmissionType=POINT_EMITTER UpdateType=NON_MOVING MaxVisibleDistance=4000.0 EmissionRate=0.0005 EmissionVolume=0.01,0.01,0.01 EmissionVelocityTableType=CONSTANT EmissionVelocity=0.0,0.0,0.0 EmissionVelocityDeviation=0.0 ParticleUpdateType=SIMPLE_POINT ParticleRenderType=SPRITE ParticleRandomOrientation=TRUE ParticleLifeTime=0.26 ParticleLifeTimeDeviation=0.25 ParticleWeight=-0.1 ParticleRandomness=0.03 ParticleDragFactor=1.00 ParticleInheritence=1.0 ParticleWindFactor=0.0 ParticleColorTableType=TABLE ParticleColor[01].Time=0.000000 ParticleColor[01].Value=1.000000,1.000000,1.000000,0.00000 ParticleColor[02].Time=0.500000 ParticleColor[02].Value=1.000000,1.000000,1.000000,0.100000 ParticleColor[03].Time=1.00000 ParticleColor[03].Value=1.000000,1.000000,1.000000,0.00000 ParticleSizeTableType=TABLE ParticleSize[01].Time=0.000000 ParticleSize[01].Value=0.20 ParticleSize[02].Time=0.500000 ParticleSize[02].Value=0.35 ParticleSize[03].Time=1.000000 ParticleSize[03].Value=0.70 TextureMaterial=A6WingVortexMaterial . . . //============================================================================= [A6WingVortexMaterial] EffectShaderName=effectLightLevel.fx DepthBufferCheck=TRUE DepthBufferWrite=FALSE IgnoreRenderOrder=FALSE AlphaTestEnabled=FALSE LightEnabled=FALSE UseLightLevel=TRUE SpecularEnabled=FALSE EmissiveEnabled=FALSE AmbientColor=1.000000,1.000000,1.000000,1.000000 DiffuseColor=1.000000,1.000000,1.000000,1.000000 ZBufferOffset=0.000000 PriorityLevel=3 BlendOp=BLEND_SRC_ALPHA NumTextureStages=1 TextureStage[01].TextureName=VORTEX_A6WingVortex.tga TextureStage[01].MipMap=FALSE TextureStage[01].FilterEnabled=TRUE TextureStage[01].StageColorOp=TEXTURE_MODULATE_DIFFUSE TextureStage[01].StageAlphaOp=TEXTURE_MODULATE_DIFFUSE 5) Prepare your wing vortex codes. In aircraft data ini, add this code under [AircraftData]: [AircraftData] . . . (Bottom of [AircraftData] codes) Component[011]=LeftWingVortex1 Component[012]=LeftWingVortex2 Component[013]=LeftWingVortex3 Component[014]=LeftWingVortex4 Component[015]=LeftWingVortex5 Component[016]=LeftWingVortex6 Component[017]=LeftWingVortex7 Component[018]=LeftWingVortex8 Component[019]=LeftWingVortex9 Component[020]=LeftWingVortex10 Component[021]=LeftWingVortex11 Component[022]=LeftWingVortex12 Component[023]=LeftWingVortex13 Component[024]=LeftWingVortex14 Component[025]=LeftWingVortex15 Now with the reference codes you proved, use it for LeftWingVortexXXX. Here is an example: NOTE: I recommmend you to do one LeftWingVortexXXX a time to test it in-game and adjust it before moving to next one. // Wing Vortex --------------------------------------------------------- // 1 = Position=-1.0,0.74,0.45 // 2 = Position=-1.4,0.27,0.43 // 3 = Position=-1.8,-0.20,0.41 // 4 = Position=-2.2,-0.75,0.39 // 5 = Position=-2.6,-1.0,0.37 // 6 = Position=-3.0,-1.21,0.37 // 7 = Position=-3.4,-1.42,0.37 // 8 = Position=-3.8,-1.63,0.37 // 9 = Position=-4.2,-1.84,0.37 // 10 = Position=-4.6,-2.05,0.37 // 11 = Position=-5.0,-2.26,0.37 // 12 = Position=-5.4,-2.47,0.37 // 13 = Position=-5.8,-2.68,0.37 // 14 = Position=-6.2,-2.89,0.37 // 15 = Position=-6.6,-3.10,0.37 // 16 = Position=-7.0,-3.31,0.37 // 17 = Position=-7.4,-3.52,0.37 // 18 = Position=-7.8,-3.73,0.37 // 19 = Position=-8.2,-3.94,0.37 // 20 = Position=-8.6,-4.15,0.37 //-------------------------------- [LeftWingVortex1] ParentComponentName=Fuselage ModelNodeName=LeftWing DestroyedNodeName= ShowFromCockpit=TRUE DetachWhenDestroyed=False DamageRating=DISABLED MassFraction=0.0 HasVortexEmitter=TRUE VortexEmitterName=A-6VortexEmitter1 VortexPosition=-1.0,0.74,0.45 //VortexG=5.0 Note how I added // to VortexG=5.0. We don't want to enable that just yet until you perfect your wing vortex. 6) In SF2, it is ideal to change the option (Start in Air, near enemy), so you can be in the air quickly with sufficient airspeed to accelerate and do hard turning for wing vortex effects testing. Remember when stating that the vortex should be directly above the wing? You will see it when pulling hard, the vortex would move down and it should touch the surface of wing. From there, you keep tweaking both aircraft effect file and the position of it in aircraft data ini. At first it may seem tendious but it will become a second nature to you. After tweaking and flying several times, the first left wing vortex is now done. In the code, re-anble VortexG=5.0 by removing '//'. Now you have a first working wing vortex. You are ready to move on the next one. When you finish working with the rest of LeftWingVortexXXX, doing the RightWIngVortexXXX is not that difficult. All you have to do is copy the entire LeftWingVortex list and codes, then rename it to RightWingVortex AND remove '-' sign for 'X' position in all vortex position. Then you are set! Hope this tutorial will help anyone who struggle to work with the wing vortex effects. Eagle114th
-
1 point@Stratos No offense, but maybe you should remove these posts starting from your question (and including this post I wrote), as they are not pertinent to the topic which is about clouds. Like Stary said, this is a crude shader tweak and it comes with rendering issues. Avionics are a totally different matter, we cannot create new functions for them from scratch. We have no source code and reverse engineering the avionics DLL library files is not feasible. Besides, during the development of ODS 30AE I tried my best to see if we could reproduce IR images for the DTV screen filter via shader. I discovered that TK did NOT implement some DirectX 10 blending operations which would be needed for that. Point being, we've beaten this horse already. Only TK can change things for good, and he won't.
-
1 pointNope, overcast and inclement are 2D cloud layers, totally unrelated, they use a different rendering and shader, so all is fine. I wouldn't lower those if we could, because unfortunately the game is hardcoded to make terrain rendering invisible when above those 2D cloud layers. What this means is that on terrains spanning from sea level up to 5km or more of elevation, you'd get invisible mountains when flying over the layer, hence you can crash into or even spawn above invisible terrain. One of TK's weird (or cheap) design decisions; of course, this doesn't happen on stock terrains which hardly reach a safe value of 4km of elevation.
-
1 pointHi Knightwolf45, did you ever finish the two engined version of the condor? I do like it a lot☺
-
1 point
Version 1.0
3,662 downloads
Description: This is optional high resolution repaint/treemod for SF2:V VietnamSEA map, I call it "Green Hell 3.5" ;) SF2:Vietnam required for Vietnam map (doh!) SF2 all-merged install preferred made and tested im May 2013 environment -included both 1024x1024 pixels and smaller 512x512 pixels versions for those with older computers -repainted hangars/base objects from my WW2 hangars pack, fits this particular scenery ok in my opinion -city textures by Brain32 from his excellent Vietnam repaint, used under freeware license -full TOD coverage included Installation: Backup your Vietnam folder, unpack and move/copy new VietnamSEA to your Vietnam folder, overwrite when asked. Legal mumbo jumbo: Freeware license apply, no to be used as part of any payware have phun Stary -
1 pointThis is not a wish list. Only a status updade from us modders. My wips: F-4F Skins for Volker´s new F-4F Focke Wulf / Piaggio P-149D Fiat G.91 R.3, R.4 & T.3 New Starfighters (therefor a new 3d Guru is needed). Tiger Moth Skins Tornado IDS & ECR skins F-104J Eiko MiG-21 SPS-K F-104 A+C skins HS.780 Andover
-
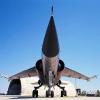
1 pointFile Name: F-104J Starfighter SF2 File Submitter: pappychksix File Submitted: 28 November 2012 File Category: SF2 Series Add On Aircraft This is a fast repaint of the F-104G Starfighter. It represents an F-104J Starfighters as used by the Japanese Air Self Defence Force, 1962 to 1986. Since the Japanese were forbidden at the time to have have aircraft with an offensive capability, I removed everything except IRM, but any weapons you want can be re-added. There squadrons are included, the 302 Hikotai, 206 Hilotai, and the last user of the "J" Starfighter, the Air Proving Wing at Gifu. This is not a complete aircraft. There are no LOD's, cockpit or avionics included. To make this work properly, you must have the F-104G Starfighter from SF2 Europe, the cockpit from Strike Fighters and the DLC F-4EJ Phantom II since the serial numbers I used are from that aircraft. Thanks to TK and his crew for the Starfighter and the game. Enjoy, Pappy Click here to download this file
-
1 point
-
1 pointMy current project: F-104J "Eiko" Natural metal skins are done. ADC grey and some special shemes will follow. All skins are in 2ß48x2048
-
1 pointI figured that this trick I found would be useful to someone. My apologies if this has already been covered. If you look at a stock aircraft's DECAL.INI you will find that they have decal with names that do not have numbers on the ends. But if you look in the CAT files the decals all have numbers after them. Well, after opening the decal NATIONNAME002.TGA, I figured out that the number at the end of the decal's name corresponds to a nation by means of the number of the nation: [Nation002] <--- This is the nation's number. ---> NATIONAME002.TGA Name=USAF DisplayName=United States Air Force That would mean that the NATIONNAME002 decal would contain the text USAF, which is correct. You can try this with any stock, NATIONNAMEXXX decal. The decal will always contain the name of the nation. Now a stock nation's markings will be contained in the four decals INSIGNIAFUSELXXX.TGA, INSIGNIAFUSERXXX.TGA, INSIGNIAWINGLXXX.TGA, and INSIGNIAWINGRXXX.TGA. The three x's would be replaced by the nation's number. Just create the correctly named decals, and the game engine will add them to stock aircraft when you fly as that nation.
Important Information
By using this site, you agree to our Terms of Use, Privacy Policy, and We have placed cookies on your device to help make this website better. You can adjust your cookie settings, otherwise we'll assume you're okay to continue..

