Leaderboard
Popular Content
Showing most liked content on 06/10/2022 in all areas
-
9 points
-
8 points
-
6 pointsYes it's the 3d max orthographic view lol Completed the UV and the first weapon for the pickup the UB-16 empty spade in the UV for other weapons
-
6 points
-
6 points
-
4 pointsI think, that i can release a first Beta this weekend. It contains the ukrainian airbases which i made as real looking as possible and the russian airbases which are made as placeholders. In a further step i will make the russian bases as unique and real like the ukrainians are already done. Then i made a placeholder targetarea for Sewastopol Harbour. If you use SF2NA as basic game then you will find Krivak destroyers in the harbour. All other games as basic will find an empty harbour. So a visit to Sewastopol looks in SF2NA: This targetarea is far away to be complete.
-
3 points
-
3 points
-
3 pointstheres been a few missing details from the Bats skin, especially if you want it from the early 90s and yeah, they mostly all had nosearts, but i can only find about half of them
-
1 point
Version 1.32
4,476 downloads
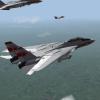
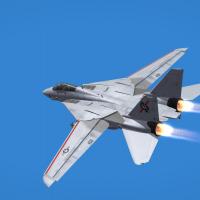
The Mirage Factory F-14 Tomcat Super Pack V1.32 22 APR, 2017 What it is: This is the F-14 Tomcat Super Pack v1.32 Full. It includes addition of Direct Lift Control to the Flight Model, AI AIM-54 Phoenix Missiles, modified Iranian F-14 loadouts and other minor adjustments. ================= Installation: =====CAUTION===== 1. This was tested at July 2013 patch level, on an "All 5 Merged" install, as well as a "vanilla" SF2:NA install. Because it uses AvionicsF14A.dll, will require at least SF2:NA (or a TW F-14) to work! It will not work on Gen 1 sims, nor will it work correctly on pre-April 2012 installs! (Caveat: Avionics70.dll F-14D should work on pre-April patch levels). 2. It is HIGHLY recommended you back up your current F-14s to a back up folder. If you have extra skins installed and wish to keep your current folders, be ABSOLUTELY CERTAIN to delete the cockpit folders from each aircraft folder after backing up, as this install features updated cockpits, and retention of the old folders will lead to artifacting on the RWR, VDI, and other systems. If you have custom skins installed, be sure to back up your F-14(A/A+/B/D).ini to preserve the texture set data. ================= 1. Unzip the contents of the F-14SP_V132.7z file into a folder. 1a. If you have installed the Avionics70 F-14D, ensure you back up the .ini files if you haven't renamed the bird, since this install will overwrite F-14D_92, 96 and 06! 2. Open your Strike Fighters 2 mod folder (e.g., C:\User\Saved Games\ThirdWire\StrikeFighters2 Europe\...) 3. CAUTION: (ONLY FOR PRE-v1.30 VERSIONS), DELETE THE PRE-1.30 COCKPIT FOLDERS!!! FAILURE TO DO SO WILL CAUSE ARTIFACTING ON THE VDI, HSD, RWR, AND POSSIBLY OTHER SYSTEMS!!! 3.a. IGNORE STEP 3 IF YOU ARE UPDATING v1.30 OR v1.31 4. Copy the contents of the unzipped Effects, Flight, Missions, Objects, and Sounds folders into your SF2 mod folder, allowing all files to overwrite (Effects, Flight, Missions, Objects\Aircraft, Objects\Weapons, etc). 4a. (RECOMMENDED) Review the flight manual for tactical employment of the F-14. 5. Go fly! NOTE: If this either a new install or an update to the F-14SP v1.30 or 1.31, follow the above procedure, allowing all files to overwrite. If this is an update to 1.14-1.22, follow step 3; for in-depth instructions, follow the F-14SP V132 Installation Instructions.pdf ================= EXTRAS: -You may choose to use the Avionics70.dll F-14D for SAR mode on strike missions. If you wish to do so, see Section 6 of the F-14 SP Update V132 word document (Para 6.1-6.3) for install procedures and recommendations. ================= Aircraft Included: F-14A (1974-1984, 1982-1995, 1996-2004) Iranian F-14A (1977-2030) F-14A+ (1987-1990) F-14B (1991-1995, 1996-2005) F-14D (1992-1995, 1996-2006, 2005-2006) ================= List of effective changes: v1.32 22 Apr 2017 1. Added Direct Lift Control, based on Cliff7600's spoiler speedbreak mod 2. Added AI Phoenix missiles with Rmax of 65nm to improve AI F-14 Probability of Kill 3. Updated flight manual to reflect DLC change and AI AIM-54 (now 75pgs) 4. Assigned White external fuel tanks to F-14A_74 and F-14A_IR (IR does not carry externals by default) 5. Fixed White fuel tank capacity (was not adjusted with grey tank prior) 6. Updated Iranian F-14A loadouts to better match most current data from ACIG 7. Updated/Added Iranian AIM-7E-3 and AIM-9J models to equip Iranian F-14As 8. Changed F-14A_IR availability date to 2030 v1.31 1 Aug 2016 1. Updated engine static thrust to match NATOPS installed measurements 2. Updated flight manual to reflect thrust change v1.30 11 Jun, 2016 1. Updated F-14A/B cockpit by Chris "ToS" with tweaks by Crusader & Caesar 2. Fixed radar scan elevation in VSL-Hi 3. Adjusted aircraft empty weights to remove gun ammo and trapped fuel 4. Added AI F-14s to improve AI survivability in a dogfight 5. Adjusted default gun tracking range to 1000ft/305m. Gun is now more accurate both with and without lock. (Crusader noticed & it was implemented) 6. Adjusted auto-departure numbers to allow the aircraft to fly and depart more naturally 7. Adjusted maximum altitude to provide player engines a buffer between 55,000 and 60,000 feet. 8. Updated cockpit avionics & weapon symbology 9. Updated Wing Sweep schedule and gave Glove Vanes smooth animation to match NATOPS 10. Reduced effectiveness of ALQ-100 & 126 11. Adjusted bands on the AN/ALR-45/50 to match published data 12. Adjusted AoA Indexer to match NATOPS (green = slow, yellow = on-speed, red = fast) 13. Adjusted F-14D_96 loadouts to remove extra AIM-7 loaded into Station 5 alongside AIM-54s 14. Adjusted Sedjil pylon allowable weight (was too low to equip missile) 15. Added inaugural cruise paint schemes for VF-1, -2, -14, -24, -32, -41, -84, -114, and -213 16. Adjusted avionics symbology 17. Added 74-page F-14 SP Flight Manual “F-14SP 01-F14ABD-1.pdf” 18. Fixed ACM Panel (Crusader) 19. Fixed F-14A_82 CAP loadout, which put the ALE-29/39 in the wrong location 20. Fixed jettison point of ECA/EFA to forward Phoenix Station 6R to match installed location 21. Changed skins to .jpeg format to significantly reduce size of mod without sacrificing detail 22. Adjusted external tank fuel quantities to 1800 lbs/tank (maximum internal and external fuel together now matches real-world 19,800lbs, rather than over 20,000lbs). 23. Adjusted engine thrust and Specific Fuel Consumption (SFC). The F110 had approximately 60% of the TF30’s SFC. The F110 was adjusted to lower SFC, while the TF30 was adjusted to increase SFC. ================= Credits: Model: Flying Toaster, Oli Cockpit: Chris (original and new update) with tweaks by Crusader and Caesar FM: ThirdWire, Caesar, Column5, Spectre8750, Cliff7600 Avionics: Crusader, ThirdWire, Sup Gen, Caesar, Dave, CrazyhorseB34 Pilots: Old_Diego, CrazyhorseB34 Skins: Dave, Spectre8750, Column5, Caesar NATOPS Textures: Chris Extra Hangar and Loading Screens: Dave Ejection Mod: Stary Testing: Caesar, Sup Gen, Dave, EricJ, Spectre8750, Saisran, Cougar_1979 Weapons: Ravenclaw, wpnssgt, Bunyap and others New Phoenix: Ravenclaw Manuals/Flight Manual: Caesar ===Dedidacted to Oli=== -
1 pointWell chaps, some of you may have noticed I've been out of the flying simulator scene for quite some time. Reason being is because of my eyesight problems (cataracts)... I just didn't have the vision needed to play any kind of flight simulator game, as I couldn't focus properly and it gave me headaches. Had the eye surgery yesterday and all seems to have gone ok... there will be a bedding in process to allow the eye to settle down (could be a couple of weeks or more). Hopefully I'll be back up in the skies once more, ready to be shot down in flames in the near future. The only thing I've played in recent weeks is a brief spell in Arma Reforger, but ended up stopping as I couldn't finish any gameplay as I got the headaches. More recently, Snowrunner has had some attention as it's just a game that I can play in very short bursts without concentrating too hard and doesn't have the complexity of flight sims. Have to rest the old peepers now as I'm struggling to even type this message as you've guessed it, my specs don't work properly anymore as my prescription has bloody changed!
-
1 point10 June 2022 Dear Fighter Pilots, Partners and Friends, This week we released DCS 2.7.15.25026 to Open Beta with many new enhancements and fixes that can be viewed in the full change log. Most notably, we are pleased to announce that DCS: South Atlantic map is now available. To provide time to adequately test, the South Atlantic Assets Pack will be delivered in an upcoming Open Beta update. The South Atlantic map encompasses parts of the Atlantic, Pacific and Southern oceans. Covering southern Argentina and Chile, the map also includes a recreation of the Falkland/Malvinas Islands. We are also pleased to provide you with a free updated external model of the CVN-74 John C. Stennis. This is an initial step in improving the free Nimitz-class aircraft carrier. Thank you for your passion and support. Yours sincerely, Eagle Dynamics DCS: South Atlantic Available now in Open Beta The RAZBAM Terrain Development Team is proud to present the South Atlantic map that is a beautiful and majestic combination of Argentina, Chile, and the Falkland/Malvinas Islands. The topography of the region includes the beautifully rugged mountains of Chile, the vast and colorful Patagonian plains of Argentina, and the windswept islands of West and East Falklands/Malvinas. Covering an area of 3.1 million square kilometres, the team’s goal has been to give the DCS community the opportunity to develop missions that reflect the scale and complexity of modern-day operations in this scenic region. When developing this map, the team was proactive in listening to the DCS community regarding both scale and requirements of modern-day military operations. This provides the best possible experience and leverages land-class textures drawn from aerial and satellite photography. Development of the South Atlantic map will continue, and the team is now moving their focus from the Falkland/Malvinas Islands to mainland Argentina and Chile. They will flesh out the rural areas of the map to provide a more authentic and lived-in look. This will include adding additional buildings, infrastructure, and tidying up vector data (like mountains). Our community's input pushed for the inclusion of mainland and the team dedicated to make it even better. Moving forward, additional airfields will be added throughout the map to provide a diversified area of Naval and Fighter operations. The goal is to include all airfields at a high quality level. More villages, settlements, and road infrastructure improvements will be added across the various regions. The following items will also be further improved during the early access period: Visible tiling around some airfields and at certain view angles. Some angular sea cliffs Forest tiling from some view angles The DCS: South Atlantic map has undertaken a new strategy for generating terrain. Whereas all other DCS maps rely heavily on art-created ground textures combined with satellite textures, the South Atlantic map relies mostly on satellite textures. While this results in a more realistic looking map at medium to high altitudes, ground textures may appear less defined at low altitude. The team is committed to further improving the low-altitude terrain textures. CVN-74 Stennis Free Update We have updated the 3D exterior model of the CVN-74 John C. Stennis aircraft carrier, and are pleased to announce that this update is completely free to all of you. We eagerly await your feedback. Thank you again for your passion and support, Yours sincerely,
-
1 point
-
1 point
-
1 point
-
1 pointA-7A being tested with new TMF A-7A cockpit: NOTE: TMF Cockpit is being tweaked to be aligned properly with TW A-7A, along with the improved night light being implemented. Eagle114th
-
1 pointwicked optical illusion, the set of wheels closest to the viewer looks smaller than the set further
-
1 pointAnd Saporoschje is finished now. So it looks in editor tool: And so in game:
-
1 point
-
1 point
-
1 point
-
1 point
-
1 point
-
1 pointHello everyone! While working on A-6s and EA-6s series aircraft for SFCE, I just thought of this. I am going to share techniques I use to inplement the wing vortex and pinpoint the location for it. That way any modders can get an idea and use it. IMPORTANT NOTES: Any codes after SystemName[032] will not work. I discovered this limitation. When creating wing vortex, please note that if any aircraft have a large wing, such as A-6, it would be ideal to either make larger vortex to use less SystemName or experiment an alternative methods. Personally I think it is impratical to try to implement the wing vortex on A-6s until TK fix this limitation. I recommend adding wing vortex to any aircraft with smaller wing span, such as F-4s, F-104s, Mirage IIIs, etc.. However, for the sake of tutorial, I will leave this post intact. A-6A is one of perfect example since it have various shapes from engine intaker to wingtip. First step - Pinpoint the location Note: The most useful tools I use is LOD Viewer. This is Godsent tool. Without it, it would have taken me probably twice or even more time required for the project. All hat off to Mue for his masterpieces! 1) Use LOD Viewer to pinpoint the first location of wing vortex. 2) Locator - I use light to help me locating where vortex would be. Here is an example in aircraft data ini file: [Fuselage] . . . (BOTTOM of [AircraftData] code) SystemName[014]=Locator1 SystemName[015]=Locator2 SystemName[016]=Locator3 SystemName[017]=Locator4 SystemName[018]=Locator5 SystemName[019]=Locator6 SystemName[020]=Locator7 SystemName[021]=Locator8 SystemName[022]=Locator9 SystemName[023]=Locator10 SystemName[024]=Locator11 SystemName[025]=Locator12 SystemName[026]=Locator13 SystemName[027]=Locator14 SystemName[028]=Locator15 Then Added this codes: // Wing Vortex --------------------------------------------------------- [Locator1] SystemType=LIGHT Position=-1.0,0.74,0.45 LightSrcOffset=0.0,0.0,0.0 Color=1.0,1.0,1.0 Brightness=0.05 LightSrcRange=50.0 LightRange=10.0 CanFlash=FALSE MovingLight=TRUE [Locator2] SystemType=LIGHT Position=-1.4,0.27,0.43 LightSrcOffset=0.0,0.0,0.0 Color=1.0,1.0,1.0 Brightness=0.05 LightSrcRange=50.0 LightRange=10.0 CanFlash=FALSE MovingLight=TRUE [Locator3] SystemType=LIGHT Position=-1.8,-0.20,0.41 LightSrcOffset=0.0,0.0,0.0 Color=1.0,1.0,1.0 Brightness=0.05 LightSrcRange=50.0 LightRange=10.0 CanFlash=FALSE MovingLight=TRUE [Locator4] SystemType=LIGHT Position=-2.2,-0.75,0.39 LightSrcOffset=0.0,0.0,0.0 Color=1.0,1.0,1.0 Brightness=0.05 LightSrcRange=50.0 LightRange=10.0 CanFlash=FALSE MovingLight=TRUE //-------------------------------- [Locator5] SystemType=LIGHT Position=-2.6,-1.0,0.37 LightSrcOffset=0.0,0.0,0.0 Color=1.0,1.0,1.0 Brightness=0.05 LightSrcRange=50.0 LightRange=10.0 CanFlash=FALSE MovingLight=TRUE [Locator6] SystemType=LIGHT Position=-3.0,-1.21,0.37 LightSrcOffset=0.0,0.0,0.0 Color=1.0,1.0,1.0 Brightness=0.05 LightSrcRange=50.0 LightRange=10.0 CanFlash=FALSE MovingLight=TRUE [Locator7] SystemType=LIGHT Position=-3.4,-1.42,0.37 LightSrcOffset=0.0,0.0,0.0 Color=1.0,1.0,1.0 Brightness=0.05 LightSrcRange=50.0 LightRange=10.0 CanFlash=FALSE MovingLight=TRUE [Locator8] SystemType=LIGHT Position=-3.8,-1.63,0.37 LightSrcOffset=0.0,0.0,0.0 Color=1.0,1.0,1.0 Brightness=0.05 LightSrcRange=50.0 LightRange=10.0 CanFlash=FALSE MovingLight=TRUE [Locator9] SystemType=LIGHT Position=-4.2,-1.84,0.37 LightSrcOffset=0.0,0.0,0.0 Color=1.0,1.0,1.0 Brightness=0.05 LightSrcRange=50.0 LightRange=10.0 CanFlash=FALSE MovingLight=TRUE [Locator10] SystemType=LIGHT Position=-4.6,-2.05,0.37 LightSrcOffset=0.0,0.0,0.0 Color=1.0,1.0,1.0 Brightness=0.05 LightSrcRange=50.0 LightRange=10.0 CanFlash=FALSE MovingLight=TRUE [Locator11] SystemType=LIGHT Position=-5.0,-2.26,0.37 LightSrcOffset=0.0,0.0,0.0 Color=1.0,1.0,1.0 Brightness=0.05 LightSrcRange=50.0 LightRange=10.0 CanFlash=FALSE MovingLight=TRUE [Locator12] SystemType=LIGHT Position=-5.4,-2.47,0.37 LightSrcOffset=0.0,0.0,0.0 Color=1.0,1.0,1.0 Brightness=0.05 LightSrcRange=50.0 LightRange=10.0 CanFlash=FALSE MovingLight=TRUE [Locator13] SystemType=LIGHT Position=-5.8,-2.68,0.37 LightSrcOffset=0.0,0.0,0.0 Color=1.0,1.0,1.0 Brightness=0.05 LightSrcRange=50.0 LightRange=10.0 CanFlash=FALSE MovingLight=TRUE [Locator14] SystemType=LIGHT Position=-6.2,-2.89,0.37 LightSrcOffset=0.0,0.0,0.0 Color=1.0,1.0,1.0 Brightness=0.05 LightSrcRange=50.0 LightRange=10.0 CanFlash=FALSE MovingLight=TRUE [Locator15] SystemType=LIGHT Position=-6.6,-3.10,0.37 LightSrcOffset=0.0,0.0,0.0 Color=1.0,1.0,1.0 Brightness=0.05 LightSrcRange=50.0 LightRange=10.0 CanFlash=FALSE MovingLight=TRUE When running SF2, all light positions are re-adjusted until they match the shape and align with the 'lining' of front edge of wing. NOTE: I recommend being above the wing, not 'on surface' of wing. When you pull high Gs, the wing will sink into the wing. You don't want that. Instead, you would rather for the wing vortex to be direclty above the wing. 3) Save all position information from locator and erase all Locator codes since you no longer need it. It is better to have clean codes instead of messy in aircraft data ini. However, now you have saved positions as reference for wing vortex effects. // Wing Vortex --------------------------------------------------------- // 1 = Position=-1.0,0.74,0.45 // 2 = Position=-1.4,0.27,0.43 // 3 = Position=-1.8,-0.20,0.41 // 4 = Position=-2.2,-0.75,0.39 // 5 = Position=-2.6,-1.0,0.37 // 6 = Position=-3.0,-1.21,0.37 // 7 = Position=-3.4,-1.42,0.37 // 8 = Position=-3.8,-1.63,0.37 // 9 = Position=-4.2,-1.84,0.37 // 10 = Position=-4.6,-2.05,0.37 // 11 = Position=-5.0,-2.26,0.37 // 12 = Position=-5.4,-2.47,0.37 // 13 = Position=-5.8,-2.68,0.37 // 14 = Position=-6.2,-2.89,0.37 // 15 = Position=-6.6,-3.10,0.37 // 16 = Position=-7.0,-3.31,0.37 // 17 = Position=-7.4,-3.52,0.37 // 18 = Position=-7.8,-3.73,0.37 // 19 = Position=-8.2,-3.94,0.37 // 20 = Position=-8.6,-4.15,0.37 4) Prepare effect files for aircraft. In next version of SFCE, you will see two files in Effects folder: AIRCRAFT_A-6_VortexEmitter.ini VORTEX_A6WingVortex.tga In AIRCRAFT_A-6_VortexEmitter.ini, you will see this code: [EmitterType001] Name=A-6VortexEmitter1 EmissionType=POINT_EMITTER UpdateType=NON_MOVING MaxVisibleDistance=4000.0 EmissionRate=0.0005 EmissionVolume=0.01,0.01,0.01 EmissionVelocityTableType=CONSTANT EmissionVelocity=0.0,0.0,0.0 EmissionVelocityDeviation=0.0 ParticleUpdateType=SIMPLE_POINT ParticleRenderType=SPRITE ParticleRandomOrientation=TRUE ParticleLifeTime=0.26 ParticleLifeTimeDeviation=0.25 ParticleWeight=-0.1 ParticleRandomness=0.03 ParticleDragFactor=1.00 ParticleInheritence=1.0 ParticleWindFactor=0.0 ParticleColorTableType=TABLE ParticleColor[01].Time=0.000000 ParticleColor[01].Value=1.000000,1.000000,1.000000,0.00000 ParticleColor[02].Time=0.500000 ParticleColor[02].Value=1.000000,1.000000,1.000000,0.100000 ParticleColor[03].Time=1.00000 ParticleColor[03].Value=1.000000,1.000000,1.000000,0.00000 ParticleSizeTableType=TABLE ParticleSize[01].Time=0.000000 ParticleSize[01].Value=0.20 ParticleSize[02].Time=0.500000 ParticleSize[02].Value=0.35 ParticleSize[03].Time=1.000000 ParticleSize[03].Value=0.70 TextureMaterial=A6WingVortexMaterial . . . //============================================================================= [A6WingVortexMaterial] EffectShaderName=effectLightLevel.fx DepthBufferCheck=TRUE DepthBufferWrite=FALSE IgnoreRenderOrder=FALSE AlphaTestEnabled=FALSE LightEnabled=FALSE UseLightLevel=TRUE SpecularEnabled=FALSE EmissiveEnabled=FALSE AmbientColor=1.000000,1.000000,1.000000,1.000000 DiffuseColor=1.000000,1.000000,1.000000,1.000000 ZBufferOffset=0.000000 PriorityLevel=3 BlendOp=BLEND_SRC_ALPHA NumTextureStages=1 TextureStage[01].TextureName=VORTEX_A6WingVortex.tga TextureStage[01].MipMap=FALSE TextureStage[01].FilterEnabled=TRUE TextureStage[01].StageColorOp=TEXTURE_MODULATE_DIFFUSE TextureStage[01].StageAlphaOp=TEXTURE_MODULATE_DIFFUSE 5) Prepare your wing vortex codes. In aircraft data ini, add this code under [AircraftData]: [AircraftData] . . . (Bottom of [AircraftData] codes) Component[011]=LeftWingVortex1 Component[012]=LeftWingVortex2 Component[013]=LeftWingVortex3 Component[014]=LeftWingVortex4 Component[015]=LeftWingVortex5 Component[016]=LeftWingVortex6 Component[017]=LeftWingVortex7 Component[018]=LeftWingVortex8 Component[019]=LeftWingVortex9 Component[020]=LeftWingVortex10 Component[021]=LeftWingVortex11 Component[022]=LeftWingVortex12 Component[023]=LeftWingVortex13 Component[024]=LeftWingVortex14 Component[025]=LeftWingVortex15 Now with the reference codes you proved, use it for LeftWingVortexXXX. Here is an example: NOTE: I recommmend you to do one LeftWingVortexXXX a time to test it in-game and adjust it before moving to next one. // Wing Vortex --------------------------------------------------------- // 1 = Position=-1.0,0.74,0.45 // 2 = Position=-1.4,0.27,0.43 // 3 = Position=-1.8,-0.20,0.41 // 4 = Position=-2.2,-0.75,0.39 // 5 = Position=-2.6,-1.0,0.37 // 6 = Position=-3.0,-1.21,0.37 // 7 = Position=-3.4,-1.42,0.37 // 8 = Position=-3.8,-1.63,0.37 // 9 = Position=-4.2,-1.84,0.37 // 10 = Position=-4.6,-2.05,0.37 // 11 = Position=-5.0,-2.26,0.37 // 12 = Position=-5.4,-2.47,0.37 // 13 = Position=-5.8,-2.68,0.37 // 14 = Position=-6.2,-2.89,0.37 // 15 = Position=-6.6,-3.10,0.37 // 16 = Position=-7.0,-3.31,0.37 // 17 = Position=-7.4,-3.52,0.37 // 18 = Position=-7.8,-3.73,0.37 // 19 = Position=-8.2,-3.94,0.37 // 20 = Position=-8.6,-4.15,0.37 //-------------------------------- [LeftWingVortex1] ParentComponentName=Fuselage ModelNodeName=LeftWing DestroyedNodeName= ShowFromCockpit=TRUE DetachWhenDestroyed=False DamageRating=DISABLED MassFraction=0.0 HasVortexEmitter=TRUE VortexEmitterName=A-6VortexEmitter1 VortexPosition=-1.0,0.74,0.45 //VortexG=5.0 Note how I added // to VortexG=5.0. We don't want to enable that just yet until you perfect your wing vortex. 6) In SF2, it is ideal to change the option (Start in Air, near enemy), so you can be in the air quickly with sufficient airspeed to accelerate and do hard turning for wing vortex effects testing. Remember when stating that the vortex should be directly above the wing? You will see it when pulling hard, the vortex would move down and it should touch the surface of wing. From there, you keep tweaking both aircraft effect file and the position of it in aircraft data ini. At first it may seem tendious but it will become a second nature to you. After tweaking and flying several times, the first left wing vortex is now done. In the code, re-anble VortexG=5.0 by removing '//'. Now you have a first working wing vortex. You are ready to move on the next one. When you finish working with the rest of LeftWingVortexXXX, doing the RightWIngVortexXXX is not that difficult. All you have to do is copy the entire LeftWingVortex list and codes, then rename it to RightWingVortex AND remove '-' sign for 'X' position in all vortex position. Then you are set! Hope this tutorial will help anyone who struggle to work with the wing vortex effects. Eagle114th
-
1 point
-
1 point
-
1 point
-
1 point
-
1 point
-
1 point
-
1 pointExactly. The SF2 games still have a reason to exist, they may be dated but they still are a very decent platform and framework for mods. The amount of third-party content made for them is unrivalled. However, TK insists on selling them overpriced on a late 90s-looking store, thus making these games even more unknown and scam-looking. Probably we got it wrong all these years, TK actually stands for Taken Down, with reference to his own game series...
-
1 pointI uploaded the 4096x4096 skins pack for the Mirage 2000-5F. It waits for approval. It's designed for the Mirage Factory Mirage 2000 pack. Preview by Coupi :
-
1 point
-
1 point
Version 1.0
1,212 downloads
Nanchang Q-5 / Q-5E / Q-5II This work started as a simple skinpack for Wrench's SF-2 Fantan pack. At last it changed so much that I decided to make a whole repackage. So at last this is only a Wrench tribute due all the old birds he always polish and upgrade for us almost every day. Thank You my friend! I tried only to complete his work on the Q-5 What's new: - All skins rework (new camos too) - Engine Intakes (by Cocas) - Brand new decal sets according Y.Gordon MiG-19 Aerofax bible - Canopy, Antennas & Rails mappings issues quick fixes - Loadout Images SF-2 Tga files Credits: - Wrench for SF-2 upgrade (for SF-1 original credits see his readme) - Cocas for new engine intake via fake pilot add - Guest for original North Korea skin - Paulopanz for all skins, decals, fixes etc. Install: - As usual all in main mod folder and overwrite North Korea Q-5E/II: - Copy from Q-5A the relative folder - Paste it in Q-5E/II folders Suggestions: - Use it over Quemoy island or Formosa strait - Make a new cold war Taiwan campaign, please That'all folks! @ paulopanz -
1 point
Version 1.0
956 downloads
This is the third of four projects I have been working on for the last 6 months. It will be followed by an F7U Cutlass Ultimate Package(when fully completed). I am also planning an F11F Tiger Ultimate package to follow . The F3H-2N and -2M were all built under contracts initially intended to cover for the disasterous F3H-1N. Following the completion of these contracts, a new Demon version was ordered in 1956-57 under a new set of contracts. This version was designated F3H-2 (F-3B after 1962). The F3H-2 could carry and launch the more capable AAM-N-6 (AIM-7C after September 1962) Sparrow III semi-active radar homing missile. The Sparrow III was a definite improvement over the Sparrow I, which was a pure beam riding missile, with no active homing capability, which meant that the guidance error was in the shape of a cone, which increased in diameter as the range inceased. The F3H-2 could also launch the AAM-N-7 (AIM-9B) Sidewinder IA air-to-air infrared homing air-to-air missile. The F3H-2 was equipped with an AN/APG-51B radar along with the AN/APA-127 Illuminator/Launch Envelope computer. The F3H-2 was optimized as a FIGHTER-BOMBER and could carry up to 6000 pounds of ordnance (bombs, rockets, or "special stores") on two fuselage and six wing stations. Late production F3H-2's also differed from the previous versions in having a slightly shorter beaver tail cone. The last of 239 F3H-2s was delivered on April 8, 1960, bringing the Demon production program to a close. Total Demon production was 519 aircraft. An interesting note is that there is NO EVIDENCE of the Demon ever being handed down to the USN Reserves. It seems almost all Demons were sent directly to NAS Litchfield Park and the scrapper. Only a handful remain today in museums......how sad. Being underpowered was its major flaw. The original Westinghouse J-40 never materialized and the J-71 was fitted instead. Pilots called the Demon the "Lead Sled" or just "Sled". This is a major rework of the existing F3H-2M demon file into the 3 variants. Almost everything has been tweeked to make it more accurate in appearance and performance. The skins have been painstakingly researched and re-created. Every squadron which flew this -2 model Demon is represented here including changes in their scheme over time. The flight model has been adjusted to fly like the Demon and give you performance worthy of its nickname. There are new Hangar and Loading Screens as well. Only Squadrons which operated this -2 variant of the Demon are included in the skins. SQUADRONS REPRESENTED: VF-13 Aggressors VF-14 Tophatters VF-21 Freelancers VF-31 Tomcatters (2 skin versions) VF-41 Black Aces (2 skin versions) VF-53 Puking Dogs VF-54 Silver Kings VF-64 Freelancers VF-92 Silver Kings VF-101 Grim Reapers VF-121 Pacemakers (2 skin versions) VF-131 Nightcappers VF-141 Iron Angels VF-151 Vigilantes (2 skin versions) VF-161 Chargers VF-193 Ghost Riders (3 skin versions) VF-213 Black Lions YES....THAT IS 23 SEPARATE SKINS!!!!!!!! All are researched and re-created here. Bureau Numbers are accurate for 3 blocks of the F3H-2 Production line (blocks h,p and t). A new weapons file for the AIM-7A Sparrow I missile is included. LET IT OVERWRITE any previous AIM-7A's you may have. This one is a new and CORRECT model. There are separate ini files to allow the user to operate Air to Ground Missions (with different ordanance pylons). PLEASE SEE READ-ME for details A read-me file is enclosed which contains installation instructions and credits. -
1 point
Version Version 1
989 downloads
Here is the long awaited Jauguar A for the french Air Force It should be compatible with SFP1 and SF2 (all versions) The base work is from BPAO, in 2005. Skins are 1024x1024, but a 2048 version is planned for version 2. It comes in 3 versions : - early 1972-85 (presently the JagA Lot1) : no laser bombing capacities - intermediate 1978-95 (presently the JagA2 Lot4) : can carry laser guided munitions, but no designator - late 1996-2006 (presently the JagA3 Lot5) : can deliver and designate laser guided ammunitions. Each version is subdivided into two sub-version for simplicity and compatibility with SF1 : With European camo fuel tanks and with Desert camo fuel tanks The weapon pack requires further refinements, but this will be done as an update Install : Just insert the content of the jaguar directory in your addon install, overwriting files when prompted to do so Credits : all 3D work is by BPAo , aircraft and pit (thank you chap, we don't forget you) The basic textures,skins and decals by Tom Venom and Sony Tuckson. skin updates and additional skins paulopanz, Coupi, ludo.m54 Decals by JAT, additional decals by paulopanz The flight Model is based on the Jaguar GR1 (http://combatace.com/topic/67434-jaguar-gr1-for-sf2-series/) by column5, kreelin, baffmeister and was adjusted (engine, mass ...) for the Jaguar A version.) Effects : Deuces, JSF_Aggie, BPAo, Sony Tuckson Special thanks to UF_Josse and various memebers of the C6 forum for their information Jeanba : bugs, historical mistakes, delays and some packaging Crusader : Correcting Jeanba's bugs, basic packagings, weapons, historical researches Tk : for the game Additionnal thanks to rollnloop for your tests No animal were harmed during the creation of this model (except for bbq). Legal stuff: This mod is freeware. Commercial use is not allowed. It is not allowed to include part ore totality of this mod in a commercial software. If uploading part or all this addon, please include porper credits in the readme -
1 point
Version 1.0
434 downloads
French Navy Jaguar M More info here: http://www.netmarine.net/aero/aeronefs/jaguar/index.htm Very important, Please READ: In order to play this MOD you MUST have installed the original Jaguar A , in order to have the 3D files. How to install it: 1-Drag all the folders from the rar file into the MOD folder. 2-Go to Objects/Aircraft/ 3-Open the folder called "JaguarA" 4-From that folder copy the folder "Cockpit" and the files: JagA.lod JagA-001.lod JagA-002.lod JagA-003.lod JagA-004.lod JagA_01_holes.TGA JagA_02_holes.TGA JagA_03_holes.TGA JagA_04_holes.TGA JagA_05_holes.TGA JagA.SHD JagA.OUT Jag_Light.TGA F-4E_DAMAGE1 F-4E_DAMGE2 5-Drag them into the folder JaguarM 6-Fly it A mission called "French Navy (Jaguar)" has been added in order to operate the plane from an aircraft carrier. Important remarks: The plane is unperpowered and difficult to land in an aicraft carrier, please never attempt to land it with one engine or fully loaded. Credits of version M: Skin: Cangas Flight Model tweeks: Cangas Screens: Cangas PA-Clemenceau and Foch: Cangas, original model by Hinchinbrooke Credits of the original Jaguar version "A": Here is the long awaited Jauguar A for the french Air Force It should be compatible with SFP1 and SF2 (all versions) The base work is from BPAO, in 2005. Skins are 1024x1024, but a 2048 version is planned for version 2. It comes in 3 versions : - early 1972-85 (presently the JagA Lot1) : no laser bombing capacities - intermediate 1978-95 (presently the JagA2 Lot4) : can carry laser guided munitions, but no designator - late 1996-2006 (presently the JagA3 Lot5) : can deliver and designate laser guided ammunitions. Each version is subdivided into two sub-version for simplicity and compatibility with SF1 : With European camo fuel tanks and with Desert camo fuel tanks The weapon pack requires further refinements, but this will be done as an update Install : Just insert the content of the jaguar directory in your addon install, overwriting files when prompted to do so Credits : all 3D work is by BPAo , aircraft and pit (thank you chap, we don't forget you) The basic textures,skins and decals by Tom Venom and Sony Tuckson. skin updates and additional skins paulopanz, Coupi, ludo.m54 Decals by JAT, additional decals by paulopanz The flight Model is based on the Jaguar GR1 (http://combatace.com...for-sf2-series/) by column5, kreelin, baffmeister and was adjusted (engine, mass ...) for the Jaguar A version.) Effects : Deuces, JSF_Aggie, BPAo, Sony Tuckson Special thanks to UF_Josse and various memebers of the C6 forum for their information Jeanba : bugs, historical mistakes, delays and some packaging Crusader : Correcting Jeanba's bugs, basic packagings, weapons, historical researches Tk : for the game Additionnal thanks to rollnloop for your tests No animal were harmed during the creation of this model (except for bbq). Legal stuff: This mod is freeware. Commercial use is not allowed. It is not allowed to include part ore totality of this mod in a commercial software. If uploading part or all this addon, please include porper credits in the readme Have fun Cangas -
1 point
Version 2.0.0
552 downloads
SEPECAT Jaguar FGR.3 for STRIKE FIGHTERS 2 This is a simple mod of the excellent 'The Mirage Factory' Jaguar GR.1 to give a 'what if' Jaguar FGR.3 tactical fighter with markings for No.45 and No.58 squadrons of No.38 Group, RAF Strike Command. This revision now also includes a desert camo skin for No.112 squadron and uses a revised 3D model. BACKSTORY In 1974 a cancelled export order for 50 Jaguar Internationals left the SEPECAT consortium with a headache as many 'long lead' items had already been ordered and assembly was already underway on the first 12 airframes. At this time the RAF were keen to order more Jaguars to form a second wing of No.38 Group, RAF Strike Command and, with the delays in the Tornado production programme meaning a shortage of work at BAC's Warton factory, BAC pushed the Labour government into accepting a deal for all 50 aircraft. Some consideration was given to standardising the aircraft to match the RAF's GR.1 force but the uprated Adour engines and different avionics saw the aircraft confusingly designated as the Jaguar FGR.3. Entering service in early 1977 the Jaguar FGR.3's served with No.45 and No.58 squadrons as part of No.38 Group and also with a reformed No.112 Squadron detached to RAF Near East Air Force. The FGR.3's uprated Adour engines and early introduction of overwing missile rails made them something of an elite element within the RAF's Jaguar force and they were deployed to many hot-spots around the world until their somewhat premature retirement in 2002. INSTRUCTIONS 1. From the AIRCRAFT folder drag and drop the JaguarFGR3 folder into your Aircraft folder. 2. From the DECALS folder drag and drop the JaguarFGR3 folder into your Decals folder. 3. Empty the contents of the WEAPONS folder into your Weapons folder 4. Empty the contents of the PILOTS folder into your main Pilots folder. 5. From the SOUNDS folder drag and drop the Adour sound file into your Sounds folder. That's it! CREDITS As always, thanks to Third Wire for a great little game/sim. Massive thanks to everyone at 'The Mirage Factory' (RIP Oli). Special thanks to sundowner for both skins used in this revised upload and also for his permission to use his revised LOD with built-in drop tanks. And, finally, thanks to everyone in the wider Third Wire community. Regards Spinners Version 2 - 23/08/2020
Important Information
By using this site, you agree to our Terms of Use, Privacy Policy, and We have placed cookies on your device to help make this website better. You can adjust your cookie settings, otherwise we'll assume you're okay to continue..









4_4_202211_27_37AM.thumb.png.3722052fe4e683aba67cdc734ee30a7e.png)
