Leaderboard
Popular Content
Showing most liked content on 01/31/2019 in all areas
-
8 points
-
7 points
-
7 pointsCool concept, thanks for putting this here so I learned something new. And thanks to Spinners!
-
5 points
-
5 points
-
4 points
-
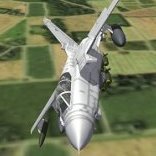
3 pointsAfter demonstrating their usefulness during the Falklands conflict, the RAF decided to retain a small fleet of Vulcan bombers. These were then treated to much needed avionics, powerplant, structural and weapons updates. The aircraft was known as the Avro Vulcan B3 in service and was used exclusively by 12 squadron. It could carry any weapon in the RAF arsenal as well as infra red and active homing missiles for self defense.
-
3 pointsWIP, something to shooting at. The T-67. What if the soviets would have introduced the Object 167 into service? Object 167 was the successor of the T-62 (object 166) with a new suspension system (was later used on T-72) and a new turbo diesel engine with 700 hp instead 580 hp in T-62. Top speed of the tank was 65 km on road, 40 cross country. Range around 450 km. So it was comparable with a Leopard 1 tank, but had a much better armour. There were some versions of object 167. One with gas turbine (helicopter engine), one with 100mm gun D-54TS (comparable with britisch L-7 gun) and one with 115mm smoothbore gun and ATGM Maljutka (AT-2 Sagger) And no, this is not paper tank. This was really tested in the 60th.
-
3 points
-
3 points
-
2 pointsAhhhhhhhhh, Swedish waters in 1952, and time to go on an anti-shipping patrol The run-in was contested...as was the run out... And home again
-
1 pointjust follow the instructions I wrote... this keeps all the pathways in their correct order and syntax yes, you will need a /Decals/*name of aircraft folder*/*name of skin folder*/D/ folder each and every single aircraft and each one of their skins, unless said aircraft use a "pool" of common decals.
-
1 pointIn objects folder, you need to create new sub-folder - Decals. And inside should be all decals in a proper location described in Decals ini of specific aircraft. Usually, modders are creating decals and putting it into a folder named same as aircraft/skin but don't need to be that way. Most important is a path in Decals ini. - that is in each skin folder. Example: Aircraft Decals entry in decals ini. [Decal001] MeshName=NoseFront DecalLevel=2 DecalFacing=LEFT FilenameFormat=AV-8B-NA_89/MODEX/2Num Position=5.75,-0.475 Rotation=0.0 Scale=0.7 DecalMaxLOD=3 [Decal002] MeshName=NoseFront DecalLevel=2 DecalFacing=RIGHT FilenameFormat=AV-8B-NA_89/MODEX/2Num Position=5.75,-0.475 Rotation=0.0 Scale=0.7 DecalMaxLOD=3 [Decal003] MeshName=FlapLeft02 DecalLevel=2 DecalFacing=TOP FilenameFormat=AV-8B-NA_89/MODEX/2Num Position=-1.1,-2.27 Rotation=0.0 Scale=0.42 DecalMaxLOD=3 [Decal004] MeshName=FlapRight02 DecalLevel=2 DecalFacing=TOP FilenameFormat=AV-8B-NA_89/MODEX/2Num Position=1.1,-2.27 Rotation=0.0 Scale=0.42 DecalMaxLOD=3 [Decal005] MeshName=Tail DecalLevel=2 DecalFacing=LEFT FilenameFormat=AV-8B-NA_89/MODEX/2Num Position=-6.7,2.4 Rotation=0.0 Scale=0.3 DecalMaxLOD=3
-
1 pointYou did not bother me at all ... With all these mods and addons, one thing doesn't run, then another. As a rule, reinstalling the game solves many such problems...
-
1 point
-
1 point
-
1 pointHi Stephen, thanks for all your work, first of all. As for me, the problem literally was with any plane, AEG through Walfisch, in every terrain. I originally tried the separate installs as directed in that post; made good sense and was straight-forward enough, or so I thought, but it would only run one theater, and if I put everything together, everything would work (I didn't argue with it; it worked). It seems quite reasonable to assume that in all the things I put in there that something got screwed up, but it did work. Then it didn't. without me doing anything, I swear. Now, what is really killing me, is that just now, I started up a mission to use as a reference in preparation for trying to fix it. And it works now. and I didn't do anything yet! what the heck?!?! I didn't change the Nations file (thanks Crawford), or reinstall anything, or remove anything. I know I wasn't hallucinating, and that the mission would begin with bits and pieces fluttering in the air. Deep down I know this is why I'm a mechanical engineer, and not a computer person. Gentlemen, thanks for your concern; I will trouble you no more - I'm off to go look at gterl's Caporetto!
-
1 pointExcellent! A collection of generic and low poly high rise buildings would be most welcome!
-
1 point
-
1 pointLofty_c - as I recall, you are running FE2 - since the north sea terrain is working, it may be a problem with how you made the other installs. It might be best to remove the others and remake them. There's a thread that shows how to make multiple installs here: https://combatace.com/forums/topic/81423-setting-up-multiple-versions-of-fe2/?tab=comments#comment-652121 When you have a problem it helps us answer if you can remind us what version you're using, what terrain you're using, what plane you were flying, etc. The more you can tell us, the better we can understand the problem.
-
1 point
-
1 pointHello everybody, The year has just begun, but we're already preparing the new update for you. Version 3.010 will be focused on improving the functionality of several modules of the sim and some of the changes are long-awaited and important. In the meantime, the work on all the Early Access projects progresses according to the schedule and many new things will be ready shortly after 3.010 release, in Q1 2019. Our map designers are finishing the map of the Southern Kursk salient that includes Prokhorovka. As we announced before, it will utilize the higher detailed landscape wireframe and higher detailed buildings damage. When it is finished, the work on the scenario campaigns for "Clash at Prokhorovka" will begin. The campaigns will recreate the large scale historical events of July 1943 to the South-West of Prokhorovka. Today we can show you several screenshots of this map: We plan to show you the new tanks soon - M4A2 Sherman, Pz.Kpfw.III Ausf.M (to be released at the end of the Winter) and T-34 mod. 1943 and PzKpfw IV Ausf.G (to be released at the beginning of Spring). We also started the implementation of the major feature - animated tank crewmen. This is a very laborious and time-consuming task since each tank has 4-5 crewmen and each one of them has his own unique pose and animations (many can also lean out of their hatches). This forced us to find new technical approaches for character animation that open new prospects not only for the Tank Crew but also other projects: For "Flying Circus" project we're making the map of 100 km front line near Arras (Spring 1918). It will be made using the same techniques we're using for the creation of the large Bodenplatte project map, so it should also be a step forward visually. Here are first in-game screenshots of Sopwith Dolphin and Fokker D.VII which will be ready soon: For our main project, Bodenplatte, we're preparing the next wave of the new aircraft. FMs for P-51D, Fw 190 D-9 and Me 262 A-1/2 are already in the works, while artists create 3D models of Hawker Tempest Mk.V, P-38J-25, P-51D-15, Me 262 A-1/2 and B-25 Mitchell-II (non-playable). Here are some screenshots of Me 262 A-1/2 (its paint schemes and cockpit are nearly ready): You can discuss the news in this thread
-
1 pointAn AI controlled CF-100 fires some air to air rockets and actually hits what he's aiming at. I got the one in the lower left corner. I also hit some hangars and barracks and destroyed a friendly fuel truck but they can't prove it.
-
1 pointIs that Clint Eastwood jogging along the forest trail down below Mandatory screenie:
-
1 pointmaking a aircraft and bring it in to the game is difficult enough but making a cockpit and try to get it work is a pain in the a..... F-4G_early cockpit , still a long way to go
-
1 pointSometimes, during a mission or when I die, it's nice to see what else is up in the sky and most recently it was this lovely Israeli Spitfire over Third Wire's best terrain.
-
1 point
-
1 point
-
1 point
-
1 point
-
1 point
-
1 point
-
1 point
-
1 point
-
1 pointUnfortunately, the images for my SF Series radar tutorial were split between an old anonymous image shack account that is long gone and a registered one that now requires a monthly fee to manage. I have recovered some of the images from the registered account. The original tutorial is intact in Bunyap's old Weapons Delivery Manual, so if that is still around for download, it has the complete text and images in decent text book format. Since the original knowledge base thread is locked, here is a copy with the salvaged images attached via CombatAce upload. Using radar and radar homing missiles like the AIM-7 Sparrow on Hard settings seems too hard for many people. With a little review of the way radar works and what the display indications mean, it really isn't that difficult. A basic summary: 1. Use Search Mode to detect a target on your display (vary the range scale using the <PAGE DOWN> key if necessary). 2. Use the <HOME> key to move the cursor to the target. 3. Use the <INSERT> key to lock on. 4. Center the steering dot in the ASE circle. 5. Launch when "IN RANGE". 6. Maintain target lock on until missile hits, or missile will miss. Note: Once you have locked on, you can use <CTRL><R> to visually acquire the target, which also identifies the type of aircraft (an unrealistically accurate form of IFF). Then use either <F4> to padlock the target from within the cockpit, <SHIFT><F8> to padlock the target from an external player-to-target view, or <F8> to see the target up close. Alternatively, steps 1 through 3 can be bypassed when engaging targets held visually: Select Boresight Mode and hold your gunsight exactly on the target until a lock on occurs. Then continue with step 4. The idea behind radar in the 1960s was that radio energy could be used to search for contacts by rapidly sweeping an antenna from side to side while transmitting radio energy pulses and receiving "echoes" from targets hit by those pulses. The antenna has a "beam", which is the pattern or shape of the radio transmission. Ideally, this beam is very narrow since it determines the elevation and azimuth resolution. The radar display graphs the azimuth (bearing) of the antenna versus the time (range) of the echoes. In the case of the F-4 radar as portrayed in SFP1 and WOV, the elevation of the antenna alternates between a look up and a look down angle. Each elevation angle is referred to as a bar. The F-4 radar's search pattern in SFP1 and WOV is a 2-bar scan. The F-4 has radar azimuth limits of +/- 60 degrees, which means it can see targets in a 120 degree cone centered on its nose. Illustration of horizontal aziumth sweep pattern: The 120 degree horizontal search cone is quite large, but not every target will be covered by it. There are four ways to get a target into your seach sweep: 1. Arbitrarily change course by +/- 120 degrees to cover a full 360 degrees. In reality, you should know what is behind you, so check turns of +/- 60 degrees is probably adequate. 2. Point your nose at RWR contacts. 3. Steer to the targets in the verbal reports from the ground controller. 4. Use the <M> key to bring up the map to see where to turn your nose to acquire targets known to ground control. The F-4 has radar elevation limits of +/- 60 degrees, but does not scan over that entire range. It merely permits the radar to continue a full horizontal sweep when banked 90 degrees. The vertical search is constrained to two elevation bars at +/- 1.875 degrees. The radar beam is 6.7 degrees wide and the two elevation bars overlap providing about 10 degrees of vertical coverage. Illustration of 2-bar vertical sweep pattern: While this was outstanding for its day, it is easy to see that targets might be above or below the 10 degrees of vertical search. The F-4 must periodically pitch its nose up or down to get more vertical coverage. Of course, the F-4 does not have look-down radar. If the nose is pointed down too much, the radar will be cluttered heavily with ground returns. In reality, the F-4 had major problems trying to use the radar and Sparrow missiles at low altitudes or against targets flying at much lower altitudes. The game is not quite so picky, but a target can try flying very low and using ground clutter to break lock ons and/or decoy Sparrows. Here is a typical search display from an F-4 radar in SFP1 with two targets: Once you have found a target on your search display, you have the option to acquire/track/lock on to the target. This means the radar stops sweeping rapidly and instead tries to keep the antenna pointed at the target at all times. This provides very accurate information on a single target, which is needed to launch and guide radar guided missiles such as the AIM-7 Sparrow. Tracking a single target does not permit searching for more targets. The F-4 radar has a cursor that allows you to choose which target you want to acqire. Press the <HOME> key to move the cursor. If the cursor is not on the desired target, then continue pressing the <HOME> key until the cursor is on the desired target. Here is what happens if you push the <HOME> key while a target is displayed (the cursor moves to the target): Once the cursor is in the desired position, simply press the <INSERT> key to track/acquire/lock on to the target. The sweeping strobe stops on the bearing of the contact, all other targets disappear from the display, and a range gate sweep moves up the strobe until it finds the target's range. At that point, lock on has been achieved. Here is what happens if you push the <INSERT> key while the cursor is on a target (the radar enters acquisition mode): If you successfully lock on, the radar displays additional information: closure rate using a rotating ring, allowable steering error, steering dot, and the min and max ranges of the selected weapon. There is even an IN RANGE light to let you know when the target is within firing range parameters. The notch in the range rate circle rotates to indicate closure rate. If the notch is at 12 o'clock (top of the circle), then there is no closure. As the notch moves clockwise from 12 to 3 to 6 to 9, it indicates an increase in the closure speed. As the notch moves counter-clockwise from 12 to 9, it indicates that the target is opening rather than closing. In other words, the target is moving away from the radar. Here is what the display looks like while locked on: Sparrows have two primary launch requirements: 1. Locked on to the target. 2. Target between Min and Max range limits. But just because you are able to launch a Sparrow, doesn't mean it has a chance of hitting. Other launch requirements that should be considered include: 1. Launching aircraft should not be maneuvering violently. 2. Steering dot should be within the ASE circle. 3. ASE circule changes size with range. In general, the larger the circle, the better the chance to hit. Try to hold fire until the circle is close to its maximum size. 4. Aspect of the target can render Sparrow shots impossible. The AIM-7 likes direct head-on shots form long distances and rear quarter shots from short distances. Crossing shots at the targets front quarter and beam may prove difficult, if not impossible to hit. 8. Launching aircraft should have as high a speed as practical since the missile can maneuver better, fly longer range, and impact sooner if it has more energy at the moment of launch. Here is what the F-4 radar display looks like when close to optimum firing conditions (the ASE circle is very large and the steering dot is almost centered in the circle): If you get too close to fire an AIM-7 Sparrow, the radar displays a big "X" (the phrase "too close for missiles, switching to guns" should come to mind): Vietnam Era RWR Indications: Ground threats are identified by a solid line. Air threats are identified by a dashed line. Radar mode is indicated by the length of the line: 1) Search: short steady line (1st ring) with no audio. 2) Acquisition: flashing medium line (3rd ring) with slow beeping audio. 3) Tracking/Lock-on: flashing long line (to edge of display) with fast beeping audio. Ground radar search: Ground radar acquisition: Ground radar track/lock: Air radar search: Air radar acquisition: Air radar track/lock: If there are any questions or comment, PLEASE only post them in the regular SF2 forums (General Discussion)
-
1 point
Version Version 1
293 downloads
General Dynamics F-16A 'Dhimar' for STRIKE FIGHTERS 2 This is a very simple mod of the stock Third Wire F-16A Netz to create a fictional export version of General Dynamics' outstanding F-16A in service with the Dhimari Air Force during 1982-2012. Lo-Viz markings are given for No.2, No.5 and No.8 squadrons. INSTRUCTIONS 1. From the AIRCRAFT folder drag and drop the F-16A_Dh folder into your Aircraft folder. 2. From the DECALS folder drag and drop the F-16A_Dh folder into your main Decals folder. That's it! CREDITS Thanks to Third Wire for a great little game/sim. Thanks to wilco for the excellent grey skin from his 144IDF skin package. And thanks to everyone in the wider Third Wire community. Regards Spinners Version 2 - 30/01/19 Version 1 - 02/12/12 -
1 pointCarrying this over from the SF1 KB... When dealing with military a/c, several types of fuels have been used throughout the years, and each has it's own density. Depending on how in-depth you want to be with your a/c or drop tanks, here are the service years, branches, and densities for jet fuels: JP-4 Density = 6.5 lb/gal (1951 - 1995, Primarily used by the USAF) JP-5 Density = 6.8 lb/gal (1952 - Present; projected to 2025, Primarily used by the USN, and other navies) JP-7 Density = 6.6 lb/gal (used by the SR-71) JP-8 Density = 6.7 lb/gal (1996 - Present, Primarily used by the USAF) Jet-A Density = 6.70 lb/gal (used by civil turbines) *These densities are for a temp of 15 degrees C / 59 degrees F. (API density) Example: 1x F-111 External 600gal Tank holds 3900lbs [600 x 6.5 = 3900] of JP-5 (I'm using JP-4 since that's what was in service at that time). Now, to insert the fuel weight into the game, it must be converted from pounds to kilograms: 3900 (lbs.) x.45 = 1755 (kgs). Once you've converted the weight, insert it into the 'Capacity' box in the 'Fuel Tank Data' section in the weapons editor. Depending on what your references are, you may get your fuel capacities in gallons, or pounds or both (or in metric is applicable). Second to having a full breakdown of fuel capacities, I prefer gallons since you can just multiply by the density, and then convert to kilograms. Below is a file with some fuel capacities to get you on your way. If you have any information, please PM me as I'm compiling a list. Mil AC Fuel Capacities.pdf
-
1 pointThere's always the question of "How Can I get the decals from my 1stGen aircraft, into SF2 the quickest and easiest way" or, you have a skin/decal set you want to add. Well, the simple truth is, it's so easy, it'll make your airplane spin!! Well use in our example, just a something 'pulled out the air', so to speak. All others will be similiar; this is just an example for showing what to move, and what to delete (we'll get to that in a minuite...) You've download and unzipped the aircraft....our example is my older B-66 skin pak.. then, it's a simple copy/paste of the "86BS" folder to the B-66 (note, the 86BS highlighted) now, since the /D (or decals subfolder) is STILL inside the skin folder, the Game Engine will not see them. So, the easiest/simplest/quickest way, is to simply copy/patse the ENTIRE SKIN FOLDER -WITH THE INTACT /D SUBFOLDER to the correspondingly named aircaft foler in the ModFolder's /Decals subfolder... please note the highlighted full file pathway -that'll be important in a minute! Then, simply open this folder, and DELETE everything, but the /D subfolder that leaves you with an empty skin folder --don't need all the stuff, as this is ONLY for the decals. What this does, is keep the decal callout paths exactly the same, without adding the extra work of editing the decals.ini for each and every skins example: [Decal007] MeshName=Nose DecalLevel=0 DecalFacing=Left FilenameFormat=B-66B/84BS/D/NTagL Position=7.3,-0.40 Rotation=0.0 Scale=2.5 MaxLod=3 you'll notice that I've highlighted the MaxLod= line. There are literaly hundreds of old, perfeclty usable 1stGen skin/decal sets that are completly lacking this line. SF2 NEEDS this line and it must be added, or you decals won't show up. This is expecially true on lots of the WW2 stuff. SO, open the decals ini and check it. If not, it's an super esay text edit (you just type it in!!) to add. This is the easiest and simplest way I've found to do it! It works for all skins/decal paks; it'll even work in 08 Level 1stGens too, as they also possess the /Objects/Decals folder. any questions, comments, request for clairifications, post in the SF2 Mods & Skinning Forums wrench kevin stein
-
1 pointRight then, since this is a topic that seems to appear on almost a weekly basis, we figured it was time to codify the basic ini moding procedures for getting those Red Air Birds flyable. Now, mind you, there are several real good cockpits available for the Fishbed series, albeit for the earlier versions (and we're not talking the Bison or 21st Century HUDed upgrades currently on the market). We're going to cover the basic tweeks necessary to give them a cockpit you can use. You're going to need several easy to use tools to start this process: Cat extract utility - this is the most important one!!! Avalible here are CA in the "Utilities" section of the SF/WoV/WoE downloads Text Editor - notepad or word pad are the units of choice. There are several 'in the works' mods for Soviet/Warsaw Pact aircraft using various 'moves' and repaints created by Lexx_Luthor, as posted on the 3rd Wire Boards, Generic Cockpits but these aren't out yet (wish they were!). So we're stuck using what's available right now in game, or modifications thereof for use on our little Red Friends. Also, here at CombatAce, in Marcfighters section, you'll find some downloads to make your Red Birds flyable; cockpit repaints and info needed. You'll be using either the A-4 or F-100 pit for his mods. For WoE users, it might even be possible to use the Hunter's pit for some of the early Soviet birds, as it also has the 'steam-gauge' look to it. Most of the 'stand-in' cockpits out there are repaints or mods of the exisiting A-4 Skyhawk pit for single engined birds, or mods/repaints of the F-4B pit for twin engined birds. It should be noted that Mago's Mig-21F cockpit, with some tweeks to stop the moving canopy, could also be used for some of the "Teen Series" MiGs and Sukhois, or ArmourDave superb Su-17 pit which also has multiple uses (Su-7, Mig-23, Mig-27). I'm not going into those now, but suffice it to say, there are usable alternatives. The aircraft we're talking about in here are: MiG-17 MiG-19 Su-7BM IL-28 Tu-16 Tu-22 (although bombers are a real special case!) Be advised, you will be extracing files, and placing them into the aircrafts in question. You will be renaming said files, and making adjustments in the "PilotPosition=" line in those cockpit inis. This is a much beter way than simply adding the cockpit pointer line, as this will give you correct cockpit/pilot positioning from the player viewpoint, inside the cockpt. In other words, a little extra work that'll make it easier to drive around with. Ok...getting started. In our example, we're going to use the Stock 3rd Wire MiG-17F Fresco-C. In the main aircraft folder you will have a file called "MiG-17F.ini". This is the file we're going to be editing. It looks like this inside: You'll see there are no references to anything resembling a cockpit, hangar screen, avionics (they didn't have any in any case), loading screen, or loadout image. This, below, is the same section, but from the player flyable F-4B Phantom: Before we get to modifiying, lets take a moment and explain what each of the lines are, and what they do. AircraftFullName=F-4B Phantom II: this is what shows on the dropdown on the mission selection menu, that allows you to pick your plane. AircraftDataFile=F-4B_data.ini: tells the game engine what data set to use for this aircraft CockpitDataFile=F-4B_cockpit.ini: tells it what cockpit to use HangarScreen=F-4B_hangar.bmp: the hangar screen. The Loading Image is the one you stare at while waiting for the progress meter to reach 100%, so you can fly. Some aircraft have them, both from 3W, or made by 3rd Party modders (like myself and many others) LoadoutImage=F-4B_loadout.bmp this is the little picture on the loadout screen, where you select weapons, drop tanks etc. LoadoutFile=F-4B_loadout.ini: defines what weapons are carried on which hardpoint. AvionicsDLL=Avionics60.dll: which avionics file to use. This is the one giving some people some problems. Simply put: you cannot have a HUD with avionics 60.dll. You cannot have ground mapping and terrain avoidance radars with avionics70.dll. And yes, there are workarounds, but that is the basic rule of thumb. AvionicsDataFilename=F-4B_avionics.ini: defines how your electronics work. Now that we've got our definations out of the way, and you hopefully understand what they mean, let's get you in the cockpit of that Fresco.... You basically need to add only 1 or 2 lines, depending if the aircraft is equipped with a radar. If it's equipped with a radar, radar warning system or if you want to add hangar & loading screen and the loadout bmp, you'll be adding a few more lines. Again, let me remind you, we're only dealing with the stock cockpits already inside the objects.cat. If you're using one of the modified Skyhawk or Phantom pits available for download, they should already come with instructions as to what to do; some even come with a fully edited ***.ini ready for use. Since the stock Scooter pit is positioned differently from ANY of the MiGs, you'll probably want to go ahead and extract the A-4B_COCKPIT.INI from the objects.cat. You'll also need the Fresco's data ini, so go ahead and extract that too. Place BOTH files into the "MiG-17F" main folder. Add this line to the MiG-17F.ini: CockpitDataFile=MiG17_COCKPIT.INI Rename the A-4B's cockpit ini to match. IE: MiG17_COCKPIT INI Open up the MiG-17_DATA.INI and scroll down until you see this section: Open up your recently renamed "MiG17_COCKPIT.INI", and look for the following lines: Copy the "Position=" numbers from the Fresco's data ini, and paste them OVER the existing one in the cockpit ini. It's not perfect; it may be off a few centimeters in any direction, but it will get you very close to the actual position in the physical model. This can be re-checked by looking out the canopy, and by using the free camera view (whilst sitting on the runway) to note the pilot's place in the aircraft, usually relative to the wing leading edge. Then adjustments to the pilot's position up or down, forward or aft can be made. The procedures outlined above can be used for any of the other aircraft listed. One of the special cases involves using AD's Su-17 pit on the Su-7 Fitter C. You'll again need to do some extracting of the Su-7 data ini; you've probably done this already to adjust the weapons loads if you use the WepPack. If not, do so now. 1) copy the ENTIRE cockpit folder from the Su-17 and paste it into the Su-7 folder. 2) copy/paste the Su-17_COCKPIT.INI into the Su-7's folder. Rename to "SU7_COCKPIT.INI 3) add the cockpit pointer line, as shown above 4) open the Su-7BM_DATA.INI and find the pilot section, as outlined above. 5) copy those numbers into the cockpit ini, also as shown above. 6) Save and close. Go fly a mission and enjoy your new pit! BOMBERS: A very special case. As there are no real bomber pits available, we have to make do with what we have. I don't usually fly bombers; there are several issues with flight modeling and the lack of a proper bombsight hinders player operations (this is without the bombsight mod available here at CA). Of the stock ones, the only ones I've used are the B-57B and Il-28. And even these have "issues". But there's always some pervert that want to fly them so..... The Il-28 Beagle has already been covered; my mod of this is available here at CA and at my site. Albeit a 'sovi-ick blue', when it should be a gray, all the ini edits are done for you. The Tupelov's are another matter...since they are usually a side-by-side seating arrangment, they require a little more special handling. A stand-in pit, although it has no verticle bombsight, could be created by using the A-6 Intruder's or even the F-111 pit. The Dev A-Team's WW2 bomber pit could also be used, but it lacks the 'jet gauges'. You'll need to follow the basic procedures above, but since these all have a ground mapping radar of some kind, you'll need to make the other additions to get it to work. Below is what my Tu-16 Badger looks like, using the A-6 Intruder pit from WoV. NOTE: if using this in anything OTHER than WoV, you will need to have a copy of it, as you'll have to extract EVERYTHING that has anything to do with the cockpit, and create a sub-folder in you Badger called "cockpit", and place all the bit in there. You'll also need to A-6's avionics_ini, cockpit ini, and have the Tu-16's data ini in the main folder. You'd do the same edits for the pilot position as outlined above, of course in the renamed cockpit ini. REMEMBER: it is highly reccomened that the various inis be placed in the main aircraft's folder, and renamed to match that aircraft!!!! I hope this clears up some questions. If there are any more -and I'm sure there will be-, please feel free to post on the boards, and I'll try to answer them. But it's a pretty cut and dry process...simple text edits and some file moving. Happy Landings!! Wrench Kevin Stein
Important Information
By using this site, you agree to our Terms of Use, Privacy Policy, and We have placed cookies on your device to help make this website better. You can adjust your cookie settings, otherwise we'll assume you're okay to continue..

